|
It's an exciting day at our house! The patio is (pretty much) done!
I shared our plan for a concrete patio a couple months ago -- there was a long lead time before they could get out and install, which is to be expected. Check that post out to see the design I drew up for the space!
I mentioned in that post that I have one main goal with our new backyard -- LOW maintenance. I don't want much wood we have to stain every few years, I don't want pavers that we have to weed all the time...I just want plain, basic concrete. ;)
We already have an awesome covered porch where we spend a lot of time:

But we always knew we'd want more of an outdoor space. We are so lucky because this backyard is so much bigger than our last one -- we have so much space to work with! We waited on a patio until we knew exactly what we wanted to do.
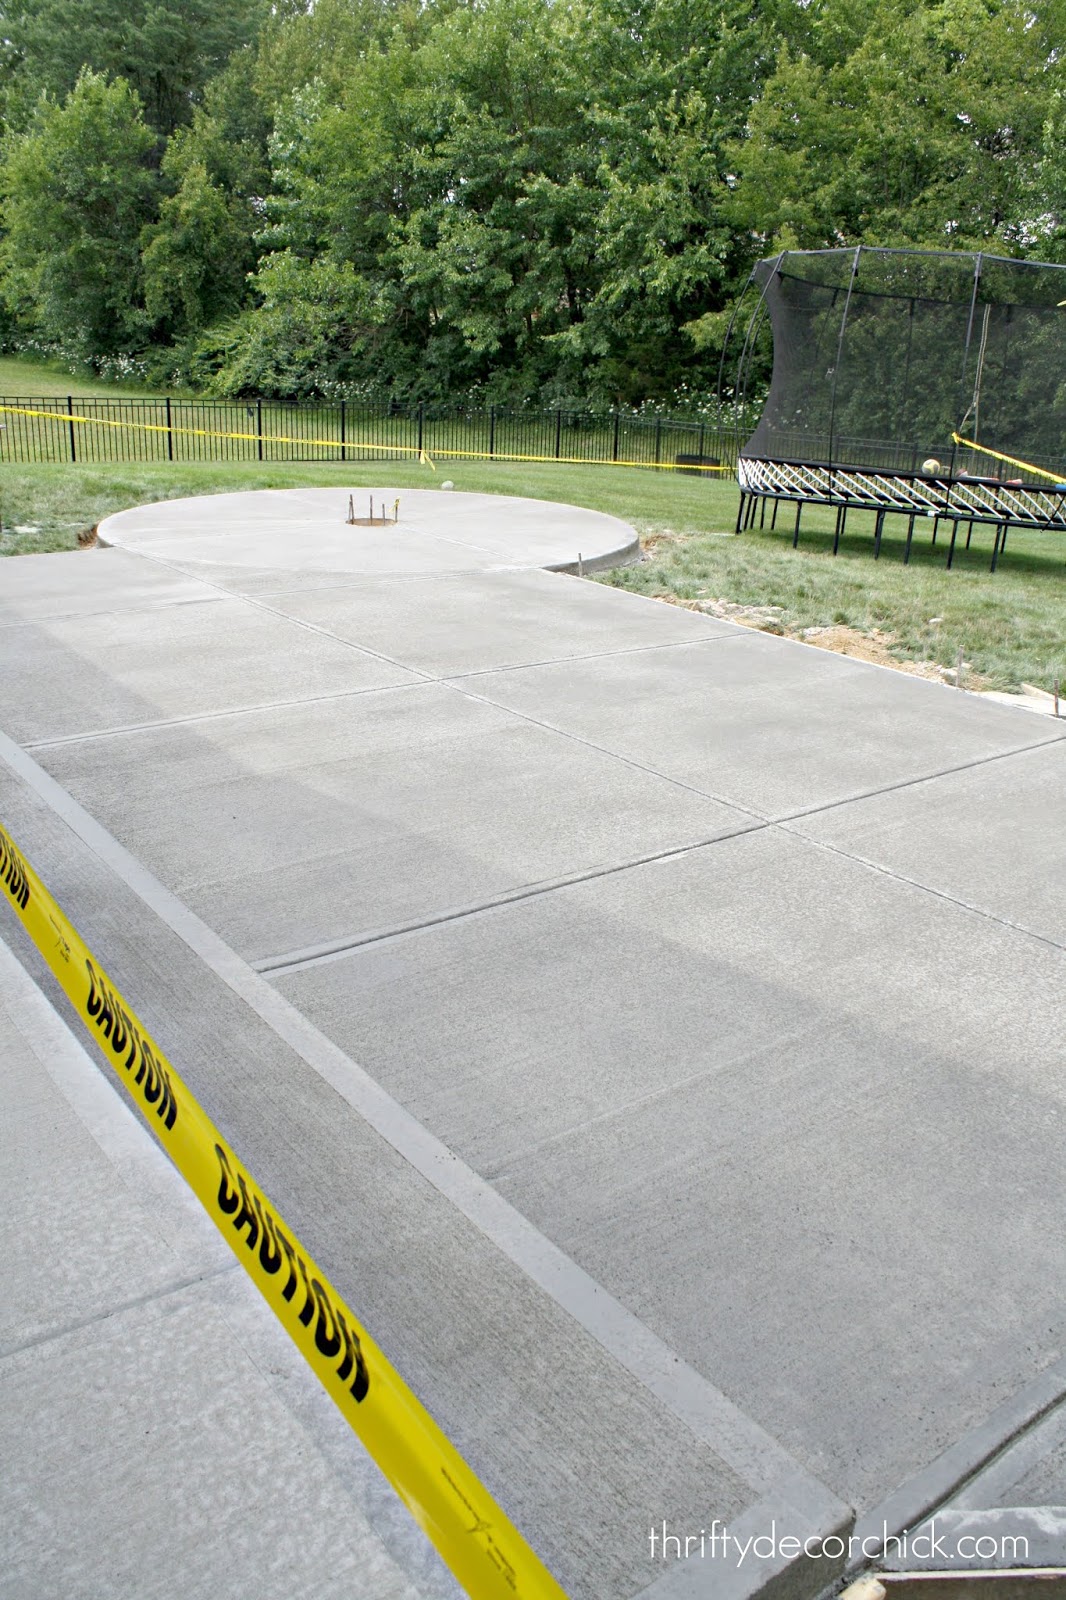
They finished up the patio today, so for now we can just look at it. ;) I'm SO stinking excited to get stuff moved on here!:
This post may contain affiliate links for your convenience.
See my policies and disclosure page for more information.
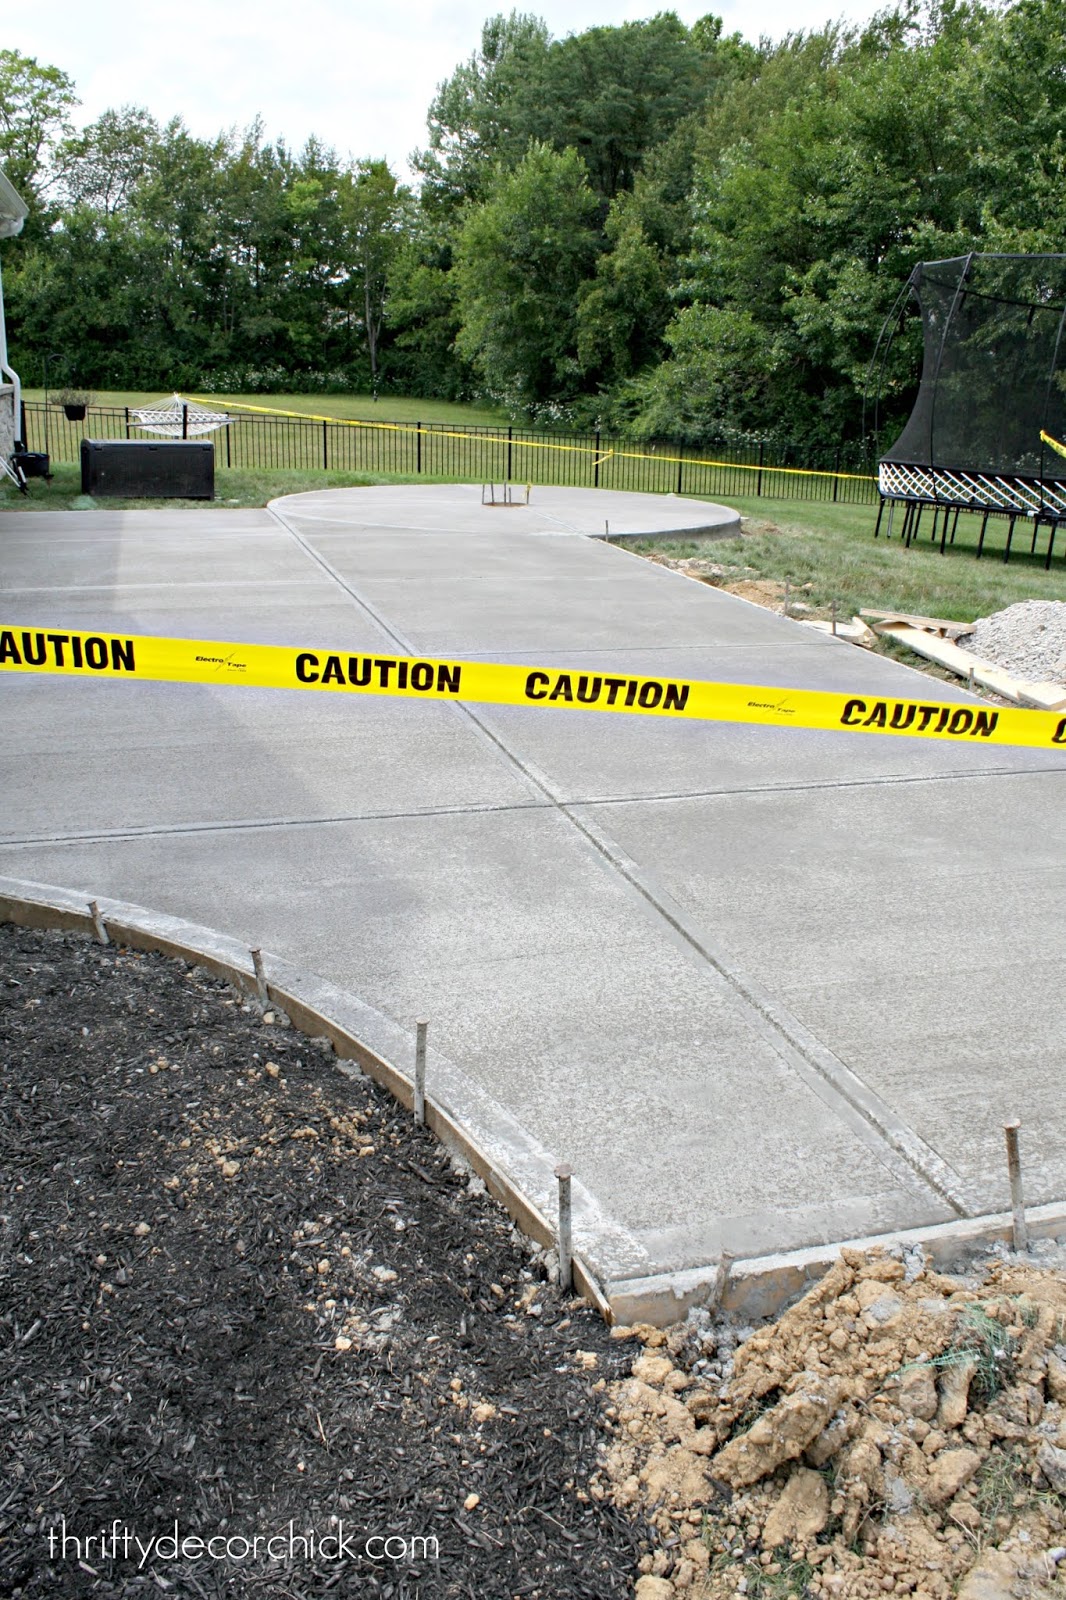
This weekend we'll be able to walk on it, and next week they'll remove the debris and the forms around the edge of the concrete.
I know many of you were surprised we went with basic concrete, but I love it! I prefer the simple look to most stamped designs I've seen.
This round fire pit spot is our favorite! They built a hole with a drainage pipe that runs to the back of the patio, which is great:
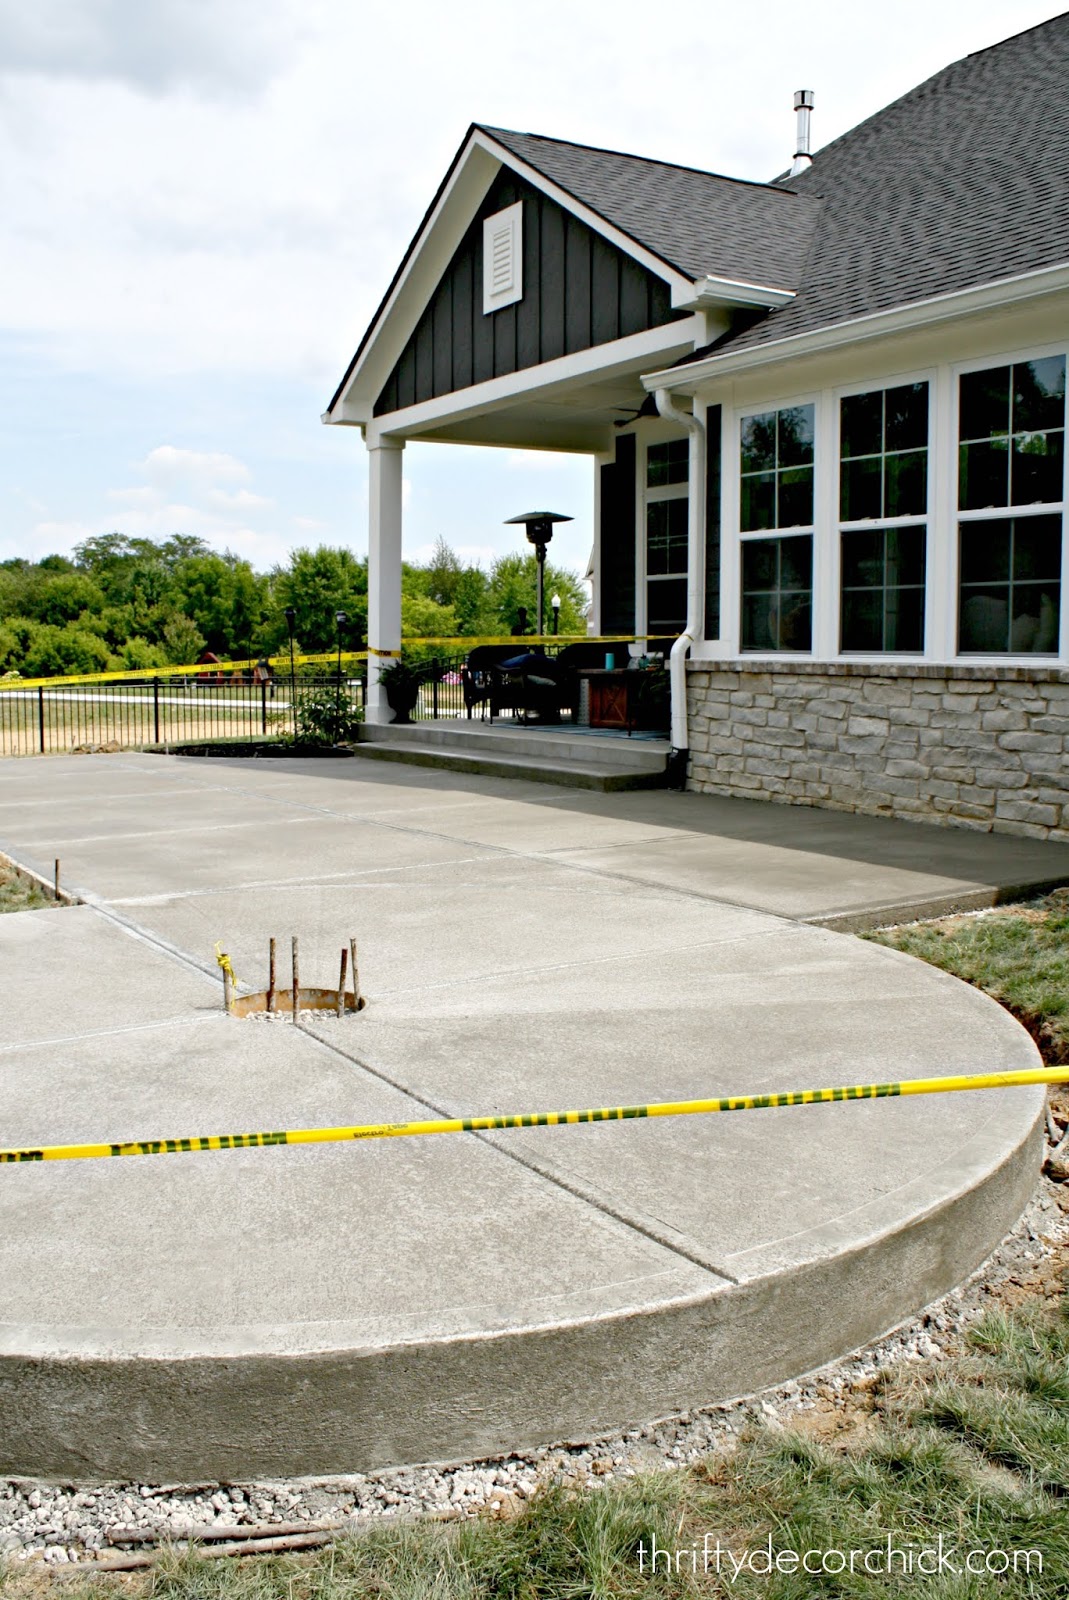
Eventually we plan to add a seating wall around the patio on this spot. Because of the slope in our yard it is higher here than anywhere else.
I know it's not much to look at now, but I can see it all dressed up in my head!:

Here's a peek at the items we picked for the patio. Since the stores are mostly sold out of outdoor furniture already, I went with this inexpensive outdoor wood table I found online:

It had great reviews for the most part so I have high hopes. I'll update you when I get it put together!
I found these wicker folding chairs at Target the other day and grabbed up the last four:

Super cute right? I hope they work well with the table. They weren't cheap so I'm keeping the tags on in case I find something less expensive.
We had a retaining wall and fire pit quoted for the round area and they came back with a price almost double what we paid for the patio! Whoa. Instead we bought this DIY fire pit kit from Menards:

It looks pretty easy so hopefully we can get that set up quickly and get some fires going!
I've told you all before how excited I am to start planting again...and I can barely wait! We hope to have the grass dug up around the patio once I decide on a plan for the landscape -- I hope in the next week or two.
The landscaping will be expensive so it will happen over time. Thankfully we've hit the timing just right because a lot of perennials will be on sale soon. The fall is a great time to plant so I'm looking forward to getting my hands dirty again!
We also plan to add the same outdoor string lighting we had at the last house. These lights are simply the best and I have a plan to hang them over the patio:

Again, I hope to do that before the fall! I can't wait to start tackling all of these projects!
I'll be sure to share the patio as everything gets added. Can't wait to start lugging everything out of the garage that we've had in there for two years. ;)
See more of our home here. To shop items in our home, click here! Never miss a post by signing up to get posts via email. Via https://www.thriftydecorchick.com/2019/07/our-concrete-patio-is-mostly-done.html
0 Comments
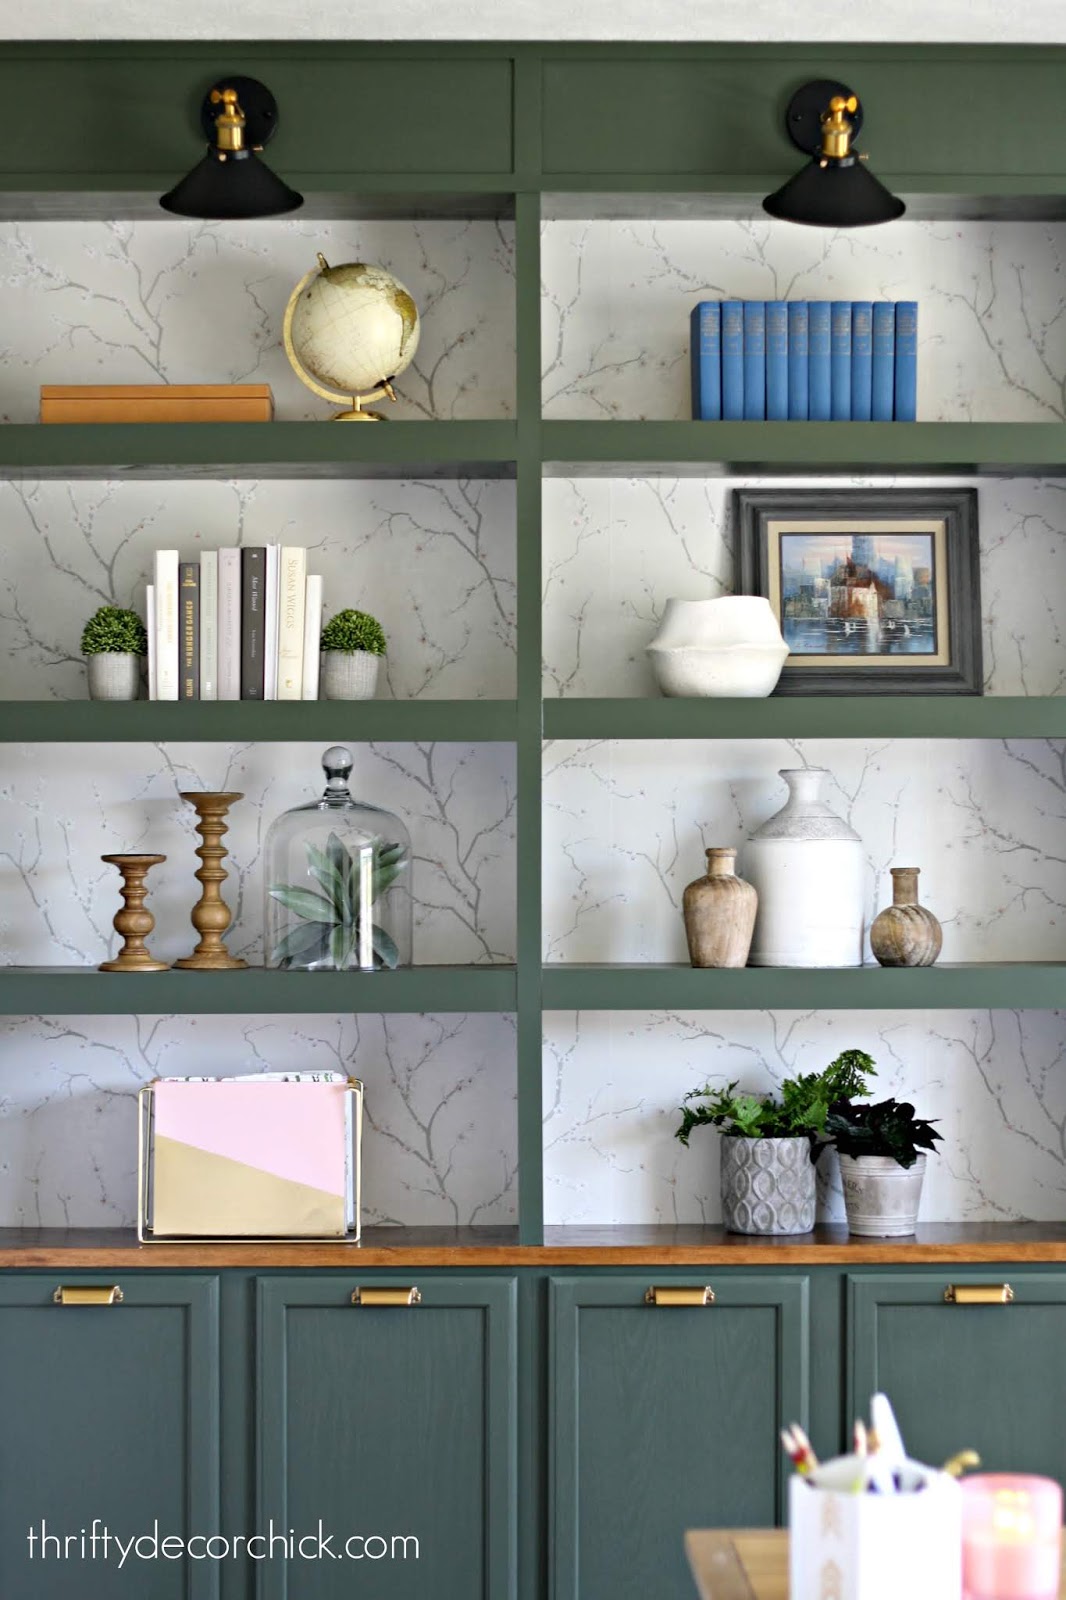
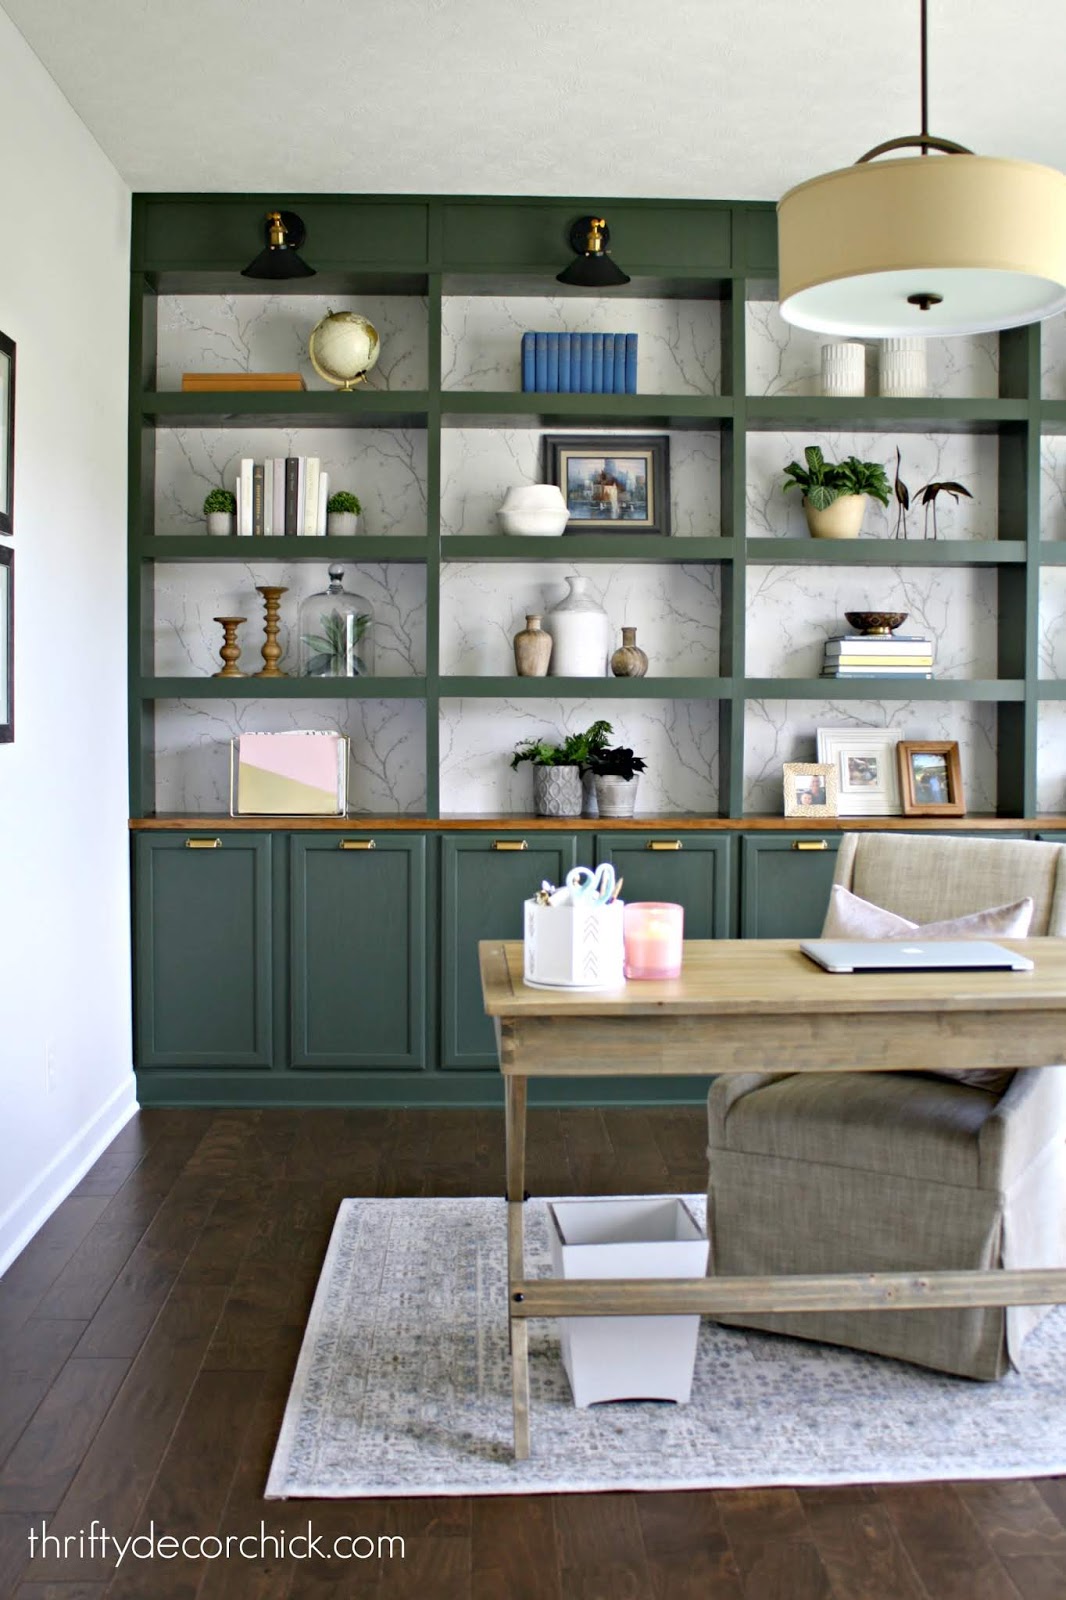
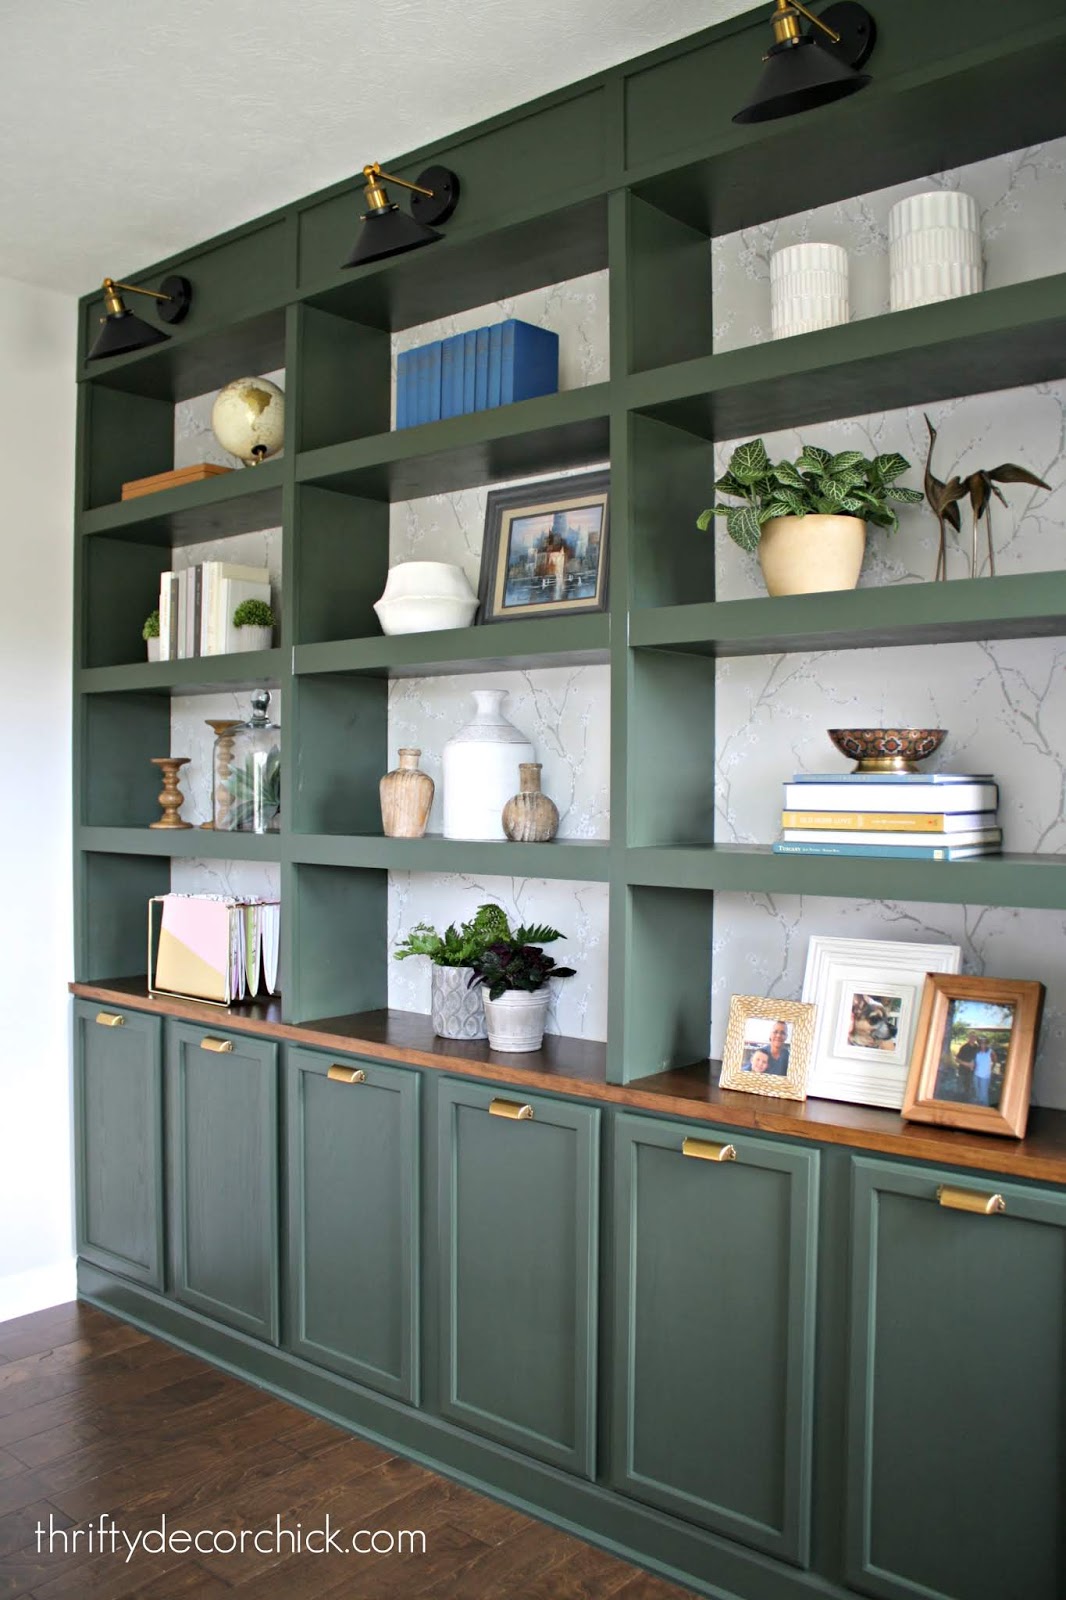
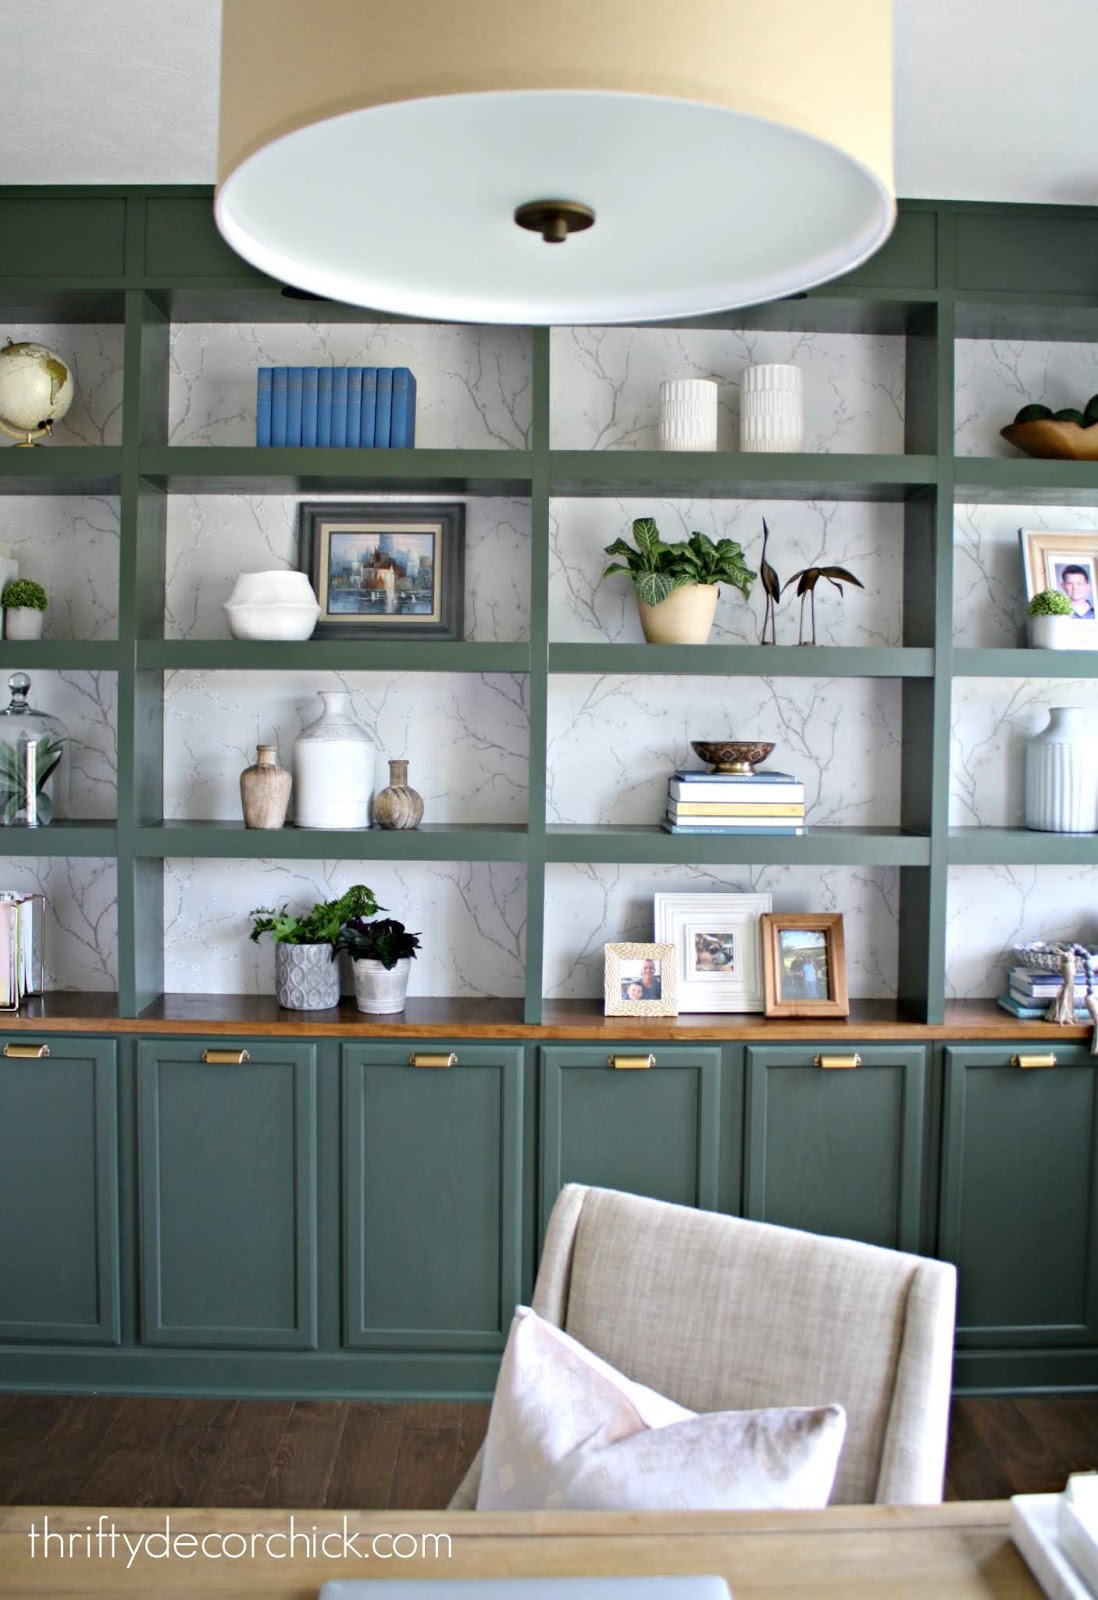
Thank you all so much for the love on my built in bookcases I shared last week! They are my favorite project I've done in a long time.
Here's a look at them again!: 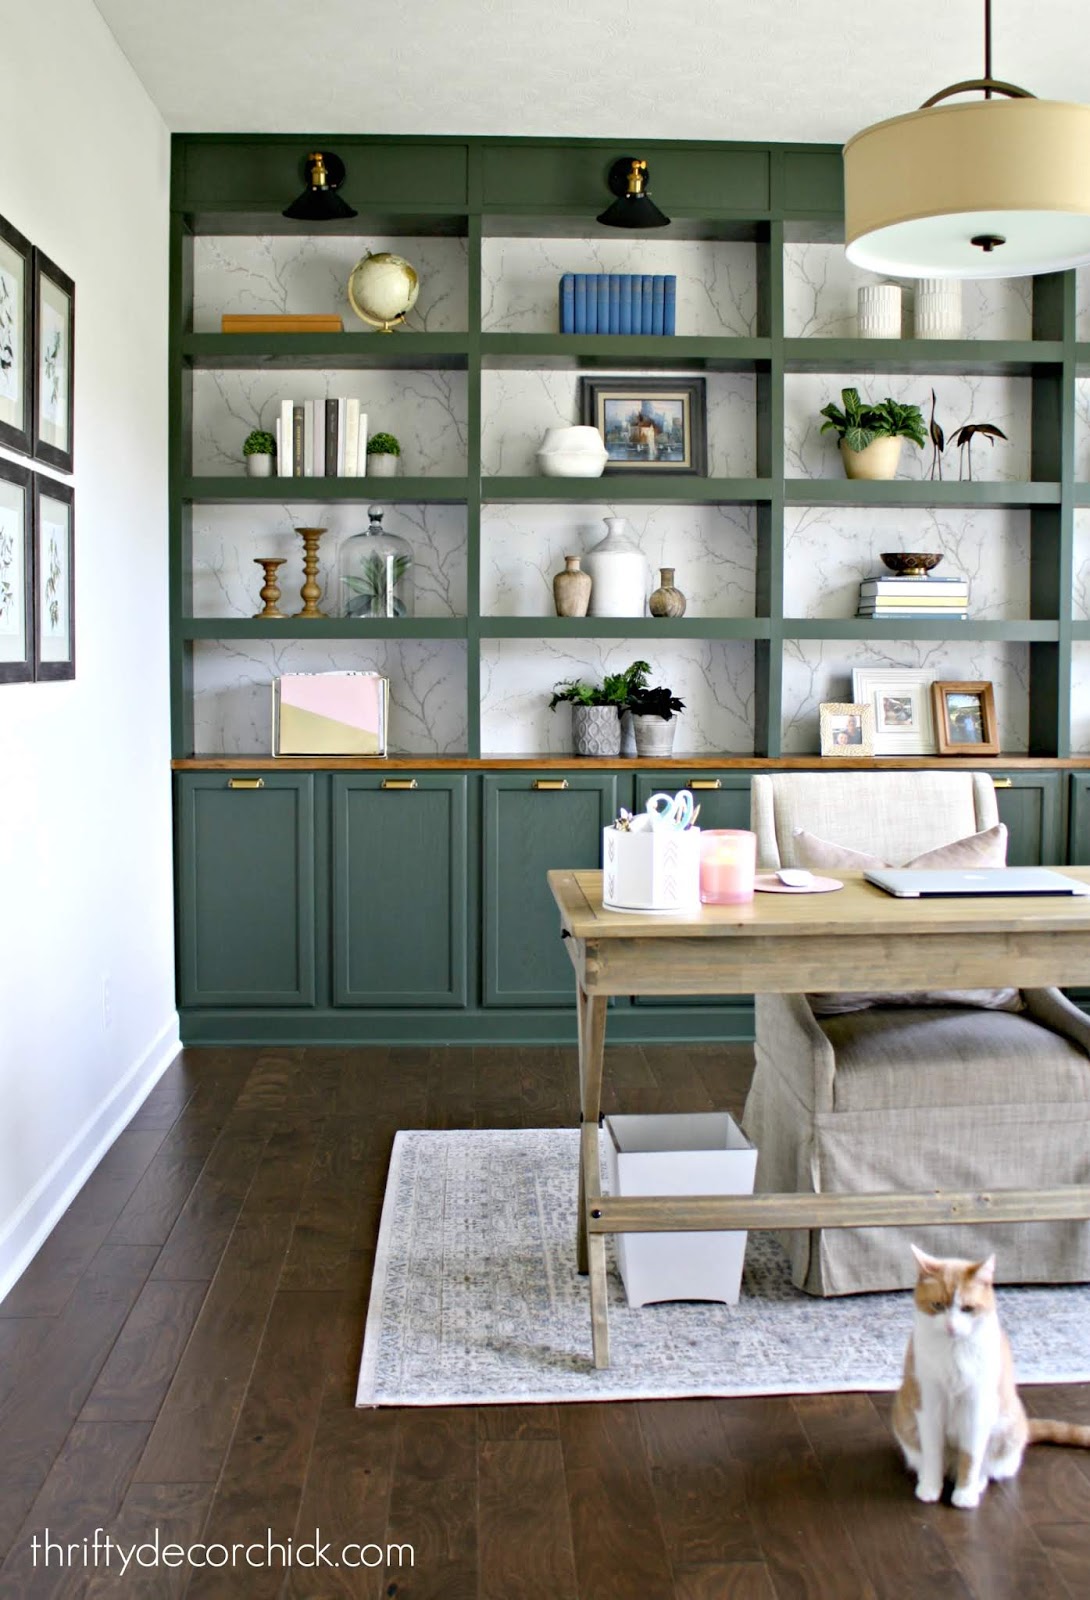
I wanted to share how much storage space there is inside of those cabinets. Even though they are only 12 inches deep, you'll be surprised with how much they hold!
This post may contain affiliate links for your convenience.
See my policies and disclosure page for more information.
Last time I did this bookcase it was in our dining room turned library. Even though we didn't use it as a dining room, I used the storage for all of our serving dishes. They held SO MUCH STUFF! 
I have the same number of cabinets this time, but in here they hold all of my craft and office supplies. Because the craft stuff has so many little pieces, I like using these canvas bins to corral everything: 
I store everything in categories -- Christmas, fall/Halloween, sewing supplies, glitter, paint, etc. It helps tremendously when I'm trying to find something for a project. The bins come in a ton of colors. I found the bins at Target on clearance and saw these clip on labels and thought they were so smart! 
I haven't written on them yet because I want to print the labels out instead. ;) They also have a dry erase option as well! The other cabinets hold my sewing machine and random office supplies in other bins: 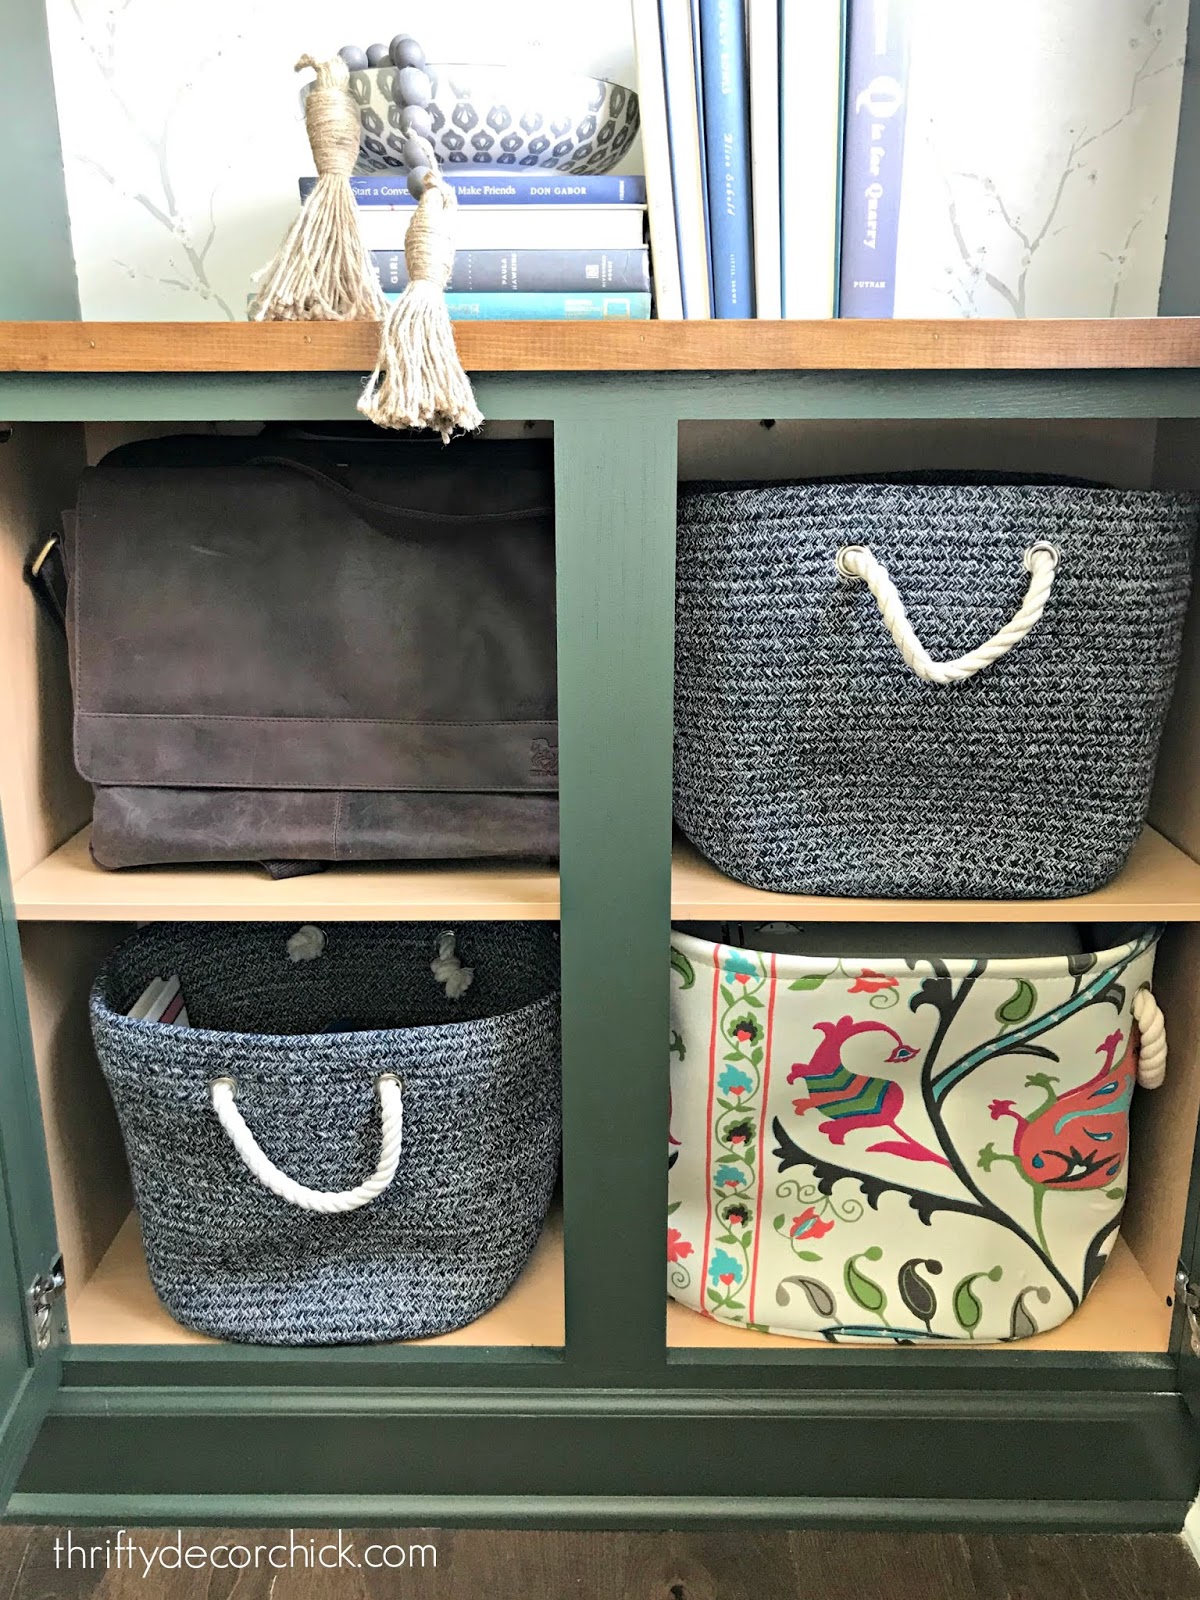

As you can see there's a ton of stuff in here, but its all tucked away so no one sees it. Form and function at it's best! There's one more thing I wanted to share about the cabinets that I LOVE. I shared this soft close door trick years ago but it's so good it's worth sharing over and over. If you've always wanted these for your doors (they prevent slamming), this is how you can do it easily: 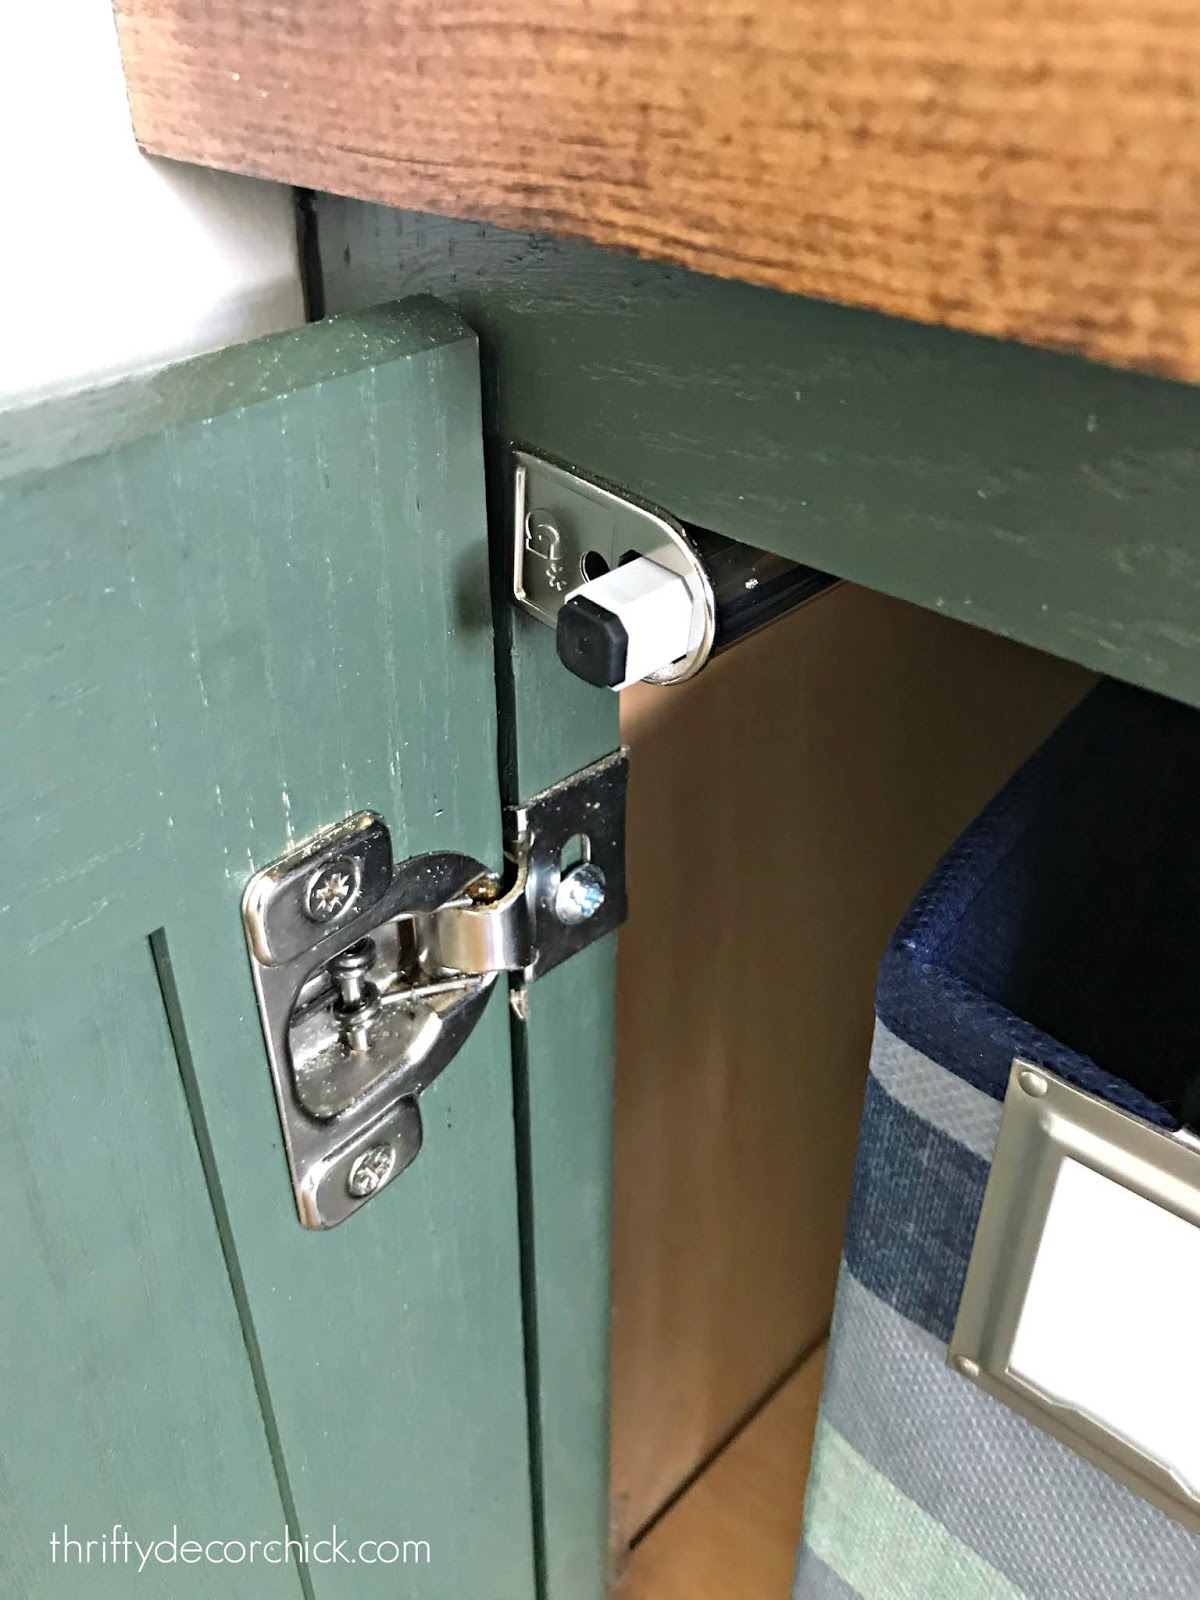
These little dampers are AWESOME. You just use a screw to attach them in the corner of the cabinet and they allow the door to close softly. They are the bomb. I found my first set at Home Depot in the store, but sadly they don't sell them there anymore. They sell a much cheaper version, which I tried despite the horrible reviews. They were right -- they're horrible. ;) They still sell the better version (pictured above) online but I found these on Amazon for cheaper, and I got them much faster. You can check out this post to see a quick video of them in action. I love them! I have so much storage in these built ins, I was able to downsize the dresser I was using on the other side of the room. I'm working on a (what I hope will be a) cool project on that wall that I hope to show you soon. :) How do you organize all of your office and craft supplies? I built this DIY craft desk (using cubbies you can buy at the store) years ago and it worked great as well!: 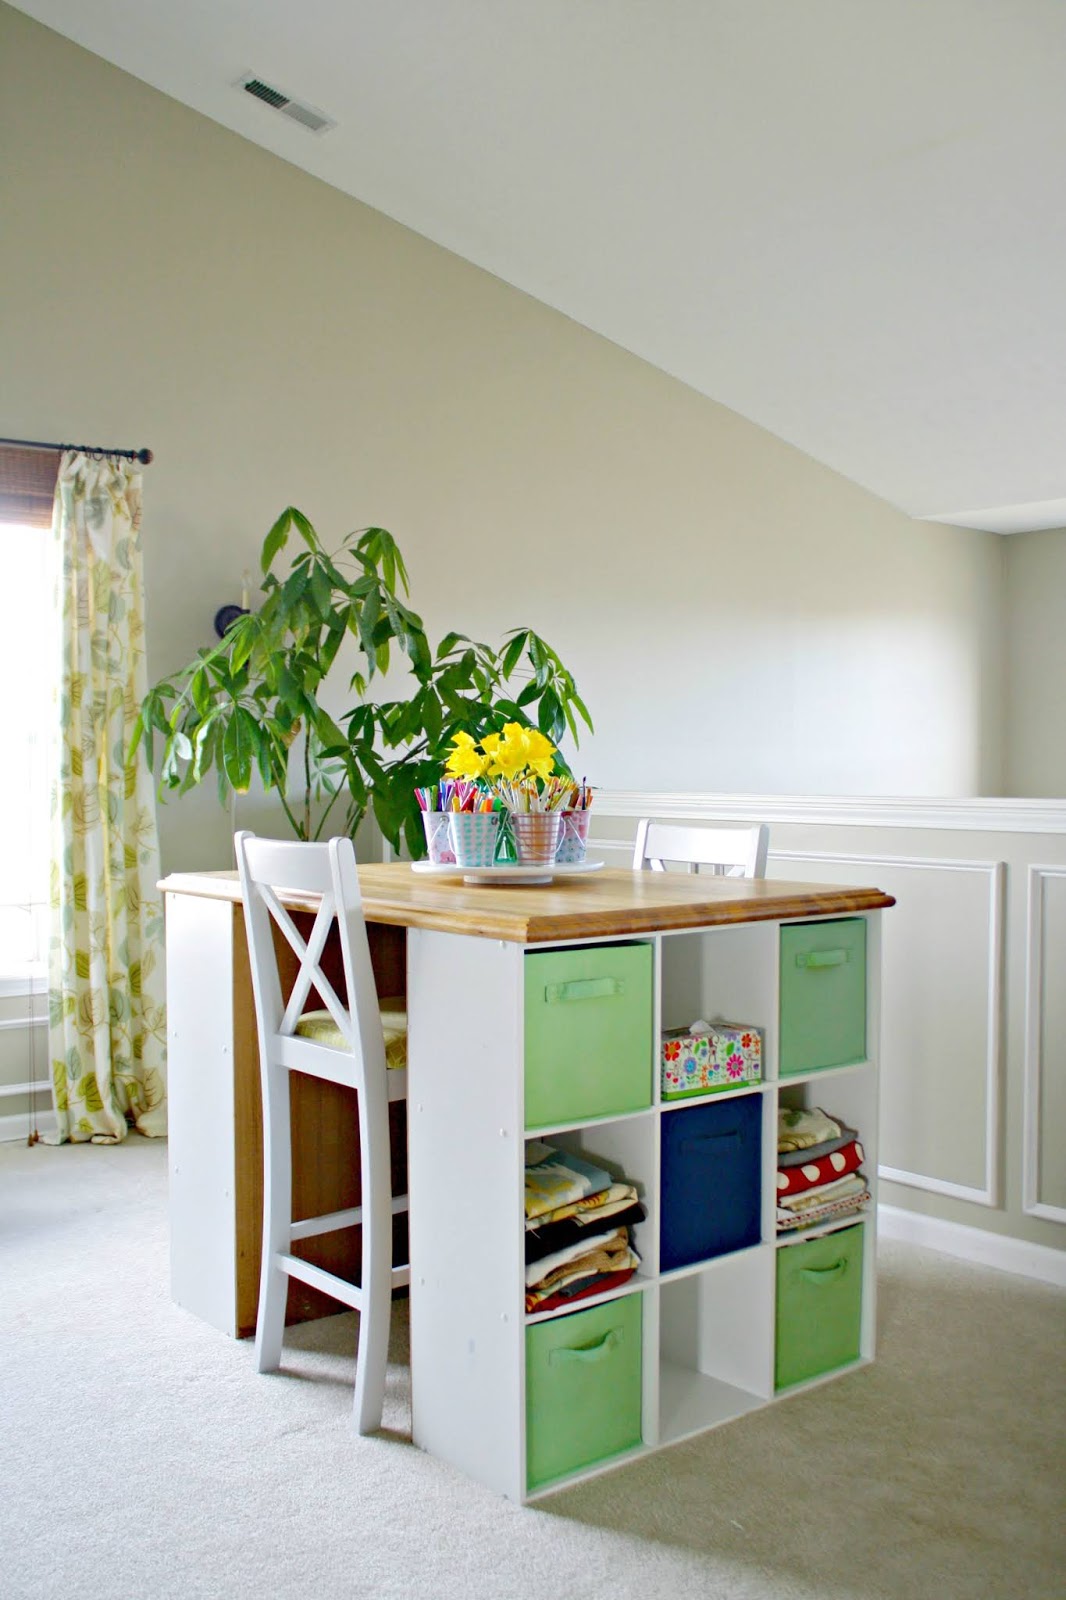
See more of our home here. To shop items in our home, click here! Never miss a post by signing up to get posts via email. Via https://www.thriftydecorchick.com/2019/07/tons-of-office-storage-and-my-trick-for.html
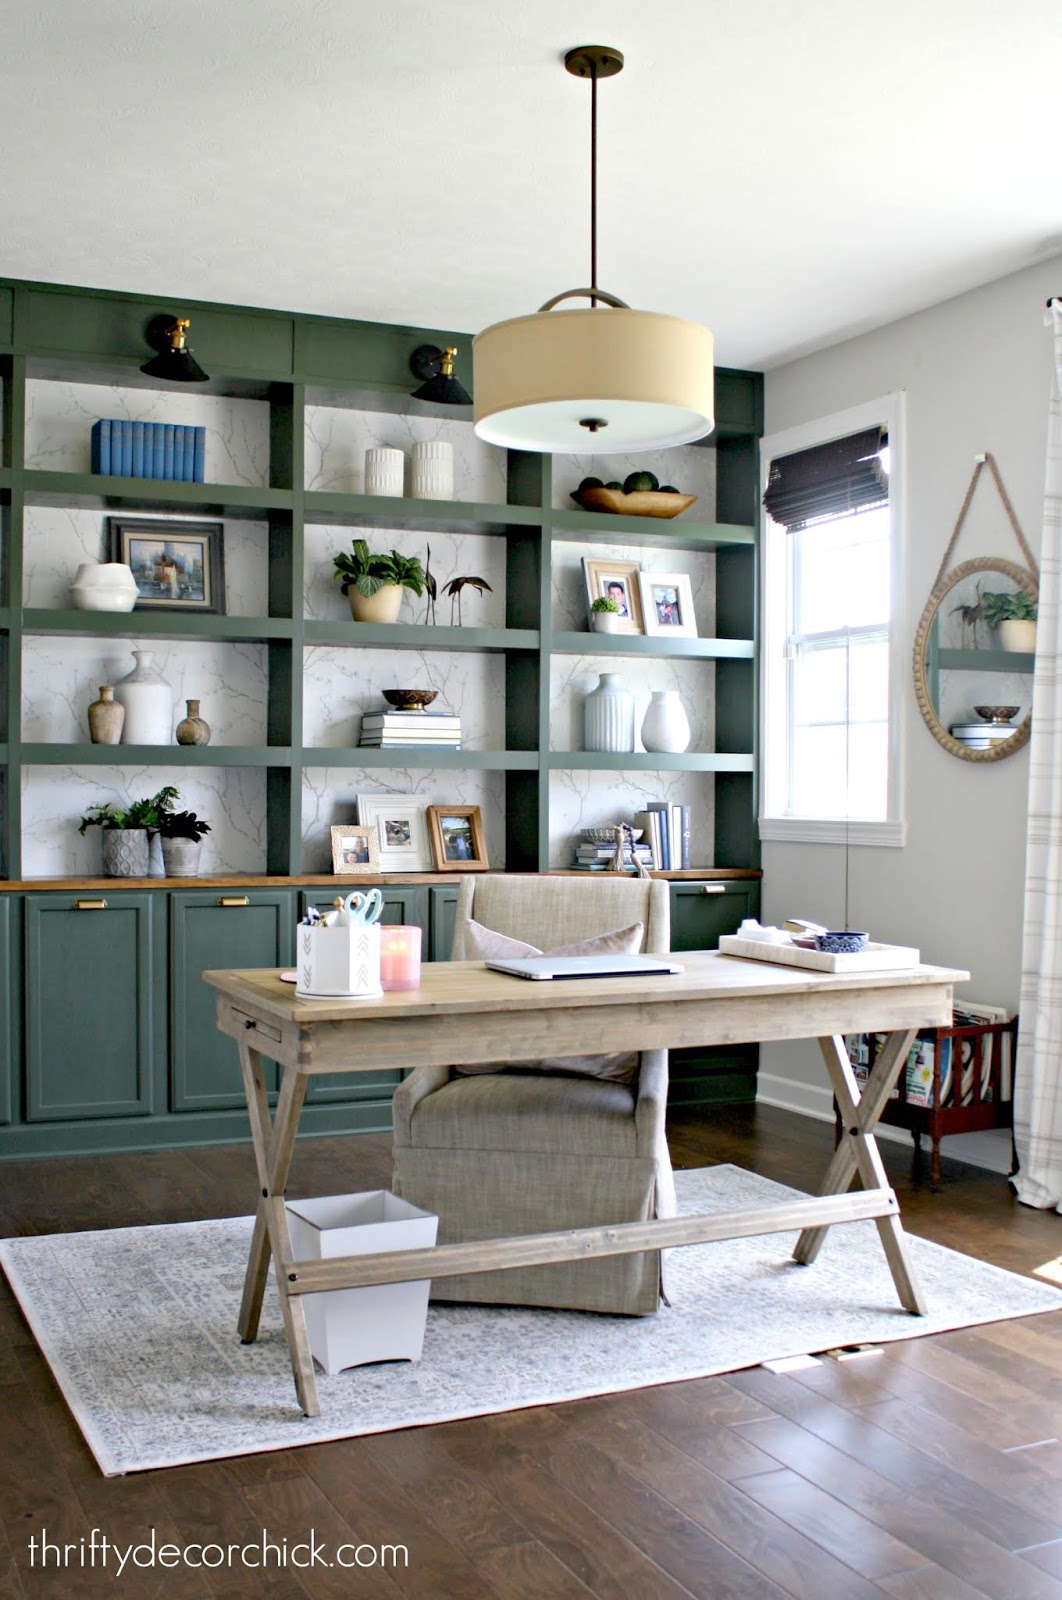
It's reveal day! Not gonna lie, I am so proud of myself for completing this project 100 percent on my own. I have been dreaming about a wall of built ins in my office since before we moved in. I pictured them there from the very beginning and they are better than I even hoped.
Let's go back and recap the steps, shall we? If you are going to attempt this on your own, these will be very helpful.
I have built a bookcase this size before, but my Dad helped quite a bit and I had help with lighting and the shelving as well. This time I was determined to do it all on my own and that I did.
This is how my office looked after I had finished unpacking all of the boxes. It was my dumping ground for a couple weeks after our move:

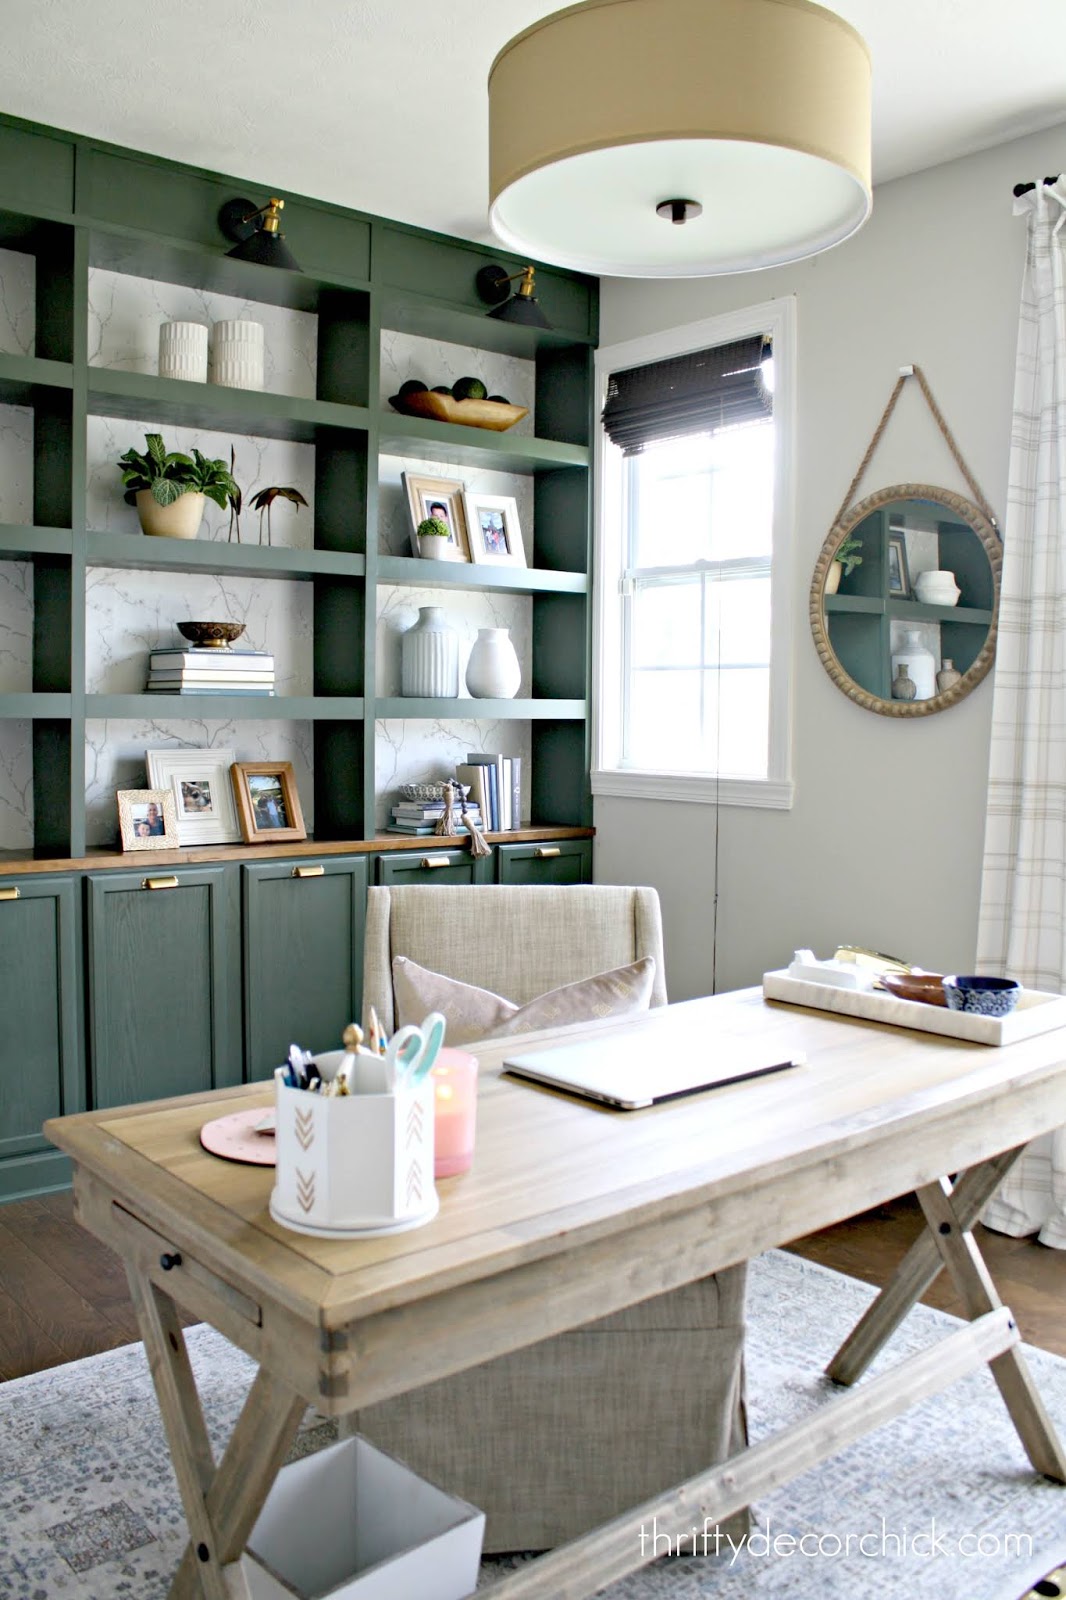
It's a lovely spot that gets great natural light. I love working in here!
This post may contain affiliate links for your convenience.
See my policies and disclosure page for more information.
Last year I changed out the the light and a few months ago I pulled up the carpet and we had our hardwood floors put down:

I get asked about those grids often -- they are window grids I found at Goodwill years ago. :) The first step in the built process was adding the kitchen cabinets as the bases: 
I use upper cabinets because they are just doors and they have a slimmer profile. They still hold a ton of stuff! Be sure to check out that post to see how I make them look built in.
Then I hung the peel and stick wallpaper -- it's still a favorite!:

This time I broke the painting up into sections and goodness, it made it SO much more manageable! It also gave me an idea of how it would look, so I was much more motivated to get it done.
I shared the pretty green color I chose for the cabinets here:

I'm falling hard for green lately! I just love it.
Next up, I shared how I built the sides, supports and header for the built ins:

After I got all of that painted I was able to get the lighting up. I saved a bunch by using this lighting trick without electricity instead of having them wired:

And finally, I showed you the three steps to building the bookcase shelves here:

After that there was a lot of caulking and touching up to do. I added some trim to the header to finish it off as well.
I was so excited to finally start decorating these after all that work!


I used a lot items I've had in our storage room for nearly two years now! I was so thrilled to bring these back out:

I did get a few new items from Hobby Lobby and At Home as well.
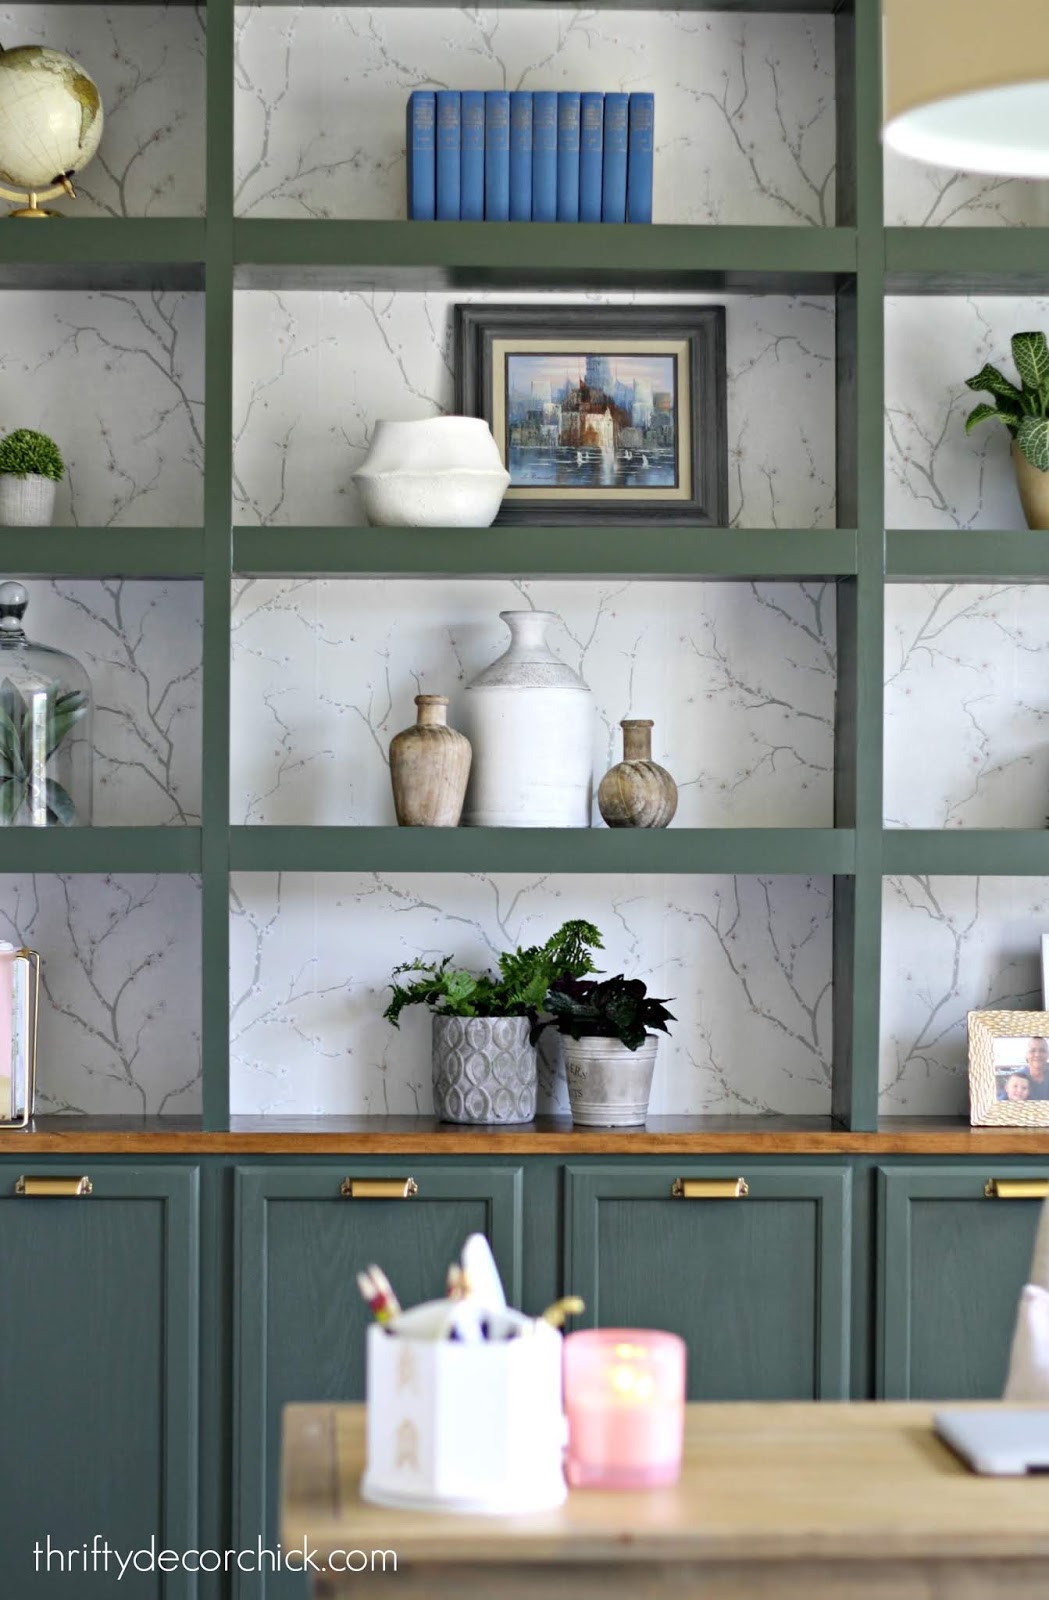
I did a massive purge of our books after the move (wish I would have done that BEFORE packing them up) so the shelves aren't full of them, which I prefer.
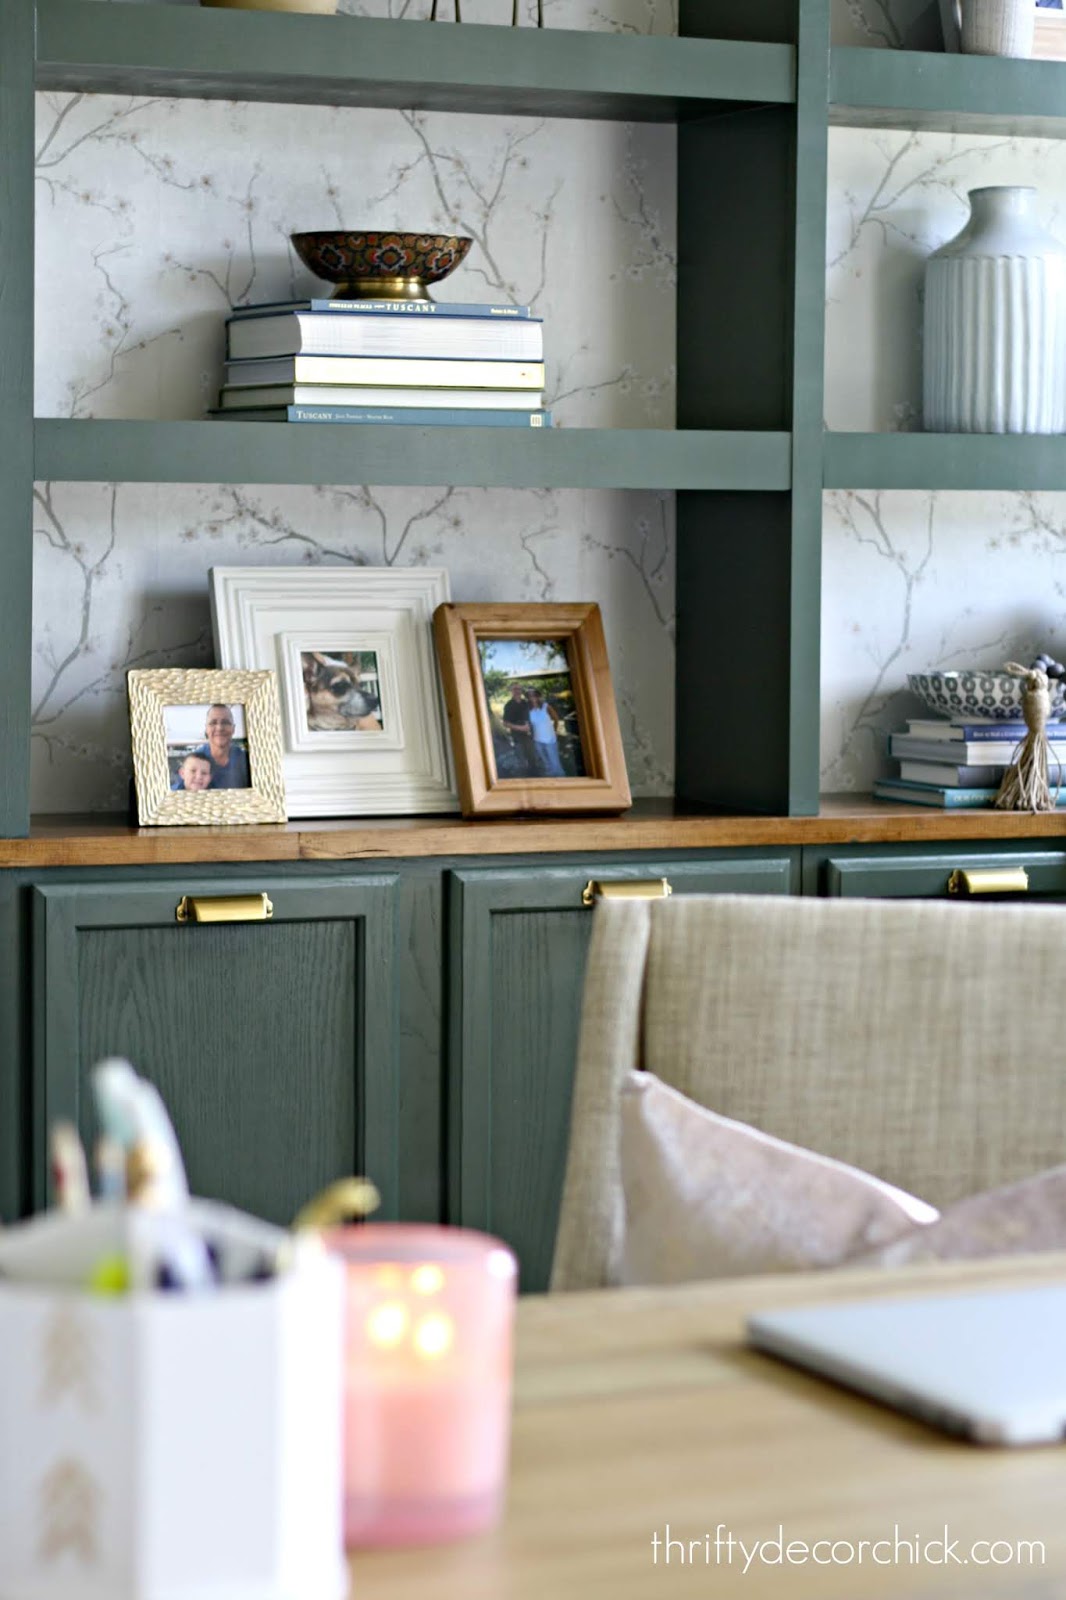
When I was decorating the shelves I got to where I was nearly satisfied, then I removed a few items. I find that's often the key when accessorizing!:

I shared my tips on decorating bookcases in this post years ago. It still works now!
I finished these up in less than two months -- which is WAY faster than I took last time I did this. Overall the way I did things this time was quicker and more efficient:
But I am worn out! ? I'm taking a break from big projects for awhile!
Enjoy more pics of this space. I'll share resources at the bottom:
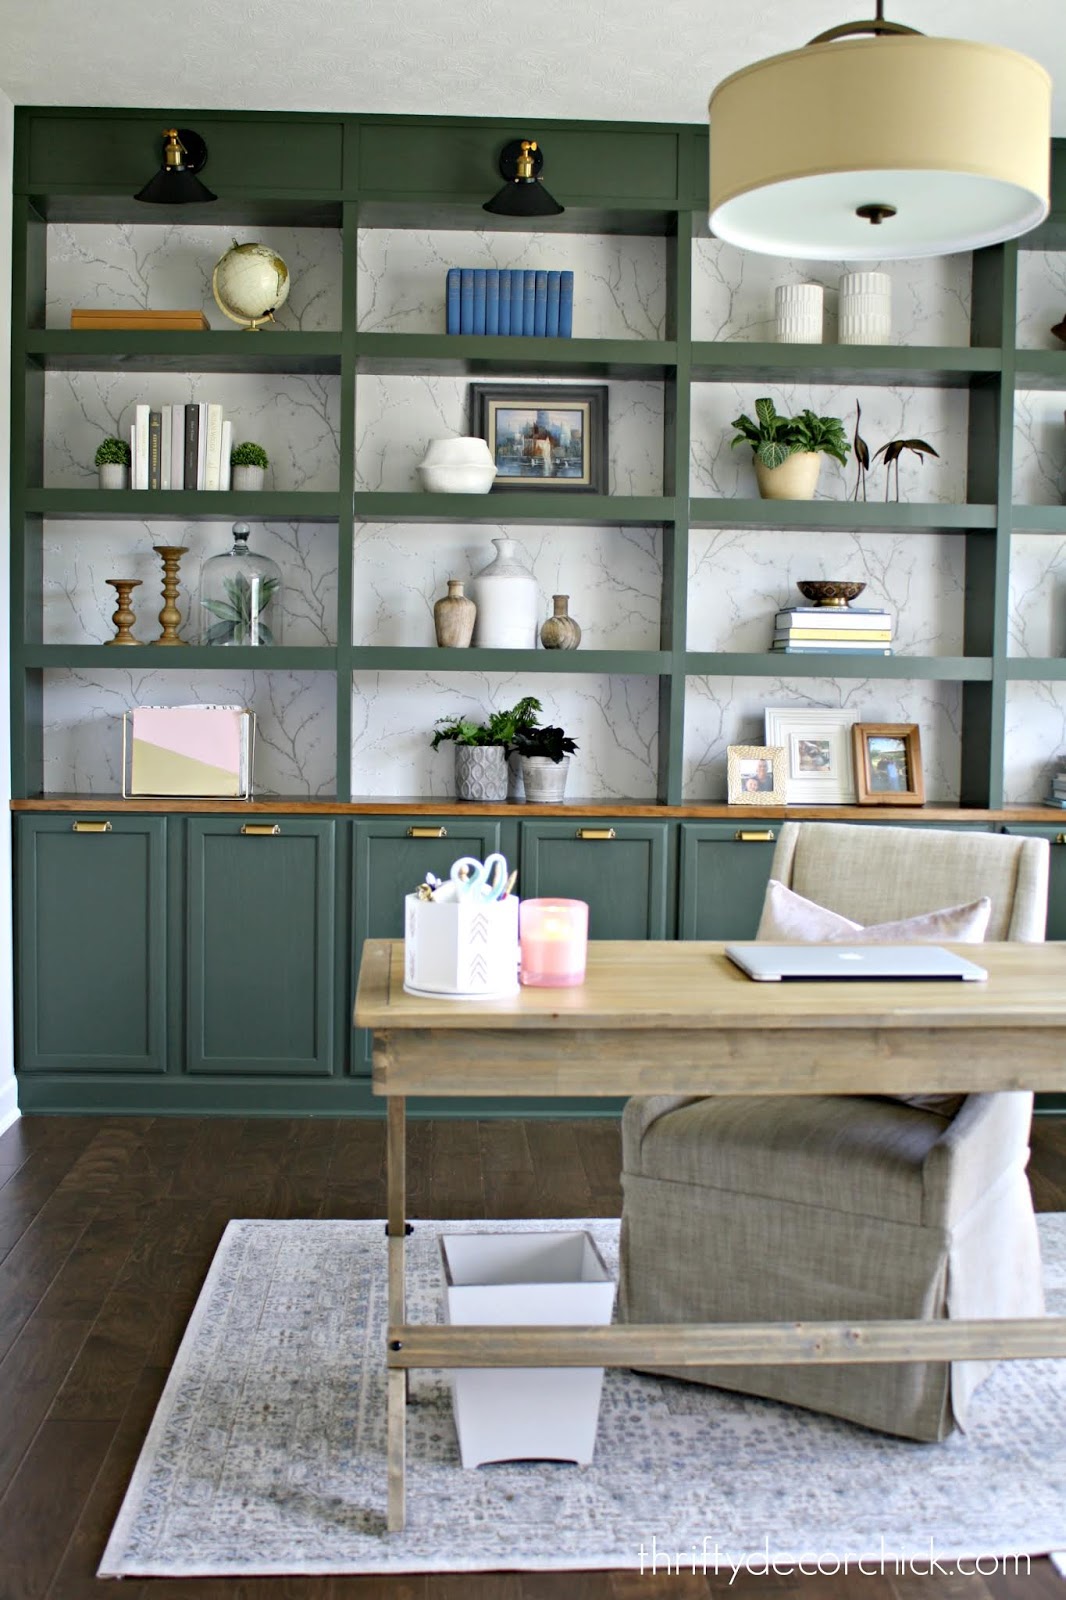
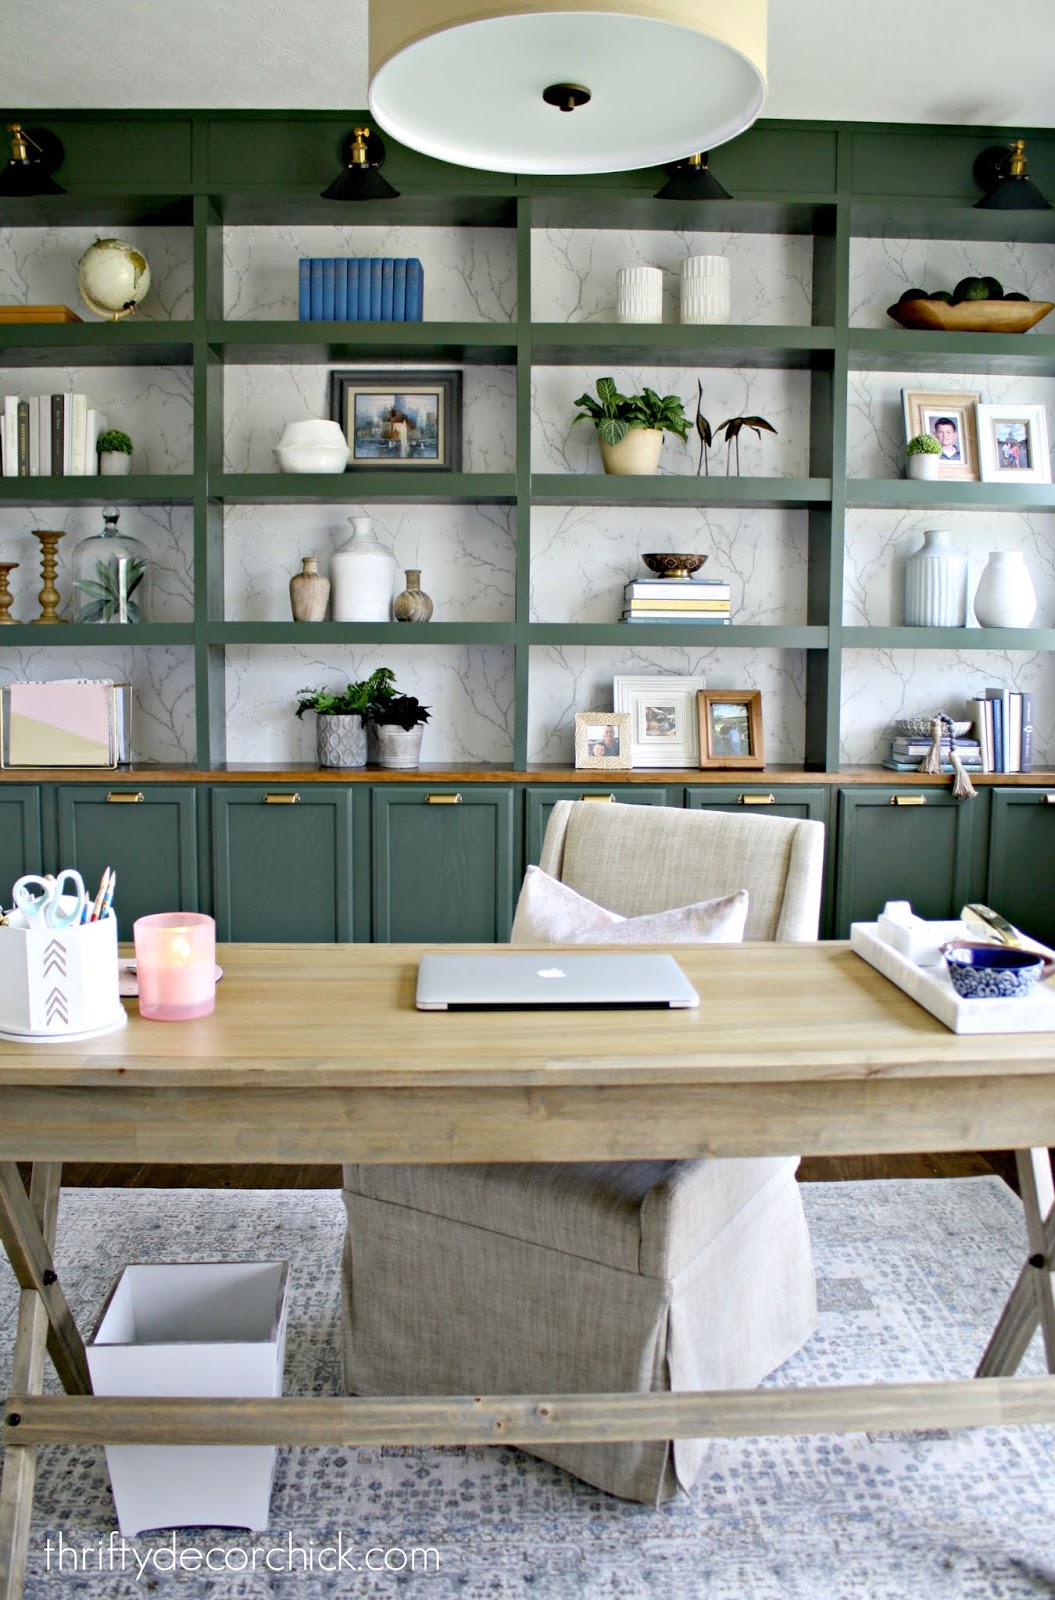

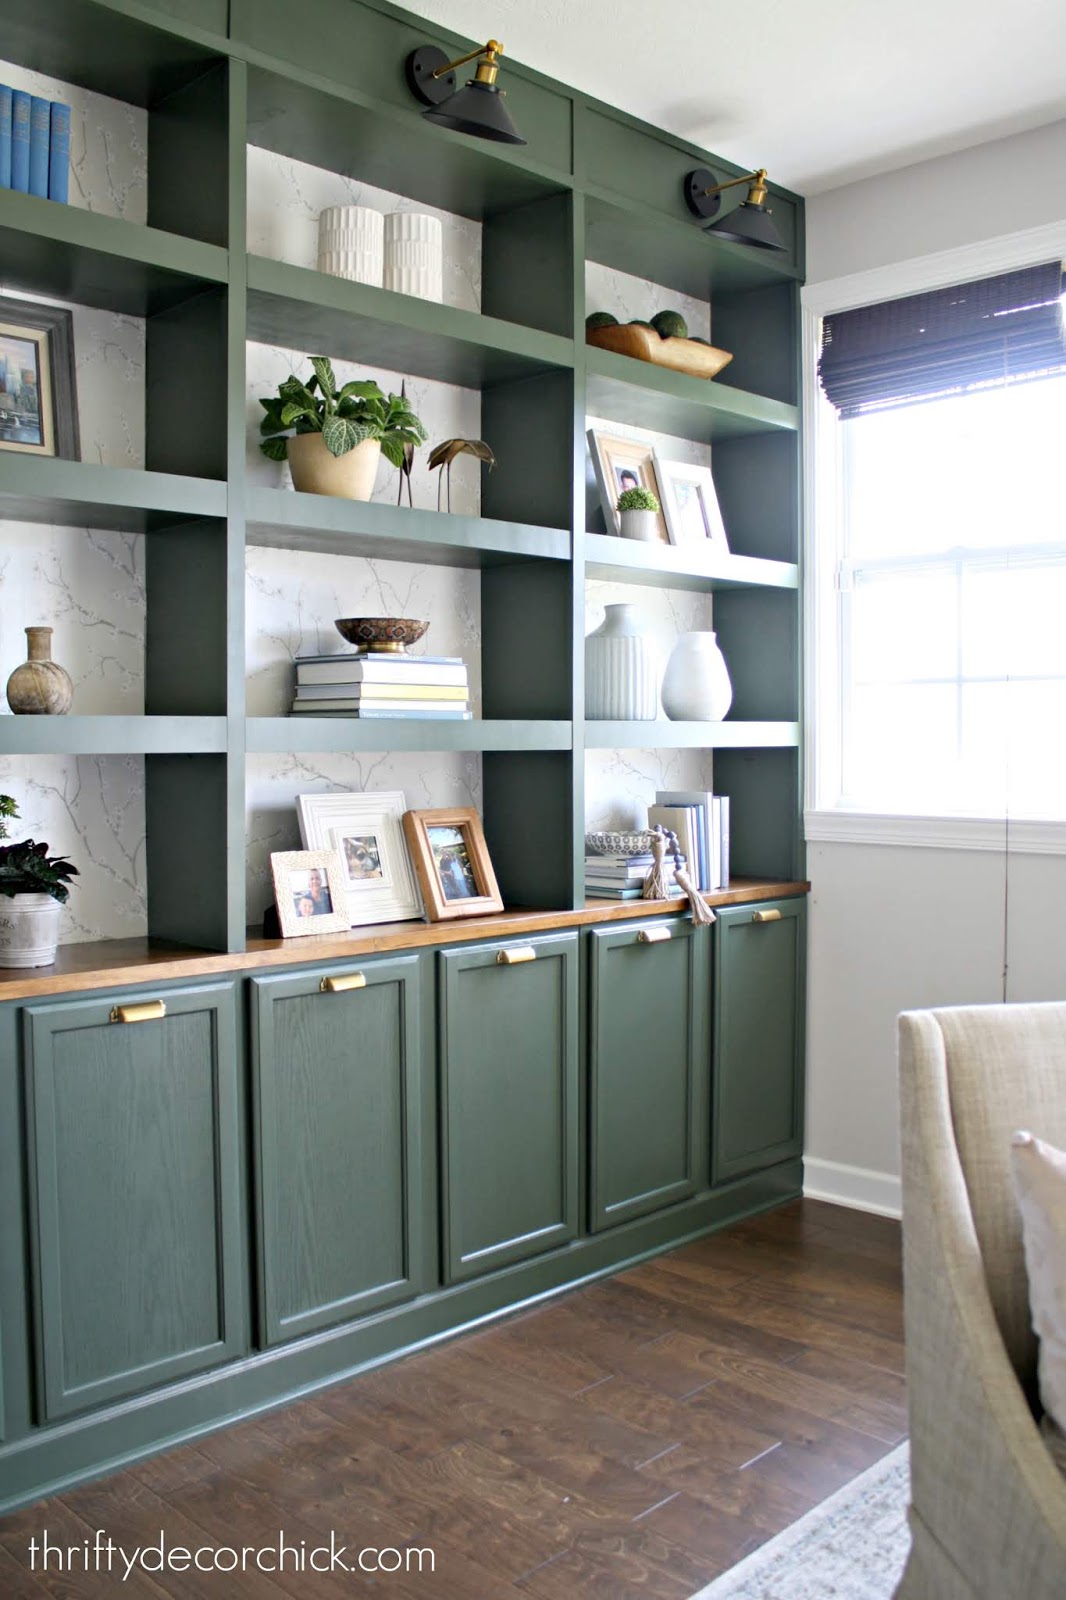
I hate to be that girl that shares so many pics of the same spot, but I'm dang proud of this so I'm doing it. ;)
Now for my favorite part! The before and after picks. Here's this room shortly after we moved in:

And the same view now:
And this view before:

And the after!:

I hope you enjoyed the process and will maybe try this in your own home! I kept a running list of costs at the beginning but stopped after a few weeks. I did estimate that I was going to end up at $1000 total for everything -- that includes the lights, paint, hardware...all of it.
I'd pay WAY more than that to have a this built for me. And it brings me great joy to do this stuff on my own!
I have more plans for the other side of this room that I can't wait to show you as well! I'm hoping to get that wrapped up next week sometime and I'll be sure to share that. :)
Here's a list of the items in this room in case you are interested!
See more of our home here. To shop items in our home, click here! Never miss a post by signing up to get posts via email. Via https://www.thriftydecorchick.com/2019/07/wall-of-office-built-in-bookcases-reveal.html
Hey hey! It's one of my favorite shopping days of the year! This year it's actually TWO days. Amazon has extended their Prime Day sale!
They have great deals on all kinds of stuff and I like getting a jump on Christmas gifts. I always like seeing the favorites of other bloggers so I always share some of mine with you on this day! This year I broke them up into categories -- decor, beauty and home items.
This post may contain affiliate links for your convenience.
See my policies and disclosure page for more information.
Let's start with my favorite -- home decor! I blogged about these LONG drapes here...they are such a good deal!: 
We ended up getting these lighter panels later (the original darker panels went in another room) because I was so happy with them. You can find them on Amazon here and they come in a number of colors. I haven't found a better deal for long drapes anywhere!
When I got our two coffee tables to make one big one, I searched forever for the perfect ottomans we could keep underneath. I found these and they are awesome!:

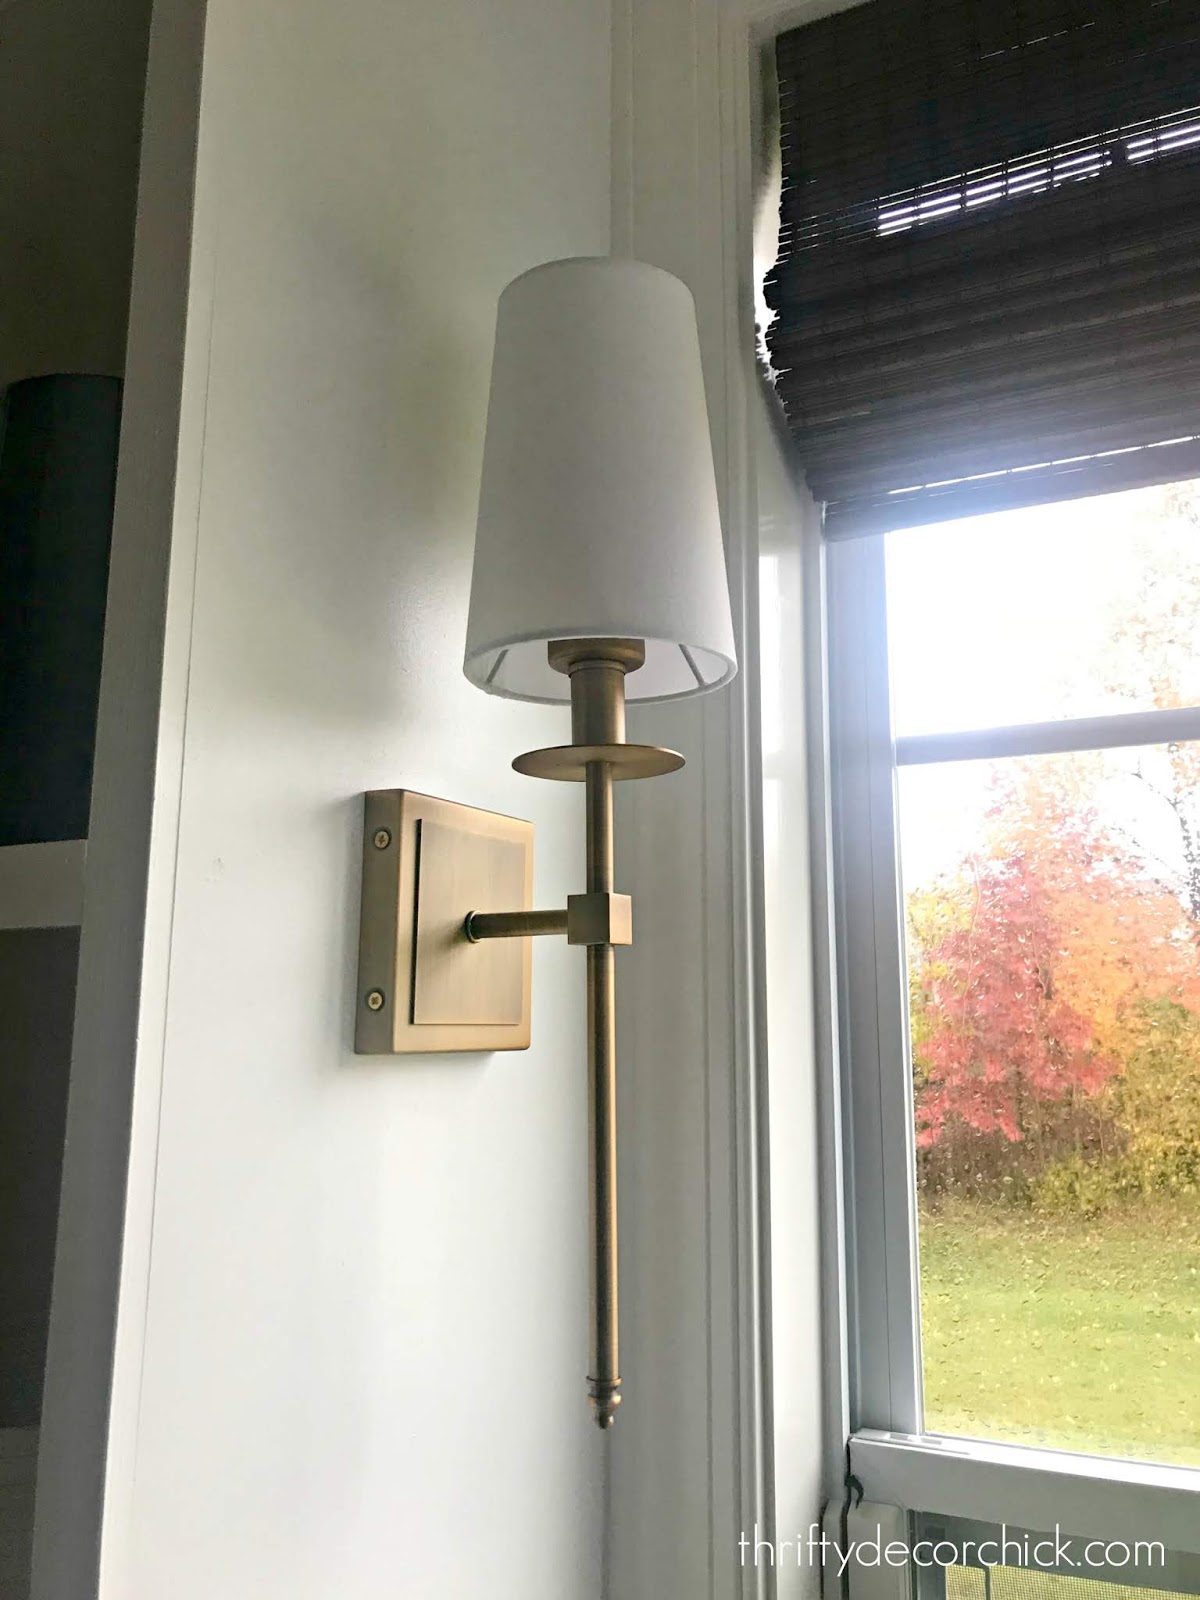
I find a LOT of light fixtures on Amazon too. My pretty upright sconces on the dining room built ins are a fave: 

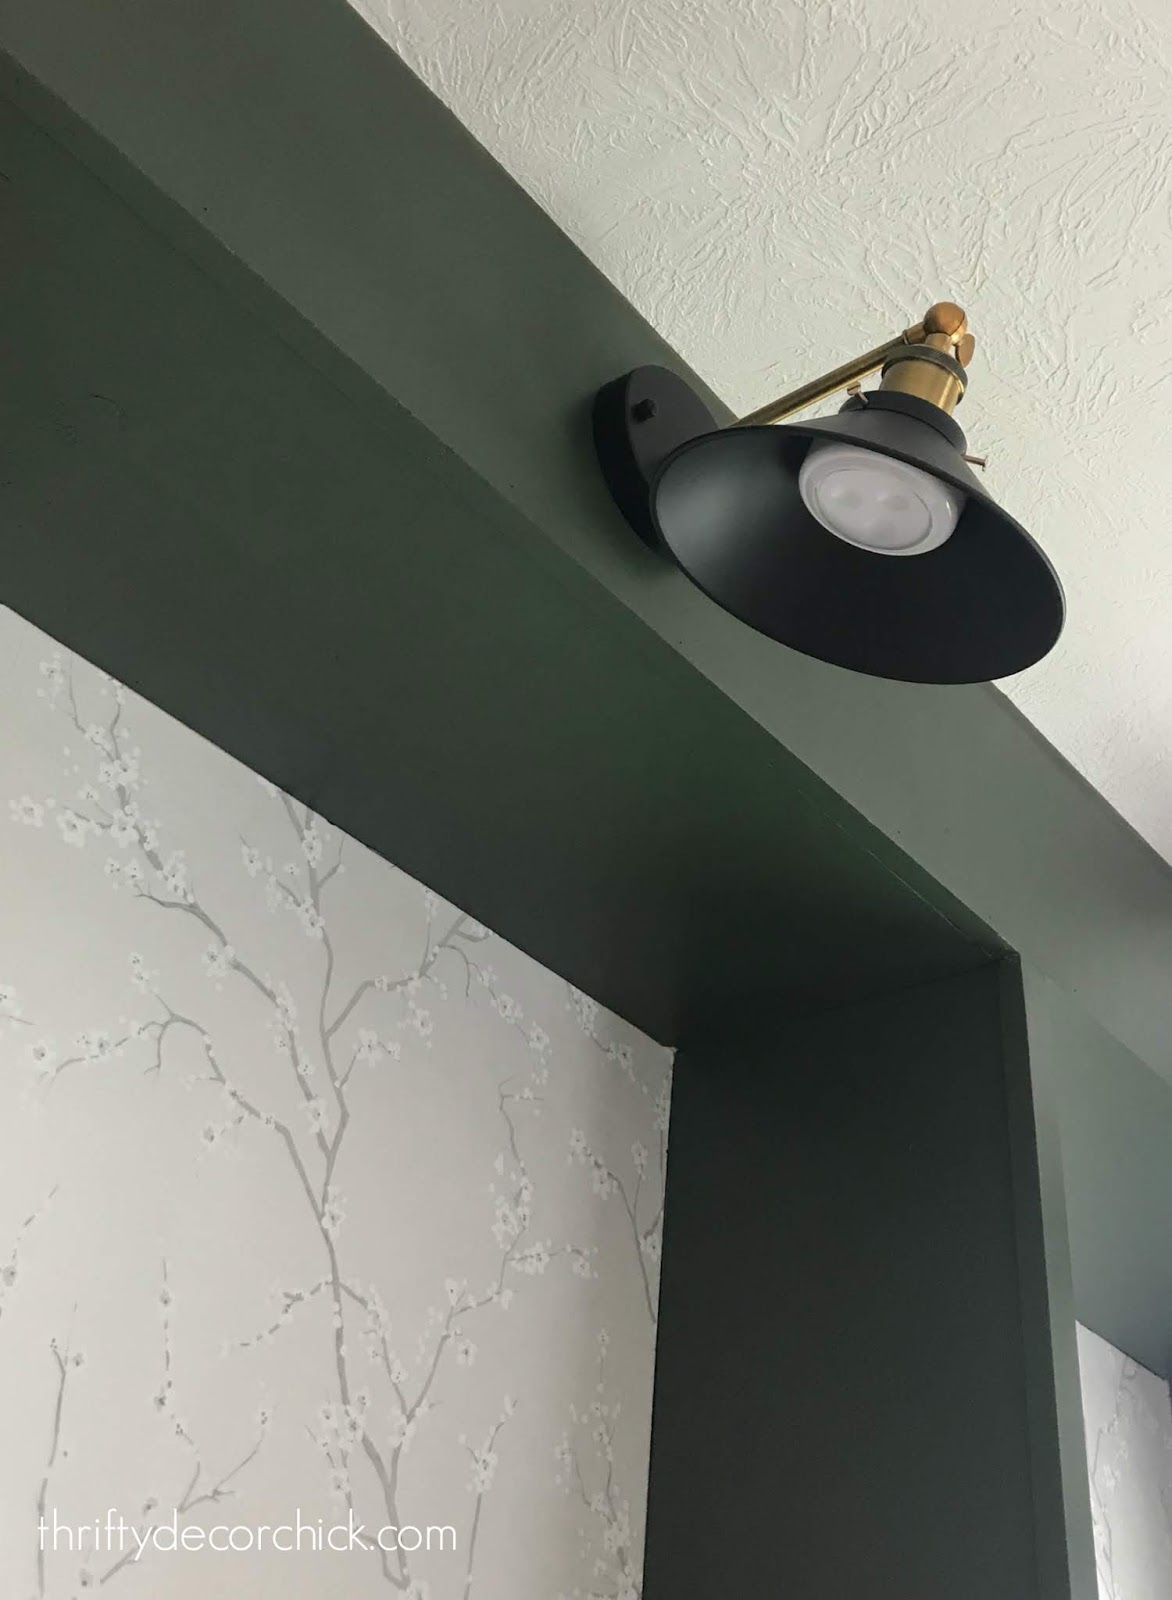
And these black and brass sconces that I've used in a couple rooms: 
I've hardwired one and the rest I've used this lighting trick to light them without electricity.
I wrote about some great Walmart finds earlier this year, and loved this console table so much I had to get it:

Turns out the price was the same on Amazon and shipping was faster (and free)! I absolutely love the lines of it -- it looks so great in our basement family room. I was quite impressed with the quality too.
OK, onto the beauty/fashion portion of this shopping spree! ;)
This small crossbody purse is a favorite Amazon purchase -- I use it all of the time, especially in the summer:

It's small and compact but still holds a ton! It comes in a TON of colors too.
I've shared my love of these hair masks before -- they work SO well and are super easy to use in the shower:

My hair feels and smells amazing after I use them!
You can find two of my absolute favorite hair tools on Amazon. The Bedhead wave styler tool is the updated version of a crimper (from the 80's):

I LOVE how this makes my hair look! It gives it big waves and it lasts two days easy. It's my favorite for "going out" hair. :)
And this Revlon volumizing hair dryer is the BOMB. I use it almost every time I wash my hair and haven't touched my straightener in months!:

It gives you that just from the salon look and makes my hair so soft and full of volume. I think I'm going to buy another one to have on hand just in case it poops out -- I love it that much!
This roomy leather bag still looks like the day I got it years ago! Actually, better! It's a beautiful bag with tons of room inside. It is my go-to for the fall and winter months and I love it:


The topper polish is a must as well, it will really keep the polish on longer. Love this stuff!
Last but not least when it comes to Amazon favorites...some of the best household items I've found.
My friend shared this awesome felt caddy and I had to get it -- it's perfect for our smaller games and card games:

The uses are endless -- it's sold as a diaper holder, which is great too. It's so roomy inside and has a ton of pockets. You can adjust the middle divider and move it where you want, or remove it all together. The handles make it super easy to carry around. This specific version is no longer available, but this one is almost identical!
This book by Marie Kondo changed my life and because of that I will keep sharing it! You can read about my epic Konmari decluttering session years ago (and why I'll never have to do it again):

I bought this tub tray before we moved into the house because I was so excited about our deep soaking tub. I use it every time I take a bath! It's functional (love that wine glass slot) and looks great too:

The Scrub Daddy sponges are the absolute BEST! I will never go back to regular sponges. They clean great (stay hard in cooler water, soften up in warm water): 
They never get stinky and food doesn't get caught in the sponge. We prefer the "mommy" version that has a soft side as well.
We bought another version of these extension cords years ago and loved them so much we recently got more for when we travel:
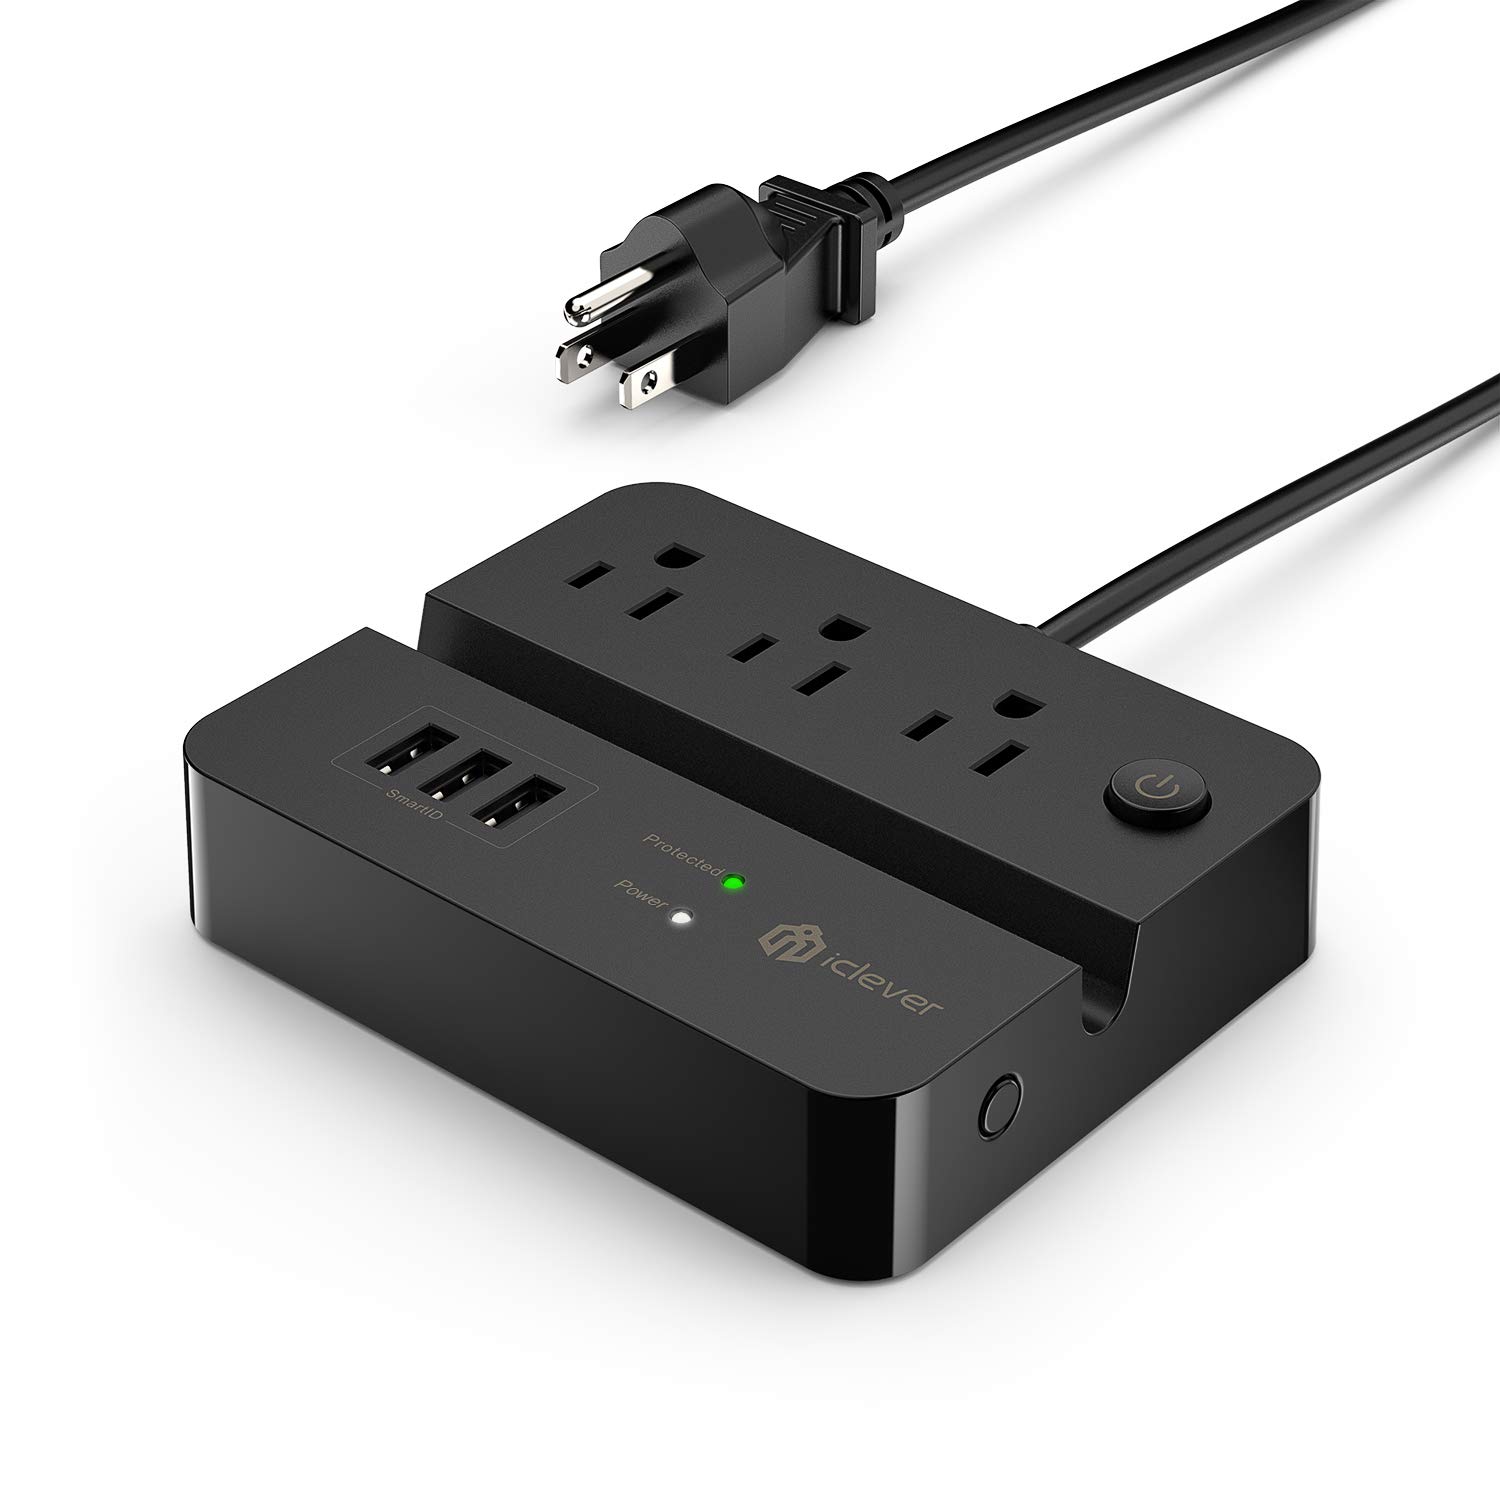
They have mutiple plugs but the best part is the USB chargers built in. They are great for by the bedside!
There you go! We use all of these items often and love each and every one! I hope you found something you'll love in your home as well! Do you have any Amazon favorites, or have you tried any of these?
If you're not a Prime member, you can use this link to get a free 30 day trial!
By the way, while writing this post I found out my beloved Dash buttons have been discontinued! I'm so bummed...we LOVE these! I always looked forward to getting a couple more for super cheap on Prime Day! RIP Dash buttons:

See more of our home here. To shop items in our home, click here! Never miss a post by signing up to get posts via email. Via https://www.thriftydecorchick.com/2019/07/my-favorite-home-and-beauty-items-from.html
Hey there! I'm nearing the finish line on the built in office bookcases!! I'm SO excited to share this project with you -- I plan to reveal the whole thing next week. You can catch up on all of the steps of this process in this post!
For now, I'm sharing a quick tutorial on how to build the shelves. This is actually a simple process (if you've done any DIY work). I always build it up in my head bigger than it is -- I knocked out all of the shelves in about four hours, so it went quicker than I planned.
This tutorial is one that works when you have supports on both sides, like a bookcase situation. If you are looking to build floating shelves, I'll add a link to the bottom of this post for that project.
I hired this part out last time I built bookcases, because the measurements have to add up just right for shelves like this. They ended up ripping (cutting) down wood strips at the right size for the shelves, but I was determined to do this whole thing by myself this time.
You have to account for the top and the bottom of the shelf and the support in between -- those added up can't be thicker than the trim piece that goes across the front of the shelf. This will make more sense in a minute.
I started with a piece of trim -- it's about 3/4 of an inch by about half an inch:

This post may contain affiliate links for your convenience.
See my policies and disclosure page for more information.

A level is crucial here. I use a longer level like this for the back, then a smaller one for the sides. I found the studs and screwed into them along the back. I LOVE these screws for wood projects. They are my absolute favorite.
You'll need to be careful not to split the wood -- that was my only concern with a smaller piece like this. But when you use good screws and either predrill the hole or go slowly, they will be fine.
Then you'll need to measure across to determine the size of your shelves. I used 1x12x6's for both the top and the bottom:

Nail or screw those in to the support pieces as you go. I get asked about my nail gun often -- this is the one I use. It's an 18 gauge and all you need for most projects. I had a 16 gauge for awhile and it constantly jammed, so I went back to this size and love it!
I used the 1x12 for both the top and bottom, but if you need to save some space, you can use luan or any other thinner wood for the bottom. It will save you some money, but you'll have to cut it to the size you want.
You'll need a piece of trim for the front of the shelf. I use select pine (without knots) for all the trim facing out:

It's more expensive, but it's nice a smooth -- so easy to work with!
You just nail it to the front of the shelf and you're done!:

That's it!
Before painting you'll need to caulk where needed and fill holes. I used common pine (with knots) for the supports and shelves on this project because I knew I'd be painting it a darker color. If you are going white you'll want to consider select pine (or any other wood) because knots in wood tend to come through the paint, even with a good primer. Select pine will raise the price though.
I hope that helps for those of you wondering how to build these shelves! I'll link to some of my other shelf projects below as well! Let me know if I missed anything or if you have any questions!


See more of our home here. To shop items in our home, click here! Never miss a post by signing up to get posts via email. Via https://www.thriftydecorchick.com/2019/07/three-steps-of-building-diy-bookcase.html
Hey there!! I've been hard at work on the office bookcases and I'm just thrilled with them! I'm so close to done, but still have a good week of work till they are ready to reveal.
This post about the lighting I picked for the built ins. If you remember, last time I did this (years ago in our old house), it took me forEVER to find the lights I wanted. I finally went with outdoor lights because everything else was crazy expensive: 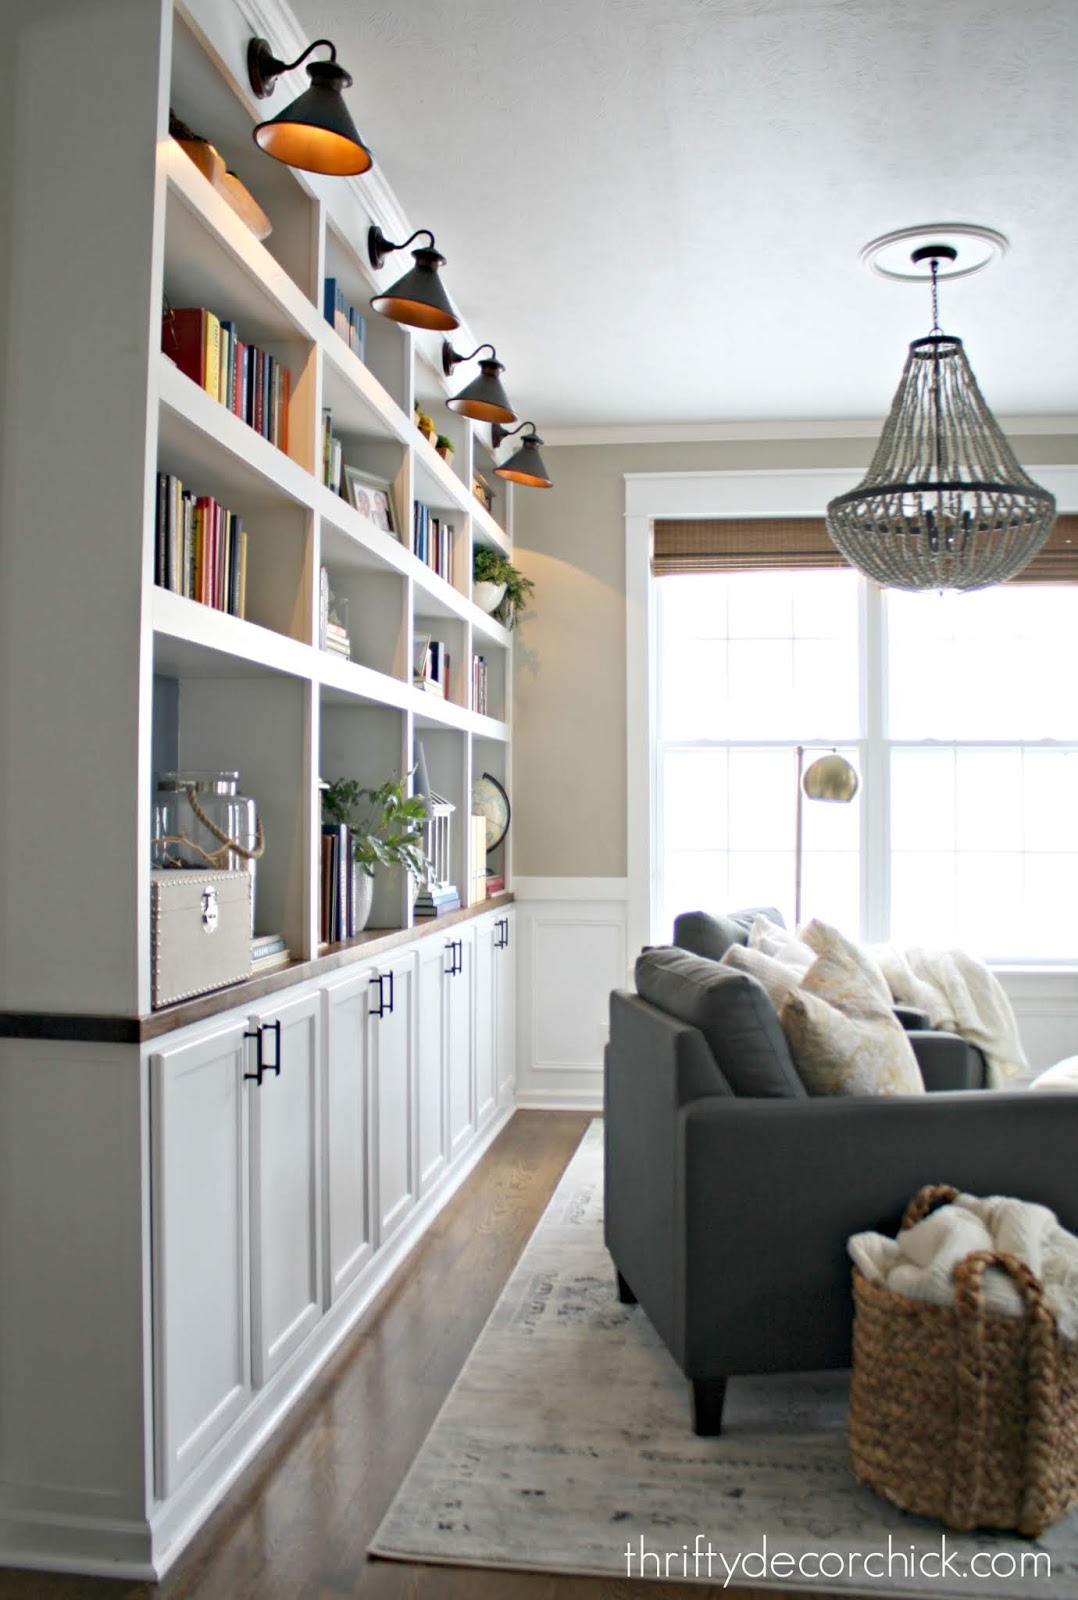
They worked perfectly!
Thankfully now that sconces have become more popular, they are much more affordable. There are a ton more options now too.
This post may contain affiliate links for your convenience.
See my policies and disclosure page for more information.
I found a brass and black sconce I love that I've used before -- you can see it here in our mud/laundry room:

I used this little hack on that light too! You can find the black sconces here (affiliate) -- they are crazy affordable and you get two in the order.
Last time I built bookcases, I had electrical run to the lights to the header. This time, because I know of this lighting trick...I didn't pay for that part. There are pros and cons to this trick so stay tuned for those!
The trick is using these puck lights inside the fixtures:

I used this little hack in our dining area as well -- it's a way to add soft lighting without running electrical:
It would have been really difficult to wire them on these skinny shelves, so this trick worked great! Make sure to check out the post above to see how I made those specific sconces work and where I found this great idea!
This time, I needed to secure them to the sconce because it was facing down. The first thing you'll need is is this 24 gauge wire:

The sconces have a part inside that has a small hole. I ran the wire through that:


When it's secure, twist the puck light (with batteries) back on:

And that's it! I use the bracket that comes with the light to hang -- just screw it into the wall and hang your light:
They look GREAT! I wanted something simple that I could aim toward the shelves, and these work perfectly.
As you can see here, I angled them so you can't see the light unless you're right under them. The scones have adjustable arms:

Check out this post to see the steps of the DIY bookcases so far! Don't they look great with just the supports and header painted? I'm so close people! :)
I almost forgot to mention, that little remote in the photo above allows you to operate these without touching them. It has a timer and dimmer option which is great. The timer is key because when I've used puck lighting in the past, we would turn them on and ALWAYS forget to turn them off. The battery ran out quickly because of that. I purchased another puck light remote for this room.
Like I said before, there are pros and cons to these:
Pros
Cons
For me, the convenience far outweighs the cons. If I have an outlet below (to run wiring) and an good spot for a light switch nearby, I'll still opt for having it wired. But this is a great option for bigger projects like this. Have you tried this lighting hack? It's a fun idea right? See more of our home here. To shop items in our home, click here! Never miss a post by signing up to get posts via email. Via https://www.thriftydecorchick.com/2019/07/how-to-add-light-fixture-anywhere.html
Well hello! It's the first Monday of the month and I'm throwing a party! The before and after party...NO I haven't forgotten about it. :) I have decided to bring it back seasonally instead of every month. That way we can still see what all the talented bloggers are up to, and perhaps get some fun seasonal projects as well!
As always, I like to highlight a bunch of beautiful spaces from the previous shindig, so let's get busy with that! You can check out the before and after project or link up your own at the bottom of this post!
This round up is very much bathroom and kitchen heavy -- you guys were busy on these spaces last winter! There were SO many linked up at the before and after link up in March, so go check that out to see more!
This kitchen makeover is truly a testament to what white paint can do. It was a pretty kitchen before but goodness...it just shines now:

It looks completely different and the cabinet color is the only thing that changed. It is SO bright and pretty, and looks so elegant now. It's a great transformation! I loved this kitchen reno because they knocked out the ceiling and created this beautiful angled ceiling with beams: 
The new cabinets are gorgeous, but the ceiling makes all the difference. Check out their remodel at the link!
Karen has two (YES two) of my favorite kitchens on Instagram. This one is in their Montana farmhouse and you'll be drooling:

She takes you on a tour of this gorgeous space and shares what they did to make it theirs. It's beautiful and you won't be disappointed!
As I mentioned, there were a ton of awesome bathroom renovations included last time, and these are just a few of my favorites!
Jenna made over this bathroom by brightening up the accents and changing a few things out. I think bathrooms are one of the rooms you can make a BIG impact with little money:

I LOVE that light blue stripe accent! And just changing out the hardware made a big difference.
This bathroom was redone top to bottom and I just loved the end result!:
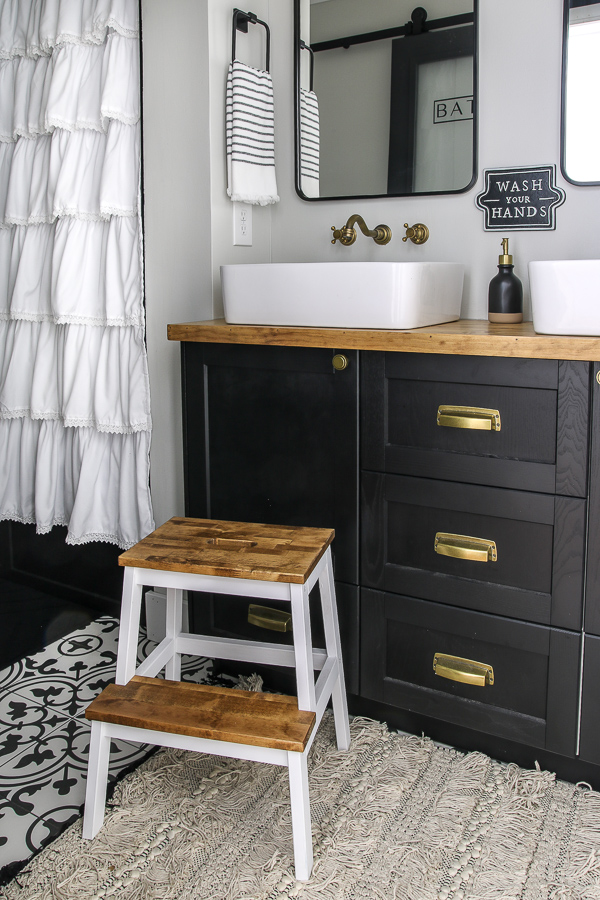
I love every single bit of it -- the floor, the black cabinetry, the modern mirrors...all of it!
This was another HUGE transformation...you really need to see the before to even appreciated how much they did:

You know my love for a beautiful wall treatment...so you know how much I love Laura's new music room:

They converted their dining room into a music room...I just love it! It's SO elegant for only $150 in materials! Wow!
And last but not least, this gorgeous master bedroom makeover had to be included:

OK now it's time to see what you've been up to lately! I'd love it if you linked back here in your post! A new button with a link is coming...hang tight for that. I can't wait to see what you've been working on this summer. See more of our home here. To shop items in our home, click here! Never miss a post by signing up to get posts via email. Via https://www.thriftydecorchick.com/2019/07/summer-before-and-after-link-up.html |
