|
I'm so excited to share our finished fire pit area with you! We made some changes big and small recently and now it's ready for nights around the fire!
We had a backyard patio installed last year and have been updating it since. I gave you a tour of the patio earlier this summer and then later we installed cafe lights over the entire patio as well. (See that tutorial if you don't have trees to attach your lights to!)
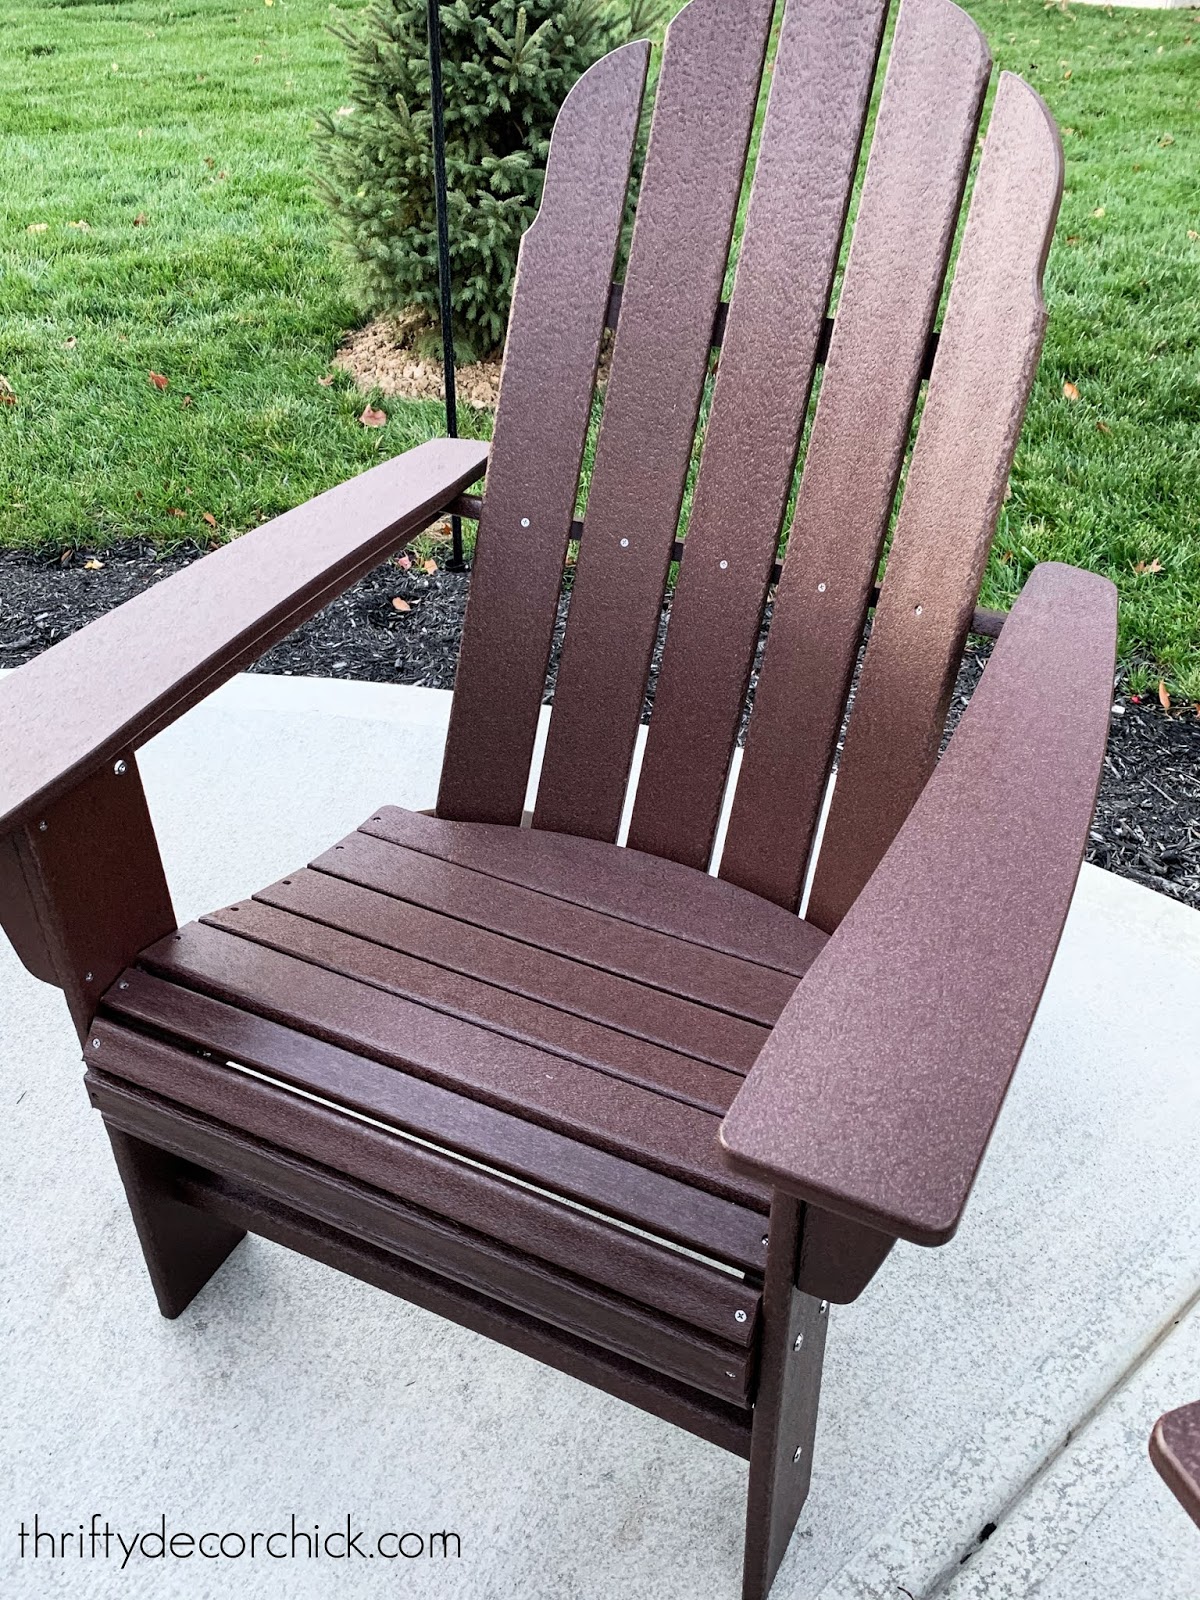
Last year I bought clearanced plastic Adirondack chairs to go around the fire pit:

We started with six and after a few storms were down to four. The plastic was fine for what we paid, but we were always planning on something more substantial long term.
SO many of you mentioned your love of POLYWOOD when I talked about our plan to upgrade. I looked into them (and with your recommendations), I was sold. The fact that they are an Indiana company and all products are made in the USA sealed the deal!
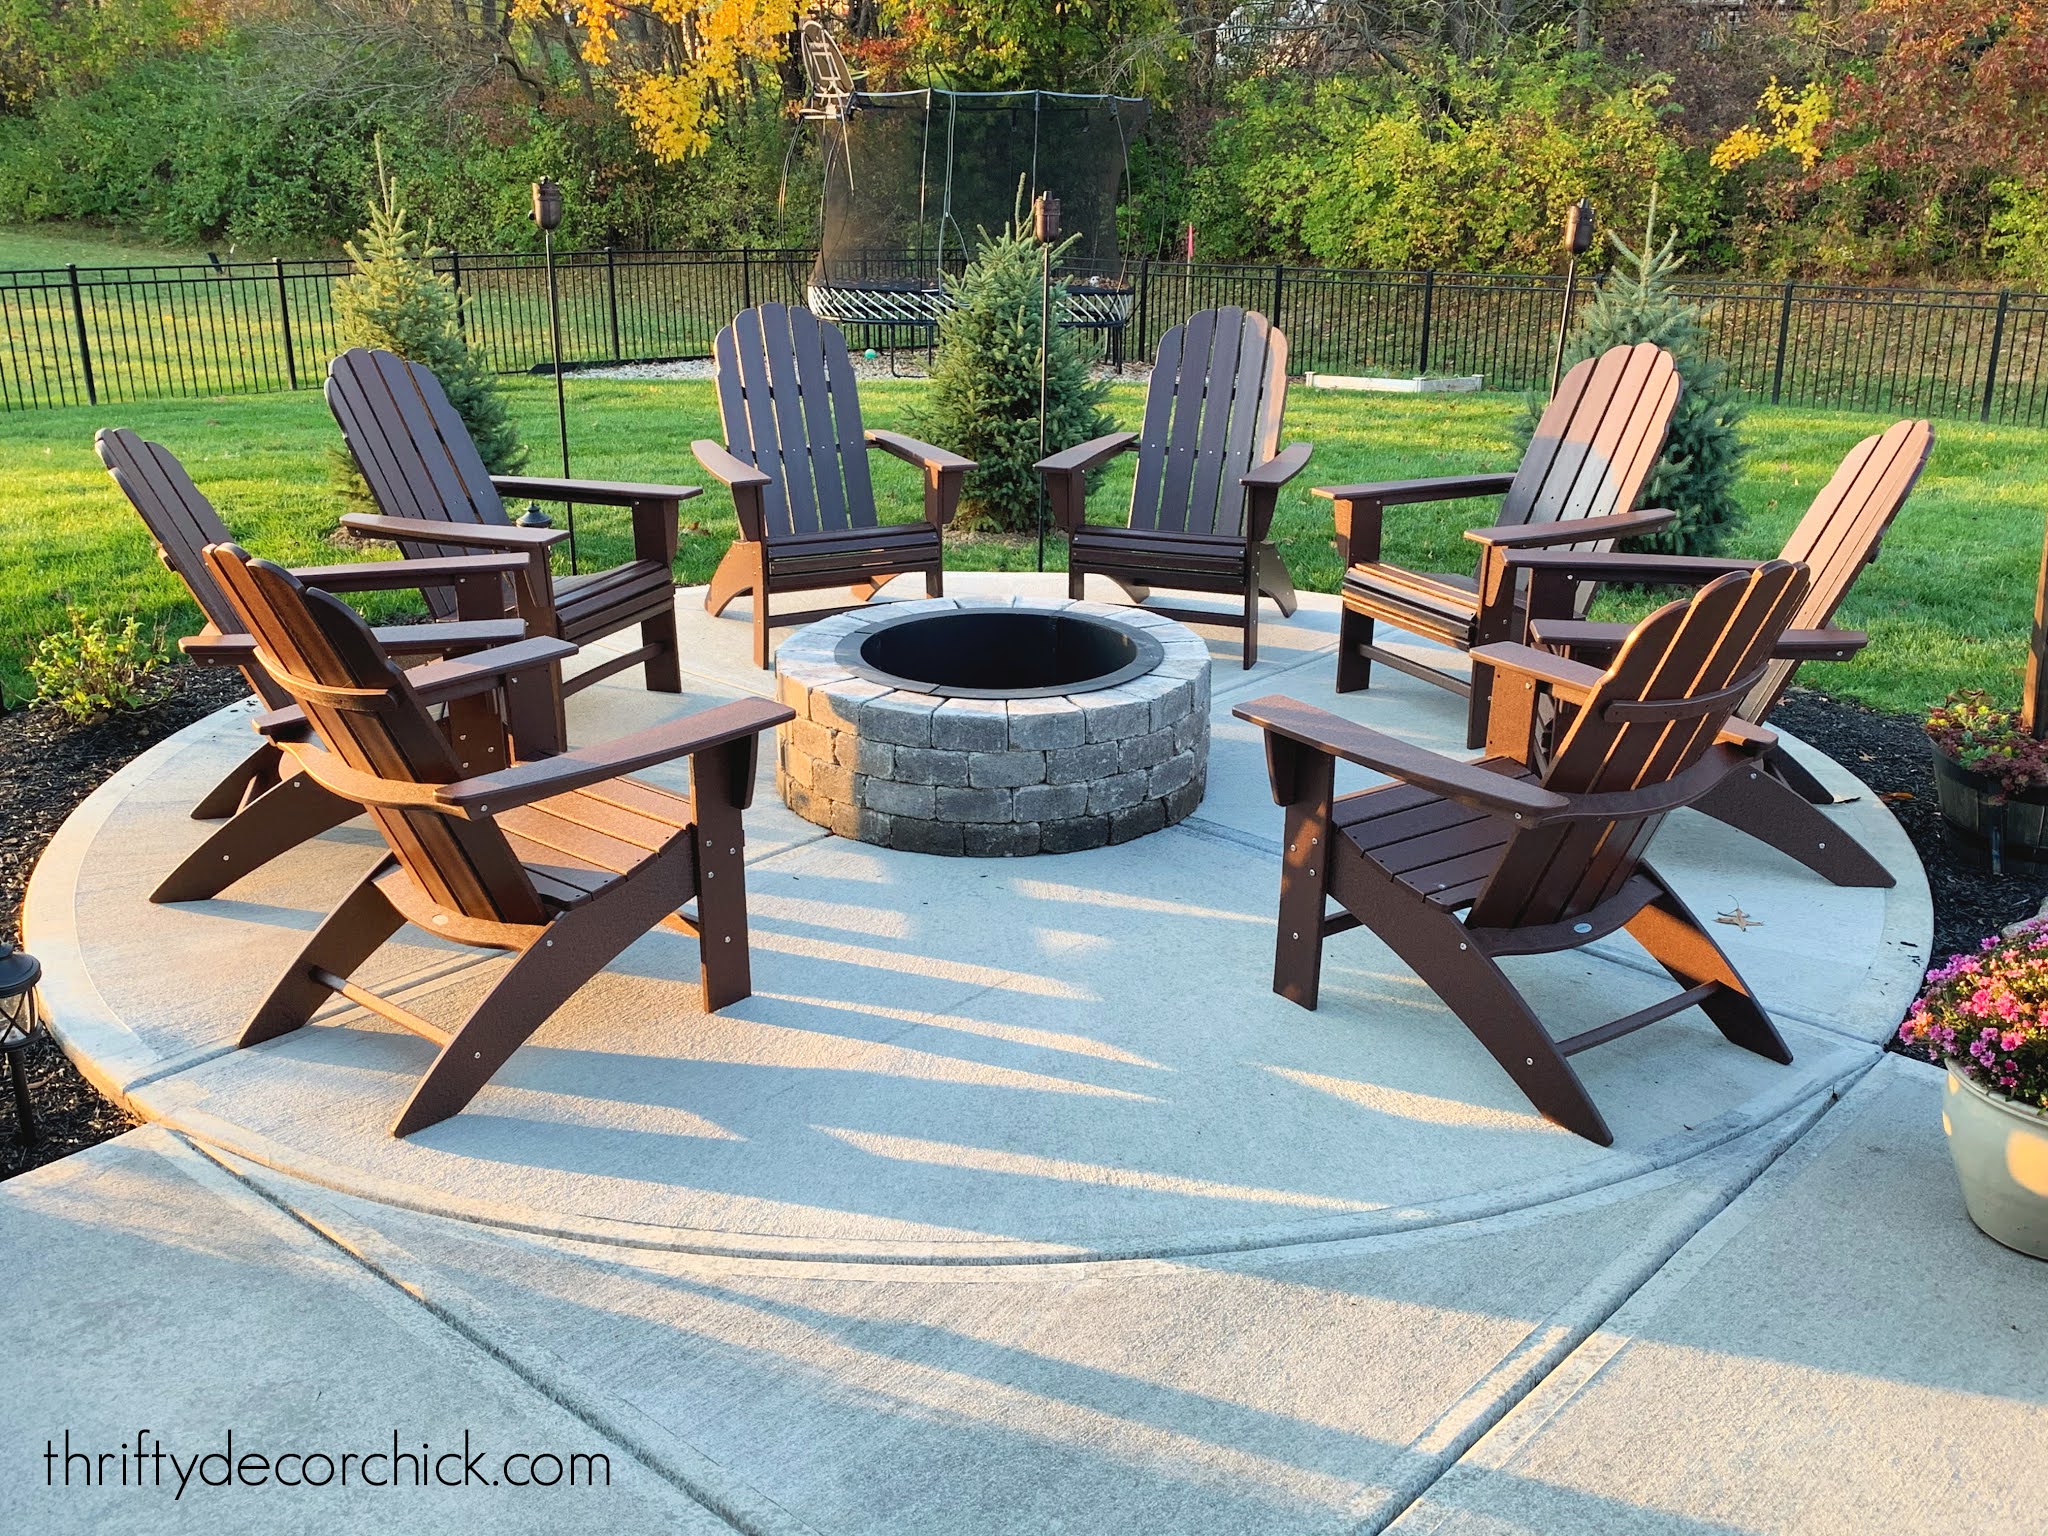
I was so grateful to work with them to finish up our fire pit area...we could NOT be more thrilled with these chairs!:
We chose the Vineyard Curveback Adirondack chairs in mahogany and they are perfection. They are crazy comfortable and roomy. This option also sits up a bit higher so they are much easier to get in and out of. That is huge detail for us!

The lovely curved back was just the traditional look I wanted.
Our favorite thing about these is the comfort -- and that they are so solid and don't move around. When we sat in the plastic ones they would scooch around every time we moved.
We are SO thrilled with how this spot has turned out!:

We had a few evergreens planted this fall, and this is just the start of our plans for trees and plants. Having this big backyard to work with is so much fun and intimidating! We're taking it slow so we don't make any expensive mistakes.
These chairs (and all of the items POLYWOOD offers) are made of recycled materials -- they use landfill and ocean-bound plastics to make their products. They recycle an average of 400,000 plastic milk jugs every DAY to make this beautiful outdoor furniture!:

They are also made to hold up in any weather -- so no need to put them away for the winter. This is HUGE for us. We may purchase covers for them eventually, but they aren't necessary. They won't fade in the hot sun either, which is important for us because this spot gets all of the elements.
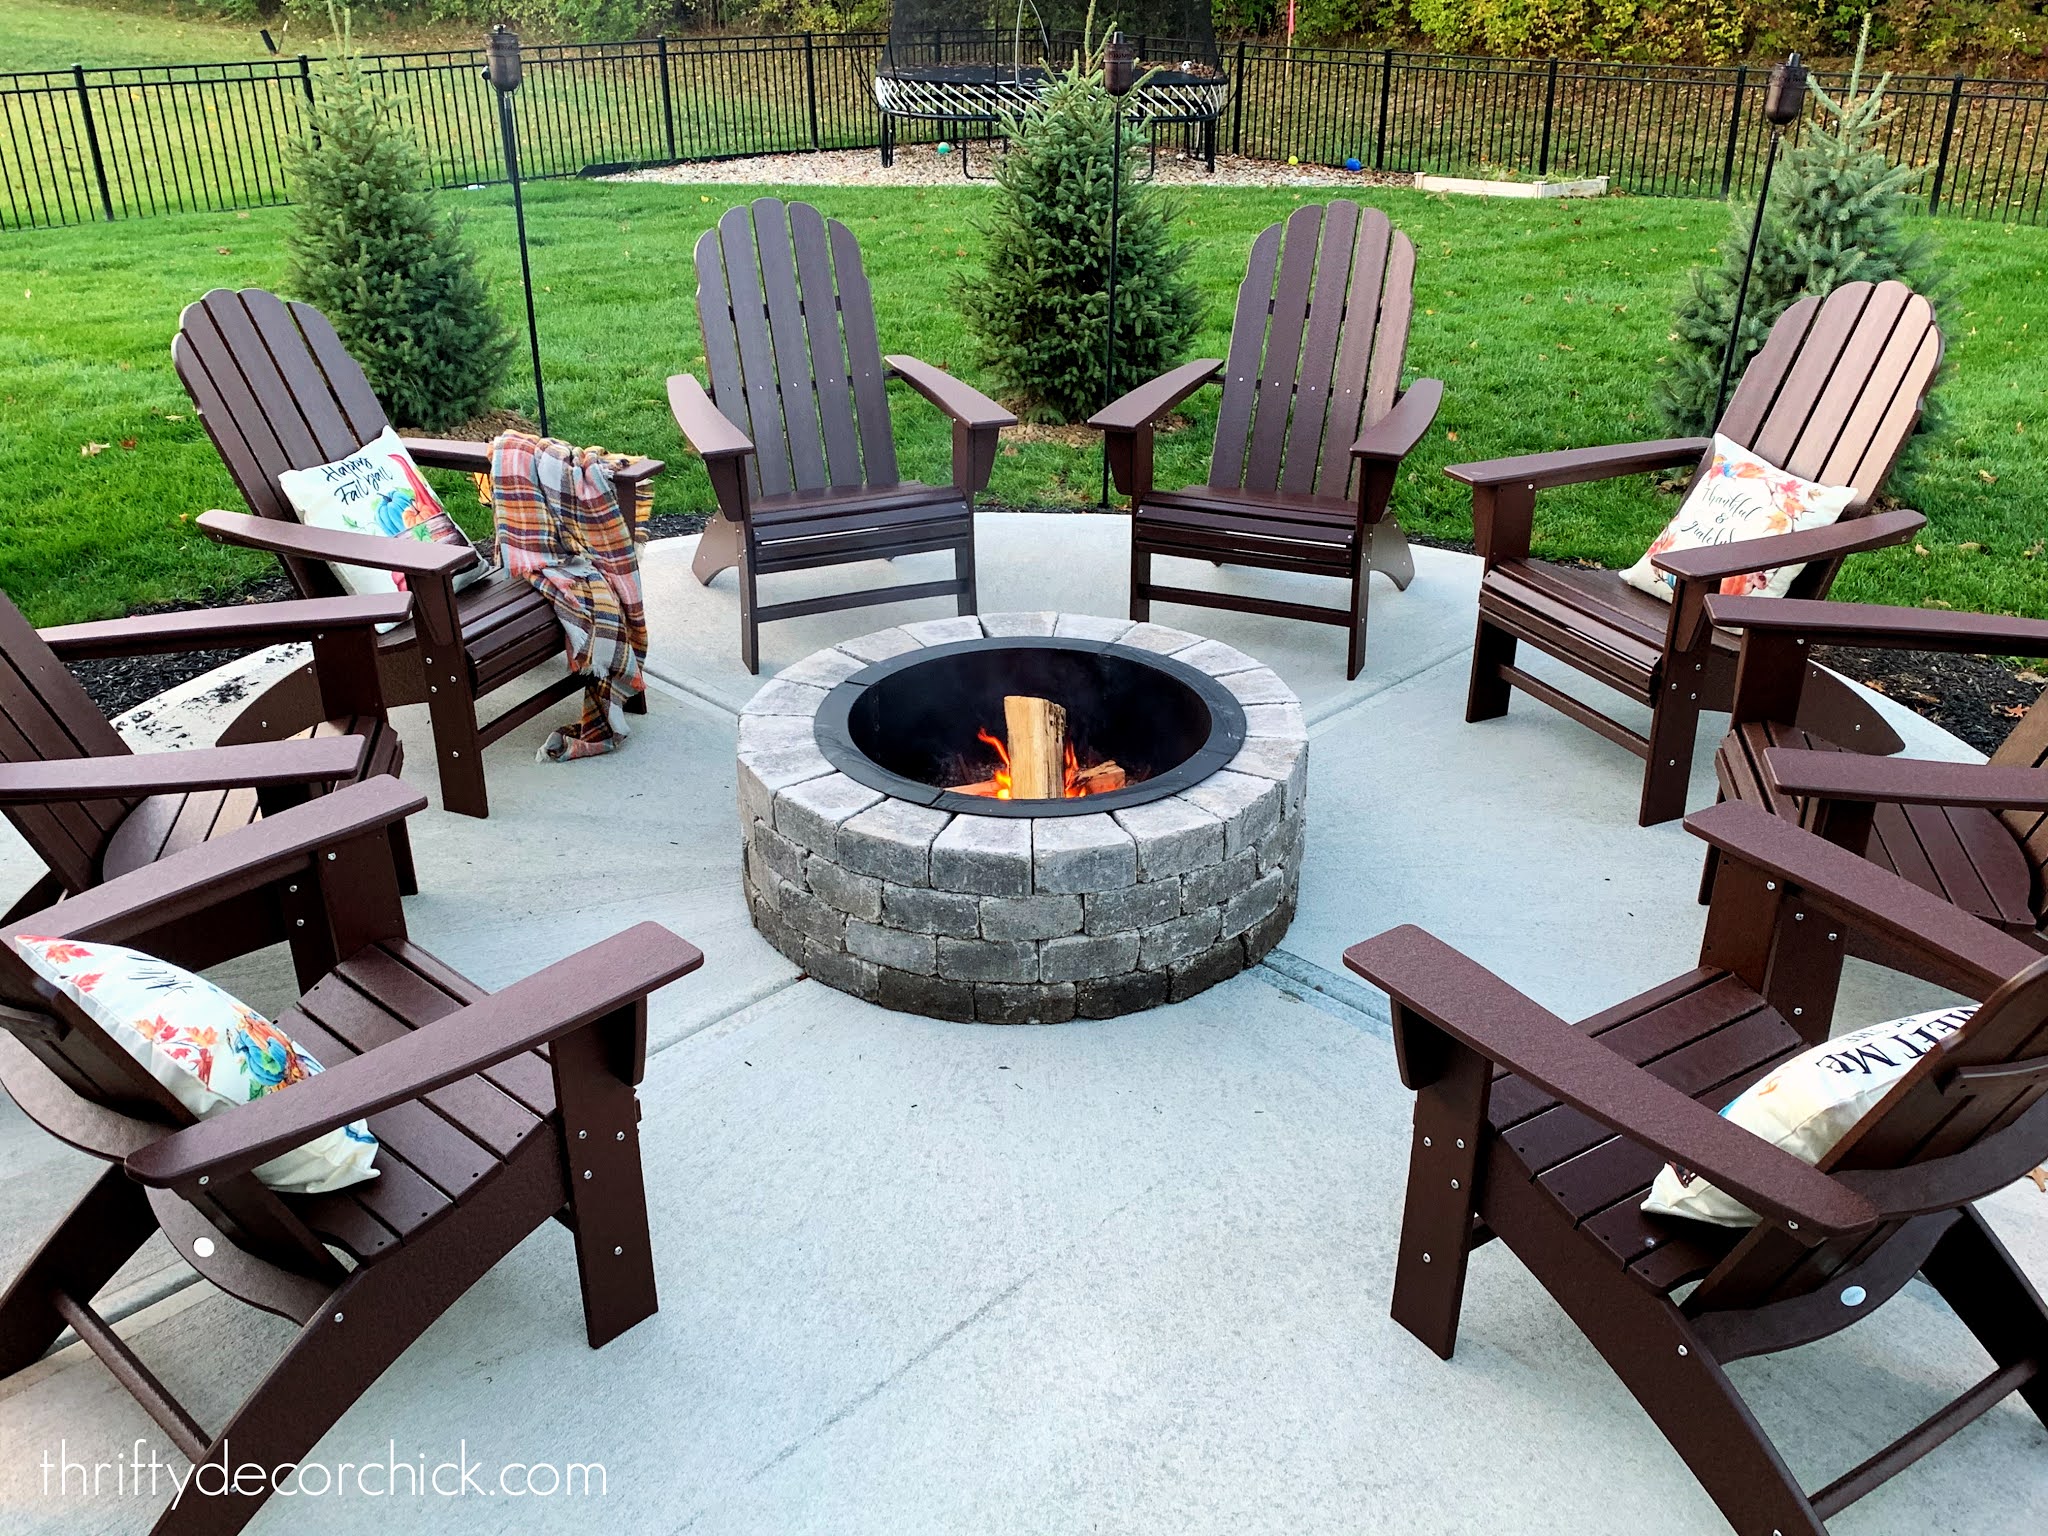
Last week I added another layer of bricks to the fire pit so that it's a bit more substantial -- the little extra height feels like a big difference! Plus now it's the perfect height to prop up our feet:

See how we built that fire pit safely and the little detail our contractors added to the patio in this spot.
One of my favorite details of these chairs is the width of the armrests -- plenty of room for a wine glass or a snack! ;)

The furniture has the look and weight of wood, but without the upkeep.
I did my research about POLYWOOD and their product and was honored to work with them. We are so pleased with this product and I couldn't wait to tell you about them.
Our fire pit area is so cozy and comfortable now -- we have the comfy seating, warm fire and lights for ambience. What more could we need?:

This post may contain affiliate links for your convenience.
See my policies and disclosure page for more information.

These are definitely an investment -- but we after hearing from so many of you and doing my own research online, I found SO many happy customers who all say they are 100 percent worth it. We've had ours for six weeks now and completely agree.
Plus, they have a TWENTY year warranty. This covers splintering, cracking, peeling and more. It's hard to find that kind of warranty on anything these days!
I already have a list of fun projects for our patio for next year, but for now we will be enjoying this beautiful space:
You can find those adorable fall pillow covers here. They were a birthday gift from my sister. :)
P.S. Make sure you visit the actual POLYWOOD site when shopping -- there are many lookalikes out there that don't offer the same quality or warranty.
I worked with POLYWOOD in exchange for some free product. If you are looking four outdoor furniture I can't recommend this brand enough.
See more of our home here. To shop items in our home, click here! Never miss a post by signing up to get posts via email.
Via https://www.thriftydecorchick.com/2020/10/round-fire.html
0 Comments
Because I'm fully in the fall spirit, I was on the search for a good pumpkin bread recipe a few weeks ago. I found this super easy one online and of course had to share it with you. You know if I'm sharing a recipe it's SUPER delicious and really easy. :)
I made some slight adjustments to this recipe to fit our tastes better. I think it would be SO good with raisins too, so I added those (and some others) as an option as well. The ingredients are pretty basic and easy to find!
This post may contain affiliate links for your convenience.
See my policies and disclosure page for more information.
Here are the ingredients (grouped by how you mix them):
1 1/2 cup flour
1 tsp salt
1 cup sugar
1 tsp baking soda
1 cup pumpkin puree
1/2 cup olive oil (canola or vegetable are fine)
2 eggs, beaten
1/4 cup water
1/2 tsp cinnamon
1/2 tsp nutmeg
1/2 tsp allspice
Optional:
1/2 tsp apple pie spice
1/2 cup walnuts
1/2 cup raisins
1/2 cup chocolate chips
And the steps for preparation:
1. Preheat oven to 350 degrees.
2. You will need two bowls for this recipe. Sift the first four ingredients together in one bowl. 3. In separate bowl combine the pumpkin, olive oil, eggs, water, spices and walnuts or other optional additions: 
4. Mix the two bowls together. Don't mix too much. Mine ends up not quite as thick as oatmeal (pictured above).
5. Pour into sprayed 9x5x3 loaf pan and back for 50 to 60 minutes. Or make muffins -- the mix makes 12 and they are perfect out of the oven in 25 minutes. You'll know when they are done when you put a toothpick into the bread and it comes out clean.
I use this muffin tin and it's perfect for this pumpkin bread!:

It bakes them perfectly! This particular one is hard to find now -- this one is the same pan, but with even more cute designs! And this one or this one would be lovely for a pumpkin bread loaf. I may have to grab one of those as well. ;)
I use an ice cream scoop to fill my tin so the batter doesn't get everywhere:

Don't fill them all the way to the top and give the pan a few taps on the counter to get air bubbles out -- I forgot to do that this time!
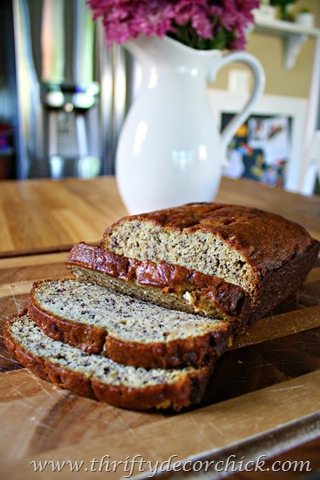
I'm telling you what...these come out SO good. They are moist and fluffy and just scrumptious:

They take no time at all, especially if you're making the muffin version. I've already whipped up two batches in the past week. If you like pumpkin even a little bit you will love this recipe. It's not an overwhelming pumpkin taste...just enough! And your house will smell like fall all day when you bake them. :)
Here's an image you can pin for later if you'd like to make these:

You can also see my easy crock pot applesauce here:

And my popular banana bread recipe (SO good!):

See more of our home here. To shop items in our home, click here! Never miss a post by signing up to get posts via email.
Via https://www.thriftydecorchick.com/2020/10/simple-pumpkin-bread-recipe.html
Hello all! The temps are starting to cool down and it's the perfect time to work outside! You may not think of fall as a big "fix up" time of year, but it's one of my favorite times to address outdoor projects.
No humidity and temps in the 60's are ideal outside working weather for me! Fall is a great time to plant bushes and trees -- they don't stress as much in the cooler temps and it's a lot easier to keep them hydrated.
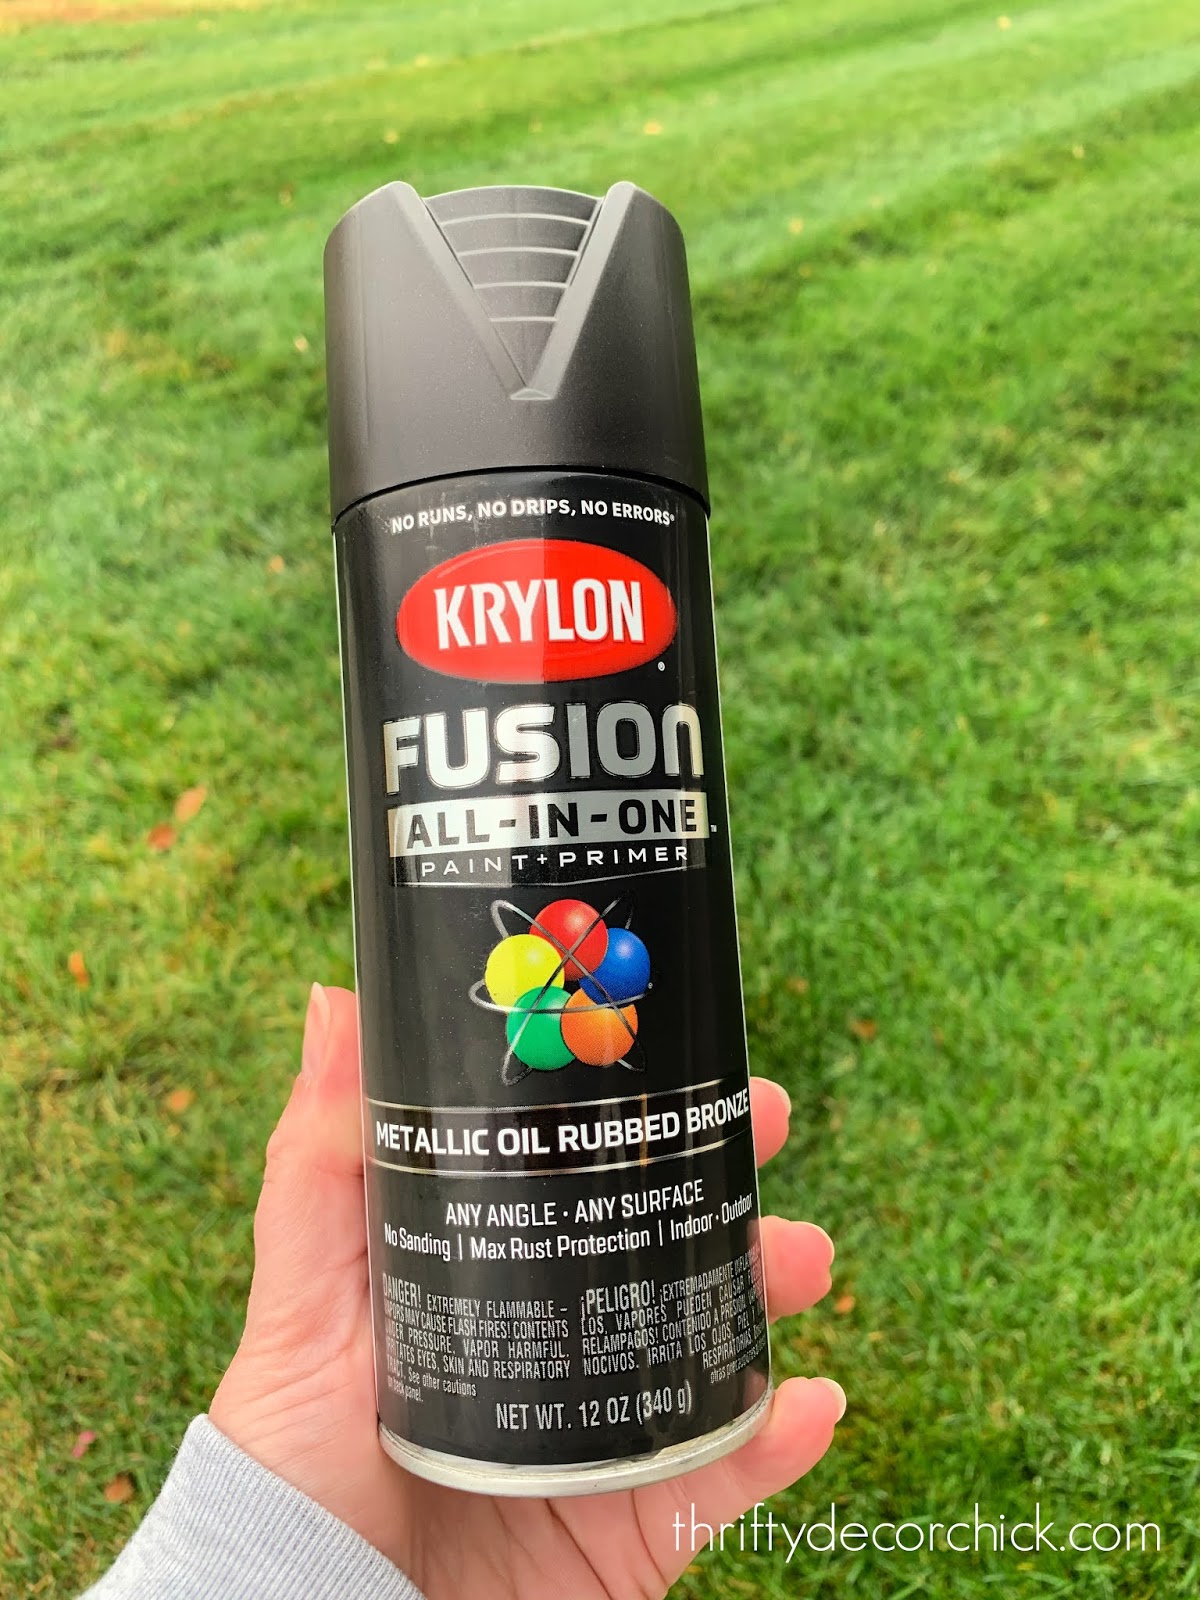
It's also my favorite time (well, other than spring) to spray paint all the things! I've been working with Krylon to share some fun spray paint projects (see how I sprayed our kitchen hardware here!) and this time I'm showing you how to give some exterior items new life.
Years ago I shared how I spray painted our outdoor coach lights on the garage...they held up beautifully for seven years (till we moved), even in the elements!
We got these wood and metal outdoor lanterns last fall and they were already looking pretty sad:
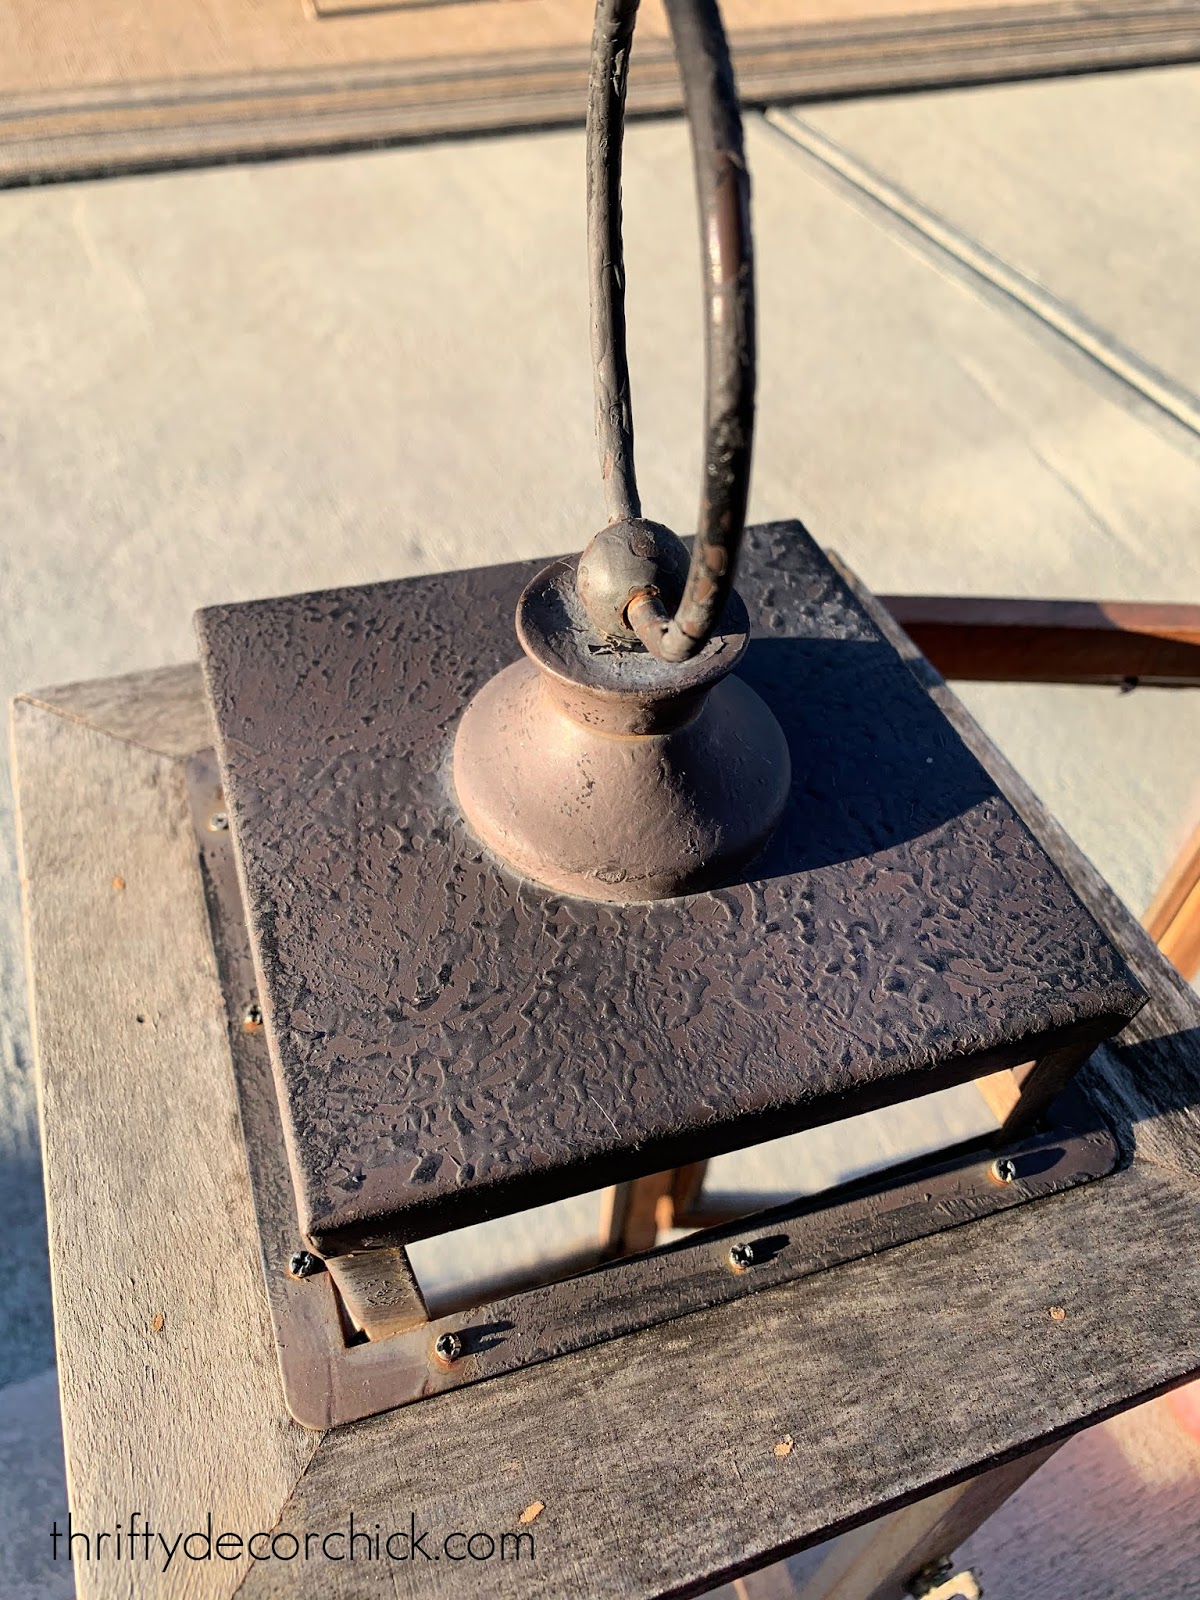
I knew a coat of spray paint would fix them right up!
I gave them a good cleaning (just with a wet rag) and let it dry. Then I grabbed the Krylon Fusion All-in-One spray paint in oil rubbed bronze:
This post may contain affiliate links for your convenience.
See my policies and disclosure page for more information.

This paint goes on like butter! So easy, so fast. Look at the difference with just two quick coats:
I even took the latch hardware off since it was standing out after the top was painted. I used foam blocks for the screws and laid the rest on a box:

They look so much better!:

I painted these in August -- they still look perfect! And they are out exposed to the sun, heat and rain every day. Next year I'll sand the wood down a bit and give that a refresh too.
The best part about tackling these projects in the fall is they will be completely refreshed when we pull them back out in the spring.
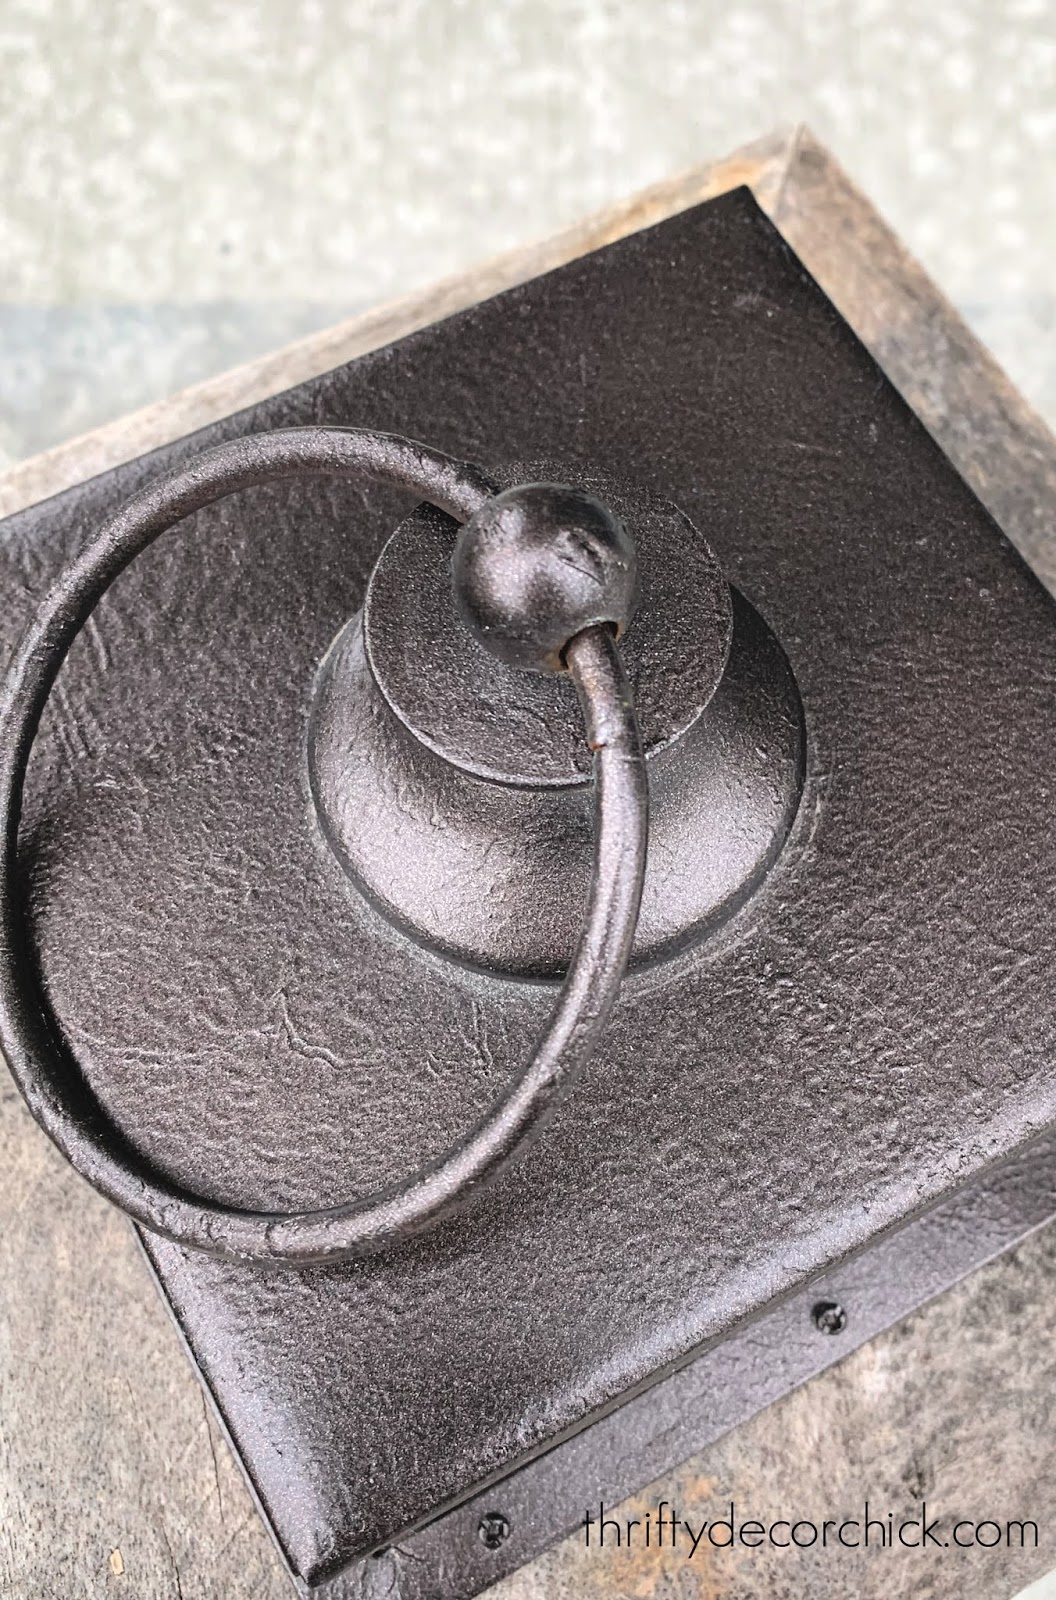
My next victims were our two hose holders. I bought these when we moved in and they looked awful:

They were a dark metallic brown color when we bought them. They function great and are in good shape, so I knew spray paint would give them new life.
I use these instead of the hanging versions because I don't want to put holes in our stone. Have you ever drilled into stone? It's super fun. ;)
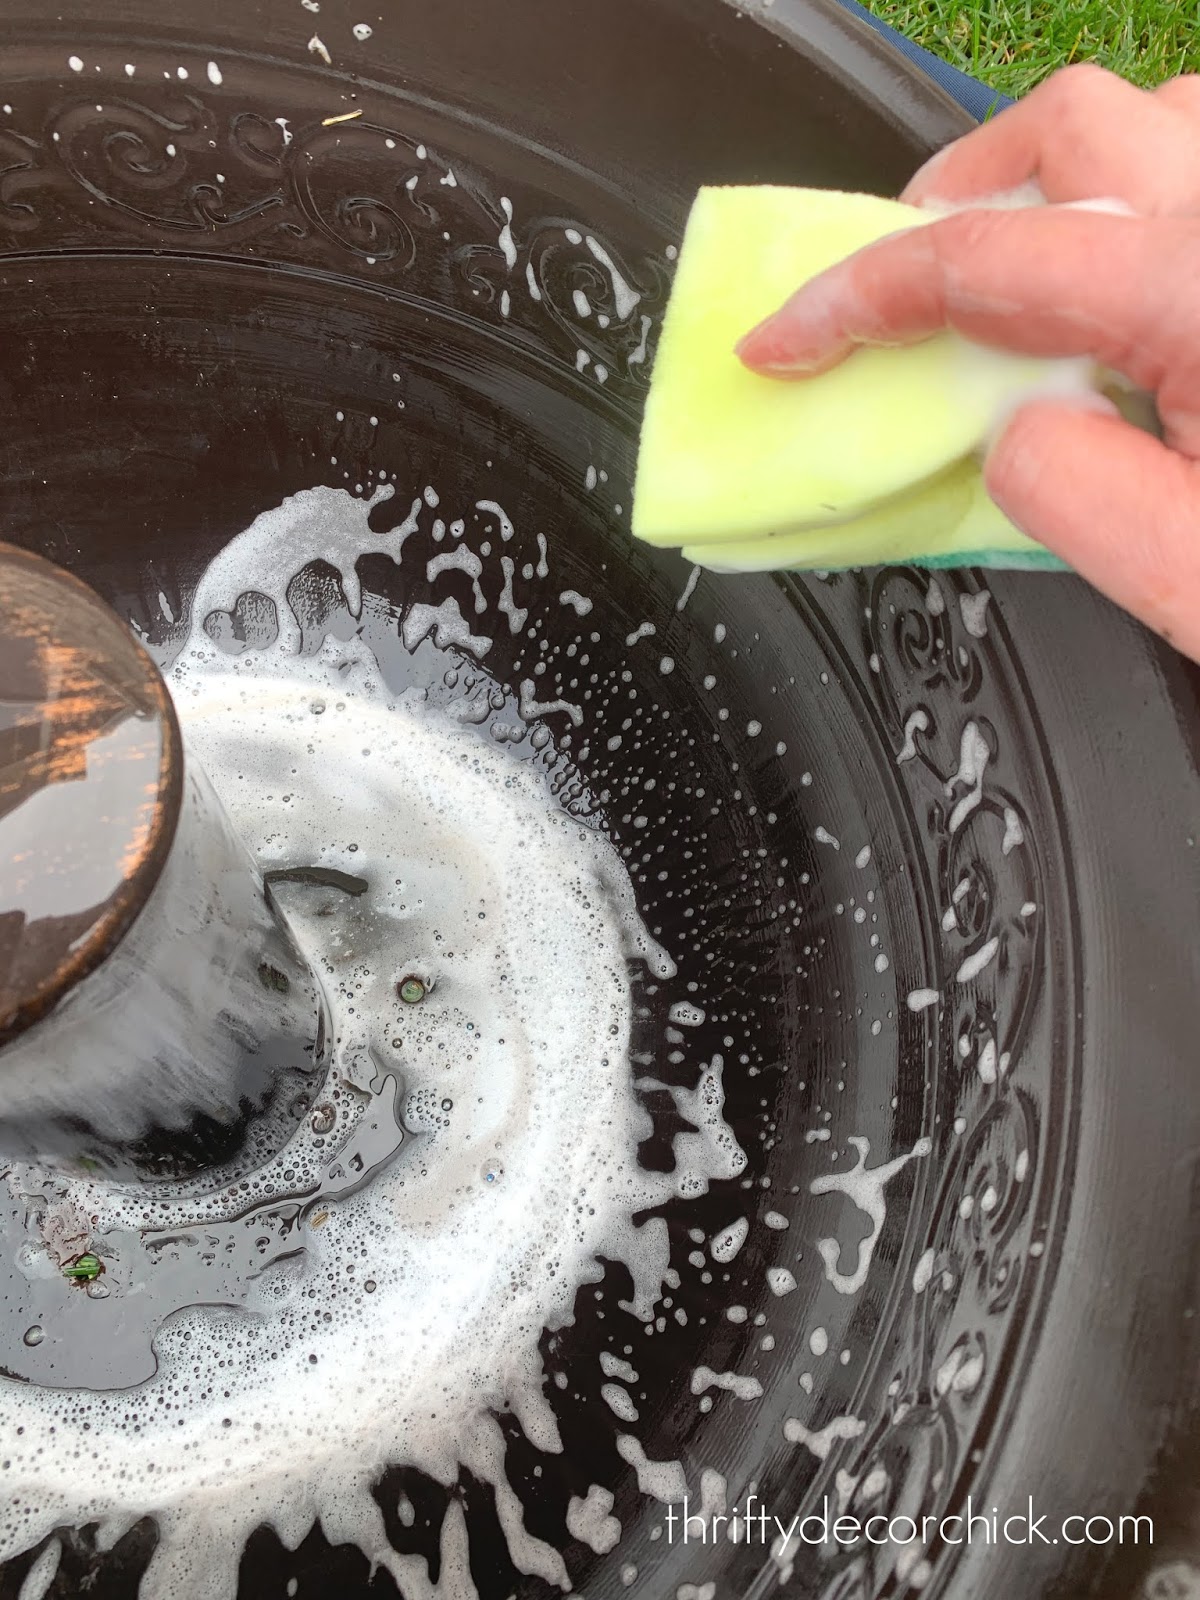
Anyway, I gave these a good wash first -- this dark tone is how they looked originally:
I used a cardboard box (that my sister left...no babies here!) to prop up the holders:

I always share three recommendations when spray painting -- one is cleaning the item well, another is using numerous light coats instead of heavy ones. This will give you a perfect finish (no drips!) and your item will dry super fast!
The third is to let it cure well before using -- I left these out for a few days (they even got a day of rain) before I put the hoses back in. Look at that beautiful finish!:

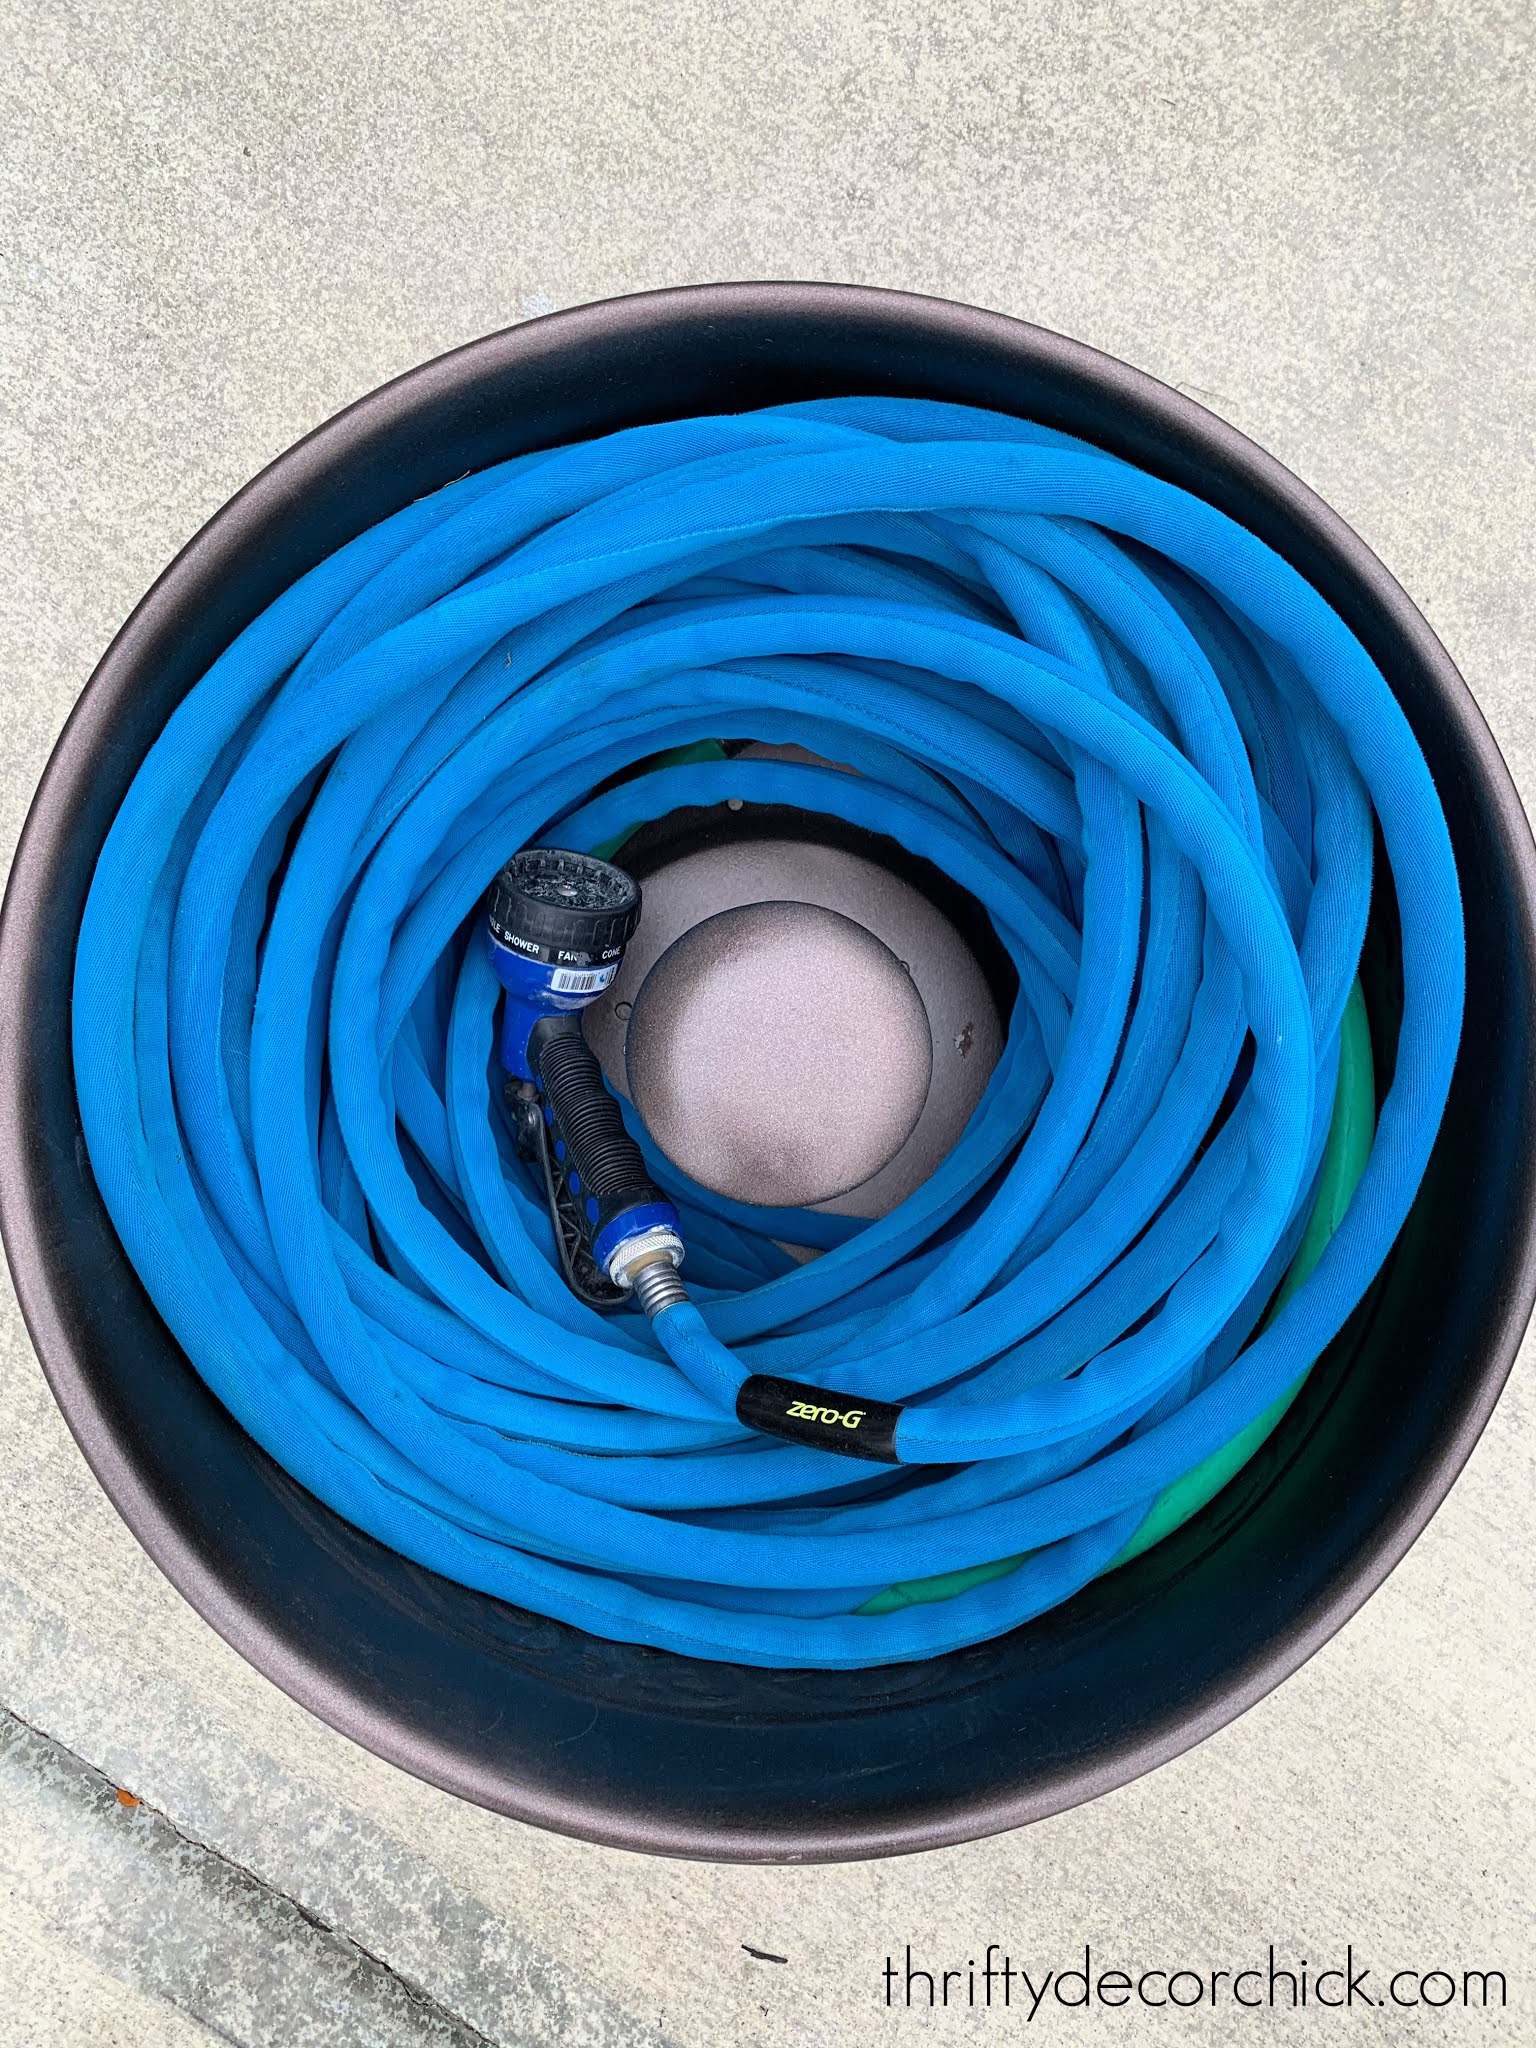
I didn't focus on the inside as much as the out, but even that looks SO much better!:
I used one can of the Krylon Fusion paint for both projects -- not bad for a completely new look!
By the way, it's about time disconnect your hoses from the bibs! Don't leave them connected over the winter if you get freezing temps (it could be a recipe for water disaster inside the house):

These will look perfect when we pull them out again in the spring! I just LOVE how easy it is to give just about anything new life with spray paint! It is the BEST bang for your buck.
Have you refreshed anything outside with spray paint lately?
This post sponsored by Krylon but all opinions are my own. I only work with companies and products I know, love and would recommend to you.
Via https://www.thriftydecorchick.com/2020/10/spray-painting-outdoor-decor.html
Because I'm fully in the fall spirit, I was on the search for a good pumpkin bread recipe a few weeks ago. I found this super easy one online and of course had to share it with you. You know if I'm sharing a recipe it's SUPER delicious and REALLY easy.
I made some slight adjustments to this recipe to fit our tastes better. I think this would be SO good with raisins too, so I added those as an option. The ingredients are pretty basic and easy to find!
Here's the recipe (grouped by how you mix them):
1 1/2 c flour
1 tsp salt
1 c sugar
1 tsp baking soda
1 c pumpkin puree
1/2 c olive oil (canola or vegetable also works)
2 eggs, beaten
1/4 c water
1/2 tsp cinnamon
1/2 tsp nutmeg
1/2 tsp allspice
Optional:
1/2 tsp apple pie spice
1/2 c walnuts
1/2 c raisins
1. Preheat oven to 350 degrees.
2. You will need two bowls for this recipe. Sift the first four ingredients together in one bowl.
3. In separate bowl combine the pumpkin, olive oil, eggs, water, spices and walnuts or raisins if desired.

4. Mix the two bowls together. Don't mix too much. Mine ends up not quite as thick as oatmeal (pictured above).
This post may contain affiliate links for your convenience.
See my policies and disclosure page for more information.
5. Pour into sprayed 9x5x3 loaf pan and bake 50 to 60 minutes. Or make muffins -- the mix makes 12 and they are perfect out of the oven at 25 minutes. You'll know they are done when you put a toothpick in to the bread/muffin and it comes out clean.
I found this muffin tin a few weeks ago and it's perfect for this pumpkin bread!:

It bakes them perfectly! This particular one is hard to find now -- this one is the same pan, but with even more cute fall designs! And this one or this one would be lovely for a pumpkin bread loaf. I may have to grab one of those as well. ;)
I use an ice cream scoop to fill my tin so the batter doesn't get everywhere:


Don't fill them all the way to the top and give the pan a few taps on the counter to get air bubbles out -- I forgot to do that this time!
I'm telling you what...these come out SO good. They are moist and fluffy and just scrumptious:

Powdered sugar sprinkled on top would be the perfect finishing touch!
They take no time at all, especially if you're making the muffin version -- I've already whipped up two batches in the past week. If you like pumpkin even a little bit you will love this recipe. It's not an overwhelming pumpkin taste...just enough. And your house will smell like fall all day when you bake them. :)
Here's an image you can pin for later if you'd like to make these as well!:

Any fall baking recipes you love? Do share!
You can also see my easy crock pot applesauce here:

And my popular banana bread recipe (so yummy!):
More of my favorite recipes can be found here! Have a wonderful weekend my friends!
See more of our home here. To shop items in our home, click here! Never miss a post by signing up to get posts via email.
Via https://www.thriftydecorchick.com/2016/10/easy-pumpkin-bread-recipe-so-good.html
Hello my friends! This month marks our three year anniversary in this house! I have had an absolute blast adding my touch to almost every room in our home -- it brings me so much joy. As I do every year, I wanted to share how many of the rooms looked right after moving in, and how they look now.
Before and after posts are my FAVORITE! So here we go! I'll link to a few of the projects from each space under the photos, but let me know if I miss anything.
Let's start with our master, since it's one of the rooms I worked on recently. It is a long room with a tall tray ceiling and a TON of windows. Here's how it looked soon after moving in:

I did a LOT to this space last year -- I wanted it to have a dark and cozy feeling.
After a lot of work it's become our cocoon away from the world:

Our mud and laundry combo is one of my favorites in our house -- it serves so many purposes and is BIG! Love it. Here's the before:

And now, with a few details that have added some much needed character!:

Our kitchen has seen a BUNCH of smaller DIY project that make a big difference! Here's how it looked three years ago:

And here are just a few of my favorite updates I've made!:
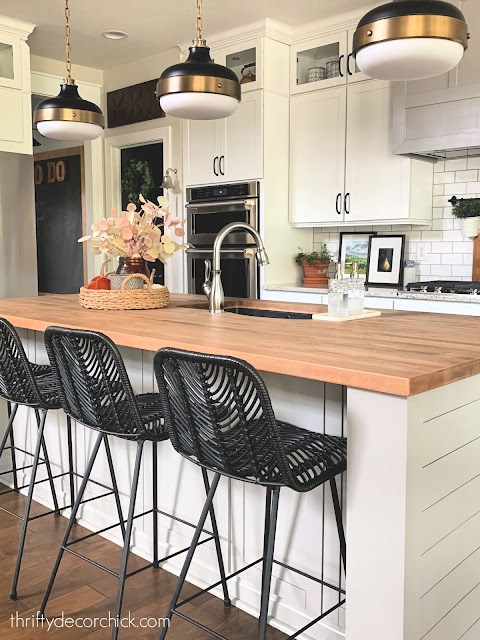 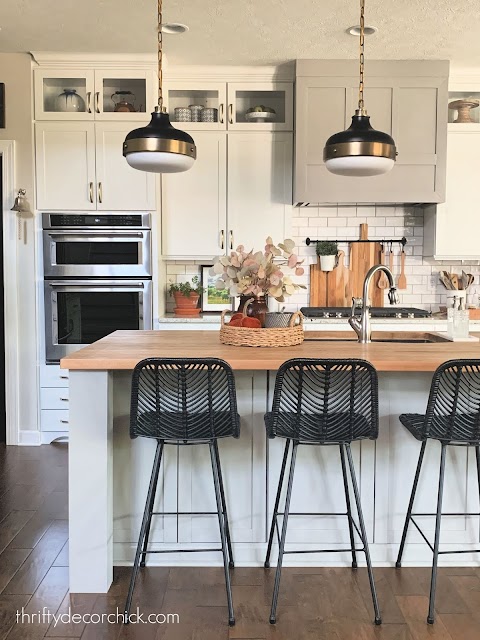 

Extending kitchen island with chunky legs (without changing the countertop)
The foyer hasn't received nearly as many updates, but the few I've done made a big difference! When we moved in, I placed the same furniture in the same spot as our last house:

It was lovely, I loved that blue dresser!
But I soon realized my style had changed and I wanted a different look:

My office has seen a ton of changes! This is what I started with:

We extended our hardwoods into this space first (our floors were discontinued right after we moved in ? but we were lucky to find some of the last boxes).
I added a HUGE bulletin board that I just love:

And built this wall of bookcases that makes a big statement and provides so much storage! I love them so much:

Our basement looked pretty great to start: 
But I've been warming it up since then! It's SO cozy down there!:


Disney art wall (not pictured)
I talk a lot about our great room updates because 1.) we spend most of our time in here and 2.) it's probably my favorite room in the house.
I don't have a good before picture of this room, so here's a pre-move in photo:


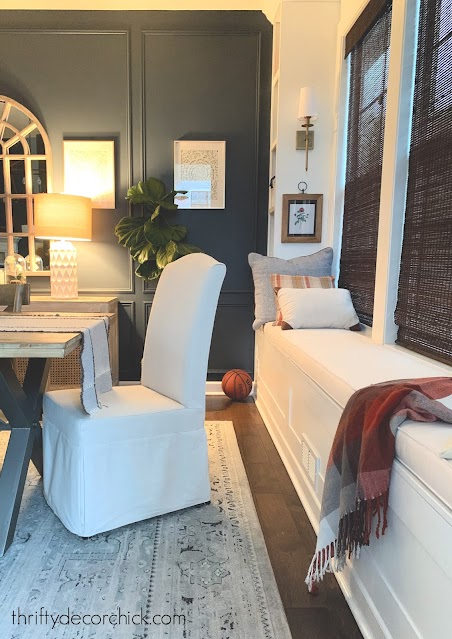
I continued that moody color into our dining area, or morning room as it's called in our home plan. Here's how it looked shortly after moving in:

And now with the dark walls and tons of character!:


We love LOVE our backyard! It's so big and has so much potential.
I've done a lot since that patio was installed:

How to hang heavy cafe lights over a patio (without trees)
This is truly our dream house...it fits our family so well and we are so in love with it. It has been SO MUCH fun to work on each space. Of course there are other rooms I've added to as well, but these were the biggies.
As always, thank you for following along! :)
If you have questions about any of them, feel free to ask in the comments.
See more of our home here. To shop items in our home, click here! Never miss a post by signing up to get posts via email.
Via https://www.thriftydecorchick.com/2020/10/three-year-before-after-tour.html
Hello! It's time for another Amazon Prime Day! Well...two days this year. I love seeing the awesome deals they share every year. I always start my Christmas shopping during this sale.
Their biggest deals are typically on electronics, but I like to share items from Amazon that I use and love in our home. This time I'm focusing more on home decor. This is the perfect time to get your home ready for the holidays!
This post may contain affiliate links for your convenience.
See my policies and disclosure page for more information.
Our family room has some of my absolute favorite Amazon finds. This gorgeous rug for one!:

It has completely changed the feel in our family room -- I absolutely love it! Ours is in the olive/charcoal color combo but they have many more colors. I love it so much, I'm ordering this rug in a different color for another room! You can see more about this beautiful Loloi rug here.
I also love our neutral poufs/ottomans that I store under the coffee tables:

I like having the open walking space between the chairs and the table, and these make it easy to put our feet up. They are super comfy.
See this post to see how I filled them after they lost some fluff here. (That will eventually happen with foam filled products.) I found that filler on Amazon as well!
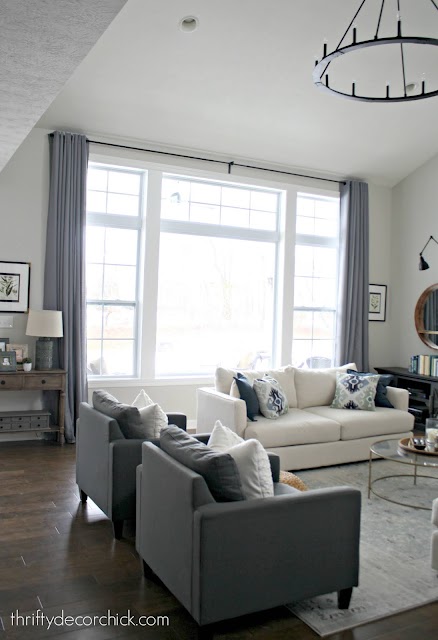
Our super long drapes are one of my favorite finds in our house because they are such a great deal:

They are SUPER long, lined and the most affordable I've found by far. They come in a few different colors and a ton of length options.
I have a TON of lighting from Amazon I've used all over our house! This brass picture light in the office was very affordable:
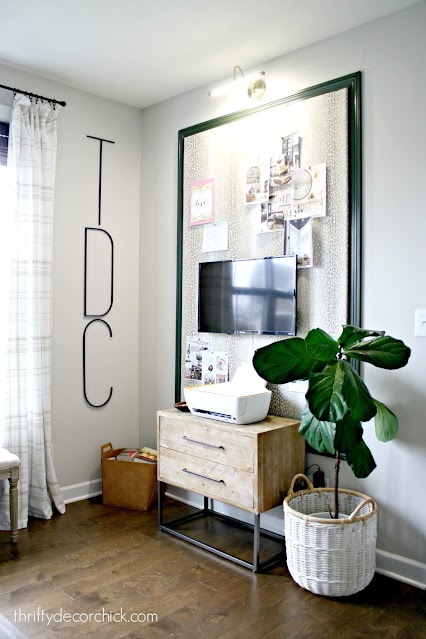
See how I made that giant upholstered bulletin board here!
I also found black and brass sconces for my DIY bookcases in here as well:

They come in a set of two and I used them in our mud room as well. Check out this post to see how I light those without electricity.
I used that same trick in our dining room. These pretty brass sconces were the perfect finishing touch on the small bookcases I built in there:
I've used quite a few items from Amazon outside this year too. So many of you loved this solar-operated fountain:
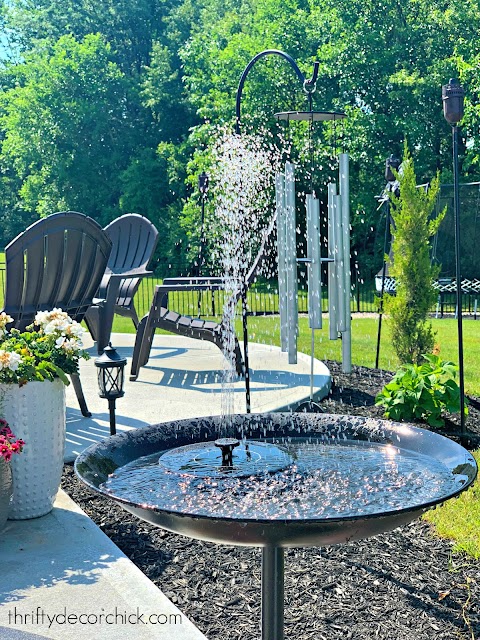
It's such a cool little item -- perfect for a small water feature or even a pool!
I finally added our cafe string lights to the back patio this summer and we LOVE them!:
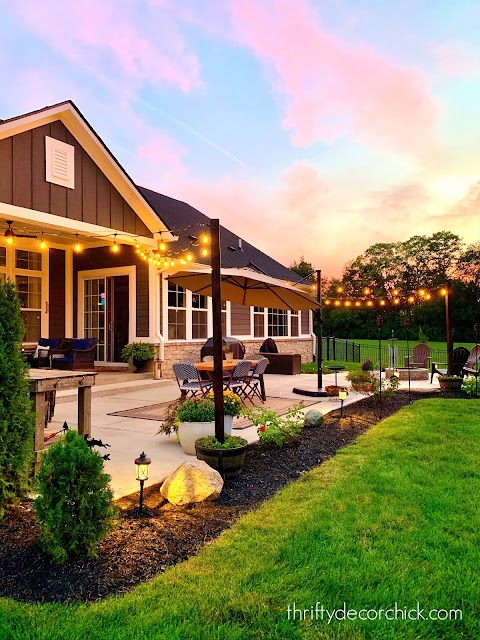
Those lights are industrial grade and will last for years (and through the elements). See the full cafe light tutorial here (it works especially well for heavier lights like these).
This simple carriage door hardware made a big difference on our garage doors!:

The versions I linked are magnetic and super easy to install (and really affordable). I've always thought these magnetic "windows" are so cool too. Those two items will transform your garage doors!
Here are a few more fun home items I've found on Amazon today:
This faux leather pouf comes in tons of different colors.
This round knit pouf is beautiful as well.
This soft heating blanket would be perfect for the couch or bed during the cold months.
I have one of these bright garage lights in ours and need to get another one. They are game changers -- SO much more light!
I use a similar wood bath caddy a few times a week and love it. It's perfect for soap, an iPad and a glass of wine.
These Christmas pillow covers are SUPER cute! And wow...that price!
This soft and fluffy blanket is our favorite and comes in a ton of colors. We all fight over it every night in the family room. (Tip: We got a larger size for extra comfiness.)
Do you have any favorite Amazon finds you use in your home? Have fun shopping! :)
See more of our home here. To shop items in our home, click here! Never miss a post by signing up to get posts via email.
Via https://www.thriftydecorchick.com/2020/10/my-favorite-amazon-finds-for-home.html
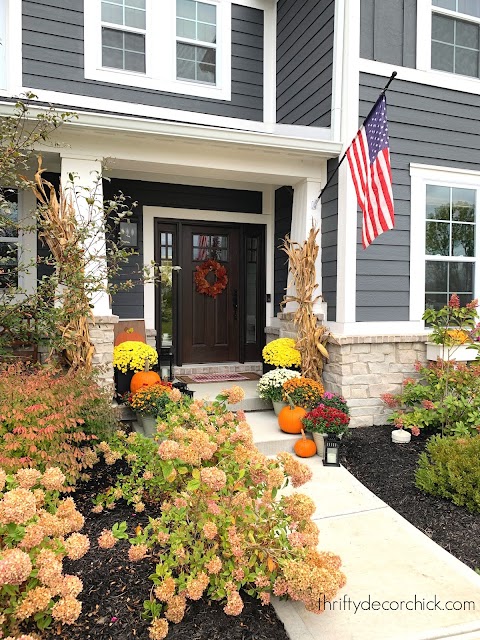
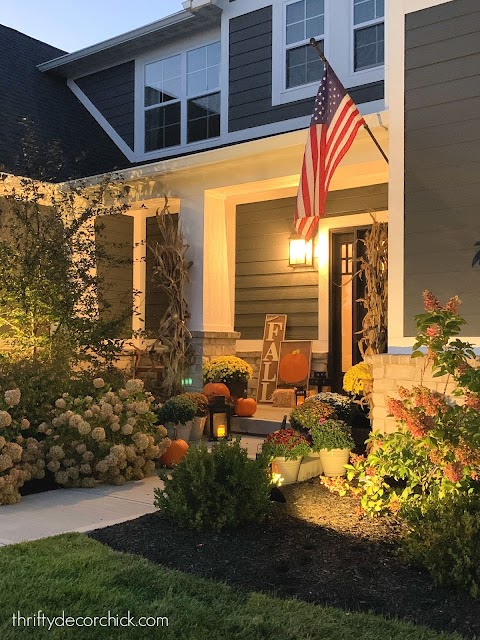
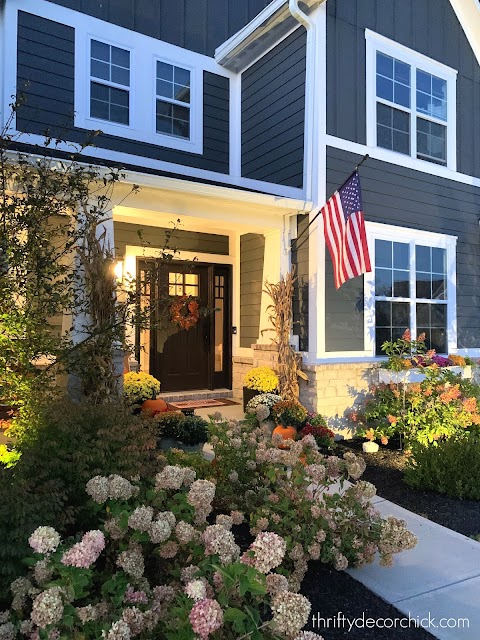
Hello there my friends! I recently added some finishing touches to our fall porch and I'm so in love with it. It's so colorful and warm and makes me so happy.
If you have any questions about the exterior of our modern Craftsman home, you can check out all of the sources and names here!
I shared what I added to our fall window boxes in this post -- you have to give planters and window boxes time to fill in. But when they do...wow!!:

As a reminder, here's how it looked when I planted everything:
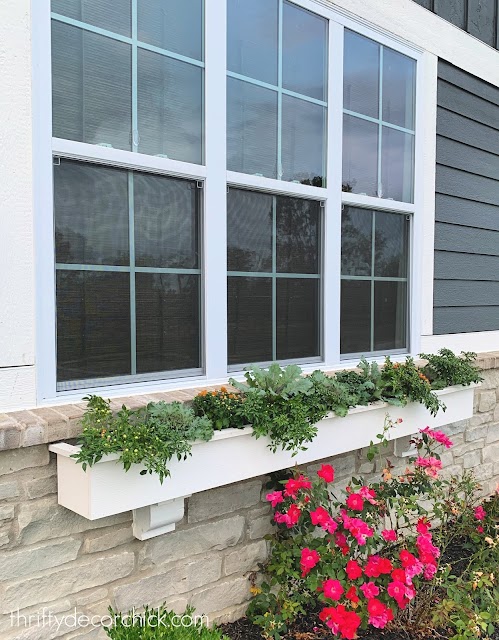
And here's how that one looks now, after about a month:
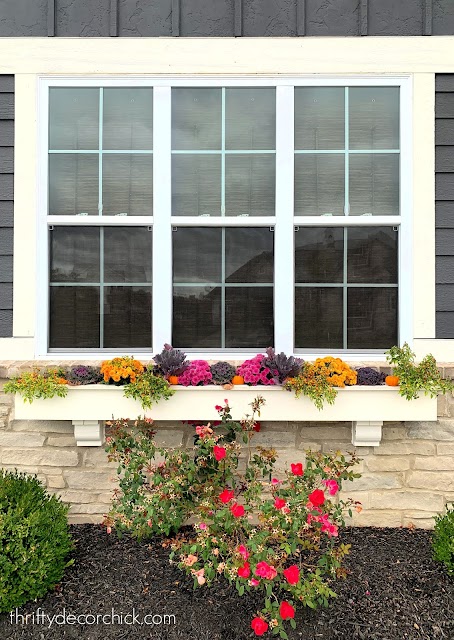
So lovely! They make me smile when we drive up to the house. The mums grew in beautifully (I'll have to start deadheading them soon) and the kale deepened to a gorgeous purple color.
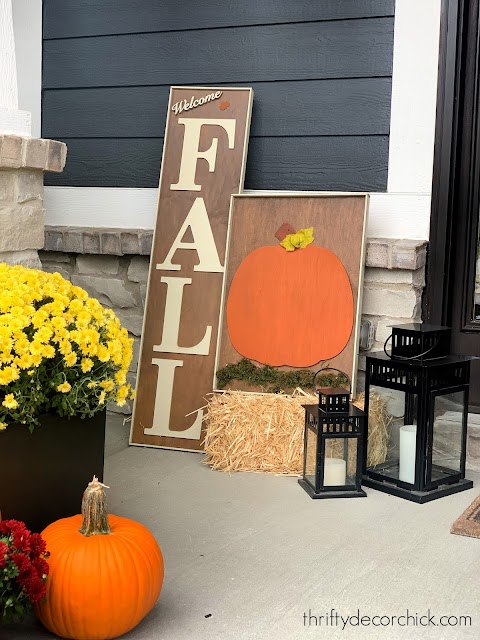
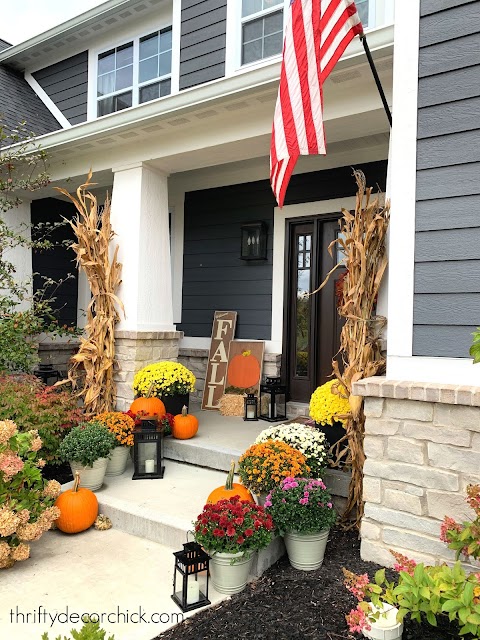
A couple years ago I shared how I made these large DIY fall signs for the front porch:
This post may contain affiliate links for your convenience.
See my policies and disclosure page for more information.
This year I added a small bale of hay to prop one up. I almost got a bigger one as well, but man those things make a mess! I'm glad I just stuck with one.
And this year I went back to using corn stalks in the front porch decor:
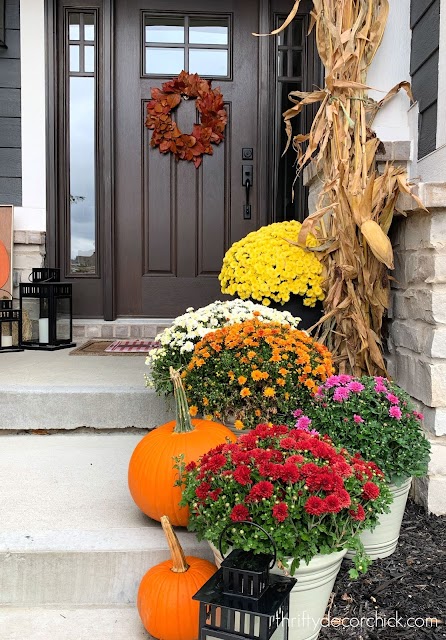
I used to use them all the time on our tiny front porch at our last house and they always made such a difference!
I went nuts with mums this year...becuase 2020. ? I wanted it to be as colorful and festive as possible. One of our local nurseries does a $5 mum sale every year and you just can't beat that price. I got a ton for the front and back porches:
If you're looking for something similar, check out these outdoor pots that aren't crazy expensive. The hardware stores are all out of them at this point. :(
What a difference from just a couple years ago! Check out how small our plants were then!:

I'm thinking about moving the hydrangeas over a bit because they are getting so big.
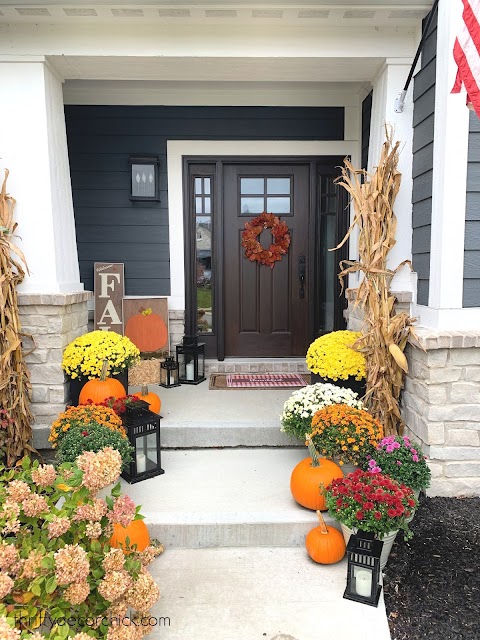
I got those wood baskets for the mums years ago (pictured above) and they looked so cute! But after two seasons in the elements they were a mess. This year I invested in some inexpensive plastic containers for the mums we put out every year:
I find mums do SO much better when they are actually planted instead of just in the plastic pot they come in. Otherwise they dry out so fast for me. It only took a few mintues to plop them into the pots and they look great!
I'm so thrilled with how colorful and festive it all is! I love our porch so much!:
The lanterns are from IKEA and I put fake candles that light up on a timer inside. Now it looks just as great at night:
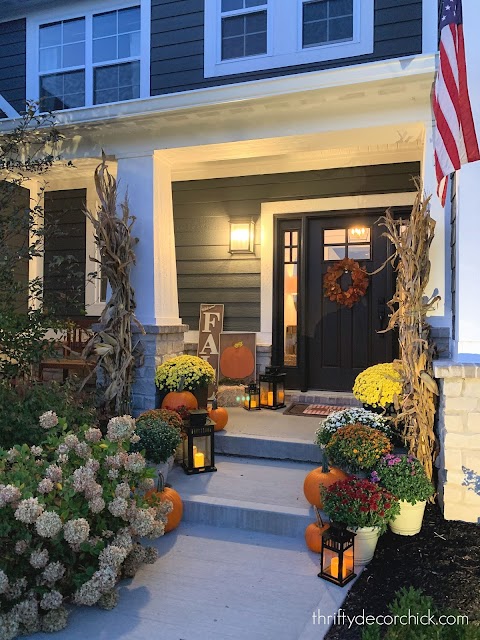 
Everything looks so beautiful and I'm reminded again how much we love our home! I just love this time of year. Even the hydrangeas look so pretty as they dry:
Now we need to get the Halloween stuff out this weekend!
Do you do much to your front porch for fall! Even if it's small you can do small things that make a big difference!
See more of our home here. To shop items in our home, click here! Never miss a post by signing up to get posts via email.
Via https://www.thriftydecorchick.com/2020/10/our-beautiful-and-colorful-fall-front.html
Fall is here and I'm back working on a bunch of projects! Feels good to be tackling stuff again. This one is simple and inexpensive fix that may be helpful for a lot of you.
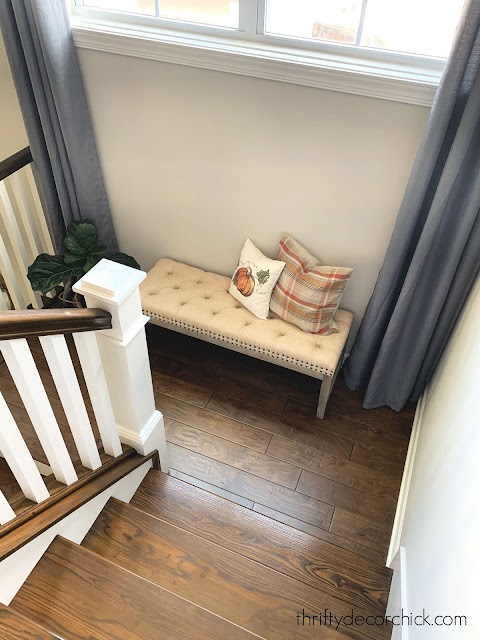
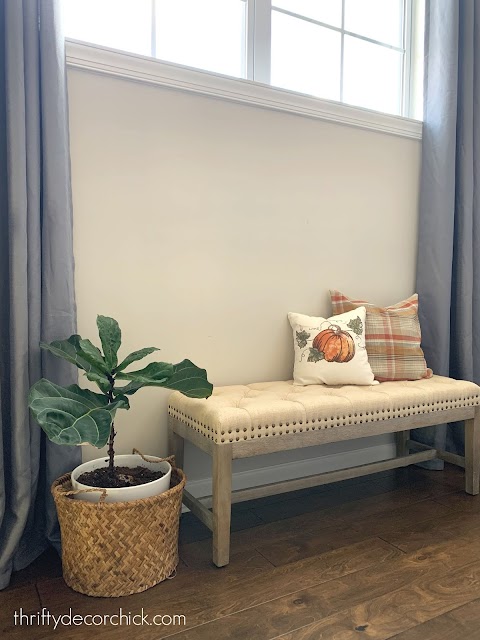
We have a window at our stair landing that I've wanted to address for awhile:

I love love love our stairs! The landing just felt a bit bare with the plain window:
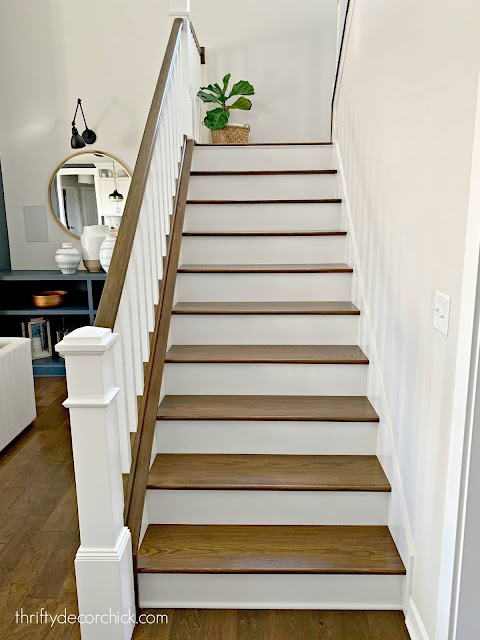
Problem is, the window is WAY up there! I needed super long curtains to make this work.
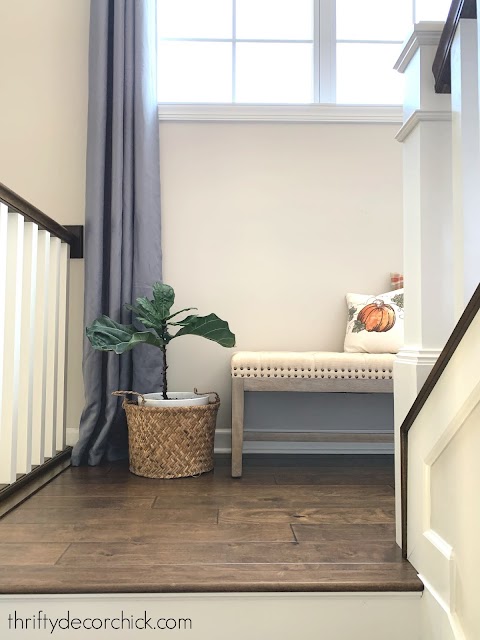
Thankfully I already had what I needed. Remember years back when I needed really long drapes for our family room? I found super inexpensive drapes and hardware that worked perfectly:
This post may contain affiliate links for your convenience.
See my policies and disclosure page for more information.
I ended up switching out those gray drapes for lighter ones, knowing I'd eventually use the gray ones later:

I got up on an eight foot ladder to hang them and thought I was going to die. I was sweating so badly I couldn't even use my tools at times. ? I am NOT a fan of heights. One hundred percent do not recommend.
But it was worth it! Our son suggested we add a bench here, which I loved! He's so smart. :) I need to steam the drapes since they've been folded up for years, but otherwise it looks great!:
This is the time of year that I welcome a bit more stuff into our home -- it feels cozy and warm. In the new year I may want a little less...we'll see!
We love it. It feels so much more finished and pretty:
Now I really need to get the rest of those walls trimmed out with the board and batten like the bottom wall.
Colby LOVES it and spends a few hours a day snuggled on the bench:
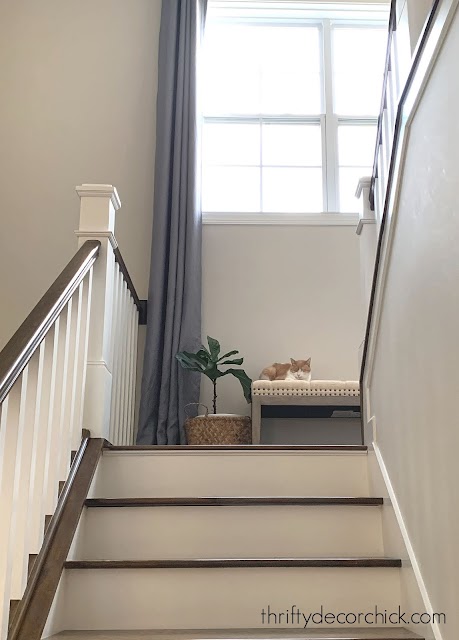
The whole family appreciates my projects. :) Maybe sweating on the ladder was worth it!
This was a quick and inexpensive fix -- I just love those. Be sure to check out this post to see more about the cheap drapery hardware and a link to the drapes I've used.
Via https://www.thriftydecorchick.com/2020/10/decorating-stairway-landing.html |
