
Hello there! It's one of my favorite weeks of the year! Life slows down for a bit and I LOVE spending time with the family. Of course there's the shopping too. ;) I'm not one to leave the house to shop on Black Friday though -- are you? I prefer to stay on the couch in my pj's and shop from home. If you're like me, I have some fun gift ideas for you this week! Yet again I've gathered a group of AWESOME bloggers and we're all sharing some of our favorite things. Anything goes! Home decor, beauty, fashion -- whatever. I think you'll love it! You can see all of the bloggers joining in at the bottom of my post, but first I'm sharing my faves. (You can see last year's post for even more ideas!)
This post may contain affiliate links for your convenience.
See my policies and disclosure page for more information.
My first favorite is one we recently purchased. Our neighbors have the CUTEST dogs and snuggle up in their dog bed. We purchased the smaller version for our dog and... 
The dog hasn't touched it but the cats LOVE it. It's called the Snoozer pet bed and it's sooo cozy. The top stands up so they can snuggle up inside. It's not cheap but it's a well made bed that will last a long time. This product is PERFECT around the holidays, but we use them all year. If you have a hard to reach plug or lamp and want an easy way to turn it on, these remote control plugs are a huge help!: 
They are great for Christmas trees, lights on railings and mantels...all over. I bought the one above for the sconces above our bed. They are just slightly too high to reach comfortably, so I plugged them both into this and now we just push a button. Awesome!
This option caught my eye too -- you can control anything that plugs in with your phone:

I found that one at Lowe's but the one I linked has two for the same price.
My luck with Amazon fashion is hit and miss -- but I've had great luck with earrings. I get complimented on both of these every time I wear them:

The tortoiseshell hoops can be found here and the paddle ones here (specify your size). I love them both and they look great with just about anything! Speaking of jewelry, these stackers have kept my earrings and bracelets perfectly organized for months!: 
I find it's so much easier to find what I want when they're organized like this. I got three different sizes -- go to this post to find the links to each one.
Let's talk FOOD. I'm a popcorn nut. We go to the movie theater just to pick up popcorn -- that's how much I love it. I've used other poppers in the past and this one is by far the best:

You put the popcorn in and turn in on -- no need to stir or watch it. The little dish on the top melts your butter. I love this thing!
We do get a few stray kernels escaping during the popping process, but it's not bad. The popcorn comes out perfectly every time!
I shared these super soft pajamas on Instagram the other day because I love them SO much:

I found mine at Costco -- I bought one set, came home and wore them, then went back the next day to get more for me plus gifts. If you can't find them there, they are sold online here. They are incredibly comfy and soft. Also very roomy so be sure to size down.
Speaking of comfort -- these little doodads have made the warmer months SO much more comfortable. They're called Bandelettes and if you experience any thigh chaffing when wearing skirts or dresses, you will LOVE THEM:

You wear them around your thighs and they are a game changer. I wore them all throughout Italy last summer and was so comfortable. They are lightweight and much easier and cooler than other options I've found.
I shared this diaper caddy before, but as you can see we use it for small games and cards instead:

This little thing has so many ways to organize small stuff -- you can move the insert inside to where you want, it has side pockets as well as a zipper pocket. Plus it's easy to carry around and just looks good!
It's a great way to corral all kinds of small items!
One of our favorite games inside would make a perfect stocking stuffer:

LCR (left, center, right) is SUCH a fun game for all ages! It says five and up, but I think younger kids could play with help no problem.
I have a weird thing about games -- I don't like the learning process. ;) I get frustrated if I don't pick it up immediately. This one takes literally two minutes to learn and it's even more fun when you add quarters to the "pot." ;)
I'm a little throw blanket obsessed, I admit it. I love them and usually buy new ones with each season. This super fluffy throw from Amazon is my new favorite:

It's a great size and SO soft. (I'm pretty sure we got the 60x80 size.)
It looks great too!:

One of my Amazon clothing faves this year was this color blocked cardigan:

It's incredibly soft and looks great with jeans or leggings, plus it's plenty long and covers the butt.
I blogged about this carpet cleaner earlier this fall and had to include it here:

See that gross water? It works so well...it's kind of shocking to see what's in our carpet! One of my favorite things about it is that it doesn't leave the carpets super wet. Love it!
This Maybelline lipstick is my absolute favorite right now. It's a beautiful berry color that I swear would look great with any skin tone:
It's number 379, called Fuchsia for Me. It goes on so creamy and stays on really well!
This final one is my most recent purchase -- I found these Old Navy pullovers last week and bought two because I loved them so much: 
I never share my mug around here, but I took a photo with both this and the lipstick on the other day to show you: 
I did my wavy hair with my favorite hair tool I talked about last year.
There's my list for this year! Do you use any of my favorites?
I can't wait to see what the rest of the ladies are sharing this week! Here's the schedule so you can follow along each day:
Monday
Tuesday
Wednesday
Have a WONDERFUL and safe Thanksgiving holiday! I'll see you back here next week! See more of our home here. To shop items in our home, click here! Never miss a post by signing up to get posts via email. Via https://www.thriftydecorchick.com/2019/11/2019-tdc-favorite-things-round-up.html
0 Comments
Delicious and easy no-bake peanut butter pie recipeI don’t claim to be a fantastic cook or baker. But every once and awhile I open my recipe binder (it creaks and a cloud of dust poofs out) and find one I love and I just have to share. You will thank me. :)I’ve made this “pie” for years, but for some reason it’s been a while since I last did. And now that we’ve had it again, I’m quite sure I’ll be making it weekly. Or so. It’s SO easy. And insanely good. You will LOVE it. That is, if you like peanut butter. Or chocolate. Or sugar. You’ll need just a few ingredients: 
3/4 c. confectioners sugar
6 oz. softened cream cheese
1/2 c. peanut butter
one container Cool Whip
2 tbsp. milk
graham cracker crust I buy the crust ready made, and I add a little somethin’ extra by using a chocolate crust:
It takes about five minutes to whip this up – first, mix the cream cheese and sugar: 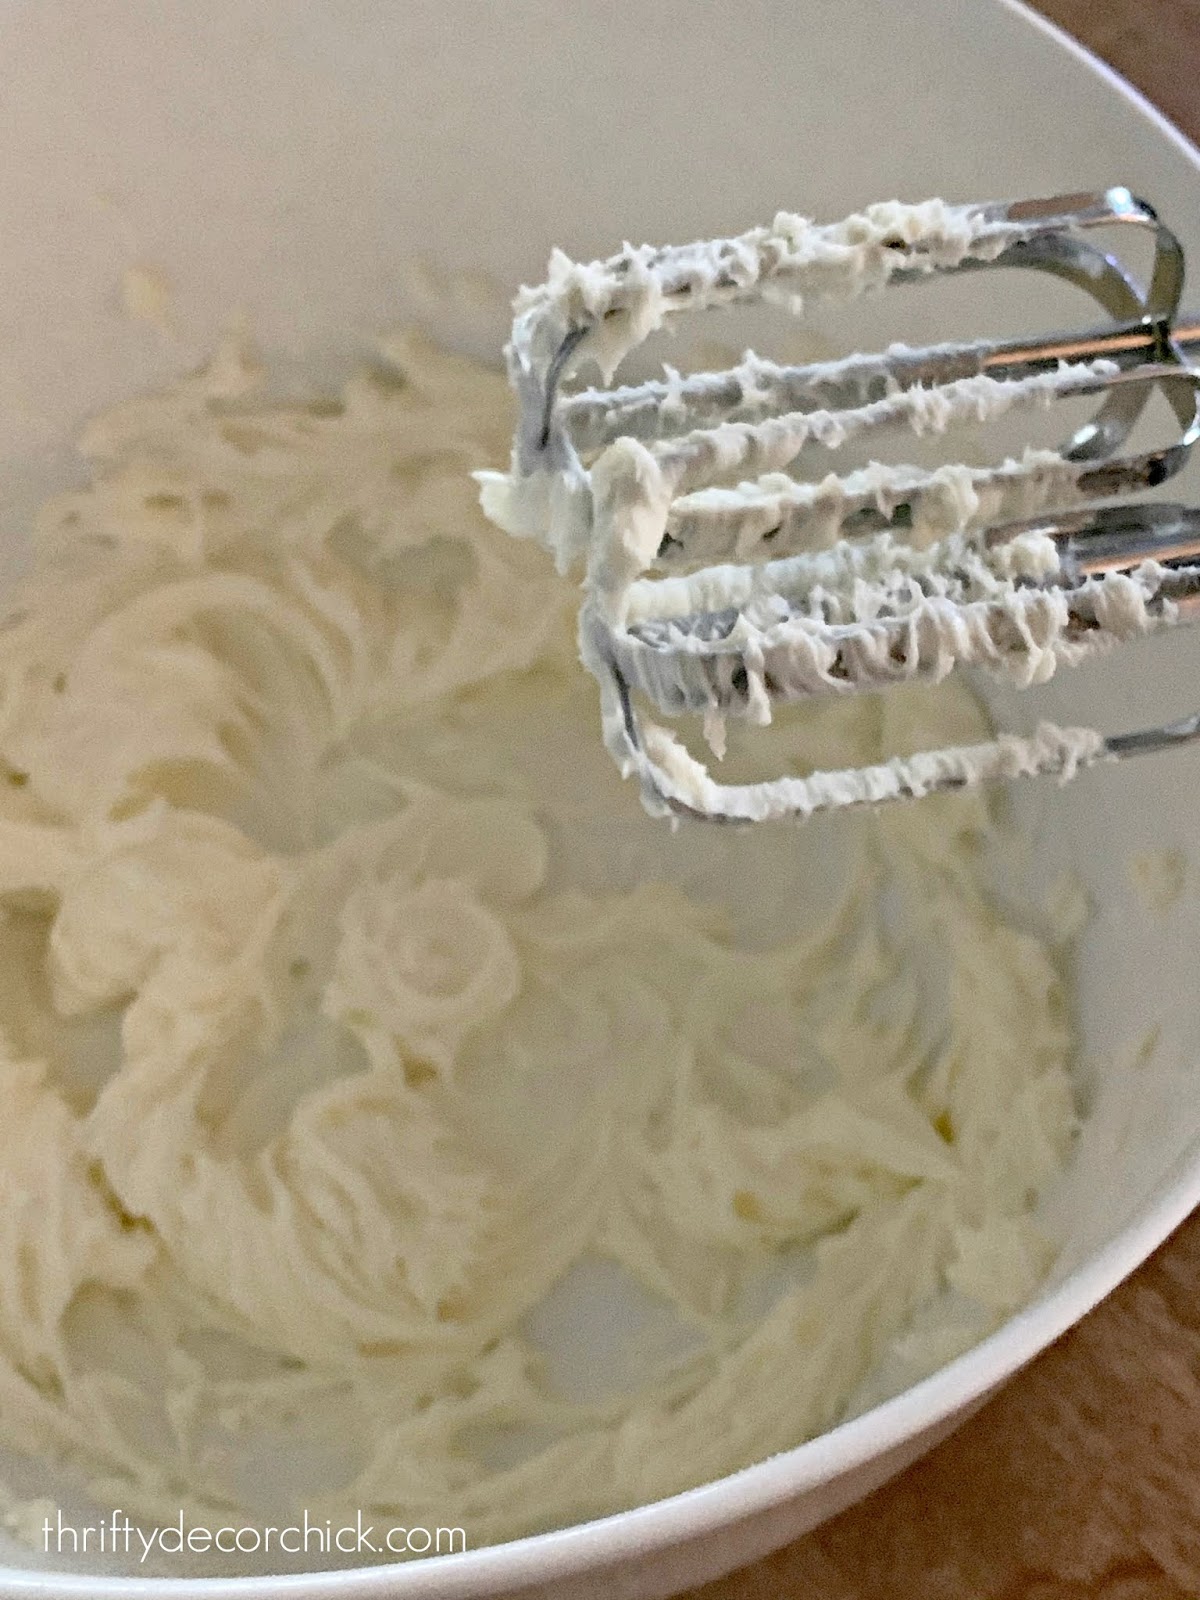
A hand held mixer does the job just fine! Then mix in the peanut butter and milk: 
I took the pictures in case you’ve never mixed anything in your life. :) Finally, fold in a container of Cool Whip (hold a little bit for the top), plop it into crust and cover with the remaining Cool Whip. Then resist the urge to eat it up with a (large) spoon: 
Does anyone else love Cool Whip so much they could eat a whole container? Or, think they could eat the whole container? I wouldn’t know that first hand. Then comes the hardest part of the whole pie – you have to let it chill for a while. A few hours is best, but I can tell you from experience that one hour is just fine. :) After it’s chilled a bit you can drizzle some chocolate over it, or maybe sprinkle some peanuts, and you have one of the easiest, yummiest desserts EVER. Have you tried peanut butter pie? It's so easy! 
Looking for more easy recipes? Check out my favorites here! This delicious pineapple cake only has TWO ingredients!: 
See more of our home here. To shop items in our home, click here! Never miss a post by signing up to get posts via email. Via https://www.thriftydecorchick.com/2010/12/peanut-butter-bliss.html
Hey all! I'm hard at work continuing to get our home decorated for Christmas. I'm doing it early this year because Thanksgiving is later and because I don't want to stress about it at all after turkey day.
When you're a decor blogger, there's some added stress to making your home pretty at the holidays -- I LOVE doing it, but this year I want to be done before December so I can spend the month sitting by the fire watching Christmas movies, drinking hot cocoa and eating bon bons. You know, how December always is in our heads. ;) Anyway, as I've been decorating I realized there are a few staples I use every year that I could not do without! They are my go-to's and I use them all over the house in many ways. When it comes to the decor there are three items I use in various ways:

I use them everywhere! Tucked into garland, containers and even trees. They add that little extra something for very little money.
This post may contain affiliate links for your convenience.
See my policies and disclosure page for more information.
The greenery picks are typically pretty cheap at craft stores, but I find it's even cheaper to cut them down off of longer garland. You'll just need some wire cutters to cut them into smaller sections. It's way easier to use them in smaller increments when just putting them here and there for fullness.
My favorite place to find the berries is Hobby Lobby -- each one is only $1 on sale. And the pine cones can be purchased in bags or you can go foraging for them outside! (Just make sure you clean them before using!)
I decided this year I'm going to do less decorating EVERYWHERE and more decorating in specific places, if that makes sense. So I went all in with the mantel, for example. I also added a bunch of the berries and greenery to our garland on the stairs:

I usually use real greenery on the stairs, but it is SO messy when it's time to take it down. I found this cedar garland at Target that looks so real! It's the best price I've seen for something so realistic.
The other staples I use all over the house are more on the hardware side of things -- the 3M hooks and metal cup hooks:

I use the cup hooks for the garland on the stair railings -- I screw them in underneath to hold the greenery:

These are so small, you don't even notice the hole the rest of the year. It's easy to screw them back in the next year as well! I also use them around the front door if I hang garland there.
I use the 3M hooks on our mantel to hold the beaded garland, and I went ahead and hung our stockings from them as well for now:

I have these metal stocking clips for the mantel that I'll use eventually, but I haven't found them in the storage boxes just yet. ;)
I also use the 3M hooks on our windows for the exterior of the house. For these I like to use these exterior Command strips specifically -- they're made to hold up to the elements:

These five staples make my holiday decorating go much smoother and make everything full and beautiful!: 
The best part is, they work just about anywhere. Greenery, a pop of color and some natural elements are all you need to create a lovely holiday home:

Remember the DIY Christmas gift art I shared last week? Aren't they too cute on my do-it-yourself picture ledges? I just love them here! Do you have any go-to's when it comes to decorating your home for the holidays? I couldn't do it without these five items. :) See more of our home here. To shop items in our home, click here! Never miss a post by signing up to get posts via email. Via https://www.thriftydecorchick.com/2019/11/my-five-favorite-holiday-decorating.html
Have you started any holiday decorating yet? I usually wait until the week of Thanksgiving, but we had such nice weather last weekend, I finished up the Christmas decor outside already! I've never done it this early and I have to say, it's SO nice to have it done!
I like to share inspiration early on so you can get some ideas for your own holiday decorating. I'm thrilled to be bringing you some tips today using some beautiful pieces from Pier 1! You may have seen these photos along with my face in this month's HGTV and Food Network Magazines. I'm thrilled to be working with them to share these fun tips.
This is a sponsored post but all tips are my own!
I tend to use the same staples every year when I decorate for the holidays. I find you can make any room look festive with a few basics -- and the items I use in every room are ornaments. I know, I know...on the tree, of course! But I encourage you to think outside of the box with these beautiful baubles!
Fill a tablescape with ornaments:
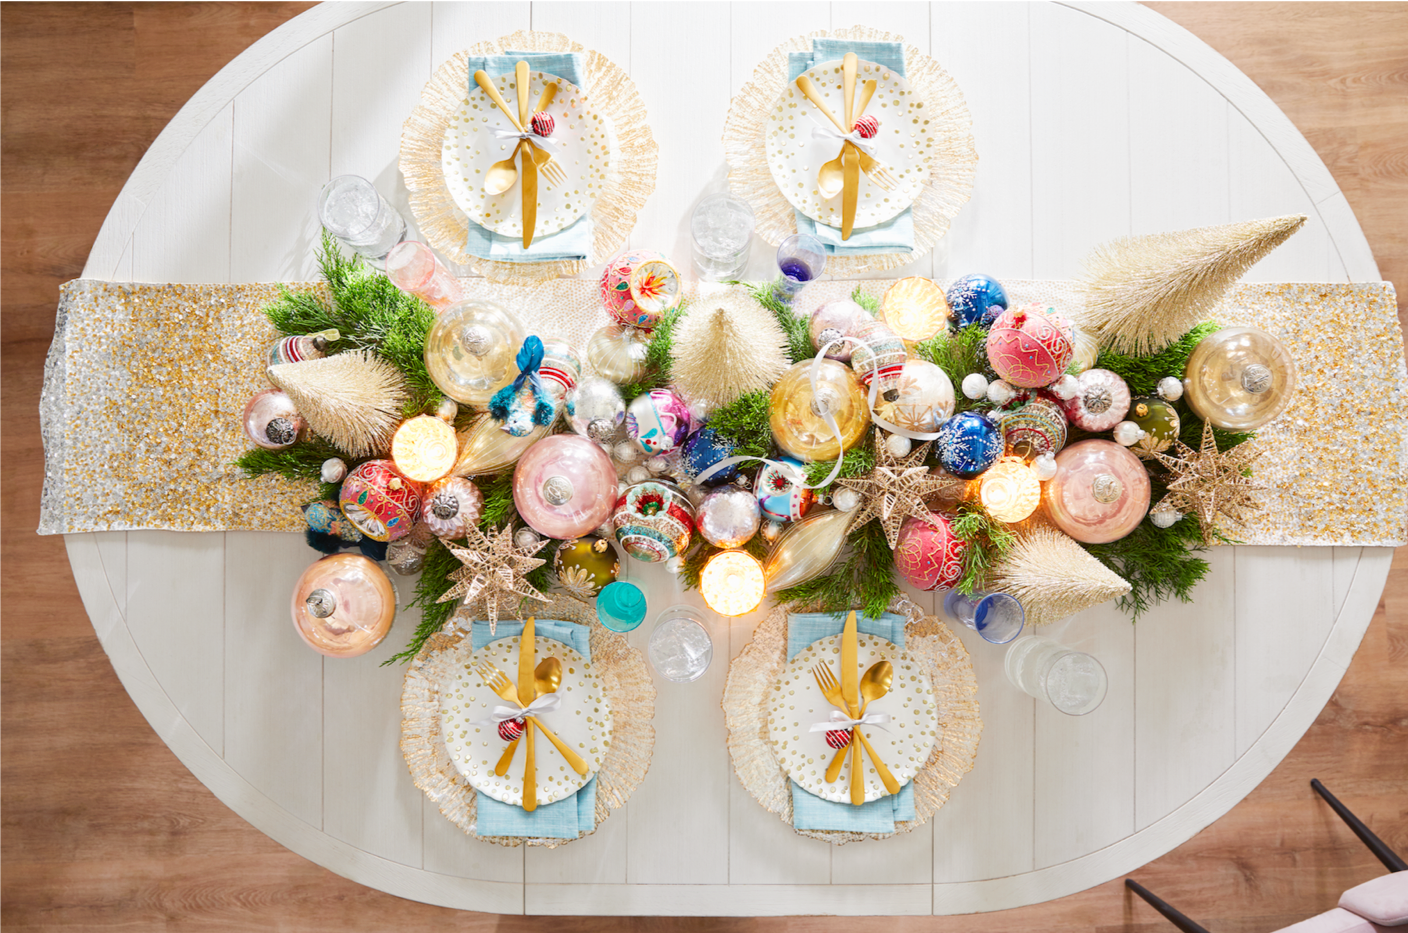
Isn't that stunning? The thing about using ornaments is it's SO easy -- for this display, start with a sparkly table runner. Place some bottle brush trees on top and then start piling on the ornaments! You can use a long piece of greenery and wind it around, or just use sprigs of it tucked here and there (it will go a lot further this way). Use wire to secure the ornaments (these beauties pictured above are from Pier 1) to the greenery, or I find that they usually stay put if tucked in well enough. I also love using ornaments as simple and pretty place tags at the table -- run some skinny ribbon through one and then punch a hole in the name card to run through as well. Or just tie the ribbon with the ornament around the cutlery as they did here! Decorate the mantel with ornaments: 
I use ornaments everywhere in my decor because they are GREAT filler and they make a big impact with color. Placing them throughout this display adds so much to this mantel! Don't forget to tuck some battery-powered lights in for some twinkling lights at night. I really love that perfection is not needed -- in fact the organic placement is what makes it feel even more lovely! I like to stay within the same color family, but definitely change up the sizes. Use small ornaments to big, as long as they all have a similar design or color. Also, how fun would a DIY ornament garland be? You can easily string the Pier 1 ornaments along a ribbon to make a custom addition for your mantel, stair railing or over the front door. Add an ornament to a gift box: 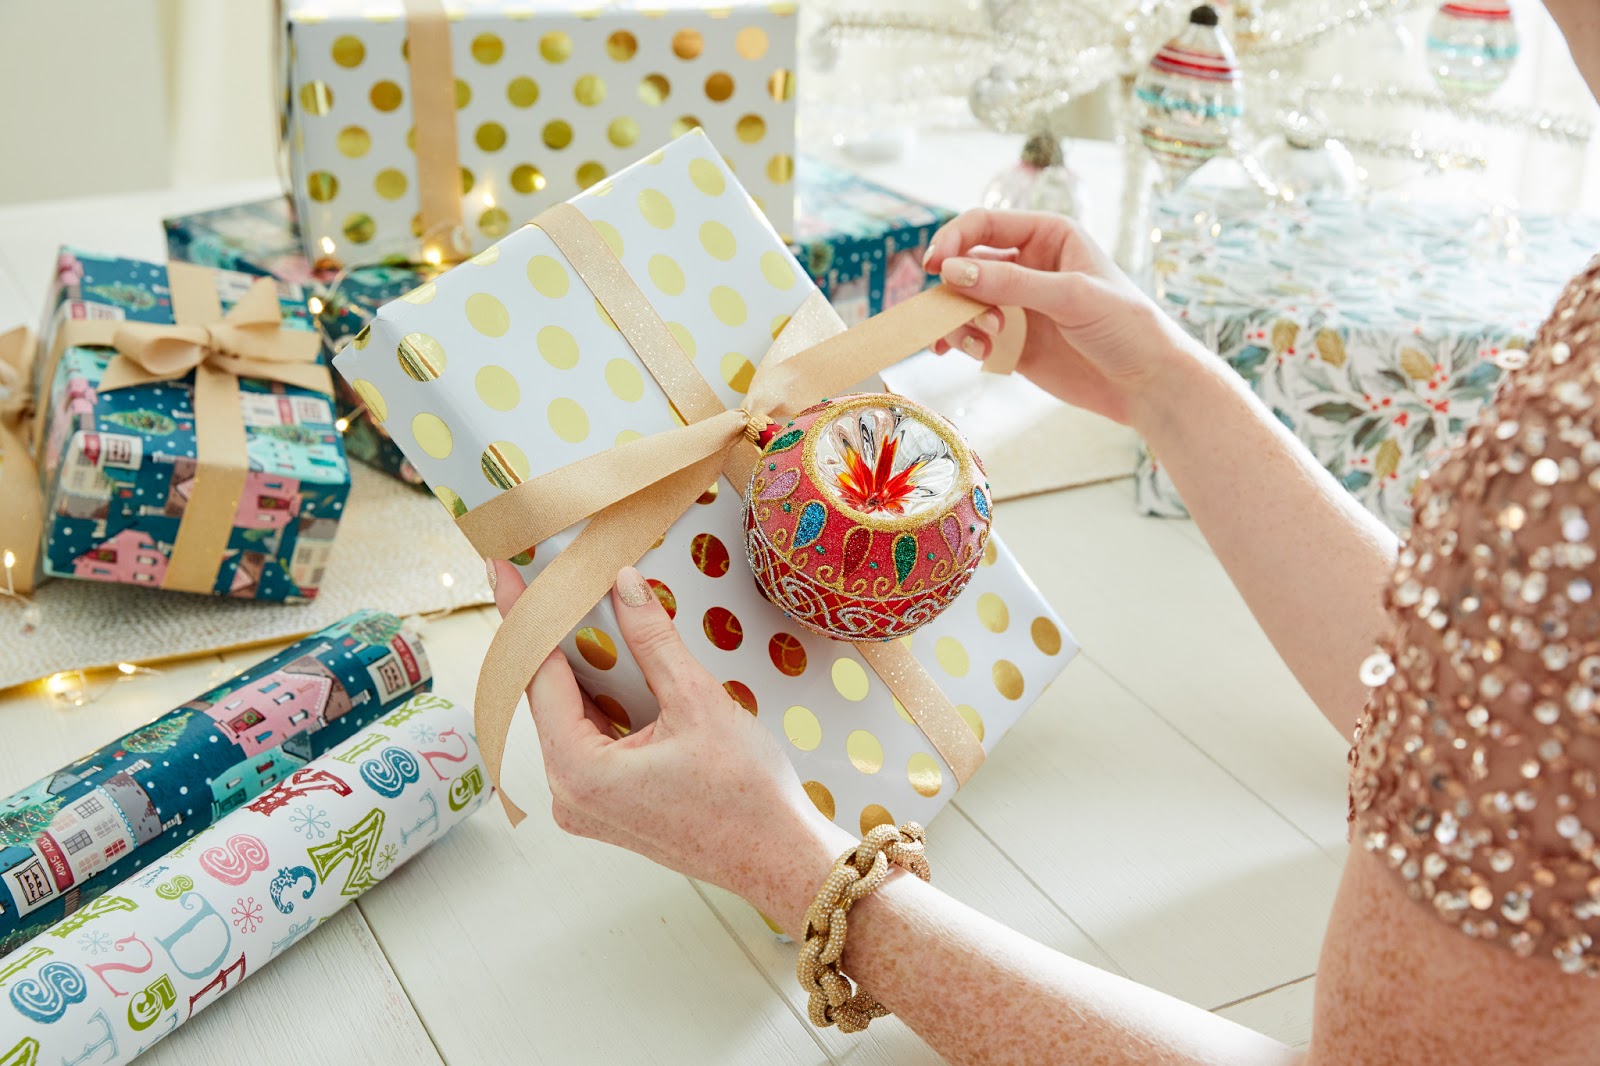
I love this idea! What a pretty and easy way to dress up a gift! This wrapping pictured is beautiful, but even a solid color would look great with the sparkle of an ornament tied on! You could even use a specific ornament color for each family member instead of writing names on tags. This would also be perfect for an ornament exchange -- but change it up on the outside so they don't know what's coming in the gift! :) Everyone will want to pick your present! I love these simple and pretty ways to incorporate ornaments into your Christmas decor. You can find so many beautiful options at Pier 1 that don't cost a ton. Even the simplest colors or designs look festive when you use multiples in one spot. Look for my photo with these tips in this month's issues of Food Network and HGTV Magazines! See more of our home here. To shop items in our home, click here! Never miss a post by signing up to get posts via email. Via https://www.thriftydecorchick.com/2019/11/easy-ways-to-decorate-for-holidays-with.html
Hello there!! I wasn't planning on sharing this project just yet...but I finished it up and loved it SO much, I just had to. HAD to.
If you don't like Christmas ideas this early, look away. Just come back in a couple weeks! ;) For those of you that do, this was a super easy project and I think it's just adorable.
I saw something similar floating around Facebook, but I couldn't find a source. I knew it would be really easy to recreate so I did just that. This is a GREAT project if you have scrap wood laying around.
I grabbed some scrap luan (I've used this stuff on this wall and this wall in our home) and cut it in three different sized boxes:

I used spray paint in Christmasy colors -- red, green and black. You can make the colors work for your decor!
This post may contain affiliate links for your convenience.
See my policies and disclosure page for more information.
Give the boards a few coats of spray paint:

I shared a couple quick spray painting tips in this short video:
Be sure to check that out if you're not familiar with spray paint! Those tips will prevent issues with drying and give you a nice, smooth surface. You can also use a brush or roller to paint these.
After they dried, I used gingham ribbon I found for half off at Hobby Lobby:

And "wrapped" each board like a present. You get where this is going? :) (I found similar gingham ribbon here!)
I used hot glue to adhere the ribbon to the backs. No need to take it down the back, and no need to paint the back!:

No one will ever see it! :)
After the ribbon was on I dug through my Christmas decor and found some cute touches for the center of each "present" -- greenery, berries, etc.:


They turned out even better than I had hoped! SO CUTE!:

I don't know yet where ours will live, but they would be so adorable on the front porch! Our porch is pretty well protected -- if you'd like to keep them outside a couple coats of polyurethane will help protect the wood.
They'd be cute on a mantel, on an entry table, even leaned against a kitchen backsplash!:

The color/decor/placement possibilities are endless! Now I want to make more. I love them so! I didn't have the red and green spray paint, so I had to buy that and the ribbon that was half off. All three items came in at under $13. Such a simple and inexpensive holiday project -- and so easily customized to the colors you decorate with this season! Check out this adorable Christmas snow globe art I made last year for another Christmas project you can finish up before the holidays! See more of our home here. To shop items in our home, click here! Never miss a post by signing up to get posts via email. Via https://www.thriftydecorchick.com/2019/11/large-diy-christmas-box-decor-for-porch.html Tips and inspiration for decorating the wall around a TV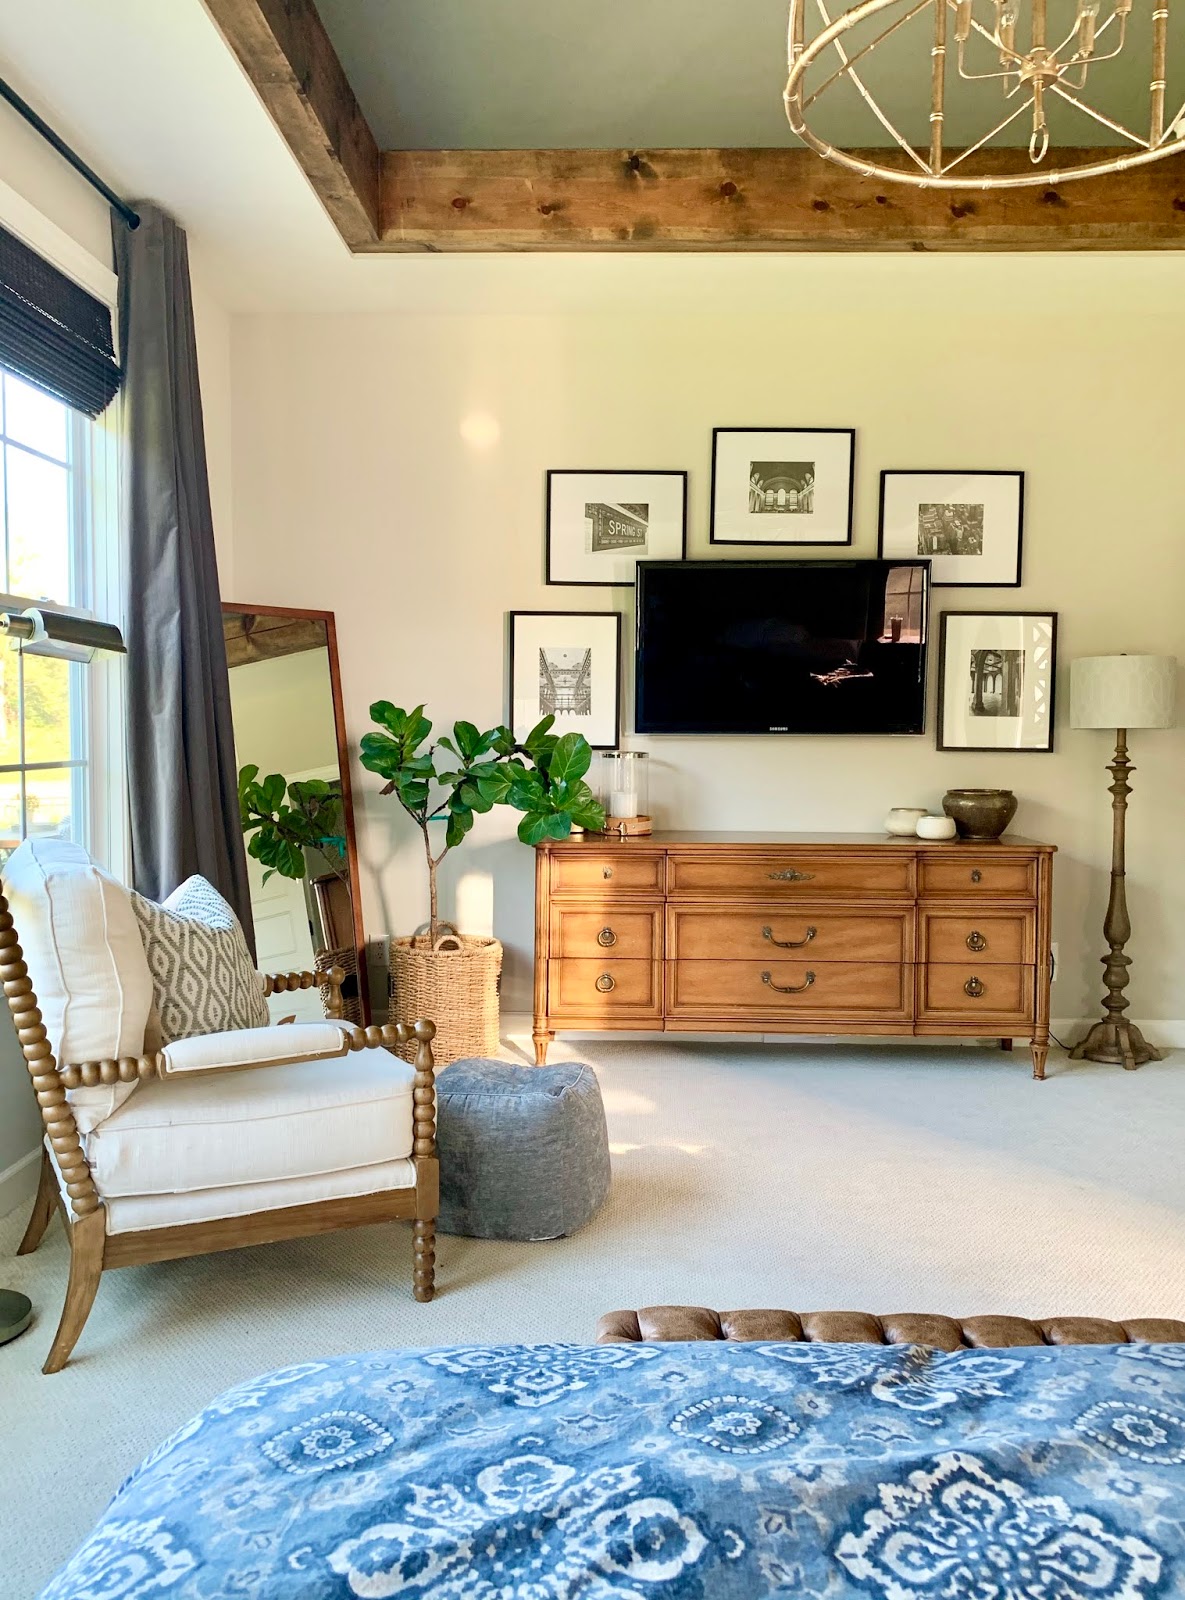
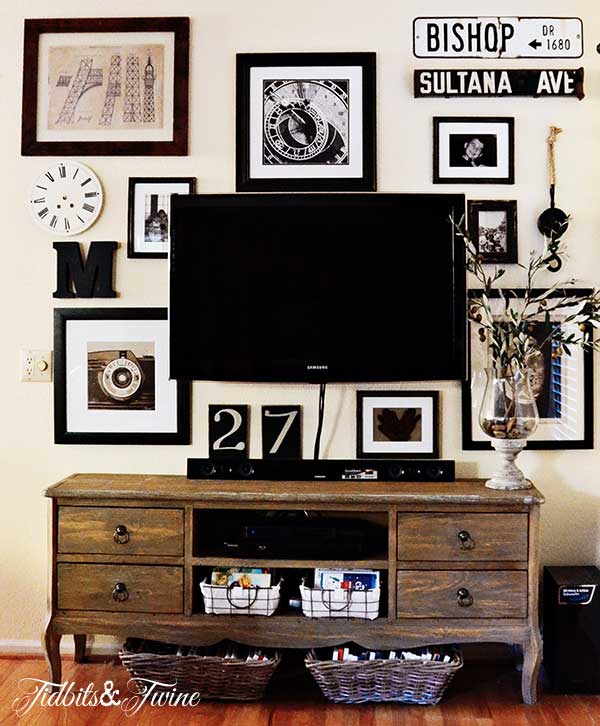
The age old question is how to make our big TVs of today work in the scheme of a room and not overpower it. I'm not a big stickler about this -- televisions don't bother me much. Especially the sleeker versions we have now. But often they kind of just hang out in the middle of a wall and stand out more than we'd like. I've gathered a few of my favorite ideas on how to incorporate a TV into the design of your house, and even help it to disappear a little bit! My favorite ideas involve gallery walls -- especially those with black frames. I think they work so well with the TV: 
Source: Pottery Barn
What a beautiful room right? I think this TV wall is done so well. White frames and other colors work well too of course, I just think the black helps to make the TV stand out a little less.
I love the idea of incorporating big artwork to steal the focus:

I like how these go all the way down to the floor too -- not just floating up above. I have always loved this image from Pottery Barn and their use of frames and other items to make a true art wall around the TV: 
Source: Pottery Barn
Keep in mind this can get busy fast -- on a large wall you'll want to be careful how wide and big you go with the gallery.
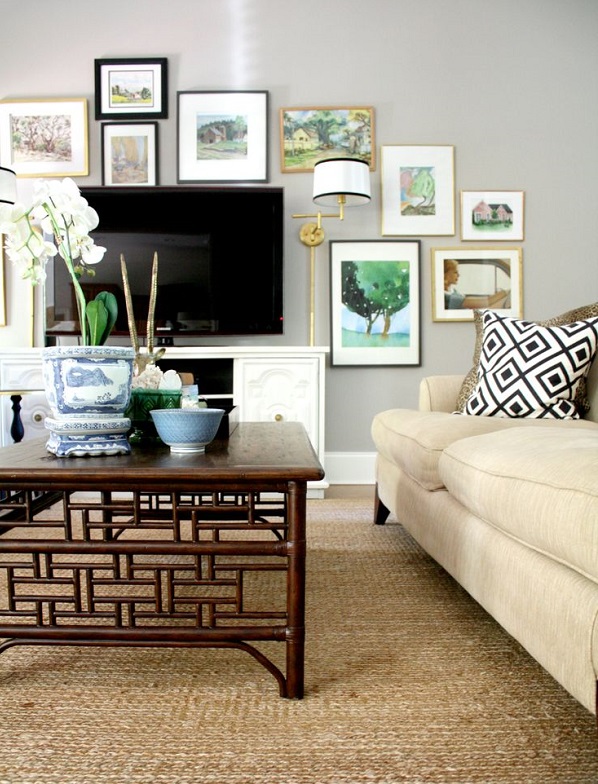
I love how this one has some art just slightly behind the TV -- you can still see it, but it feels layered:
These are a couple of my favorites -- I like the simple but non-symmetrical layout:

I love the way Emily pulls in some color around hers as well:
Beautiful!
If you don't want to use art, then try something else -- I love Marian's use of decorative plates for a softer feel:

I love the floating frames and low TV stand here:

This is simpler and less cluttered look if the frames are too much for you. Side note -- I prefer to hang our TVs instead of sitting them on the surface. I just like the look better and it gives more breathing room and space to decorate around them.
Before we knocked out a wall a couple years ago our TV hung on a different wall in our family room. I flanked it with lamps (I usually lean towards symmetry) and added a wood box underneath:
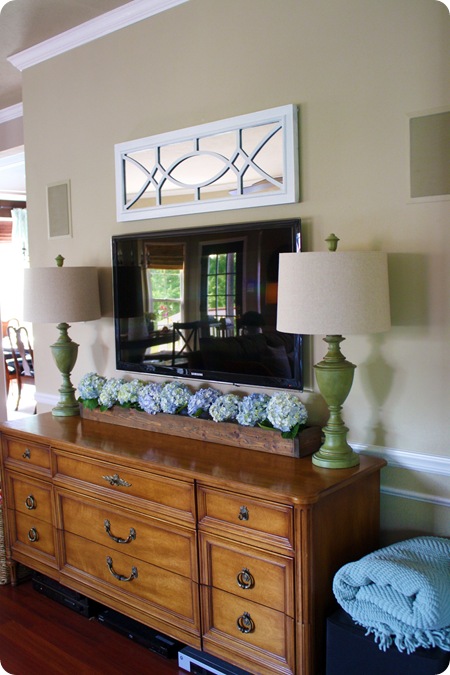
I tend to go simpler in our own home -- sometimes doing too much can backfire and bring even more attention to what you're trying to minimize. It all depends on your space and taste. I also like the idea of going darker on the wall behind the television. You can do the whole wall or a smaller section -- I love this dark gray fireplace: 

You can see here how our dark fireplace camouflages it a bit: 
On a similar note -- did anyone watch Fixer Upper this week? I think it was the first time ever that she incorporated a television in her design: 
(HGTV)
I couldn't believe it! But I was happy to see this -- I'd love to see how she incorporates them more.
Have you done anything special to minimize the TV in your house? Or does it not bother you much? I have some ideas in mind for our master -- if it turns out I hope to show you next week!
Via https://www.thriftydecorchick.com/2016/01/tips-for-decorating-around-tv.html
Hey all! I haven't started my Christmas decorating just yet, but I am planning on starting earlier than usual this year. With Thanksgiving being later and travel, I don't want to be stressing about holiday decor.
I'm already thinking about what I'd like to do -- I plan to add a new color to our tree and I'm excited about that! It's fun to dream up how the house will look all decorated for the season. I was at Target today and found SO many cute things, I just had to share them with you. I'll include links if I found them online!
This post contains affiliate links for your convenience.
See my policies and disclosure page for more information.
I have to say, I was a bit underwhelmed with the dollar spot at Target this year. They usually have really cute stuff, but there wasn't much I was interested in.
But the rest of the stuff was great! I stopped by the Magnolia section first:

I loved this grapevine wreath -- I think it's because it's so similar to the Christmas grapevine wreath I made a couple years ago! Mine was waaaay cheaper. ;)

They also had a reindeer, snowflake a dove option. You can't see here, but they have tassels on each corner.
These tree collars are big right now! This seagrass tree collar looks like a basket with the handles: 
The Magnolia line had a lot of lovely greenery strands as well.
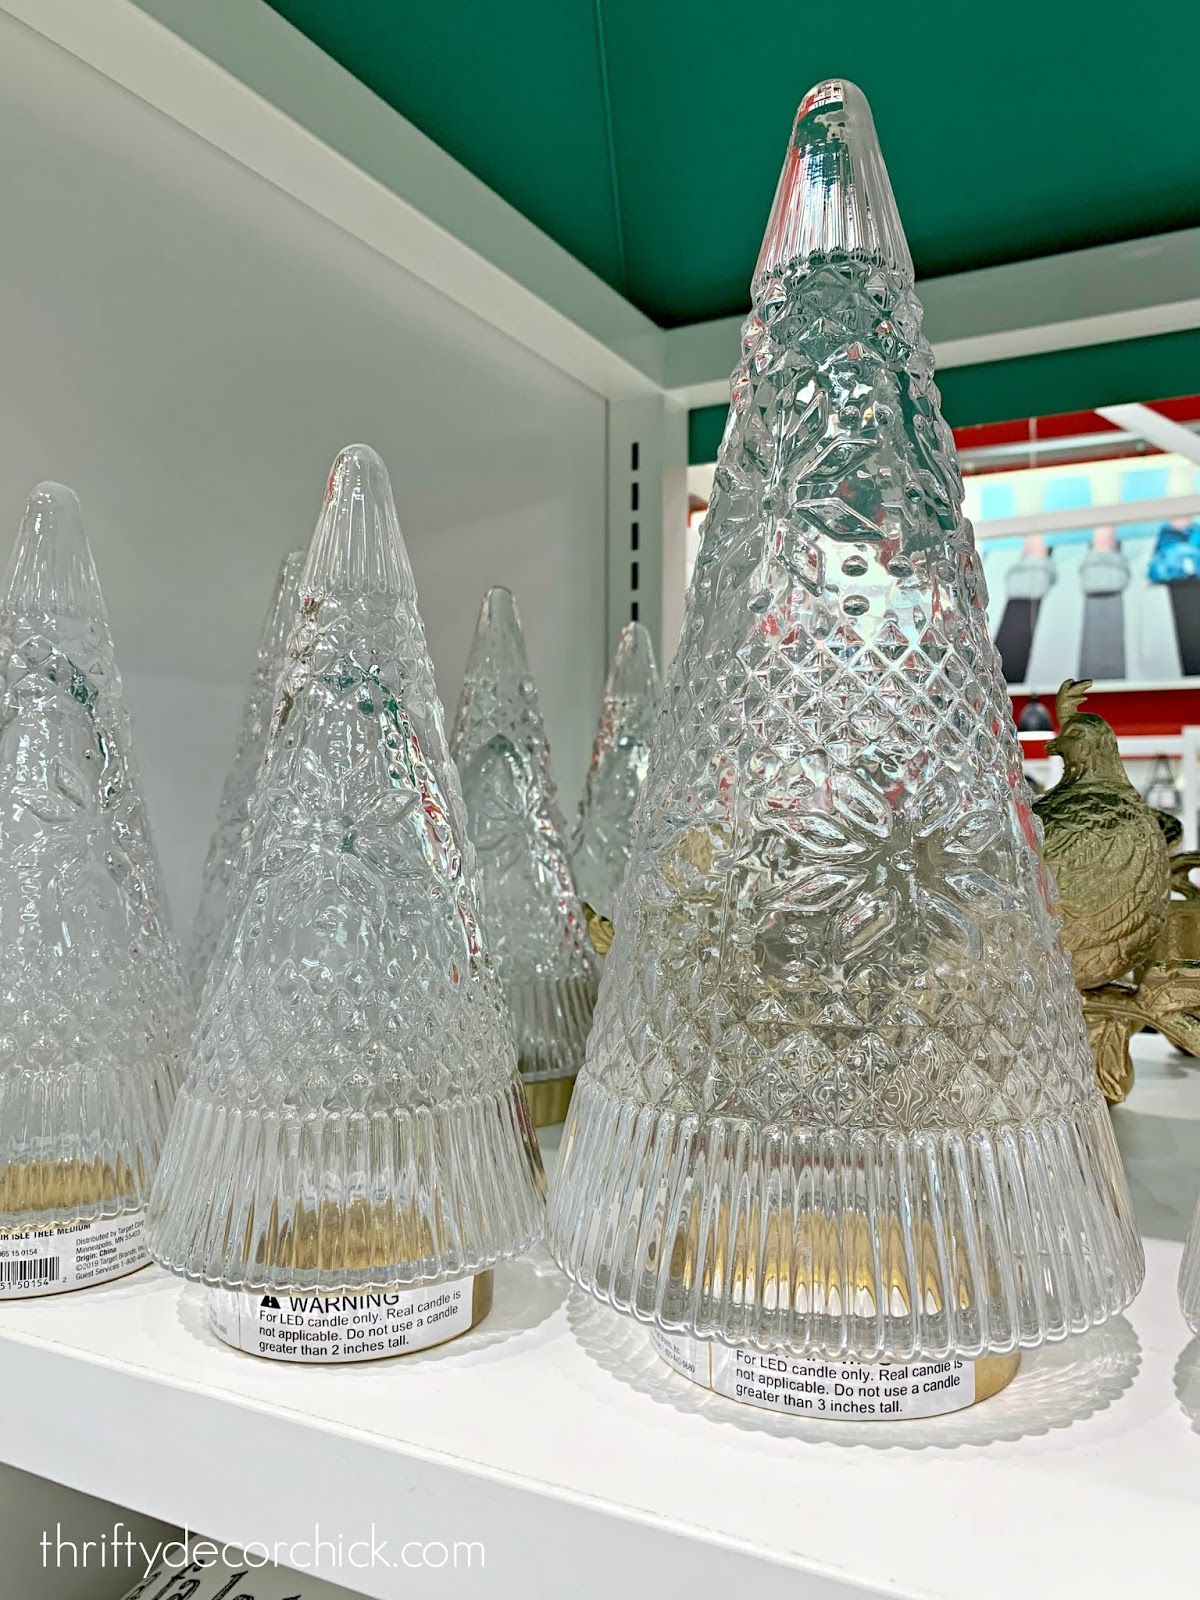
Onto to rest of the decor -- they had a great selection this year! I loved these ribbed glass trees that light up:

The lighter version is described as pink online, but it looks more silvery pink in person.
For the past few years, I've been moving towards seasonal basics like figurines and trees. I bought a similar tree in a basket last year and love it!:

These have a bit of glitter to them. If you prefer something without, these snow covered options were pretty too!:

I can't find the snowy ones online!
They had a TON of Christmas pillows and blankets. Lots of chunky knit pillows:

You can't go wrong with cable knit! Those would last well into winter.
This ornament wreath was so pretty -- I loved all of the colors!:

You could make this for way less using my DIY ornament wreath tutorial -- but be sure to heed my advice in that post if you decide to make your own. ;)
I thought these glass trees were absolutely gorgeous! You put LED candles underneath:
I loved them so much I bought two. They also had regular candle holders in the same design. I'm trying to resist going back for those as well. Wouldn't those be stunning down the center of a table? Goodness I love them!
These wood reindeer figurines are the staple items I was talking about earlier -- they would look great anywhere!:

Set them up on a mantel or console table, throw some greenery around them and you're done!
I have a couple sets of vintage brass candlesticks that I LOVE to use at the holidays. If you don't have access to a vintage set, these brass candlesticks are a lovely option!:

Those are another item that will be lovely anywhere you put them. You don't have to stick to the dining table!
These cranberry beads are great vase filler, piled around candles (preferably battery operated), or piled under a cloche:

I can't find these online unfortunately. I'm kicking myself for not grabbing this -- I may have to go back.
Did anyone else have one of these ceramic Christmas trees growing up? We had one that was in my husband's family but it broke years ago. I still miss it:

They also have these in miniature ornament versions! So cute!
These sparkly reindeer are a great basic too -- especially at only $8 each!: 
Of course there was a ton more, but these are what caught my eye. Have you been browsing the holiday aisles yet? Walmart has a great selection this year too! See more of our home here. To shop items in our home, click here! Never miss a post by signing up to get posts via email. Via https://www.thriftydecorchick.com/2019/11/lets-go-shopping-target-christmas-decor.html
Hello my friends! I'm back today with the final installment from this year's Indy Home-A-Rama. You can see the first luxury home tour (with one of my favorite homes) and the second modern home tour (I loved it so much it got it's own post) if you missed any of those!
Of these last two, one was my least favorite and the other I really loved because of the great room. It was awesome! I don't have many pics of the fourth home to share but I did love the front porch!:

This home was built and designed by Whicker Construction
I mean, really love it! It was so grand and I loved the double porches on either side.
This little office/homework room was really cool as well. I liked that dark blue gray color on the cabinets:

I mentioned in the first tour that there were quite a few trends I noticed throughout each home, and the deep cabinet color and wallpaper in this room were two of them.
It's funny because this kitchen was my least favorite, but was still really beautiful!:

I think I would have loved it more if they had all open shelves on top or all cabinets...it felt busy to me this way.
The stairs to the basement were SUPER cool -- open stairs always kind of freak me out, but these didn't have a huge opening:

I really loved the modern feel, especially for a basement.
The fifth home had the great room I loved. The exterior was probably my least favorite, but I did love those black windows!:

This home was built by Gradison Design Build
The basement walls were covered with this vertical paneling -- the color and height helped it to feel more contemporary:

I loved this little bar/nook! The shelves in front of the mirror were a nice touch and the sconces lining the wall were fun:

I really loved the white bathroom with these large black framed mirrors:

I always wonder if sconces in the bathroom would be enough light. They sure are pretty though!
Another gray bedroom -- told you they were everywhere!:

This cool wall treatment in the stairway paired perfectly with the modern railings:

You know how much I love a window seat!:

This great room was SO awesome -- so spacious! I loved the planked ceiling and wood beams:


This room was HUGE! The kitchen was mostly gray as well, but the open feel kept it light and bright:


This room was pretty sparse -- some plants or wood cutting boards on the counters would have warmed it up.
The laundry room was so pretty -- it felt a little "sweeter" than the rest of the house but I loved the cabinet color and the tile:

I'm off to work on the master bedroom makeover! I wanted to finish it up before November 1 -- I'm just a little behind. :) See more of our home here. To shop items in our home, click here! Never miss a post by signing up to get posts via email. Via https://www.thriftydecorchick.com/2019/11/luxury-home-tour-three-dont-miss-great.html These yummy three ingredient biscuits are so easy to make!
Most of us have a crutch when it comes to certain foods, right? Like sweets or chips or whatever. Mine is bread. Anything bread. Buttered, toasted…any shape, any color, flavor, I’m there. These little biscuits are SO heavenly. They taste similar to the cheddar biscuits at Red Lobster. Is your mouth watering yet? The best part is they are soooo simple. Three ingredients:  The three ingredients you'll need:One cup self-rising flour1/2 cup butter (softened) 1 package (8 oz) softened cream cheese You just mix the three ingredients together. It will be very thick:  One little addition I made this time was a bit of shredded cheddar cheese. Just a sprinkle, maybe a few tablespoons?
I scooped them out on the (greased) pan using my ice cream scoop:
 I use this more for baking than I do for ice cream. ;) When I had just a bit left to scoop out, I added some dill to the mixture:  I LOVE dill and my sis suggested it – brilliant. I only added it to the last few cause I didn’t think my husband would like them with it. This recipe makes over a dozen biscuits because I make them smaller. When you put them on the baking sheet you can place them pretty close together because they don’t spread much while baking. Bake them in a preheated oven at 400 degrees for 15-17 minutes and then ENJOY their buttery, crumbly goodness:  Go ahead and eat one or three right off the baking sheet. I wouldn’t know anything about that. They are seriously amazing. I make them when we entertain and they’re always a hit. LOVE. If you’re planning your Thanksgiving meal they would be a great addition – let me know if you try them out! :) See more of our home here. To shop items in our home, click here! Never miss a post by signing up to get posts via email. Via https://www.thriftydecorchick.com/2013/11/easiest-yummiest-biscuitsever.html |

