|
Hello my friends! I'm back to share a project involving one of my very favorite DIY "tools" ever -- spray paint! I've blabbed on and on about my love of spray paint for years now. It's one of the easiest and least expensive ways to completely transform an item (or room!).
I was thrilled when Krylon asked me to work with them this year. I've used their paints on tons of projects over the years and was excited to try out some new-to-me versions as well. I have some fun and helpful projects planned over the next few months.
This first one is in the kitchen and I'm SO excited about this transformation!
When I was picking out the finishes for this house, I went much "softer" than I had done in the past. The floors were originally much lighter (that flooring became unavailable so we had to go with something different), and I went lighter with the cabinets, paint, hardware...almost everything.
It felt right at the time, as we were starting fresh. But I quickly discovered that I am a contrast lover through and through. Almost immediately I was craving it. I started painting walls super dark, hung dark wallpaper and changed out some lighting for bigger and bolder options.
For a couple years now I've been eyeing our kitchen hardware:
I picked a lovely brass handle that looks GREAT. I love the handles and the color is gorgeous!
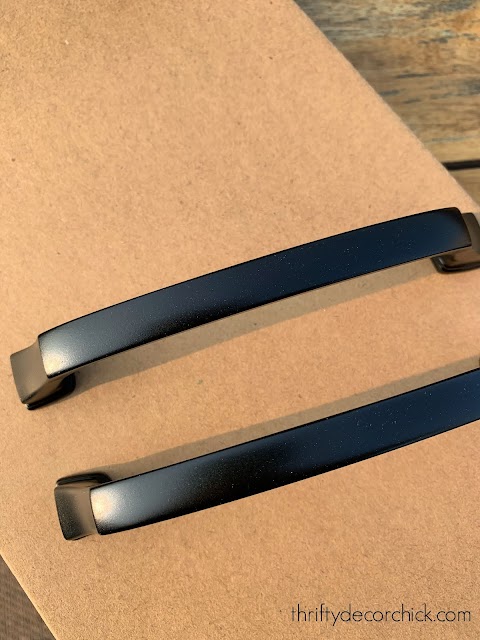
But they haven't felt substantial enough for me for awhile. It was something I noticed every time I walked in the kitchen. Last spring I decided to buy a set of black handles just to see if I liked them:
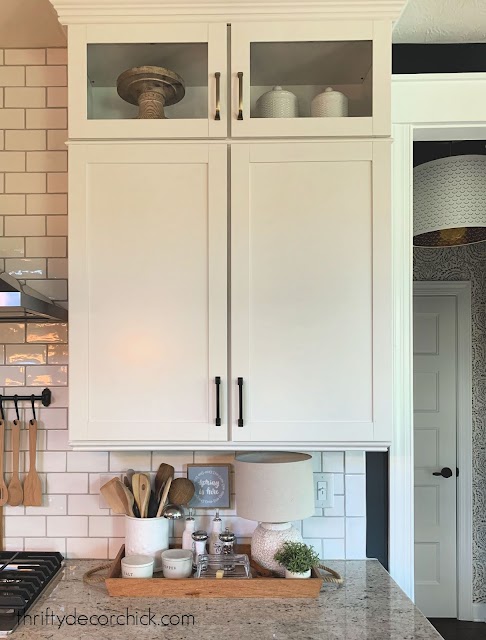
We loved them! But it would have been hundreds of dollars to replace them. And ours are really nice, I just wanted to change the color.
Spray paint to the rescue!! I've spray painted hardware in the past and it's a really easy DIY project. Spray paint is a GREAT way to ease into do-it-yourself projects. For this one I used the Krylon Fusion All-in-one spray paint:

I wanted a slightly more modern feel so I went with the satin black. It's more of a matte finish but not dull at all.
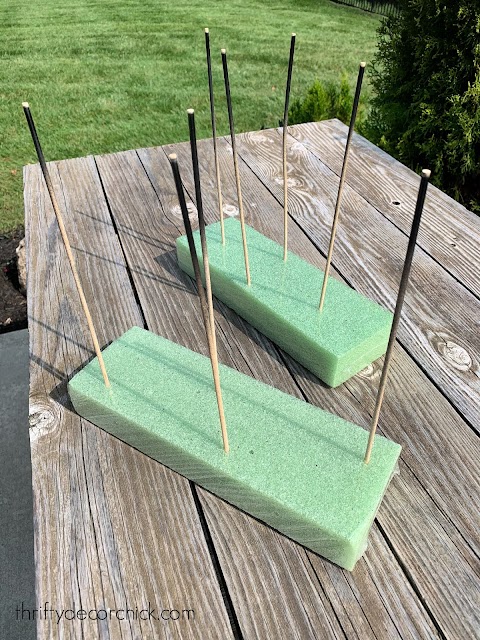
Spraying hardware can be tricky because you need to get all the angles. Sometimes it's difficult to access it all. My friend Lindsay shared this brilliant tip on Instagram:
Here are the basics of spray painting broken down!
Step one: Prep your hardware well.
I worked in shifts -- I would remove four handles at a time. I left the screws in the cabinets so there was no worry about misplacing them.
I used a soft, damp cloth to wipe down the hardware well. There's no need to use cleaners unless you have grease build up or something stuck. Dry them well and then let sit for a bit to ensure they are completely dry.
Step two: Start spraying! (But not too much.)
First up, shake your spray can well (and continue to do so in between coats).
My biggest tip when it comes to spraying an item is to use a very light hand. Try not to hold down the nozzle and go to town. For items that you want a "factory" finish on, lighter coats and more of them are best.
You can see that even after two coats my hardware wasn't covered:

I did three to four coats each, which may sound like a lot -- but you only have to wait about a minute in between coats. That's another reason for spraying lightly...it will dry much quicker!
If you spray too heavily or too thick you'll get drips, or it will get gummy and take forever to dry. If you add more coats on top of that it's a recipe for a mess.
I also recommend starting to spray just before the item and then continuing off to the side. I learned this super helpful trick when I used a sprayer to paint our old kitchen cabinets. This helps control your spray and keeps the coats super even.
This spray went on like butter! Zero drips, zero splatter...perfection! You can see here how my set up worked:
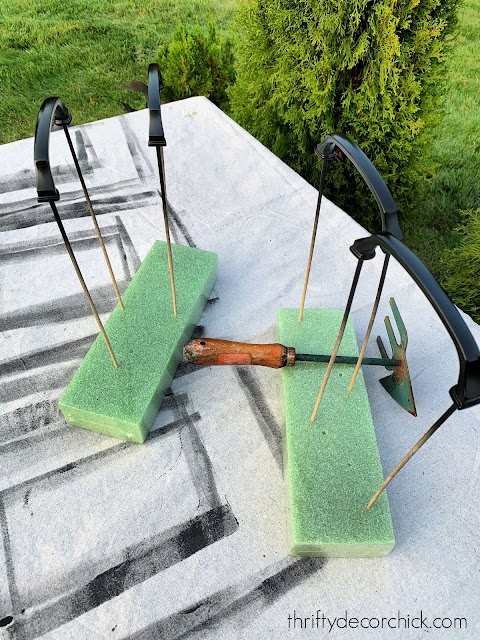
The gardening tool was just used to weigh down the foam a bit. :)
This contraption made painting these SO much easier! What a great idea!
Step three: Let them cure!
After the last coat I made sure to give them a good 20 minutes to dry before handling them at all. Then I moved to another spot to dry for longer. I used a cardboard box in the sun on nice days with no humidity:
Check out that beautiful finish! ?
I did this over a few days so some days were warmer/more humid. On those I brought them inside and placed them over an air vent to dry.
After they sat for a couple hours I was able to reinstall them, but at first I didn't tighten them against the cabinets:
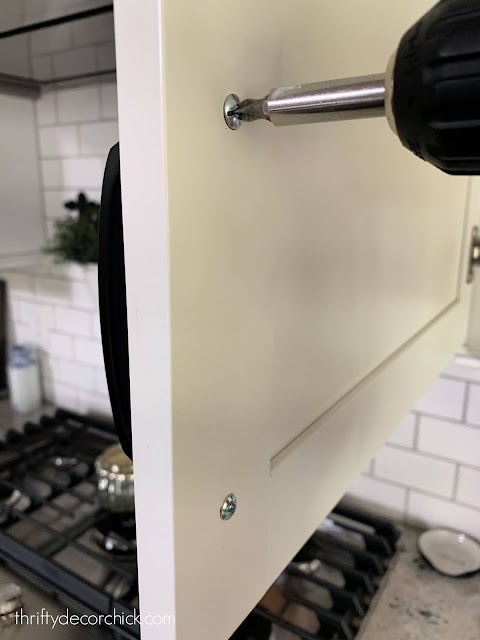
We didn't use the handles and 24 hours later I fully tightened them.
For the next few weeks we will use a light touch, but they are completely useable! You just want to avoid knocking anything into them while they cure, or completely dry.
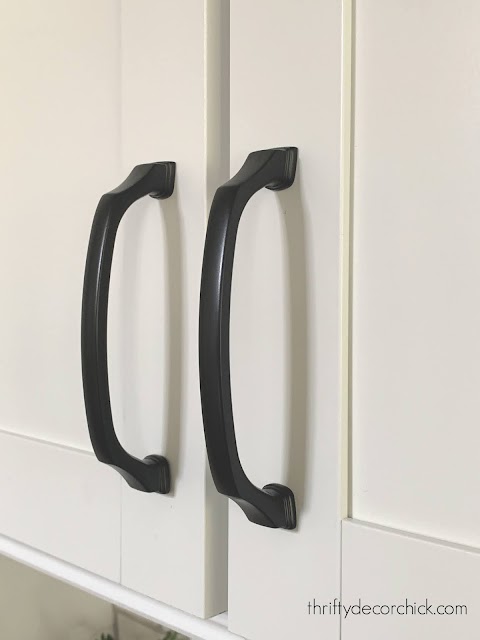
When you take your time spray painting you'll get a factory finish on your "new" hardware!:
You can use a primer before painting as well, but this Krylon Fusion All-in-one paint is just that, all in one! No sanding or priming is required, which is a huge time saver! In my experience, cleaning the item well and then letting it fully cure is most important.
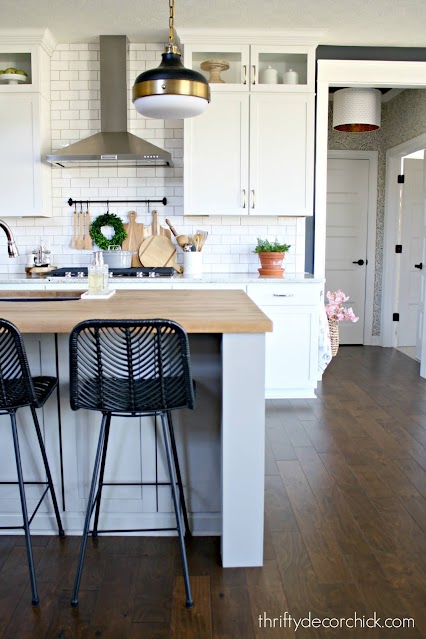
The black hardware makes such a big difference in here!:
 
We LOVE it!! Start to finish this took a few days, but by far the majority of that time was letting the hardware dry. I also did it in shifts because I only had four spots in my spray paint "station."
Both versions of the hardware are equally pretty -- but I was craving more distinction. This was such an easy and cheap transformation. Spray paint can make such a difference!:

I'm a HUGE fan of using black accents in a room. It's one of my favorite ways to decorate a space.
I really wanted to tie in our lights and island stools:

I'm still a huge brass fan and think I always will be. We still have plenty of brass accents in here that I love. (In fact, I've left the island hardware brass for a two toned look. I may spray those eventually but love it for now.) The darker cabinet hardware makes a bigger statement.
Here are the basics of spray painting if you want to give it a try!:
I did this transformation with less than one can of the Krylon Fusion spray paint! That's 40 handles and I still have a ton of paint left in the can. You just can't beat it:

You can see all of the awesome Krylon products and more inspiration here!
If you're interested in anything pictured you can find most of the items (or similar) here!:

This post sponsored by Krylon but all opinions are my own. I only work with companies and products I know, love and would recommend to you.
See more of our home here. To shop items in our home, click here! Never miss a post by signing up to get posts via email.
Via https://www.thriftydecorchick.com/2020/09/how-spray-paint-cabinet-hardware.html
0 Comments
I've been having fun with the small hallways we have in this house. Our home is very open but has a few of these little spots that I want to make special. I feel the same about smaller spaces like powder and laundry rooms -- they are the perfect spot to do something dramatic and fun!
I've already given the hallway off the kitchen a makeover:

You can read all about that at the link above. I LOVE that wallpaper and am so happy with how that space came together.
I shared another "hall" last week that's next on my list:

This post may contain affiliate links for your convenience.
See my policies and disclosure page for more information.
It's an area off our foyer that transitions to the basement stairs and bathroom. Our foyer is a calm and pretty spot and I want to continue that feel into this area.
I showed you how I added the art light without electricity:

And the next step was to add another lighting hack to dress up the space a little.
I've shared this easy adapter before when I worked on the hallway pictured above. Did you know you can easily change up a recessed can light to hang a pendant light? You just need this light converter:

You just unscrew the existing light bulb, then screw in this instead. You can adjust the length of the cord to whatever you want.
Then you use this white part at the bottom to attach your new pendant cover:
 
If you want a heavier or bigger light fixture that's what you'll want to use.
I've always loved the look of basket pendant lights and found this one at IKEA:

But when I got it up, it just didn't work. This space is small, but it still needed something more substantial. I think going small in a small space only emphasizes the smallness. Got that? ;)
This is the second time I've tried a basket light and I'm realizing it's just not my thing. I tried though! So instead, I went to the basement for the lamp shade I have from IKEA.
It used to hang in that wallpapered hallway I shared above, but I hung the white version there instead. (Both are from IKEA.) I've always loved the color on this one and the cut outs are so pretty! It worked SO much better!:

I just love these shades! I just remembered I also have one above our tub!:

I love the detailed cut outs -- they're slightly different for each color.
I also really like the gold lining -- it's a beautiful detail, especially when the light is on:

You can use a regular bulb, but I find bigger, globe bulbs like this one look better in a shade like this.
You may notice I also painted the ceiling in this small area. It's a light blue called North Star, at 50 percent:

If you love a paint color but would prefer it a little lighter or darker, they can adjust that for you at the paint store.
This is the same color I used on the foyer ceiling right next to this space:

The light shade is a really pretty grayish green color that works perfectly with the art in the hallway:

The next step for this little makeover is the biggest one! I hope to share that one with you soon!
These converters are an easy way to add a little flair to a space with a recessed light. No electrical experience needed. :)
This lamp shade trick for ceiling fans is another great hack!:
 Via https://www.thriftydecorchick.com/2020/09/hang-fixture-from-recessed-light.html
This is the time of year that the list of projects I want to accomplish before the holidays gets reeeeally long. I always want our home to function well and look it's best during the holidays!
I get the urge to declutter and organize more than ever in the fall -- more so than in the new year. I think it's because I know more STUFF will be coming into the house and I want to clear out beforehand.
I've been focusing on some places that I haven't touched much since we moved in. I followed the Konmari decluttering and organizing method years ago and it has served us SO well. But I'm realizing I kind of threw stuff in cabinets and haven't touched them since, so I'm addressing a few spots.
Remember this pretty cabinet makeover I did in our master bathroom?:

This cabinet has served us so well! Our bathroom is bigger than our last one, but has a lot less storage space.
This cabinet has been a perfect spot for our towels, bathing needs and general bathroom stuff. And it's pretty!:

I've just been throwing items in the drawers since I added that cabinet a couple years ago. It was getting to the point where we couldn't shut them, so I knew it was time to address this spot:

Has anyone else been watching The Home Edit on Netflix? Every time I watch an episode I want to go tackle a drawer or a dresser or a room. ?
They talk a lot about corralling items in bins, which is a practice I've followed for years. I think they use too many bins sometimes, but I can definitely get behind the thought!
The problem is, the bins they use from the Container Store are not cheap. I LOVE that place, but I was looking to spend a whole lot less. Thankfully I discovered these inexpensive bins at Target a few weeks ago:

This post may contain affiliate links for your convenience.
See my policies and disclosure page for more information.
They are perfect and the price is right -- the smaller bins are only a buck each!
I started by getting rid of some towels we don't use and stacked our hand towels in the bottom drawer:

Notice I used one of the trays to hold the washcloths -- and do you see that EMPTY space? Yes!
I had a large basket in the drawer with a bunch of hair stuff:
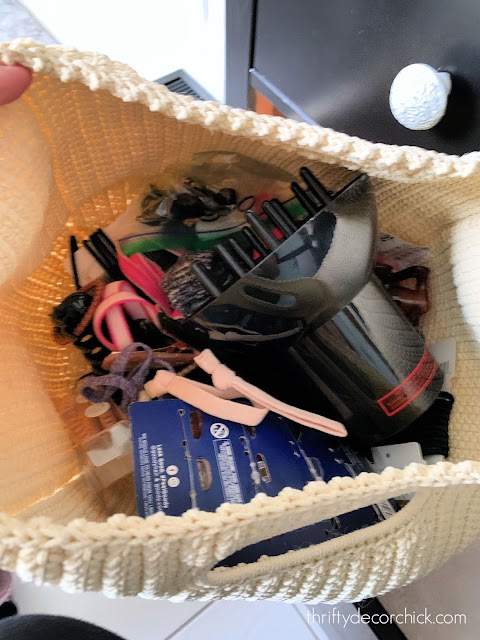
Sorry for that blurry pic, I didn't realize that till now. I was always digging around the deep basket every time I wanted something.
I sorted through those items and ended up using four of the Target bins to organize everything:

I put larger dryer accessories in the big bin, clips and headbands in the middle sized one and smaller clips and hair bands in the smaller ones.
I've said it a million times, but keeping things organized saves you money! I have approximately 125 hair bands that I do. not. need.
The top drawer (the skinniest) holds my hair tools:

SO much better!!
I kept the organizing going in the kitchen -- this large bin holds smaller appliances and their accessories:

Love that these have handles for easy access!
Those pesky plastic lids all have a home now:

Before they were spread all over in one of the kitchen drawers. (I find it's SO much easier keeping these separate, especially when unloading the dishwasher.)
The bins below were in the kitchen organization area (the rest were in the bathroom section) and are the perfect depth for the kitchen drawers:

I ended up buying a couple more for this drawer because these fit so well.
They also have these really shallow trays that are perfect for corralling items in my desk drawer:

I knew I had to share these with you because they function so well! These come in both a gray and clear version in all of the sizes.
I really love that they are uniform from top to bottom, so it's easy to stack or place them right up against each other. So many of these are tapered and I feel like space is wasted.
I'm trying to think of more places that need some organizing. ;)
Here are the versions I used:
Extra large bathroom bin (I used for kitchen gadgets)
Large flat bathroom tray (in office drawer)
Frosted drawer bin (for kitchen drawers)
See more of our home here. To shop items in our home, click here! Never miss a post by signing up to get posts via email.
Via https://www.thriftydecorchick.com/2020/09/perfect-cheap-organizing-bins.html
Hello my friends! It's been a lovely (almost) fall week here and I've been busy working on some fun projects!
I have a small makeover planned for our little hallway off of our foyer. Part of my plan involved adding a picture light similar to the one over my giant fabric bulletin board in my office.
If you have an outlet under the spot where you want a sconce or light, it is actually a pretty easy wiring job for an electrician (and in my experience not very expensive). I called an electrician we use to see if he was available and he was booking two weeks out.
Because I'm impatient when I want to start a project, I decided to look into some options on my own. If you don't want to mess with the money or the time of wiring for a new light, this trick is perfect!
I've shared this with you a couple times, but I'll show you all the ways I've installed lights without electricity in one spot! Here's the hallway I'm working on:

You can see how I did that wood planked wall for cheap here!
I wanted to put the picture light above the art on that wall. We have an overhead light but I wanted to add a little accent lighting in this spot.
This post may contain affiliate links for your convenience.
See my policies and disclosure page for more information.
I started doing some checking online and ended up going with this battery operated picture light:

The color was just awful. ? But the light is surprisingly bright and it has a remote for easy operation.
It also has a switch on the side that you don't even notice, in case you want to use that instead. There are three lighting options -- warm, natural and cool light.
I sprayed the light in a gold spray paint and then got it hung up. (It even has a tiny level on the back for easy hanging.) It has a remote similar to other lights I've used:

Step one of 25 for this small makeover is done!...

It's low enough we can easily reach up to turn it on without the remote. Love it! A couple reviews say the light isn't very bright, but I'm pleased with it. The lights can be angled to where you want as well.
Here are the other ways I've added lighting without electricity or wiring...
I hung sconces and added remote lighting in our dining area:


I hung a sconce in our mud/laundry room in a spot with no wiring using this method as well:

And did the same for the bookcase lighting in my office (that link shows how to attach the battery lights to sconces that face the floor):

This method saves a TON of money instead of hiring out electrical work. I wouldn't use it for an area we use a lot...say, for a vanity light. But it works great for accent lighting you don't need on all the time.
The remote versions with timers are AWESOME. Otherwise it's easy to forget they're on and the battery will run out. :)
Have you tried any of these hacks to get lighting without electricity?
See more of our home here.To shop items in our home, click here!Never miss a post by signing up to get posts via email. Via https://www.thriftydecorchick.com/2020/09/adding-.html
Hello there! After a long summer slumber, I'm back at it with a bunch of DIY's! If you've read TDC for awhile, you know that I turn into a sloth in the summer. I try to fight it but it's something that happens every year. I slow down and love it. :)
The second the temps start to cool down a bit I'm back at it with tons of ideas and projects! This DIY vent hood is an update I've been planning for a long time.
We had a metal vent hood that came standard with our kitchen. I considered a wood vent hood when we built, but I wanted to see how we liked this for awhile:

I had a vent hood added when I remodeled our last kitchen and loved it!:

That kitchen had more of a farmhouse feel and that design fit in perfectly!
Over time I was missing that added custom touch in our current kitchen. There's no wrong or right here -- the metal vent hood looked great! But I knew I could add some character with this project.
I had a design in mind that was a little more modern. I also had an idea that would allow me to build the whole thing without drilling into the tile backsplash. (In case we ever need/want to take it down.) These kinds of projects are so fun for me -- it's like putting a puzzle together as I go!
My plan called for removing all of the trim and crown on the sides of the cabinets:

I took those off and when I went to remove the crown I hit a hiccup I'll tell you about in a minute.
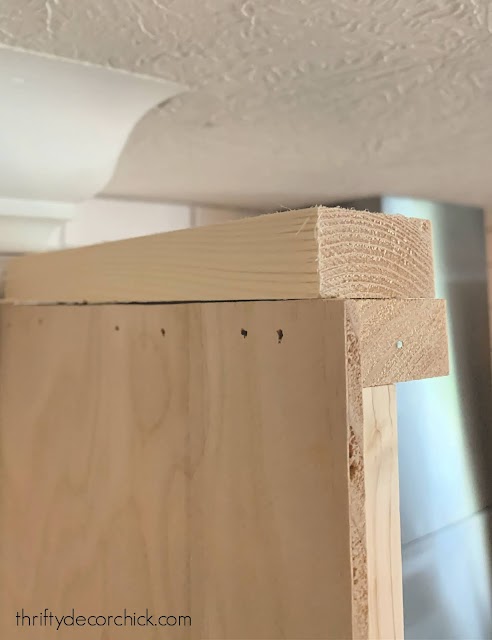
I cut down two matching pieces of wood that would become the sides of the vent hood. At the top I nailed in a 1x2 that I was going to use to secure these pieces into the ceiling:

As you can see, I left some space (the thickness of the boards I was using) at the front of each piece. More on that in a minute!
The crown came down fairly easily, and I started to work on the small trim underneath. It was then that I realized that the trim was installed before the cabinets -- it looked like the molding and cabinets were installed from the top down. Waa waaaaa.
This threw my plan out the window, so I had to come up with a new way to do this:

I was determined not to drill into the tile or grout. If you don't have tile or don't mind drilling into it, you could use a 1x2 in the wall and attach everything to that.
You can see in that photo above that I ended up securing the board into the side of the cabinets, but down further than I originally planned (I had to cut the length a bit). Not a big deal, but I really wanted to have these secured into the ceiling as well.
This hood isn't heavy -- I used thin boards to build the whole thing. Cabinets are made to hold a great deal of weight, so even if this whole thing was attached to just the cabinets, it would have been fine. I just wanted it to be as secure as possible and I'll share how I did that below!
This is where my nerd tendencies come out. ? I kind of like figuring out solutions when I hit an issue. Next I added more 1x2s to the bottom and the front -- notice on the front I made sure to leave a gap (like I did at the top) for the front piece to fit in perfectly:

I did this so I didn't have an unfinished edge showing on the sides of the hood. Normally that wouldn't be a big deal because I'd cover them with trim, but because our cabinet doors are so close, that wasn't an option. (The doors wouldn't open if I added trim.)
It was helpful that I wanted this to have a slightly more modern design. It allowed me to build a box, which is way easier than what we had at the old house.
I was thinking ahead to continue the crown around the top (by coping the molding to match up against the current crown). So I added a bit of wood at the top that the crown could be nailed into:
That plan changed later, but that extra 1x2 was still helpful support.
I did this on both sides and then started the supports across the front:

You can see here how I created a way to make this extremely secure. I screwed a board into the ceiling beams above. The front was later attached to that, so this thing isn't going anywhere. (I used a level to figure out the placement so the front panel would fit perfectly against it.)
If you are using thicker wood for your box, you may not need as many supports across the front. I was going as light as possible and only using quarter-inch thick luan for the front and that can get wobbly.
I attached the front piece, nailing it into the sides (the 1x2's I showed you earlier), the supports across the front and the header piece:

This post may contain affiliate links for your convenience.
See my policies and disclosure page for more information.
I made sure that the side pieces came out enough that we could still reach inside to hit the buttons on the front of the vent. I used a vent with the buttons on the bottom at our old house.
I was left with an opening on the sides that I planned to add crown to:

But as I was finishing it all up, we realized we liked the simple design without the crown a lot.
So I ended up pulling this tool out:

It's called a contour gauge and I used it our mud room to install shiplap around our window trim. You place it against whatever you're trying to match and then trace the shape onto your wood. I used a jigsaw to cut the trim to match. I share the result below!
It's never perfect, but I've told you a million times that caulk covers a multitude of sins. ;)
I used some scrap luan as a header across the top and then started adding my trim on the front with wide lattice pieces from Menard's:

Then the finishing touches of filling holes, sanding those down and caulking:

I started painting it white to match the cabinets, but wasn't quite feeling it. I color matched our cabinets last year when I added the cabinet "feet" and DIY light rails to our cabinets, but unless I sprayed the hood, I knew the finish wasn't going to match perfectly.
I'm a lover of contrast, so I was being pulled to making the hood the same color as the island. I knew instantly it was the right move!
We absolutely love how it turned out!!:

It makes the kitchen feel more custom and adds the character I was hoping for:

Here's a view of how the sides look after using the contour tool:

The funny thing is, it fits in so well, we barely noticed it almost immediately. It's like it was always meant to be this way!

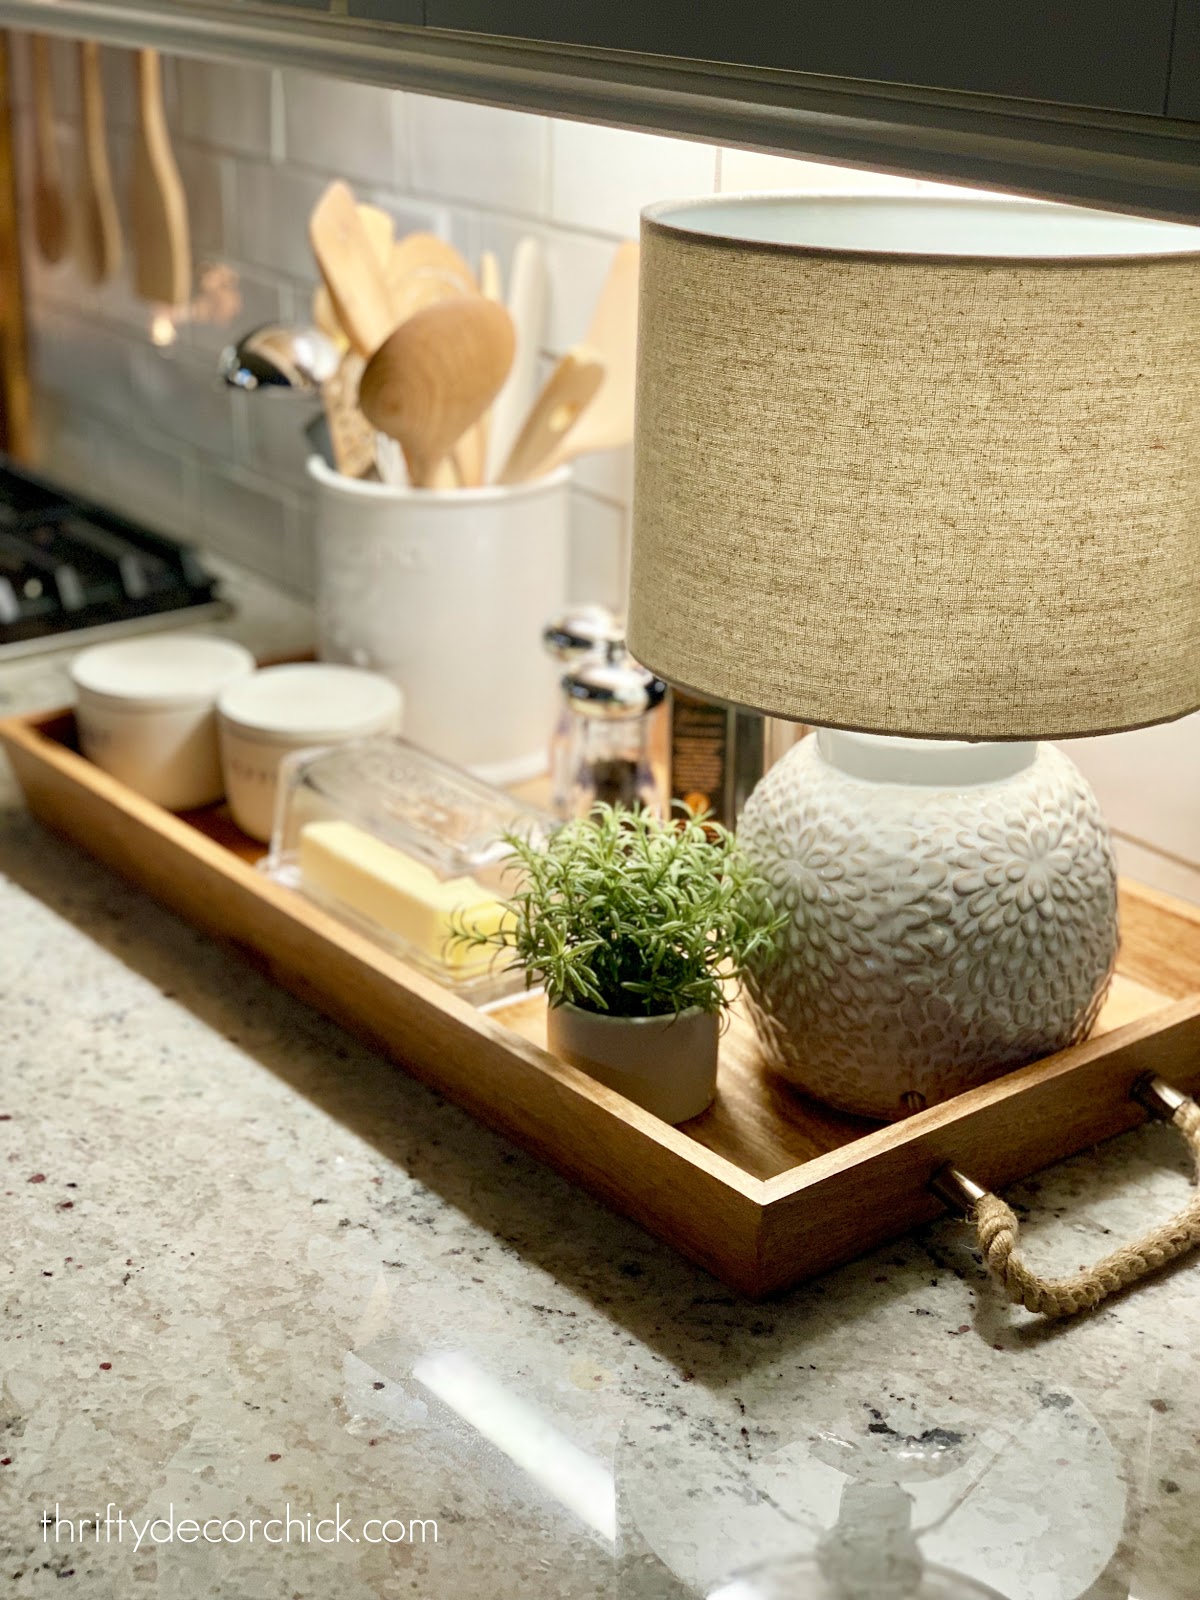
I shared this exact view a couple weeks ago when I showed you how I use trays for fall decor!:

Our hood vents to the outside and the intake vents are on the bottom. Make sure to look into those details if you attempt this project!

Here's the color formula for this gray color:

I spent about $70 in wood to do this project -- I used some scrap but had to buy most of it. Remember you can have your wood sheets cut down at the hardware store if you need help with that part.
I'm already excited about having the perfect spot for a Christmas wreath. ;)
 Have you added a vent hood in your kitchen? You can see how we did the more traditional vent hood design at our last house if that fits in better with your home.
If I missed anything you're wondering about, or if you have any questions, please let me know!
You can shop the items in this post below:

Pin this image for later!:

See more of our home here. To shop items in our home, click here! Never miss a post by signing up to get posts via email.
Via https://www.thriftydecorchick.com/2020/09/build-DIY-modern-vent-hood.html  I will share this post every year because it's important to me that we have a visual reminder of this day, now 19 years ago. As many of you know, New York is near and dear to us. It's a city we love so very much. I always knew I'd love it, and when my husband took me on my first trip days before September 11, I found out I was right. I was obsessed. This photo always gives me chills. We're at the top of the Statue of Liberty and you can barely see the towers behind me: 
I think it was nine days before 9/11. Nine days later and the towers were gone. My husband was a band director at the time -- a few months after we were supposed to travel to Japan for a band trip. He canceled that trip and instead we took the kids to NYC. We've seen Ground Zero at it's best and worst. New Yorkers stopped us numerous times and thanked the kids for visiting. These first photos are from the Ground Zero Museum and tell the story of that day. This location is separate from the new museum – it used to be closer to Ground Zero but it looks like it’s moved to 14th street. If you visit the city I highly recommend visiting both. I let the photos do the talking (forgive the quality, all were taken with a phone over the years):  
      ![117_thumb[1]_thumb[5]](https://lh6.ggpht.com/-Q-Wi0Q5JSiY/VBGtTPy0sVI/AAAAAAAAqzE/ikGgk1KdkR8/s1600-h/117_thumb%25255B1%25255D_thumb%25255B5%25255D%25255B2%25255D.jpg "117_thumb[1]_thumb[5]")            
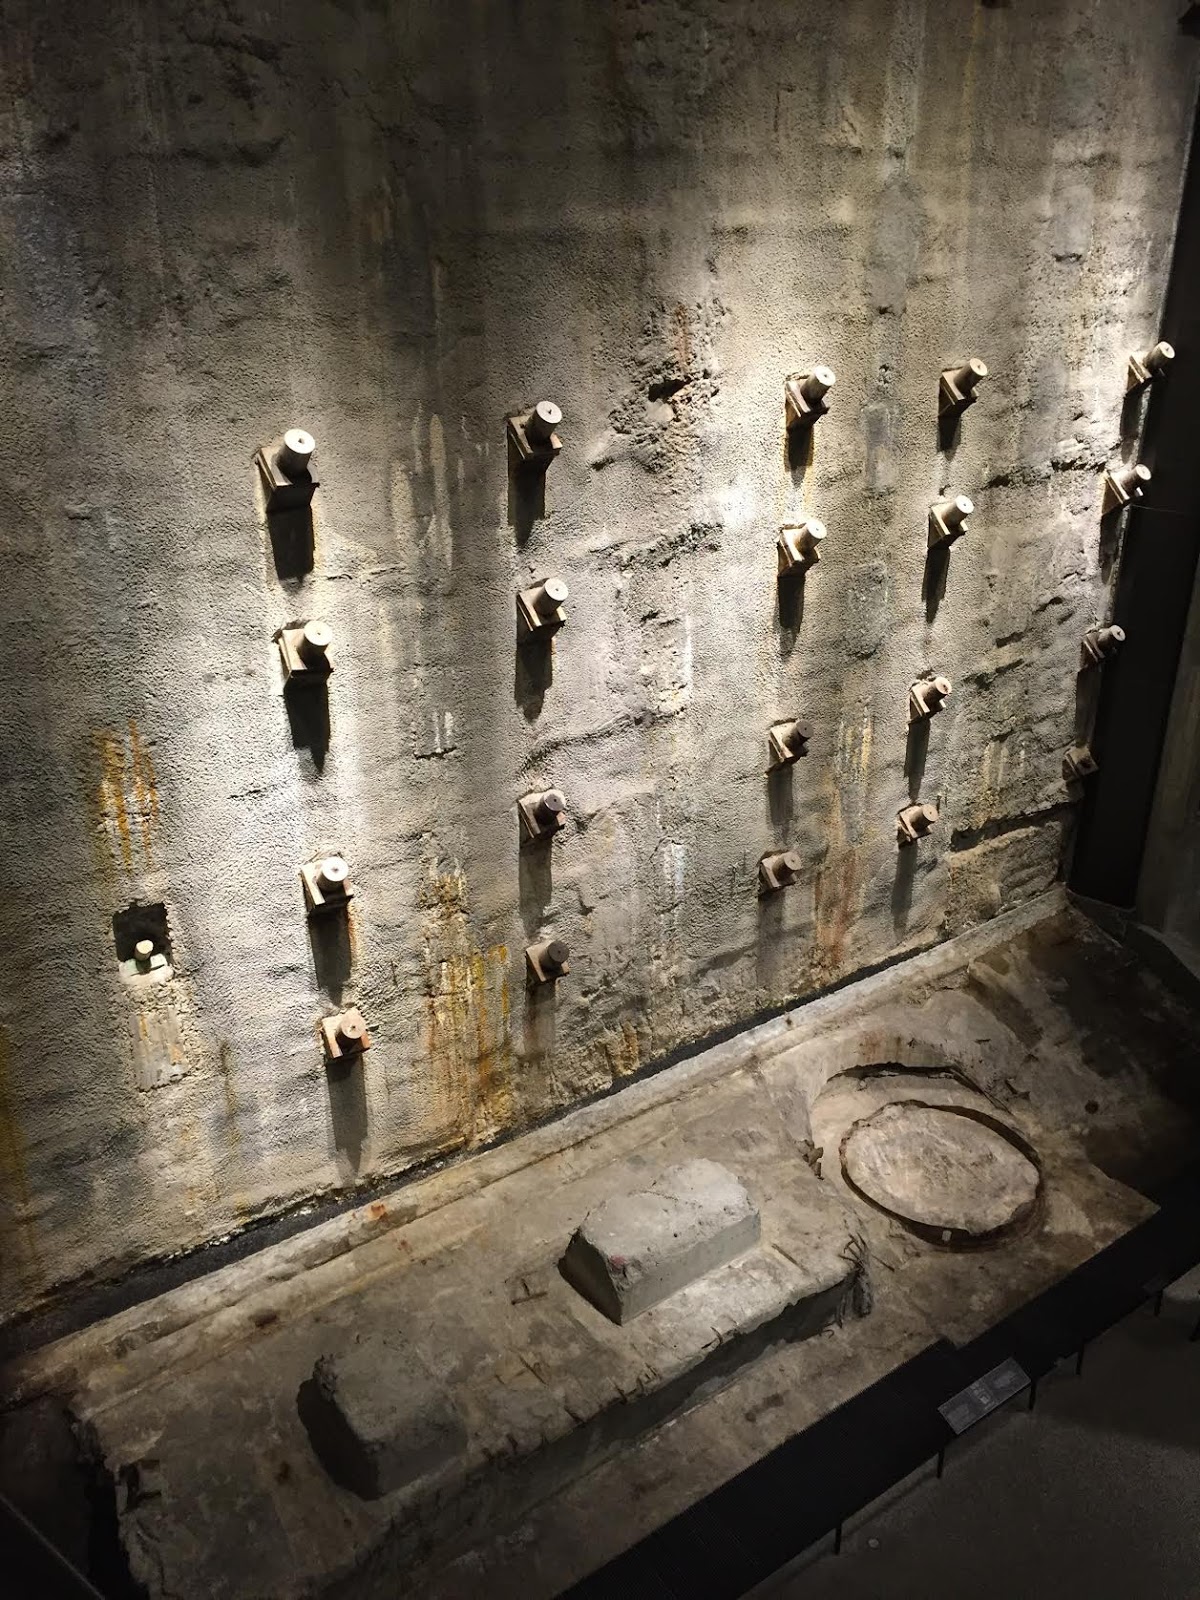
The new 9/11 Museum looks so small from the outside, and you think it will only take an hour or so get through. Plan accordingly because this museum literally goes deep into the Earth and you can spend hours in there.
It is one of the most well done museums I've ever visited, especially considering the content. The beginning is a tour of the footings and walls of the towers (this wall below was one of the towers). Don't miss the room in the middle in this part of the museum -- it holds photos of each of the victims as well as video about each one. There are no cameras allowed in this space -- it is most definitely a memorial. There is a separate room at the end of the main part of the museum and it can be easy to miss -- but it holds most of the photos, artifacts and videos. It may not be suitable for younger kids but our (then) nine-year-old did fine. (There are parts of this room we steered him away from.) There are no cameras allowed in that area as well.
If you go give yourself plenty of time and be prepared for the heaviness in your heart you will feel as you walk through and when you leave. It is overwhelming and unavoidable. I think every person that visits New York City should visit at least once.


This artwork signifies the color of the beautiful blue sky on that morning. There are 2,983 squares -- one for each person lost on September 11th and at the 1993 bombing.
God bless all those we lost on that day and their families. God Bless America.
  
(Freedom Tower)

If you have plans to visit NYC, be sure to check out my guide for the must-sees on a quick trip. This is especially helpful if it's your first time there.
See more of our home here. To shop items in our home, click here! Never miss a post by signing up to get posts via email. Via https://www.thriftydecorchick.com/2019/09/eighteen.html
Hey hey! It’s about that time of year to turn on the fireplaces -- in fact we’ve already had the family room going at night a couple times. Gas fireplaces are wonderful -- we’ve had a wood burning one before (in an apartment if you can believe it!) and it was great but the convenience of gas can’t be beat.
Our current fireplace doesn't have glass, just the chain link and I LOVE that: 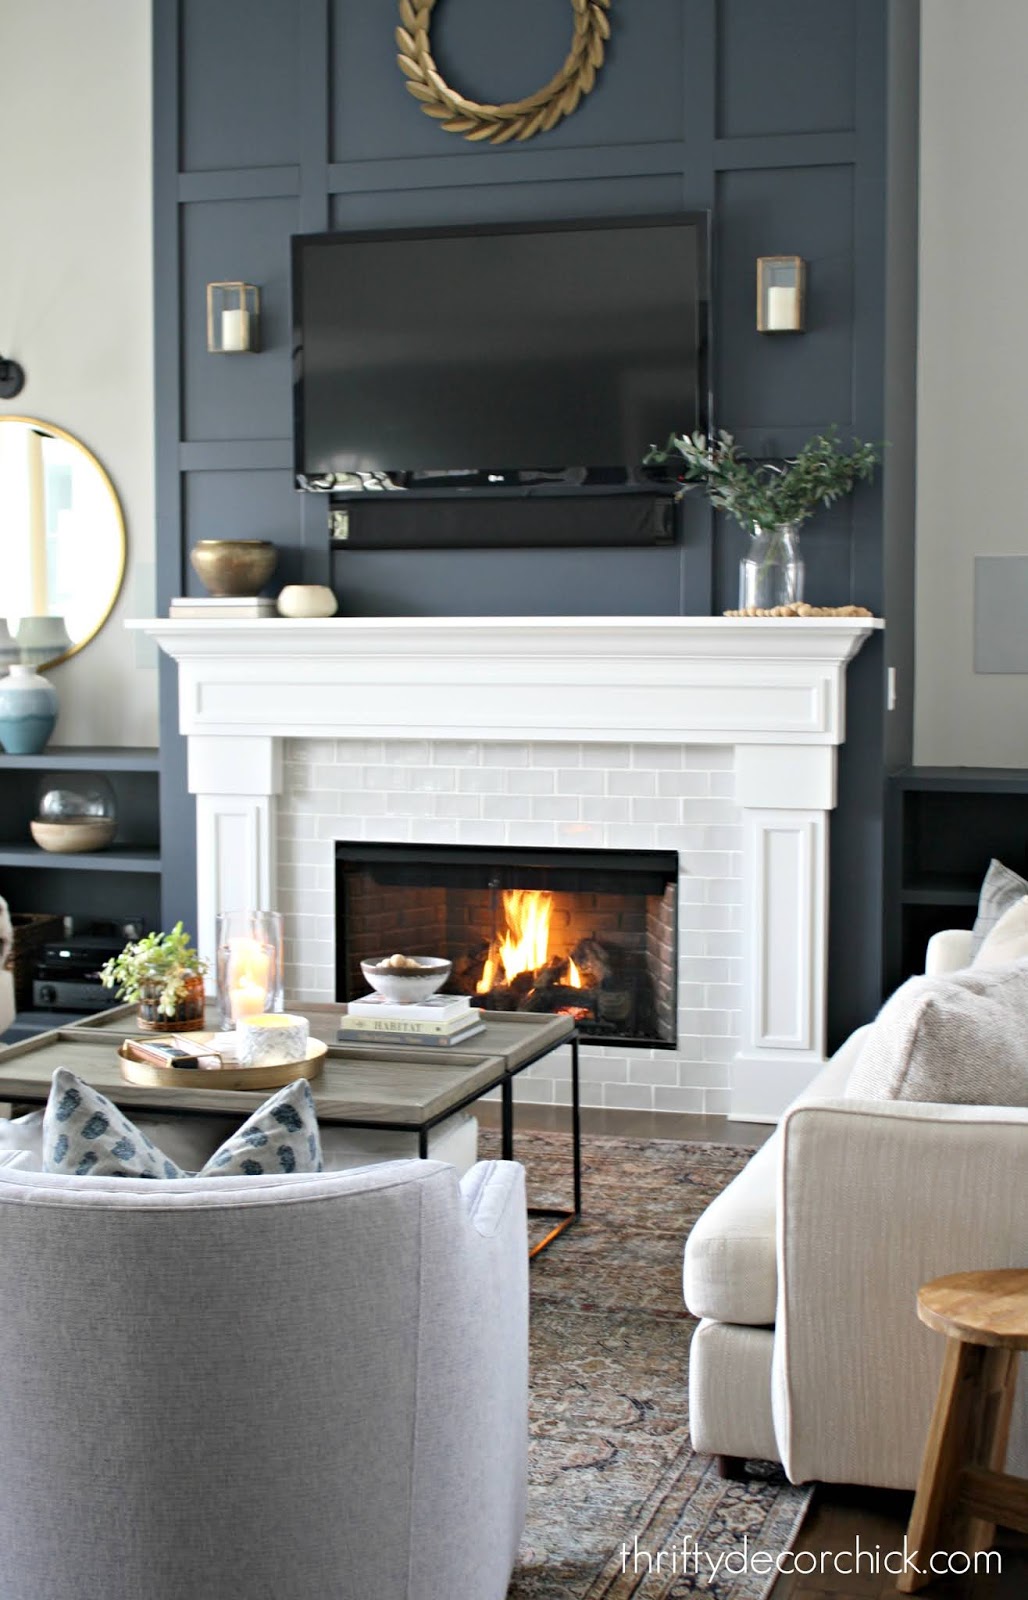
But in the past we've had the gas insert with glass on the front. After a few years I noticed how filthy the inside of the glass would get, but didn't think I could do anything about it. I learned how to clean the inside of the fireplace glass years ago and it comes in SO handy, especially this time of year. I always clean the glass in early fall before we light the fireplaces for the season. It’s not hard to do at all and just takes a few steps. (These photos are from our last house with the gas insert):  I don’t know how the inside gets so yucky, but every year it needs to be cleaned: 
This post may contain affiliate links for your convenience.
See my policies and disclosure page for more information.
The first step is to make sure the pilot light is off! I don’t think it’s a big deal to open it up with it on but since you’ll be cleaning the glass and all, I recommend you just have it off. To start you’ll tilt down the bottom grate like so:  This one I can’t remove unless I unscrew it, but it does give me access to the back side so I can clean the grates easier. Inside and underneath on both sides of the firebox are two clamps. You’ll need to bend down and find them and then you just release the clamp:  Do this on both sides. This releases the glass front of the fireplace. It will tilt out from the bottom:  And then you can pull up on the whole piece of glass and just pull it off. The whole thing has a cleat at the top that sits under the upper grates:  So if you just pull up on the glass it should come off very easily. Be careful, it’s heavier than you think it will be but totally manageable. You can also unhook the top grate if you want too:  You can do that with or without the glass installed -- it makes it easy to clean in the sink or with the hose outside.
You’ll want to lay the glass front side down so you can clean it. I try to use something without a ton of chemicals – I’m sure anything would probably be OK but I just worry about the chemicals with the gas/fire. You know, explosions and stuff. No biggie:
 
While I’m at it with everything opened up I’ll clean out underneath the fireplace a little and then replace the embers inside. Those are the fluffy stuff at the bottom -- you can see that after time they get kind of brown and yucky:  I bought this bag of embers years ago and it’s lasted me a long time. You can also find them here. I don’t replace all of them, just the ones on top:  It makes a big difference when lit -- lots of glow:  If you want a more modern look you can use glass isntead! They come in all different colors -- I love the clear glass option and this dark blue. When you’re done cleaning the glass just hook the glass back on the top cleat on to the firebox, then you’ll need to clamp everything back in:  You’ll have to push hard to them secured but again, it’s not too bad. When you’re done you’ll have a clean, sparkling fireplace!:  Ours was a mess -- the glass, the grates, everything was dirty from all the dust we’ve had around here. It’s nice to have it all finished up and looking good now!:  If you missed how I installed that herringbone tile you can catch up here. If you have a gas fireplace did you know how to clean this glass? I had no idea till a friend showed us how to do it. It’s SUPER easy to do and it will take you about 10-15 minutes start to finish. I don’t know if these steps will work for every gas fireplace, but I’m betting they are all fairly similar. I’ll show you a couple other quick tips to get your fireplace looking brand new again next week! (See how to use high heat paint on your fireplace here.) Here's an image to pin if you'd like to try this project later! 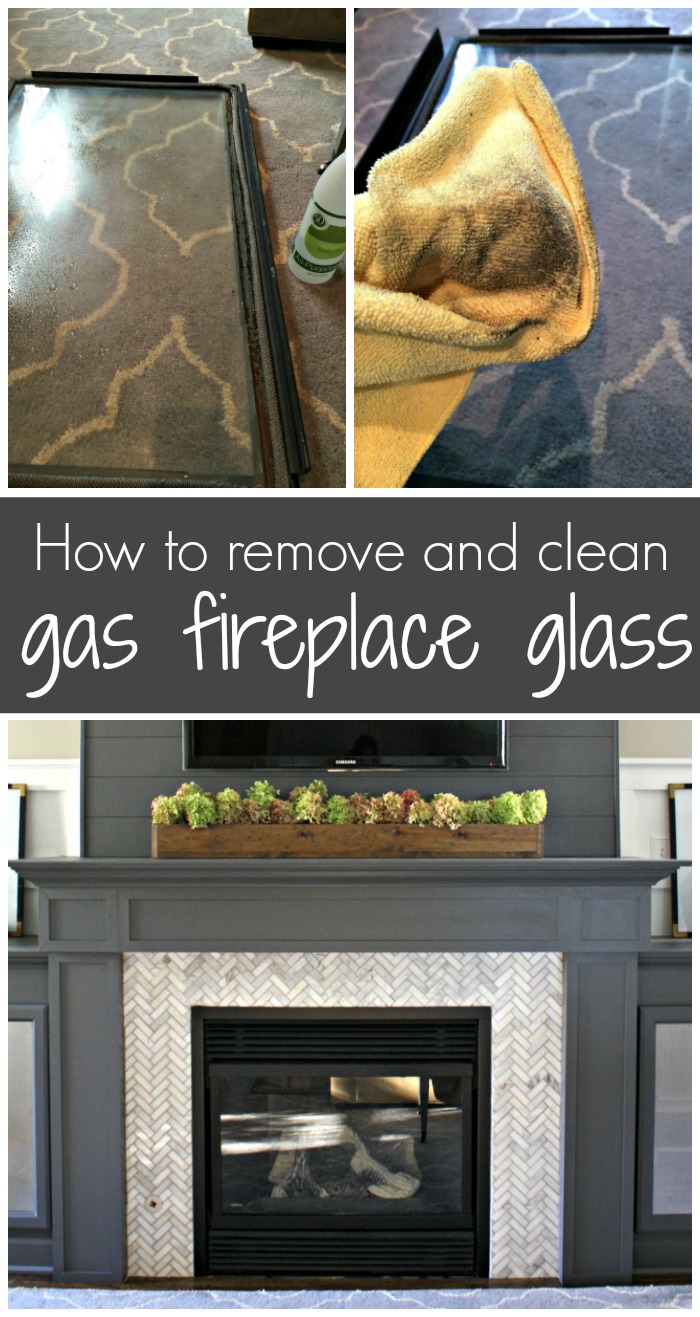
Via https://www.thriftydecorchick.com/2014/09/cleaning-gas-fireplace-glass.html
Hello my friends! I'm slowly bringing out some fall decor -- the cozy vibe is making me so happy! It already feels so much warmer in our home.
I shared my friend Marty's post about decorating trays on Facebook a couple weeks ago and was inspired by her pretty decor. I started thinking of ways I could incorporate some trays with my fall decor.
I'm a lover of using trays while decorating -- they corral stuff while keeping it looking good. They're an ideal way to organize smaller items that look out of place by themselves.
Last year I placed the items I reach for most in the kitchen in a tray on the counter:
This post may contain affiliate links for your convenience.
See my policies and disclosure page for more information.
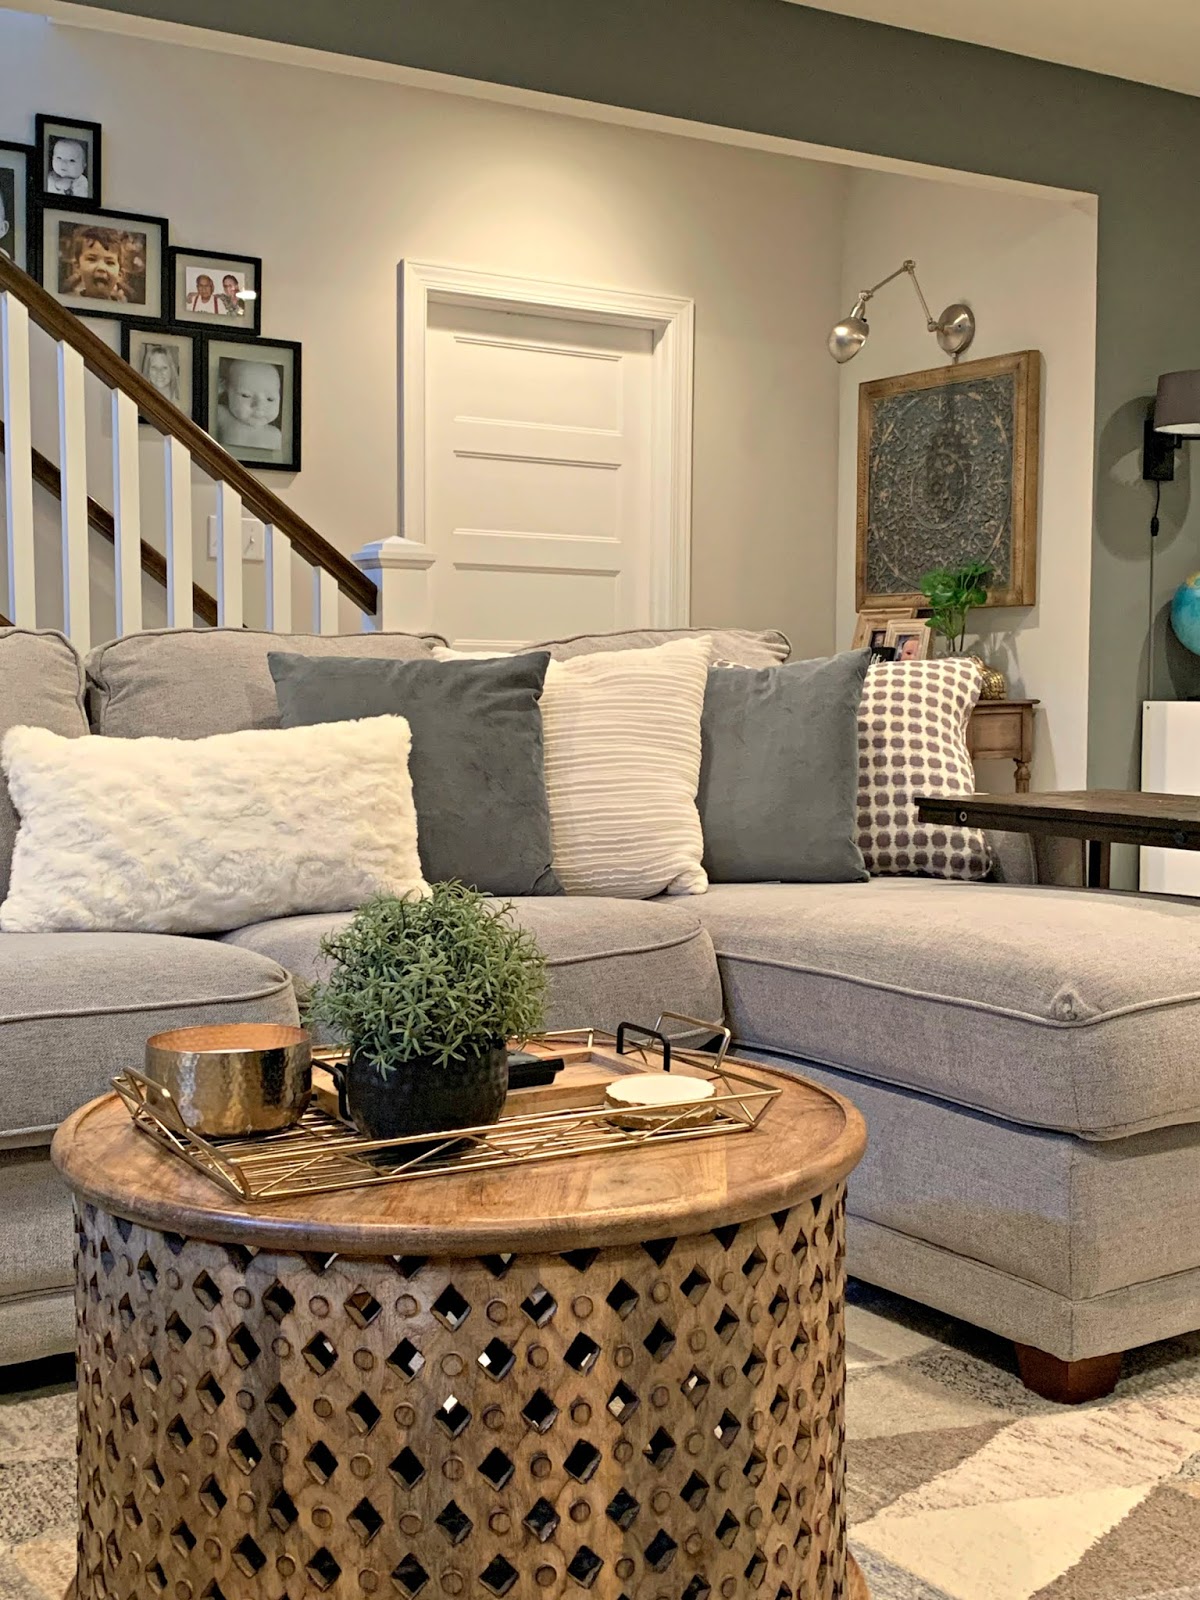
And they're a perfect way to organize remotes, coasters and more on a coffee table:

See how we used two coffee tables to create a large one for less!
I found a couple trays I loved at Target and got to work gathering some fall decor to display. I placed this large wood tray on the dining table:

Think outside the box when it comes to displaying flowers (real or faux) -- I had this decorative wood pot but can't put water in it. I used a small vase inside for the flowers and you can't even see it. ;)
The amber glass was from Target last year and I put a battery operated candle (on a timer) inside. You have to have some "glow" in fall displays! It's pretty much required. ?
I loved this woven seagrass tray with handles for the kitchen island:

I like to hide my glass candles inside prettier containers as well -- I found that gray planter at Hobby Lobby and plopped the candle inside. (We put it on the counter when lit because of the branches.) I'm trying to use a little less of the traditional fall colors this year so those pretty faux eucalyptus branches were perfect! They whisper the fall vibe instead of yelling it. ;) 
There are three tips for decorating trays any time of the year:
1. Vary the heights of items -- a vase with flowers or branches is perfect!
2. Use different textures and colors -- the woven tray, the small rosemary plant and velvet pumpkins add some interest.
3. Decorate in odd numbers -- items gathered in odd numbers are just more appealing to the eye.
These tips go for decorating just about anything!
I also added my fall prints back into the frames and that's about it for fall decor in the kitchen:

Do you use decorative trays in your decor? They are such an easy way to dress up a space!
You can find the items I used for my fall trays here:
Similar wood rectangle tray Round woven tray with handles Wire coffee table tray Round large wood tray Similar small velvet pumpkins Similar large velvet pumpkins And if you're interested in anything else pictured you can find it here:  See more of our home here. To shop items in our home, click here! Never miss a post by signing up to get posts via email. Via https://www.thriftydecorchick.com/2020/09/using-trays-home-decor-styling.html
Hello and welcome to September -- one of my favorite months of the year! Our weather has been so lovely the past few days and looks great for the next couple of weeks.
I usually wait just a tad longer to change out our window boxes and planters, but some of them were looking awful, so I decided to get started on the fall versions.
Our window boxes never took off like usual this year. :( We had a deep freeze one night late in the spring and even after covering them, they were zapped. The potato vine never did well and the petunias didn't grow much at all.
I gave up on them a couple weeks ago and stopped watering because they looked so bad:
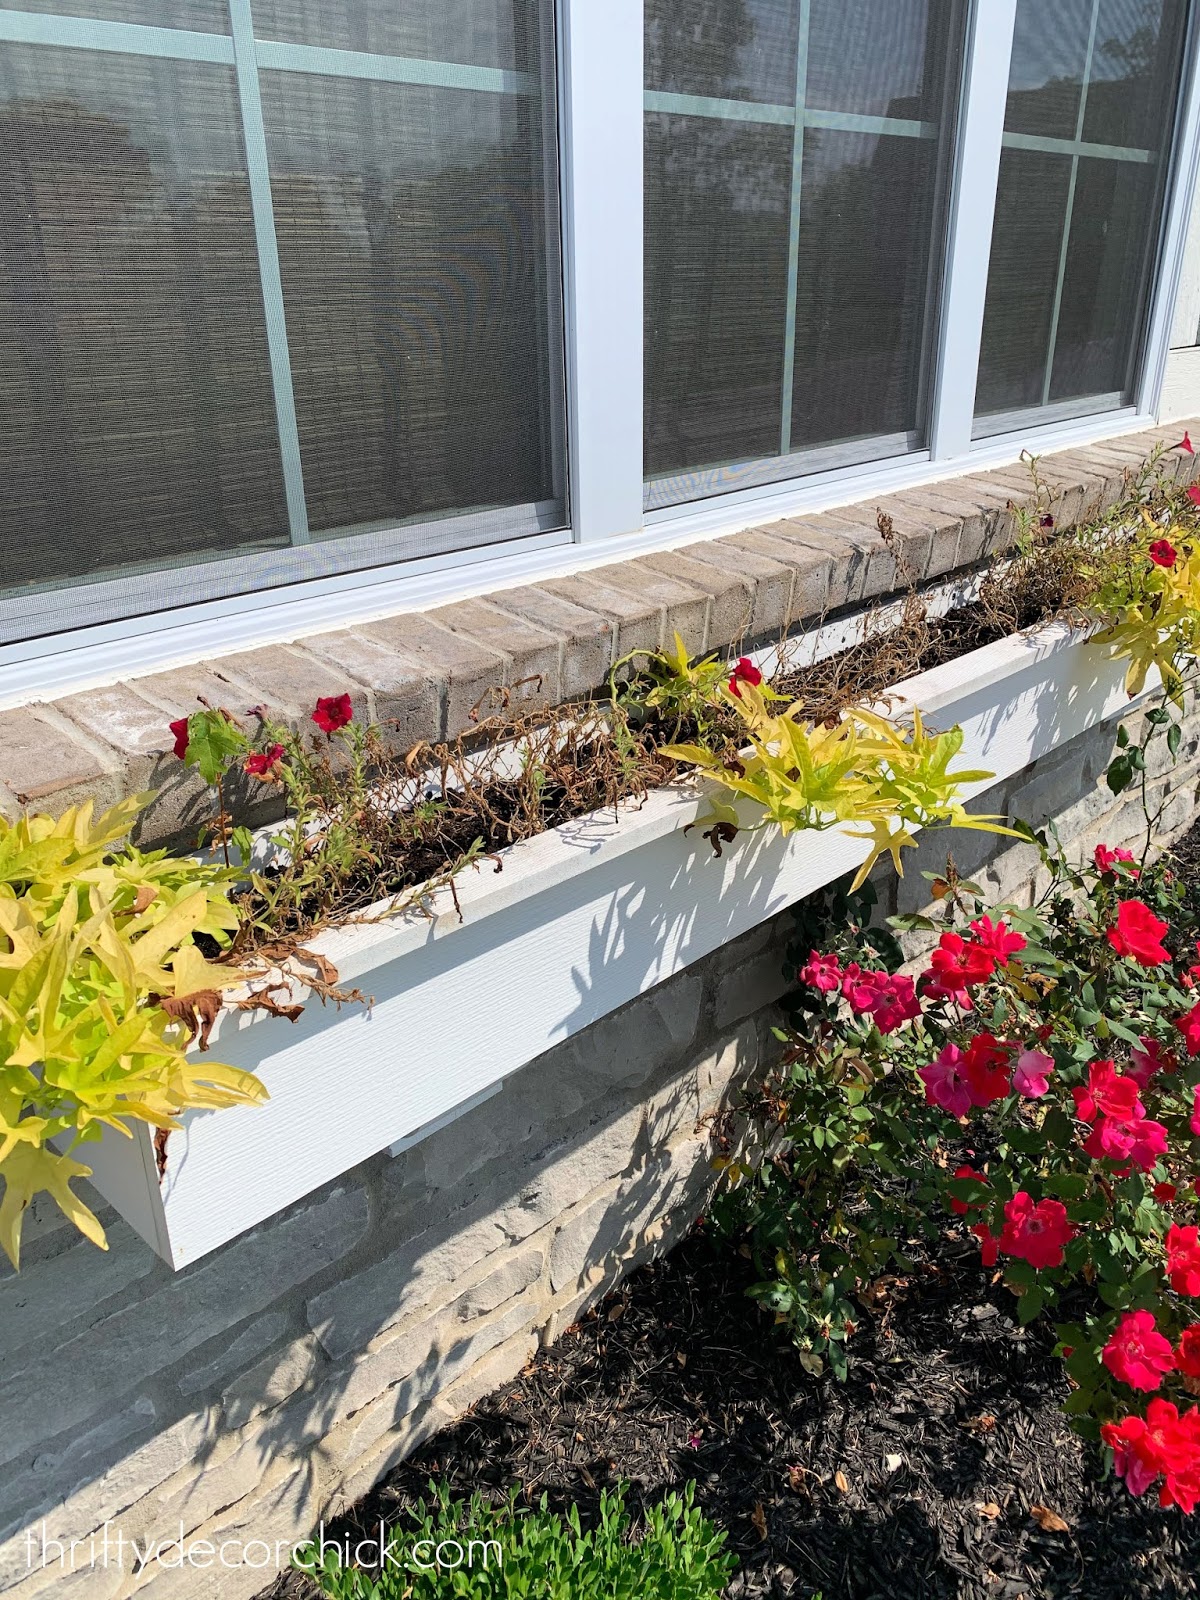
The petunias filled in much better than this most of the summer, but overall it was nothing like usual.
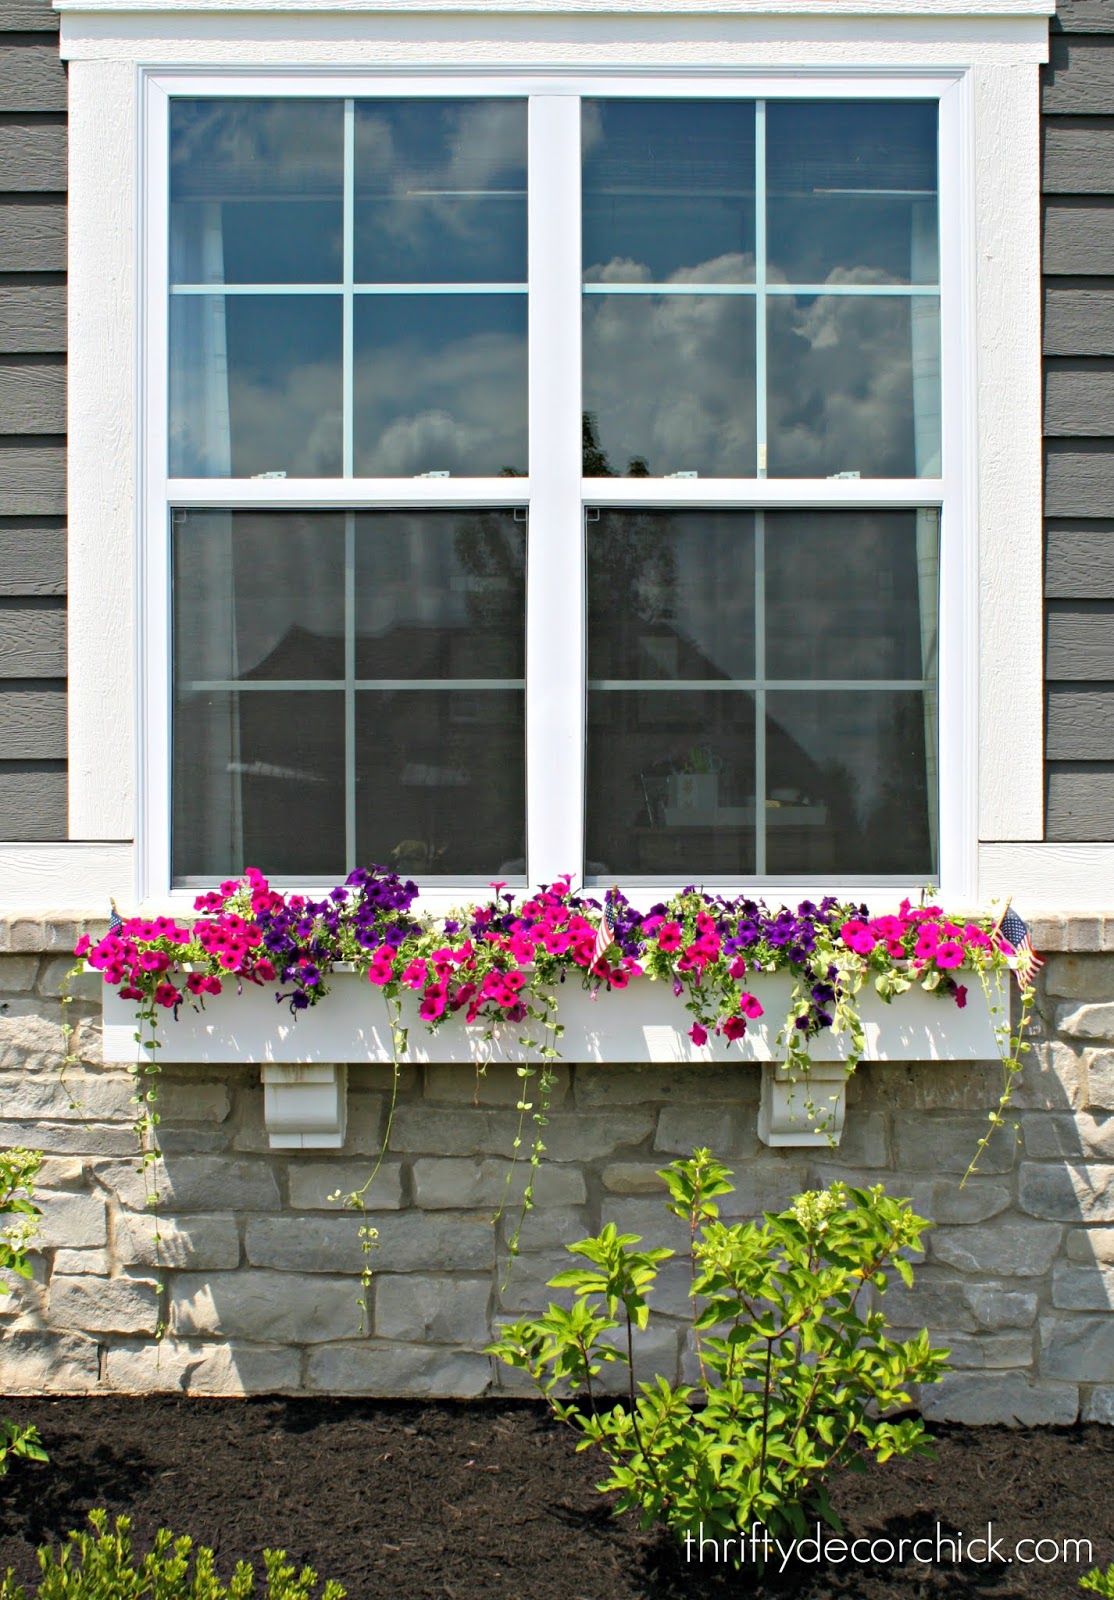
This is how they usually look:
Since our temps are looking great for at least the next two weeks, I decided to start working on the fall window boxes.
I have a few standards for the planters this time of year, but I found some new favorites as well! You can't go wrong with different varieties of kale:

They also come in green versions, but I love the deep purple tones in these. I grabbed these two versions for our window boxes. Kale are GREAT because they are so full -- you'll want plants that take up a lot of space to help save money.
Mums are a given, of course! They are perfect for the pops of color you'll want in your planters. I also love Coleus -- there are so many beautiful options. I couldn't find any Coleus small enough for the boxes unfortunately.
This year I wanted to include something different than usual. The key to exterior planters is to keep in mind filler, spiller and thriller. For fall, filler would be your more compact items like mums and kale. Thriller would be taller items like grasses (which I don't usually use in the window boxes).
I loved these pepper plants that would have worked well for the thriller as well -- great pops of color and tall enough to stand out!:

Vines or asparagus fern are great for the spiller, but I don't find they do as well in the cooler months around here.
This time I went for these gorgeous "hot pops purple" peppers -- they are so full and spill over the boxes beautifully:

The little peppers start yellow and orange and turn into the dark purple. I saw some that turned bright orange as well.
I combined those with the kale and orange and purple mums:


The purple mums haven't opened yet, which is a good thing! I'll have to dead head all of them to keep them blooming throughout the season.
Here are all of the plants I used for these fall window boxes:


I plan to add some mini pumpkins here and there throughout soon as well.
They will all open up and fill in well -- I'm excited to see the color combo blooming together:

I've gathered a few more fall planter/window box ideas I loved from some fellow bloggers to give you inspiration for fall planters.
Carli added some beautiful fall touches using plants from around her yard -- brilliant!:

This autumn planter is a perfect example of filler, thriller, spiller!:

And I loved the height and fullness of this one from House of Hawthornes:

I LOVE the dried hydrangea blooms in this gorgeous fall planter!:

I may have to add some to our boxes and planters -- and cross my fingers they don't blow away!
If you have a covered window or porch, you can combine faux with your real plants:

If you're looking for something a little softer than a traditional planter, I love this idea of using a basket for your fall porch:

Beautiful ideas, right?
I will share an updated pic when our blooms start to open up and fill in over the next few weeks. Do you have a favorite addition for fall planters or boxes?
See more of our home here. To shop items in our home, click here! Never miss a post by signing up to get posts via email. Via https://www.thriftydecorchick.com/2020/09/fall-window-box-planter-ideas.html |
