2022 Holiday Tour of 22 Decor and DIY Blogger's Homes!
It's that wonderful time of year again! I'm joining in on a huge holiday home tour that my friend Jenny at Evolution of Style hosts.
(She's my brilliant friend who taught me exactly how to paint my kitchen cabinets!)
If you're visiting for the first time from Northern California Style, welcome!! I'll share the next stop in the tour and links to all of the participants at the end of this post:

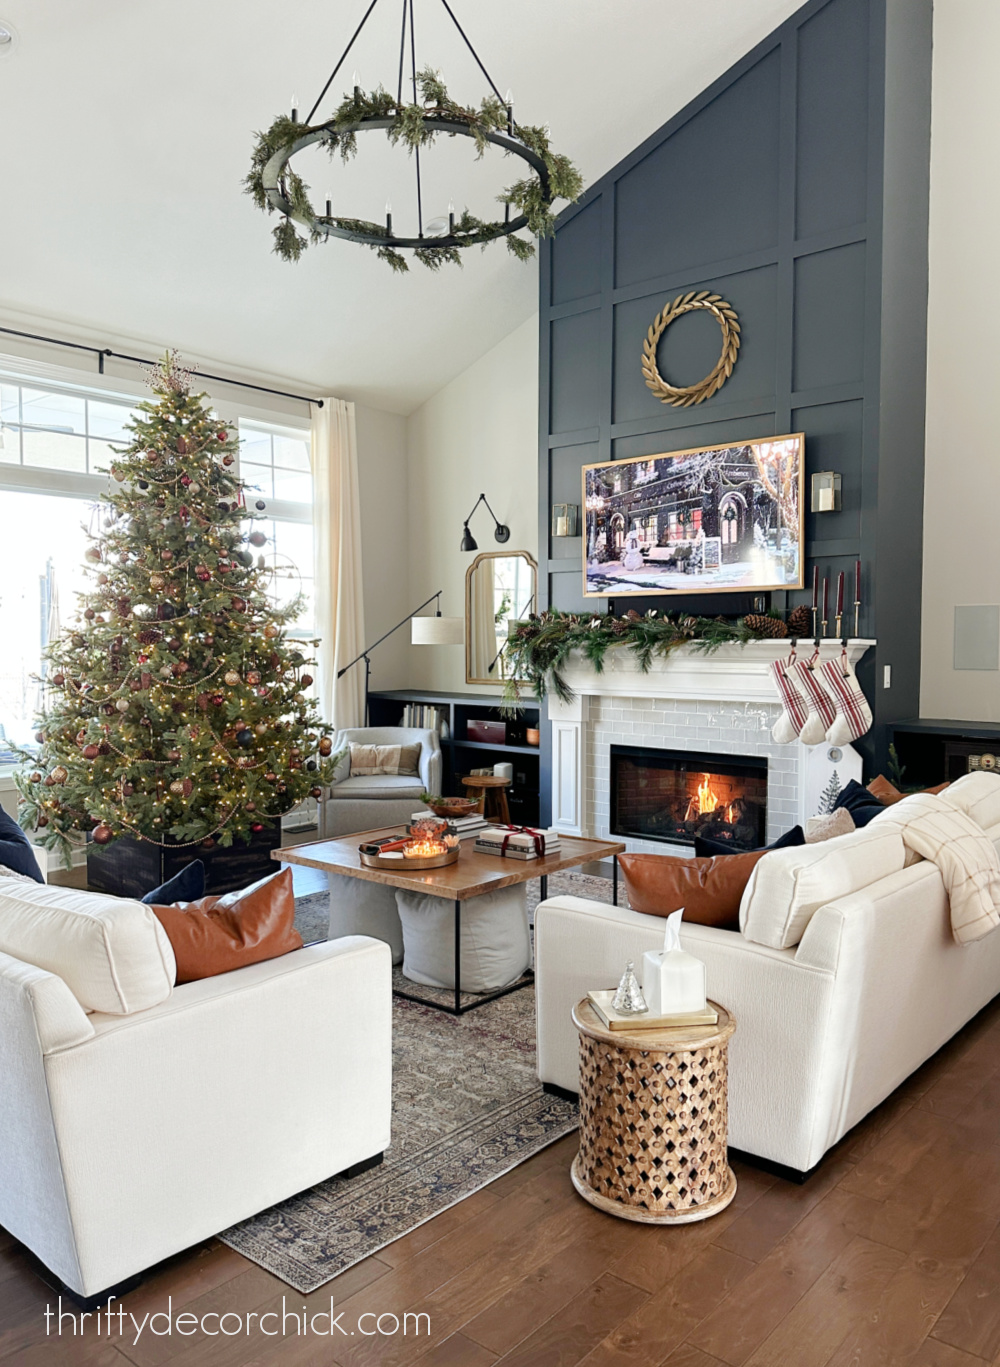
I always seem to share our family room in these tours, probably because it's the first room I decorate for the season...and my favorite. It's definitely our favorite place to be this time of year.
We LOVE the tall ceilings and open layout in this space, but of course I want it to feel as cozy as possible. Lucky for me, a big fat Christmas tree and all the trimmings definitely helps to warm up this room even more!
Earlier this week I showed you our new tree with it's jewel tones, metallic sparkle and rustic touches. Those may not sound like they all work together, but it came together beautifully!:

This post may contain affiliate links for your convenience.
I may earn a small commission when you make a purchase through links.
See my policies and disclosure page for more information.
If I forget to link to a project or item you're wondering about, please let me know in the comments.
I went with an asymmetrical look with the garland on the mantel again this year:
Last year I used a bunch of ribbon in the tree and on the mantel, but because our tree is SO full this year, I went a tad simpler with the greenery.
Instead of ribbons I hung a few of those pretty spiral ornaments that are also in the tree. I love the little delicate detail!
I shared how I layer my mantel greenery years back -- I literally just stack them on top of each other to make it as full as possible, and then work them together a bit.
After the garland is right, I add picks and pine cones to include some color and texture. This year I tucked in some of this pretty metal leaf garland from Target as well:

I'm starting to get more comfortable with letting go of symmetry in my decor...it's been a process over the years. :)
I especially love the look at Christmas:
I shared my twist on the stair garland a couple weeks ago -- this year I attached the greenery at the bottom of the spindles instead of on the handrail:
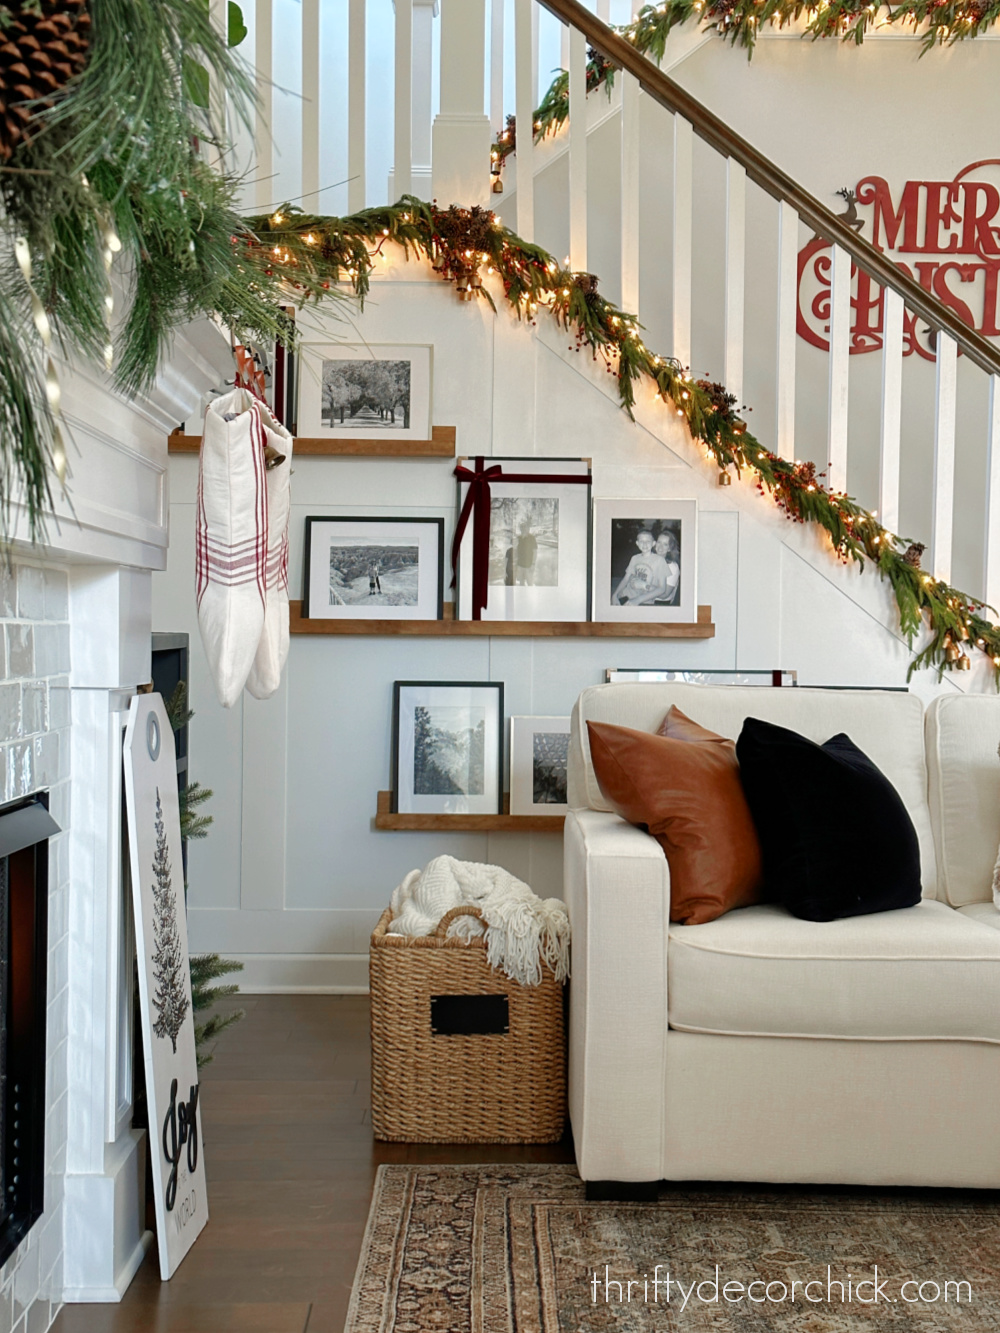
It lets the pretty staircase shine, but also looks just as festive! And it's way safer, especially if you have little ones (or older ones!) in the house.

I like to add a little something to the stairs every year. This time I placed some ceramic houses (from Target years ago) with battery votives inside:

The soft light is so sweet at night!
Here's a view of the room from up in the loft:

I love this view!
The little decor touches are what make this room so special. I love the look of rich, velvety ribbon, so I added it here and there around the room.
To hang the bells on the newel post:

Wrapped around some coffee table books:

And tied around a few frames on my DIY picture ledges:

I filled a wood bowl with cinnamon sticks and a few cuts of greenery from outside:

And I've added bells wherever I can, without going overboard. I hung them from our stockings:


And all over in the tree as well!

We adore this room and love spending time in here, both as a family and entertaining friends. It's such a wonderful, welcoming space...especially this time of year!
Here are a few more photos of our living room -- I hope you enjoyed the tour! I'll share links to a few projects at the end of the post:


OK, that wide angle makes our family room look massive. It's not that big, but it's fun to be able to get it all in one shot!
Now it's time to tour some more beautiful and festive living rooms!
Next on the tour is the lovely Summer Adams. You can check out all of the bloggers at the links below. I hope you find inspiration for your own holiday decor!
More about our living room:
 Monday, November 28th (Front Porch/Outdoor Spaces)Evolution of Style | Maison de Cinq | Home by Heidi | Southern Hospitality | Cindy Hattersley Design Monday, November 28th (Front Porch/Outdoor Spaces)Evolution of Style | Maison de Cinq | Home by Heidi | Southern Hospitality | Cindy Hattersley Design 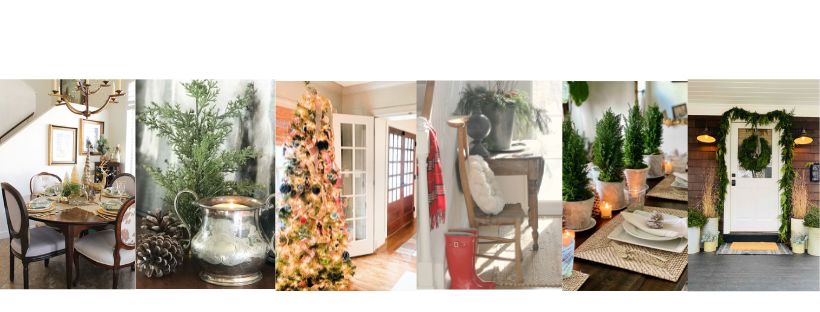 Tuesday, November 29th (Entries/Dining Rooms)Hello Lovely | A Stroll Thru Life | County Road 407 | Southern Heather | Classic Casual Home | Most Lovely Things Tuesday, November 29th (Entries/Dining Rooms)Hello Lovely | A Stroll Thru Life | County Road 407 | Southern Heather | Classic Casual Home | Most Lovely Things 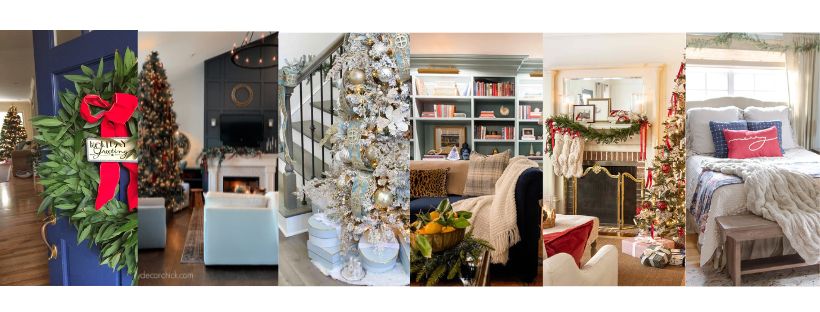 Wednesday, November 30th (Living Rooms/Dens)Northern California Style | Thrifty Decor Chick | Summer Adams | Make Mine a Spritzer | Sincerely Marie Designs | Postcards from the Ridge Wednesday, November 30th (Living Rooms/Dens)Northern California Style | Thrifty Decor Chick | Summer Adams | Make Mine a Spritzer | Sincerely Marie Designs | Postcards from the Ridge 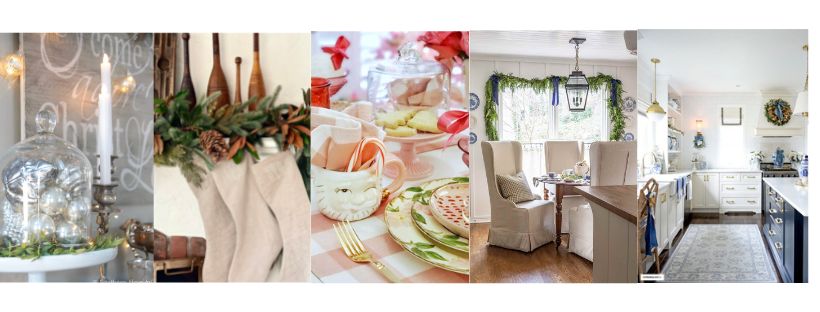 Thursday, December 1st (Mantels/Kitchens/Laundry Rooms) Southern Hospitality | Cindy Hattersley Design | Home with a Twist | Sincerely Marie Designs | Citrine Living Thursday, December 1st (Mantels/Kitchens/Laundry Rooms) Southern Hospitality | Cindy Hattersley Design | Home with a Twist | Sincerely Marie Designs | Citrine Living  Friday, December 2nd (Bedrooms)Dimples and Tangles | This is Our Bliss | Shine Your Light | Sincerely Marie Designs Friday, December 2nd (Bedrooms)Dimples and Tangles | This is Our Bliss | Shine Your Light | Sincerely Marie Designs
Never miss a post by signing up to get posts via email.
Via https://www.thriftydecorchick.com/2022/11/our-festive-christmas-living-room-2022.html
0 Comments
Decorating our tree with deep moody hues, metallic sparkle and natural wood accents.
Decorating a Christmas tree in more subdued tones can be just as festive and beautiful as the classic holiday colors!
This year's jewel-toned Christmas tree is my favorite I've done...ever. It is just so PRETTY, and I often find myself just sitting there and staring at it.
Over the past few years I've been inching towards a bit of a more natural look for our Christmas tree. Well, as natural as it gets with gold ornaments and shiny garland. ;)
Last year I softened things up a bit with ribbon hanging from the branches, it was such a lovely touch!
This year I used mostly brown and gold ornaments, but ended up throwing in some jewel tones in dark blue and maroon as well.
It is my most beautiful tree, and I did it without buying any ornaments. I used a few tricks to use what we had to fill her up:

This post may contain affiliate links for your convenience.
I may earn a small commission when you make a purchase through links.
See my policies and disclosure page for more information.
The key to this game is my tried and true DIY makeover tool -- spray paint! I never fails me. :)
I didn't want to use any bright red on the tree, only the deeper tones with some brighter metal colors to glam it up a bit.
We had plenty of this beaded garland I've used over the years, but it was red. Spray paint to the rescue!:

I used the bright and shiny gold Rus-toleum spray paint I shared in my top brass spray paints post for these.
It's not brassy at all, but a very bright and pretty gold color. I love it!
Trying to cover every bit of the red on these beads would take forever, so it's a good thing I was OK with some of the red peeking through here and there:
Via https://www.thriftydecorchick.com/2022/11/our-moody-jewel-toned-christmas-tree.html My ten favorites for the home that make great gifts!
Every year I do a gift round up with blog friends and share a variety of home, beauty and treat yoself items we LOVE. You can find last year's list of home decor favorites here!
Life has been crazy busy lately, so I didn't get my fellow bloggers lined up this time...but I'm still here to share some of my favorites!
I gathered ten items that we use and love. Most are new, but a few are so good I've shared them numerous times over the years.
They make great gifts, but would also be lovely in your own home. ;)
1. The comfiest blanket!
I have a problem when it comes to throw blankets...it's hard for me to resist them. I thoroughly enjoy a fluffy new blanket, but anymore I only purchase oversized versions that are plenty big.
We often share a large throw, and I've even been known to purchase a queen or king sized blanket that we can share on the couch.
This post may contain affiliate links for your convenience.
I may earn a small commission when you make a purchase through links.
See my policies and disclosure page for more information.
This time of year calls for thickest and warmest possible, and this lovely oversized knit blanket has been perfect:

I had it in my cart for a month and finally got it a couple weeks ago. We ALL love it, including the animals. It's oversized at 60x80 inches and the underside is a soft and warm sherpa fabric.
So far it's held up beautifully in the wash. I want one in every color!
2. Mini chargeable blender
This mini blender is something I was eyeing for years. I love smoothies, but rarely make them because dragging out and cleaning our large blender seems silly for just a small drink.
The small Blendjet is AWESOME!! You can use it literally anywhere because it doesn't plug in.
Just charge it, fill it and make your smoothie any time or place:
Read the full post
Via https://www.thriftydecorchick.com/2022/11/10-home-favorites-that-make-great-gifts.html Thirty-five FREE Christmas printables to use in your holiday decor.
Tons of free holiday printables to use for your Christmas decor, gift tags and more!
I've gathered a bunch of Christmas art prints to use in your home or to give away. You know I love 'em!
I use these for every season because they are a super cheap way to change up your decor and most importantly, pretty. :)
I've rounded up 35 of my favorites for you!
You can print these at home or email them to most drug or office supply stores to be printed that day. (And they can do larger sizes!)

This list includes art you can frame, gift tags to print out, a few kid-friendly options and even some cute labels for sweet DIY or baked gifts.
Visit each blog (at the link below the photos) to get the full resolution image to download. Free printables for holiday art
I print out a few of these every year! I love framing them for super easy holiday touches around the house.

Lil Luna/Joy to the World
Via https://www.thriftydecorchick.com/2016/11/20-free-christmas-printables-to-deck.html A twist on the traditional stairway garland -- hang it at the bottom!
Have you pulled out any holiday decor yet? I always like to get a few things done before Thanksgiving, but this year I've been on a roll.
Our family (especially my husband) LOVES Christmas decor, and would happily have it up for months out of the year. ?
After Halloween he starts asking when we'll pull out the tree, and when I'm ready to take it all down at the end of the year, he's asking to keep it up for a few more weeks.
I've started pulling out the Christmas decor for a few areas and working on spots that take the most time, like our stair railings. This is the earliest I've ever started, but it's been fun to have the time to play around with different ideas for our holiday decor.
I'm really excited about possibly being done earlier than ever this year so I can relax and ENJOY the twinkle lights.
Our open stairs are one my very favorite parts of our home! I choose classic white balusters and a stained railing that matches our wood floors. Over the years I've added greenery draped various ways at Christmas.
The first year I attached thick garland under the railing:

I've also swagged the greenery and wrapped it around:

This post may contain affiliate links for your convenience.
I may earn a small commission when you make a purchase through links.
See my policies and disclosure page for more information.
All are beautiful! You just can't go wrong with any combination of garland and lights.
I've recently been looking into the "real touch" greenery that has been all over social media the past couple of years. A site called Afloral sells it, but I just couldn't bring myself to spend that much on garland, even though I love their quality.
I was THRILLED when I found the exact same Norfolk greenery at Kirklands, and on sale! I also got a discount code when I signed up for their emails, so I got this gorgeous greenery for less than half of what Afloral charges.
I had to purchase online and pick mine up at a local store -- look for that option if they are sold out for shipping!
This stuff really is as nice as it's hyped up to be. It feels so soft, but you can manipulate the wired branches easily:
Read the full post
Via https://www.thriftydecorchick.com/2022/11/holiday-garland-at-bottom-of-stair-railings.html Easy and delicious pumpkin bread recipe with simple ingredients.
Because I'm fully in the fall spirit, I was on the search for a good pumpkin bread recipe a few weeks ago. I found this super easy pumpkin recipe online and of course had to share it with you. You know if I'm sharing a recipe it's SUPER delicious and really easy. :)
If you like pumpkin even a little bit you will love this recipe.
As always, I made some slight adjustments to this to fit our tastes better. I think it would be SO good with raisins too, so I added those (and some others) as an option as well.
The ingredients are pretty basic and easy to find!
This post may contain affiliate links for your convenience.
I may earn a small commission when you make a purchase through links.
See my policies and disclosure page for more information.
I use this adorable pumpkin baking pan to make mine -- it's perfect for this pumpkin bread!:
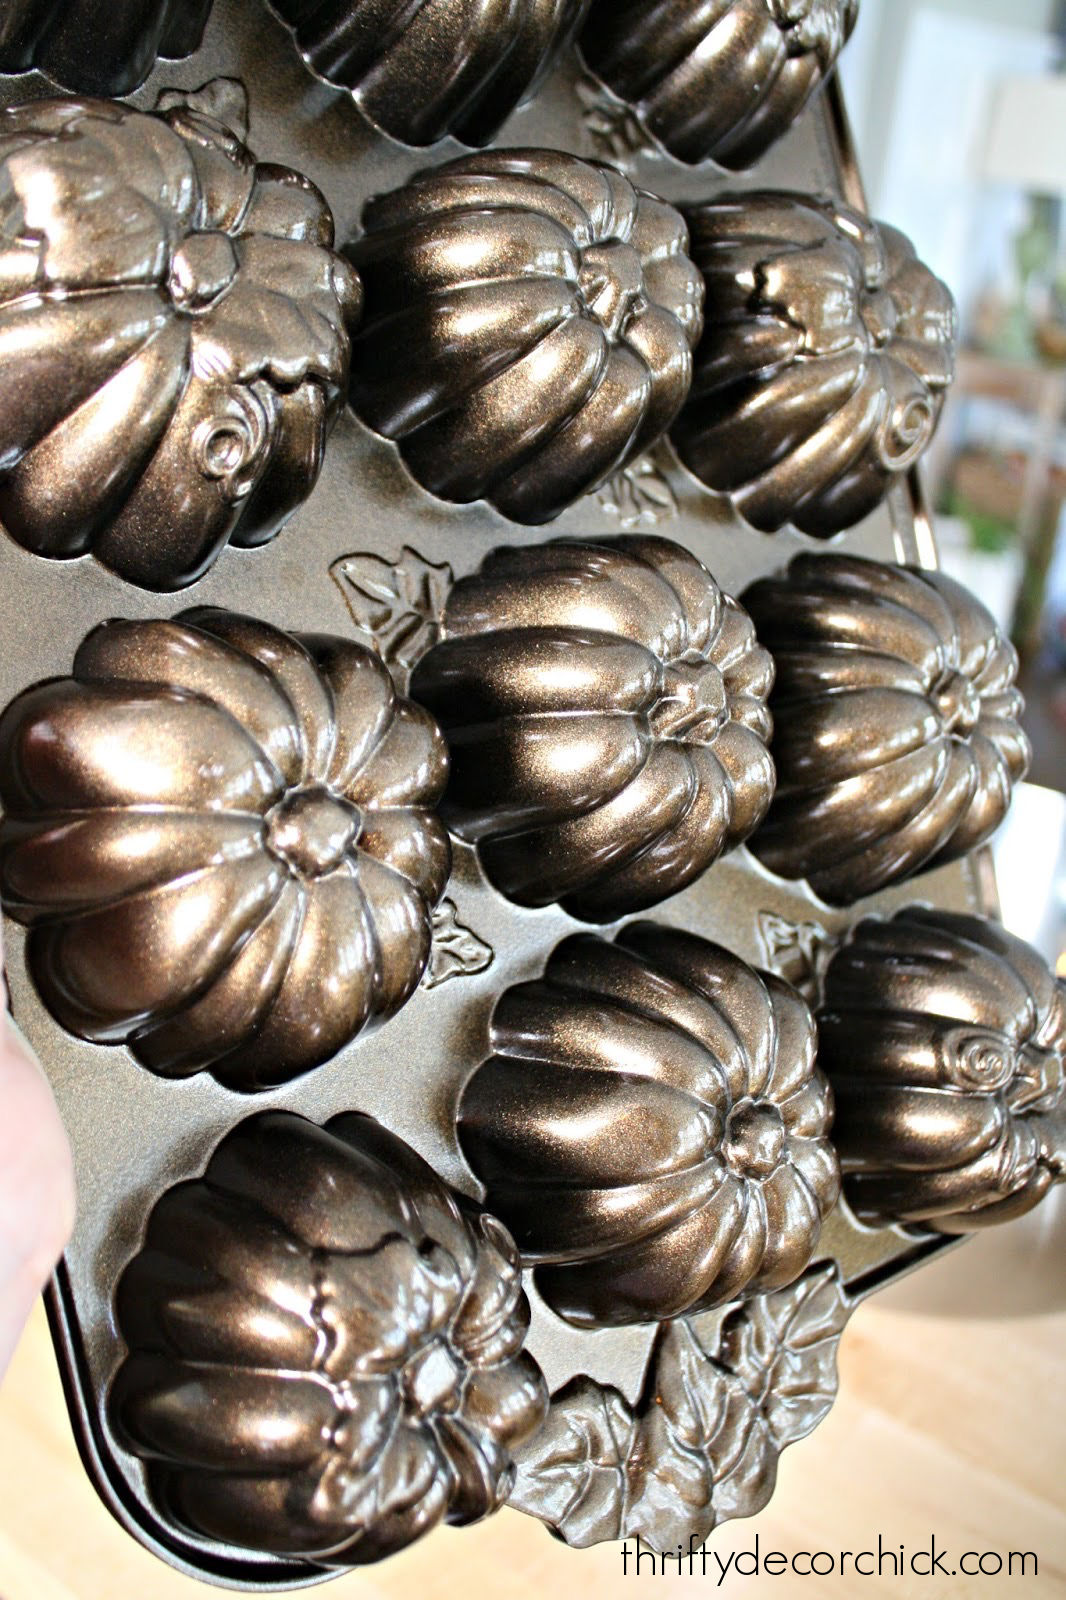
Making these into cute pumpkin muffins makes this recipe perfect for gift giving throughout the fall season.
It bakes them perfectly!
There are larger options as well. This pumpkin loaf pan or this one would be lovely for a pumpkin bread loaf.
I may have to grab one of those as well. ;)
Here's the recipe for this delicious fall bread...
Easy and delicious pumpkin bread/muffins
(grouped by how you mix them)
1 1/2 cup flour
1 tsp salt
1 cup sugar
1 tsp baking soda
1 cup pumpkin puree
1/2 cup olive oil (canola or vegetable are fine)
2 eggs, beaten
1/4 cup water
1/2 tsp cinnamon
1/2 tsp nutmeg
1/2 tsp allspice
Optional:
1/2 tsp apple pie spice
1/2 cup walnuts
1/2 cup raisins
1/2 cup chocolate chips
Steps for pumpkin bread preparation:
1. Preheat oven to 350 degrees.
2. You will need two bowls for this recipe. Sift the first four ingredients together in one bowl. 3. In separate bowl combine the pumpkin, olive oil, eggs, water, spices and walnuts or other optional additions: 
4. Mix the two bowls together. Don't mix too much. Mine ends up not quite as thick as oatmeal (pictured above).
5. Pour into sprayed 9x5x3 loaf pan and back for 50 to 60 minutes. Or make muffins -- the mix makes 12 and they are perfect out of the oven in 25 minutes.
You'll know when they are done when a toothpick into the bread comes out clean.
I use an ice cream scoop to fill my pumpkin muffin tin so the batter doesn't get everywhere:

Don't fill them all the way to the top and give the pan a few taps on the counter to get air bubbles out -- I forgot to do that this time!
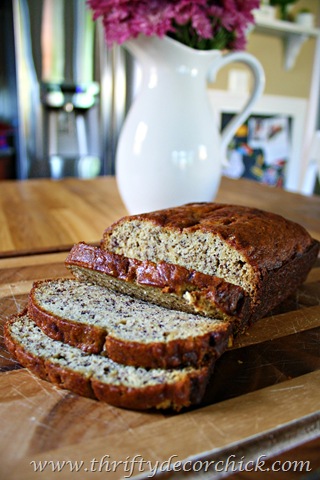
I'm telling you what...these come out SO good. They are moist and fluffy and just scrumptious:

They take no time at all, especially if you're making the muffin version. I've already whipped up two batches in the past week.
It's not an overwhelming pumpkin taste...just enough! And your house will smell like fall all day when you bake them. :)
Pin this for later if you'd like to save this bread recipe:

You can also see my easy crock pot applesauce here:

And my popular banana bread recipe (SO good!):
Never miss a post by signing up to get posts via email.
Via https://www.thriftydecorchick.com/2020/10/simple-pumpkin-bread-recipe.html See the plans and layout for our basement kitchenette!
Who decides to start building a small kitchen from scratch during the busiest time of year, right before the holidays?
THIS GIRL.
Because I often sit on large projects for months as I research and decide on finishes...once I'm ready, I'm READY.
I've transformed a lot of rooms in our homes, but rarely from the ground up. When we had our last basement finished, I did a lot in our laundry, bathroom and family room down there.
But this is the first time I'll be taking on the majority of the to do list in a room that has nothing but walls and cement floors.
We are a basement loving family, so this project has been a dream of ours for the past five years. (Check out our five year before and after house tour here!)
Not only do we enjoy hanging out down there, but we love to entertain in the basement as well.
One side of this space is already looking great because of the giant TV/bookcase wall I built last year:

But the little alcove meant for our kitchenette had some catching up to do!
I decluttered this space a couple years ago to make it more functional for us. It served as a Lego building station for the most part:
I never had the carpet put down there when we built, thinking that we would finish off this space soon after we moved in. Well, five years later, here we are! ?
And in the past two years, we've added to the clutter for sure. All of our extras that I knew would go in this kitchen were thrown into baskets and bins.
But I did have my popcorn station set up nicely:

This post may contain affiliate links for your convenience.
I may earn a small commission when you make a purchase through links.
See my policies and disclosure page for more information.
It's the most important part!
We've been putting money aside for this project all year, but as I started doing more research I learned just how expensive cabinets can be.
Before I ordered any, I needed to decide on a layout with these details in mind:
Considering all of that, I came up with a U-shaped cabinet layout. I did a very rough sketch on my computer to show you the plan!
The right side is where all of the upper cabinets will hang. I did this because the fridge has to go over there anyway:

From left to right -- bottom: corner cabinet and three drawer unit.
Top: corner upper and wide upper cabinet next to the fridge.
The sink will go on the long wall in the middle:

Corner cabinets sit on either end, with storage inside to the corners.
Planning out a cabinet layout isn't easy! The measurements of the cabinets rarely works out perfectly, so you have to account for spacers so that drawers and doors can operate without banging into each other.
Because of that, there were awkward empty spaces by the sink that I could have put tiny nine inch cabinets in, but that would have called for more spacers. I thought it would look odd.
So instead I'll be building in some small shelving units. They'll be great for baskets or bins that we can store stuff in. I think this will add some interest on that wall too. (And I'm using scrap wood for it, so WAY cheaper than additional cabinets.)
On the left wall (the longest one pictured above), we'll have the two wine fridges with a pull out trash can in the middle. Later on I'll build a bar as well.
This is where I plan to attempt a curved design similar to this one from the Home-A-Rama tours I shared with you:

I was thrilled to see that in person because I've had this idea in my head for years. We'll see if I can make it happen!
I know those cabinet images are pretty basic, but hopefully they give you an idea of our layout. It will all make sense as it comes together. :)
After a TON of research (and being thisclose to building the cabinets myself), I decided on these unassembled cabinets from Home Depot:
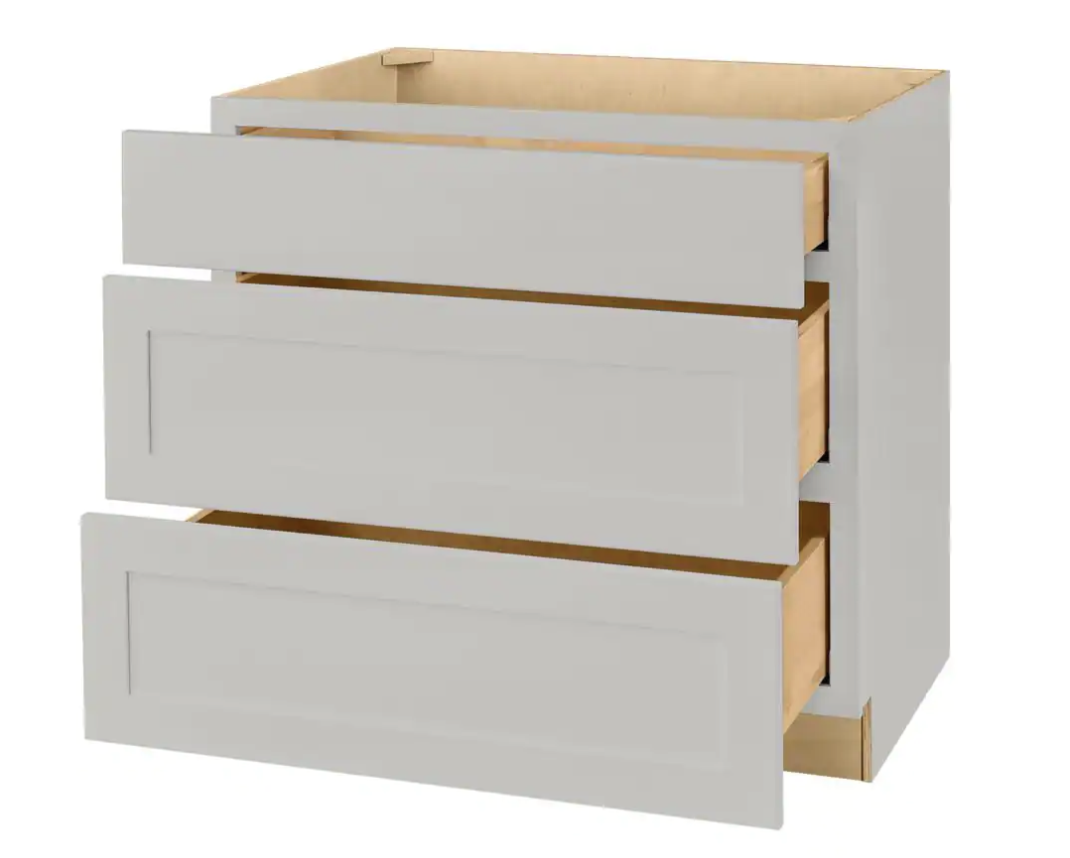
Because I have to assemble them, they are less than we'd pay otherwise. I'm VERY pleased with the quality so far!
I'll do a whole post about these soon, but overall the materials are better than standard in-stock cabinets and they come with full extension, soft close drawers and soft close cabinets. It will be so nice not to have to add those myself!
Before we could start anything in this space, I had to remove everything from the area so our electrician could get to work. Our builder wouldn't place the outlets at counter height (even our licensed electrician was confused by that), so they had to be added.
All of his drywall cuts were under the counter height thankfully, so I don't have to do much patching. When he was done, I removed all of the baseboards in this space:

Other than the cabinets, I ordered a few other items to get this room through the first phase.
My goal this month is just to get the room operational, with cabinets and countertops so we can have a sink with running water. :)
After that I can focus on the holidays and then tackle the fun finishes early next year. I have a feeling this one is going to take me awhile!
I ordered this black granite sink. We have the black upstairs and I love the look and low maintenance. This time I decided to do a single basin instead of two:

And I've been eyeing this Lifeproof LVT (luxury vinyl flooring) for the past year and finally purchased a few boxes for this space:

This is the dusk cherry color that is available in store.
I have a couple of other options in mind...I'll definitely share what we decide on.
We're just so thrilled that we'll have it functioning when we hibernate down there during the holidays and winter months. This will be such a wonderful addition and will be a fun project for me!
Never miss a post by signing up to get posts via email.
Via https://www.thriftydecorchick.com/2022/11/basement-kitchenette-plans-and-layout.html A five year before and after tour our home!
Join me as I share a before and after tour of our house! We've lived here for five years now...can you believe it?
I love looking back to see how much everything has changed over the years...it's so fun to see the result of all of my DIY projects and updates.
It has been a labor of love to transform our spaces and it's been so fun to share it with you along the way!
I'll share links to the biggest projects in these rooms, but if you have a question about something in particular, let me know in the comments.
You can see all of our paint colors here and I share details about all of our finishes as well.
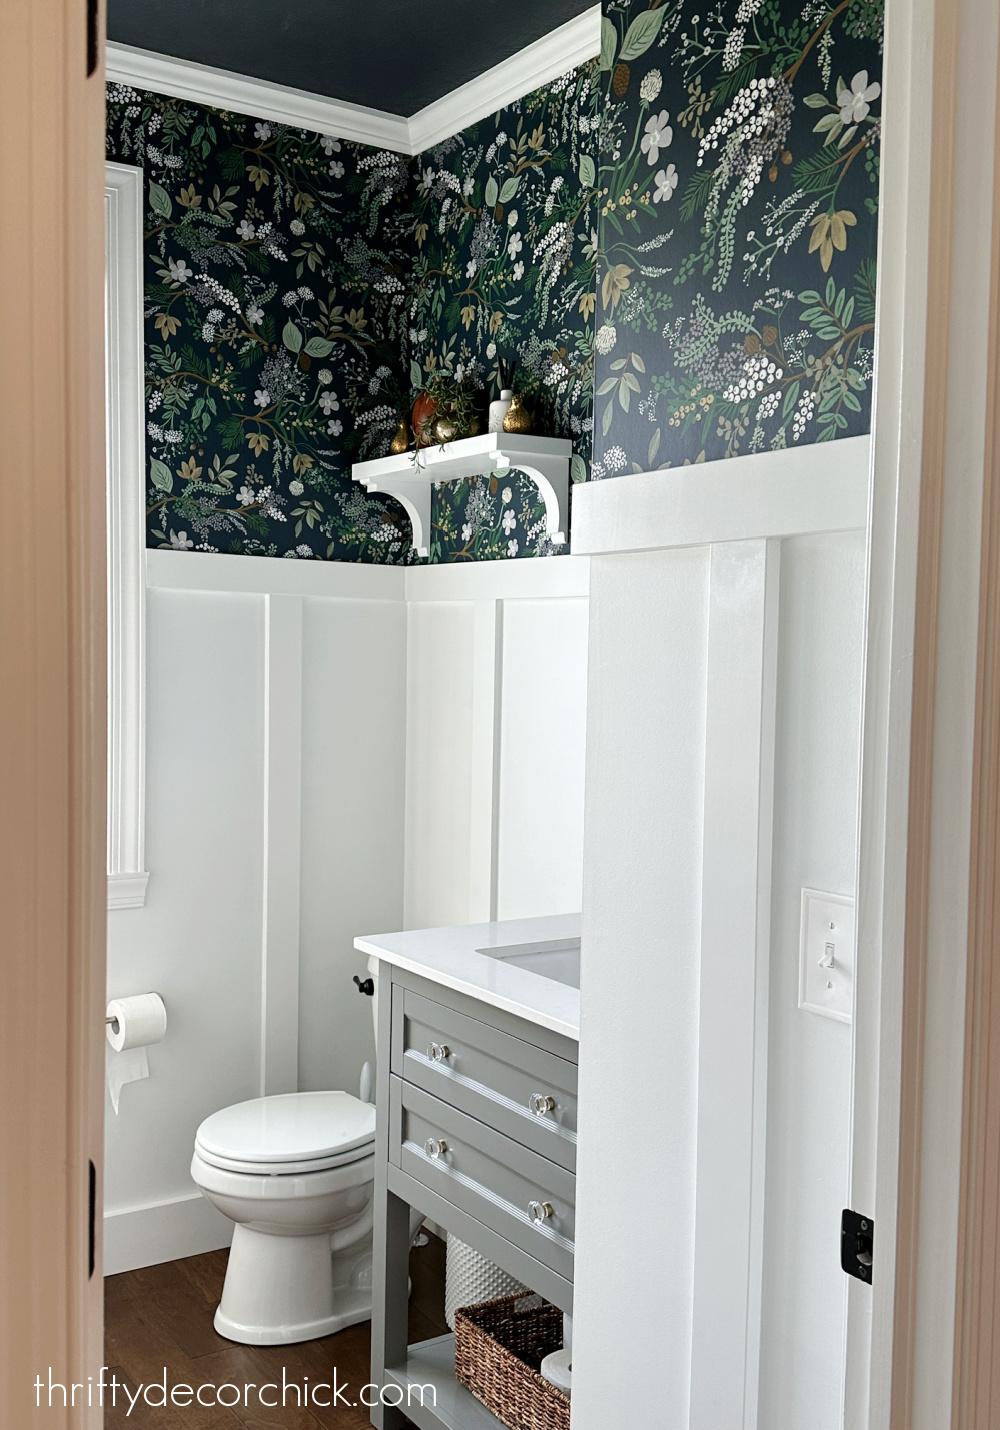
The very first space I worked on was our powder room. This is how it looked soon after moving in:
This post may contain affiliate links for your convenience.
I may earn a small commission when you make a purchase through links.
See my policies and disclosure page for more information.
Our pantry makeover was one I tackled this year as well, and it started out with this open shelving:
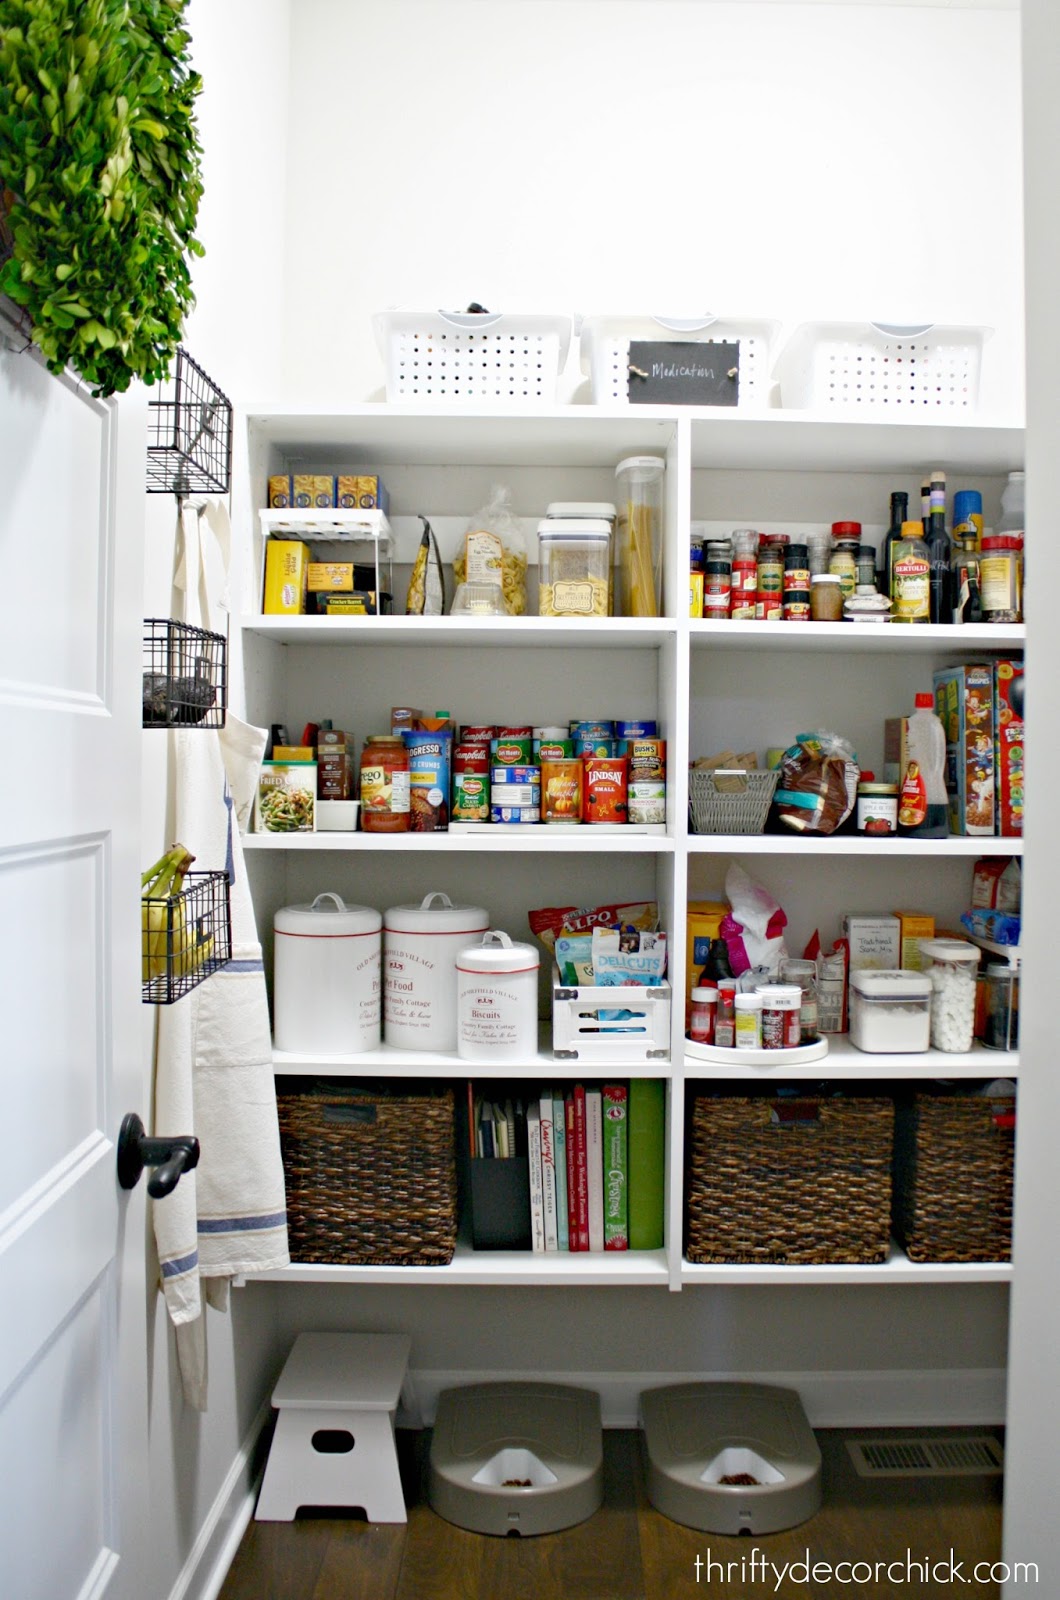
I tore everything out (and kept it for a future project) and installed cabinets instead:

We have a TON of storage in these tall pantry cabinets thanks to my DIY roll out drawers inside:
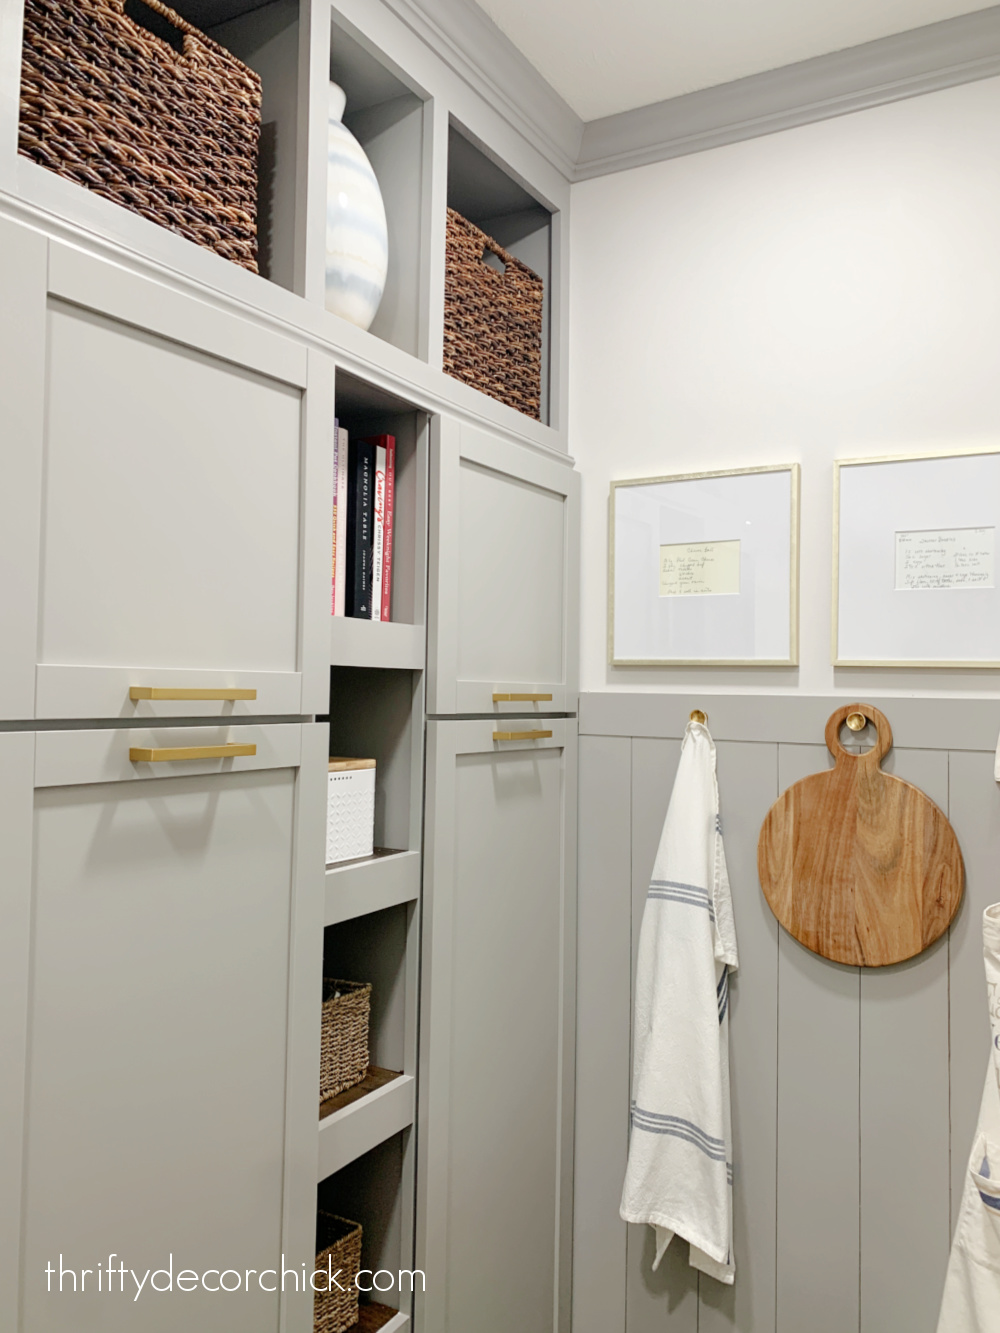
The pantry is one of my all time favorite changes I've made to either of our homes! Having everything in the cabinets calms me when I walk in. :) It's been so much easier to keep organized as well.
I recently made some small updates to our foyer -- here's a shot of how it looked from the door before:

And that little alcove now, with that pretty pinstripe wallpaper:

I made a decorative vent cover for the entry wall a couple months ago:

This was how the other side looked at first:
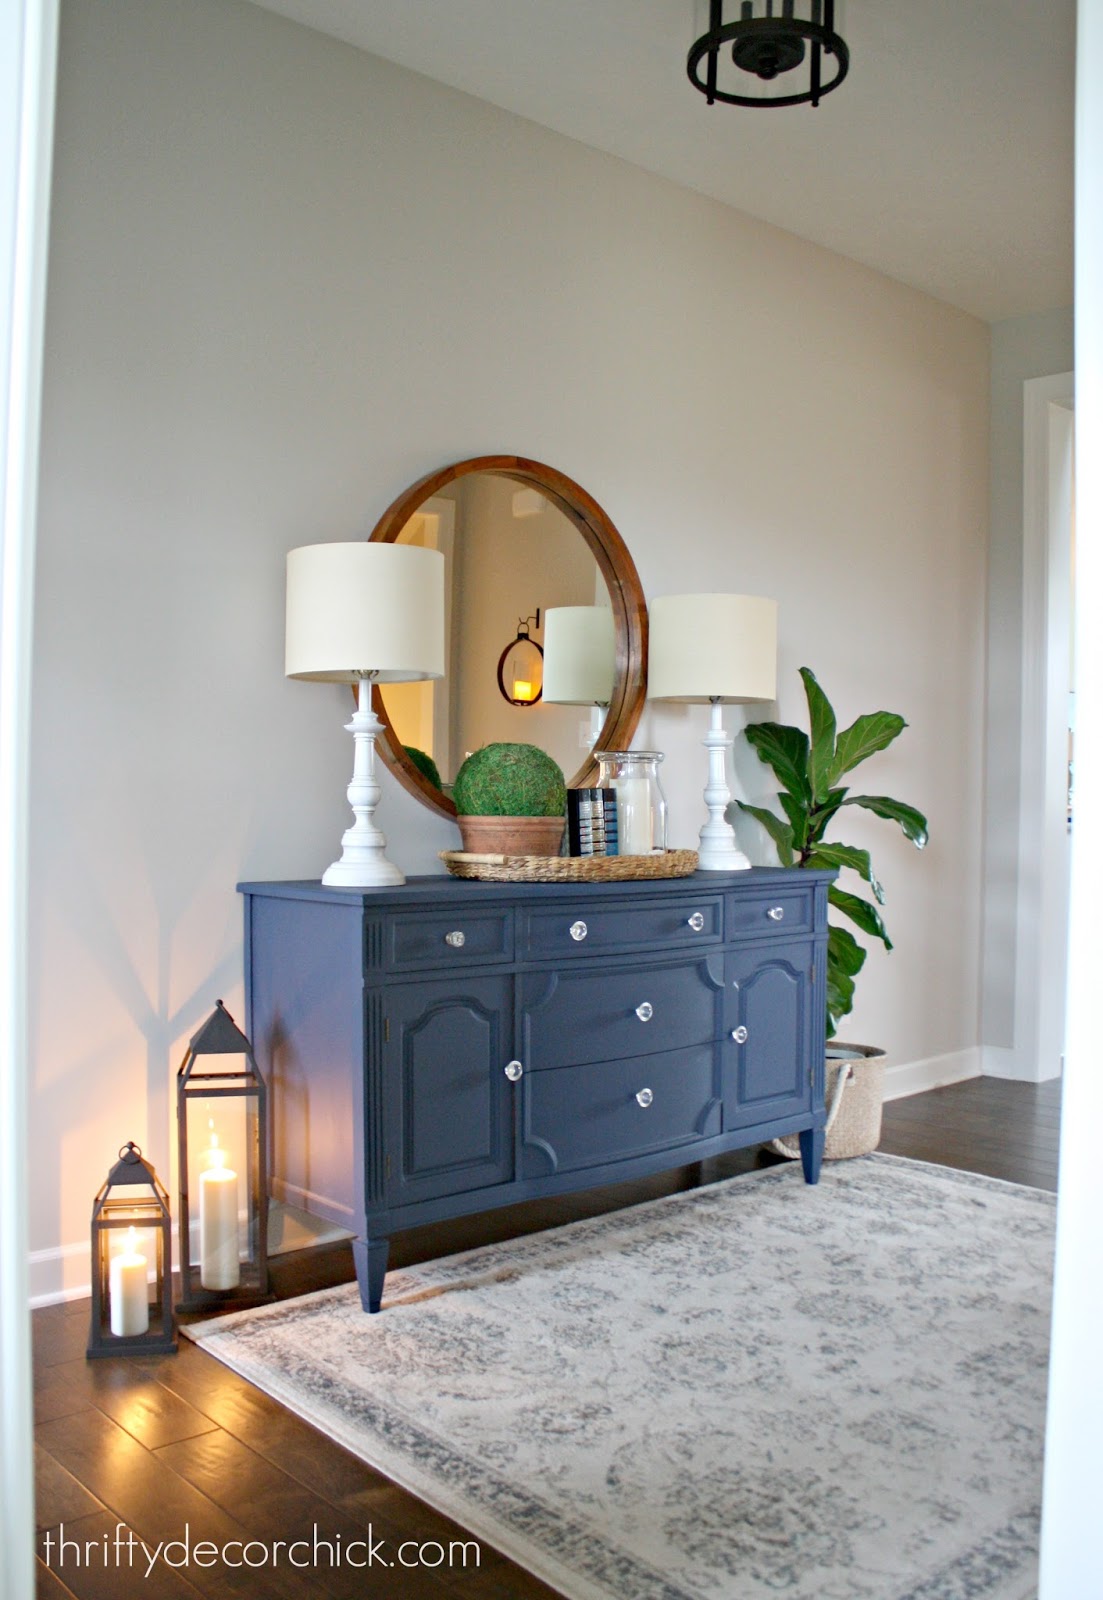
It was lovely, but I love adding some character! So I added some simple, inexpensive trim, swapped the entry tables and spray painted that mirror:

My closet makeover was another huge DIY project this year! It is a GREAT size, but wasn't super functional:

I built and installed the IKEA Pax wardrobes and created a custom closet that fits my needs perfectly!:
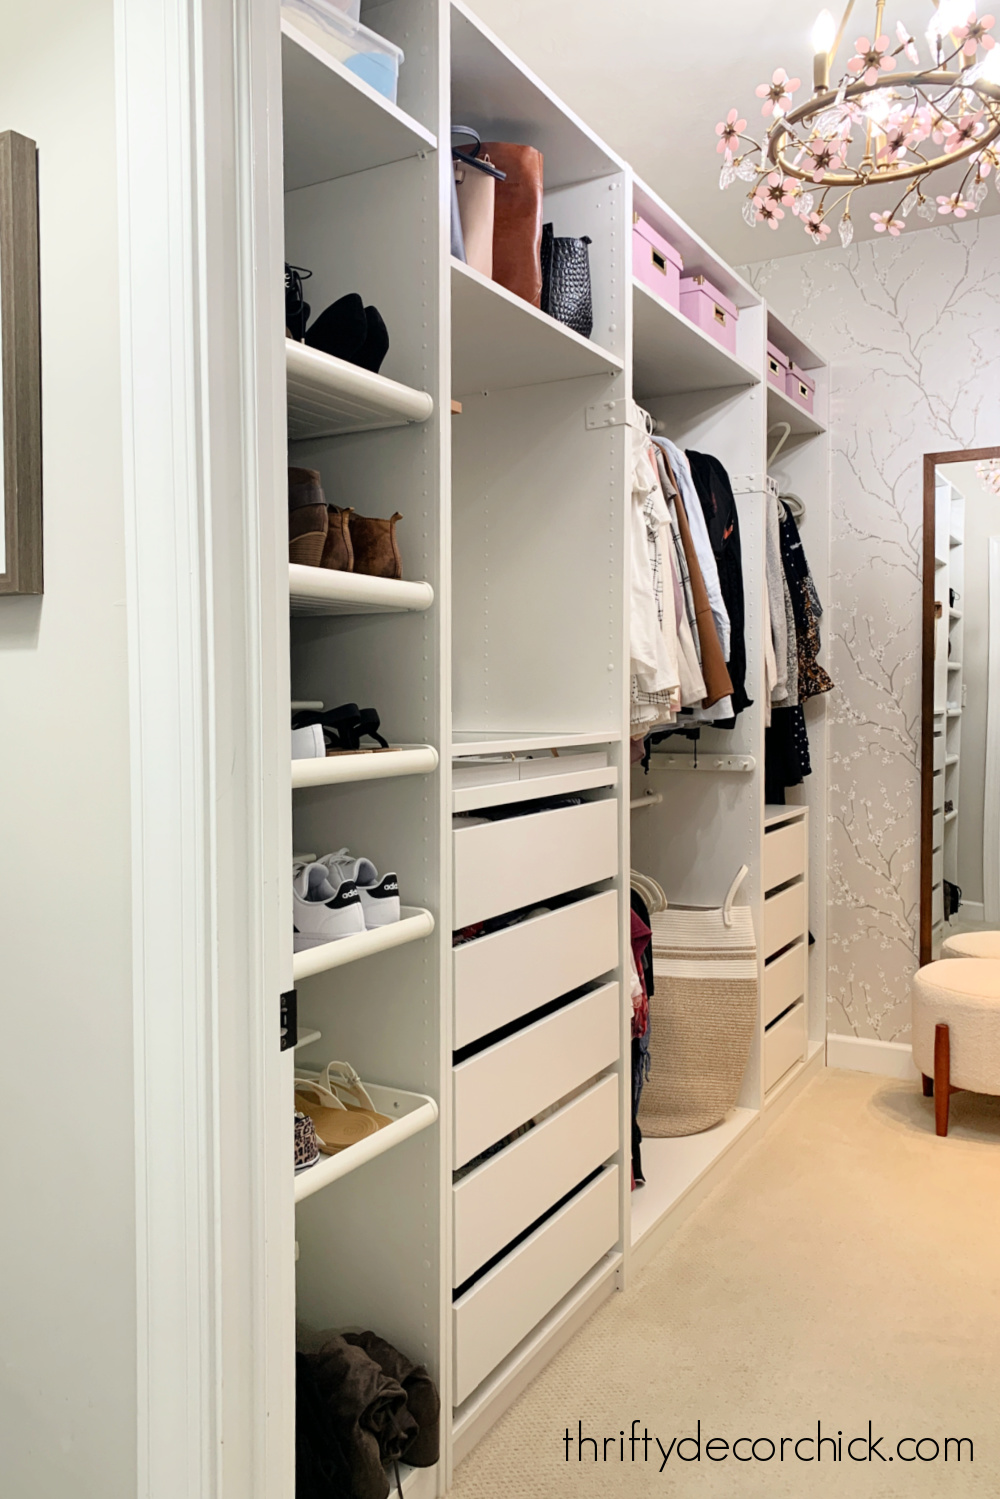
See how I used the space on the other side with this easy cubby built in storage as well.
Our white and gray kitchen hasn't seen any massive projects, but there have been a TON of smaller ones! I shared a bunch of the small kitchen updates in this post, but I did finish up a big one late last year.
Here's how our kitchen looked early on:

Here's another view with the simple shelves I hung after moving in:

And now with the custom touches to the island and the thick floating shelves I built next to the fridge:

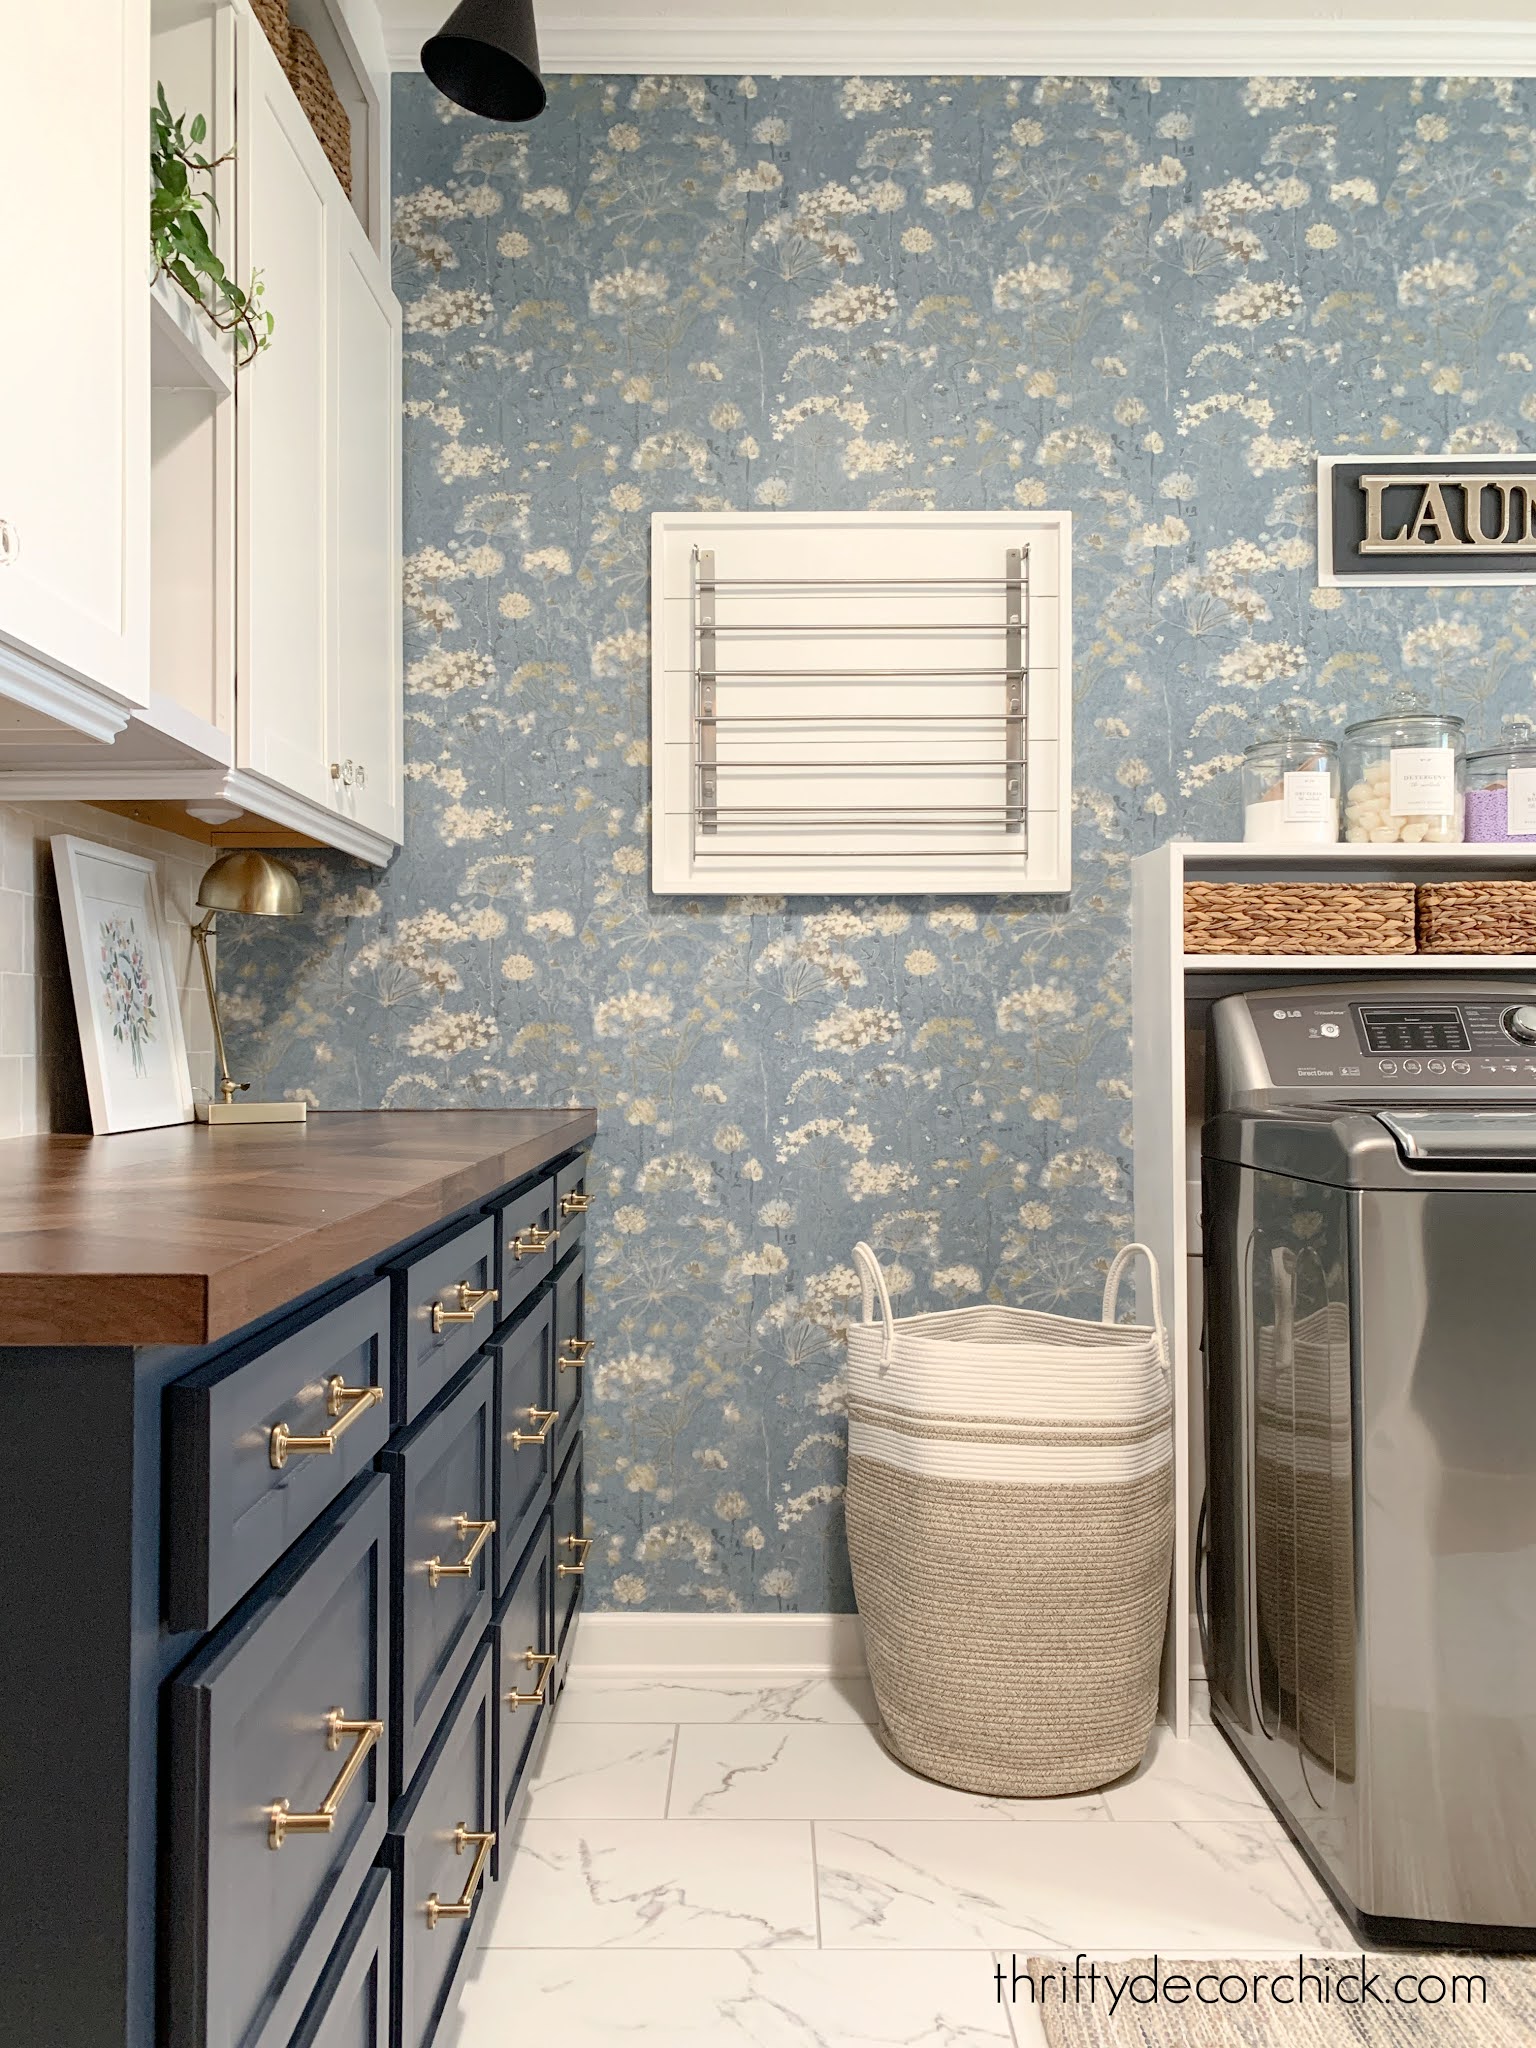
Our mud/laundry combo is one of the hardest working rooms in our house, but I knew it could function even better for us.
We had a simple folding table on one end of the room:

I knew that spot was being underused, so I installed base cabinets and added a shaker style trim to the drawer fronts that I LOVE!
We also had the cabinets moved over above the new storage:
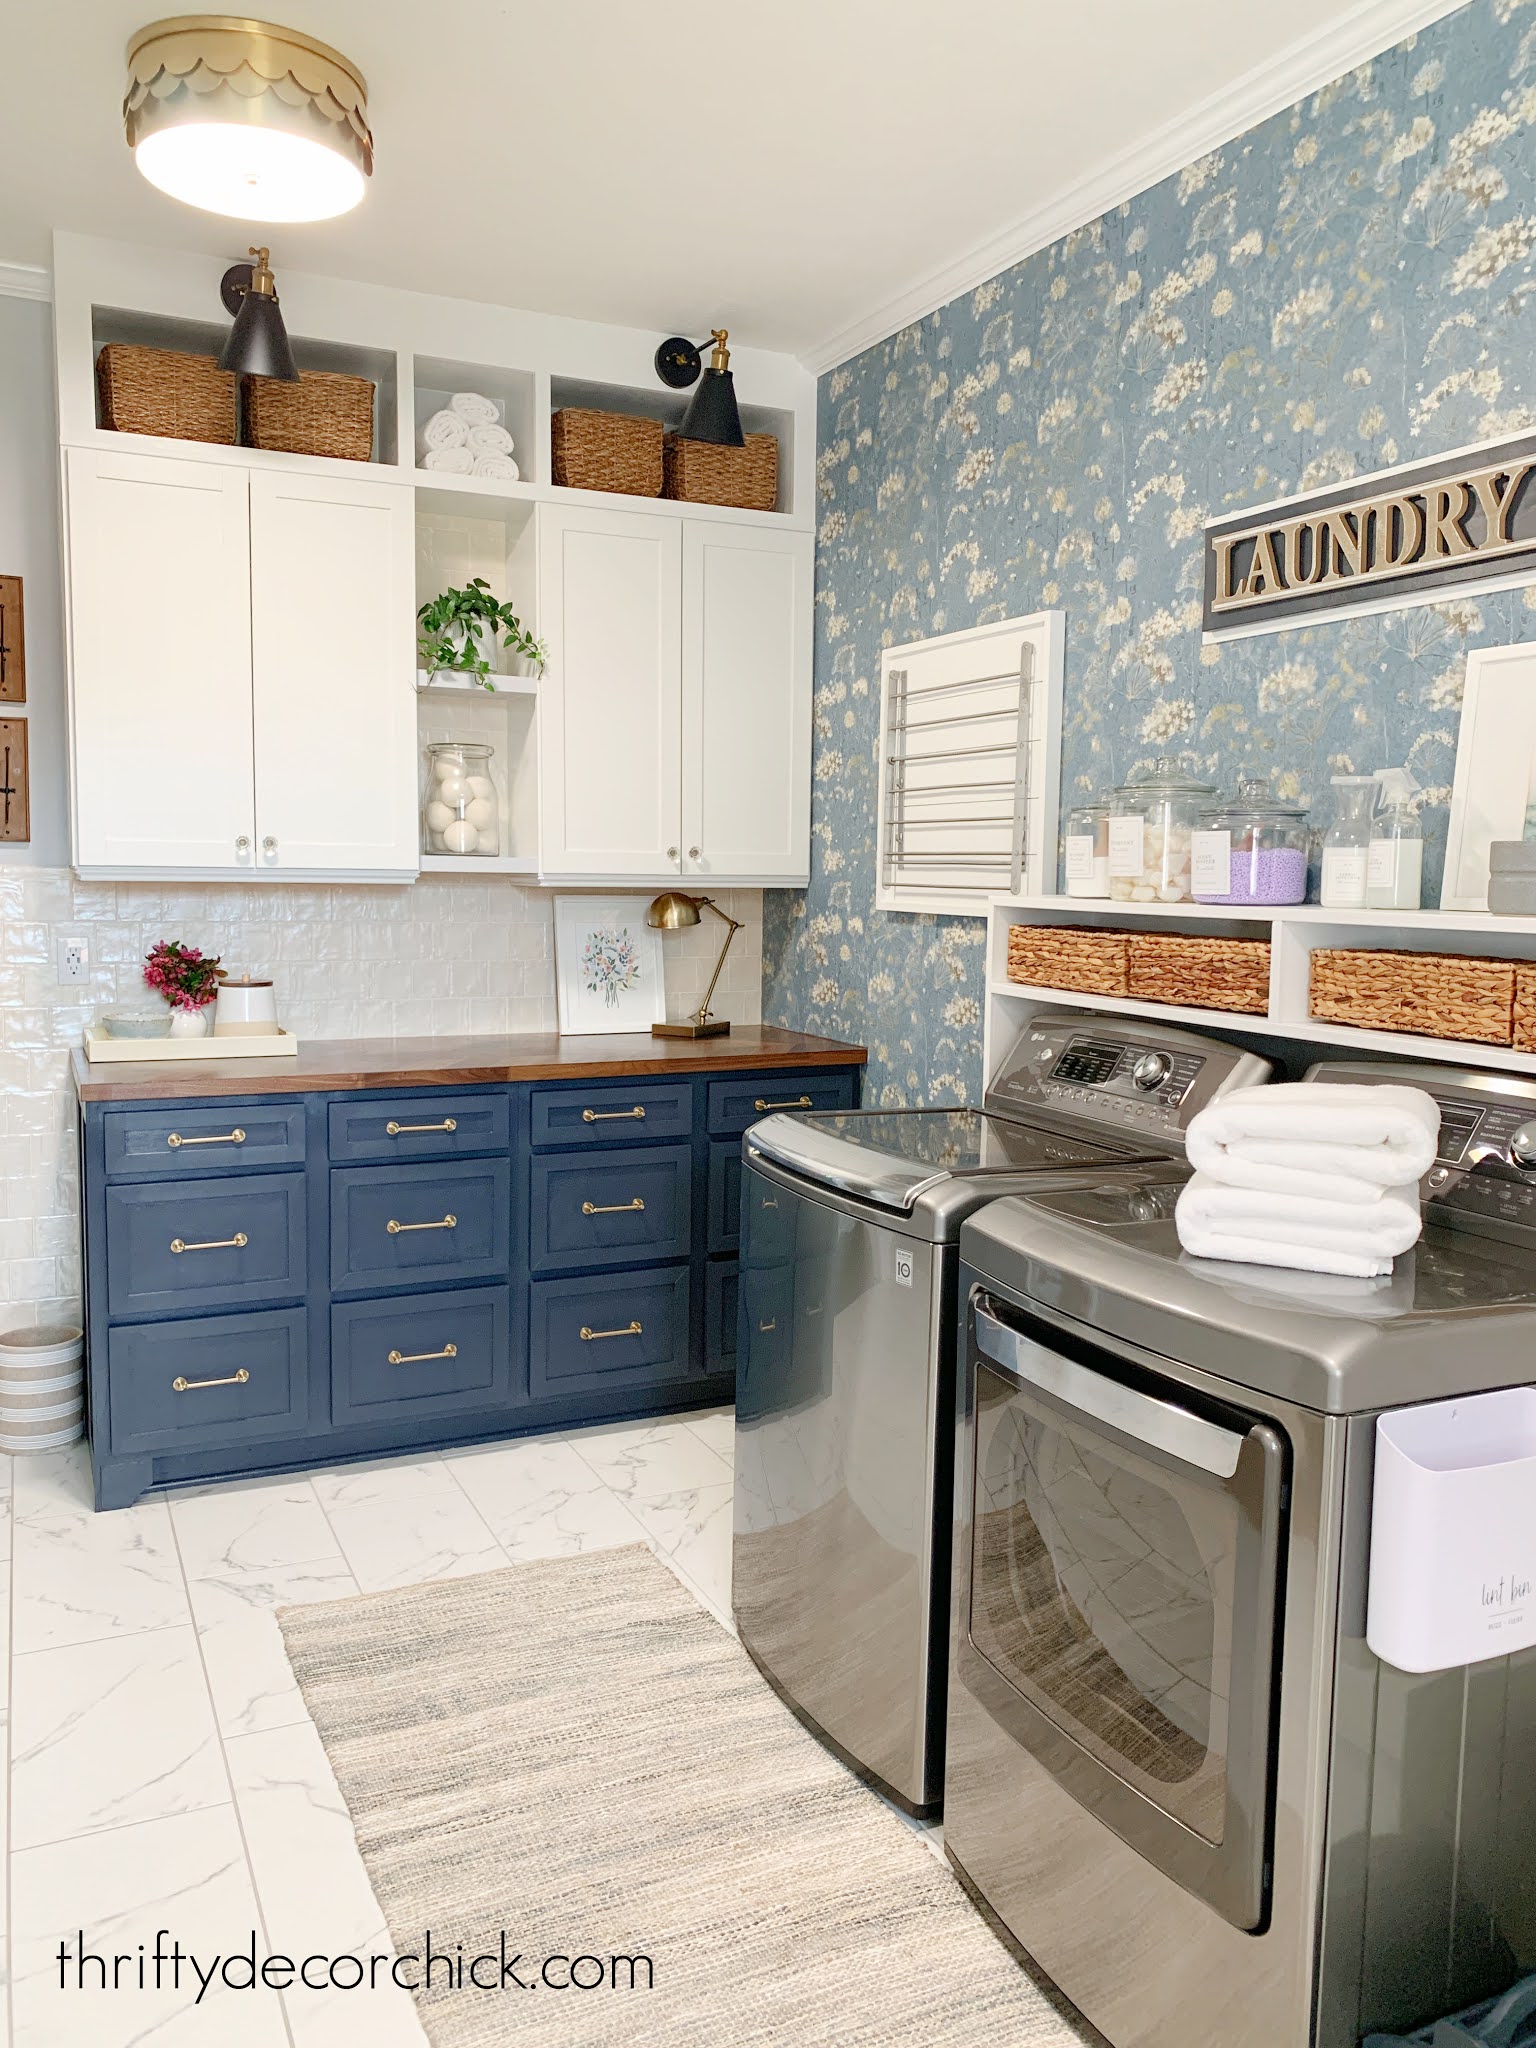
That beautiful floral wallpaper is such a lovely view when we walk in the door every day!:
We already had a really nice bench and storage on the other side:

So I added my touch with the inexpensive shiplap, paint, and those awesome pull out shoe cubbies underneath!:

Take a full tour of this room (including the cat closet) here!
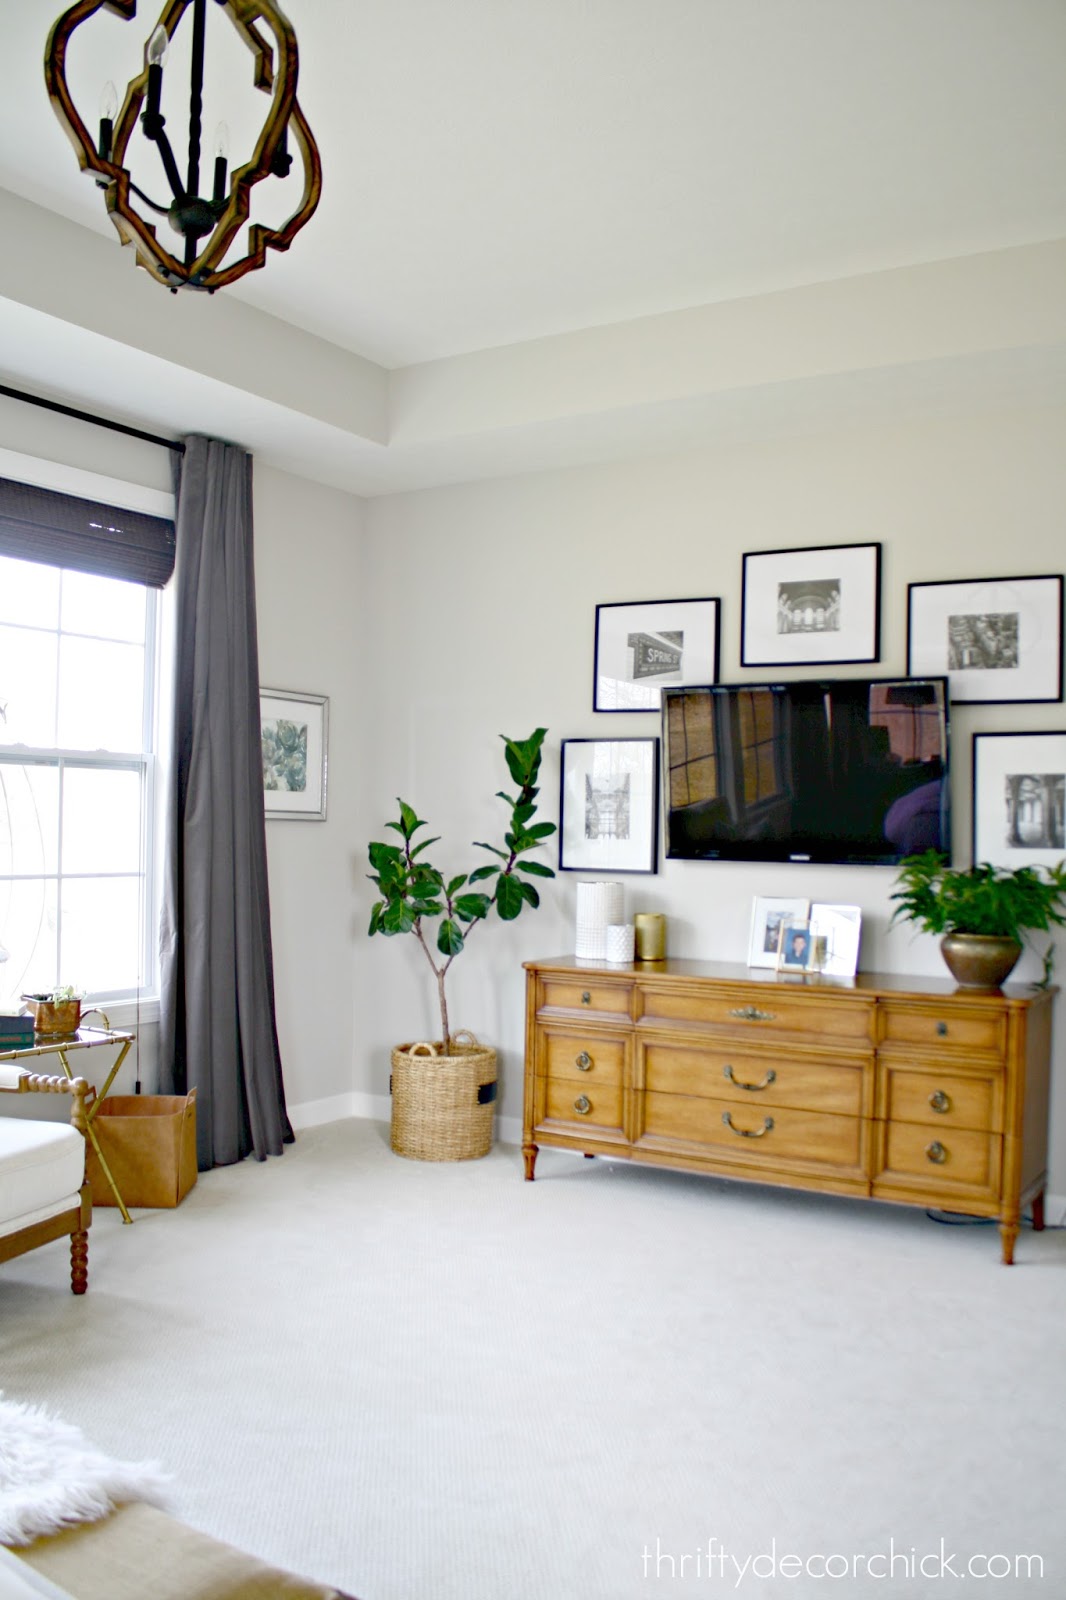
The bedrooms have gotten some DIY updates as well. Our bedroom started out bright and light thanks to all of our great windows:

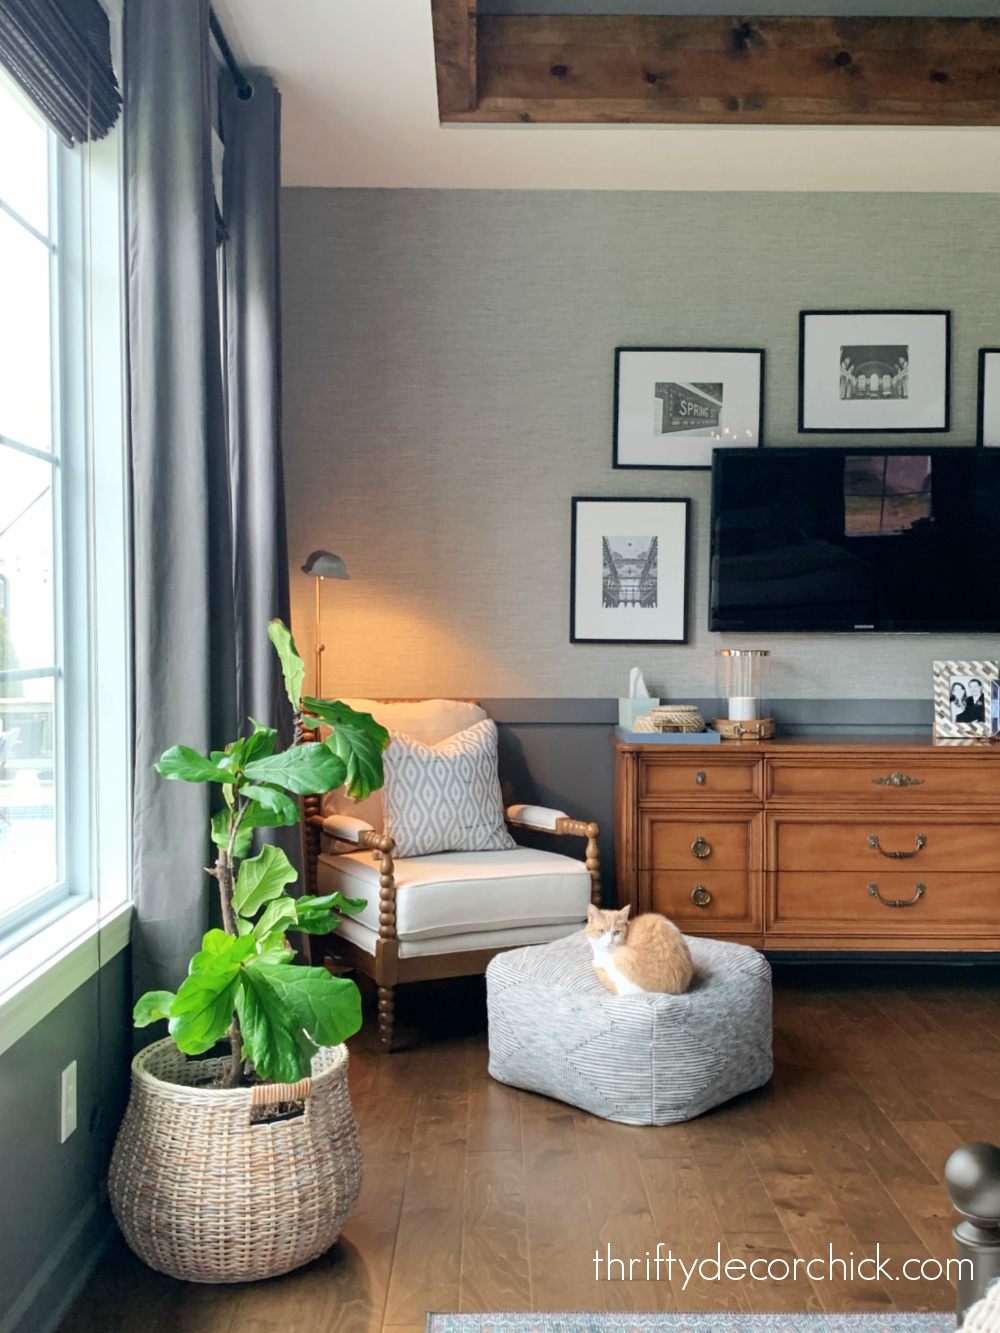
But I wanted to warm it up a bit, so we added those faux wood beams around the tray ceiling and then painted it:

I added a grasscloth wallpaper on the walls with a simple chair rail at the bottom. And we had our engineered flooring put down in here as well:
I spend a TON of time in my office so I wanted a comfortable space that functions well and looks good! Here's where I started:

And after I built the wall of bookcases (with tons of storage at the bottom!):

I absolutely love all of the warm colors and textures in here. It's a lovely place to work!
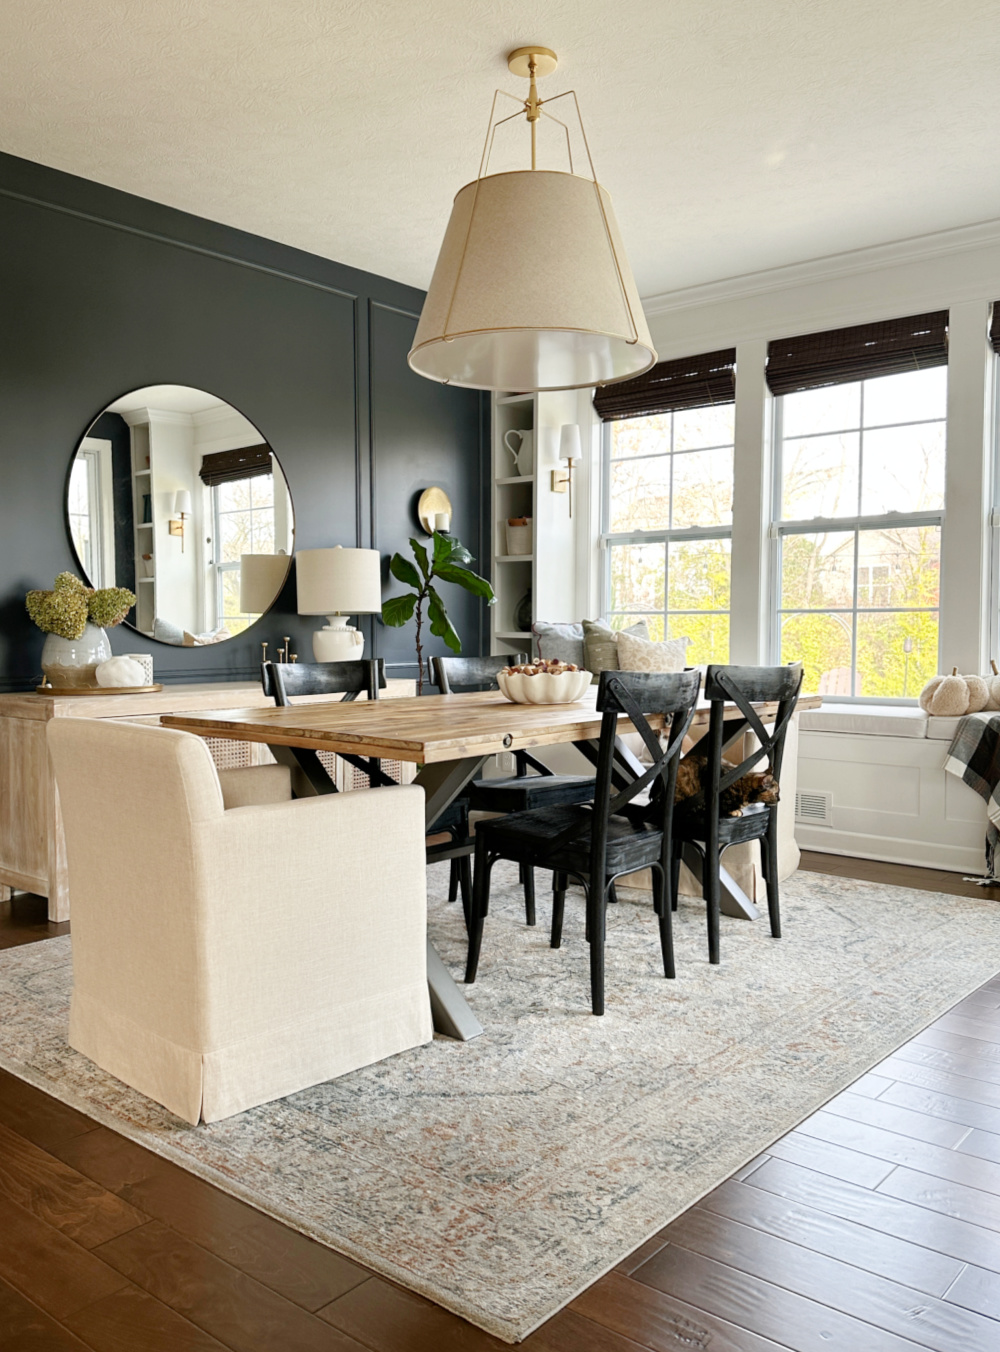
Our dining area is a casual space and open to the family room and kitchen. I knew exactly what I wanted to build here before we even moved in:

The wall of windows was calling out for a window seat!
I built the skinny bookcases on either side to finish it out and then added some contrast with the paint color:
That deep blue Cyberspace color is my favorite! I've used it as an accent throughout our main level.
We replaced the light fixture a couple months ago when I realized this white and brass shade pendant that I'd been lusting over for YEARS had gone on major sale.
But it got even better, because after ordering they refunded me some of my payment and I ended up getting it for 75 percent off!
This room needed some curves to soften it a bit...we just love it.
OK, I'm wrapping up this tour with two of our favorite rooms! Our family room is what made me fall in love with this house:

I was hooked when I walked in and saw the ceiling height and those great windows.
After building the simple bookcases by the fireplace, adding the trim to the front and recently building our huge coffee table, it's become one of the coziest spots in our house!:

I still smile when I walk in this room, I'm so happy with it!
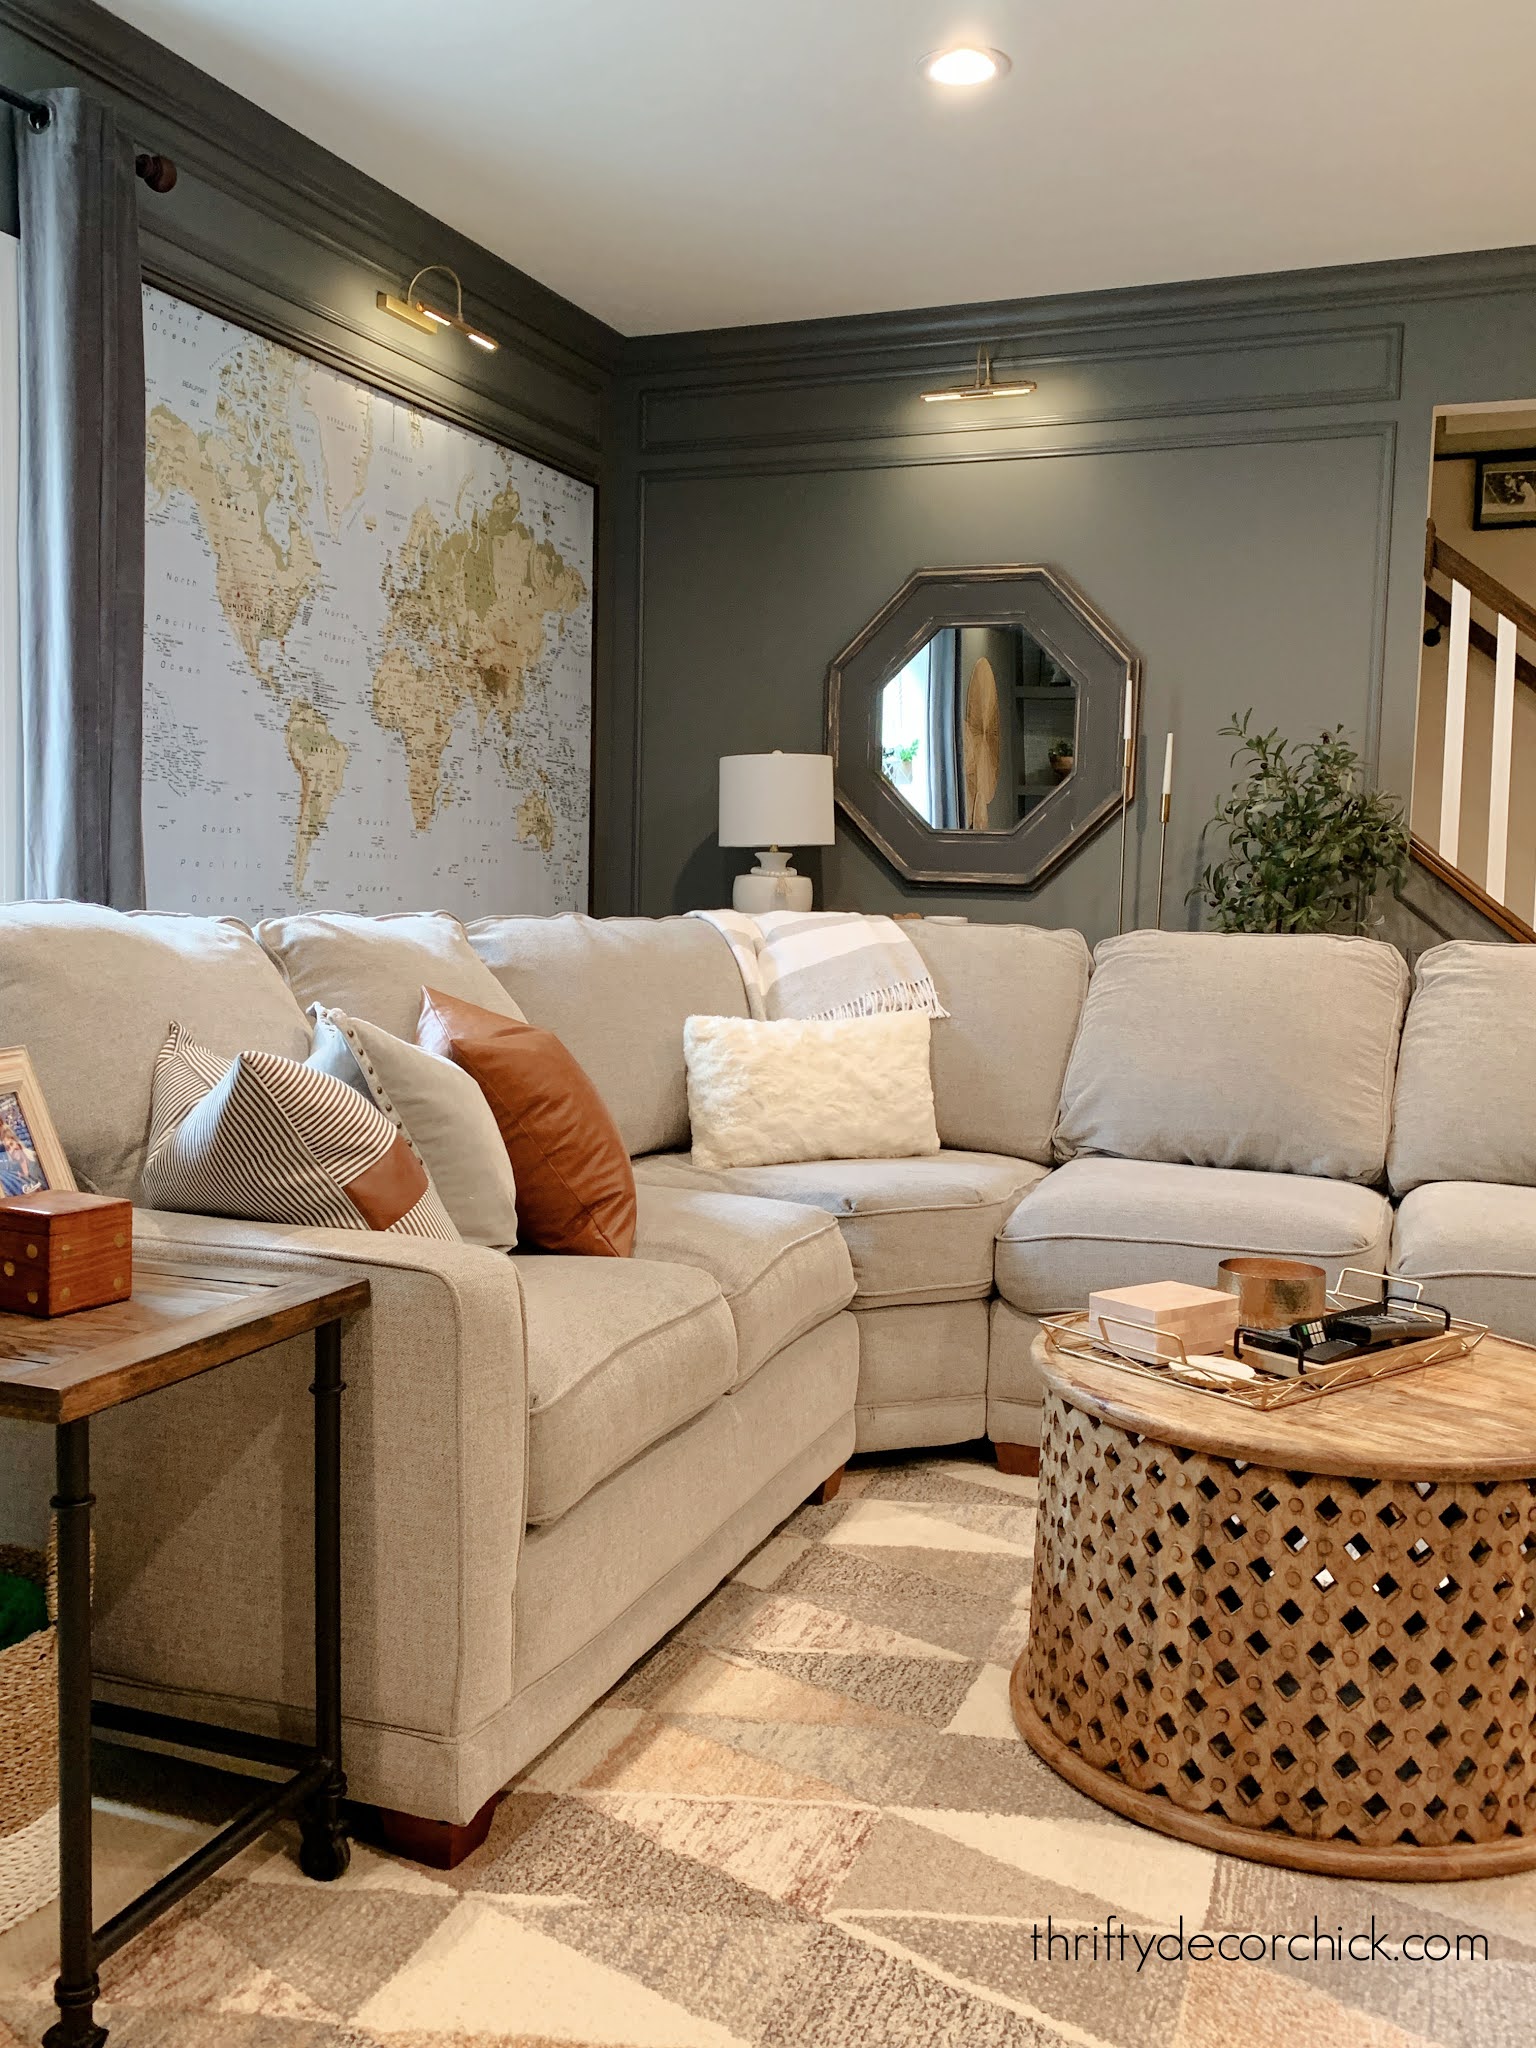
Our basement is our absolute favorite place to spend our time. I've worked on SO many projects to transform that space.
Here's a long wall in our basement before:

And now, after the 18 foot wall of built ins I added last year:

The dark gray paint (Westchester Gray) and trim on the walls created a cozy/moody feel that we just love:

Last year I added a built in electric fireplace to an adjoining space and it really does help to warm up our basement:

The kitchenette is next up down here and I'm SO EXCITED. I'll share the plan and progress very soon!
I hope the changes I've made to our home inspire you to attempt new DIY projects or ideas. :)
If you've used any of my tutorials, feel free to send me a photo of your project! I absolutely love seeing how you all customize them in your own homes.
Never miss a post by signing up to get posts via email.
Via https://www.thriftydecorchick.com/2022/11/our-five-year-before-and-after-home-tour.html |