Ten cute and simple 4th of July crafts, decor and entertaining ideas.If you're hosting over the July 4th holiday, these projects can be knocked out pretty quick. And the easy food ideas are great for entertaining. You know I love a printable and this free download is an easy way to add some red white and blue without spending any money: 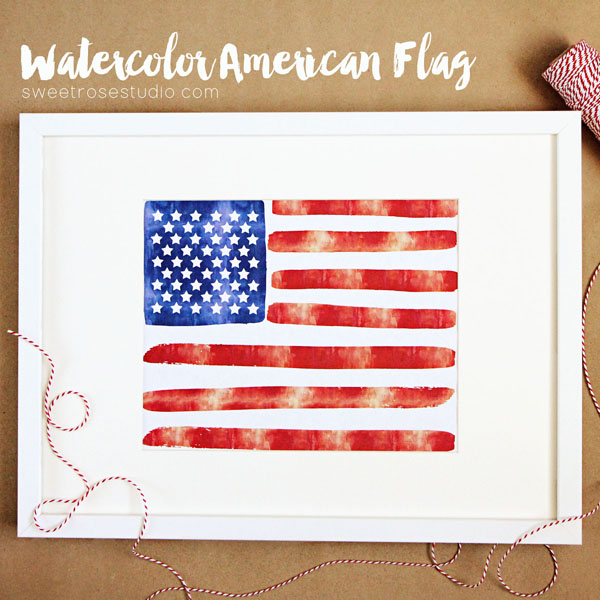
You seriously can't go wrong with these -- such an easy way to add seasonal touches without spending much money.
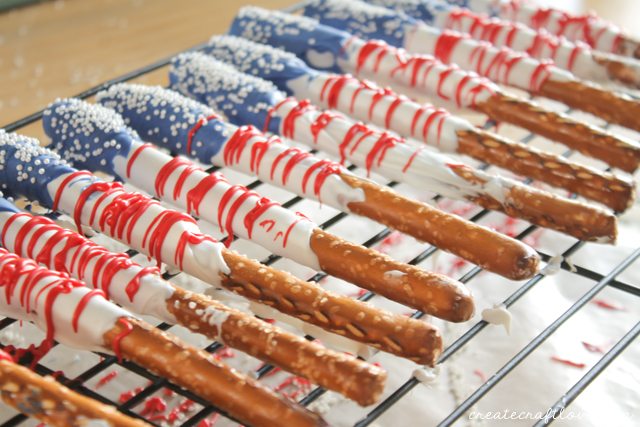
These pretzels are super festive and I'll be making them for sure:
This post may contain affiliate links for your convenience.
See my policies and disclosure page for more information.
I've made these at Christmas and they are GOOD.
Make your own garland with paper and a quick run through the sewing machine:
Read the full post
Via https://www.thriftydecorchick.com/2016/07/super-easy-and-fun-fourth-of-july-ideas.html
0 Comments
My five absolute favorite outdoor DIY projects for the summer!
Tis the season for outdoor projects! I always feel like just as I'm getting amped up to add more plants or start a new summer project outside, the stores are already starting to clearance everything out.
I've already purchased a bunch of plants on sale...and summer just officially began! Crazy.
There's plenty of summer left to enjoy, and I've got you covered if you're considering adding any updates to your deck, patio or landscaping. I gathered my top five do-it-yourself exterior projects that have made the biggest impact on our outdoor living spaces.
Not only do they look good, but they function just as well! All of these can be completed in an afternoon.
1. How to build a SAFE fire pit on the patio
When we had the concrete patio poured a few years ago, I designed an additional round area for chairs and wood burning fire pit.
I get asked about this spot more than any other outdoor project! The round design gives the patio some interest and it makes for great conversation with friends and family. :) We love this spot!
Before you attempt a fire pit on a patio, consider that there is a safe way to install a wood fire pit on a concrete surface:

You can read about the drainage that was added and more in that post as well.
Our round fire pit patio is 14 feet across.
We added the AWESOME Polywood Adirondack chairs around the fire a couple years ago and they still look brand new, even after two years of rain, sun and snow. They are truly one of the best products we have in our home.
2. Hanging outdoor cafe lights (with no trees)
We hung these pretty patio lights at our old house as well, but we had a pergola and mature trees to work with. Here, it's an open space with all new landscaping, so we had to figure out a different way of hanging the cafe lights over the patio:
Read the full post
Via https://www.thriftydecorchick.com/2022/06/top-five-favorite-DIY-outdoor-projects.html How to make any lamp dimmable in five minutes!
Did you know you can make (almost) any table or floor lamp dimmable? How cool is that? It's easy to change out a lamp switch to one that can go from bright to soft light.
This little DIY project takes five minutes and is a great starter project for beginners interested in learning how to do basic electrical work around the house! You don't need to pay an electrician to update these light fixtures.
We have quite a few three-way lamps in our home, and I love having the option of changing up the brightness of the light. But those incandescent light bulbs have always been more expensive, and even more now that everything is switching to energy-efficient bulbs.
Plus it drives me crazy that one brightness level goes out quicker than others on those bulbs -- in our foyer where we have two lamps, we usually end up with one at the lowest light and one at the brightest. :)
But then last fall my friend Diane shared that you could easily change out your lamp socket and I put it on my mental project list. It just never occurred to me that a lamp cord dimmer was an option!
I decided to try this out on the two lamps on our long foyer table:

This post may contain affiliate links for your convenience.
See my policies and disclosure page for more information.
You know this is right up my alley! I fell in love with soft dimmed lights years ago and shared how to install a wall dimmer switch.
That's another easy starter electrical project (I promise it's not hard), but this one is even easier!
To change out your lamp socket, you'll need this dimmable replacement lamp socket and just a few common tools -- I'll share those below.
By the way, you can use this plug-in dimmer switch adaptor to make any lamp dimmable as well. But you'll have to keep the switch out where you can access it.
Both options are great! This tutorial keeps things a little cleaner visually. Step 1: Double check that your lamp is unplugged
Then check it again. One more time.
Thank you. :)
Step 2: Remove the existing lamp socket
After removing the lampshade (and harp in my case), you'll need to remove the existing socket. Mine was plastic and the top part unscrewed:
Via https://www.thriftydecorchick.com/2022/06/how-to-make-any-lamp-dimmable-in-minutes.html How to make this easy banana and avocado ice cream recipe!
Trust me...the combination of these two creamy fruits combined together makes the most delicious ice cream or smoothie!
But because I have been known to eat an entire vat of guacamole all by myself, and have been known to do this often, I just had to try it. It only takes a few minutes to make this delicious treat. And did I mention the best part? You do not need an ice cream machine! There are only six ingredients: 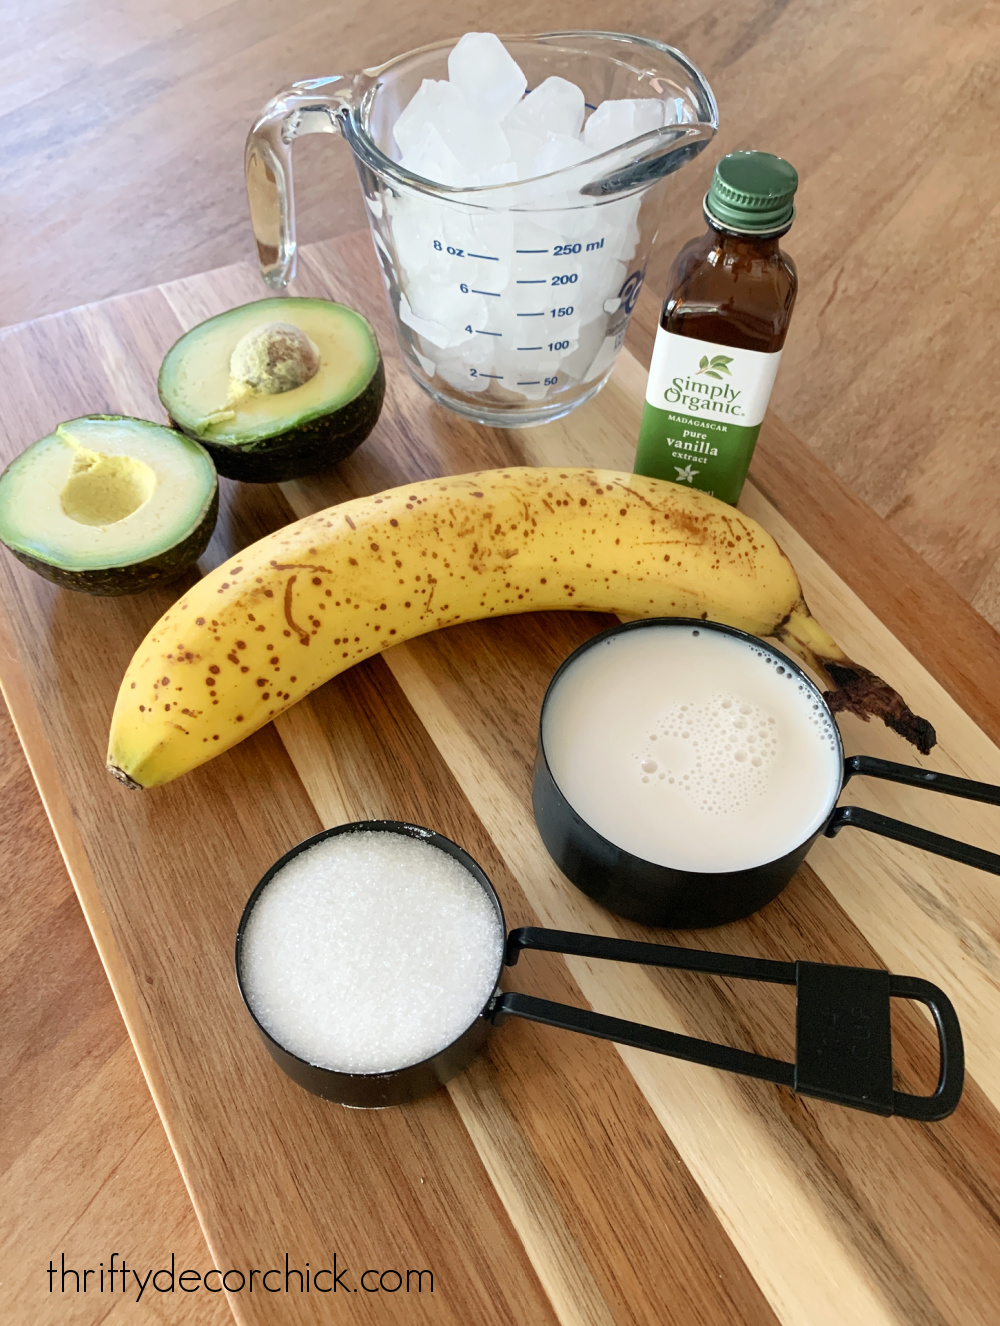
AVOCADO BANANA ICE CREAM RECIPE
1 medium ripe avocado
1 frozen medium banana
1/2 cup milk (we use almond milk and it was great)
1 cup ice (optional but it helps give it a frozen consistency)
1/2 cup sugar
1 tsp vanilla extract
The only time in this recipe is the freezing -- cut up the banana into slices and place them into the freezer beforehand:
I would recommend giving them at least few hours to get completely frozen. Then place all of the ingredients together in a blender or food processor: 
Process for a few minutes until all of the ice is blended well:

I recommend taste testing as you blend...because our avocados were so small this time, I added a half of one more to my mix to cut down on the sweetness a bit.
It will have a consistency very close to ice cream when it's ready:

Looks SO appetizing, I know. ;) Just WAIT.
Let. me. tell. you. It is SO good.

OK seriously, it’s scrumptious. Smooth with a great creamy texture, and sweet. It would be just as good as a smoothie too!
I think you'll like this even if you don't like avocado. There's no strong avocado flavor -- the sweetness of the banana definitely takes over. I don't taste any avocado in it at all actually!
You can freeze it after mixing to give it even more of an ice cream texture:

I prefer it a little creamier, so I like to let it thaw just a bit out of the freezer.
This avocado ice cream does not get brown with time.
I figured out a few changes this last time I made it, since I don't think this recipe needs much extra sugar.
This is how I'll be making it from now on:
1 medium ripe avocado
1 frozen medium banana
1/2 cup almond milk
1 cup ice
2 tbsp sugar
dash of vanilla extract
I used overripe bananas this time, which are sweeter. If you use the same, I don't think there's any need for either the vanilla extract or the sugar.
If you use younger bananas, the smaller amount of sugar would be perfect!
Start with less sugar to see how you like it! You can alway add more as you blend.
You all have shared some great banana and avocado ice cream variations over the years:
Have you tried this amazing DIY ice cream? I know it doesn't look super appetizing, but I think you'll be surprised at how delicious it is!
Do you love any weird food combos? Two of mine are ranch dressing on pizza and Wendy’s fries dipped in a chocolate frosty. ;) YUM.
Pin this one for later with this image:

Never miss a post by signing up to get posts via email.
Via https://www.thriftydecorchick.com/2012/05/avocado-banana-ice-cream.html Adding pretty decor touches to my closet with wallpaper and lighting!
I did a huge, top to bottom transformation of my closet last year using all IKEA units and I still pinch myself when I walk into this space. It is a night and day difference from where it started!
Once all the hard work was done, I was able to start adding in some decor touches to pretty it up a bit. I added a beautiful wallpaper and some brass touches that made a BIG difference.
Last fall I shared this big IKEA closet makeover reveal:

This post may contain affiliate links for your convenience.
See my policies and disclosure page for more information.
Tearing out the wire shelving and making this space work better was one of the BEST decisions ever. This organized closet has made a huge difference in my days!
The first big change in this makeover was removing the shelving back in the corner and replacing it with these stacked cubby units for folded clothes:

That gave me a spot for all of my off season clothing as well. Those little drawers have been great for smaller stuff socks and undergarments.
IKEA sells a bunch of components like these to customize their Kallax units.
The small knobs that come with those IKEA drawers were a bit too tiny for my liking, so I replaced them with these round brass pulls instead:

They definitely make more of a visual impact now as well.
Those cubby bin label holders are awesome -- they clip on the canvas bin and you can slide a label inside. Mine had a nickel finish, so I spray painted them in my favorite brass spray paint (Metallic Warm Gold) to warm them up a bit:

Those specific clips are hard to find in the store anymore, so I've used these plastic bin labels lately as well.
All the organization is wonderful, but my favorite part of this wall now is the lighting! I got three Urshult cabinet lights from IKEA and spray painted them in that same brass color:

The bulbs are LED and don't get super hot, so the spray paint holds up just fine. I plugged them in the wall next to this tall unit -- I used my favorite cord covers to corral the cord and switch along the side of the cubby units.
Years ago I installed a motion sensor light switch in this closet as well:
These motion sensors are PERFECT in a closet!
Some of you may remember the VERY pink wallpaper I tried out in this closet at first. It didn't last too long -- it was just way too much and not the look I was going for overall. I wanted something softer and prettier for sure.
I went with one of my favorite peel and stick wallpapers -- the same cherry blossom print I used behind my office bookcase shelves:

So I went with the "pearl" finish I used in the office -- it has touches of a coral/light pink tone that work beautifully in here:

I had larger artwork here before, but I wasn't feeling it for this space. Instead I found this beautiful botanical print online and printed it out at CVS. Love it!
The pretty blossom wallpaper is also on the wall behind the mirror in my little jewelry nook:

This is such a pretty space now, I'm so happy with how this all came together! I love when form and function meet so well!
Those IKEA lights are the perfect low light in here...I just love them!

Never underestimate the difference some good organization will make in your life. So worth the time and effort!
This wall was impossible to keep under control before:

But look at it now!:

I absolutely love walking into this space every morning and night...it's a breath of fresh air. After living with it for eight months now I can say I wouldn't change a thing! (But I have some ideas to customize these IKEA units even more, so stay tuned for that.)
Be sure to check out the full IKEA closet makeover post to get all of the details and sources for everything else in the space. :)
Here's a recap of the decorative items I've used in here:
Pearl cherry blossom wallpaper (three colors available)
And check out 20 more DIY custom closet ideas here!
Never miss a post by signing up to get posts via email.
Via https://www.thriftydecorchick.com/2022/06/decor-wallpaper-upates-in-ikea-closet-makeover.html A quick DIY project to change the height of my new office cabinet!
I recently found a little cabinet with sliding glass doors on FB marketplace and knew it would work well in my office. Turns out the height wasn't quite right, so I made some minor changes to make it work!
I don't shop secondhand as much as I used to, simply because I was cluttering our home with my finds. If you like an item even a little bit, you have to grab it knowing it may not be available long.
After years of visiting Goodwill and antique shops regularly, I'd found so many wonderful treasures...but they started taking over. ;)
Years ago I decided I needed to cut down on the secondhand shopping, and it has made a HUGE difference in the clutter in our house! Now when I buy something, I have to know where it will go before I bring it home.
I loved this cabinet so much, if it didn't work in my office I knew I could make it work in a couple other spots as well:

There's a Pier 1 tag on the bottom -- I don't think they have actual stores open anymore, just online right?
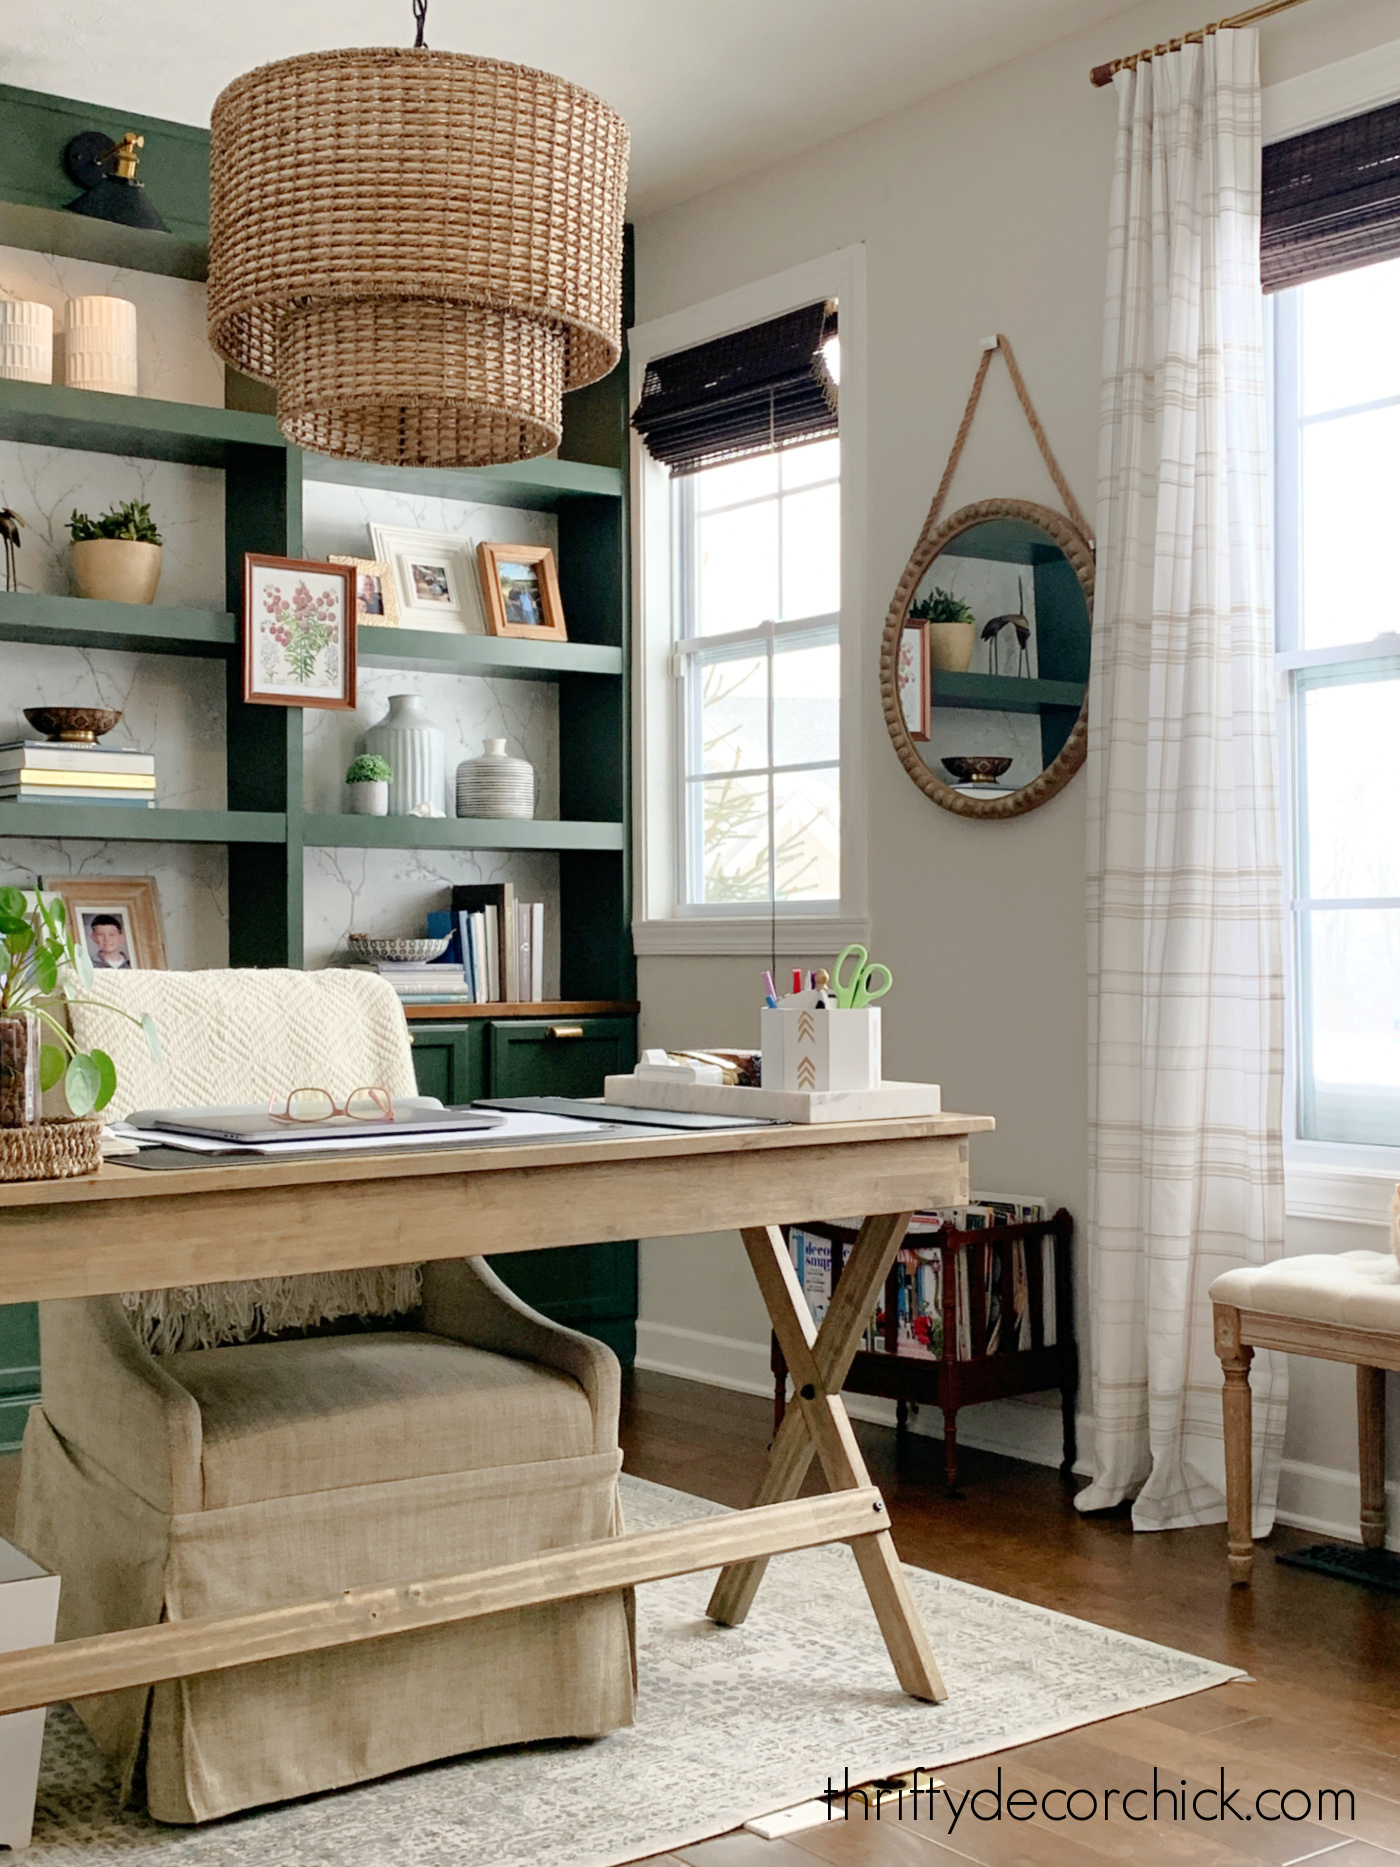
I loved the open space on the bottom and the sliding "X" doors. The wood is a lovely color, but I did think about painting it for a split second.
I'm so glad I decided against it! I knew it would be beautiful in my office with the deep green color (Vintage Vogue) on the bulletin board and built ins.
First I planned to put it right between the two windows, under that mirror:
This post may contain affiliate links for your convenience.
See my policies and disclosure page for more information.
That vintage rolling magazine rack in this photo was one of my absolute favorite secondhand finds EVER...but one day a few months ago I moved it to vacuum and it literally fell apart.
Like, truly crumbled before my eyes. ? I tried putting it back together, but it was a goner.
Since then I've been looking for the right item for that spot. The cabinet dimensions were perfect, but when I tried it there it was visually WAY too heavy.
I did some maneuvering and decided it would be lovely on my upholstered bulletin board wall instead!
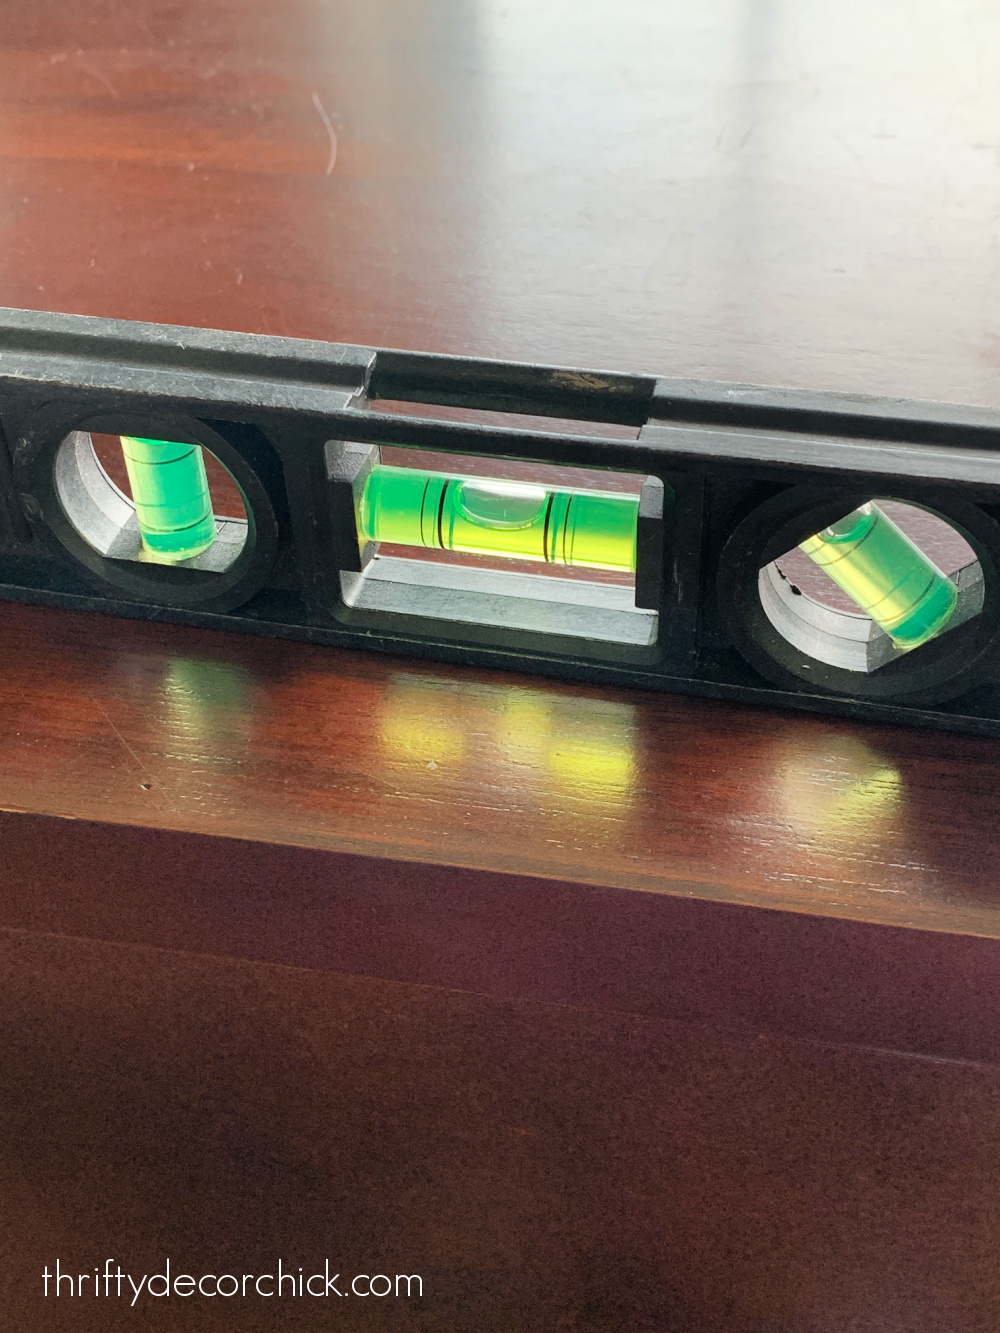
It was too tall to fit under the TV...so I laid it down on the floor to do some checking. I figured I could disassemble the bottom part and cut the legs down.
I was right! The bottom section came apart easily. I removed the feet, the bottom shelf and the legs. Of all of the those, the top portion of the legs were my only option to cut because of the hardware components everywhere else:

So the top part of the four legs were my focus because they only had screws inside. These are double sided screws, much like I use to hang cabinet hardware as decorative hooks.
I used pliers to remove them:

These legs had a very slight taper to them at the bottom, so when I laid them on the saw to cut I had to prop the narrow end up just a bit like so:

This pushed that side up just a tad so the cut would be level.
Give yourself some room if you attempt this with tapered legs! It took a few tries -- shaving off just a bit here and there to get them all the exact same length.
Because the double sided screws needed to go back in, I clamped the legs down and used a drill bit to make a new hole:

I shared how I did this in more detail in my heavy duty DIY floating shelf tutorial.
Quick tip -- use painter's tape to mark the depth needed on the drill bit. That way you won't go too shallow or too deep.
Also, it's helpful to place painter's tape on or around the surface before cutting with the saw. It will help to prevent the wood from splitting.
When I had all the legs cut down to the same size, I reinserted the screws:

To get a good grip with the pliers, I use these can lid grippers to prevent the screws from getting stripped as I put them back in. You could also use a scrap of a rubber rug gripper pad to do the same.
I was nervous...even though all the legs were the same length, I was worried it wouldn't all go back together perfectly. But it did! Whoot!:
I used a stain pen to cover any dings in the wood from the saw on the legs.
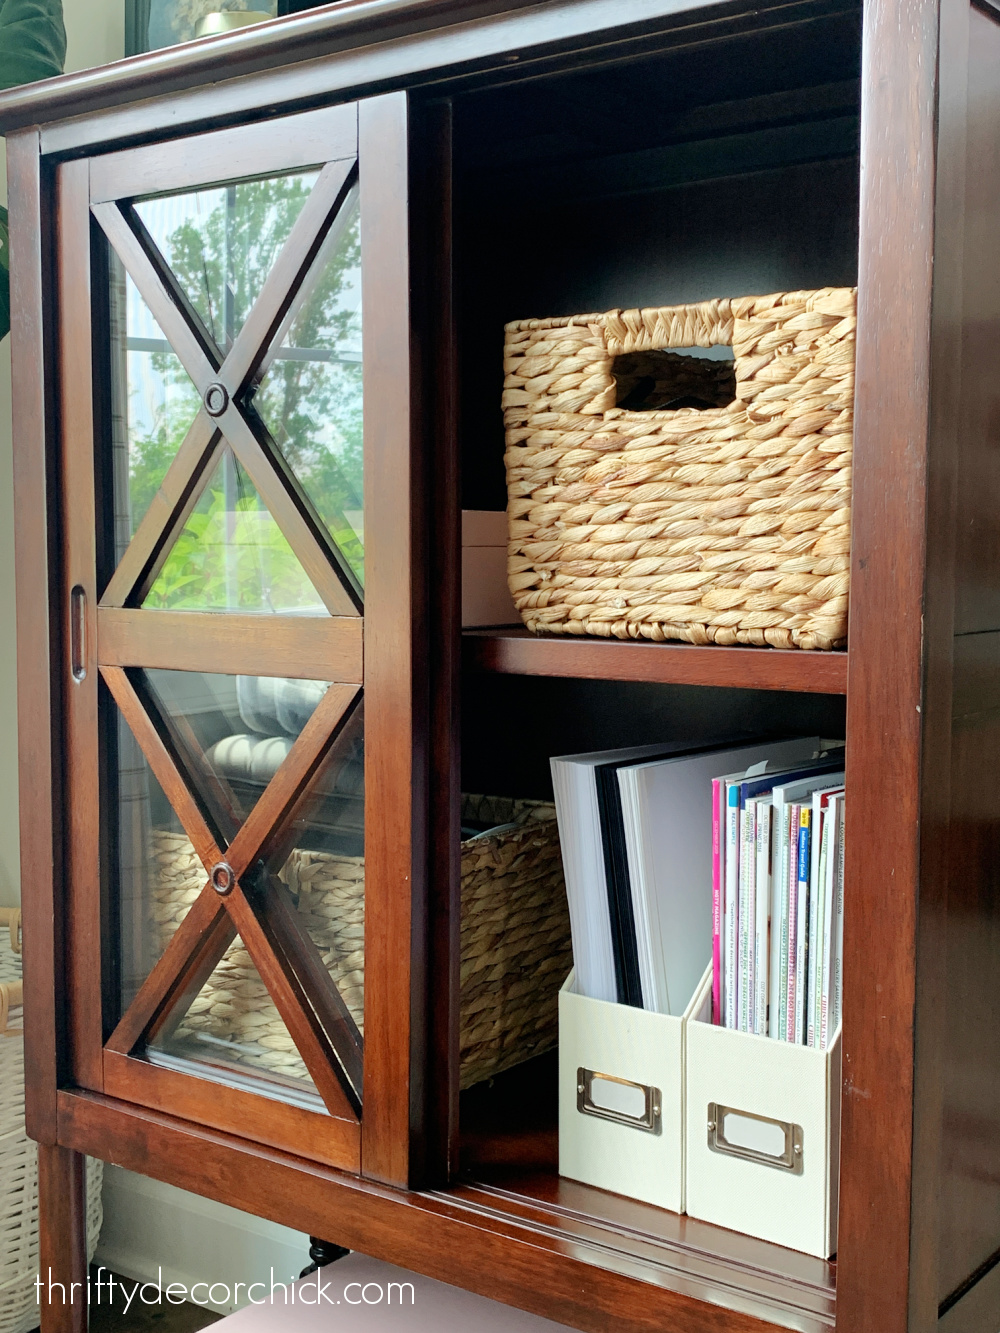
Then I cleaned the cabinet well, put the shelf back inside and then started organizing! I grabbed a couple of these wicker storage baskets for the inside, and this set of fabric covered storage boxes as well:

I moved the printer I had on that wall to the bookcase behind my desk. It will function so much better for me there!
I LOVE it!! It's just so lovely in my office and feels like it was made for this space:

It was such a simple change and only took me about 45 minutes from start to finish.
Those sliding doors are my favorite part...I just love them. ?
I encourage you to see how pieces can work better for your home...you'll be surprised what a few small tweaks can make! :)

Have you found anything great on Facebook Marketplace? I don't look often, but when I do I always find great buys!
See all of the DIY projects in my cozy office here:
Never miss a post by signing up to get posts via email.
Via https://www.thriftydecorchick.com/2022/06/wood-office-cabinet-with-sliding-doors.html My top ten favorite dollar store purchases!
These are the top ten items I always grab at the dollar store! We all love a good dollar store deal, but there are definitely some items that aren't worth the money, or can be found in greater quantities for less.
There are a few that I ALWAYS grab when I stop in. I've compared the prices of these items to places like Target and Walmart, and they are all much better at the dollar store.
OK...a lot of the items are actually $1.25 now. But there are plenty of items that are still a dollar or less! :)
I'd love to hear what your favorite go-to items are too! Feel free to share them in the comments at the end.
Let's start with my favorite dollar store find...
Gift bags
I don't find their small rolls of gift wrap to be worth it, because you get so little. But their other wrapping supplies like bows and gift bags are priced competitively.
I haven't found a selection of gift bags for this price anywhere else:
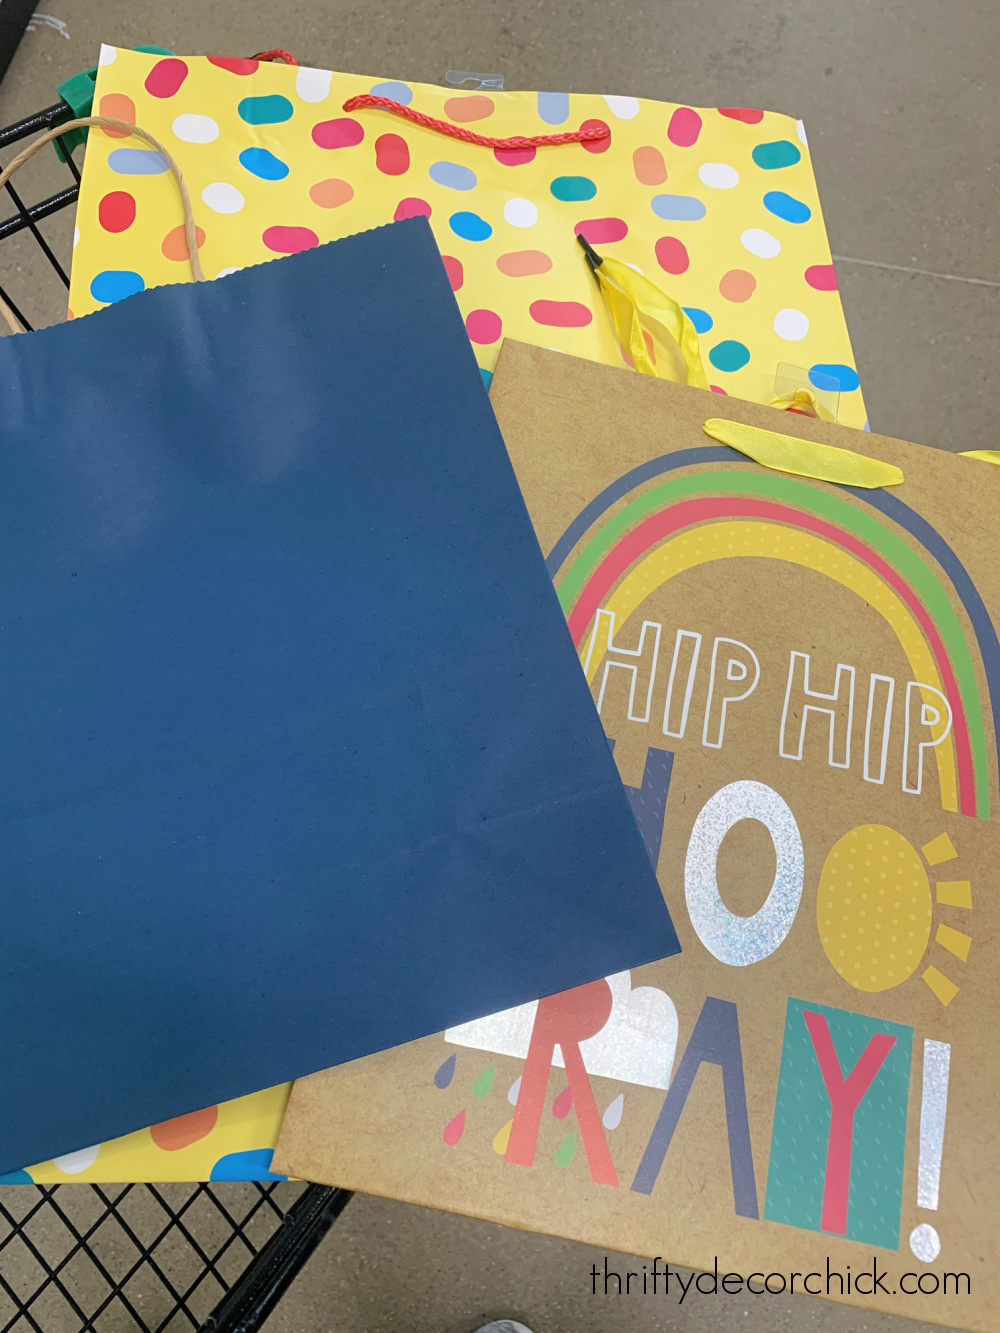
They carry options in every color, size and for all the big events -- baby shower to wedding to birthday. The dollar store is great affordable option for large gift bags as well. You'll save a good three to five bucks on the bigger sizes.
Also, their 24 count tissue paper is half the price of larger stores!
I'm always impressed with the colorful and fun designs -- so cute! And the quality matches bags I've bought anywhere else.
Of course their holiday selection is always adorable too. Check out how I use gift bags to make Christmas decor and artwork here!
Greeting cards
I've always noticed the HUGE selection of greeting cards, but it hasn't been until the past year or so that I started picking them up and looking closer:

They are adorable! From funny to really sweet -- I've found everything I need.
As a family we love to gift each other cards from both the animals and us, so it can get expensive. They have a great variety for every holiday and event.
Now I just need to get my husband to shop for his cards at the dollar store. ;)
All cards are a dollar at most, and some are two for a buck. You save at least $3 on each card -- it's hard to beat that price!
Candles/glass decor
The home decor glass aisle at the dollar store is the best! Their simple glass holders are timeless and they have a great selection of vases that are perfect for a DIY project.
I shared how to make this elegant glass candleholder with two $1 items from the dollar store:

Those look great all year, but especially dressed up for the holidays! I've also used their simple glass holders for other crafty candles like these "snow"-covered candles.
If you like the glow of candlelight, but prefer not to have different scents, their basic candles are great. Screen protectorsThese phone screen protectors are one of my all time favorite dollar store purchases!You can find them in all different sizes and phone types, and they work just as well as the $10 (and UP!) options at other stores:
|