|
Hello my friends! I hope you're doing well! I've been busy finishing up a big paint job in our master bedroom. This room isn't completely finished just yet -- I'd like to add some decorative touches to complete the space. But until I can get into a HomeGoods again, this is where we're at. :)
Let's look back at where we started! This is how the room looked before moving in:

It's a long room and much skinnier than our old master, but still has lots of space. We LOVE all of the windows in here!
Shortly after moving in, I completed the makeover on the IKEA dressers as our nightstands:

Then I hung our drapes and roman shades and that was about it:

See how to make that DIY upholstered headboard here
The first BIG project in this room were the faux beams around the tray ceiling. It really added some drama to the room that we love. It also made it feel super cozy and comfy...so I decided to keep going with that feel for the space.
I'd love to lighten up the window treatments someday -- both the shades and the curtains. But these were super affordable and they block the light big time. We need DARKNESS when we sleep so light blocking drapes are non-negotiable. (I'll list sources for everything in this room at the bottom of the post!)
Eventually I hope to find lighter treatments that still keep it dark at night...but I'm not super hopeful that I'll find them without spending a fortune. So until I find exactly what I want, these work great! (The drapes come in a few colors and are SUPER long, which is hard to find!)
I decided to keep the cozy vibe going...I hung the peel and stick grasscloth wallpaper last fall. I LOVE this wallpaper!:

This post may contain affiliate links for your convenience.
See my policies and disclosure page for more information.
Oh, and we had the hardwoods continued in here as well. We were lucky to get just enough to do this room and my office -- the floors were discontinued soon after we moved in.
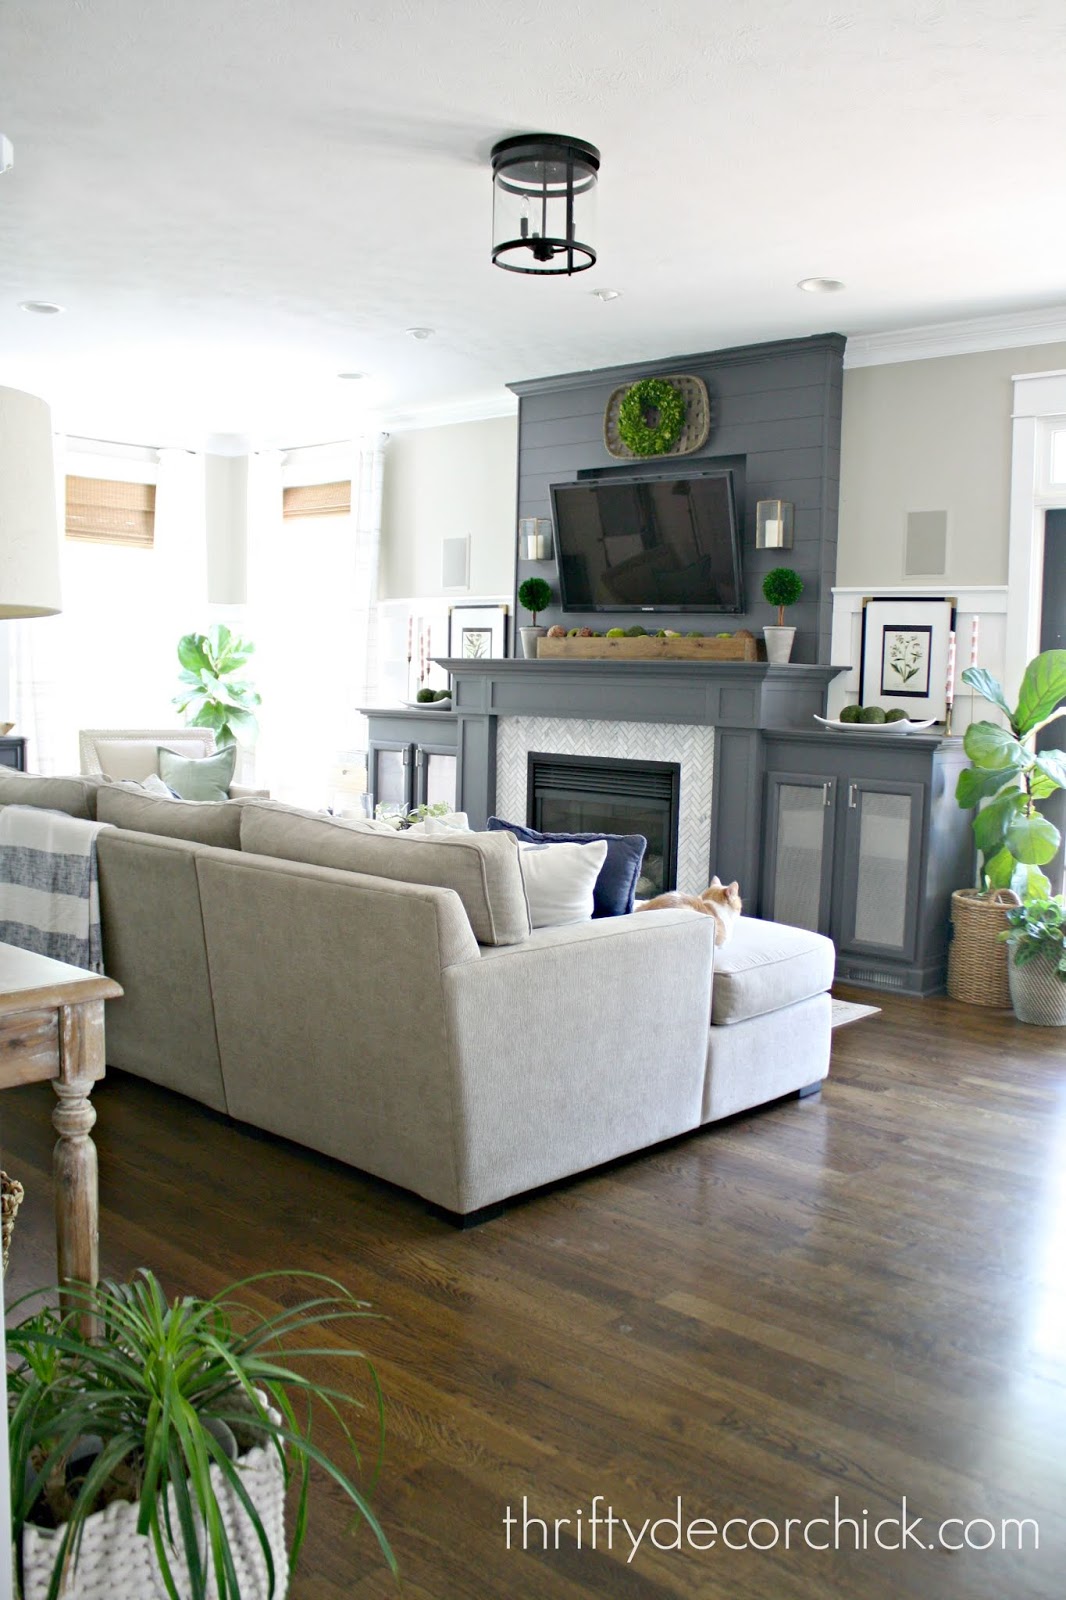
After all of that I focused on other projects around the house for a bit. I tend to flit from project to project...if you haven't noticed. Ha! I finally finished up the paint on the chair rail and below last week. I used the same color as the tray ceiling -- Westchester Gray by Sherwin-Williams.
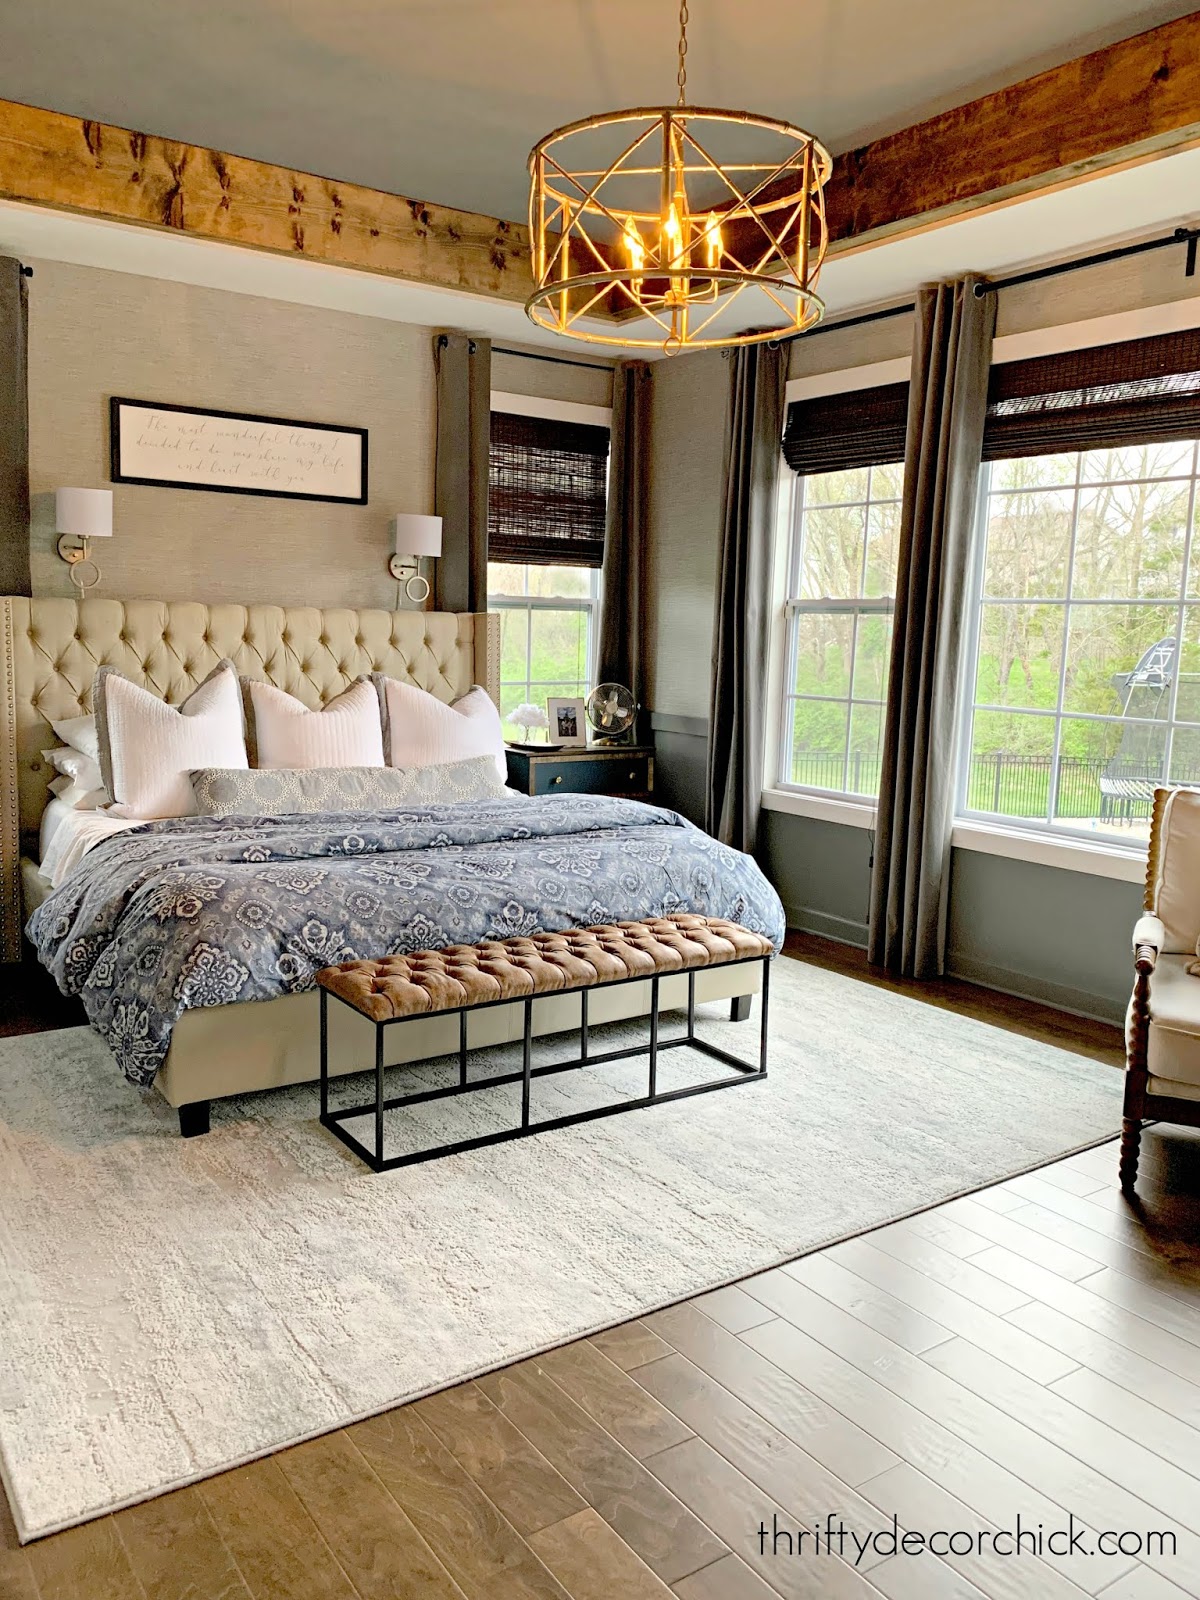
This space is SO cozy and warm...we absolutely love it! Here's how it looks now:

I hope to find some new throw pillows and a blanket for the bed (I stole the long pillow from the mud room for these pics).
Now more than ever, I wanted this room to feel like a warm "hug" -- a little hokey I know, but home has never meant more!

I thought about painting the window trim for a hot second...and then quickly decided against it. It will take forever. Maybe I'll do it eventually but I'm waiting on that project!
Here's a look at my favorite side of the room before:

And here it is now with the wood beams, wallpaper, trim and paint:


I was planning to paint that dresser, but after I painted I changed my mind...for now. I like the wood tone against the gray. We'll see what happens. :)
This room gets a TON of natural light, so it was easy to go darker with the paint and ceiling. It's still super bright and light. But at night it feels like a cocoon and we love it:


This isn't the final reveal...I'll zhuzh it up some more when I can shop again. :) But I've worked really hard on this space and wanted to share the progress!
I've been getting a ton done lately! Not all super exciting stuff, but I'm getting a bunch knocked off my to do list. It feels good! I'm going to tackle a few more small projects and then start another big one that involves a lot of painting.
Here's a source list -- let me know if I forgot anything!
(You can click any of the photos below as well.)
 See more of our home here. To shop items in our home, click here! Never miss a post by signing up to get posts via email. Via https://www.thriftydecorchick.com/2020/04/our-cozy-master-bedroom-reveal-with.html
0 Comments
I’m back with a DIY project I’ve been wanting to tackle for a long time. I mentioned a while back that my house had been finally been debrassified (I replaced all of our interior door knobs), but I was wrong. I had forgotten about a couple in the house.
(This is a helpful post from our old house!) But these were exterior door knobs that we use a key with – so replacing them meant spending more than I wanted on new keyed knobs. I figured I’d try to change them up myself. I’ve always wondered how spray painted knobs hold up and it’s the age old question – some say they do great, some say they do horribly. We’re about to find out. Well…in a few weeks/months anyway. **You can find the link to see how they held up at the end of this post! I did a couple doors with varying uses/elements so it will be interesting to see how they turn out. But first, the how to. Use a screwdriver and take the knob off the door: 
This post may contain affiliate links for your convenience.
See my policies and disclosure page for more information.
Ignore the horrible, dirty mud room door. And missing trim. And blinding brass. Don’t be afraid to take the knob off – even I avoided this for years and it’s not a big deal. It's two pieces and the screws, that’s it. Just remember how they go back together and always remember the access to the screws side goes inside the room! First up, and I think this is most important part – clean them. I just used my basic cleaning stuff but anything that will get any grime or grease off is what you want:  Thing is, if you don’t clean them well the primer and paint won’t hold well – you’ll get crackles or it will easily wear off those dirty areas. I took them out in the garage and needed something that would allow them to stand up, so I stuck the one with the long part into a shop towel cardboard box and just laid the other one on top:  I later stuck the screws in there too – they stand up straight so you can spray all sides at once. So…the primer part. I have some really good (and expensive stuff) called BIN primer in a spray. But it’s a pain in the butt to use. I told you more about it here. I’ve tried everything to make it spray smoother but it just doesn’t work. This time my gloves and the can ended up covered in the primer:  
SO frustrating, because it's great primer! The paint sprayed all clumpy and gross too, so I actually had to sand down the knobs a bit to help that. I’m throwing the primer out, which is annoying cause it’s not cheap. I ended up just using a basic black primer instead:  The BIN spray is a stronger, better primer, but I was tired of cussing so there you go. You'll need to let each coat of primer and paint cure for a good amount of time before the next coat. Don’t they already look so much better though? SO. much. better. I finished up with my BFF…good old ORB (that’s oil rubbed bronze for those not tight with it):  Hello my friend. Good to see you again. When spray painting remember short, light coats – not long, heavy ones. There’s really not much to it if you remember that. I took the knob off the back door too and you can see the wear on the keyed side from being outside:  It will be interesting to see how these hold up – the mud room door is one we use a key on all the time, so that will get lots of wear and tear. The back door we don’t use a key on much, but the outside part gets hit with the elements. And we use both doors numerous times a day. On the back door I took the knob off and did that first:  I didn’t want to take both off just in case something went wrong. You know I don’t have much luck with that door. The deadbolt part was a little more tricky – we’ve been told we need to replace our whole back door (water issues) and every time I get inside there I see why. The insides of that one were rusted so it was hard to get the lock part off the outside part of the door. I just ended up spray painting the inside part. I also took the strike plate off and sprayed that, but I know it will get scratched up – it already is. Most of it should stay the ORB color though, so we’ll see how that holds up: 
I decided to makeover that mud room door so I can’t show you the after on that one just yet. ;) But here’s how it looks on the back door:  So here’s the thing about painting doors – this is why you really want to take the knob off before you paint. I didn’t and now the knob isn’t exactly where it used to be and you can tell. :) I’ll update you in a month or two and let you know how these are holding up! I’m really interested to see. Our coach lights that I spray painted still look fantastic:  They are exposed to the elements for sure, but no one handles them. Have you ever tried spray painting door knobs? How did it turn out for you? I’d love to hear! I love a good experiment. :)
**Want to see how these held up? See how they turned out here.
To see the magic of spray paint on other projects, go here.
See more of our home here. To shop items in our home, click here! Never miss a post by signing up to get posts via email.
Via https://www.thriftydecorchick.com/2013/10/spray-painting-door-knobs.html
Hey all! I hope you are doing well! We are almost exactly at two and a half years in our "new" home and it's had me thinking about how much my style has changed since we lived in the old house.
My decor style is always morphing over time, but a new space gave me free rein to change things up a bit. During our time in this home, I've noticed how my decorating has changed quite a bit.
Starting fresh will do that I guess?
Let me be clear -- I don't think either of the looks is better than the other, I just think it's fun to look back and see how my style has changed!
If you have been around for awhile, you know that we did a big renovation in our old house, in segments, that started about six years ago. The first part was taking down a wall in our family room to open up the space -- that area in the corner used to be my office:
This post may contain affiliate links for your convenience.
See my policies and disclosure page for more information.
This was by far the best decision we made in that house! I gave us SO much more space and allowed us to make our kitchen bigger as well.
As far as my decorating, I look back and notice that it was more farmhouse style then. I sold and donated SO MUCH stuff shortly after moving in here, and many of the items in these photos have gone to loving homes. :)
Farmhouse decor hit it's peak about that time, so I was right on trend...for once! Ha!

In this house I've gone a little more moody with the paint colors, and have pared down the accessories and art quite a bit: 
Which is funny, because we have more open space here, and probably more wall space?
But from the start I wanted to use less than before:

I think it was because we had lived in the tiny hotel room for so long in between houses. (Three humans and three animals in 300 square feet for nine weeks.) When we got in here I had this strong desire to have less stuff around us.
I figured over time, I'd want to add more and more, but I haven't. I'm still perfectly happy with living with less decor:

I used to feel like every wall had to have something on it...but it's been nice to let spaces breath and just BE here.
Goodness, I loved this shiplap bathroom so much! And I worked SO hard on it!:

I still love it! I used way more color back then...who knew aqua and red would look so good together? (My inspiration came from our son's artwork that hung in there.)
I think it's my desire for less stuff or distraction now, maybe because I'm getting older. But I went way more dramatic and a bit more modern with our current powder room:

It's hard to tell here, but the dark peel and stick wallpaper has gold flecks throughout that is a more sophisticated contrast to the traditional board and batten.
This simpler wall trim treatment felt right here -- and it was way less work than the powder room with shiplap and board and batten in the old house!
I'm not sure I've worked harder on a space (or been prouder) than our kitchen renovation in the old house! I keep going back and forth on adding another wood hood -- this one looked so good!:
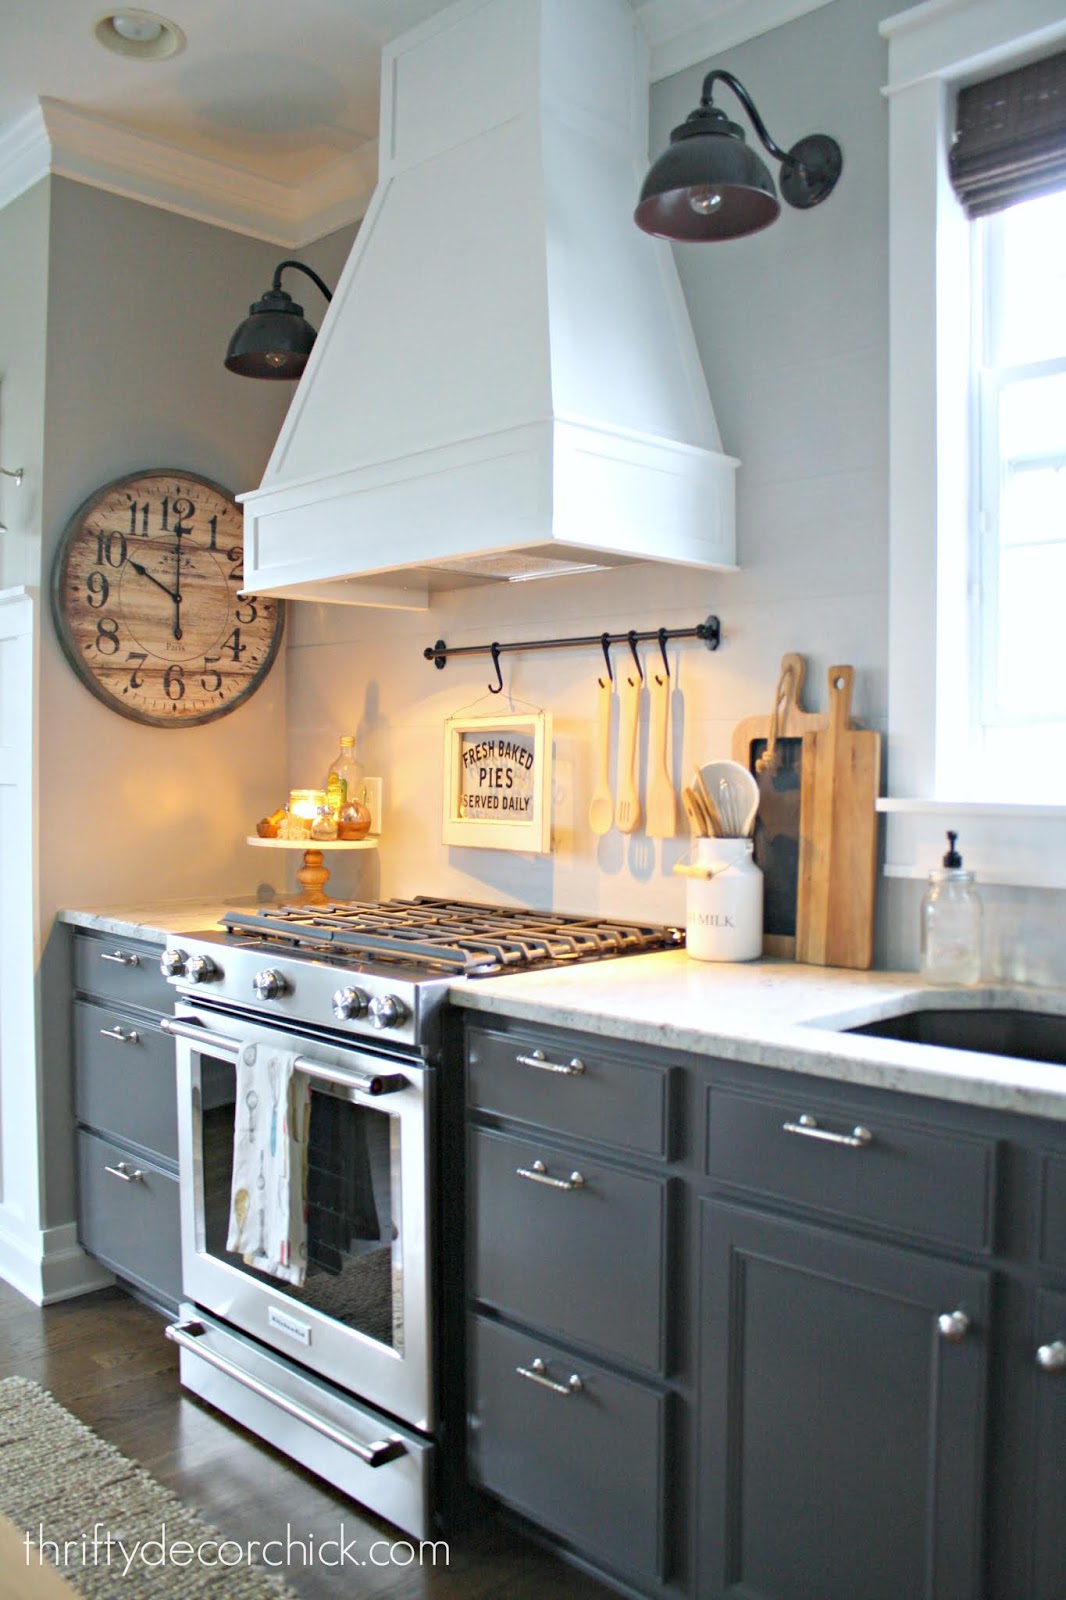
I also loved the contrast of those darker lower cabinets and white uppers.
I chose farmhouse style for the lights and accessories, as well as the backsplash. I went with a shiplap cement board instead of tile for budget reasons (and it was MUCH easier to install):

Subway tile has been around forever, and definitely fits in with a farmhouse look. I went with a slightly more modern take on it in the new house with a darker grout:

The tile also has a beautiful wavy texture to it that gives it a little more interest than regular subway.
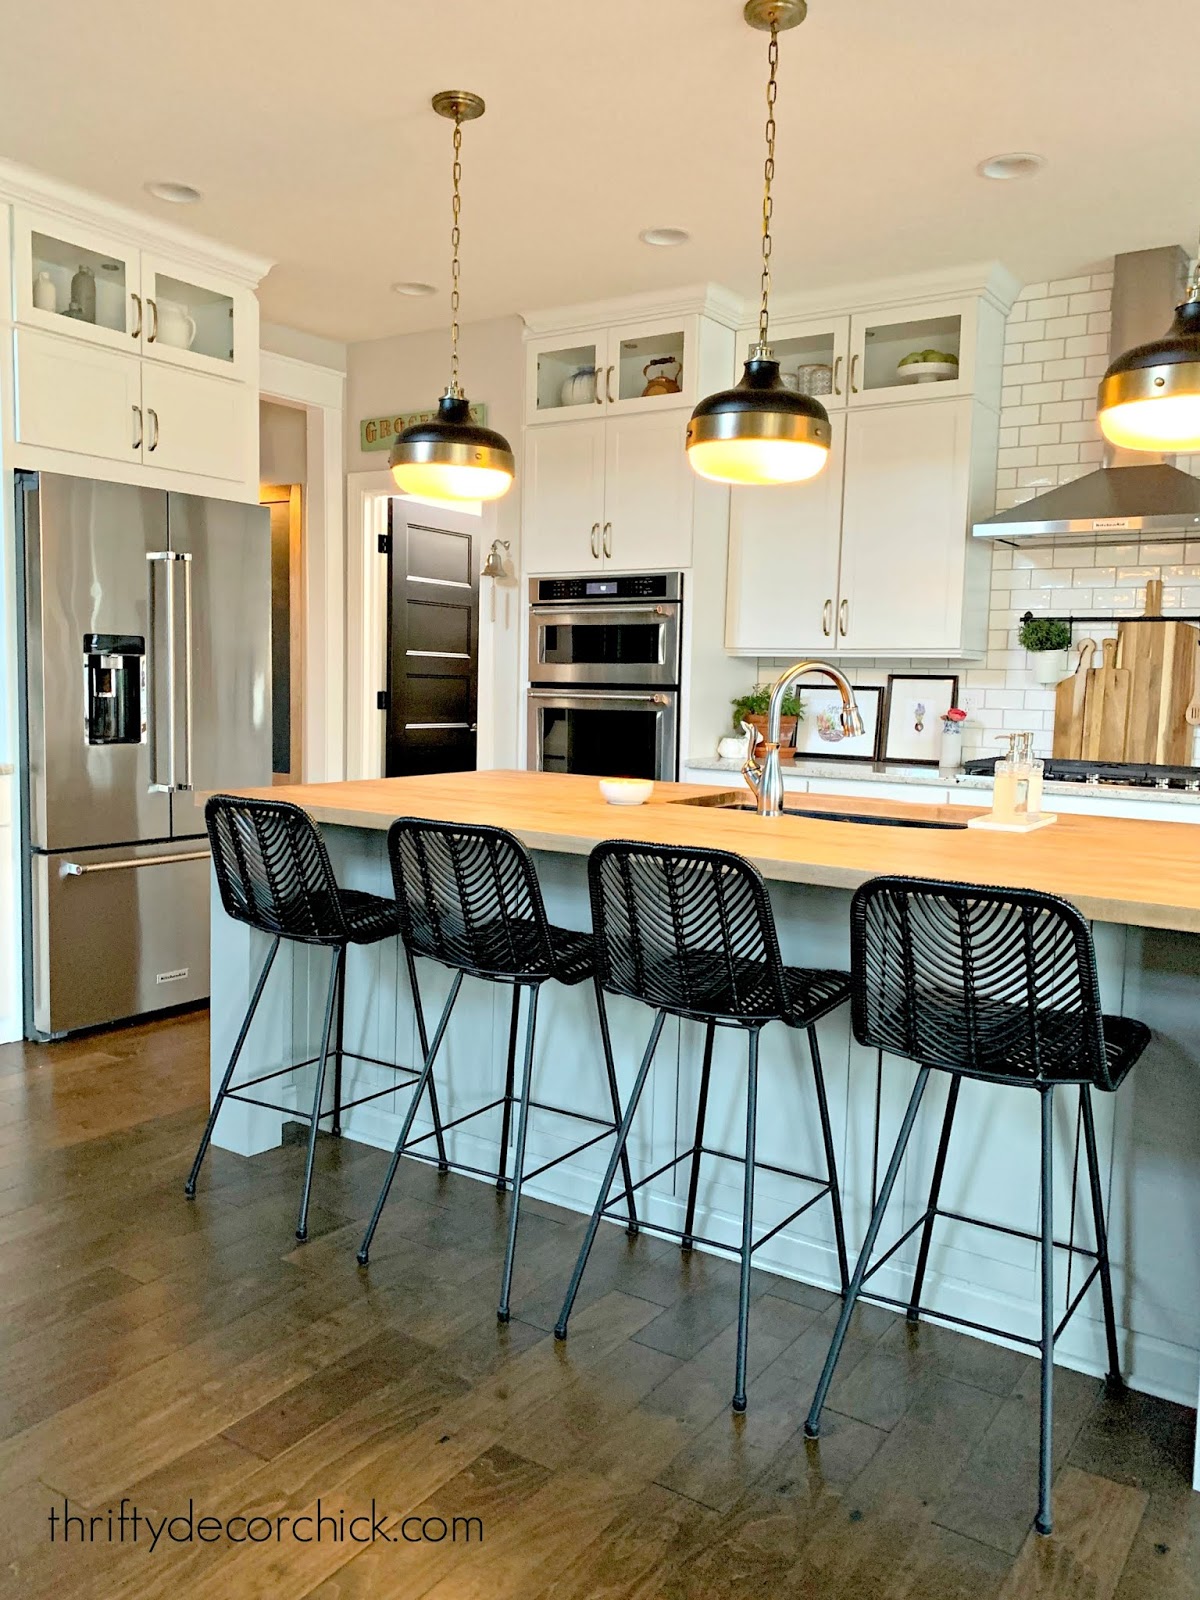
I had dreamt of those brass and black pendant lights for YEARS and was so thrilled to incorporate them into our new kitchen! Over time I've added more black touches with the stools and black painted door to tie into those.
I can't let go of some of my farmhouse touches in here though -- that dinner bell and the cutting boards will always stay. ;)

I'm always going back and forth on painting our island a darker color...the need for contrast is deep in my bones. But with darker colors in the dining area and family room, I wonder if it will be too much. Time will tell!
The window seat we installed in the old kitchen was a dream come true for me:

The lights definitely added that farmhouse feel as well.
This time, I built some small bookcases on the window seat and a more modern light fixture:

Now that I've had a few of them, I don't think I could live in a house without a window seat! :)
Here's another example of how I've gotten a little more daring with paint colors but also toned down the accessories. Here's a look at the DIY bookcases I built in our old dining room turned library:

I boxed up ALLLL of that decor...and then ended up not using so much of it.
When I built similar bookcases in my office, I went with a moody dark green and pared down the accessories quite a bit:

I love that they let the pretty wallpaper that lines the back shine!
One room that I've keep very similar is our master bedroom. Our old one was large, but SO incredibly cozy too:

The mix of dark and light gray walls made it feel so warm, especially at night:

This time I'm sticking with the gray -- I started by adding the wood beams around the tray ceiling and painting it dark:

And then continued by hanging faux grasscloth wallpaper. I LOVE it so much!
Wallpaper has been another difference in this house. I have used it in four rooms here and never used it in the old house!
Next up is painting that chair rail and the walls below. Overall, this room is one that is pretty similar as far as the decor:

I can't wait to get more done in there! It's going to be so lovely.
Darker accents, less stuff and less farmhouse decor are the changes I've noticed most since moving into this house. It's been an absolute blast decorating this home, and I'm so glad you join me during the process!
See more of our home here. To shop items in our home, click here! Never miss a post by signing up to get posts via email. Via https://www.thriftydecorchick.com/2020/04/how-my-decorating-style-has-changed.html
Hello my friends! I've been busy on a paint project I hope to reveal next week. Until then, I wanted to share a few of my favorite kitchen gadgets I've been using a TON lately.
Now that we're eating more at home (more meals and just...more) these have been on a constant rotation around here. I've had them all for a long time, but have used them more in the past month than I did in the past six months! I don't mind cooking -- I've shared quite a few delicious recipes over the years. But I'm all for anything that makes meals quicker and easier. These all save a lot of time and effort! My favorite popcorn popper
I've told you about this one before, but it works so great it's worth mentioning again. If you like popcorn as much as I do, it's a must! I've tried all kinds of poppers, even doing it on the stove just in a pan. My go-to used to be this popper you would stir, but it would get beat up so quick, I was always replacing them. I was on the lookout for something new.
I found this one at Homegoods, but you can get them all over! It's the Dash popcorn popper:

This post may contain affiliate links for your convenience.
See my policies and disclosure page for more information.
I love it because you just fill it up and turn it on...that's it. You use the little cup that fits on top to measure your popcorn:

Pour that inside and then just turn it on! You do NOT add butter or oil to the machine.
The cool thing is you can put your butter in that same cup and it will melt with the heat of the popper:

Then just pour it on!
Lately we've been really into this movie theater butter (which I'm sure if full of horrible stuff, but it's GOOD) along with real butter, but both are delicious.
My favorite thing about this popper is how easy it is, but I also love that it pops WAY more of the kernels than any other way I've tried:

**I recommend using regular sized kernels -- the small ones tend to go crazy in this thing and fly out everywhere.
**Also, turn it off before the last few kernels are popped so the popcorn doesn't go flying.
You can find this Dash popcorn popper here or here.
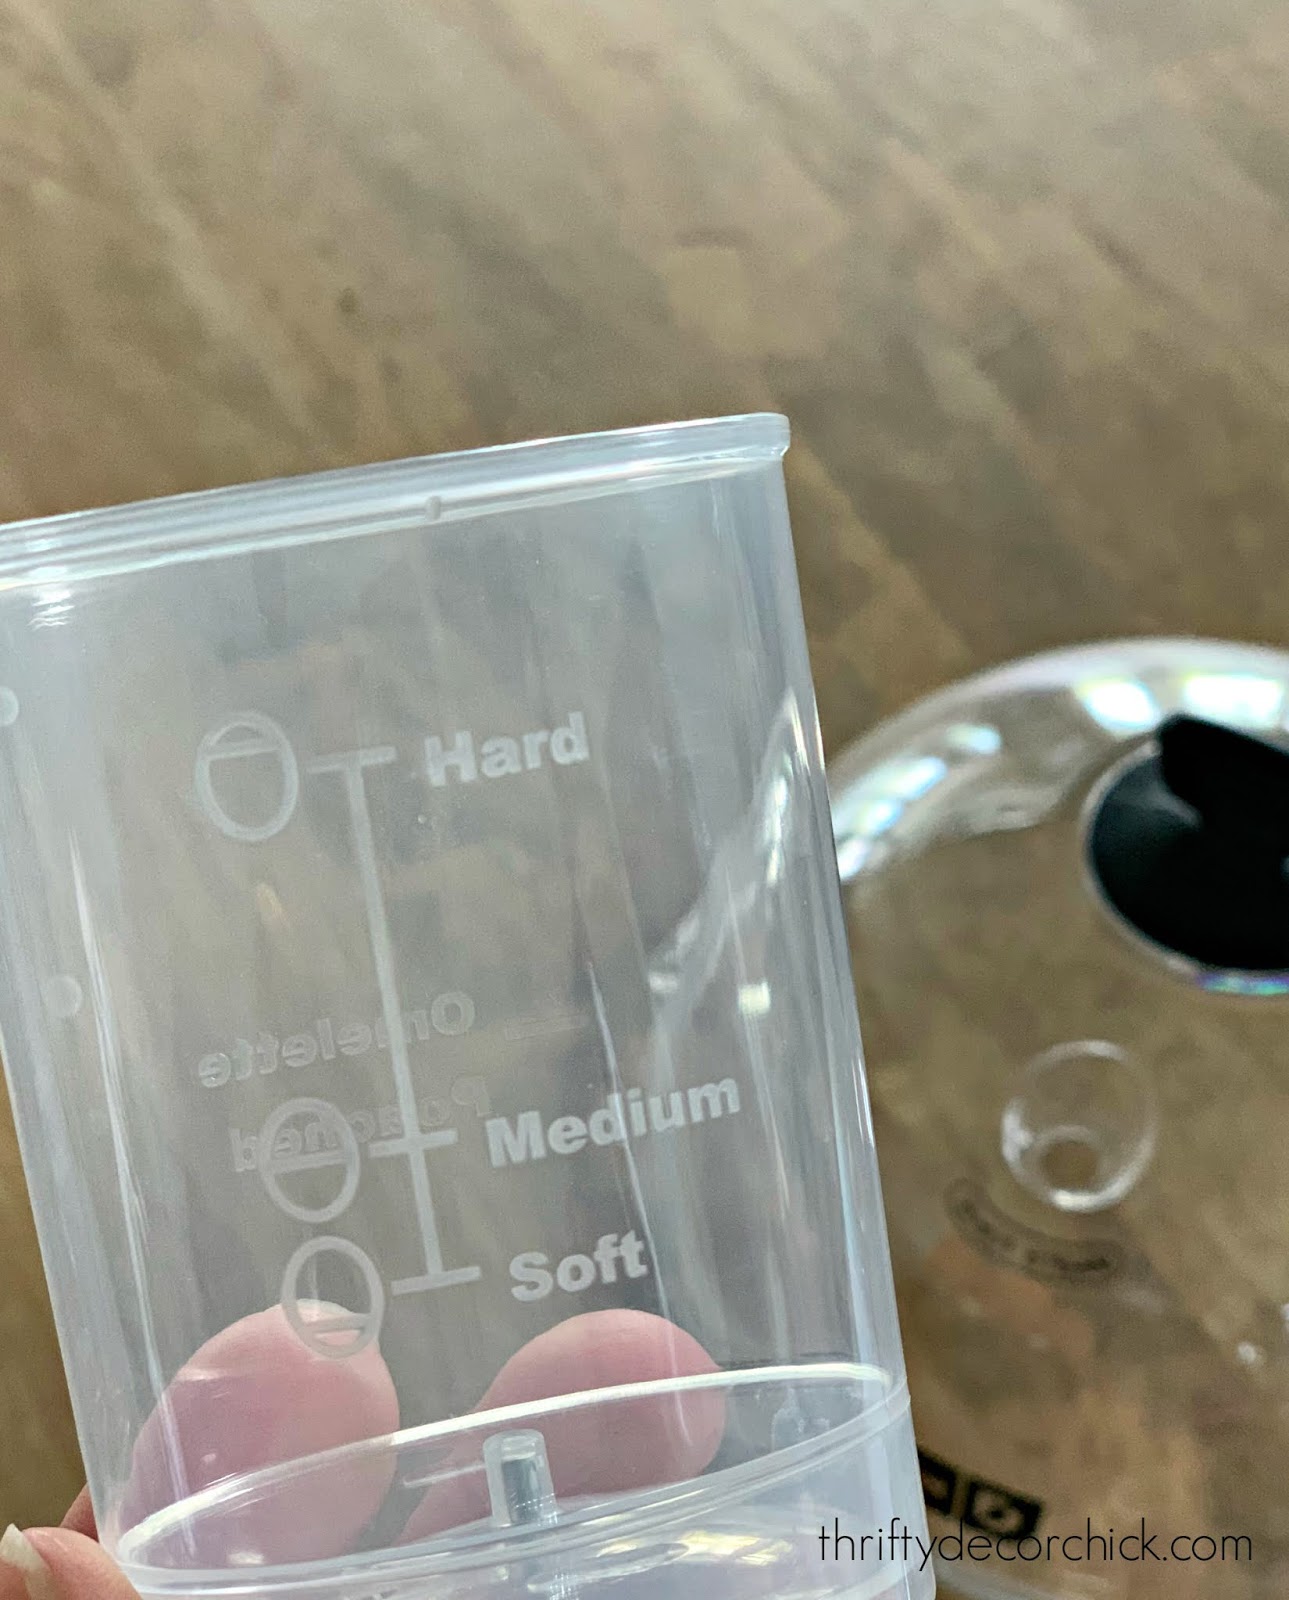
Quick and easy egg cookerThis one will only be useful if you like eggs -- and if you do, it's a game changer! I know boiling eggs is not hard. But this Dash egg cooker is quicker and even easier:
Dash seems to carry a lot of helpful kitchen gadgets!
For hard boiled eggs (my preference), you just have to poke a tiny hole in each egg with this tool:
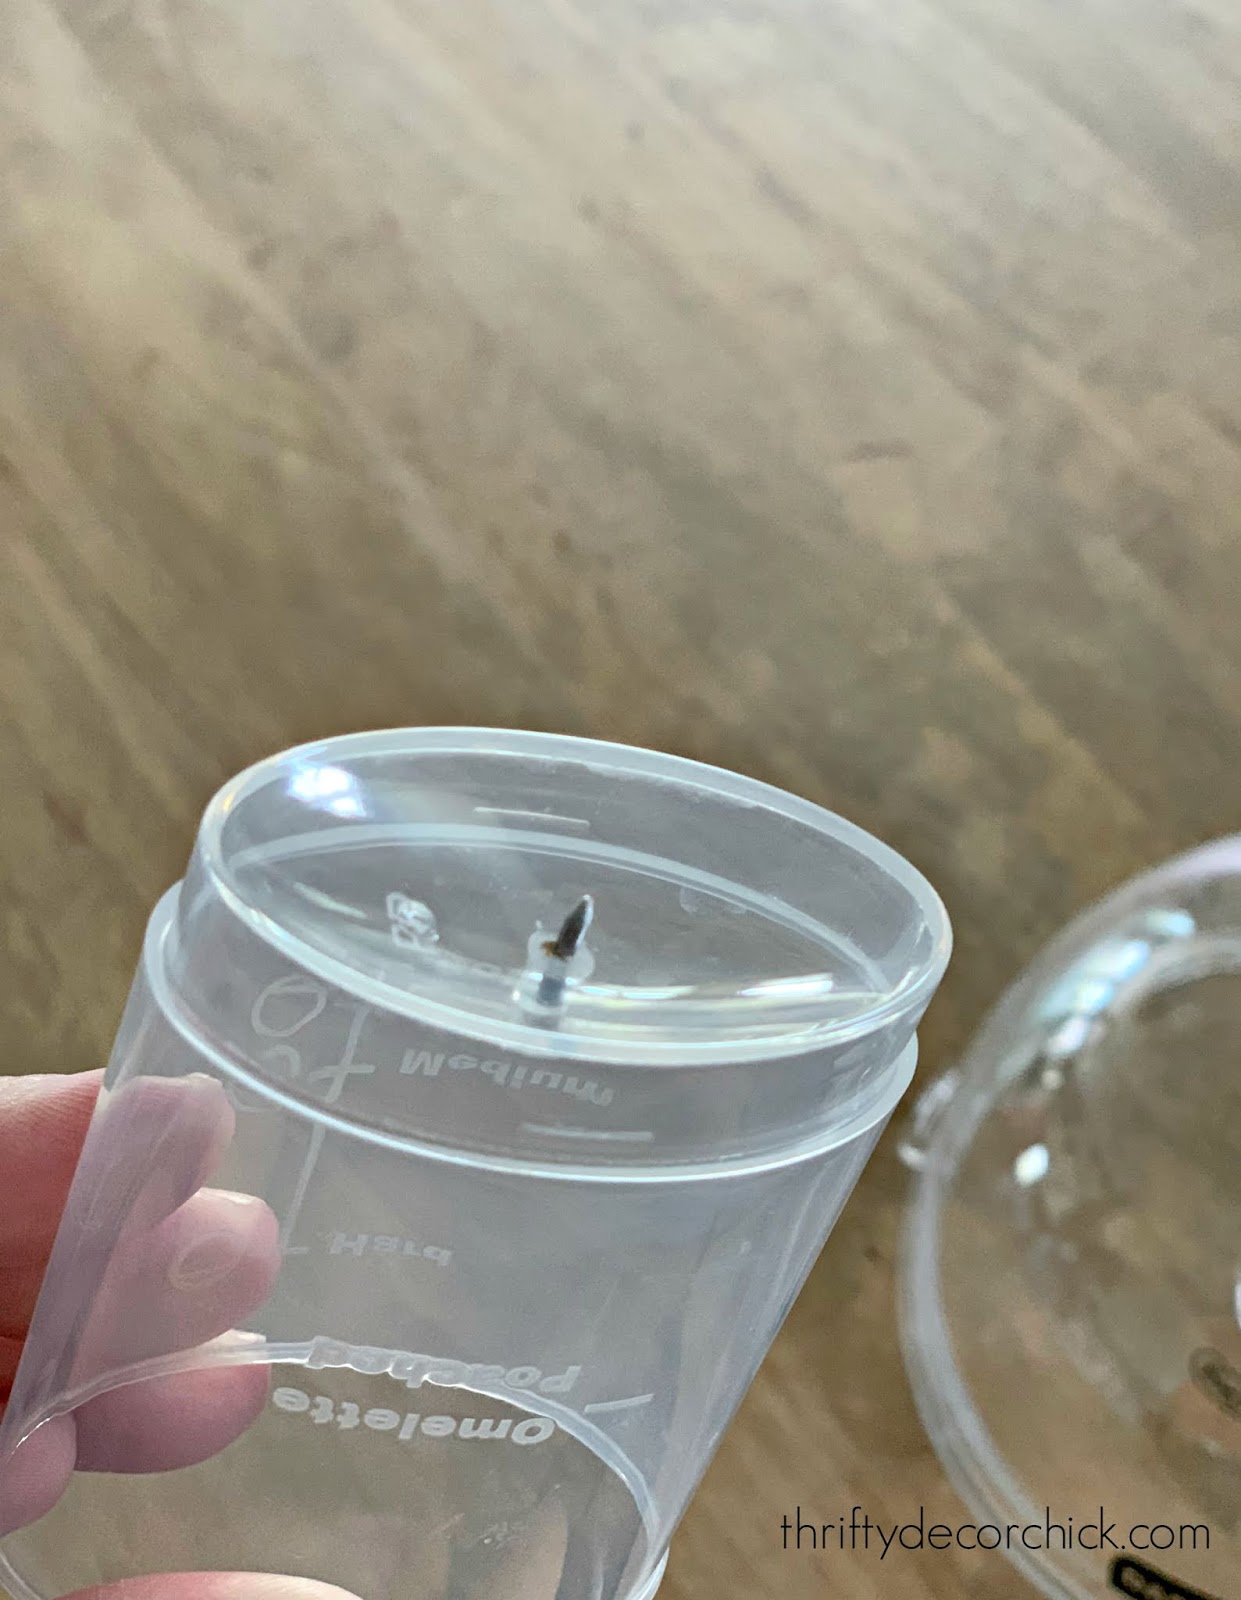
Then fill the measuring cup with the appropriate amount of water and pour it in:
Flip the switch and it will beep and turn off when finished. That's it! I find these are WAY easier to peel than those I make on the stovetop. Other than the ease, that's the best part about this cooker. **The eggs will be HOT! Take care when removing them. You can find this Dash egg cooker here and here! Air fryer for quick meals
This one has been used the most of all! I LOVE our air fryer!!:

You can cook meat and meals in it, but we haven't tried much of that yet.
It's so great for snacks like chicken nuggets, pizza rolls, tater tots...basically everything that's not good for you. ;) I've made potato wedges in it as well...so many foods come out perfectly in this thing:

The size isn't huge, but I stack food and it comes out great. Sometimes I pull it out half way through and mix them up a bit.
You can adjust the time and temp -- they give you guidelines but I find it's better to test it out and see what works best. I use the 350 temp most often and rarely have to cook anything longer than ten minutes:

I recently started making our bacon in it and it comes out perfectly crispy! I love it!
It saves the time it takes to preheat the oven, and usually cooks faster than it would in the oven. Clean up is pretty easy -- just take the tray out and wash both parts.
You can find our Power Air Fryer here or here.
Have you used any of these gadgets? If you have an air fryer I'd love to know what you make in it. I think if you try these you'll find them incredibly helpful!
A couple years ago I asked for tips on using the pressure cooker...and I still haven't used it once. I really need to attempt it but it intimidates me. (Check out the comments in that post for helpful tips and recipes!)
**You can pin this for later with this image:

See more of our home here. To shop items in our home, click here! Never miss a post by signing up to get posts via email. Via https://www.thriftydecorchick.com/2020/04/my-favorite-kitchen-gadgets-that-make.html
I have a quick and AMAZING recipe for you today!
We had friends over last weekend and one of my girlfriends brought brownies. Now I like a good brownie...it's just not always my pick for a dessert. If you offer me one, duh, I'm going to take it. But it's not one I'd pick to make on a whim.
Until now. :)
I must introduce you to the most amazing brownie...EVER. There is a special, secret ingredient that will rock your world. I asked my friend for the recipe, thinking it was some super special family thing passed down through the generations -- and had to laugh when she told me she made them with a box mix.
First of all, I didn't even KNOW about dark chocolate brownies. Um, hello. I didn't like dark chocolate till a few years ago and now it's my favorite. There's actually two secret ingredients but one didn't surprise me as much as the other...can you guess?:

The cinnamon wasn't a big shock, I mean, have you had chili with cinnamon? Next level stuff. But the kicker (literally) was the chili powder. Man oh man...these are DELISH. Hands down the best brownie I've ever tasted.
You make them according to the box (she subbed coconut oil for vegetable oil and I do the same) and then you add three teaspoons cinnamon and one to two teaspoons of chili powder.
That's it! You'll notice something different, but it's not overwhelming -- just GOOD. I used one teaspoon of chili in my batch (I had to make one to, uhh, show you all) and it was perfect, but I will definitely try more.
It's hard to describe why these are so good, you just have to try them for yourself. We were all standing around and oohing and ahhing over the flavor. So yummy. I wish I could give you all a sample. :)

I love to share simple, delicious recipes and this was one! You really must try it. Have you tried this trick in your brownies? I bet it would be good in chocolate cake or cupcakes as well...I'll try that next.
You may like my easy banana bread recipe as well...

And my slow cooker chicken and noodle soup is SO GOOD:

See more of our home here. To shop items in our home, click here! Never miss a post by signing up to get posts via email.
Via https://www.thriftydecorchick.com/2016/11/the-secret-ingredient-for-best-brownies.html
One of my favorite changes I made to our last house was painting the interior doors black. It makes SUCH a statement. Black doors are classic and the contrast adds so much to a space.
I got most of the doors in that house painted:

You can see how I painted those interior doors here. It's not always as simple as just painting -- there are some things you'll need to check before starting.
So many of you have asked why we didn't go with black doors in this house. I did have them quoted when we built, but the price seemed high when I knew I could do it myself for the cost of a gallon of paint.
And I wasn't sure I'd want them in this house...I wanted to live with them first. And after two and a half years, I'm still completely in love with our white doors.
About a year after we moved in I got the itch to try out the black on one door -- I painted the back side of our garage door and LOVED it:

I picked that door because it wasn't in the middle of the house where a lone painted door would stand out.
Even though I loved it, I haven't been in any rush to paint more doors, until recently. Maybe it's because I'm trying to use what we have right now, but I realized this would be a great time to tackle another one!
Our pantry door is in a sea of light walls and white cabinets, so I figured some contrast would do this spot well:

Check out the door painting post I mentioned to get all of the tips and details you'll need!
I talked to our builder after I painted the door in the mud room and found out everything is painted in latex, not oil-based paint. So there was no need for me to prime like I always have. (Although a tinted primer is a great idea when you're going from white to black!)
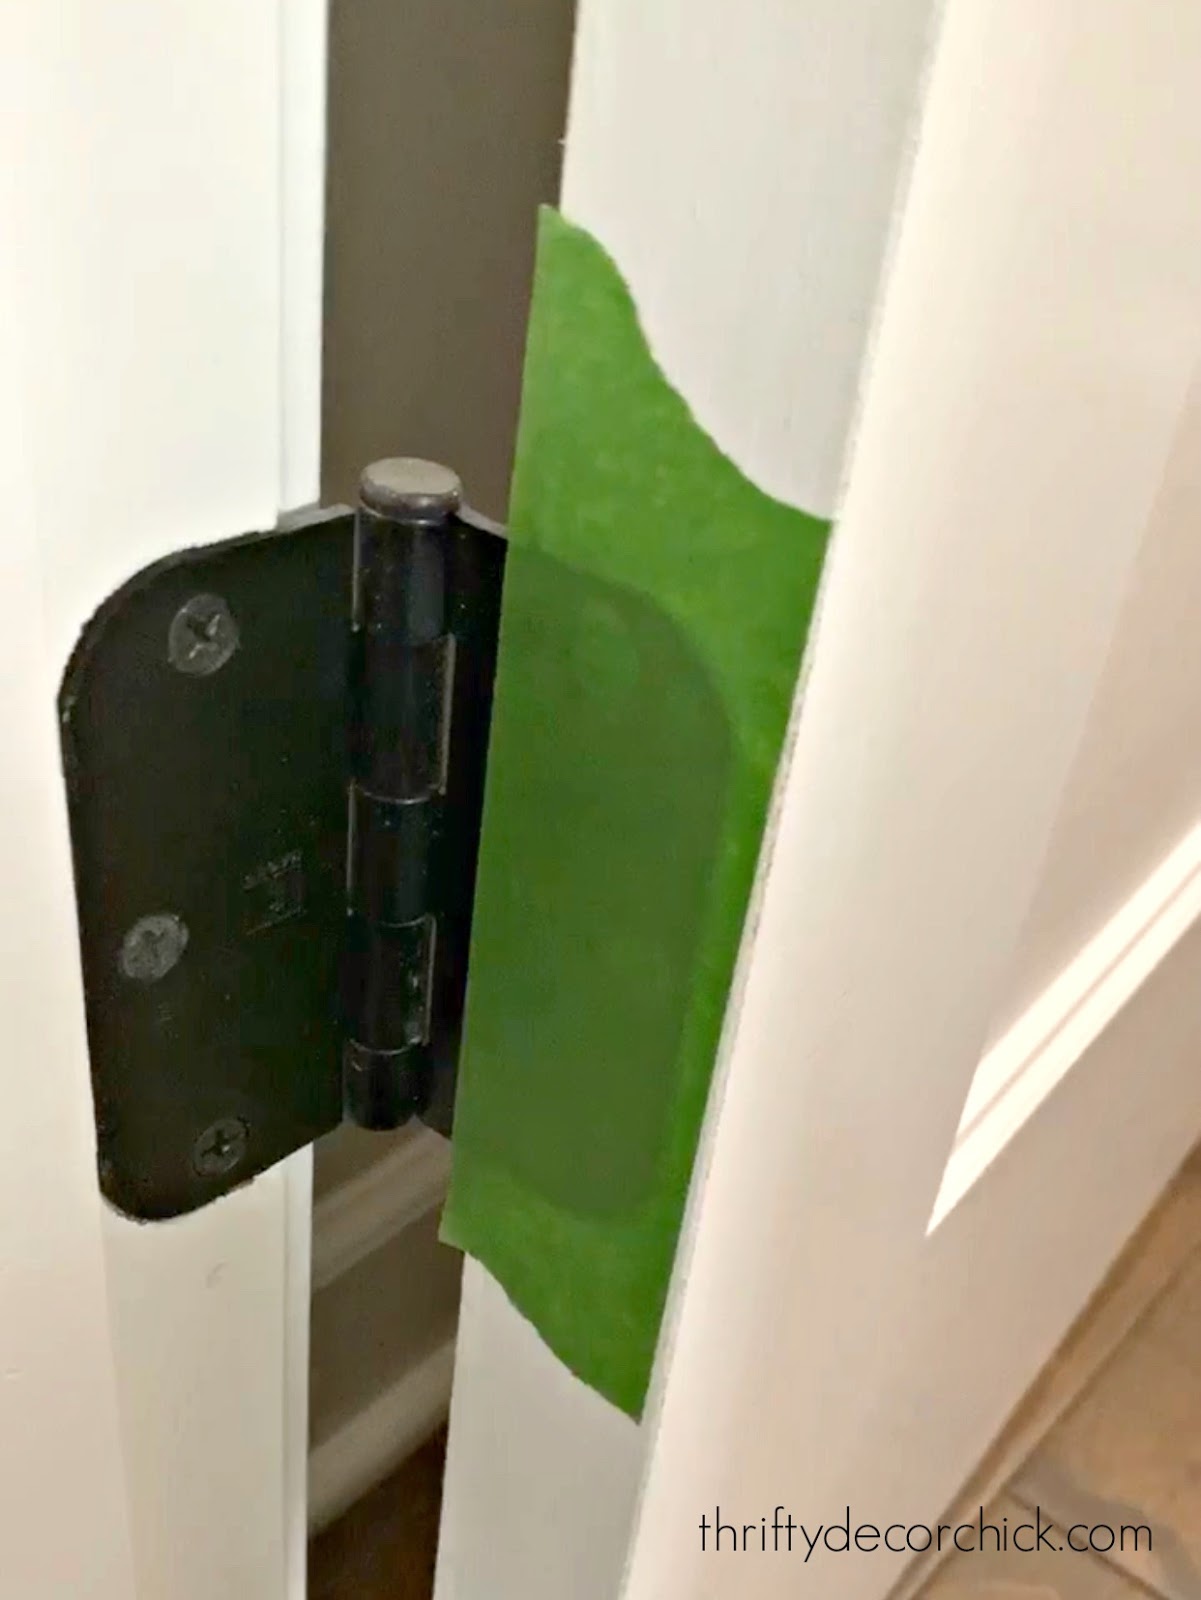
I never take my doors off the hinges when painting -- there's no need. This is my trick for easily covering the hinges with painter's tape:
This post may contain affiliate links for your convenience.
See my policies and disclosure page for more information.
Cover them and then use a razor to cut around the hinge.
Peel the tape off the door and leave it on the hinge so you can paint right over it:


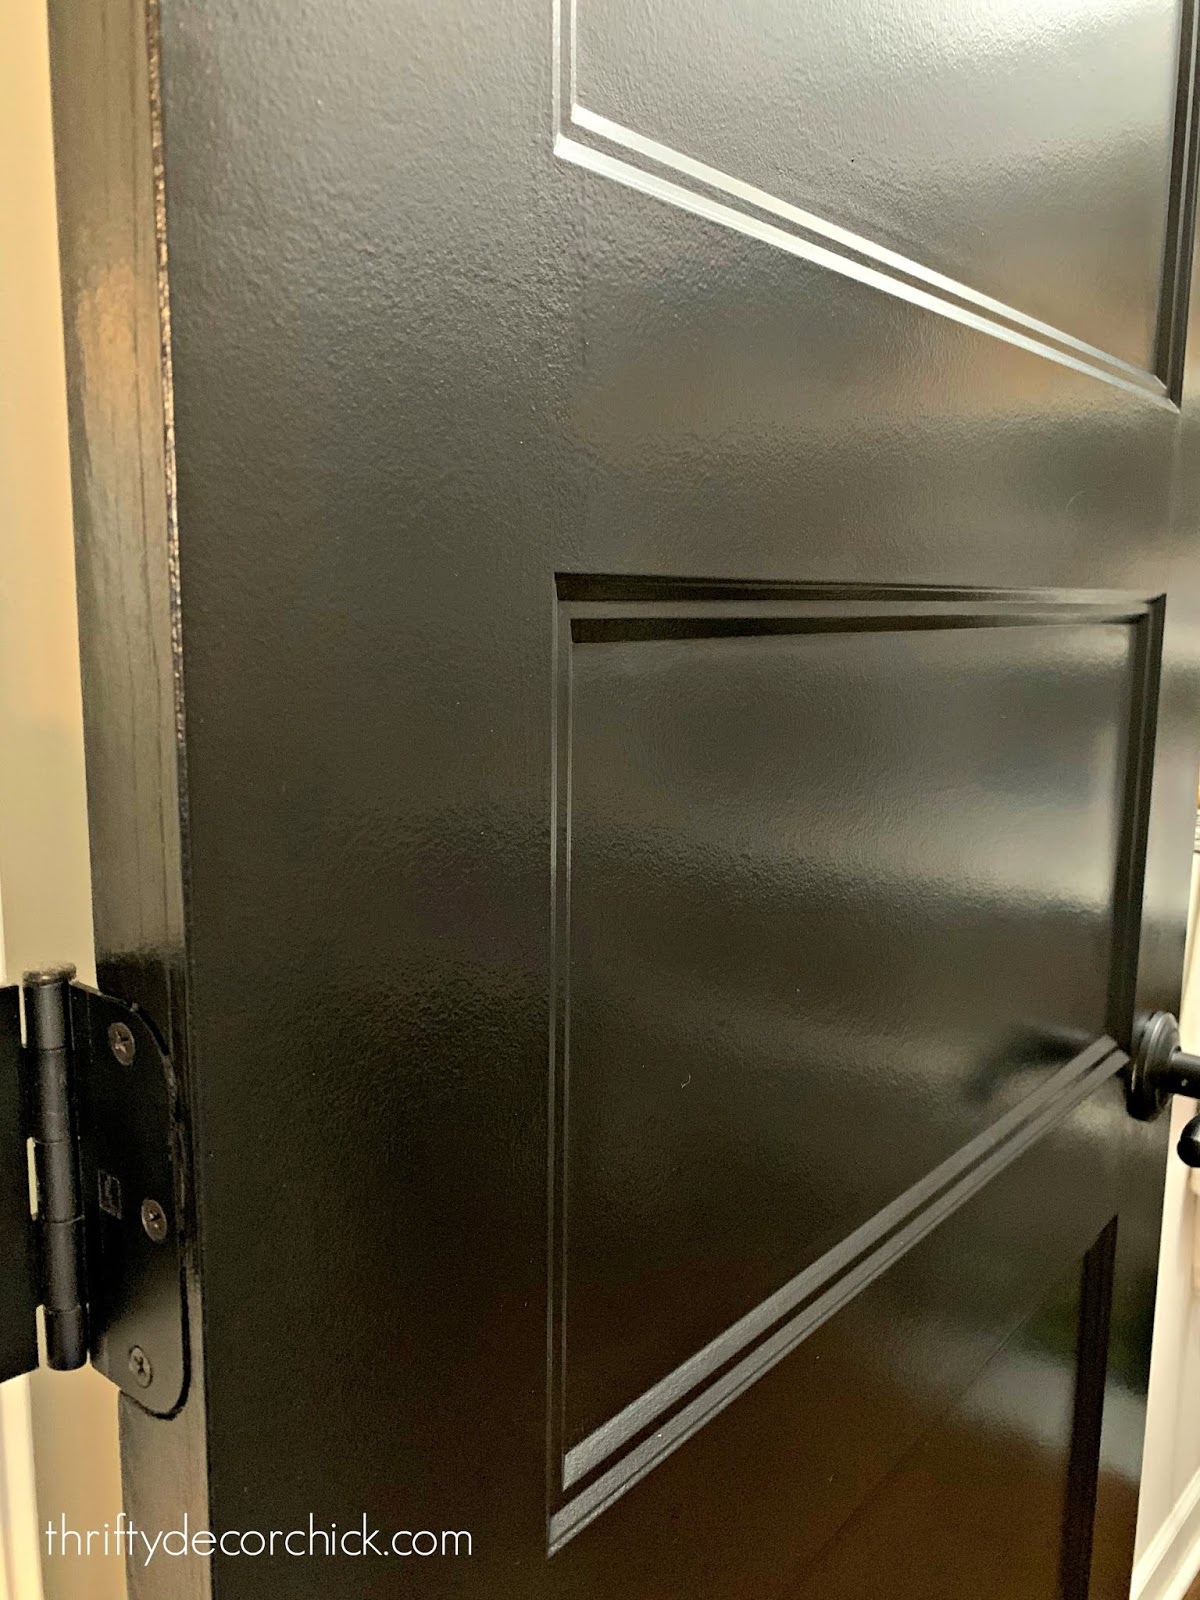
Don't skimp on the paint with the roller! But don't push super hard when rolling it on (or the roller will leave paint marks along the sides). I did three full coats and then some touch ups here and there.
The result will give you a smooth, shiny finish that looks like it's been sprayed:
By the way, you can spray doors with a sprayer as well! I just find it easier to leave it in place. (Check out this post for my favorite paint sprayer and how to use it.)
I am never disappointed by a black door. Ever. :) I absolutely love them: 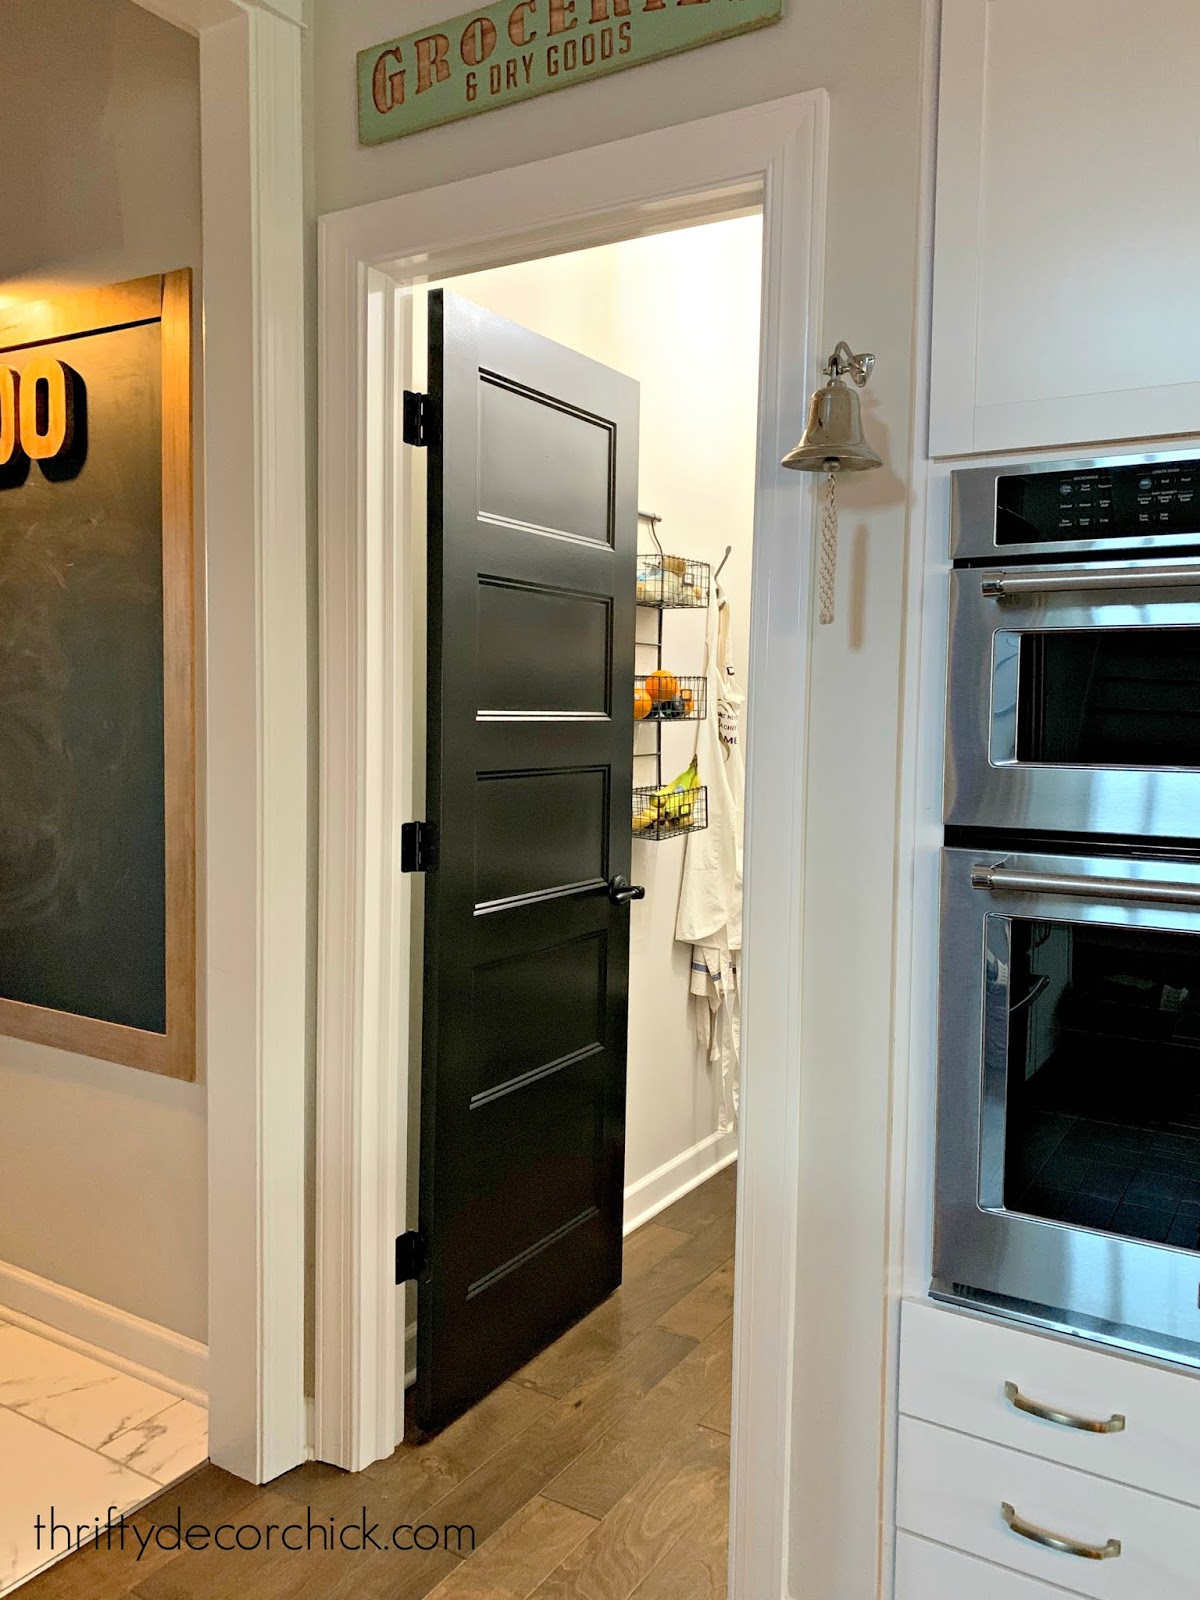
It really breaks up all of the white in this spot. I adore our five panel doors, and this really brings attention to them.
I used a semi-gloss sheen in the color Tricorn Black by Sherwin-Williams. We had a lot more texture on our doors in the last house so I used an eggshell. Both will clean up really well.
I especially love how the black door ties in with pendant lights and stools at the island:
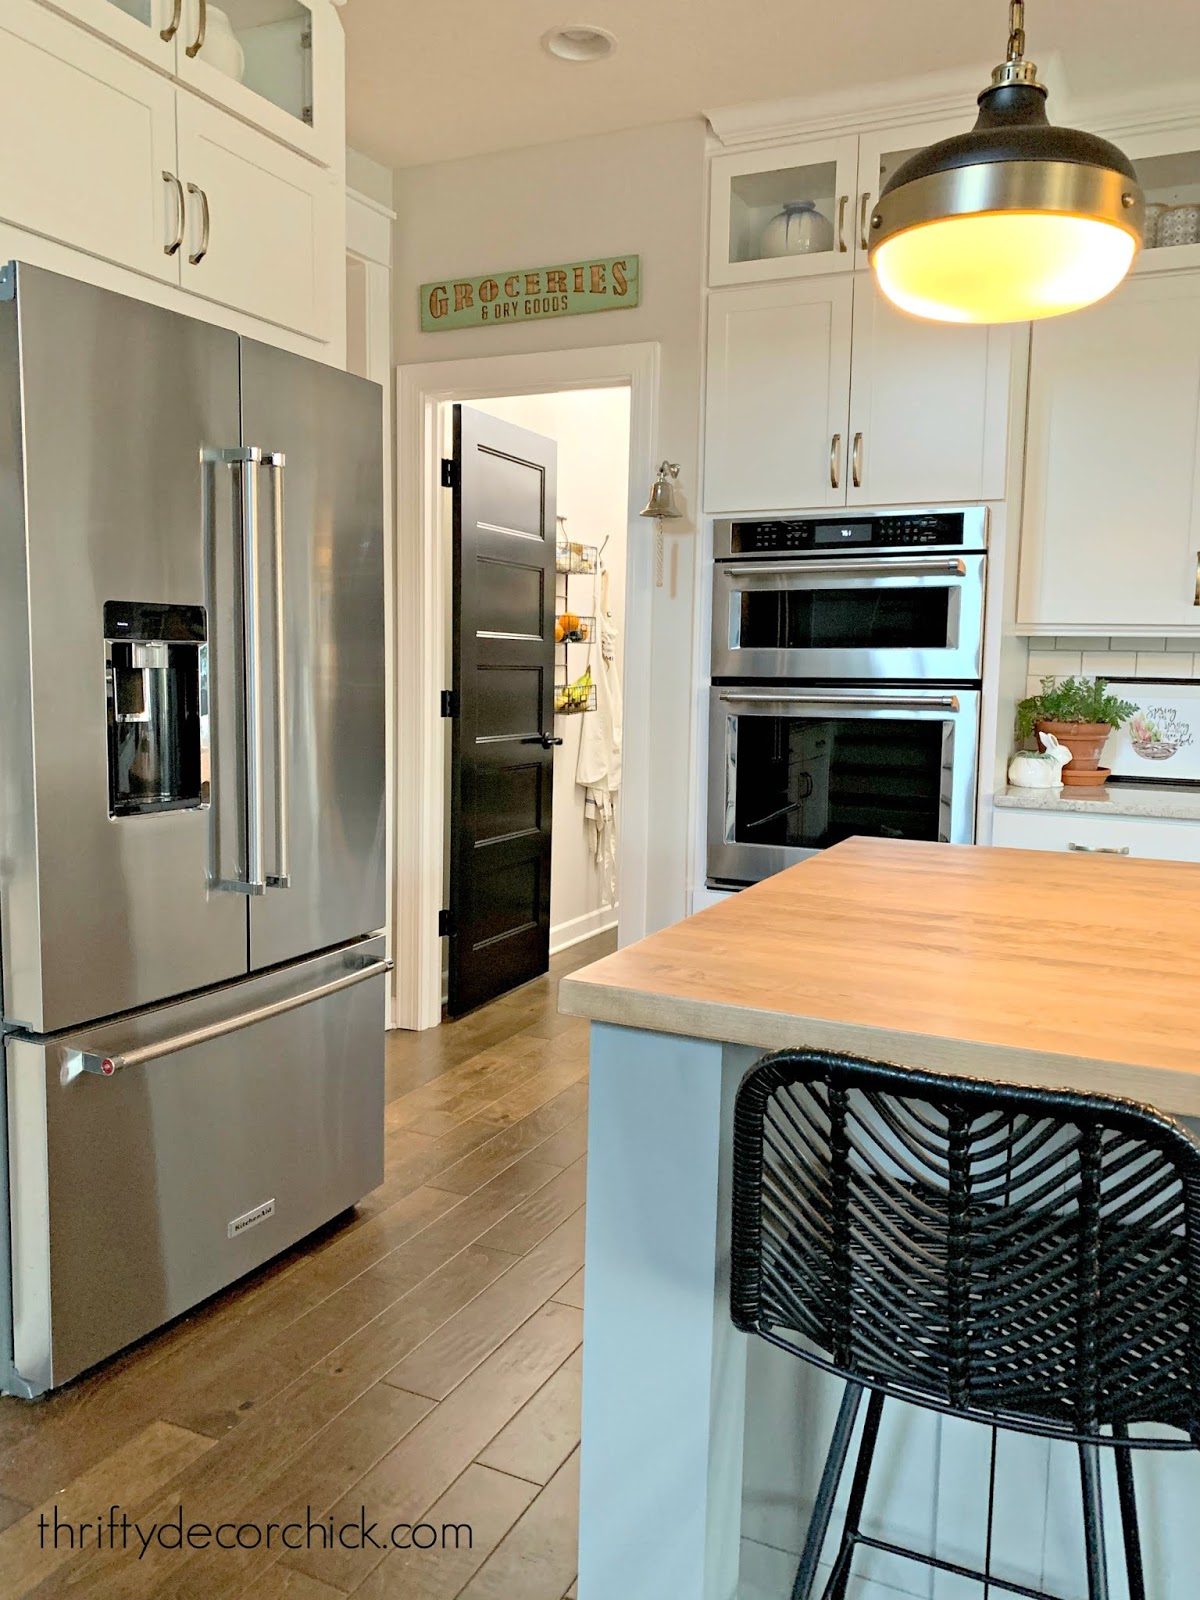
I've told you before how much I love a touch of black in a room. I think it grounds a space in a way nothing else can. The bit of contrast always looks great!
Now I plan to keep going in the house...I'm starting all over. ;) Two down and around 20 to go!:
Have I convinced any of you to paint your doors black over the years? I love other colors too -- a light gray is beautiful. Dark navy would be awesome! And I almost went with a dark green for the doors in our home. All would be lovely!
If you're interested in anything you've seen in this post, click on the photos below to shop:
 See more of our home here. To shop items in our home, click here! Never miss a post by signing up to get posts via email. Via https://www.thriftydecorchick.com/2020/04/why-painting-your-doors-black-is-always.html
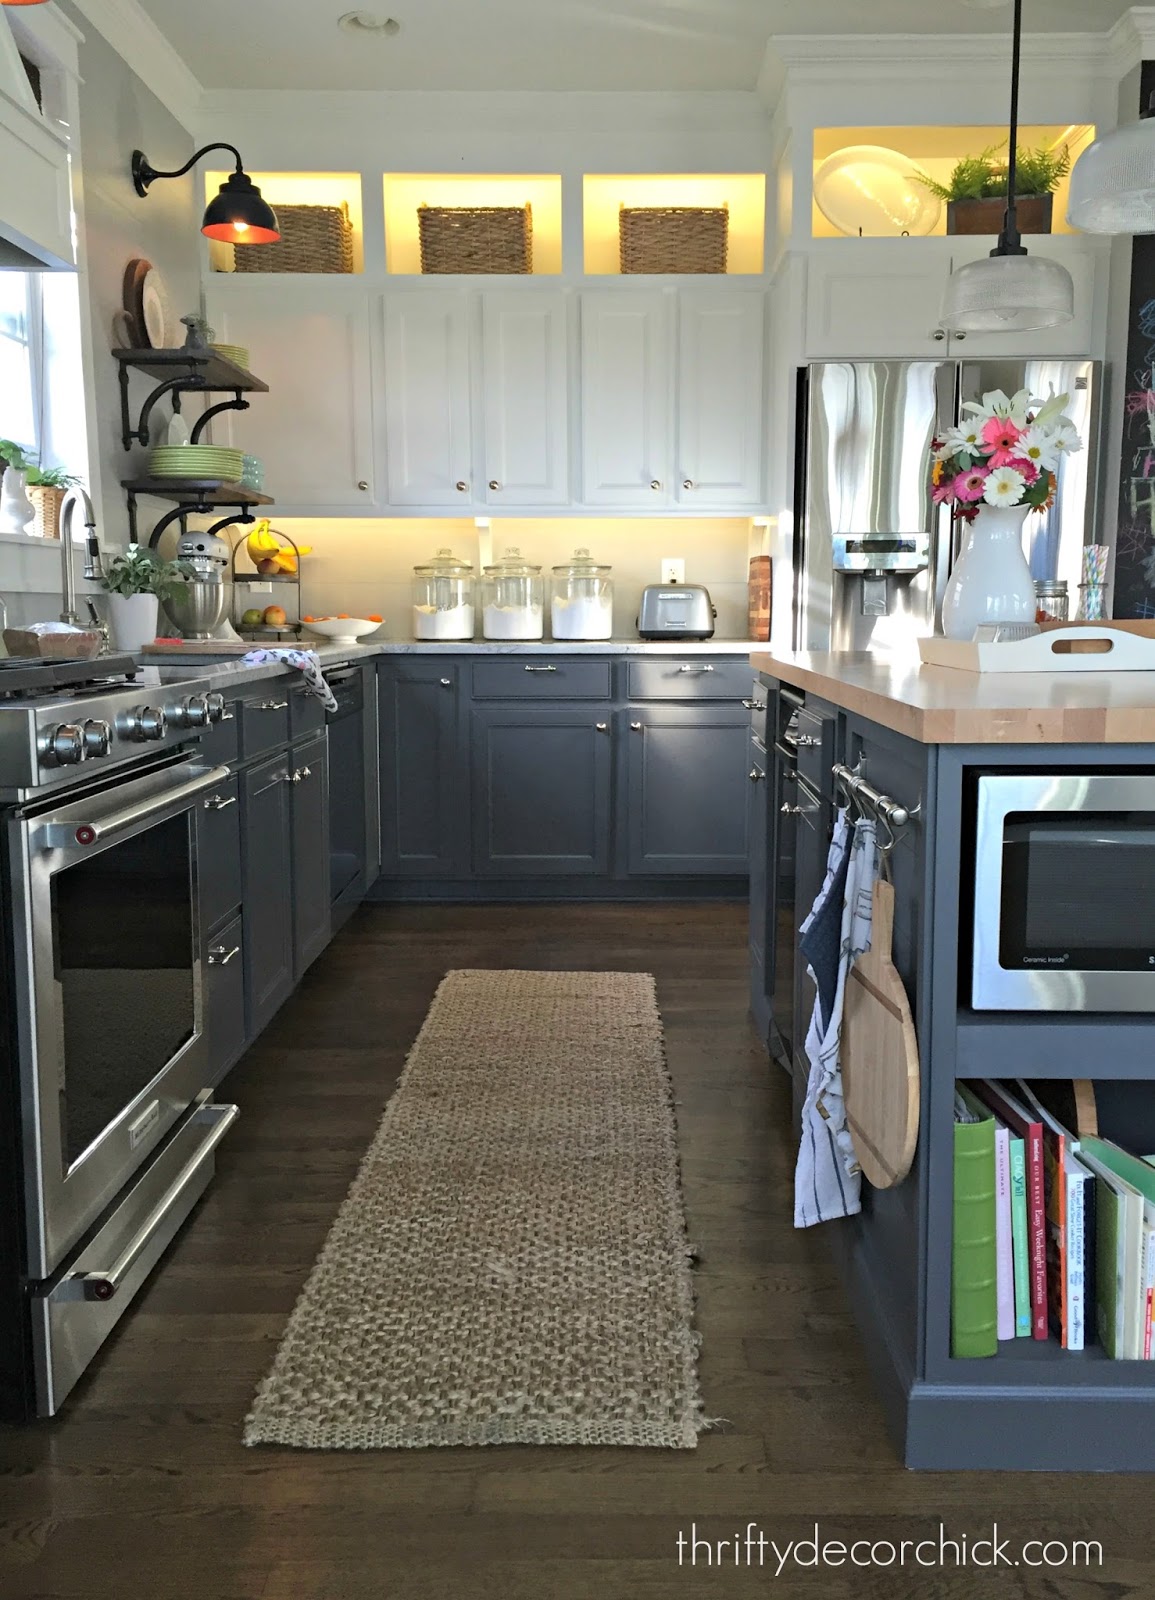
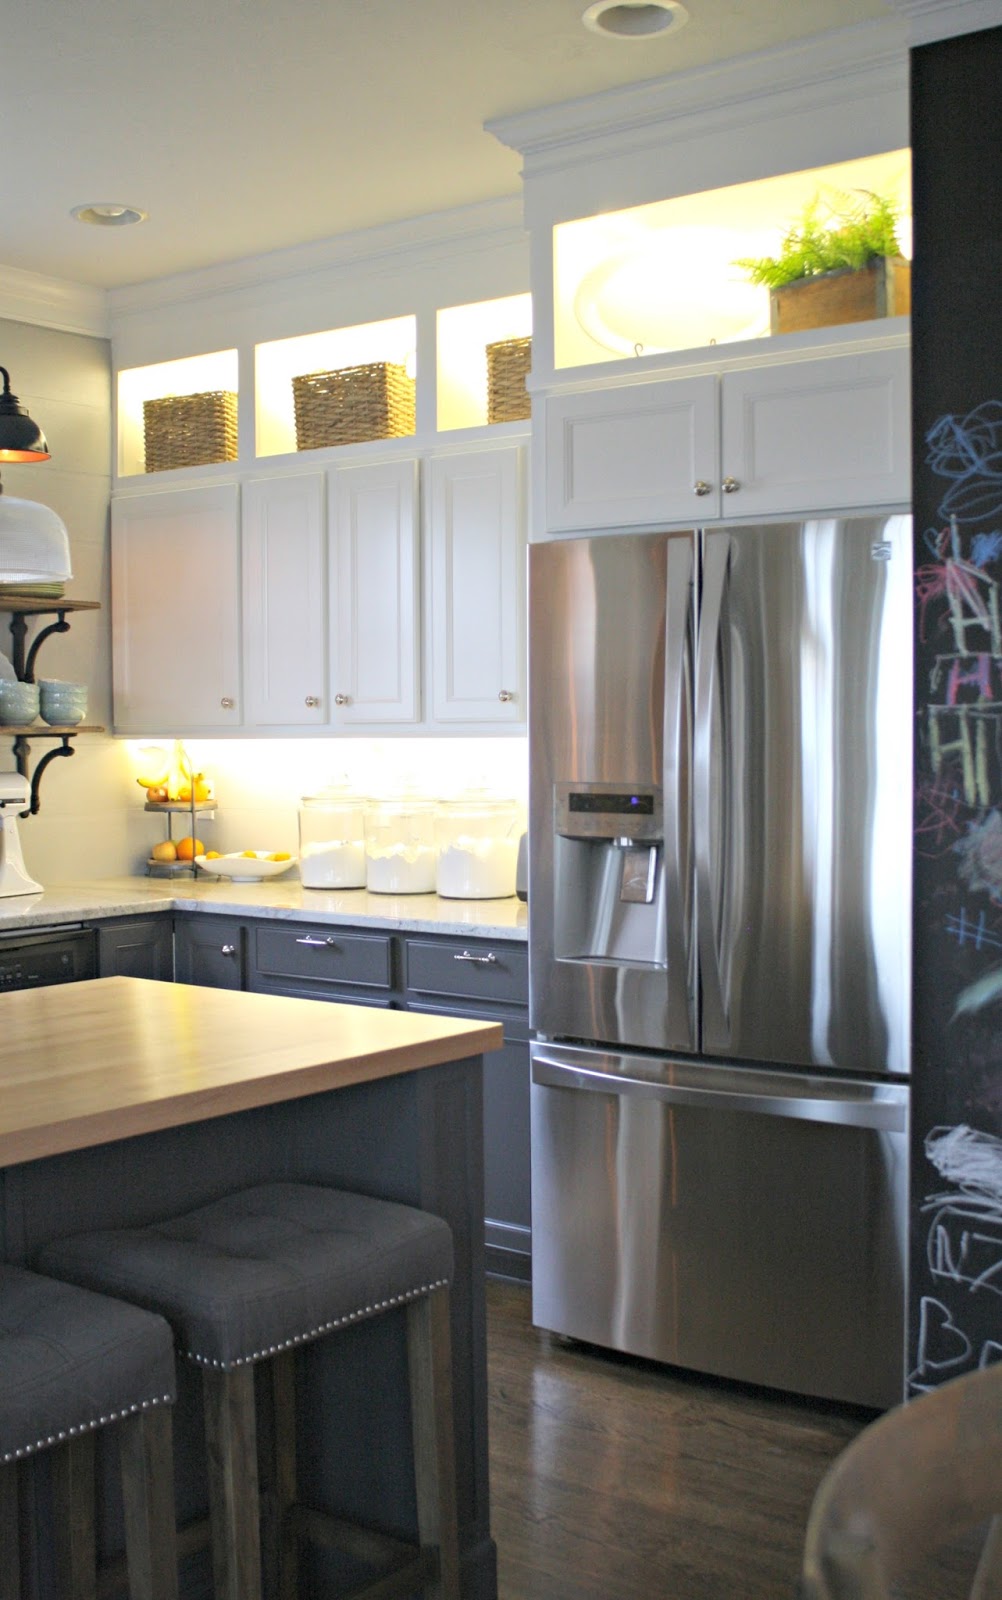
I finally finished up one of the last items on my list for the kitchen renovation. I called this room done last fall, but I did have a couple little things left on my list. I was happy to get this upper and lower cabinet lighting knocked off! (Edited to add -- this is the kitchen from our old home, but the tutorial is up-to-date!)
I installed the under cabinet lighting back then but never showed it to you because I wanted to get the upper cabinets done too. It was great having them down below but the upper lights are the real showstoppers.
I LOVE how they look all lit up!:

This post may contain affiliate links for your convenience.
See my policies and disclosure page for more information.
I'm so thrilled with it! If you'd like to see how I've done this in the past, check out this post. If you don't have an outlet and switch dedicated to these lights that tutorial is one you'll want to use.
I used timers back then and they worked great -- and you could easily use timers on these too. The only difference between then and now is that I had an outlet run up high in the wall this time and I used different lights. This version works great if you only have one run of cabinets you are working with. The one I did years ago will work better if you have a bunch of cabinets you want to light up.
So...check out both posts to see what will work best for you! There are pros and cons to each type of lighting -- last time I used rope lighting and numerous incandescent light strips and I really like the warm light those let off. They are bulky compared to these though, so this is a much less intrusive design. I'll go into to more detail on the pros and cons later in the post too.
This is one of those projects that looks intimidating but is SO not. I promise you, you can do this! I used this tutorial as my guide so you can check that out too.
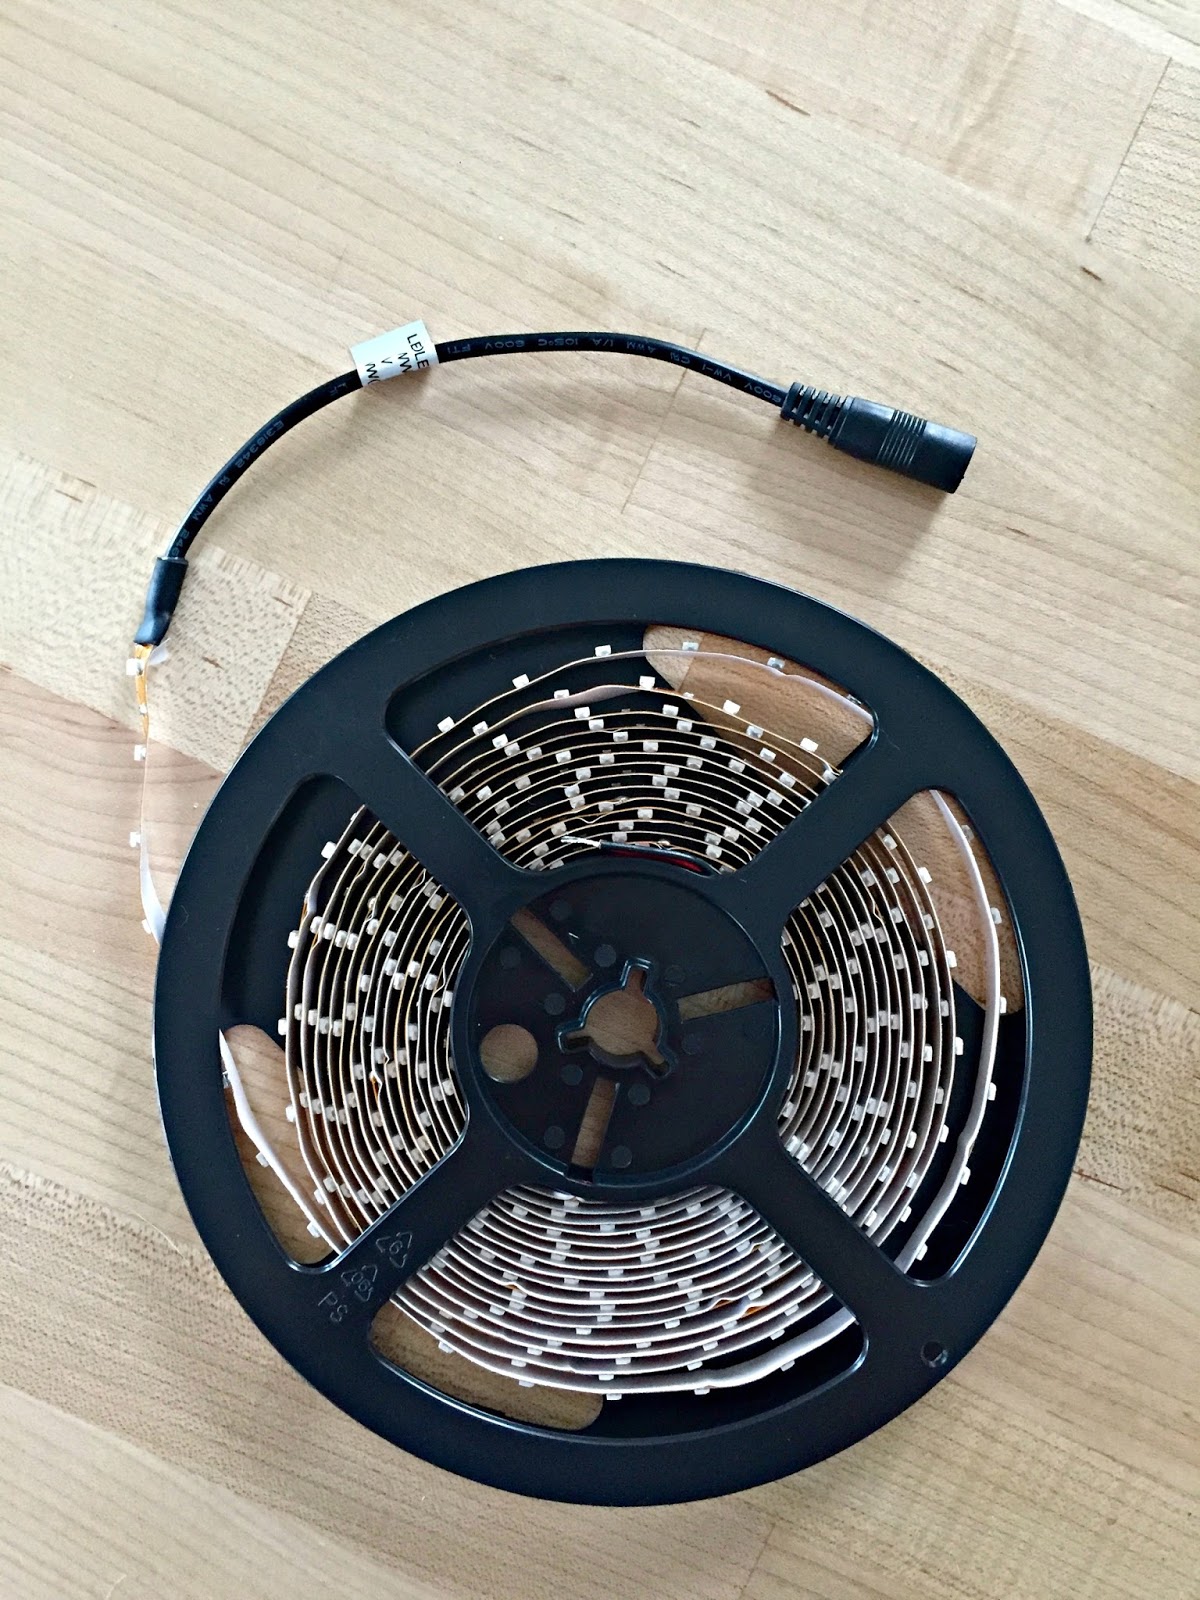
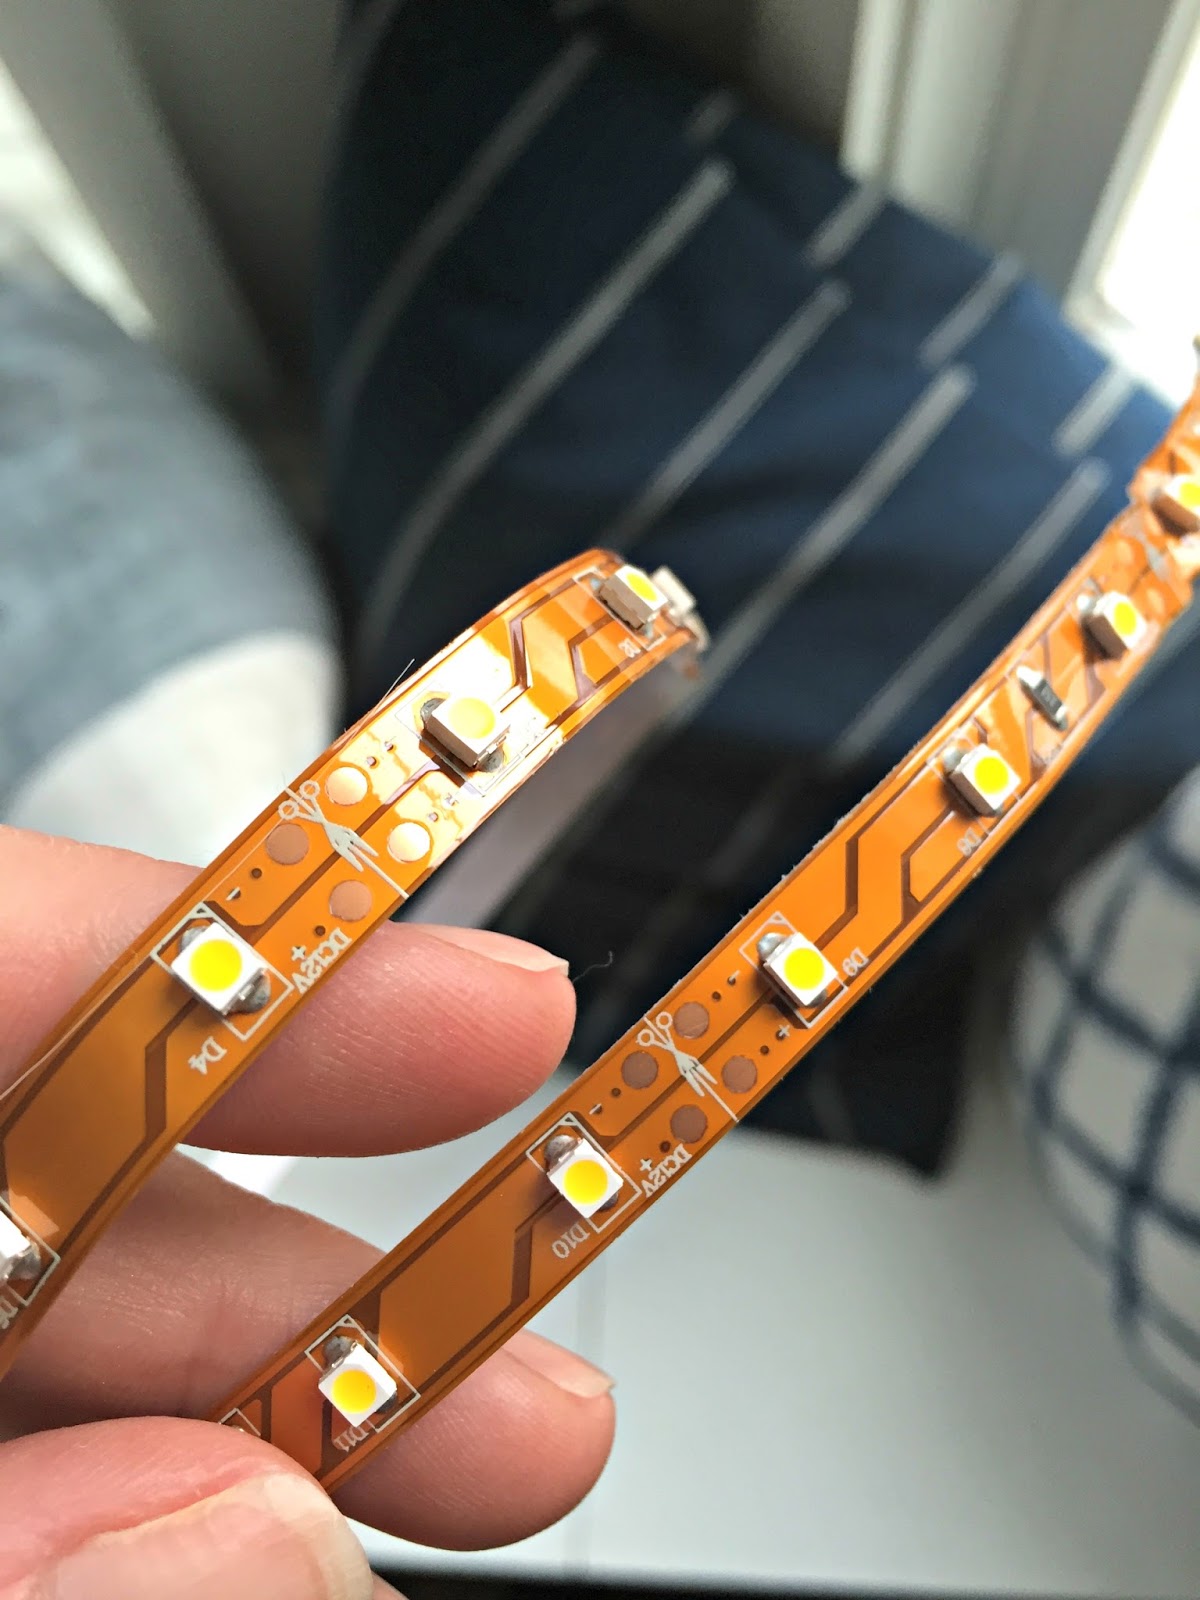
The materials
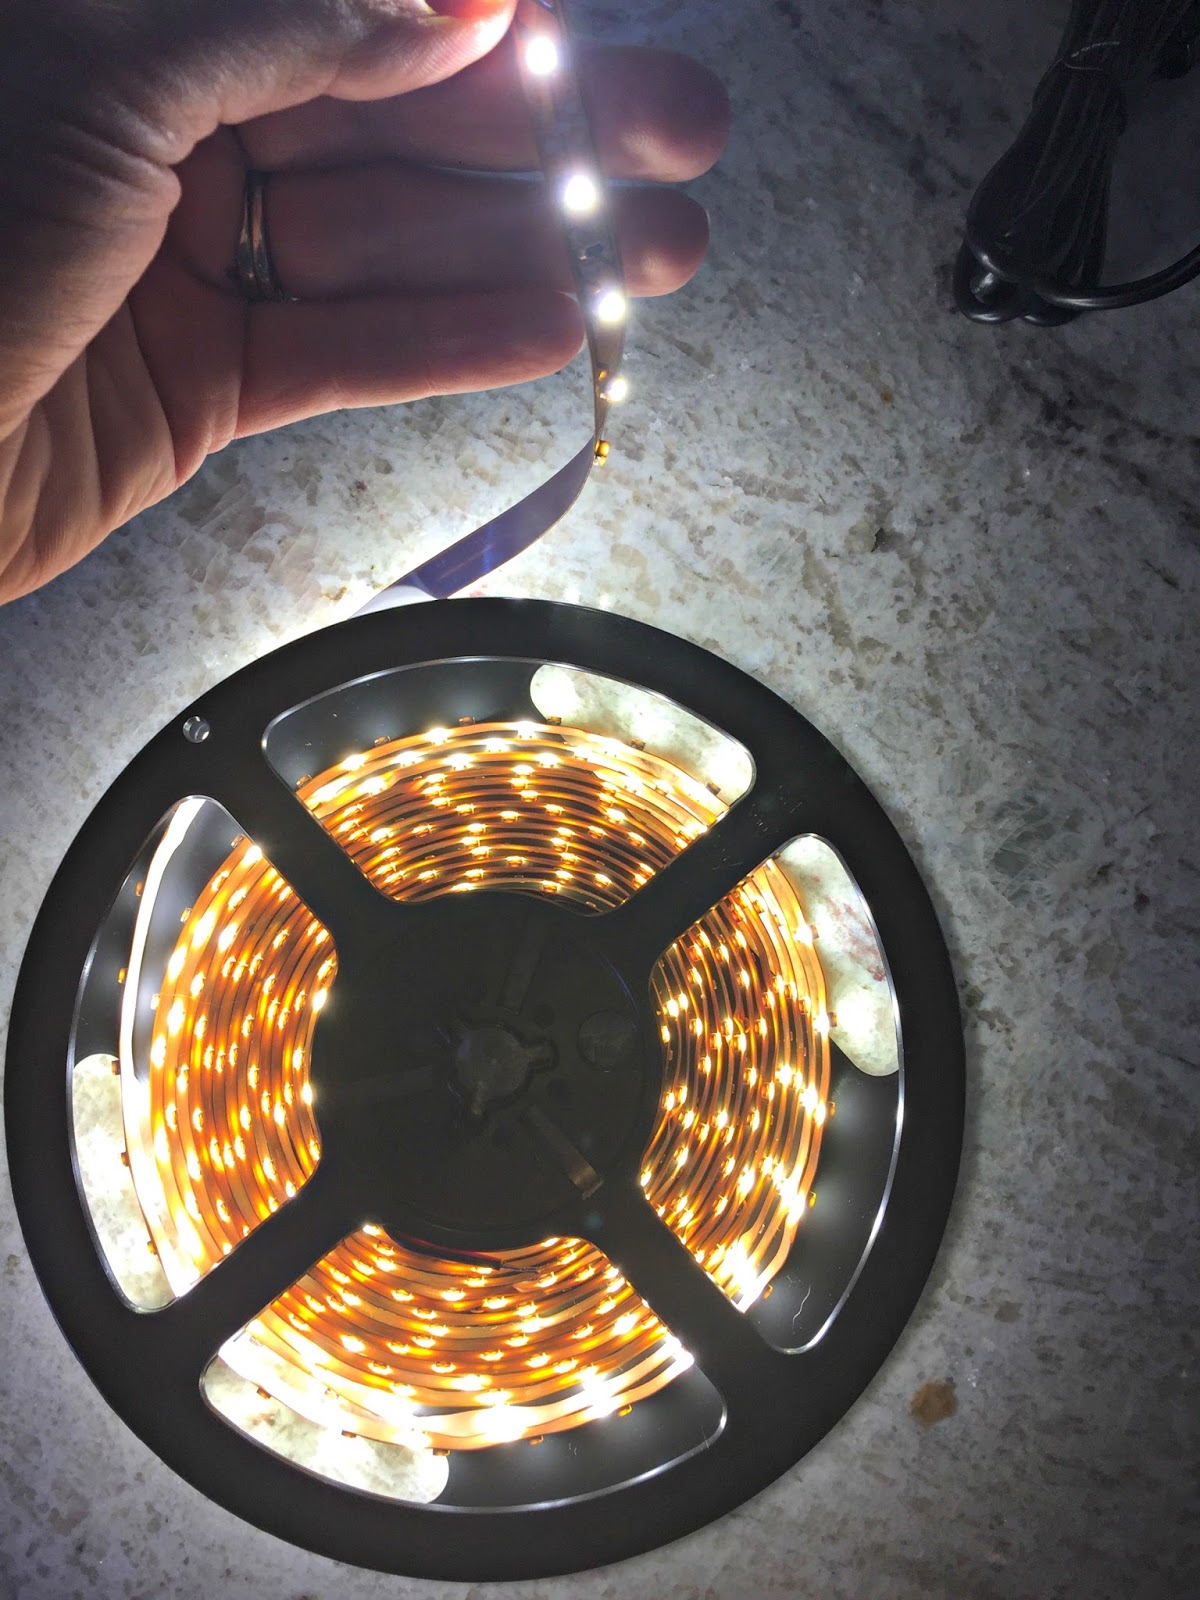
The lights I used are easier to use than rope lighting because they are so tiny and because they come with a sticky back -- that's a big help. These are the lights I used:
First thing about these -- they say warm light, but I don't consider them warm, at least not when compared to regular incandescent lights. They look much warmer during the day than at night. I absolutely love the look, but just know that "warm" is a bit of a stretch. :)
Here they are lit up:
If you purchase these, you will need this power adapter for each run -- I bought two, one for the under cabinet lighting and one for the uppers:

I had an outlet installed (connected to a switch) before we finished up the drywall in the kitchen. It's on a wall at the end of the upper cabinets, and I had it placed low so it's hard to see:

I used cord hiders to hide all the cords on this project -- I use these all over my house:

I hate cords -- it's my thing. I think they can ruin a beautiful project quick so I always have them on hand. You can see the ways I hide cords in this post!
The installation
For the lower lights I ran the cord and cover up inside the cabinet on the left inside. For the uppers I ran the cover down the left side of the cabinet, behind the trim:
You only see it if you look for it. There's a slight bump where the adapter and lights connect but other than that it's seamless. If someone ever notices it you know what I give them -- a cookie. :)
The strips have a sticky back -- so peel the paper off and just stick it to your surface. Mine have stuck fine to painted and unfinished trim. For the lower cabinets I just ran the lights along the back of the DIY light rails I installed:
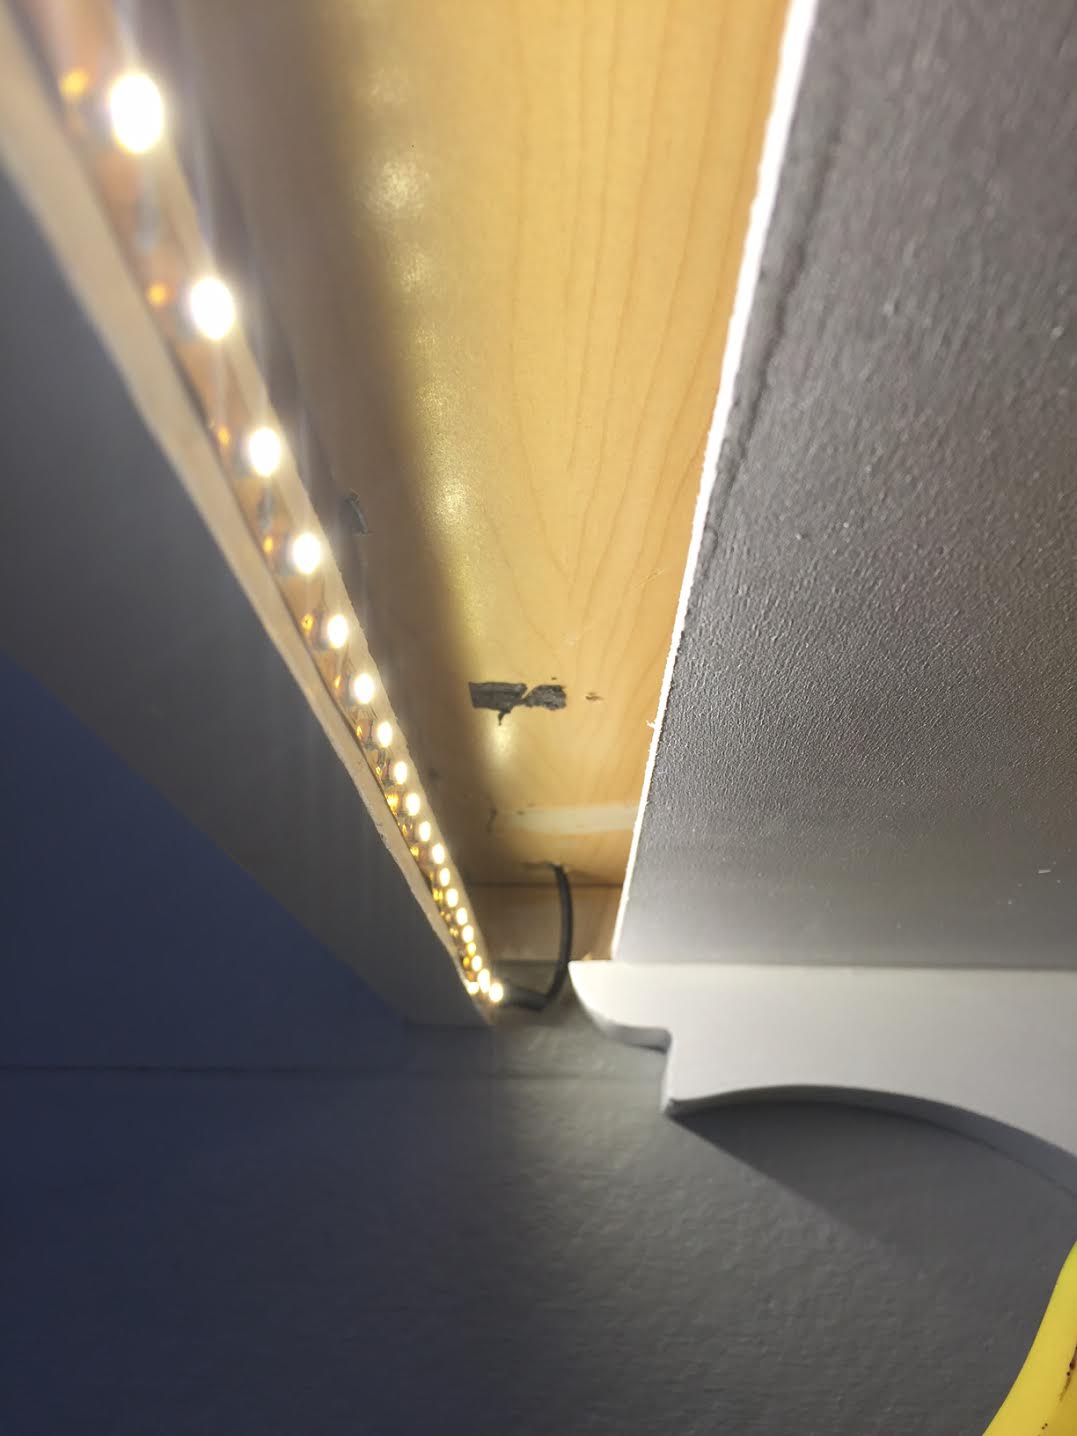
For the uppers I ran it along the back of the header. I drilled holes between each set of cabinets and threaded it through:

When you get to the end of where you need the lights, cut them. Make sure to do this where the little scissor marks are:
Now, you can cut this, then attach it to 12 volt wire with a soldering iron and then continue them. The manufacturer does not recommend putting two whole 16 foot strips together. So if you have a spot where you want the lights, then a break, then you want them again, this is your solution, but only using one 16-foot length. (The tutorial I linked above shows you how to do that so be sure to check it out if you need to do that.)
I actually bought the iron because I thought I'd have a break in the cabinet over our fridge. I pulled the light through in the back of the cabinet (where it met up with the other cabinets that are further back) and needed to get that light to the front of that cabinet (to attach the lights to the back of the header). To do so meant running it along the sides, which you would see.
Instead of trying to use wire and the iron, I came up with a simpler solution. I went ahead and ran the lights along the sides of that cabinet, and then picked up some tiny crown molding (found mine at Home Depot):

Then I installed it a little low so you can see the glow of the lights coming out of the top:
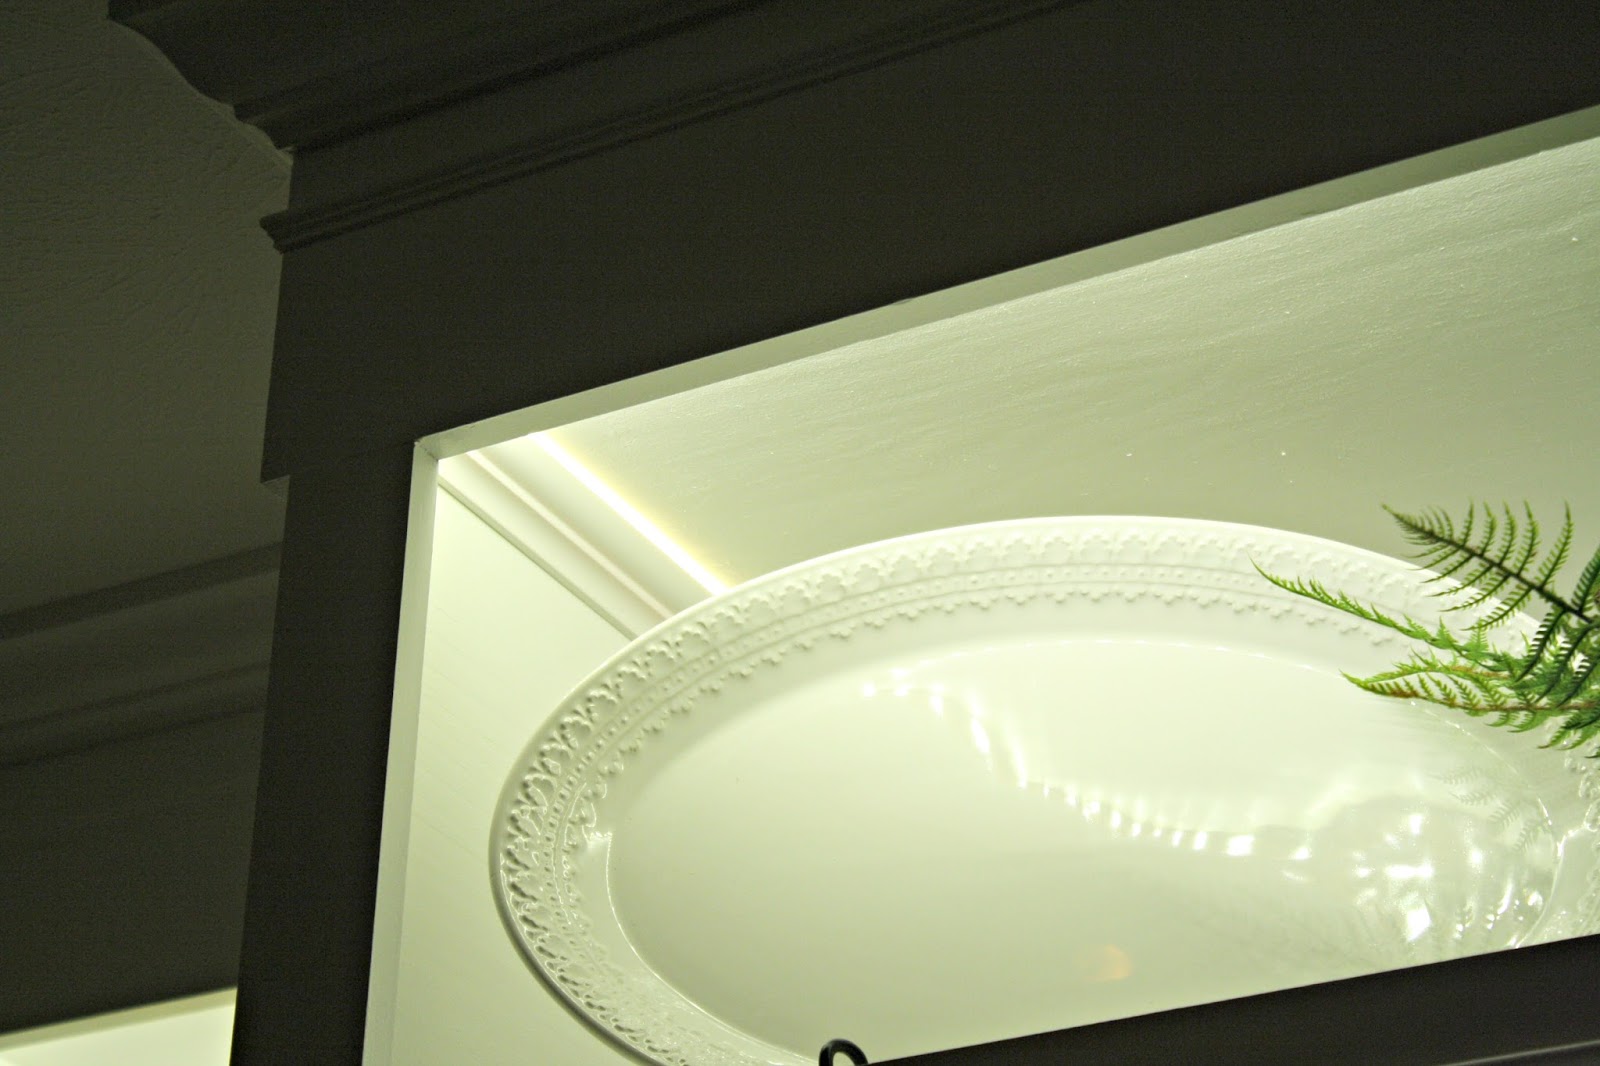
Remember these are LED lights so they stay very cool to the touch. This is a trick you can use with your regular crown molding too! It's a cool look, especially in a basement or theater room. It offers low ambient light in a room that you want mostly dark. Just make sure not to have your crown go all the way to the ceiling.
If I had connected wire I would have had to hide that running along the sides anyway, so this was an easier solution.
The result
It was hard to get a good photo without the lights blowing out -- my best pic was actually taken with my cell phone:
This really shows the true look of them when they are on. This was during the day and they look warmer here. They are LOVELY! I love the low light at night.
As I mentioned before, there are two ways to do cabinet lighting. The light strips and rope lights I shared years ago here have a warmer glow, but it's a lot harder to find the incandescent strips now. And they do burn out eventually. The LED lights will go forever, are cool to the touch and are easier to maneuver.
These are easier to use on one bank of cabinets like we have here. They'd also work great in a bookcase or built ins. Once you've had under cabinet lights it's hard to go without them!
It really is great for task lighting in a kitchen at night, even with all of the overhead lighting on:
There is one final change to make -- I had the sconces and these lights run on the same switch and I've changed my mind on that. I'd rather have them operate independently. Thankfully there's an easy solution for that so I'll show you that soon! (Edited to add -- you can see the simple way to do that here!)
Also, these are not dimmable with a standard dimmer, but you can get this one that you wire to them. It's manual though, so it needs to be in a spot where you can reach it. It would be ideal for under the cabinets -- you could attach it underneath and adjust the light.
I hope all of this makes sense! If you have any questions about this process please let me know. These are a really affordable and energy efficient way to add accent lighting to your kitchen! Here's an image to pin for later if you are interested:

Here are a couple more of my favorite DIY lighting projects!


See more of our home here. To shop items in our home, click here! Never miss a post by signing up to get posts via email.
Via https://www.thriftydecorchick.com/2016/03/diy-upper-and-lower-cabinet-lighting.html
Hello my friends! I hope you are hanging in there and staying well! I have a really delicious recipe for you today that is super easy and quick to make.
I got this recipe from a friend recently and I'm not sure exactly what to call it -- it's not a casserole, and not quite a soup. It leans more towards a taco soup so I'm going with that. :) As I started to write down the ingredients list, I realized at least half of the items wouldn't be needed and it would still be really good. So I added a bit and removed a lot and made it even easier to make! 
This post may contain affiliate links for your convenience.
See my policies and disclosure page for more information.
So here you go, my edited taco "soup" recipe for your enjoyment!: Easy taco soup dish
1 pound ground beef
1 package taco seasoning
1 cup rice (I used brown rice)
1 can corn
Two 10 ounce cans diced tomatoes (with chilies if you like it spicy)
onion, diced (I used about 1/4 cup)
2 tsp garlic
dash of lime juice
chopped cilantro (as much as you want!)
1 can beans if you like them
Toppings:
Mexican-style shredded cheese
Sour cream
Tortilla strips
Cilantro
It's super easy to make! Here are the steps:

I had tacos to serve these in, but we ended up eating it like soup instead, hence my soup title. It would also be delicious with tortilla chips or in tacos or flour tortillas.
It's a hearty meal and you can easily adjust it to your liking:
I hope you enjoy it! I am already looking forward to making it again. :)
Here's an image to pin for later if you'd like to save this one!:

(By the way, the photos in the dish are a day or so later. It has more of a soup consistency at preparation.) P.S. You can find our pretty dishes here, the blue table runner here and our woven placemats at IKEA or here. See more of our home here. To shop items in our home, click here! Never miss a post by signing up to get posts via email. Via https://www.thriftydecorchick.com/2020/04/easy-and-delicious-taco-soup.html This helpful tip is super simple and cheap (free if you have the basics on hand). I found this DIY jewelry cleaner months ago and it’s actually from a food site here. Which is fitting because all of the “ingredients” are from the kitchen:  DIY jewelry cleaner recipe
1 tbsp salt
1 tbsp baking soda
1 tbsp dish detergent
one cup water
1 piece of aluminum foil
bowl
Just stick the water in the microwave for one to two minutes (I do two to get it nice and hot) and while it’s heating use a piece of foil to line the bottom of the bowl:  When the water is ready, pour it in the bowl, add the tablespoons of baking soda, salt and detergent in and watch it fizz:  That’s the fun part. ;) Then you just place your jewelry in the bowl for five to ten minutes. The ingredients eat away at the grime and dirt and my rings come out sparkling! It’s amazing! I feel like I commercial for dish washing detergent with all the SPARKLE but it’s true – this stuff really works well. I used to use jewelry cleaner from the store, but the brush that came with it fell apart after the second use. Since then I’ve used a soft toothbrush but I find I don’t need to use it with this recipe. When I take my rings into my jeweler to be cleaned they look at me like I have three heads and ask WHAT IN THE WORLD I have been doing. I guess the spray paint, saw dust, paint, glue and all the other DIY messes stick around. ;) This homemade version eats away at all that stuff and makes them absolutely shine. Love it. And the ingredients are so basic I always have it all on hand. If you are cleaning a bunch of jewelry you’ll want to make a new batch each time, according to the source. I’ve also used this on more delicate jewelry like an opal ring – it worked beautifully. Some of the reviewers on the site I linked to mentioned it messed up sterling silver jewelry, but then others said it cleaned up their silver beautifully, so try it for silver at your own risk. Check out that link for reviews before you try something you are hesitant about! I’m thrilled with it and highly recommend it – I’ll take an easy, cheap solution any day! :) Have you found any great tips lately? I hope to share some of mine with you more often – good results and the bad. **Check out my other cleaning hacks and tips here! See more of our home here. To shop items in our home, click here! Never miss a post by signing up to get posts via email. Via https://www.thriftydecorchick.com/2012/08/pinterest-inspired-diy-jewelry-cleaner.html
I've been working on little projects while staying safe at home, and I'll continue to share those with you here on the blog! I'm sharing a slightly different DIY today and it involves one so many shudder at...electrical projects. Hang in there with me!
I picked up a few dimmers a few weeks ago (knowing we may be at home for awhile) to install around the house. I also installed a couple outlets and switches that I must have bought shortly after moving in. I've been busy at the breaker box! If you know how to change out a light switch or outlet, these will be easy for you. And even if you don't, I encourage you to watch a YouTube video to see how easy it is (or check out the tutorials I share in this post). I promise it's not that hard. Once you get the hang of it each of these take five minutes to change out. They're all easy fixes that make life a bit easier AND save energy and light bulbs!
This post may contain affiliate links for your convenience.
See my policies and disclosure page for more information.
Dimmer switchesI've blabbed on and on about dimmer switches for years for good reason! They are my FAVORITE! Dimmers allow you to soften the light rooms so they aren't so bright at all times:
I love them in any room -- we have them in bedrooms, bathrooms (if you get up before the sun they are a must!), the kitchen, dining area and family room. Pretty much all over the house. :) 

I added one to out master bath and the foyer last week: 
They not only adjust the light to your liking, but they add an ambience to a room in the evening that is really lovely. Plus you will save energy and your light bulbs will last much longer. You can find my simple tutorial for installing a dimmer switch here! (I wrote that post years ago -- I show one way to install them, but check out the instructions inside the package for updated methods.) Things to consider when purchasing -- make sure your dimmer switch works for LED light bulbs. Also, if your light operates from one switch it is called single pole. If a light works from more than one switch it's called three way. Most dimmers work for all of these now -- that's why they cost more than they used to. (Back in the day they were less than $10 each.) You can find my favorite dimmer switches that work for LEDs and every switch here and here! Recessed outletsI've shared these cool recessed outlets (and how to install them) as well. They are great outlets because they give you a few more inches behind furniture and TVs: 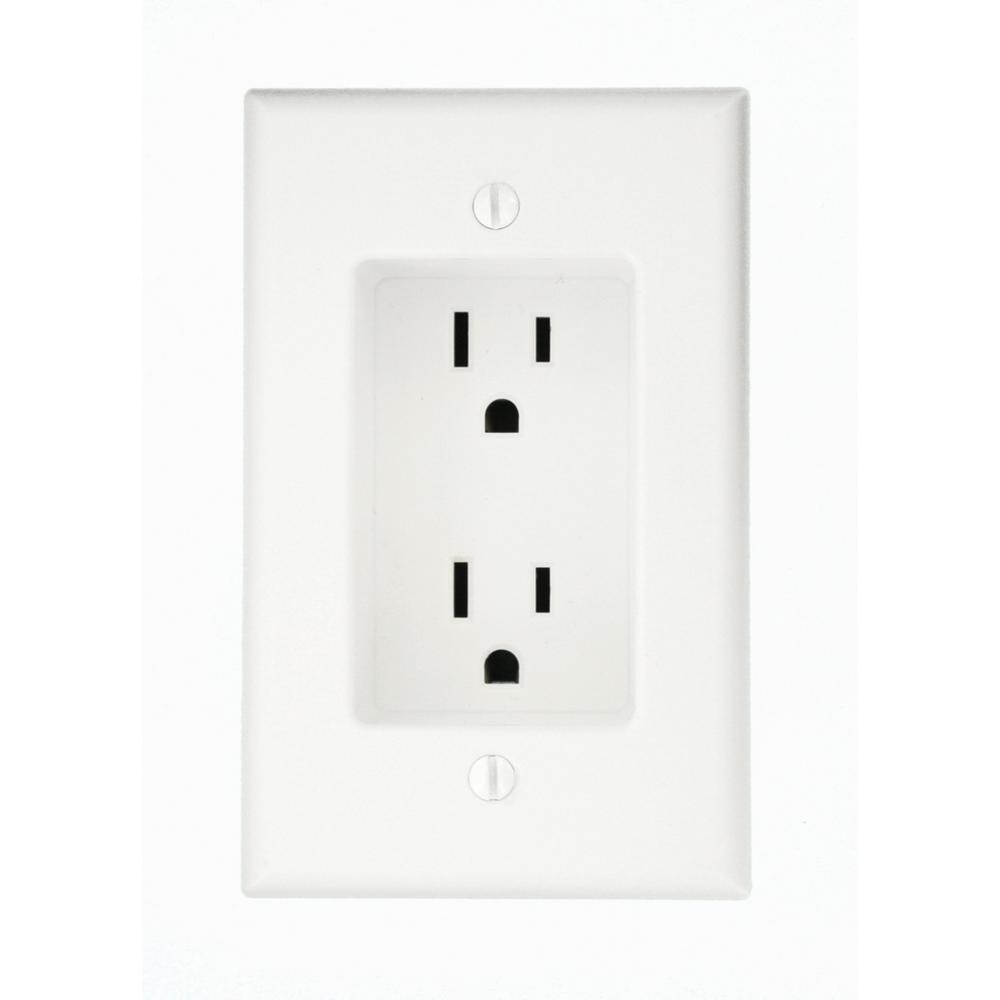
I've shared before how much I hate when I can't push furniture all the way against the wall -- these help tremendously!
Also, if you're having an outlet installed behind a hanging TV, I recommend these instead of a regular outlet. That way you have plenty of space behind:

Still haven't painted the trim in this room. ? It's on my list while we're at home!
USB outletsThese USB outlets are another favorite because they are so useful. You still have two regular outlets, but also two USBs as well: 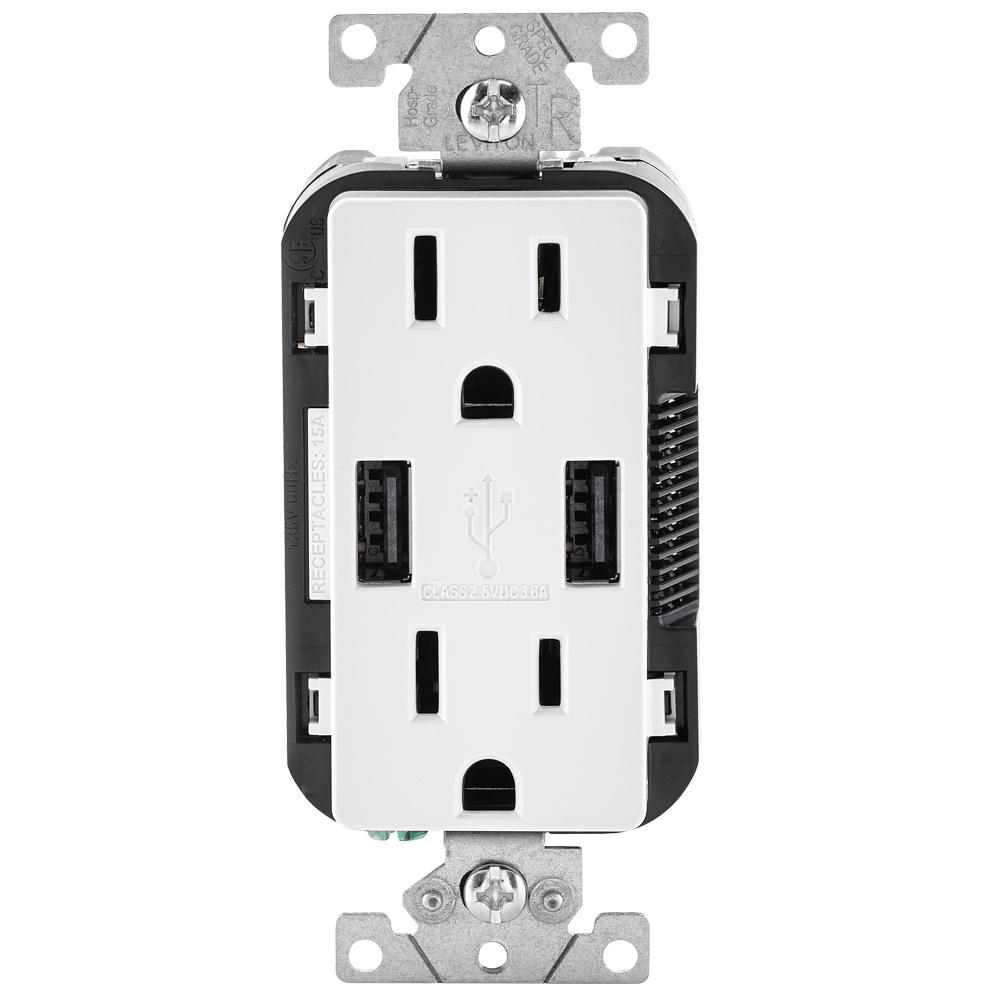
You can plug anything in like a normal outlet, but don't need the bulky chargers to power up your devices. There's plenty of room to have something plugged into every spot.
We have one in our mud room and it's perfect because we have so many items that need to be charged -- speakers, watches, phones, etc.
I keep all of the cords right there so we can grab them all:

The kitchen island is another perfect spot for one of these!:
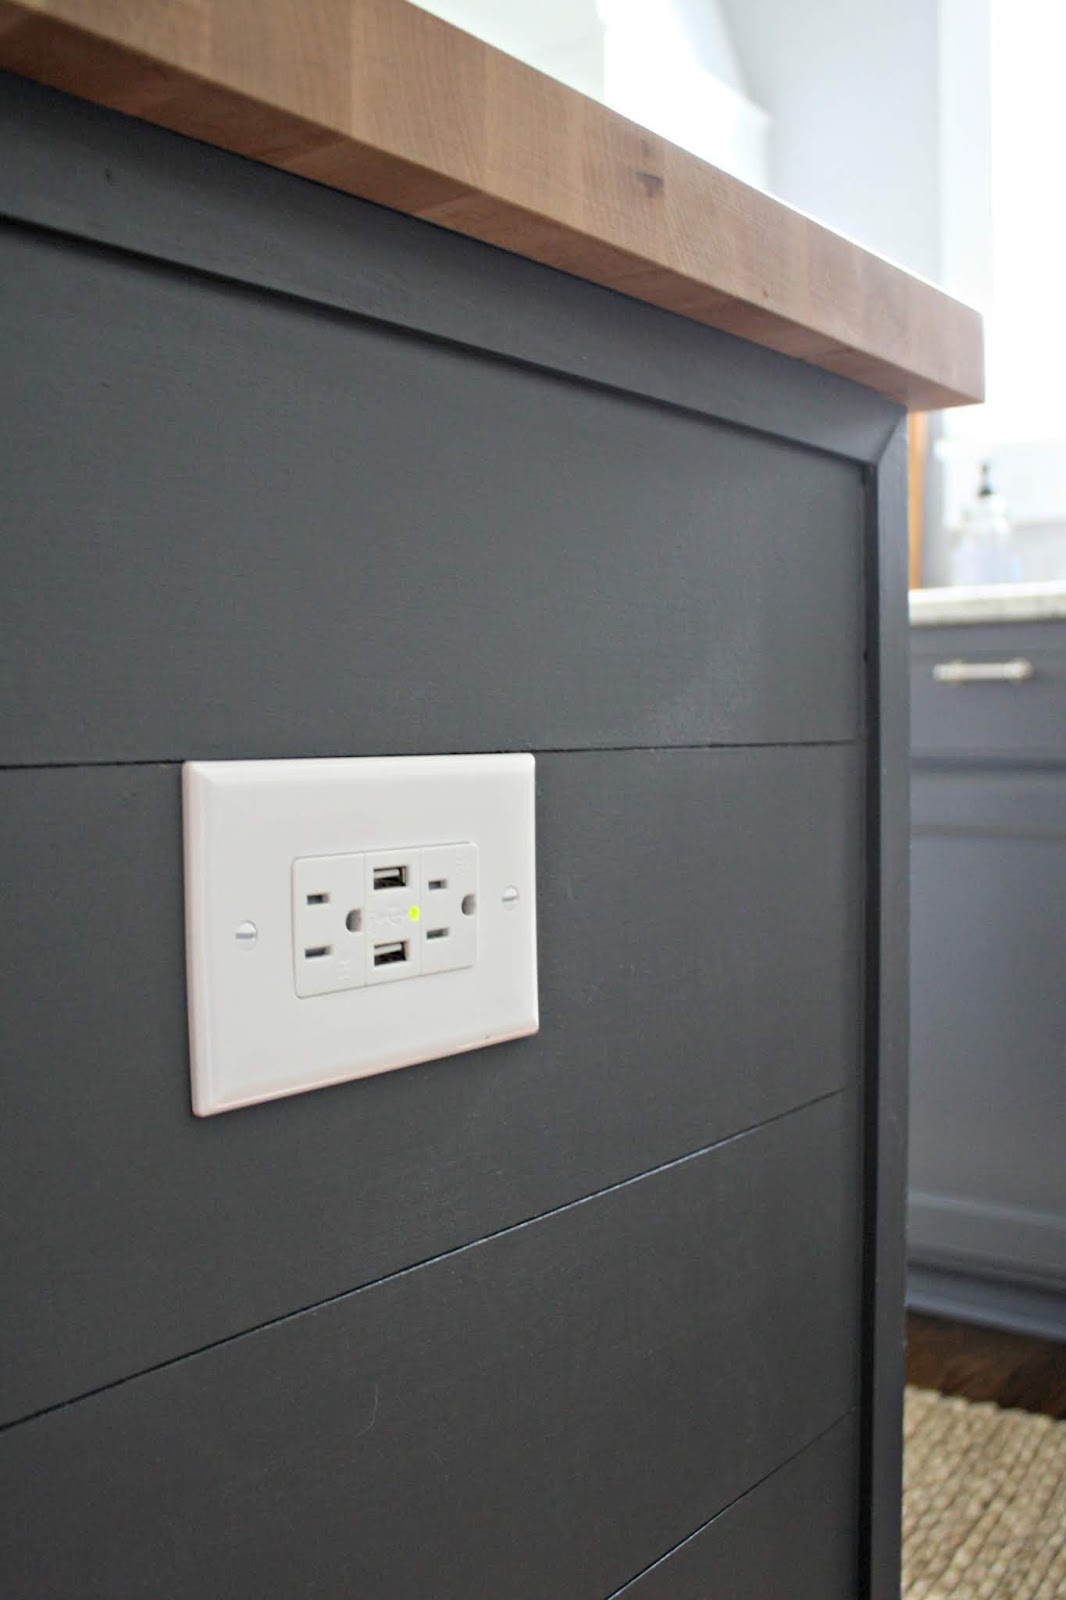
I think they'd be great in an office or bedroom as well.
Motion sensor lightsI hate when lights are left on around the house! Not calling my family out or anything...I'd never do that. ;) I used one of these in our old house and loved it. I must have bought one for our new home because I found it the other day and installed it in my closet: 
The motion sensor light is GREAT for areas where They turn on when you walk in and you can set how quickly you want them to turn off when you leave the room. You can also tap the button to turn them on and off. I think they're especially helpful in closets and pantries. It takes some getting used to -- you'll still reach for the light switch for a good week after putting it in. :) They will save you some money on the electrical bill if you have light switch offenders in your home. You can find motion sensor light switches online here and here. If you're planning to install any of these handy switches or outlets, you'll want to pick up a voltage tester as well. It's super simple tool that tells you if there's any power going to what you're working on. I ALWAYS test (in addition to turning off the breaker) -- even though the light is off, there may be power coming from an another room. I think you'll find any of these helpful around the house! If you're working from home this is a great time to tackle little projects like this. Let me know if you have any questions! See more of our home here. To shop items in our home, click here! Never miss a post by signing up to get posts via email. Via https://www.thriftydecorchick.com/2020/04/my-favorite-lighting-and-outlet-hacks.html |
