|
Hello there! I'm hoping to get a TON done on the office built ins this weekend! So far our summer has been crazy busy already, so I'm looking forward to at least one day this weekend with nothing planned.
Because bookcases and shelves and everything "built in" are on my mind, I've gathered a round up of 15 AWESOME do-it-yourself built in projects I think you'll enjoy.
I was blown away by the great ideas and execution of my fellow bloggers, as always! You'll find links below each photo to the full tutorials. Enjoy!
Cristina ALWAYS knocks it out of the park. Her wall of built ins in their family room is just stunning:
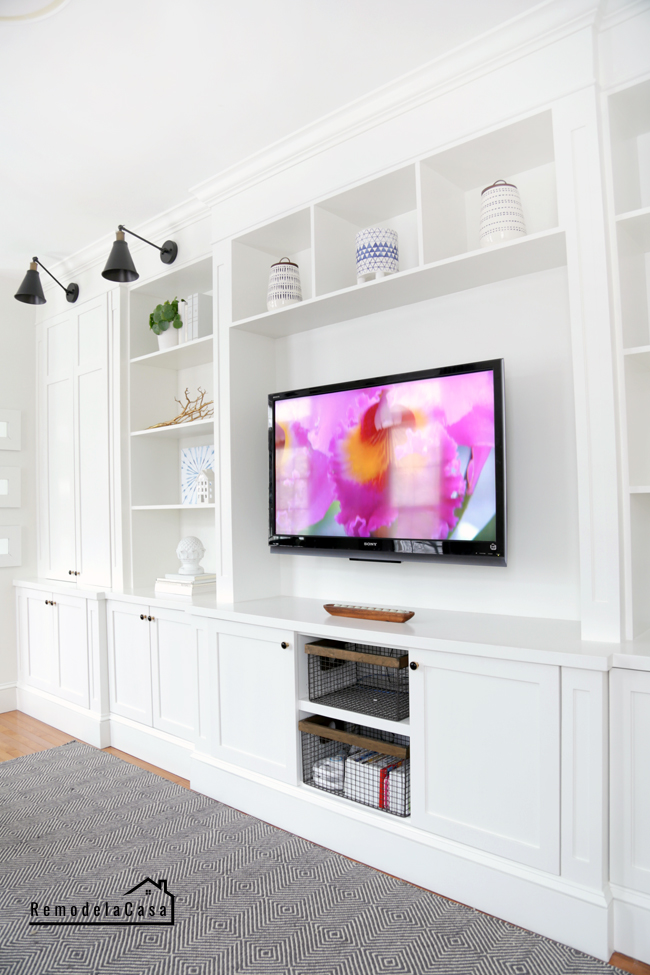
She has some major skills. I know this took so much work, but wow was it worth it!
Jaime is another talent, and at first glance you might think you need more advanced DIY skills to pull this one off:

But I think you'll be surprised to see what she used to create these. Brilliant, pure and simple!
Aren't these built in lofted beds just the coolest?:
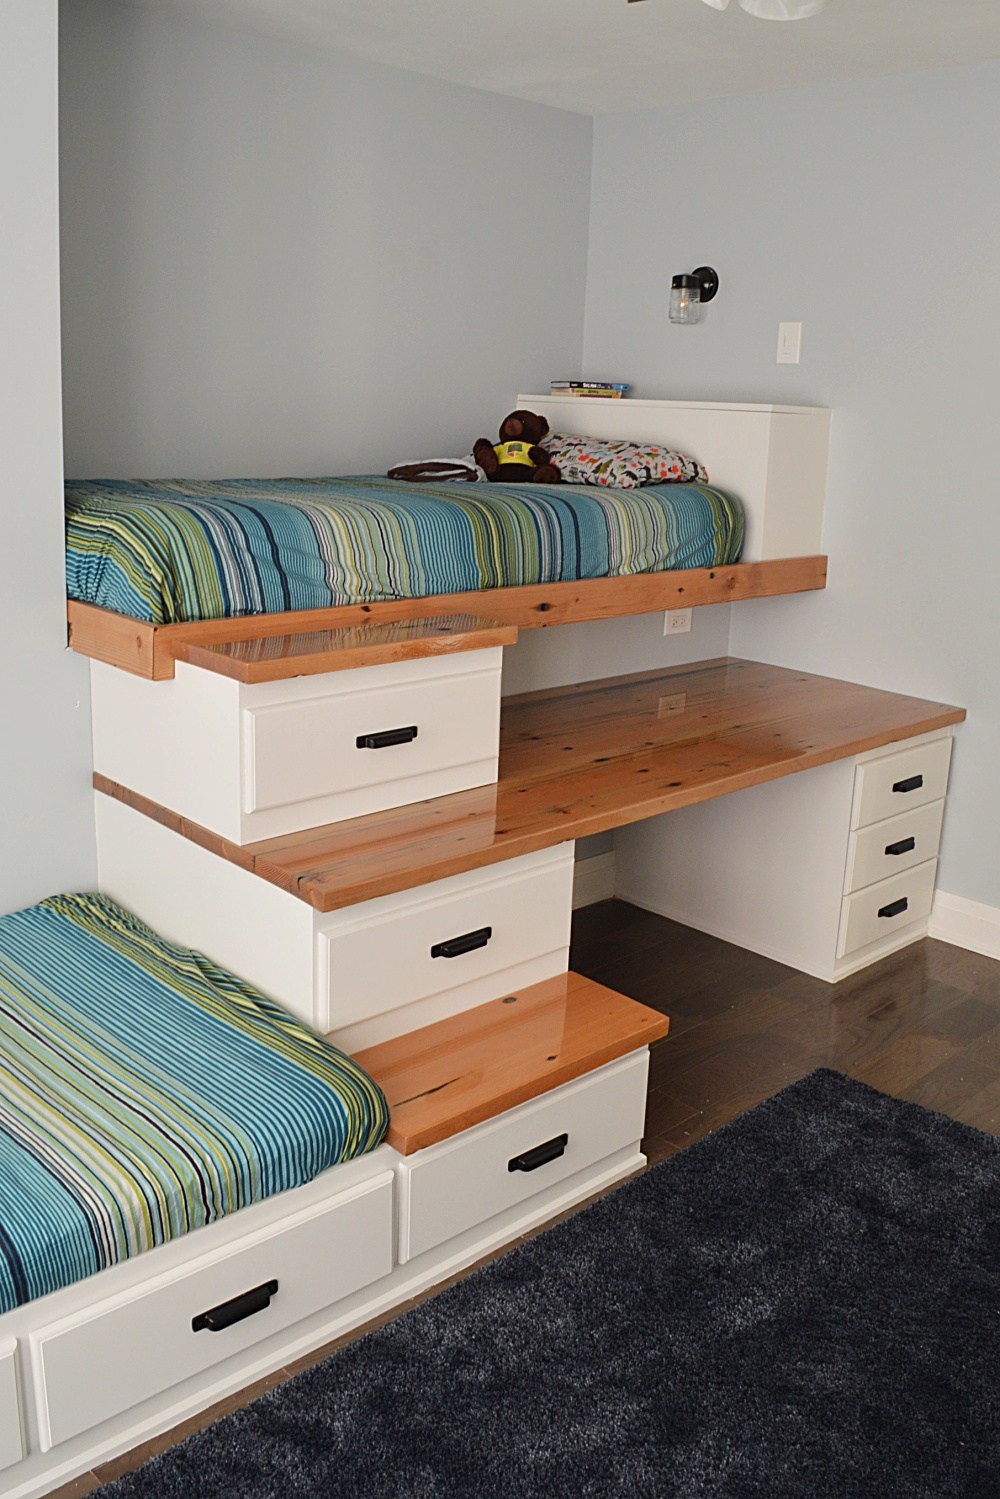
I especially love all of the storage, and the built in desk too. So much function that takes up very little floor space!
My friend Chris shows you how to make a beautiful wall of bookcases using items from IKEA:

They look completely custom! She recently painted them black and they look even more amazing now.
If you want more function in your entry space, this is an awesome tutorial for mud room built ins:

The upper storage would look great over a desk too!
Kim created built ins around a beautiful window and it makes the whole wall a statement now:

You know my favorite part is the window seat! :)
If you have cabinets with open wall space above, this is great way to add some additional character:

The walls were empty before she added the shelving -- love how those turned out! Looks like it was always meant to be that way.
My friend Beth used cabinets for her bases as well, but added a pretty "X" detail I love:

That wallpaper is so pretty too! It looks so good against the white cabinets.
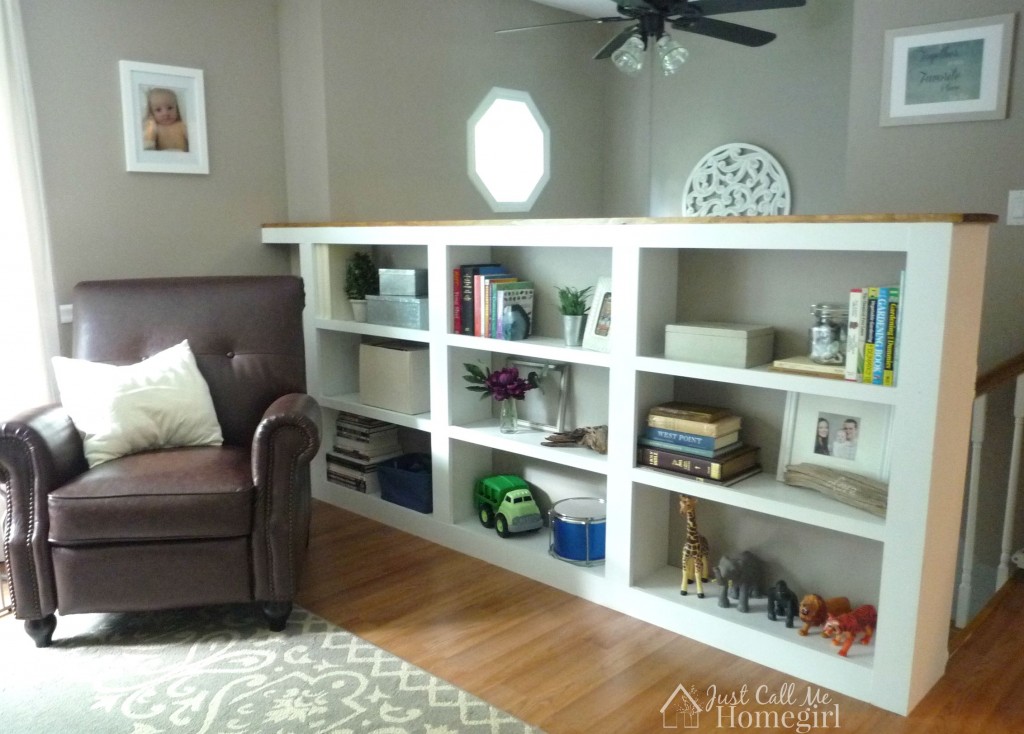
Tara created some separation and privacy by adding this half wall of bookcases:
If you are barn door fan, this is the built in for you!: 
The best part of this built in entertainment unit is you can hide the TV behind the doors! I LOVED these next two bathroom ideas! This one was originally just an open nook with wire shelves. What a beautiful upgrade!: 
And this one was a small closet -- now it's oozing with character with those pretty wood shelves: 
I've always loved bookcases flanking a doorway. What a great idea that adds a custom look for sure: 
Brittany created small built ins that needed to function well for her kid stuff, but they look great too!: 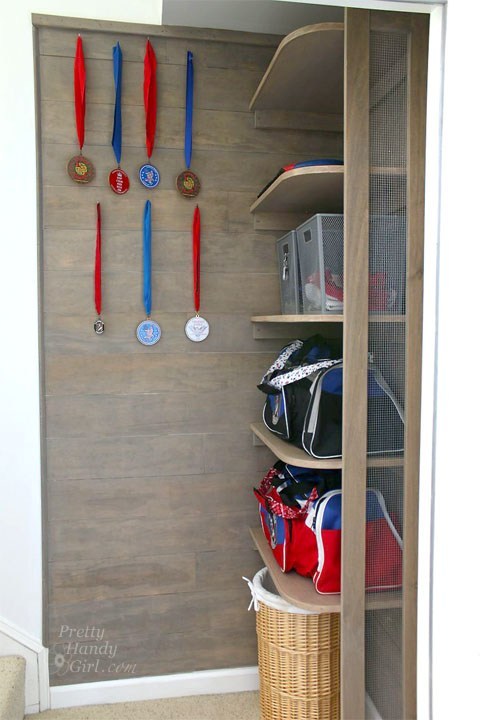
I love that she created so much awesome storage out of such a small space! And finally, this pantry makeover is a great idea! If you love the look of built ins in the kitchen, I think this is just lovely: 
The storage inside is even better! Go take a look! Hope you enjoyed this built in/bookcase project round up. SO many beautiful ideas, they get my mind turning for more projects! ;) Have you attempted a similar project in your home? See more of our home here. To shop items in our home, click here! Never miss a post by signing up to get posts via email. Via https://www.thriftydecorchick.com/2019/05/fifteen-gorgeous-diy-built-in-projects.html
0 Comments
Hey hey! This week I've started really tackling the BIG built in project in my office. Yes...I'm still working on the mud room too. It's how I roll.
I really want to get this DIY project done this summer, so I wanted to get started sooner than later. I usually work slowly, but since I've done this once before in our old dining room turned library I'm hoping it will go a bit quicker this time: 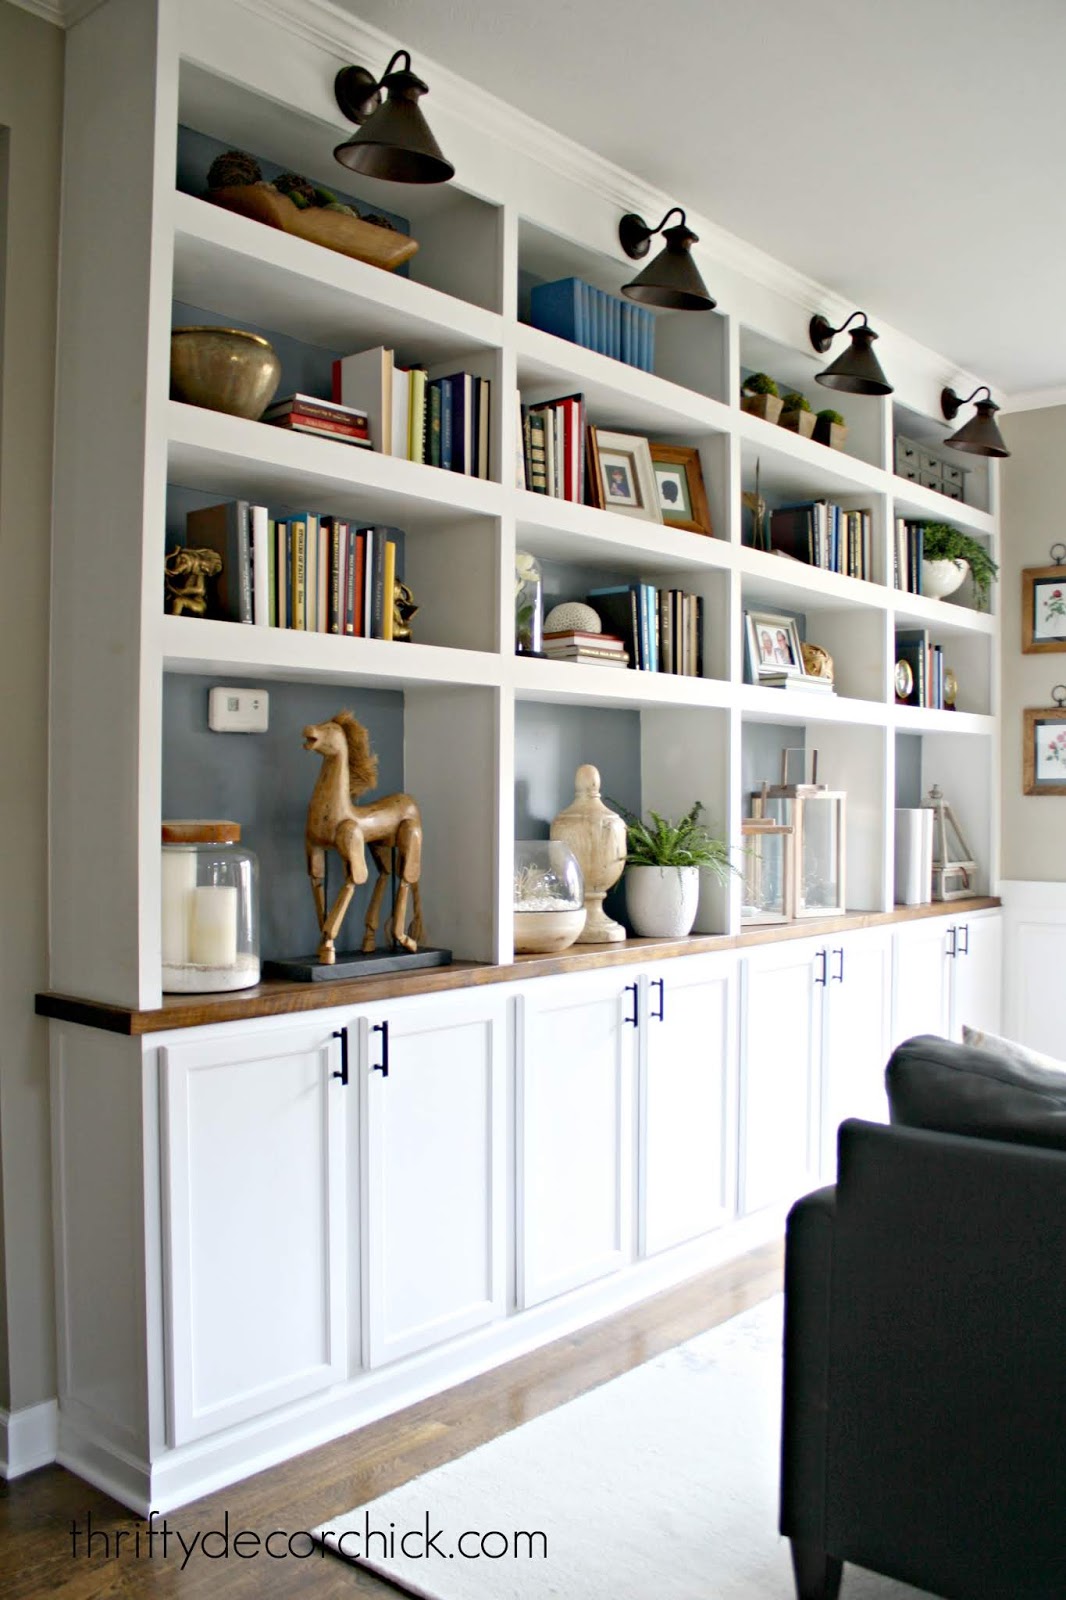
I'm also not worrying about a couple steps I took last time, so that will save some time and money for sure!
This post may contain affiliate links. See my policies and disclosure page for more information.
I shared my plan for my office here -- and I've figured out a few more details since:

The first step was getting the floors down in here. I was glad to see the carpet go! I needed the carpet gone before I installed anything.
I removed the baseboards on the sides and along the back of the wall -- the back piece I'll use again later on:

I used my Dremel cutting tool to cut through the base and then this method to remove the baseboards.
Here's the key for building a bookcase like this with closed storage underneath -- I use UPPER kitchen cabinets. They are only 12 inches deep so they are much easier to work into a space. You can use the lowers, but they come with drawers on top, which looks more "kitcheny" to me.
I always want a simpler look, so the uppers are where it's at. The thing is, they look a bit awkward just sitting on the ground (there's no toe kick on them like base cabinets). To create that custom look, you'll just need to add some height to them like so:

I used four 1x5s -- one for each cabinet. I wrap the inside of the bottom with them -- two long ones first, then brace it all with the shorter pieces. I secure them with my nail gun, but you could use screws as well.
This brings the cabinets up to a more natural height, and allows you to install the baseboards back across the front. To do that, you'll need to add some scrap pieces along the front of the new toe kick to bring the base out a bit. (That part is still to come.):

Check the height of your current (or future) baseboards before deciding on the height of your toe kick. Because our base is more than four inches, I had to go with a five inch wood piece (which is actually only 4.5 inches) because anything shorter wouldn't have allowed me to use the same size baseboards.
My next two steps are to cut out a hole in the back of a cabinet for the only outlet on the wall, and then I can secure them to the wall. Installing cabinets isn't my favorite thing because you have to watch to make sure they stay flush from all angles. But it usually goes pretty quick!
After that I can get the baseboards back on. I may get the painting started after that so I don't have to do quite so much at the end! Call me crazy but I think it's already looking good!:

I'm stoked to get these in the wall because I have a ton of craft supplies in our basement storage room and I can't wait to get them out of there. Since I don't paint inside the cabinets I can go ahead and put all of that away.
After that I will start the wallpaper -- I'm planning something on the back wall. Right now I'm leaning toward this peel and stick cherry blossom print (affiliate):

But it depends on how it works with the color I have planned for the built ins. ;) I THINK I'm going in a completely different direction than I originally planned. Any guesses?
Total cost so far for the built ins:
$300 for the four cabinets (mine were on sale, you can find them at most big box hardware stores)
$20 for the wood for the bases
So far it's been easy...the real labor comes with the getting the bookcases up. My list is VERY long, but it feels so good to have this part done! I'd LOVE to have this done by mid-summer, but you know how that goes. ;) Stay tuned for another update! See more of our home here. To shop items in our home, click here! Never miss a post by signing up to get posts via email. Via https://www.thriftydecorchick.com/2019/05/the-office-diy-built-ins-have-started.html
Hello hello! It's been quite some time since I've highlighted a DIY/decor blogger and this one is certainly worth breaking that dry spell! You can see all of the fantastic bloggers and home tours over the years here.
This time it's my friend Lindsay from Frills and Drills. She's SUCH a talent, I know you'll love what she does! I discovered Lindsay on Instagram and was instantly impressed with what she accomplishes, especially as a young mama. She reminds me of myself ten years ago...when I had a teensy bit more energy and worked a little faster. Kidding...I've never worked fast. ? I've been wanting to share her with you for quite some time and the day is finally here! Check out her projects below with links to each one...
One of my absolute favorites of hers is the marble tiled wall in her master bathroom:

She shares a product that makes this process MUCH easier (believe me!!). What a difference this one wall makes! She does some projects for friends too, including this little DIY mud room bench wall: 
Wouldn't you like to be her neighbor? ;) If like this look but you're not ready to try planking a wall with individual strips of wood like I did in our last basement, the product Lindsay used for the wood accent wall may be a good option! She even builds furniture! And it's gorgeous! She's built a few media consoles, like this media unit with the overlay detail for her mom: 
This wood and white console was inspired by a much more expensive option online and I love the stained details: 
Lindsay wanted wood beams in their dining room so she did it herself!: 
These are a great option if you don't want to spend a ton of money on true wood beams! One of my absolute favorite projects of hers is the recent gray and marble laundry room makeover: 
She did almost every bit of this room by herself! Told you she is way talented! :) And finally, she's the queen of organizing closets with the help of IKEA units: 
You can find Lindsay's projects on her blog, Frills and Drills, or on her Instagram page where she shares even more! All of this gorgeous trim in her mom's foyer is one of her latest projects shared on IG: 
Go tell Lindsay hello and have a great weekend my friends!
See more of our home here. To shop items in our home, click here! Never miss a post by signing up to get posts via email. Via https://www.thriftydecorchick.com/2019/05/showing-off-lindsay.html
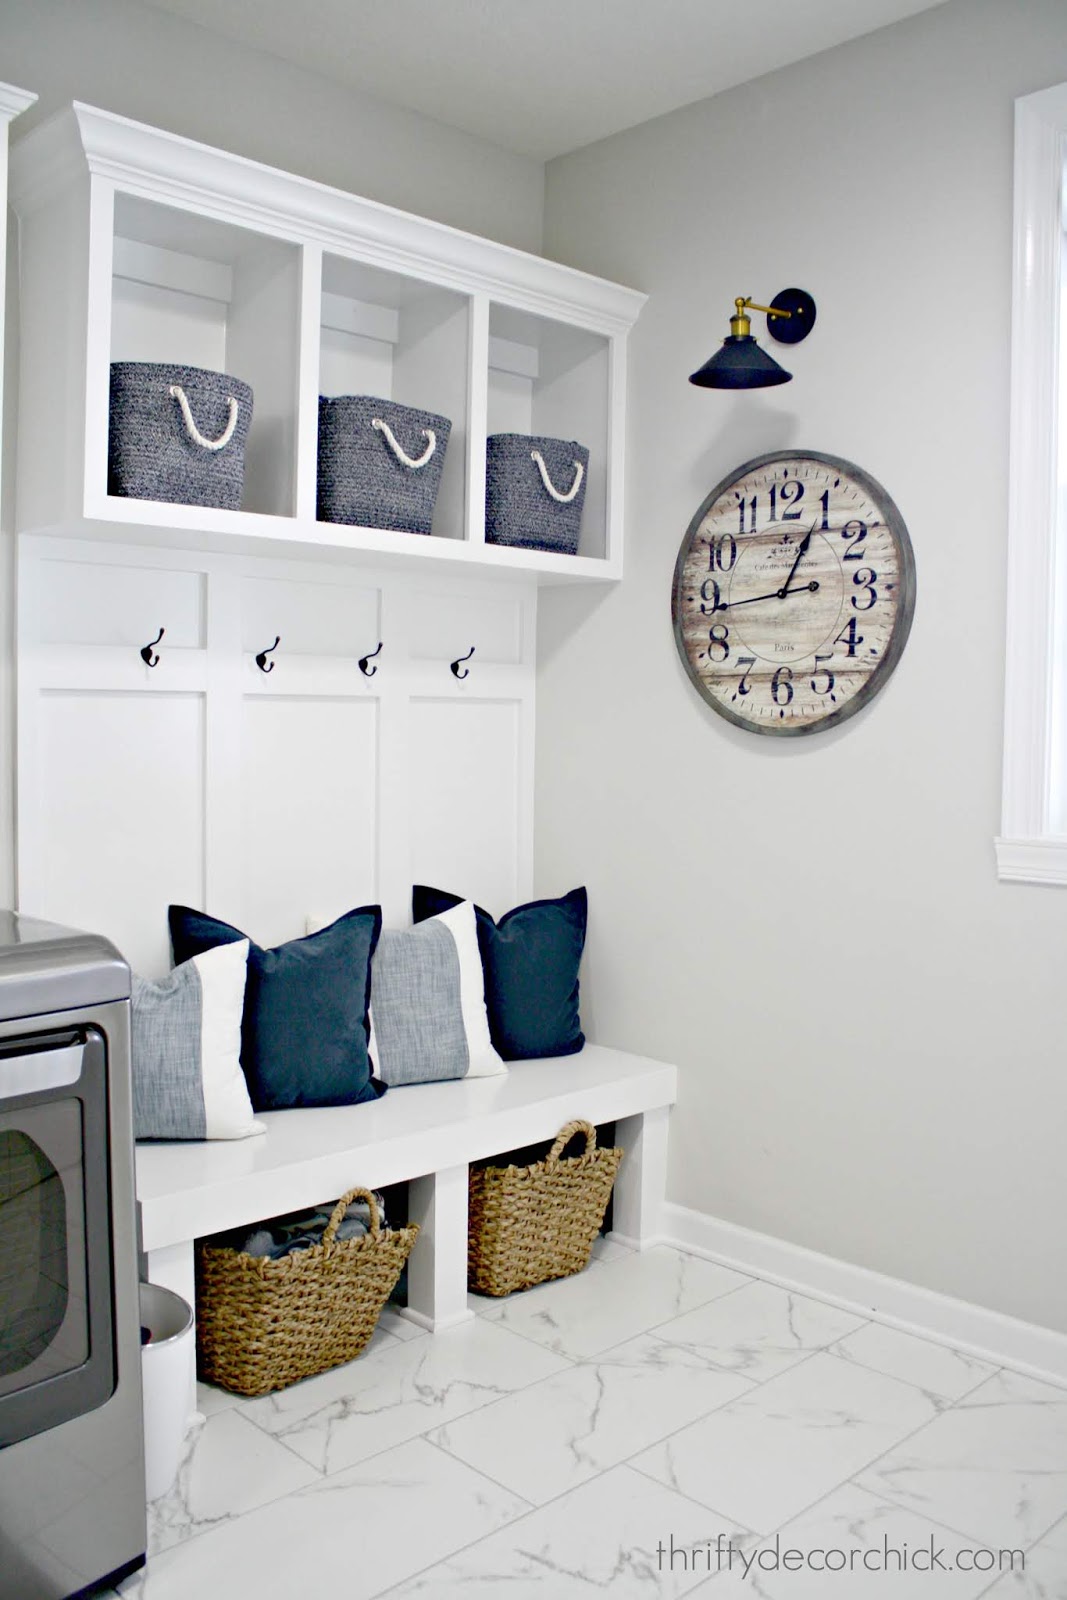
Hey there! I've been hard at work on our mud/laundry room makeover that I told you about here. It's taken me way longer than I thought it would, for reasons I'll explain in a minute.
Let's go back to how the room looked shortly after moving in:

The lighting was horrible (more on that in a bit!), but otherwise, not much changed other than I changed out the "boob" lights later on with some cute flush mount fixtures I got from an outlet store. (You can find them online here!)
I shared my paint misstep with a color I thought I would love:

I did NOT love it, and hated the height that I had it at too. I quickly changed directions with this wall and the feel of the room and I'm SO freaking happy with it now!
I told you last week that I decided to go with a much lighter color called Whitestone that I used in our old master bedroom. I decided to do a shiplap accent wall instead of board and batten around the whole room.
I've done smaller shiplap walls on our staircases, and had help doing the large wall in my old office/craft room in our last house:

I did the smaller walls in there, but they were easier than this one!
My go-to for shiplap (or planked walls as I've always called them), is using very inexpensive luan instead of "real" wood. Luan comes in 4x8 sheets, is very thin, easy to cut, easy to install and only costs $15 for 32 square feet. You just can't beat it!
I had it cut down at Lowe's, and this time they didn't do the best job keeping the strips a consistent size. Most of them started at 4.5 inches and ended around four inches because of the way they ran through the saw. It made the installation much more difficult because I couldn't use most of the pieces as they were.
I can't complain though, because they cut them for free (they usually charge for cuts over a certain amount now), and the convenience can't be beat! When I've done this in the past they've gone up MUCH quicker though.
I always use change to figure out my spacing -- it just depends on the distance you want between planks. This time I wanted a more noticeable line so I used a nickel:

As you install you'll need to use your coin to check the spacing as you nail the boards in (I use an 16 gauge nail gun) and also check for level as you go. Usually our walls and floors aren't perfectly level, so I err on the side of the coin and my eye more than perfect leveling.
This time I had a lot of trim to move around too -- the crown on the built ins and the window especially. For these spots a tool called a contour duplication gauge is SUPER helpful:

I really need to upgrade mine, but it does the job. You trace this onto your wood and then use a jigsaw to cut it out. Perfection is NOT necessary. Most of my cuts are not even close to what the tool gives me, but after caulk and paint you can't even tell. I've told you before, caulk is my BFF!!
And what do I always say? If someone is going to look that close and notice the small imperfections...they get a cookie. ;)
Since my boards weren't all perfect, it took longer than usual. Plus filling holes and caulking and all that jazz is a lot of work! Not hard stuff, just busywork. But it was all so worth it!:


I am so thankful I decided to just do this one wall in shiplap! GoodNESS it would have taken me forever to do it all around the room. I don't think the other walls need it anyway. There's plenty going on otherwise:

This room will get crown molding at some point down the line. The line at the ceiling isn't perfect because the lines of the room aren't perfect. You'll find this to be true a lot of the time. Frustrating, but common!
I added the beautiful wood mirror from Target -- I have admired it forever and finally found the perfect spot! It's great for checking everything right before we head out the door:

One big difference in this room is the lighting. I added the flush mount lights from Ballard last year, but the daylight bulbs in them make ALL the difference. If you have a room that gets little to no natural light, these are a game changer!
I finally added the light to that sconce above the mirror -- you can see how I did that without having electricity by reading this post:

The sconce matches another one in the room by the huge chalkboard (that I DID run electric to), and I love that they add a touch of black in the room as well as tie in the gold ceiling lights with the gold/brass accents.
I found new baskets for the upper part of the built ins at Hobby Lobby. The were 40 percent off and hold way more than the old baskets. I keep all of our winter gear in here -- there's a basket for each of us:

I shared how I made the DIY bench cushion last week! It's such a great way to add some softness and color to a seat for not much money. Remember the other fabric I showed you? I made a long lumber pillow for the bench with that:

I got enough of it to make another one for our bed. I love it so much!!
I have about half of the room painted -- I still have a lot to go. I'm SO happy with this color. I looks so great against the white trim and the wood and black tones we have in here:

This week I hope to tackle the rest of the painting as well as start the shoe cubbies for under the built ins. Can't wait to replace those floppy baskets!
Let's look back at how the room started, shall we? I didn't have a problem with it before -- it was perfectly lovely! (Minus the boob lights.) I just knew it had big time potential:

Now it's so bright and lovely, with custom touches that make such a big difference!:

I can't wait to get after the rest of my list in here! We've really enjoyed this mud room/laundry combo, simply because of the size of this room. Our last room like this was way too small and just didn't work at all.
Stay tuned for the rest of the makeover! :)
See more of our home here. To shop items in our home, click here! Never miss a post by signing up to get posts via email. Via https://www.thriftydecorchick.com/2019/05/beautiful-mudroom-makeover-step-one.html
Whoooooo...we are SO excited about the possibilities for our backyard. Giddy! We've lived here about 19 months now and we've always had big plans for the back of our house, we just know it will take a while to get to where we were at the old house.
If you are new to my site since we moved into our current home, you may not have seen much of our old backyard. If you are a long-time reader, excuse me while I reminisce a bit. ;) Then I'll get to the plans for the new house!
We lived in our old home for more than 14 years. We had a deck built soon after moving in, but after that didn't touch the backyard for years. Eventually we paid off a significant amount of debt by following the Dave Ramsey plan. (You can read all about our journey at that link!)
Soon after paying that off, we saved up to add a large patio with a fireplace:

It was absolutely DREAMY:

We just adored this space and used it as often as we could.
Later on we added a pergola to the deck as well:

You can read about the BEST string lights for outside here. They are still holding up years later!:

And of course...the part I miss the most. My babies, the plants. I worked SO hard on making the whole backyard a beautiful oasis:


Gardening is one of my greatest joys in life -- the initial work is tough, but so worth it. I would walk through the yard almost daily in the summer to cut the flowers for inside and to see how things were growing.
I have missed that SO much, I can't even tell you. Since we moved into this house I've replaced a few plants with knock out roses (a favorite of mine) and I planted three peony plants. Another favorite -- see my tips for growing peonies here!
I asked our builder to include as many hydrangeas as possible and they obliged. I can already tell they are going to take off this year big time. But for me the joy is in taking an empty spot and filling it up with green and color. So far we haven't had many places to do that.
I didn't want to add much to the backyard knowing that someday I'd have to dig them up when we added a patio. So I've held off for the most part and I am itching to get started again! Thankfully, I think it will happen sooner than we thought! We got some quotes for a patio and they didn't come back nearly as high as we thought they'd be.
Currently we have a covered porch that is the BOMB:

We LOVE having this covered porch right off the house. I know it sounds crazy when you see how pretty our old backyard was, but we've already used this patio more in two years than we did the old one in double that amount of time.
I'm not sure what it is? It's definitely cooler under here on a warm, sunny day, so that has a lot to do with it I'm sure. The fan helps a ton too. And now that I think of it, the fact that (for the most part) the cushions stay dry when it rains helps too. So often we'd want to go out at the old house but the cushions were wet or needed to be cleaned.
All that to say...we do miss having some room to spread out a bit! And this spring especially there are days when I just want to go out with a book and sit in the warm sun. This is the thing though -- I told my husband from day one that I did NOT want a deck. No wood. Or very little of it at least (I could see adding a pergola again). Not only that, but I didn't want a paver patio again.
The upkeep of the wood wasn't TOO bad, but I still don't want to deal with it. The paver patio was gorgeous, but with the trees around, a ton of little sprouts would start in between the pavers. It was a lot of work to keep those at bay throughout the summer.
So I want to go as simple as you can get...concrete. Boring, basic concrete baby! I cannot wait. ;) My husband loves the look of aggregate (as do I), but one of the contractors we talked to said it should be sealed at least once a year, if not twice. So we're still discussing that.
Because I like to see things on paper first, I came up with a design for the patio (please know this is super rough and was not drawn for all of you to see it ?), but it gives you an idea!:

It will be quite large in total -- about 700 square feet. Our backyard is HUGE and we have a ridiculous amount of room, so this will barely take up much even at this size.
We have one of those huge umbrellas that covers a lot of space, so I plan to use that over a table and chairs right off the current porch. I'd like to have a spot to lay and read or lay out occasionally, so that's off to the left.
Our favorite part is the large round firepit area in the corner. I've dreamed of something like that since we moved in and I can't wait! I've always loved the idea of a large spot big enough to have a bunch of chairs.
And of course, I can barely even wait to start landscaping around all of it. I'm considering rocks instead of mulch this time though -- do any of you use rocks in your landscape? It will help keep the upkeep costs down significantly I think. We'll be adding trees and eventually I hope it will be just as pretty as the old house!
So that's the plan for now...we're hoping they can get us in in July, so we have to wait awhile. We're good at that, considering it took 14 years to get from this:

To this at our old house:

See more of our home here.To shop items in our home, click here!Never miss a post by signing up to get posts via email. Via https://www.thriftydecorchick.com/2019/05/our-big-plans-in-new-backyard.html
Hey there! I've been plugging away at the updates in our laundry/mud room and I'm SO so happy with them! It's so lovely and I'm excited to get the first phase done and share it with you.
First up, an oldie but goodie. It's been awhile since I've made a cushion for a bench, but it came right back to me. Years ago I shared how to make a no sew bench cushion here -- be sure to check that post out for ALL of the steps.
I went fabric shopping the other day and forgot how much I enjoy it! I haven't needed to look for fabrics for some time -- I always get so inspired. I found a couple I absolutely LOVED at Joann's:

The one on top was pricey but they were both half off and I had another 15 percent off of that. So not too bad! (And I didn't need much for my projects.)
Today I'm working with the lower fabric (the stripes look black in the photo above, but they are a lighter blue/gray). For this project you'll need a base of some kind to staple the fabric into. I found what I needed in my trusty scrap pile and cut it down to size:
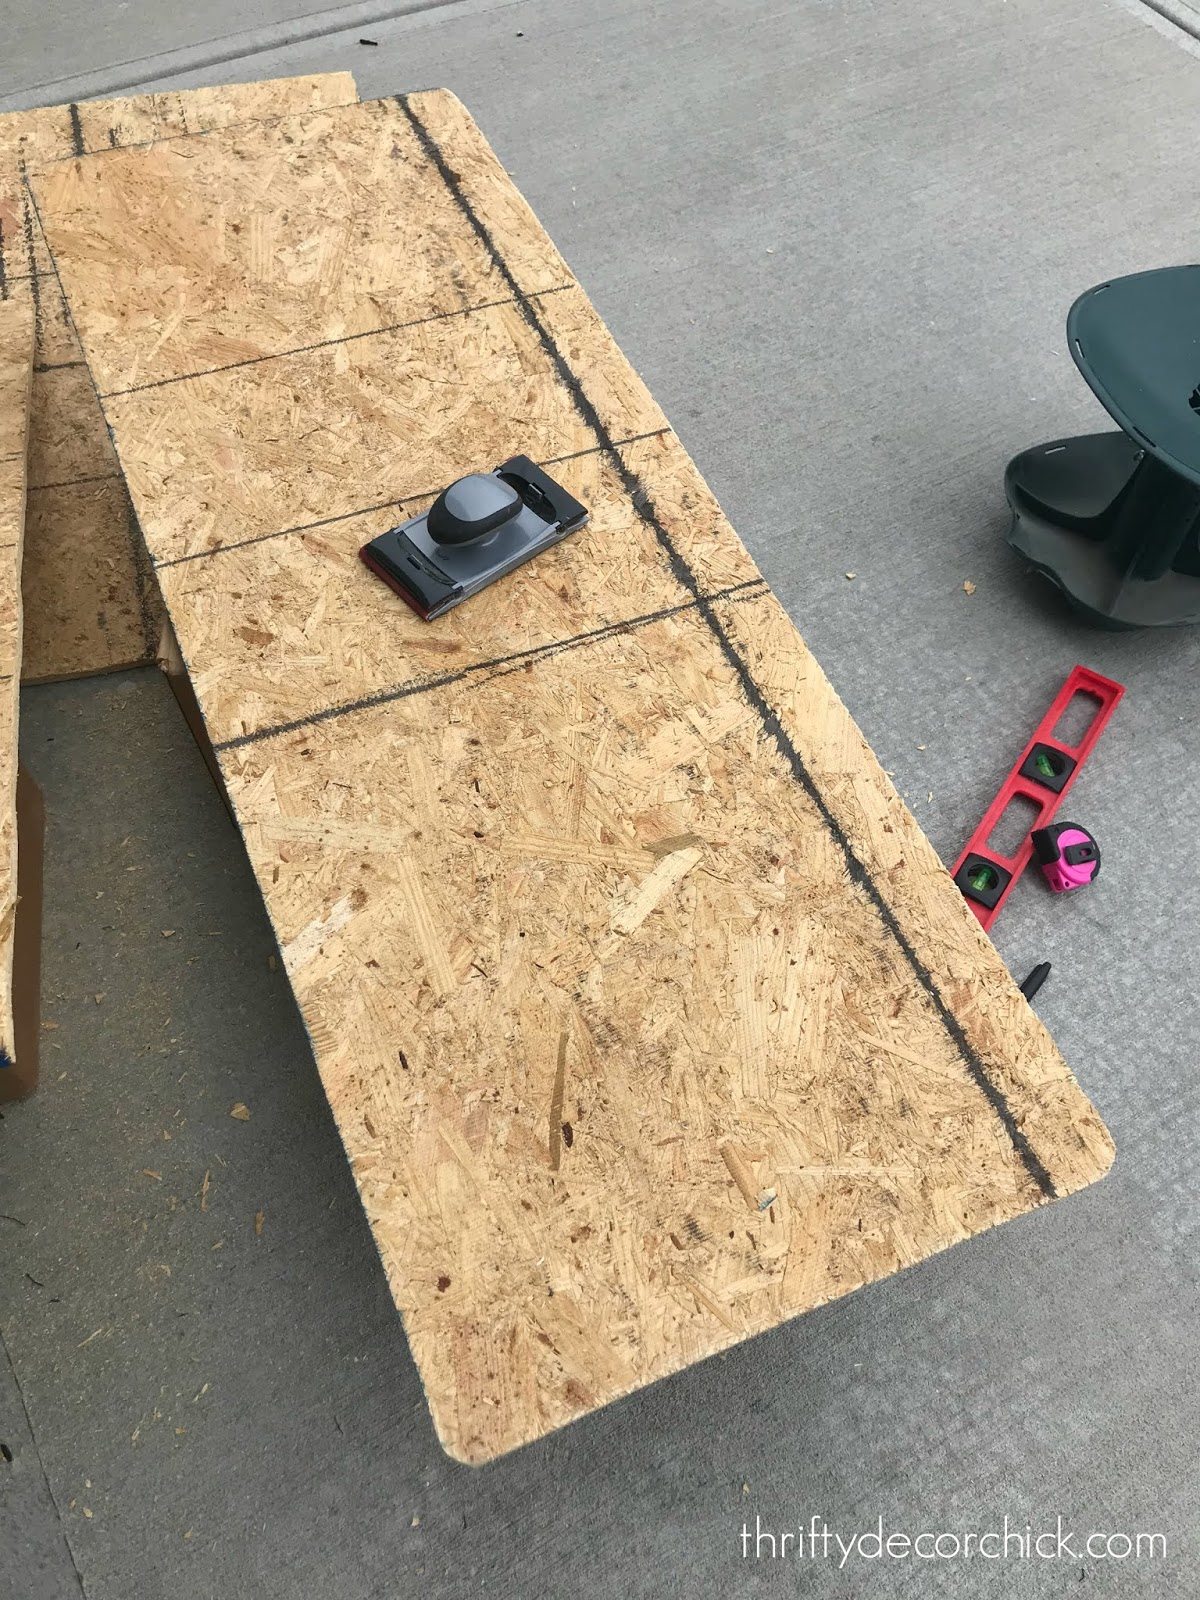
Notice the slightly rounded corners -- I like to do that so the fabric isn't stretched across anything pointy. Over time it wears at the fabric.
You'll want to check out this tutorial to see the next couple of steps in detail, but here's a big tip -- I use egg crate foam instead of thicker foam from the store. It's cheaper (especially in the fall during back to school sales) and does the job just as well. (Plus you'll have much more to work with!)
After securing the foam to the board, you'll want to wrap it with a light fabric like muslin to hold everything together well. If you want it extra cushy, you can use batting too.
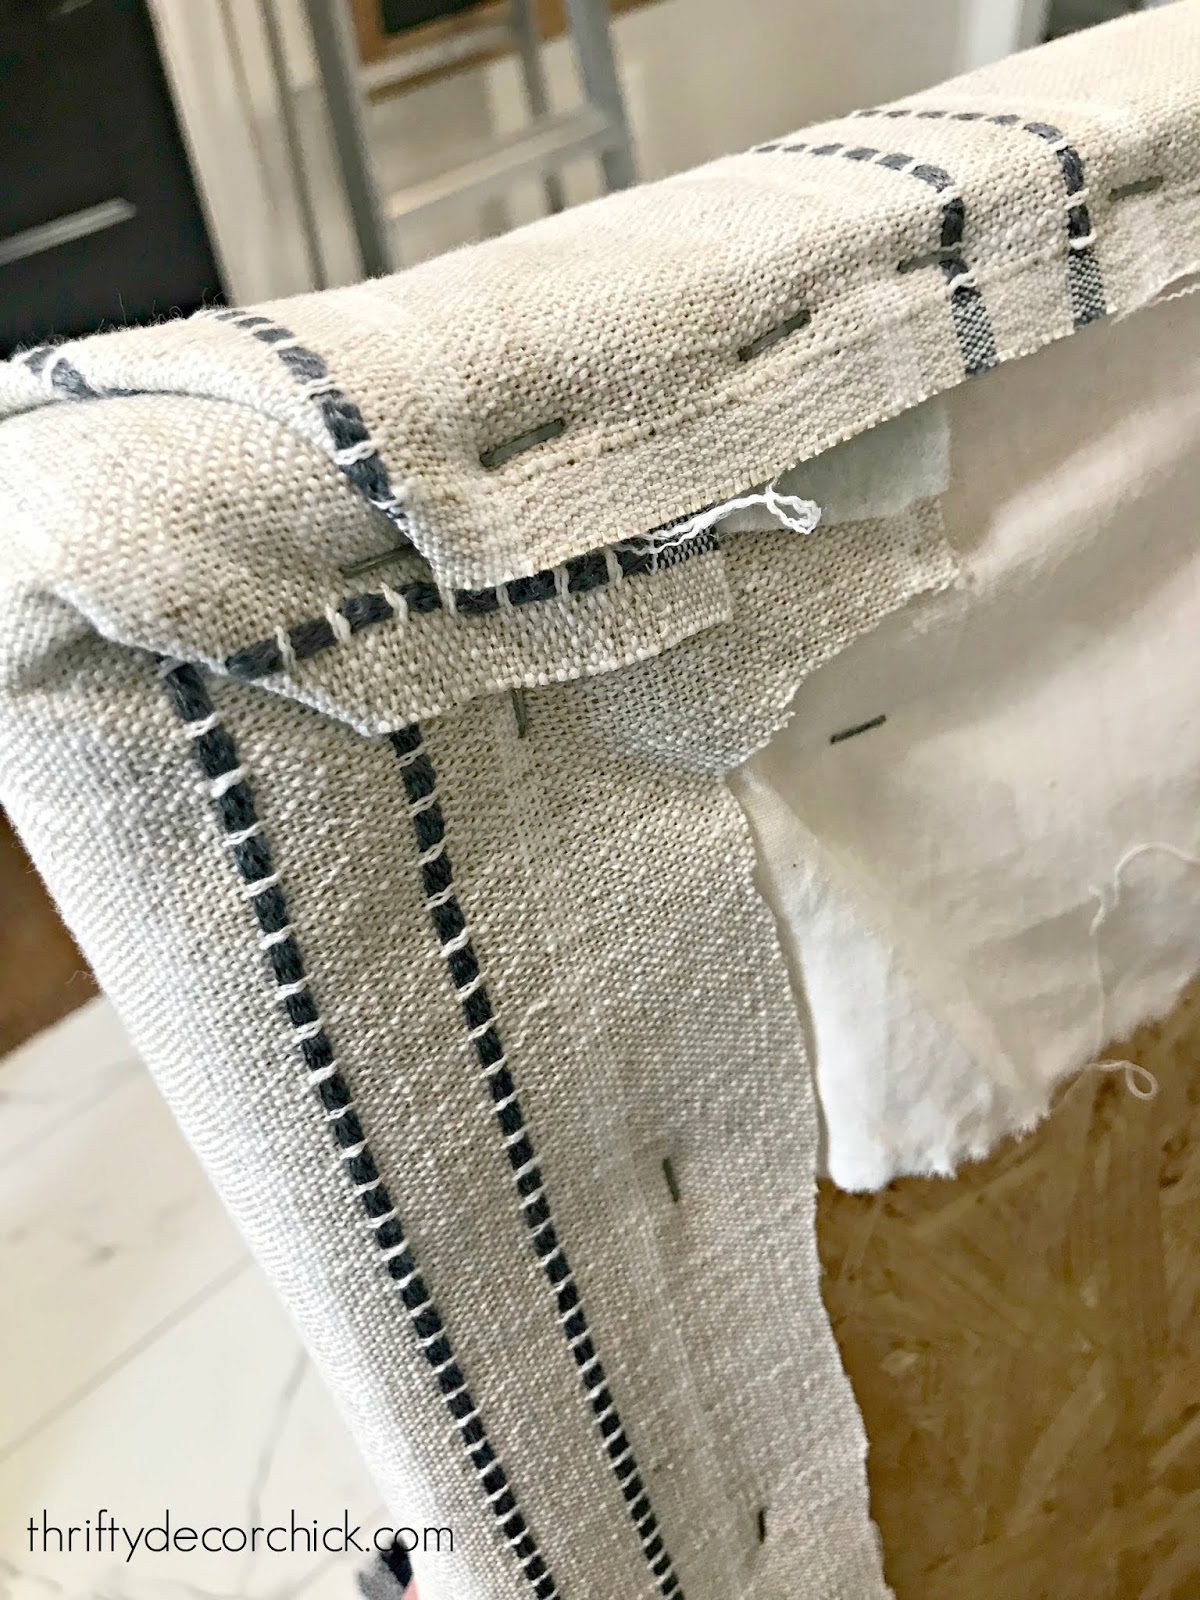
I use a regular staple gun to secure the fabric to the back as I go. If the staples don't go in all the way I just pound them in with a hammer:

Take your time when using a stripe -- you'll notice if it doesn't line up well! My biggest tip for this part of the process is not to pull the fabric too taut around the wood. If you do it will pucker up along the sides and you'll see where you added each staple.
I usually leave the corners for the end and make them as clean as possible:

This is the hardest part of the whole project.
The underside will look horrible -- but who cares?:
Not me! ;) I'm so pleased with it -- the fabric is PERFECT in here with the new wall color (see all my plans for this room here!): 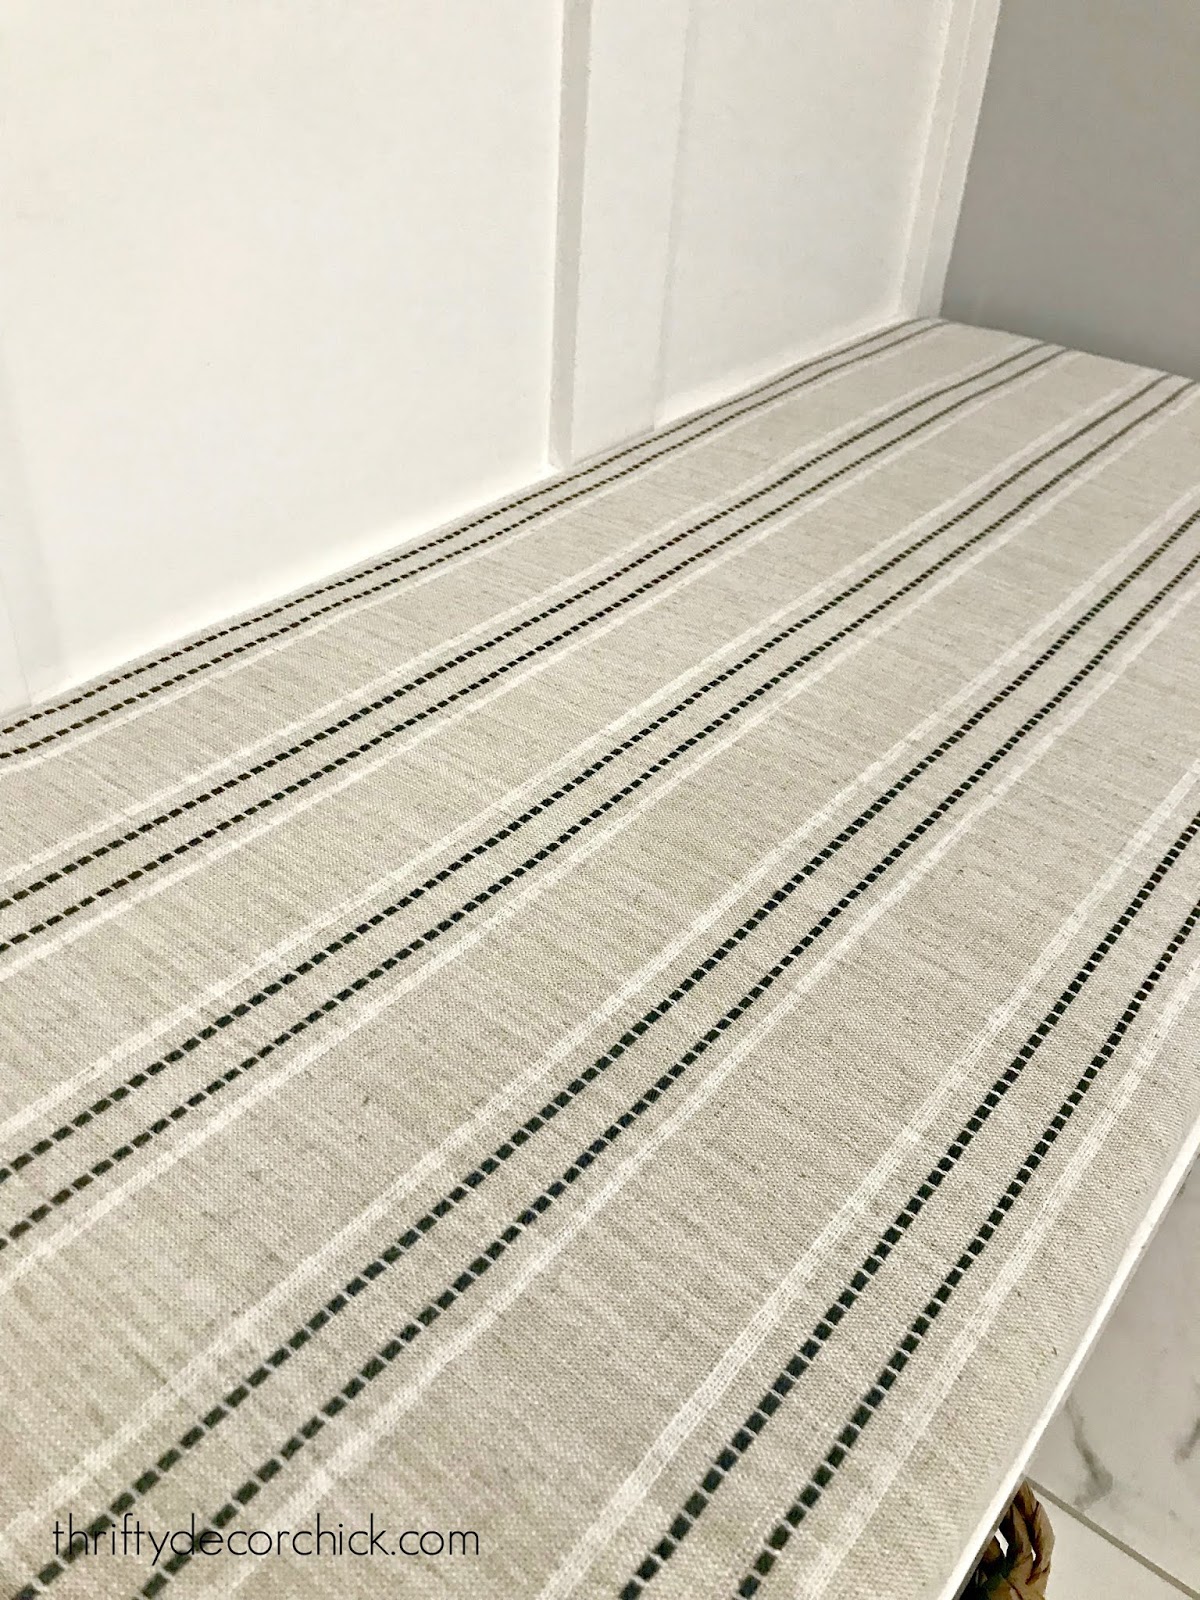
I almost went with something more modern for the fabric, but I'm glad I found this instead. It's more "me" for sure:

It's so fresh and pretty. And yes, I will be spraying it with Scotchguard!
I did a little something with the other fabric I showed you up above as well. I'll share that soon! I can't WAIT to replace those shoe baskets with something sturdier. Once I finish up the wall next to this bench that will be my next project:

I hope to be back with more updates in here this week! See more of our home here. To shop items in our home, click here! Never miss a post by signing up to get posts via email. Via https://www.thriftydecorchick.com/2019/05/easy-diy-no-sew-bench-cushion.html
Hey there! This room refresh is a case of if you give a mouse a cookie...or if a DIY blogger finishes one project she wants to start another. Basically the same thing.
I'm in the process of starting the built ins in my office, but I also started another project that's keeping me busy too. I had a bit of a misstep already that I'll show you in a minute.
It started when I shared this built in unit on the side of our fridge a couple of weeks ago:

I've been thinking about some updates to our laundry/mud room for a long time now, and this photo got me motivated to start. Look at that wall...just calling out for something cool!
Here's a better look at it:

I've planned to continue the board and batten from the built ins around the room. I played around with heights and taped off one that would bring the B & B a little more than half way up the wall.
I didn't want to go all the way up where the back of the built in bench did for a few reasons (it not matching the exact design of the bench for one), so I settled on a different height...and turned out I hated it. ;)
I also hated the color I picked out. I don't usually choose wrong when it comes to paint colors, but you really do need to see it on the wall before you know for SURE sometimes. It's a color called James River Gray that is really a lovely color -- a beautiful ashy gray blue.
But I HATED it in here:

The area under the green tape was supposed to go white. I knew almost immediately that I didn't like the blue color for this space, but I kept going with the whole wall to be sure. I was sure. Ha!
It's such a pretty color but it goes too country blue in here for me. We don't get a ton of natural light in this room so knew I needed something lighter.
I also scrapped the board and batten idea because I realized it was going to be too much of it. I felt like I needed to match it to what was already there and the spacing was going to be really busy in here:
So instead I plan to go with a color I know I love, Whitestone by BM. (I have it mixed at Sherwin-Williams.) I used this color in our master bedroom at the old house:

It's a very pretty light blue/gray.
I also plan to give that wall (maybe all of them, but I doubt it) a treatment of some kind. That wall in particular gets lots of scuffs from us taking off shoes and tossing them in the general direction of the shoe bins. We don't usually take them off and place them in there nicely. ;)
That bench area will get a few other changes too -- I plan to make rolling bins for the shoes (the baskets are falling apart and drive me crazy). I'll be getting rid of the pillows and will add a DIY cushion instead.
I also have an idea to build that area up to the ceiling. It bugs me that those cubbies and the cabinets over the washer and dryer don't go all the way up. We'll see if I can make that work!
The other side of the room may only get paint for now, but the long range plans are bigger. I hope to add bottom cabinets under the folding table:

You can see how I hid the cat litter here!
That would mean finding a new spot for the litter, which we've wanted to do for awhile. I have a couple spots in mind. I also plan to cover that whole wall in something pretty, whether it be wallpaper, or a stencil, or tile.
It's a big focal point when we walk in from the garage, so I want it to make a pretty statement. I'm considering a cement tile look like I did in our son's old bathroom:

But would probably do something lighter instead of the black and white. I'm loving this one, this one and this one (affiliate links)...but if I find a cool wallpaper or stencil that may win out.
I've got time to look since this side will have to wait until the budget allows. I think this could be a really beautiful and even more functional wall when I get done with it!:

I've already started painting the window wall, again! And it's SOOO much better already. I'm seeing my vision come together just a bit! I'm also going to hit the office hard soon too, but the mudroom projects (at least most of them) are quicker and easier. So stay tuned for both! Do you have a laundry/mud room combo? We had one in our old house that I hated because it was so small. I ended up moving the laundry to the basement and made it a dedicated mud room because it was always such a mess in there. I LOVE this one because it's so spacious. It will be fun to put my stamp on it! See more of our home here.To shop items in our home, click here!Never miss a post by signing up to get posts via email. Via https://www.thriftydecorchick.com/2019/05/my-mudlaundry-room-makeover-plans-and.html
Hello friends! Now that our weather has seemed to change for the better finally (crossing my fingers), I've been motivated to clean this house from top to bottom.
You'd think a new house is the cleanest you can get -- which is true in some ways. But the construction dust settles in places that you don't find till later. I'm still finding spots they didn't get to!
I'm on a mission to give the house a thorough cleaning before summer hits. I was thrilled when the folks at Home Made Simple asked me to review their cleaning products. Let the deep clean begin!:

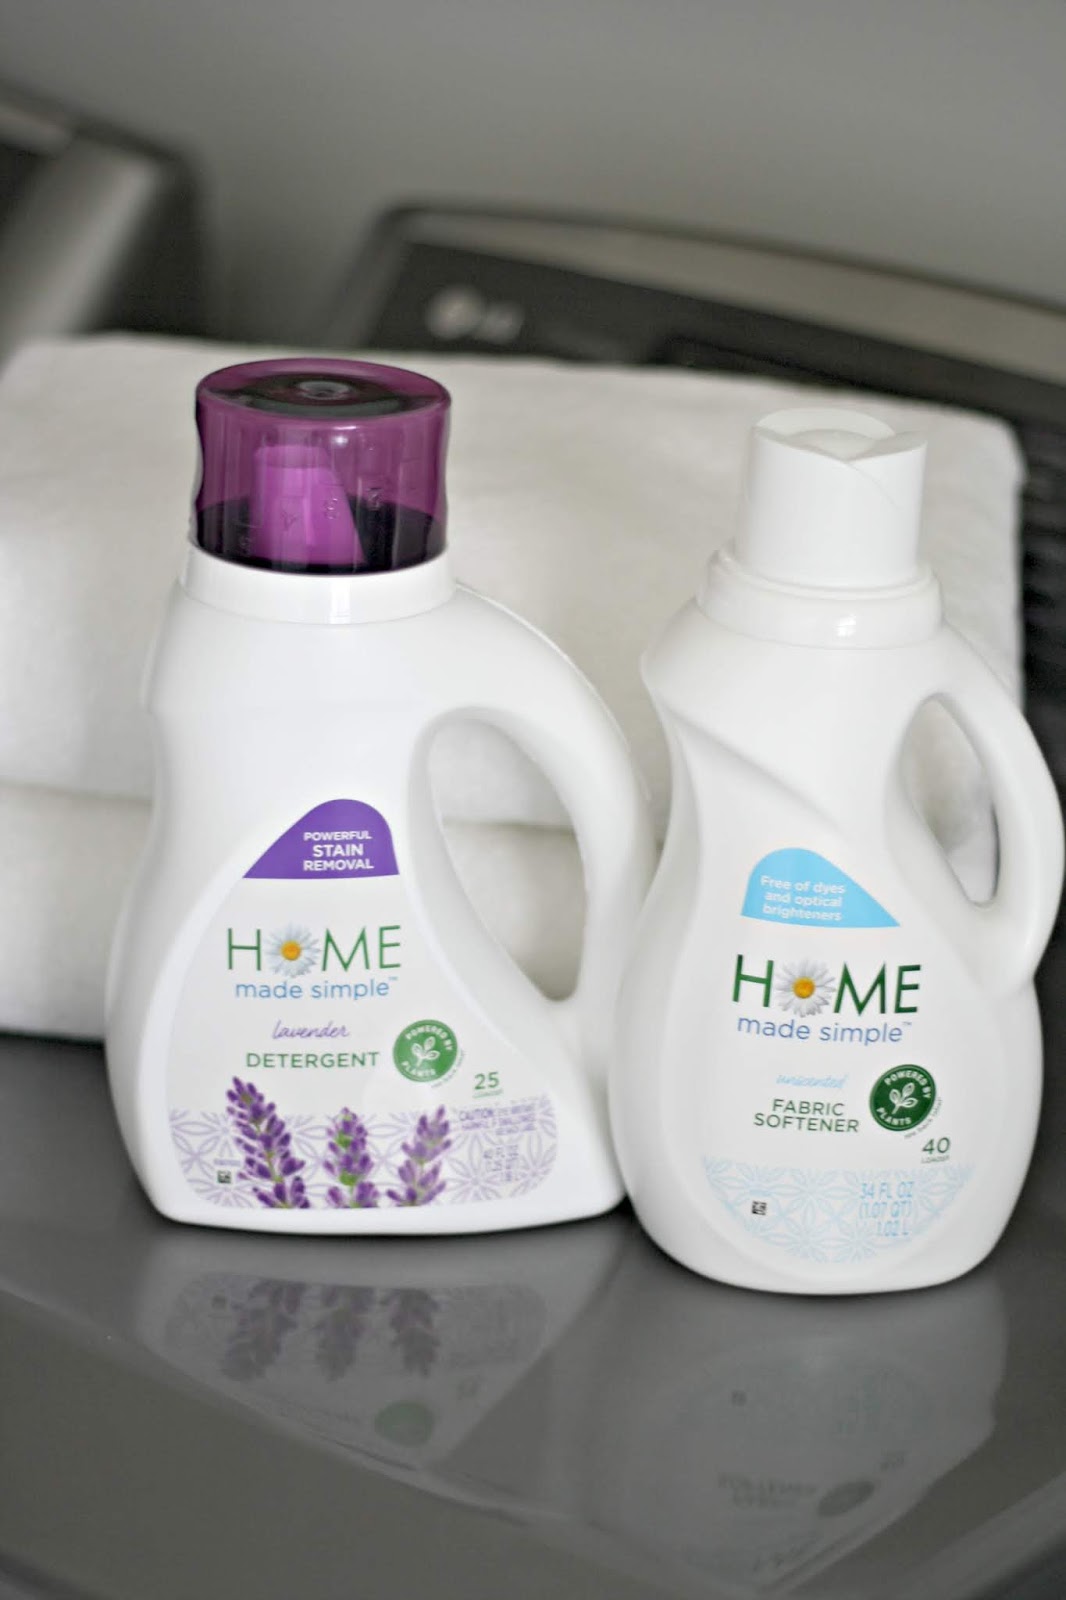
I received the laundry detergent and softener as well as the multi-purpose spray and dish soap. All of these products are plant-based so I was excited to try them out!
I started testing out the spray on one of the hardest spots to clean (in my opinion!) -- the sticky shelves in the fridge:

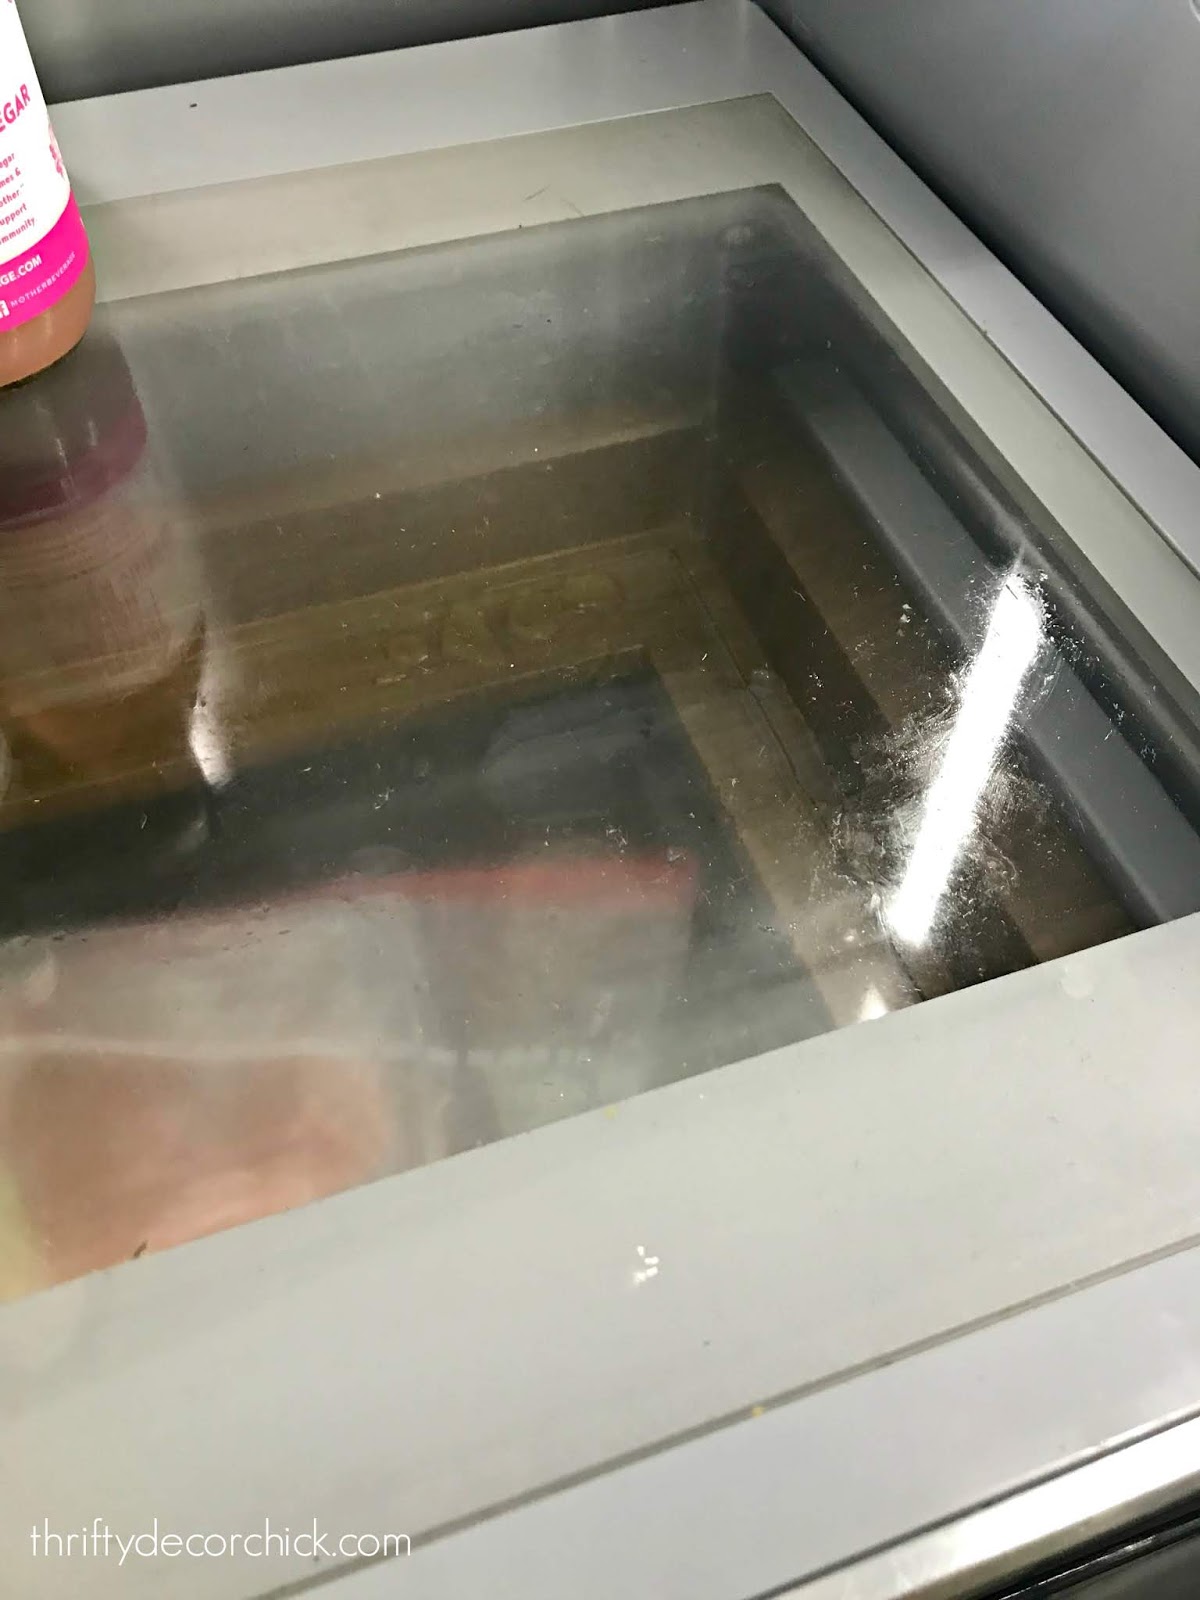
I used the multi-purpose spray on this shelf since I couldn't remove the glass:

I didn't even let it sit like I usually do -- just wiped it up and it came up immediately. I was impressed that it cleaned glass so well. No streaking and it worked easily and quickly.
Encouraged, I tried it on the goo under the glass on another shelf:
It came right up as well. I was hooked. When I can pull the glass out, I like to wash that in the sink with dishwashing liquid, so I did that with the Home Made Simple dish soap.
Look how sparkling clean they came out!:

Yesss! I don't think it's been this clean since we got it installed! ;)
I wasn't planning on cleaning out the entire refrigerator, but I was so excited at how well the products worked, I kept going.
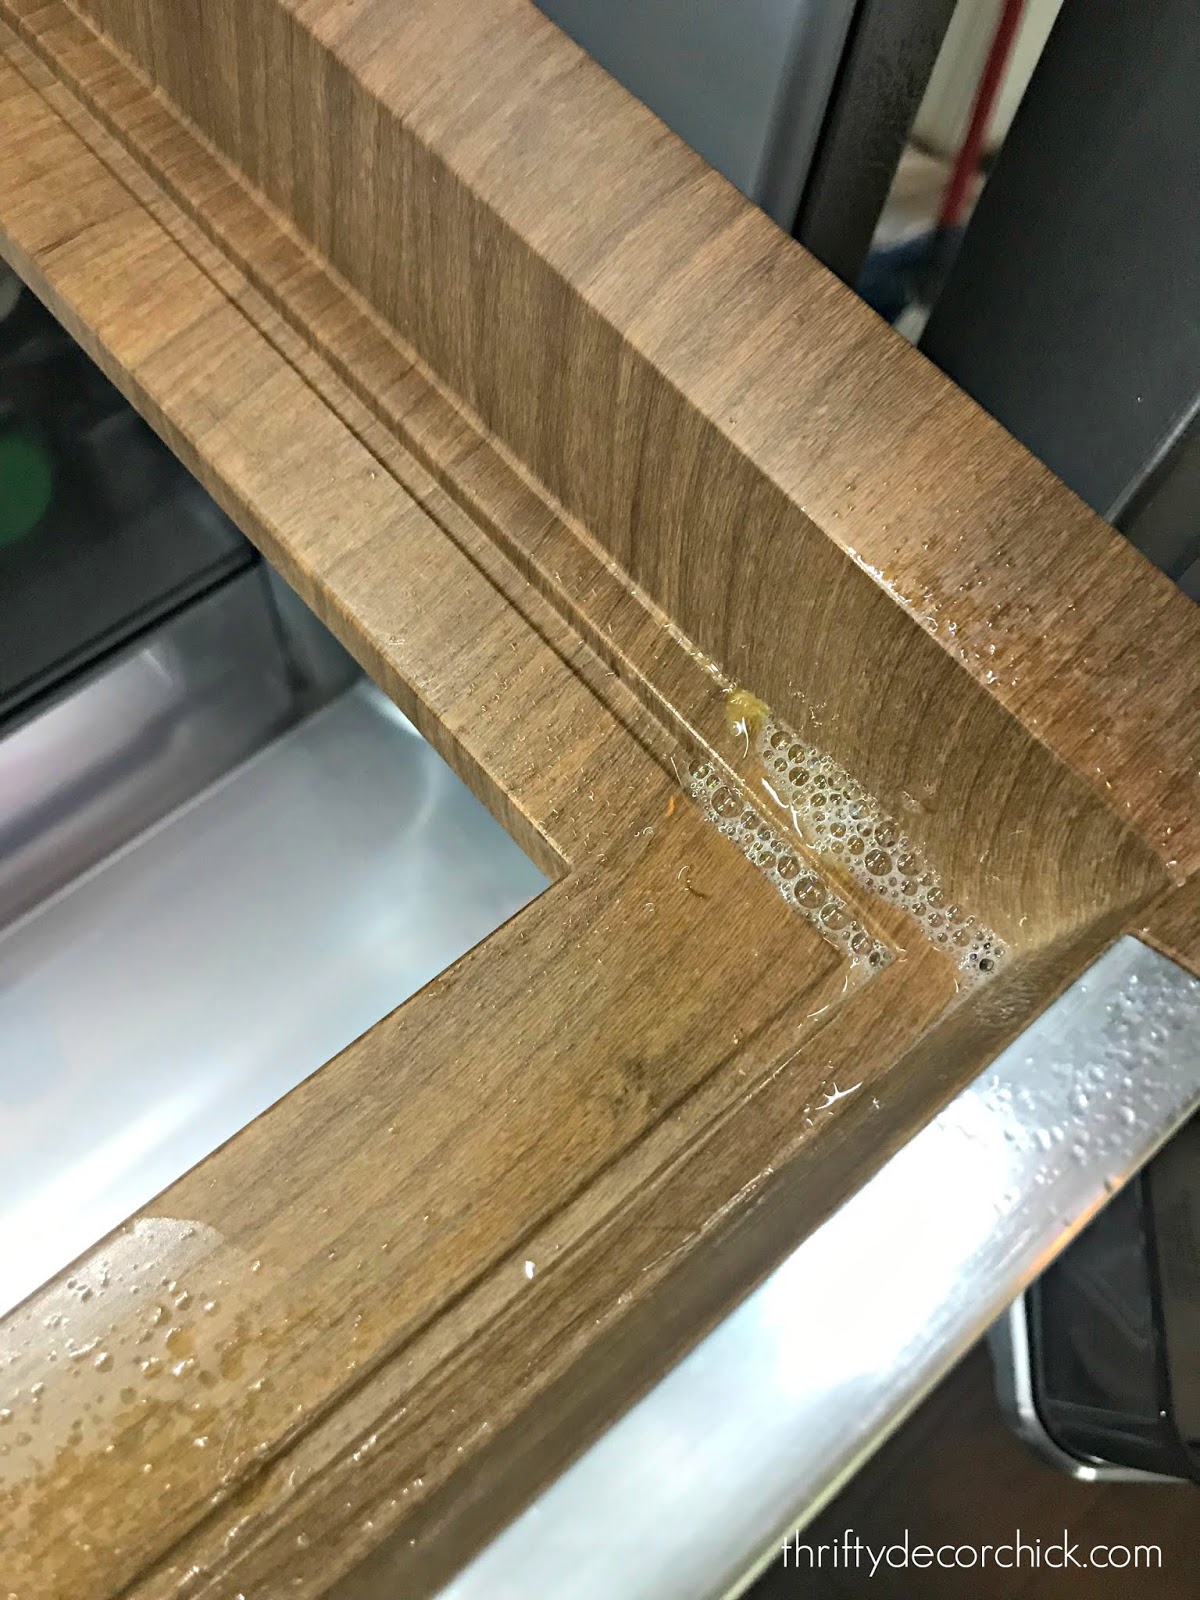
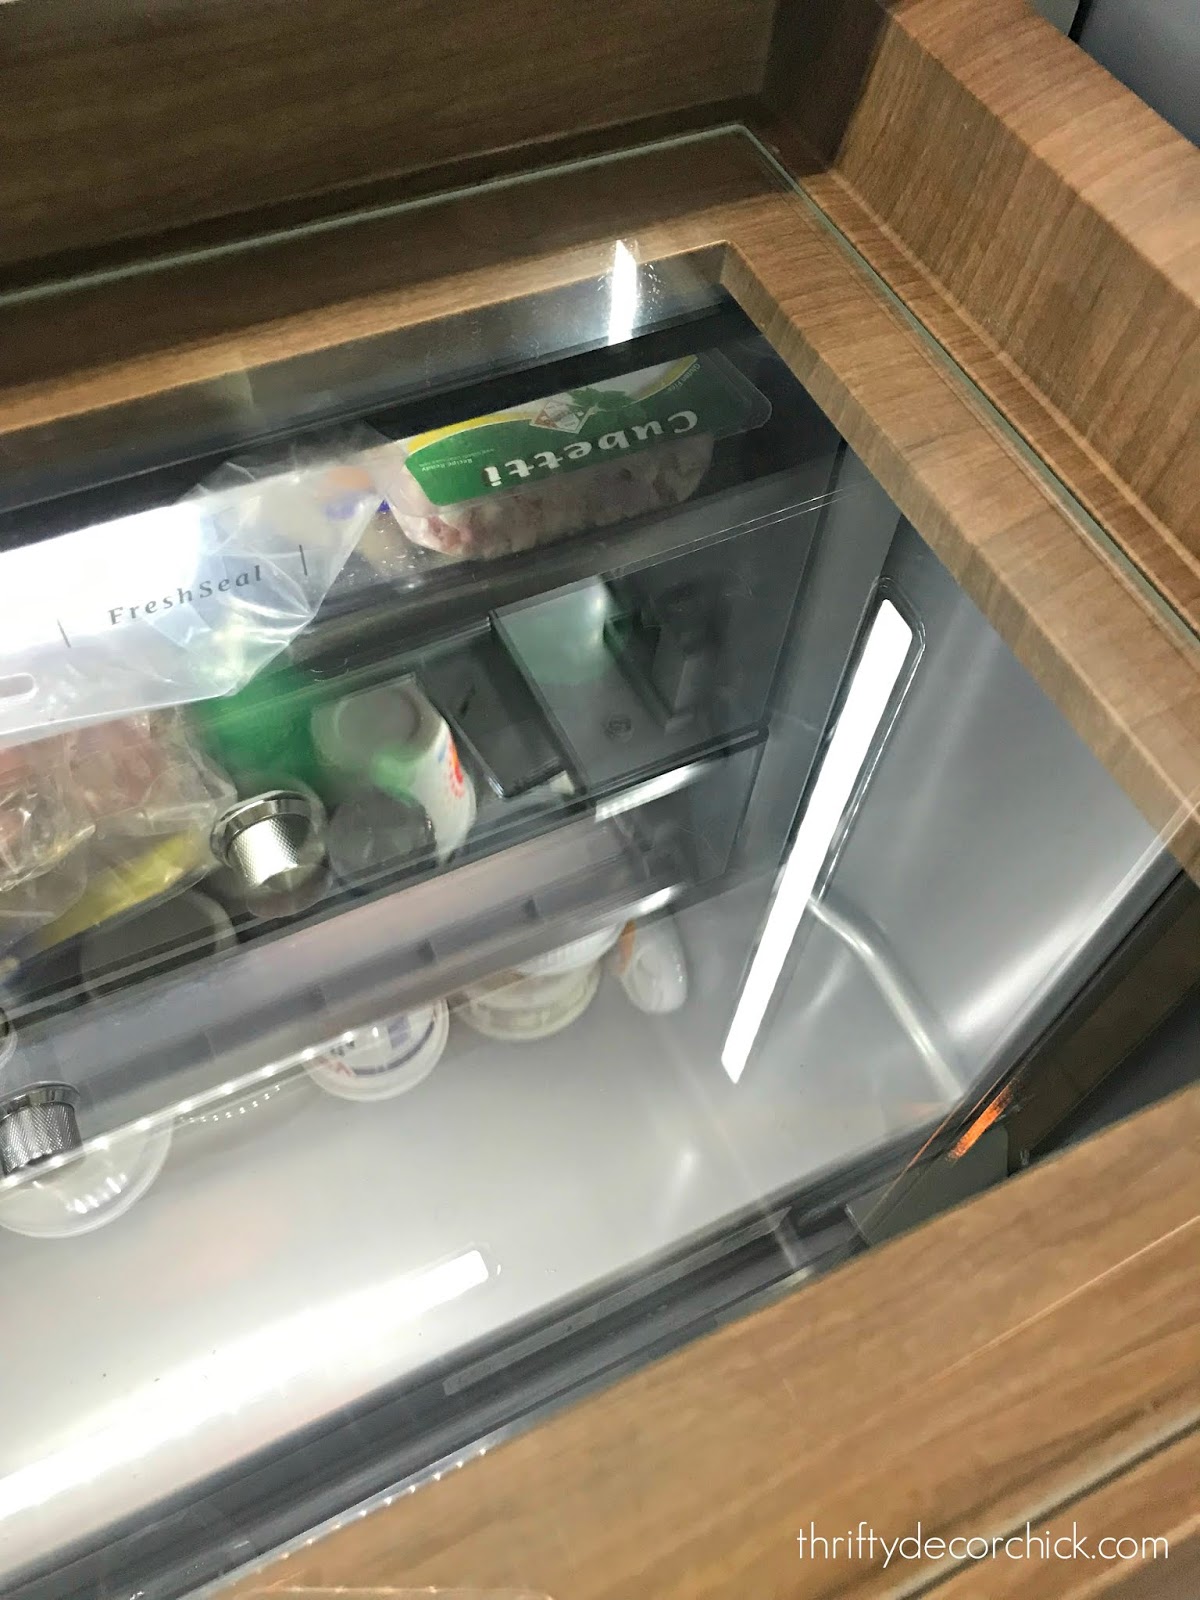
We have the prettiest fridge I've ever seen. Not kidding, it's beautiful inside. I had never heard of a beautiful refrigerator till I saw this one. ;)
I used the spray on the wood shelf inside as well as the sides:

The inside is now clean and organized. No more goo!:

Told you it was pretty! ;) Anyone else feel like a horrible person when they clean the fridge? I feel like I throw away way too much. I recently tried the laundry detergent and softener on a load of towels and sheets: 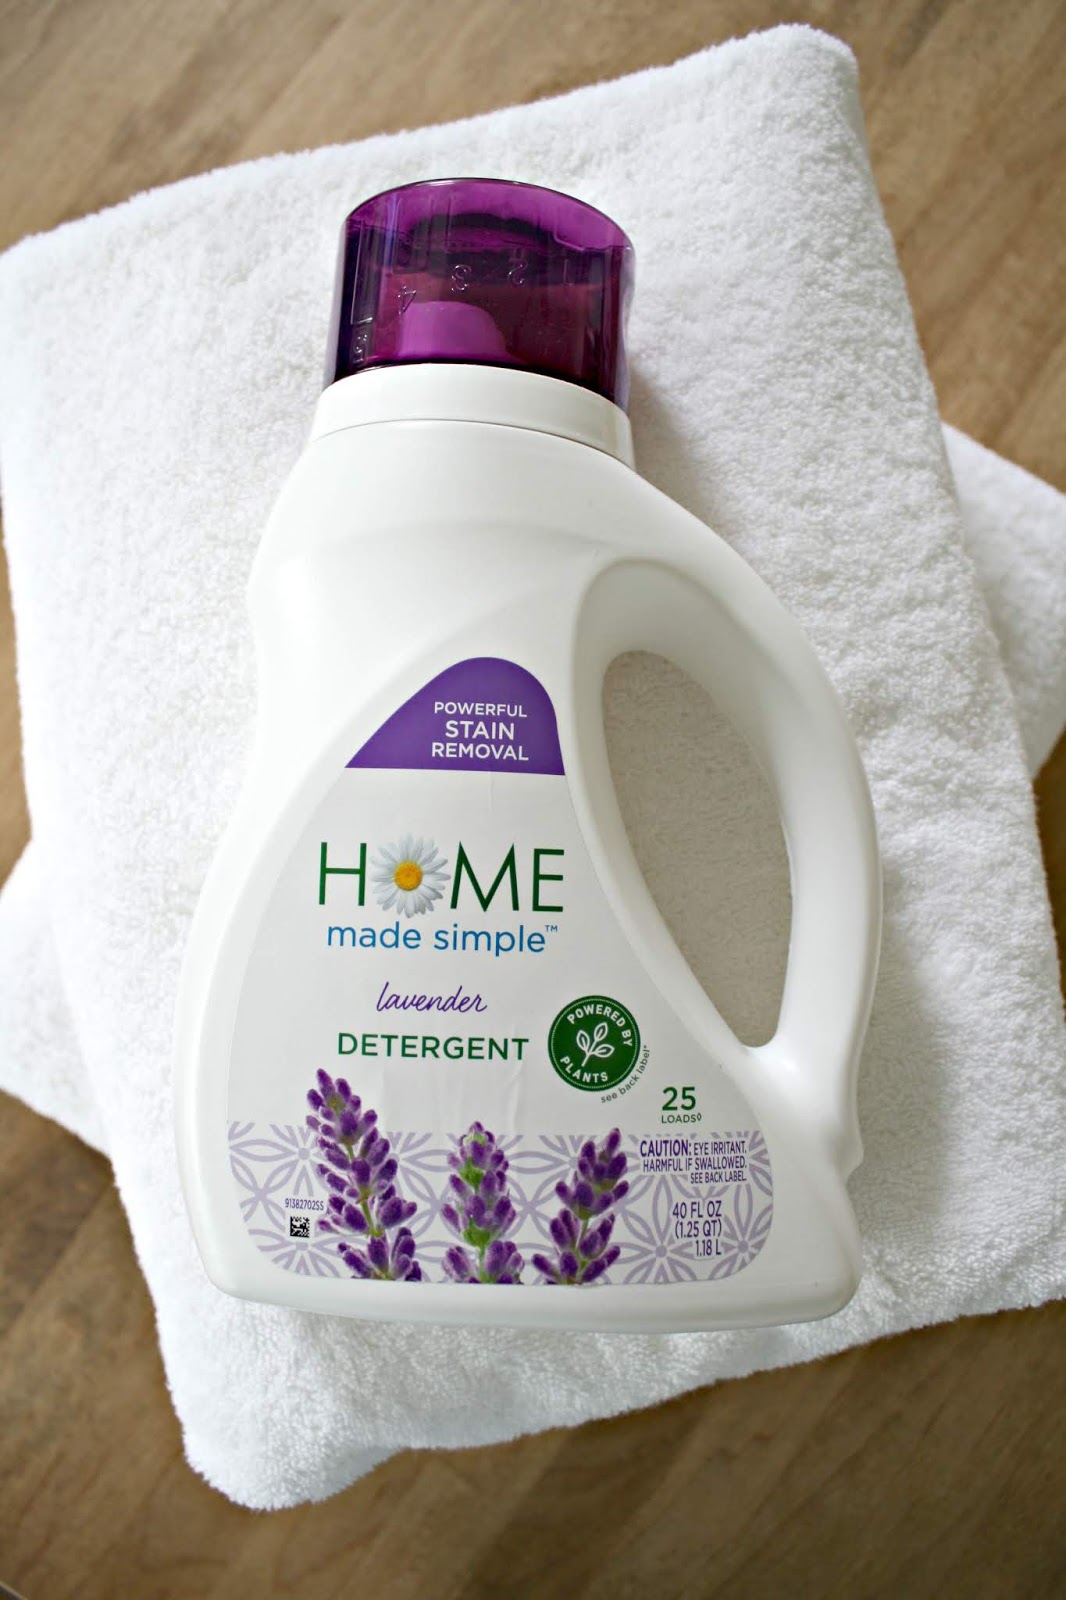
Everything came out soft and clean, and just ever so slightly scented. The Home Made Simple cleaning products do have a scent, but it's not overwhelming at all. The detergent comes in an unscented option as well if you prefer that.
The detergent is concentrated for HE washers so a little goes a long way:
OK, odd question, but how do you make your bacon? I discovered baking it years ago and will never go back to frying. It's much easier -- put it in and set the timer. And it comes out flat and crispy, just like I like it!
The only problem is cleaning the pan. I use one that gathers the grease, and it is a pain to clean. Usually I'm scrubbing it over and over to get the grease and bacon bits off:

I have to tell you, of all of the products I'm most impressed with their dish soap. So impressed, I'm switching from the brand I've used for years. I used the lemon scent, but it's also available in rosemary and lavender.
It made washing this pan EASY:


I also used the multi-purpose spray throughout the kitchen, on both the granite and wood. If you treat your butcher block like I did, you can use almost anything to clean it -- it will not harm the wood: 
I was extremely impressed with the products and would absolutely recommend them. You know I only do that when I really love a product!
You can find the Home Made Simple cleaning products conveniently at Walmart online or in stores! They are affordable and work well -- I think you'll be pleased if you try them out!
This post is sponsored by Home Made Simple, but all thoughts and experiences are my own. I only work with brands I know and trust.
See more of our home here. To shop items in our home, click here! Never miss a post by signing up to get posts via email. Via https://www.thriftydecorchick.com/2019/05/spring-cleaning-with-plant-based.html |
