|
Hello there! Hope your week is going well! I'm back with an 18 month before and after recap of our home. I really can't believe it's been that long -- because it feels like we've lived here WAY longer. Feels like many years, not months. Not sure if that's a good or bad thing. ? I'll go with good.
You all know looking back and seeing what I've accomplished so far is just about my favorite thing ever. A lot of people wondered what I would do with myself in a new house. I always laugh because it has given me a whole new canvas for projects. (I knew it would!) I've had an absolute blast adding my stamp to it!
Some have asked why I didn't have the builder do many of the transformations, and the main reason is...I just know I need more time to make decisions. When it comes to paint colors and built ins and stuff like that...I need to live in the space to figure it all out. That, and I know I can do things cheaper on my own. :)
So I've rounded up a few of my favorite makeovers so far -- be sure to check out this post to see how the house looked one year in! I grabbed some of these photos from my Instagram account just because they are the most up-to-date.
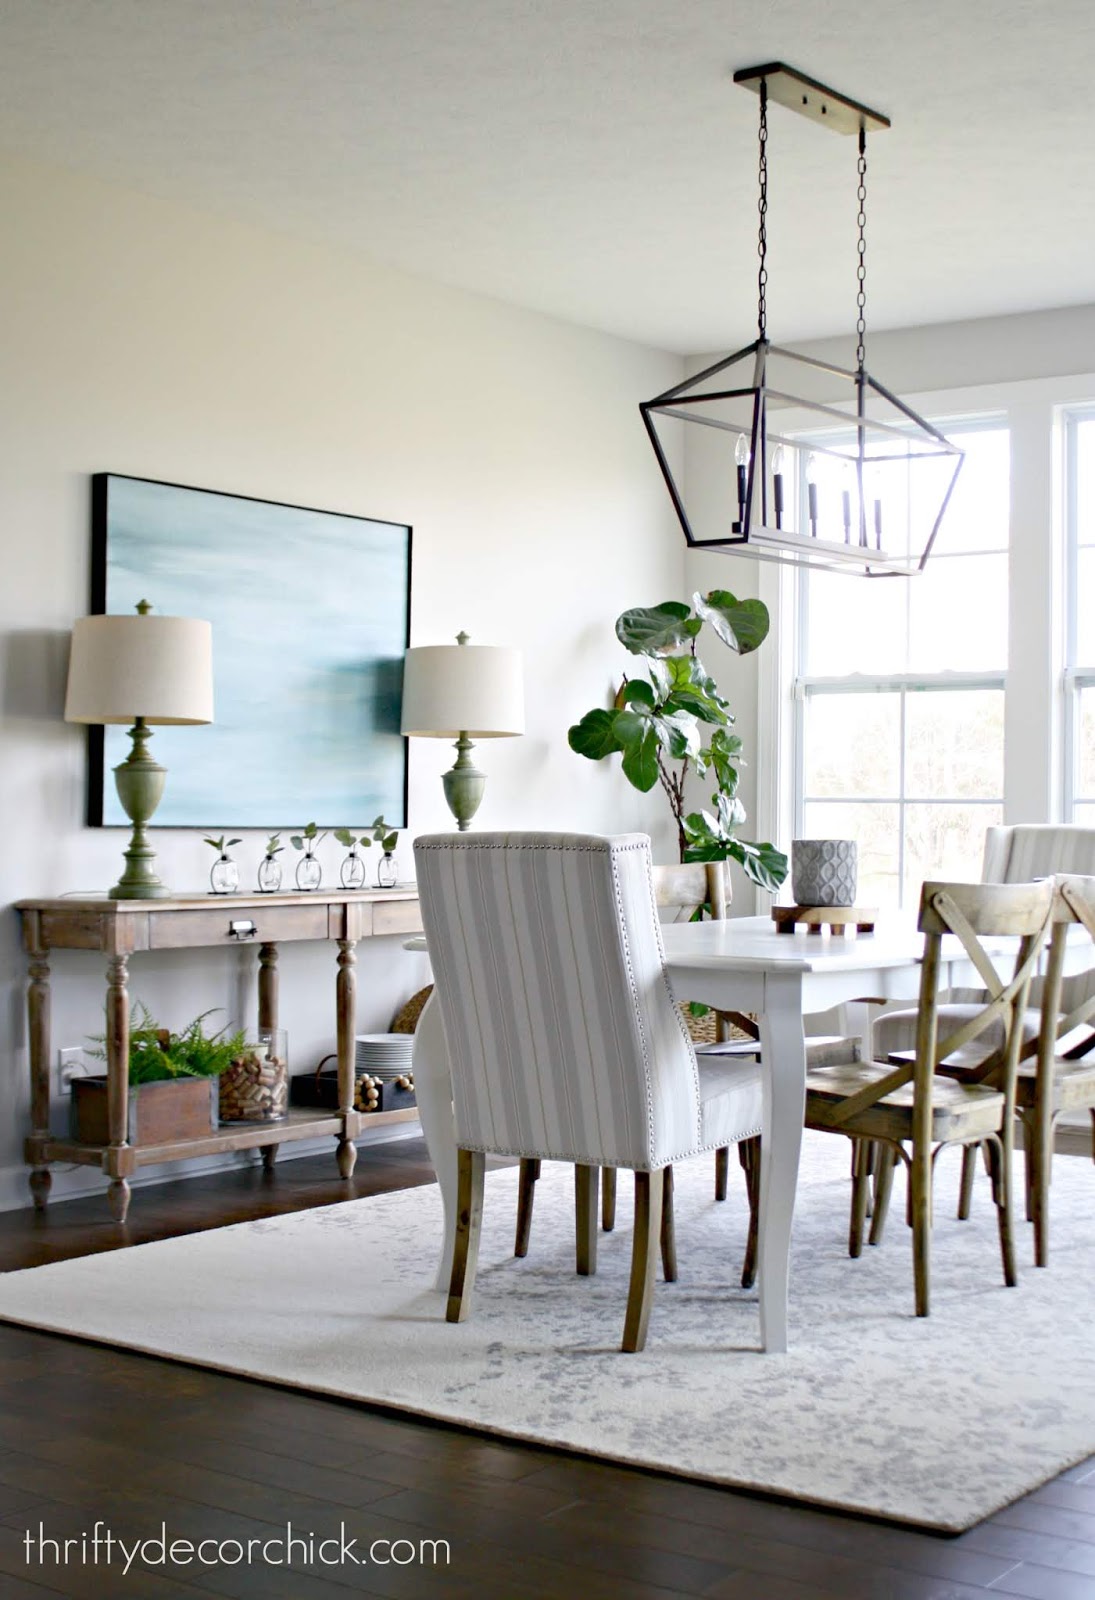
The dining area/morning room got a lot of attention last fall! This is how the room looked at my first reveal:
It was lovely! I just wanted to add some contrast and character in here.
About six months after moving in we found furniture for this space that we loved. Later I added a moody paint color, a window seat and built ins:

I hadn't put the rug back in here when I took this photo, but the room now has the rug that was in our family room.
If you can't tell, I have a thing with blue. I LOVE IT. I later added the pretty blue and white floral wallpaper in the hallway nearby:

You can see all of the details and changes to the dining area here!
I'm thrilled to have a dedicated foyer in this home! It's one of the things that I loved about the layout. Here's the foyer after unpacking and getting things settled:

I realized something the longer we lived here -- just because I had a piece of furniture in a room in the old house, I could switch things up a bit! I stuck to what I had before, and it was silly, but an epiphany of sorts that I could change it up.
So this year I moved some furniture around (I added the $15 wall treatment last year and then painted the ceiling too) and now it feels SO much more like this house:

Take a look at the foyer projects here!
I have many more projects on my list for our master, but we are loving the dramatic changes we've made so far! Here's the master soon after moving in:
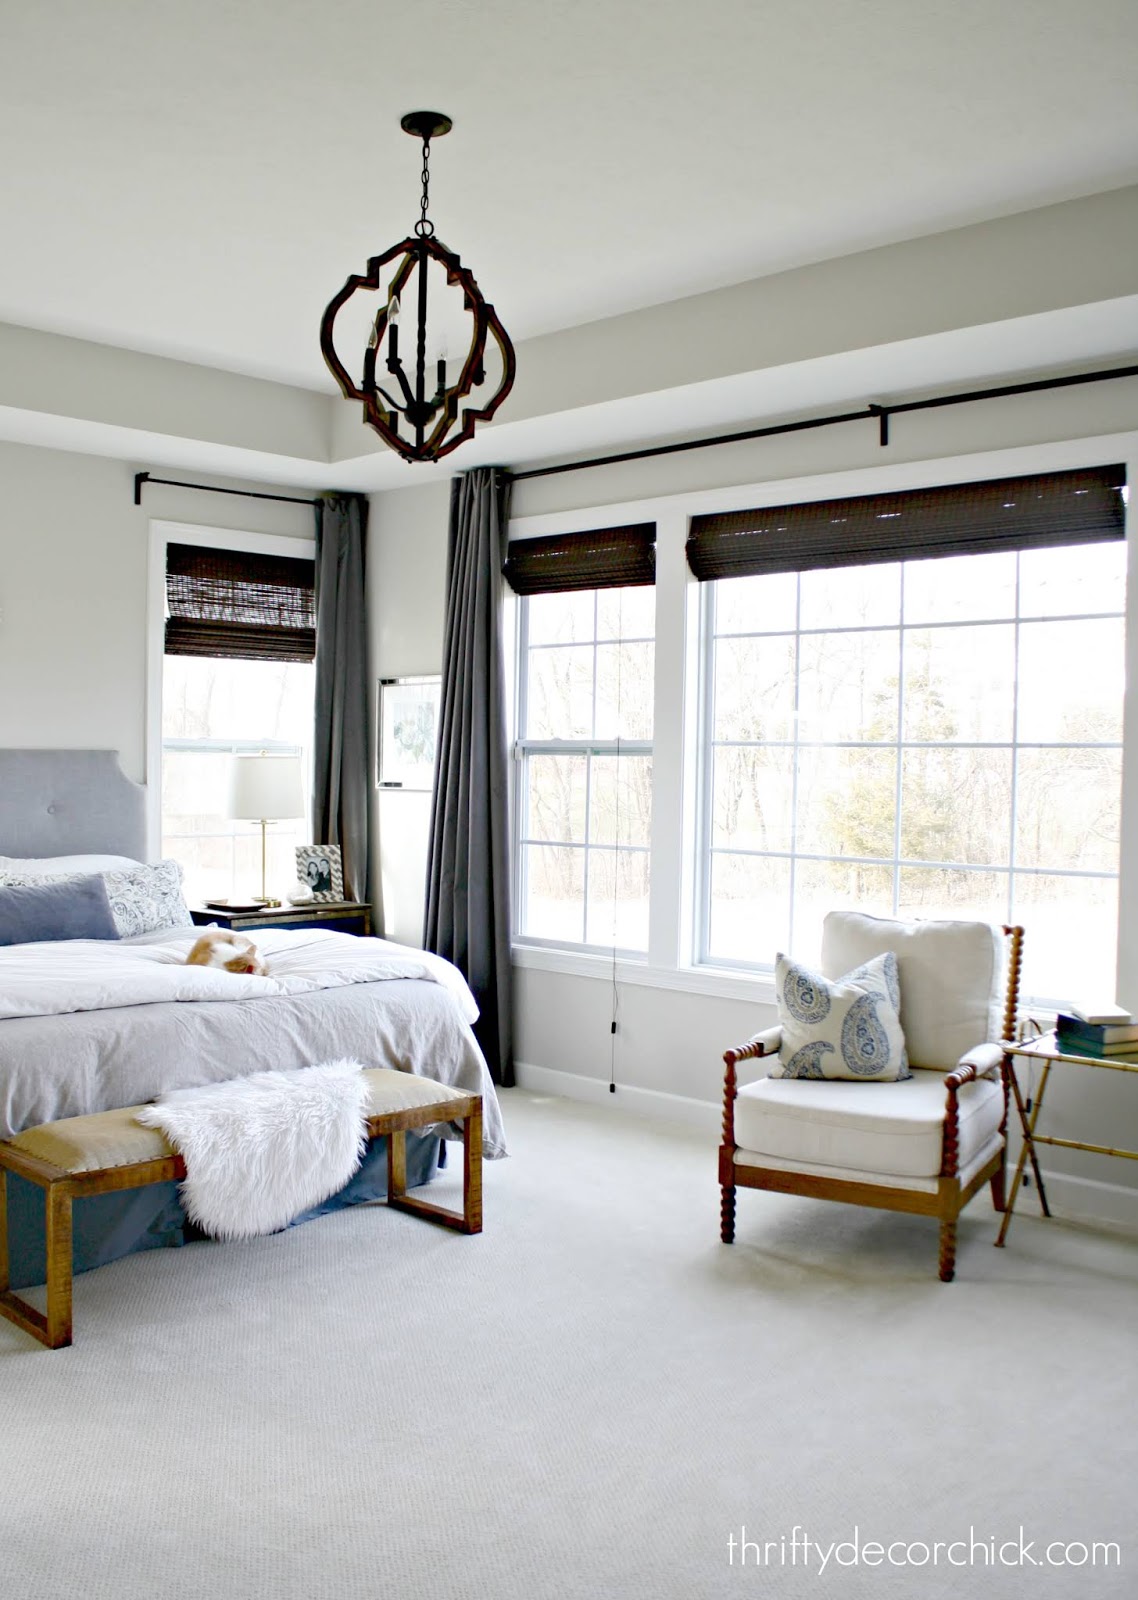
We added some new items in here (new light and bed), but the biggest change was the dark tray ceiling and wood beams:

You get a little holiday spirit in this post -- this is the latest photo I have of the changes. ;) We have newer bedding that I shared here.
I looooove the dark ceiling in here! It's so incredibly cozy:

The powder room makeover was my first in this house -- I started on the smallest room and it still took me forever! This was the room soon after moving in:

I fell in love with a peel and stick wallpaper that kicked off this makeover and I'm still SO happy with how it all came together. This bathroom transformation really made this feel like home:

Our basement family room always been one of our favorite spots in the house! This is how it looked the first time I shared it:

I added a dark accent wall that runs the length of the basement:

I also ended up buying the console table that I shared here and I LOVE it! It's perfect down here!:

The nearby wall got the dark gray color as well. It started like this:

And now looks like this after the recent updates I made:

It is the perfect storage for our games!! This was such a fun project. You can see all of the basement transformations here.
Our kitchen didn't get many updates till recently -- I just finished up a bunch of smaller projects. Here's a shot I took right before moving in:

And here it is with the small updates -- you have to look closely for them! You can go here to see all of the details I've added over the past couple of months:

Our family room was the room I focused on most for the first six months or so. Here's a shot of the stair wall a few days after moving in:

And here it is a couple weeks ago (ignore the dog toys):

Those simple picture ledges are one of my favorite DIYs ever -- you can see larger versions of them in the basement above as well!
I love the symmetry of our family room, but I was craving some contrast. It was very vanilla before:

And now the dark wall color on the fireplace wall and built ins (I added those last year) adds a bit of drama but still keeps things calm and cozy:

Whew! I've tackled some minor projects in the mud/laundry room, my office, the basement stairs and our master bath as well. I started on our son's room soon after moving in and haven't touched it since, so that's on the list for this year.
My mind literally swims with ideas! I'm so thankful for our beautiful home and all of the potential for projects that keep me busy and give me an outlet for my do-it-myself and decor passions.
It has been so much fun and I'm so thankful to have you all join in with this process! Do you have a favorite transformation so far? Have you tried any of these projects in your home?
See more of our home here. To shop items in our home, click here! Never miss a post by signing up to get posts via email. Via https://www.thriftydecorchick.com/2019/04/what-difference-18-months-makes.html
0 Comments
Well hello! I'm finally done with the sweet little project I've been working on in the kitchen! Duh...the kitchen again. ;) I promise this is the last kitchen post for awhile.
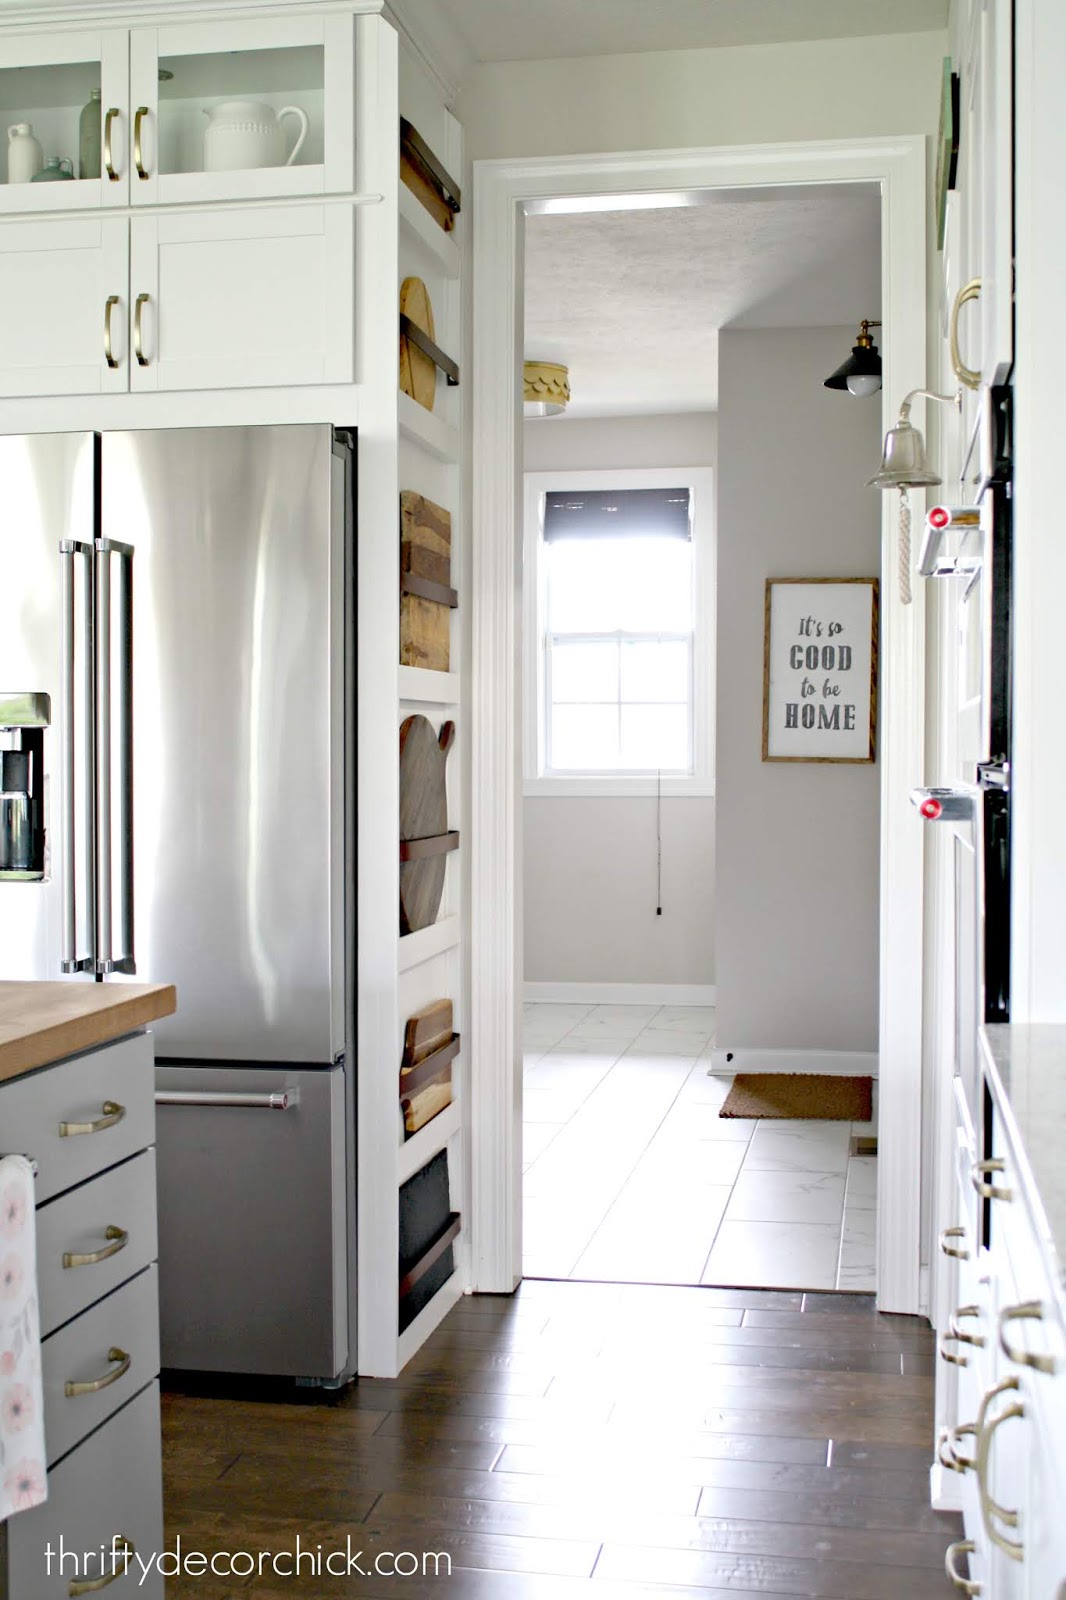
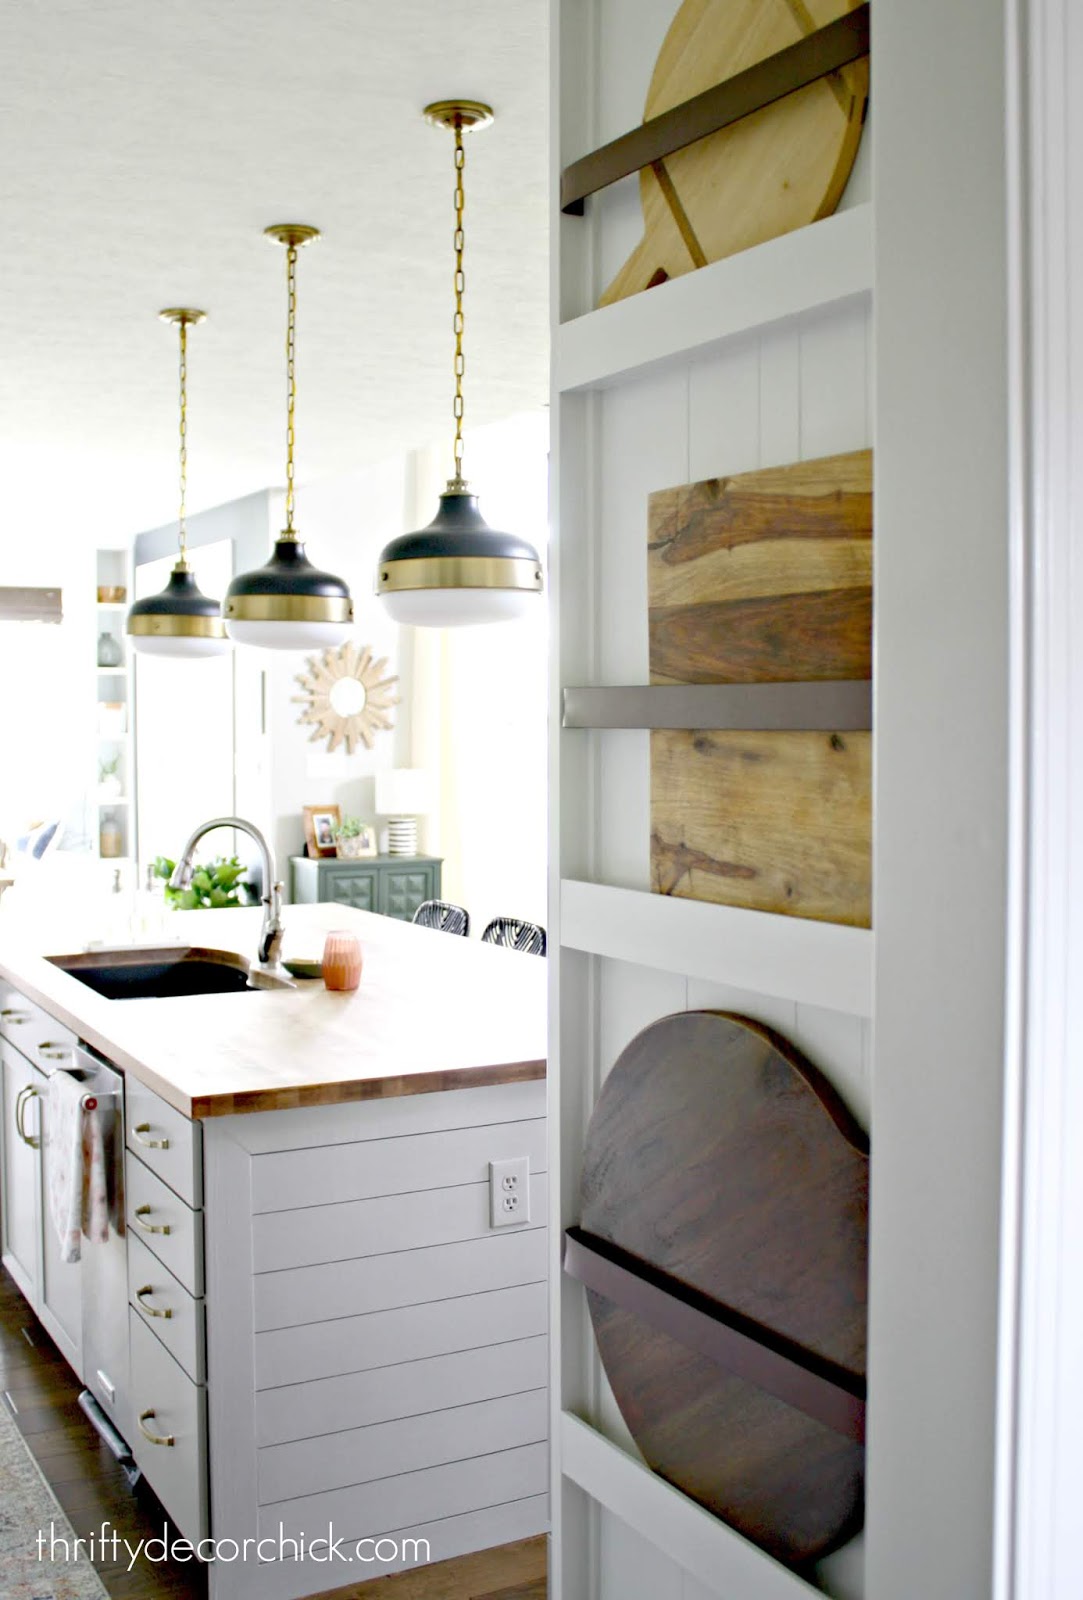
This DIY was the most complex of any of the small updates I've made lately. If you've missed any, you can catch up by seeing the new kitchen island with chunky side panels here, how I built out the end of our kitchen cabinets, my trick for adding kitchen cabinet feet and my tutorials for under cabinet lighting and how to hide it here. Whew! OK, as I said, this was the most complex of all of them, but makes a statement. Like the other projects, it's not dramatic and something you'd immediately notice because it's in a spot that not everyone sees. The area I've wanted to tackle is this boring side of our refrigerator: 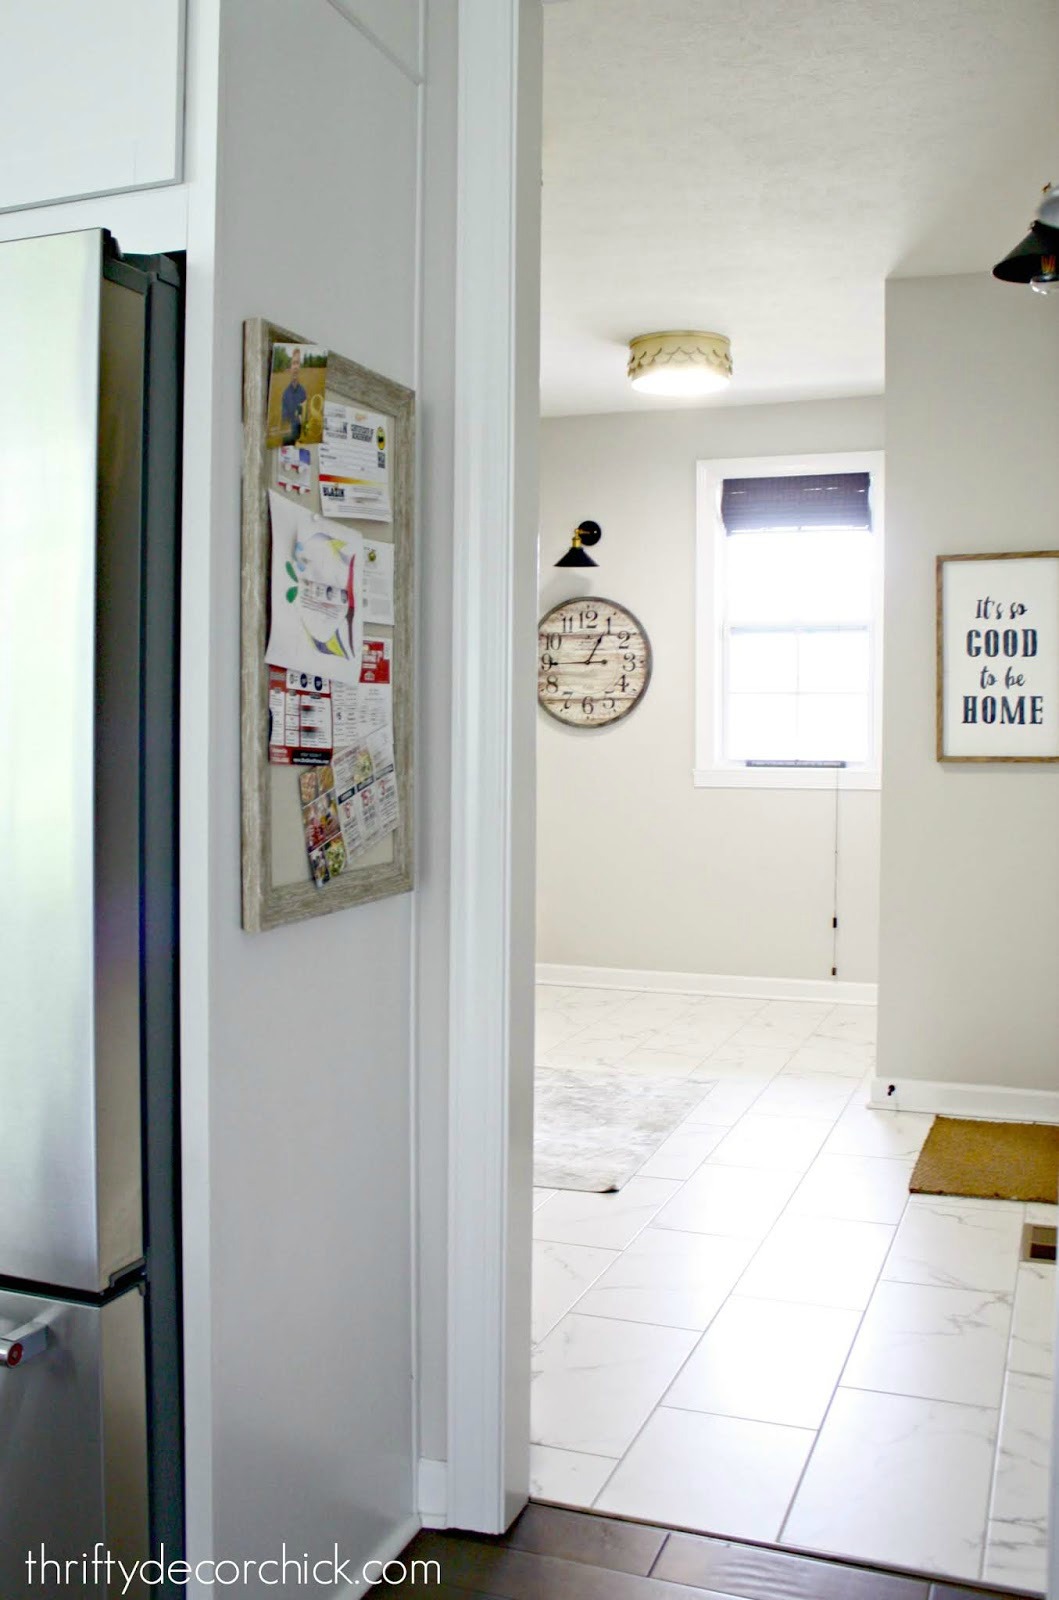
It's a spot with so much potential, right?
I've planned to do this for awhile, and when I saw how my blogger friend Yuni added this fun treatment in her kitchen, I knew what little detail I wanted to add:
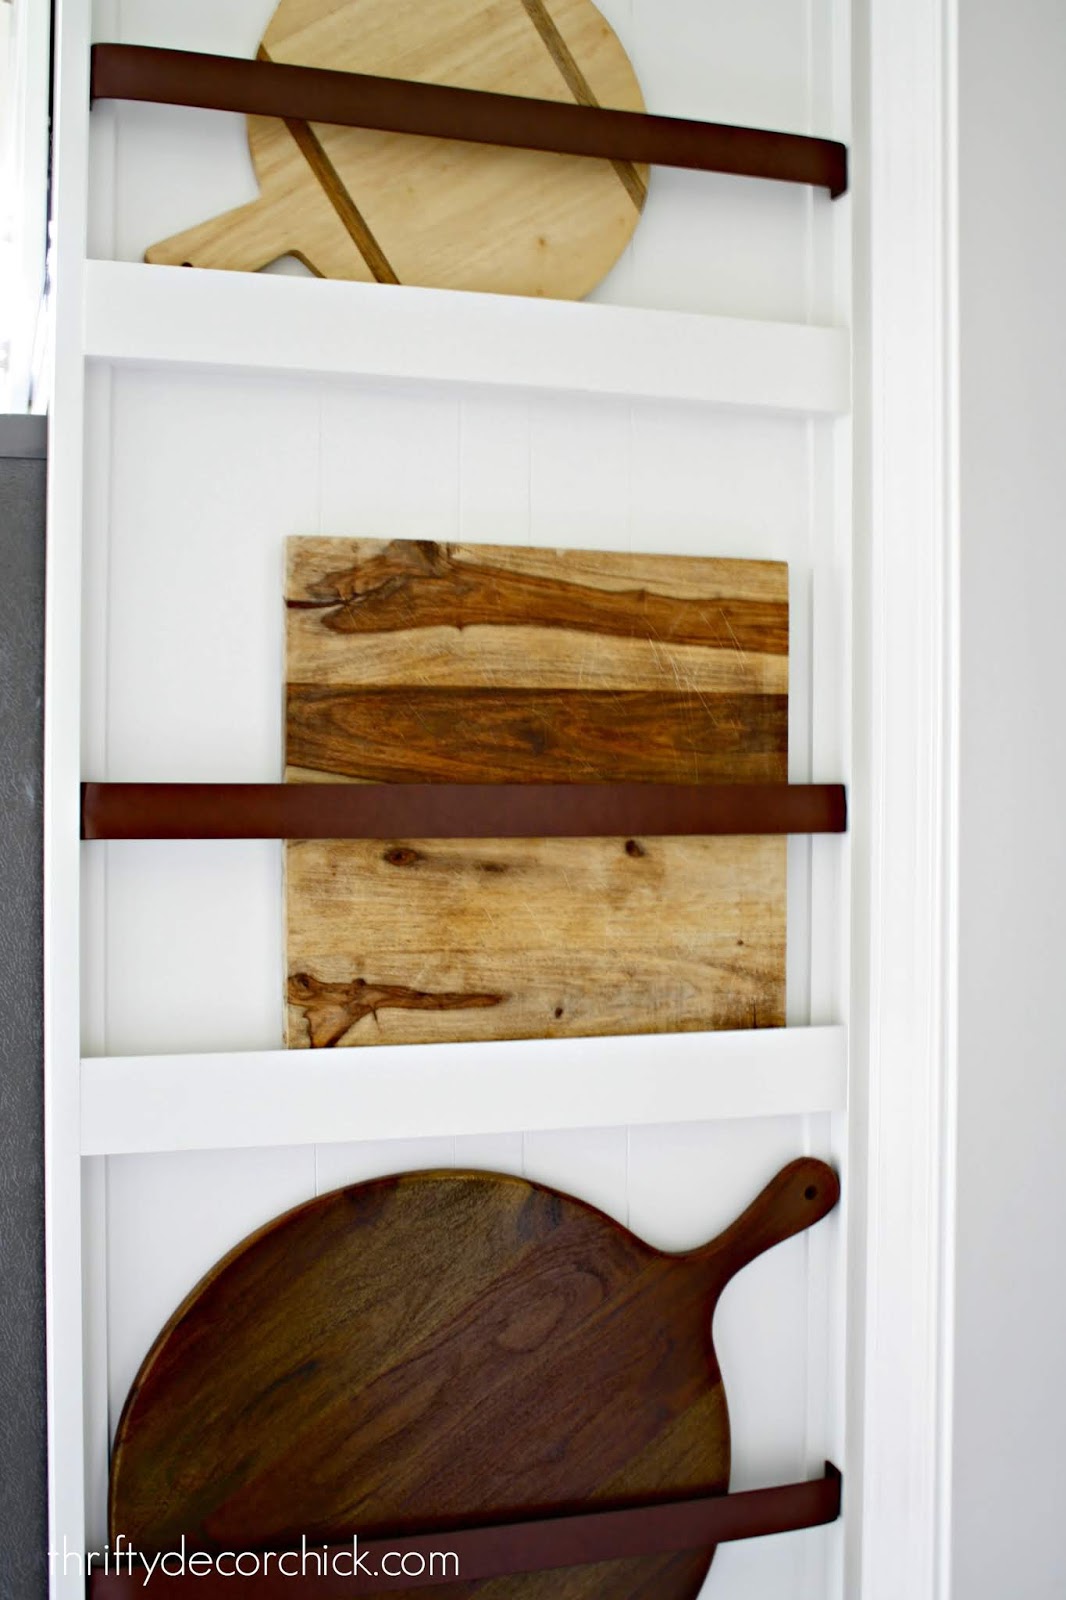
I wanted to build something that would hold our large cutting boards and this was perfect. The leather accent was my favorite!
To get started, I had to remove all of the trim from the side of the cabinet. This included a little decorative piece that hides where the cabinets meet. Then I got busy with the sides of my shelves:

Here's a close up -- I used a 1x2 on the sides -- nailed right through the front (and into the wall on the right).
Because I wanted some extra support for those pieces, I grabbed some smaller trim (measures about 1/2 inch by 3/4) and nestled that up to to the sides of the 1x2s:

This gives everything a little more support.
Then I needed to start figuring out where I wanted my shelves. I was initially only going to go with three or four, but this is a tall cabinet (nine feet), and I felt like it needed more:

I ended up doing six shelves. I covered the gap between the two cabinets with one at the top and then at the bottom -- those are the smallest. I increased the size slightly as I moved to the middle. The two shelves in the middle are the biggest (I have a couple large boards I wanted to make sure would fit).
To build the shelves, I used three pieces of trim -- the half by quarter inch stuff to start it, then a piece of 1x2 on the front of that (all nailed into the cabinet with short nails and into the side trim with longer nails).
I also added a strip of very thin lattice across the front -- this gives the items a place to sit and the lattice trim prevents them from going anywhere:

The next is a part you could easily skip if you are making this the same color as your cabinets. At first I was planning to paint this a different color than the cabinets. Because I didn't want to mess with having to prime/paint the cabinet side, (which would take more time to do properly) I wanted to cover it up.
I lucked out and found various pieces of luan leftover from other projects that happened to fit perfectly. The pieces aren't all symmetrical, but I knew I wouldn't see that much of them, so it didn't bother me:

I saved money by using what I had, but then I had to caulk quite a bit between these -- the edges on some were just too rough. So what I saved in money I gave up in time. :)
Oh, and because I know I'll get this question -- I added the strips to the back after the shelves for two reasons. One -- I only had eight foot pieces, and this is nine feet tall. The shelves took up some of that and gave me just enough. Secondly, I wanted the front of the shelves to be flush with the sides. If I had put this on first, they wouldn't have met up correctly.
After all that, in the end I decided to paint it all the same color as the cabinets -- it was going to be too difficult to do a contrasting color when there was no good place for it to end. I didn't want the sides to be a different color than the cabinets. SO...again, the backing is not necessary. But it does add a little detail to it.
Once everything was caulked and painted I moved on to the fun part! I'm not sure what Yuni used, but I decided to use belts as a strap to hold the boards on the wall. (These are similar (affiliate) to what I used.) I started by using one of the belt holes for the left side (I cut off the end of the belt):

Washers are a must! They will prevent the screw from coming through the belt.
I could have just attached these to the front of the unit, but I liked how hers tucked back inside. I installed the left one and then would pull the other side taut to see where I needed to cut the belt:

Once I got the sizing right (scissors cut these just fine), I drilled a hole for the screw, then repeated the washer and screw installation on this side. The right side took some maneuvering to get it tight (my drill didn't fit great back there), but it went much faster after I did the first one.
I'm SO pleased with the final result!! It's another great detail that adds some character to our kitchen!:
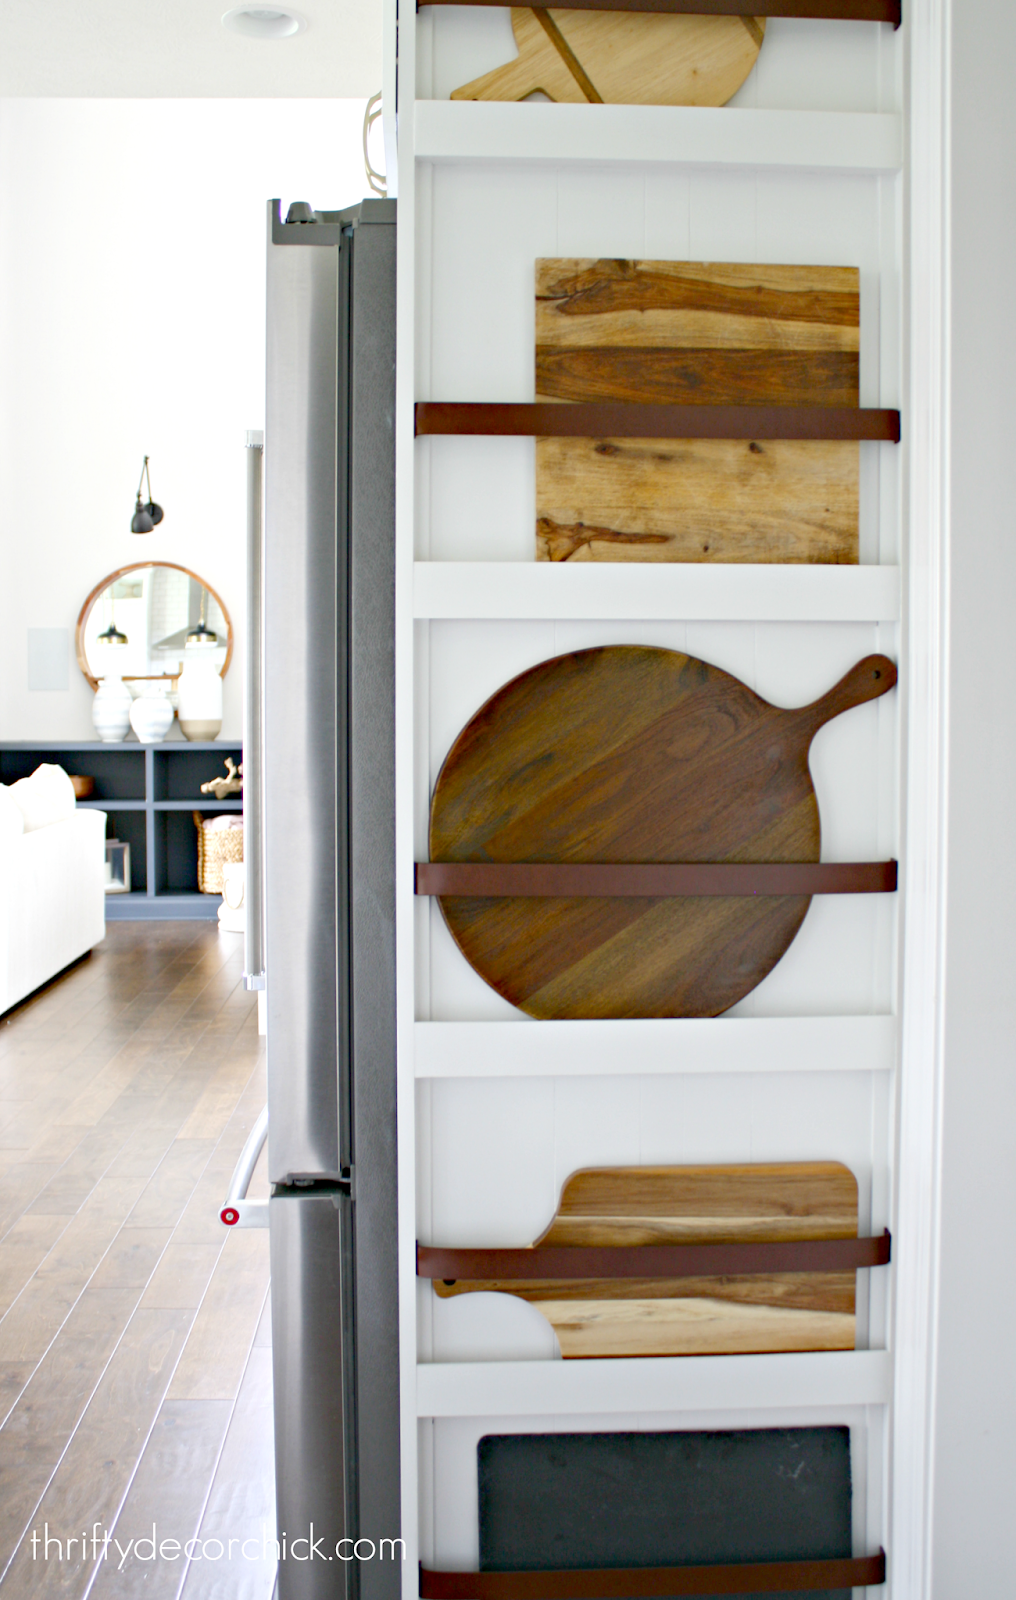
LOOOOOVE! This project is right up my alley -- pretty and functional! I also gained some space in our cabinets by displaying these. Always a good thing!
My favorite board is the large round one:
Its really a pizza paddle and I got it at Pottery Barn (affiliate) on sale and with a gift card. It's HUGE -- I put our meats and cheeses on it when we have company. (Looks like it's on sale now!)
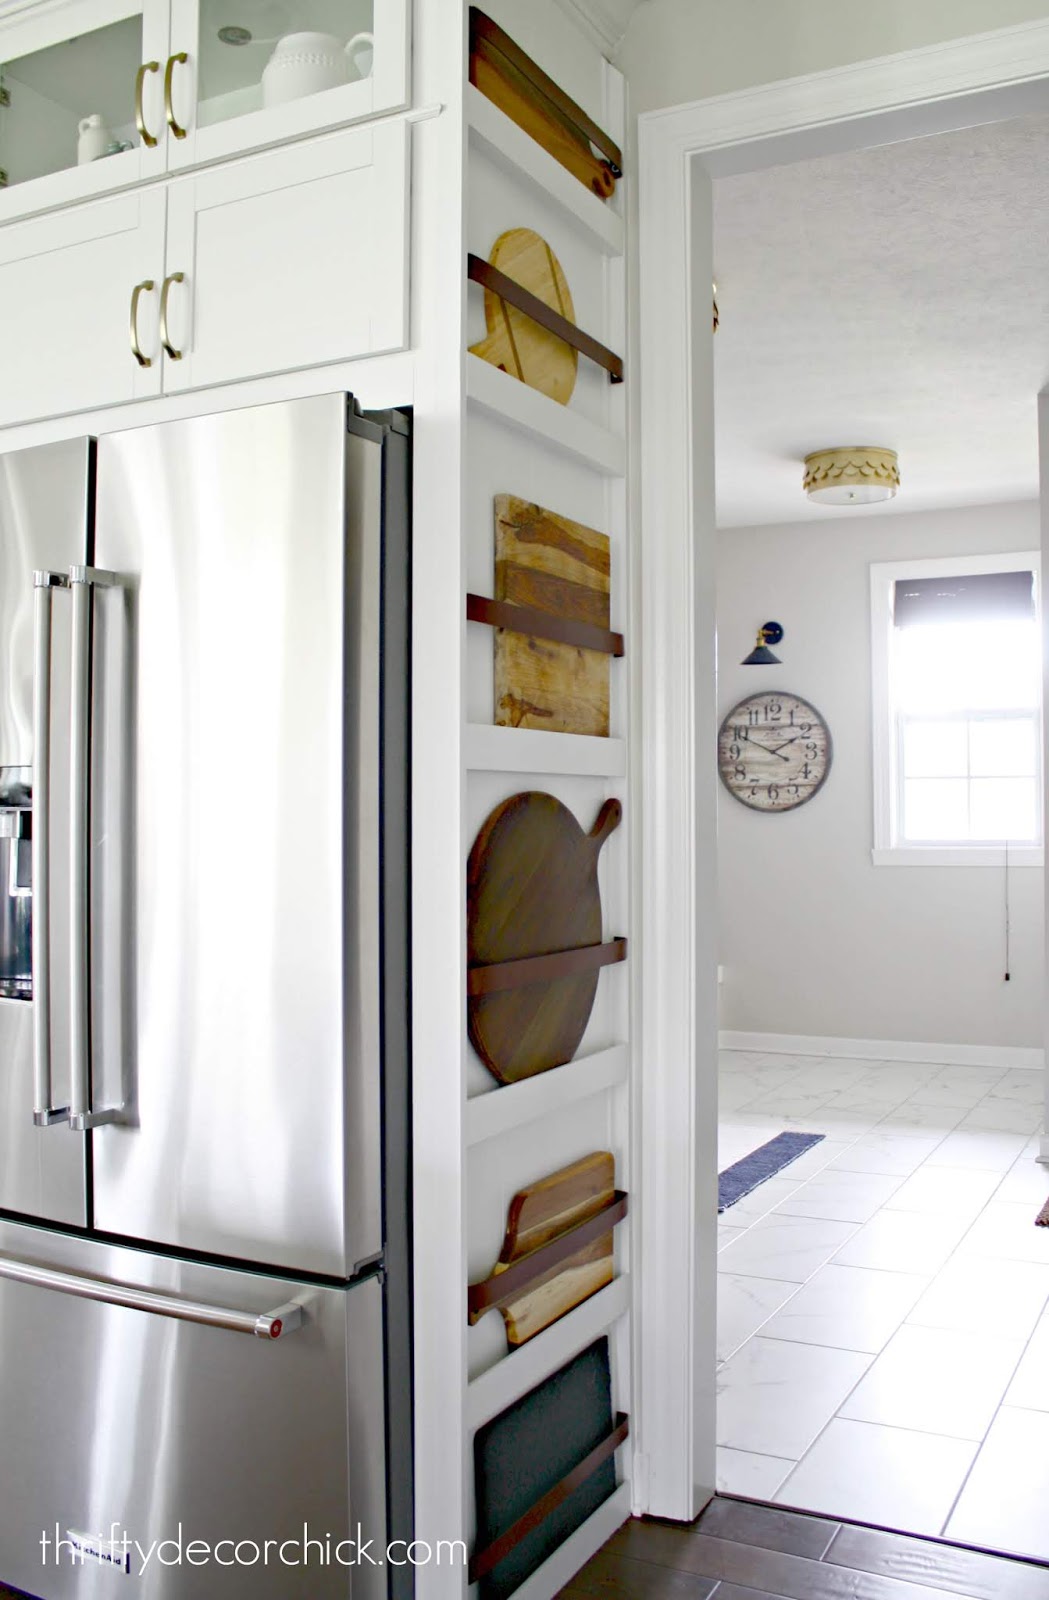
By the way, you may notice the side pieces are angled at the top -- this will all be covered eventually when we have additional cabinets added to the other side of the fridge. We'll have to add to the crown molding at that point so I'll add it to this side then too:
The crown will wrap the whole thing at the top -- but until then, just having it cut off at the top looked really odd. I cut it at an angle to soften the transition a bit.
The cabinets on the other side will be a bigger budget item. I'm SUPER excited about those but it will be a bit before we can get those. So until then, we've been enjoying the smaller projects I've completed over the past month or so:
I spent about $100 on this project -- the most expensive of all of my recent additions. I'm thrilled with the function it adds to our kitchen! I've really enjoyed adding these custom touches to this space. Little by little I'm adding my stamp to this house and having a blast doing it!
I promise this is the last kitchen post for a while. SWEAR. ? Now that I'm done in here (for now) my focus will be on other projects.
Have you ever added function or storage to an odd spot? It's seriously one of my favorite things EVER.
By the way, if your fridge is open with no cabinets around it, you can see how I built in our refrigerator at our old house. Here's the before:

And how it looked all finished up!:

See more of our home here. To shop items in our home, click here! Never miss a post by signing up to get posts via email. Via https://www.thriftydecorchick.com/2019/04/adding-form-and-function-on-side-of.html
Hello there! I don't know how I went down the rabbit hole of some of my older posts recently -- I think I was looking for an old project maybe? But I got sucked in.
I noticed a few trends in my old decorating style and thought it would be fun to take a look back. Many of these are projects that may have brought some of you to the blog years ago! My how things have changed! :) Note that I am NOT making fun of my old decorating (I'm proud almost every step along the way) and I am not making fun of anyone that incorporates any of these things...let's make that clear. You'll see I still like them all, I just don't use them quite as much. It does tickle me to look back at things I may have had a little obsession with. Decor trends come and go and it's just fun to look back. SPRAY PAINT I still LOVE spray paint. It's been a DIY staple of mine and always will be! We were deep in debt when I started blogging, so I would often take thrifted items and spray paint them...even if they were fine to start with. ? I had a few missteps, like painting this big stone pear black: 
It started as gray -- not sure why I thought black would be better. Goodness. I LOVED spray painting. I'm surprised I have brain cells left.
I spray painted frames, light fixtures, door knobs, decor, art, window shades...even the floor vents!:

I loved me some ORB spray paint -- otherwise known as oil rubbed bronze. When a blogger mentioned ORB everyone just knew what it was. ;) Ahhh, the good old days.
I will say...the painted vents looked great with our dark wood floors at the old house (not the ones pictured here), and I've started doing the same at this house. They hold up surprisingly well and the darker color doesn't stand out nearly as much.
I will always love a good spray paint project, don't worry. These lamps used to be shiny brass and the mirror was a wood tone before I sprayed it black:

I still think spray paint is the easiest way to transform decor on the cheap. I've just reeled it in just a bit over the years. :)
THE COLOR BLACK
I loved oil rubbed bronze a LOT. But my go-to for many years was black. I was obsessed with painting things black -- it really didn't matter what it was (obviously with the pear). When I painted our laundry room bright yellow (not one of my favorite design decisions), my accent color was...black:

I spray painted most of the items you see in that photo too. Even the clothespins in the jars. See? Problem.
And when I painted furniture...I painted it black. Alwaaaaaays:

A touch of black is still a favorite of mine -- you can see why I think every room needs some of it in this post.
But I'm trying to branch out just a bit! I went with a pretty olive green for this piece in our family room and still LOVE it:

STENCILS (EVERYWHERE)
Another DIY project I did a lot was stenciling -- on furniture, art, the walls...I used them a lot!
I added some in a shimmer paint (shimmer was another favorite detail) inside the wainscoting in our old family room:

And I figured out a way to give them texture too -- I did this treatment in two of our bathrooms way back when:

Thankfully it wasn't hard to remove! You can see that process and the after photos here.
Nowadays the only thing I stencil are DIY lettered signs like this one:

But there are still some gorgeous patterned stencils for walls and floors! I don't think that trend is going anywhere soon. It's just been updated a bit. ;)
CHALKBOARDS
Another trend I repeated over and over was chalkboards. I had a TON of them at one point. I didn't care, I loved them!
This spot on our old kitchen wall had many versions of a chalkboard -- it started with this one:

And that same spot eventually became a full chalkboard wall. I loved it then and still do!:

My love of them is still strong -- they are such an easy way to fill a big wall and add the black accent that I love.
We only have one giant chalkboard now and I'm pretty sure it will be the only one in the house for awhile:

You know me though...
VINYL WORDS ON THE WALL
And finally...a trend that started years ago and is still strong today, it's just morphed a bit. Remember how big the vinyl wall sayings were years ago?
Gosh I had them EVERYWHERE...both in vinyl and with my own handmade stencils. This stair wall was one of my favorites:

You'll notice another trend back then was poor picture quality. ;) It says "The best things in life aren't things." That stairway wall went nuts on the Internet!
I talked about the word art trend last year and how I think it's gotten a bit out of hand (but I still have some word art pieces that I love).
Now I try to think outside of the box and DIY my art for the walls when possible:

Did you have any of the same decor obsessions? Did I get you hooked on any of these years ago? :)
Overall my style has simplified quite a bit. I prefer quieter design overall now, but as I always say, I appreciate my process throughout the years. Every step along the way has been a blast, and I've loved sharing it all with you!
See more of our home here. To shop items in our home, click here! Never miss a post by signing up to get posts via email. Via https://www.thriftydecorchick.com/2019/04/five-decor-trends-i-loved-little-too.html This isn't a huge before and after but it's one of those little things that has bothered me since we moved in. I did this in our old house and never showed you the tutorial for it! You wouldn't really notice it if you looked at our old kitchen cabinets: 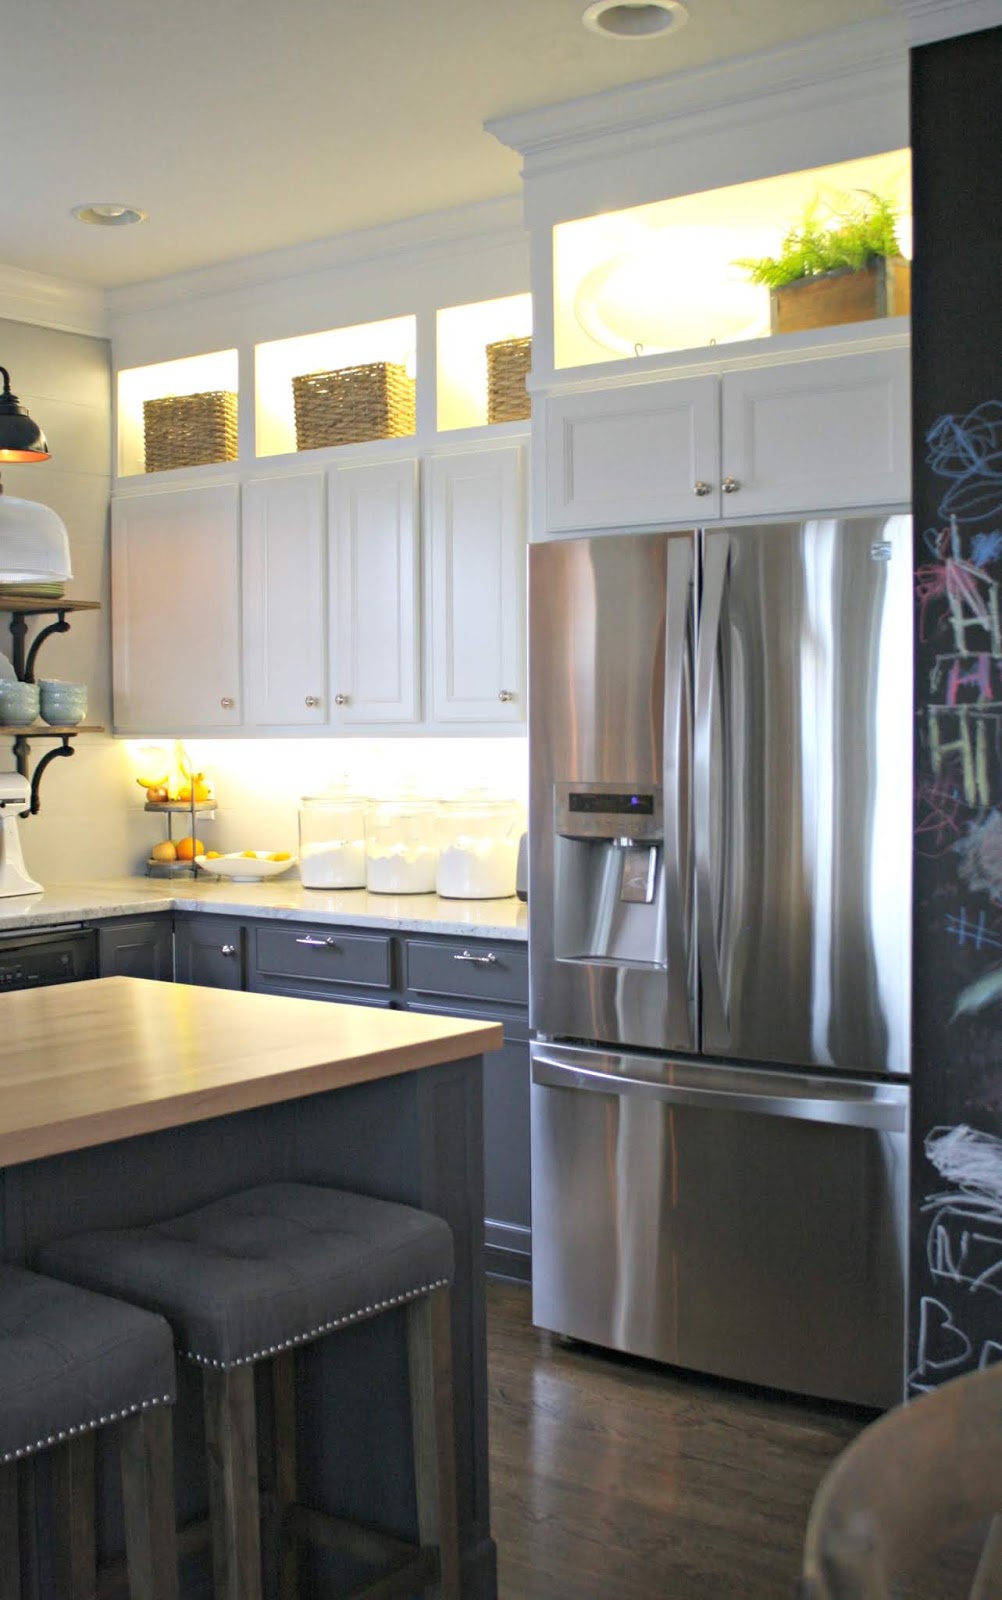
I'll share more about that in a minute, but first, let's talk about the cabinet lighting!
I've shared how to add this detail to your kitchen a couple times over the years and I highly recommend it as a way to add a custom touch to your cabinets. It's like landscape lighting for me -- it brings the whole space to a whole other level!
A loooong time ago I shared how to add the under cabinet lighting when you don't have them hardwired. I used the outlets for our fridge and our mounted microwave to make that work.
But if you have a dedicated outlet for the lights, this cabinet lighting tutorial is the one for you. When I remodeled our last kitchen, I had an outlet added up above the cabinets with a switch. That way is even easier because you buy everything you need online (see link for a full list). It worked GREAT!
Back to the DIY project I just finished up -- I didn't want to see the lighting under the cabinets so I added my own light rail. Light rails are molding that are installed under the cabinets to help hide the lighting under the cabinets.
I was surprised ours didn't come with them for this house. You can see what I mean in this photo from my post about the DIY feet for the lower cabinets:

See how you can see the lighting under our cabinets? Like I said, it's not a big deal. But it's just one of those little things that bothers me. When we sat at the table we could easily see the lighting underneath.
So I got to it and added my own light rails yet again! I should mention I had these priced out from the cabinet company our builder used and about choked -- they were not cheap!
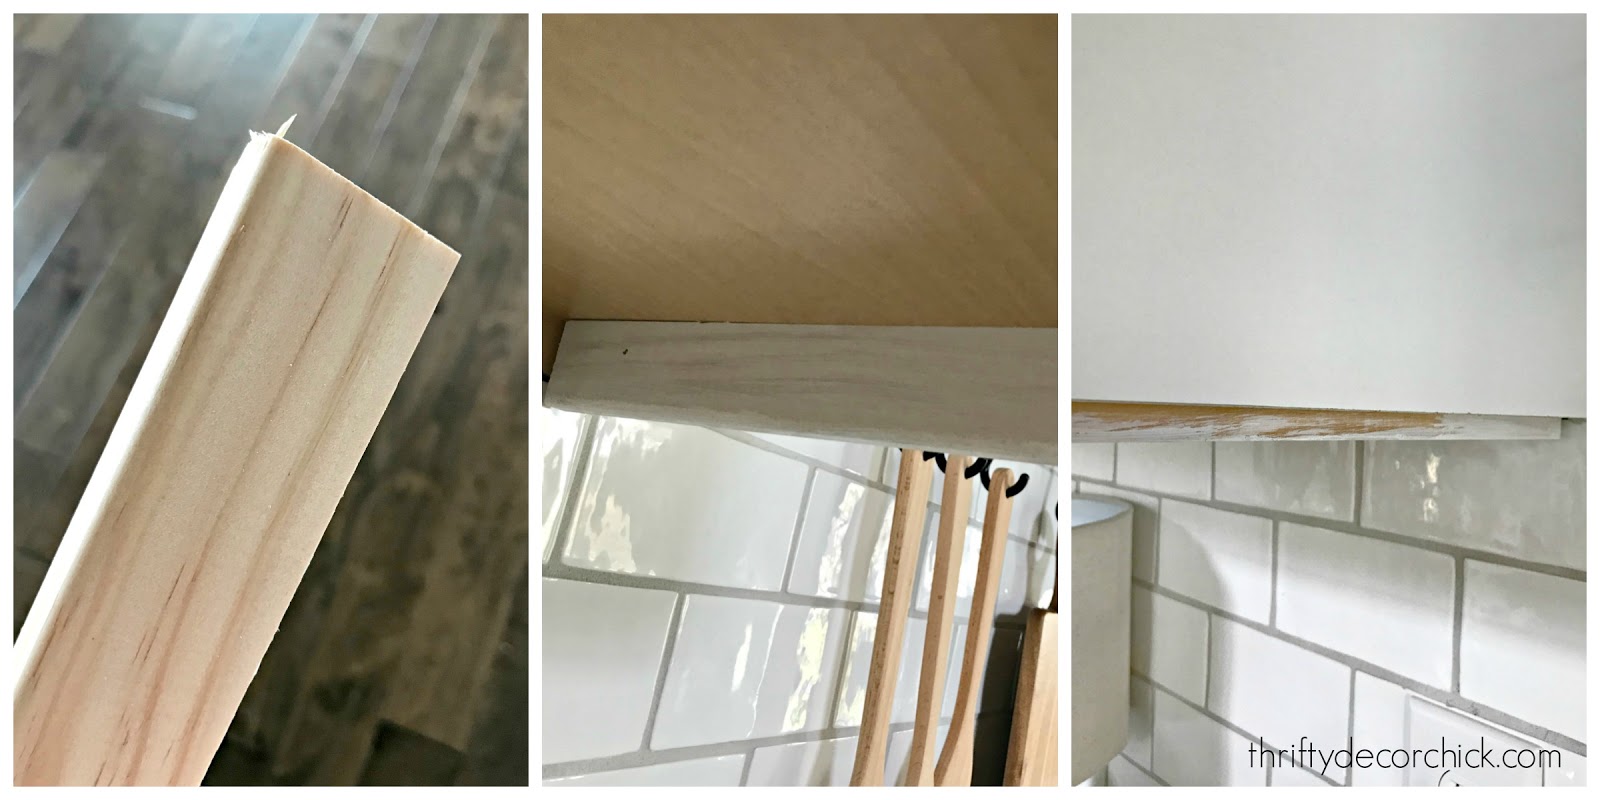
First I found some simple flat trim from the hardware store -- I painted one side of it and then attached it to the underside of the cabinets all the way around. You'll want to make sure it comes down past the cabinet a bit like the photo on the right:
I had to get under the cabinet to nail from underneath through the side. (I didn't want the nail holes to show from the outside.) Now the pinched nerve in my neck starts to make sense, right?
And then you can take your pretty trim and attach it to that piece on the front. The trim I used has a flat top (I got mine at Home Depot) so it fit flush with the lip under the cabinet:

I nailed most of these from under the cabinet as well (watch the length of your nails!), but ended up nailing a few from the front too just to make sure they were secure. Here's how it looks under the cabinet:

I was planning to touch up the paint the next day, but the neck issue happened and I've decided they're just fine as is. ;)
Here's a close up look from the front:

It fit seamlessly with the cabinets and looks like it was always there! (After I painted it to match.)
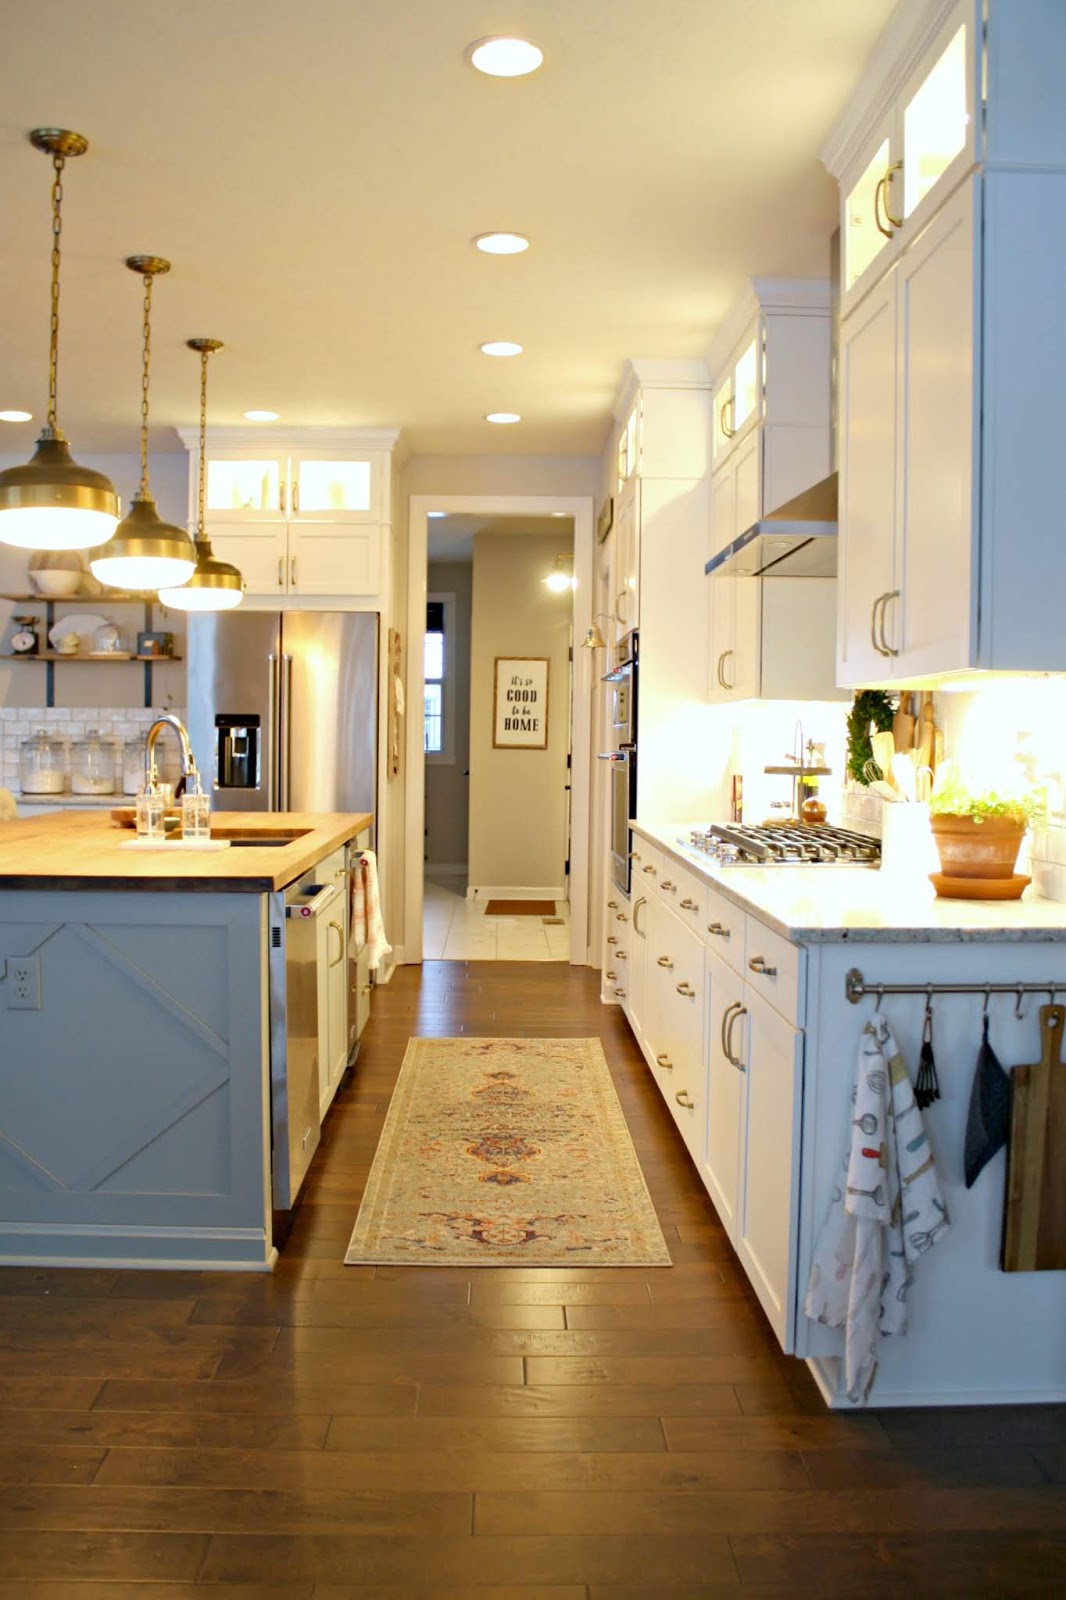
My husband didn't understand why I wanted to do this so badly, and later he said he was so glad I did it -- it really does make a difference. He noticed it the first time we sat down at the table -- you can't see under the cabinets nearly as easily:

Here's the view without the light rails again:
I tried to get a similar angle -- no more ugly light fixture underneath!:
Have you ever noticed light rails or heard of them before? This small detail just hides everything a little better. I had to buy the two trim decorative pieces for this project and the flat ones I used as the base, so I think the total cost was around $30. See more of our home here. To shop items in our home, click here! Never miss a post by signing up to get posts via email. Via https://www.thriftydecorchick.com/2019/04/diy-cabinet-lighting-and-how-to-hide-it.html
Hey there and happy weekend! I'm back today with a very quick art project. Sometimes I hesitate to share these simpler ones, but then I hear from so many of you who appreciate them. So I'll continue to share!
When I shared our morning/dining room makeover last fall, I mentioned I really wanted to add a little something to the walls next to the mirror:

I felt like it needed something, but I wasn't sure what.
A few months ago I was walking through Walmart and found these pretty brass frames -- I grabbed four of them and hung them on each side of the mirror. I loved the look!:

But I wasn't sure what I wanted in them. :) So they hung with the generic filler for months.
I started looking into art a few weeks ago, but nothing has struck me just yet. Instead of forcing it, I'm going to wait for something I love.
But I was kind of tired of looking at them without something in them, so I came up with a quick way to fill them. I kept all kinds of scraps from the wallpapered hallway right off of this room and decided to cut them for the frames:

Because of the repeat of this paper and the size of these frames (the mat is 11x14), I had to use the same design for all of the frames, but I did flip them on the top and bottom:

You can find these gold frames online here (affiliate). I'll share the rest of the sources for this room at the end of the post!

It took all of ten minutes to get them filled and on the wall!
It was a happy accident that the blue in the wallpaper is pretty much an exact match with our wall color. I really love the art and frames:

I'm not sure it will be permanent, but it's better than before! And now I don't feel rushed at all to buy something to fill them.
Best part was that it was FREE! Well...that paper wasn't free, it was actually a splurge. So you know I was going to use as much of it as I possibly could! ;)
What have you used to create art in your home?
You can find links to many of the items in this room here:
//
 JavaScript is currently disabled in this browser. Reactivate it to view this content. JavaScript is currently disabled in this browser. Reactivate it to view this content.
I love finding cheap ways to make art -- here's a few other ideas that I've done over the years:


See more of our home here. To shop items in our home, click here! Never miss a post by signing up to get posts via email. Via https://www.thriftydecorchick.com/2019/04/cheap-art-project-with-leftover.html
Hey hey! I had to take a break from the little kitchen projects I've been working on due to a pinched nerve in my neck. I was getting in odd positions to complete a project a few days ago and it resulted in a couple nearly numb fingers. Fun times!! ?
Thankfully I'm almost back to normal. It's healing quicker than I thought, but it still feels like it takes forever! I don't mess with nerve stuff after my back/leg issues a couple years ago.
I got some spring planting and basic clean up done outside before this happened, so I figured I'd share our spring exterior with you today! I took these photos on a sunny day, in the evening and on a cloudy day, so you'll get a variety. ;)
I've been spring cleaning -- putting away chair covers, hanging stuff back up, sweeping the porches and cleaning the exterior lights. I also added flowers to our window boxes and the front planters. Our weather has been glorious so it's been so great to be outside!
The mulch was done this week and we've never had it freshened up this early -- I'm loving that the exterior is looking so nice this early! I'll start on the porch and move around a bit:
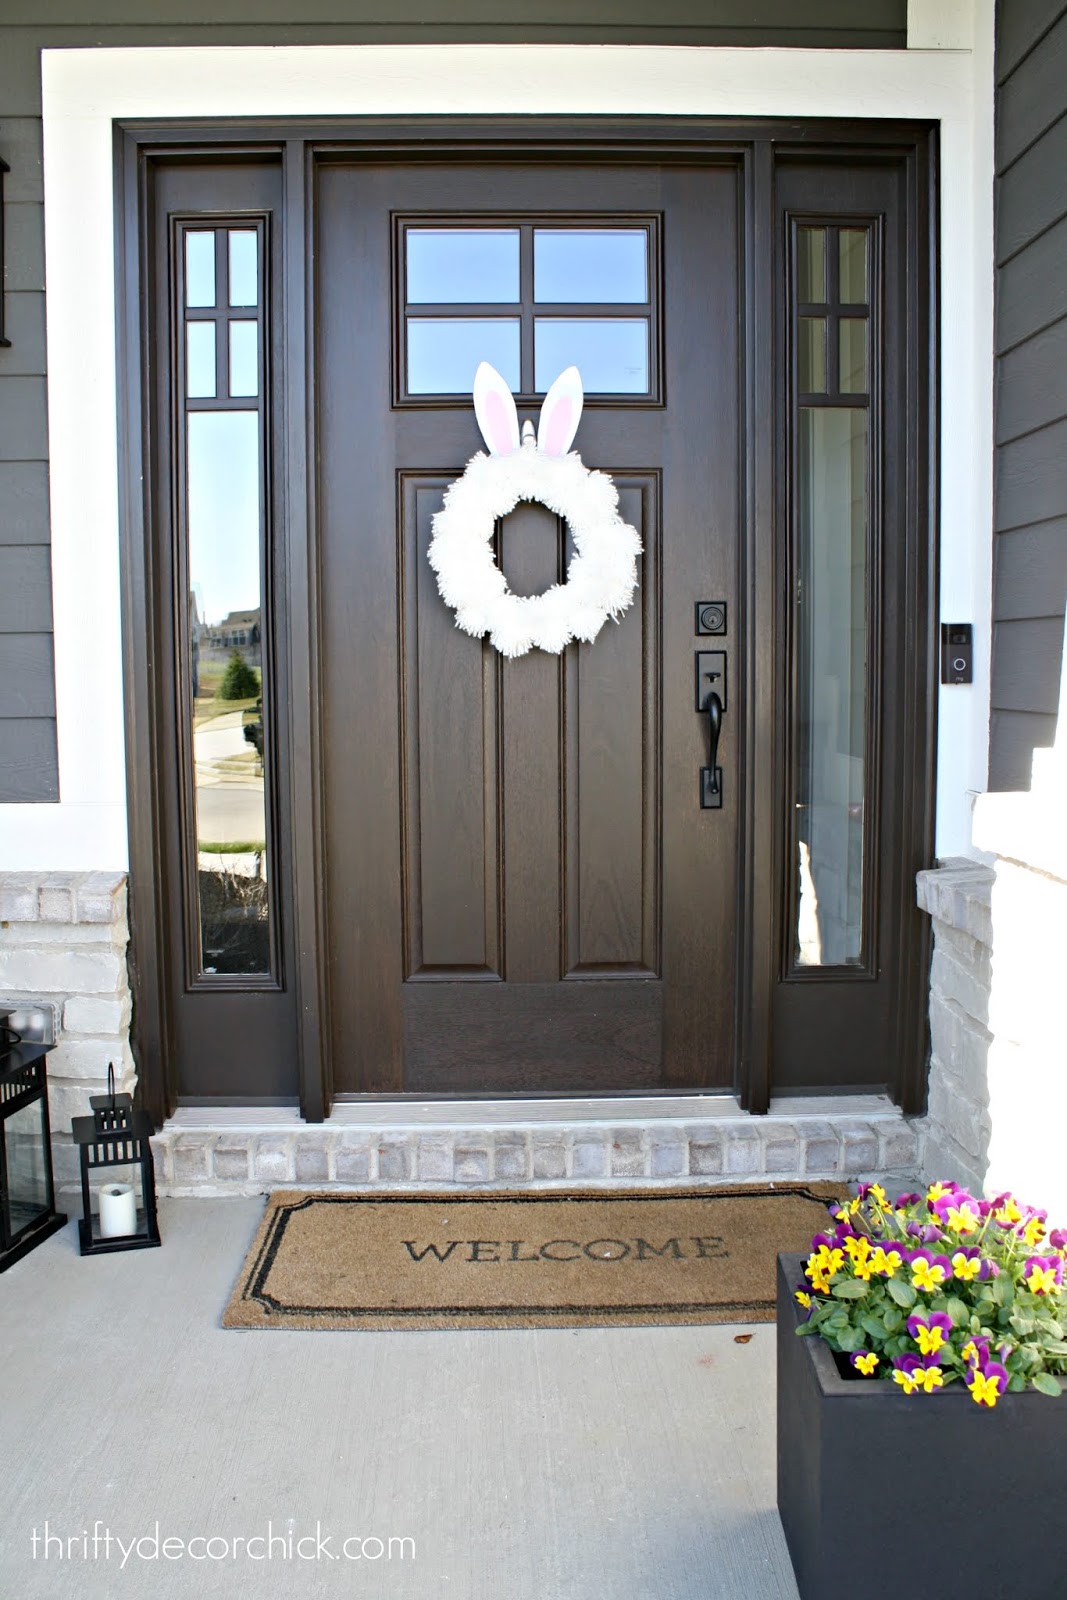
That fluffy bunny/Easter wreath is one of my favorites ever -- so dang cute!! It's held up well so far.
I hung the welcome sign back up after taking it down for the fall and winter:

I found it on clearance at Hobby Lobby last year and it didn't work anywhere inside -- so I hung it out here instead. It works with our house colors perfectly!
The landscaping is just now starting to bloom. I just love this time of year! I'm excited to see the plants grow every year -- everything out here is still so new:

I got the window boxes planted with yellow/orange, red and purple pansies:

I love that combo with our dark siding color.
I grabbed hanging containers with purple and yellow pansies and just plopped them into our planters on the porch:

The covers are off the chairs on the back porch and it's been wiped down and swept up -- we're ready for warm evenings out here:

We love our modern Craftsman exterior so much -- it's one of my very favorite things about this house! The only thing missing is our American flag. I need to get a new one and get that up on the porch:
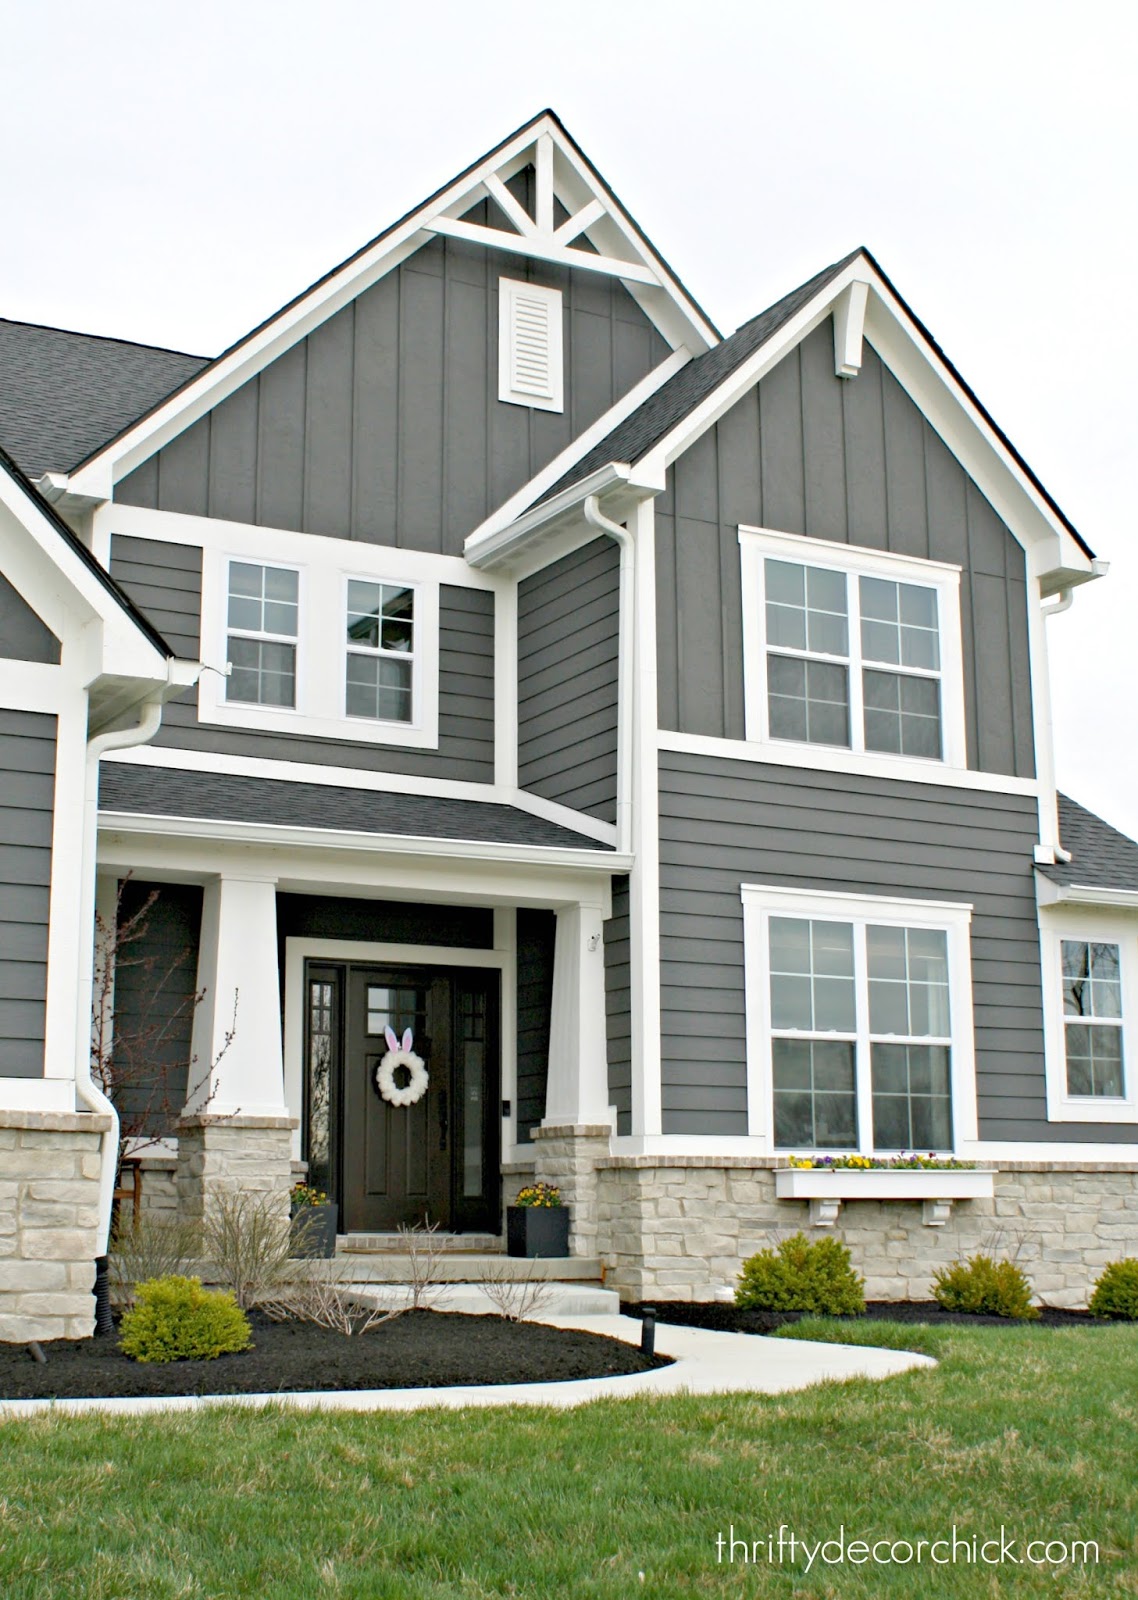
The grass is greening up nicely! The lawn is my husband's baby and he's thrilled it's a little more established. It took forever to green up last spring because it was put down pretty late in the fall the year before.
I asked our builder to include as many boxwoods as possible (for green all year round) and tons of hydrangeas. They did a great job! The hydrangeas are just now starting to bloom:

I installed half of the landscape lighting a year ago: 
And then finished it up with some path lighting and a few more spots lights in early summer. This is a project I encourage you to try yourself -- it's NOT a difficult DIY, I promise! It's much easier than you'd think:

Landscape lighting is one of those things that really elevates a home -- I think it's one of the easiest and biggest changes you can make to your exterior!
Obviously things aren't fully blooming just yet, but I'm so happy with the new mulch and flowers, I had to share a look at the house so far this year! You can see our home in full bloom in this exterior home tour from last year.
Have you started planting yet? Any outdoor projects planned this year? I'm really hoping to get a garden started -- I'm SO excited to start growing food and herbs again! We'd also really like to get a patio started in the back yard, but we're not sure about pricing. If you know of any good concrete companies in Indy, please let me know!
If you're interested in any of our outdoor items you can find them here! (Affiliate links included.)
//
!function(d,s,id){var e, p = /^http:/.test(d.location) ? 'http' : 'https';if(!d.getElementById(id)) {e = d.createElement(s);e.id = id;e.src = p + '://' + 'widgets.rewardstyle.com' + '/js/shopthepost.js';d.body.appendChild(e);}if(typeof window.__stp === 'object') if(d.readyState === 'complete') {window.__stp.init();}}(document, 'script', 'shopthepost-script');
//  JavaScript is currently disabled in this browser. Reactivate it to view this content. JavaScript is currently disabled in this browser. Reactivate it to view this content.
See more of our home here. To shop items in our home, click here! Never miss a post by signing up to get posts via email. Via https://www.thriftydecorchick.com/2019/04/our-exterior-spring-home-tour.html
Hey there! I've got another quick project in the kitchen to share with you! I swear I'll move on from this space next week. Probably. ;) I've had fun adding these small details to customize this room little by little.
You can see the kitchen island makeover and how I dressed up the basic ends of our kitchen cabinets here.
This time I worked on a project I actually started years ago. I came up with this idea at our last house and never implemented it. When I finished the end of the cabinets last week I knew it would be a perfect time try this one.
Because the ends are now finished off, I was left with a straight edge at the end of the cabinets and knew this would be perfect. You can do this where your cabinets meet a wall as well.
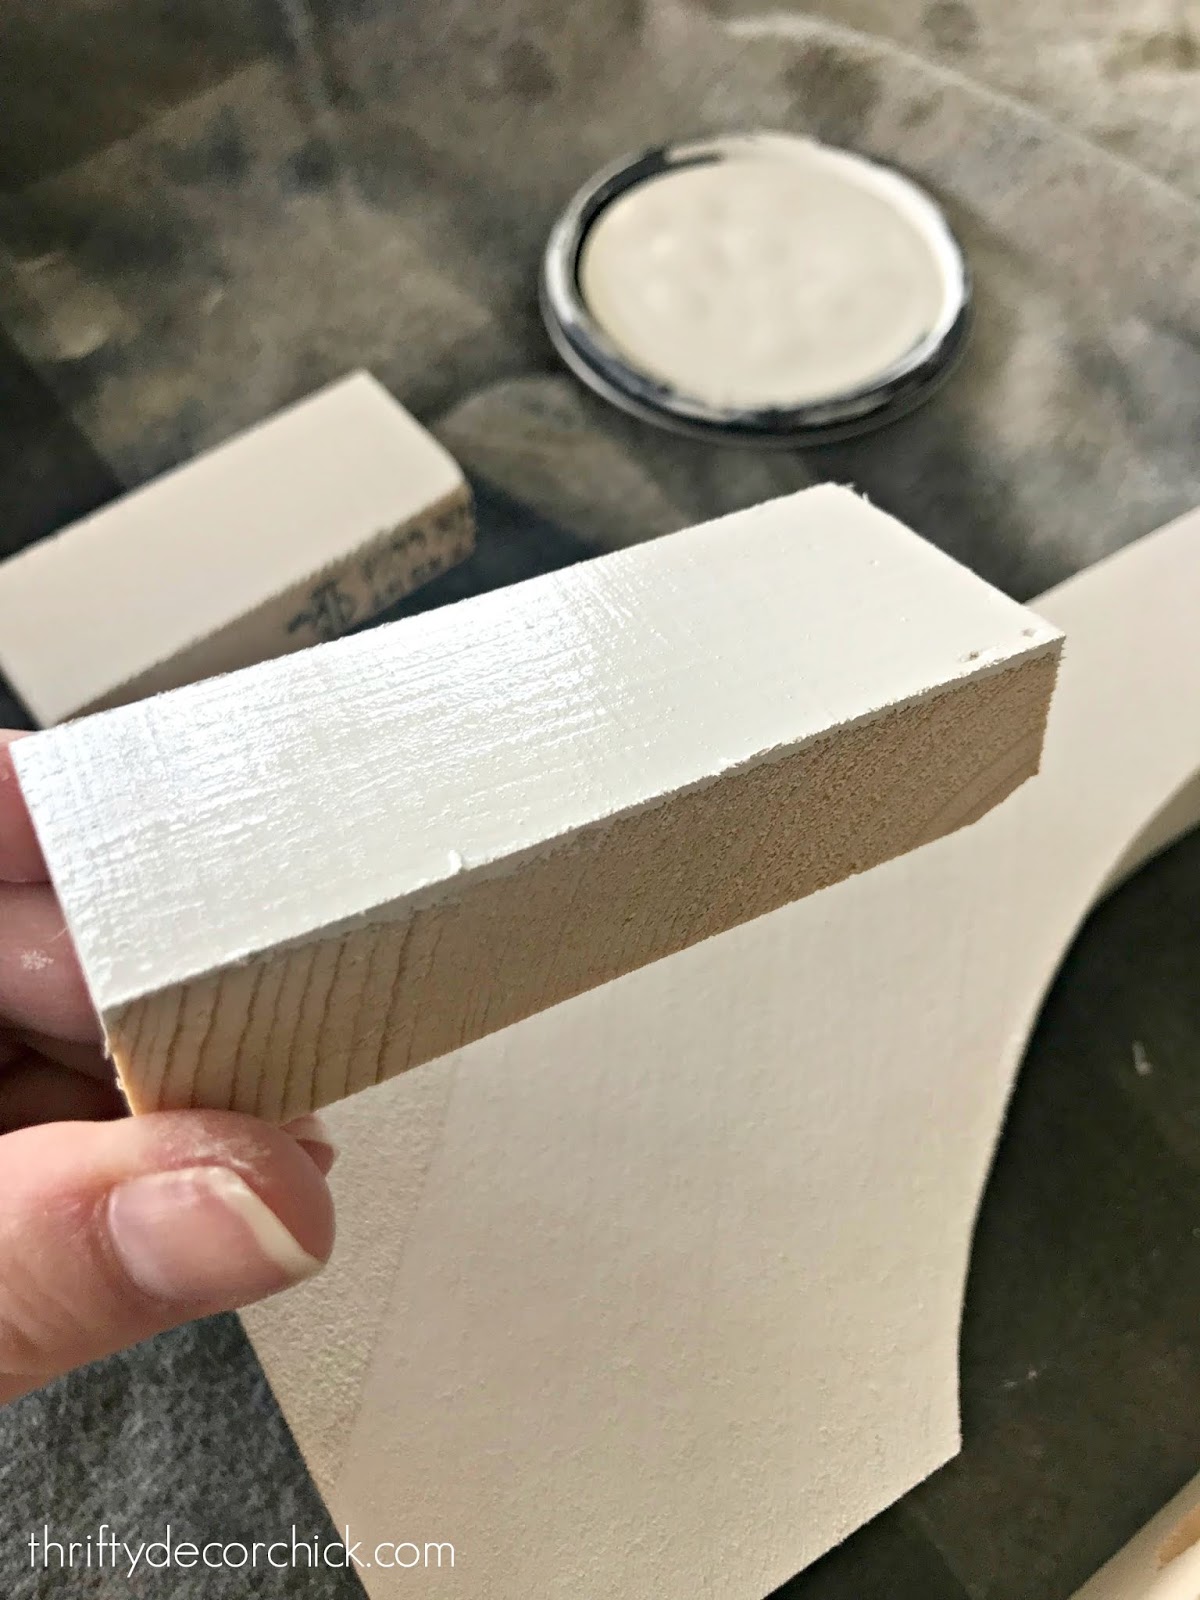
I started with these wood corbels from Home Depot:
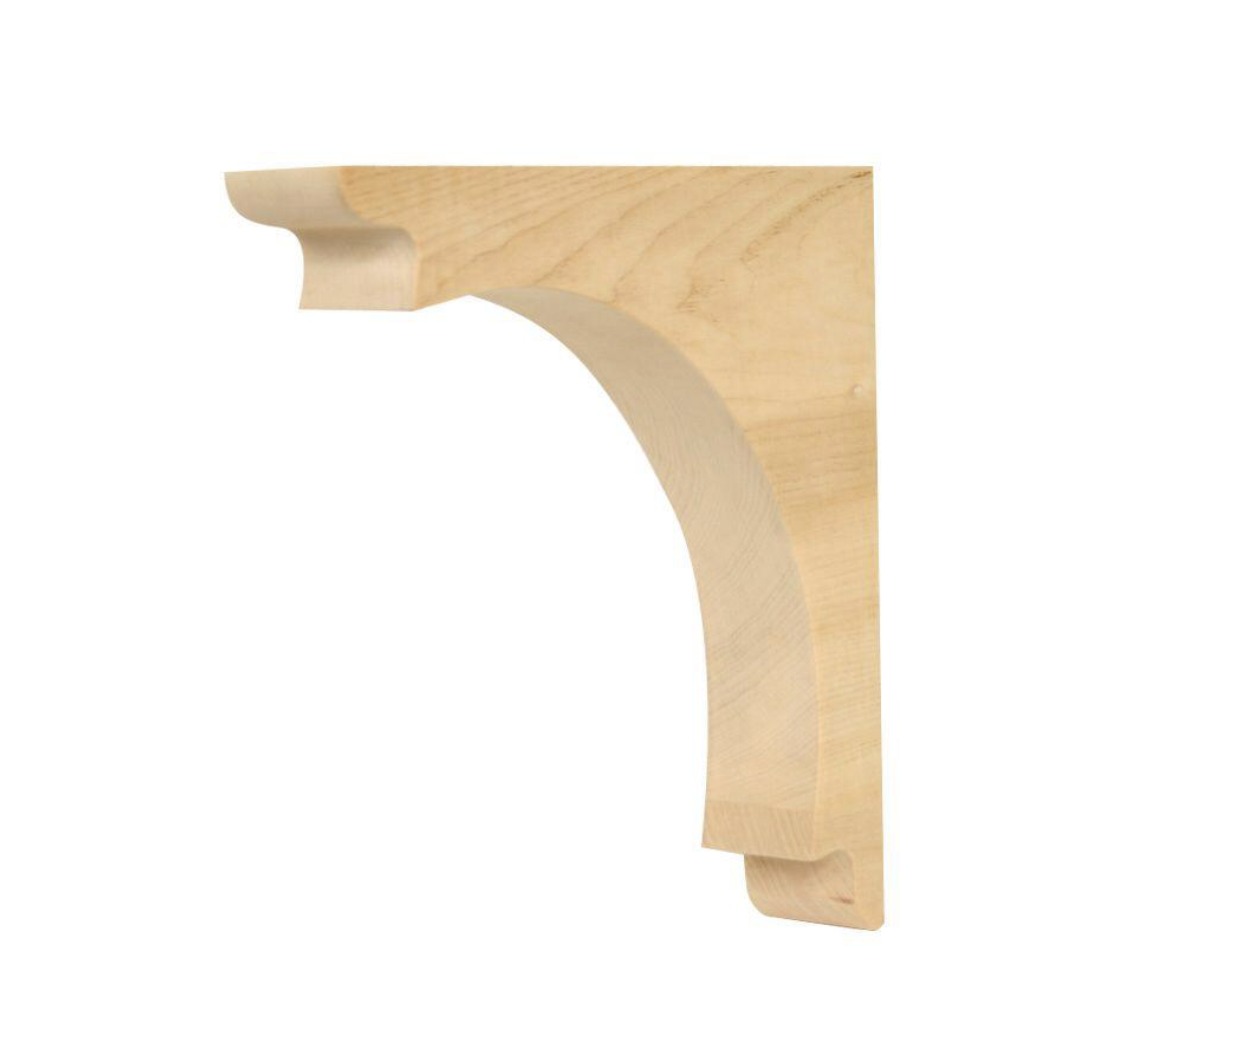
Then I gave them a few coats of the cabinet paint color with light sandings in between: 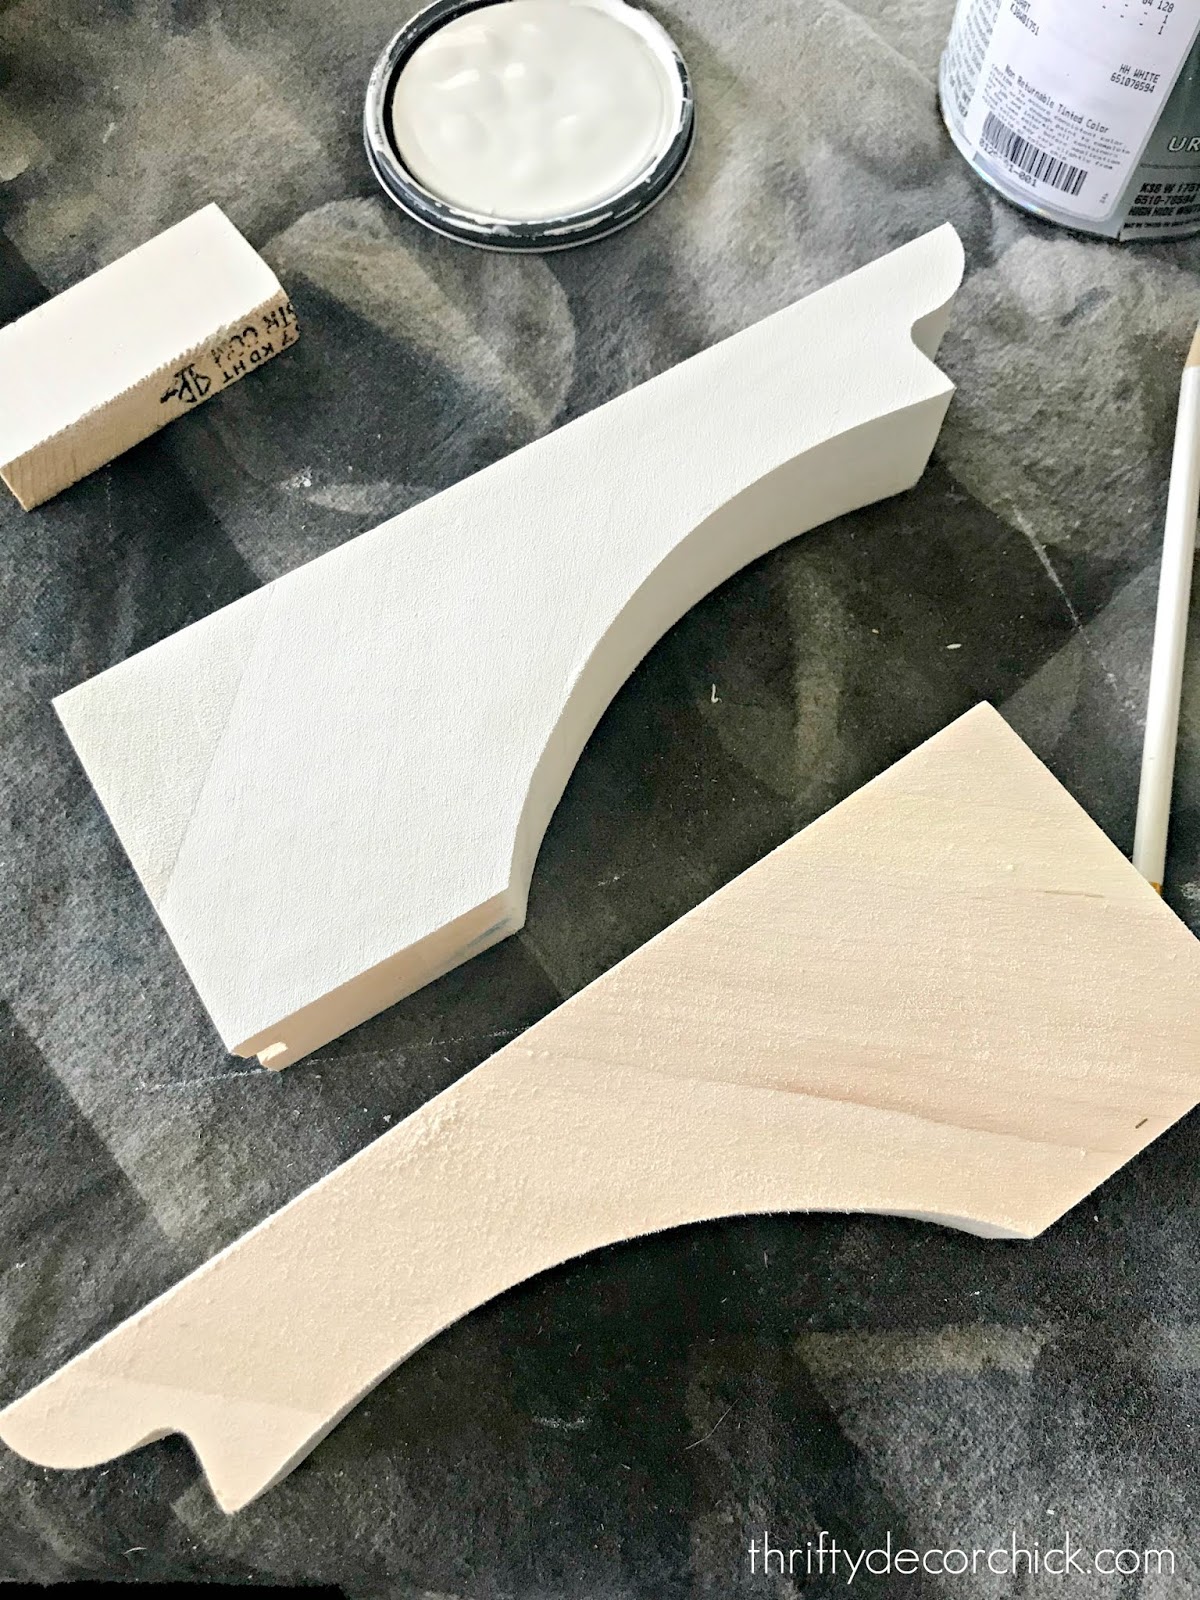
I had the paint matched to our cabinets. Do you see my vision here? They are now cabinet "feet."
This would have been a super quick project -- just painting and attaching them. But I did one extra step that added a little time. I wanted to make sure no crumbs could get back behind them (it would be a pain to clean back there), so I made a back that kind of closes it off at the back.
I cut peices of scrap wood the depth of the open space behind the corbels, and then painted one side the cabinet color:
Then I attached it to the base of the cabinets with a nail gun:
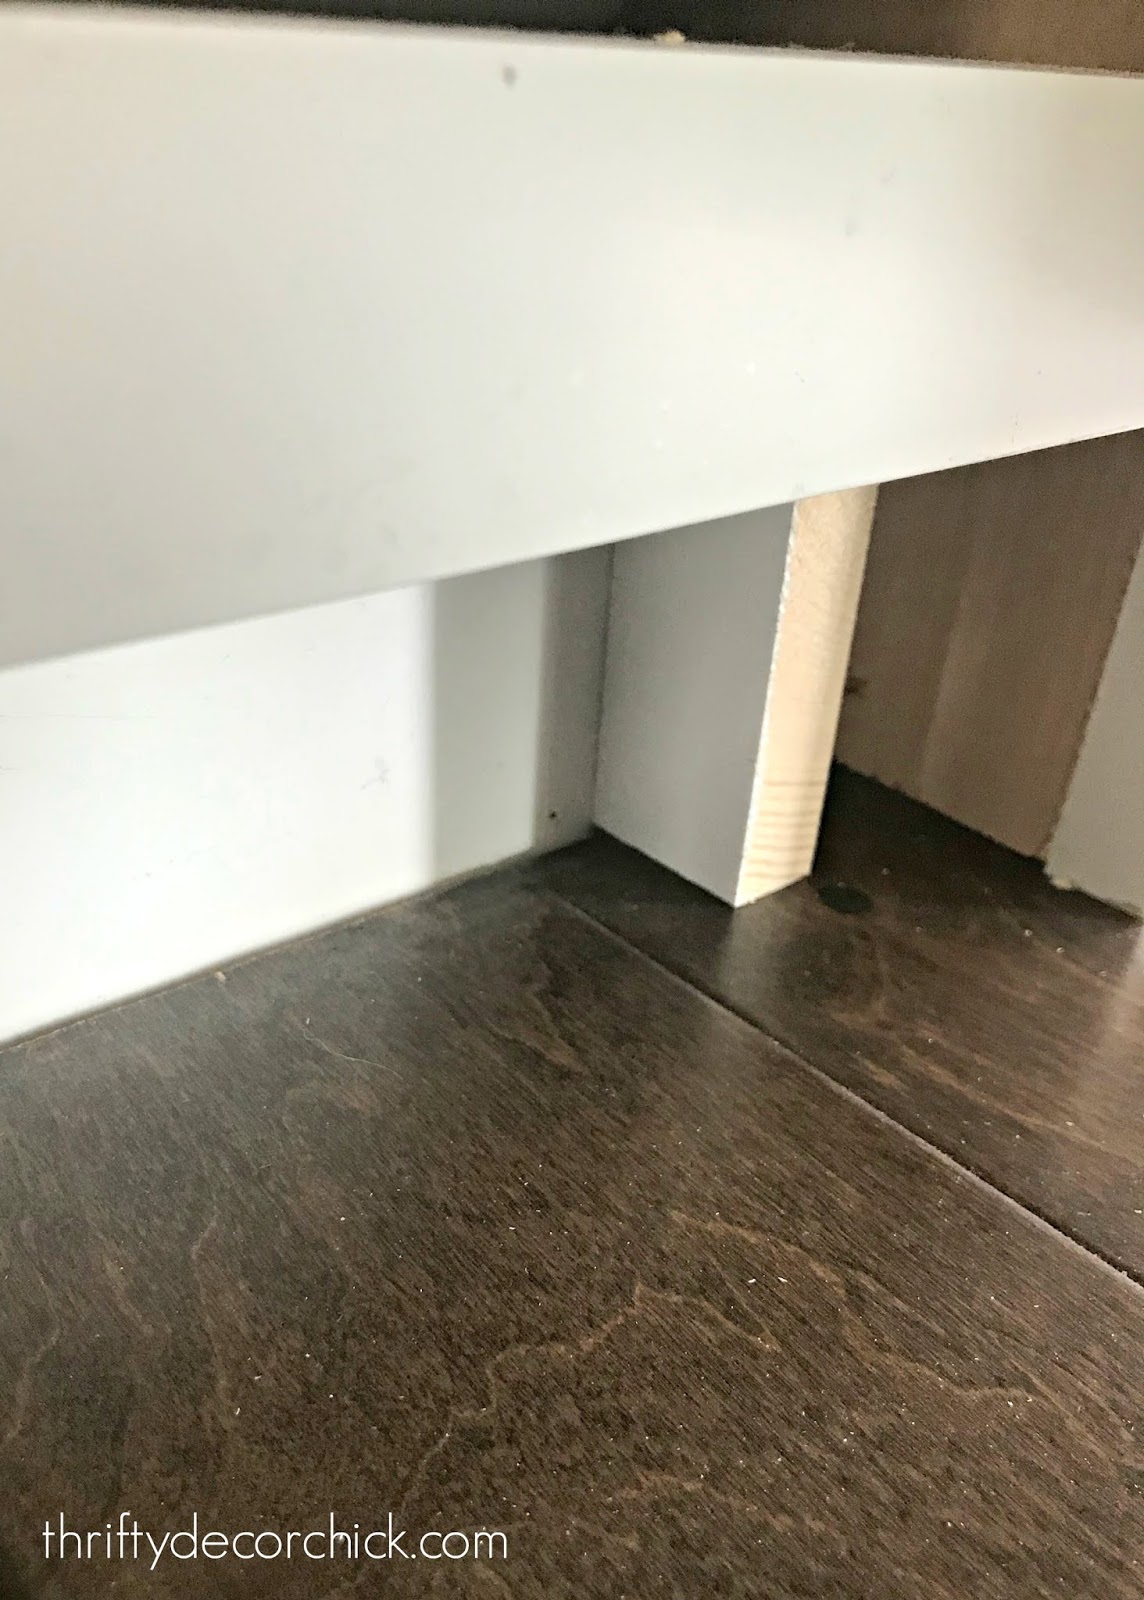
I checked the spacing before nailing it in -- making sure it was lined up perfectly with the new feet. This prevents anything from getting back behind them, and it allowed me to secure them even more by nailing into that from the front. Because I did this I had to remove the quarter round and then reinstall, but it was worth it! To secure them I nailed from the side (where I could), from the top through the cabinet (right up against the lip of the cabinet, so you can't even see the nail holes) and through that little stopper piece from the front. None of them are going anywhere!: 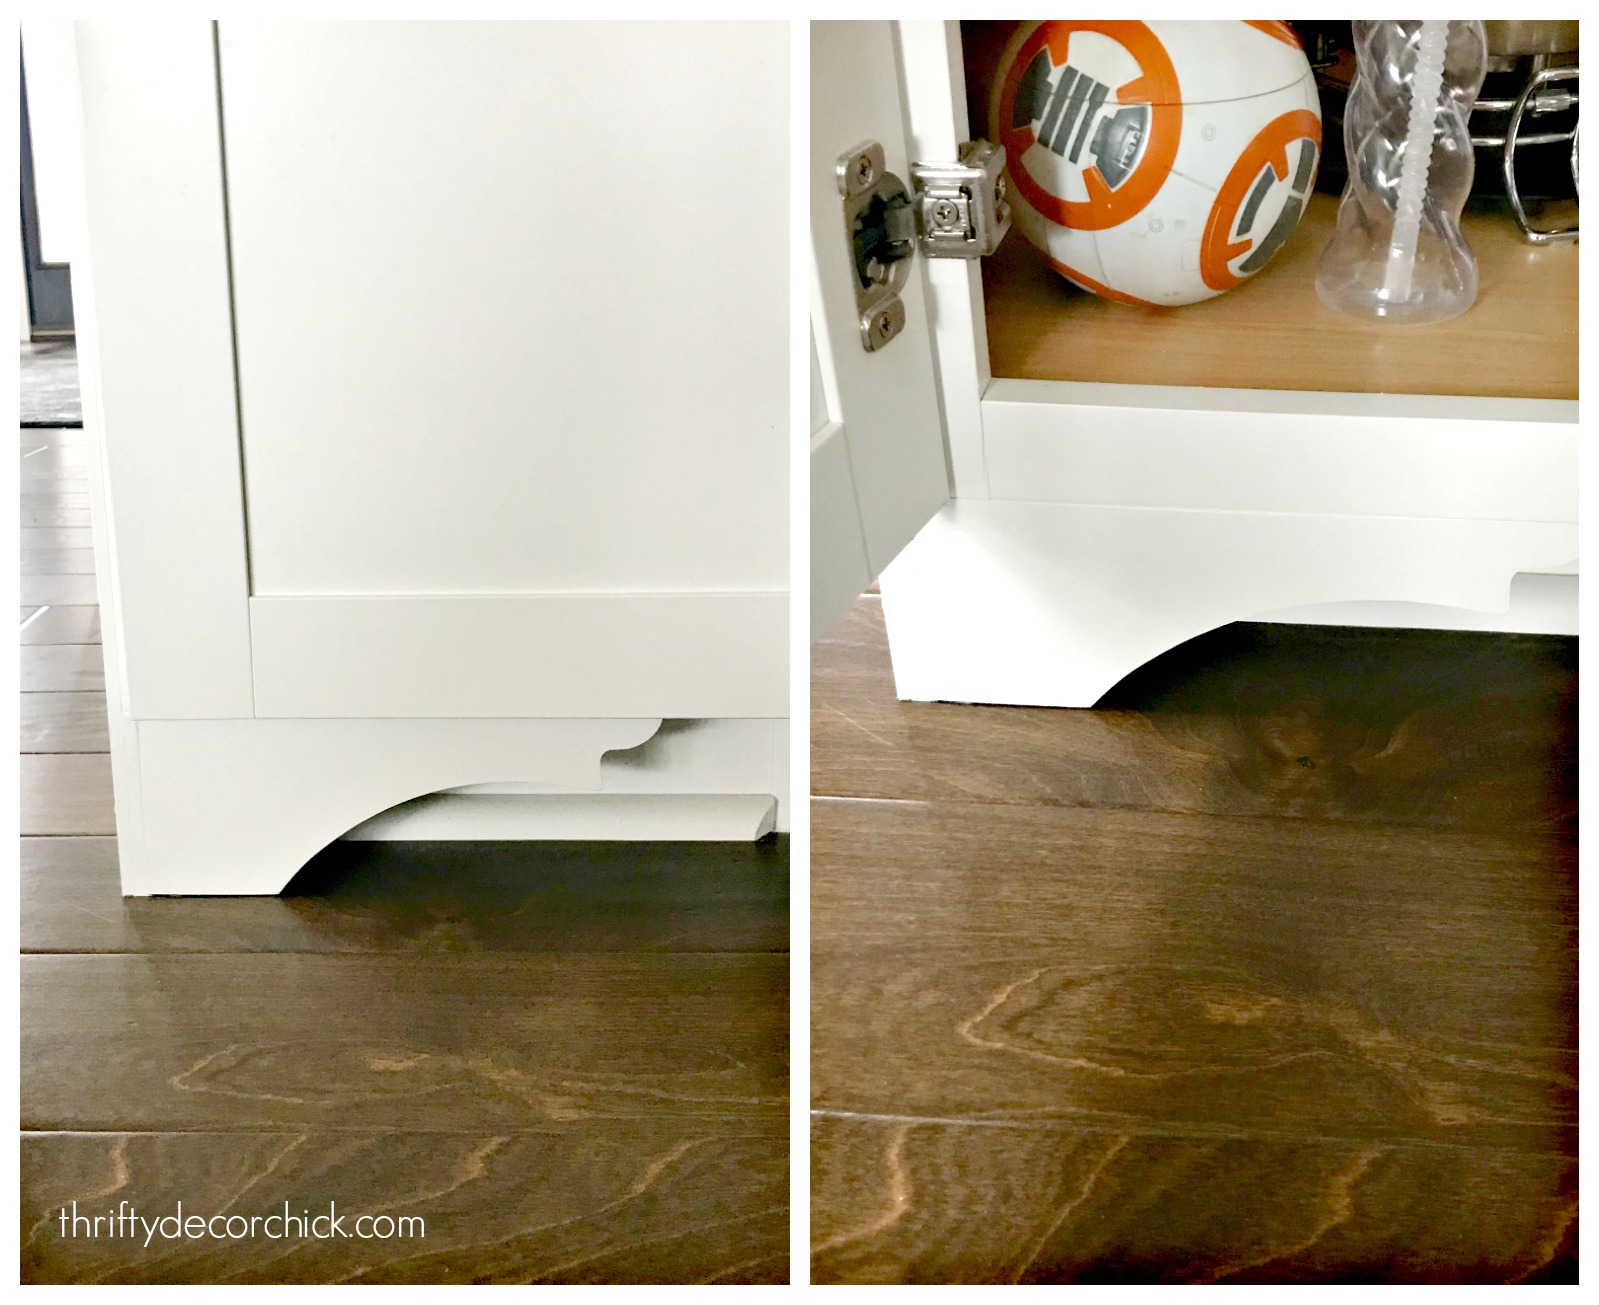
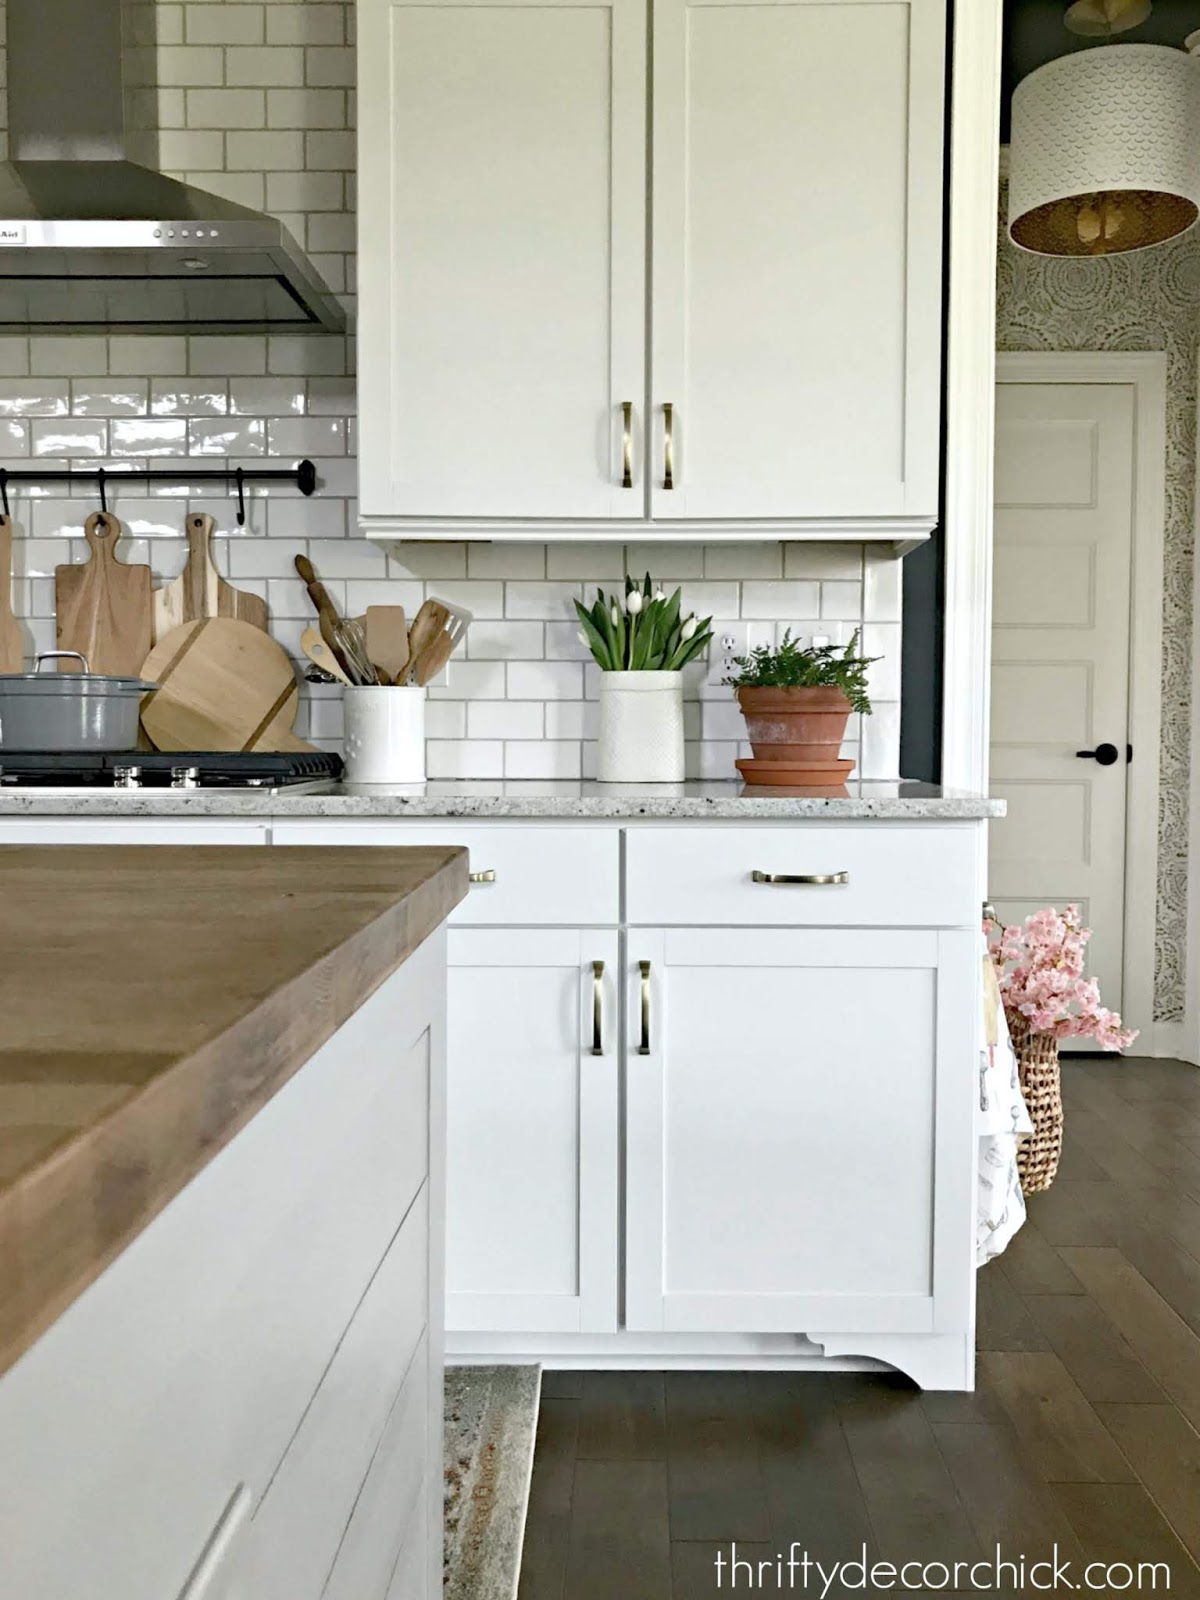
You can only see where they meet up with the cabinet if the doors are open, so I didn't add any decorative trim along the bottom to hide that seam. I'm thrilled with them! They add another detail to the kitchen that doesn't scream at you, but add to the whole look of the space. These little projects layer on one another and are adding some character to our kitchen!: 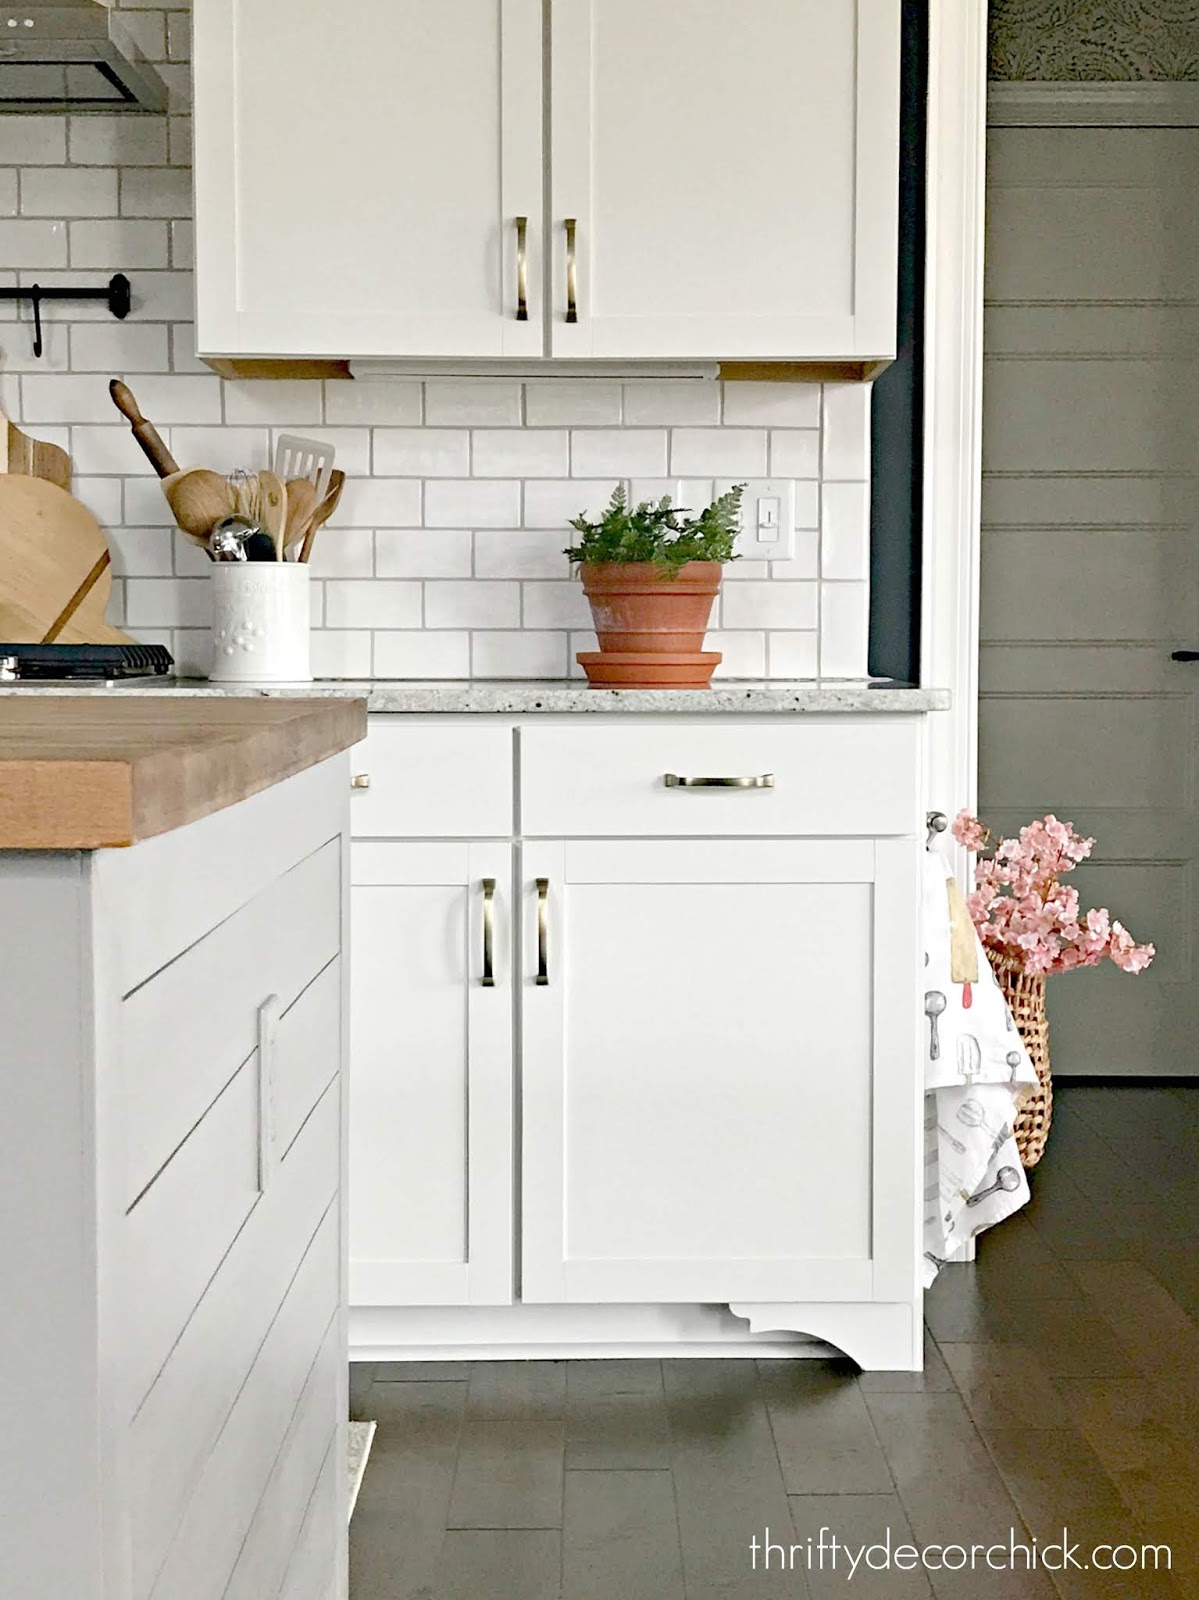
A hint to my next little project is in this pic! ;) I originally planned to put a set under the cabinets where our stovetop is, but I didn't want it to get too busy. I may still do it, because I love how they look! But I felt like I should do every section of cabinets if I do, and that would be way too much for me. So for now I just went with the ends of the long set of cabinets: 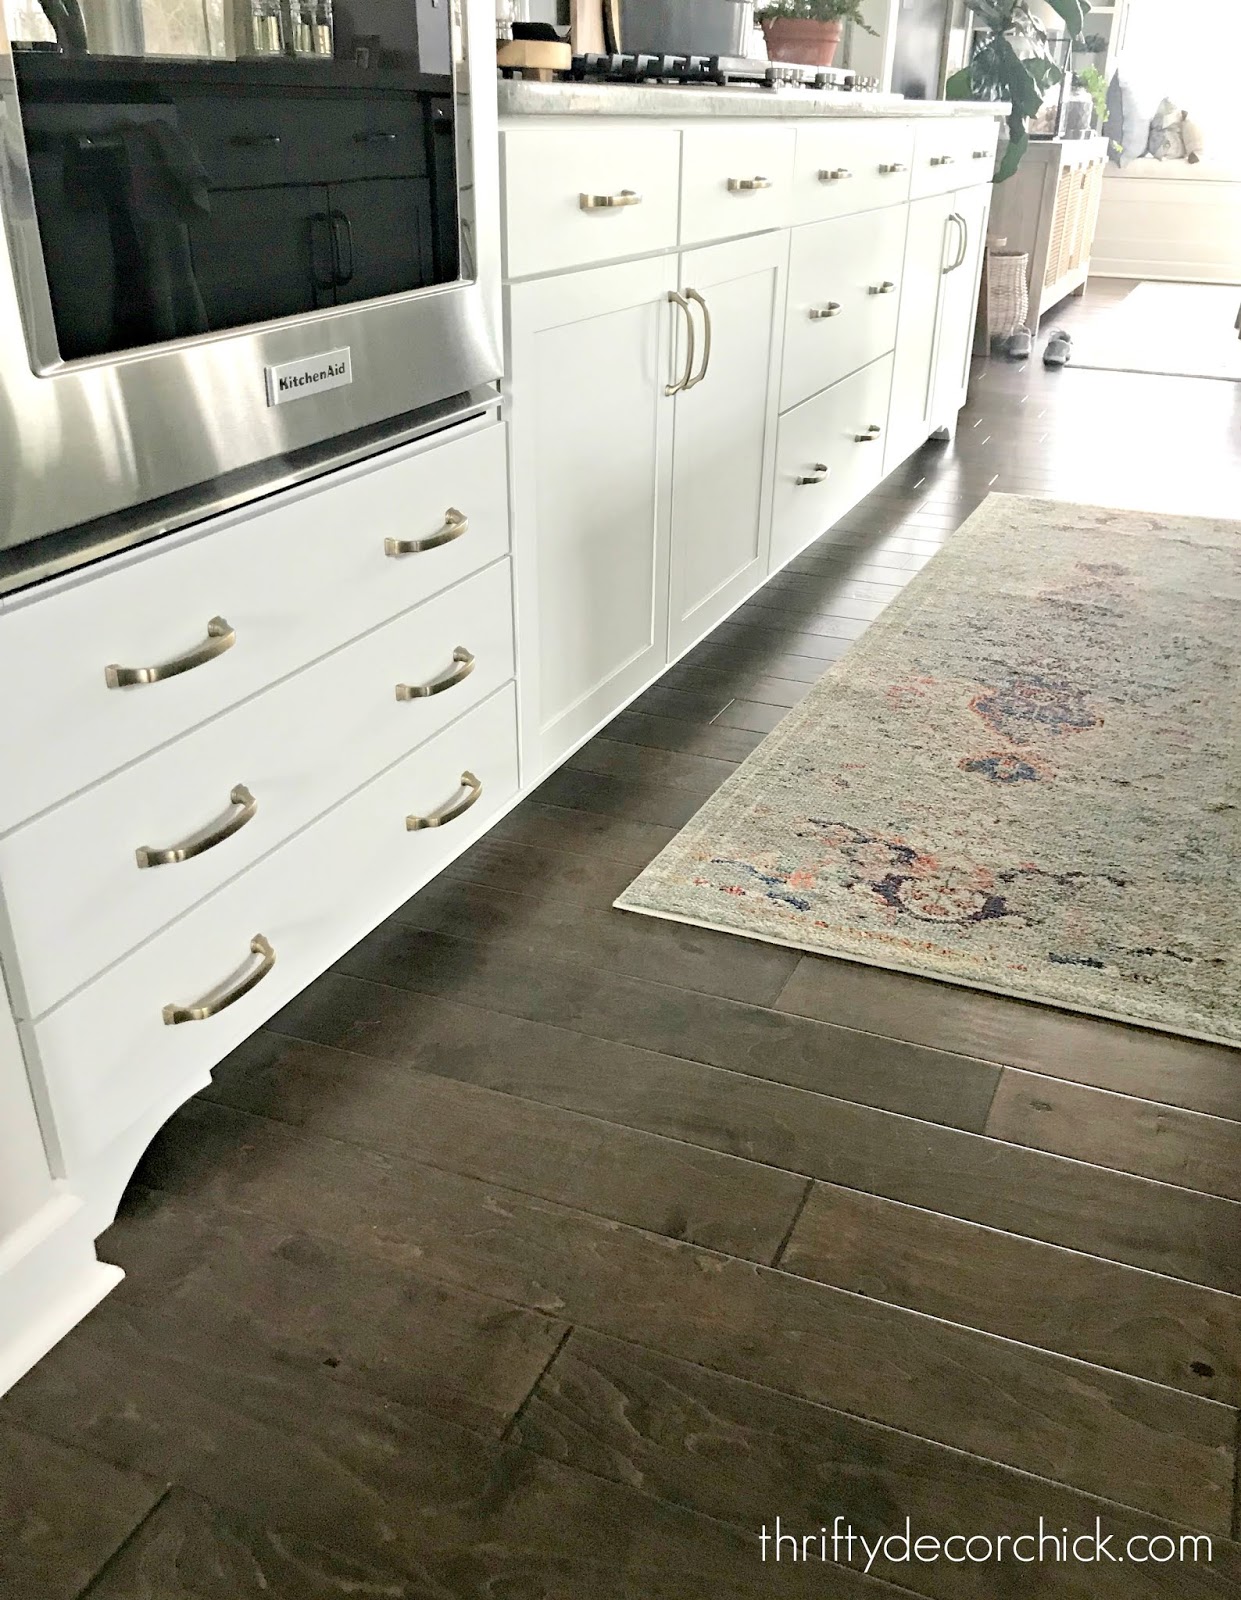

I researched a ton of kitchens that have cabinet feet and they range from this simpler look like this (just at the ends) to each cabinet having a set -- so anything goes. I just depends on your preference! When the budget allows we are adding cabinets where there shelves are -- you can see my plan at that link. Until then I'm having a blast with these smaller projects!: 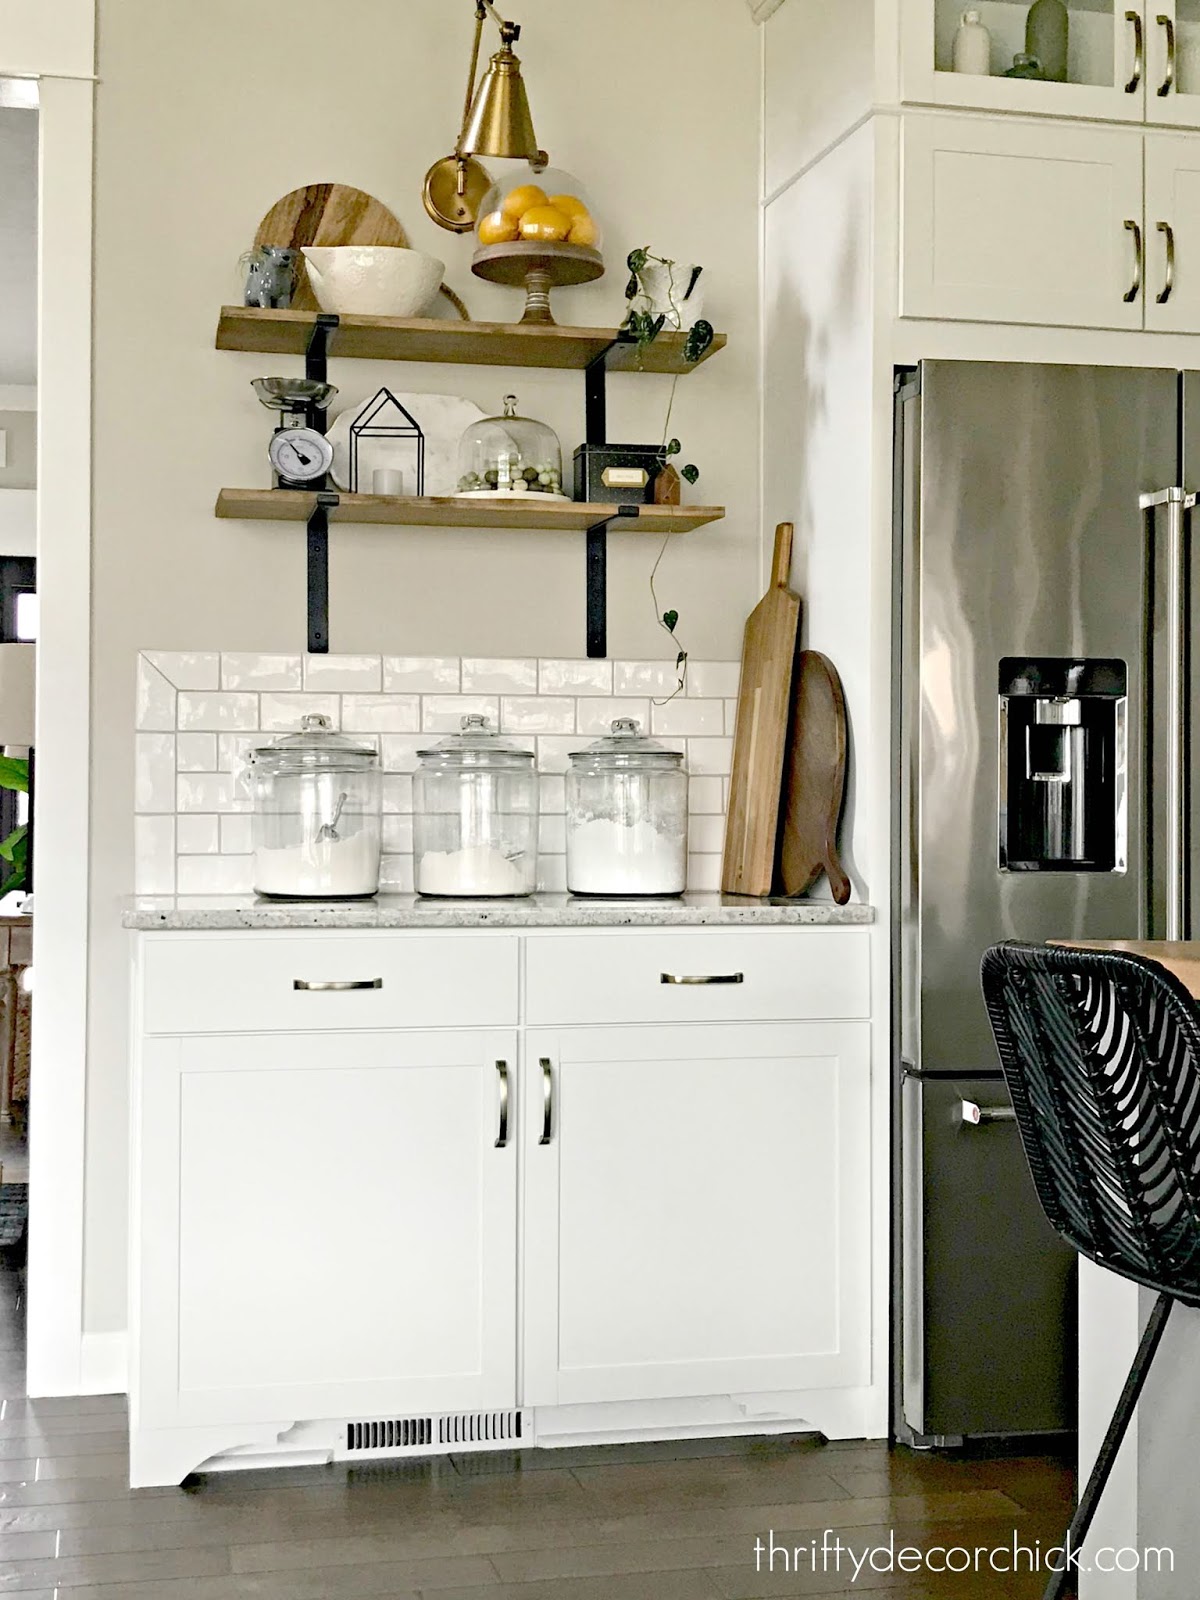
I only spent $40 on this project! If you are skilled with a jigsaw you could make them for even cheaper. I preferred the thickness of these to what I could do on my own. You could still do this if you have the standard toe kick at the end of your cabinets, but you'll either have a space behind them you'd see from the side or you'll want to add a back to them that closes off that area, if that makes sense. :) If you have any questions let me know! I just love these DIY cabinet feet and the softer touch it adds to our kitchen! There are a lot of hard lines in here and I wanted to add some pretty lines. **You can find our kitchen runner here! See more of our home here. To shop items in our home, click here! Never miss a post by signing up to get posts via email. Via https://www.thriftydecorchick.com/2019/04/diy-furniture-feet-for-basic-kitchen.html
Hey there! Hope you had a great weekend! I've been hard at work in our kitchen finishing up a few smaller projects. I LOVE our kitchen, but I've planned all along to add some small details that add some interest and character.
You know character is the name of my game! My goal for the past 15+ years of home ownership has been to add custom touches to our homes. :)
I started out with the island makeover I shared last week. We LOVE it! This one is a quick project that I never had to address in our old kitchen makeover because we didn't have any exposed cabinet ends:
Basic cabinet ends don't bother me -- but I do see them as an opportunity to make the kitchen feel more custom!
I considered a bunch of different looks, but in the end went with the simplest design. My friend Jenny shared a bunch of great options for dressing up the ends of cabinets here.
First I had to remove all of the trim along the side -- the quarter round, baseboard on the wall and the trim along the back of the cabinet. I used a pry bar and my hammer to pull those off.
Because the cabinets have a small "lip" on the front, I needed to make everything even so I could add the trim on top. Most cabinets will have that face part that will make things uneven on the side. I had a piece of luan cut to the size I needed and then I nailed it on to the cabinet with my nail gun:

When I redid our kitchen island, I kept the old trim I removed to use on this project.
I had to buy a couple new 1/4x3 pieces of lattice (I find this size at Menard's), but most of them were from the old island design:

I created a very simple board and batten look on the ends. Two on the sides first (so there was a clean look along the front) straight to the floor. Then the two pieces on top and bottom, and then the middle one.
You could do anything here! Beadboard would be lovely. I could have gone with a planked look like the island, but didn't want to repeat it too much.
I started painting it with white paint and then I realized our white cabinets are not bright white (which I expected) -- so I took a door to the paint store and had it color matched.
This might be my new favorite white!:

It's such a lovely, creamy white. I love it! I sanded lightly after each coat and did three coats total.
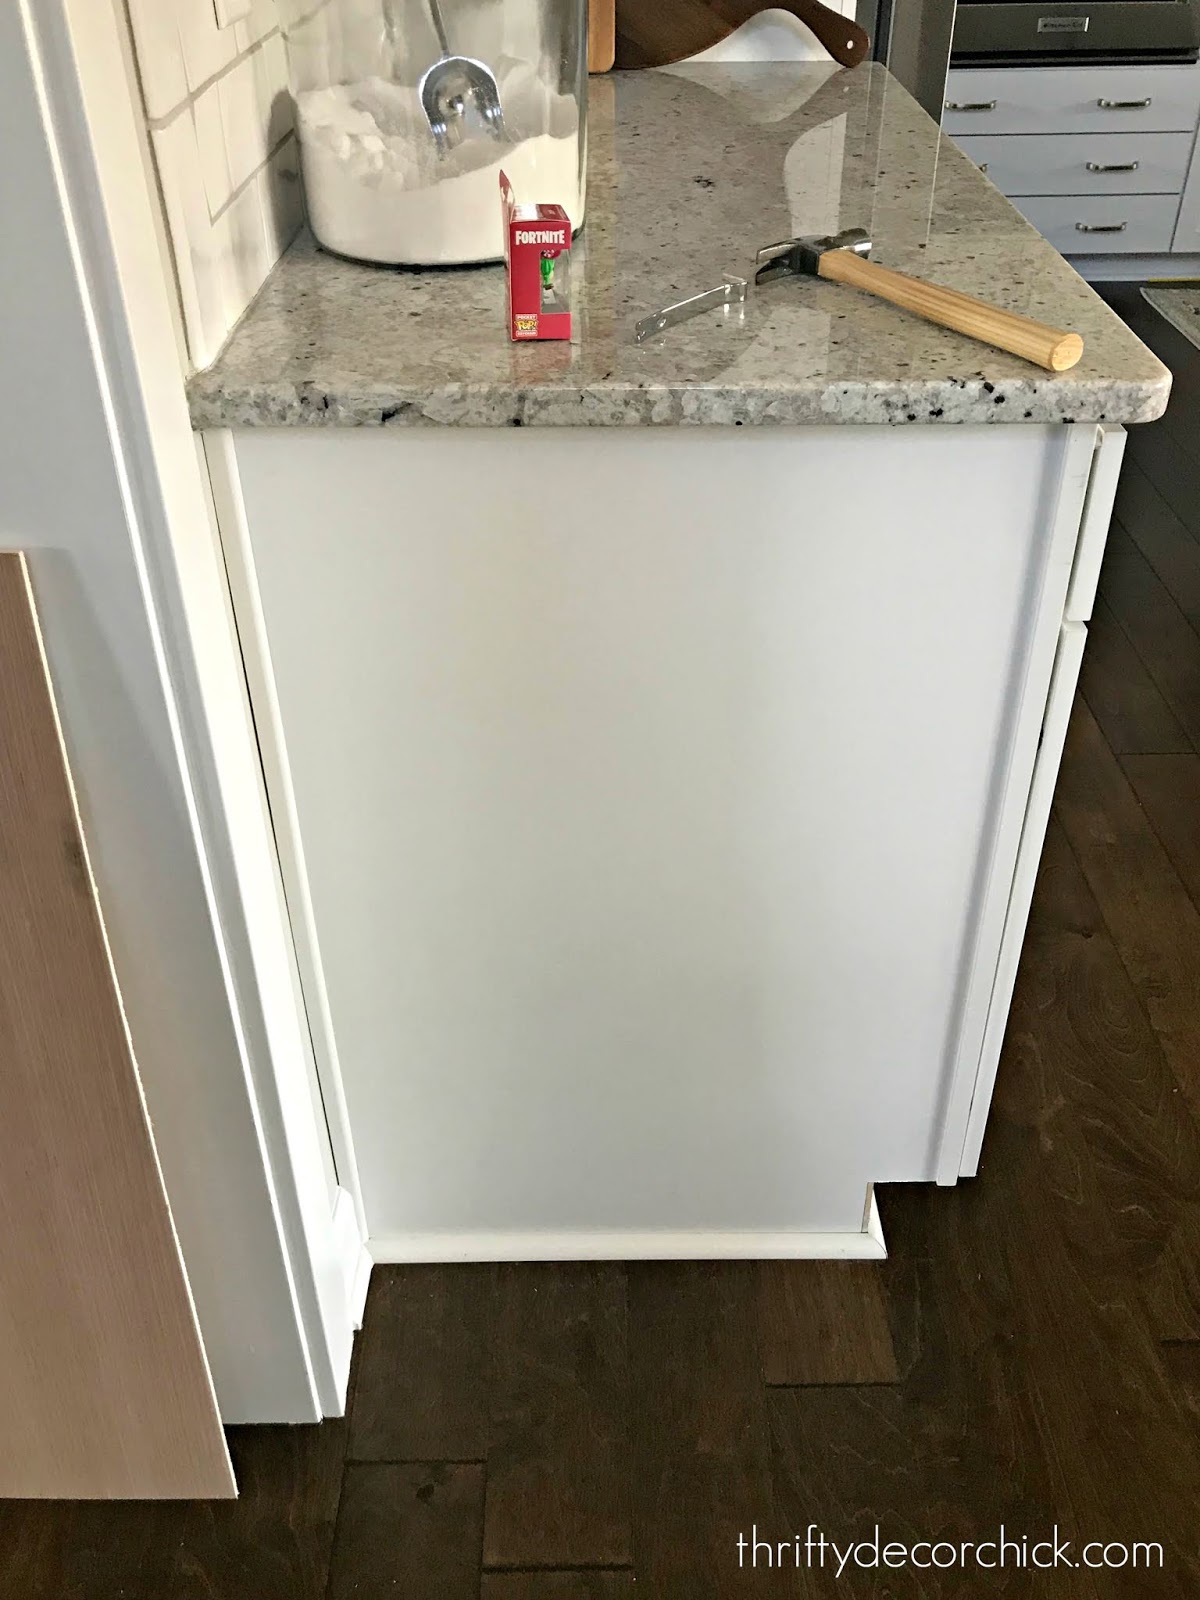
I'm only showing you this angle because I am finishing up another project I'll be sharing soon. ;)

I LOVE how it makes the cabinets look more custom! It's a pretty detail that's subtle -- again, not in your face. I don't know that anyone would even notice the change if they came in the house, but overall it adds a little something.
I love those projects -- when you tweak something for the better and it's subtle enough the space feels different, but a visitor wouldn't be able to put their finger on it:

Here's the only pic I could find of this view (before I did much to the kitchen):

And here it is now with the "new" island and DIY detail on the end of the cabinets:

And here's a before of the other side of our kitchen:
And with the new end added to the cabinet here (and that beautiful wallpaper!):

Yes, I covered most of this one up with the IKEA bracket and my cute kitchen stuff, but the end of the cabinet is still a beauty!
I did both exposed ends for about $30. The 4x8 luan is plenty for this small project, and I have a bunch leftover. I had some of the 1x3 trim and bought a couple more.
I don't count the paint because I'm using that for other projects in here. ;) More to come soon!
Have you tried a simple project like this in your home? I plan to do the same to the ends of our bathroom cabinets too. I can't wait to show you what's next!
See more of our home here. To shop items in our home, click here! Never miss a post by signing up to get posts via email. Via https://www.thriftydecorchick.com/2019/04/how-to-upgrade-end-of-your-builder.html |
