|
If you've read TDC for awhile, you know how much I love a good wall of built ins. I think they create so much character without spending a ton of money. Thing is, there's no need to build the whole thing from scratch. You can create a really custom look with basic, unfinished cabinets as your base for the project.
There's a little trick to it though! I have a go-to for almost all of the built ins and bookcases I've built over the years. Instead of actual bottom cabinets that you'd find in a kitchen or bathroom, I use the uppers only.
This is for a few reasons -- they don't have the drawers that most lowers have (which makes it look more kitchen-like), they are cheaper! and they don't take up nearly the space regular lower cabinets do. (Uppers are only 12 inches deep.)
The bonus is you can walk into almost any large hardware store and pick up what you need right there. These are the unfinished cabinets I usually use:

This post may contain affiliate links for your convenience.
See my policies and disclosure page for more information.
The other bonus is they come in a few different sizes -- so for most walls you can find a configuration that works and just line them up to create the base for bookcases.
You do have to do some prep to make them look custom -- the first step to making kitchen uppers look like built ins is raising them up a bit. If you just install them on the ground they won't look as built in.
I use 1x4s and nail them into the sides around the bottom of the cabinets:
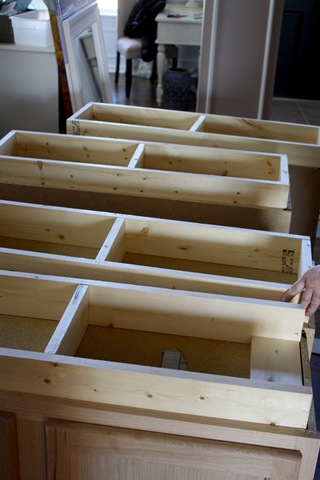
Actually, the size of the wood will depend on the height of your current baseboards (or the height of new ones you may be installing):

The center piece is for added support. To make these look custom I wrap the bottom with baseboards and this base pulls them up off the ground so that's possible. You can read more about the steps for cabinet installation for built ins here. That post explains everything in more detail.
When you add the base and then some simple trim on the ends to dress it up, it gives it all a much more sophisticated look:
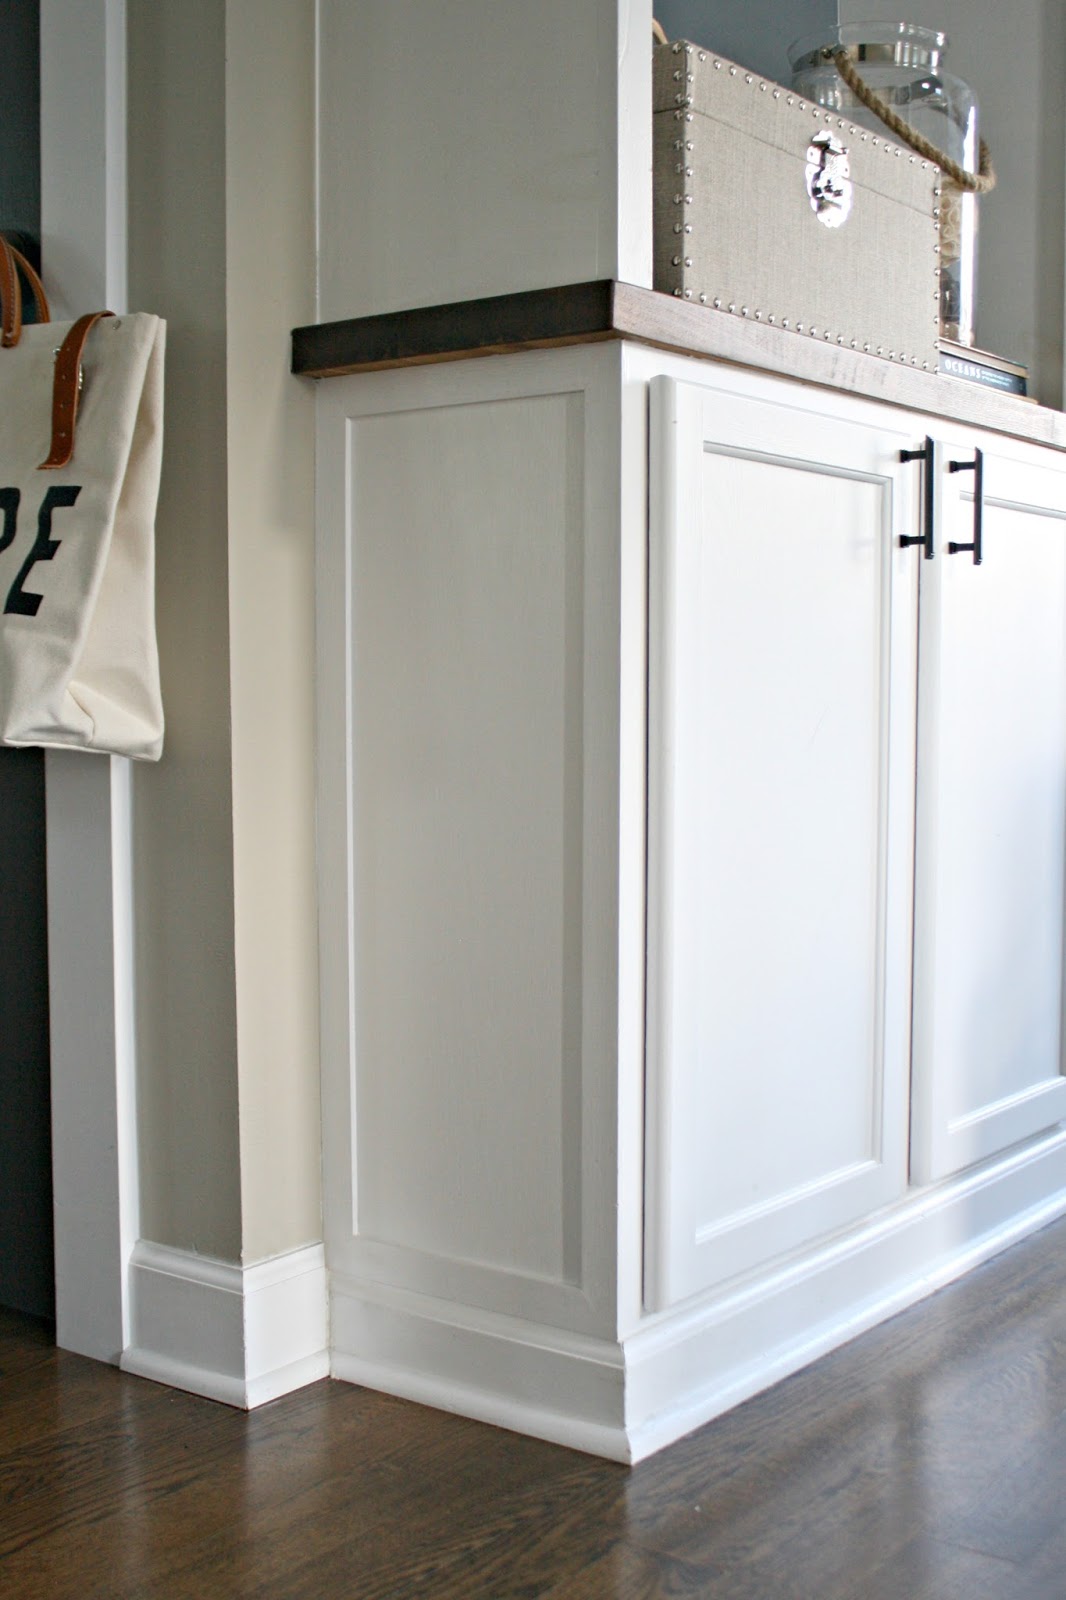
Of course the butcher block counter offers some nice contrast and makes it feel even more custom:
I added a wall of upper cabinets in our old loft that gave me SO much storage space for craft and office supplies:
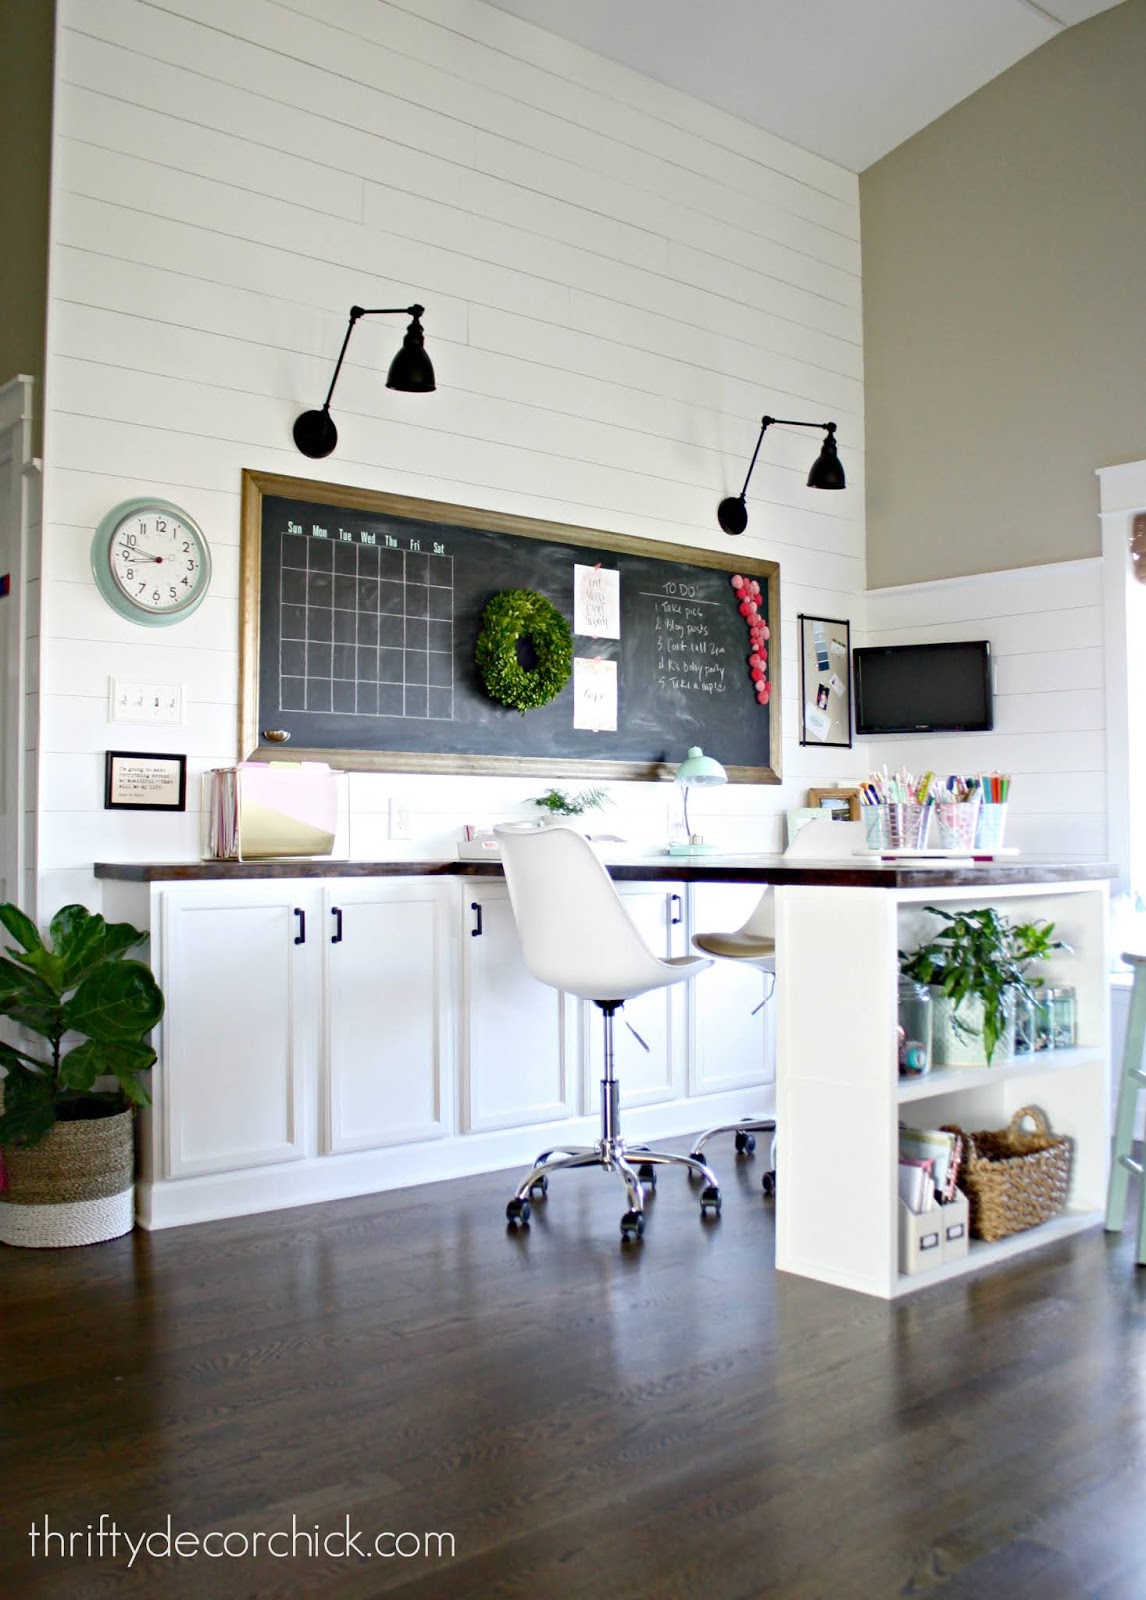

You can see more of that craft room/office/loft space here!
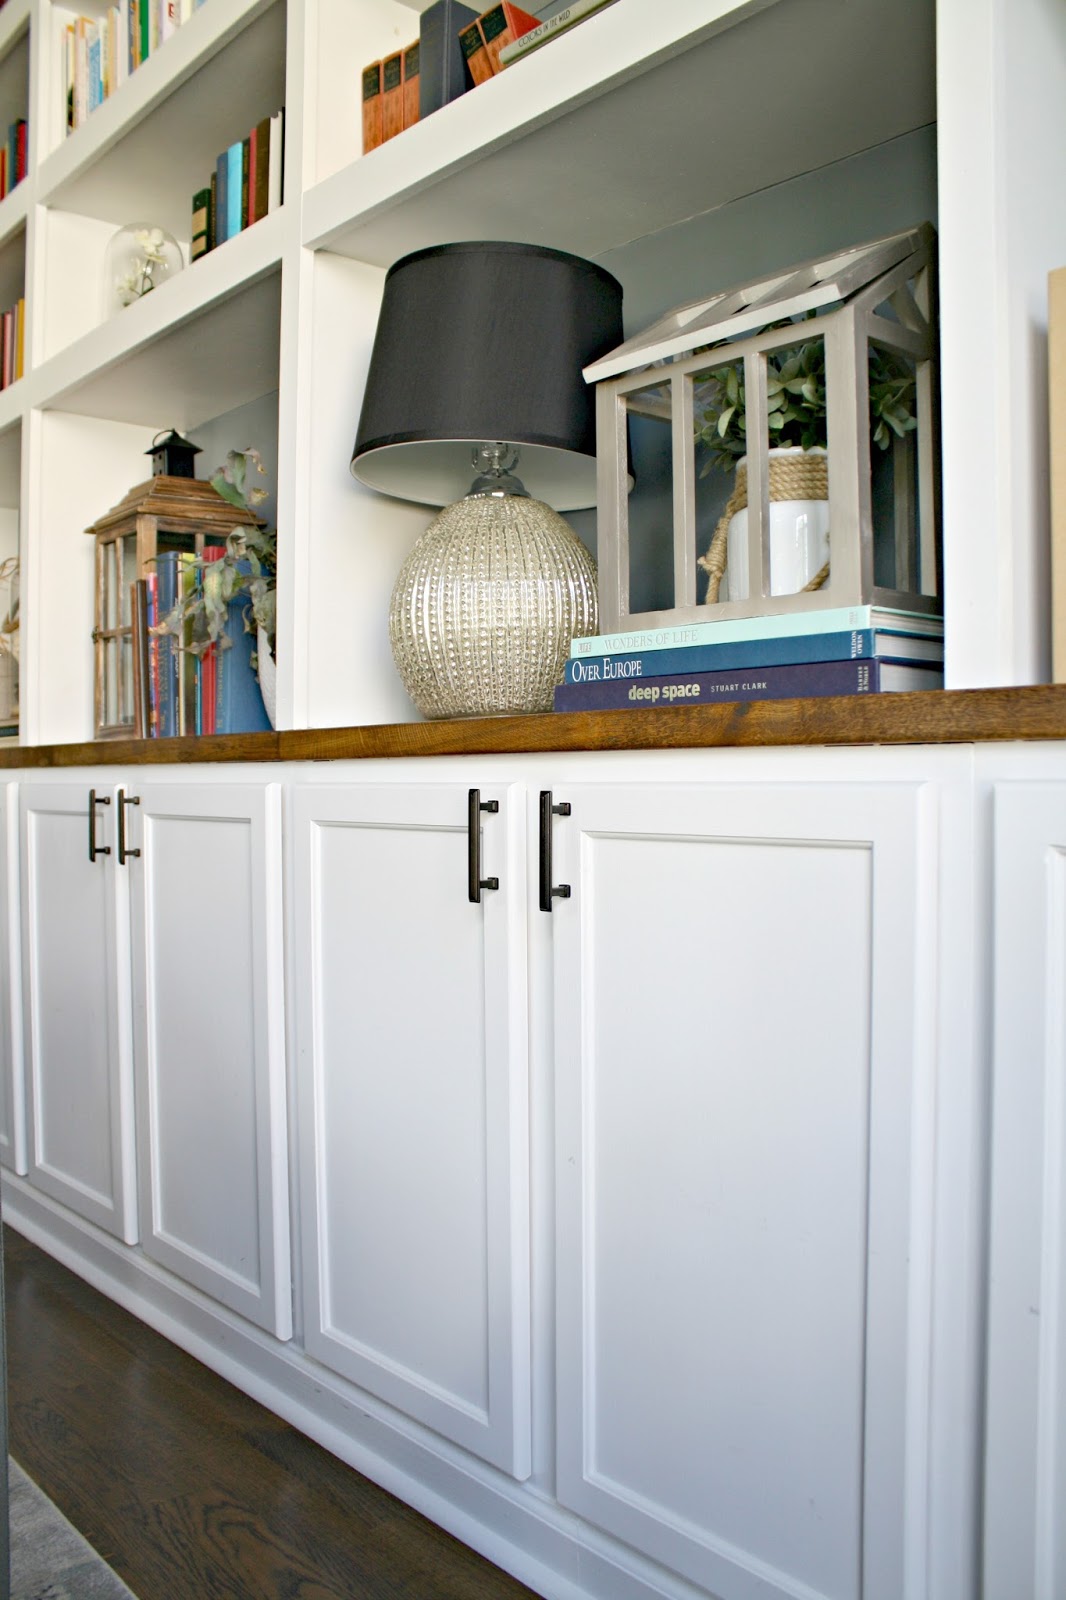
This built in was in our dining room turned library and I've shared it a million times, I know. But we easily saved a couple grand by doing this project ourselves. The inexpensive cabinets make it a really affordable project!:

It is truly the best combo of form and function -- those cabinets are only 12 inches deep but they hold a ton! (Think of how much they hold in your kitchen.) I used the upper cabinets that go over a fridge for our mud room bench: 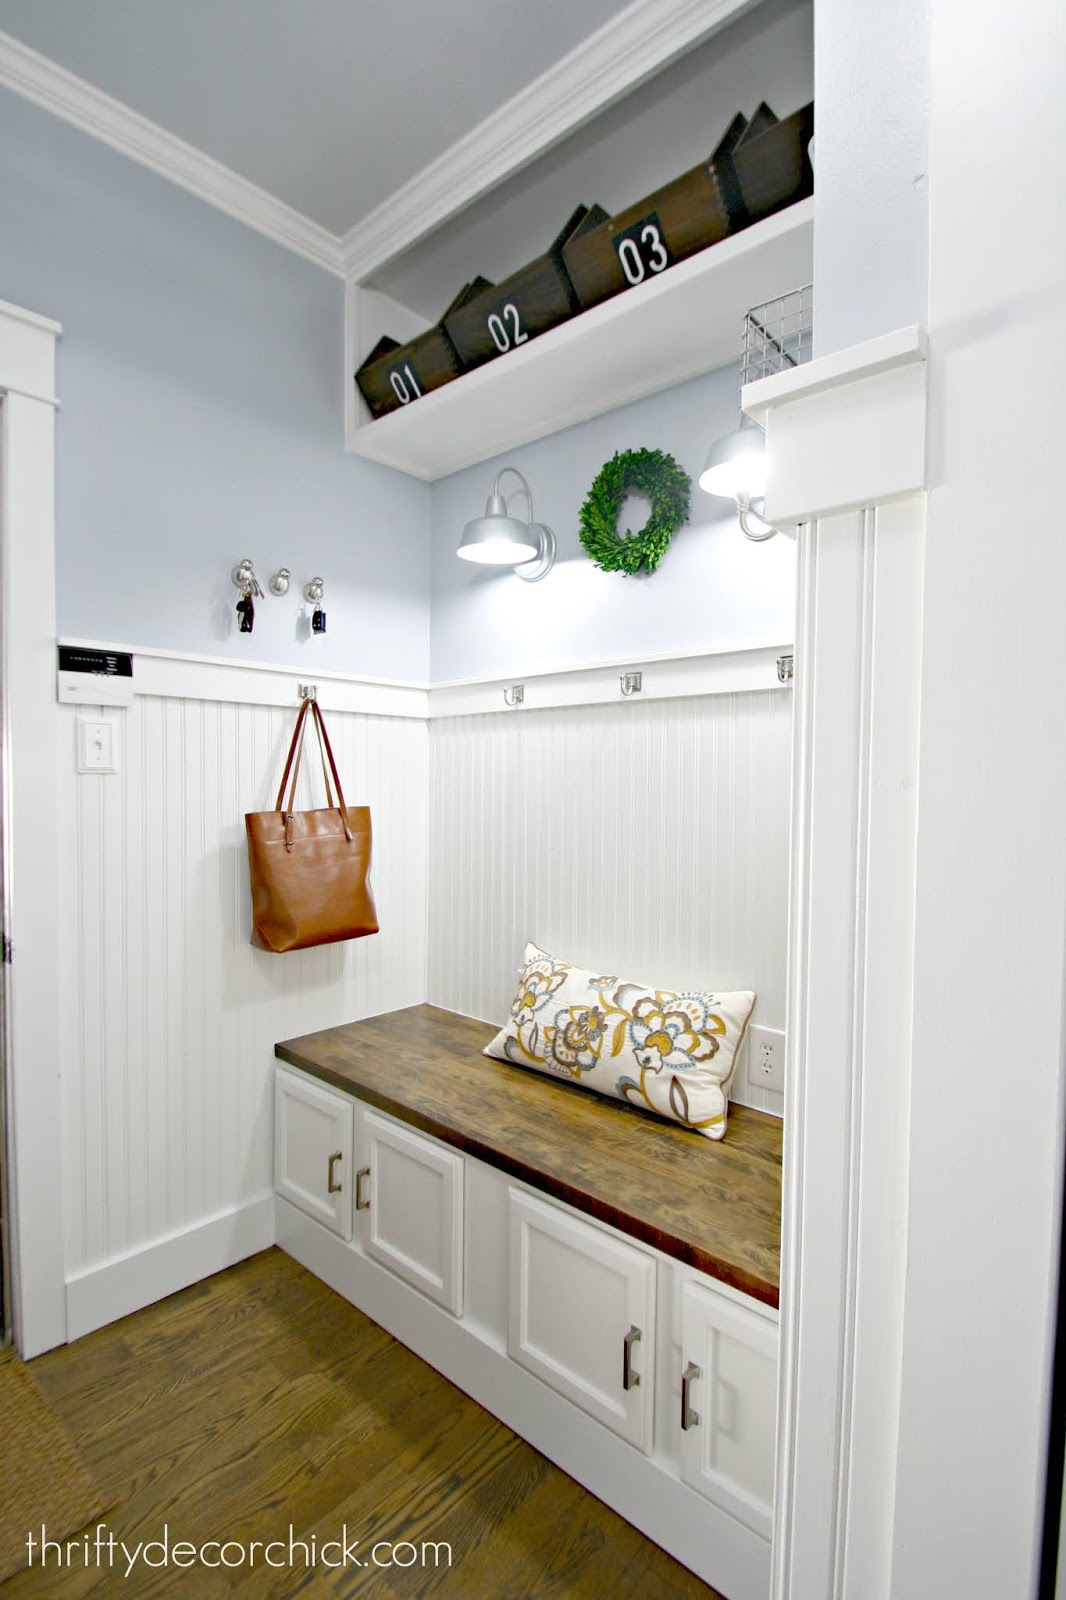
And my first project with these was another project I did with my Dad for my son's bedroom:

I have Dad to thank for this idea -- he's the one who thought of it for this room and I've kind of taken off with it over the years. :)
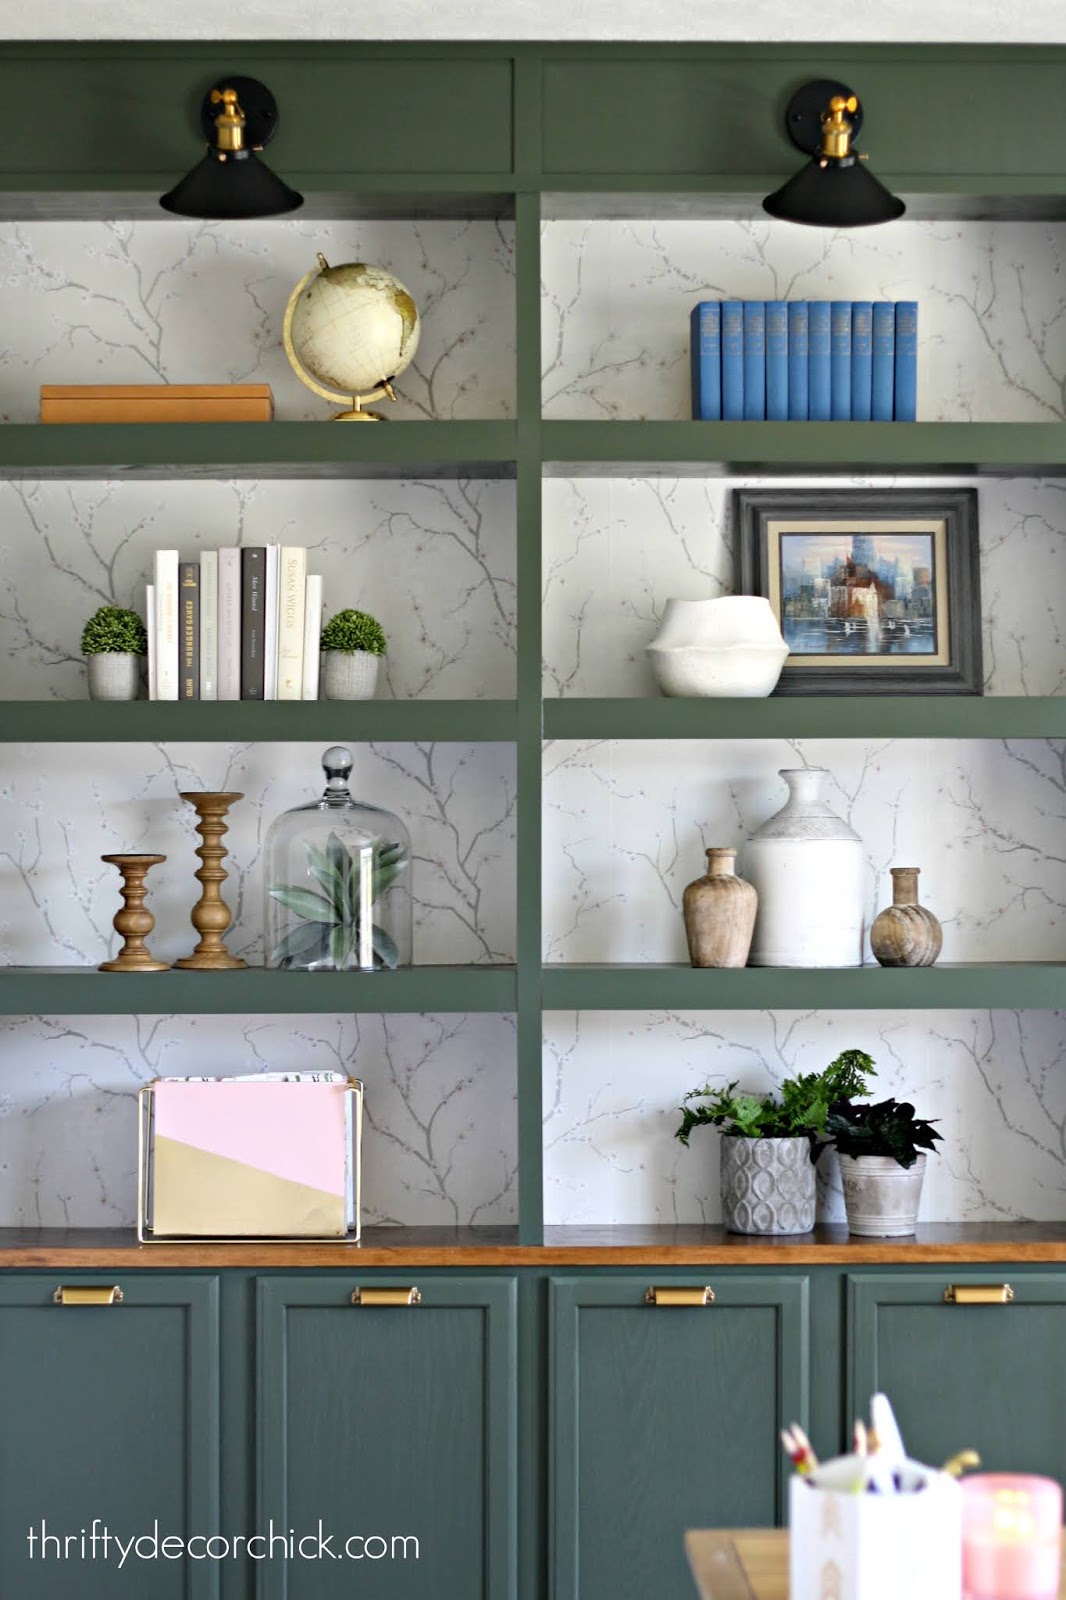
I used those same skinny, upper cabinets for the bases of my office built ins in our new house:
Have you tried this trick to build custom built ins or bookcases? I'm thrilled with how they look in our home and I'm sure I'll add more in the future!
You can shop some of the items from these rooms here:

See more of our home here. To shop items in our home, click here! Never miss a post by signing up to get posts via email.
Via https://www.thriftydecorchick.com/2016/06/how-to-create-custom-built-ins-with.html
0 Comments
Hello my friends! I've been excited to share this project with you! Installing these outdoor lights have been on my list since we moved in nearly three years ago.
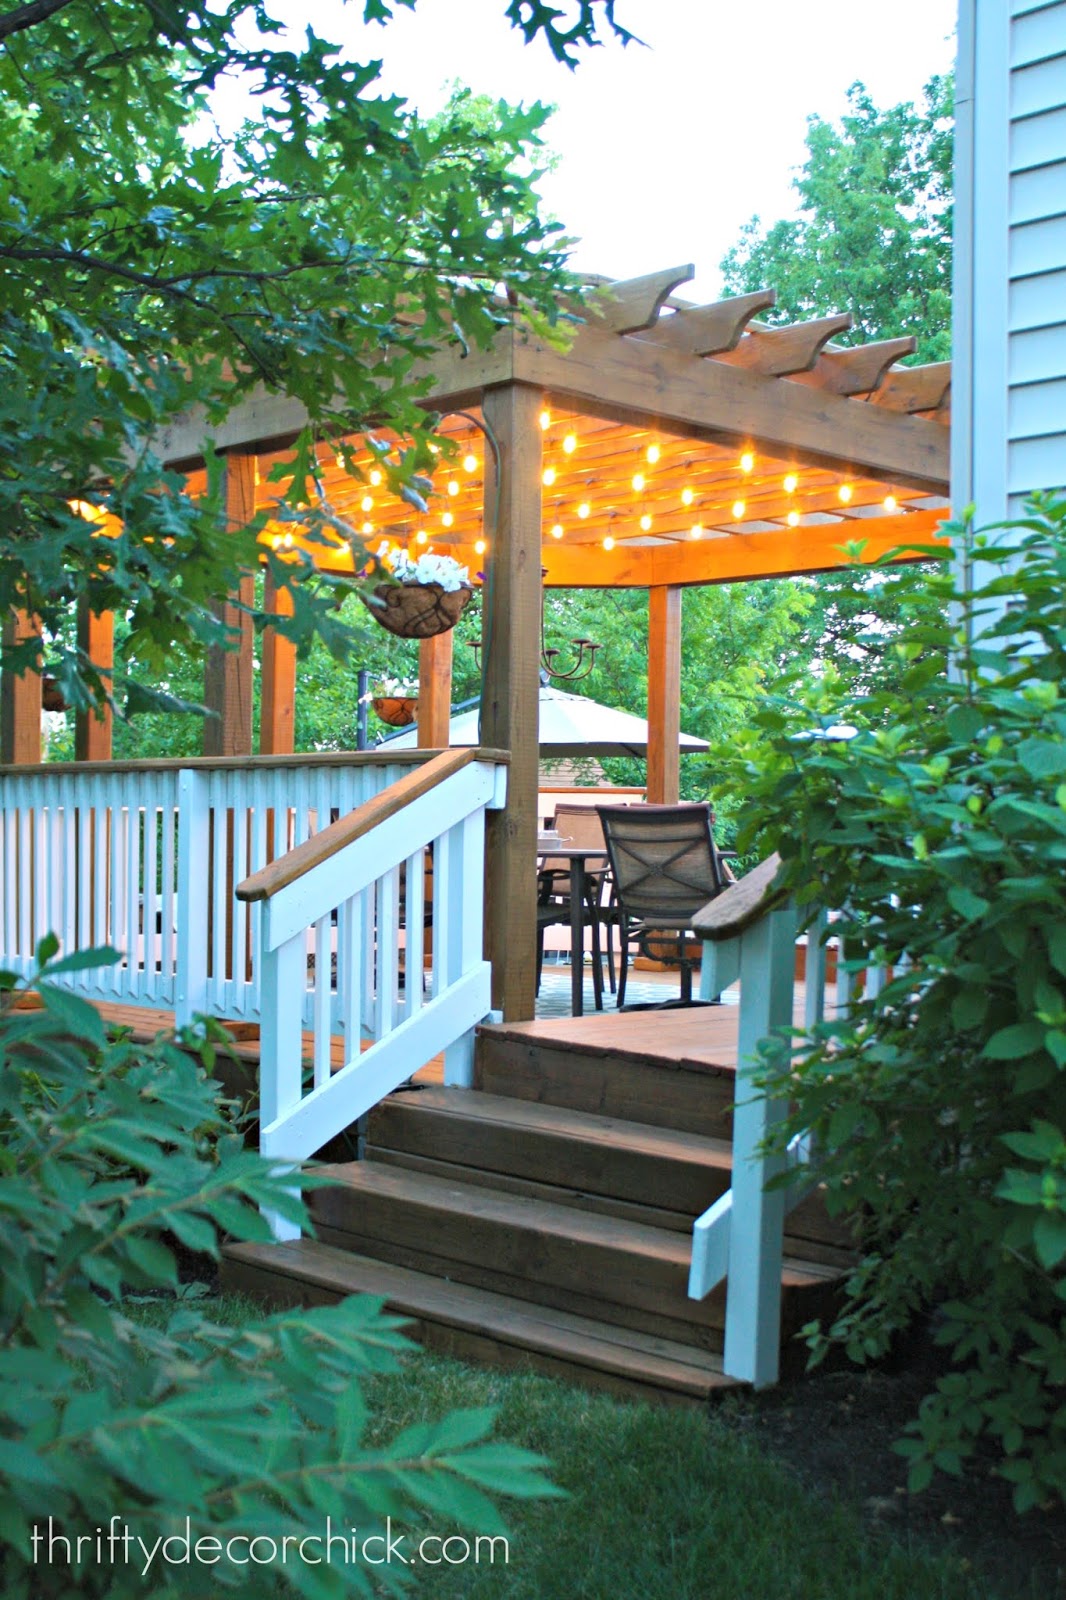
We had outdoor cafe lights hanging from the pergola at the old house:
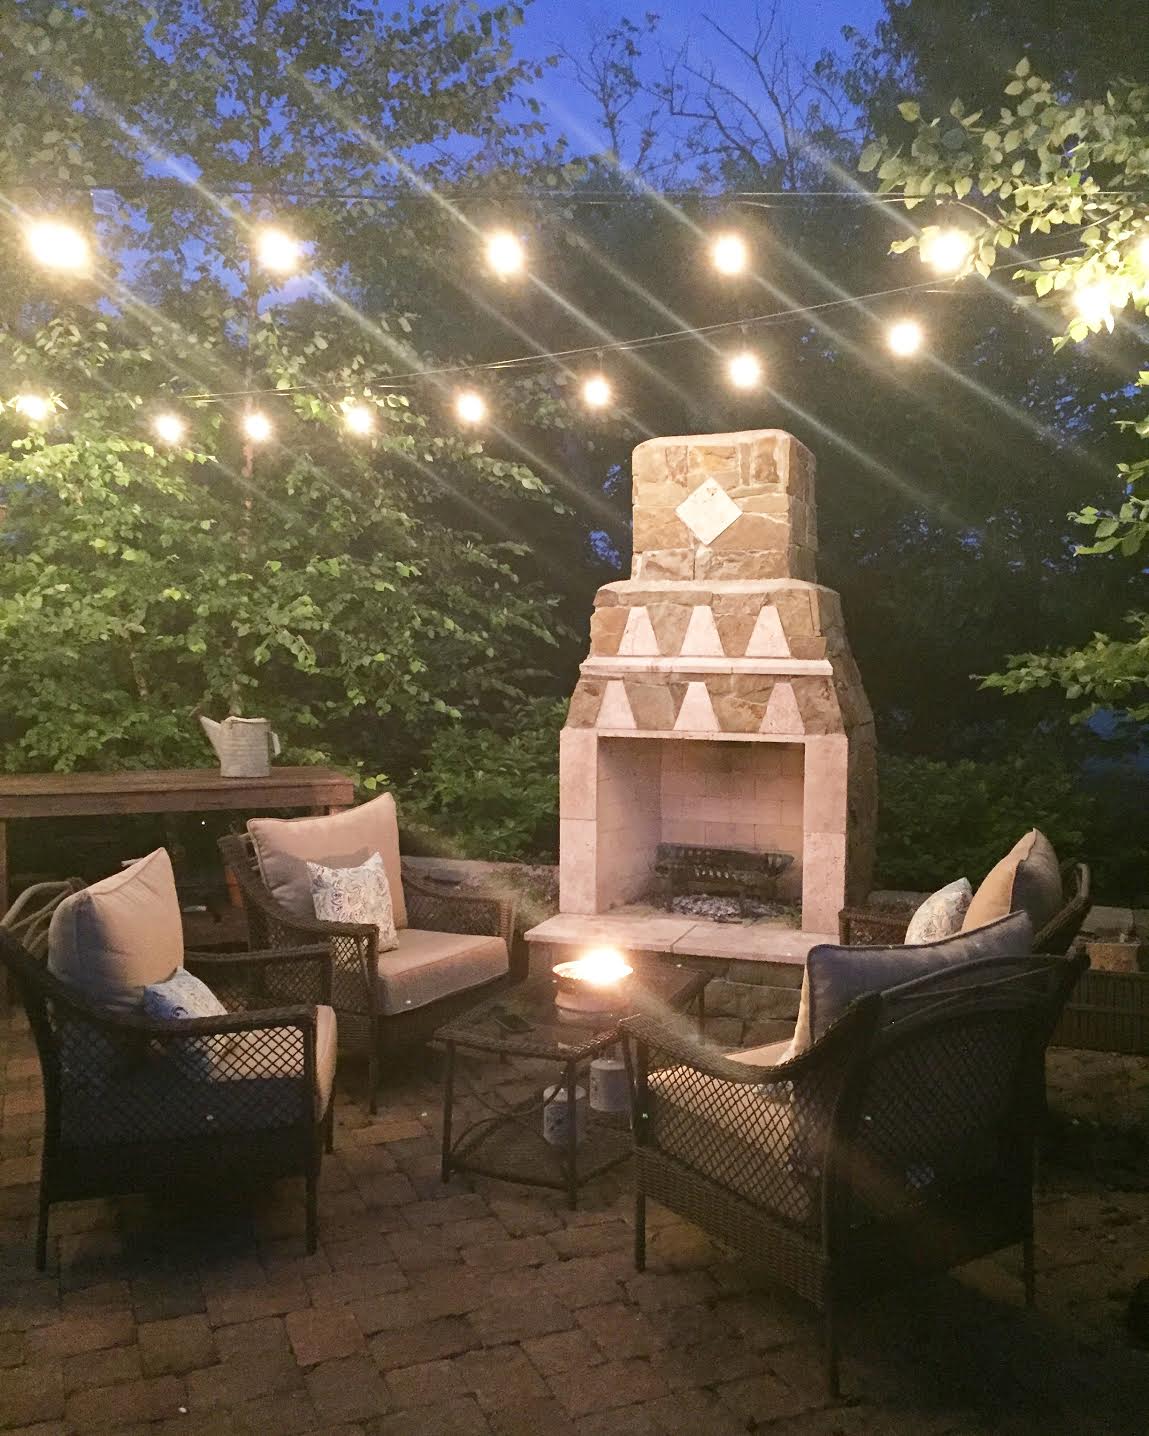
And then later had them hung from the trees over the back patio:
This post may contain affiliate links for your convenience.
See my policies and disclosure page for more information.
We love these outdoor string lights in particular. They are sturdy, commercial-grade strands that hold up to everything. We kept them up in rain, wind and snow and they still look/work great today.
It helped that we had trees big enough to hold the weight of these -- they are heavier than your average outdoor lights, but again...they last forever.
Knowing we were going to hang them over the new patio, I grabbed a couple boxes of the lights last year. I was really hoping to get them up last fall, but it didn't happen:
Because we don't have trees around the patio yet (and it would be years before they'd be strong enough to hold the light strands), we had to figure out a different option.
I've been researching this for a year because it was so important for this to a.) be functional, b.) look good and c.) not cost a fortune. I gathered info from a bunch of tutorials I found and then we had to make some more changes at the end I'll share with you. (Hint: the tutorials we found didn't work for the heavier lights!)
Let's get started! I'll list ALL of the items you'll need at the end of the post, but here are the step by step instructions.
Step 1: Gather the planters you'd like to use.
Some of the tutorials I found used wood wine barrel planters -- but the ones I found either had large holes already drilled into the bottom or they weren't super sturdy. I was worried the concrete would ooze out between the slats of wood.
I bought three plastic planters for this project awhile back, but I decided they were too tall and not wide -- you want something that has a wide base. We returned those and got these plastic barrel planters instead:

They still have that wine barrel look but should hold up much better!
I initially had three planters, but we ended up using two when we figured out how many feet of lights we had.
Step 2: Secure the poles in the planters.
Next, we grabbed eight foot 4x4's for each planter. The quick set cement set really fast -- but this next step was helpful. I installed "L" brackets onto the bottom of each 4x4 and then screwed them into the bottom of the planters before adding the cement:
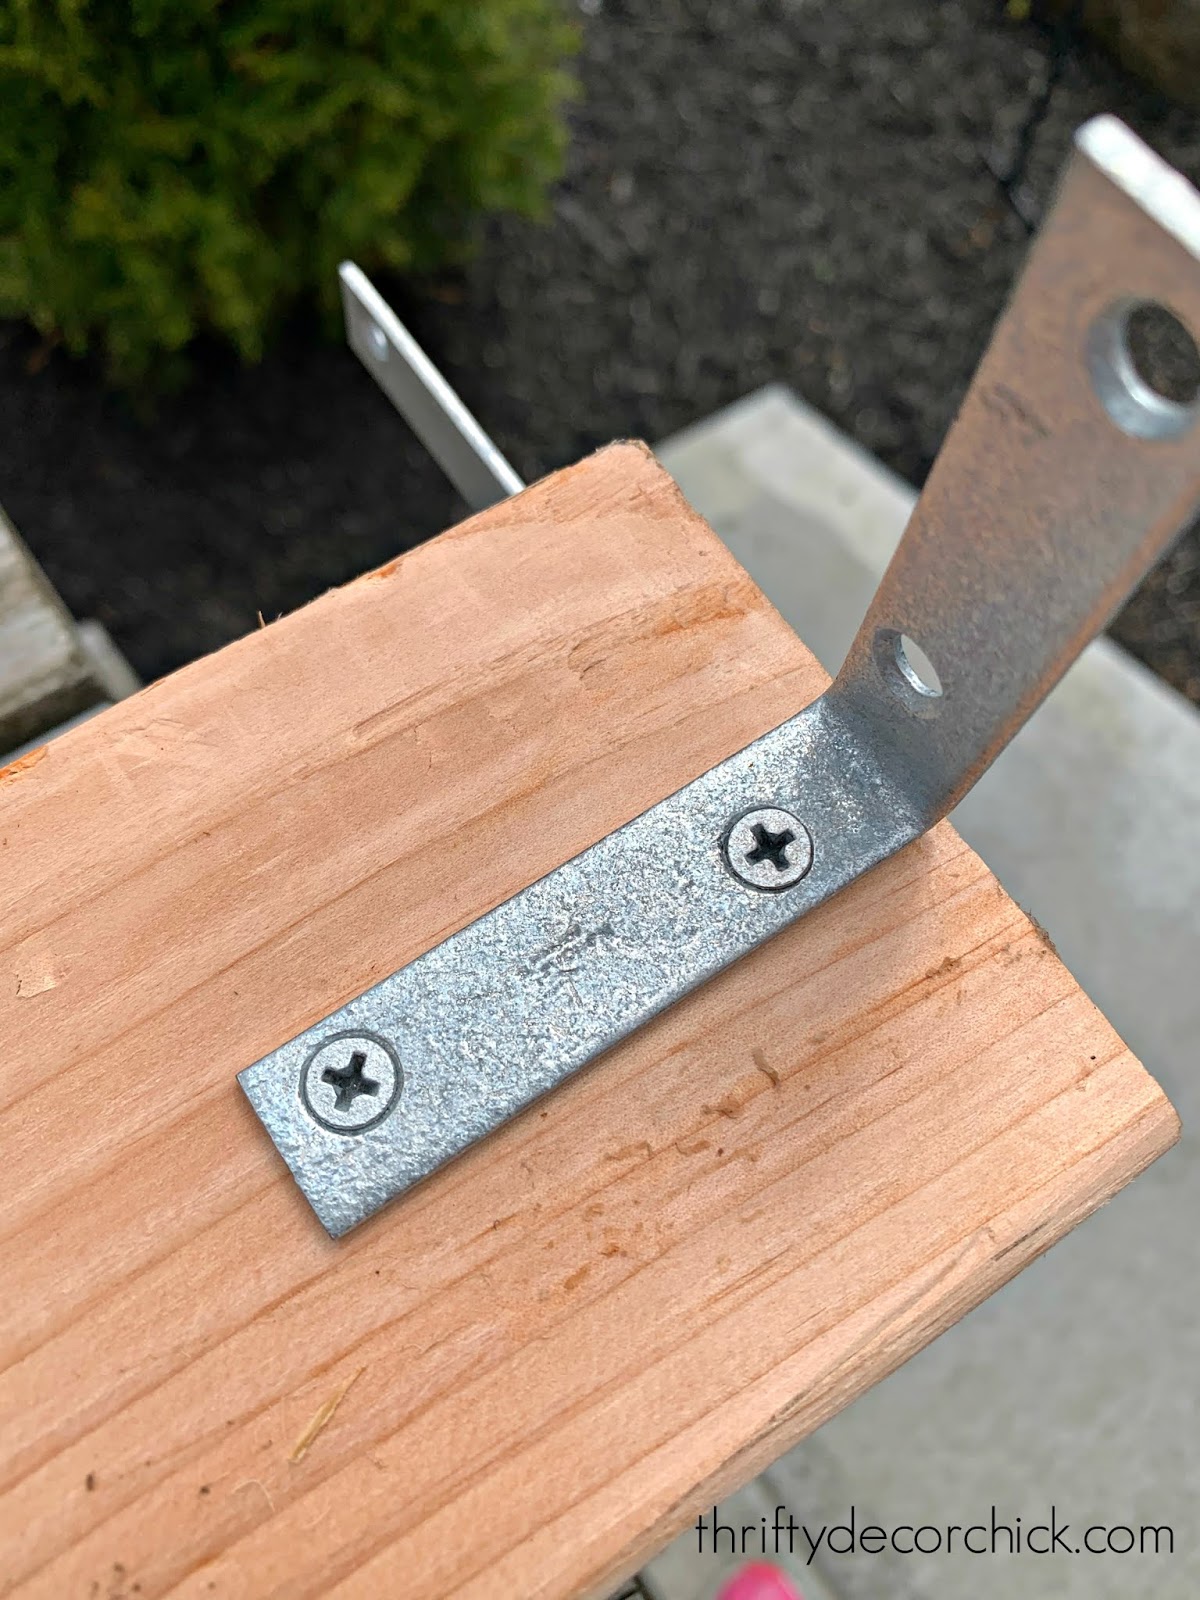
This will not keep them super secure (at least with plastic planters), so you can't let go just yet -- but they do help!
I've never use cement but it was surprisingly easy! We used two 50 pound bags of Quikrete for each planter:

We added and mixed one bag at a time -- you add the cement and then spray water. You don't need a ton of water -- just mix as well as possible so there's no dry cement left:
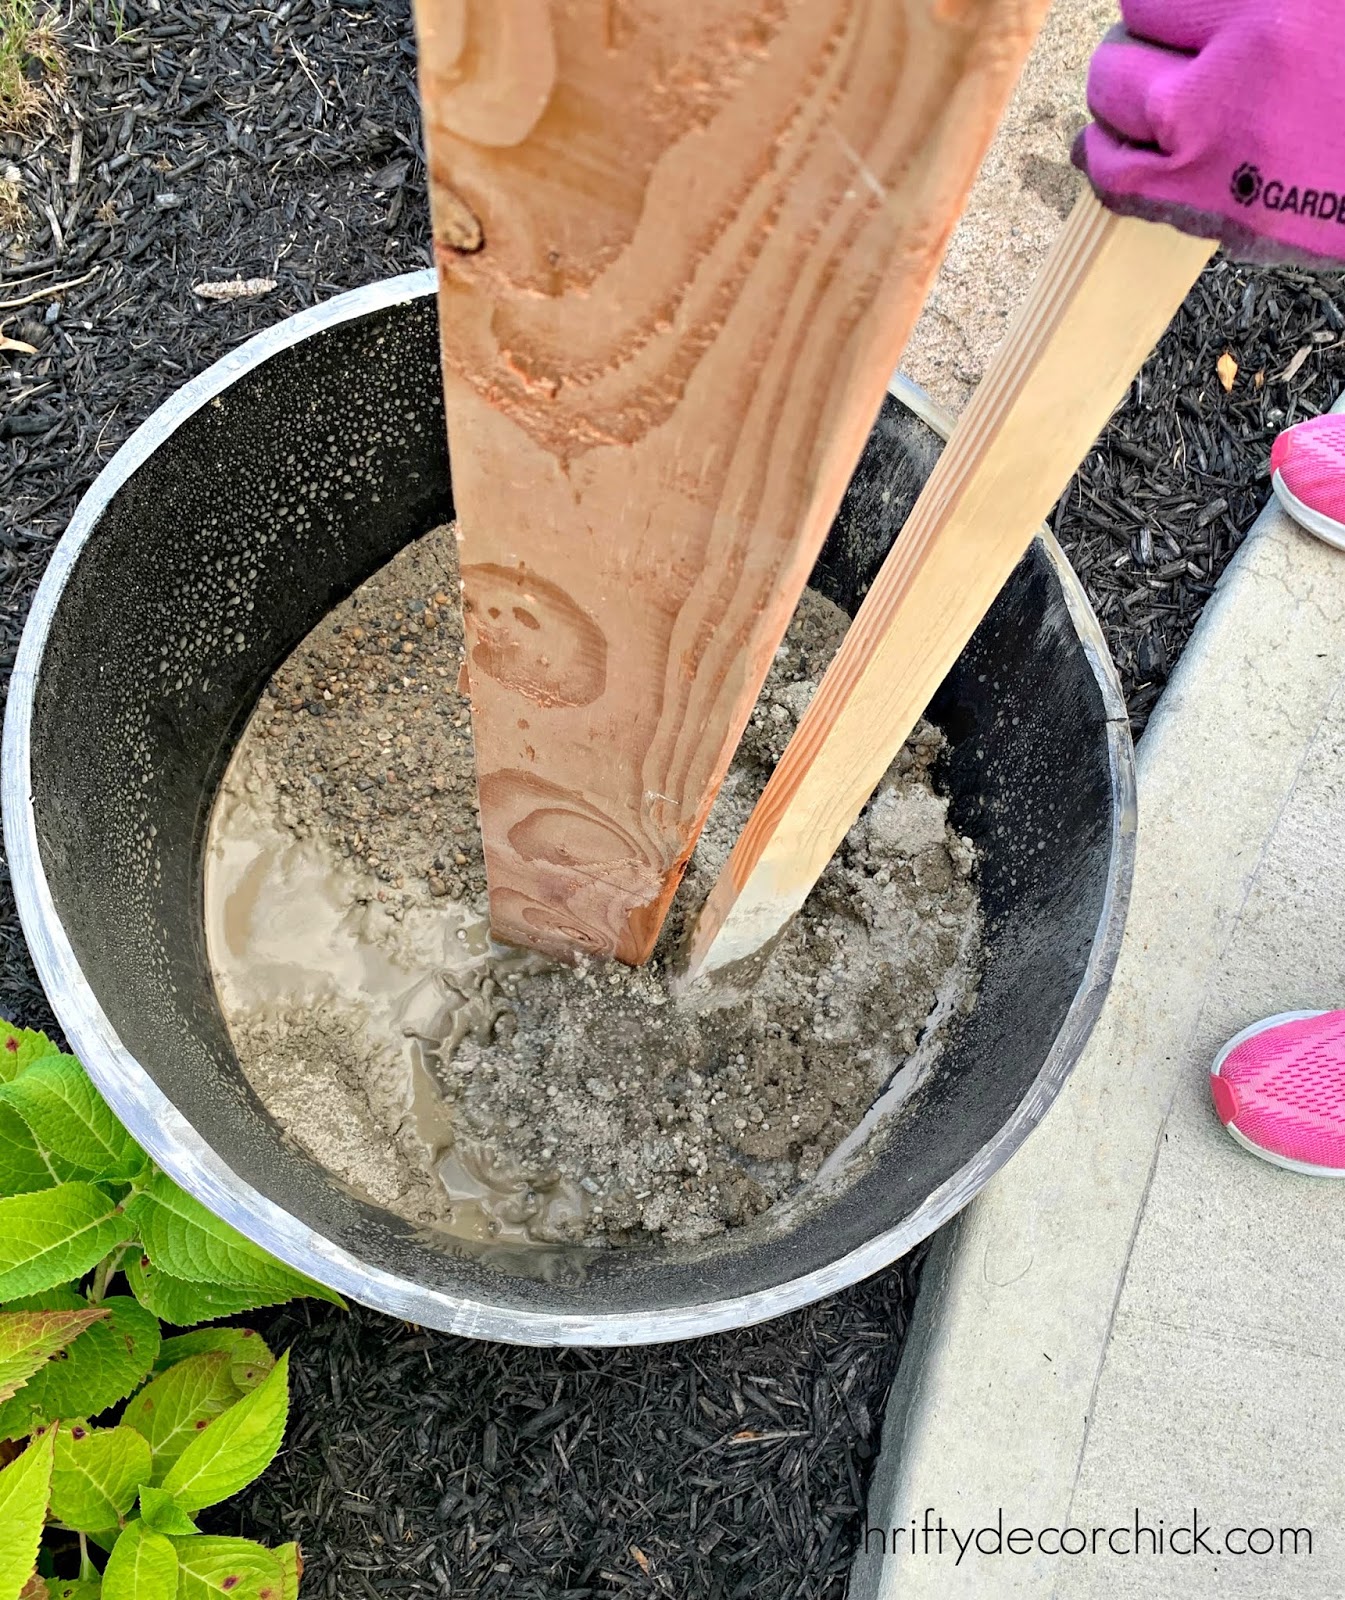
For the first planter it took three of us because I was worried the 4x4 wouldn't hold at first. But the cement sets up so fast, it just took two of us for the second one.
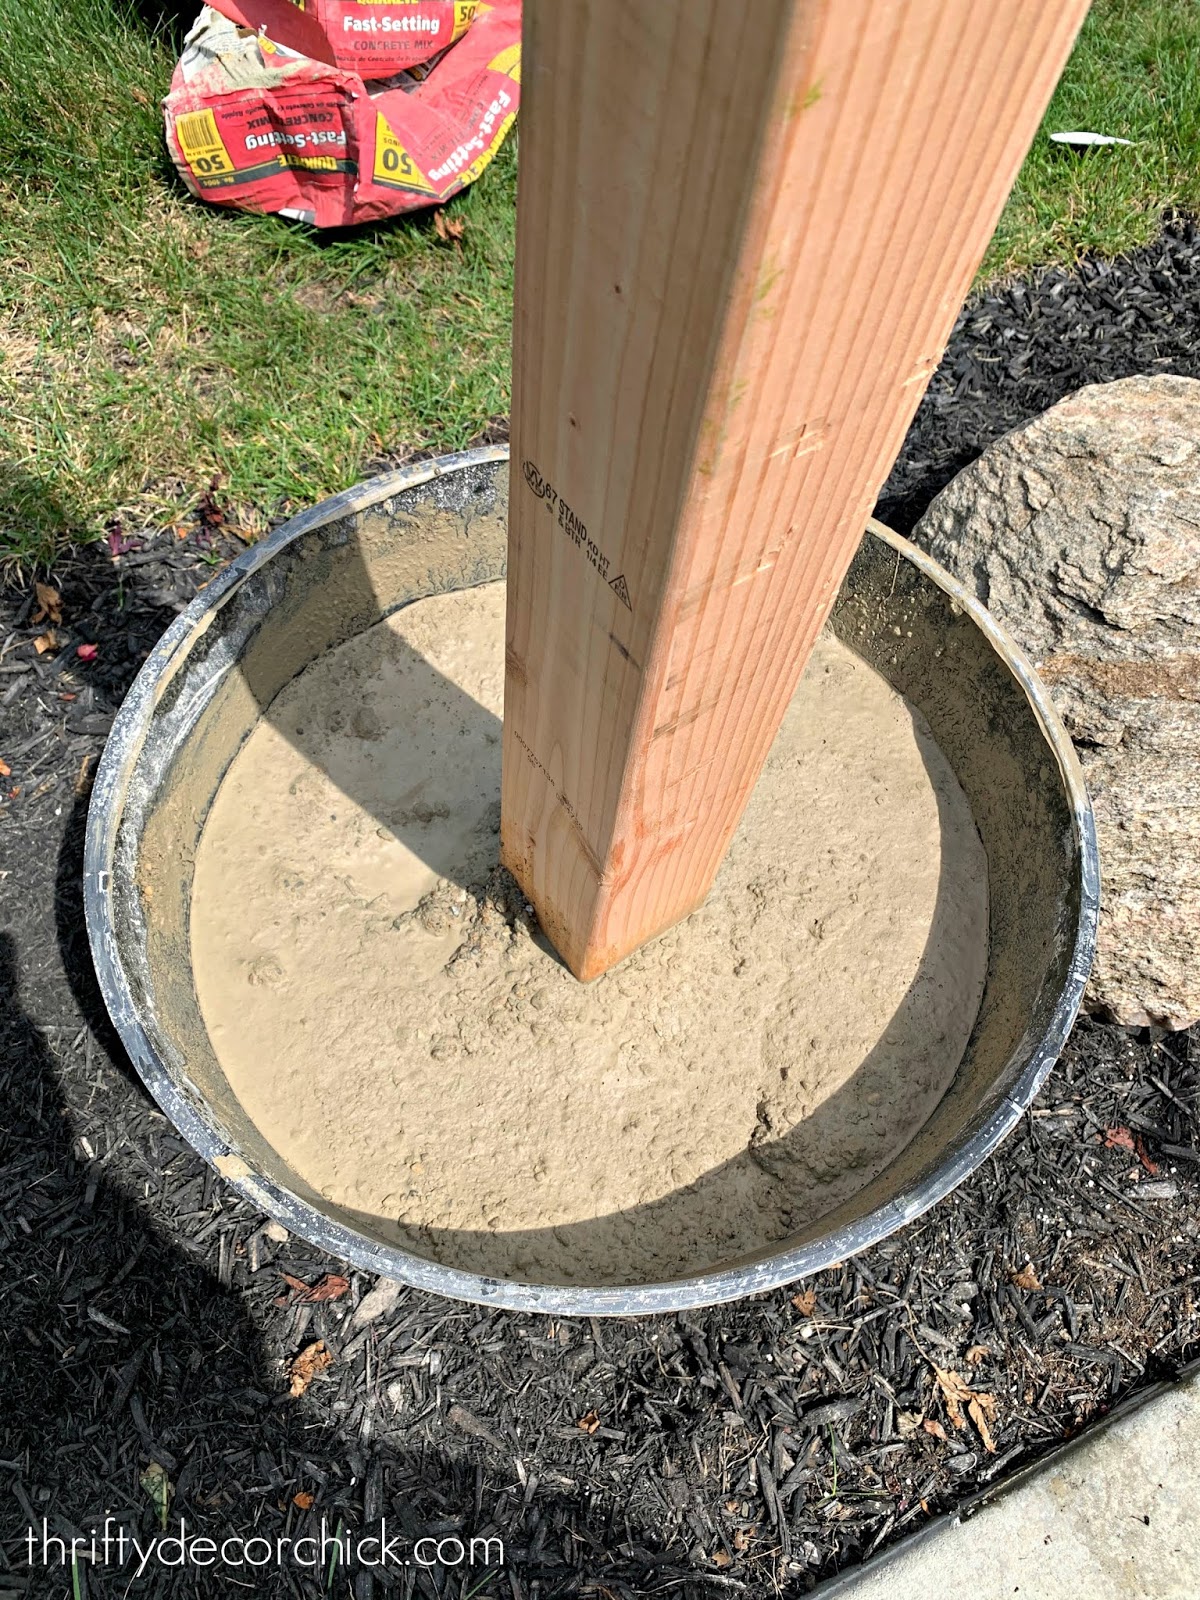
Use a level to check the 4x4 during this process. It doesn't have to be perfectly straight -- remember you can adjust the mulch or dirt under the planters to help make the poles straight.
Within 15-20 minutes it wasn't budging:
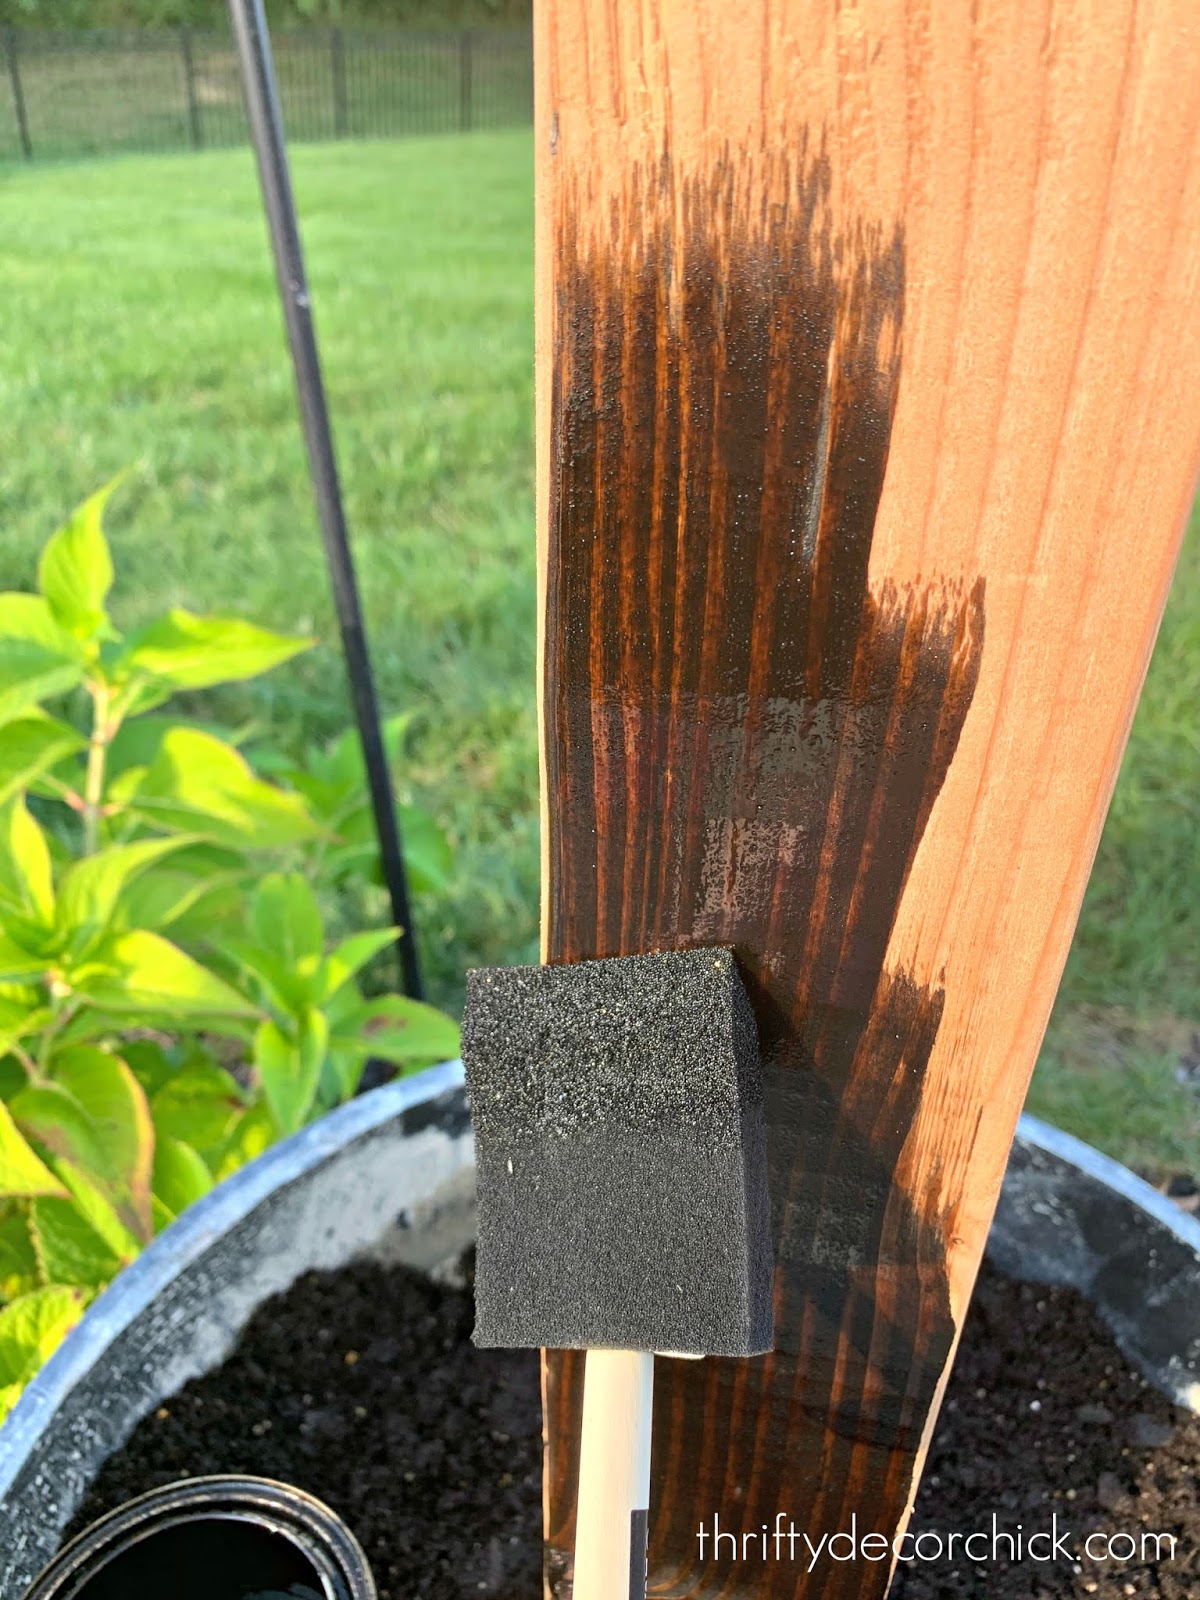
You can stain or paint the 4x4's before setting them in the cement, but I'm too impatient for that. I wanted to get them up! It was easy to get them stained after the fact:
Step three: Secure the planters into the ground (if needed).
Soooo this part went really well and was way easier than we thought it would be. That is, until we started pulling on the 4x4s a bit...and we realized there was no way these wouldn't tip over from the weight of the lights. (Even with 100 pounds of cement!)
The lights aren't CRAZY heavy...but we were draping them across the patio, so the distance adds some tension. We had our handyman come out to take a look (he was helping me hang the lights anyway) and he came up with a brilliant solution.
He found long metal steel flats at the hardware store that he pounded into the ground and then secured into the cement portion of the pots:

You'll need a stone/cement drill bit to get into the set cement. You can also do this while the cement is drying with a regular drill bit.
He attached four to each planter and it worked like a charm!! Brilliant. They don't budge. I'm surprised the planters in the tutorials I found stay upright -- but as I mentioned, if you are placing them closer together or using lightweight light strands, they will probably work. (Our lights are strung 20+ feet over the patio.)
Because I was filling the remaining part of each planter with soil and plants, I drilled a few holes into the sides of the planters so water doesn't pool up inside:

I found a flat of these succulents at Lowe's -- it was SO easy to plant! You can either just lay them down over the dirt or tear them into pieces like I did:

Hopefully they do well out there! One flat was $21 and I had plenty for the two planters. In the spring I'll add petunias that will spill over the sides.
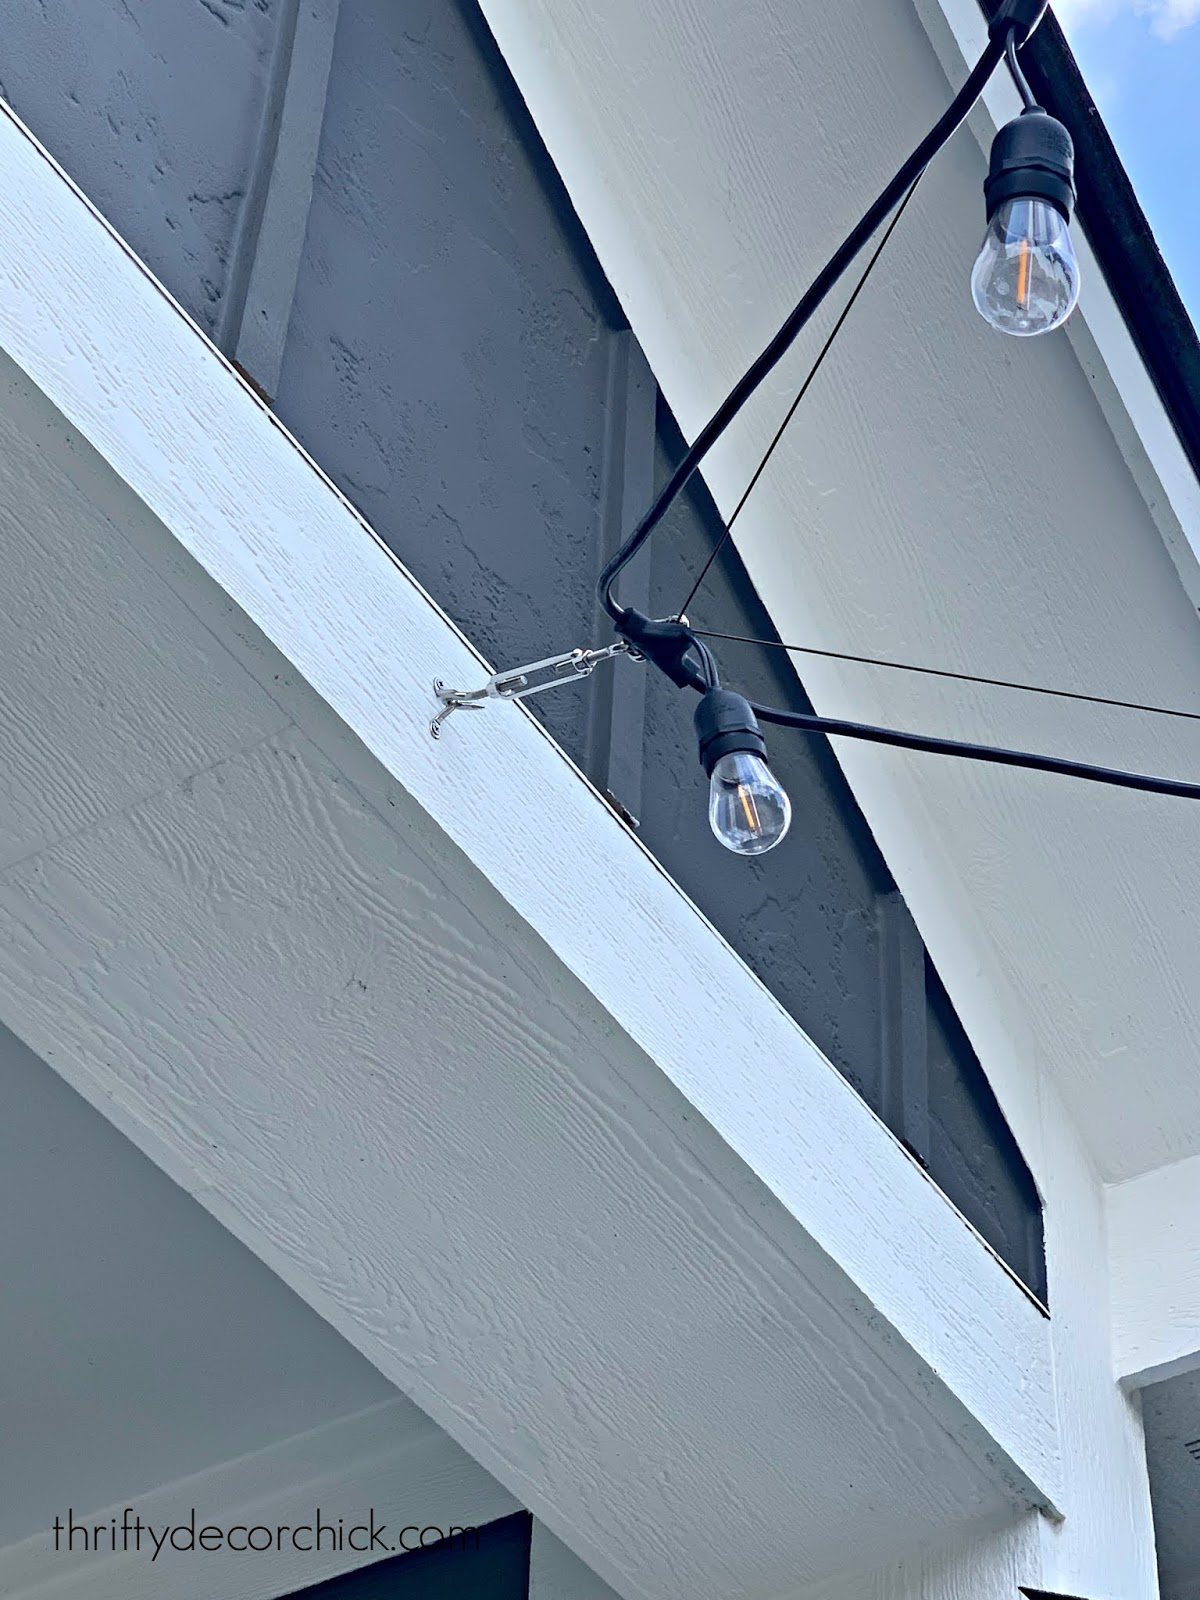
Step four: Hang the lights with hardware.
Next it was time to get the lights hung! I bought this light hanging kit last year and it had everything we needed:

We had plenty of hardware and wire leftover. If you are draping the lights less than seven feet, you can just hang them by themselves. The brand recommends that you use wire for distances longer than that.
The kit comes with 150 feet of wire, which was way more than we needed. The outdoor lights we use are from Feit and are 48 feet each. So you'll just have to map out the design you want based on your space and how long your lights are. I knew where we wanted to start (the corner of the patio so we could access a plug), and I placed the planters (before we added cement) where we wanted them to drape:

It's hard to determine exactly how much you'll use, so we knew the placement of the last attachment to the back of the house would depend on how much of the lights were left, if that makes sense. We thought it would reach to the corner of the house, but instead we had to move it in a bit. This made it so we didn't have any excess lights/cord hanging down.
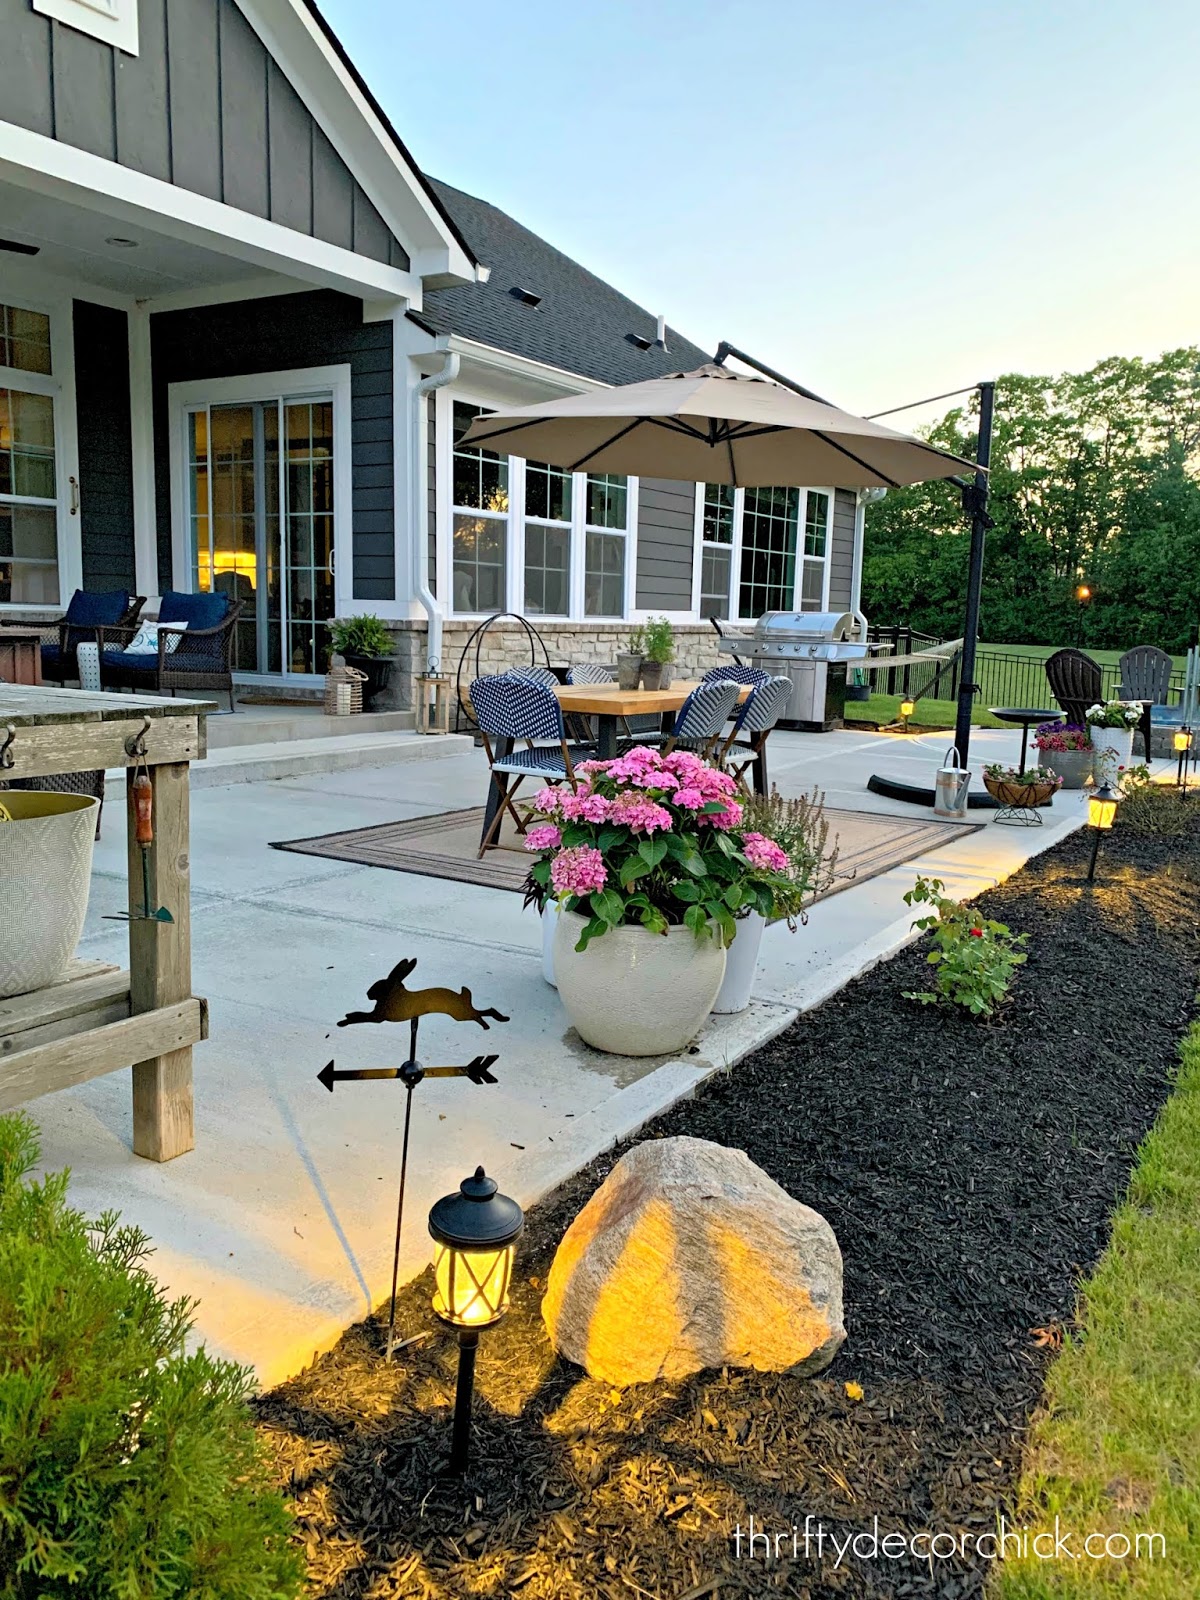
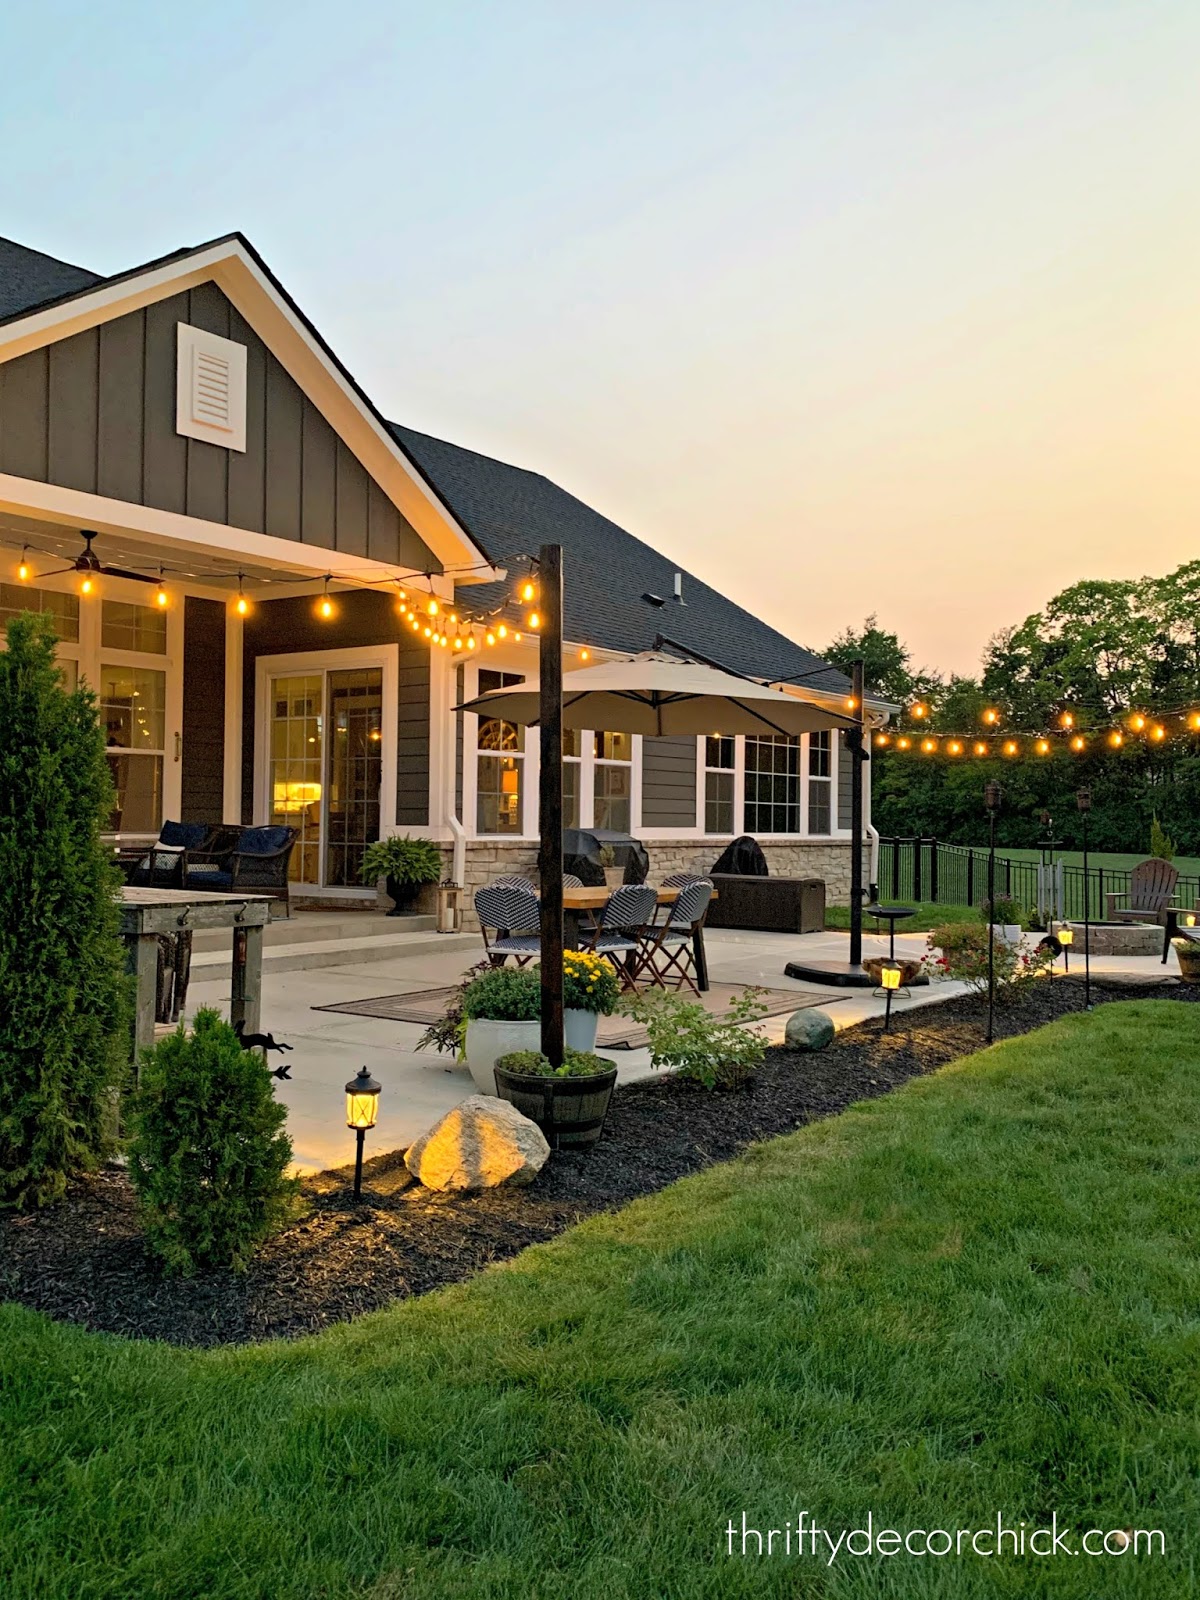
It is SO beautiful and even better than I imagined!:
We hung the wire and then used small zip ties to attach the lights. You can string the wire through the holes in the lights beforehand, but the zip ties after was easier. This way you can secure the wire first and then add the lights after the fact.
I always lean to a simpler look so I didn't want this to get too busy. We could have added more planters and lights and had them go back and forth many times...but I prefer this! If you want more, go for it!:

I shared all about these awesome industrial cafe lights here -- in the few years since that post, they now make them in LED instead. This will save on electricity -- each bulb is only one watt.
The old sets came with a ton of extra bulbs because they were glass. These are plastic so they only provide a few extra (also because they'll last MUCH longer than the incandescent version). The LED version is also lighter (weight wise) than the ones we used years ago.
I don't always love LED lights, especially outside. I prefer a warmer light, but as you can see, these aren't stark at all. Very warm and welcoming:
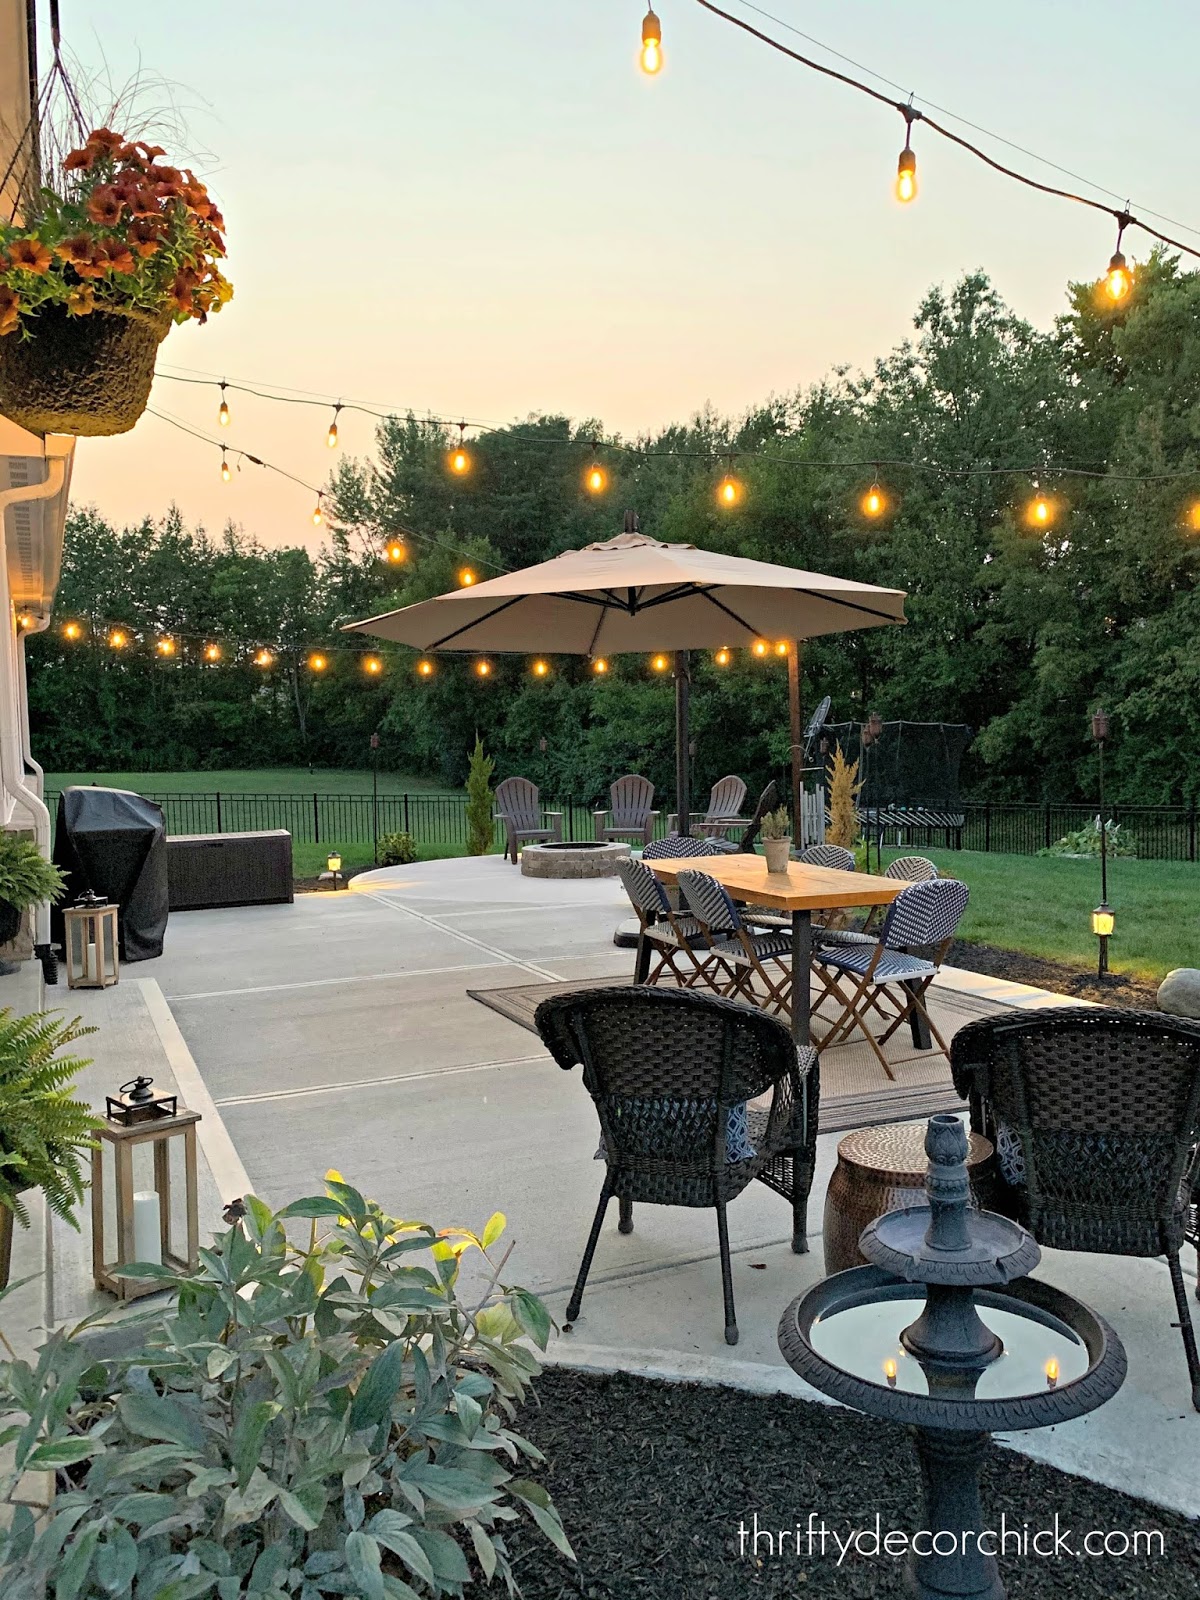


Make sure you tighten the bulbs well -- if they aren't working that's usually the problem. We were going to have a switch run down the porch column so we could easily turn these off and on, but our handyman reminded me that a remote switch would work just as well. We saved SO much money using that instead of having electrical work done. This is the remote we used -- just plug it into the outlet, then plug the lights into the device. You can turn the lights on and off from inside or outside easily. Here's a look at the lights when it's completely dark: 
Do you have pretty lights hung outside? They make everything feel a little more magical. :)
String light tutorial if you have trees Commercial grade string lights Plastic barrel planters Three foot steel flats for securing the planters Light hanging hardware kit Quikrete cement Remote control outdoor plug/switch You can use this image to pin this project for later: 
See more of our home here. To shop items in our home, click here! Never miss a post by signing up to get posts via email. Via https://www.thriftydecorchick.com/2020/08/make-diy-string-light-planters.html Hello there! I've been hard at work on our back patio finishing up projects I've wanted to tackle for months (and years!). I'm so excited to show you what I've been up to, but first...I had to share the most satisfying "tool" I've ever used. Have you ever watched power washing videos? I go into a trance -- watching all that grime wash away is so soothing to me. It makes me happy. ? We've never had one, in the past I've rented one when we needed it. But our garage floor was already such a mess, so we decided to get a power sprayer a few months ago. I didn't want to mess with gasoline every time we used it. I wanted something I could plug in and use right away, so we went with an electric version: 
This post may contain affiliate links for your convenience.
See my policies and disclosure page for more information.
It's the Greenworks 1800 PSI electric pressure washer. I found it at Lowe's but it's available online as well. I've always heard power washers that don't use gas aren't as powerful, but the reviews for this one were really good so we went for it.
I used it on our driveway and garage floor and it did a great job -- it didn't get all of the grease stains off the garage floor but everything else came up well. Last week I decided to try it out on one of our outdoor rugs and the difference it made was worth sharing!
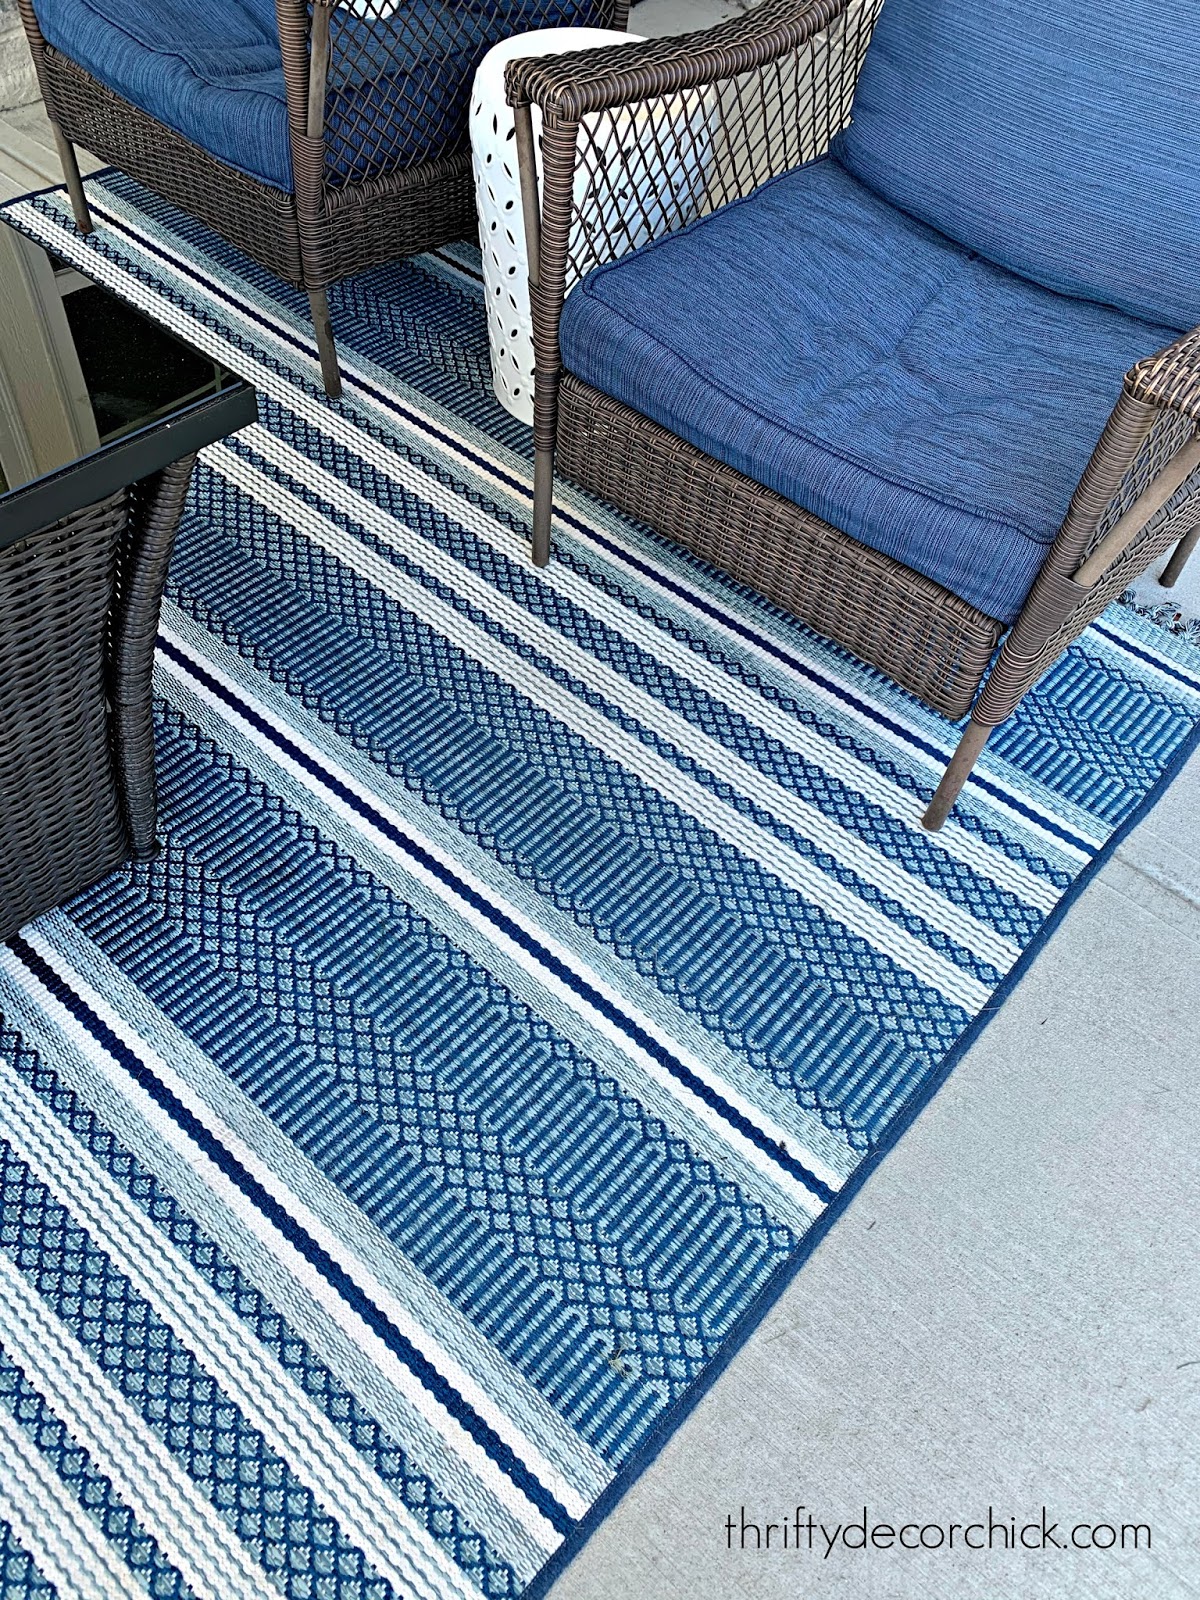
I didn't realize how dirty this rug was until I started cleaning. Yikes!:

This thing rocks! Now that rug looks like the day I bought it!
I used the washer on our other patio rug but that one wasn't nearly as dirty:
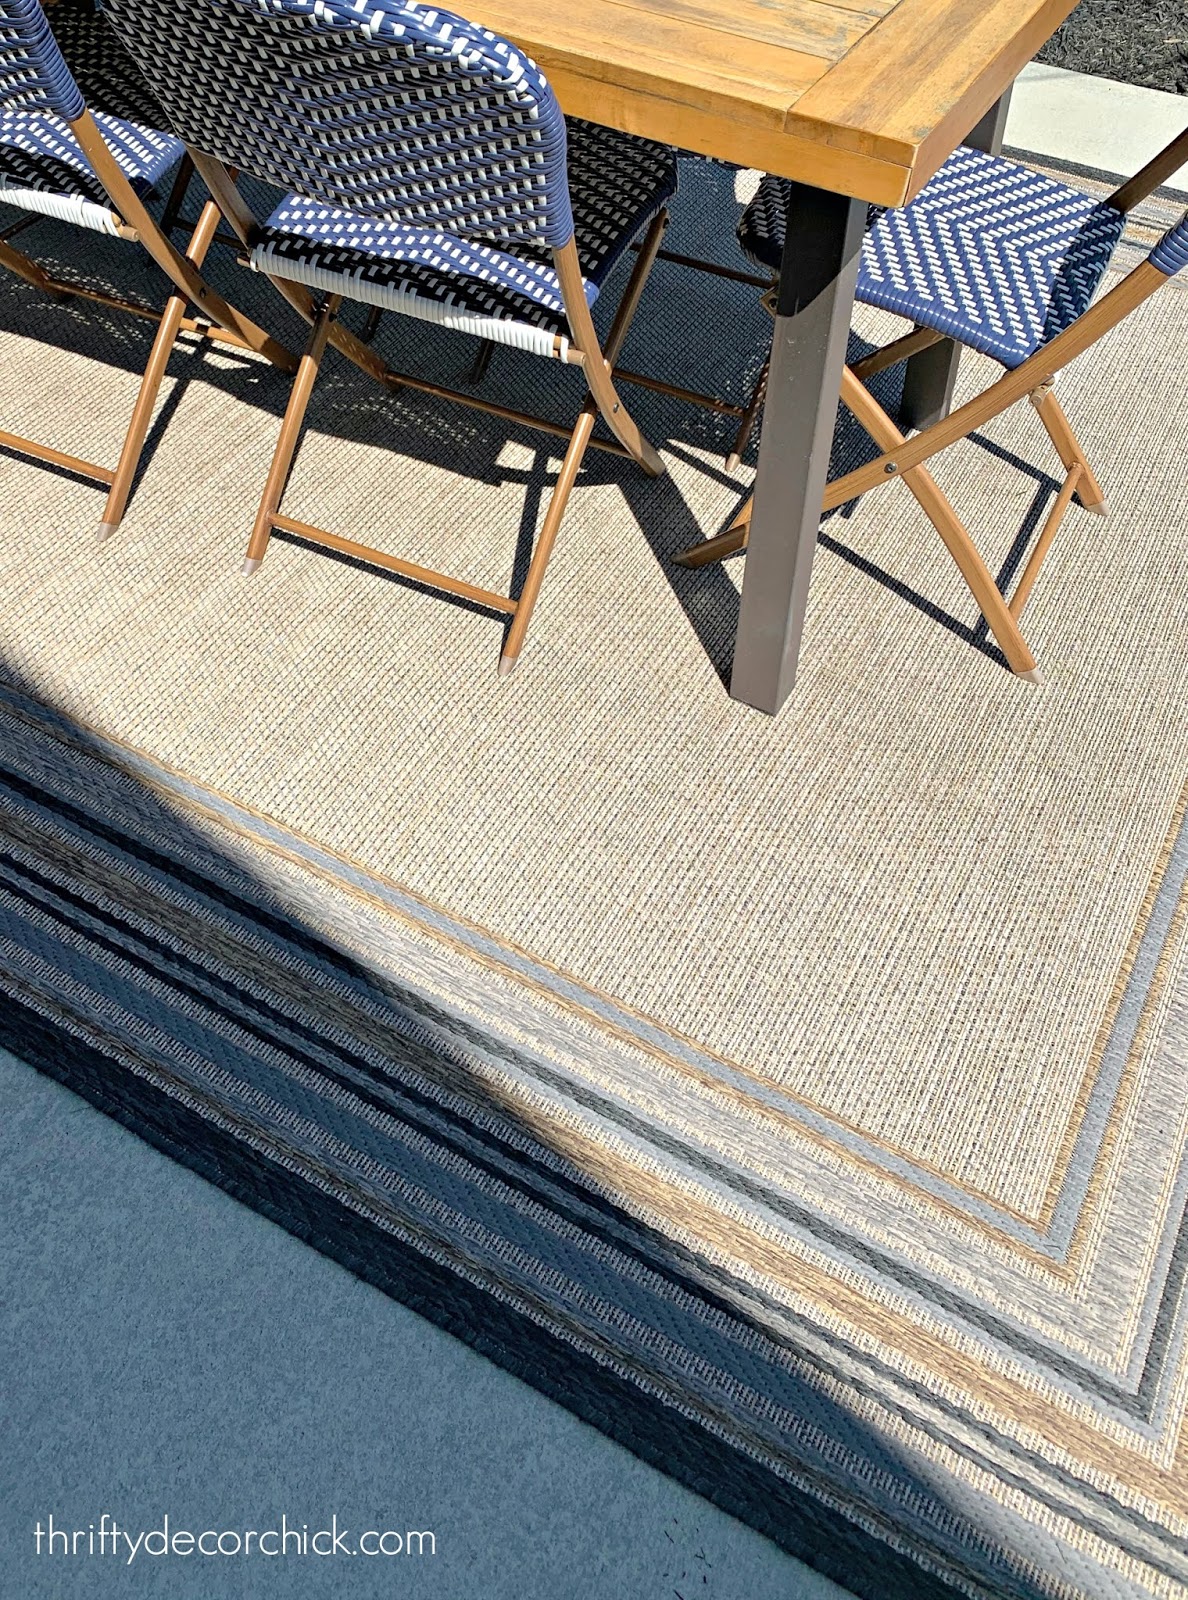
I guess it makes sense -- the striped rug is on the covered patio where we sit a ton. We eat and drink there more, and it doesn't get rain to wash any dirt off.
I took a quick video to show you how well it works:
So satisfying right?? I could seriously watch that for hours.
I wish I would have taken a before pic of the rug -- I didn't realize how dirty it was! Here's how it looks now:
This electric pressure washer is the easiest I found to use, and it was one of the least expensive. Well worth the money already!
You can find this Greenworks washer online here. It has different settings and nozzles for different projects -- from concrete to washing fences or your car. The power cord is really long so it's easy to pull it around a big space.
I've also heard you can use pressure washers on outdoor cushions. Of course make sure you use the correct setting when doing that. Also...wear shoes (no flip flops!) and don't spray anyone or yourself with a pressure washer. I hear it's not fun. ;)
If you're interested in anything pictured here, you can check the items out here:
 Via https://www.thriftydecorchick.com/2020/08/how-easily-clean-outdoor-rugs.html
Hello all! I've blogged about these easy wood ledges/shelves before, but they are SO easy to build and so versatile, I thought it would be worthwhile sharing them again. I added them to yet another area in our home last week!
You can buy these online of course -- but they are usually shorter than what I've wanted. And you'll pay way less for these if you make them.
They're a perfect beginning DIY project because the wood can either be cut down at the store, or you can cut it yourself with just a miter box and saw.
I made some for our family room first -- they are the perfect spot to layer framed photos:

This post may contain affiliate links for your convenience.
See my policies and disclosure page for more information.
Then I made one for our master bathroom -- it's great storage spot for bath necessities or just pretty stuff:


I went LONG for my next version. These are super long, eight foot ledges I made for our basement:

You can see more about that wall of toy and game storage here. The size of these wood ledges is perfect for art or small decorative items. Our son's Funko Pops fit perfectly. :)
He has been into Legos since he was four years old, so you can imagine the collection we have! He had a lot of his little Lego figurines (called Brickheads) along theses shelves as well, but it was getting cluttered.
So I whipped up a few more shorter ledges to hold all of those and free up the game area a bit. It took maybe an hour, start to finish. You just need three pieces of wood and the sizes can be changed based on your needs.

Just for comparison -- I found these online and 36 inches (the size above) is $89 EACH. ? I used basic, cheaper pine for these (usually I use select pine) and I spent $20 for all three (plus I have some leftover wood).
I'm not mad at ya if you want to buy them, I get it! Sometimes I'd rather buy than build. But this just goes to show how much you can save doing them yourself.
If you missed the link above, you can see how to build these easy ledges here. I used a nail gun and screws, but you could use glue if you don't have a nail gun. The back part needs to be the most secure (and the front is just to keep items from sliding off).
You can paint or stain them easily, but I usually stain just because it's faster. But they would be beautiful in bright white on a dark wall! A fun pop of color in a kid's space...the possibilities are endless!
Use them for frames and art, or if you have wall space in a kitchen you could line up your favorite cookbooks and trinkets. I just love them because they are so easy to throw together, but look SO good for such a small price:

Have you added these simple ledges anywhere in your home? I think you'll love them!
Via https://www.thriftydecorchick.com/2020/08/how-DIY-art-wood-ledges.html
If you would have told me that three years after moving into our home I'd still be organizing and purging things I wouldn't have believed you. :) I don't know if it's normal to still be going through stuff at this point, or if it's because we're spending more time at home than usual. But I've been tackling spots we just kind of threw together after moving in. And it feels SO good!!
I've shared my journey of decrapifying and organizing many, many times over the years. And with each year I feel like I'm getting closer to having our home under control and functioning really well.
I had a memory pop up the other day on social media -- I was sharing how I wasn't purging much as I packed up our old home. I had gone through an extensive decluttering process using the Konmari method a year before. It worked really well for us and I still recommend it 100 percent:

But I had to laugh at that memory because after our stuff sat in storage for nine weeks...there was SO SO SO much I got rid of after we moved in. After living without it for so long I would open a box full of stuff and think, WHY did I keep all of this? ?
I guess it's a process that is never perfected. Even though we've bought plenty of new stuff for this house, we have less stuff overall. It's ongoing over time. As I age, my patience for things we don't use or need filling our home gets lower and lower -- so I keep getting rid of more and more.
There is a great sense of peace in having less and having a spot for everything we do have. Again...age is doing this to me. I'll take that aspect of getting older! :)
We have a kitchenette in our basement that is a great size and it will be such an awesome space...someday. We have plumbing roughed in and I didn't have carpet installed here knowing we'd be tiling or putting down vinyl of some kind eventually.
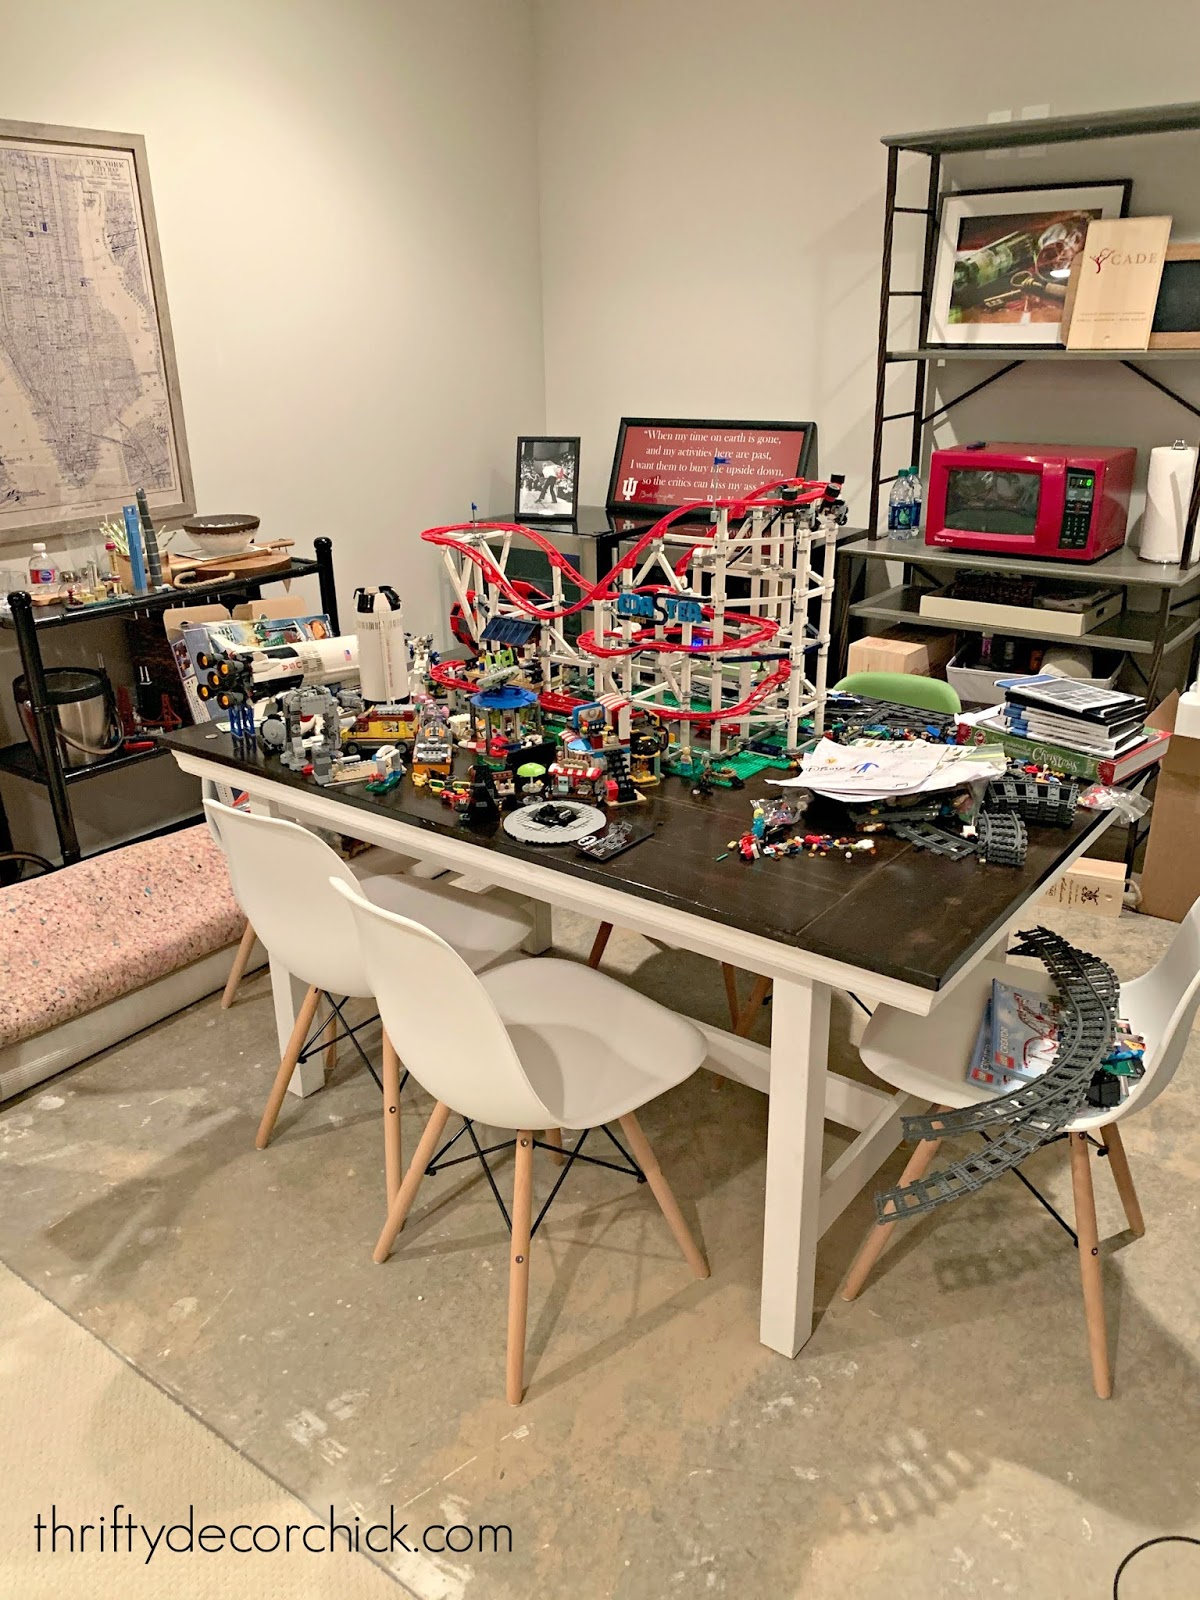
But it has become a dumping ground for junk, Legos and more junk since we moved in. I was so tired of looking at it, so I started tackling it the other day:
This post may contain affiliate links for your convenience.
See my policies and disclosure page for more information.
This is where things from the old house that didn't have a spot go to live. :) Things I still love mind you...but it was all just kind of thrown in there.
The mini fridge hasn't worked since we moved in, but it sat there for nearly three years:

The roll of extra carpet and padding was from either our bedroom or my office when we put the hardwoods in. I dragged it down here a year ago to put under the table.
And it sat:

So it was time to get this space organized. Overall we purged a lot of stuff. Most of those Lego pieces on the table were extras, so we gave them to the neighbor kids. I still LOVE that bamboo table I found at Restore years ago. I turned it into a bar cart back then and now it's back to just being a decorative table: 
I had a smaller table in that spot before but this works so much better. We moved the big Lego set (our son's biggest set that he is super proud of) and finally laid down the carpet under the table. My love of symmetry won out, so I dragged one of the fridges over to the other side to even things out. SO much better. Ha!: 
I organized this tray with all of the craft stuff years ago and now it's on display again. So cute!: 
Now our son has a spot to build Legos again, which he loves. You can find a similar wire basket here! That tabletop is still in great condition -- I'm super proud of the farmhouse-inspired tabletop I built using an IKEA table as a base. 
Now that the room is clean and decluttered, we have plenty of room to walk around in here:

Did you know you can't just toss a fridge because of the Freon? You need to have a junk place dispose of it properly (which costs money), or you can take it to your local hazardous waste location for free like we did.
I hung some art to fill one wall for now (I only focused on the wall we see when walking into the space). I have big plans for it eventually!:

Overall I only kept things that we love and use in this space, which is my mantra for the whole house!
Decluttering is the best feeling!! I forgot how much I loved it. ;)
Here's the before again to remind you of what a mess it was:

And that space now, decluttered and organized:

If you're interested in reading more about the Konmari method of decluttering and "tidying" -- check out my post here! We still have a few hots spots in this house, but they are going away slow but sure. Now that I use this method I don't have to decrapify the WHOLE house anymore. It's much easier to keep up with!
We're hoping to at least start this kitchenette this year. The cabinets are the biggest thing -- once those are in we can focus on plumbing and counters. I can do the flooring and then this spot will at least be functional!
It's going to be a fun project someday! :) I'll share our plans with you soon.
Are you decluttering your home lately? Do you enjoy it or find it tedious?
See more of our home here. To shop items in our home, click here! Never miss a post by signing up to get posts via email. Via https://www.thriftydecorchick.com/2020/08/decluttering-problem-area-konmari.html
Hello there! Since we moved into our modern Craftsman home nearly three years ago, I've received tons of questions about everything from our roof shingles to the bathroom tile. I wasn't much help because I didn't know the names of any of the items -- until now!
When I was going through a pile of papers a couple weeks ago, I came across our selections for the house, along with the names of everything! Whoot!
So here are the resources for (almost) all of the finishes in our home -- let me know if I forgot anything.
Let's start outside...

Our siding is HardiePlank cement board in the color Knight's Armor by PPG. The trim color is Delicate White. The siding, like many gray colors, looks more gray in the shade and has a bluish tone in the sun.
Our stone around the bottom of the house is Halquist in Brookfield Gray and the brick around the top of the stone is Glen-Gery in Anchor Bay:

This post may contain affiliate links for your convenience.
See my policies and disclosure page for more information.
Our front door is Therma Tru (FCM 607-SDL) and we used an English walnut stain:

The hardware is Kwikset hardware called Hawthorn.
Our shingles (surprised at how many questions I've had about these!) are CT Landmark in Moire Black:

Our garage doors are in the Somerset design with the same siding and trim paint:

I dressed them up with the new carriage door hardware and lights a few months ago. (I ended up adding the handles!)
Our front porch, covered back porch and the large backyard patio we had poured last year are all brushed finish gray concrete:

Now for the inside!
Our powder room vanity is Jeffery Alexander (092-30, Astoria Modern collection) in gray: 
The counter is quartz in Fiji White.
The bathroom and kitchen cabinets are Aristokraft in the style Brellin:

The cabinets are white and the island is stone gray -- I color matched that so I could paint the rest of the island when I built it out. (It looks blue in this light but is a very light gray.)
All of our cabinet hardware in the house is from Amerock. You can find our kitchen handles here and our laundry and powder room hardware here.
All of our appliances in the kitchen are Kitchenaid (and we love them!) You can see the beautiful interior of our fridge here.
Our backsplash tile is a 3x6 subway tile with a beautiful wavy finish. The tile is Artigiano and the color is Italian Alps. I had them do a 50/50 running bond pattern.
Our counters are maple butcher block on the island (see this post to see how I treat the wood to hold up to water):

Our sink is black granite and I LOVE it. We had a similar one in our last house. This one is the Silgranit sink from Blanco in the color antrhacite:
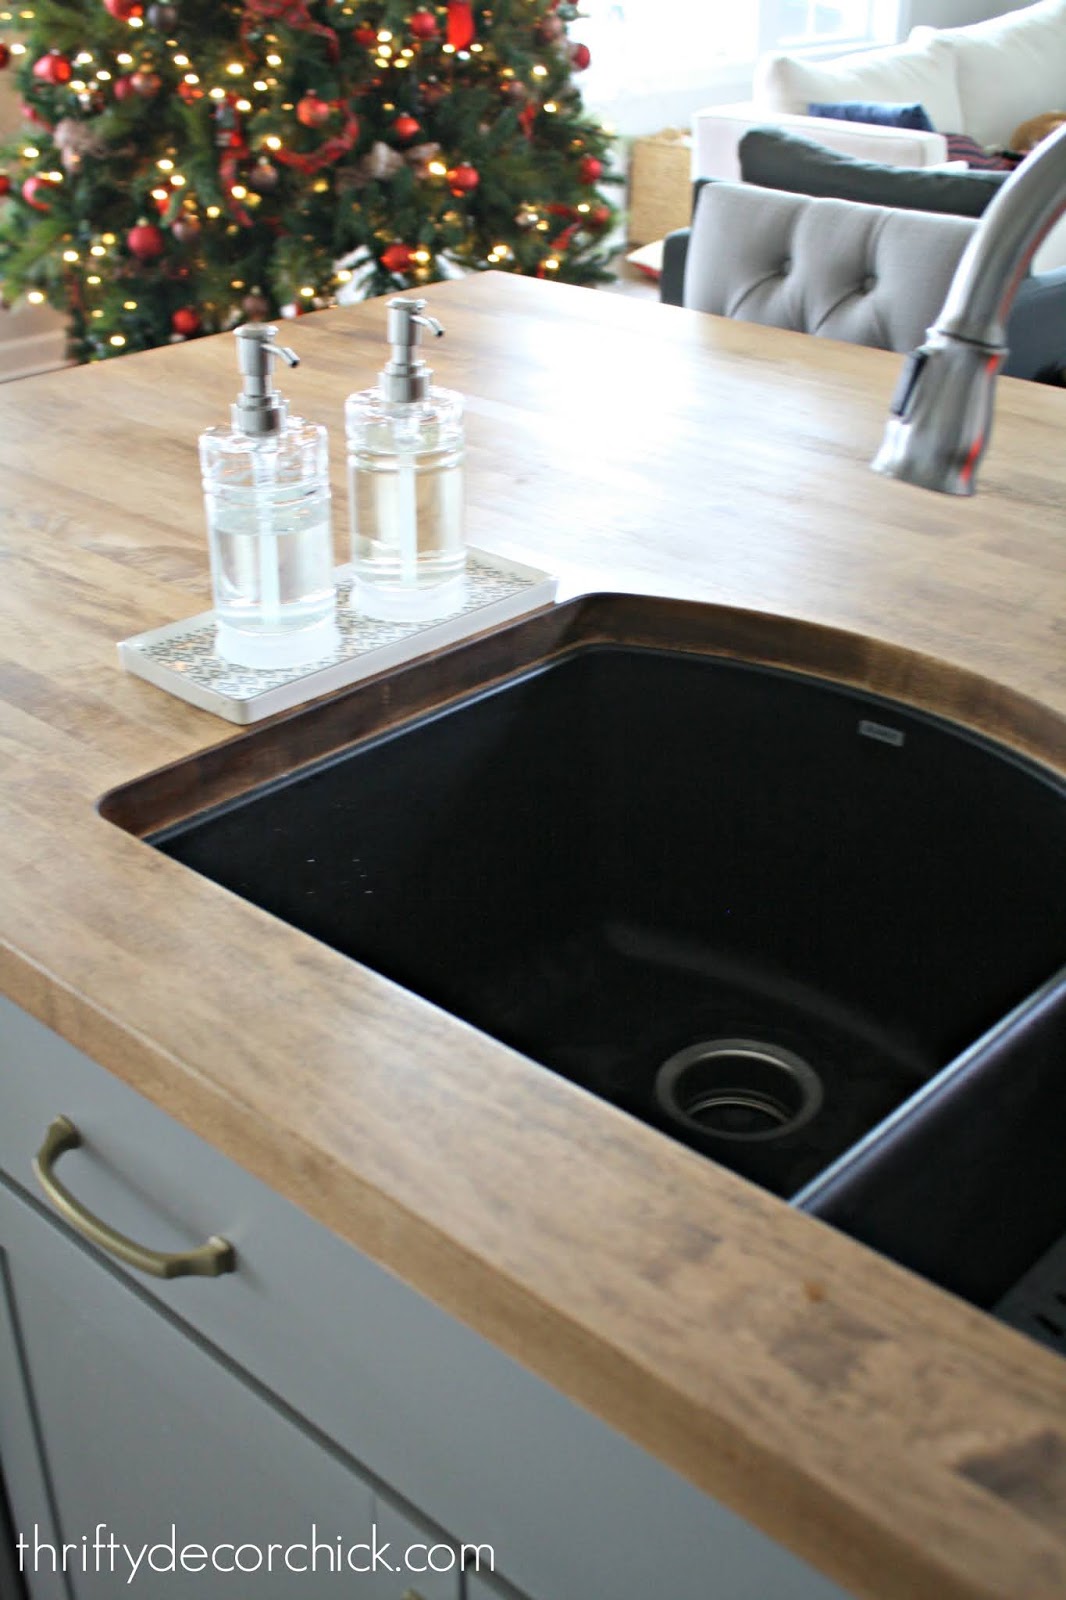
No, our tree isn't up yet. ;) This photo is from years ago.
And the other counters are granite called Cotton White:

Our bathroom tile is 12x24 Calcutta ceramic tile with Tec dove gray grout:

The shower floor is Excalibur hexagonal mosaic tile in Timber Wolf (153) with the same dove gray grout:

I LOVE our shower floor! I originally wanted a pebble tile, but didn't want to worry about cleaning all of that grout. This is much easier to keep clean.
Our tub is the Jacuzzi Fiore free standing tub:

Our granite counters in the master bath are called Gray Sky with undermount rectangle bowls. The door hardware throughout the house is Kwikset Ashfield in iron black: 
Our doors are solid core, five panel Conmore doors.
The fireplace surround is 3x6 subway tile, similar to the Artigiano used in the kitchen. It has that same wavy, hand made look that I love. I believe this is our fireplace tile, in the color Gris:

Check out this post to see how I added that grid trimwork to the fireplace.
It would take another post to go through all the lighting choices, so for now you can visit this page to find the lighting links for each room. (Just click the photo you're interested in and the links will come up.) You can also find all of the paint colors from both houses here. If you're curious about a project from a room pictured, you can use the search bar or click on the corrisponding room name on the left of my site. If I missed something please let me know and I'll add it to the list! :) See more of our home here. To shop items in our home, click here! Never miss a post by signing up to get posts via email. Via https://www.thriftydecorchick.com/2020/08/modern-craftsman-design-finishes.html
Hello my friends! The start of August always gets me excited for fall...especially with the cooler temps we're having. And a bunch of stores have released their new home decor, so it's been fun to check out all of the fall goodies.
Fall is my favorite season for many reasons, but the colors are what get me the most. The warmer tones feel so cozy -- just what I need after a hot summer! I know fall talk may be too early for some of you...but this year more than ever I'm excited and it makes me happy to share this pretty stuff.
I used to decorate with an explosion of orange pumpkins, and I still love that, but now I prefer adding warmer accents that make the whole house feel cozier. Cozy, without yelling THIS IS MY FALL DECOR. I do still add plenty of pumpkins though. ;)
I thought I'd share some of my favorite items found both online and in stores recently. These are all part of the fall product lines, but most could be used year round! When you display items like these together they will fill your home with a warm autumn vibe without the themed decor.
This post may contain affiliate links for your convenience.
See my policies and disclosure page for more information.
First up, Target! These copper lanterns would be so lovely both inside and out:

They would be perfect by the front door, but would also be pretty next to a fireplace or down the middle of the dining table.
Amber bottles grouped together have that cozy fall feeling:

Add some real or faux floral stems and you have a beautiful centerpiece! I have vintage amber jars I pull out every year during the fall months.
Simple glass jars with rust, yellow or purple florals are an easy way to add fall touches:

Of course...a good fall wreath is a must have. I loved all of these, but the bleached eucalyptus was my favorite: 
It was SO pretty in person. Very light and delicate. I'm not a coffee drinker but I thought these fall coffee stencils were so cute!: 
What a fun idea for a coffee lover with a fall birthday.
My favorite way to add warmer touches are with fabrics. Cute hand towels for the kitchen, pillows in the family room and cozy blankets in the bedroom go a really long way!
I love this pretty rust color:

That design also comes in a dark gray. Love the tassels! This blanket almost went into my cart -- I can't get enough of chunky knit blankets in the cooler months: 
Just throw that over a sofa for a cozy touch without any effort! I loved these pretty bedding pieces in fall colors -- so pretty: 
They would be so lovely together. That duvet cover is family friendly -- much thicker than a normal duvet cover. Someone please get both of these and send me a photo of your fall bedding! ;)
Pottery Barn never fails to bring it this time of year. So many cozy touches without feeling themey.
These colorful candle holders would warm up any space!:

I could see a bunch of these lined up down a table or grouped together on a coffee table. You can't go wrong with candles!
I mentioned how much I love changing up textiles for the different seasons. I always keep my eye out for fall napkins I can use to make pillows:

If you use an inexpensive fabric for the backs, you'll get four seasonal "Pottery Barn" pillows for WAY less. I used a similar plaid napkin for mine and love pulling them out when the temps drop.
Warm metals like copper and antique brass are perfect for this time of year. And they fit in beautifully with the rest of the seasons too:

Items like this are easy to change up from fall through the holidays -- fill with items like small pumpkins for fall or ornaments and greenery for Christmas.
Of course you can't go wrong with faux stems in the colors of fall! I love the light feel of these branches:

Stick them in vases and hanging baskets, or lay them in a tray or along the middle of a table.
Terra cotta anything is perfect this time of year! These would transition beautifully from late summer into November:

These remind me so much of Italy...and the warmth of Tuscany feels like fall all year long! It never hurts to start thinking about your fall decor a little early! I won't pull anything out for a few weeks at least, but it's fun to plan. But if you're like me and fall decor makes you happy...do it! It's YOUR house, you get to do what you want. ;) See more of our home here. To shop items in our home, click here! Never miss a post by signing up to get posts via email. Via https://www.thriftydecorchick.com/2020/08/sophisticated-fall-decor-not-themey.html |
