How I store all of my home decor, candles and knick knacks!
I didn't plan this, but 2022 has become the year of organization in our house and I LOVE IT. I've tackled the HUGE pantry redo and organization, our mementos and photos, and even under the kitchen sink!
We've lived in this house for about four and a half years and I feel like in just the past six to nine months I've really started figuring out exactly where I want to keep things. Not only that, but how I want to organize them.
I know, I say it till I'm blue in the face -- I think you need to live in your spaces for awhile before making any major decisions on how you want to use the rooms. That could just be what works for me, who knows. But I find I make mistakes if I move too quickly.
That goes for organizing too! My latest victim is my decor stuff in our storage room. I've been working on this for the past few months and it's been 90 percent done for the past two months. This week I finished up the last little bit and had to show you!
I know...you're sitting on the edge of your seat to see our unfinished walls, floors and plastic shelving!
But, man, I love how organized it is!:

This post may contain affiliate links for your convenience.
See my policies and disclosure page for more information.
This is all decor stuff -- candles (so. many. candles.), hardware, fabric, faux flowers, etc. I WISH I had taken a photo of how much we had right after moving in...we had five of these tall plastic shelves.
FIVE.
This may seem like a lot to some of you, and very little to others. I will say, compared to most decor bloggers this is nothing. This I KNOW. ?
Anyway, I have purged like you wouldn't believe over the past few years, and this is what is left. I use the Konmari method to decrapify everything in our home -- it has worked well for me and has made our lives function so much better.
As I've decluttered and gotten rid of stuff, the plastic shelving has dwindled. (There are some bins as well but I'll talk about those in a bit.) We have a little alcove in our storage room that is about 30 square feet, and months ago I did some figuring and realized I could fit what was left in there.
The shelving is the exact same width as the little "closet" space, so I knew they would fit perfectly. I decided to place them so I could walk in between and see/reach both sides. This side is mostly the larger decor items:
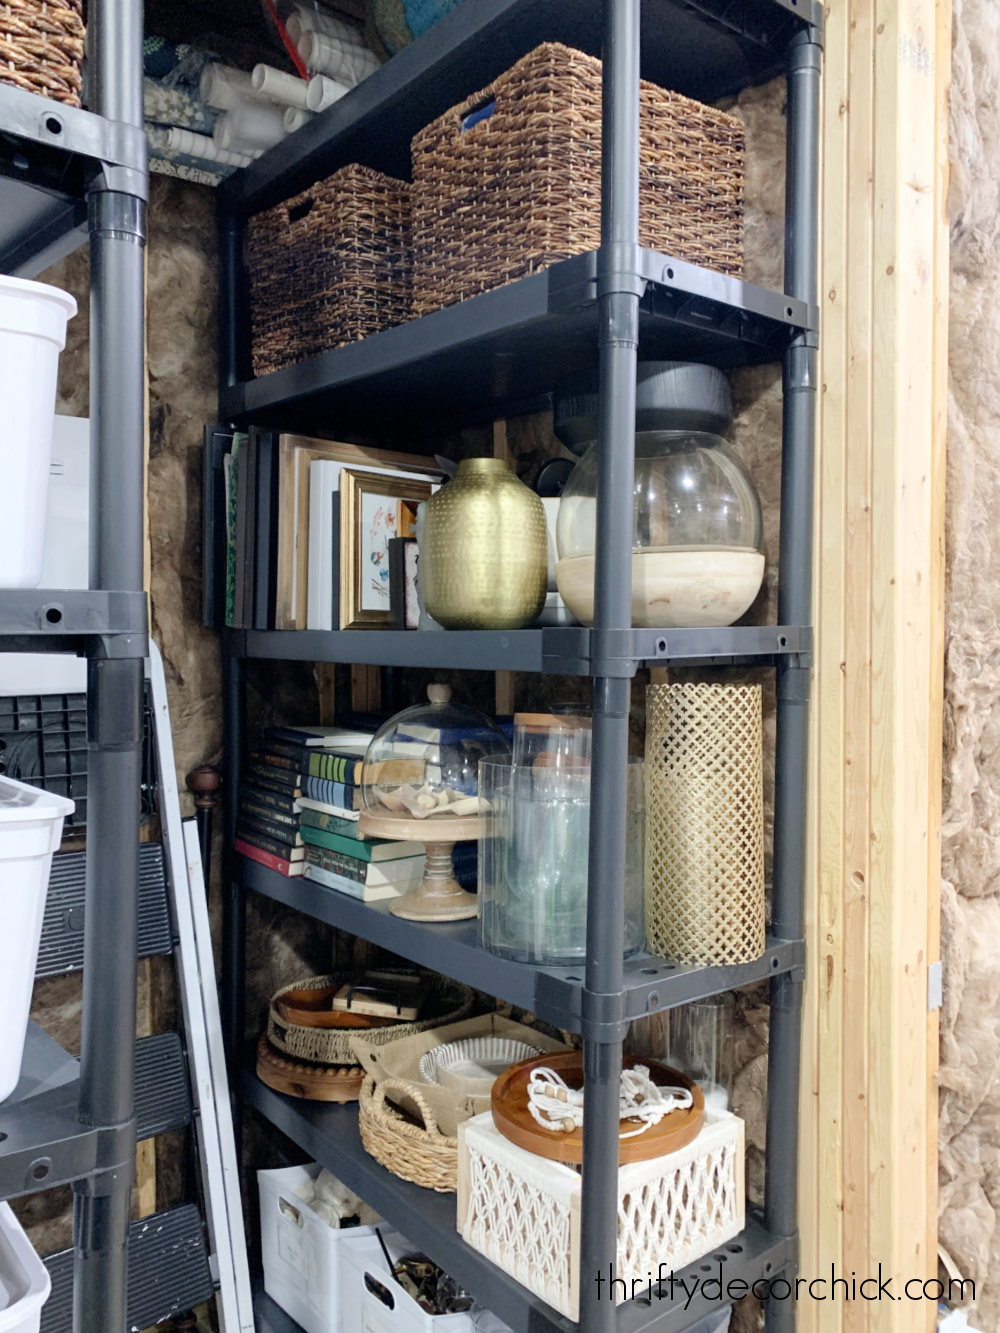
A lot of this will be gone when we finish up other projects and spaces -- the rattan bins above are full of fabrics that I plan to use. The stacks of books will go in my husband's office someday when we work on that.
There are only certain decor items I keep and love anymore -- trays are one of them. I use those a lot, especially during the holidays.
Actually, most of the decor items are things I use seasonally! I used plastic bins from Big Lots for the smaller items like glass containers and filler:
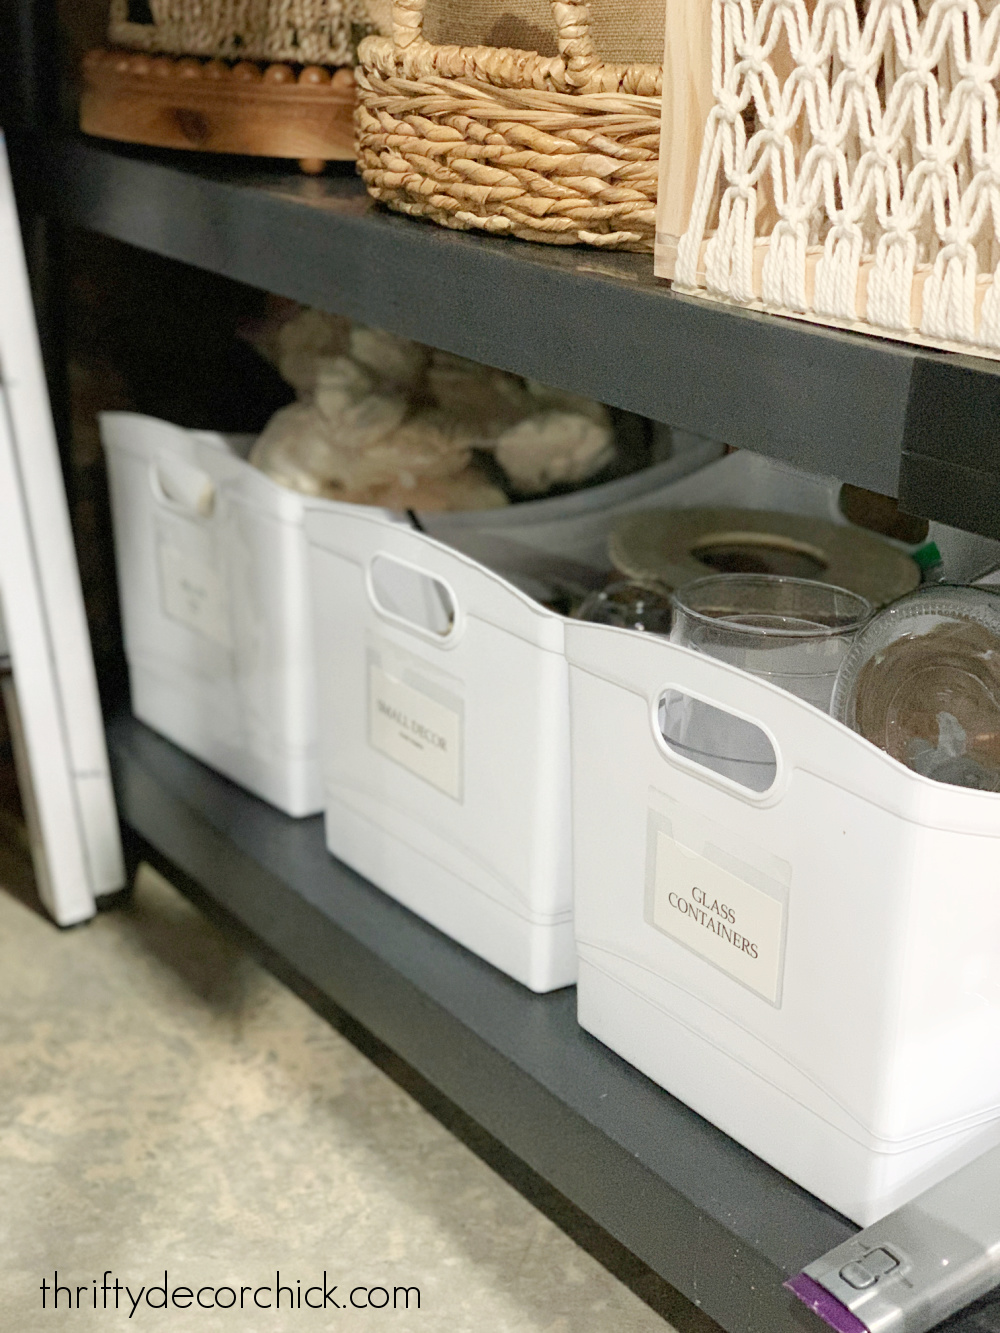
I like how large these are, they hold a ton of stuff!
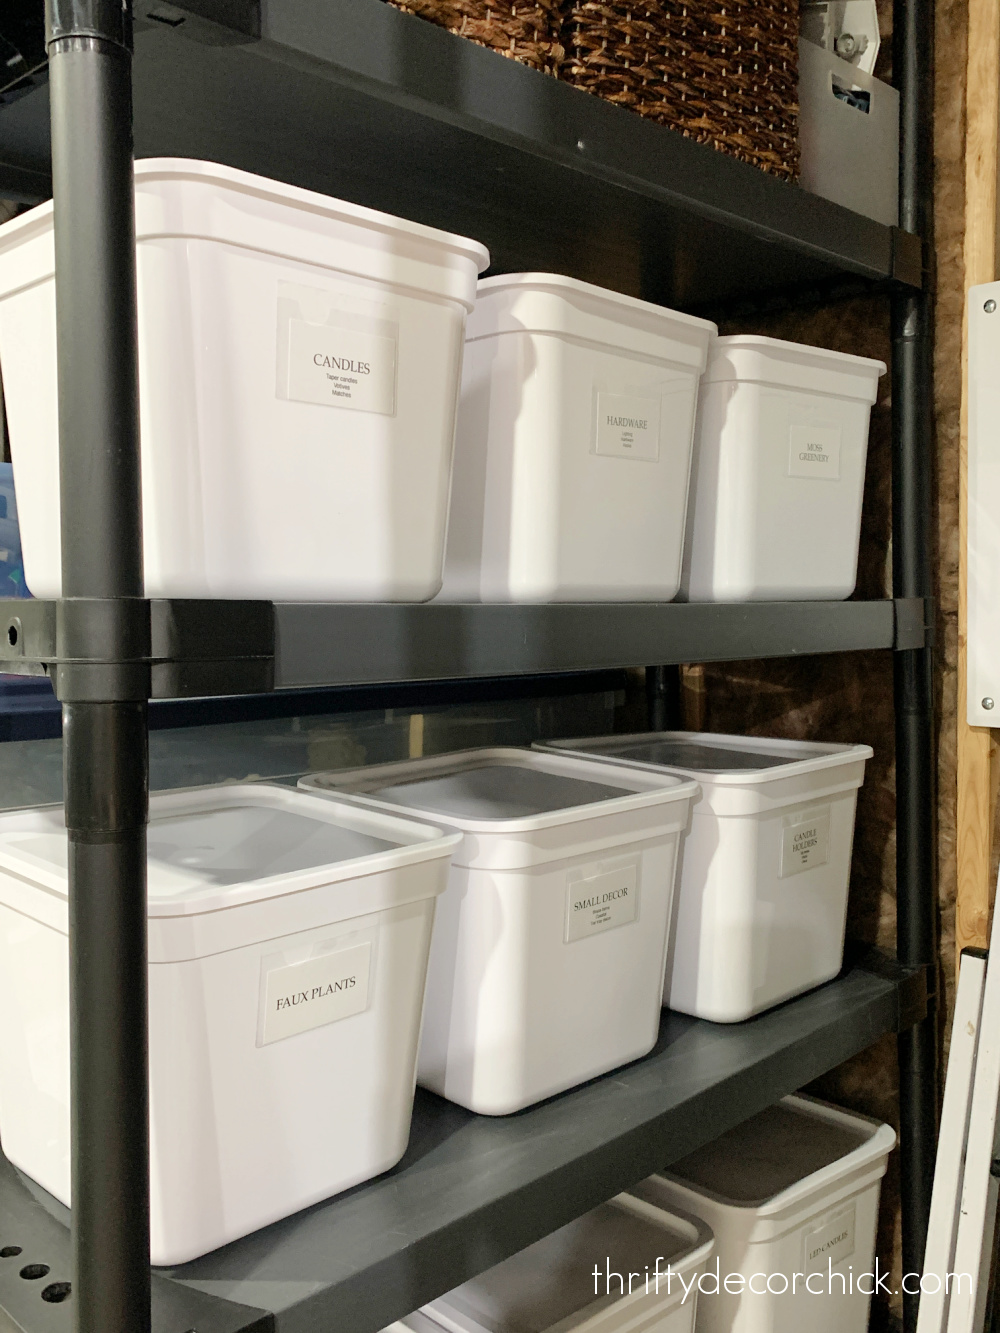
The other side is my favorite. :) I found these awesome plastic bins with LIDS that are perfect for the smaller decor items. They are such a great deal, only $4 each! And they hold way more than you'd think:

I started out with a few of the clear ones (bottom shelf) last year, and by the time I finally got around to them and wanted more, I couldn't find the clear version anymore.
So I went with the white, which I actually prefer.
If you want to see what you are storing at a glance, there is a gray tinted clear option.
I do NOT want to see all of the little clutter. I've had my decor-type items out on storage shelves until now. I tried grouping them, stacking them...I just found it to be a waste of space, especially with smaller items.
Candles for example, you can only stand so many on top of each other. But then you're not using the shelving space well because they're spread out and not up.
That's why I love these bins and am so happy with them. I mean, look at how many candles I can fit in one!:

That's 14 candles in there by the way! I'm sure there's some rule about storing scented candles with other scented candles...but so far so good. They all smell like they should. :)
I can't believe how inexpensive these are for how sturdy they are -- and the lid!
Anyway, I love the storage, but for the white ones especially I definitely needed some kind of labeling system. I already had the stick on labels from our art and photo storage books, so I used those on my bins:

The sticky part has a pocket and these Avery labels fit inside. I created one for each bin and added some detailed info on some of them as well.
You know...in case my family urgently needs some coastal decor...they'll be able find it quick!:

Nah...this is all for me. :)
And it's worked SO well. I like having things put away, but also want to find them quickly. This solution solves both! I mean, just look at them...

I started out just writing what was in them by hand, but then thought, who am I?? I needed printed labels. ?
I've been on both sides of the storing things in bins method over the years, but the reason I'm solidly on the bin team now is because it prevents me from overspending. I only have room for what I have room for...and I love that.
Not only that, but I find it much easier to keep track of what I do have when it's separated and organized like this.
We keep the step ladder in here anyway, and I realized how easy it was to pop it open in the middle of the shelving. So now it will live between the two:

As you can see, we have some larger bins in this space as well. Some is fall decor that I need to try to make room for up in the garage. A couple are for our Christmas village items that we put out in the basement.
We also have a bin just for electronic stuff -- cable, HDMI, speaker cords and gaming stuff. I went through it and got rid of a bunch, but we still have enough to warrant the large bin.
My goal is to build wood shelving in this little alcove and then I can get rid of the plastic shelving and some of the bins. I want to add some lighting in the ceiling before I start on that.
For now, I'm thrilled with my little decor "hallway" -- I have easy access to everything I need! Do you have a lot of candles and greenery that need a home? What's your solution for storing all of it?
Via https://www.thriftydecorchick.com/2022/03/how-to-organize-and-store-home-decor .html
0 Comments
An affordable and easy way to install rolling storage containers in under the sink cabinets!
This is a great way to utilize ALL of the storage space under your kitchen or bathroom cabinets. It makes the most of the vertical space in that awkward spot as well.
I'm so excited about this easy alternative to more expensive rolling cabinet drawers. I shared the DIY rolling shelving version I used in our new and improved pantry a couple of weeks ago.
If you have some do-it-yourself skills that is a great option you can customize to the exact size and depth that you need. But if you'd rather not DIY, I found a really affordable ready made version that may work for your needs!
I started making these myself because most of the store bought options are usually more money than I'd like to spend. But a reader shared this option with me and I had to try it out. It's the Hallbar pull out frame:

There are two bonuses to this product -- one, it's affordable. About the same price as the drawer slides that I use for my DIY versions. But the best part is it comes (pretty much) ready to go. You pull it out of the box and the slides are already attached and ready to be installed.
It's marketed as a roll out tray for recycling bins, but I knew I could find other uses for it. :)
I've been finishing up a couple lingering small projects inside the new pantry cabinets and almost used the Ikea option here:

This post may contain affiliate links for your convenience.
See my policies and disclosure page for more information.
But I already had the drawer slides for this last roll out shelf, and had just enough scrap wood left to make it:

It's perfect for our pet food storage bins! These containers are nice and large and the lids seal really tight.
So instead I tried this Ikea pull out under our kitchen sink! The plastic bin we had down there was too small and didn't keep things as organized as I'd like.
I pulled everything out of the cabinet and cleaned inside well. I always wonder HOW a space like this gets so dirty? I wiped down the bottom of the cabinet and vacuumed out all of the mess.
Then I decluttered some random items that had found there way down there and started figuring out how to store what was left.
Years ago I shared this awesome metal pull out unit for under the sinks, but the wider version I wanted to use under the kitchen sink didn't fit. Thankfully this IKEA option fit perfectly!:

Installation is easy -- just pull out the slides underneath and attach them to the bottom of the cabinet with screws.
I like that these are nice and compact but use the vertical space better. The width of the tray doesn't take up much room and yet you can store a lot of stuff!
The base sits up just a bit, so it clears the frame on the bottom of our cabinets nicely. The tray operates smoothly and fully extends out of the cabinet:
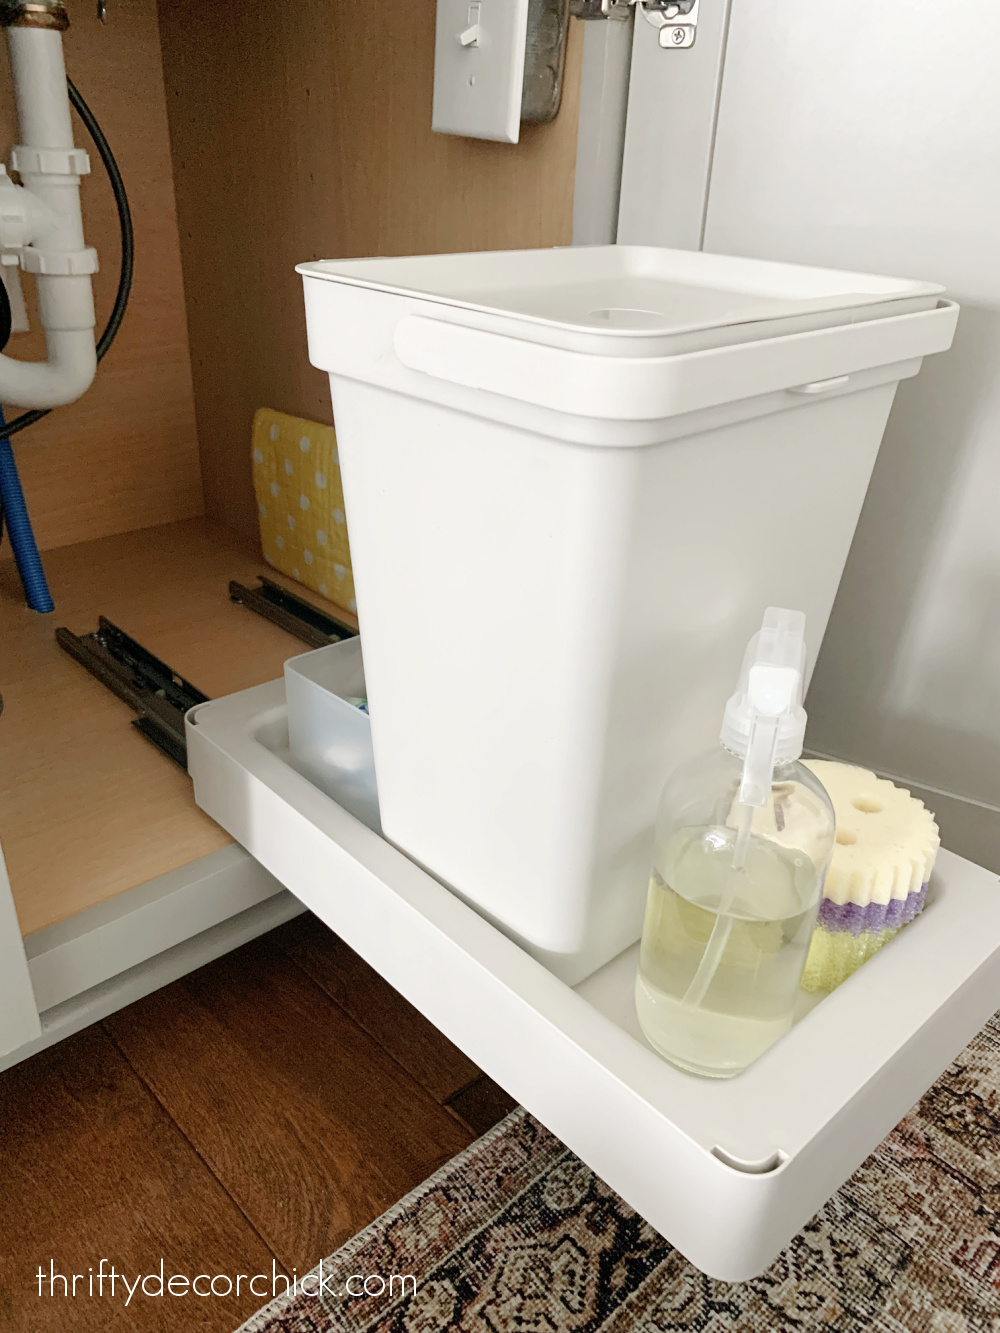
The Hallbar has a concave base, so the small IKEA trash bins fit inside perfectly.
It also comes with a frame that holds the cans:

The frame allows you to drop the trash cans in from the top. Unfortunately the tall frame was hitting our plumbing in the back of the cabinet, so I wasn't able to use that part.
Turns out I didn't need it! I fit everything we keep under our sink on the tray. The taller items like extra dish soap, fruit wash and long scrub brushes fit perfectly:
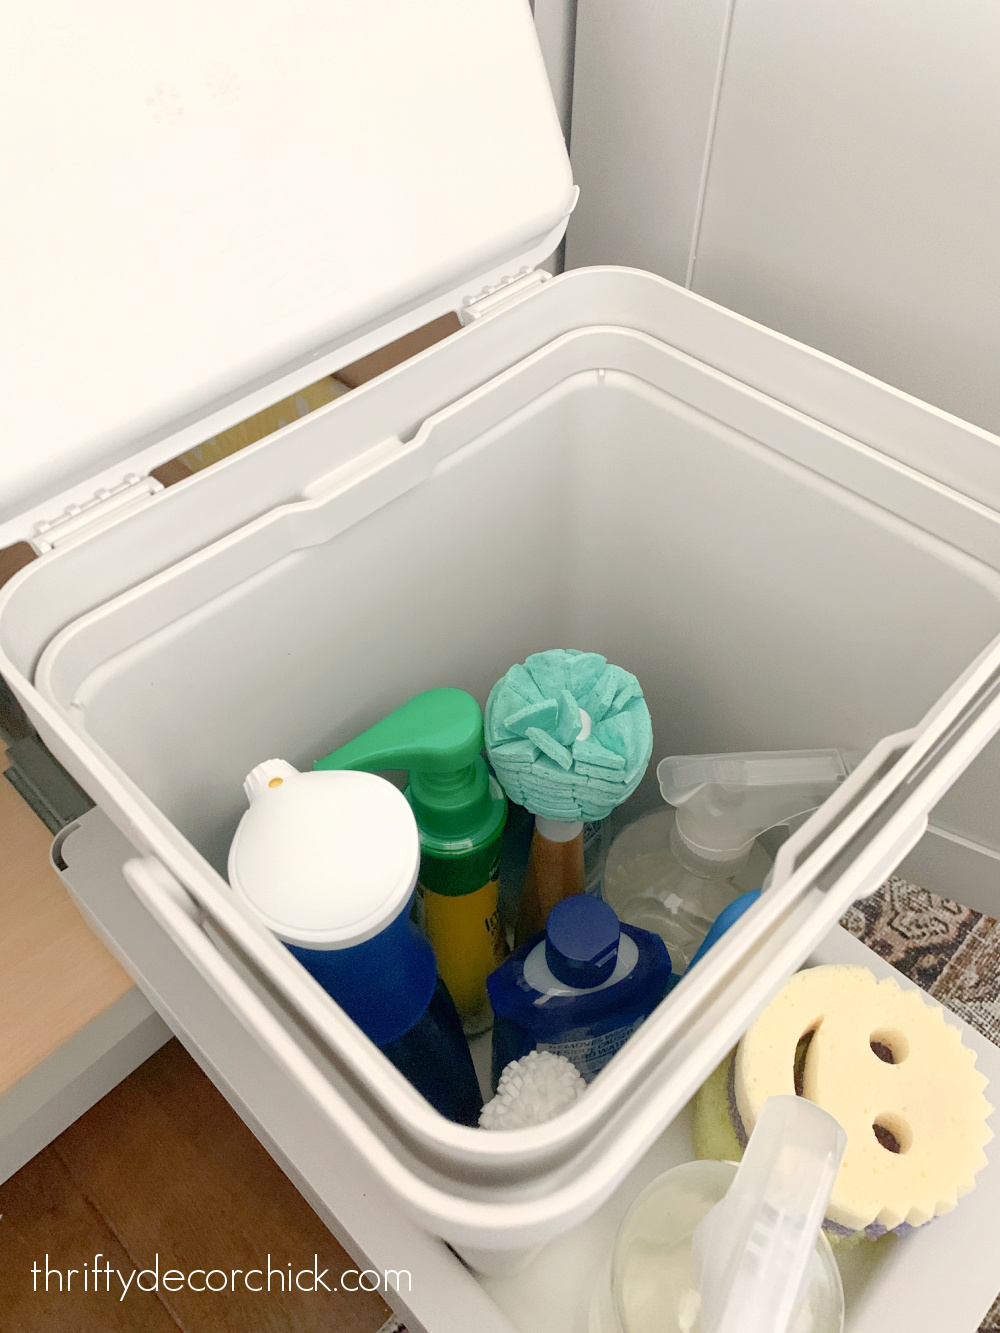
I placed the items we reach for most often -- my FAVORITE dish sponges/scrubbers and cleaning spray bottle -- in front for easy access.
I put one of my favorite plastic bins in the back to hold the excess dishwasher pods, since the pipes were slightly in the way of the trash can and I had to move it forward just a bit.
We keep most of our dishwasher tablets in the tip out drawers in front of the sink, so the extras aren't something we need often.
These small trash bins from Ikea are awesome -- the lid stays open when you need it to and they have a handle for easy carrying:

I think this under the kitchen sink organizer would be useful for so many things!:
If you have a basket or bin that fits inside the concave base, this option makes for an easy pull out you can tailor to your needs. You could even install a cabinet pull to grab when pulling it in and out! (Do this before you install the tray so you can screw it in underneath).
By the way, the trash cans come with a little insert that holds your trash liners in place.
They even include a small label for the lid so you can keep track of what's inside. :)
This was the final result after the clean out, declutter and with the new pull out tray installed:
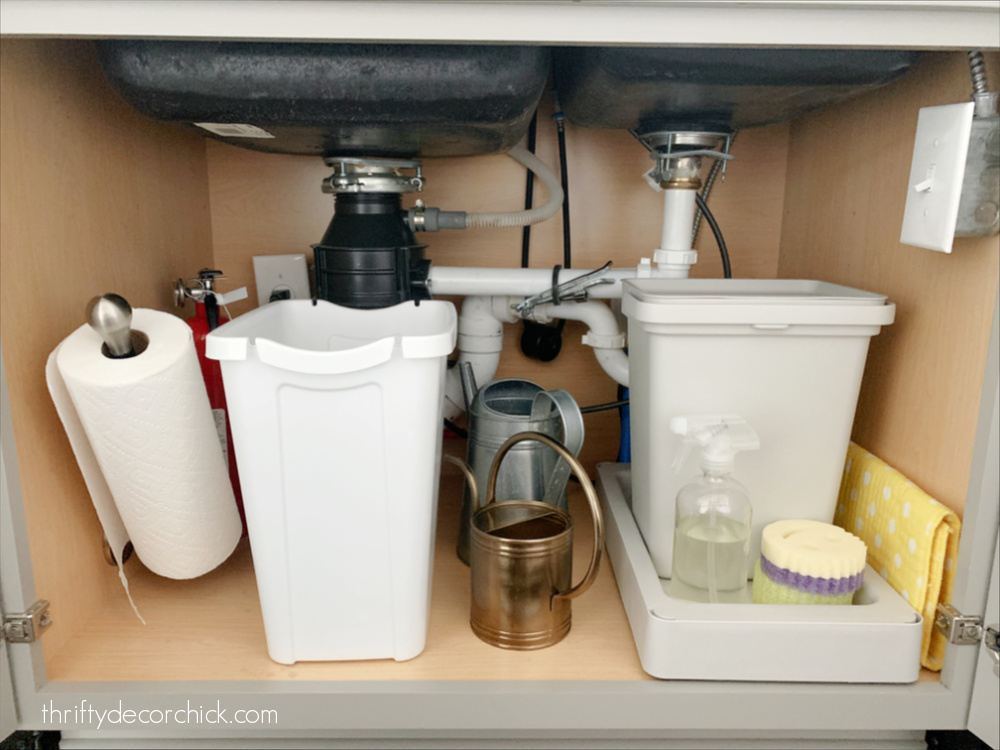
Here's what we keep under the sink along with the supplies in the rolling tray:
I swear I can go into IKEA one hundred times and there's still so many items I never see!
I love that my reader suggested this as an alternative to the pull out drawer -- I had to share it with you. With a couple tweaks and out of the box thinking, there are SO many ways to use this inexpensive pull out.
Never miss a post by signing up to get posts via email.
Via https://www.thriftydecorchick.com/2022/03/easy-organizing-under-the-kitchen-sink.html DIY wood countertop spice rack using butcher block
This simple DIY spice rack fits perfectly on your counter and looks great! You'll only need a few pieces of wood to create a pretty storage solution for your spices.
This one could be called the three little bears of spice rack tutorials. It's such a simple project when you get down to it...but it gave me fits.

I didn't mean to take a week away from posting by the way -- I've been fighting a sinus infection for weeks now, and late last week it hit me harder than ever. I was knocked out on the sofa or bed for nearly 48 hours straight.
I blame that for some of my issues...maybe my brain was foggy? I'll blame the illness for sure. ;)
For awhile I've had an idea for a simple countertop spice rack, and last week I finally started tackling it. It would be easy my brain said! Just a few pieces of wood, less than an hour...TOPS.
The plan was as simple as you can get -- I was going to build a simple frame with a couple shelves. Maybe some dowel rods across the front for a cute touch. That's it. Nothing on the back, just simple.
I started with 1x2's and checked to make my spice jars would fit. The width was great, but my initial plan was to do two shelves so I could stack three levels of the jars.
But because the wood was 3/4 thick and the jars were about four inches tall, it wasn't going to work. (I didn't figure that out until I cut two pieces though.)
Next, I tried a 1/2 inch thick piece of wood that was even wider, so the jars had even surface space:
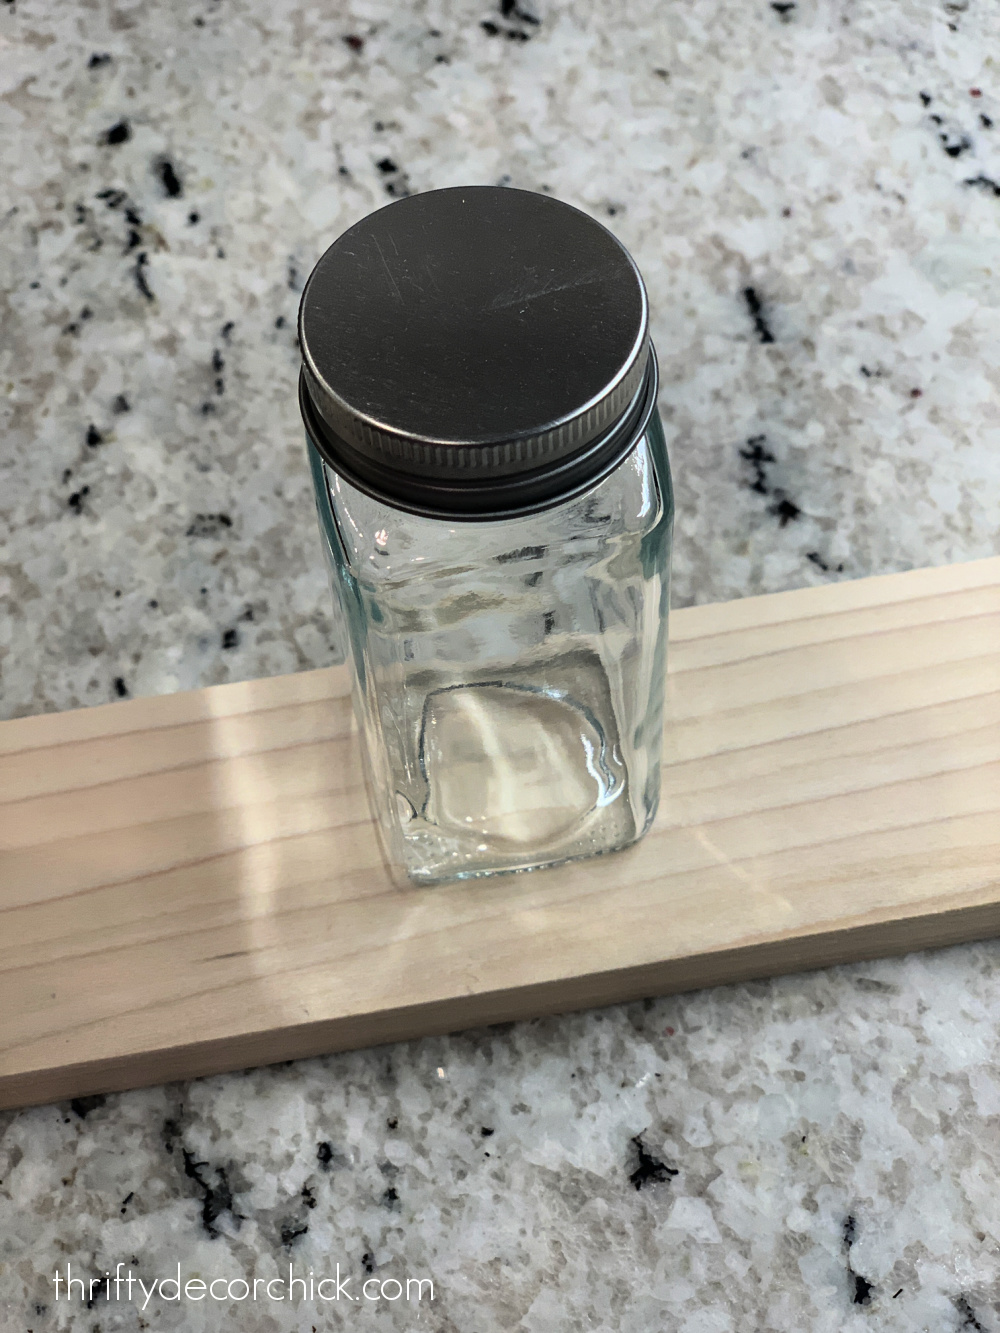
Perfect! I was well on my way -- the 1/2 thick wood was going to save me the space I needed.
I started to assemble the frame for this (SIMPLE!!) spice rack, using the corner clamp I used when I built our DIY frame for the TV:

This post may contain affiliate links for your convenience.
See my policies and disclosure page for more information.
With wood glue and a couple nails, the first corner went together perfectly!
But with each additional corner, it got more and more precarious, and as I went to lift it up after the fourth corner, the whole thing fell apart.
Strike TWOOOO!!
It was then that I knew I had to back this thing somehow. It needed more as a base on the back to make it stable, especially since it would be standing upright and not one I would hang on the wall.
I went digging through my scrap wood pile for something that was the dimensions I needed, but also thick enough that I could nail the frame around it.
Excess butcher block leftover from our island kitchen was the perfect solution! When I found it I knew I'd want to stain that and do a contrast color for the rest of it. I used my favorite stain preconditioner on the butcher first:

And then stained it with one coat of Special Walnut but Minwax. I didn't want it to be super dark, just a light brown tone.
The wood countertop is one and half inches thick, so of course the trim I already had wouldn't work. (It wouldn't work anyway because I was going with completely different dimensions, but whatever.) SOOOO, back to the hardware store to grab a couple 1/2 thick boards that were 3.5 inches wide.
Using some wood glue and my nail gun, I wrapped the butcher block with this "frame" and my spice rack was starting to come together:

After filling in the nail holes with this awesome filler (my new favorite for the past year or so!) and caulking the corners, I gave the frame a quick sanding.
Then painted it with a couple coats of Tricorn black (the same black I use on my black interior doors):

My last step was to add a center shelf that I cut down to size on my miter saw. I used wood glue along the back of it and then carefully nailed into the ends of the shelf through the sides of the frame.
When it was done I breathed a sigh of relief and was thrilled with how it turned out...finally!!
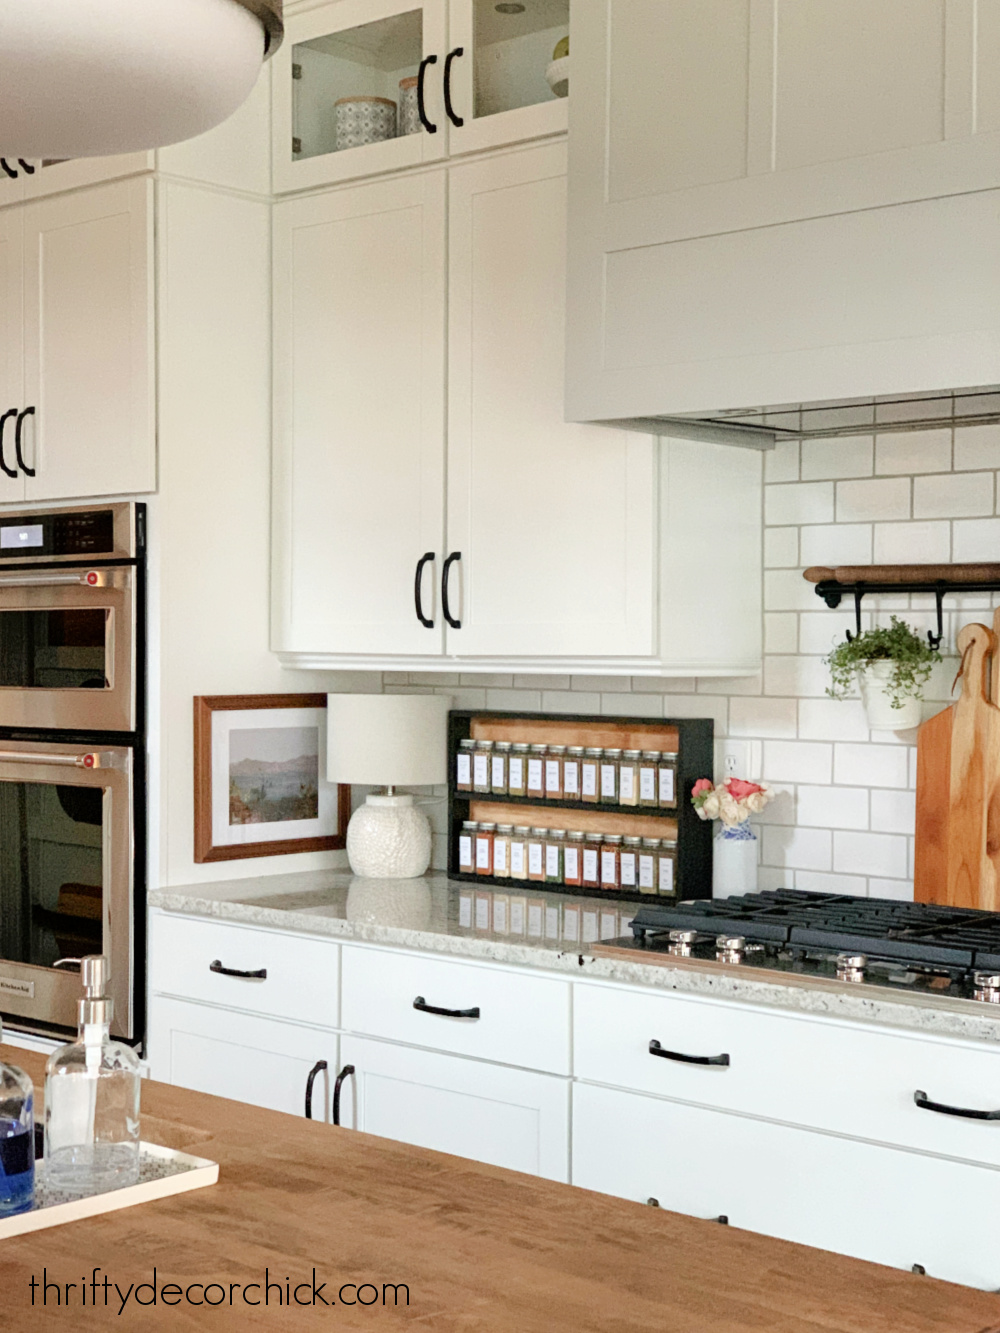
I tried it out on the end of the counter, but later moved it to against the backsplash.
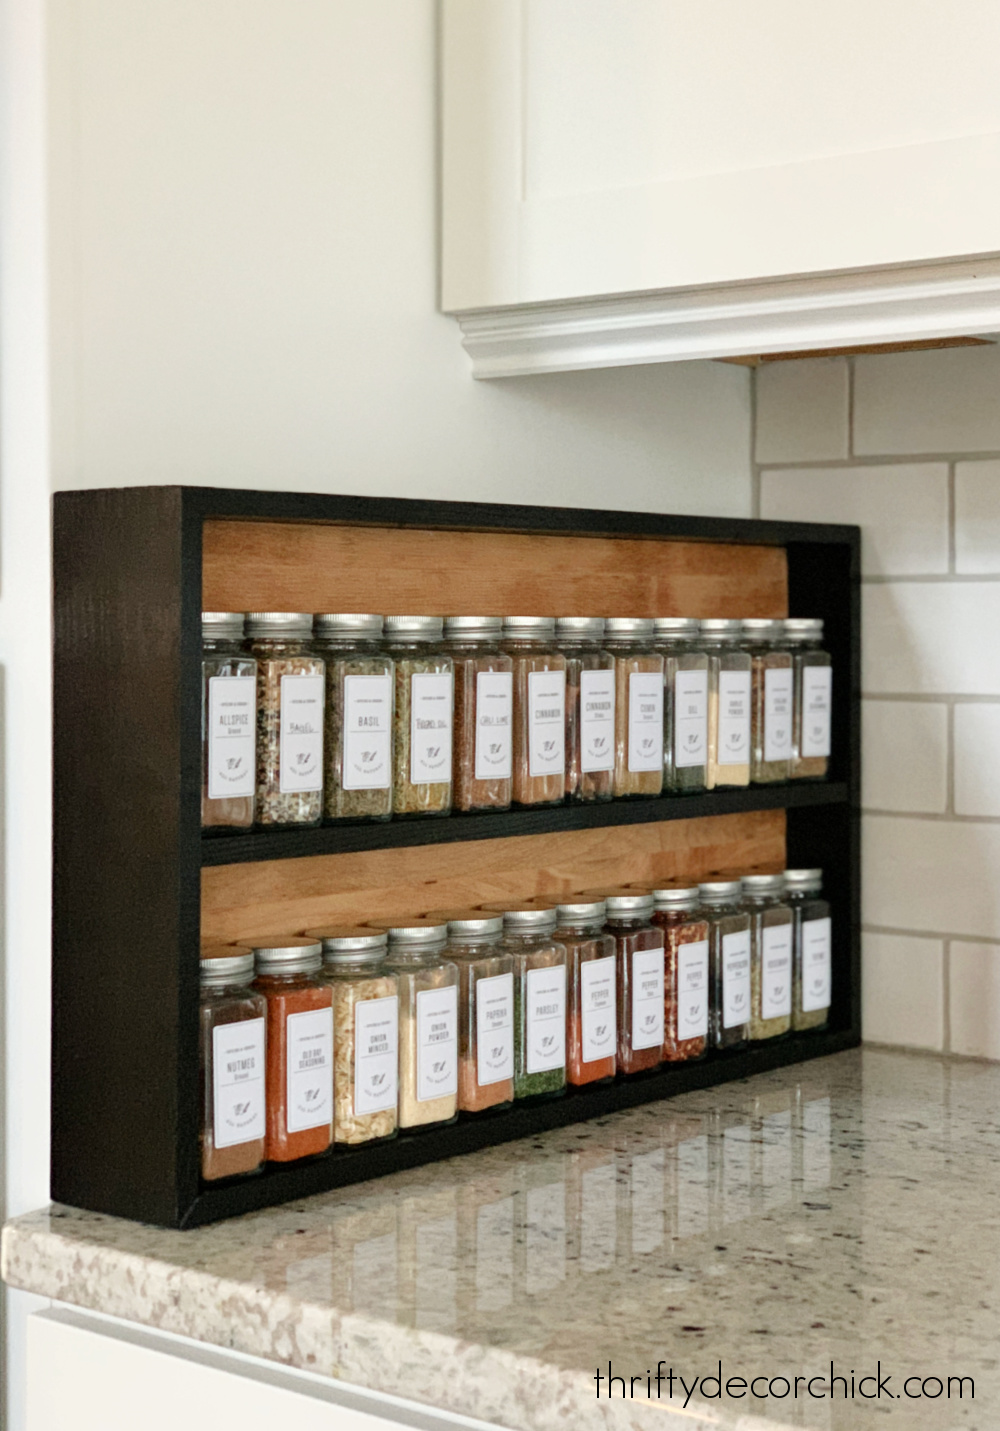
The design is simple and I love the wood stain and black combo. It provides a ton of spice storage:

I fit 28 jars on my two tiered spice rack (as you can see I had to nix the three level idea) which is perfect for our needs! It fits nicely under our kitchen cabinets.
You may remember I had a spice drawer in the pantry cabinets a few months back with the cute mason jars. I quickly realized I hated having them stored with only the label on the lids visible. Even if I stored them alphabetized, I still couldn't find what I needed quickly enough.
My brain is visual (are you surprised?) and I need to be able to see the actual color and texture of the spices and herbs -- I find what I need quicker than even reading the labels!:

I ended up with these taller glass spice containers with the cute labels and LOVE them. The set comes with a TON of labels, including a page of them you can use to write your own. (I scanned the empty labels into my computer so I can print off more in the future if needed.)
I love how they look, and really love having them so close to where I cook or prep food. I think a wooden spice rack looks great as kitchen decor:

It only took three tries, but I finally got a finished result that I love. You may notice there are no dowel rods across the front. I decided with only two shelves we really didn't need them, and I like the simpler look:

It's a good thing I didn't want to use them, because the frame wasn't deep enough to add them anyway! GoodNESS. ?
I doubt we'll have any issues with these staying put, but if we do I plan to add a leather accent like I used on the cutting board storage on the side of our fridge.
There are a bunch of variations you could use for your own DIY spice rack!:
Thank you so much for the kind comments on our pantry makeover reveal by the way! I always love reading your comments and thoughts:

I love that my crazy projects might inspire projects in your home.
Never miss a post by signing up to get posts via email.
Via https://www.thriftydecorchick.com/2022/03/DIY-wood-counter-spice-rack.html This crown cutting jig makes cutting and installing crown molding a BREEZE!
When I say this little crown molding tool is a game changer, I mean...GAME CHANGER.
If you've ever cut crown molding on a saw, you know what a pain it can be. I have to keep examples of the cuts nearby to remind myself every time I do it because it can be so confusing.
To get the perfect cut, there's a lot of flipping and reversing (anyone else singing is it worth it, let me work it? ?) and making sure the crown lays just right on the saw.
I've shared how to cut crown molding on the saw and also how to use decorative corners that make crown molding much easier...but THIS, my friends, is the best of them all!
I've been working on finishing up the pantry makeover recently and had to install the crown molding before I could move on to the next step.
I planned to add it around the cabinet extension I added to the top of those tall pantry cabinets, (you'll see that at the reveal!) and then decided to keep going with it on all of the walls:
This post may contain affiliate links for your convenience.
See my policies and disclosure page for more information.
This small room has eight corners though, and cutting crown molding is one of my least favorite DIY jobs. Installing isn't bad, the cutting is a pain!
So I finally looked into a crown cutting tool I've seen a few times online.
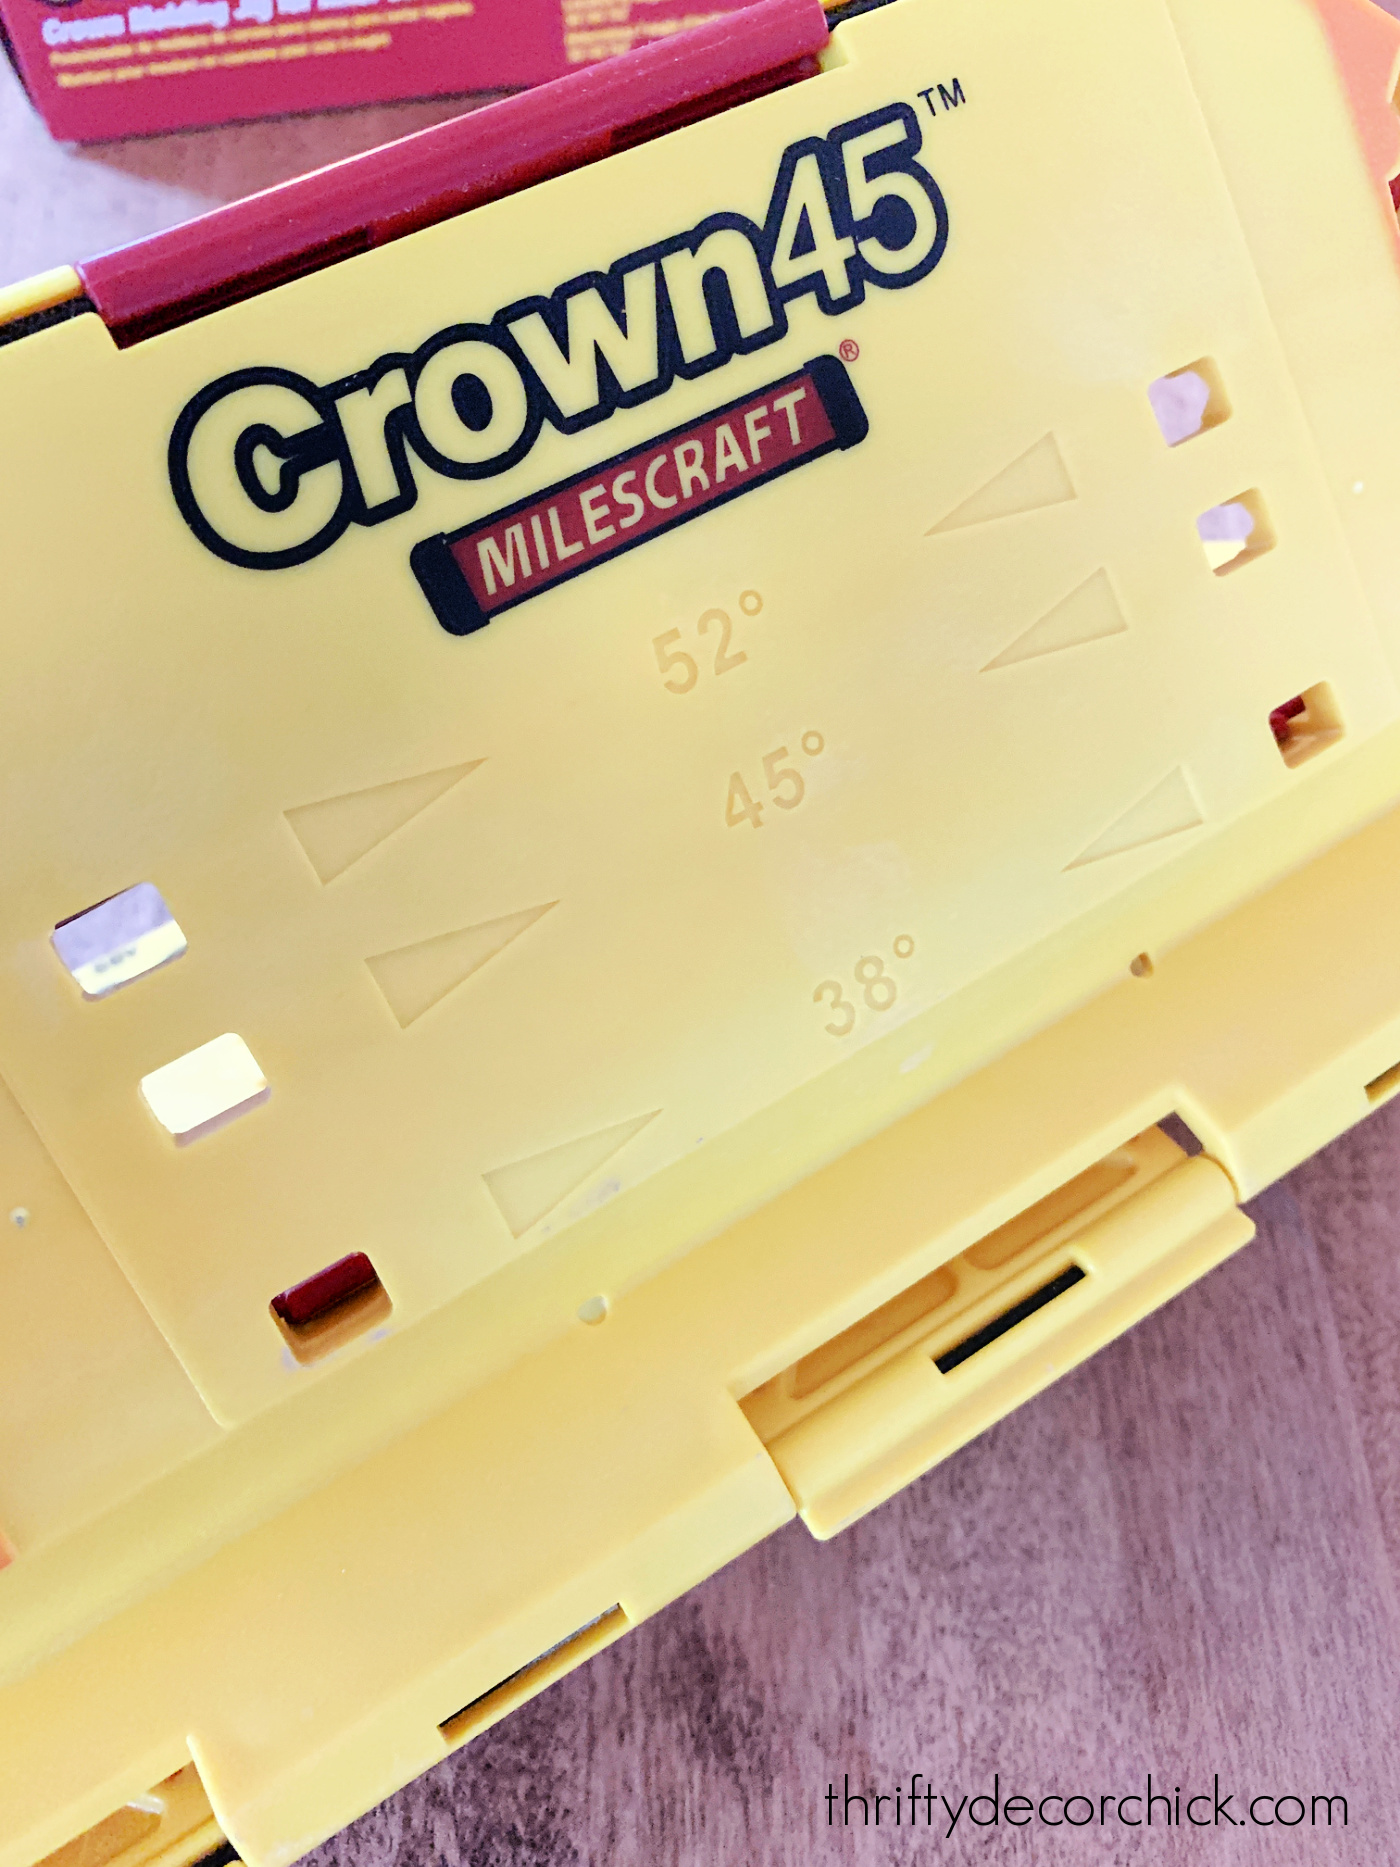
I found this Crown 45 cutting jig and figured I'd give it a try:

When you pull it out of the box the tool is intimidating...I had no clue what to do with all the gizmos. But they provide a link to this video that explains how to set it up (super easy), the tools included (very helpful) and how to place it on the saw.
I watched the video and kept saying to myself...there's no way it's that easy. No way. I was wrong!
First up, they provide these little angle finders that are stored on the jig:
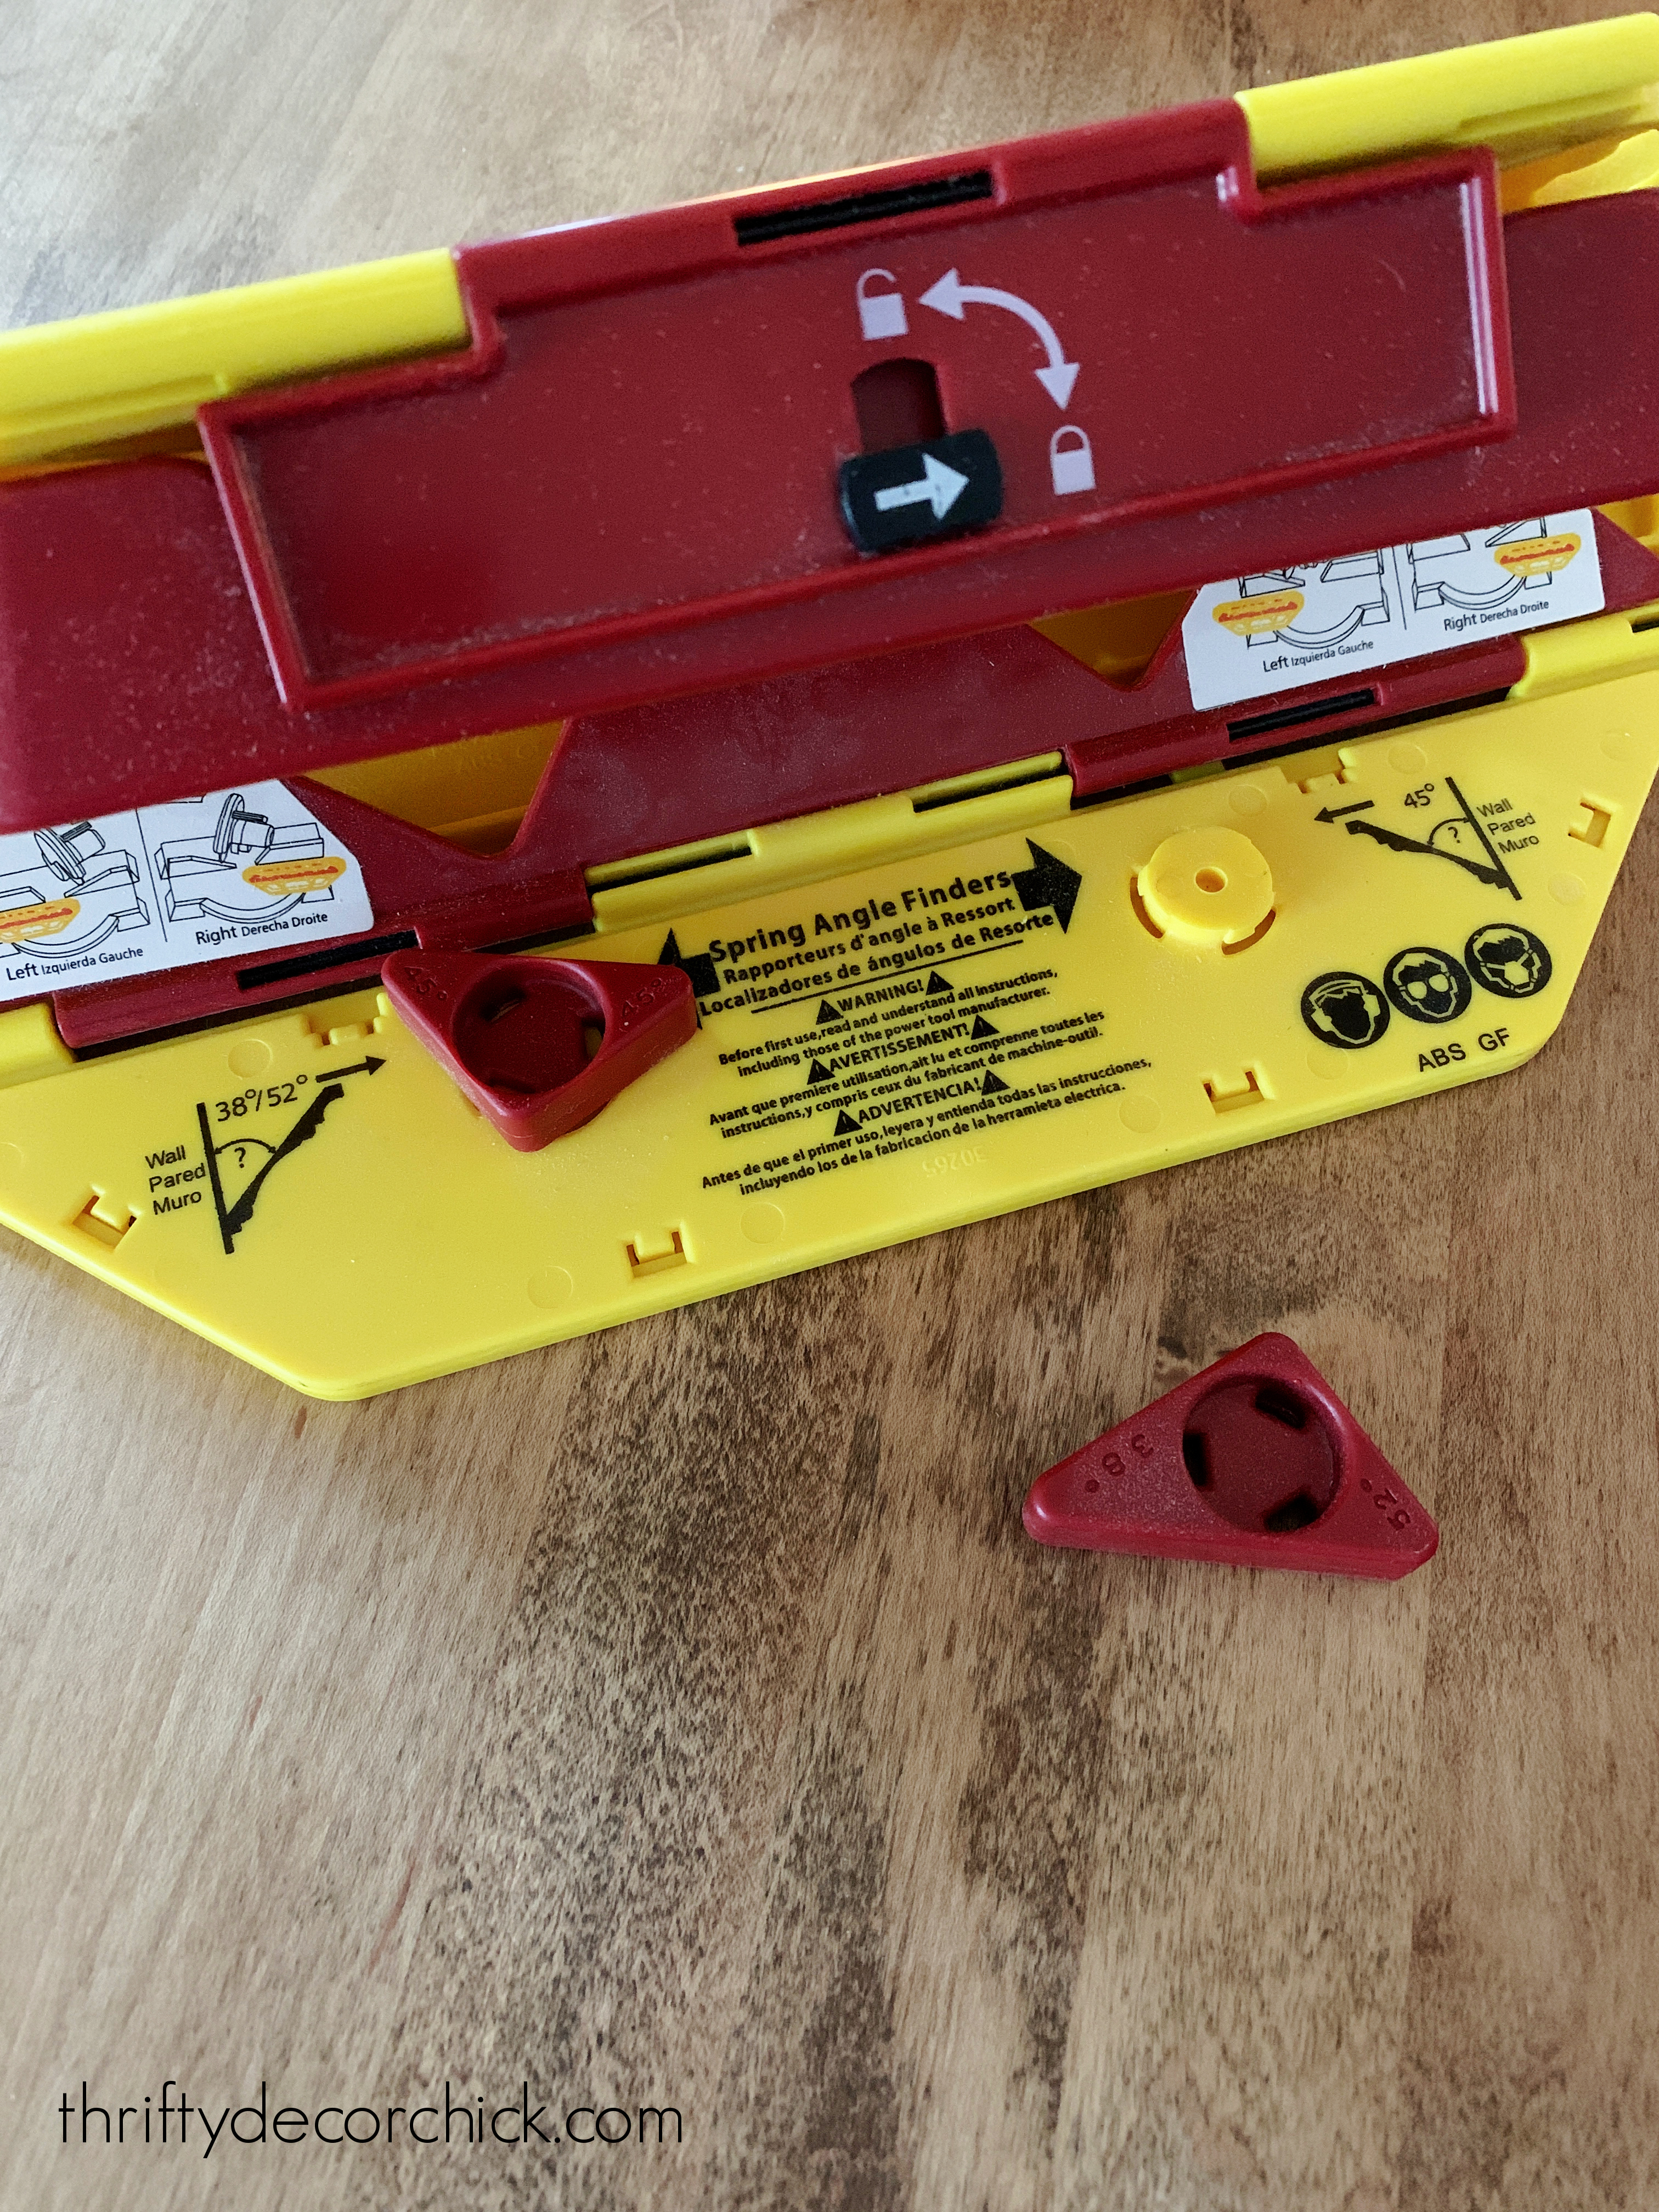
Place your crown on a flat surface (wall or a table) and place the angle piece inside till you get the right fit. For example, this one is not good:
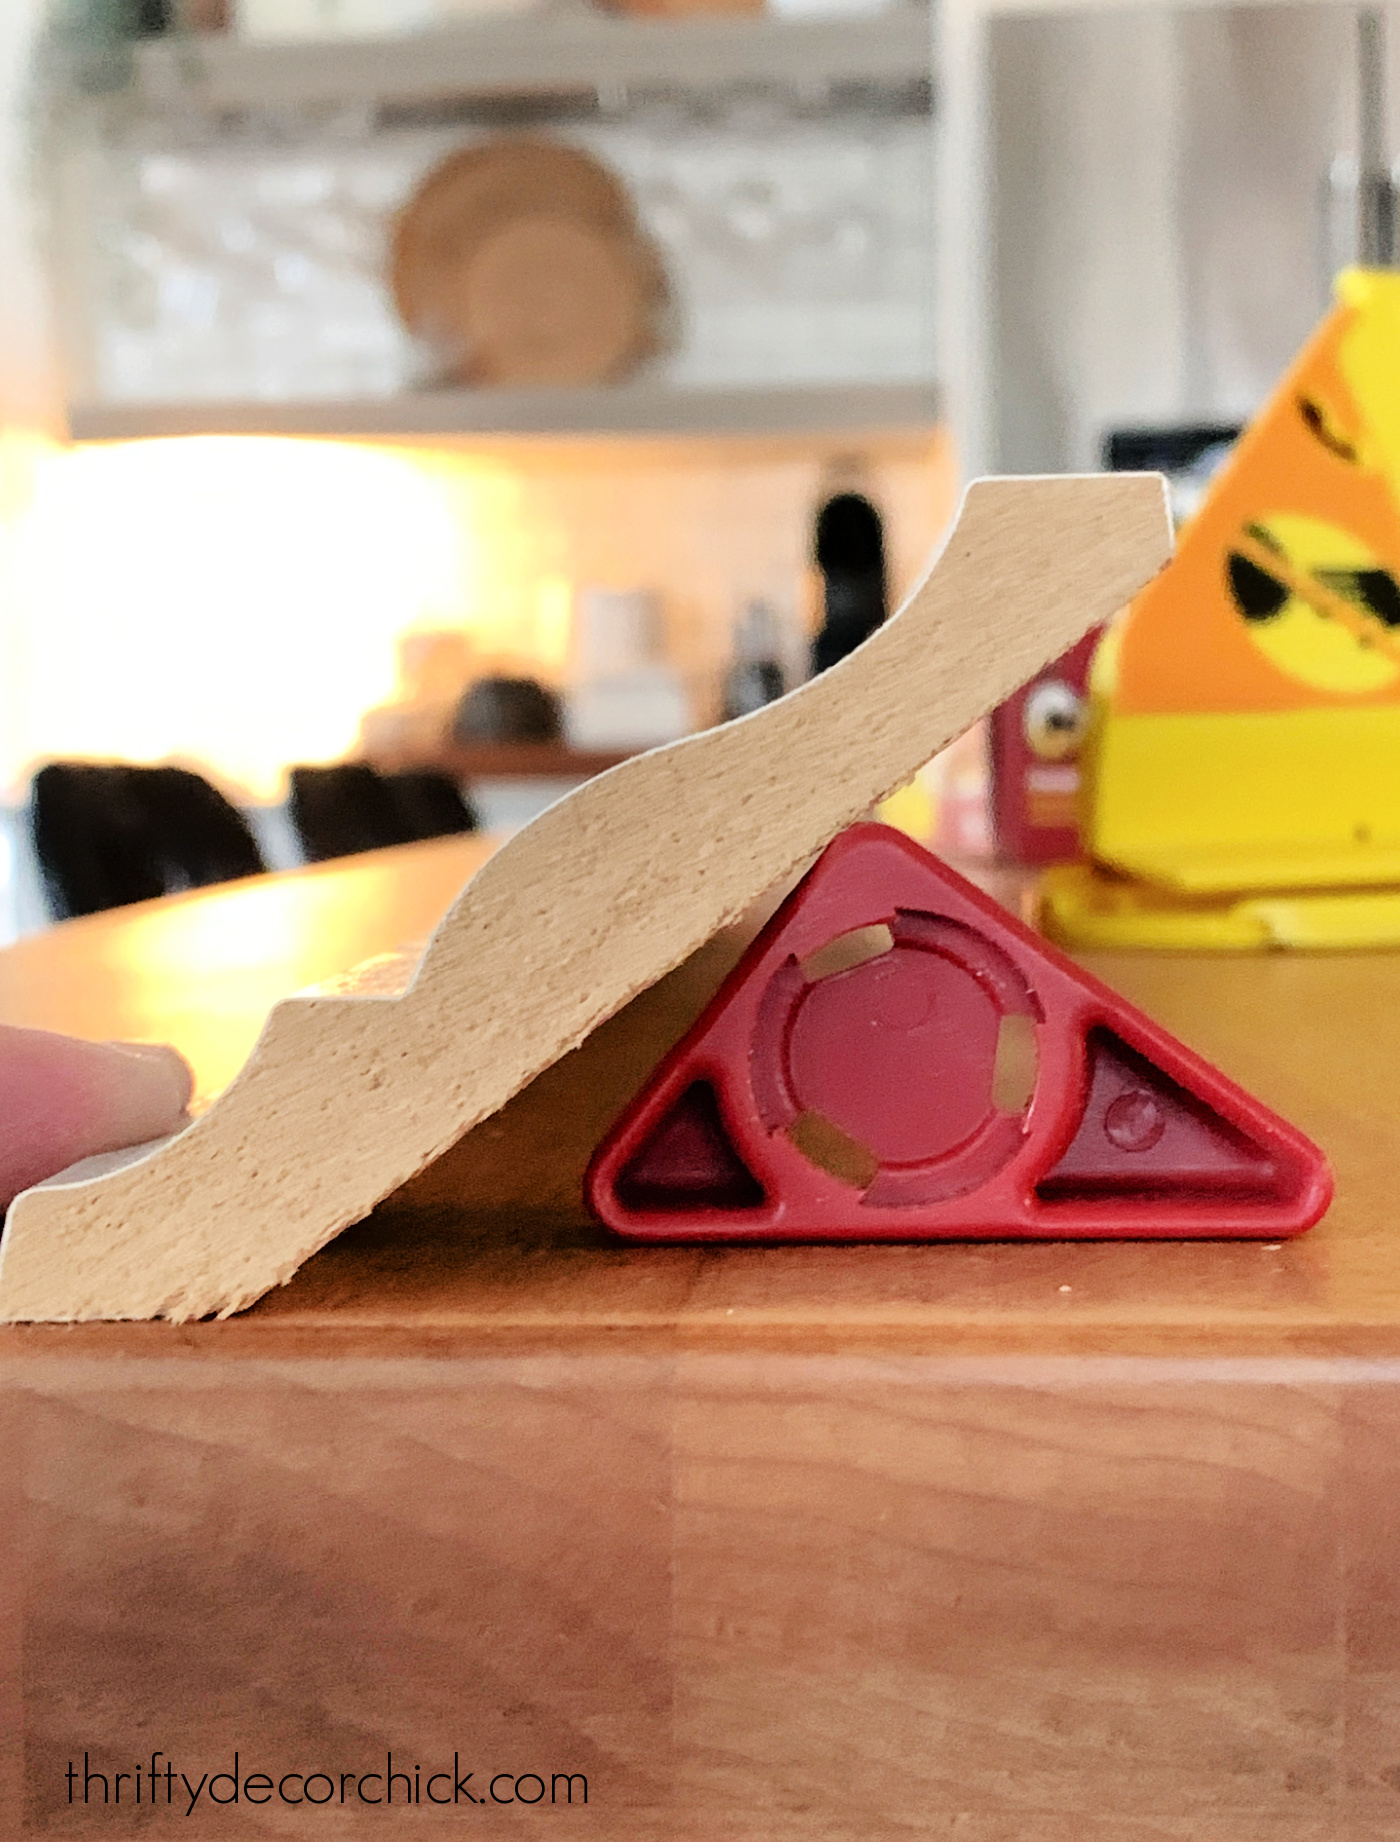
But this one (38 degree angle) is perfect!:
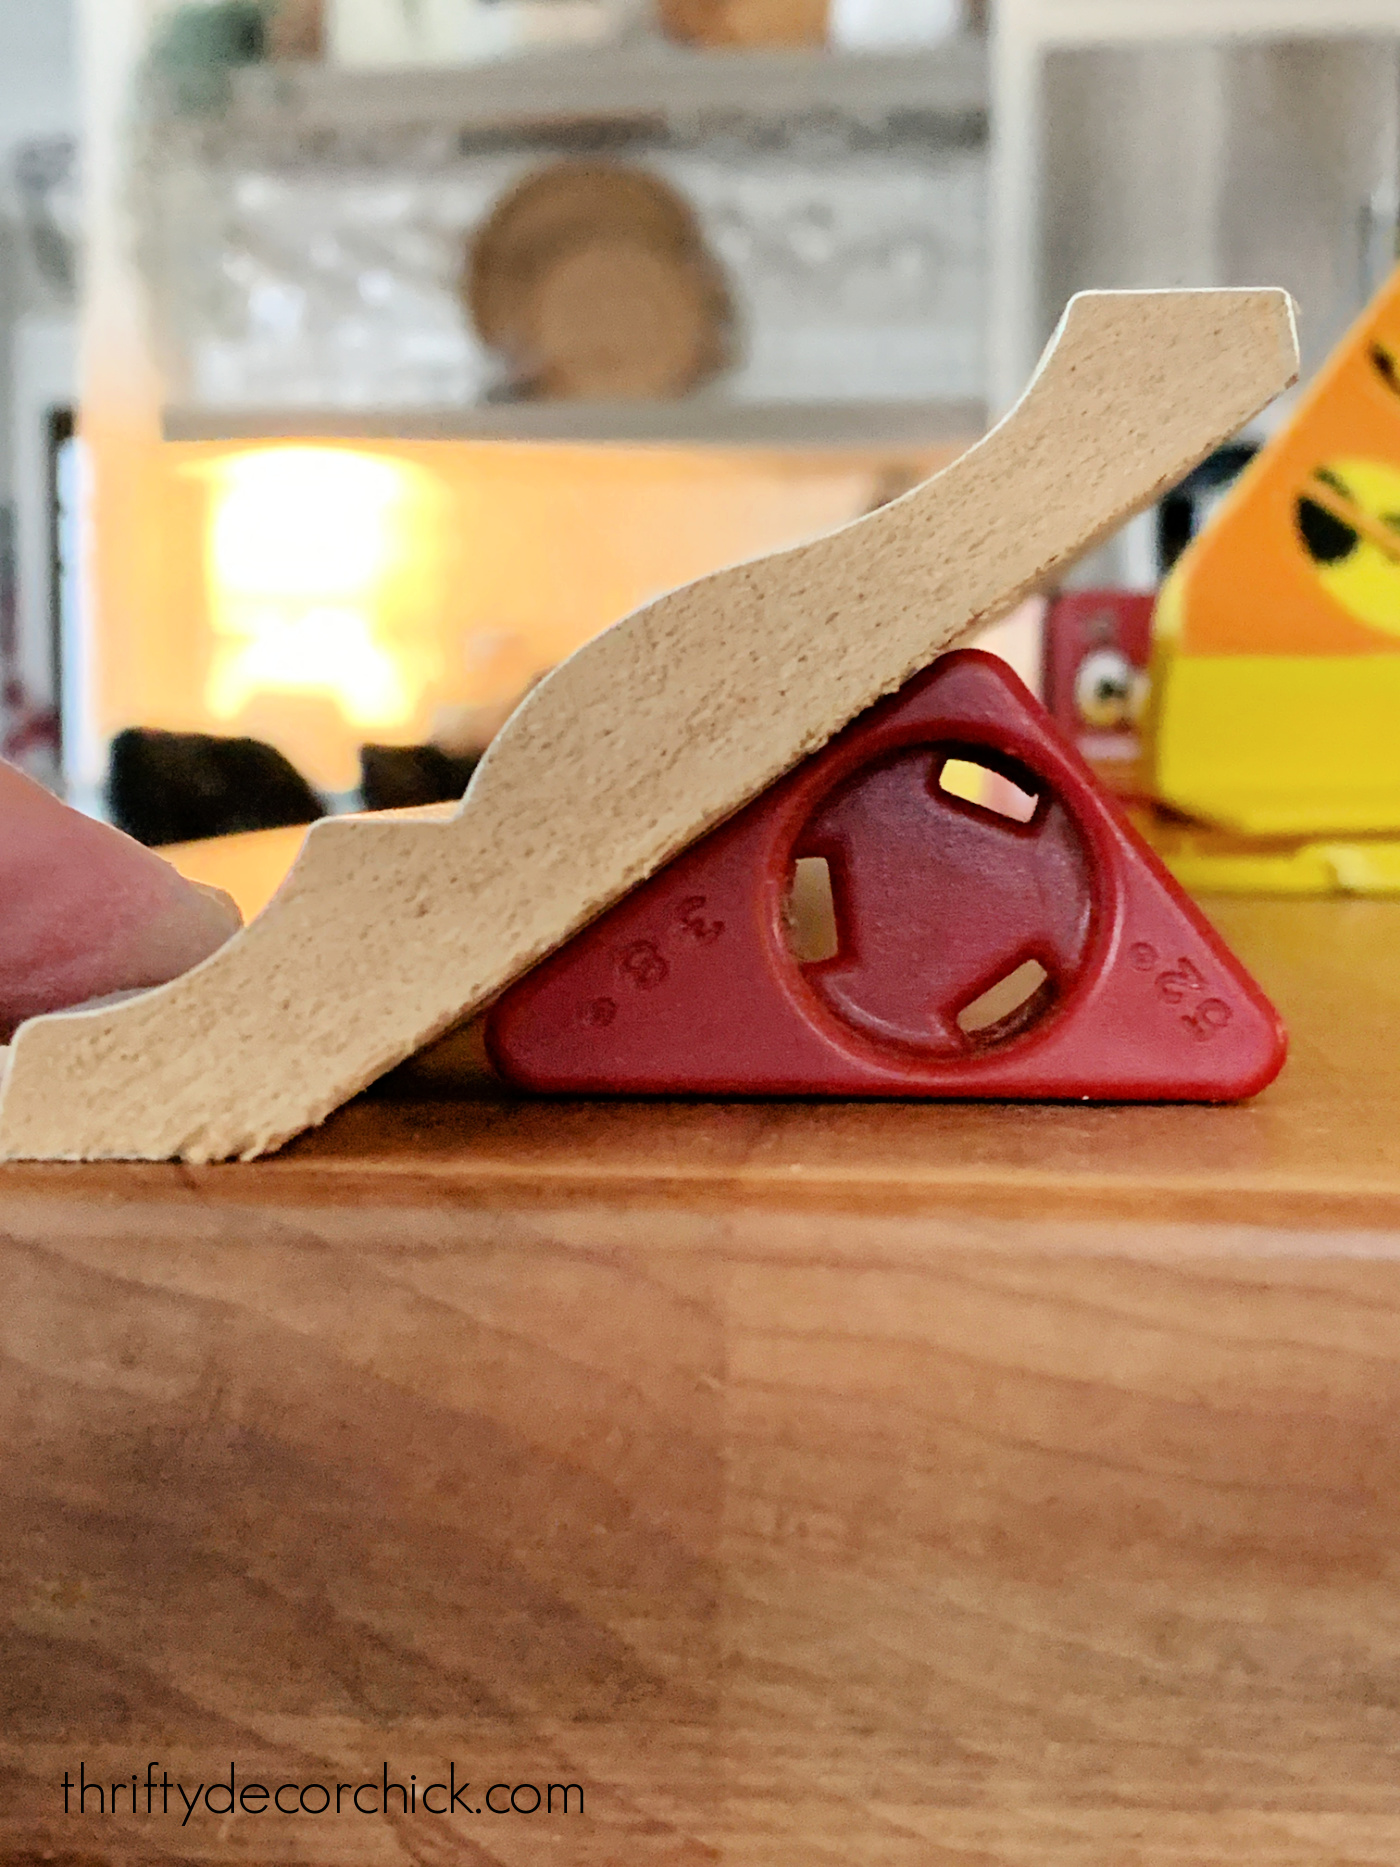
Crown molding comes in a few "spring angles" so these little angle finders are incredibly helpful!
The spring angle is the angle from the crown when it's installed to the wall behind it.
Before you start cutting, you'll want to place your jig at the right angle height:
This is what keeps it at the perfect angle while cutting the crown molding on the saw.
Their video shares where to place the jig for both inside and outside corner cuts, as well as the direction your saw blade should be going.
I tried my first test cut on a scrap piece, held it up in the corner, and started to believe. ;)
I laughed out loud when I held the first two pieces up next to each other and they matched perfectly. I mean...where has this thing been all my life??
All you have to do is place your crown down first, then push the jig up to it. You'll want to make sure the back of the crown is flush against the saw guard at the bottom:
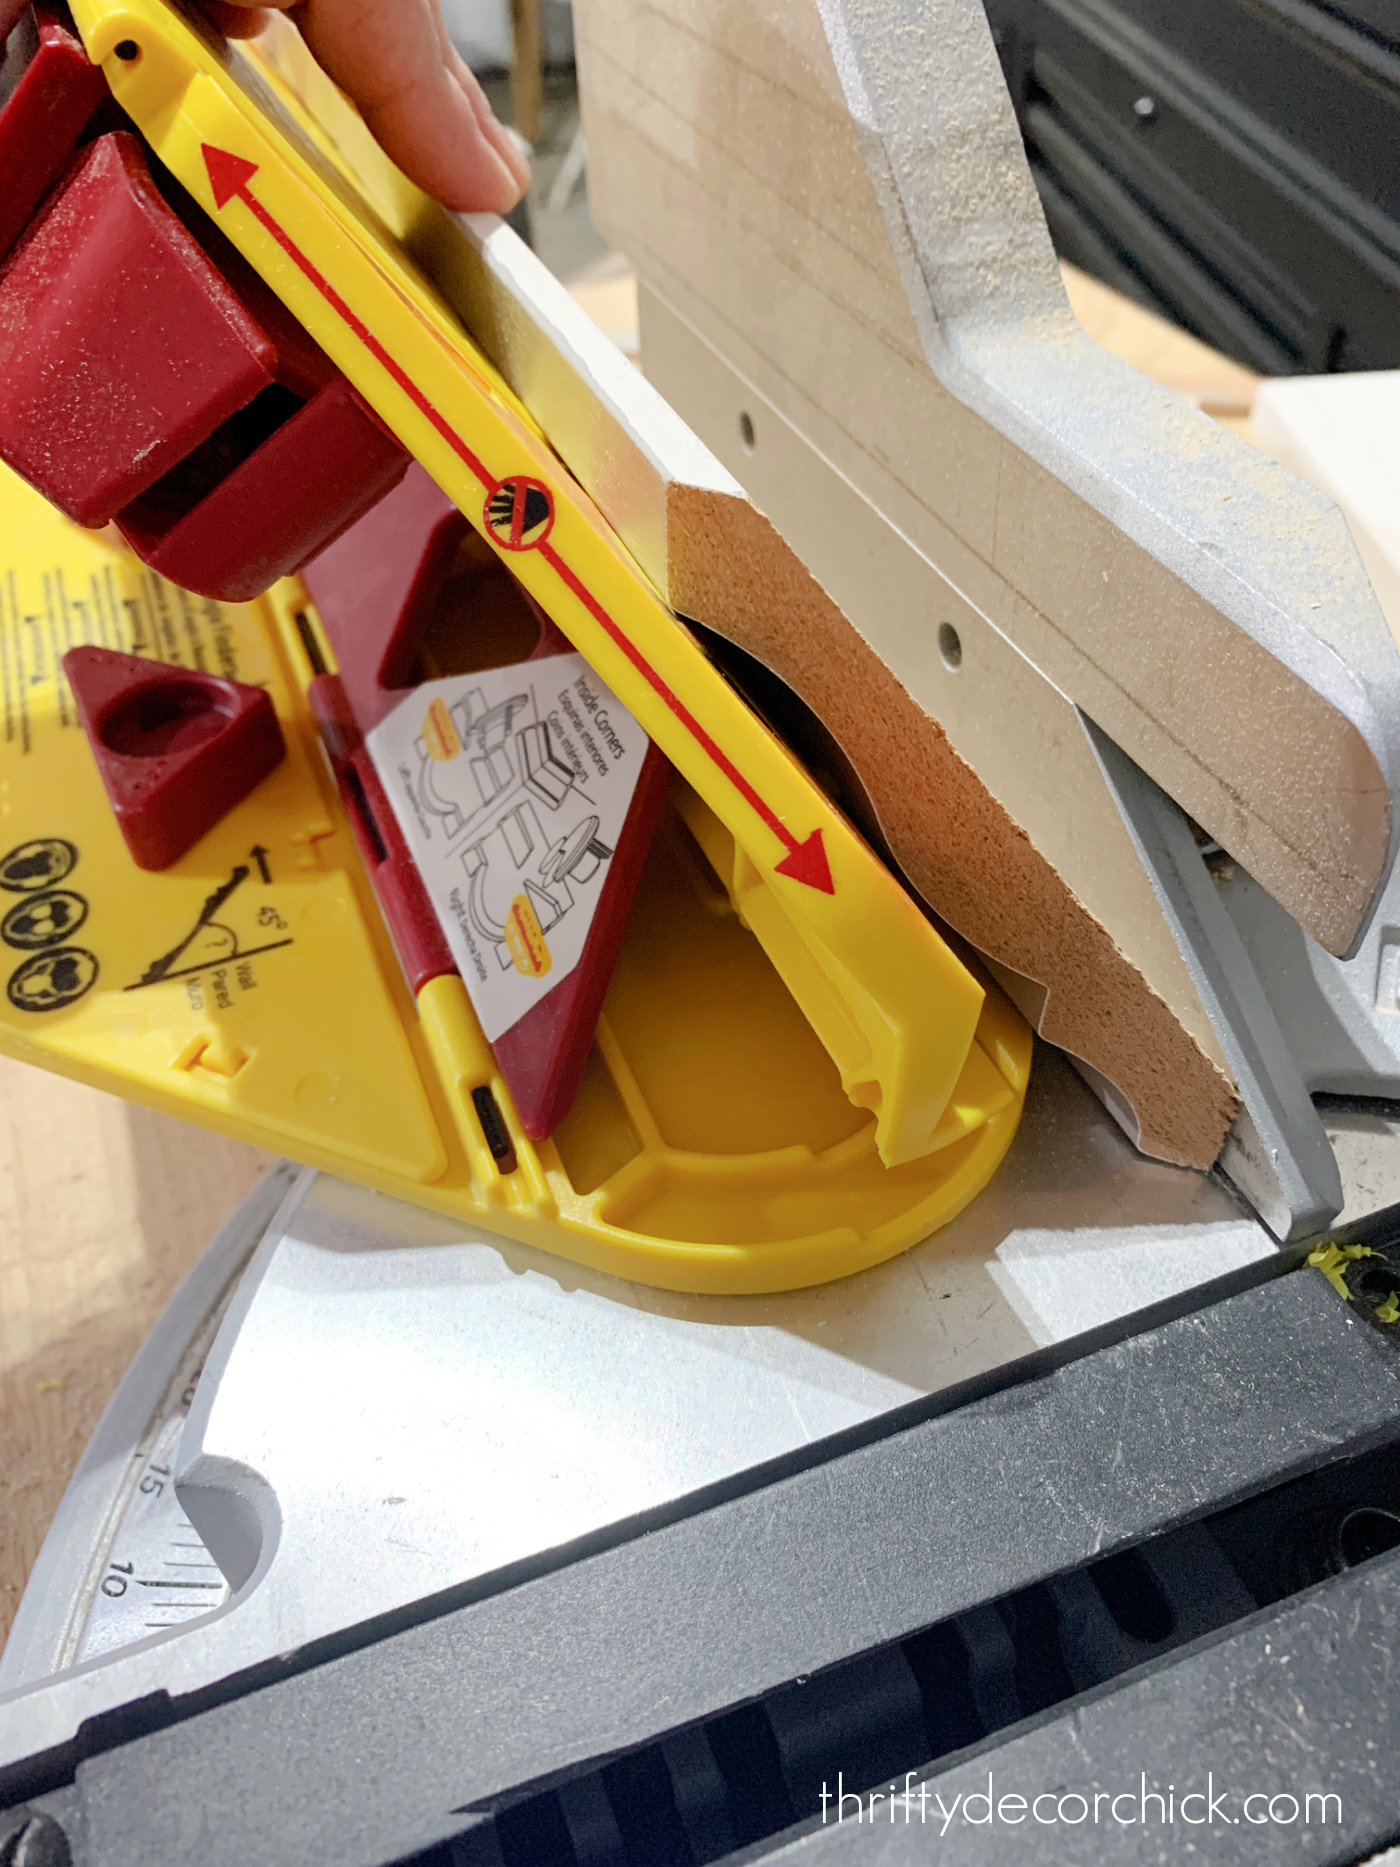
Make sure your jig is out of the way of the saw, then cut in the direction for your inside or outside cut.
The instructions are on the jig as well -- it's a bit confusing to remember at first, but after a few cuts you'll get it down quick.
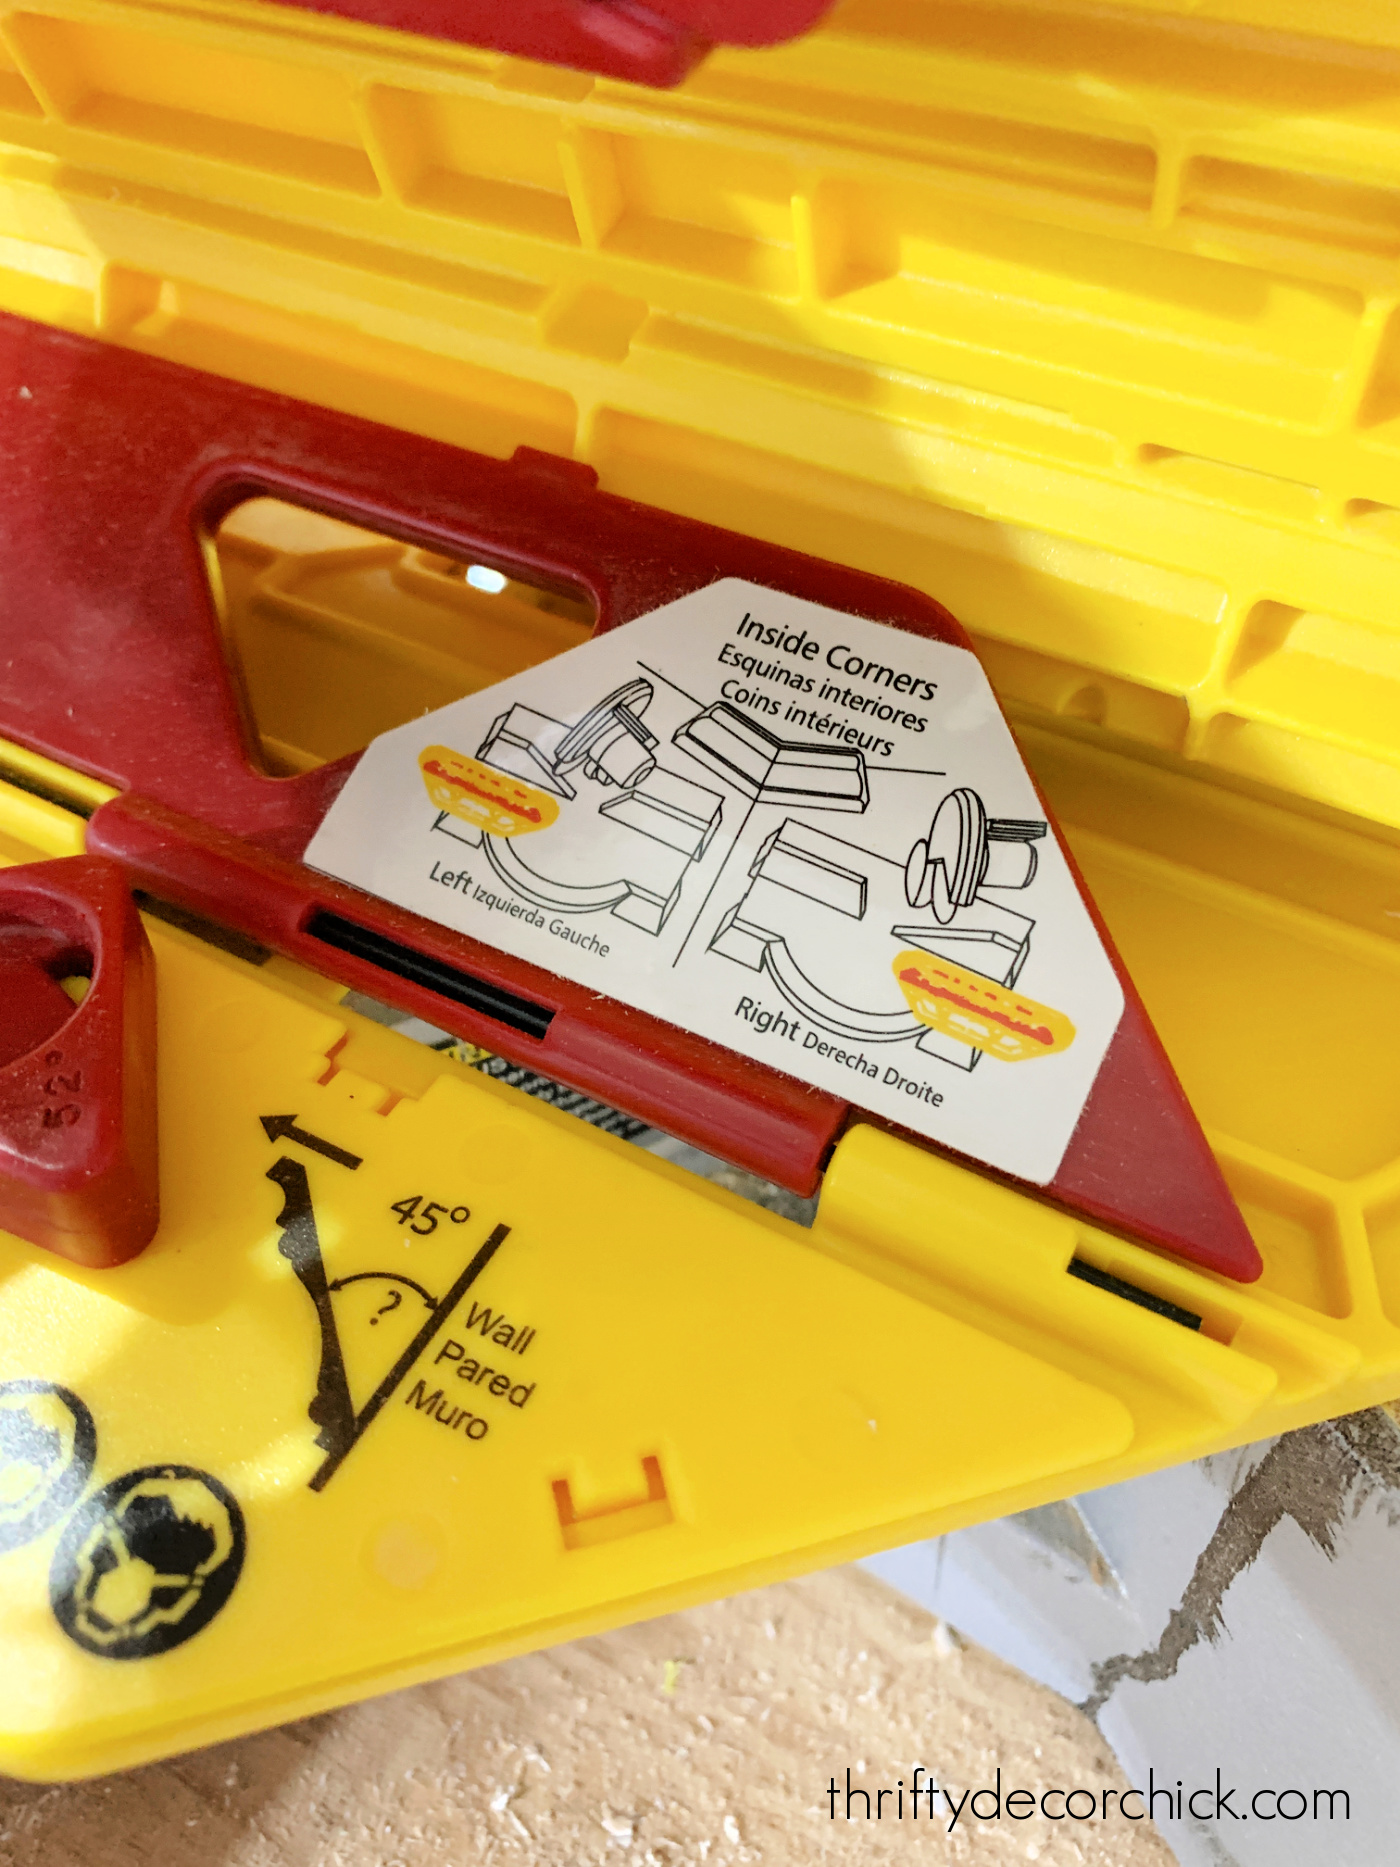
You'll want to mark your measurements on the back of your crown, not the front, because all of your cuts will be made from the back of the molding.
This is nice because you don't mark up the front of your trim!
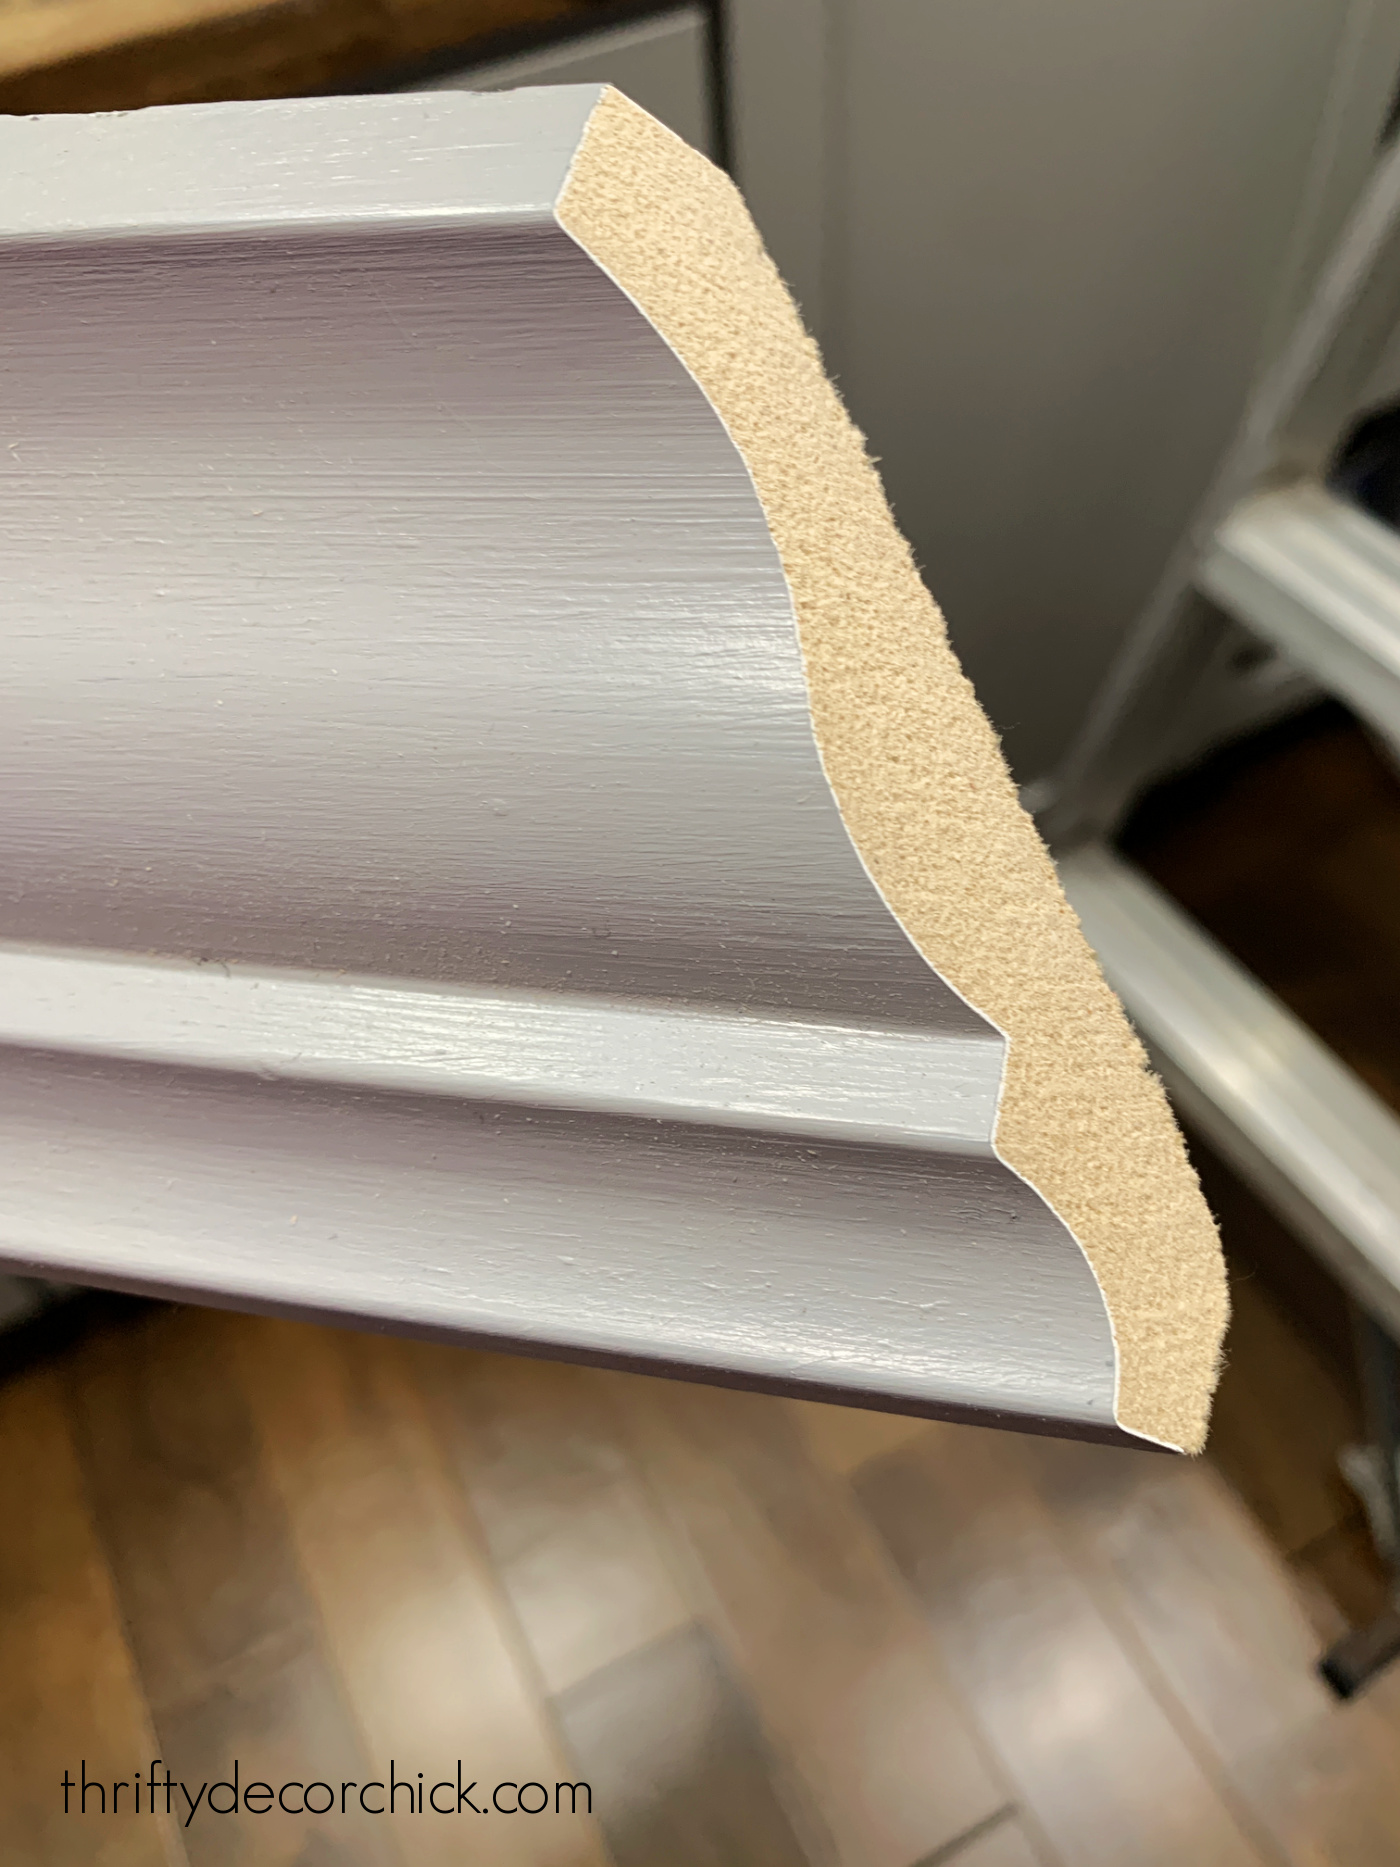
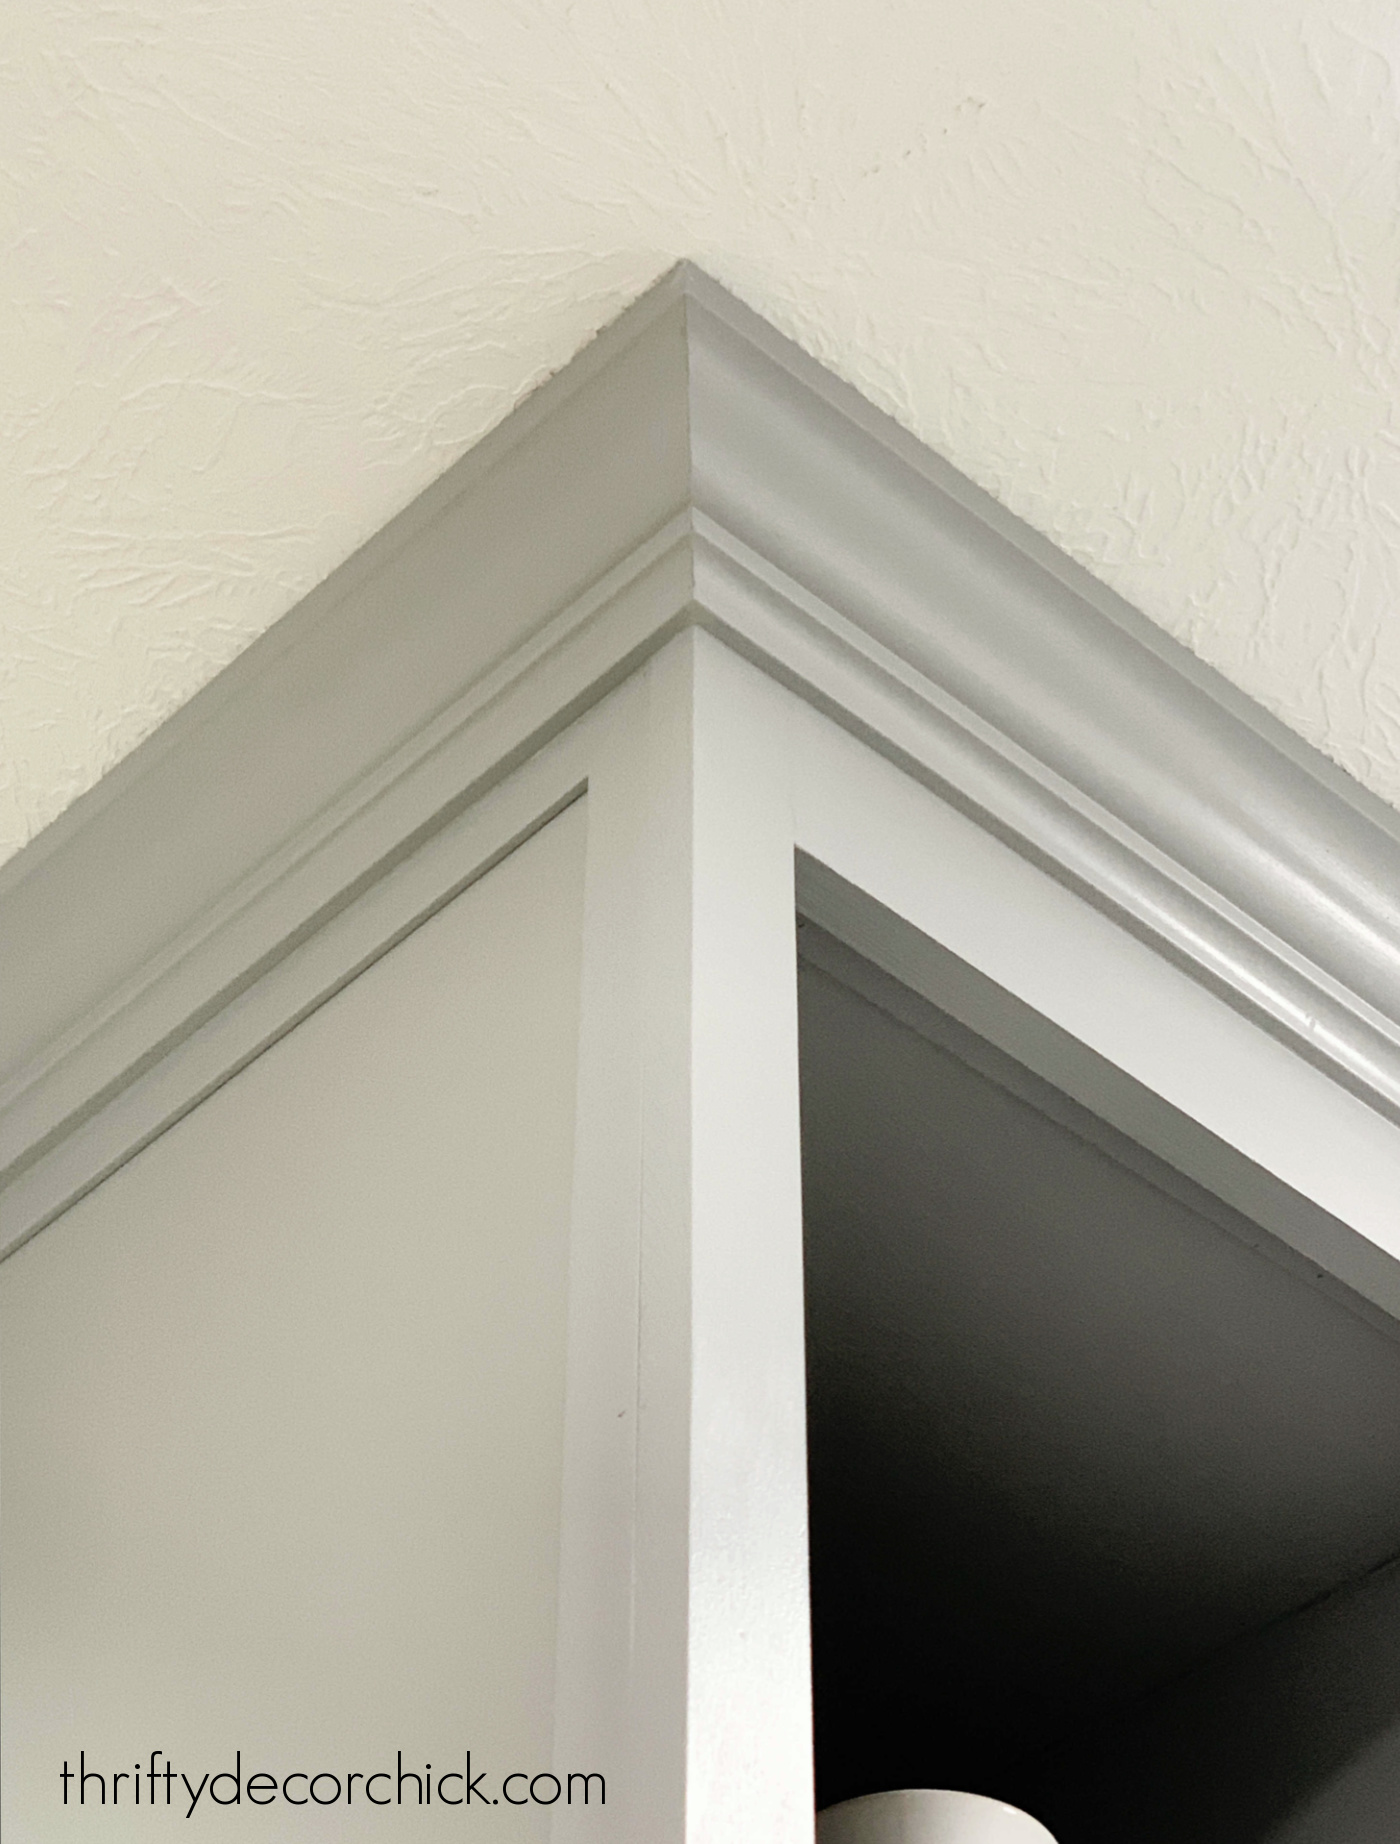
My first two pieces were for an outside corner and they met up PERFECTLY:
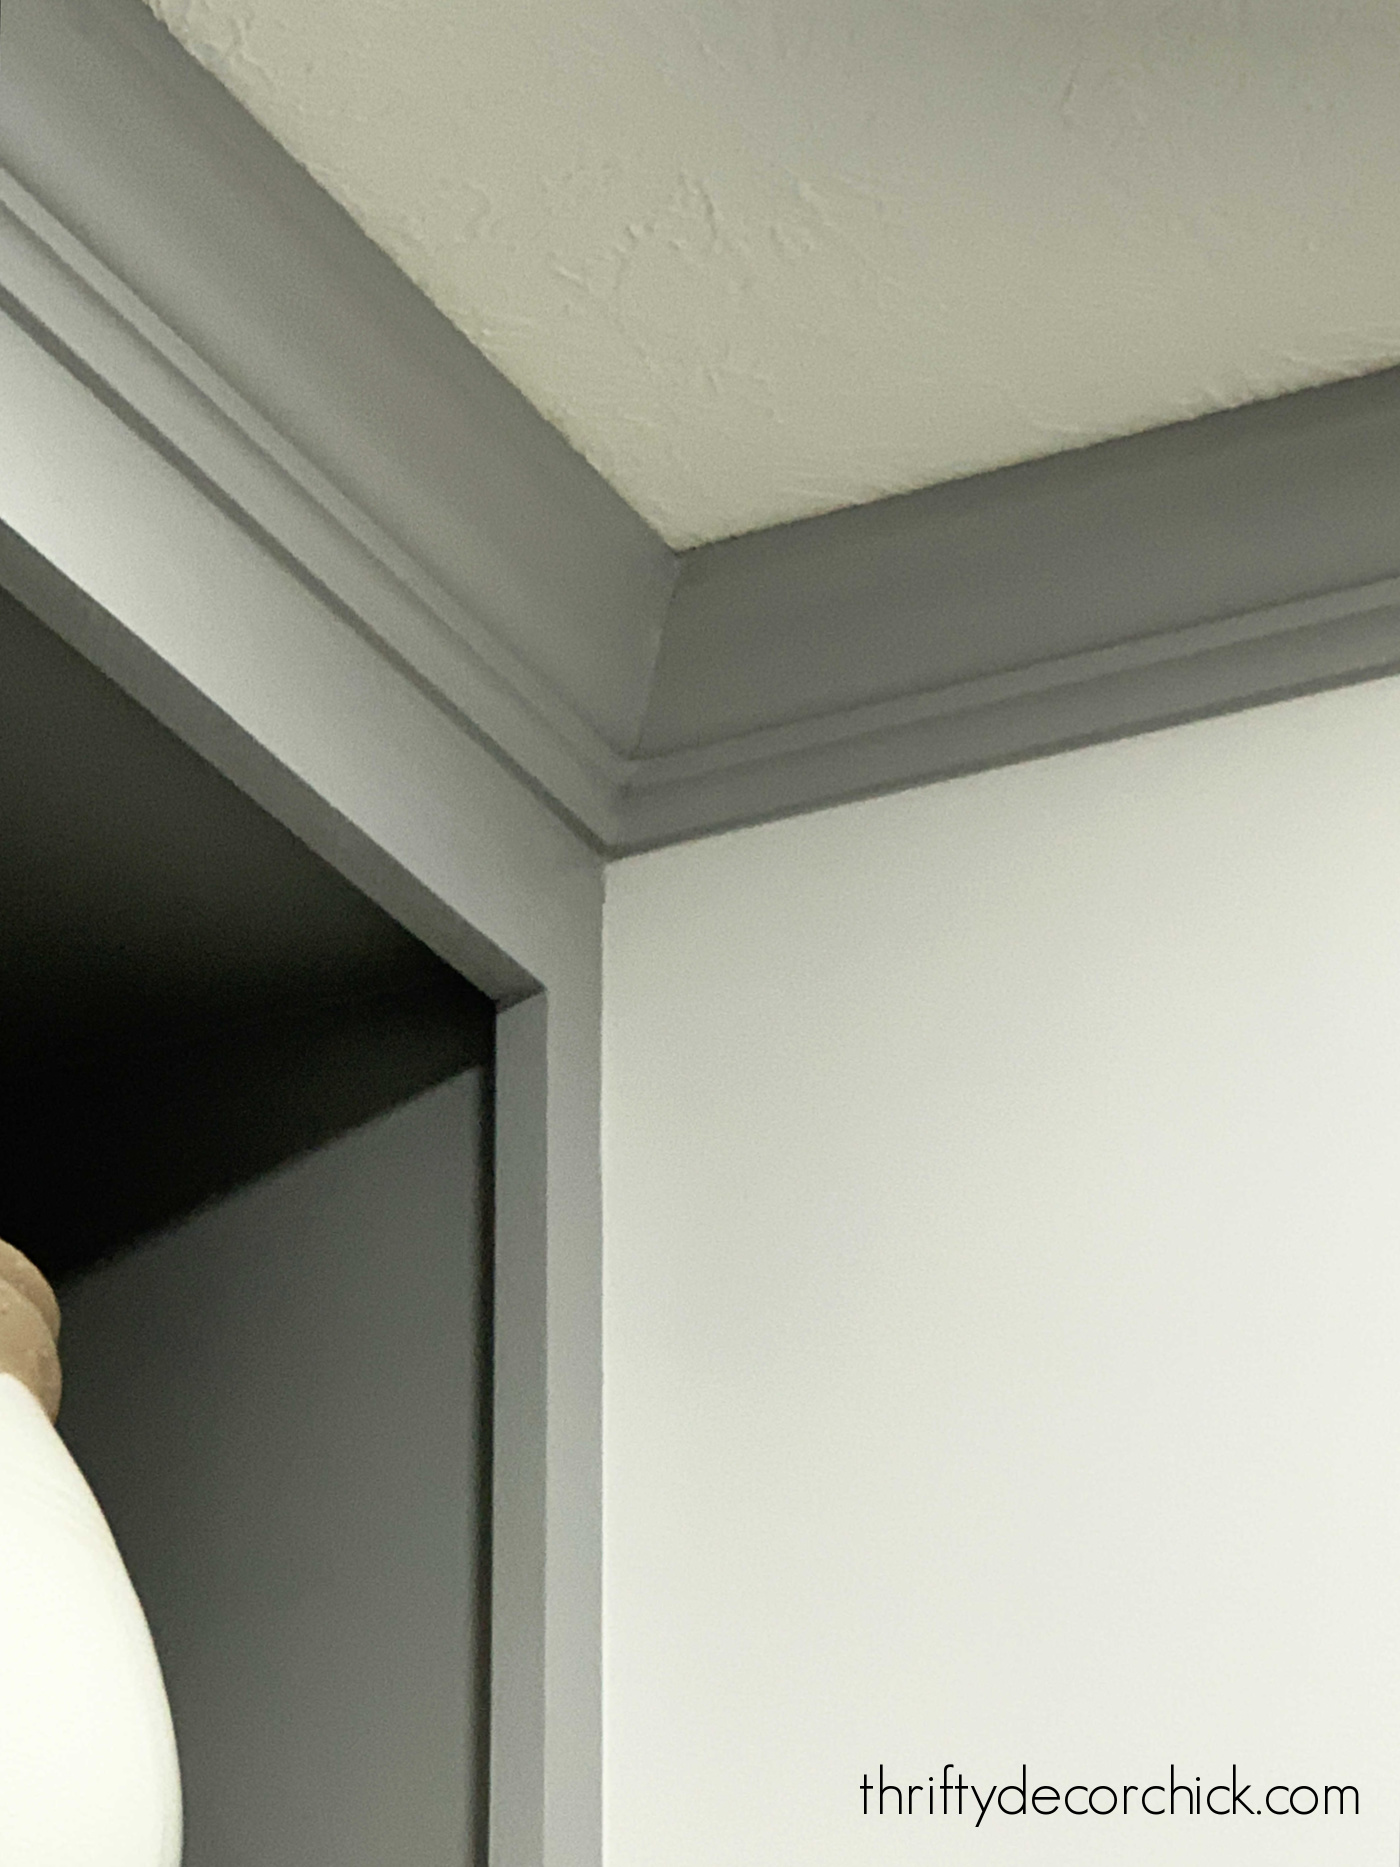
And the corner pieces were excellent as well!:
I cannot tell you how much time (and crown molding!) this jig has saved me! Even though I've cut crown numerous times, it was usually frustrating and time consuming to get just right.
I'm shocked at how well it works and how easy it is to use. And I'm KICKING myself for not getting one sooner!
This probably knocked half the time of what I would normally spend installing crown molding.
Total game changer. Now I'm eyeing all the rooms that could use this trim!
I got this crown molding jig online, but you can find them at Home Depot too.
Have you ever attempted cutting crown molding? If it's intimidated you, I highly suggest using a jig like this!
Never miss a post by signing up to get posts via email.
Via https://www.thriftydecorchick.com/2022/03/easy-way-to-cut-crown-molding-jig.html Make your own DIY slide out pantry or cabinet drawers for SO much less!
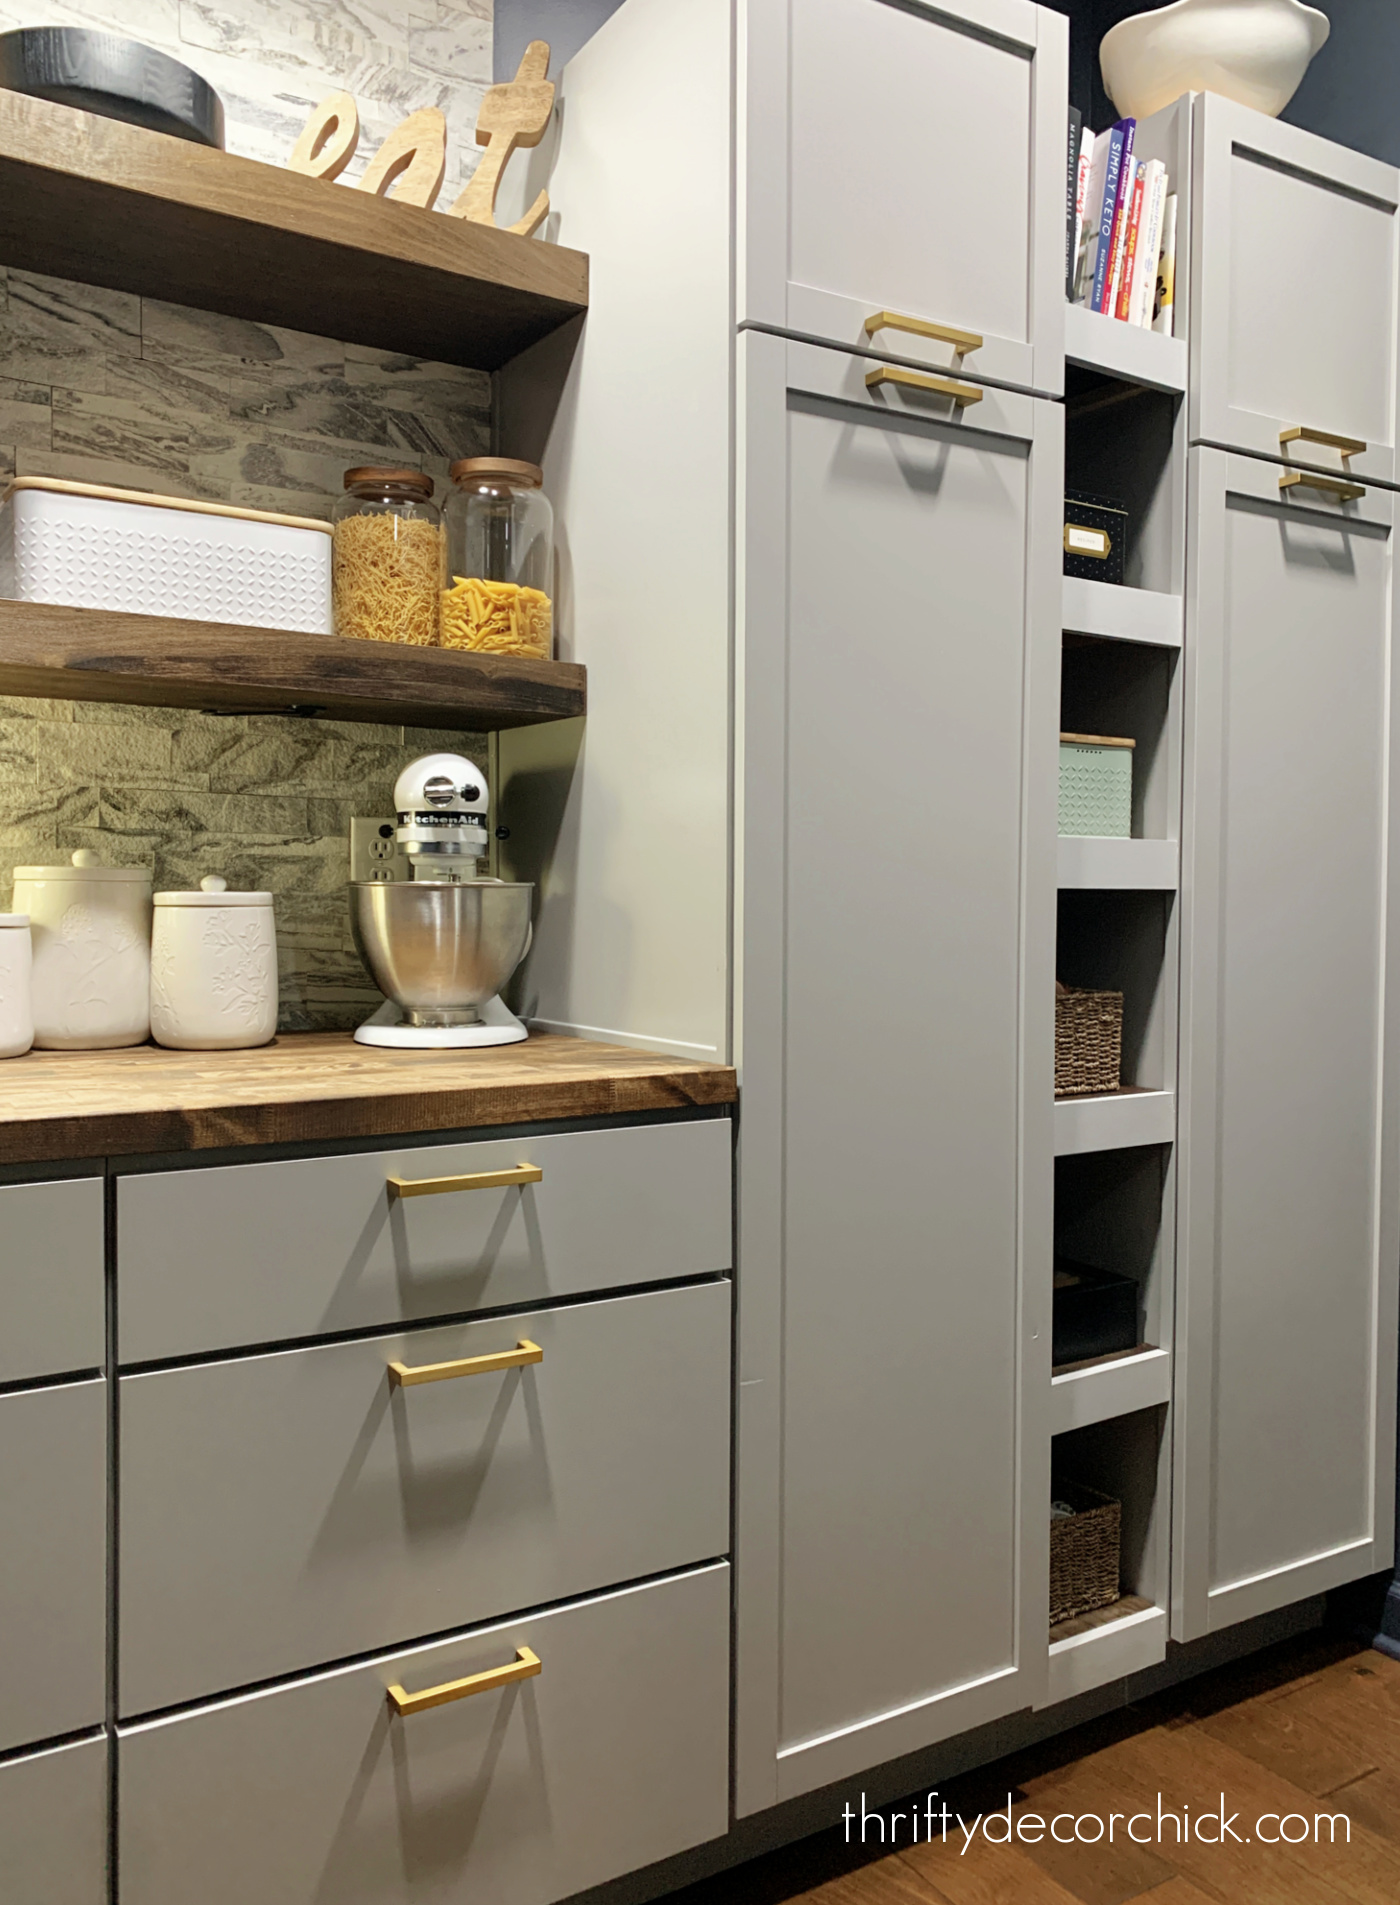
I'm back with another great project from the pantry makeover! Have you seen those awesome metal cabinet inserts that roll out with cool ways to organize all the kitchen gear?
They are great, but are SO expensive. I can't ever pull the trigger on one of them knowing I could create something myself for so much less!
Last fall I took down our open shelves in our pantry and have been replacing them with closed cabinets and some prep space instead. My goal has been to turn the space into more of a functional butler's pantry.
It's turned out SO great and even I'm a little surprised at how well it's worked for our family. :) My favorite part...everything is organized wonderfully inside the cabinets.
We've been able to use our pantry since I installed the cabinets four months ago, but I've had a long list of to-do's since then.
I'm determined to get this project done in the next week...or two. The little details always seem to take the longest!
I built most of these DIY pull out drawers for our tall pantry cabinets month ago, but knew I would make a couple more.
I'll share how to easily build these shallow drawers and then two ways to install them:

See my policies and disclosure page for more information.
Determine how you want your drawers (or shelves) to function first
The hardware comes in all kinds of sizes and versions:
DIY pull out storage using custom drawers and slide hardware
I've installed every kind of drawer slide, but for this particular style drawer I like using these basic bottom mount soft close versions because they're relatively easy to install:

The slides are mounted on the insides of the cabinet (I'll show you photos in a bit), so the size of your drawer can't be bigger than the width of the opening, minus about half an inch on either side to accommodate the hardware.
Once you know the dimensions, you can start your simple drawer build. This can be done a number of ways, but I've found this way to be the most sturdy and secure.
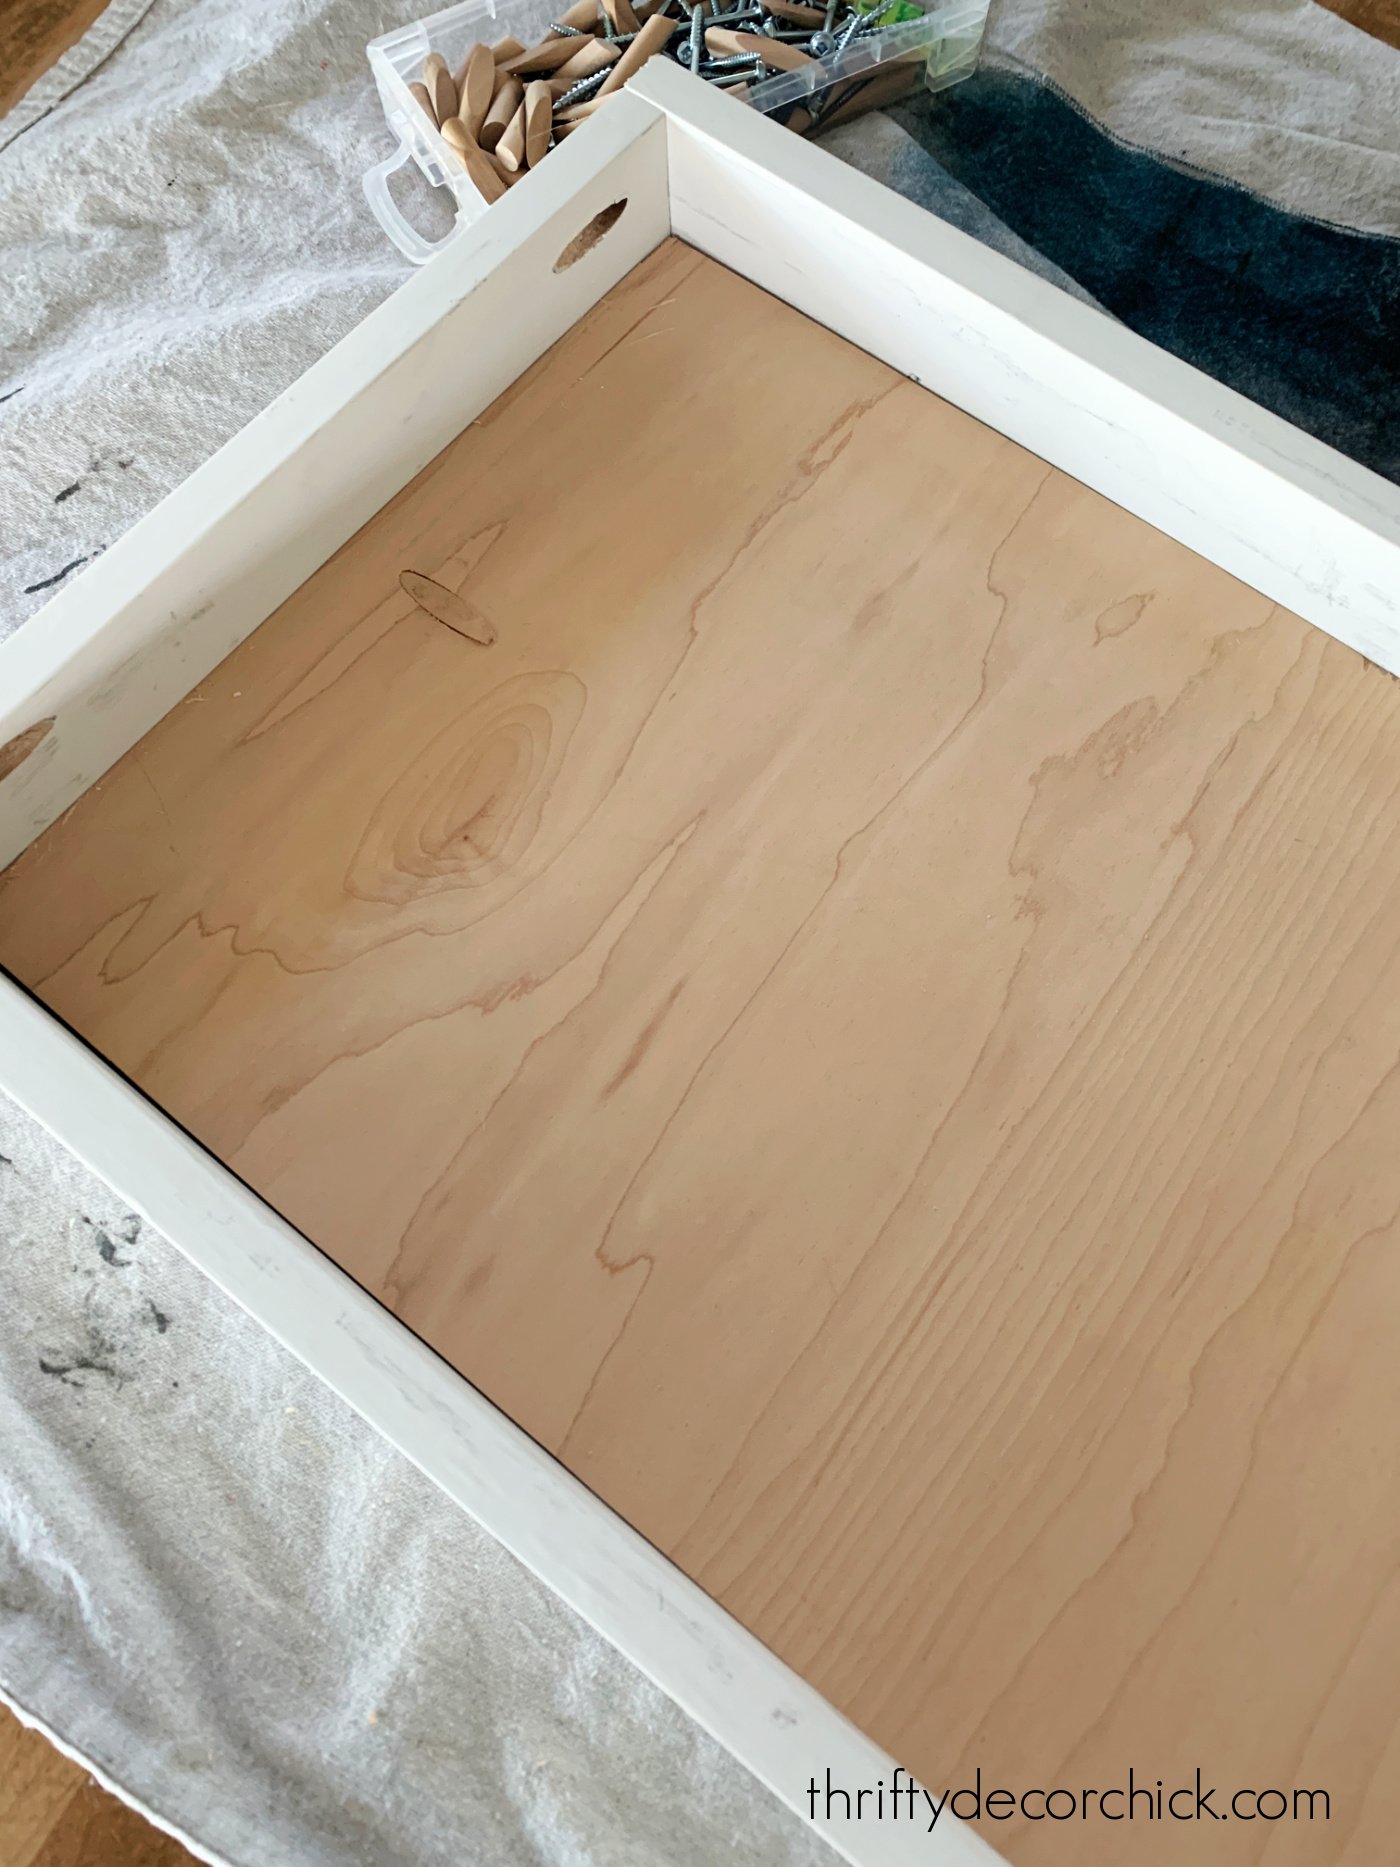
I measured the bottom part of the drawer and cut my 3/4 inch plywood to size. I was framing the sides of the drawer with trim, so the base is a bit smaller than the actual drawer:

If I installed the trim around the top of the base, then the bottom would need to be wider and longer. But because I was adding to the width and length with trim, it needed to be a bit smaller. (One and half inches to be exact, because of the 3/4 inch trim framing each side.)
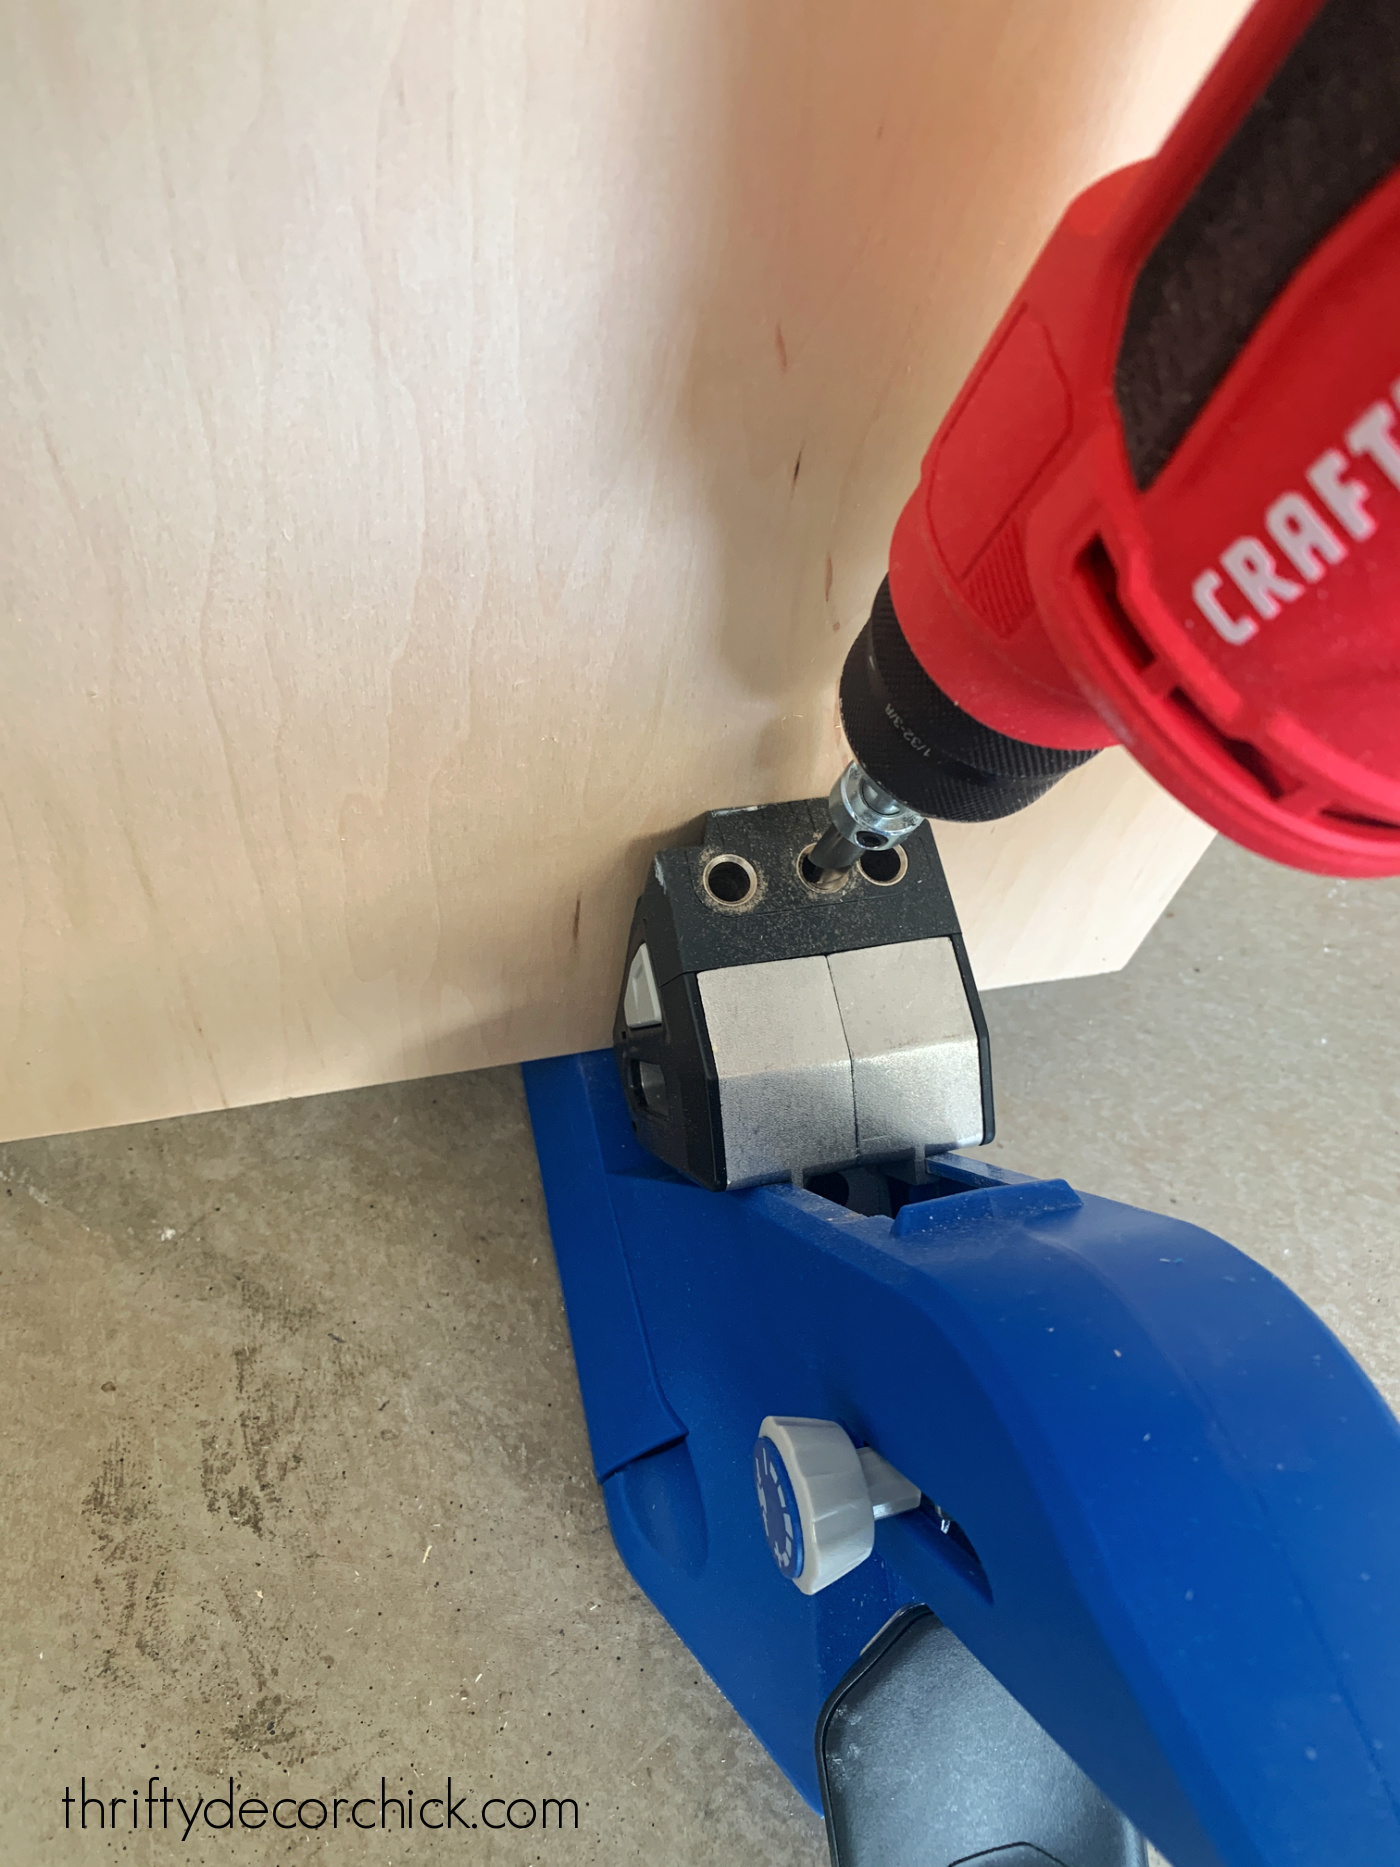
Up till about six months ago, I used wood glue, a nail gun and some screws to put something like this together, but I finally purchased a Kreg jig. It is such a handy tool to have!
BUT this is a pretty basic DIY and will work just as well without it!
I use the Kreg 720 pocket hole jig and love it because it's so easy to get the wood in and out of the jig to drill the holes:
I wanted our drawers to be very shallow, so I used 1x3 inch wood to trim them out. Make your sides taller for a deeper drawer.
Before I secured anything, I checked the fit of all the cut pieces:

I drilled a pocket hole into the trim pieces as well, so I could attach the sides to each other and to the drawer bottom for a really secure piece:

Make sure to drill your pocket holes on the opposite side that you will see!
Once your pieces are good to go, start attaching the pieces together with the Kreg screws. I still like to use some glue as well.
I forgot a couple holes and spaced it on the placement so they were on top on this one, but Kreg has wood plugs you can use to fill in your holes:
I don't care so much about that, at least not now! Maybe someday I'll finish them up, but you'll see later in the post that they look great from the front when done.
After your drawer is assembled, it's time to add the sliding hardware. This is why I prefer this simpler option -- they easily attach on the bottom corner of the drawers.
Make sure to put the front edge right up to the front of your drawer:
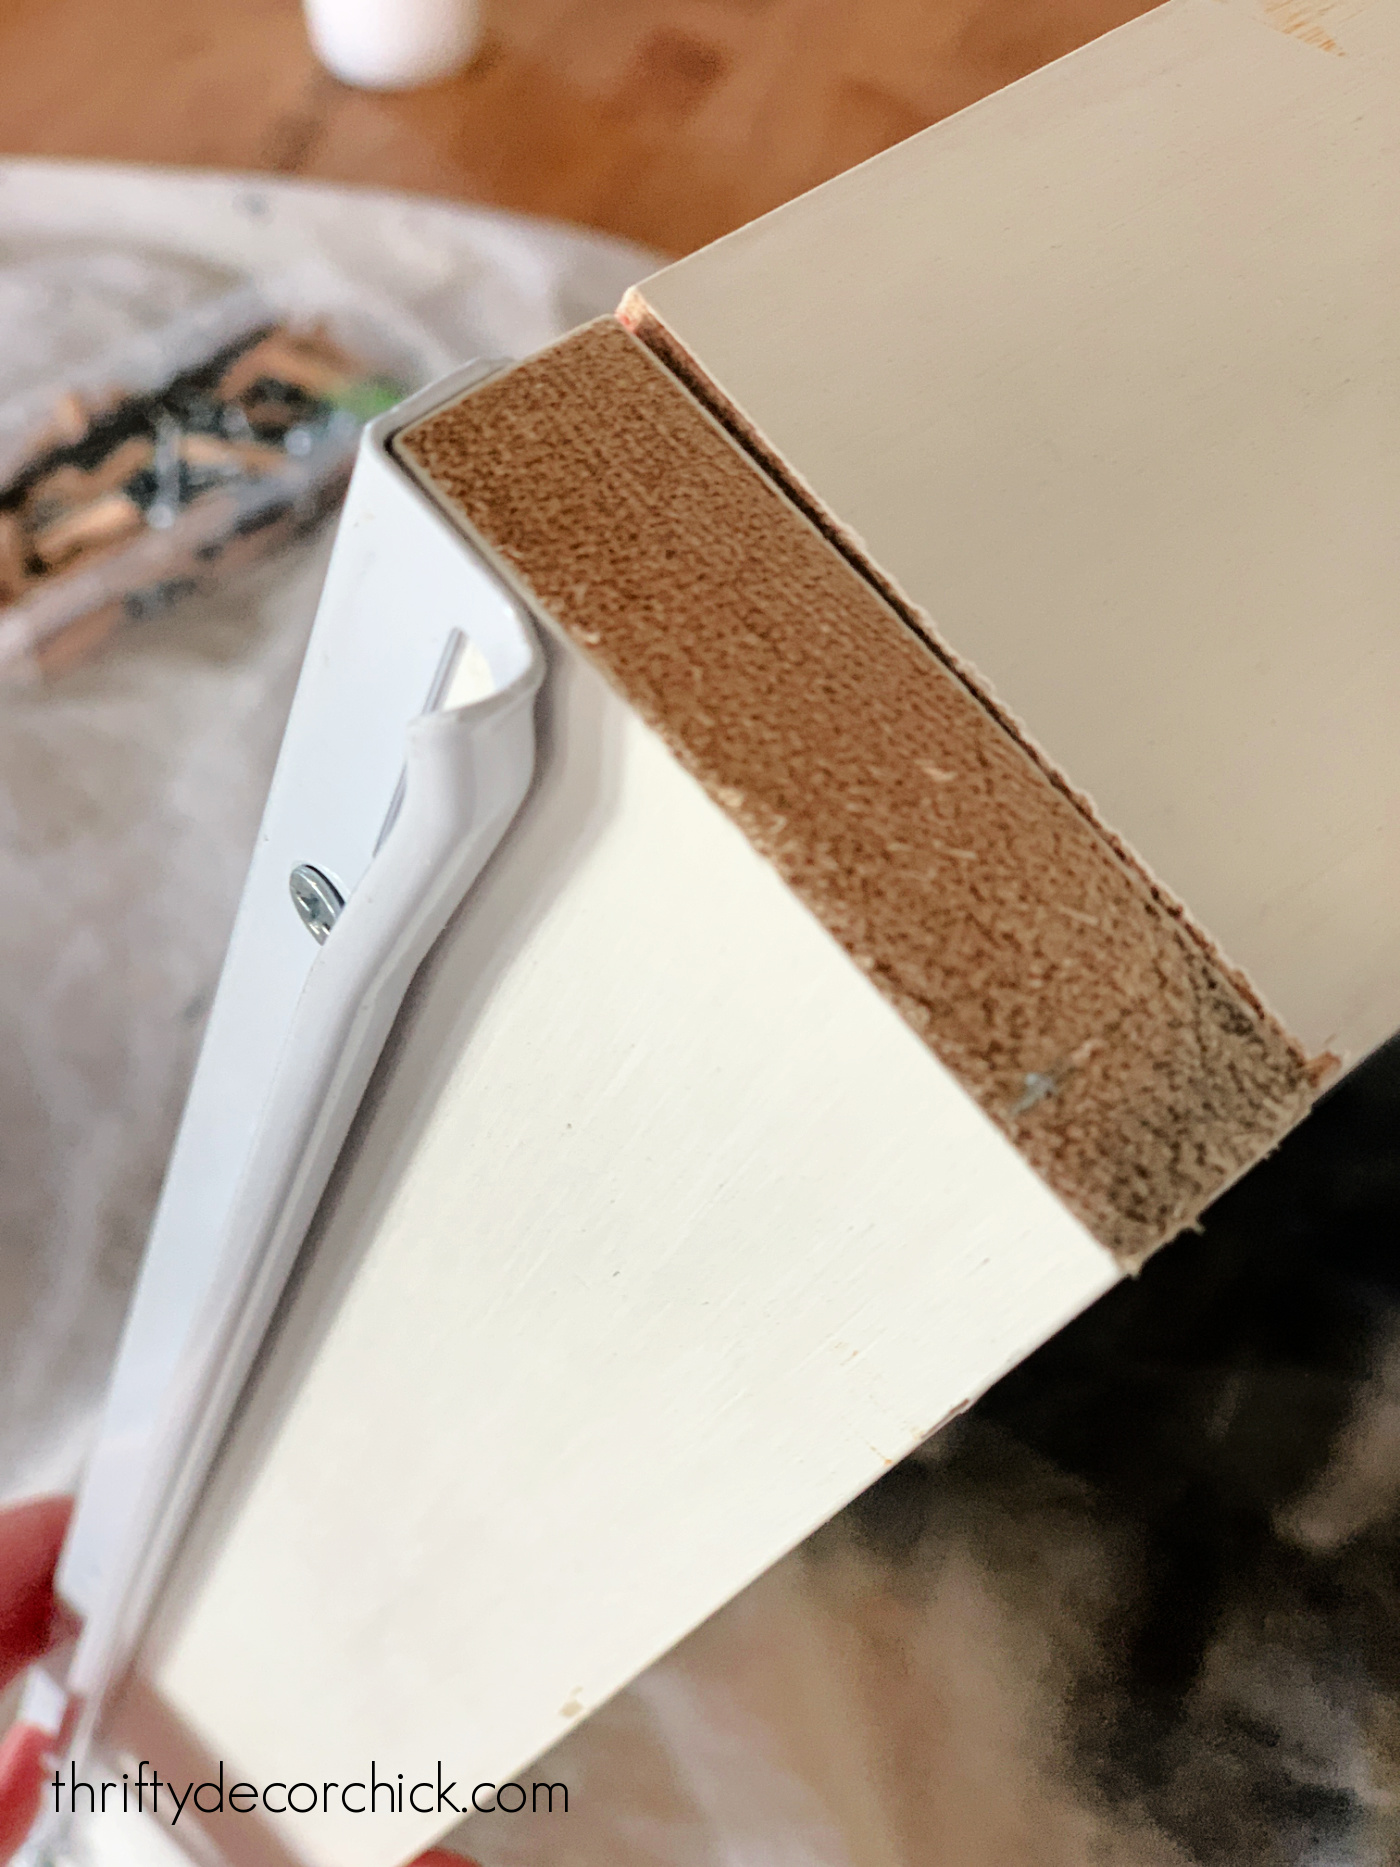
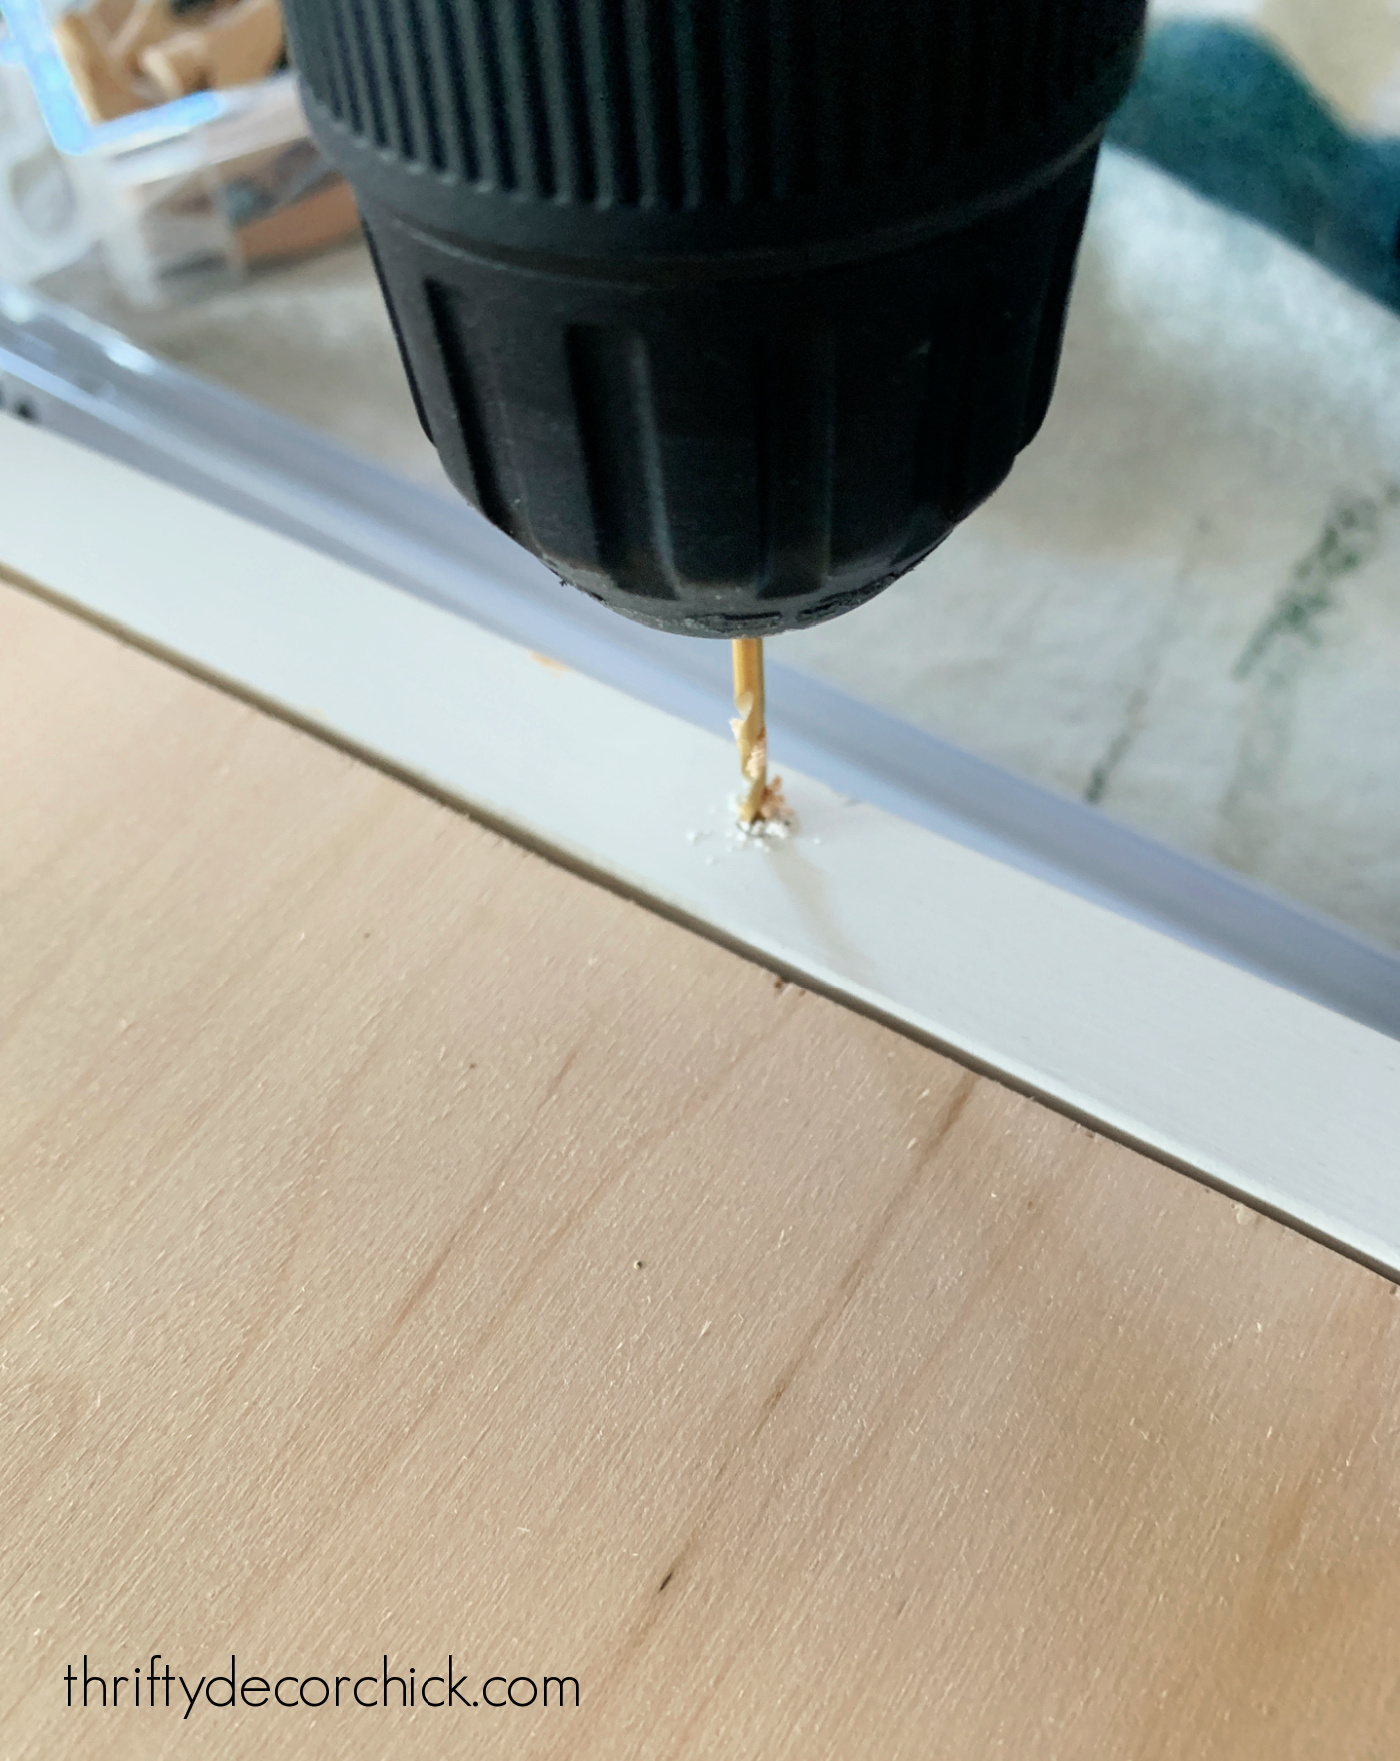
The slides come with the screws you'll need -- I recommend predrilling the holes to make sure the trim doesn't split:

Now you're ready to install the drawer brackets inside your cabinets! This part is SO MUCH FUN.
Actually, it sucks, I hate it, and I would be happy to never do it again! :) But I know I will...
The drawer slides come with a spacer for the installation, but I don't use that. It's not thick enough and because of that, will not allow the drawer to move in and out properly. (At least on these cabinets.)
I don't follow the instructions at all actually...but be sure to check them out to see if they'll work for you!
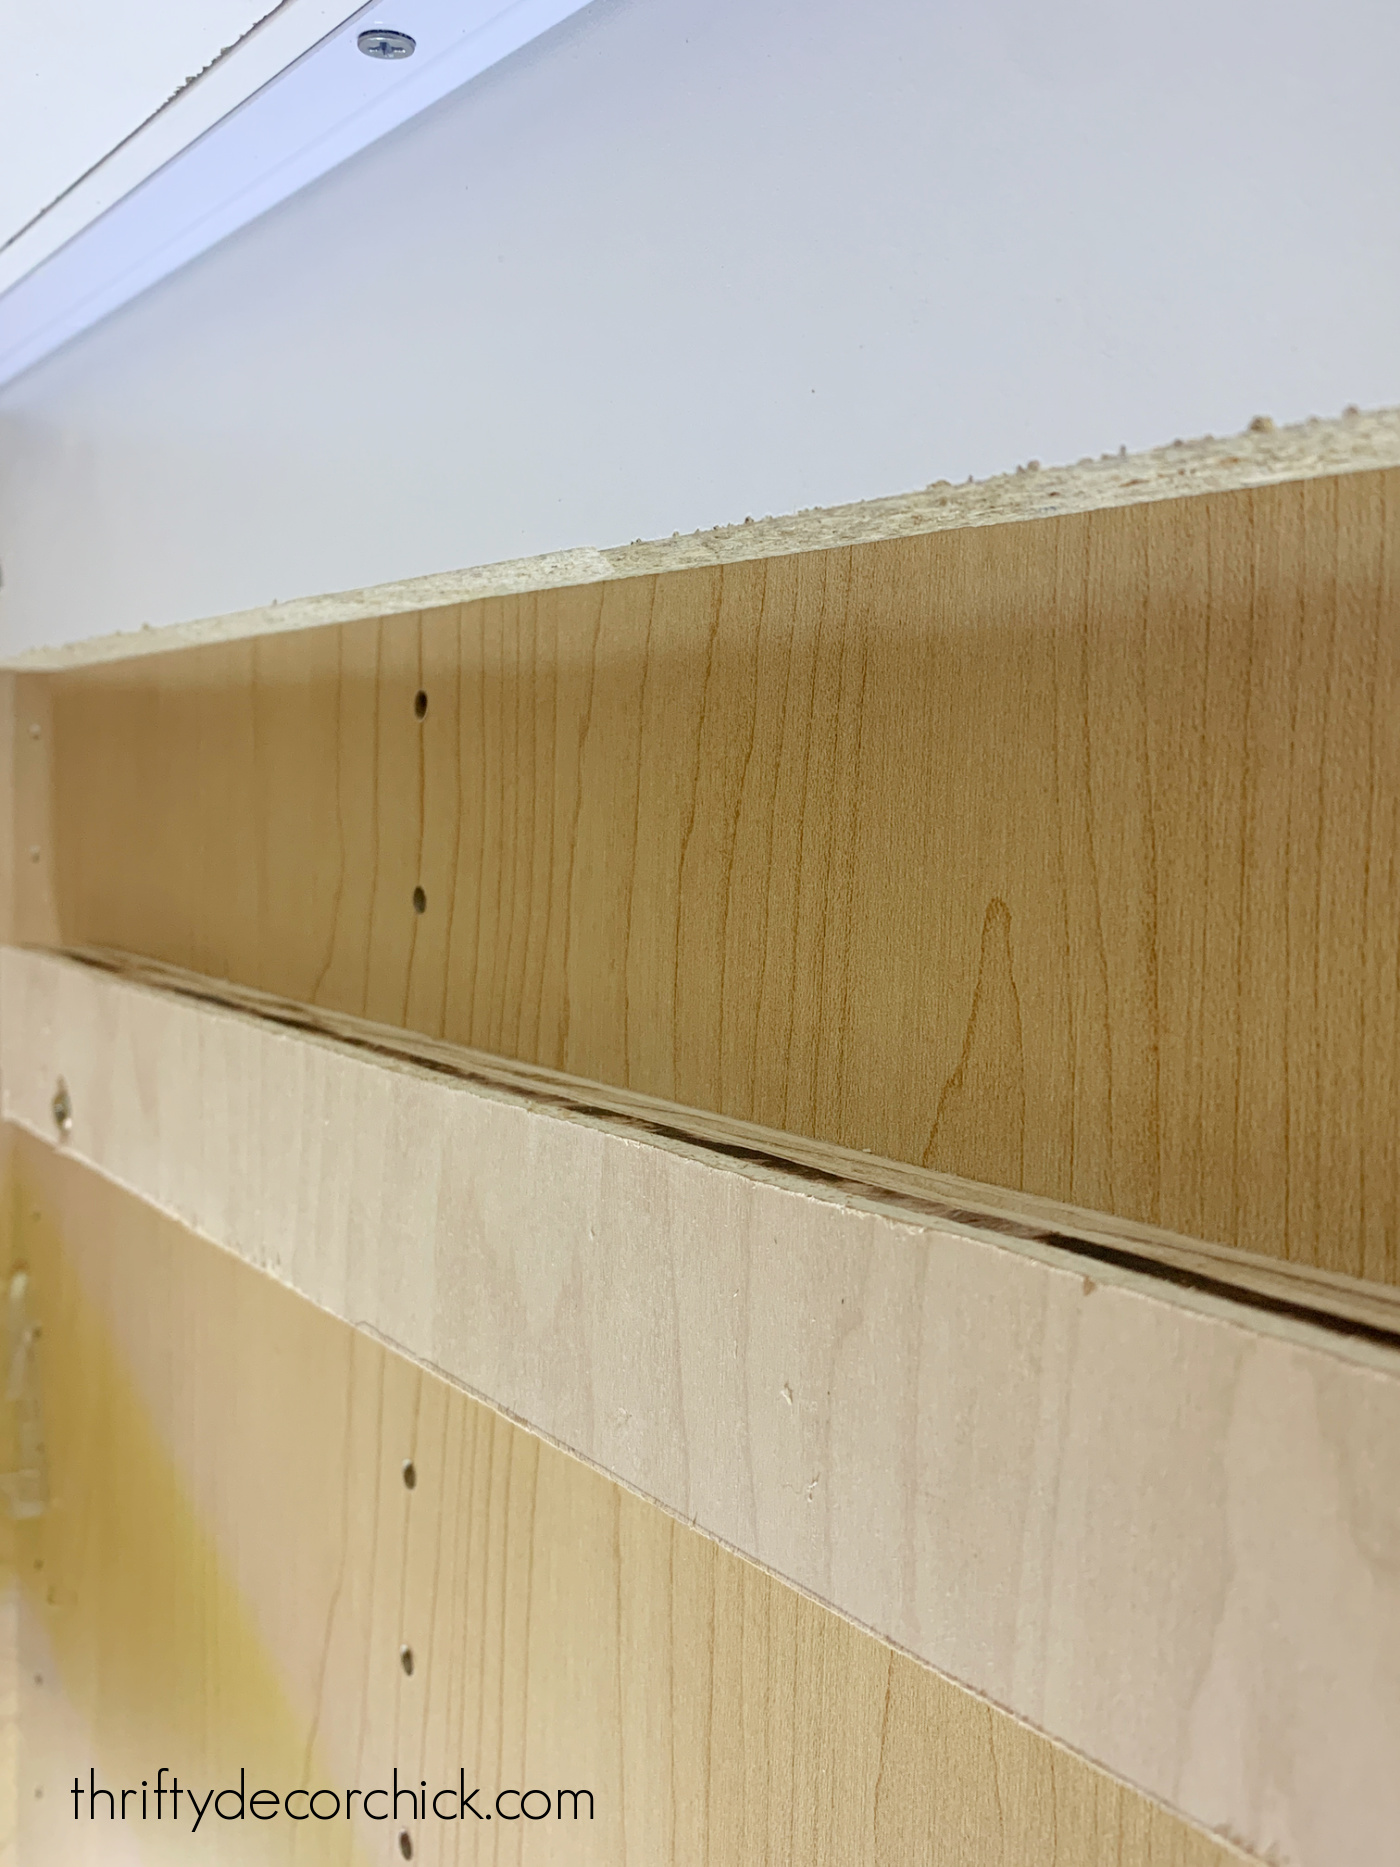
Instead I cut a piece of scrap wood the same depth of the brackets and then install it inside, on the sides of the cabinet where I want my drawer to go:
This part can be tricky. I've found the easiest way to get them level is to cut a scrap piece of wood at the height I want each drawer bracket.
Then I hold it against the side of the cabinet, place my support on top and mark where I need to screw it in.
But because cabinets are not always perfectly level, you'll want to double check to make sure your support pieces are level from back to front and across the width of the cabinet like so:
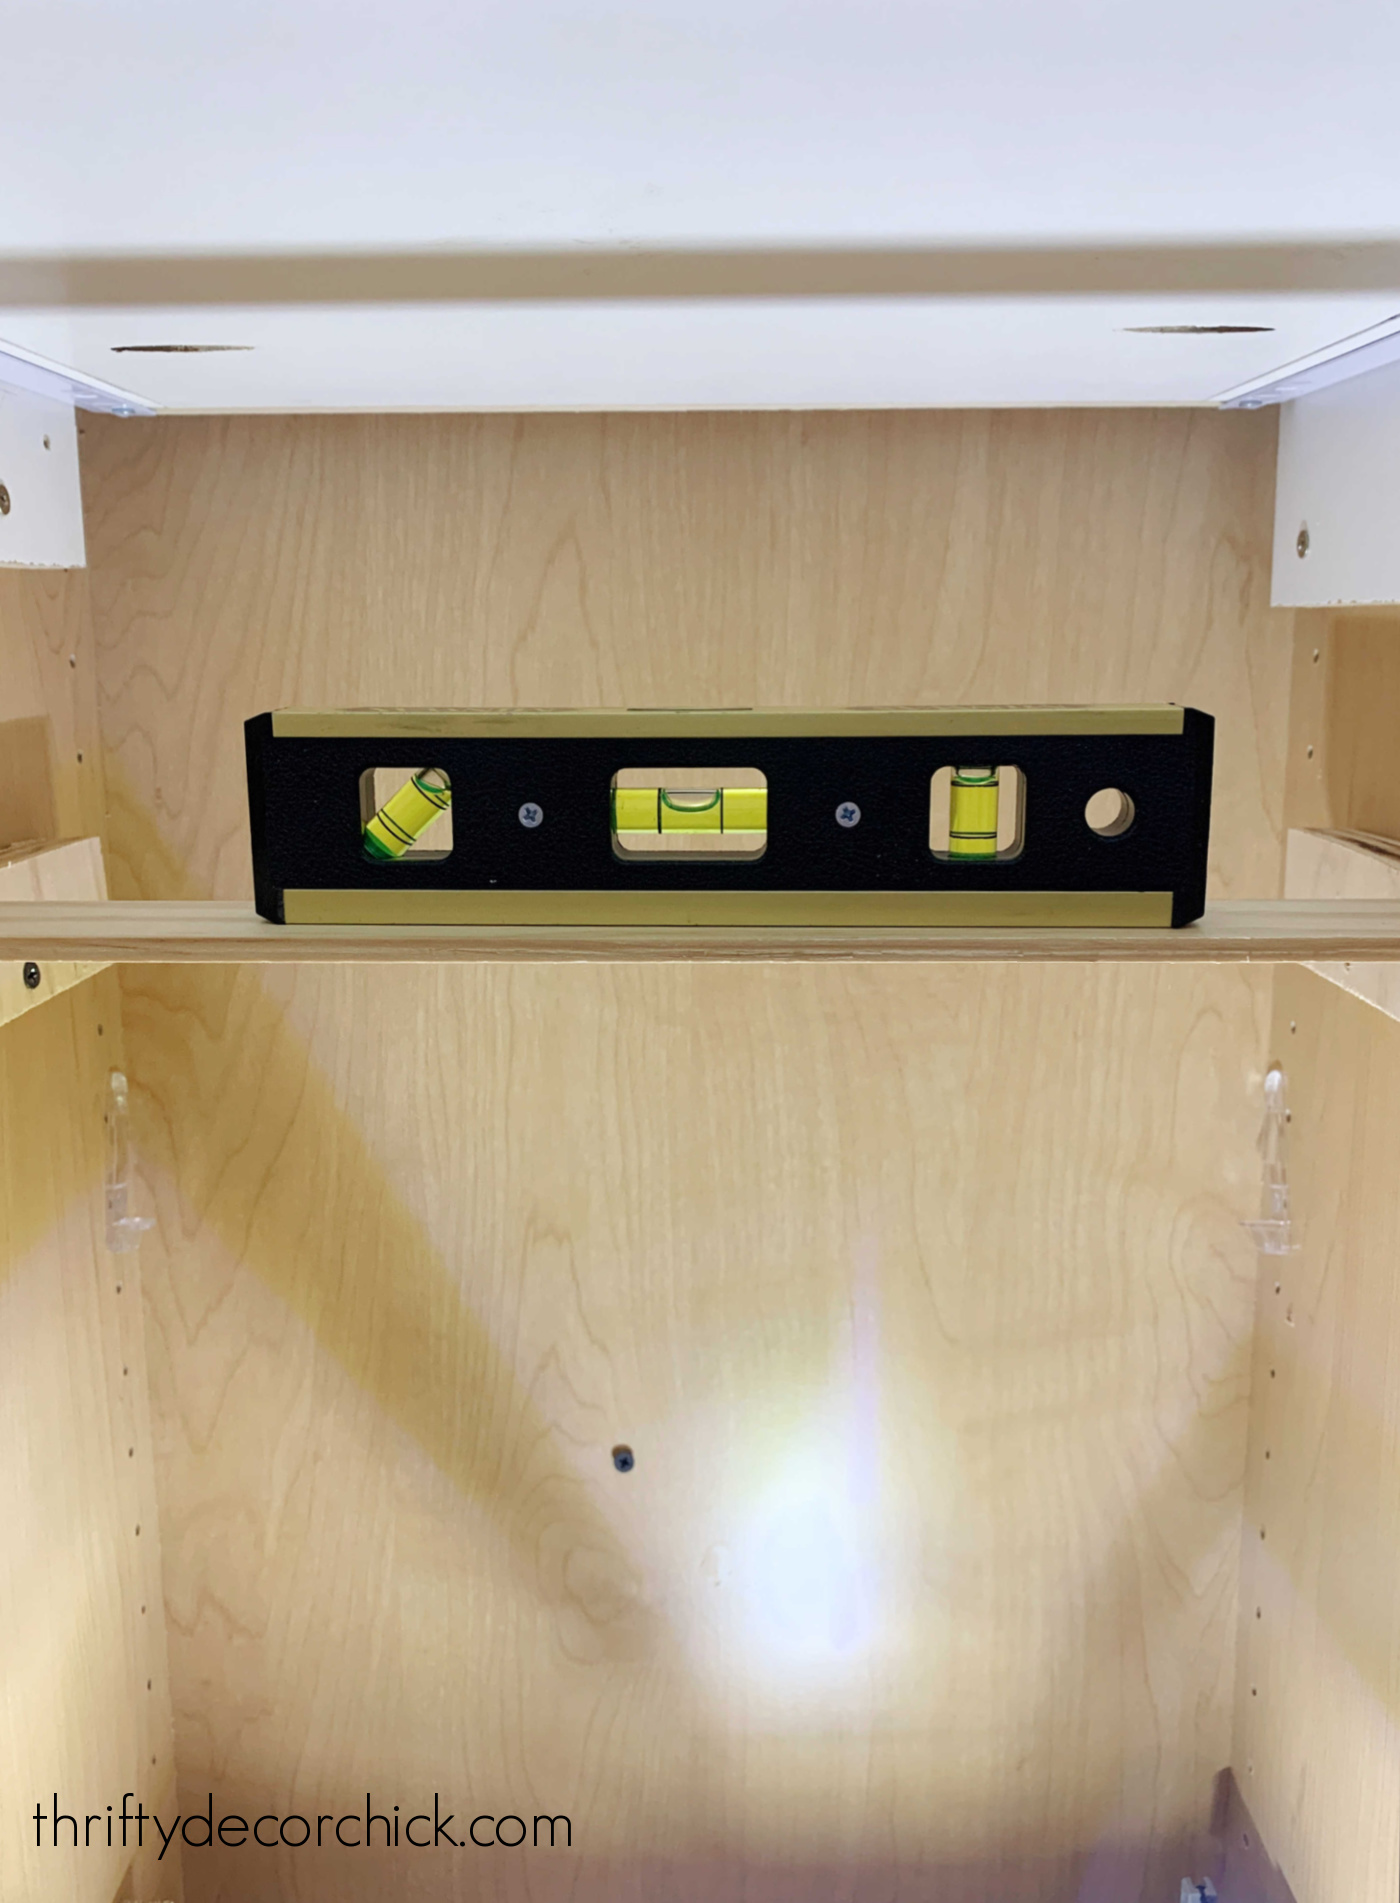
I cut a piece of wood the width of the cabinet and then placed the level on top to ensure I was good to go.
It's a lot of checking for level and making tiny adjustments, which wouldn't be a huge deal if you weren't working in a tiny, deep cabinet that is impossible to maneuver around!
You can attach your drawer hardware to the supports before installing them, but I find it works so much better to do it after.
I like to give a little bit of room at the front, so I place them about a quarter of an inch back from the front of the cabinet frames:
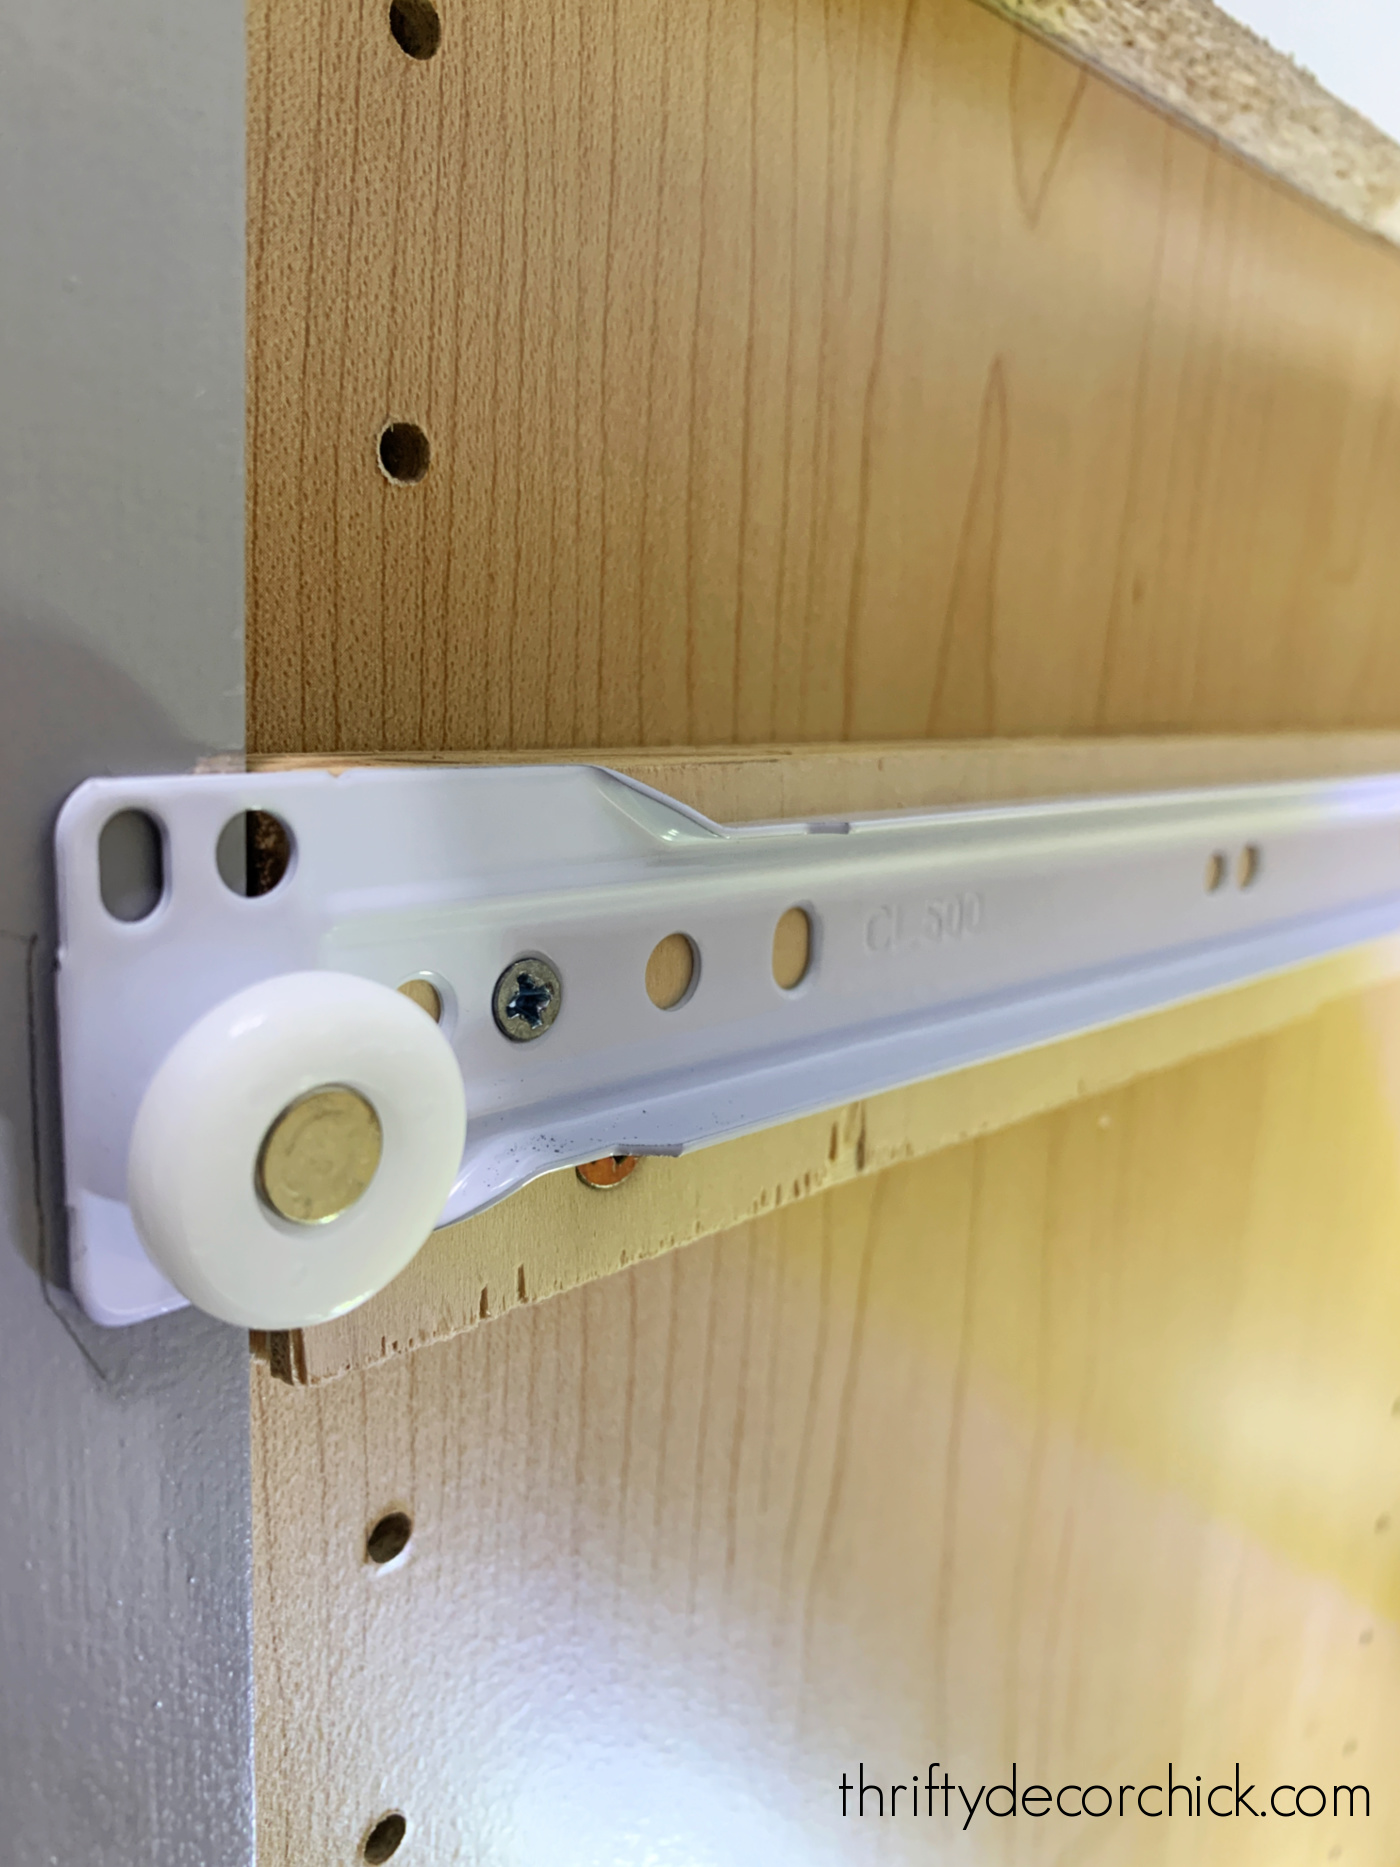
All of my supports come from my scrap pile! I like this much installation method better because it's WAY more sturdy than the plastic hardware provided.
I knew we'd be putting heavy cans and jars in these, so wanted them to be able to hold a lot of weight!
This method also gives a perfectly consistent width from the front to the back of the cabinet, so the drawers will move smoothly:

The drawers will slide in easily as long as your supports are level.
If you get any resistance as you pull and push the drawer, your supports are either too far apart or too close.
I knew I'd be adding a front panel to my drawers, so I didn't mind the cut edge showing:

I cut down some thin wood trim and then nailed it on like you see here:
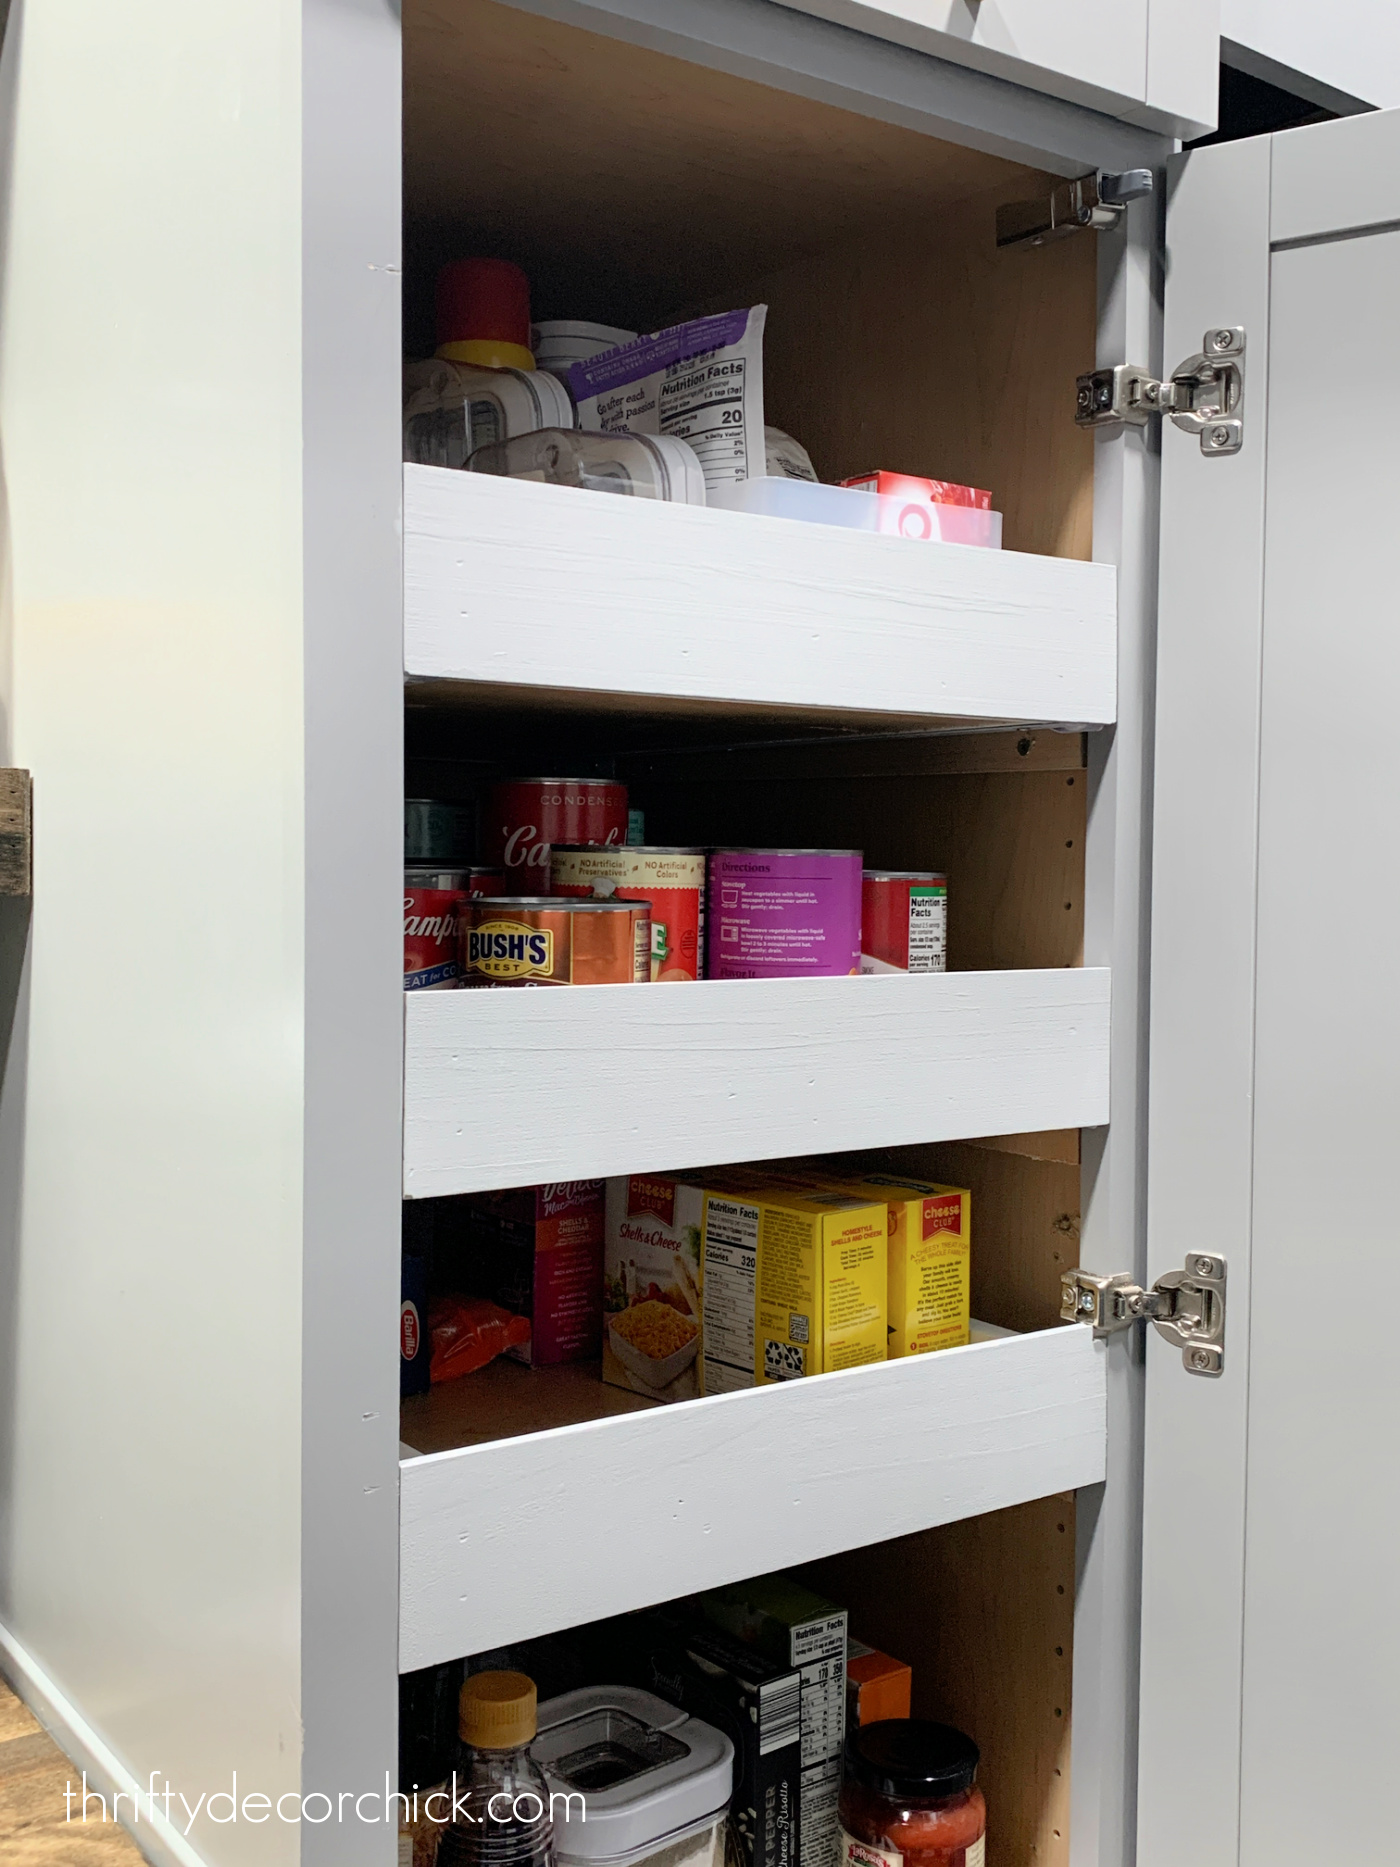
The slides we used are not full extension, so they don't come ALL the way out like in our kitchen. But because the pantry is so tall and we can access them from the side, it doesn't matter.
The soft close is GREAT -- I'm a sucker for that! It is especially nice with the heavier shelves:

DIY pull out drawer attached to a shelf
There is another way to install these drawers, and I've used this method many times over the years as well!
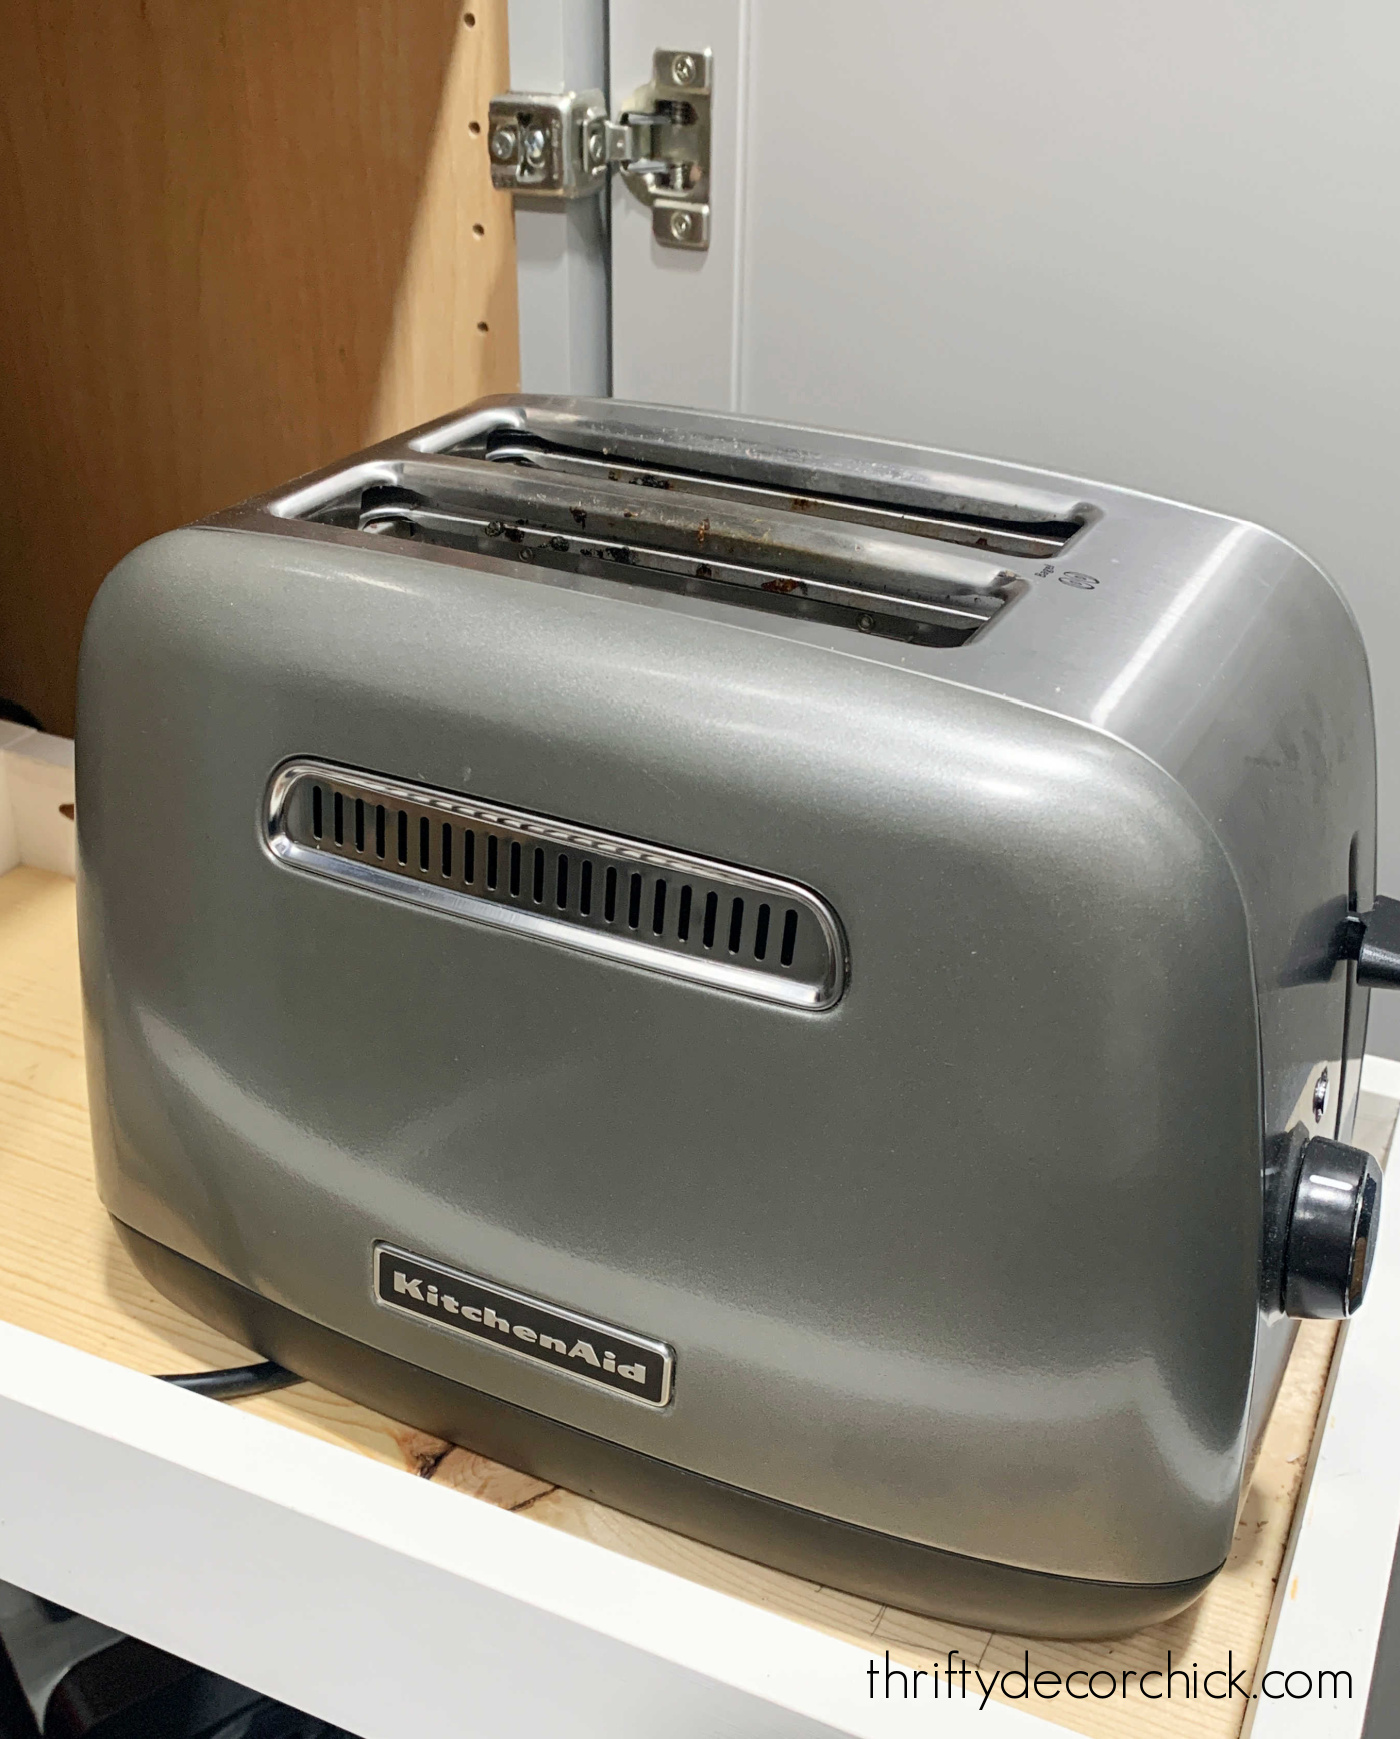
I shared how I made a quick DIY roll out pantry shelf for bulky saucepans years ago, and also showed you how to add a pull out appliance shelf to your pantry here.
This time, I made another shallow drawer, and then attached the drawer slides to both the top of the pantry shelf and the bottom of the drawer:
This option keeps the slides out of sight, but also gives you the full extension and/or soft close that is so nice.
It also is MUCH easier because you don't have to mess with installing the drawer hardware! This is definitely my preferred way to do this, but again, it depends on what you're storing.
If you're planning to keep a lot of heavy items in these drawers, I would err on installing the drawer hardware inside the cabinets like I showed above.
At the very least, you will want to secure the shelf from the top, so your drawer doesn't tip forward or out when extended.
This DIY project allows you to make custom drawers at the perfect height and size that you need. They also make cabinets SO much more functional, because you'll use up all kinds of wasted space.
And you can actually see what is inside, instead of crouching down and searching! They make for better kitchen organization for sure.
This project only cost me the price of the drawer hardware because I used scrap wood, the shelves that came with the cabinets and melamine (from the previous pantry shelves!) to make them. So far I've made seven and I plan at least one more.
I know this is a lot of info, so feel free to ask questions in the comments!
Never miss a post by signing up to get posts via email.
Via https://www.thriftydecorchick.com/2022/03/DIY-pull-roll-out-pantry-drawers-shelves.html |
