|
Hello my friends! I tackled a quick DIY shelf project the other day using a method I've perfected over the years. Now I'm able to throw them up super fast. And I only used scrap wood from the garage too...so it was free and only took me about an hour to build.
That's what I call a successful project!
I've shared how to build DIY floating wood shelves a few times -- these in our old laundry room went crazy online!:
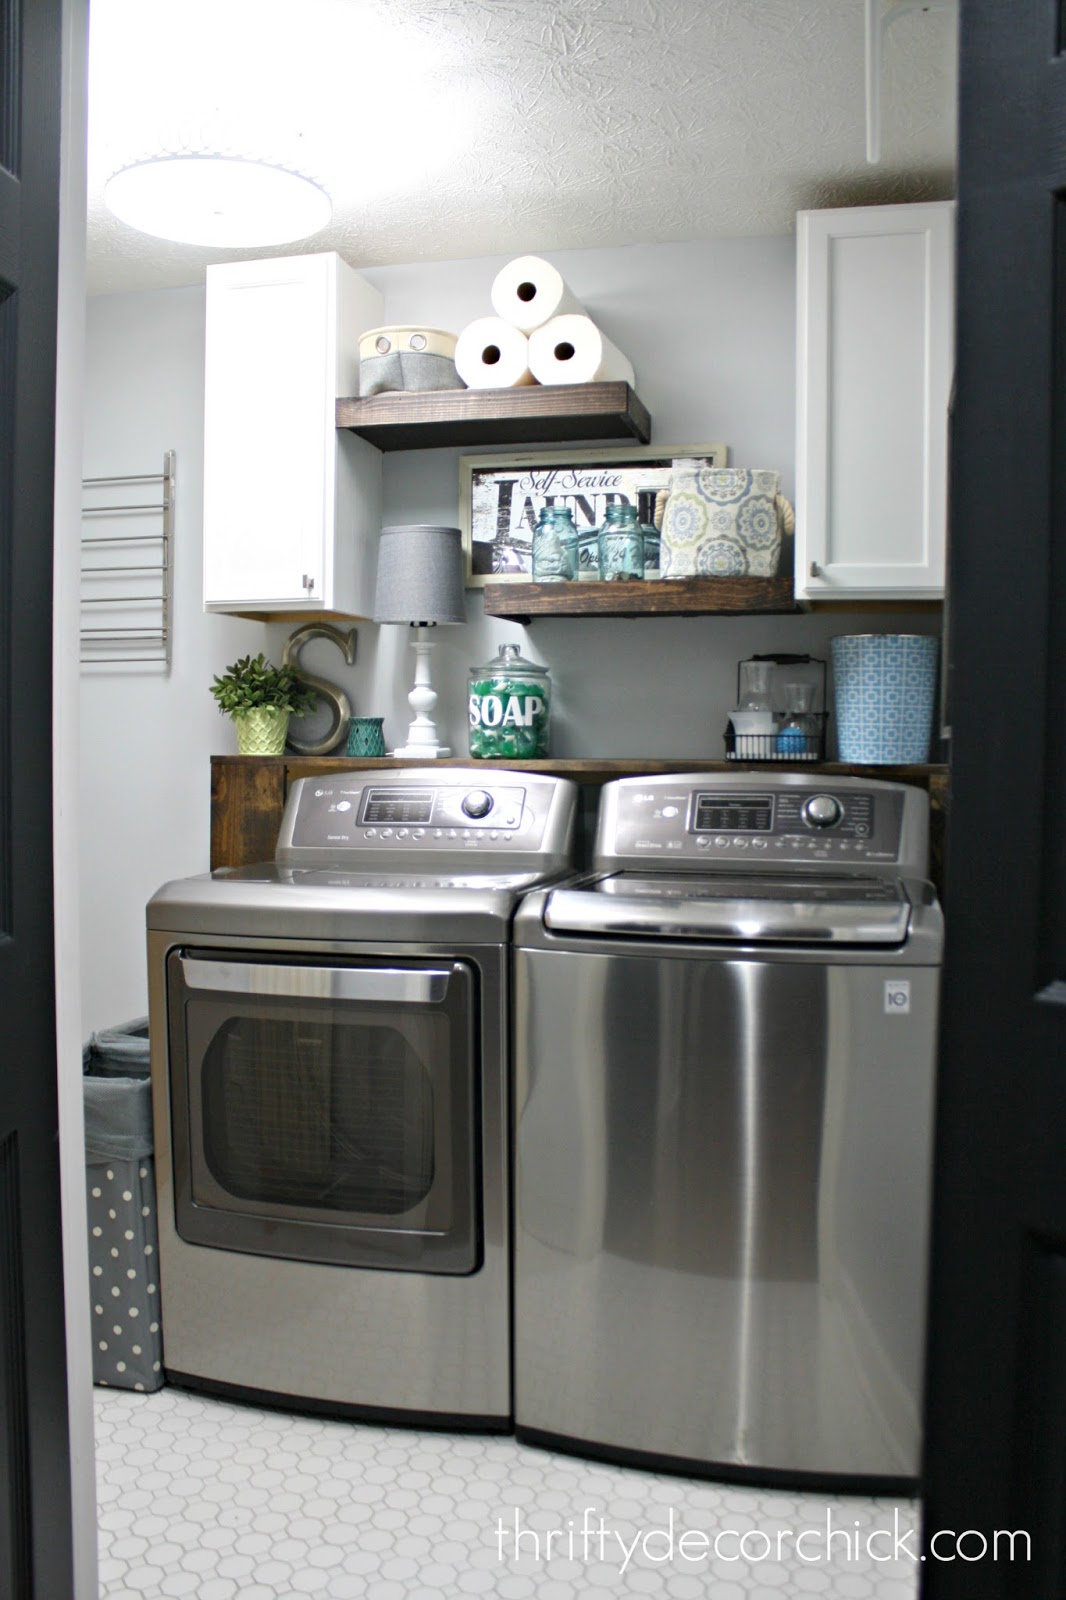
Check out how I built that shelf behind the washer and dryer here.
And the floating shelves in our old basement bathroom were a favorite of mine:
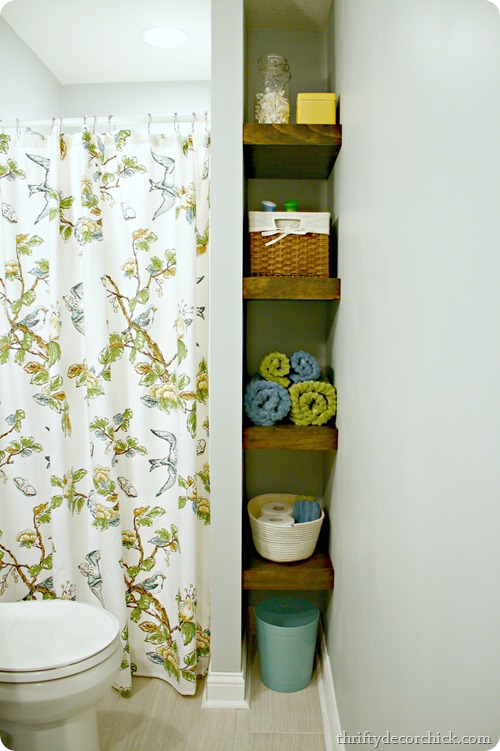
They are easy to build on an open wall, but even easier and more sturdy on three walls like the ones in our bathroom above.
I had an idea to add them to our water closet in the master. This room is tiny -- much smaller than what we had in the old house. But I love having the separate space!
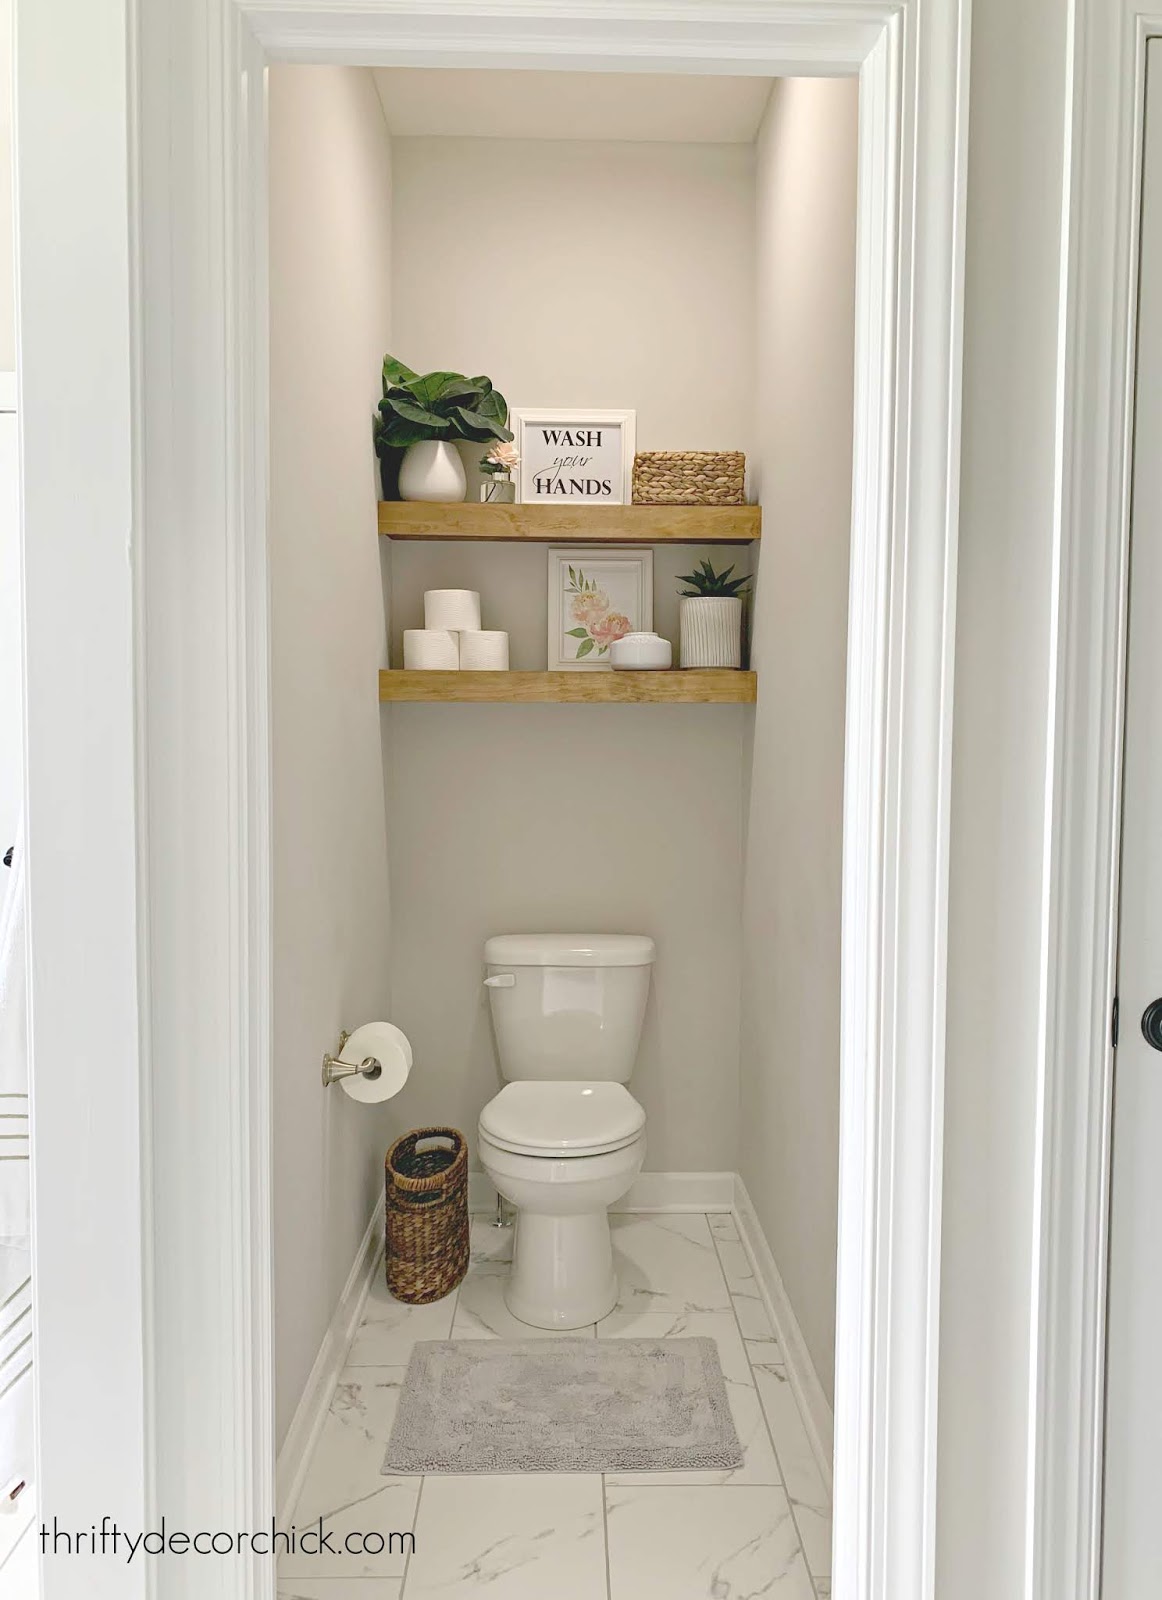
It's always felt cramped, especially with all the stuff -- basket for extra tp, trash can, a book or magazine on the back of the toilet (just being real here). I had an idea to get stuff off the floor and build some shelves above the toilet:

This post may contain affiliate links for your convenience.
See my policies and disclosure page for more information.
Like I said, I've done this so many times it's a pretty easy and quick project for me. I sorted through all of the scrap wood I had in the garage and found pieces that would work perfectly.
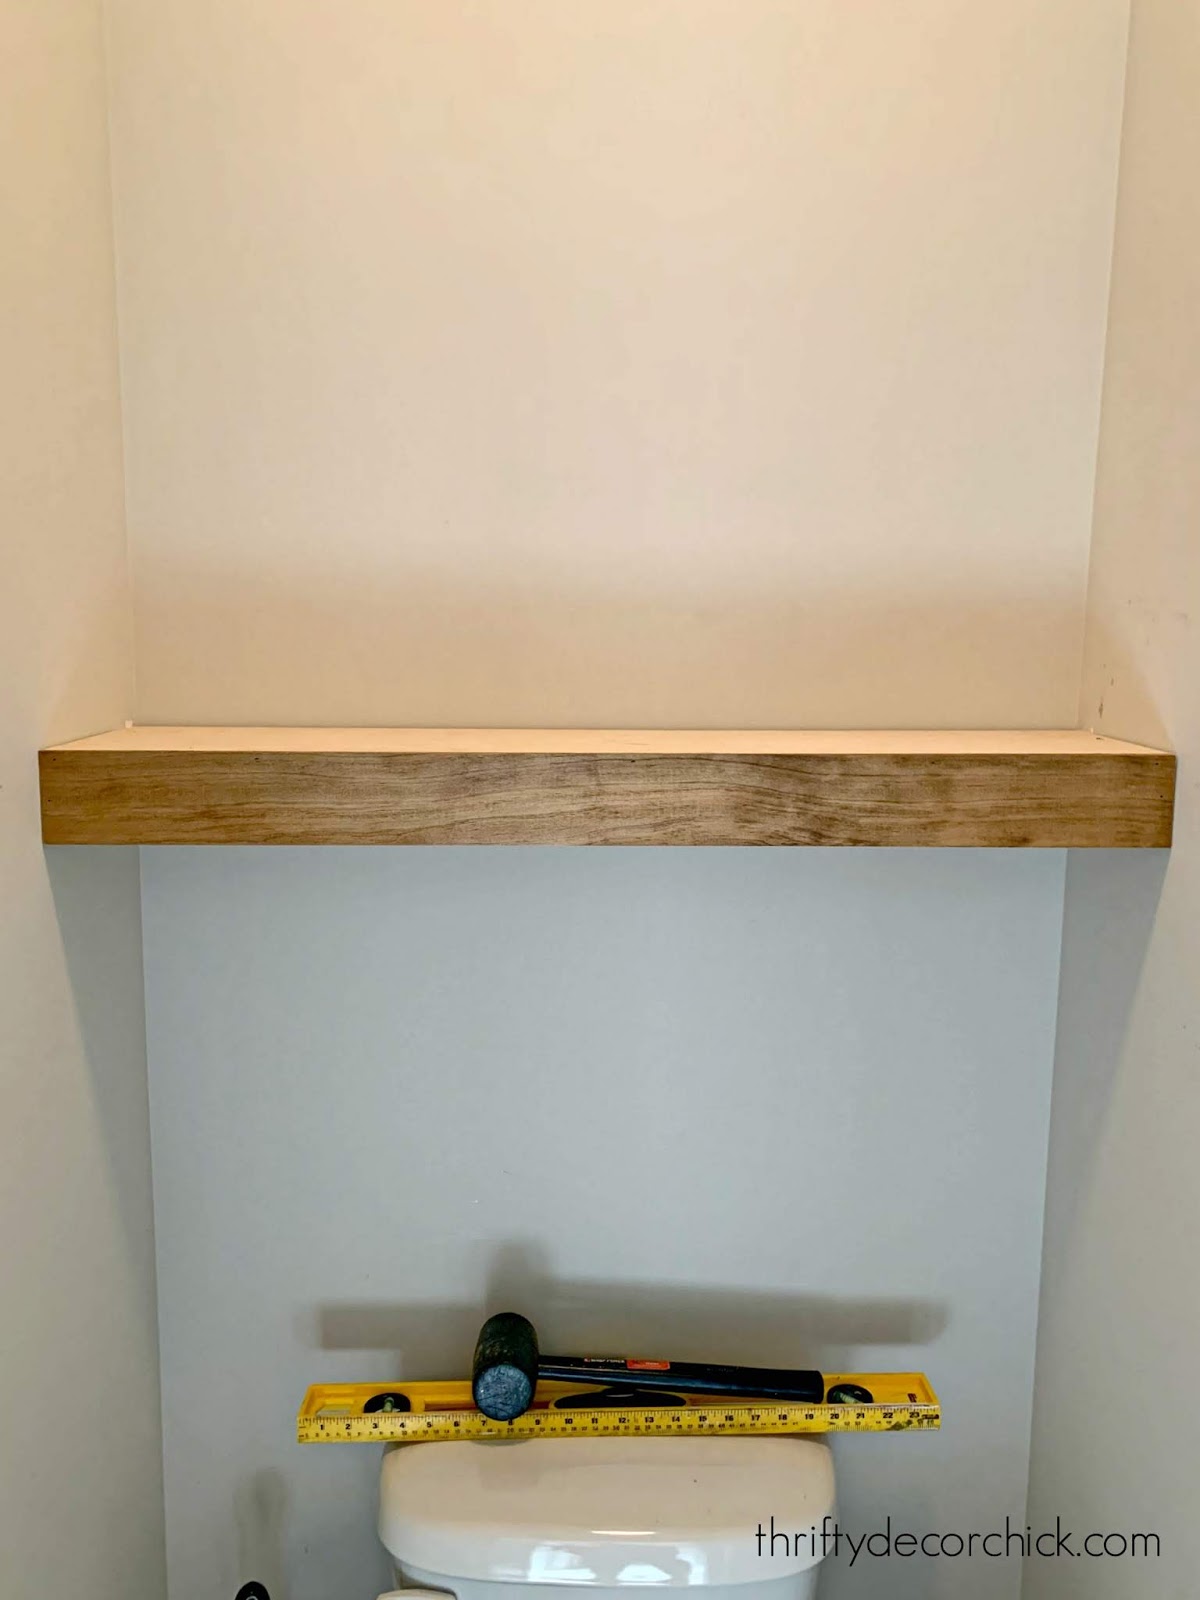
First step was finding the right sized support pieces. Make sure they are level and screw them into studs if possible:
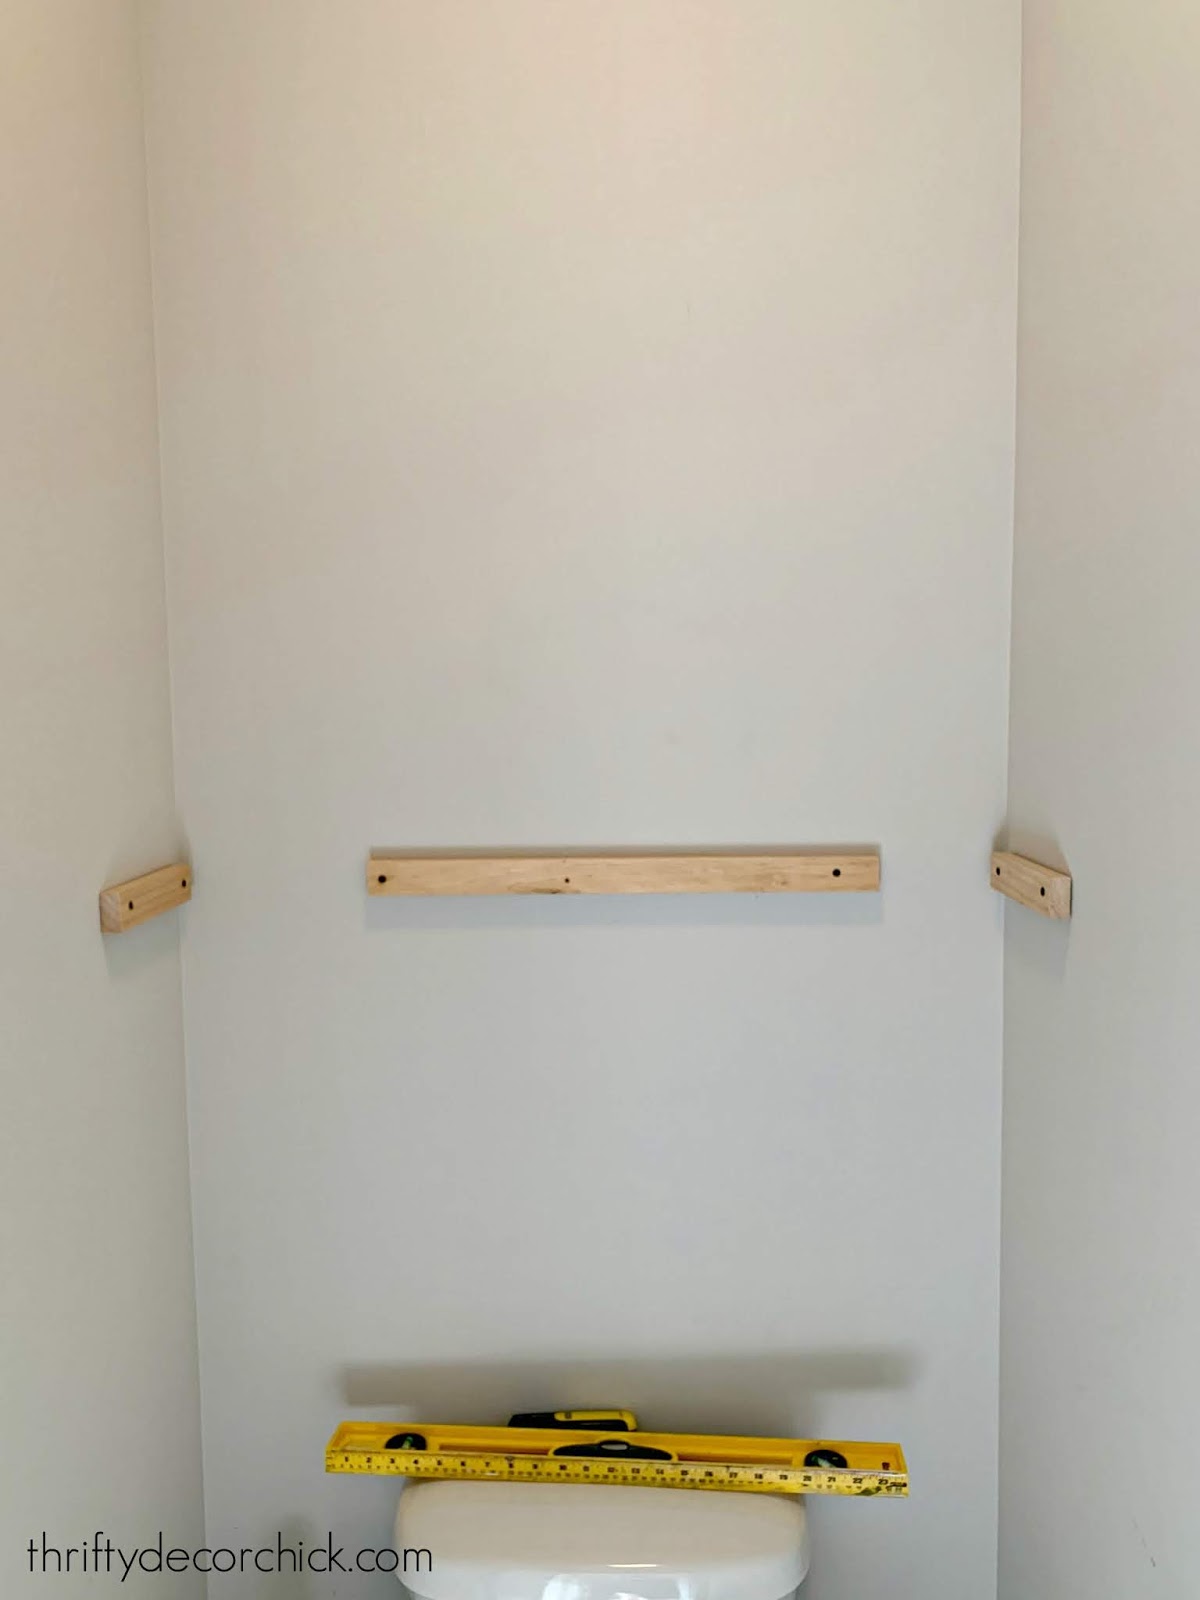
Make sure to use a level to check the pieces as you install. For shelves like this that won't be holding much weight at all, I have been known to throw some screws into just the drywall. But get as many into studs as you can. (Hint: the corners are always a good bet.)
Normally I'd use a piece of trim the whole length of the back wall, but I was using what I had. If you don't have the full length it will be fine.
Next up, put the top of your shelf on and nail it into the supports:
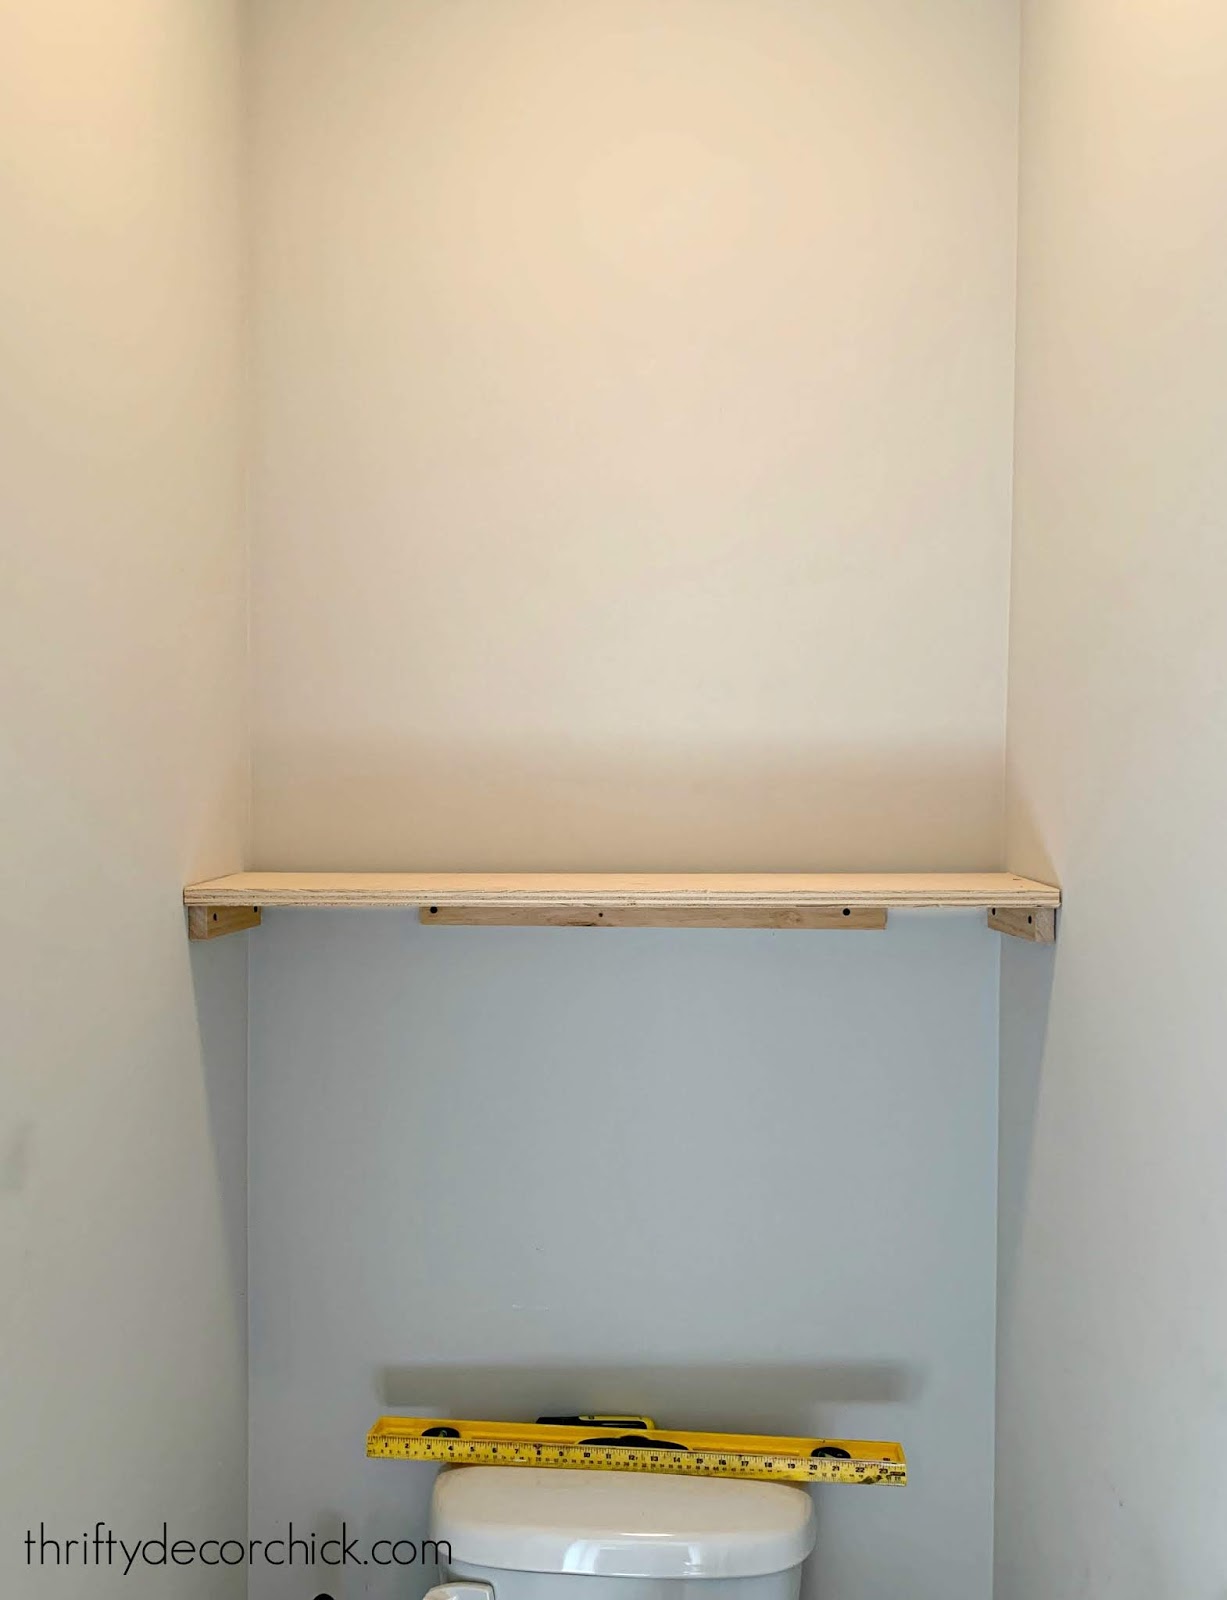
Then cut your front trim to fit and nail that in too:
I had just enough of this stuff that was already stained from another project. Perfect!
I built my second one the exact same way. Now you can be done with the building if you'd like...

Or you can add a piece of wood to the bottom to cover the supports. If you use a full length of supports along the back and sides (and stain or paint them), I don't think it's always necessary to add anything on the bottom.
But if you want a more finished look, you'll want it. Turns out I had more scrap that was the perfect size for the underside. It's rare that a project comes together so perfectly for me. :)
The key to building these thick floating shelves is making sure your supports are the right size. You'll have the supports, plus your wood on top...that will need to be the same size or smaller than the trim you add to the front. And if you want to add a bottom piece, the thickness of the support, top and bottom need to be less or the same as your trim on the front.
This is so all you see from the front is your clean trim -- not any edges. Hopefully that makes sense! That's the trickiest part of all of this but after that it's a quick project.
I planned to paint these until I found that stained trim (Provincial by Minwax) for the front. I went with that (staining is SO much faster in my opinion) and then a coat of polyurethane.
When all was dry I added some accessories -- how cute is it in there now?:
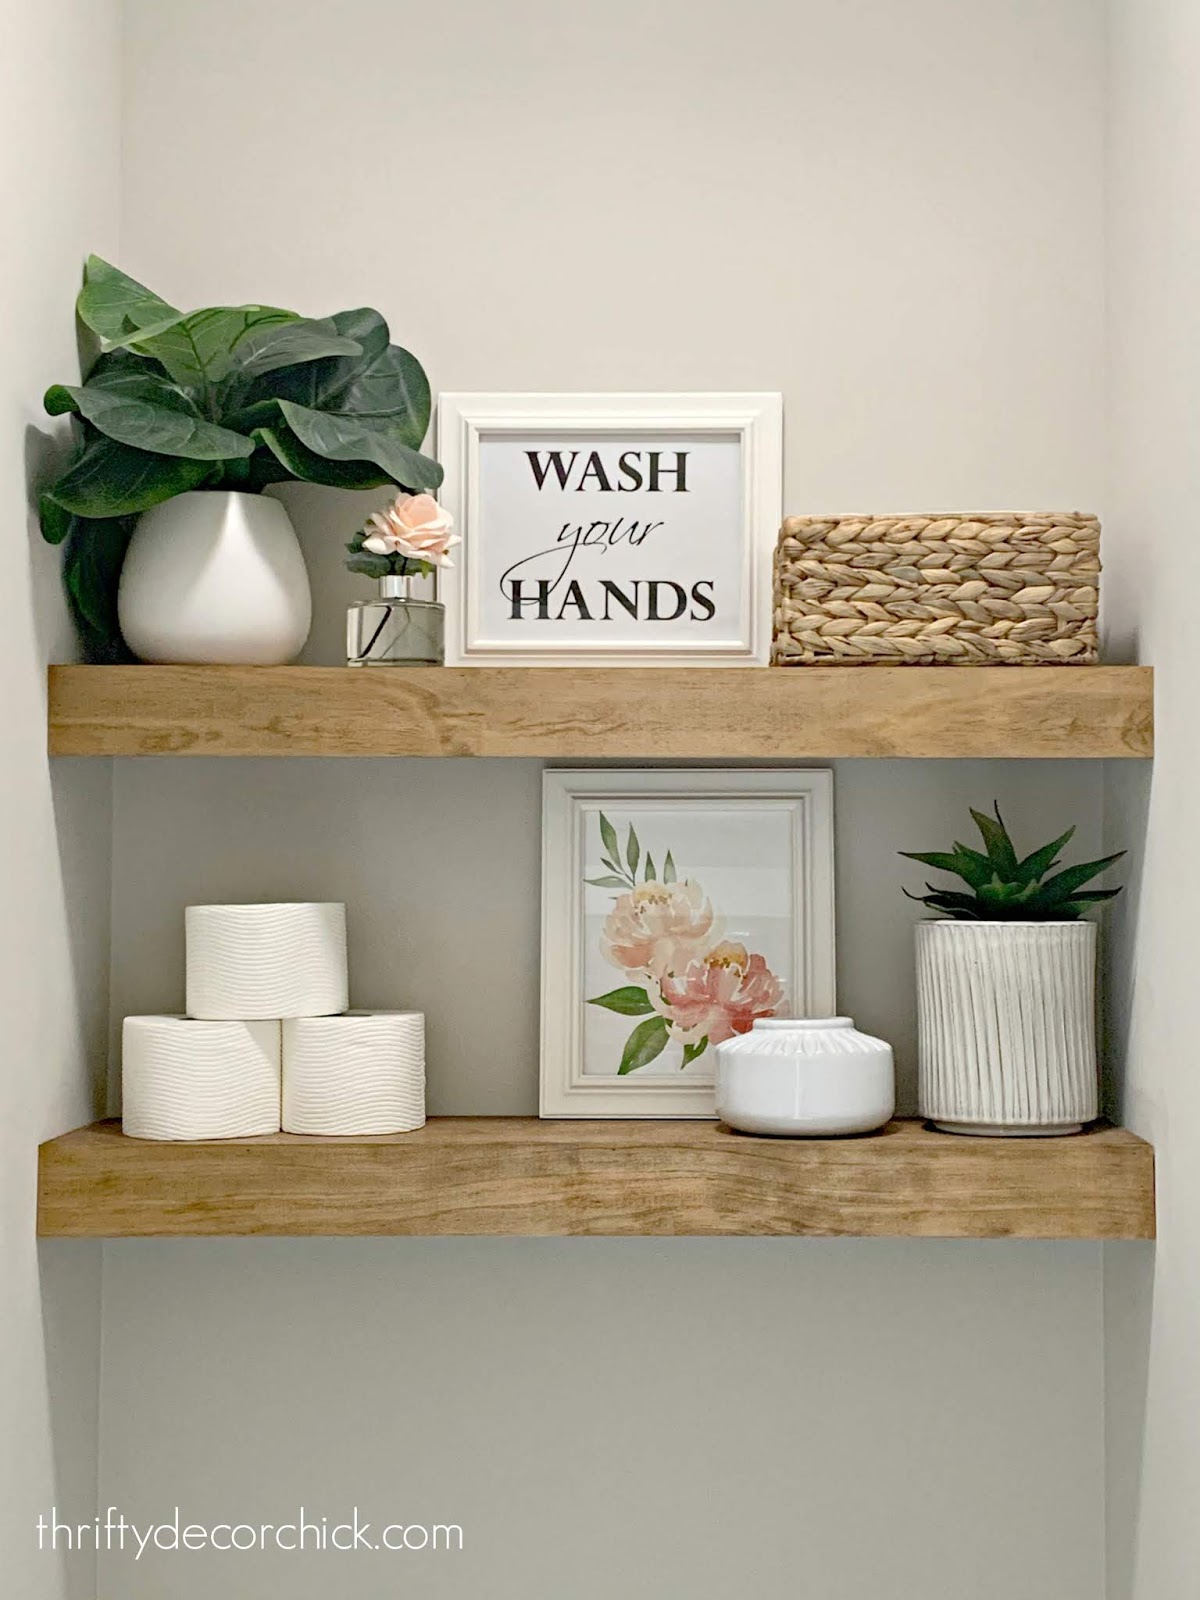
I made that "wash your hands" sign -- copy and paste it if you would like to use it! (If you need the full file size feel free to email me):

Click on that image and then save it from there.
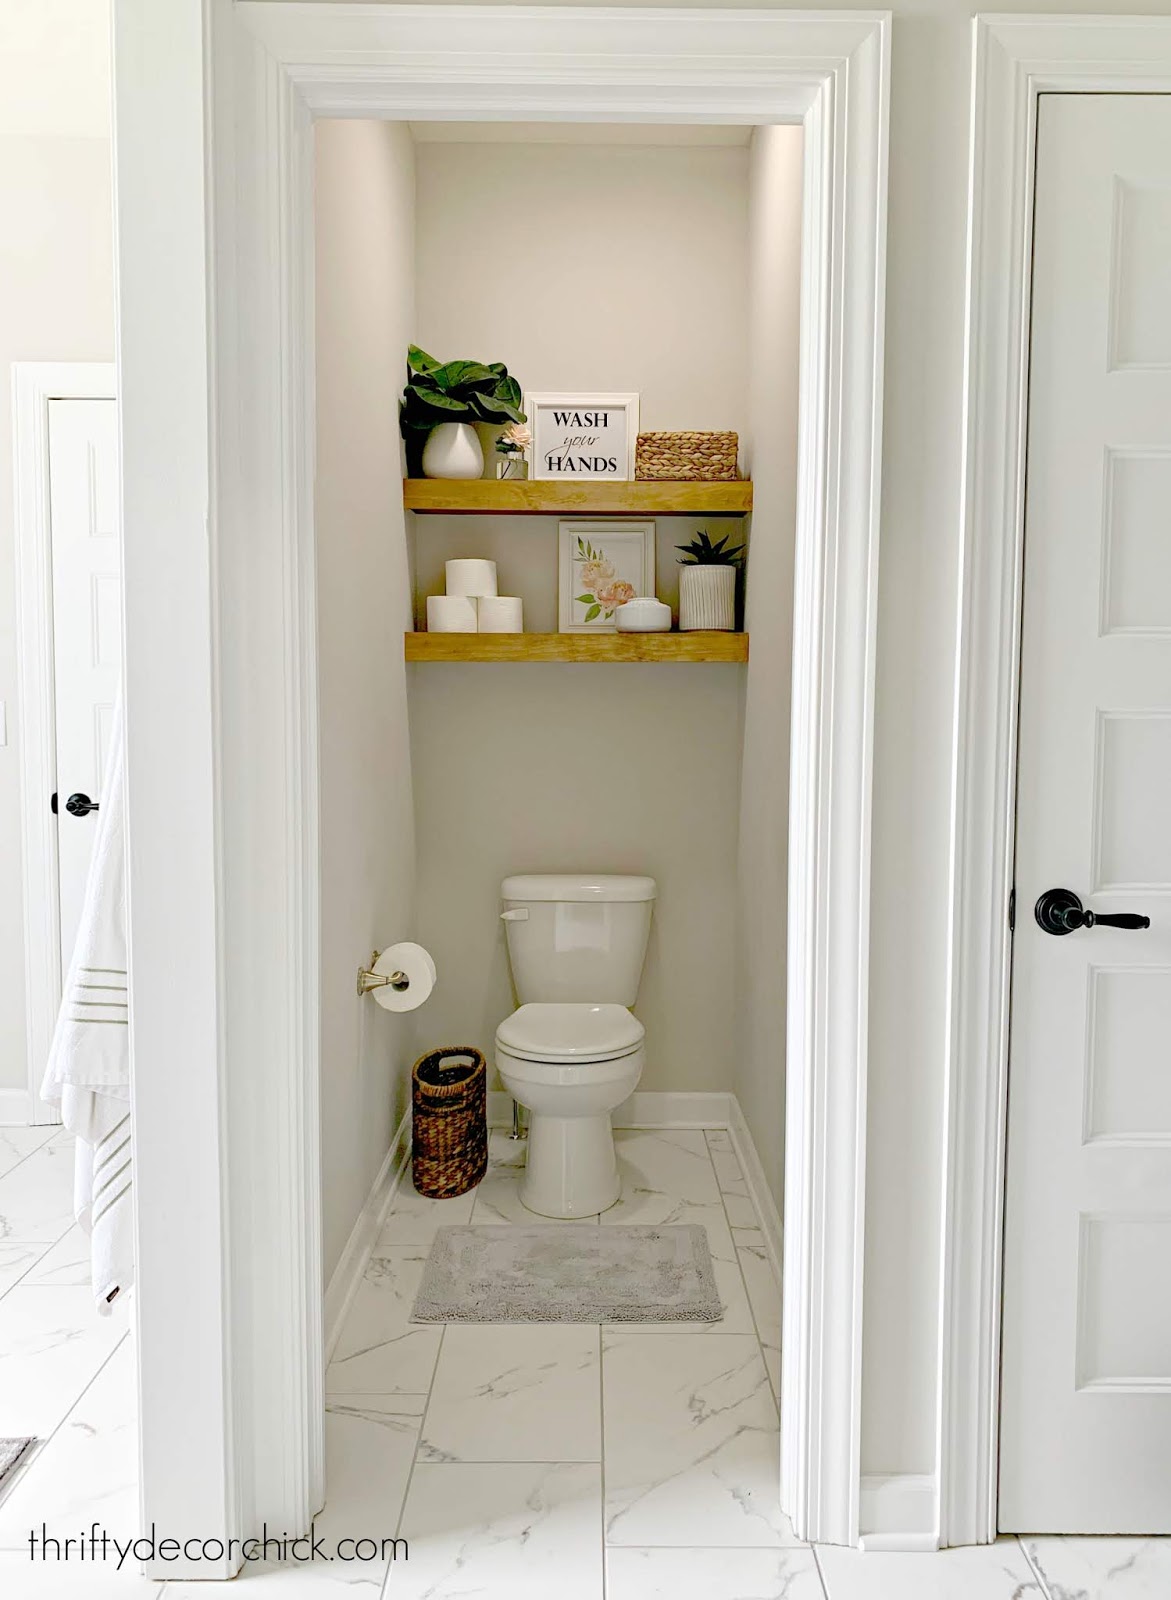
While I was working on this space, I did something else I used to do a lot -- took down the door! Man, I can't tell you what a difference it made in here! SO much more room!
I wish I would have thought ahead and just had this cased out with no door:
You can see how I cover where the hinges go in this post as well. It makes the door pretty seamless, like the door was never there.
I've never installed shelves over a toilet because I've always thought they would interfere with sitting. But these are only eight inches deep so they don't even stick out as far as the tank:
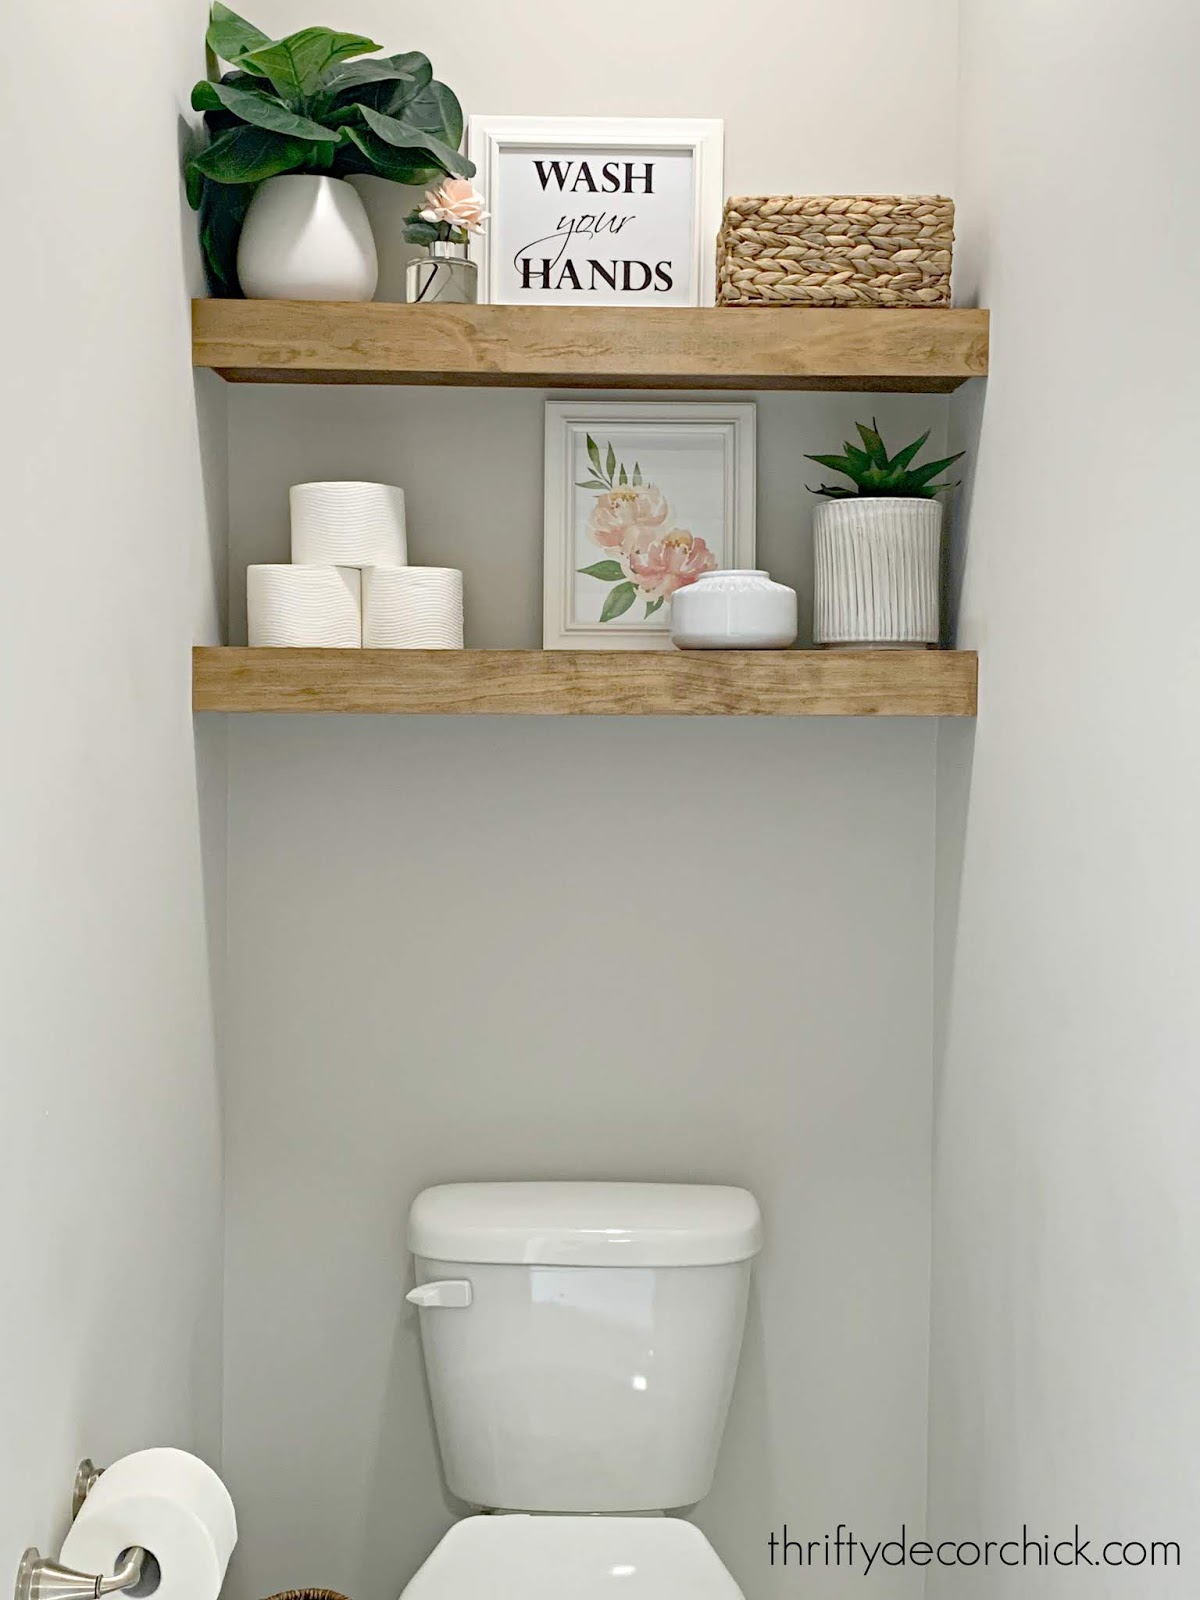
With the extra space in here and these pretty additions, I look forward to visiting the bathroom. ?
I also changed out the light bulb in here to a daylight version instead of incandescent. I love them for spaces with no natural light -- they get rid of the yellow cast and make things so much brighter. They aren't for every room, but in spaces like this I LOVE them.
Let's look at the before and after! Here's the little room before:

Such simple updates, but they made a HUGE difference!:
These were quick and easy to build -- I had them up in an hour and with stain and poly I was at about 90 minutes of work. Floating wood shelves would be a great beginners project!
Have you tried this DIY project anywhere in your house? They are perfect in a small space like this.
My picture ledge shelves are another favorite of mine:

By the way, this is the same process I used to build the shelves on my office bookcases as well:

Via https://www.thriftydecorchick.com/2020/05/lets-build-some-shelves-in-hour-with.html
0 Comments
Wow!! I am so thrilled to get this part of the renovation done! I'll admit I was a little anxious on how I would extend our kitchen cabinets so I hesitated a bit. I thought it would be much more involved than it was. Thankfully it went really quickly and was a fairly simple build. (This is a popular updated post from our last home!)
For YEARS I've been planning to build our cabinets up to the ceiling. We picked them out more than 11 years ago and went with the shorter versions rather than taller. I knew that tallest shelf would be too high to reach and I was trying not to spend any more money building this house. :) We did have crown and if you have basic cabinets I think it makes a HUGE difference. You can see here where I had taken it down to build in the fridge -- it was still up on the left:
Just adding some crown is a super effective way to make your cabinets look more high end.
I still would have done this project even with the taller cabinets. I love the look of built ins and building them up to the ceiling just feels more custom to me.
So here's the thing, I didn't use any fancy tools to build these boxes. They were so crazy basic -- no pocket hole jig even. If you will see the sides of a piece you definitely need to use that, but for these (and the box I built to extend the island), I just use screws:

This post may contain affiliate links for your convenience.
See my policies and disclosure page for more information.
This is my favorite corded drill -- I love it for bigger projects that last longer than my battery operated drill.
I didn't even use glue (I've learned adjustments may need to be made later). Those who build for a living are probably cringing. :) But these won't be touched much at all and the boxes are strong! My point is, you don't need a ton of tools or a workshop (your kitchen floor is fine) to do things like this. All you need is some wood, a drill and a dream. ;)
The hard part of every project like this is figuring out the sizing of the boards to make the boxes. I spend most of my time perfecting that. I stand with a tape measure and notebook and draw pictures of what I want to do and end up scratching most of it out before I get to the final. It's how I work it all out in my head. About an hour later I'm ready to have wood cut.
I have all my pieces cut down at Lowe's -- I didn't do them all at once this time because I was checking sizing as I went. That is SUCH a wonderful service and I don't mind at all that they've started charging for more than a few cuts. It's well worth it to me!
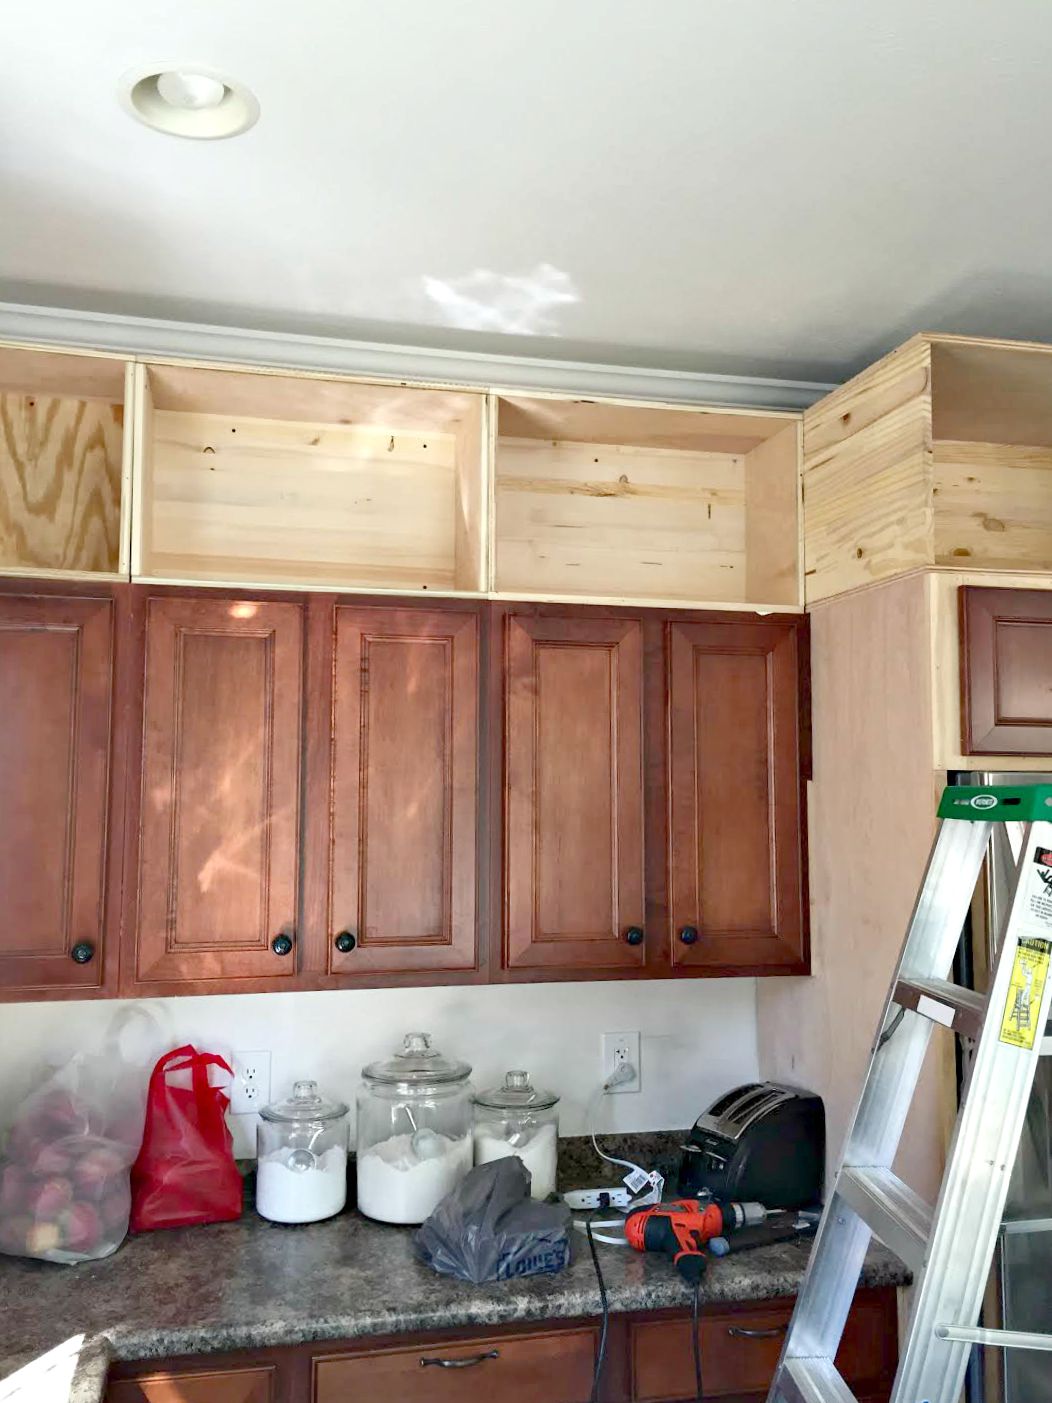
I built one box at a time and placed them up on top of the cabinets:

Your cabinets are built to hold quite a bit of weight so don't worry about that -- I later screwed them into the studs above (and to each other) so that took most of the weight off.
I built actual boxes -- if you are really good you could build the entire piece and then put it up there. You could build one big box with one piece of wood separating each section, but I knew I wanted to mimic the look of the bottom cabinets with trim so I wanted the sides of these to be thicker. I hope that makes sense!
I waited till I had the three installed before I started the cabinet above the fridge. It doesn't go all the way back but I wanted it to go back enough so that I could attach it to the one next to it. It's also screwed into the stud on the wall and into the cabinet below:
I was already in love!! My husband and child were just humoring me at this point, nodding and saying, yeah it looks greaaaat. Trust!
We had about two feet of space above our cabinets and I made these 16 inches tall. I was adding a header above and didn't want it to be too thick. I also didn't want the cabinets to be too tall either, I thought that would look at little off since our uppers are a basic size.
Next I had to prep for the header piece. I screwed some scrap wood into the beams in the ceiling for the header to attach to at the top. I didn't get a good pic of this but you can see a piece of that sticking out behind the header to the right in this pic:

As you can see, after that was secure in the ceiling I was able to attach my header to that and the cabinets. I used a 1x10 piece of wood for this part.
Also, I didn't remove the crown to put these up -- I knew I could cope new pieces in so that saved me a ton of time. I just notched out a corner in the header so it would fit over the existing crown.
Next were the finishing touches -- this is my favorite part because things start to come together! I added some trim along the bottom:

And then I added the vertical trim to mimic the look below:

I was getting really excited at this point!
I made the header thick because I have crown and trim that I needed to continue around this part. That takes up about five inches of it. Also, I will be adding lighting inside the cabinets and that will run along the back of the header. This gives me plenty of room to add that and have it hidden.

I was working on a deadline here -- I am a procrastinator through and through. I've had weeks to get this done but I work best when I HAVE to get it done. The counters are coming this week and I wanted to get everything up high done that I could.
I finished up the fridge cabinet and started adding more trim to hide the rough stuff:
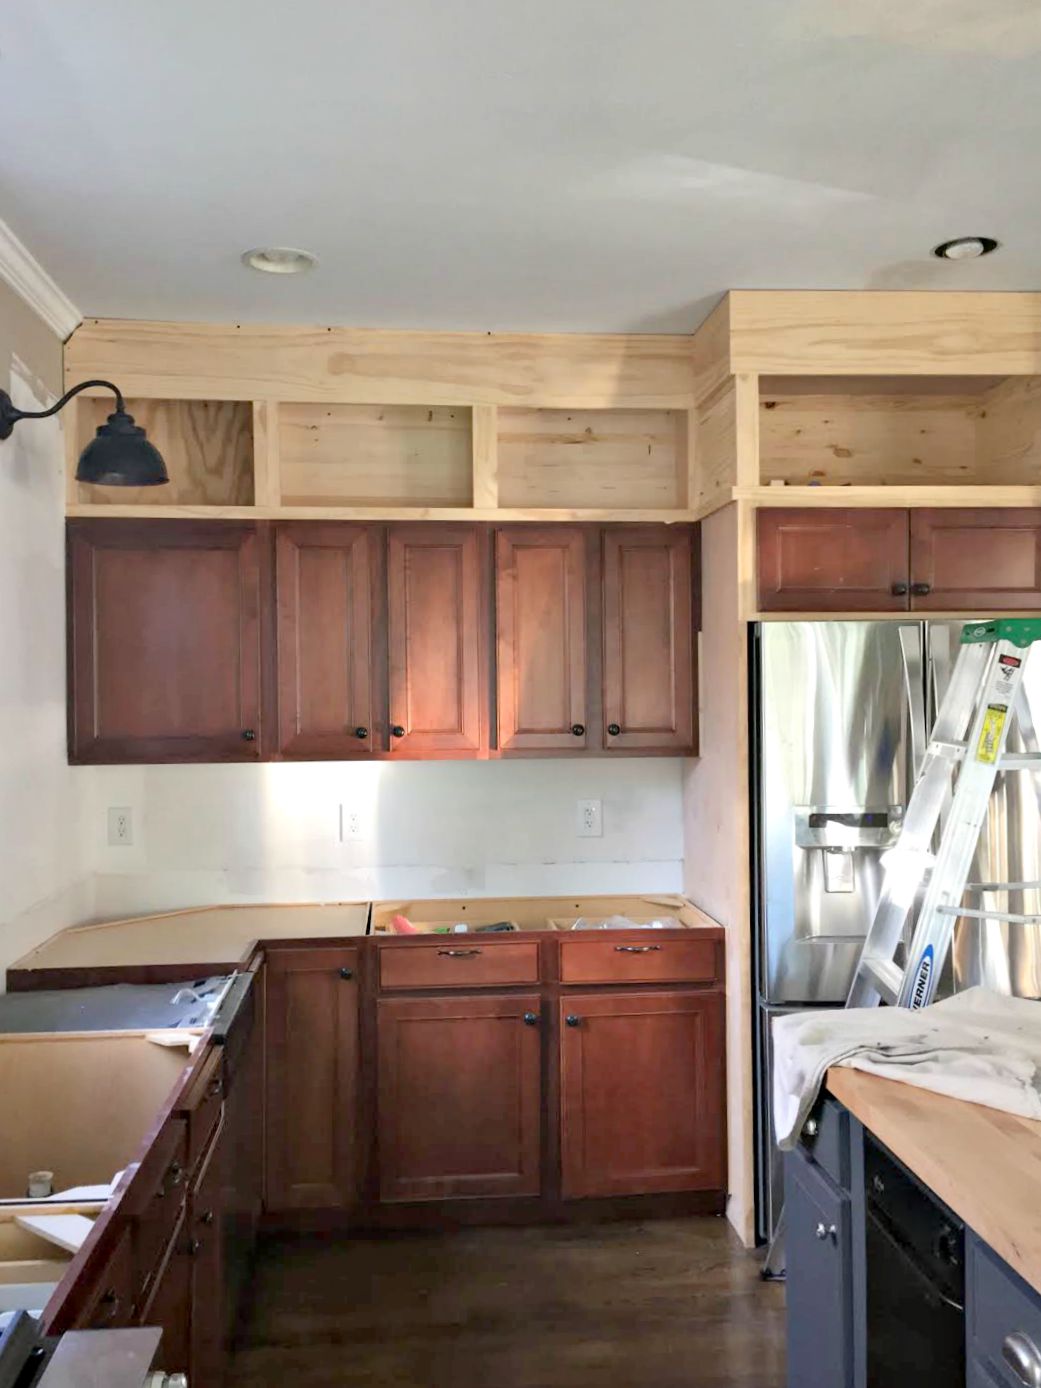
Here's a shot of how that's coming together:

You can see here we had to have the recessed light moved out a few inches -- it was right in the way of where the crown was going. Renovations are a constant dance of two steps forward and one step back. :) It's hard to see there but if you look close you can see how I added the small trim along the top that goes around the rest of our great room. It's an easy way to make your crown look extra chunky. Here's another shot before the crown was started: 
Excuse the mess! We had some drywall fixes to take care of as well. I clearly should just stop trying to clean. A couple of you have asked about the cabinet on the left side -- I won't be moving it because the the way the doors open would be awkward. :) And here's how it's looking with the crown (that I had help with, I'm not great at coping yet): 
I absolutely LOVE it. I'm so thrilled!! I used some extra wood leftover from the fridge enclosure so that helped a ton with costs. I ended up spending maybe another $100 and that includes trim. I would have paid hundreds in labor if we had hired it out. If you have a large space above your cabinets like us, I recommend making them additional upper or open cabinets. If you have less space you can just add the header and close the whole thing up. With a lot of space like we have that would be too big of a header. If you have any questions or if I missed anything please let me know! Have you attempted this project in your home? I know many of you have been thinking about it! **You have to see the finished kitchen makeover here! **Pin this project for later with this image: 
See more of our home here. To shop items in our home, click here! Never miss a post by signing up to get posts via email. Via https://www.thriftydecorchick.com/2015/09/building-cabinets-up-to-ceiling.html
Well this seems to be a tips and tricks week here on TDC, so let's keep that going! If you missed the other posts from this week, you can see how to make a window private for super cheap here and how to dress up a ceiling fan with a lamp shade here.
I shared this refluffing tip on my Instagram stories the other day and had so many people respond, I figured I should share it here! It's a pretty easy fix. I got these ottomans for our family room last year and we LOVE them: 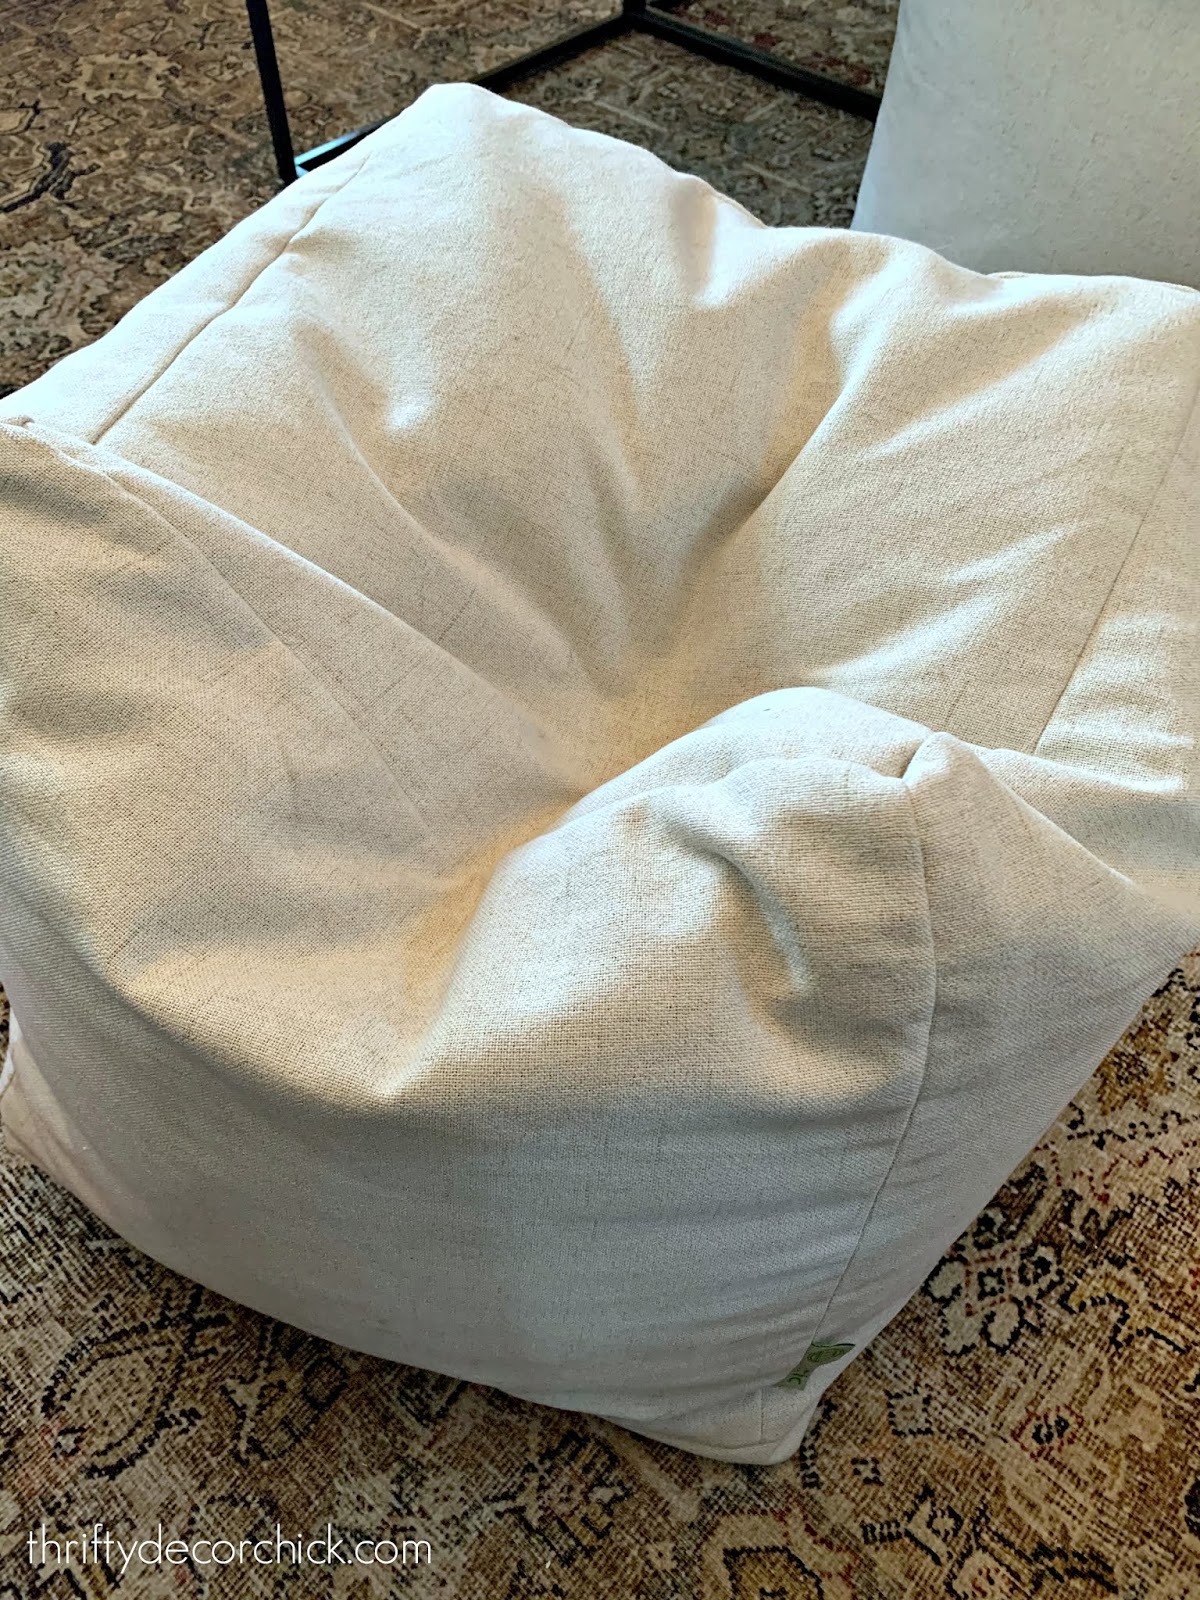
This post may contain affiliate links for your convenience.
See my policies and disclosure page for more information.
You can find the neutral poufs/ottomans here!
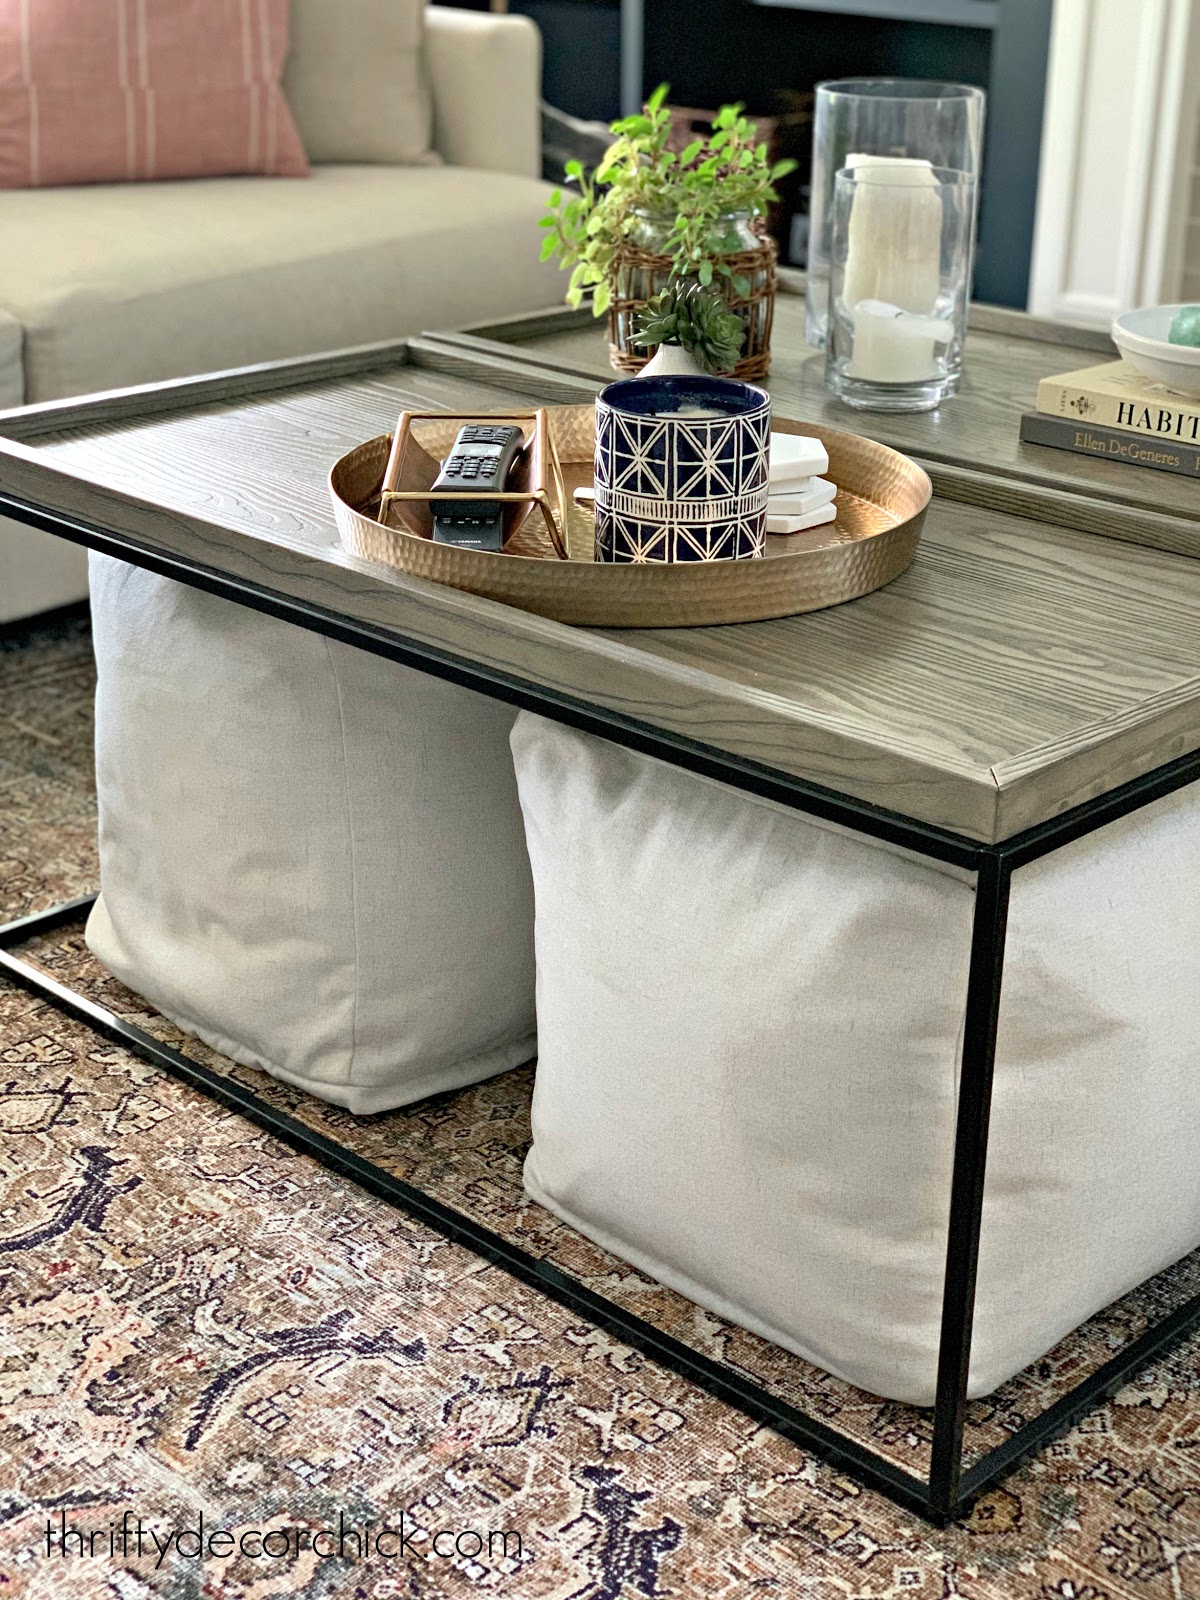
We keep them under the coffee table and I've been really happy with them. But like anything that's filled with foam, they start to lose their fullness over time. The foam gets crushed, so a full ottoman or pouf will start to shrink.
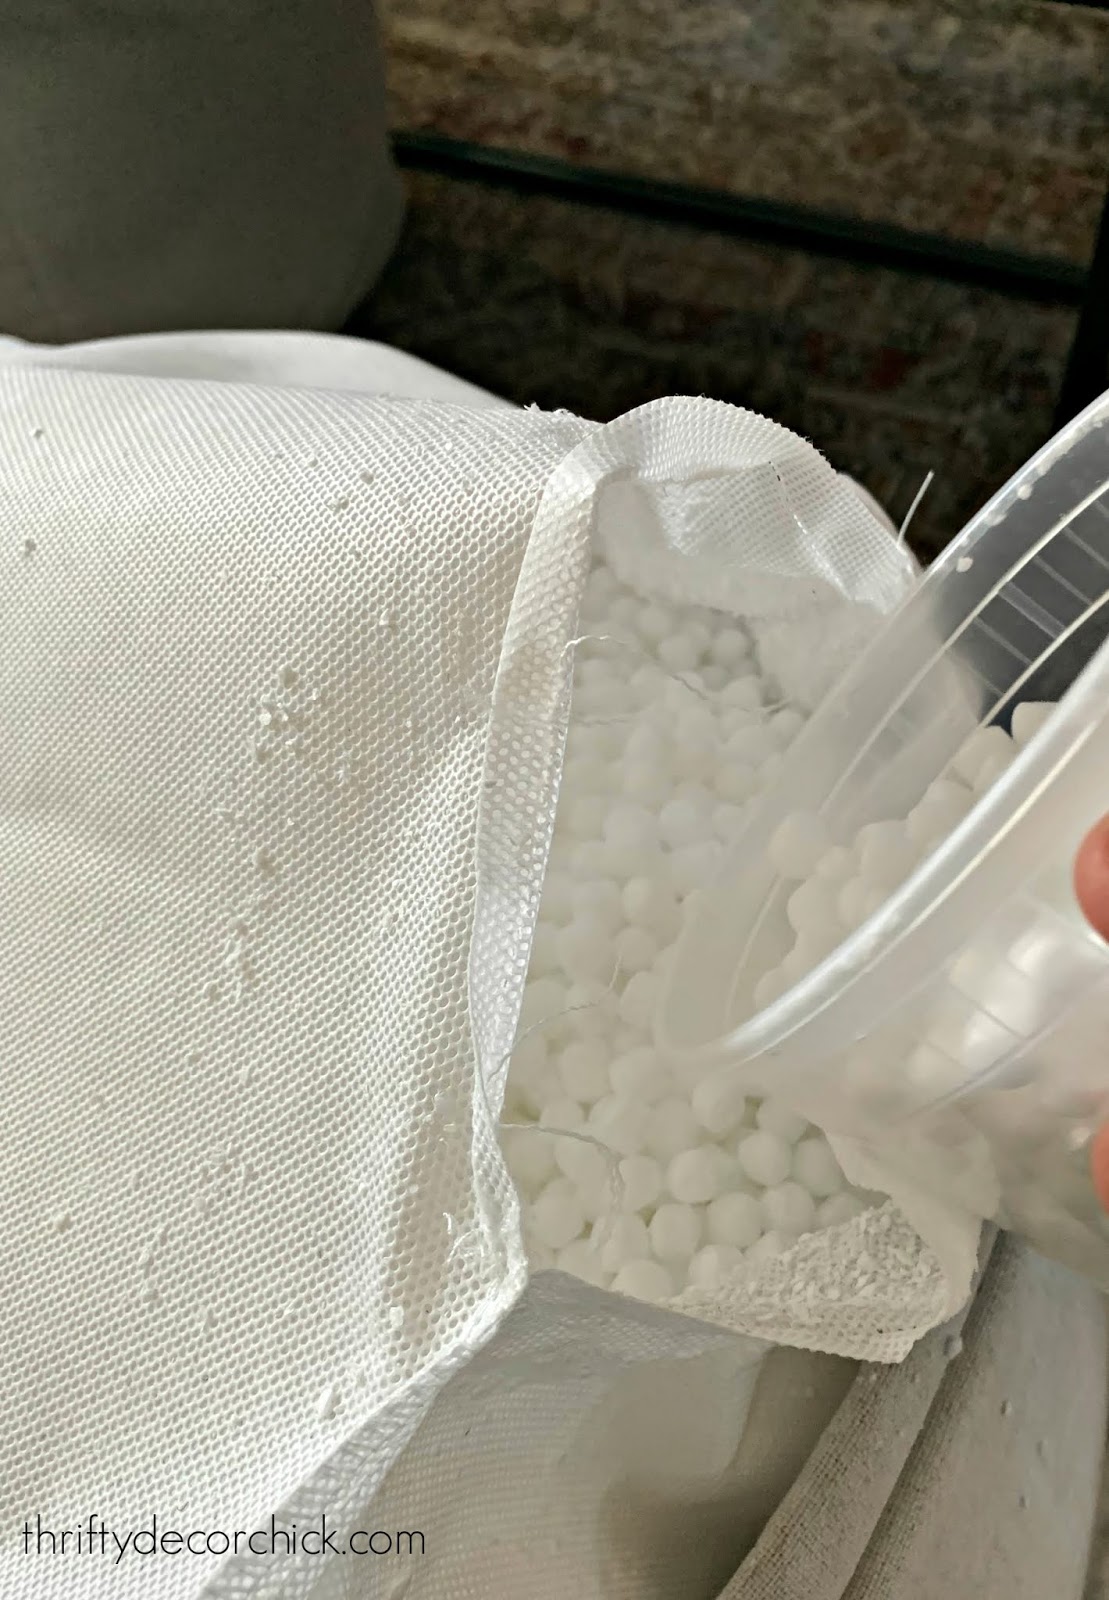
I like mine as fluffy as possible, so I wanted to fill them back up! Our ottomans have a nice cover with a zipper at the bottom. There's an insert with the foam inside that I had to open up:

A seam ripper is super helpful for this part! It makes quick work of opening this up.
I ordered foam filler online here -- there was a TON! I have plenty left for future use:
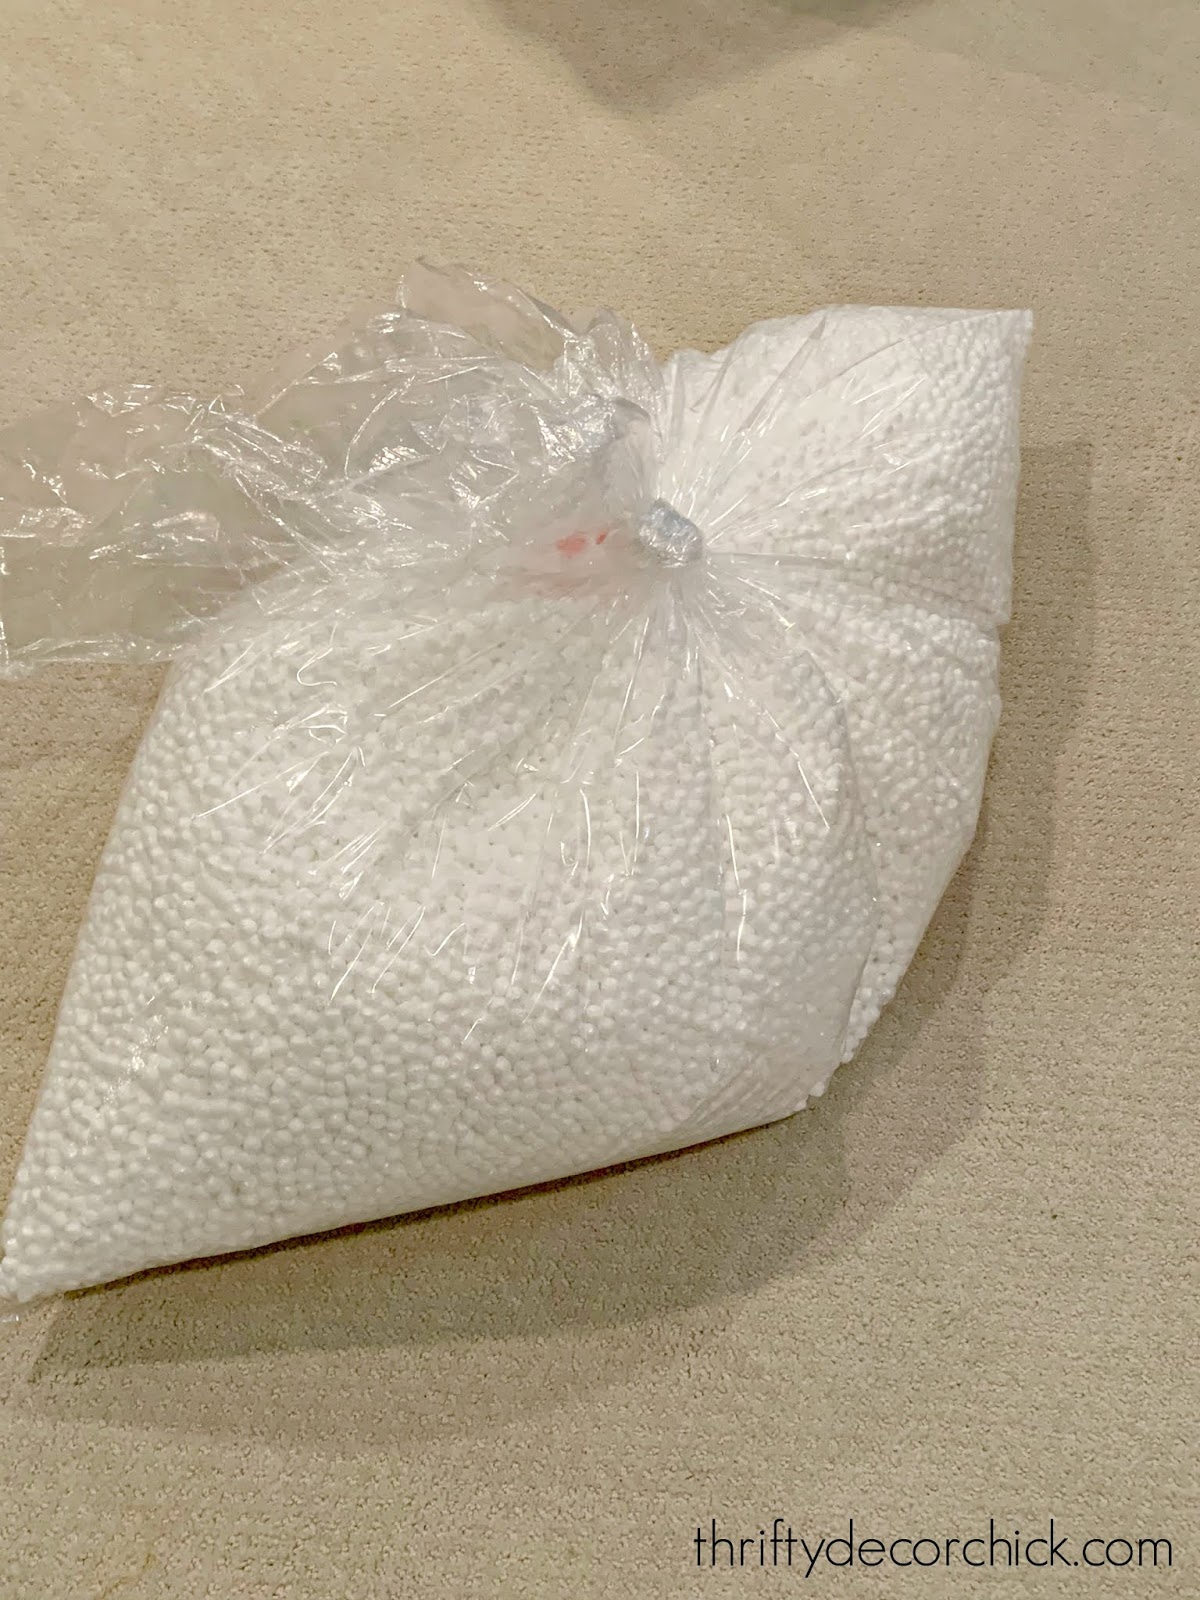
We used a cup and scooped it into the insert...slowly. This stuff will go all over if you're not careful.
These larger foam pellets were pretty easy to work with though:
Once I had them as full as possible, I hand sewed the inserts closed. That's it!
Just look at the difference!
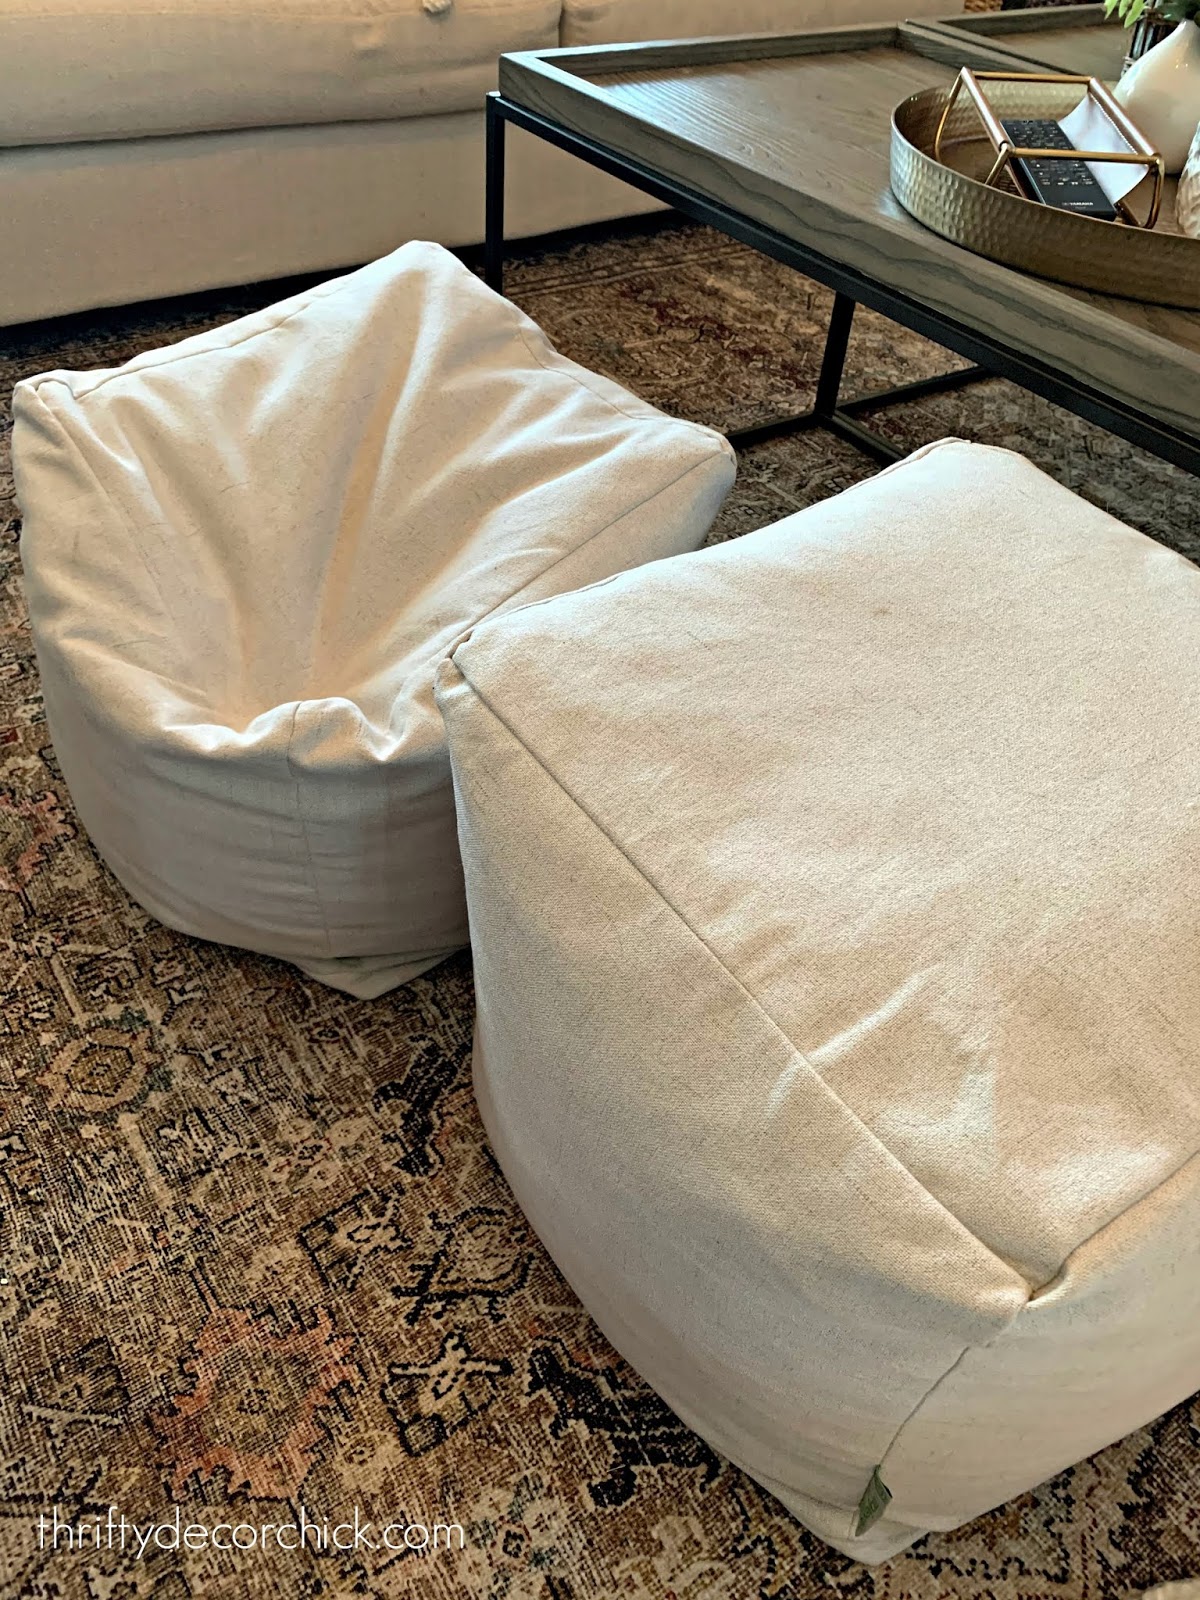
SO much better! These decorative poufs are usually not cheap -- refluffing will give them a much longer life.
It took me about an hour to fill them back up. Now they look like they did when we got them!:
This fix works on any ottoman, cushion or pouf filled with foam pellets. And of course, bean bags! In a couple years I'll probably have to do it again, but as you can see, we have plenty. ;)
Do you have a sad, flat ottoman that needs some fluff?
**You can find my beautiful rug (that I love SO much!) here and our coffee tables here.
See more of our home here. To shop items in our home, click here! Never miss a post by signing up to get posts via email. Via https://www.thriftydecorchick.com/2020/05/how-to-easily-refluff-flat-ottoman-pouf.html
Hello all! A couple weeks ago I did a little project that only took about five minutes and buck to complete. So of course I had to show you. :)
I saw an idea in one of my old magazines and then did a little researching online to see if I could figure out how to do it myself. I didn’t find the how-to, but I did find another inspiration picture:  We have a ceiling fan in our family room (this is an updated post from our last house) and even though I’d prefer something prettier, it’s staying for now. It’s necessary for the times the oven starts smoking in the kitchen, the smoke alarm is going off, and opening the windows and flapping the kitchen towel just isn’t cutting it. :) The fan is darker brown, which I do like. It has three lights as you can see here:  This post may contain affiliate links for your convenience.
See my policies and disclosure page for more information.
Nothing awful, but I was inspired by the photos I found and wanted to try something different. I decided I was going to do my best to use what I had on hand to change it up. I started by taking off the glass covers – you just squeeze the metal pieces inside and pull the glass off:  Next up – to figure out how to get my lamp shade to stay on the fan. I had large Goodwill drum shade I planned to use and it was the type with the wire circle at the top of the shade – the kind you have to use with harp. (More on that in a bit!) So I stood under the fan for about ten minutes, thinkin’ and a thinkin’. I noticed there was a little jobby on the bottom where the pull chain came out. It matched the one on the side:  Because I’ve changed out a meeellion lights in this house, I have plenty of electrical parts laying around. I dug through my stash and found this lamp pipe (also called a nipple): 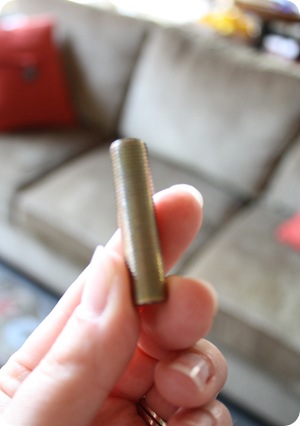 I knew if I could get it connected to the fan, I could figure this out: 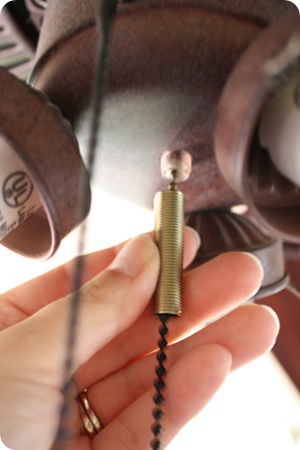 I looked and looked and LOOKED and tried every little trinket I had in my tool box, and nothing worked. Drats. I was so determined at this point, I was off to the hardware store. :) I looked around for awhile, but couldn’t find the exact piece I needed. Lowe’s Guy and I both spent a good ten minutes looking through the drawers of nuts and connectors, and still couldn’t find anything that worked. And then Lowe's Guy No. 2 came up to help and suggested I look in…wait for it…the ceiling fan area. Now, who would have thunk it? :) Bahhhrilliant. There I found exactly what I was looking for:  Two of these little connectors came in a package for about $1.50. Not bad. They are called couplings and you can find them here...but I recommend you try them out at the store to see what fits. I threaded the coupling to the fan, put the longer "pipe" into that one, and then put the hole of the lamp shade over the long piece:  I secured the shade up there with a small nut (picture on the right). It worked perfectly! The original lamp shade I tried was way too big though, so I took another off a lamp and used that instead:  Love, love, LOVE. There’s a few things to consider if you want to try this out – first of which is your ceiling height. The shade hangs lower than the glass shades did, by about five inches I'm guessing? Our ceilings are nine feet, so we still have plenty of clearance. Something else to consider is your lamp shade. My shade was the type that fits on the lamp with a harp – it’s called a spider fitting: 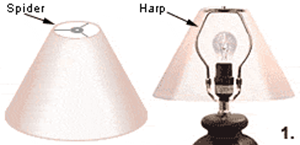
This "spider" natural linen drum shade is lovely and would work perfectly! This white linen shade would work as well. If you have an uno style shade, or the type that fits right over the lamp socket, you’ll have to use a different method:  I’m sure there’s a way to wire that type of shade up there. But if you are thinking about trying this out, I’d suggest using one with the spider fitting, just because it’s SO easy. If the bare bulbs showing from underneath the fan are going to bother you, this probably won't work for you. That doesn’t bug me one bit, since you only see the light bulbs if you’re right under it:  You actually see less of the bulbs this way than with the original glass shades! One more thing to consider is the size of your shade. The light bulbs need to be two to three inches from the shade, for safety reasons:  But that also depends on the wattage of your bulbs – ours are 60 watt and we have a dimmer on this light. (And even though our shade is large enough, I had the light on full force for hours the first day, feeling to see how warm the shade was every ten minutes or so.) It was fine. But I’m a freak like that. :) And of course, the newer LED bulbs make this even less of a concern -- they burn so much cooler than incandescents. This new look makes more of a statement than the glass shades, but I find I notice it less. Maybe it’s because those covers were never my cup of tea. Or it could be because I love drum shades (especially those trimmed out with lovely jute trim). I LOVE how it turned out. Especially because it only cost $1.50!:  Oh, and it holds up great when the fan is running too. Our fan doesn’t shake much anyway, but it’s totally secure. If you don’t have a drum shade, HomeGoods always seems to have a good selection. Or try the online options I linked above. You can also find decorative ceiling fan pull chains at most hardware stores or online. There are tons of cute options! Over the years ceiling fan designs have started to use the drum shade look more and more. This is a beautiful option and I like this one too. But adding a shade to your current fan will save you tons of money! So have you doctored up a ceiling fan? With spray paint? New shades? Have you tried this project? Do share! Here's an image to pin this for later: 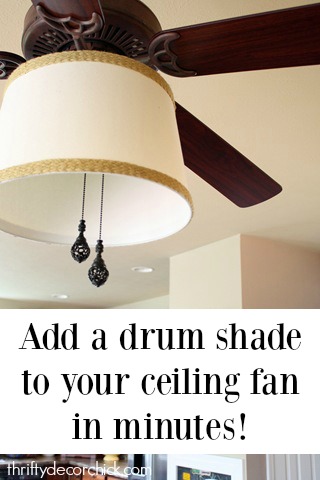
See more of our home here. To shop items in our home, click here! Never miss a post by signing up to get posts via email. Via https://www.thriftydecorchick.com/2011/04/prettying-up-ceiling-fan.html
This simple way to "frost" a window, or make it private, is one of my favorite home hacks ever! It's so simple and cheap, and helps with an annoying problem that would be expensive or messy to fix otherwise. I've actually shared this before (a looong time ago), but it's one that's worth sharing again!
I've only had to use this trick a few times, but it's been so helpful. The first time I did this was on our glass pantry door ten years ago: 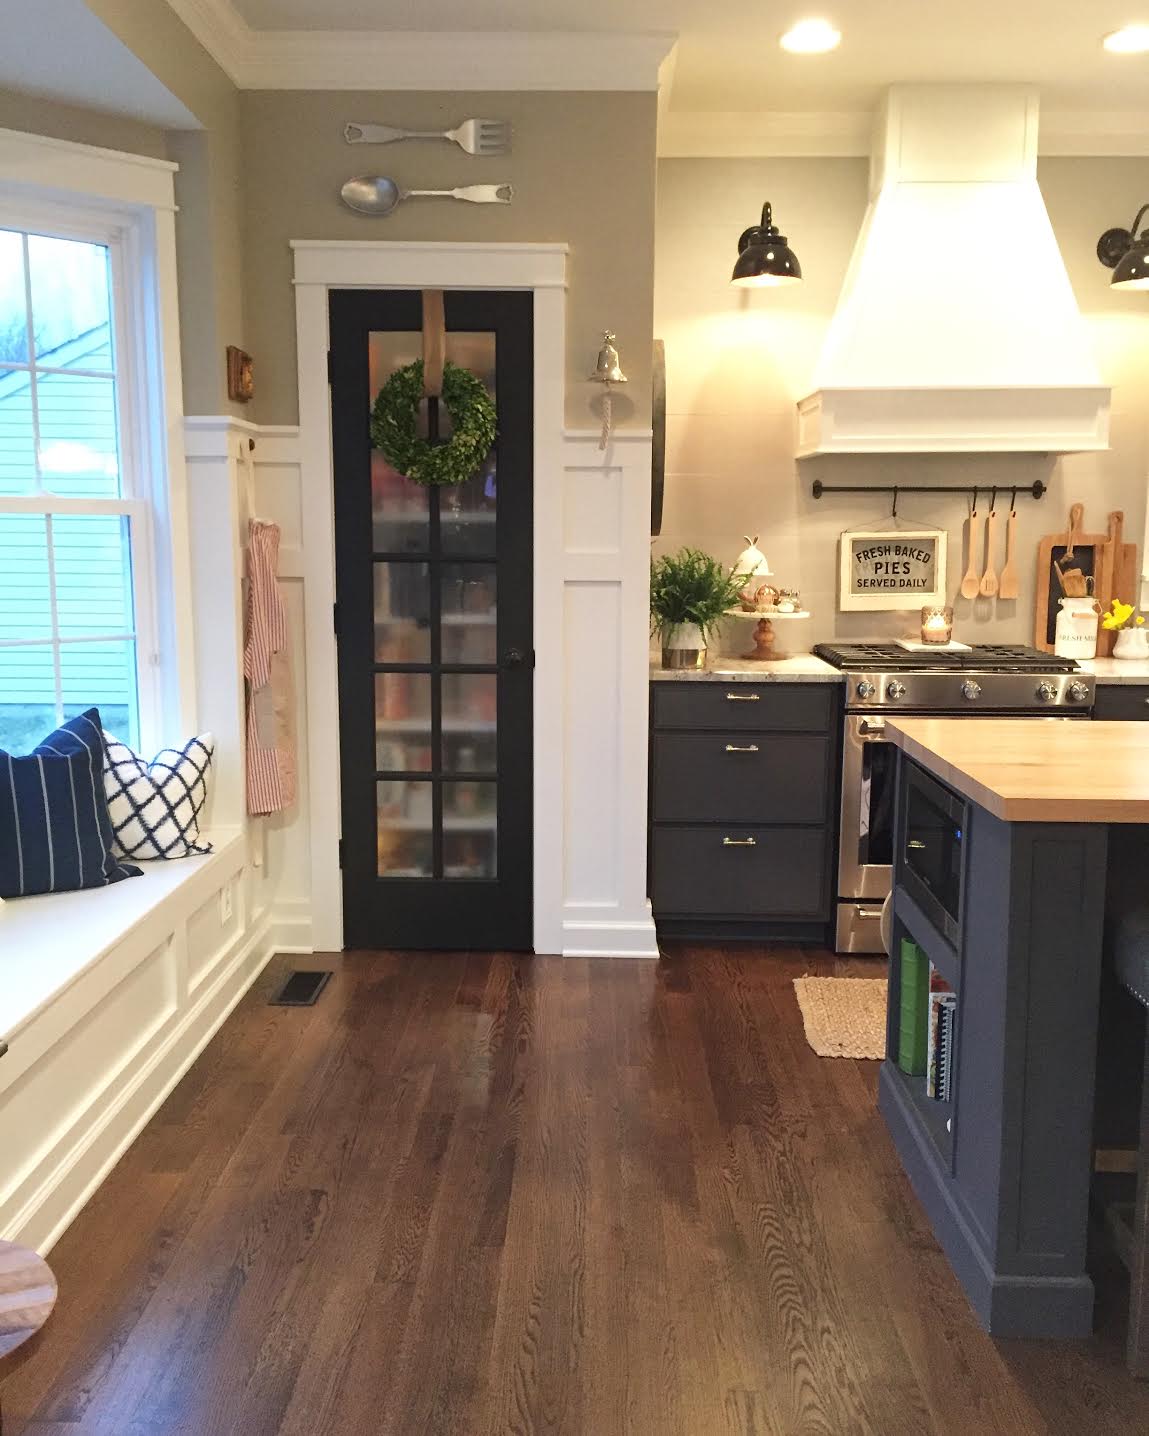
I was able to "frost" that pantry glass door for next to nothing! (Although getting the film placed perfectly on those panes was a PAIN...now I wouldn't be quite so exact with it.)
A few helpful readers told me about this trick forever ago. Who knew transparant contact paper is the easiest and cheapest way to make a window private? I was so pleasantly surprised when this actually worked!
We had a big bathroom window in the old house that I made private with this as well. I didn't think I'd need to do it again, until we moved into this house and realized the powder room window was placed in a less than ideal spot:

This post may contain affiliate links for your convenience.
See my policies and disclosure page for more information.
I don't know what took me so long, but I finally did this private window trick again and it worked like a charm. You'll need transparent matte Contact paper: 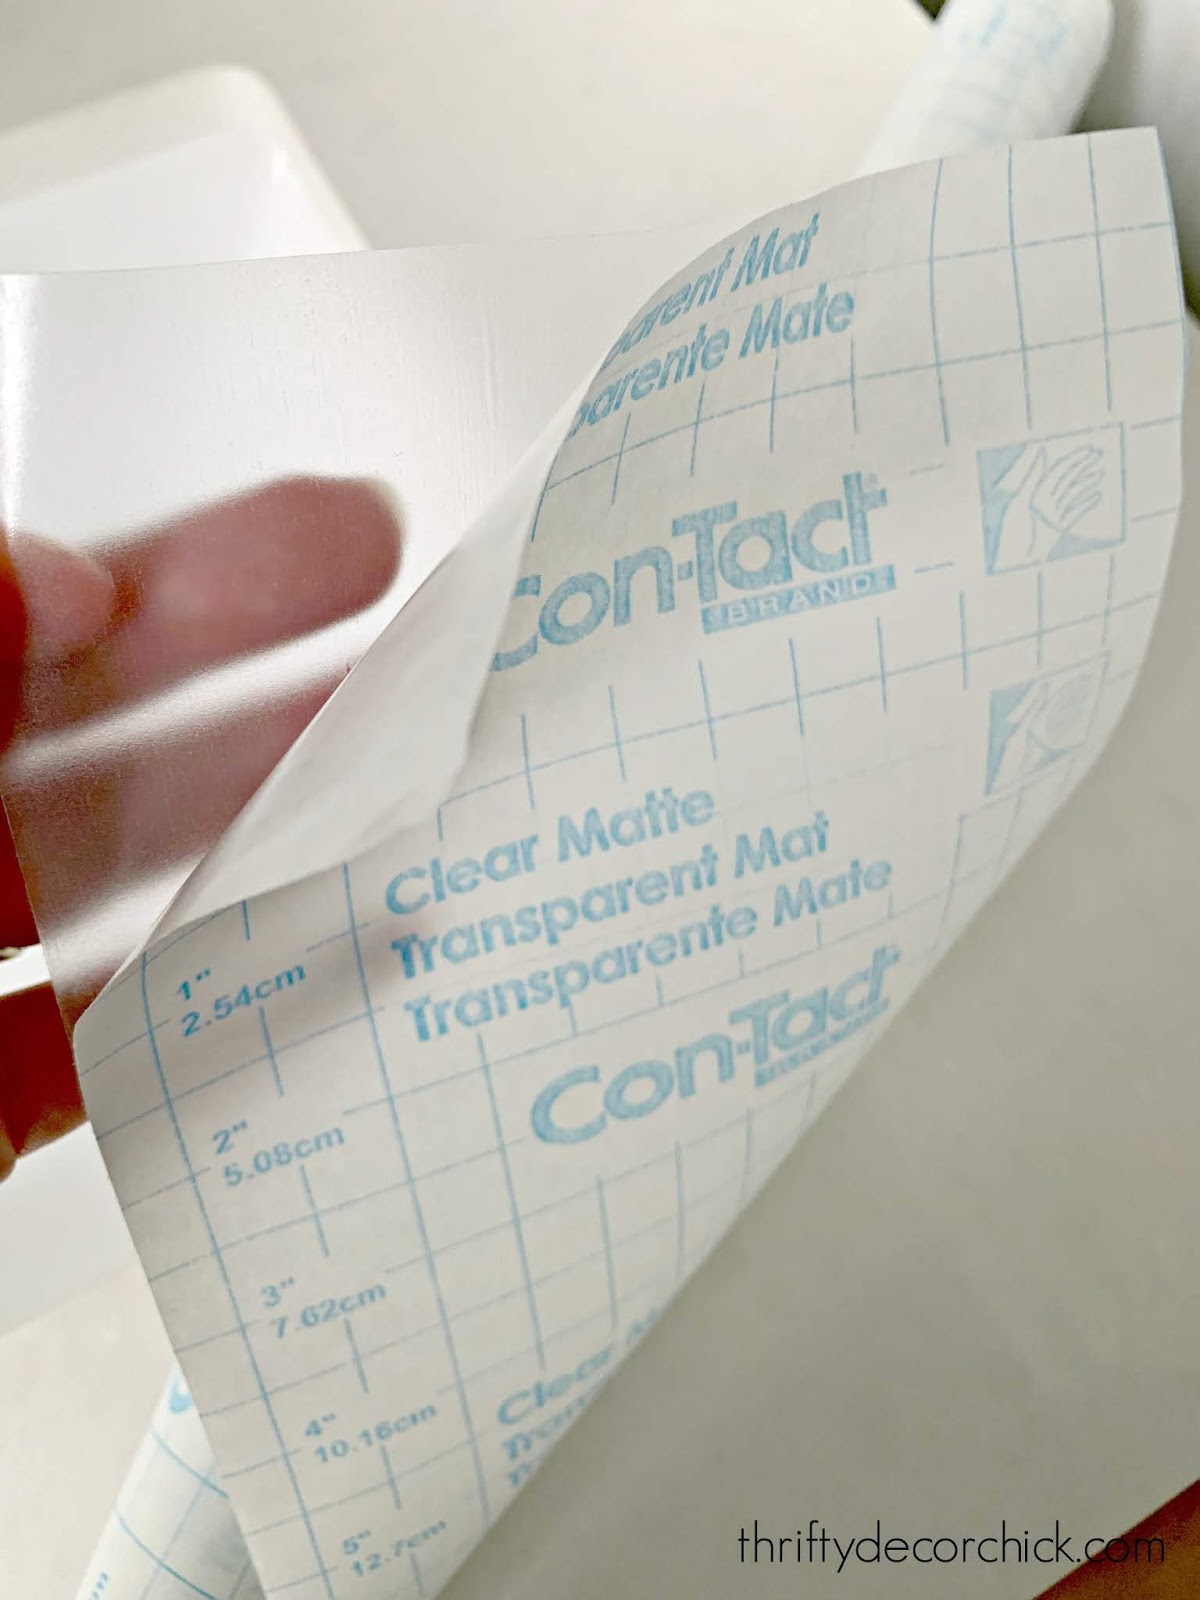
Take a look at this post to see all of the easy steps on how to install this on a window. You'll just need a spray bottle with water, scissors and some way to push out the bubbles.
Because this paper isn't wide enough for the window, I cut the peices in the size of the window panes. You can also cut them in strips, which is how I did it on the window in our old bathroom.
You'll have TONS of bubbles, but they will push right out! I always use these pan scrapers, but even a debit card will work. You just need something with a smooth side to push the bubbles out of the sides. (I leave some space around each peice so I can do that.)
This time, the vinyl looked like this a day or so after I installed it:

But those marks disappeared over a few days. So odd! They almost look like bubbles, but aren't. I still don't know why that happened.
I only placed it on the bottom part of the window. You will not be able to see through it -- everything will be blurry. When I did this last time I thought it would bother us not being able to see out, but it never did.
Same in this house:
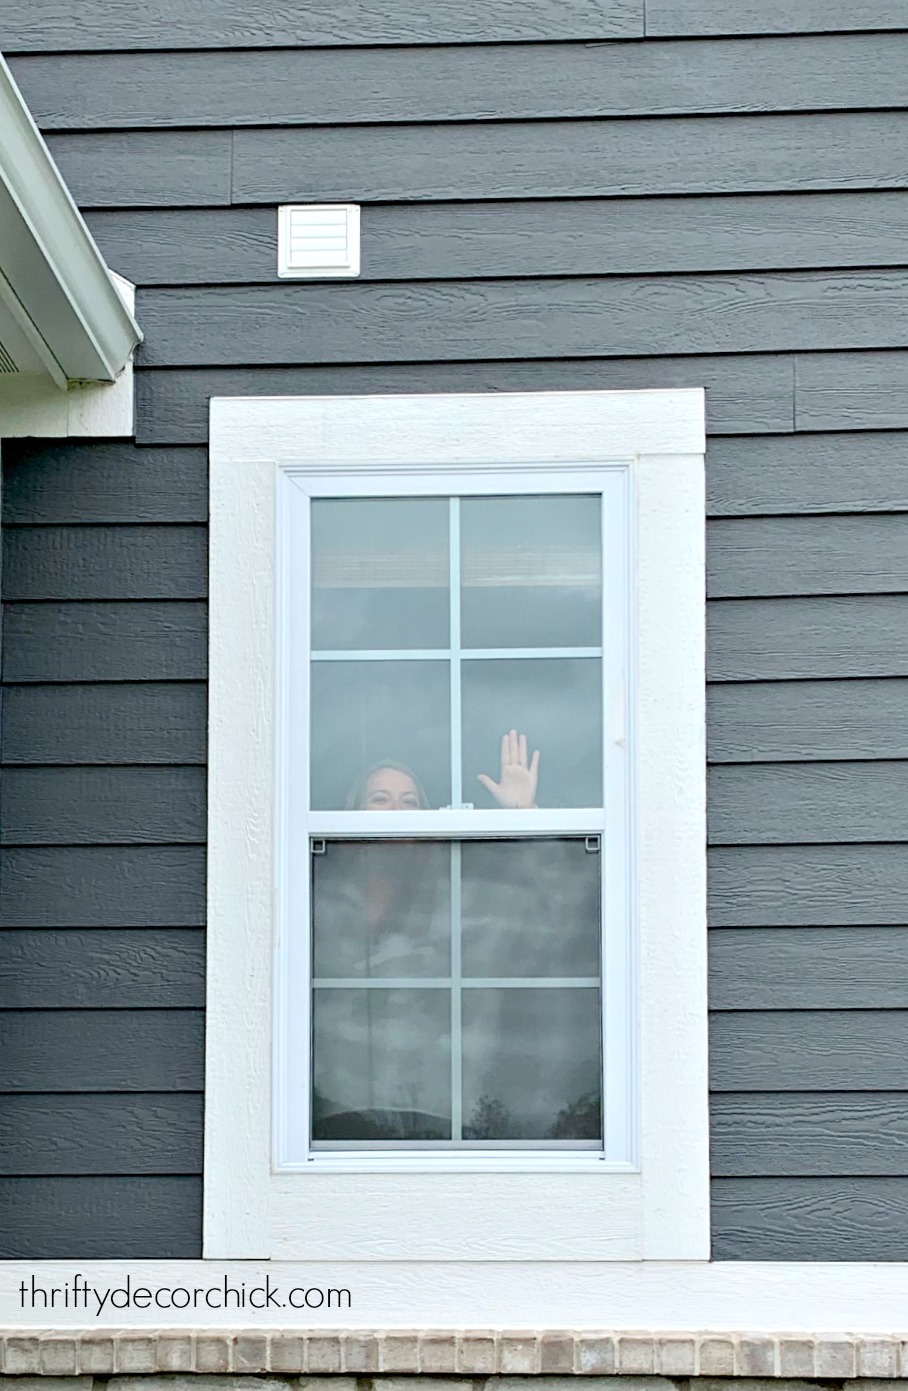
As you can see, we can still see out of the top part of the window. ;)
Also, if you stand right up on it like I am above (I'm leaning against the window) I'm blurred but not overly so. But if you're just inches away you can't see much (at night with a light on you'll see movement for sure).
I took a pic of our son standing away from the window slightly and couldn't see him at all. I thought he had moved away before I could take the photo!:
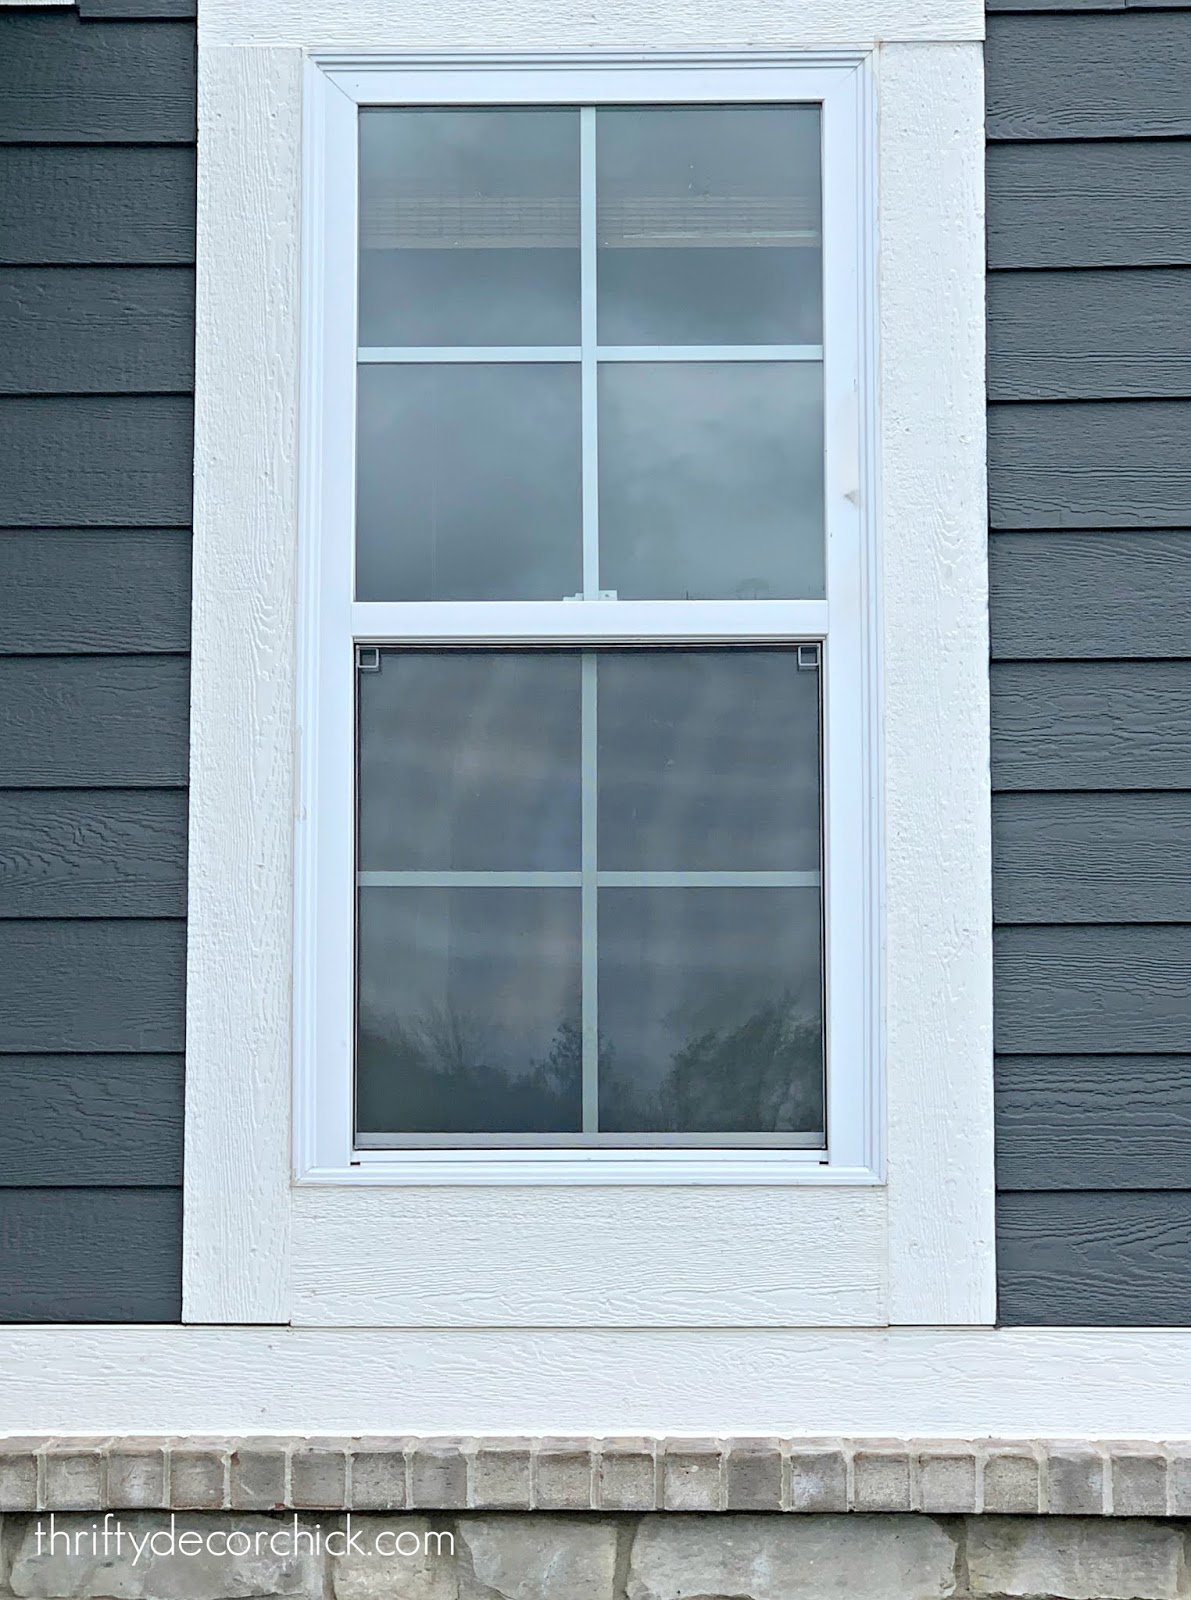
I also love that you really can't tell half of the window is "frosted" from the outside. I'm considering doing this on some other bathroom windows as well!
Here's how it looks from the inside:

There are window privacy films you can try that work well as well, but they are more expensive. You can also use spray paints -- this frosted spray paint is for windows, and this mirrored spray works as well. But they take a lot more prep and time.
I can whip this out in ten minutes and a whole roll is $6 -- it lasts forever! Have you ever tried this easy private window trick?
See more of our home here. To shop items in our home, click here! Never miss a post by signing up to get posts via email. Via https://www.thriftydecorchick.com/2020/05/easy-and-cheap-way-to-frost-windows-for.html
You may know by now that I sometimes start projects and then see something shiny and switch gears in the middle of it. Our mud/laundry combo is a good example of this. I quite literally stopped painting in the middle of a wall:

I have zero shame in doing this...it stayed like this for a YEAR. Ah well, at least it wasn't super noticeable.
Finishing this wall and another one have been on my list for, well...a year. I finally got that finished and I'm so thrilled with the changes I've made in here, I figured I'd do a little recap with before and after photos. I'll also share what else I'd like to accomplish in here.
This room is a mud room and laundry space -- which if not large enough, I would not recommend. We had the combo in our old house for awhile and it was WAY too small. But when you have it all in a big room, it's pretty awesome.
I LOVE that we can walk in from traveling and dump all of our dirty clothes right into the washer or hampers. I also love that it's close enough to our living spaces that I can start loads/move clothes over to the dryer easily.
Anyway...here's what we were working with soon after moving in. I chose a neutral ceramic marble-looking tile (I'll link the products or similar ones at the bottom of the post!) for the flooring:
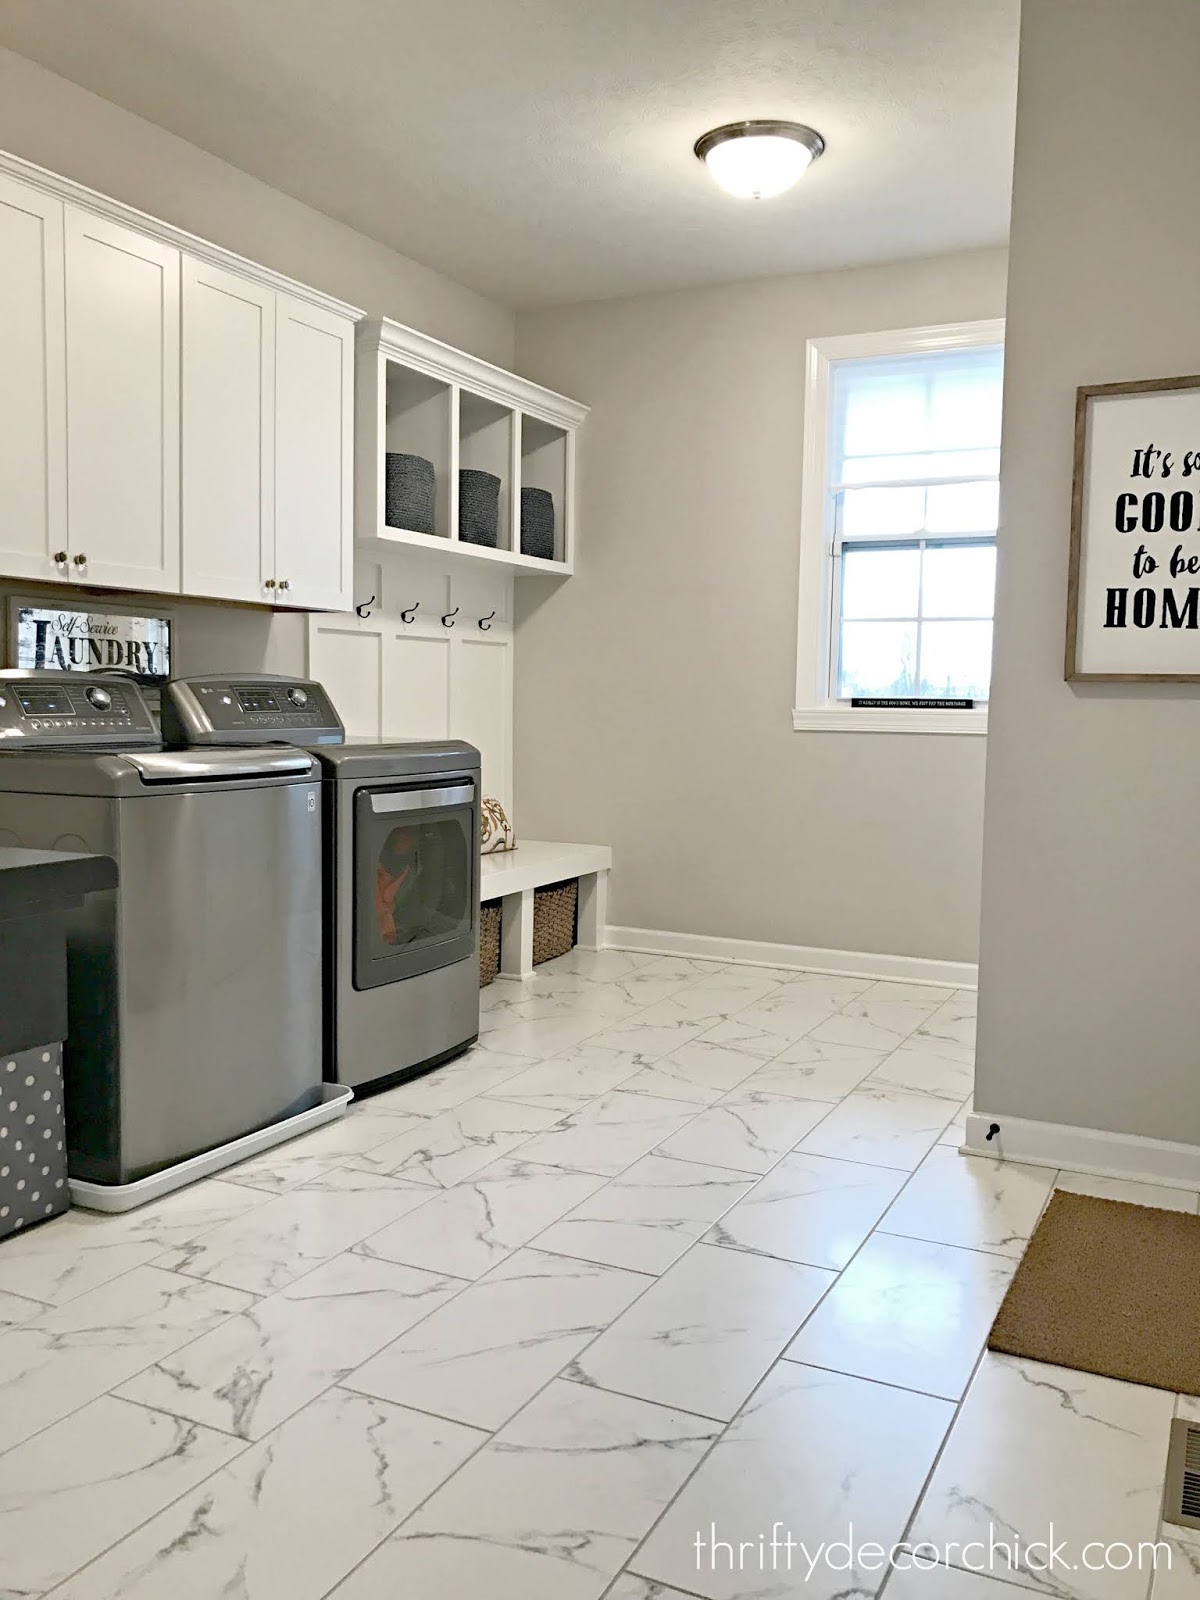
I was able to design the layout of this space and drew at least 15 layouts before deciding on this one.
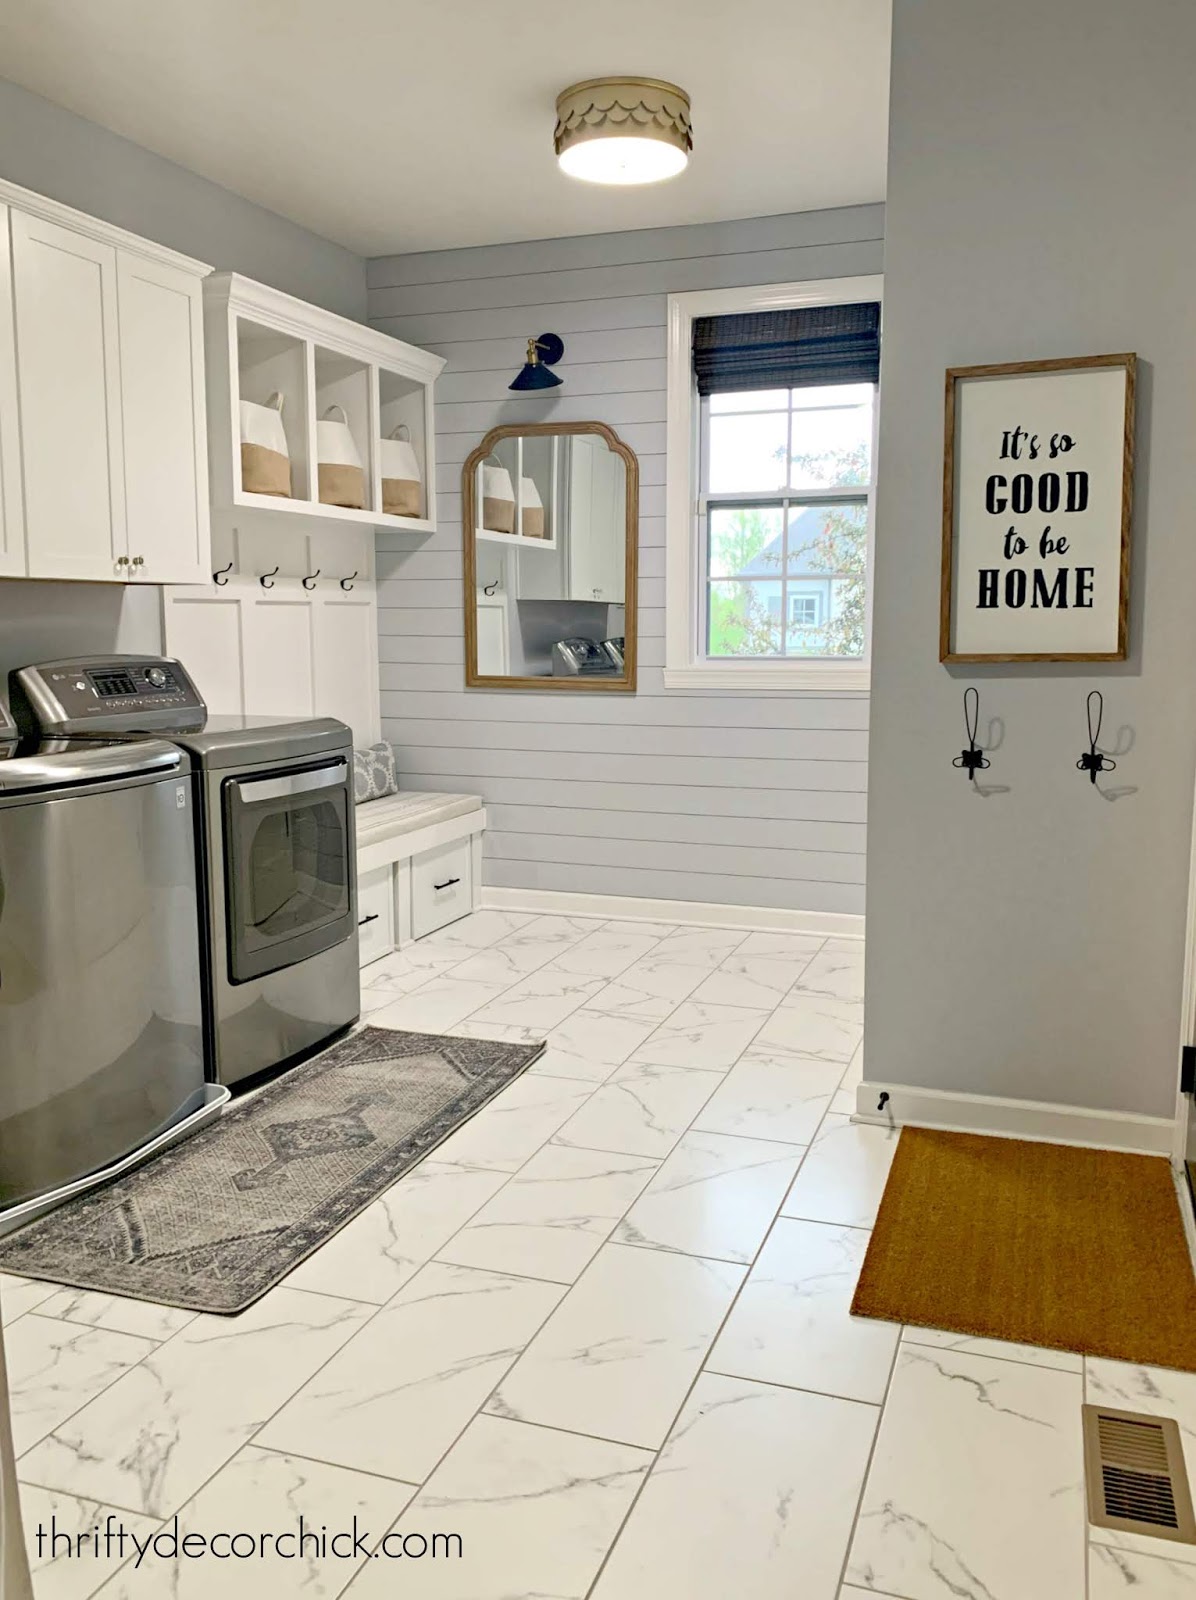
A year after moving in I changed out the standard lights to these pretty brass flush mounts and then last year I added the shiplap wall and painted (half of the room):
This post may contain affiliate links for your convenience.
See my policies and disclosure page for more information.
I built those pull out shoe cubbies a couple months ago and they are working perfectly! I love them. The original wall color was the one I used throughout the whole house -- agreeable gray by Sherwin-Williams: 
The new color is called Whitestone, and I used and loved it in our old master bedroom.
You can see how I made that lettered sign here! After adding the huge DIY chalkboard, this is how that view looks now:


We have a long folding table along one wall that we keep our cat litter under:

It also serves as a command center -- we charge all of our electronics here and all mail lands here first:
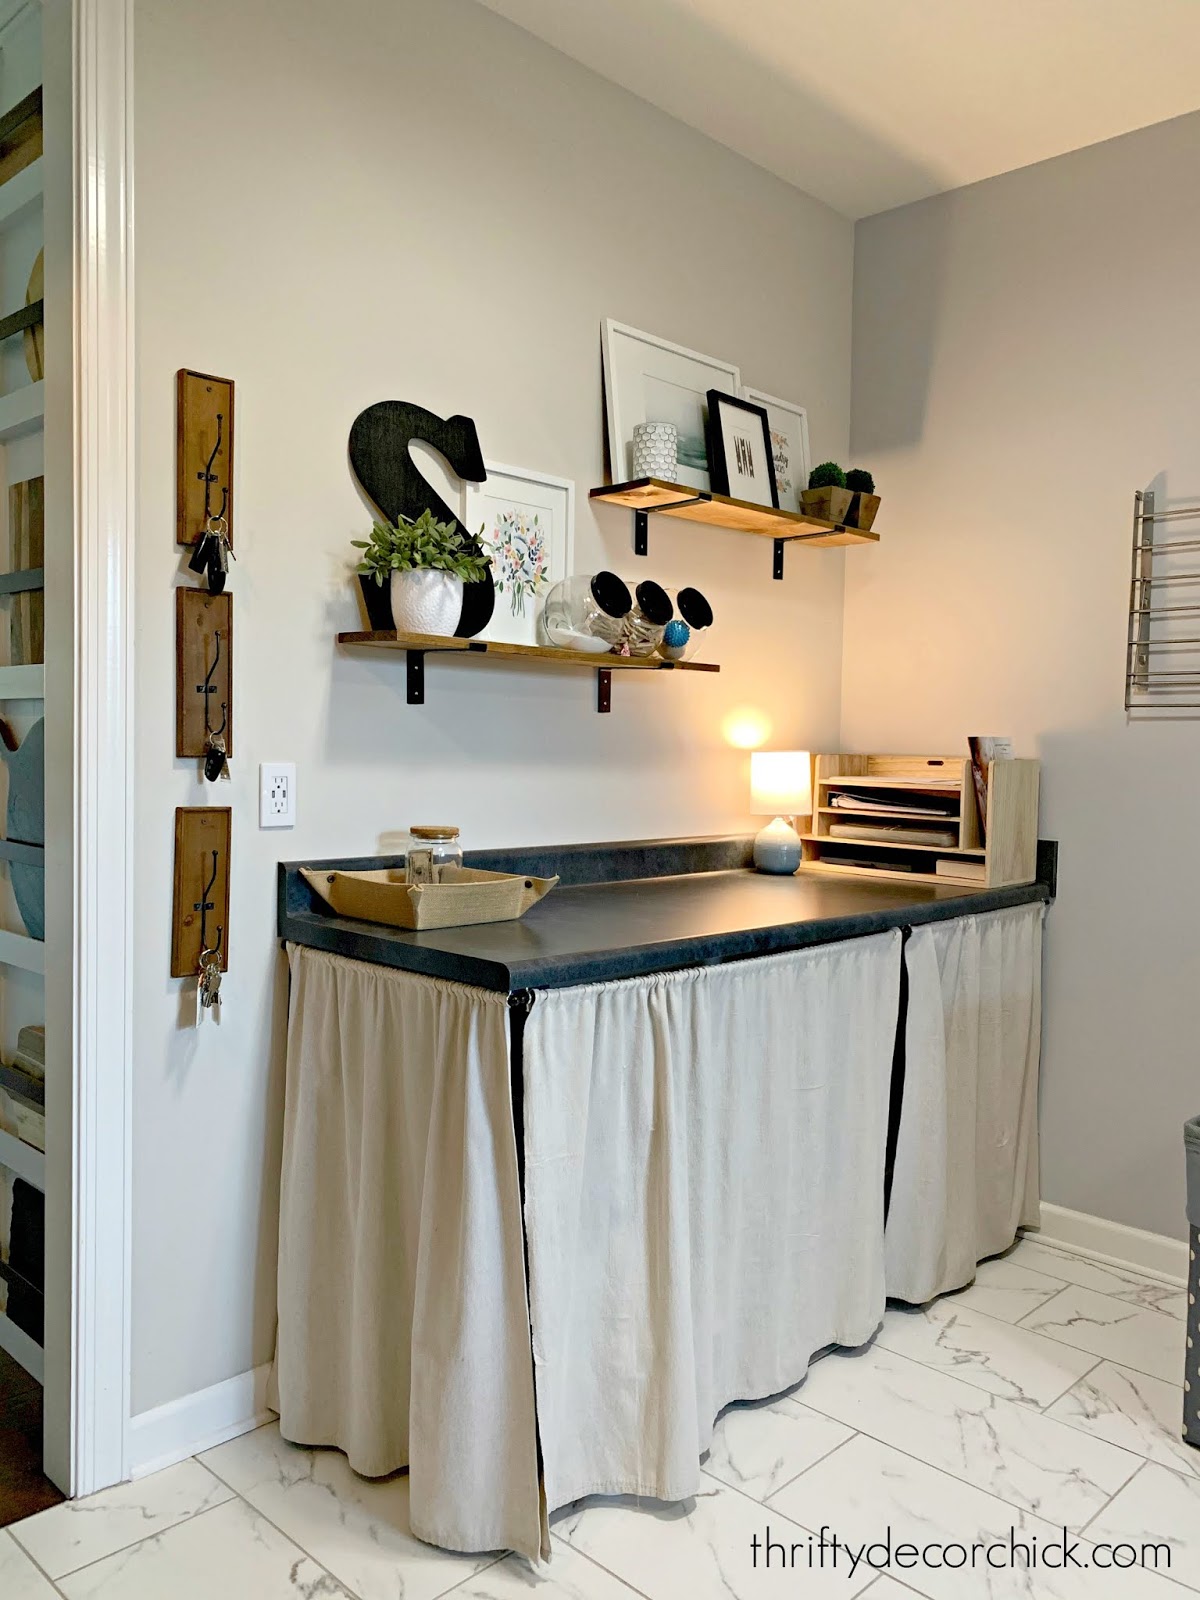
You can see how I hid the cat litter for just a few bucks here!
You may notice that wall isn't painted still -- I have a DIY project in mind for that wall I'm hoping to work on soon!
Here are a few more looks at the space so far!

Our washer and dryer are still kicking! You can read my review of this LG top loader washer and dryer here.
Look, the wall is painted! ?


Here's a look inside that closet -- it's basically the best thing ever:

You can see more of the mud room closet and how I organized it here!
I hope to add crown molding in this room soon, and then paint those closet doors black. I have bigger plans for the folding table area, but with all that's gone on lately I doubt it be in the budget anytime soon. Maybe next year!
Do you have a combo mud and laundry room? Do you love it or hate it?
Here's a list of the projects I've completed in this room and links (click the photos) to the items as well!:
 See more of our home here. To shop items in our home, click here! Never miss a post by signing up to get posts via email. Via https://www.thriftydecorchick.com/2020/05/painted-mudlaundry-room-combo-finally.html
Well hello! I shared this quick tip on my Instagram stories this week but it was such a good one I thought it deserved it's own post. :) I've seen this tip a few times over the years but haven't tried it -- I just wasn't sure how well it would work.
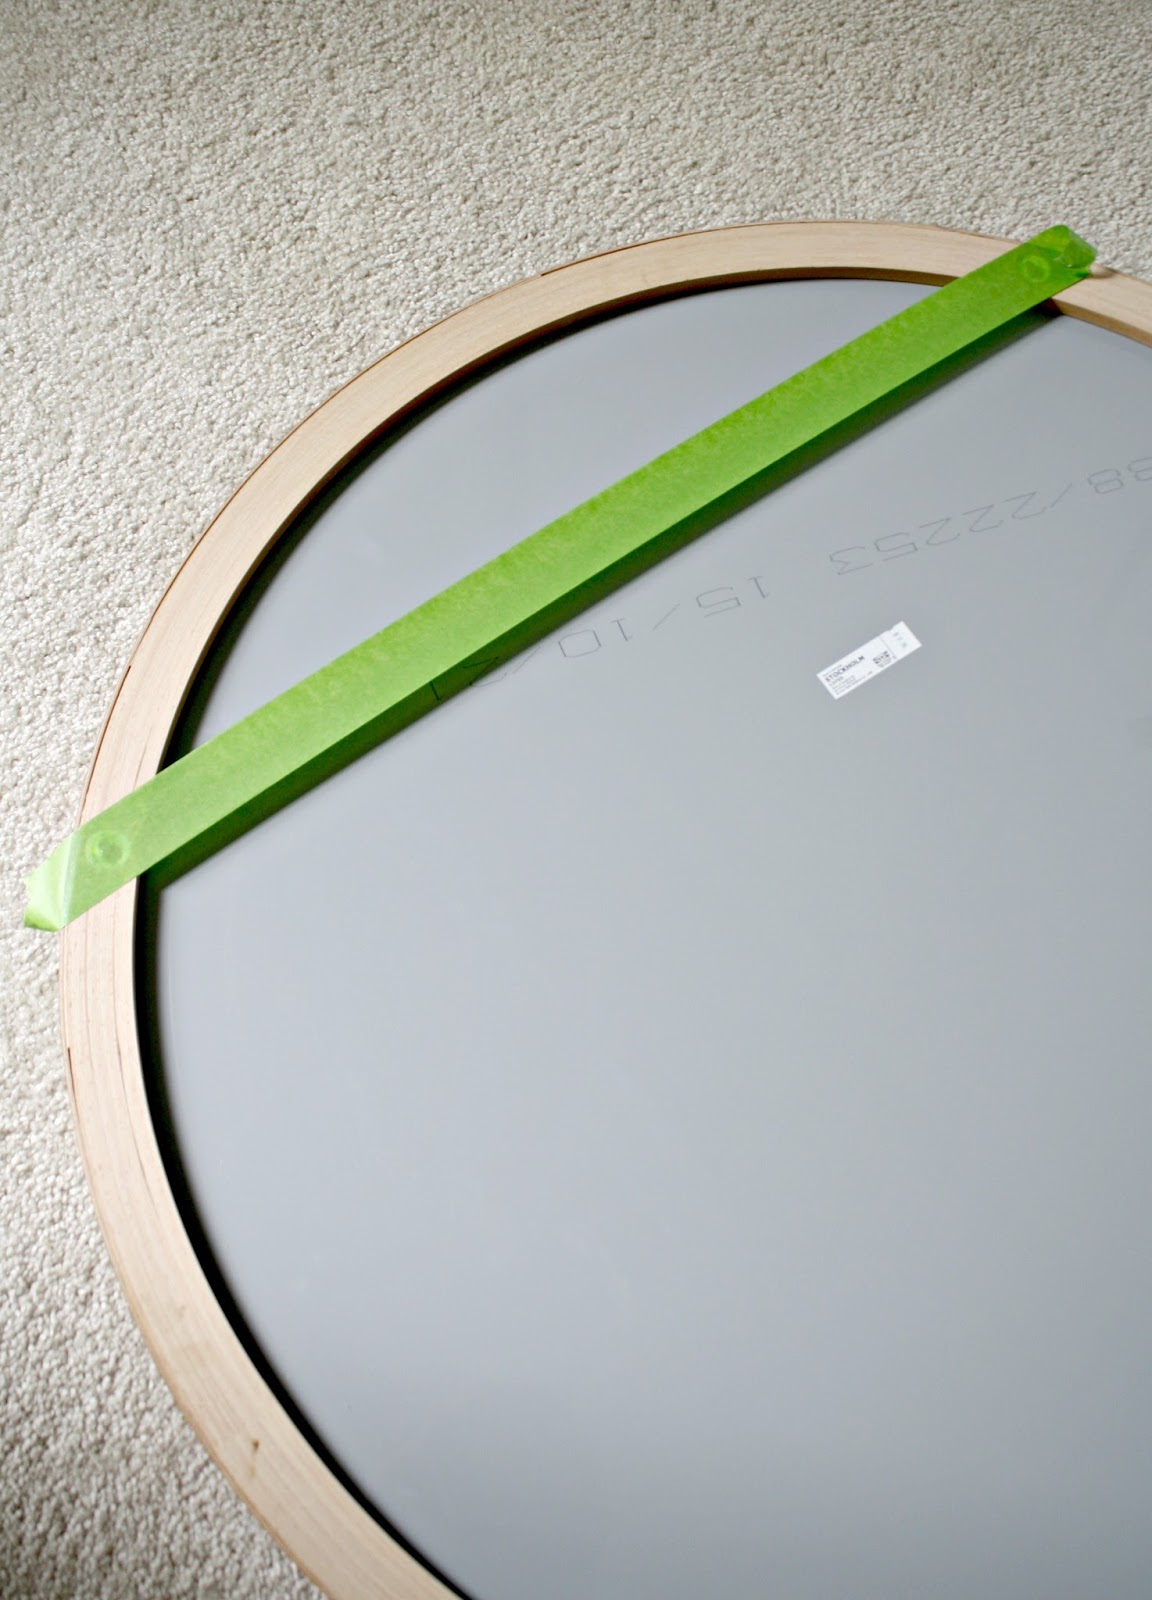
But it worked like a charm and I'll be using it again! I bought two of these IKEA mirrors at least a year ago for the bathroom renovation:
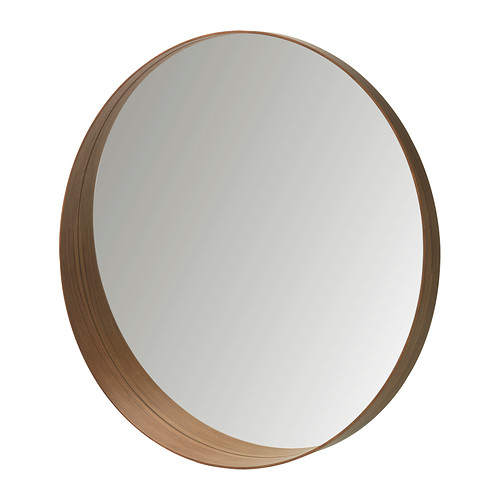
They are the Stockholm mirrors and are so pretty! I wasn't sure how long it would be before I started the room, but it's a long trip to our closest IKEA (before we had one open up here) so I grabbed them up.
This week I was finally to the point where it was time to hang them and it was very exciting. :) They are quite large so the holes on the back were far apart. You can use a level (I have a couple long ones), but I found this trick to be much more precise than measuring and trying to transfer that measurement onto the wall.
Because I was drilling into tile I wanted this to be as exact as possible. This little hack is pretty easy. You'll need to grab some painter's tape and put it across the holes on the back of your art or mirror:
This post may contain affiliate links for your convenience.
See my policies and disclosure page for more information.
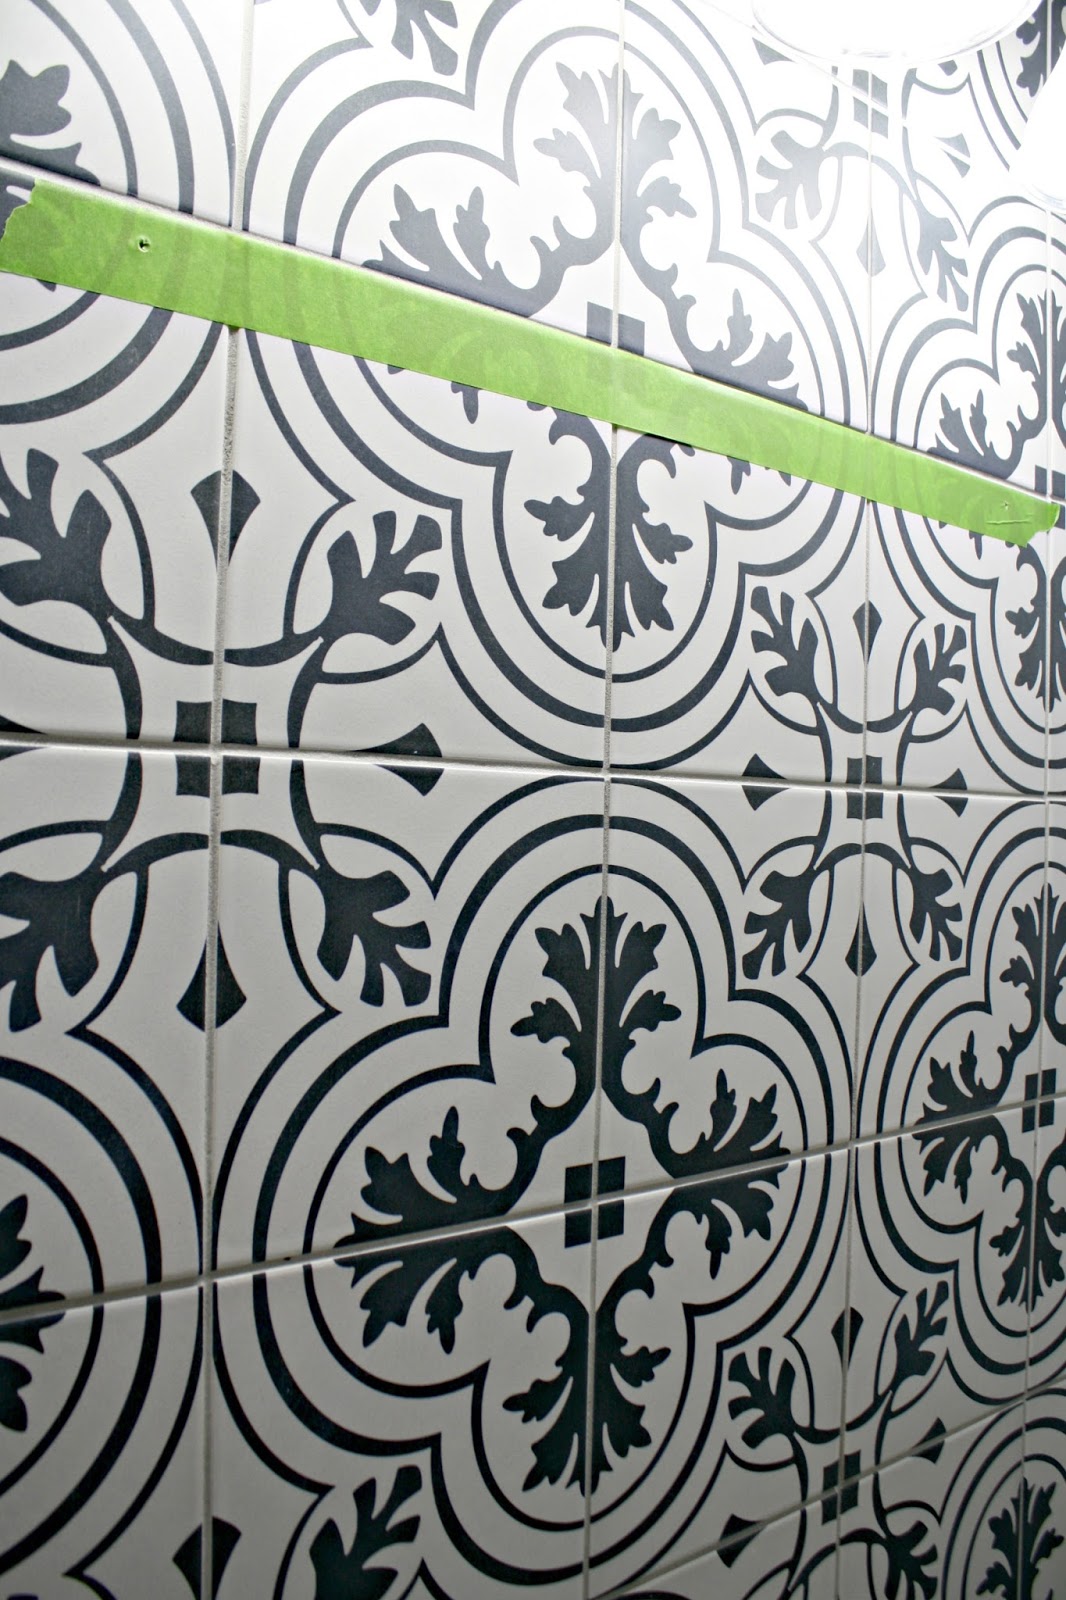
Make sure the tape is placed at the same spot on each side. (Meaning the same distance from the top of the tape.) Then I poked a hole through the tape. You can also mark it with a pen for a really precise measurement:

Then you take your tape and place it where you want on the wall. You'll still need a level for this part -- I forgot to take a photo of using it, but you need to hold it against the tape to check:
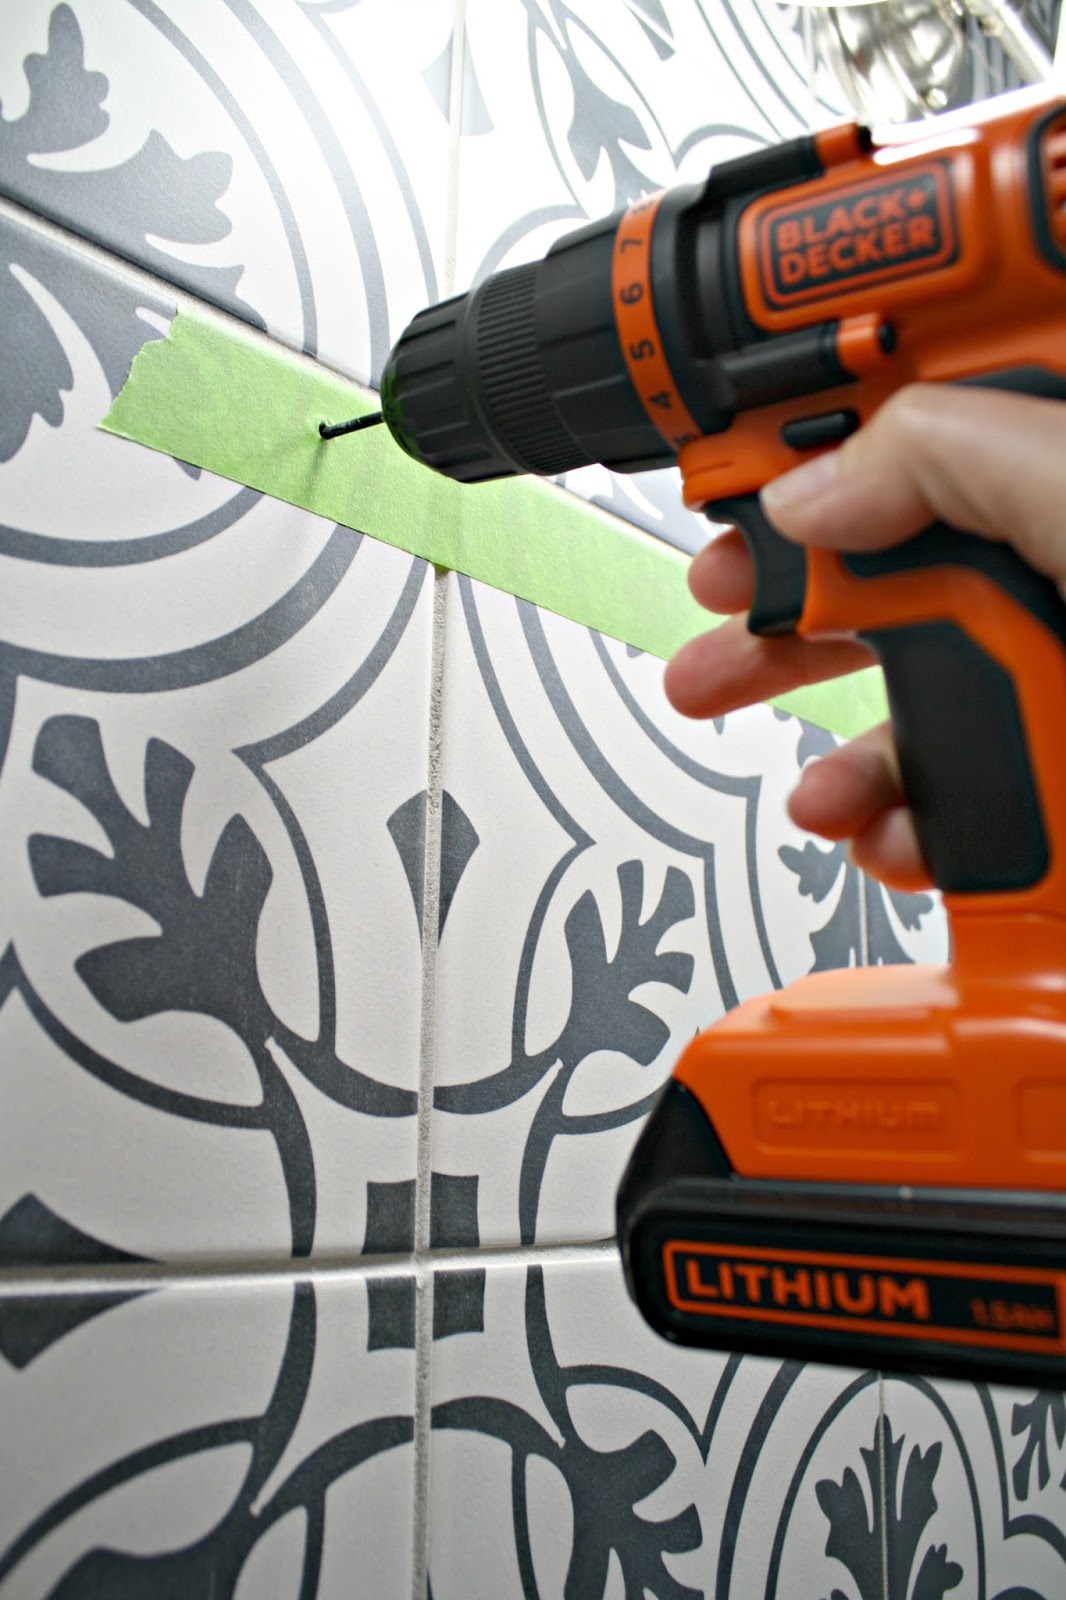
Then you just drill, using your marks as a guide!
Side note -- you can find that beautiful cement looking tile here.
When you drill into tile you need to use a bit specifically for tile -- this is the set I have and I like that they include four different sizes:

It takes awhile to get through the tile -- you'll need some patience and a fully charged drill. ;)
Then you can insert your anchors or screws and hang your item!
Again, I've always measured with tape or a level but I found this to be much more precise. I wasn't going to mess around with this tile!:
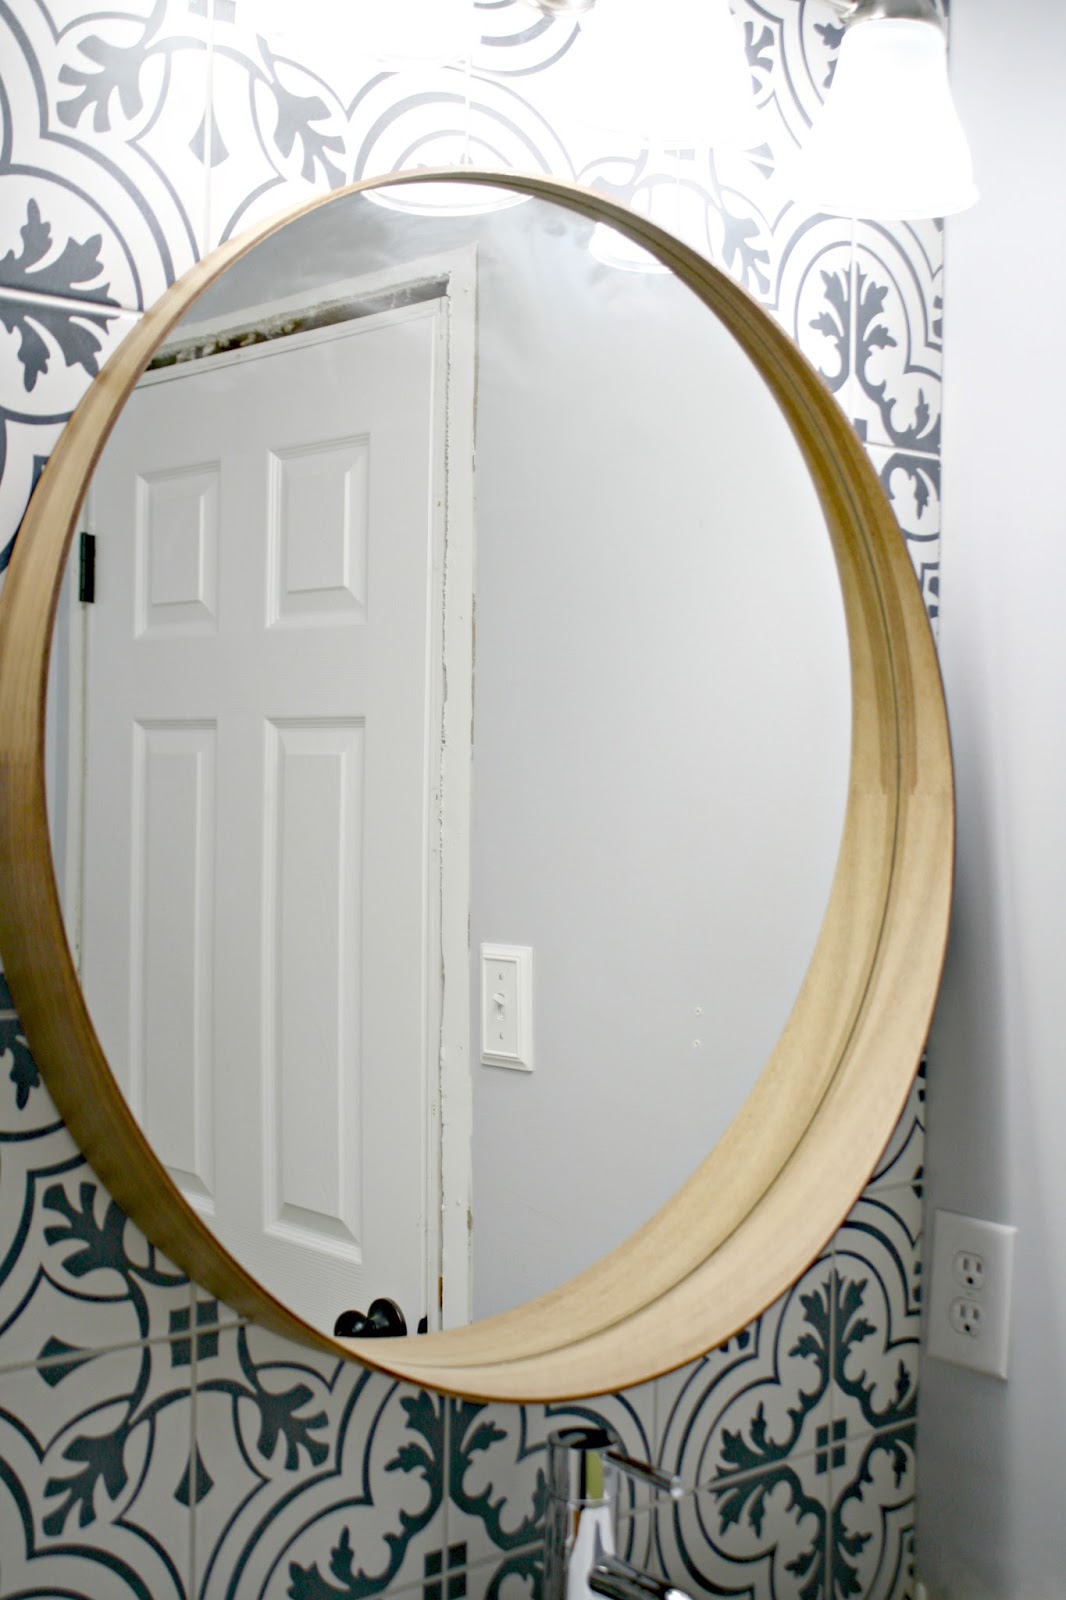
Sorry for the messy mirror -- the major cleaning will happen after the room is done. ?
Now this part of the room is fully functional again and it only took maybe two months? Ha! I'm pretty sure I remember saying something about it only taking two weeks. I should know better.
So much left to do -- today I plan to get that door trim up! Slow but sure, this room is coming together and is turning into one of my favorites in our house!
Have you used this hanging trick? I'm a fan for sure!
**You can see this full bathroom reveal here. It's one of my favorite room makeovers ever!
See more of our home here. To shop items in our home, click here! Never miss a post by signing up to get posts via email.
Via https://www.thriftydecorchick.com/2017/06/easy-painters-tape-trick-for-hanging-art.html
Spring and summer may not seem like the obvious time to consider a fireplace renovation, but if you're considering a makeover, this could be the perfect time! You won't be using it as the weather warms up, and it will be ready when you want it to really shine in the fall!
I've worked on many fireplace transformations over the years. They think they are a great way to update a space -- redoing that one focal point can change the whole room. I've gathered some great fireplace DIY projects to share with you today, but first, let's look back at what I've done in our homes! Our family room has a super tall fireplace that was calling out for something: 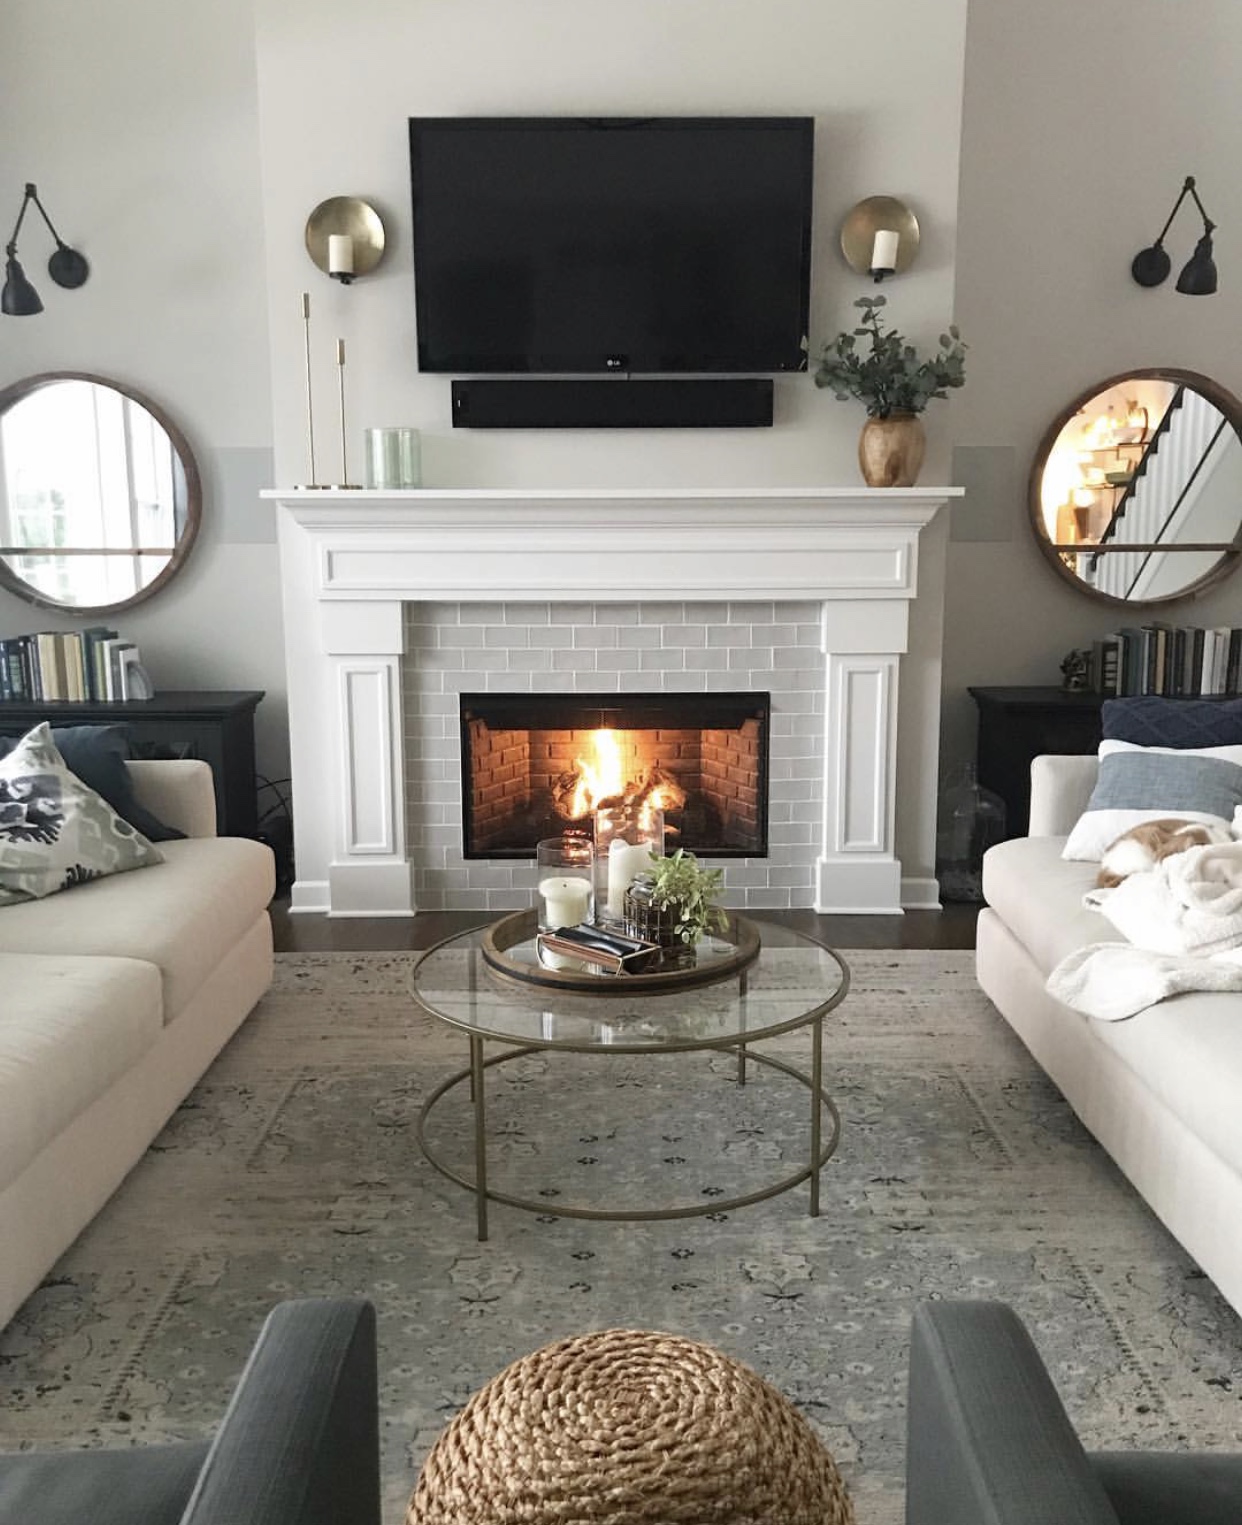
In the past couple of years I've painted it, built bookcases on both sides of the fireplace and added grid trimwork:

SO much more character!
We added an electric fireplace to our basement in the old house:

I later tiled the whole thing with stacked stone. We loved it!!

I hope to add another electric fireplace in our current basement someday.
We had the fireplace at our old house placed in the corner -- which I immediately regretted:

The deep mantel was awkward, and I tried all kinds of things over the years to make it work.
Finally we added a wall above the corner fireplace and built a new surround -- it made a HUGE difference!

I later added the shiplap wall above and it was the perfect finishing touch.
A few years ago we took down a wall in that room and installed the fireplace against the wall instead:

I also added the planked wall on top for only $13! Now let's take a look at some other great fireplace redos. :)
If you don't like the tile on your fireplace surround, you can absolutely paint them! I love this faux ceramic tile look:

These next few are so beautiful, but you really need to check out the befores to see how far they've come! I love this classic white and marble design:

This one was super basic to start, with no detail or mantel. Look at it now!:

Check out this gorgeous before and after! Love that stacked stone:

This fireplace with the built ins is so classic -- it has come a long way!:

This one has really become a beautiful focal point:

If you like your fireplace but just want to beef up the mantel a bit, this is a great tutorial:

I know so many of you have brick fireplaces you want to update, but don't know where to start! This painted outdoor fireplace is so crisp and clean now:

If you don't want to completely paint the brick, you can always whitewash it to tone down red tones:

Or try the beautiful German schmear on brick instead: 
If you have a brick surround and want to tile over it, check out this tutorial: 
You know how much I love a planked wall above a fireplace! It's such a simple and inexpensive way to add some character: 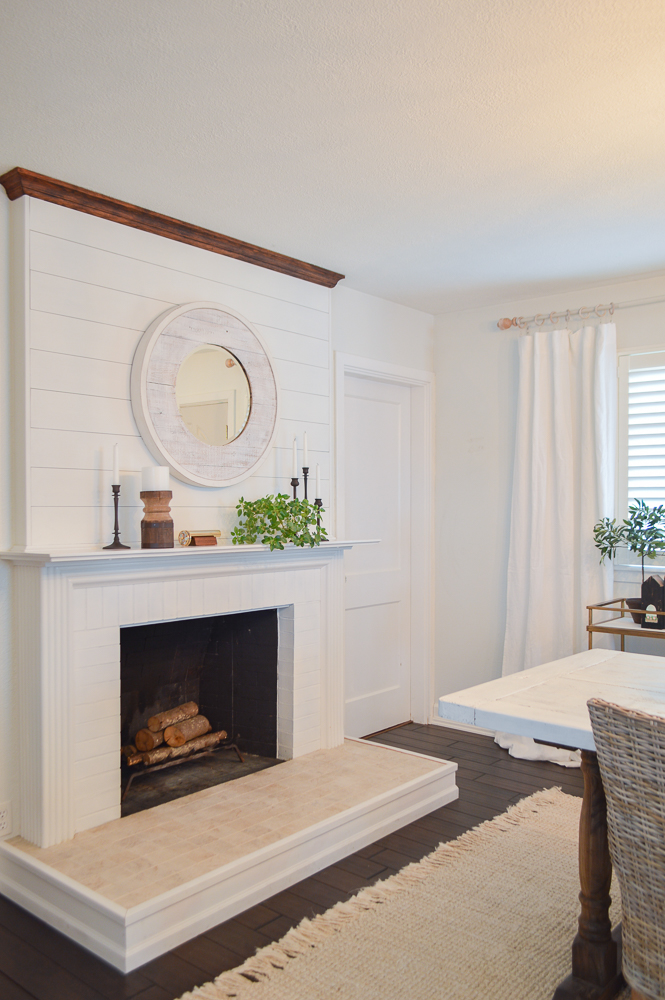
And if you have a stone that is feeling a little heavy, try this tutorial to build a wood mantel and surround around it. It really brightens it up!: 
Have you made any updates or changes to your fireplace? Have you dared to paint brick? I hope these projects inspired you if you're considering a fireplace makeover! See more of our home here. To shop items in our home, click here! Never miss a post by signing up to get posts via email. Via https://www.thriftydecorchick.com/2020/05/how-to-add-tons-of-character-to-boring.html
Hey there! Our weather has been SO lovely lately, and I've been knocking out outdoor projects. I set up the back patio, cleaned off the front porch and cleaned up the flower beds. But my favorite projects have been on our garage doors!
I've made a few simple updates that have made a big impact. I don't think I've ever showed you the garage side of the house, but we love our doors. They fit perfectly with the modern Craftsman style of our home. My plan when we were building was to have "dark sky" lights hanging above our garage doors. These are lights that shine the light down, so they lower light pollution. I just love the way they look and love them hanging over a garage door. Unfortunately when it came time to wire them, they could not install them above the doors because of the headers. There just wasn't enough room with our design. So at the last minute I scrambled to pick out new coach lights for outside. I picked something inexpensive, knowing I'd eventually change them out. They ended up being way too small for our house, but were fine for a while. I wasn't thrilled when the finish on one started coming off: 
This post may contain affiliate links for your convenience.
See my policies and disclosure page for more information.
They are only two and half years old -- way too soon for this to happen! But I took that as my signal to change them out. I found these black dark sky lights at Lowe's awhile back and fell in love:

They were exactly what I had in mind when we were building!
They are a little different in that they are LED lights that cannot be changed out (no bulb to replace). I'm a little nervous about that, but the price was pretty good and I know we'll save on electricity costs. I just hope they last for years!
I got all of those hung and then started on my other projects. If you remember, I added carriage door hardware to our old garage door and LOVED it. It's an instant update that makes a big difference.
I got a magnetic set soon after moving in and went to add them to the doors...and then realized the trim that we love so much on the doors is not metal. The doors are, but not the trim:

Wah wahhh. So those went back!
Fast forward a couple of years and I decided to give it a try again! This time with ones you attach on the door (like our old set). I found this decorative garage door set at Home Depot:

They are really easy to install -- just figure out where you want them, then mark the holes with a pencil:
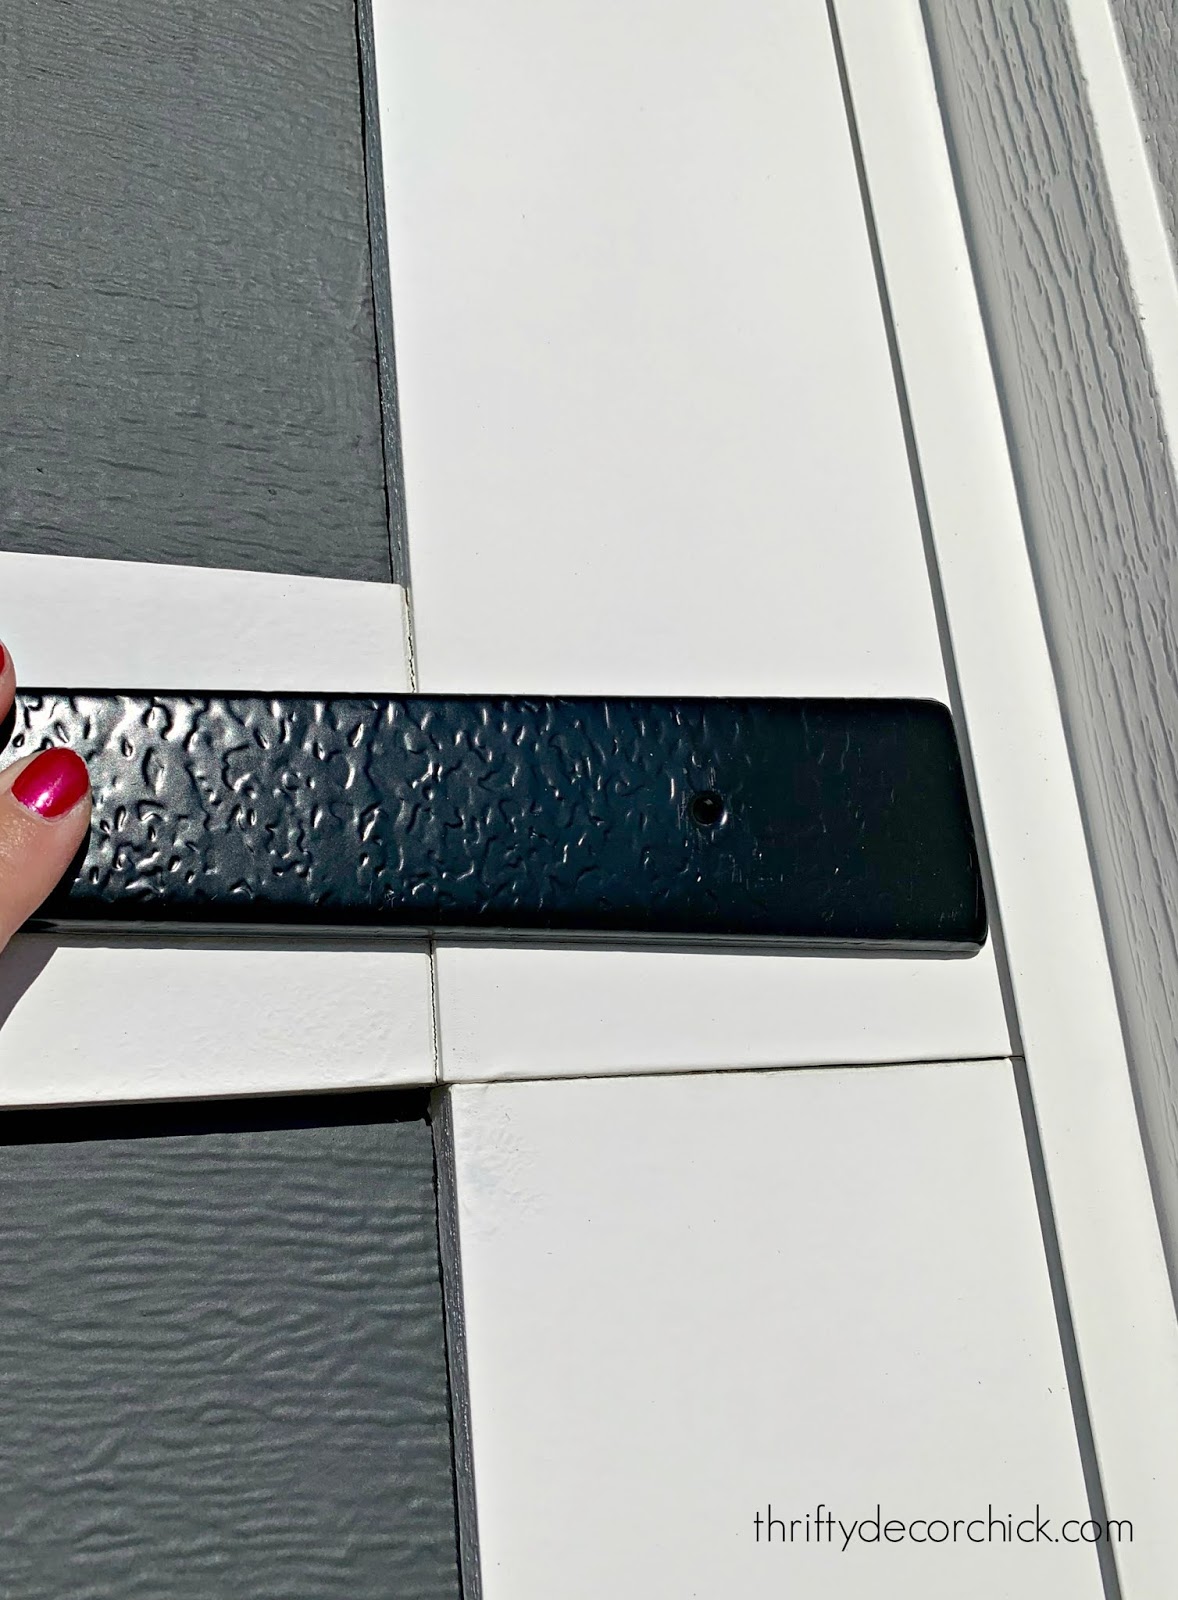
I started with a smaller drill bit, and then put tape over the hole before making it a bit bigger. Putting the tape on top helps keep the drilled hole super clean:

The wood doesn't lift up around it with the tape -- that's important if I ever want to take these off and fill the holes later. Just in case! :)
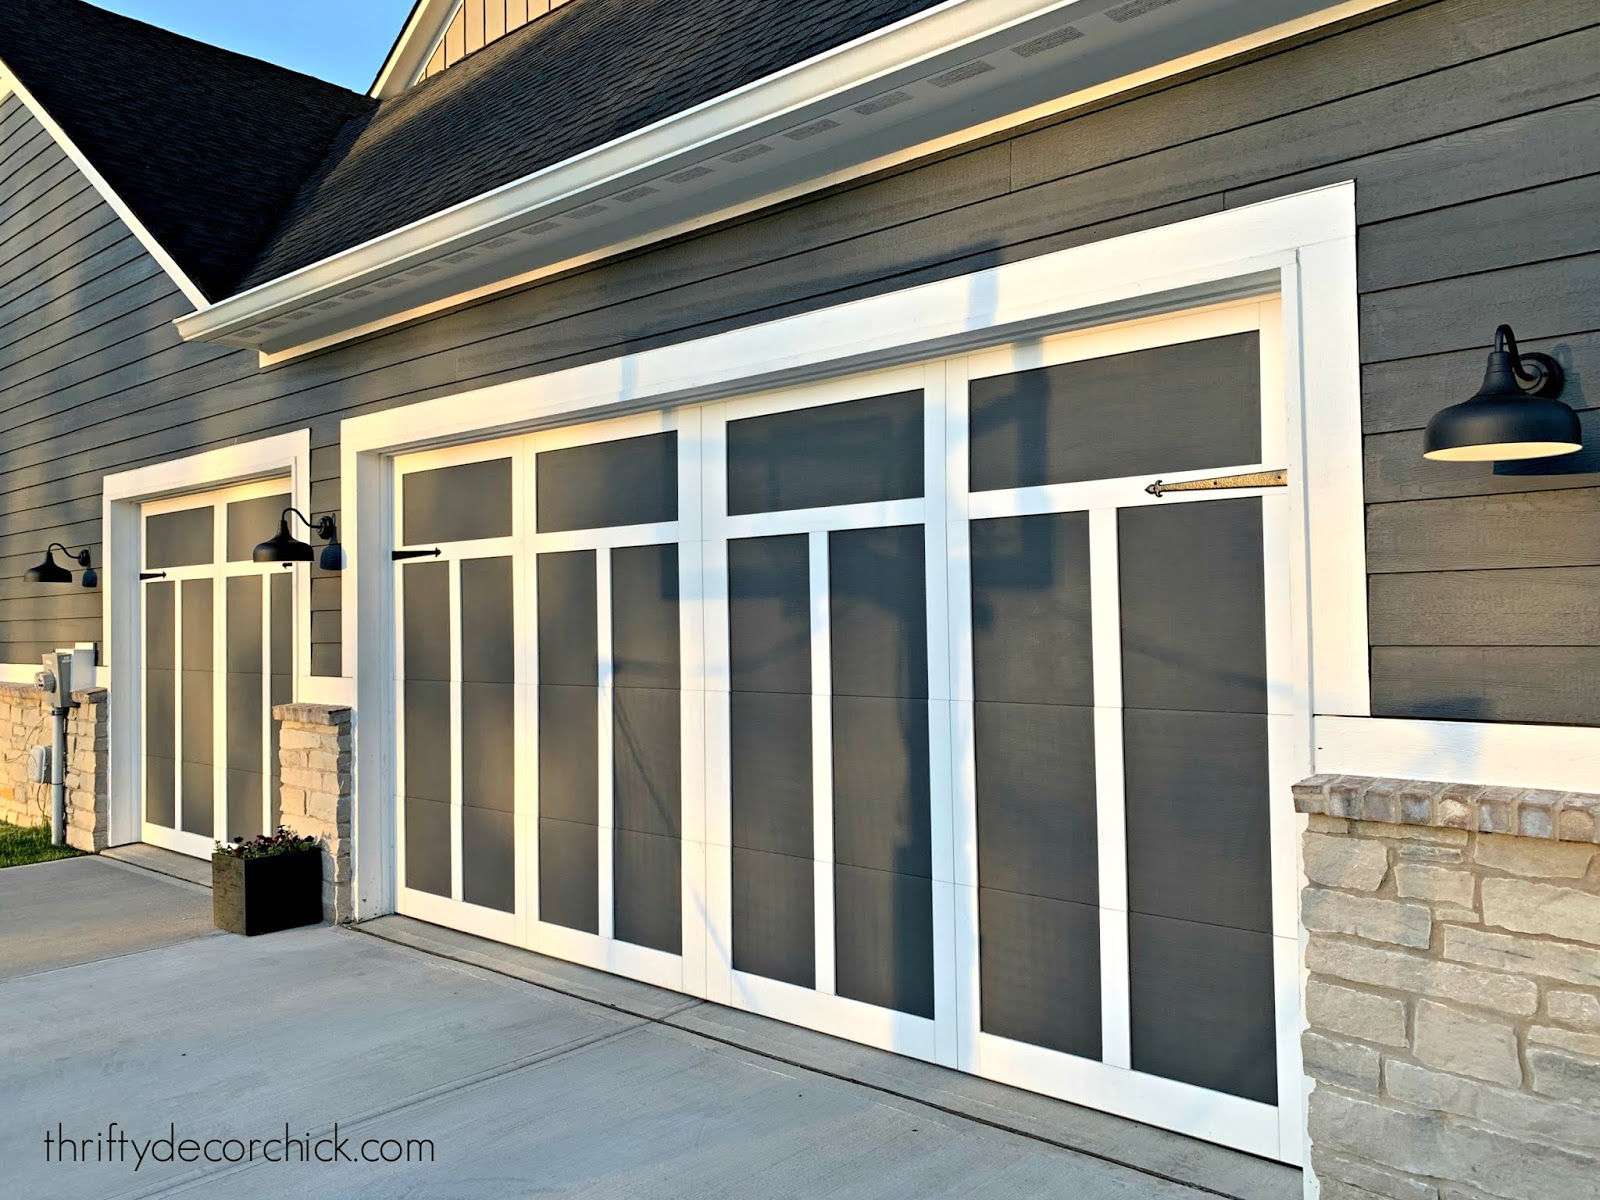
No need so far, because we love them!:

You can see my final little project in that photo -- I've always wanted to add a flower pot between the two garage doors. Those are wave petunias and they will fill in nicely and spill all over. They are a great option price-wise because they get so full.
Here's how it all came together! They are little changes but look so good!:
I wish I had taken a before picture! But you get the idea. :)
That garage door hardware comes with two sets of hinges and a set of handles. Usually you'd use both set of hinges on one door (see how I did it at the old house here), but with our current garage door design I only needed one for each garage door.
So now I have one set of handles -- I think it would look great to add them, but I'd have to buy another whole set in order to get two more handles for the other door.
For now we're living without (we like it just fine with the hinges):

But eventually I may bite the bullet and buy another set for the handles. Maybe I can sell the remaining hinges.
Here's a look at the dark sky garage lights -- they don't illuminate as much as regular coach lights do, but they still give off plenty of light:

I have a big project planned for the doors someday, but I won't be doing that myself. It will finish off this spot perfectly! Stay tuned for that...eventually. :)
If you have regular metal doors, these magnetic carriage garage door hardware kits are MUCH easier to install! (And cheaper.) Just stick them where you want them.
I love adding character inside and out of the house! These are some really simple ways to do just that.
Via https://www.thriftydecorchick.com/2020/05/easy-garage-door-updates-that-add-tons.html
Well hello there! Thanks so much for your excitement over our patio project. ;) Today they finished installing and mortaring the fireplace. Tomorrow they start applying the stone. SO. EXCITED.
Because we are on an outdoor roll lately, I got some mojo up in here and tackled a project I’ve wanted to do for years. I’ve always wanted a potting bench…you know, for all the plants I can’t keep alive. ;) I wanted it for planting, but also for entertaining. A separate spot to put ice, drinks, food, whatever...sounded awesome. (This is an updated post from years ago that I'm sharing again!) So the potting bench was the perfect answer. And my Dad said he’d help me build one. He came over and I showed him my inspiration photo: 
This post may contain affiliate links for your convenience.
See my policies and disclosure page for more information.
That would be the Abbott Island from Pottery Barn (of course) and it is pretty awesome, yes? The price is pretty awesome too – as in I’m pretty awesomely going to pass out, $1300. Dad’s response? “We can totally do that.” OK, I added the totally…he didn’t say that part. But he knew we could do it! We talked about what type of wood I wanted to use. Initially I wanted cedar (because it would hold up best outside) but it is more expensive. Then Dad asked if I’m good about putting outdoor stuff away or covering it for the winter and my response it was a quick and definite NO. So we went with cedar. :)  That's my Dad way up there! We got our supplies – two 4 x 4’s, a few 1 x 4’s and a bunch of 1 x 6’s. (If you have no idea what I’m talking about, I’ll show you those in a video below.) We cut the 4 x 4’s to 36 inches, then stood them up to start our design:  We cut the 1 x 4’s to the length we needed (more on that in a bit), then attached them with screws to the top of each 4 x 4 and about a foot from the bottom of each as well (for the bottom shelf I wanted): 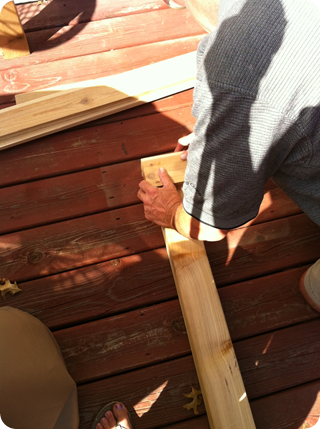 You can see here how the 1 x 4’s (the long horizontal boards) go off the edge of the legs a bit:  That’s because we created a “frame” around the whole thing, on top and bottom:  No mitered (angled) cuts – just simple, straight ones. The best kind. ;) For added support, we put a couple more boards on the inside of each leg as well: 

See how basic this is? It’s just boards screwed into boards. If you have tools, YOU can do this! We added a couple more boards to the middle, again with screws – just for a bit more support:  More support never hurts. Then we cut 1 x 6’s to the depth of the table (about 25 inches) and laid them across the bottom. Yet again, we just screwed them in. No glue, no nails. Just screws. Easy peasy. I swear. We cut more 1 x 6’s to fit the top, this way going with the length of the table. Our cuts were a bit off and we were getting a little tired and a lot hot, so we just installed them, then Dad cut down the edge with the jigsaw: 

It worked like charm! And then…we were done. Start to finish, it took us two hours. TWO HOURS. I can’t believe how fast it went! We were both in a groove, because this whole thing went like buttah. Not one issue -- we couldn’t believe it. I found some basic, low profile hooks and attached those to the sides:  I have no idea what I’ll hang on them but they look FAB! I love it so much!!:  I did a quick video to show you the details up close, just in case this isn’t clear. It really is a basic as it looks though – it came together easily. Here’s the video and I cannot believe I put my face on here, seriously. I had been sweating profusely for two hours straight. And I say “um,” “basic,” and “just” an awful lot. But this should help you see more of how it was built: You can see on the video that the bench is placed over our fireplace vent right now but the fireplace is not on and the pilot light is not lit. It will be moved over. Do not put anything near your vent! So here’s the PB version:  And ours:  The PB version is 50 inches wide, 28 deep and 36 high. Mine is 60 inches wide, 28 deep and 37 high. I didn’t even plan on the dimensions matching up so much, it just worked out that way. :) The cedar wood cost about $130 – not a super cheap project, but considering it’s $1000 cheaper than my inspiration, I’m thrilled. And mine is even wider than theirs! By the way -- this could easily work as an island in a kitchen! I’m trying to decide if I’m going to add some wheels – I found these super cool casters:  I just don’t know if they’re chunky enough. I may put them on just to see – it won’t hurt! Now…the BIG question! What to do now? I had planned all along to stain or paint it. When I mentioned paint to my Dad I think he may have had a small conniption. ;) He said the cedar will age beautifully over time and he would just leave it. And when I hosed everything off, it was even more gorgeous – the water brought out all the beauty in the wood:  So now I’m leaning toward just a coat of poly or Tung oil, to bring out the tones of the wood. What would you do? Paint it? Stain it? Leave it as is? I know what my Dad would do. ;) Once I figure that out, I’m going to start using it and I cannot wait! Speaking of my Dad – HE IS AWESOME!! It thrills me to no end that we can DIY together like this. I love that we continue to make father/daughter memories, even as I get older. And he reads this blog, every day. :) Thanks Dad, I love you! Go see how I finally finished this pretty potting bench here!: 
And see how I used these same steps to build a DIY wood vanity for our son's old bathroom:

See more of our home here. To shop items in our home, click here! Never miss a post by signing up to get posts via email.
Via https://www.thriftydecorchick.com/2011/08/diy-potting-bench-with-dad.html |
