How to decorate for fall without the usual themed decor.Five easy ways to create a warm and cozy autumn home with these pretty accessories!
Ahhh yes, it's the most wonderful time of the year! Well...second most wonderful. Fall has everything I love -- cool temps, the beautiful leaves, everything apple flavored, and my favorite part...NO BUGS.
It's simply the best. I'm always ready to start warming up our home decor around August, but I held off a bit this year and started putting some items out this month.
I LOVE fall decor -- from the cute, themed items with pumpkins and fall signs, to the more understated decor with warm, rich colors and beautiful textures.
Over the years I've started leaning more towards the latter, at least for inside. For outside I'm still 100 percent on the traditional fall decor train.
I've found some really lovely decor that has tons of texture and incorporates the fall color palette, but doesn't scream FALL. These easy little vignettes will warm up your home and make it feel perfectly cozy for for the autumn months.
I'm sharing the basics for non-traditional fall decor and I'll link to each item pictured under the photos!
Baskets or rattan decor
First up, I a little fall vignette for our kitchen island!
Last fall I shared some ways to decorate for fall with trays, and I'm really loving the natural look of these rattan baskets:
This post may contain affiliate links for your convenience.
See my policies and disclosure page for more information.
It comes in a set with three different sizes! I've used them all over the house. They're softer than most and won't scratch up your furniture.
I thought the three stone vases would work all year round...I love the dot texture on them:
Those beads are from one of my new favorite shops on Amazon. They have a TON of gorgeous beads in all different colors and materials. These amber/brown bead strands are another favorite of mine for fall.
I almost didn't get the black candle holders/hurricanes (they come in a set of three as well) but I'm glad I did. They are so versatile and I love the subtle fall look with the leaf design:
Aren't they pretty? The medium size fits my Aldi candles perfectly! (Aldi candles are SO much cheaper than B&BW!)
I use the two remaining hurricanes in my office, along with the smallest tray in the set:
Those wood beads are an awesome find too. They'll work all year round in my decor!
I am really loving these basket trays -- the texture is just what I was looking for:
Oh and you can see in the background that I like to use inexpensive fall scarves as throws on furniture. They are oversized so can easily double as a lightweight throw.
They look great thrown on the back of a chair or sofa, or piled into pretty baskets.
Brass or gold decor
Brass ANYTHING works so well in autumn. The warm metal fits right in with fall decor. I couldn't pass up these cute brass squirrels from Target:
I need to find some acorns and lay them in the tray. ;) I mean, come on. How adorable!
I plan to add more to the mantel, but these guys are a good start:

Gold or brass accents are warmer tones that look great with deeper fall colors. I always pull out my brass candlesticks in the fall, you'll see some of those in just a bit.
Pampas grass
Pampas grass has made a huge comeback in the past few years! It's used in a lot boho style decorating, but I think it looks especially great as a fall accent:
These little tiny pampas are so cute! I love them.
Don't forget that fall printables make for easy fall decor as well! I shared how I created this watercolor print from a photo and I always bring this and the pear print out when the cooler months hit:

I also found tall pampas grass that looks great in my tall umbrella holder:
These add so much texture and you can find them in a bunch of different colors.
Wood accents
Fall filler around here typically consists of tiny pumpkins or acorns, but I wanted to try something new this year. I LOVE this wood ring filler!:
It's so cool and a great alternative to the traditional fall fillers.
I filled up one of my pretty wood vessels with them:
Decorating tip: If you don't have enough filler, use plastic grocery bags first, then fill with your decor.
The wood rings would look great in a bowl surrounding a candle, or filling tall glass hurricanes.
By the way, those rings are oddly satisfying...they made a wonderful noise when they bump up against each other. :) My three year old niece spent a good 30 minutes stacking, laying and counting them out on the table the other day.
I feel like my style and our home is made for fall colors. I love using deep accent colors like blue and this lovely green:

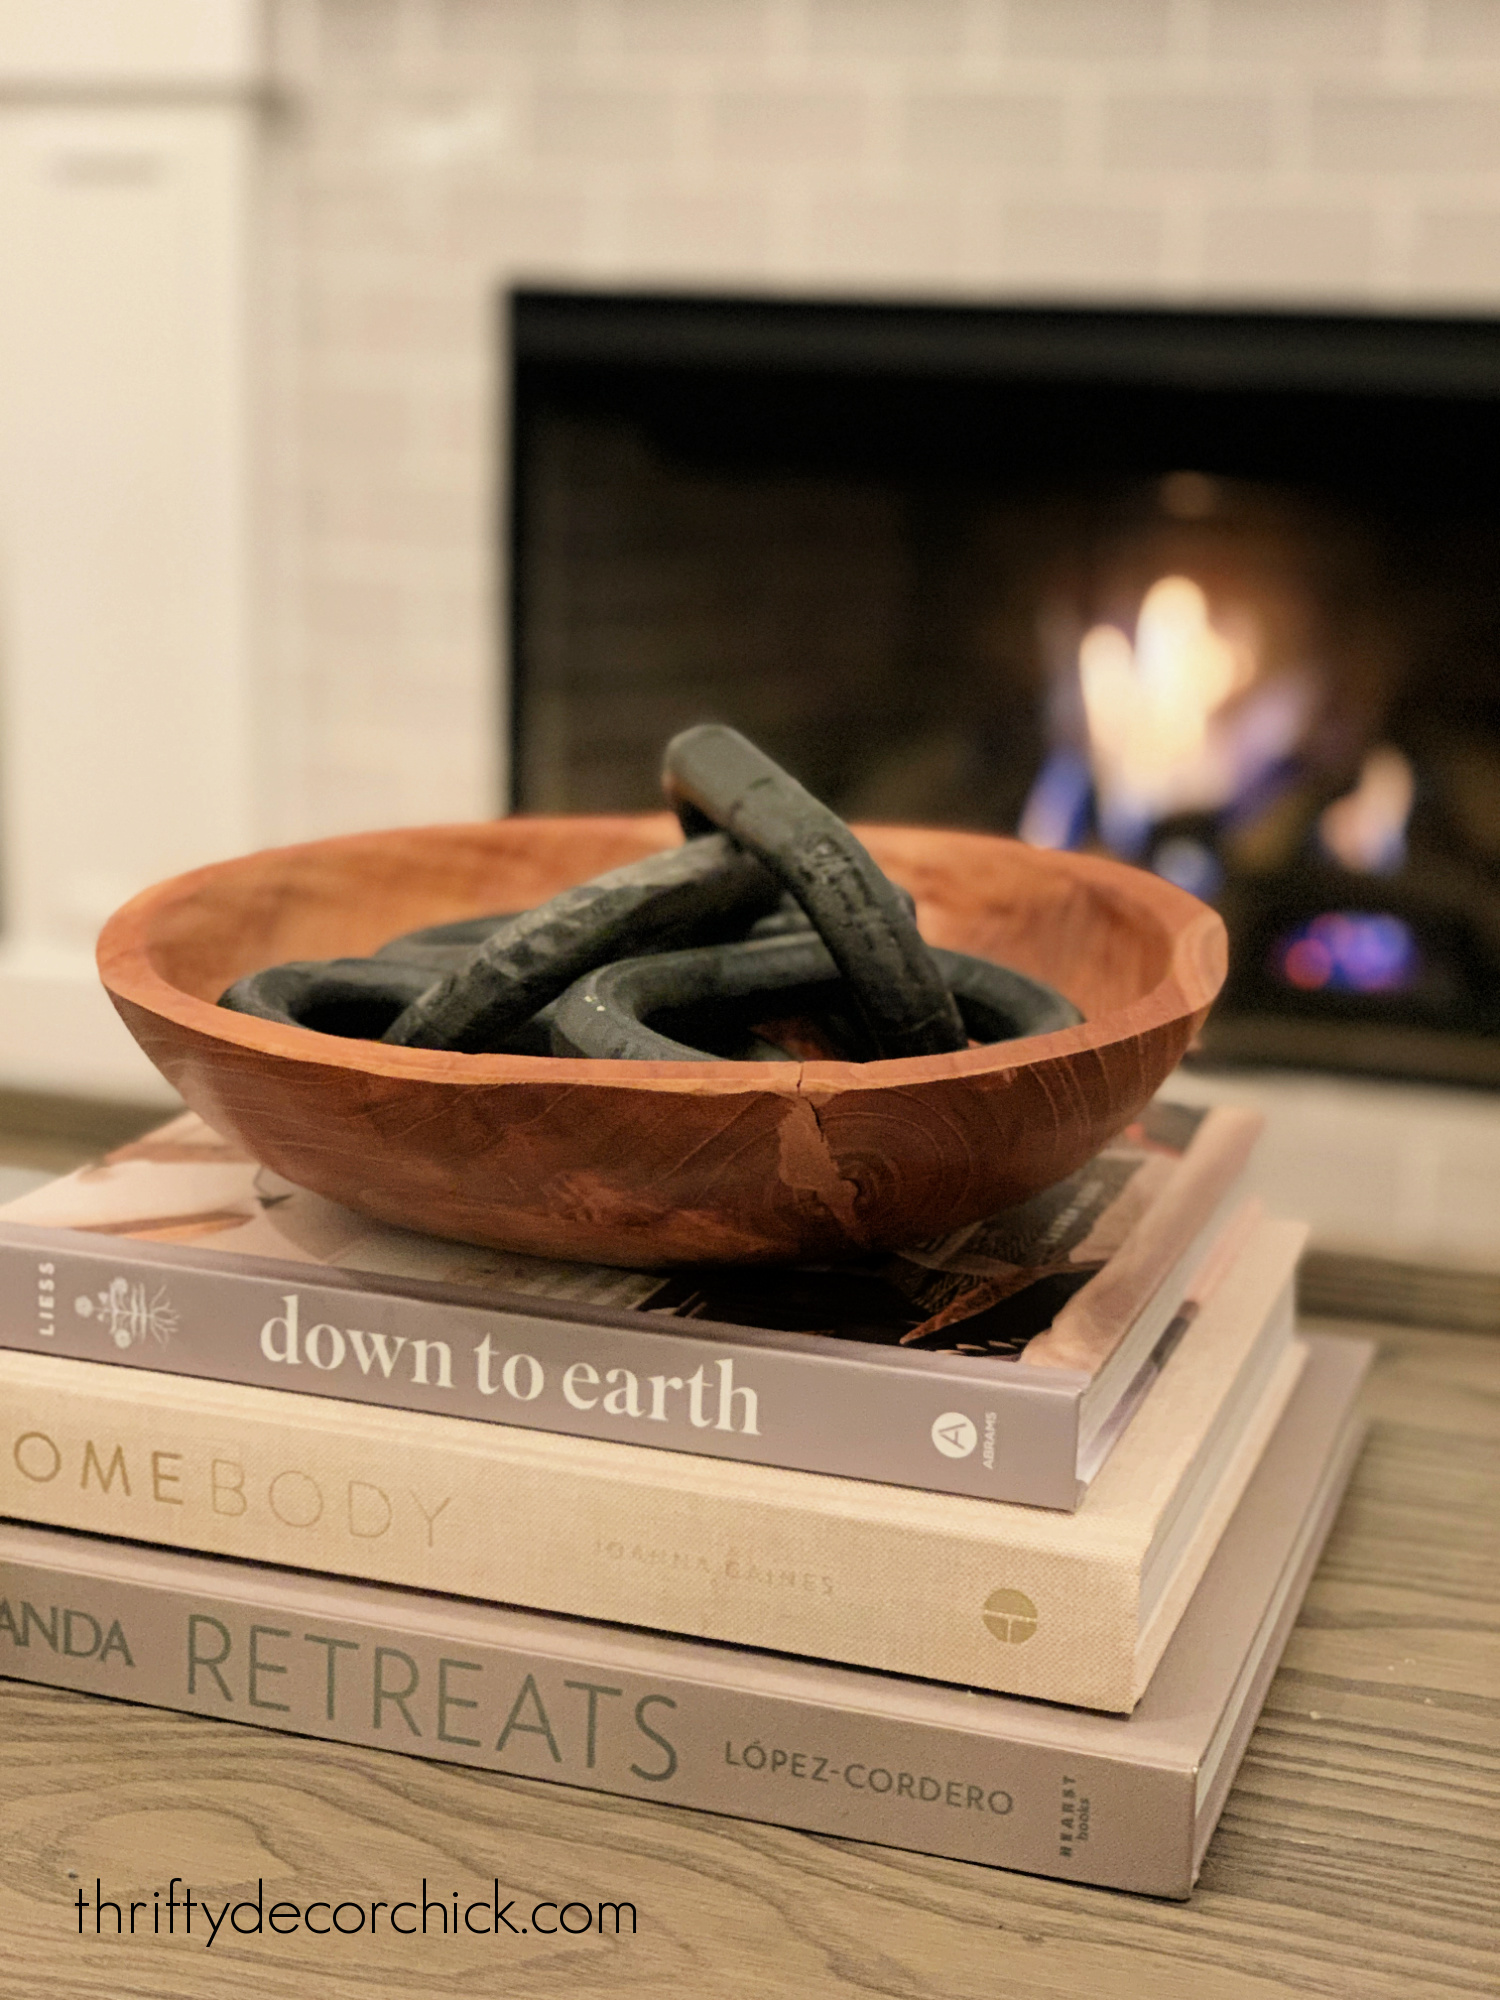
Everyone needs a great wood bowl in their decor, and this one is perfect. It's new but has some character to it:
I started seeing these wood chains in decor about a year ago and fell in love with them. BUT you couldn't find them for under $80 anywhere. It was nuts!
Now you can find them in all kinds of wood finishes for WAY less. I have a wood toned version in the basement, but I'm really in love with the black:
Bowls and trays are great because they make almost anything look cohesive. They make for easier decorating for sure!
Just plop some stuff in and it magically looks pulled together. :)
Pillow covers in warm colors
Pillow covers are always an easy way to decorate for the seasons -- switching them out is one my go-to's:
The plaid covers are new and are so warm and pretty, but don't feel too themey. The dark mauve covers are actually napkins that I made pillow covers out of.
I love using that method for fall and Christmas pillows because I save a TON. I get "Pottery Barn" pillows for a fraction of the price:

I've had the faux leather pillow covers for awhile and LOVE them so much! I used them in our basement as well:
They have a slightly more modern vibe, but the different texture warms up a space beautifully.
Interesting decorative fillerThe basics always look great this time of year -- tiny pumpkins, acorns, pinecones...they all look great as decorative filler.
If you're looking for something different this fall, check out fillers with deep colors, like my faux figs:
Ohhhh I love them!
I've had this wood tray forever, but any basket or wood bowl will do!
I don't use purple in our home any other time of year, but I've really been drawn to it for fall lately:
In the kitchen I love my faux artichokes with their purple and green tones:
There you go -- fall decor ideas that aren't typical but will fill your home with lovely color and texture this season.
I still love my pumpkins and traditional fall touches (I may do a little fall tour soon) but if you're looking for non traditional fall decor options, these will work great!
You can use most of these accessories through the year and they'll still fit in no problem. :)
Do you use any non-traditional options in your seasonal decor?
Via https://www.thriftydecorchick.com/2021/09/non-traditional-fall-decorating-ideas.html
0 Comments
Dress up a small accent wall with a gorgeous sconce, dark wall color and beautiful wall trim!
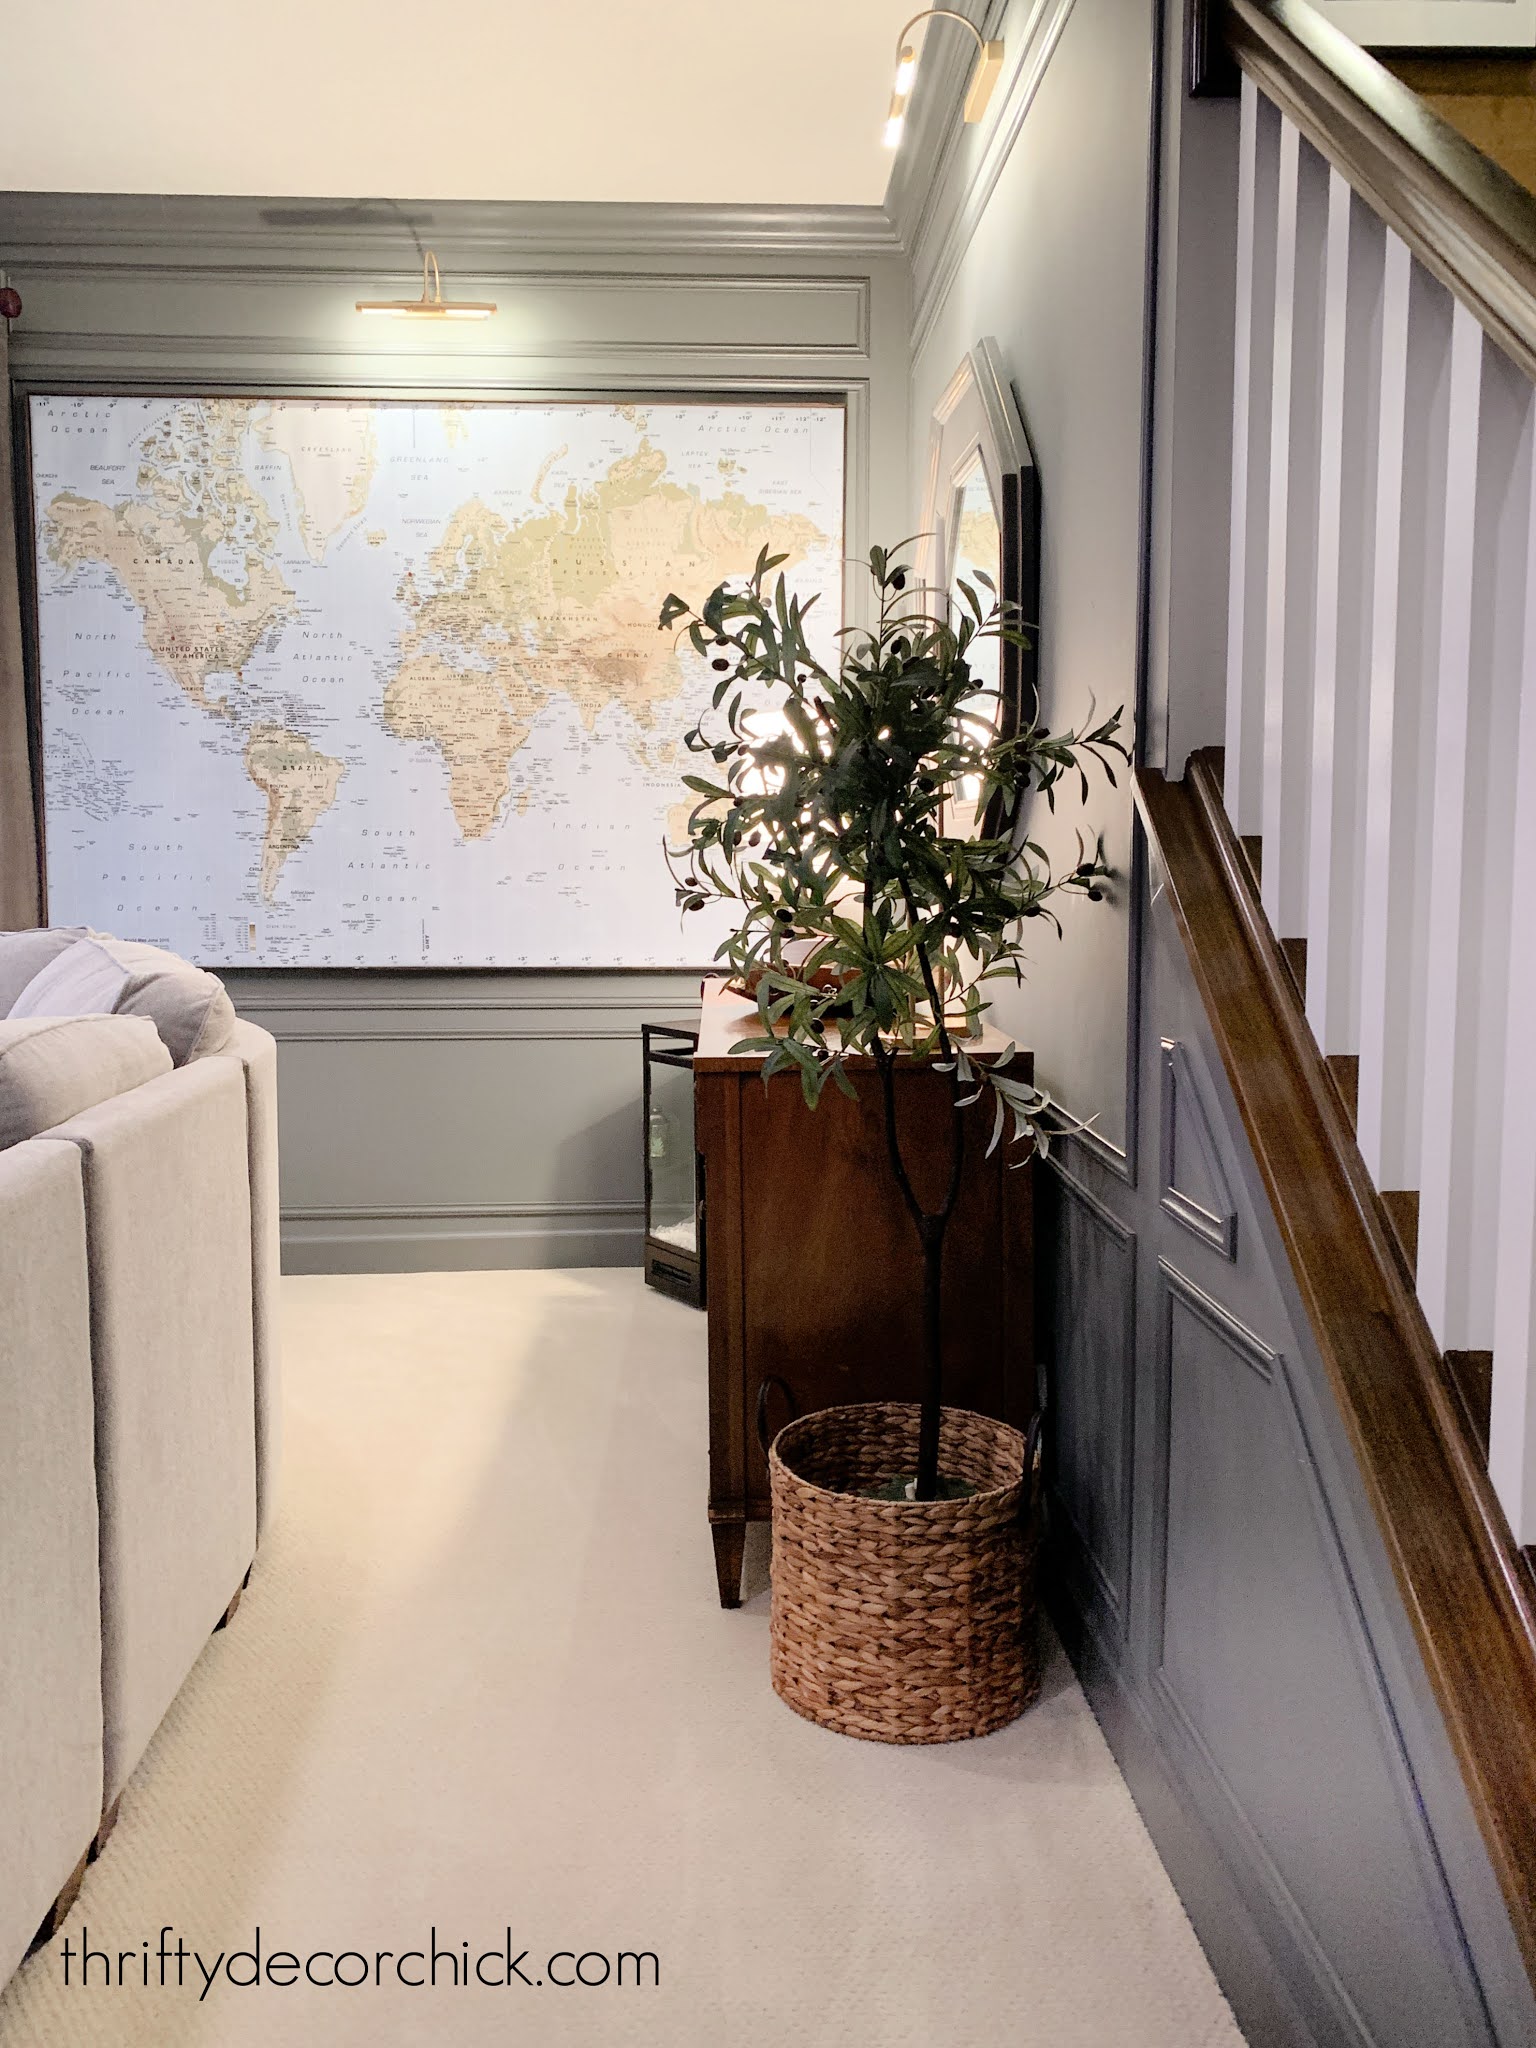
We have a small accent wall at the bottom of our basement stairs that was calling out for a little redo. It's not much, but is a focal point, as it's the first thing you see when you walk down the stairs.
If you've been reading Thrifty Decor Chick for long, you know our basement has gotten a lot of attention this year!
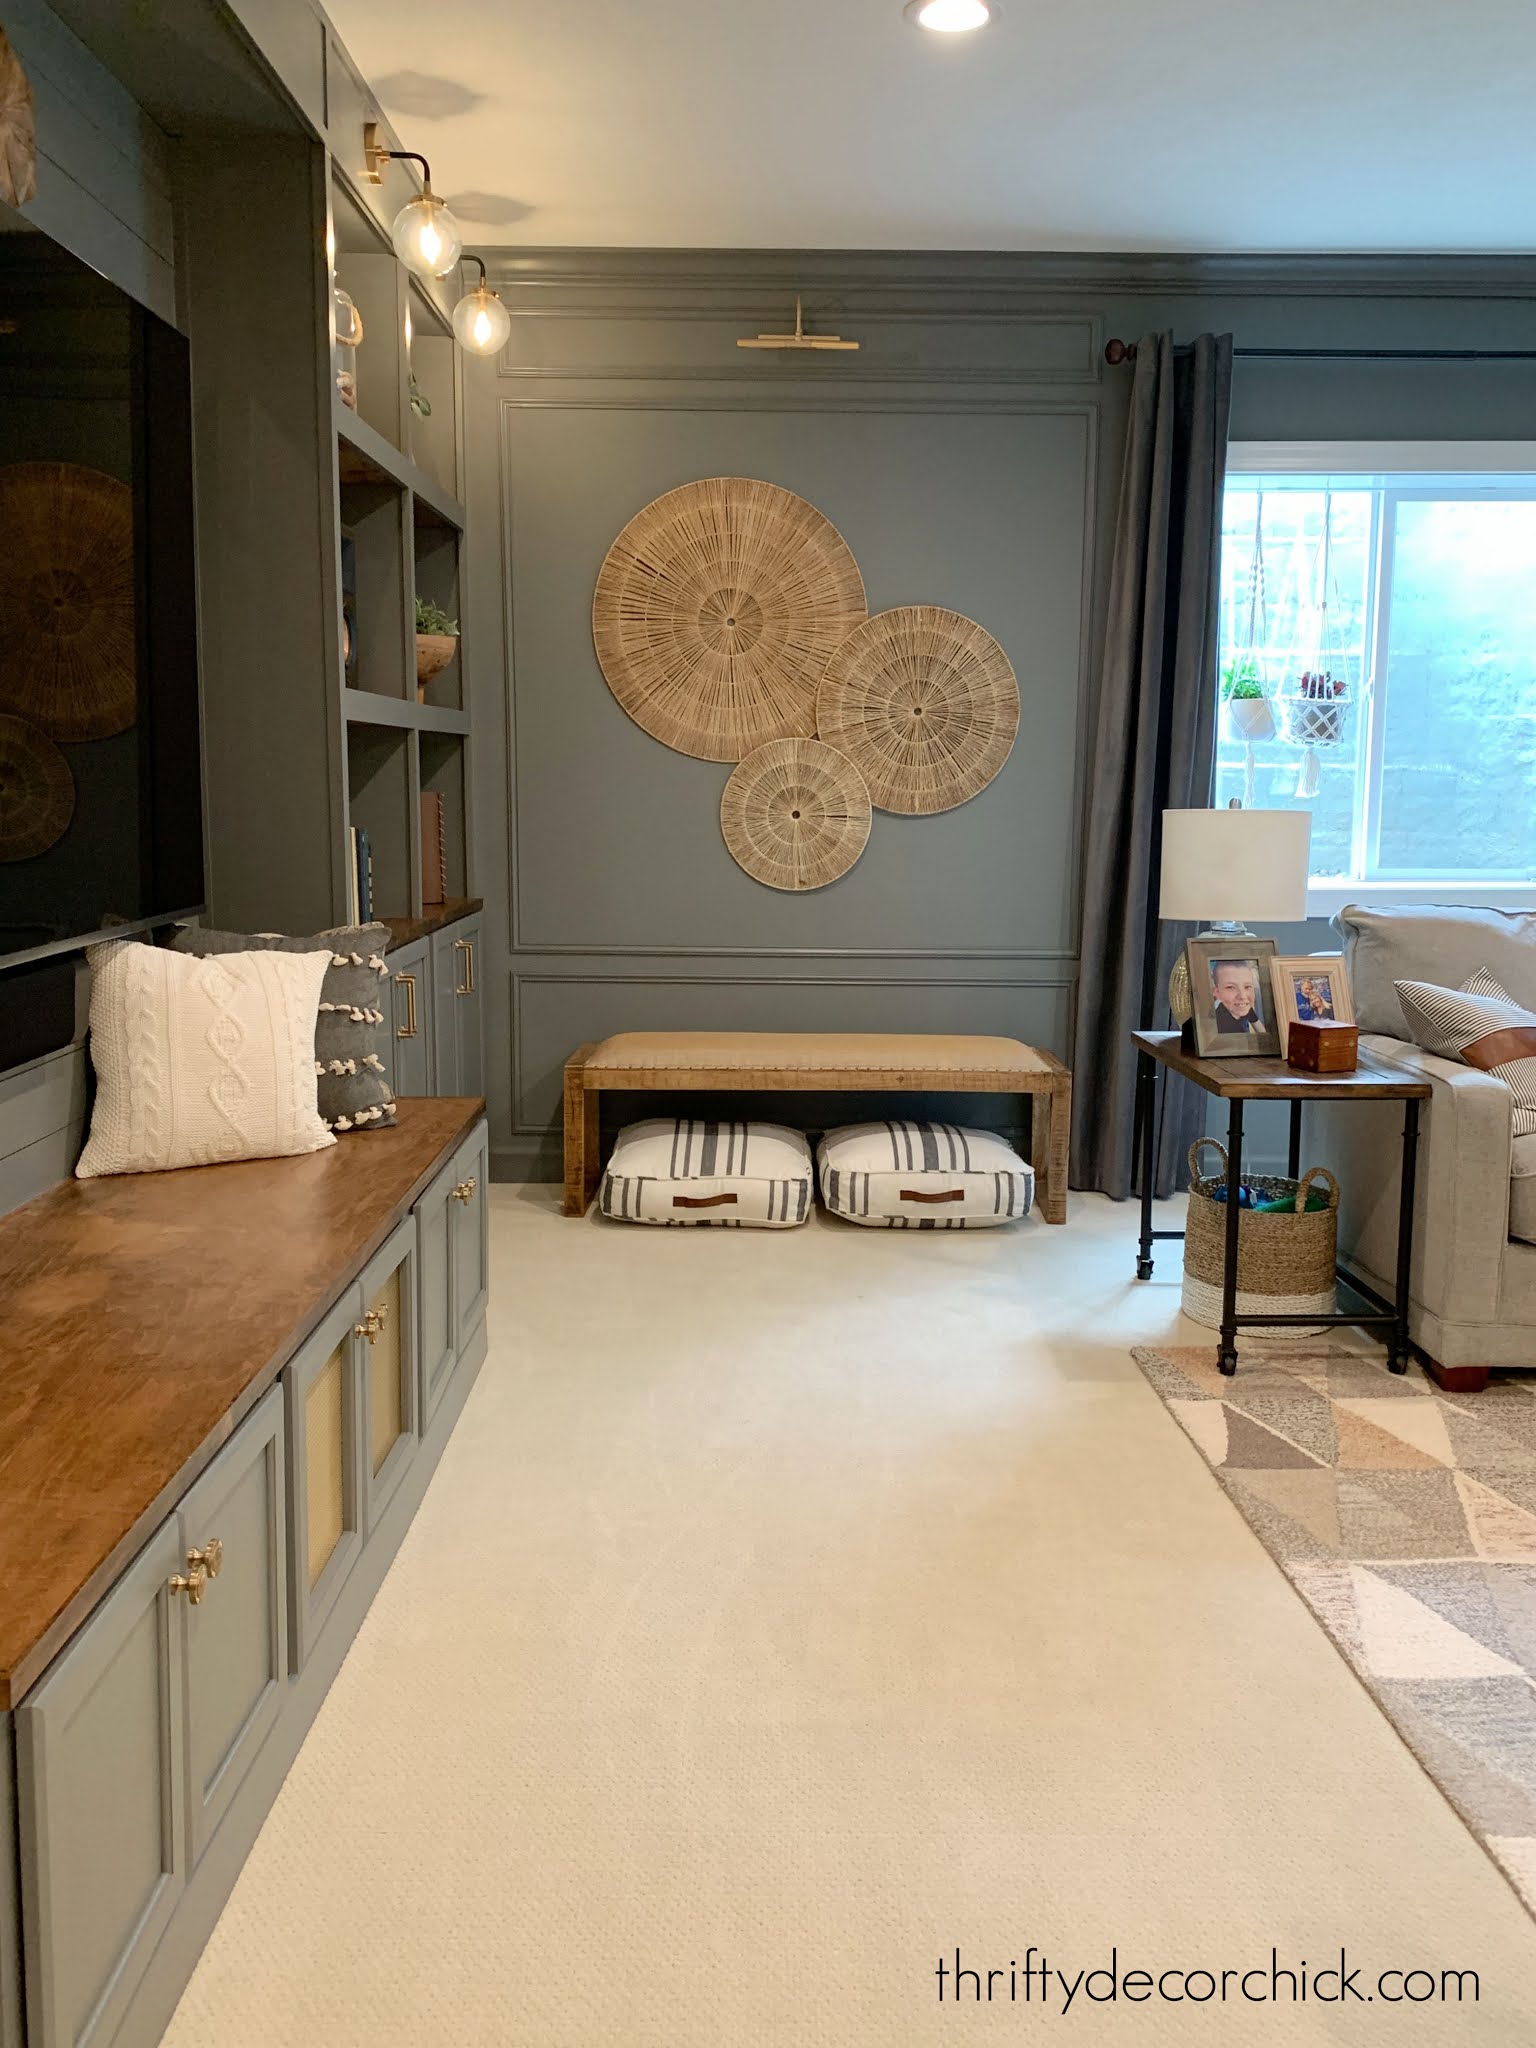
I built a HUGE 18-foot built in entertainment center on one wall, then added some beautiful crown, wall trim and accent lighting later on:
I've always known I was going to carry the dark gray color around into our stairway landing. When I found the perfect light fixture for that small accent wall, I knew the time had come!
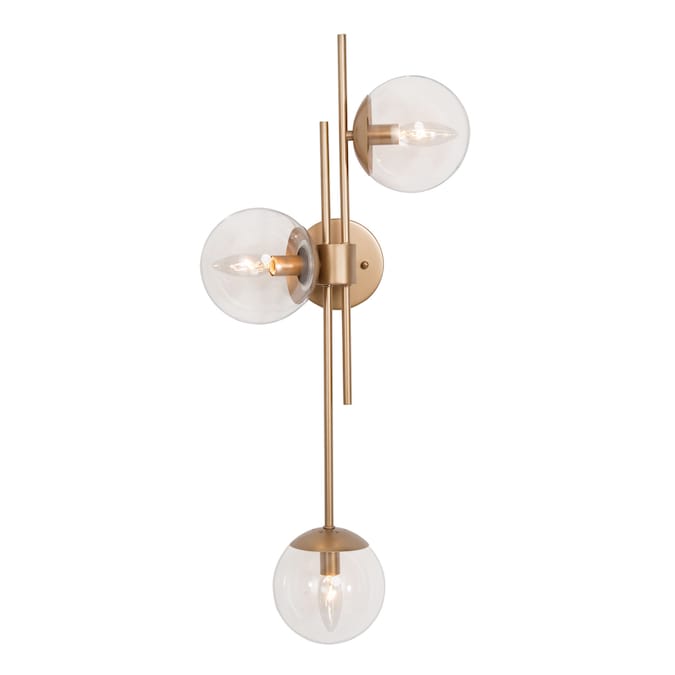
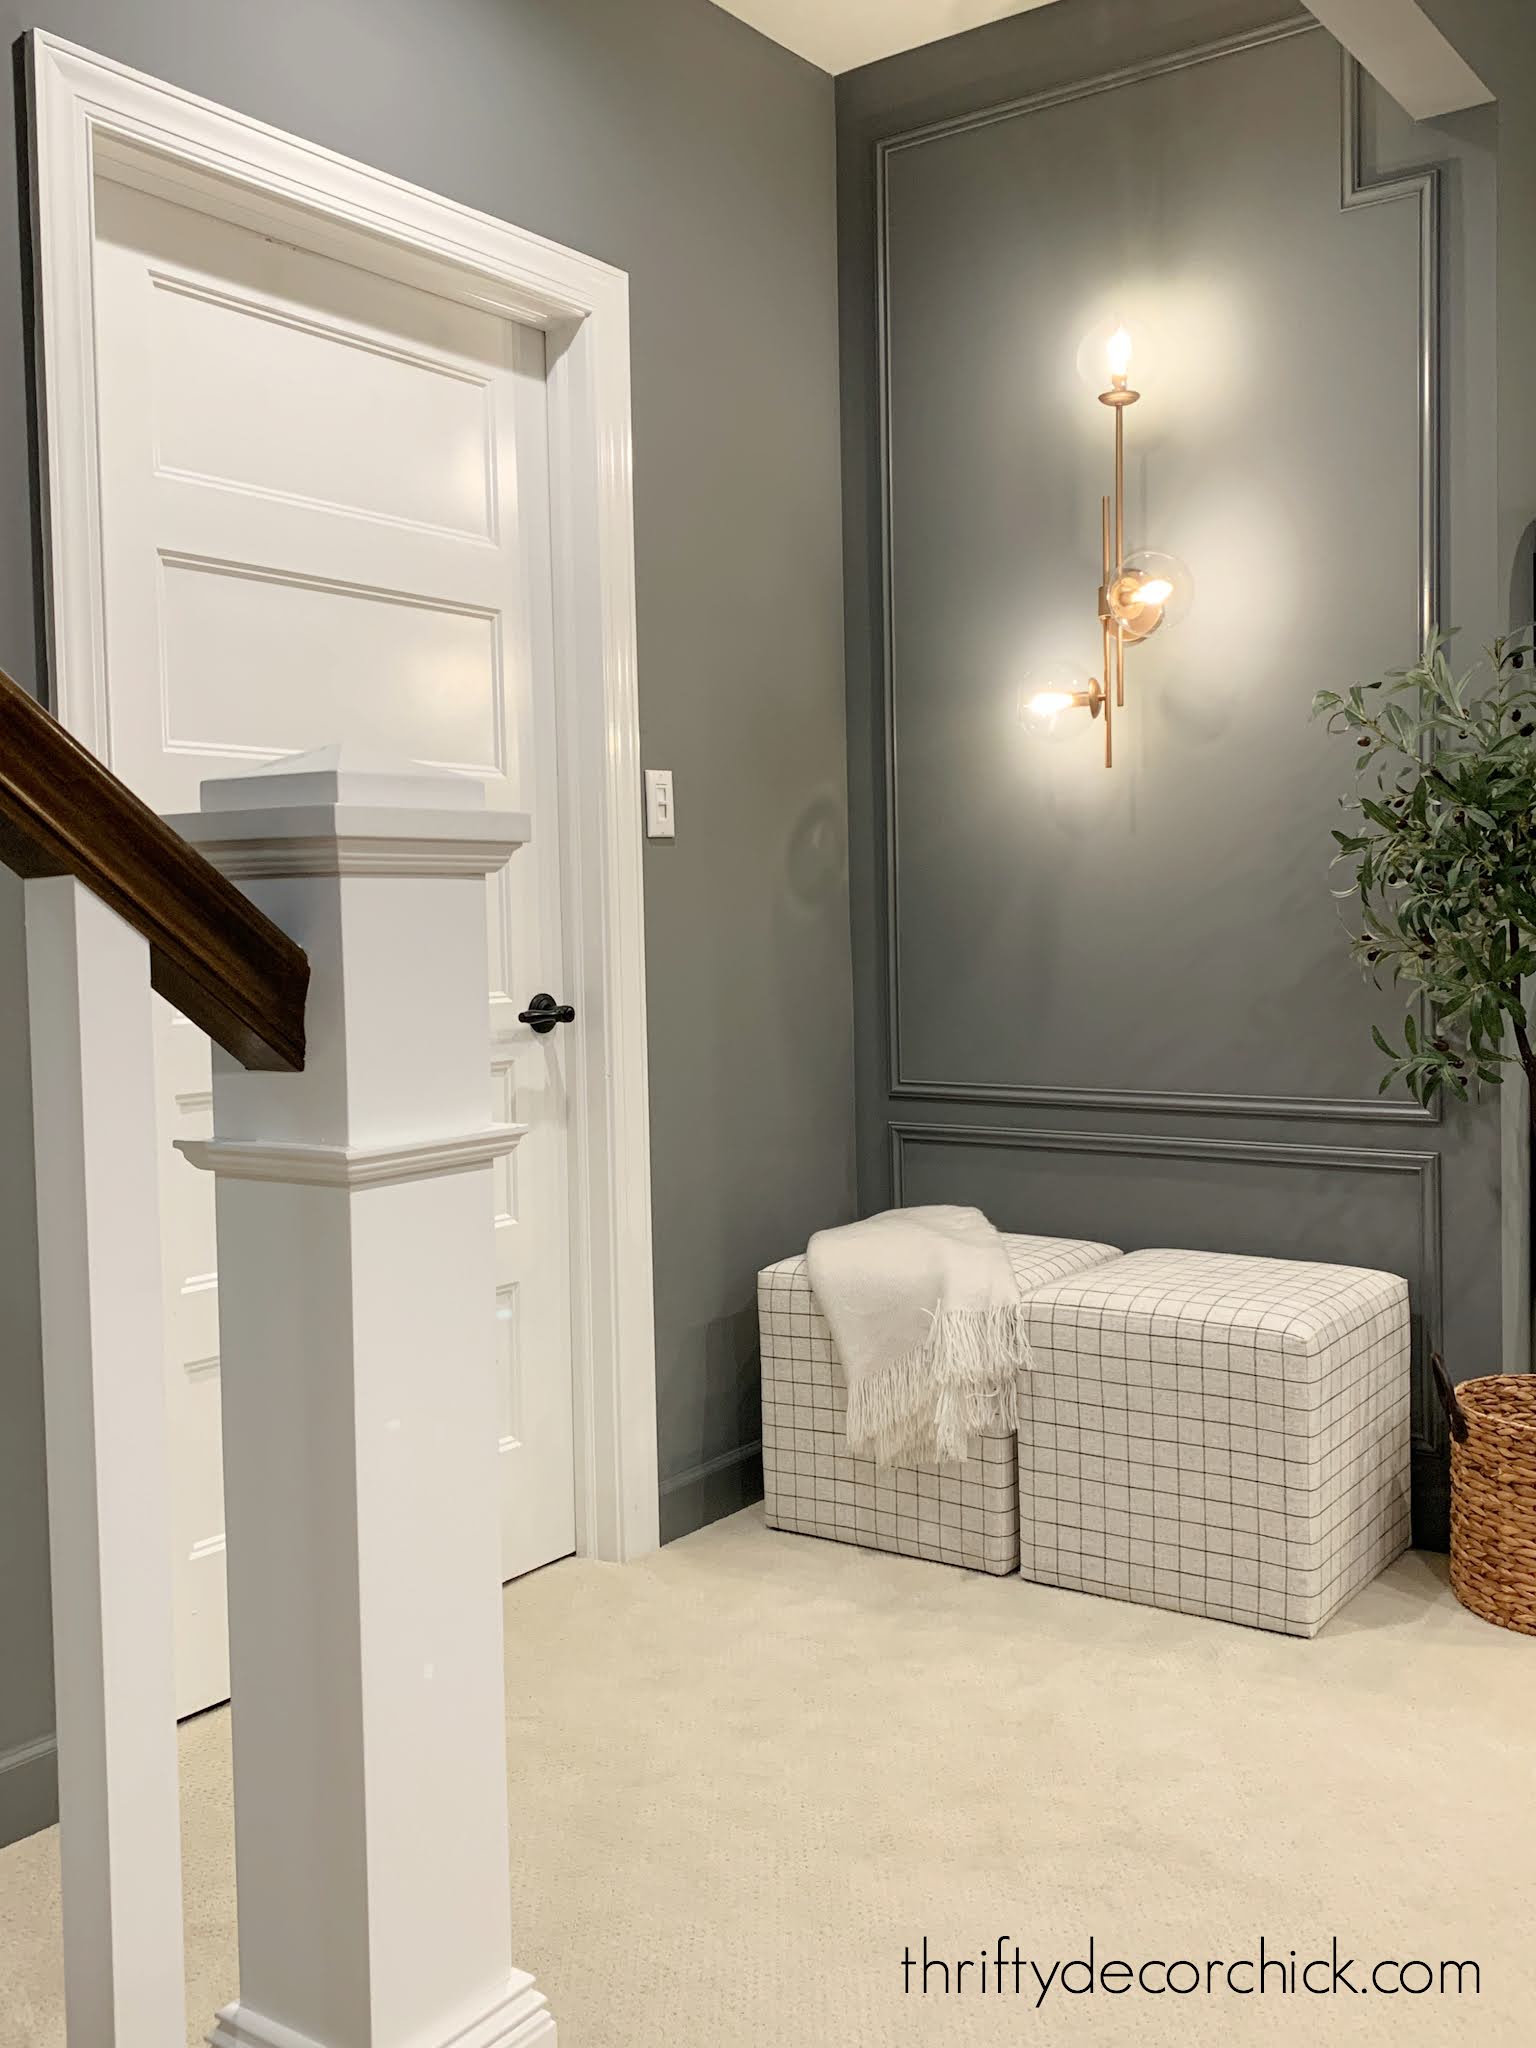
This three light globe sconce pulled the whole plan together for me -- we loved the modern vibe but knew that I could still make it look cozy in our warm basement:
This post may contain affiliate links for your convenience.
See my policies and disclosure page for more information.
I love how it ties into the globe sconces I added above the built ins!
It's a similar brass color as those and the remote sconces I added around the room:
I could only find one before picture of this space. I had a plug in sconce, art, and my secondhand bamboo bookcase full of decor:

But after adding the bookcases on the other side of the room, it felt like it was too much right there. We have plenty of spots for accessories down there and I wanted to simplify this area.
We had to have electricity run for the sconce, which is very easy to do if you have basic electrical or wiring knowledge. If you have an outlet or switch nearby you can add a sconce with minimal or no drywall fixes.
I LOVE the light!! SO much:
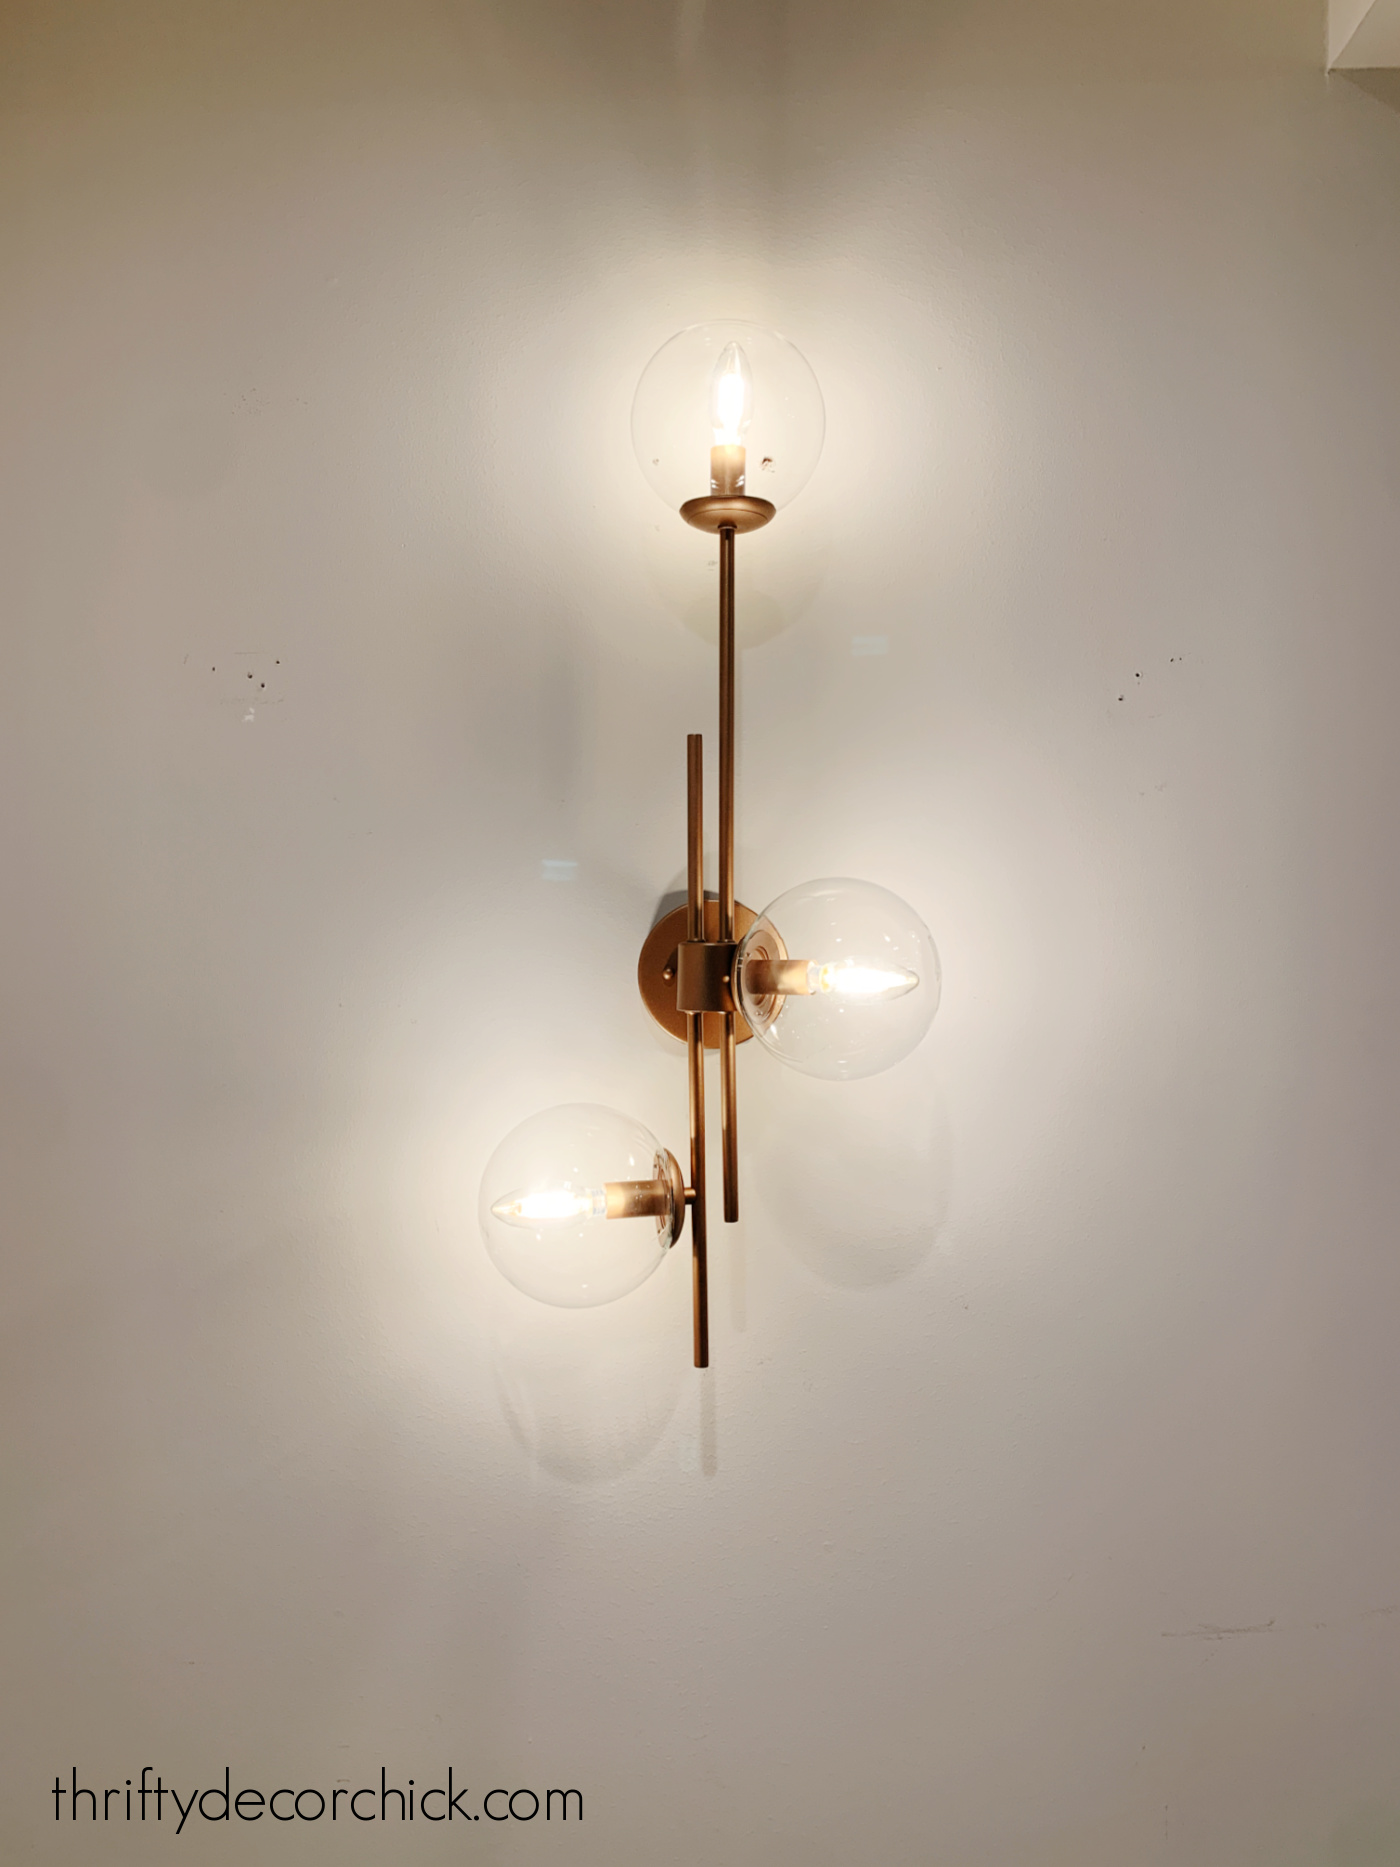
We installed it flip flopped from the image online, just to keep the top globe away from little hands and/or out of the way if we sit underneath it (see more in a minute).
It looked SO good already! But it needed some drama:
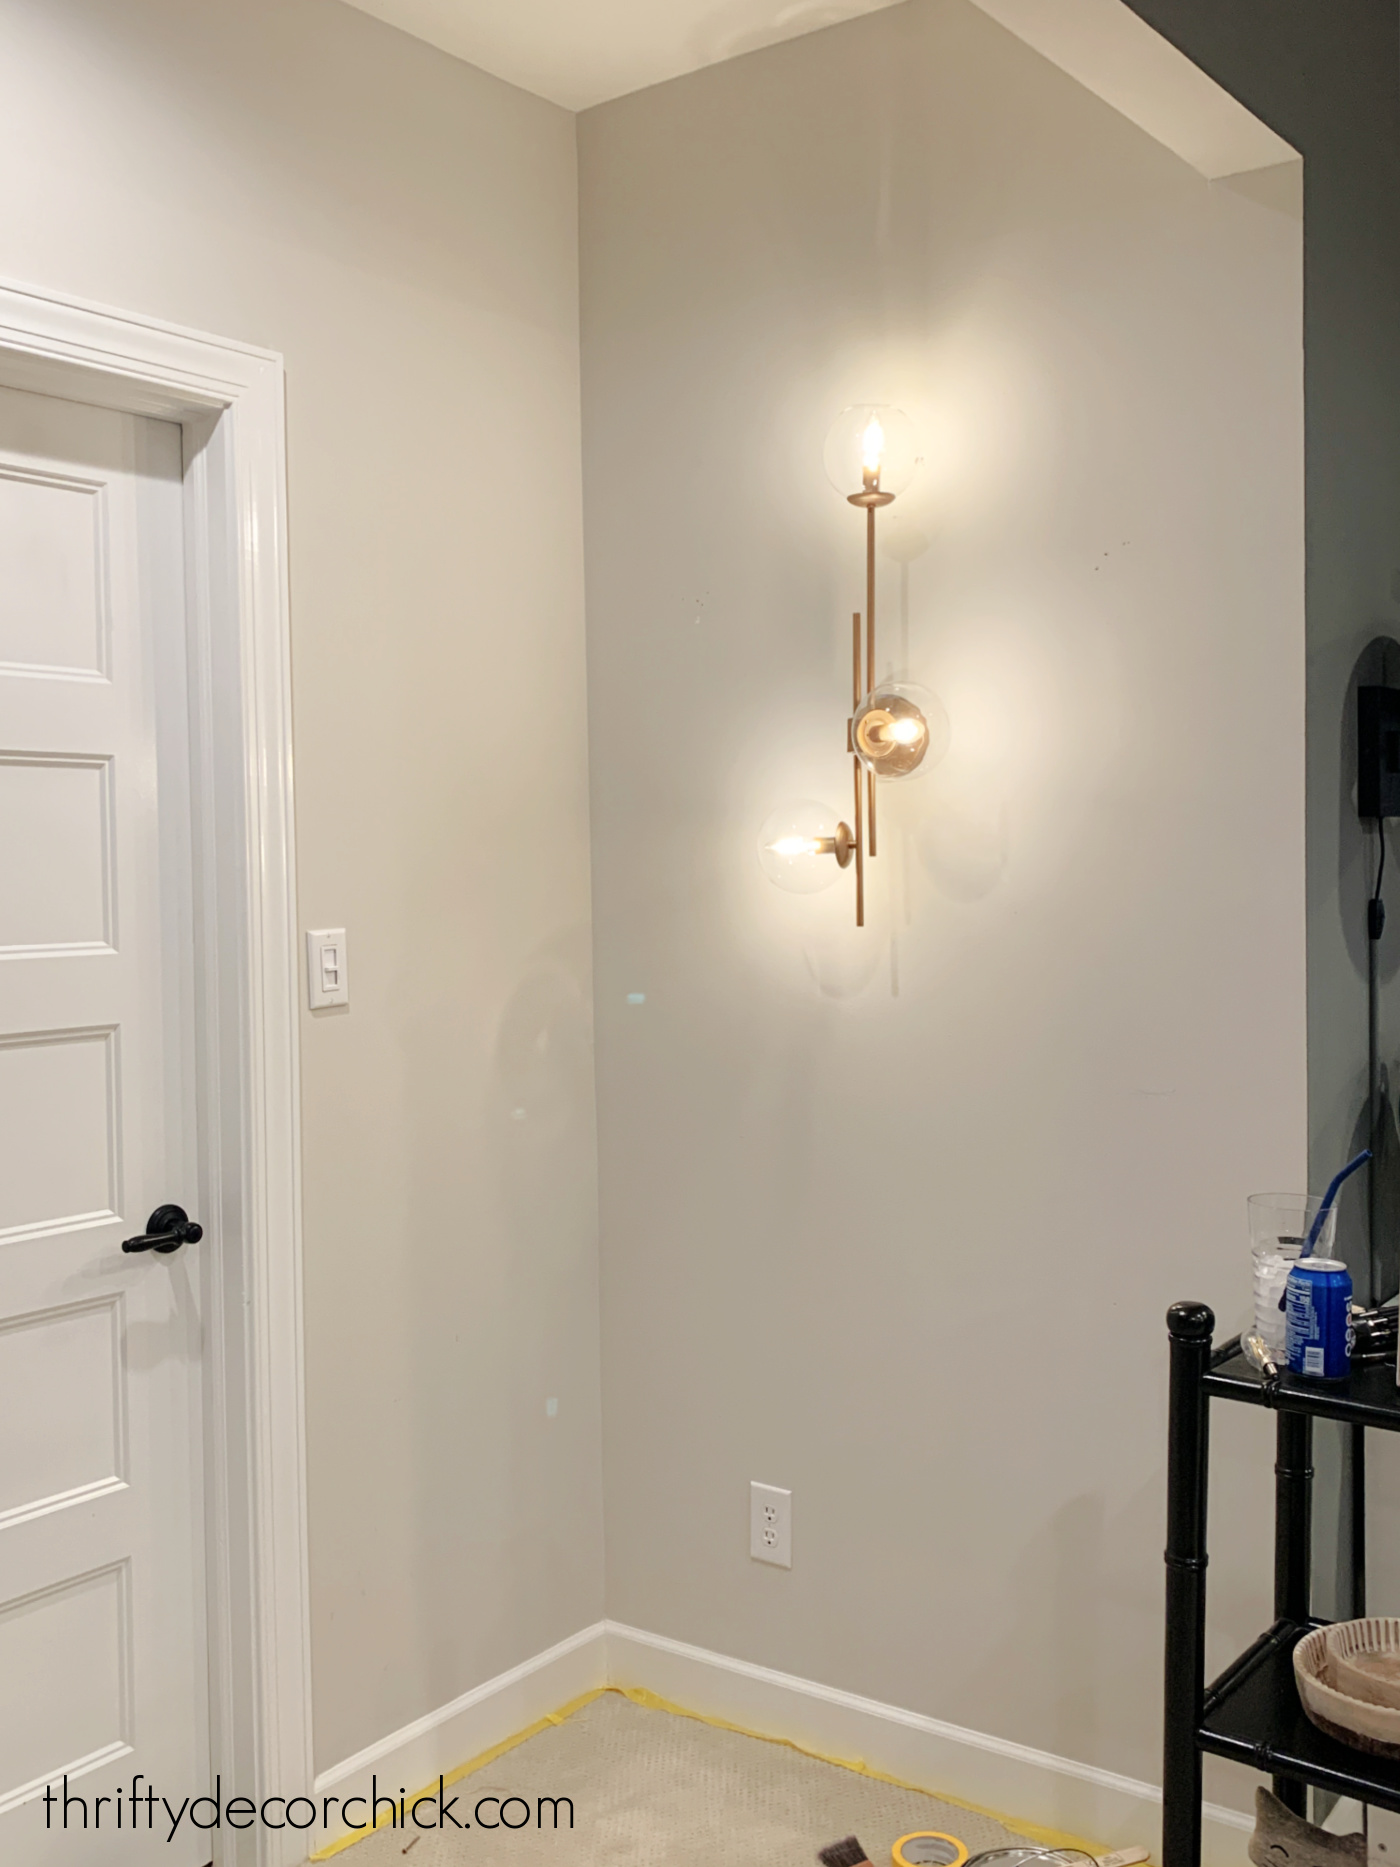
So I continued the beautiful Westchester Gray (from Sherwin-Williams) around the corner and it made all the difference!
I told my husband the other day that I pray I never want to change the color of our basement walls and trim...it will be SO MUCH work. ? We love this color though, so it will be a very long time from now.
I swear every time I add this color it just feels like a big, warm hug when we walk into the space:
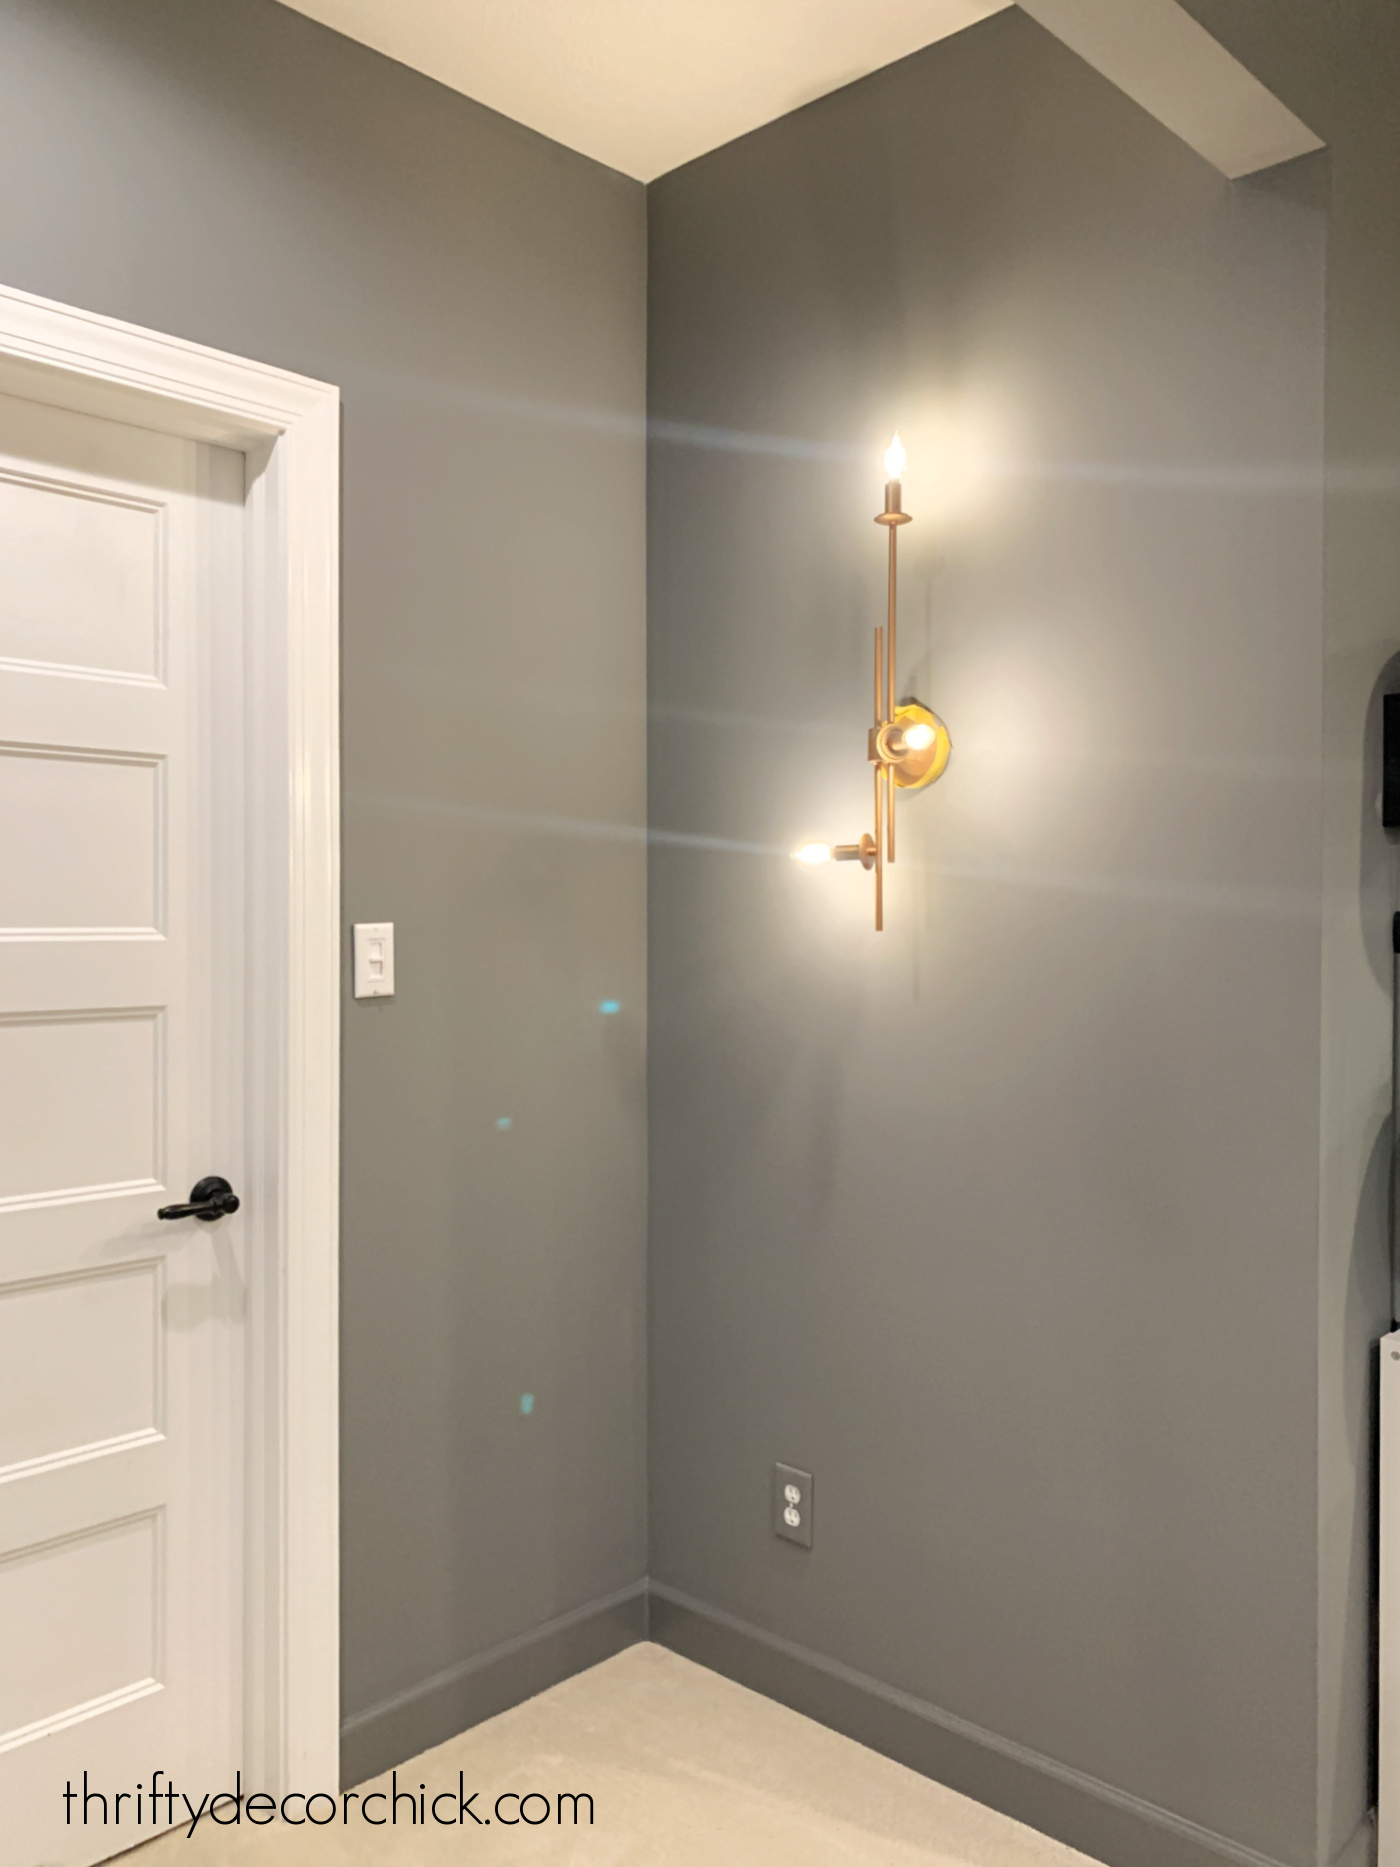
A basement or bedroom is a perfect spot for this deep color. Grays are definitely a more "cool" color, but this one leans more warm to me.
The deep gray made a big difference but it still needed something. I'll give you one guess on what I added...trim of course!
I played around with doing something different on this little wall, but in the end decided to go with the simple trim I added to the rest of the room earlier this year.
This wood trim is about $8 for an eight foot piece and you can find it at most large hardware stores. I gave it a coat of semi-gloss Westchester paint, then did a light sanding before moving onto the second coat:
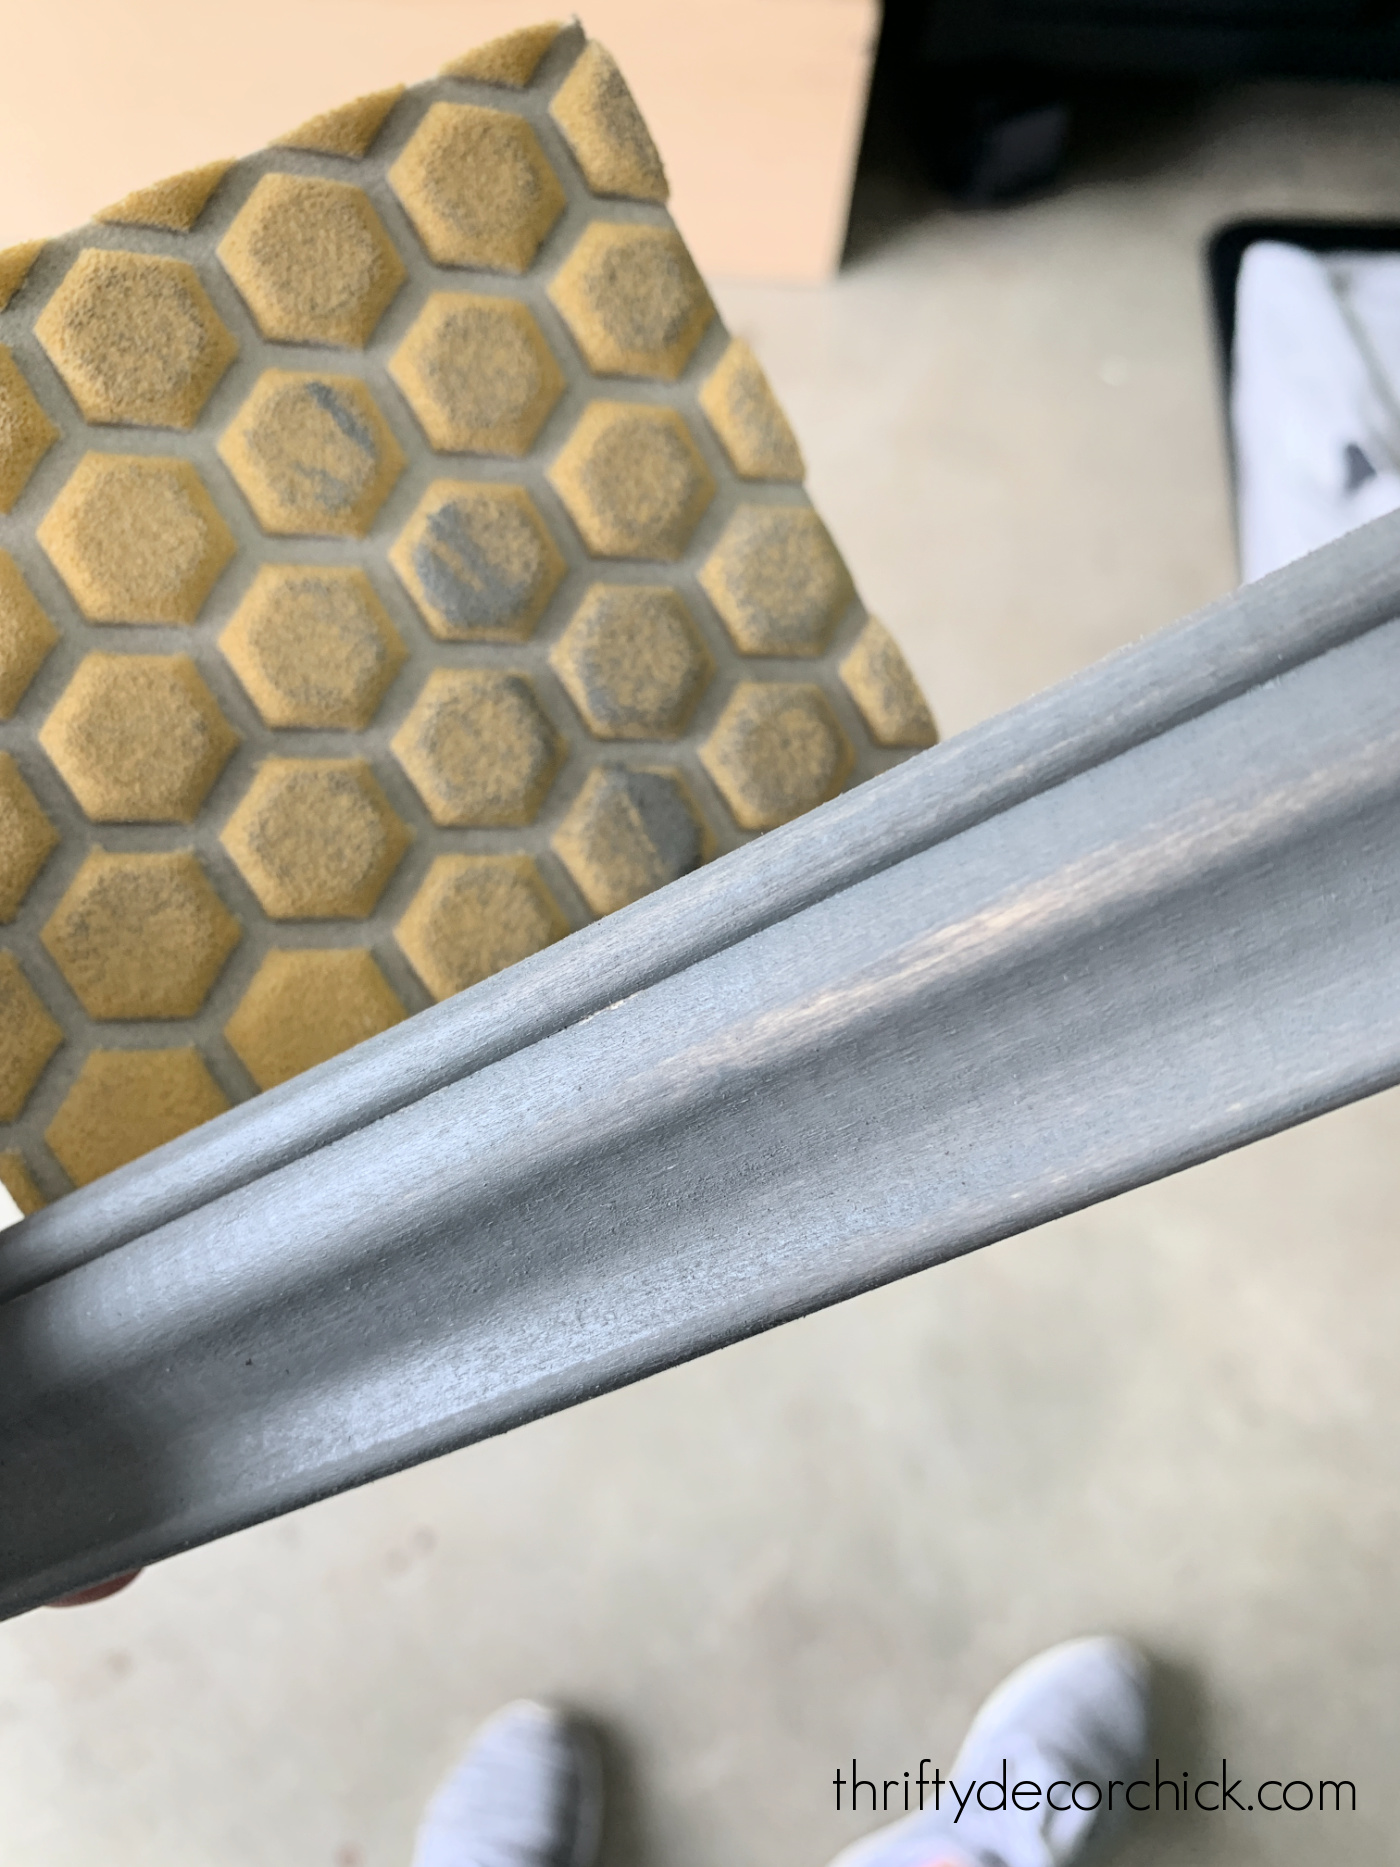
Those textured sanding pads work great for detailed projects like this!
My saw was happy to see me again! I haven't used it in MONTHS!
The cuts are all simple 45 degree angles, so this is a great beginner project. I installed all of the trim with a nail gun.
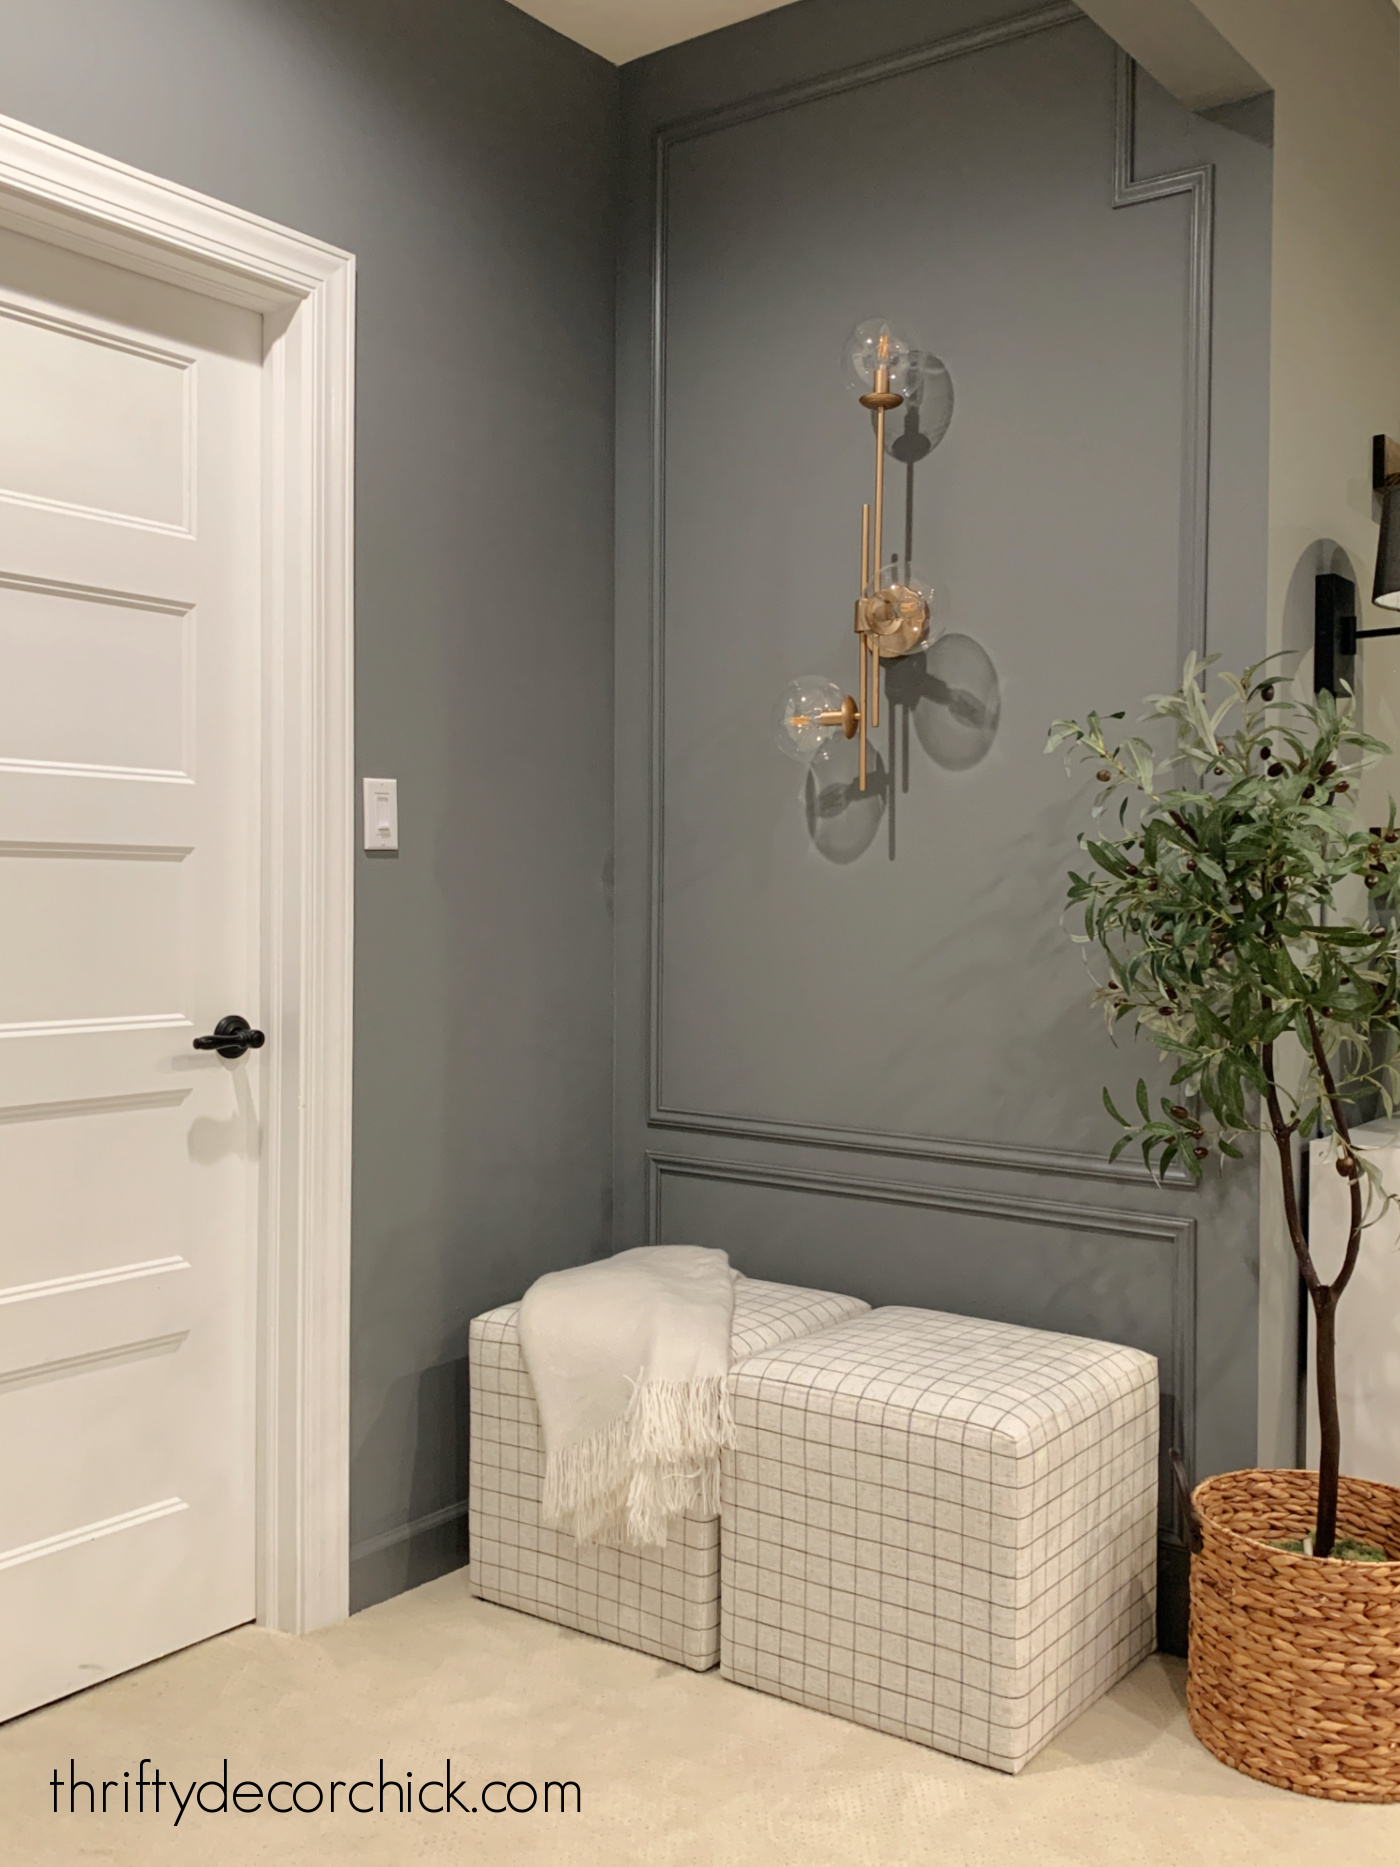
I got everything up and was SO happy with how it came together! Our son suggested adding a bench in this spot, which I thought was brilliant:
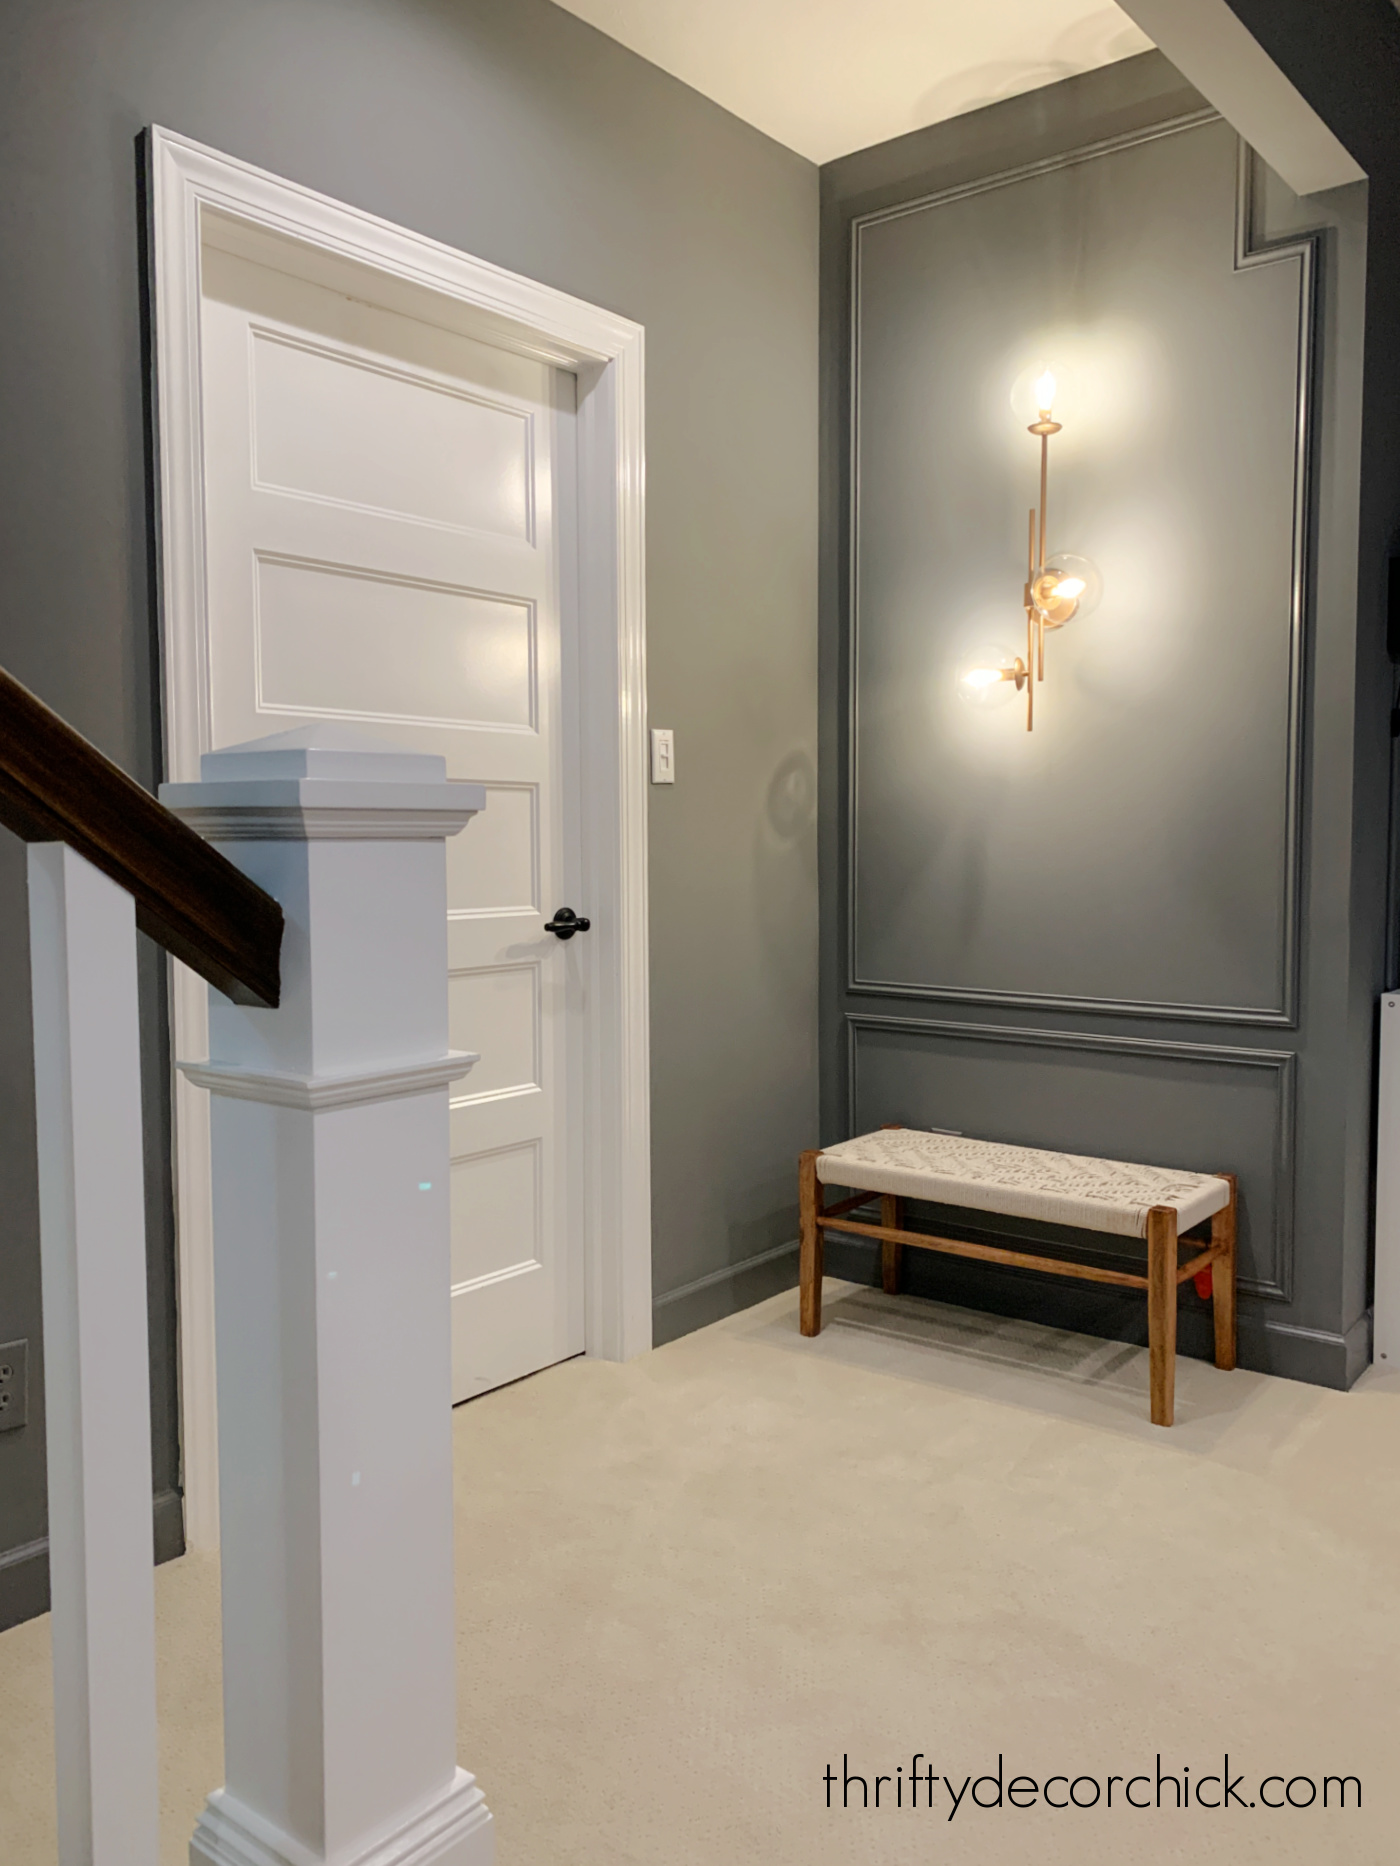
I love that woven bench, but it was just too dinky here.
So instead, I grabbed the two square ottomans that we had placed at the ends of our long game table down here and placed them there instead:
Perfect!
Now they're not taking up space at the end of the table, but if we need more seating we can easily grab them.
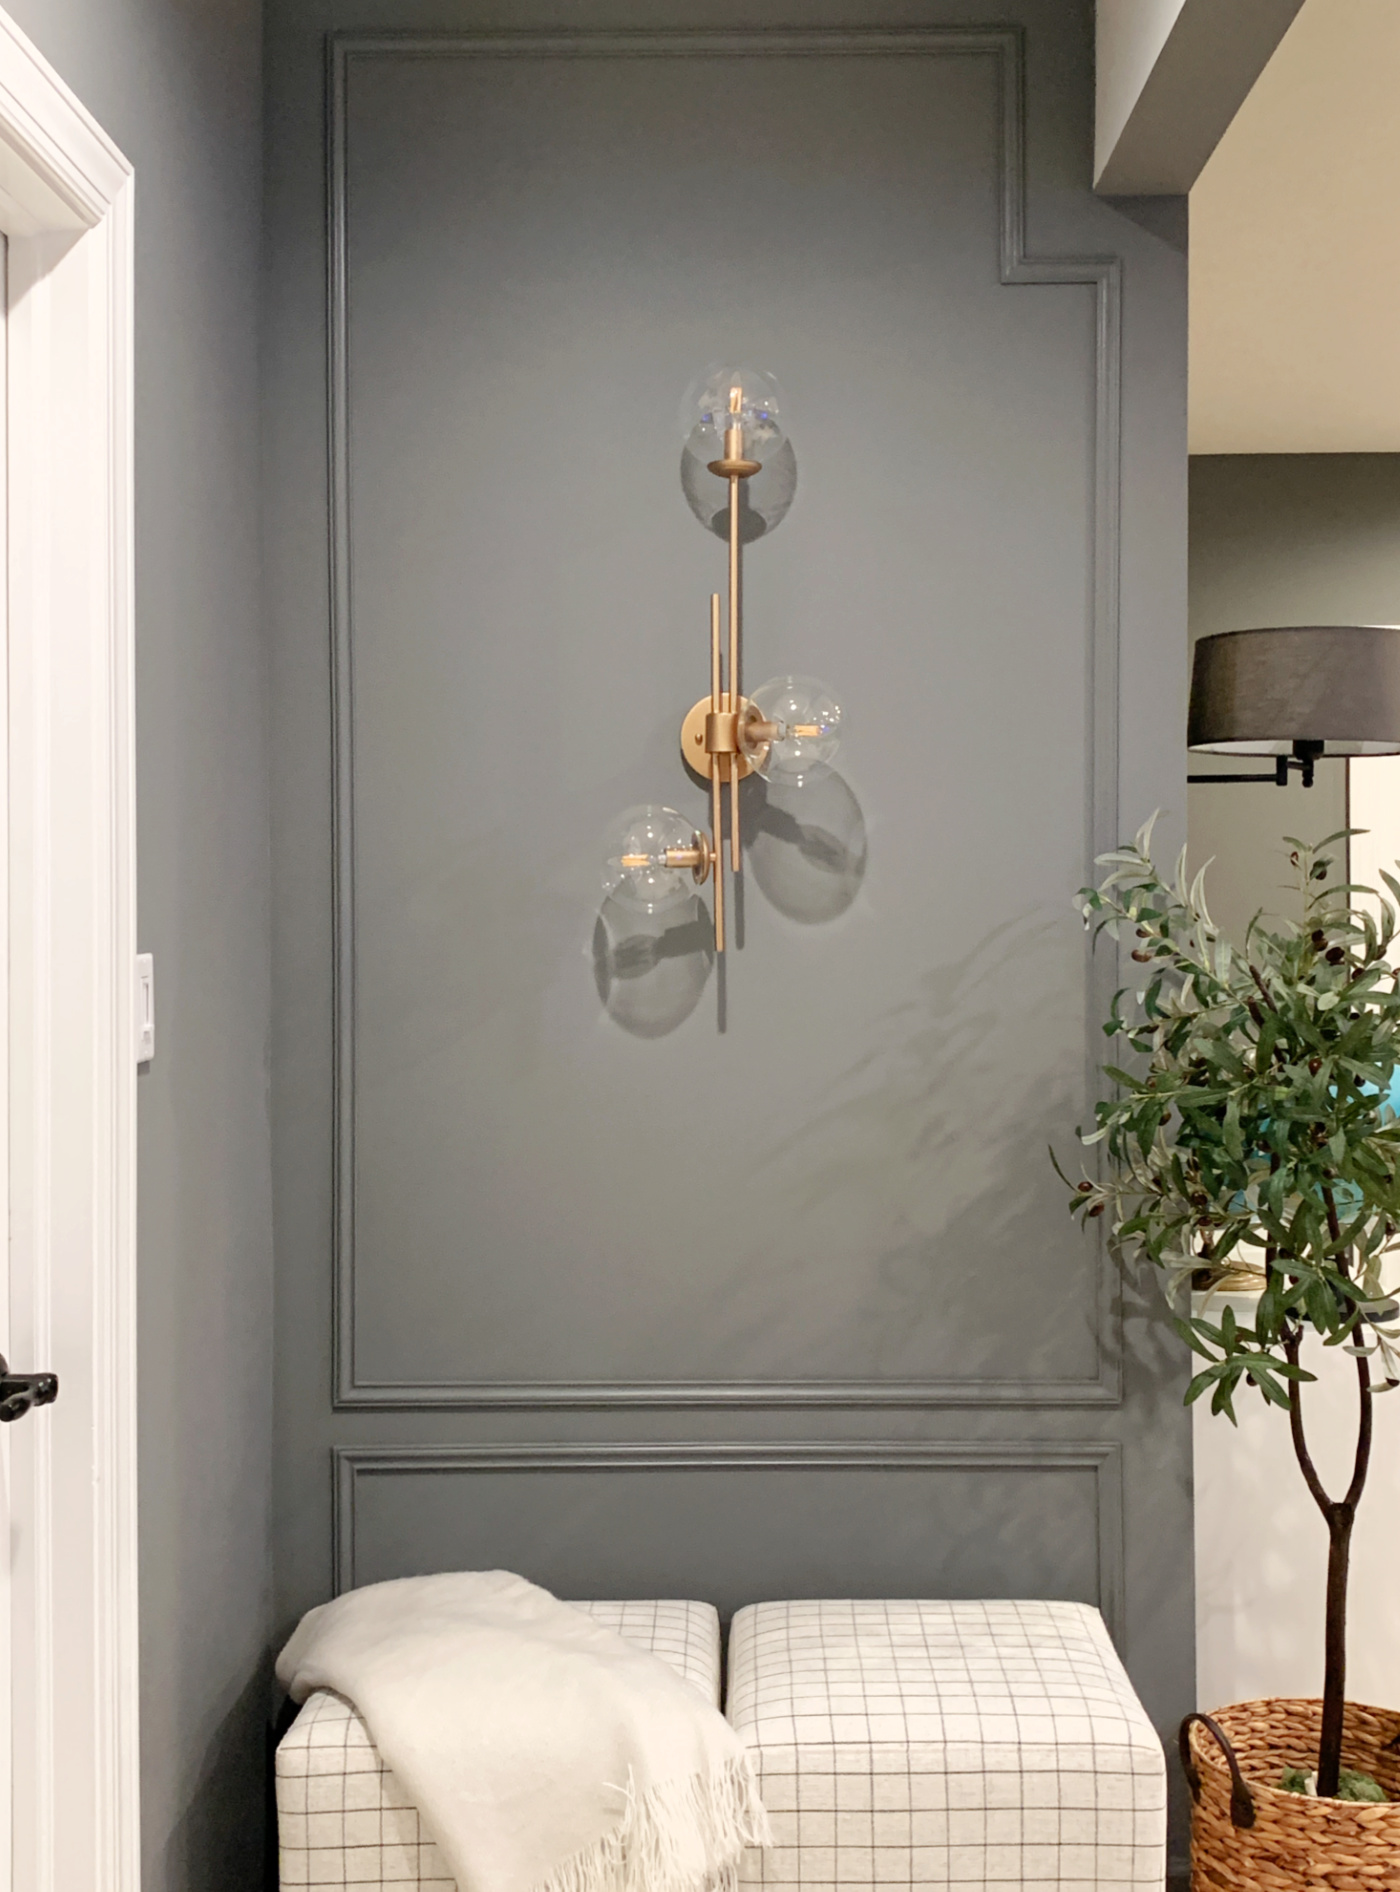
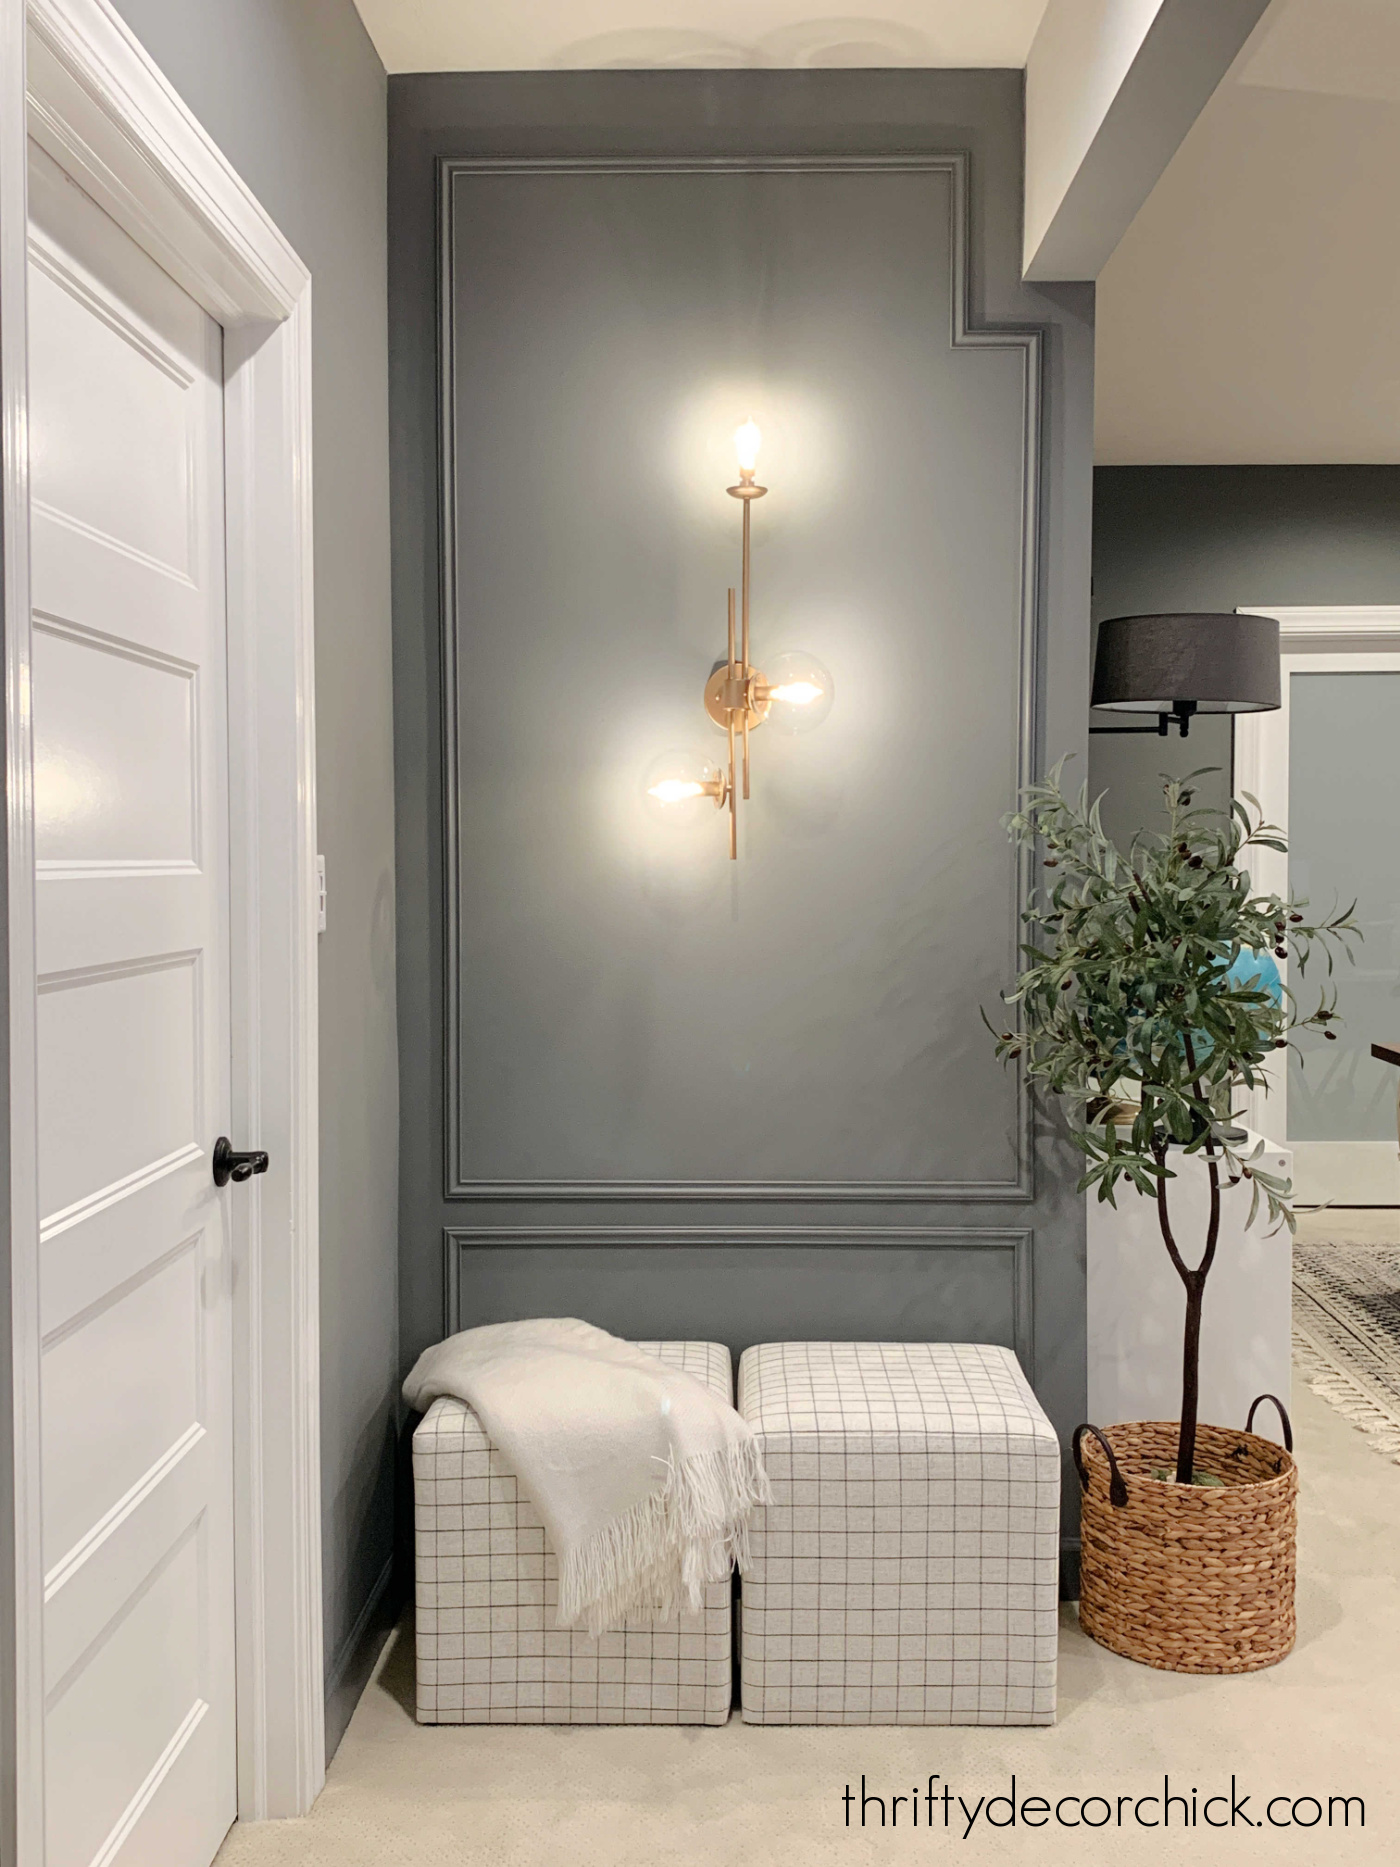
I'm so very pleased with how this little spot came together! I just love that brass finish against the dark gray walls:
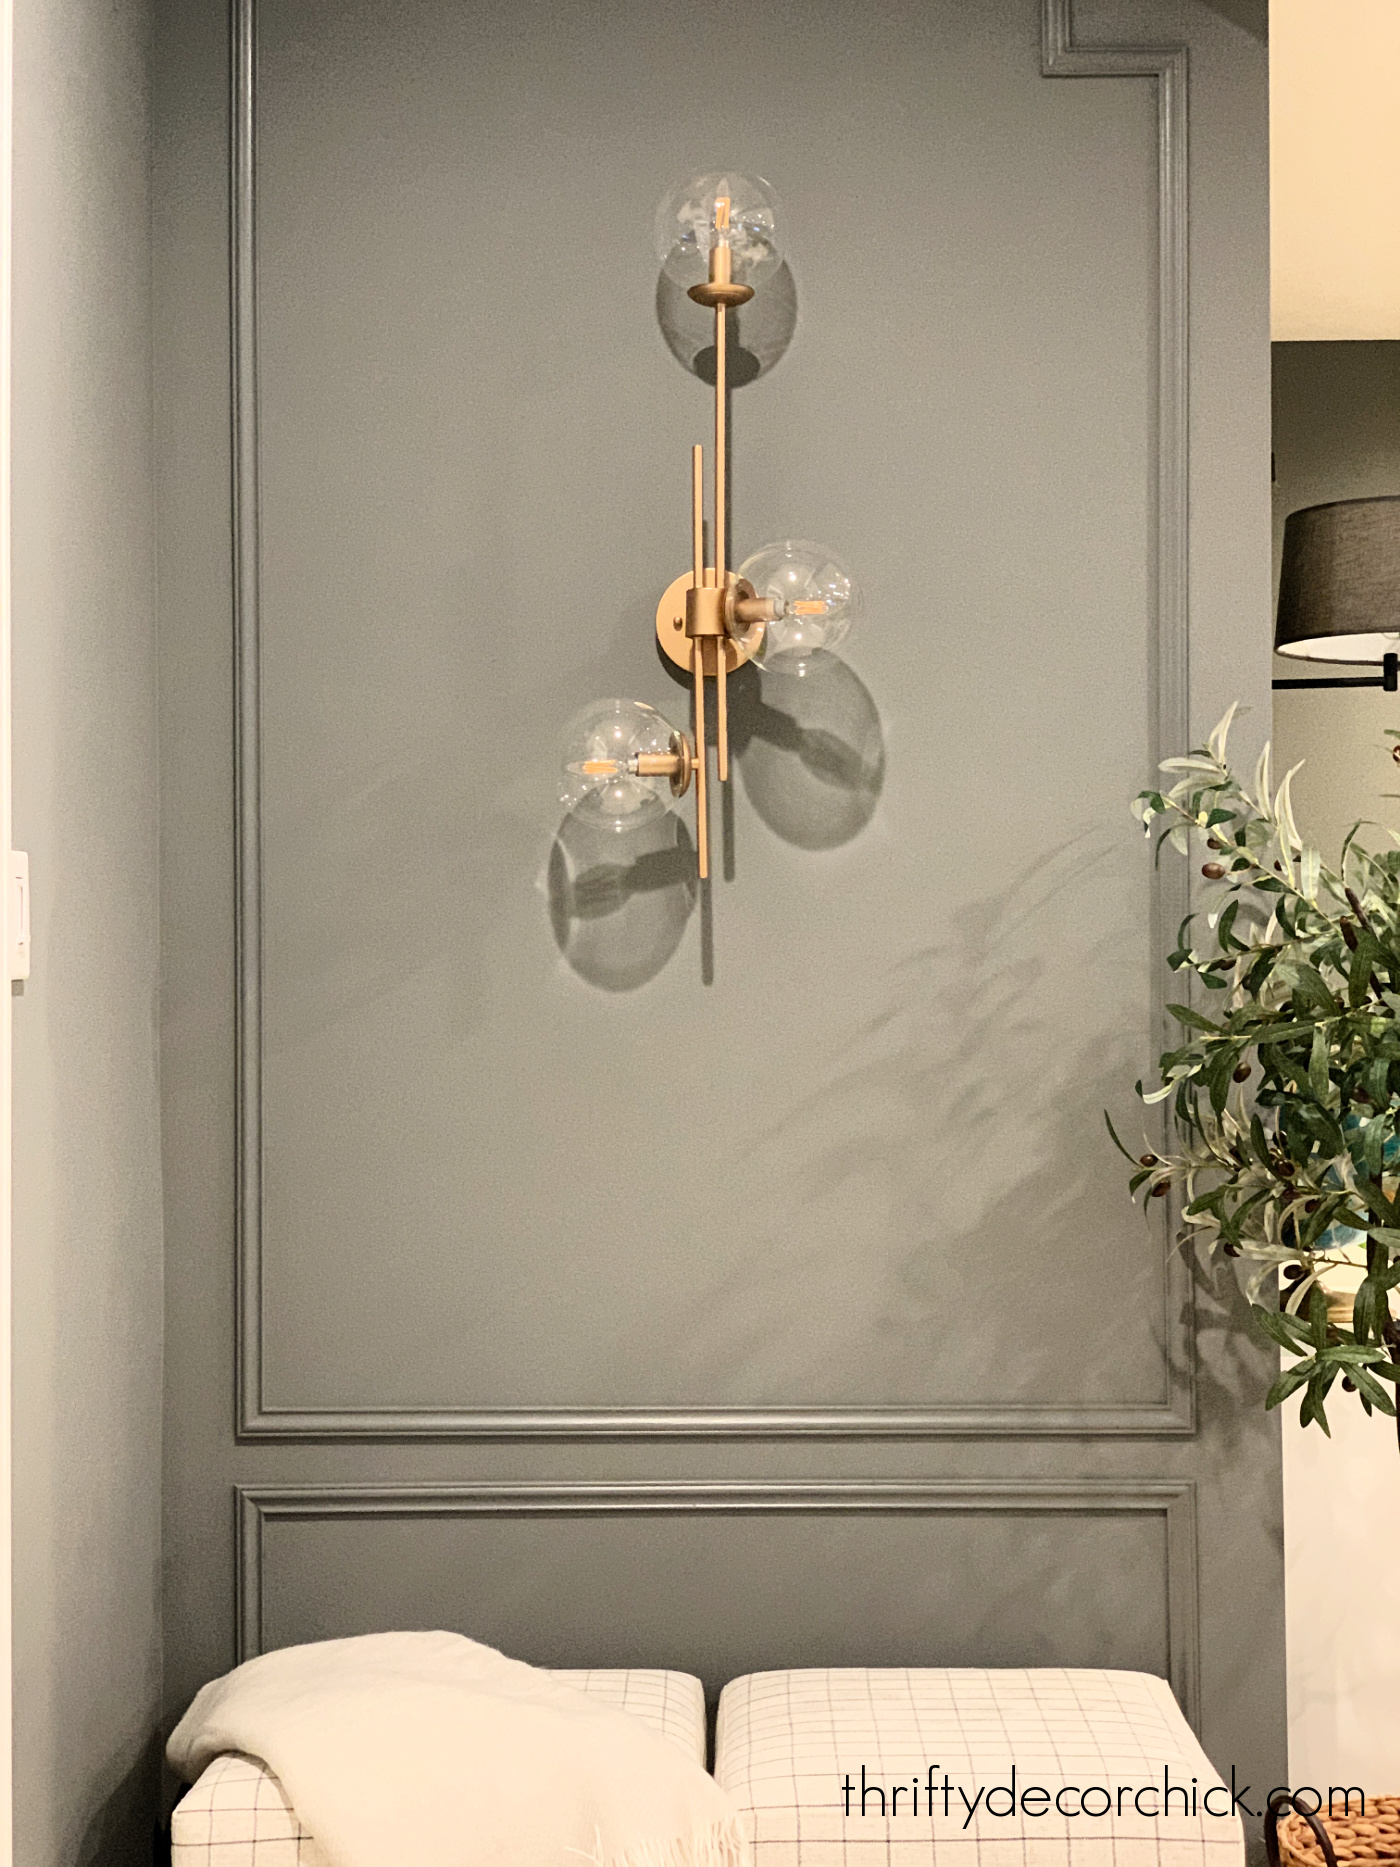
That simple trim makes such a difference, right?
I love how the sconce acts as art. I really wanted to simplify this corner and calm it down a bit. This worked beautifully!
Of COURSE I used a dimmer switch here, so this light dims nicely and turns into a gorgeous night light. Love it:
I have another project in the works for this little area that will warm it up even more. Can't wait to get started on that!
Now that the weather is starting to turn a bit cooler, we're spending more time in this cozy basement. We hibernate down here all winter and I love it!
Have I convinced you to dress up your small walls and hallways yet? They are calling out for some special attention. :)
Never miss a post by signing up to get posts via email.
Via https://www.thriftydecorchick.com/2021/09/create-modern-accent-wall-sconce.html How to replace a recessed can light with a chandelier or ceiling fan! Change out a can light to a light fixture 35 pounds or under.
There are a few easy ways to update or change out your recessed lights and I've shared in those in the past. If you have old, yellowed cans with halogen bulbs, it's super easy to replace your old recessed lights with beautiful LED versions.
You can also add character and detail where a recessed light is installed by using a simple kit to change it to a hanging pendant light.
I did this in our little blue and white floral wallpapered hallway:
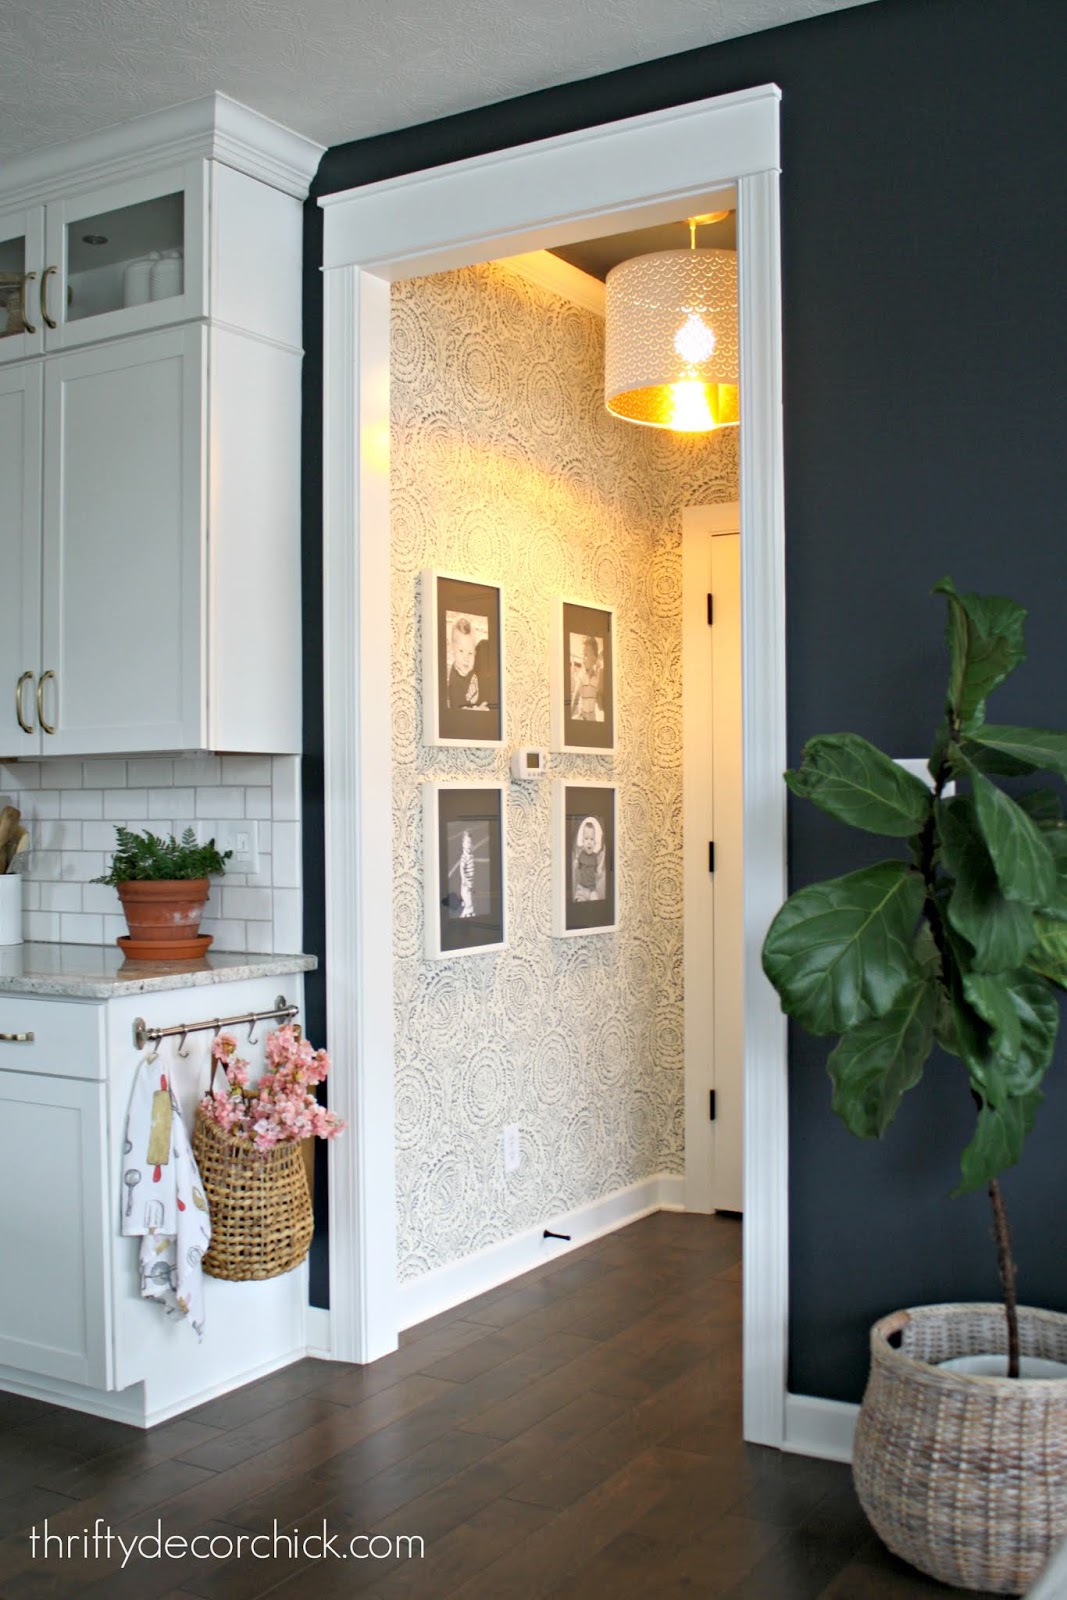
And in our foyer vestibule when I added (you guessed it)...wallpaper there as well:

Both of those options are SUPER simple and take no electrical knowledge at all!
I do have some electrical experience, so I thought this next one would be especially easy. Although it turns out you don't need to know much other than how to wire a light fixture to do this one.
So I thought...easy! ?
You know how sometimes what you think will be super difficult turn out to be a breeze, and projects you think will be easy turn out to be much harder than you thought?
This was one of those harder than I thought ones.
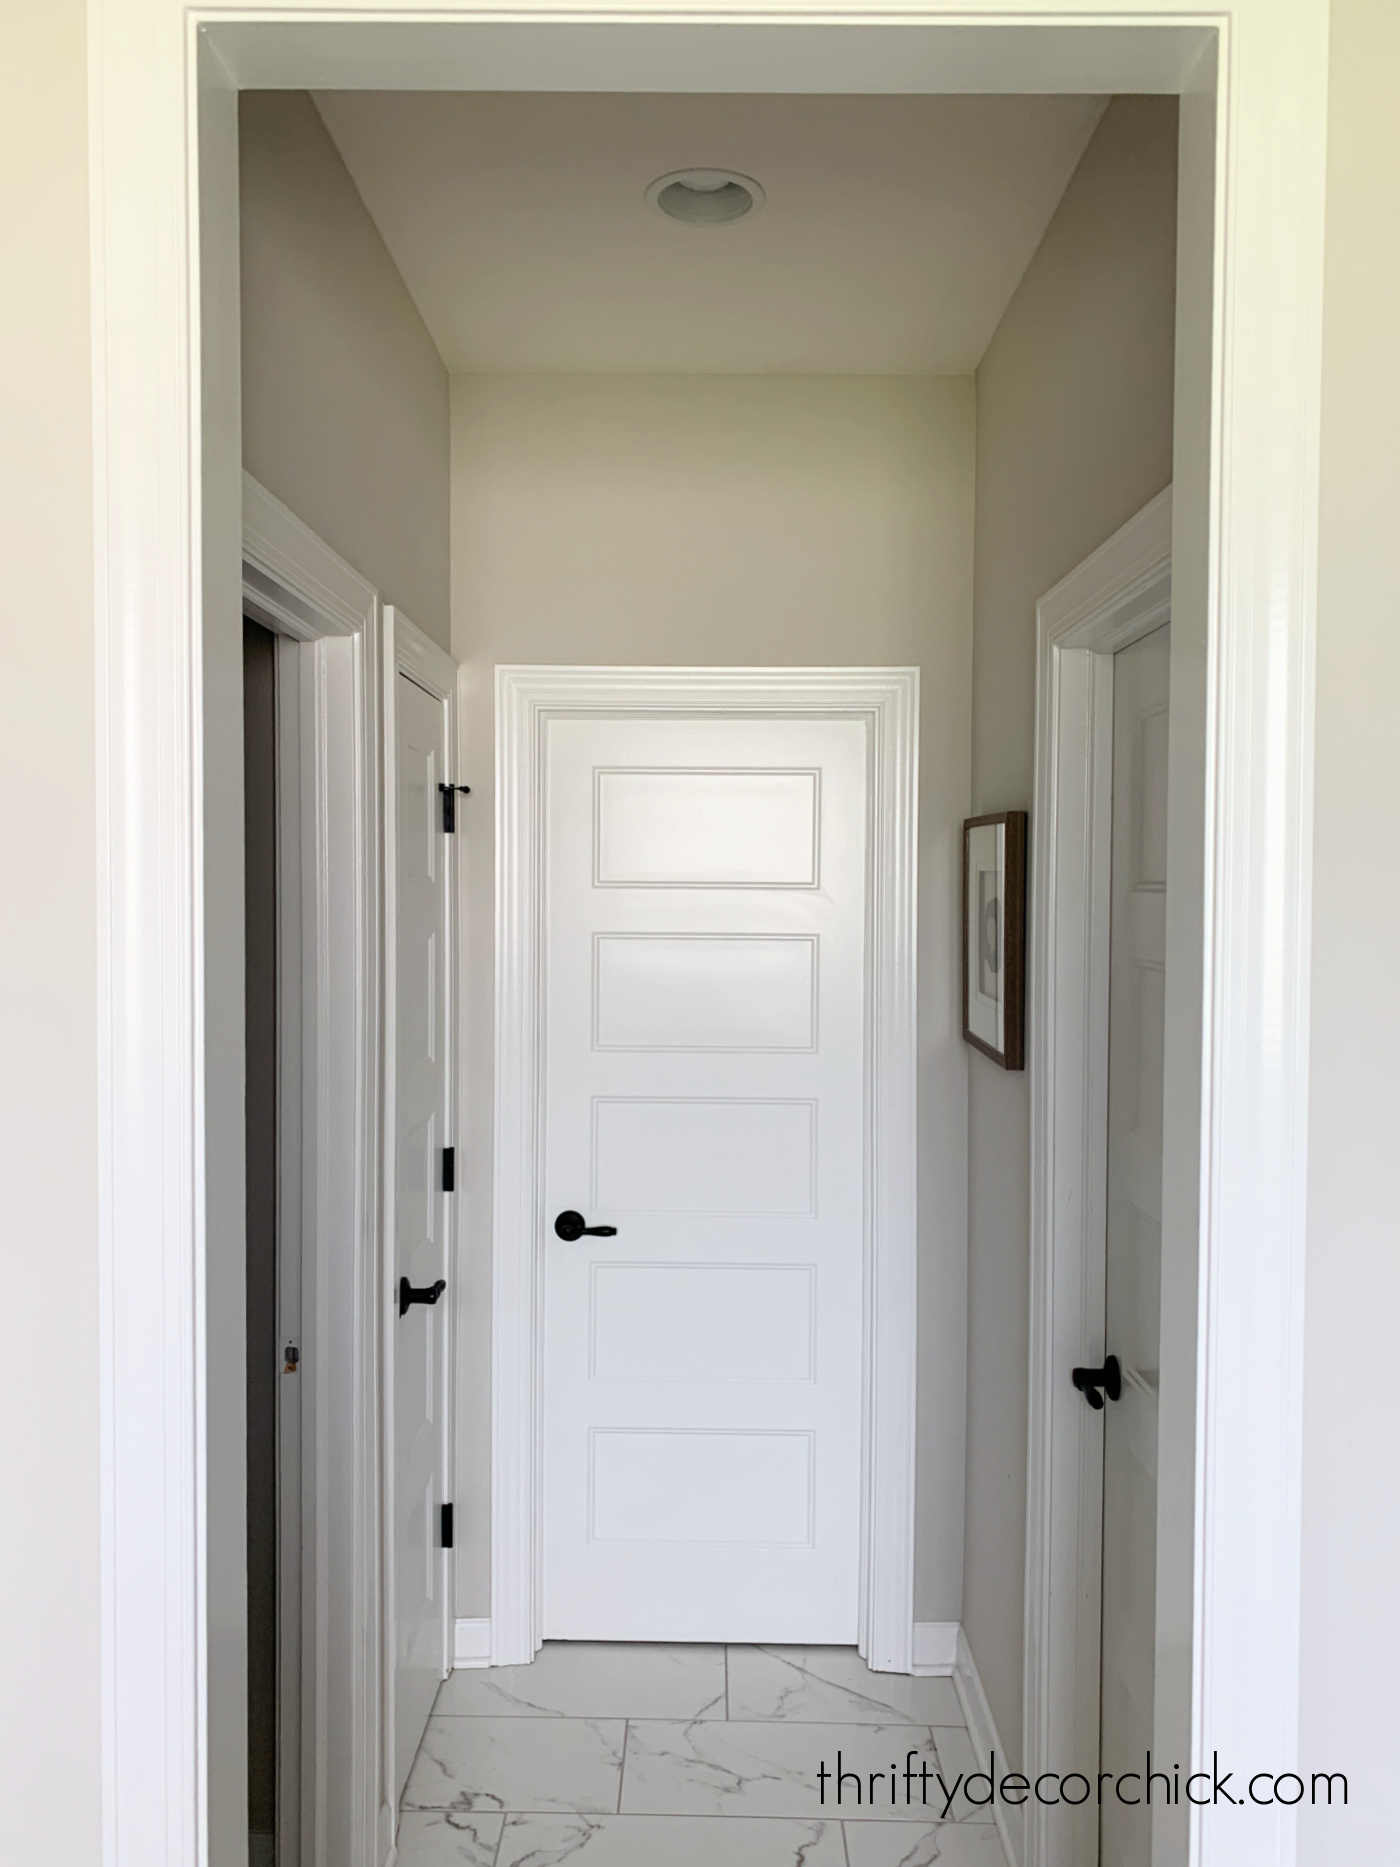
I've been working hard on my closet makeover over the past couple of weeks. As I've walked through the little hallway in our bathroom over and over throughout the process, I've thought about some updates I'd like to make there as well.
It's a small space, but as you can see above, I love treating spots like that as tiny rooms I can decorate. :)
We have a recessed light in this area that I knew would look great with a hanging light:
This post may contain affiliate links for your convenience.
See my policies and disclosure page for more information.
There's a converter kit you can use to hang a light fixture (something bigger than the pendants I used in the other hallways) or even a ceiling fan:

They just have to be 35 pounds or under for this particular kit. I got mine at Lowe's, but hang in there till the end of the post for a better option and how-to videos.
Do you sense the foreboding? :)
I found this Parker light fixture that I LOVED, and it was on sale last week. Perfect timing!:

I love the brass and white combo and it's a decent sized light. I like to go bigger than you'd think in small spaces like this. (This is a great knock off of this gorgeous brass fixture with a white shade that is priced MUCH higher.)
It was on sale and I got an additional discount, so it was $60 off the regular price. I was so excited to get it up -- I knew it was going to look so good in there!
This is where the project, that should take an hour, turned into four. FOUR. HOURS.
The can converter isn't that difficult to install really...it's basically just a bracket that you install inside the can so a heavier light can be hung.
But the directions in the kit I used were abysmal. So bad that I eventually stopped trying to use them and decided to figure out the install on my own.
It just wasn't working for me...the bracket would not stay secure. Also, the converter kit has a metal medallion that you have to use to cover the large recessed hole. But I could not figure out how to install the light I was using with that medallion.
I tried EVERYTHING.
Then...this gorgeous light gave me some fits as well. The cord is covered with fabric, which looks great. But if you have to shorten your chain, you'll need to cut this as well.
Normally this wouldn't be a big deal, but the fabric around the cord instantly started unraveling. I tried leaving it alone but every time I moved the cord the fabric would fray even more:
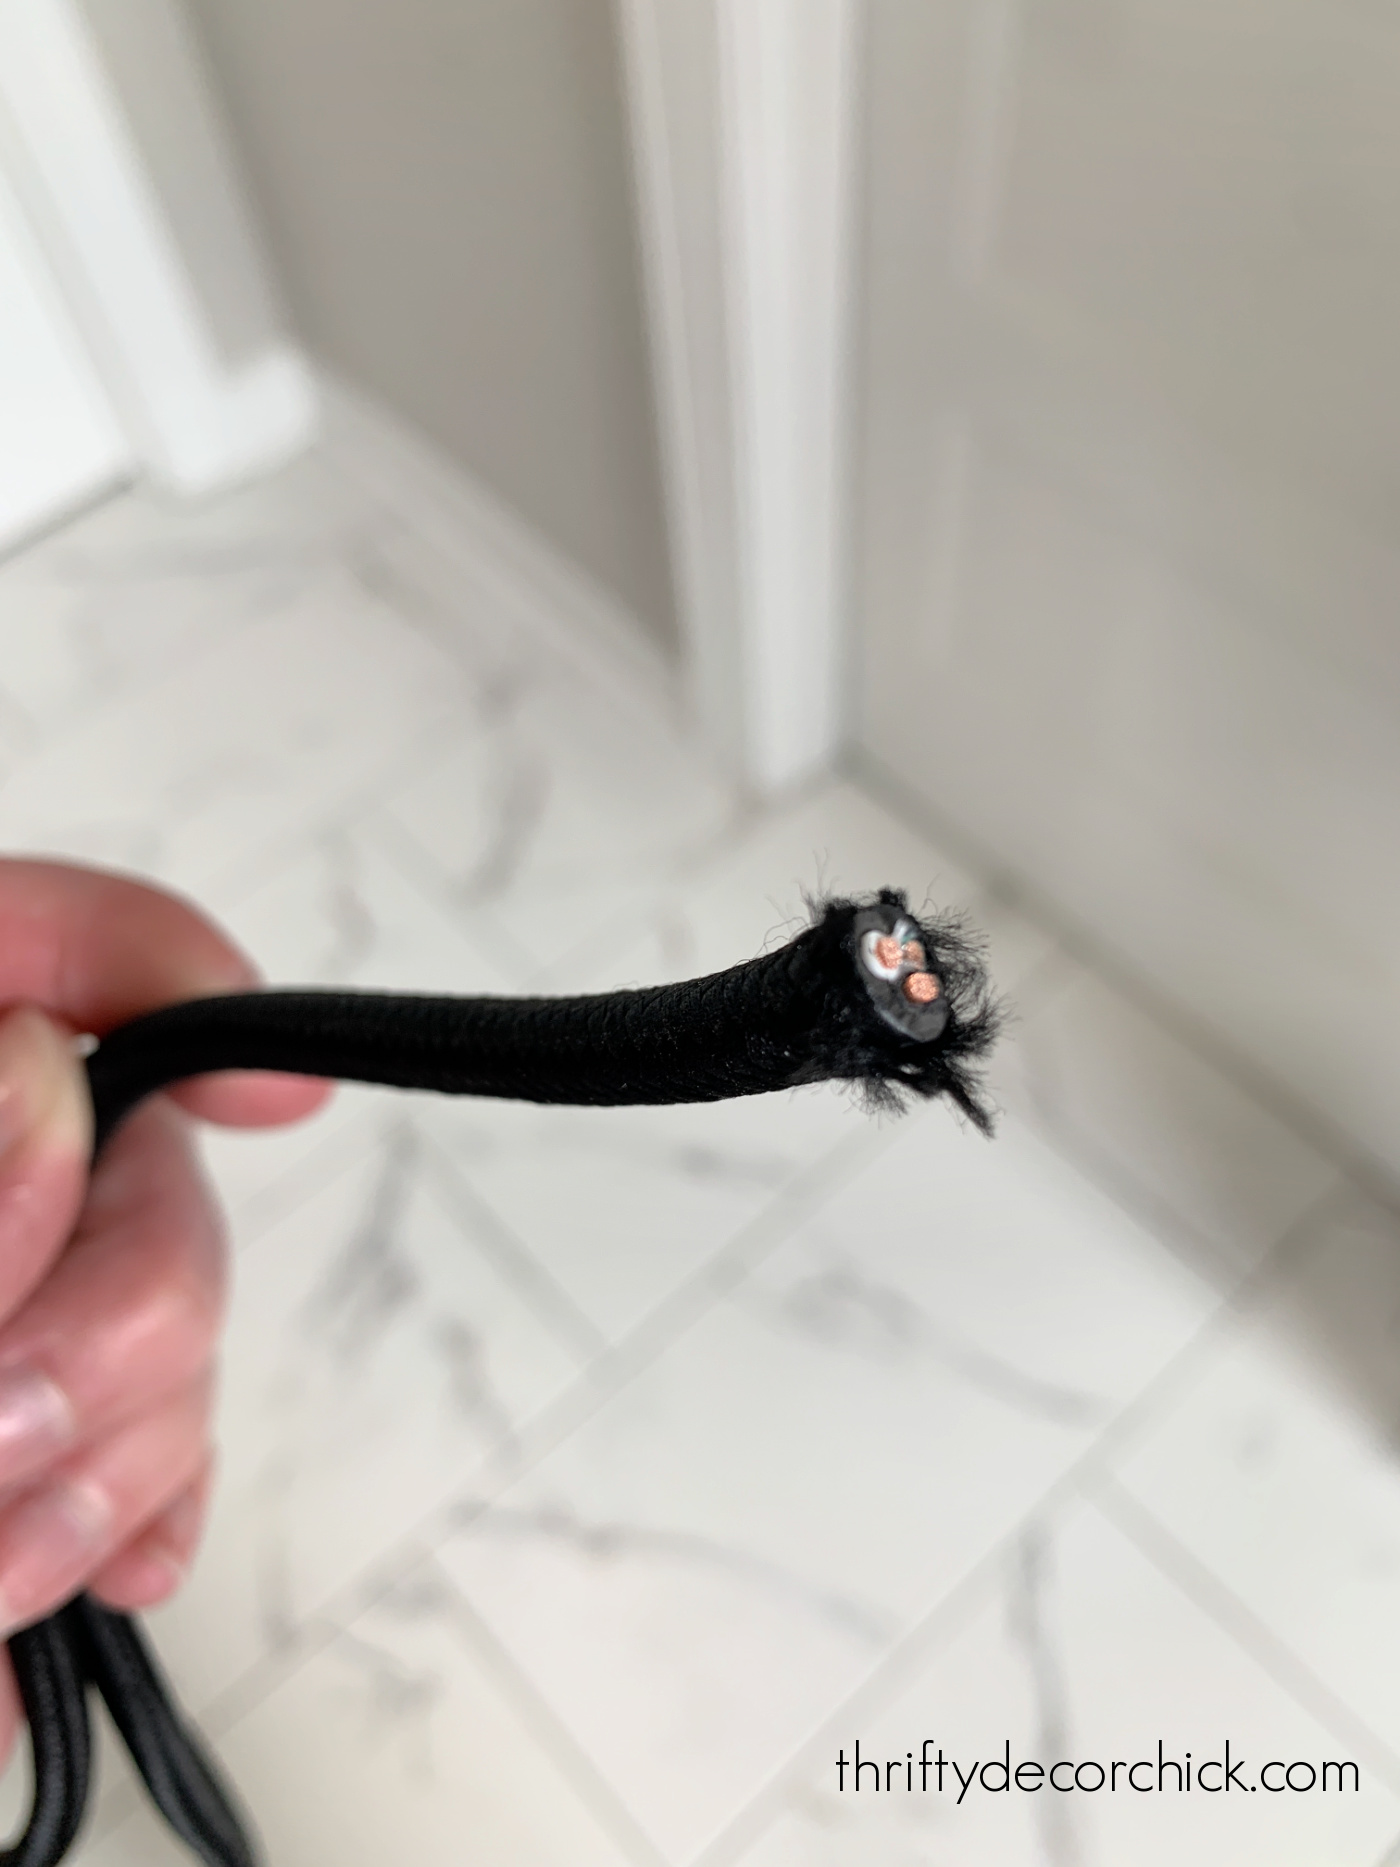
It was a HUGE mess, so I had to carefully cut all of that off of the cord, which took forever because I was trying not to nip the actual cord.
Between the light fixture giving me fits and the kit not working, this project took way longer than I planned.
But I don't give up! Or I'm just incredibly stubborn. Either way, I finally figured out a solution.
It was as simple as running back to the hardware store for a flat medallion for the ceiling instead of the dome shaped option they provided in the converter kit.
Once I figured that out, the light went up in about 15 minutes...as it should.
Thankfully, I love it as much as I thought I would! It's a really lovely light:
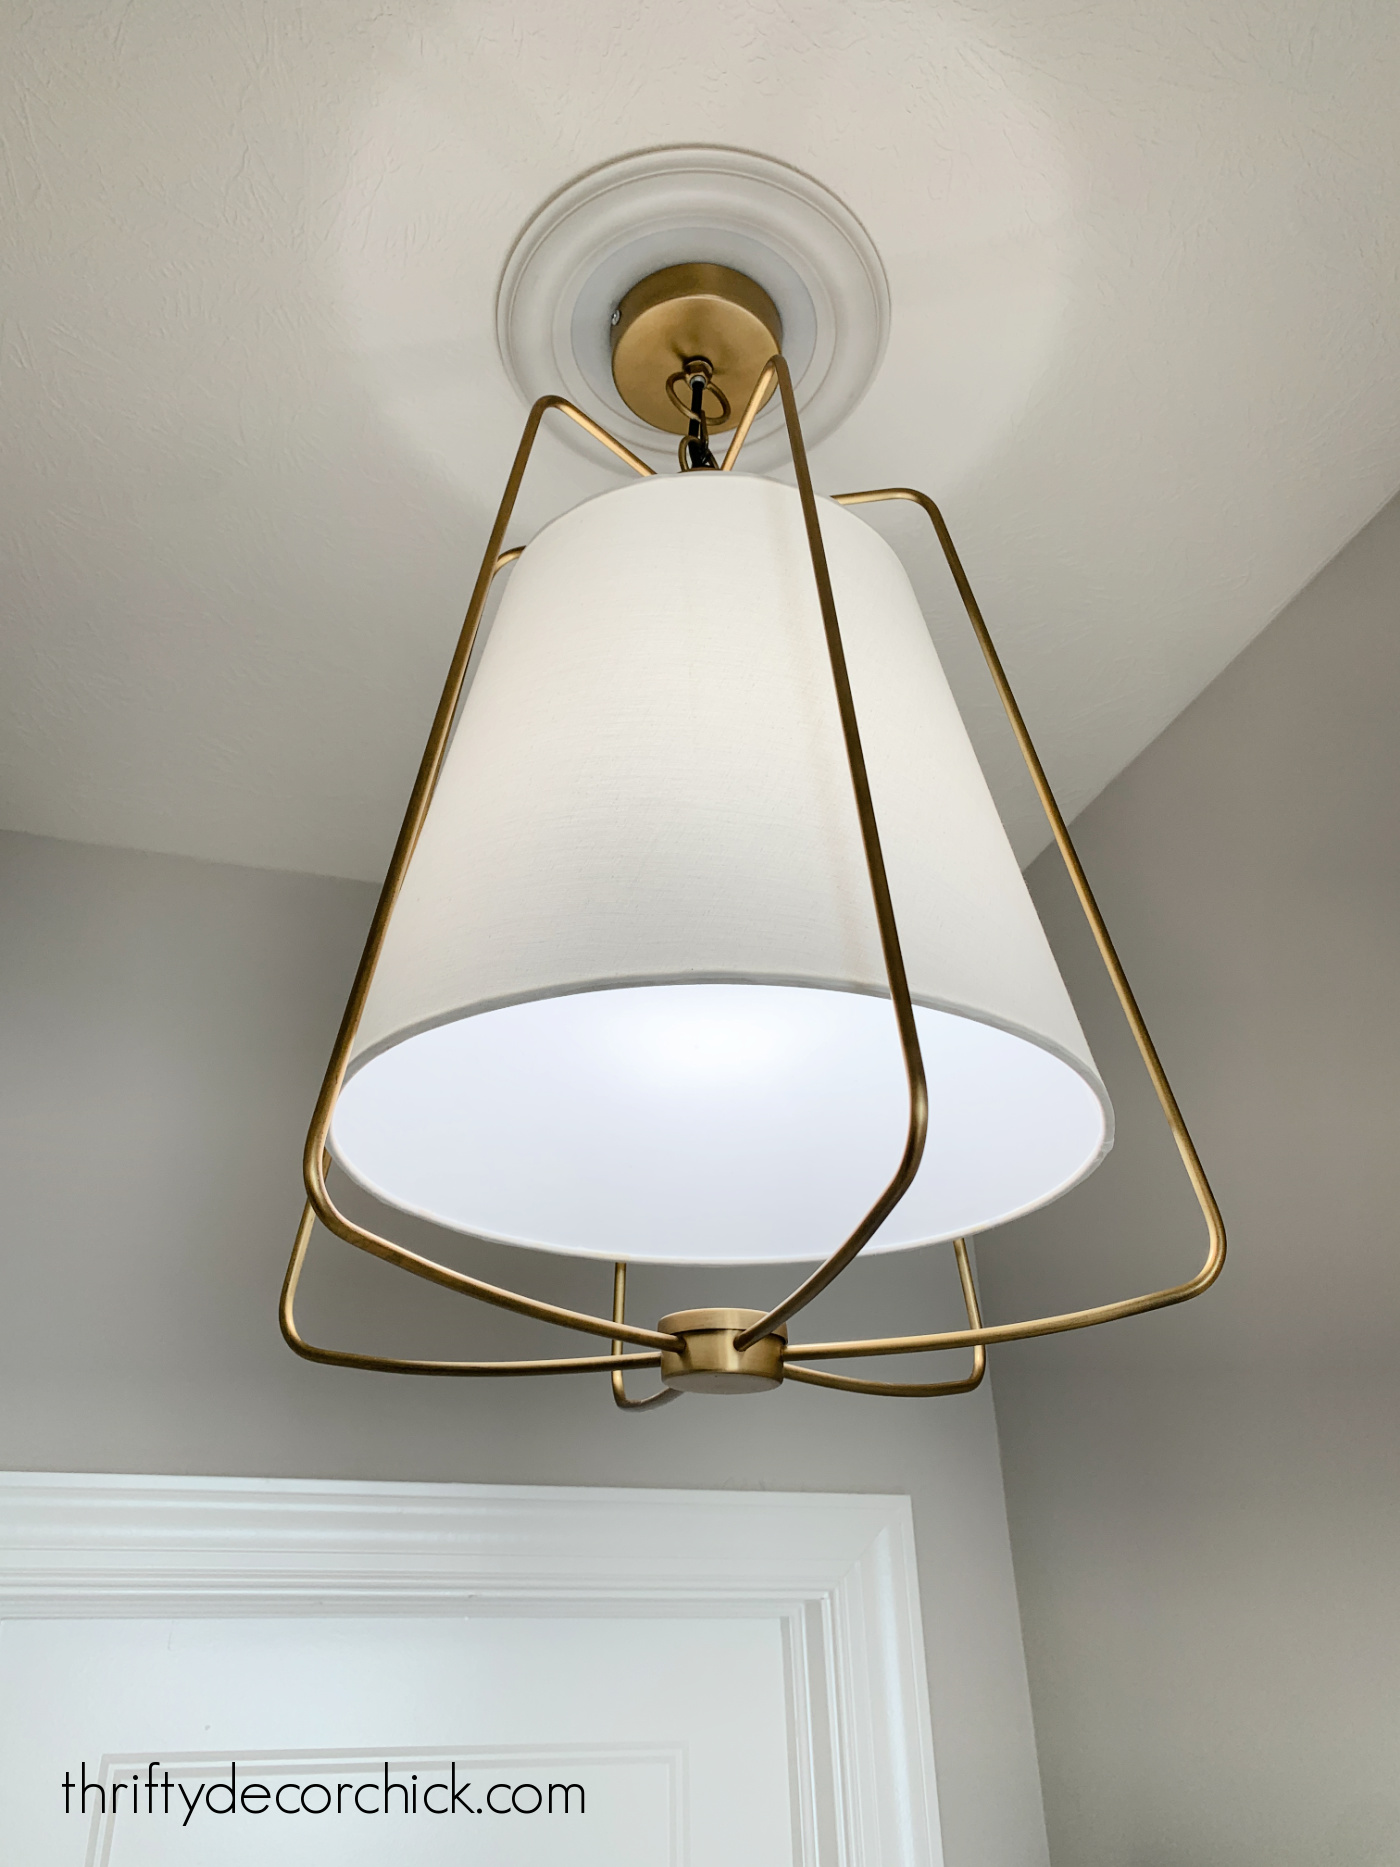
I plan to go pretty dramatic in this space and this gorgeous light is my inspiration.
NOW I think it was worth all the work. During the cussing, not so much.
Just adding a pretty light fixture adds so much to this small space!:

So here's the thing -- this project doesn't need to be as hard as it was for me. It really should only be an hour from start to finish, tops.
I did some research and it turns out THIS can light converter is MUCH easier to install and has better instructions as well. It's also half the price of the one I got...I ordered two more for less than what I paid for the one I used.
I plan to change out mine with that mounting bracket/converter kit instead. Mine sucked. :)
If you purchase that option, this YouTube video will walk you through the installation.
No matter what kit you use, a flat ceiling medallion is a must.
If you are impatient and can only find the version I used at a local store, check out this helpful YouTube video to see how to install the kit I used. But don't use that kit. ?
That's my tale of the lighting project I thought was going to be easy...but wasn't. Have you tried converting your recessed can lights with one of this kits? How did it work for you?
Do you think I'm crazy for not giving up three hours in, or do you admire my perseverance?
Never miss a post by signing up to get posts via email.
Via https://www.thriftydecorchick.com/2021/09/change-recessed-light-to-chandelier.html How to create tons of storage for bulky items in the closet! These cubby units hold a TON and look great.
I've been planning my closet makeover for some time now...and my plans for the space have changed more times than I can count!
They have continued to change in real time as I've been working on it, but that's part of the fun for me.
Planning the organization, in your main closet especially, is something you really don't want to mess up. It's a lot more detailed and expensive than a smaller closet.
Our recent coat closet makeover inspired me to get moving on this one. I was just so tired of the constant clutter and mess in my "hers" closet.
We didn't pay extra for melamine or custom shelving when we built our house four years ago -- as much as I HATE wire shelving, I knew it would take me awhile to figure out the layout I wanted.
Paying for anything more felt like a waste of money at the time. I'm REALLY glad we waited...because now it's coming together just as I had hoped. I'll have a spot for EVERYTHING.
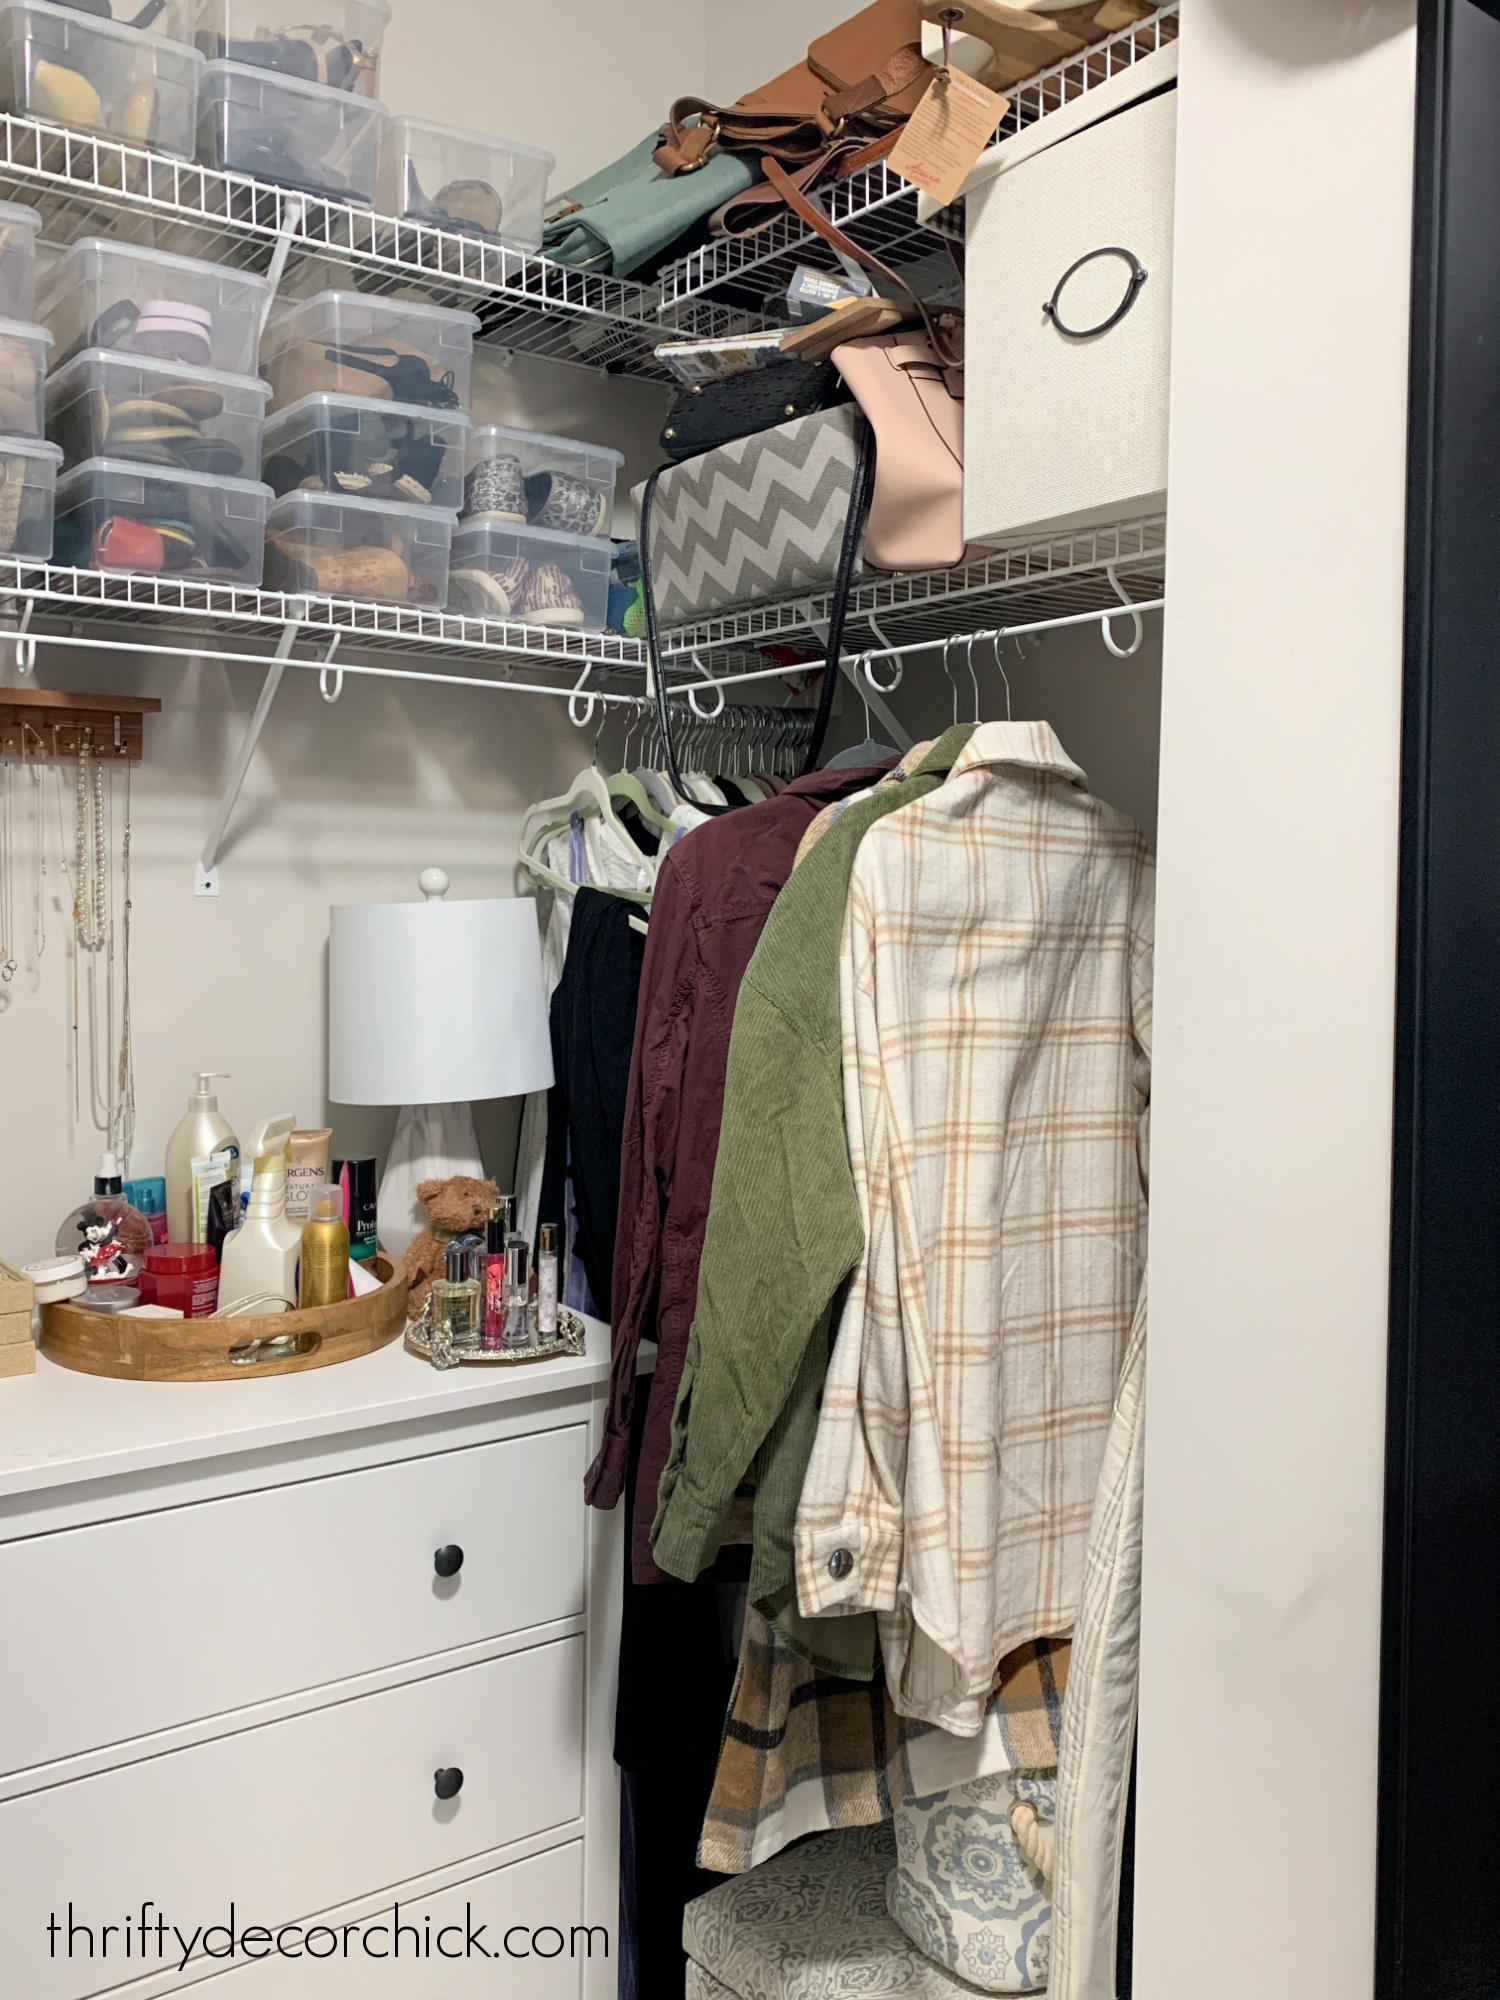
I started off my closet redo with this corner. It was the biggest thorn in my side, just because it was so cluttered:
This post may contain affiliate links for your convenience.
See my policies and disclosure page for more information.
As you can see, I had a lot of tall hanging storage available. Problem is, I don't need that much for dresses and long items.
Instead I used it for the much needed dresser instead -- that part was very functional for me.
I had an idea to find a home base for most of my folded clothes and it's working beautifully!
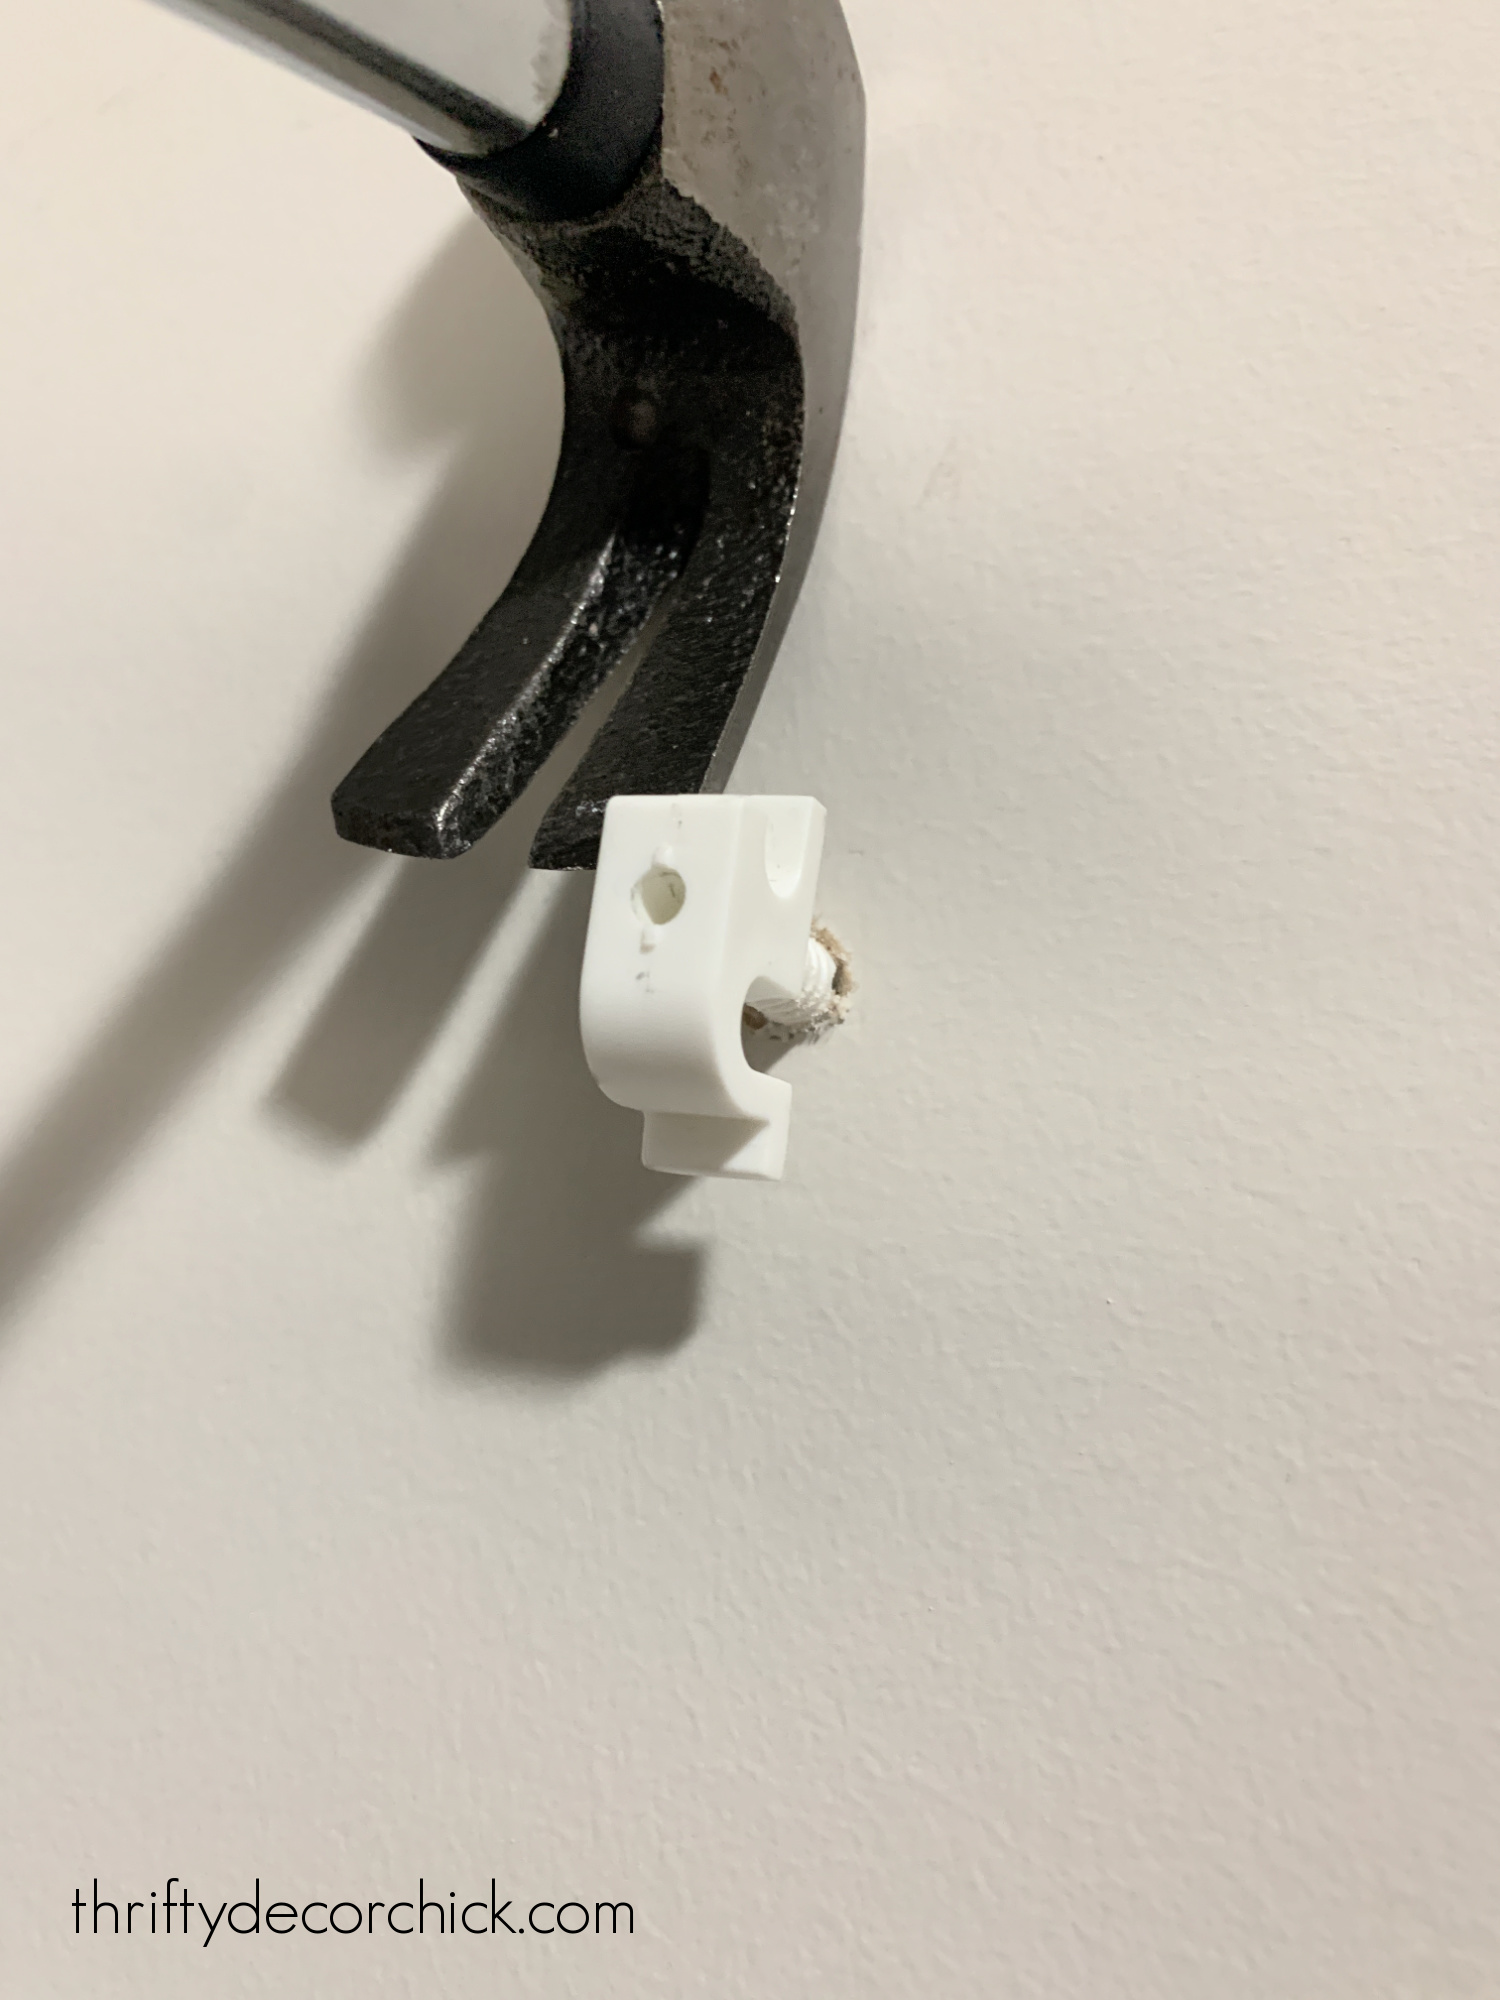
First up, I needed to remove all of the wire shelving in that corner. FUN TIMES. You'll need a flat edged tool like a flat screwdriver, as well as something to pry the hardware off the wall, like a hammer or crow bar:

You'll need to take those metal pins out first -- don't try to attempt removing the shelving with that still intact! You'll end up with giant holes in your walls.
Once you get them pulled out a bit they come out very easily. You can pull them out by hand sometimes as well.
Once the pin is out, you can remove the plastic brackets that hold the wire shelving up:
Repeat this 485 times.
You'll be left with Swiss cheese walls full of holes:
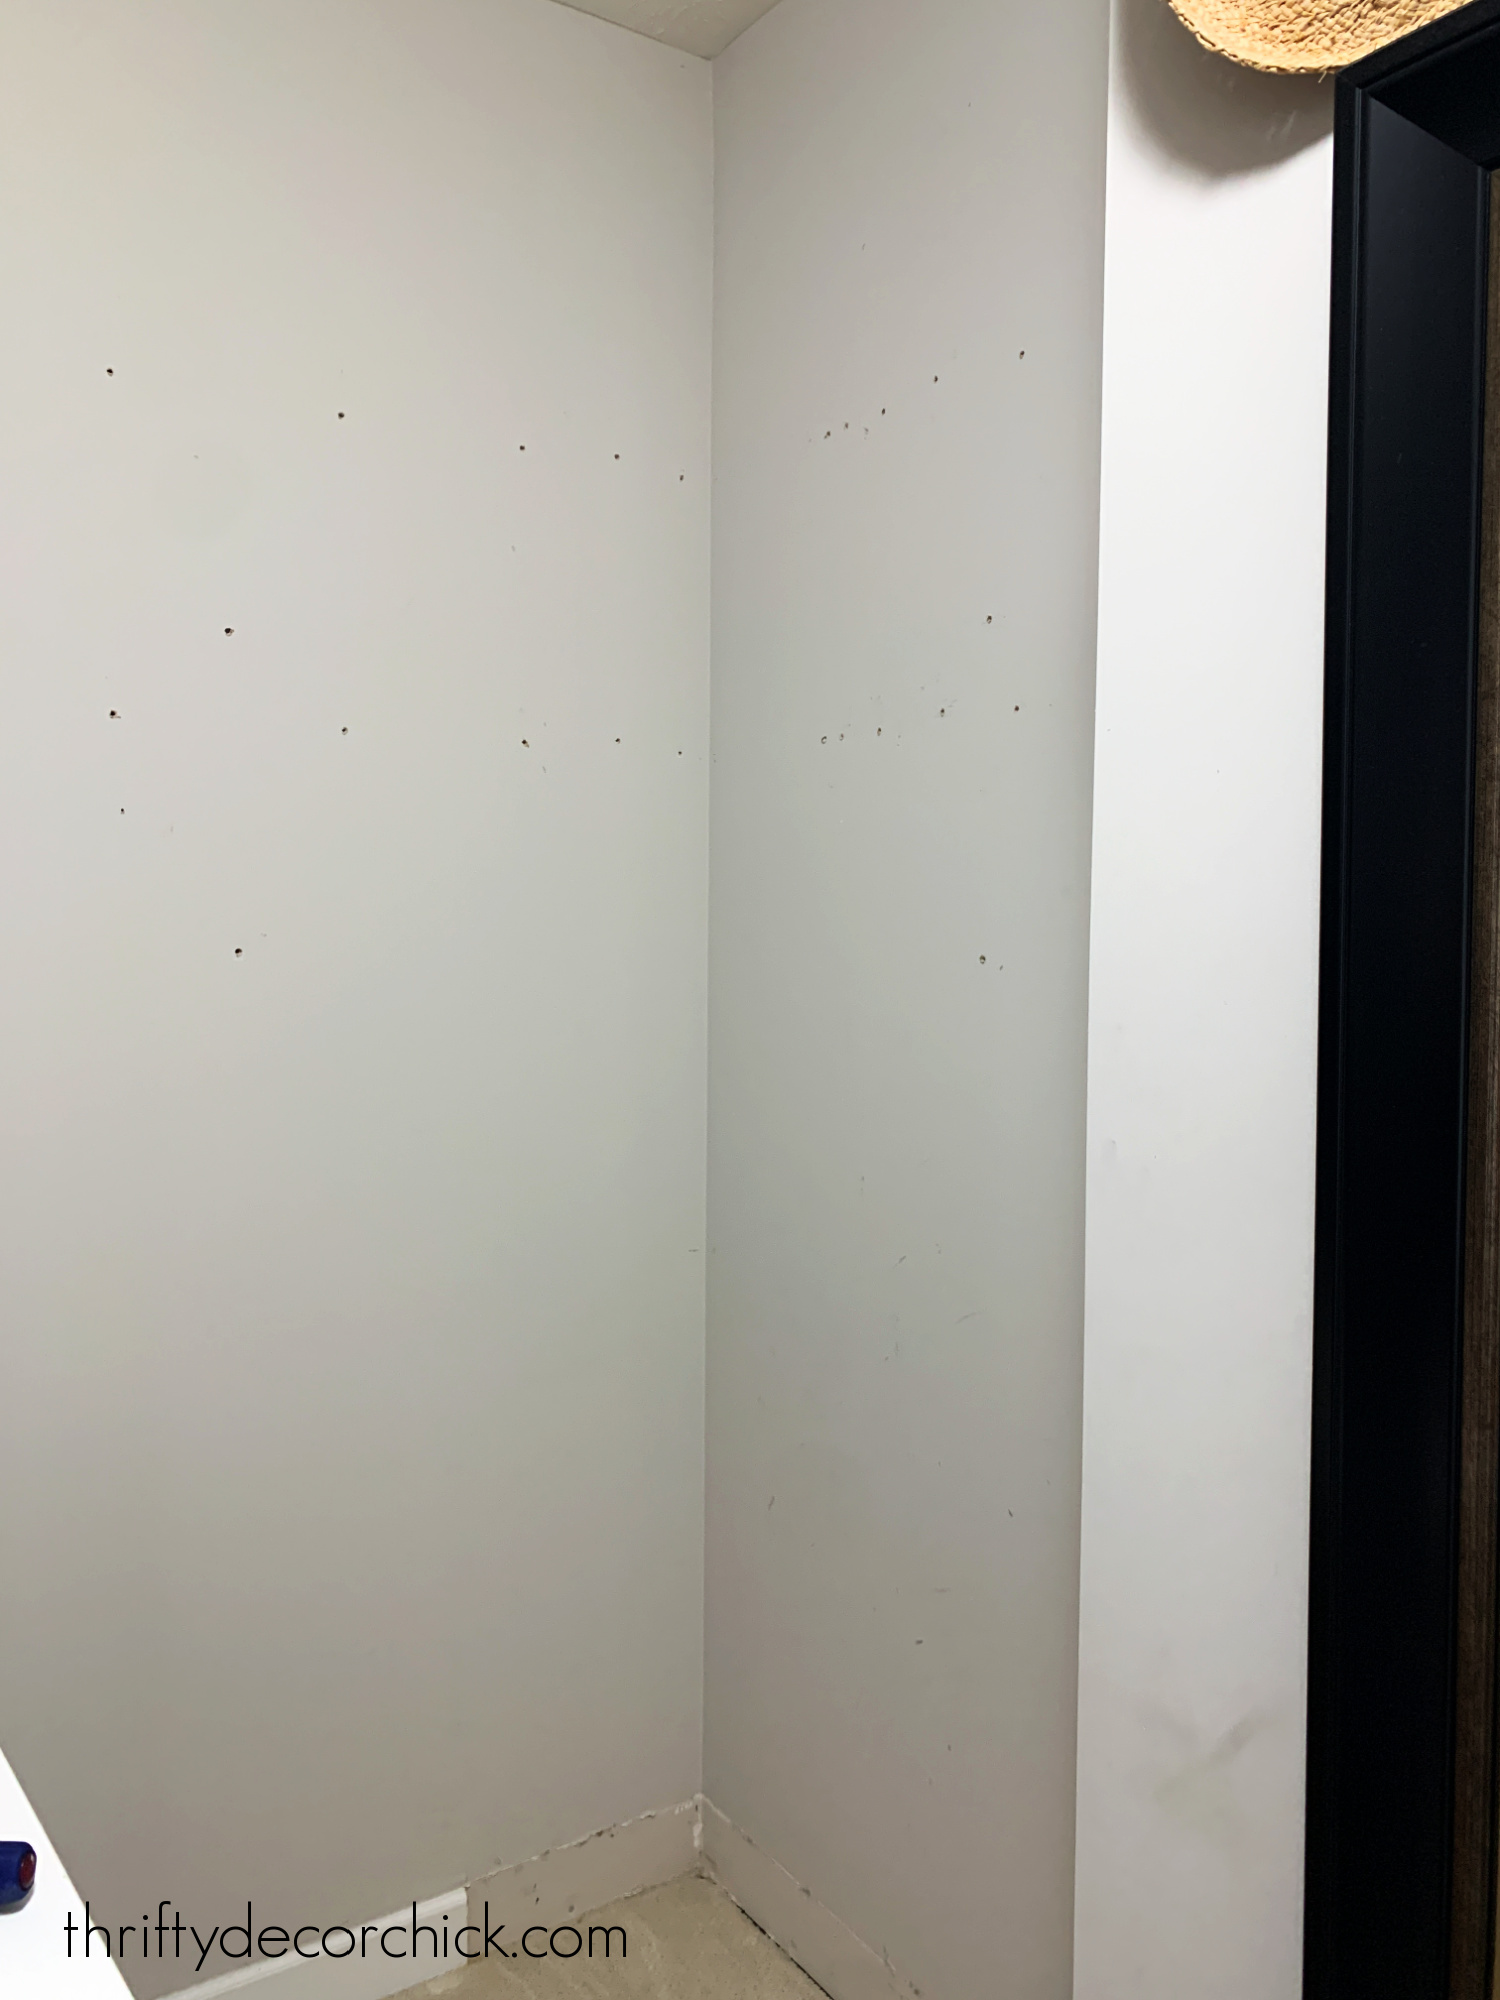
These holes are larger than your average nail, so you'll want to use my tutorial for filling large holes in the wall to get those covered up.
By the way, I don't fill every hole. If it will be covered permanently then I don't fill them. (Unless it's abnormally large.)
Next up, I had to ensure my new closet units would fit right up against the walls. This is key to getting a more custom, built in look...no matter what room you're working in.
I used my reciprocating saw to cut into the baseboards where the storage units would end:
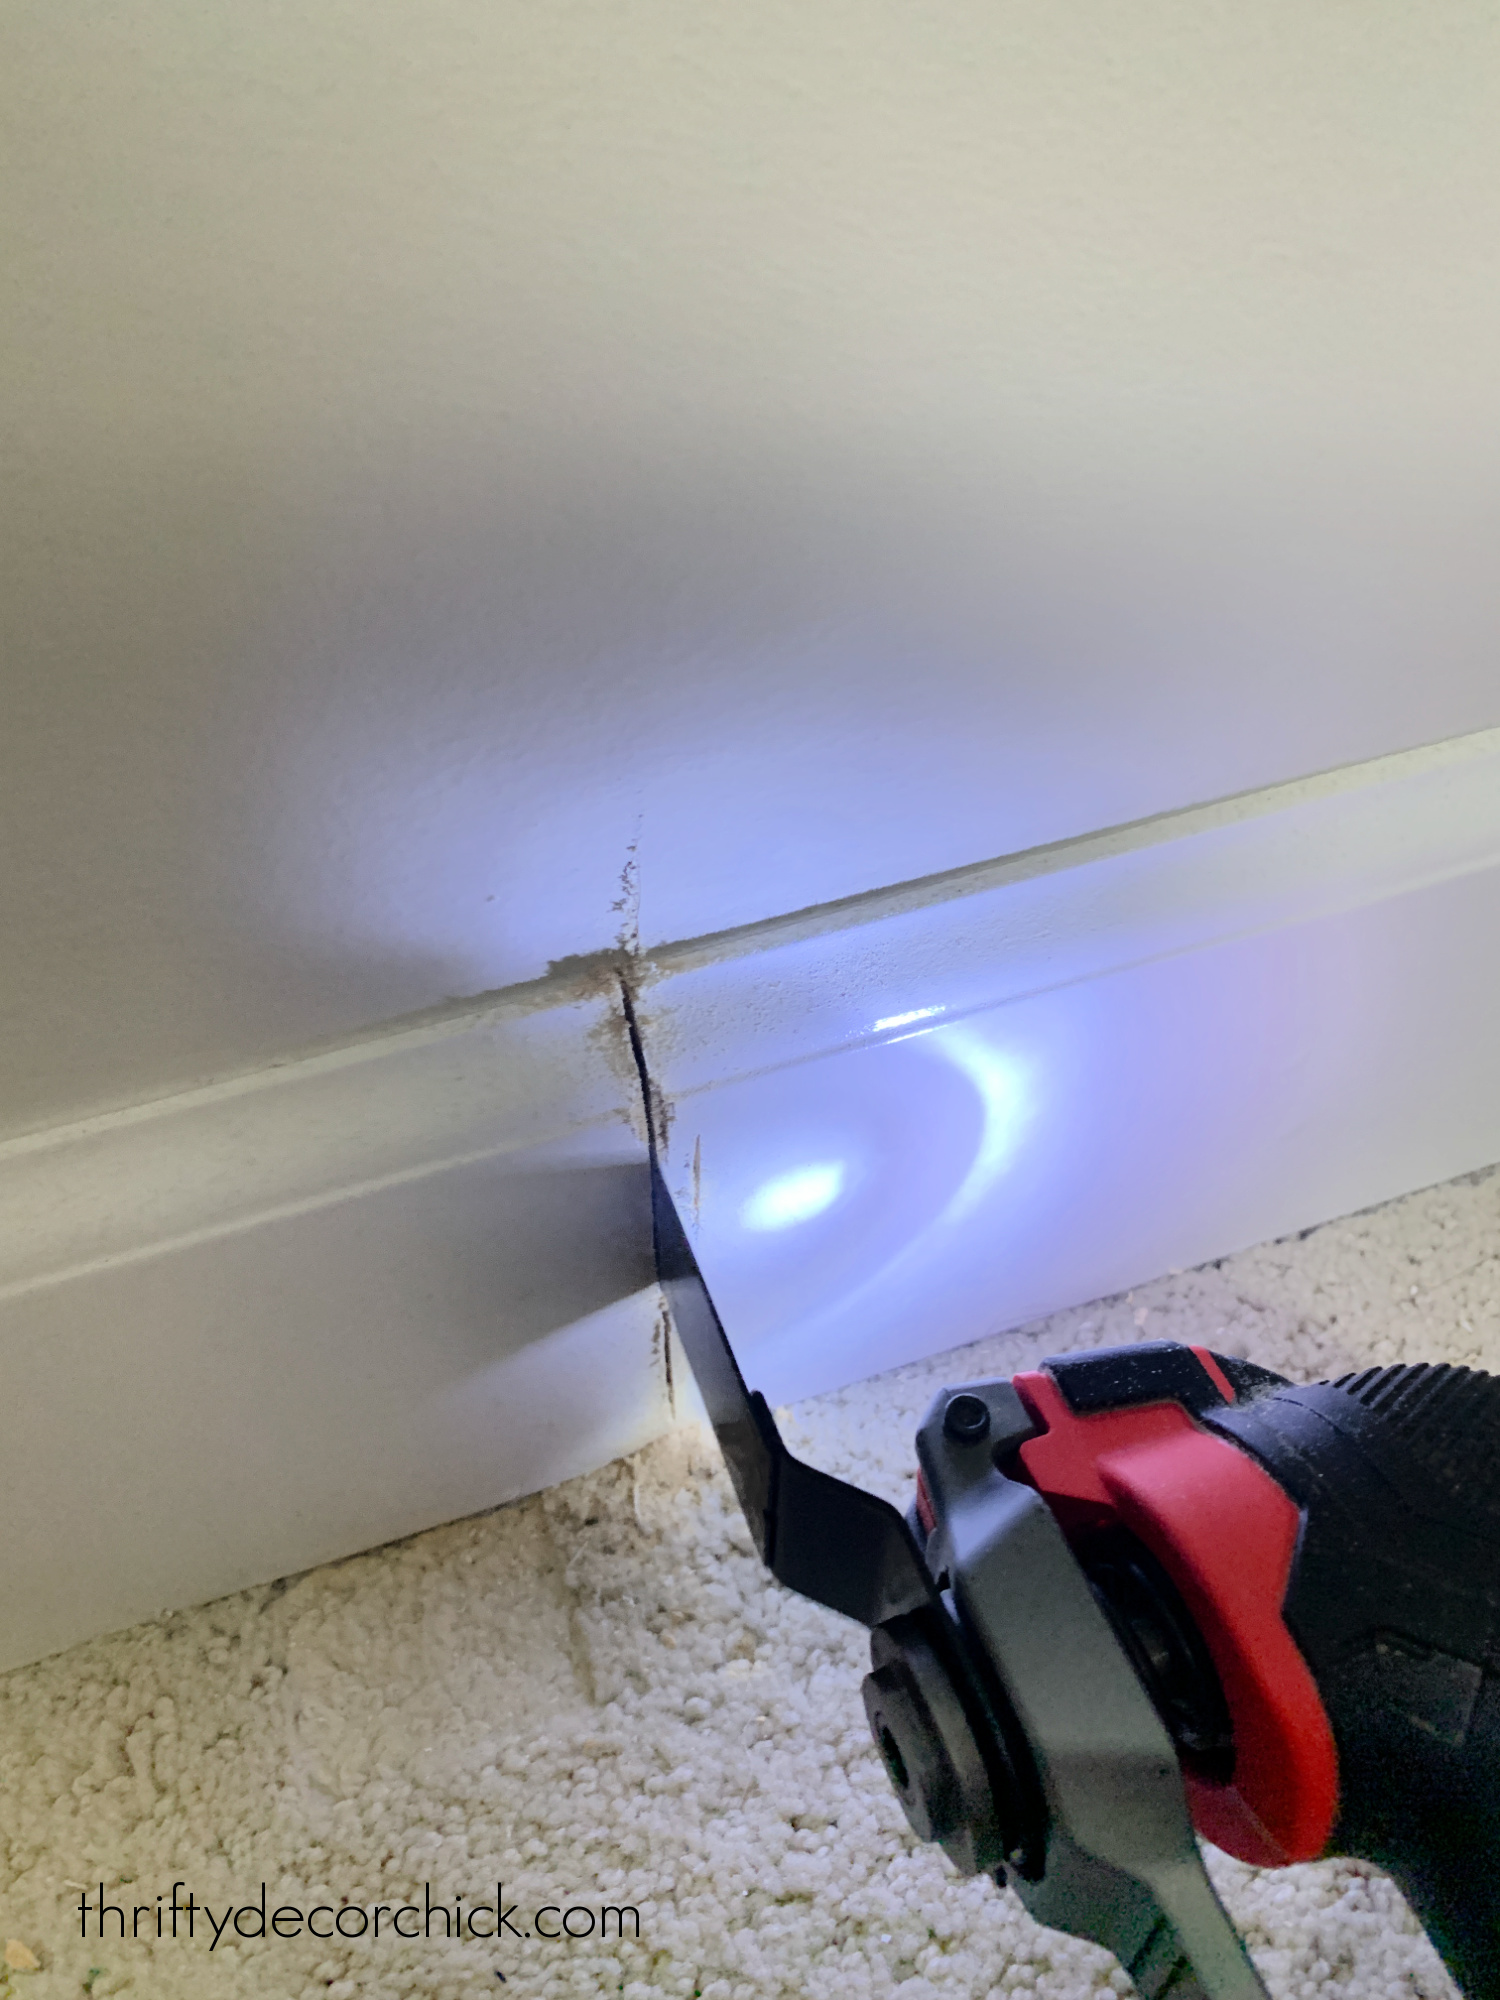
And then used this method to easily remove the baseboards in that nook.
I knew I wanted some bling in here...that back wall isn't huge so I could do something fun. Enter my easy go-to for accent walls...wallpaper of course!
I found this pink metallic peel and stick wallpaper at Target and thought it would add the perfect amount of drama:
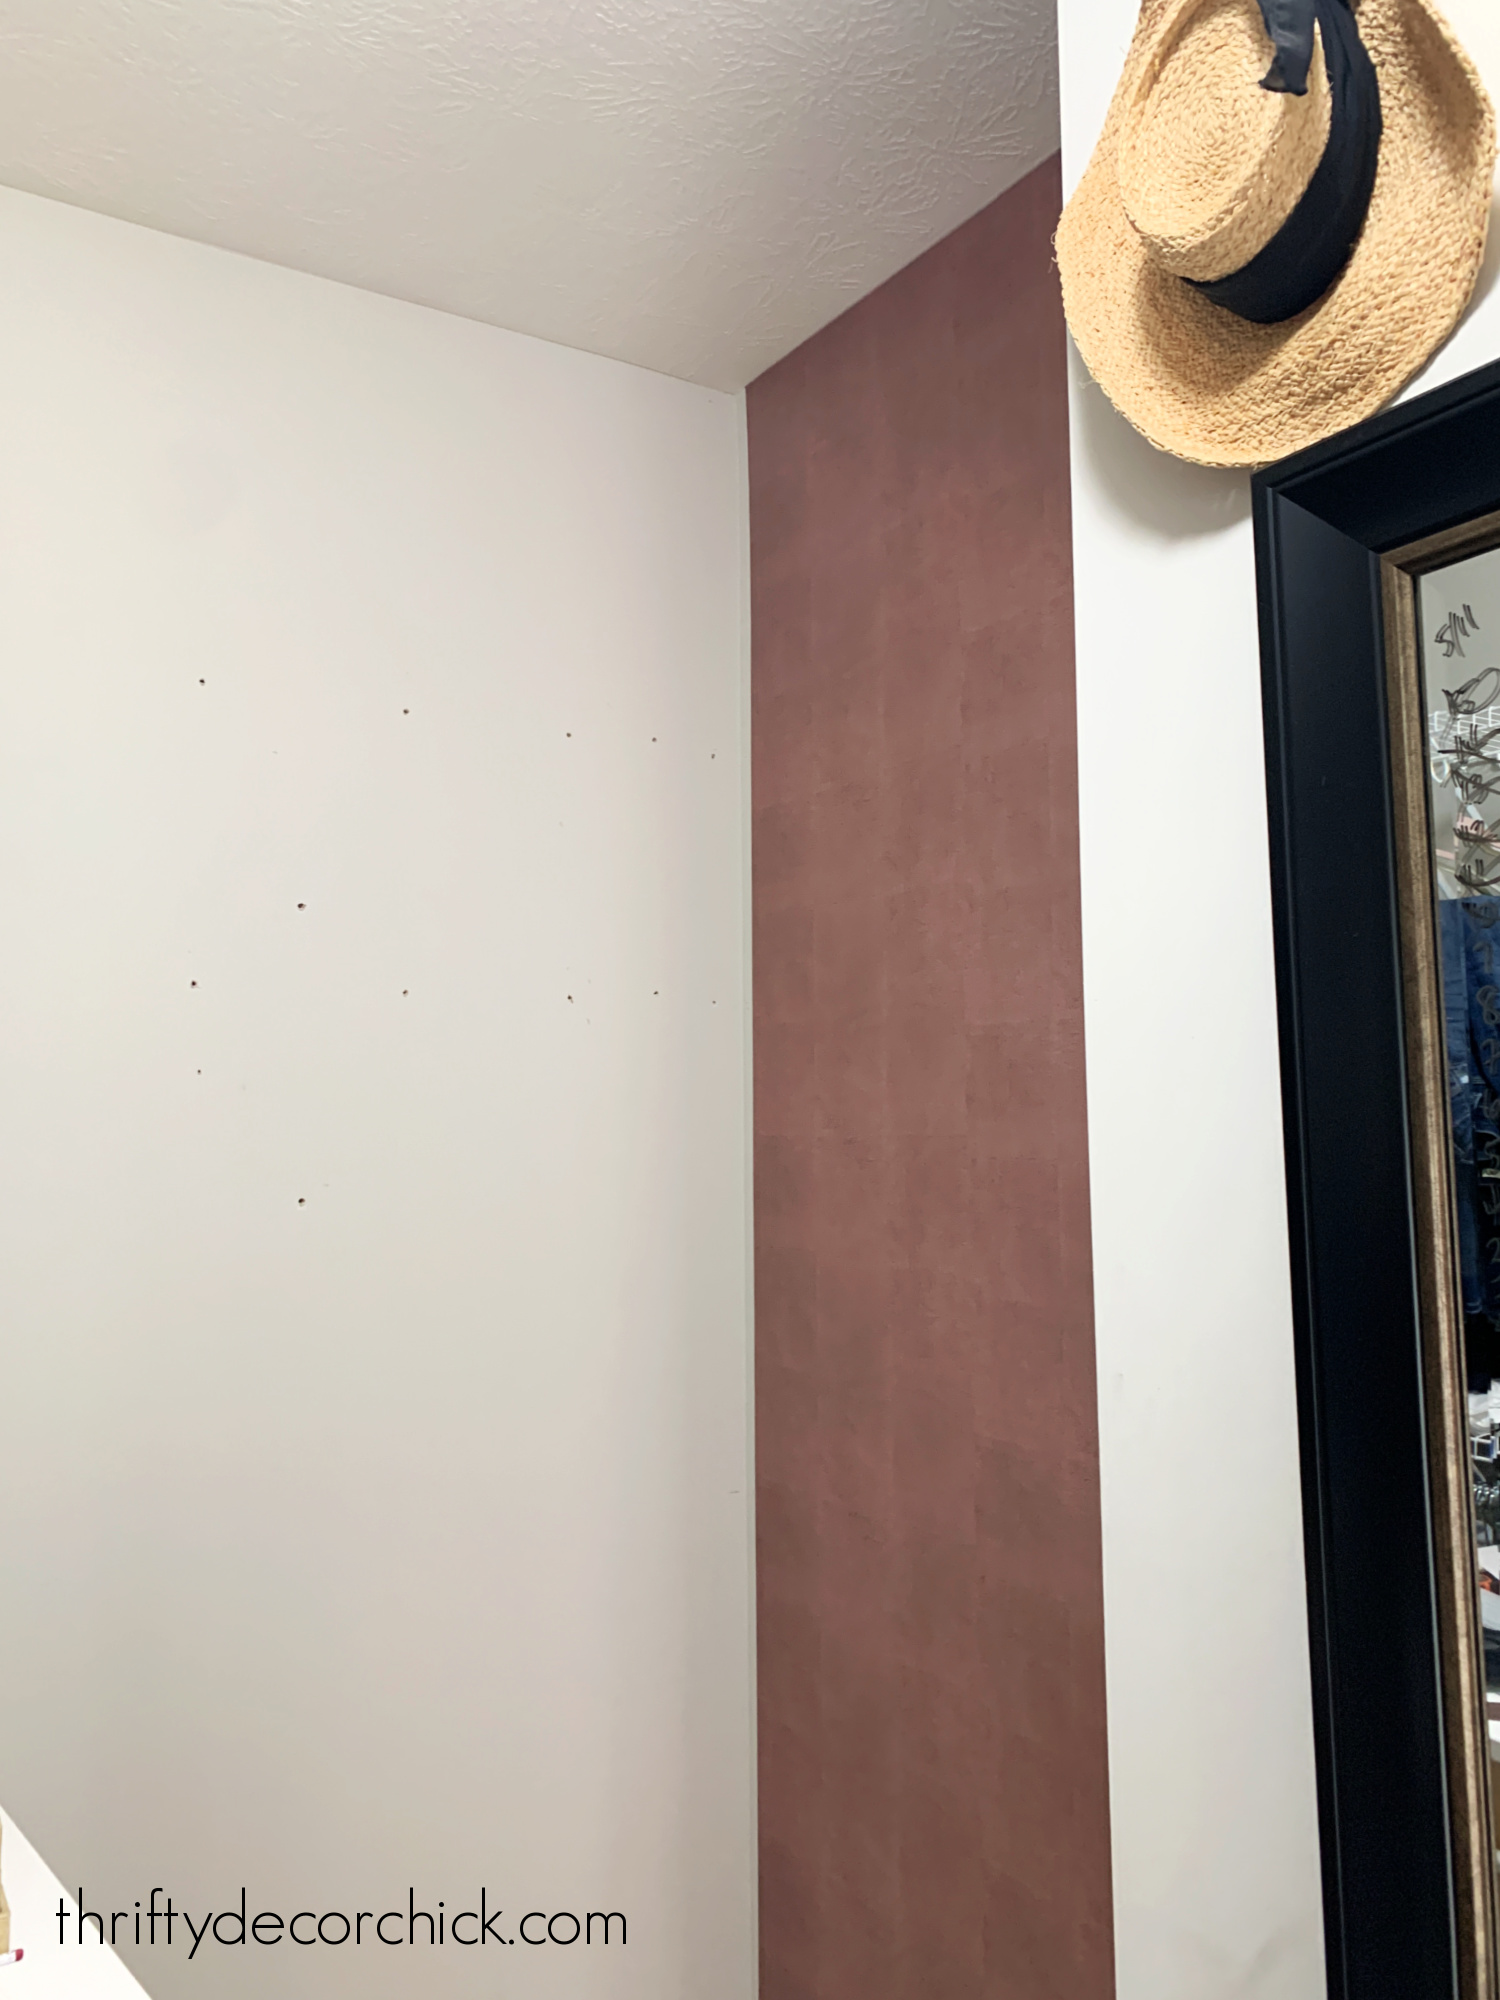
You can see more about installing peel and stick wallpaper here! I love it. It will go perfectly with the new light I picked out for in here! I'm so excited to get that up.
When you purchase wallpaper, make sure you grab more than enough of what you'll need, and look to confirm that they are the same lot number:
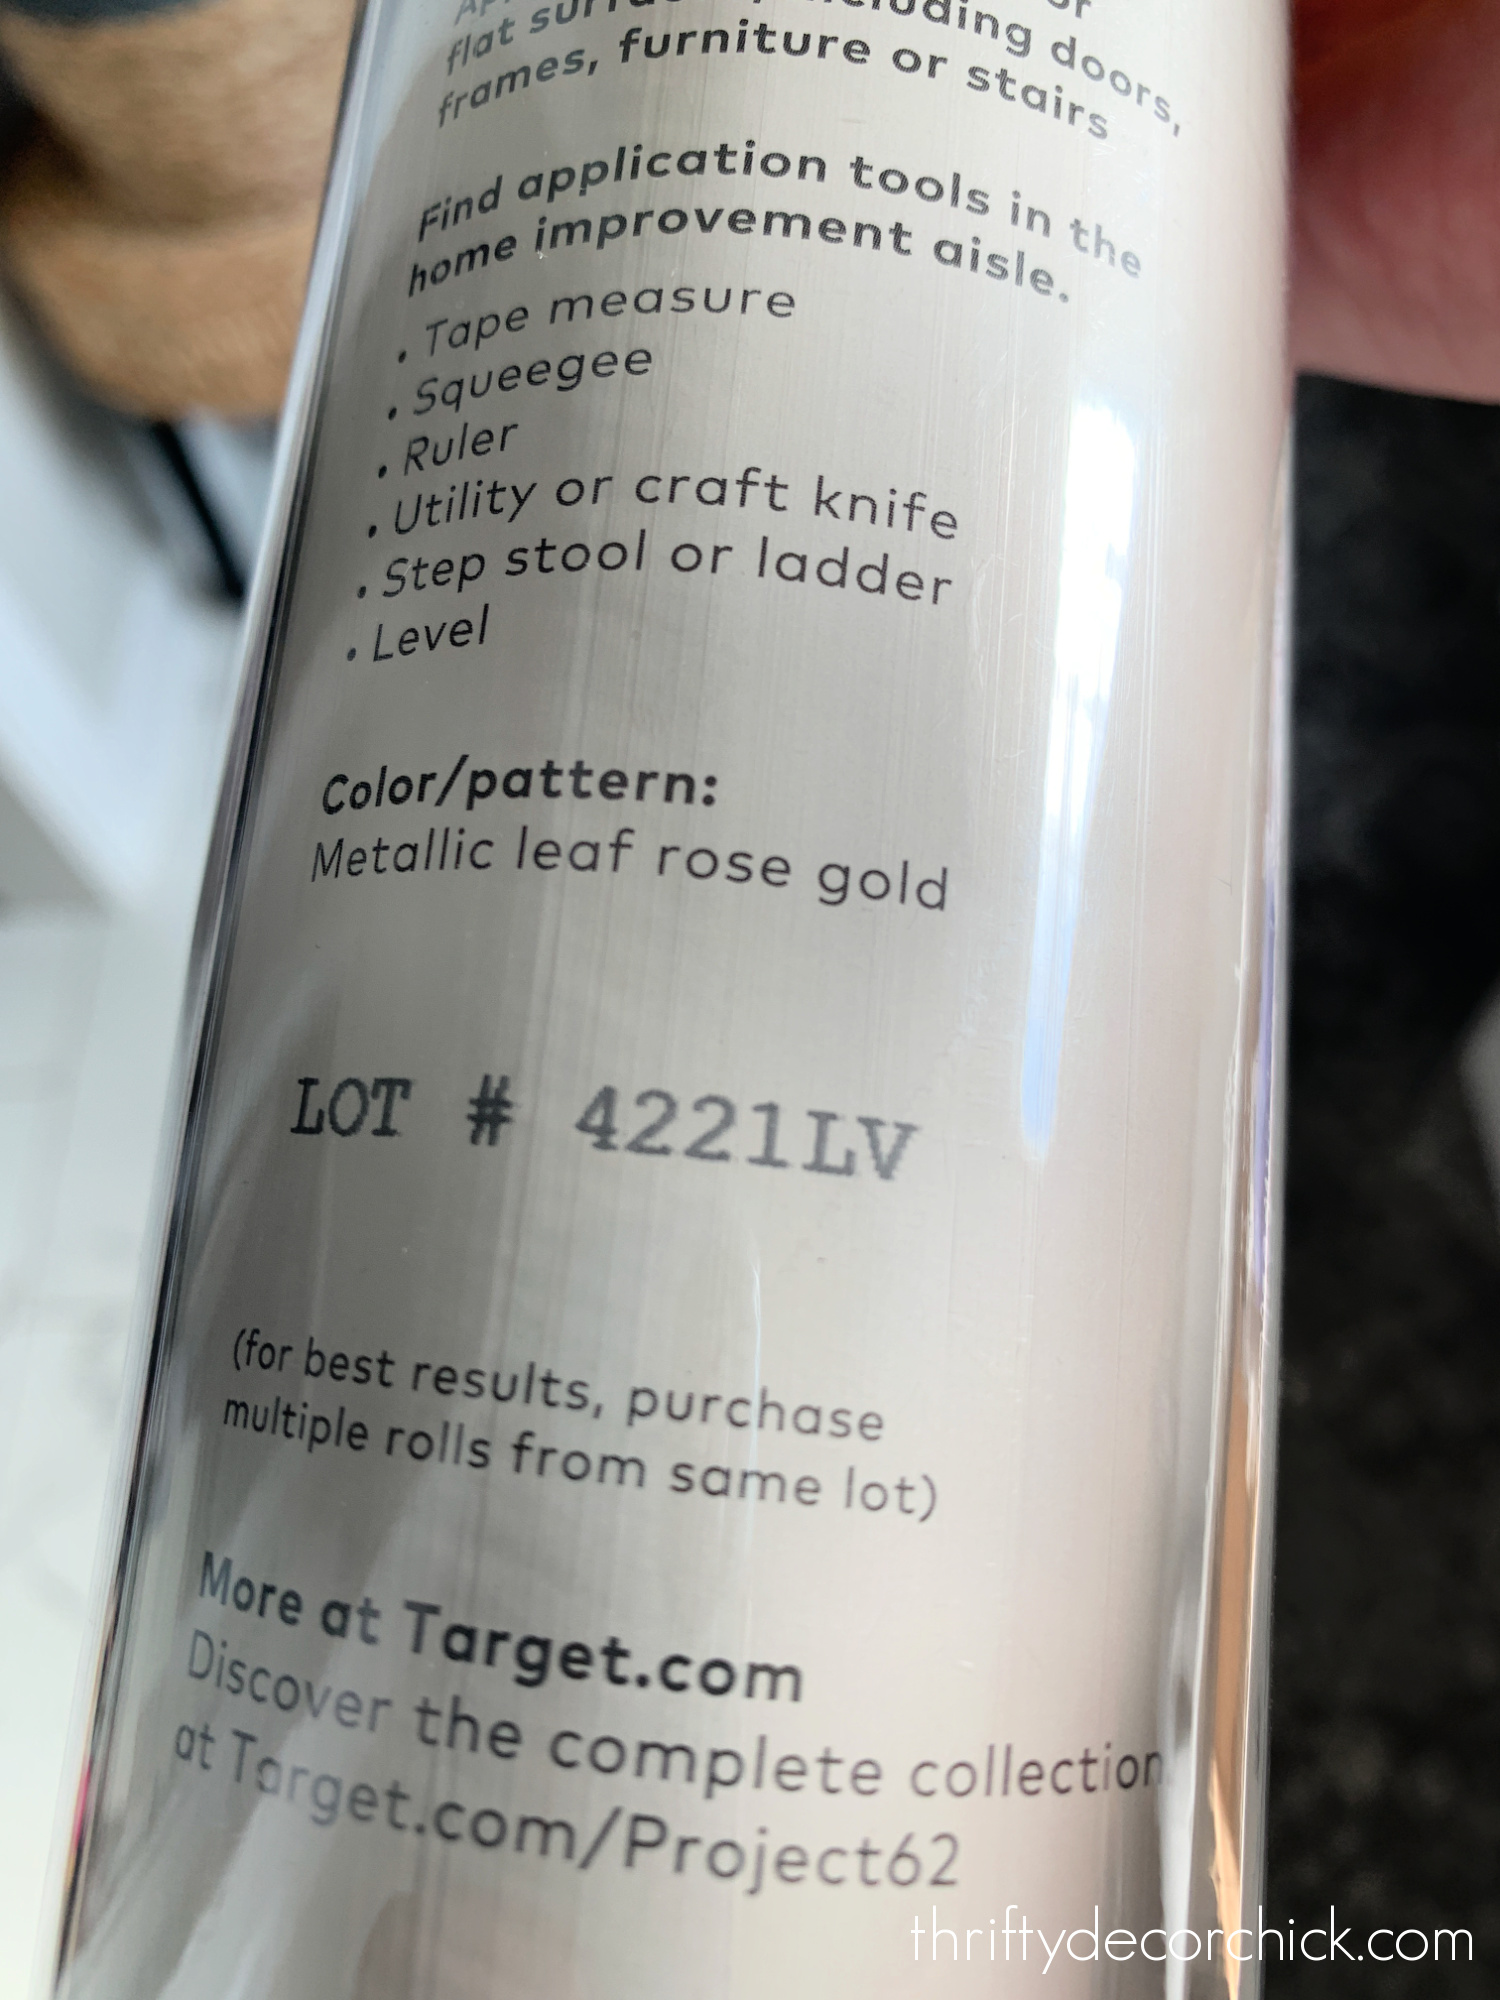
Like tile and flooring, different lot numbers can have slight differences that you may notice right up against each other.
Then it was time for ALL the storage!! I was inspired by a wall of cubby units that my friend Carli used in her son's closet makeover. I shared her project with a bunch of other gorgeous closets here.
I was so excited to get these put together...

I picked the nine unit Kallax shelves from IKEA...but not just one, TWO of them to stack in the little corner nook of my closet.
I was so excited, I didn't even take a picture of the progress, but I hung two of these bins on the wall. I say hung, because you need to make sure and secure them to the walls with the brackets they provide. But really, they are just stacked on each other.
I grabbed some pretty rattan baskets from IKEA for the cubbies, but quickly realized they would be awful...at least with clothes. I love the look, but little bits of the wicker would get into and caught on the clothes.
Instead I opted for these simple navy bins from Target:
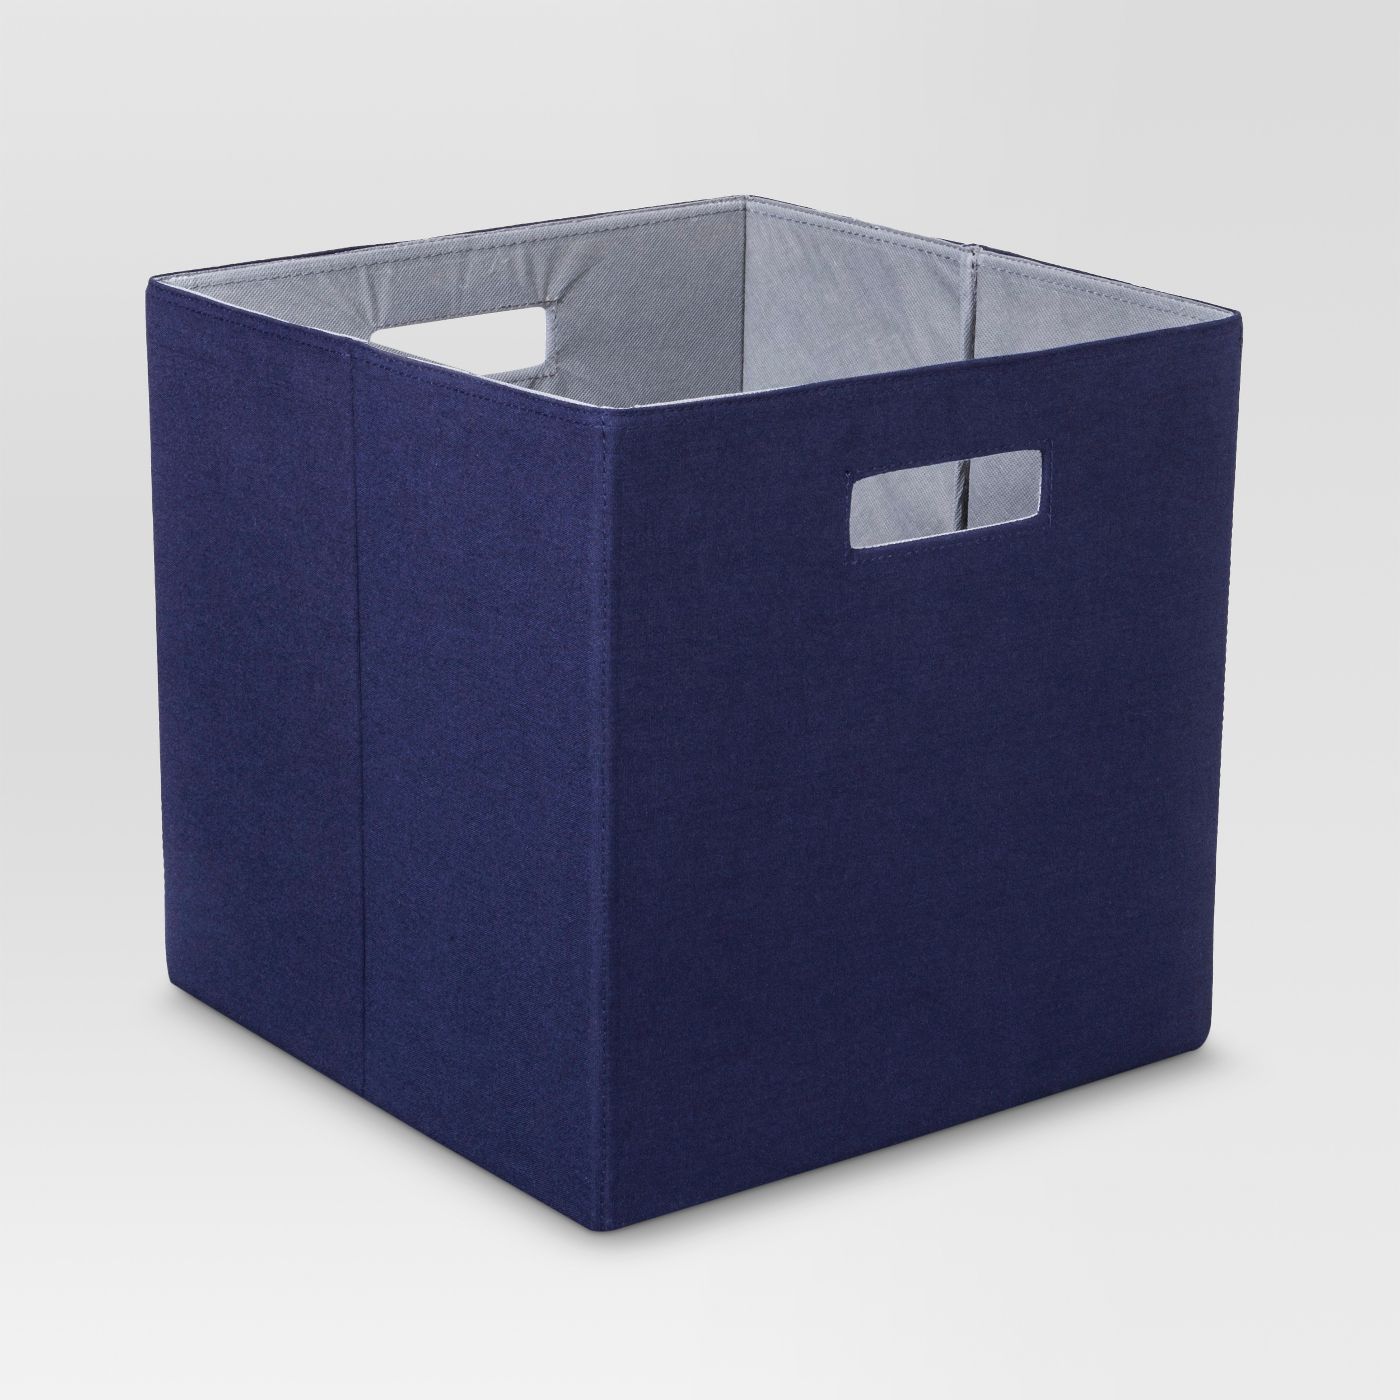
They slide so much easier and are much cleaner for the clothes.
I filled the 18 cubby units with all of my bulkier clothes that take up more space, like hoodies and sweaters:

Most I placed in the bins, but some I have folded and stacked on the shelves as well.
I also utilized all of this new storage space to organize less used items like my seasonal clothing -- things like themed Halloween, fall and Christmas clothes. Since I don't wear those often, they went to the top of the unit.
I also have some Disney shirts and sweaters I only wear on our trips, so those went into the top bins as well.
These clip on cubby bin labels are awesome and easily slide on to the canvas bin:
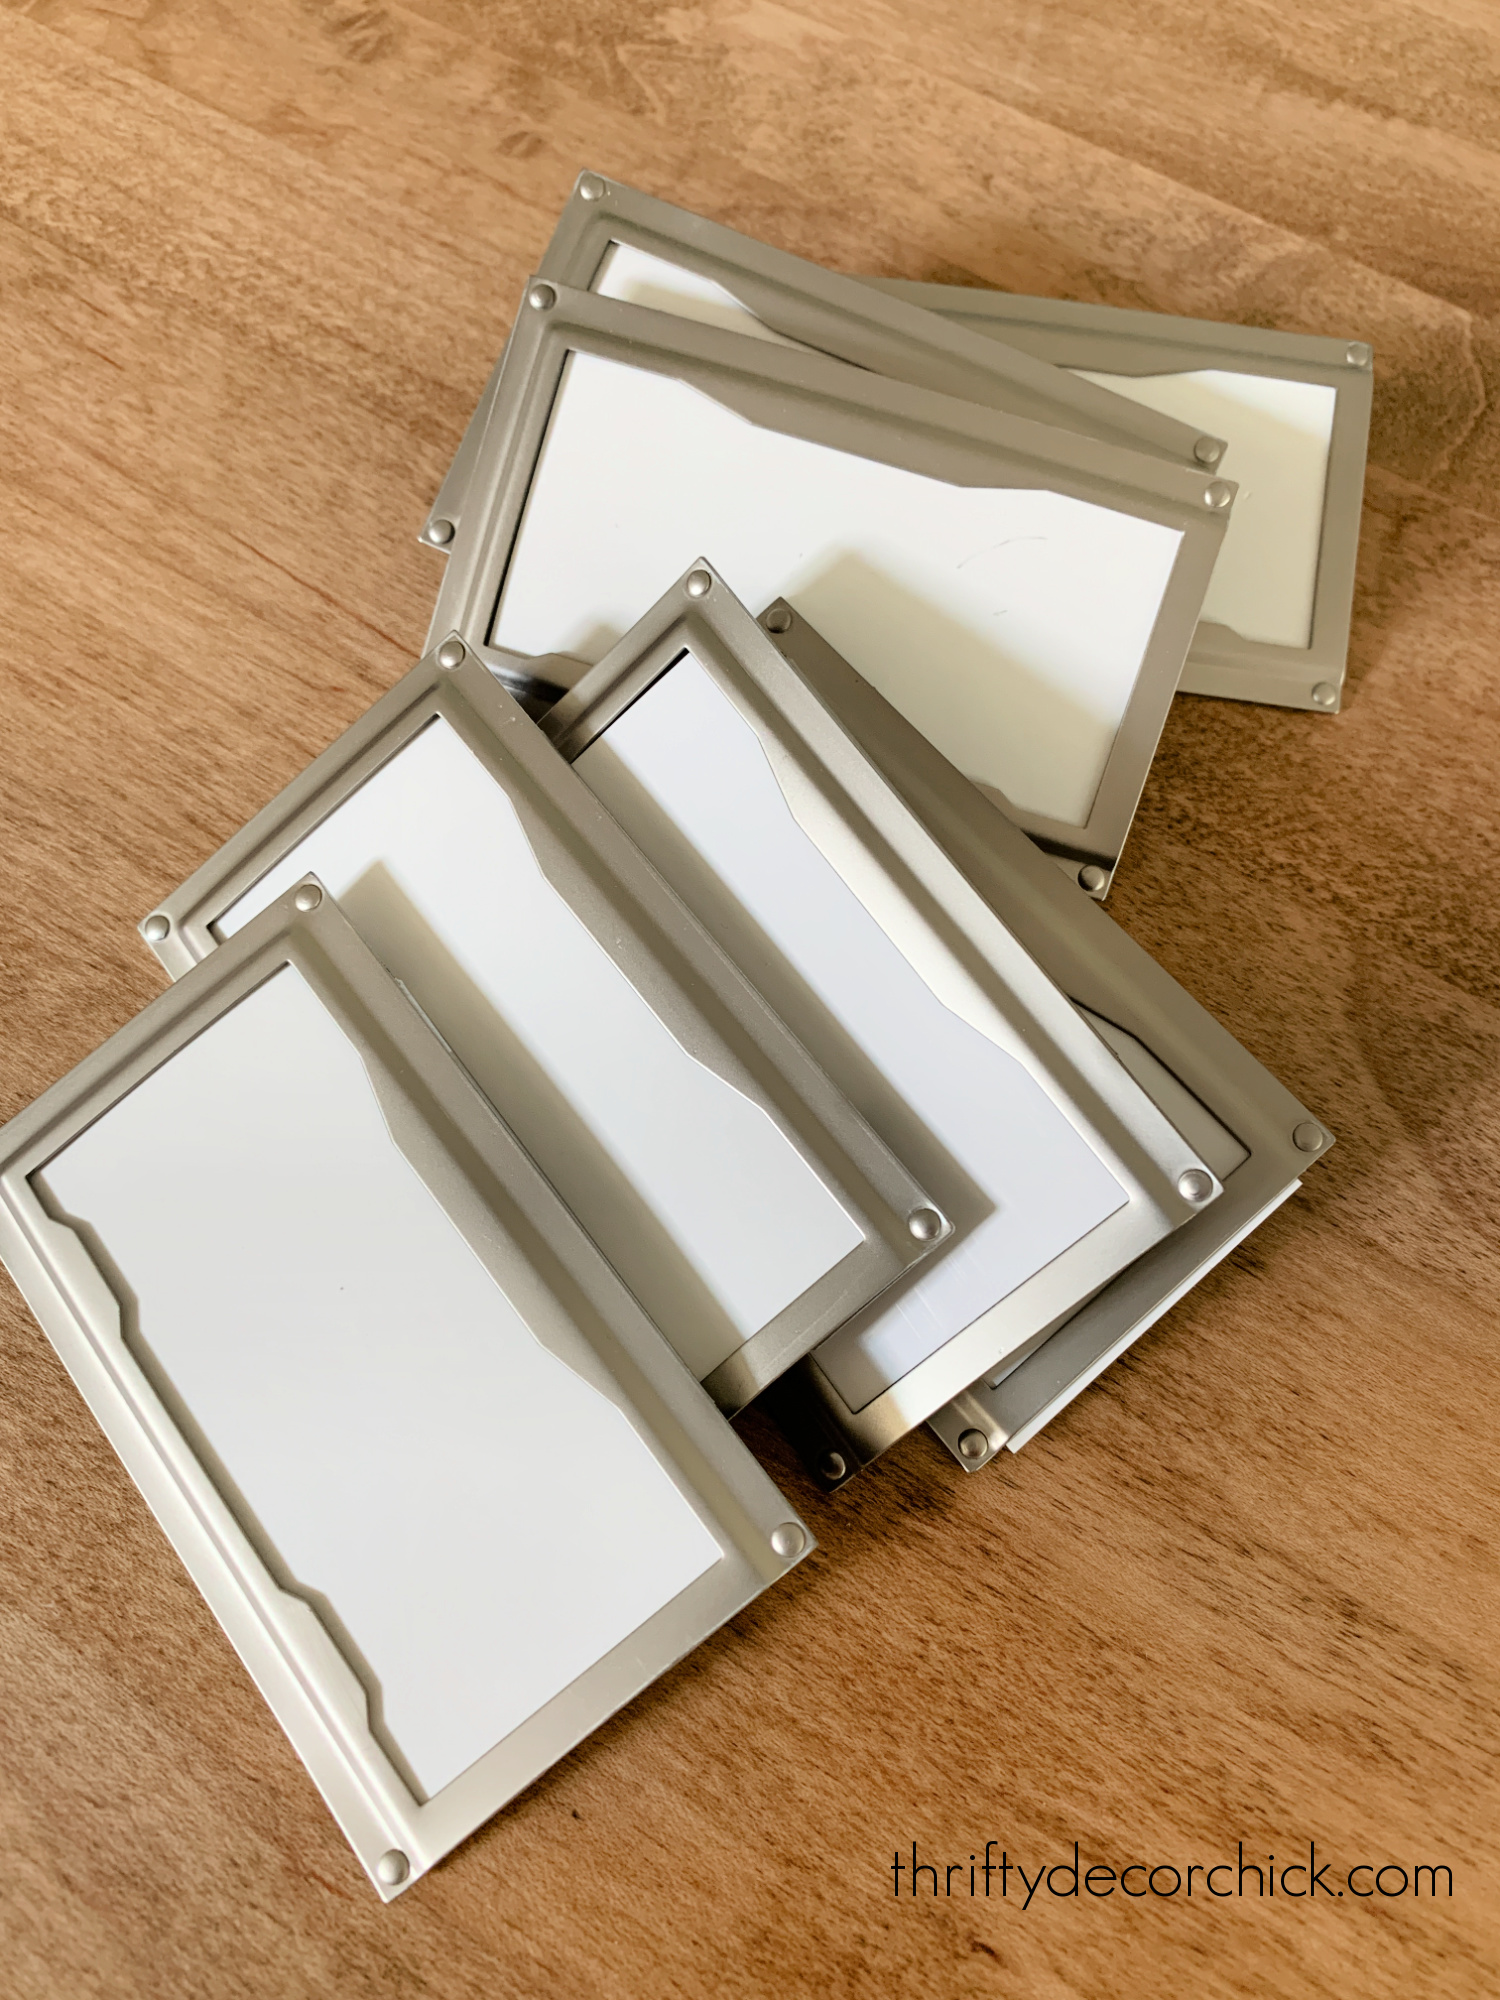
I haven't labeled them just yet -- I want to wait until I get the entire closet done.
I can't even tell you how nice it was to get all of this sorted!! No more clothes piled high on the shelf right when I walk in:

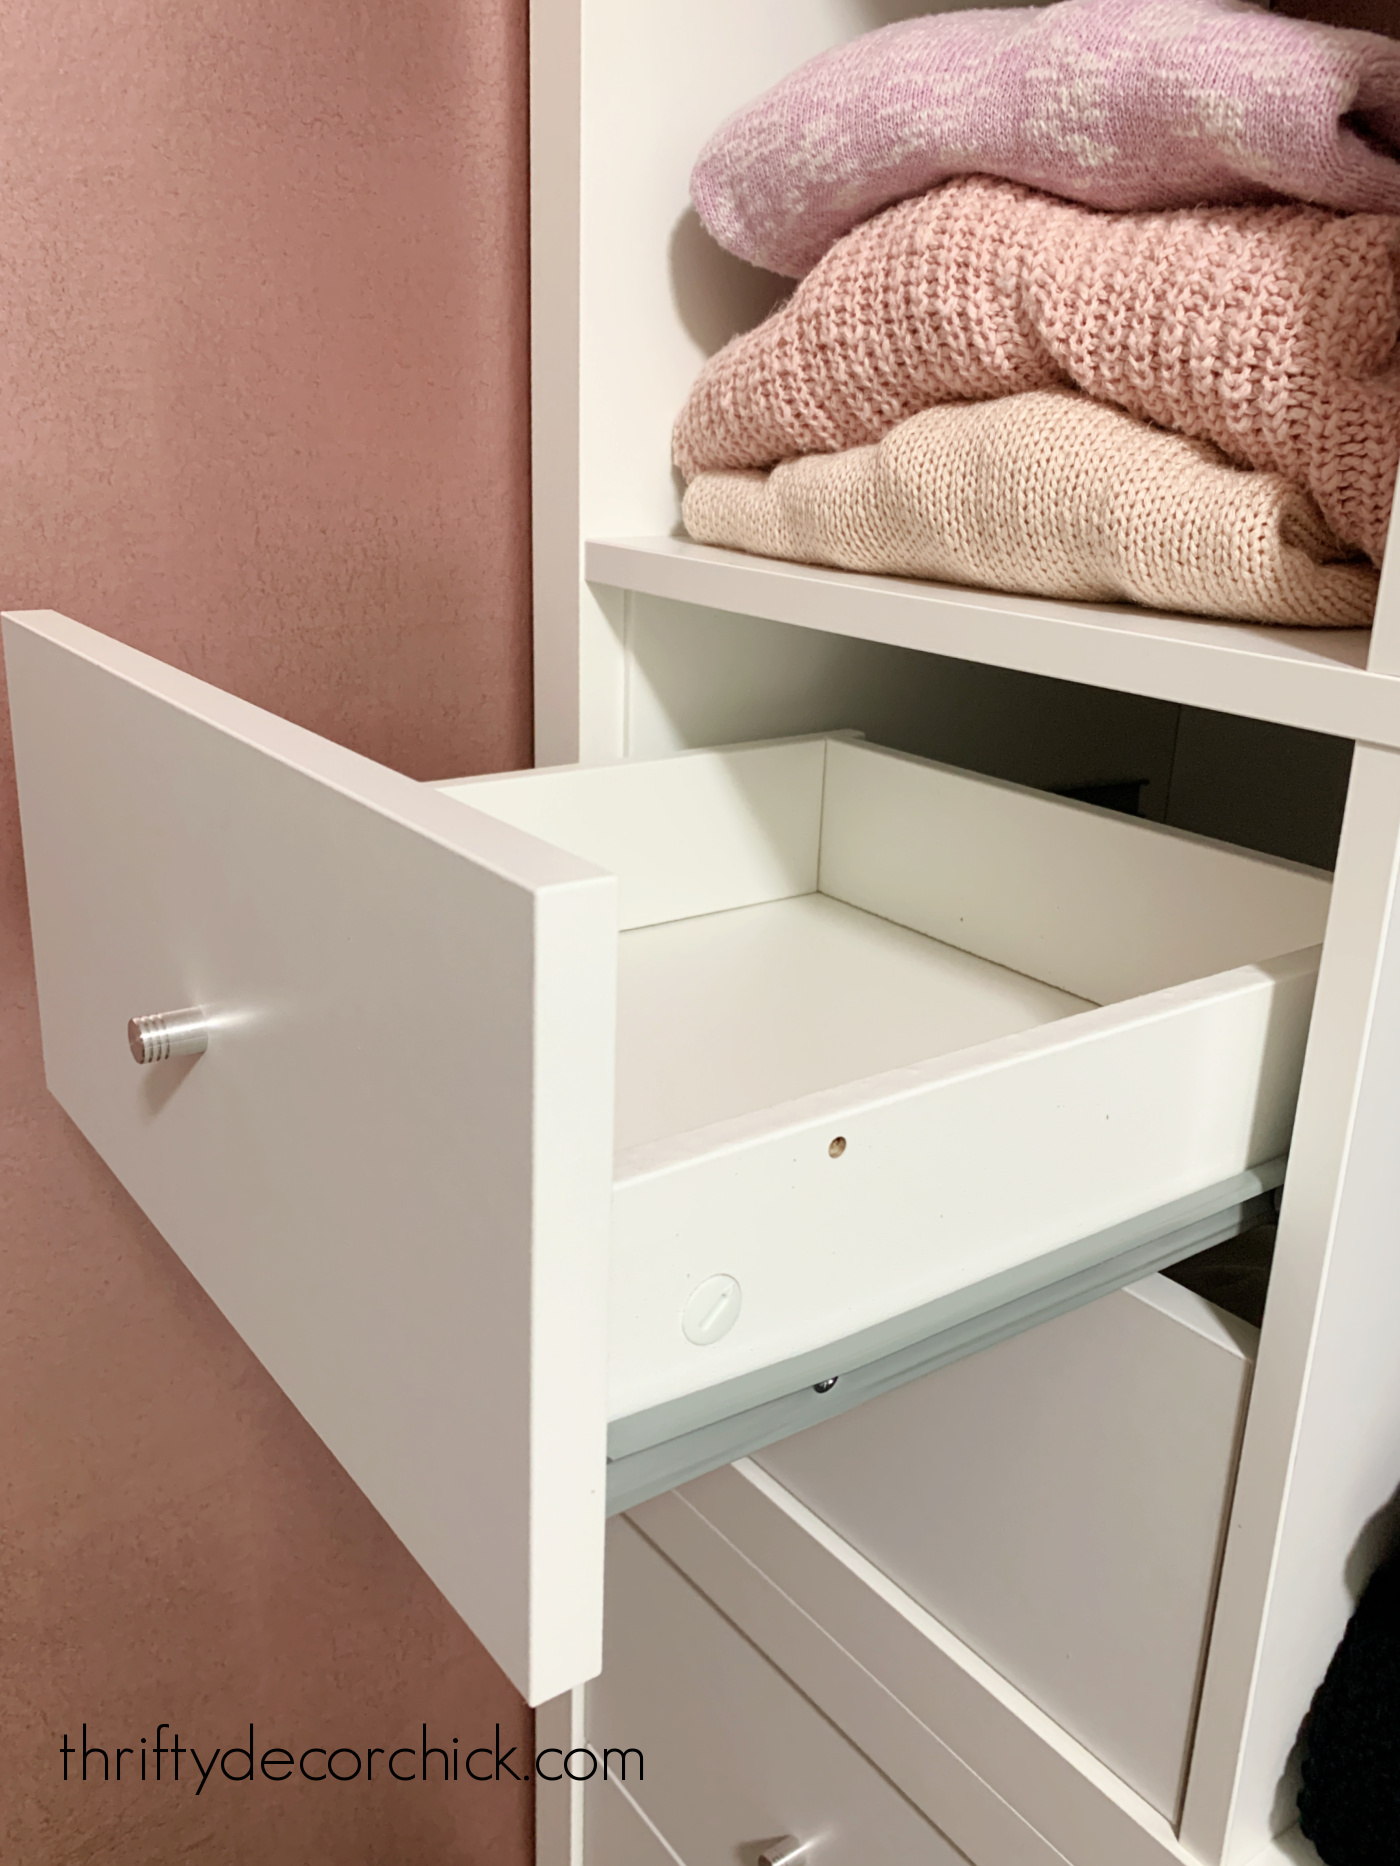
Aren't those little drawers awesome? They are drawer inserts for the Kallax units. (You can also find them here if you don't have an IKEA nearby.)
They are perfect for little things like socks or jewelry:
I love that I have a few empty spots to work with. The organizing part is my favorite!
But where was all of that bulky clothing that went into the bins before you ask?
Well...nicely folded and placed on the wire shelves of course:

Ha! Nope.
Actually, I snapped this photo after I took the hoodies and sweatshirts off the shelf, so it looked way worse before.
This was how most of my folded clothes were "organized" for the past four years. It obviously wasn't working!
Now it's all perfectly sorted, organized and easily accessible:

I always strive to incorporate both form and function when working on a space. This little nook is the perfect example of both!
Here's the before of this corner again to remind you of where I started:
Say it with me...no. more. wire. shelves! What a glorious day. ?
Of course that corner was just the beginning...this redo got way bigger than I planned. But it's turning out SO GOOD and I can't wait to show you more progress soon!
Have you used these Kallax units anywhere in your home? They would also work great inside a standard bedroom closet, with hanging rods.
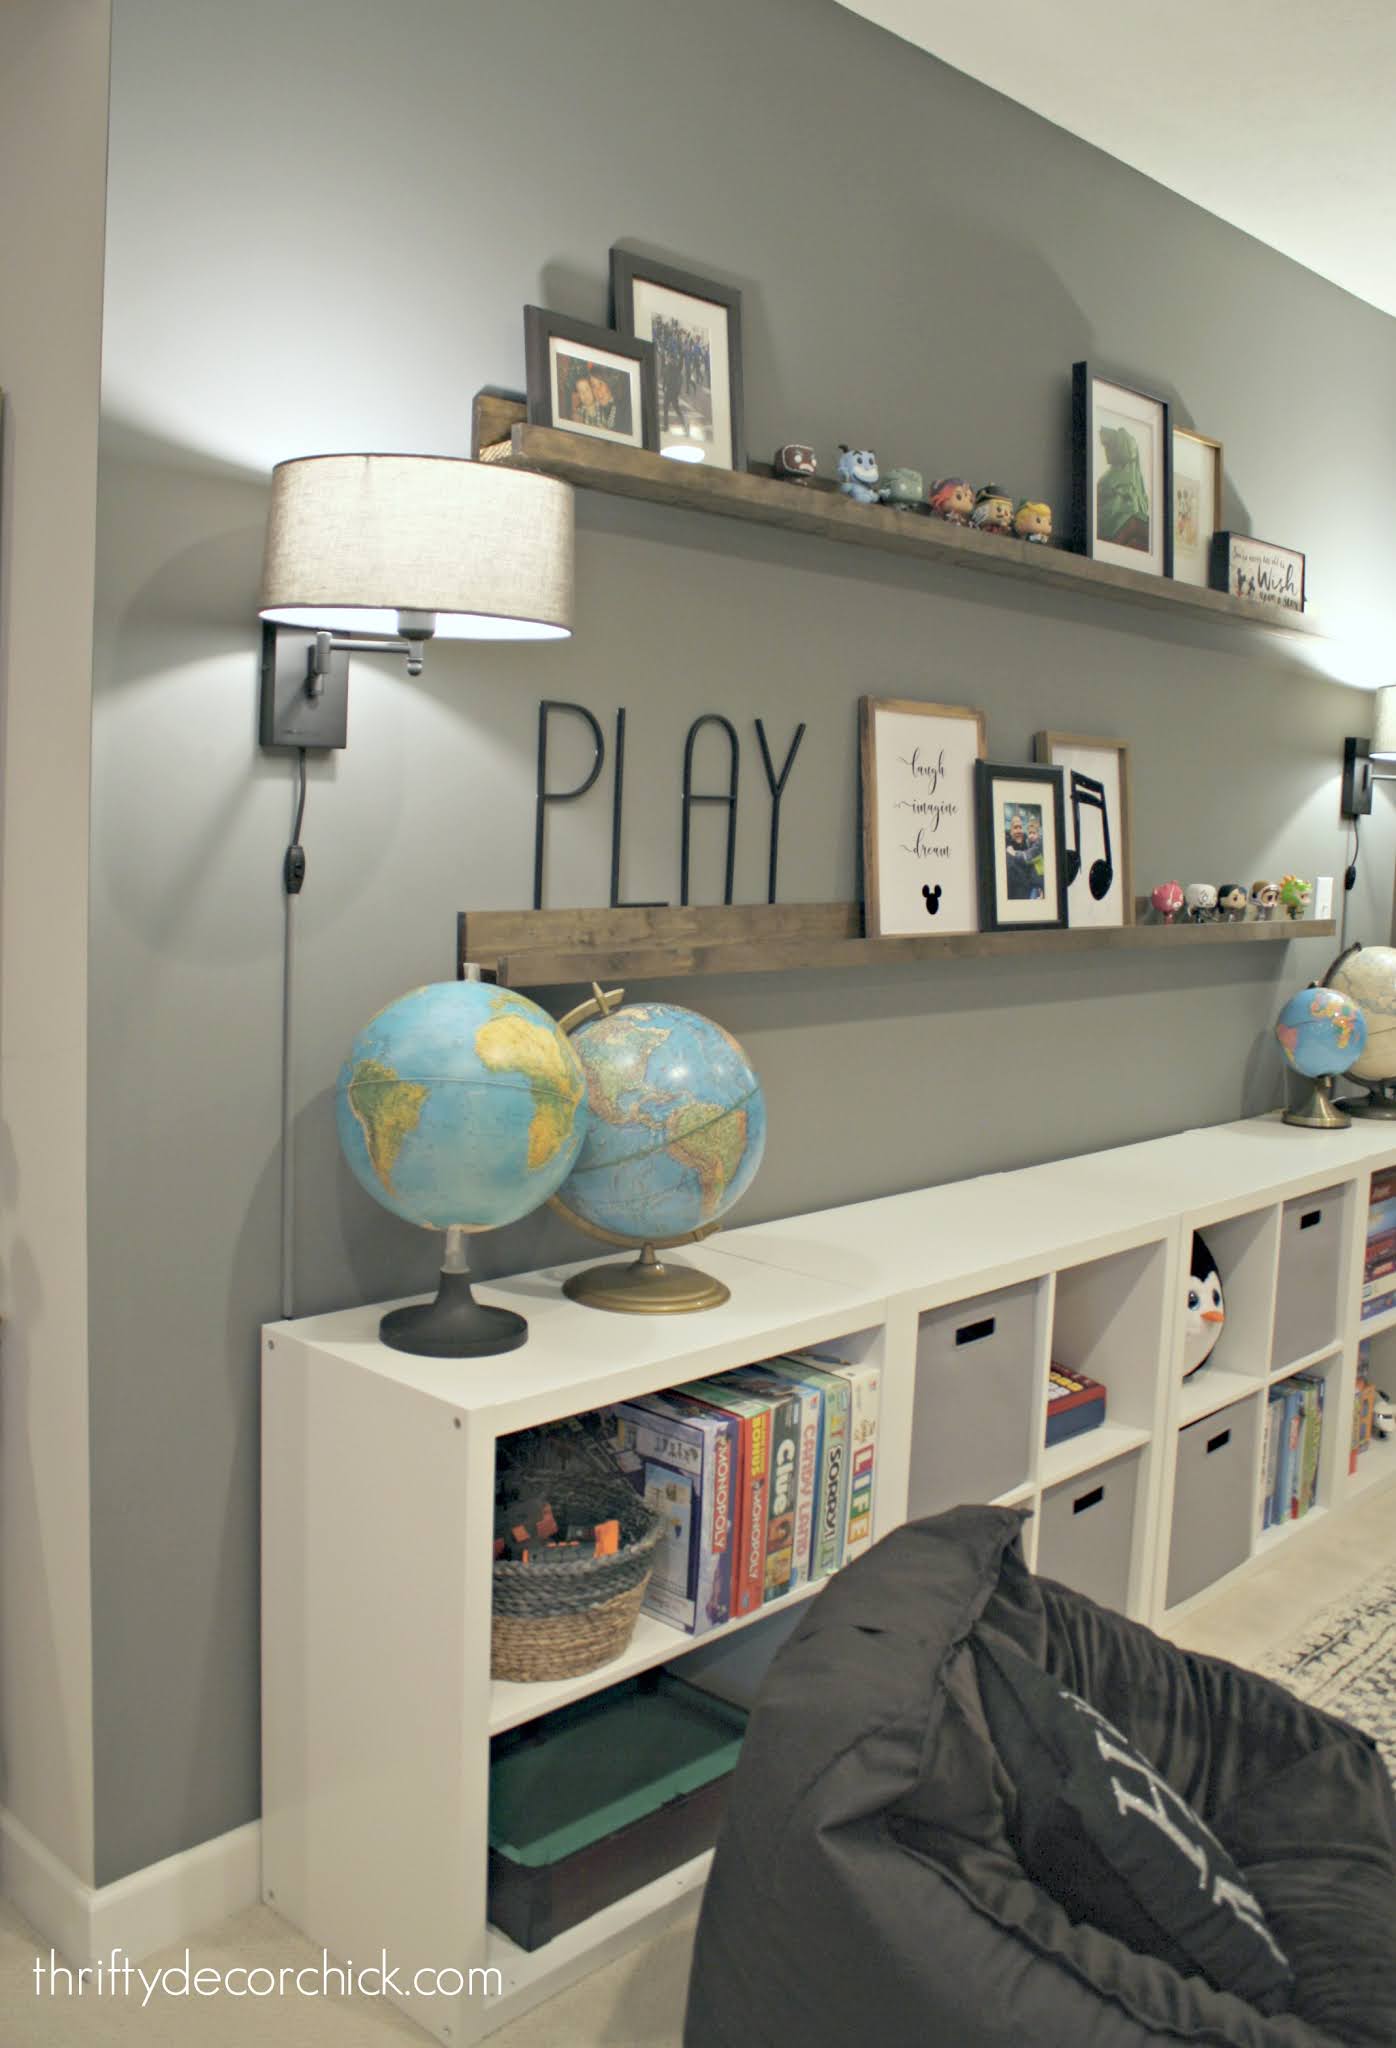
I used a similar, smaller version for the wall of game storage in our basement:
Never miss a post by signing up to get posts via email.
Via https://www.thriftydecorchick.com/2021/09/Kallax-closet-unit-hack-storage.html  I will share this post every year because it's important to me that we have a visual reminder of this day, now 20 years ago. Can you even believe it?
It's so odd to me that there is a whole generation that wasn't even alive when 9/11 occurred.
As many of you know, New York is near and dear to us. It's a city we love so very much. I always knew I'd love it, and when my husband took me on my first trip (days before September 11, 2001) I found out I was right.
I instantly fell in love with the city.
This photo always gives me chills. We're at the top of the Statue of Liberty and you can barely see the towers behind me: 
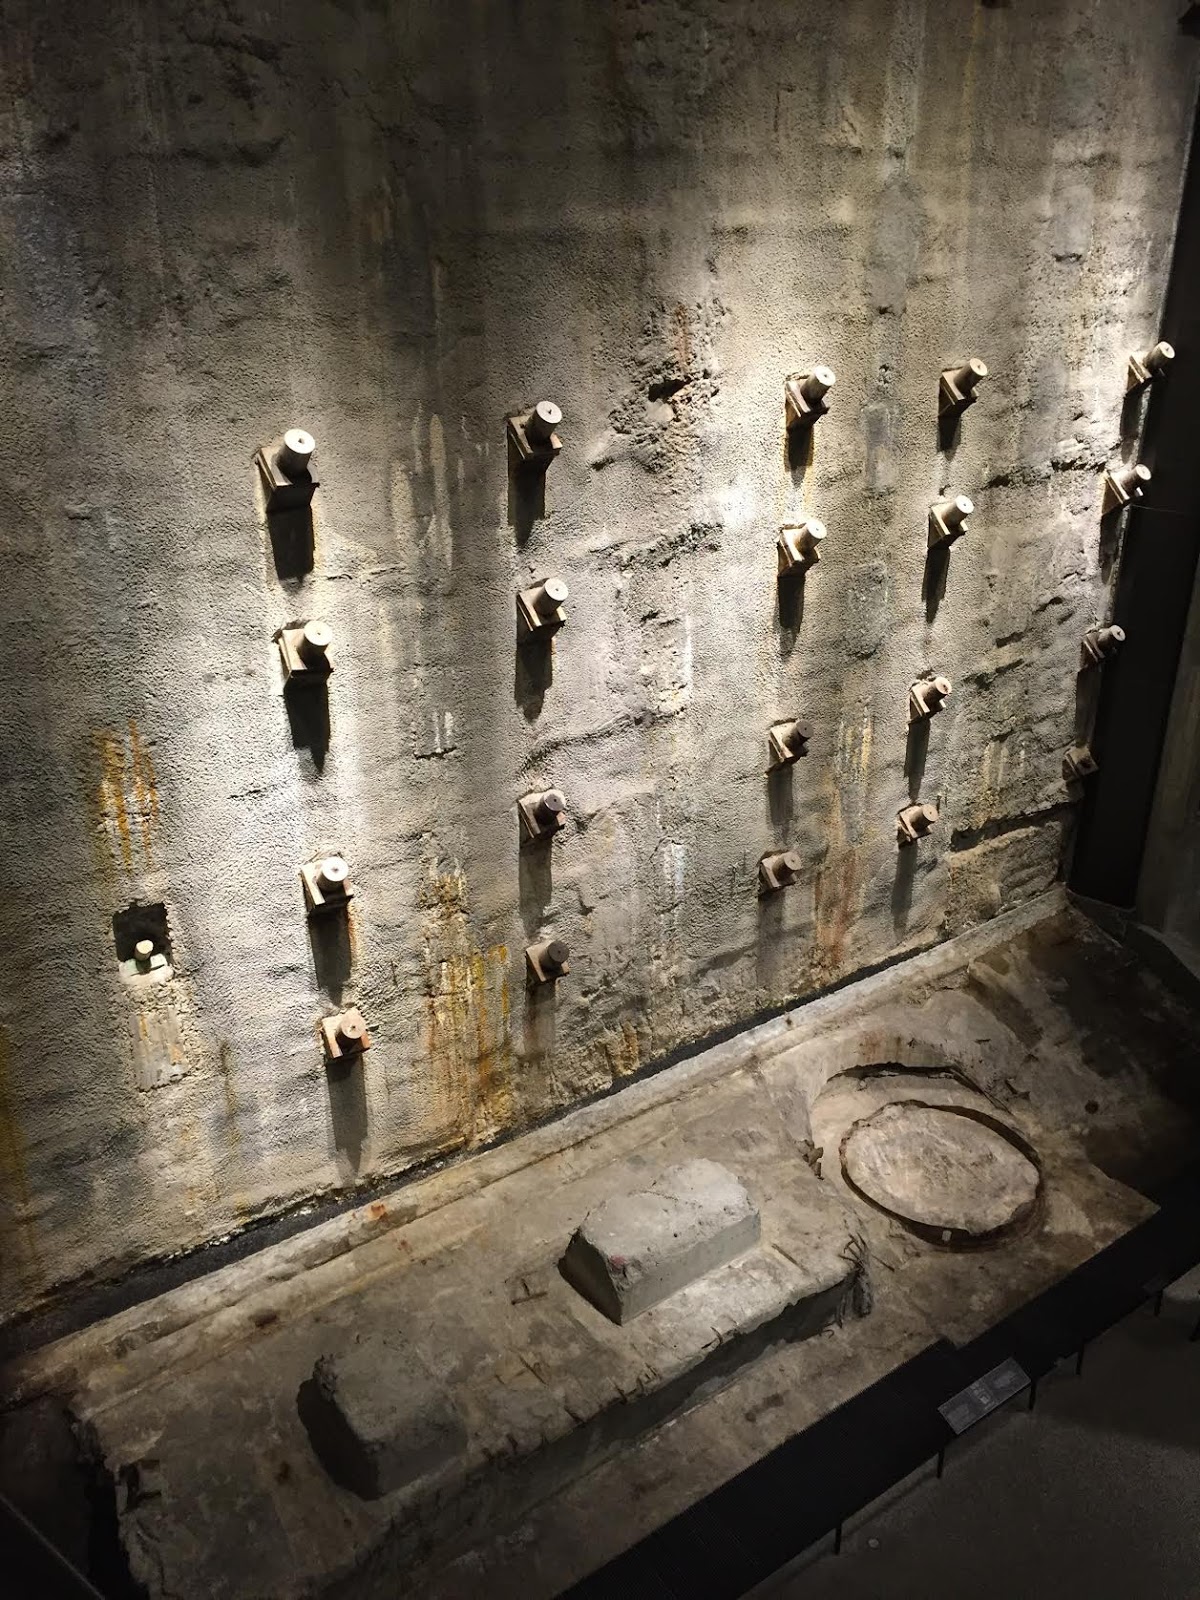
I think it was nine days before 9/11. Nine days later and the towers were gone. My husband was a band director at the time -- a few months after we were supposed to travel to Japan for a band trip. He canceled that trip and instead we took the kids to New York City. We've seen Ground Zero at it's best and worst. New Yorkers stopped us numerous times and thanked the kids for visiting. These first photos are from the Ground Zero Museum and tell the story of that day. This location is separate from the new museum – it used to be closer to Ground Zero but it looks like it’s moved to 14th street. If you visit the city I highly recommend visiting both. I let the photos do the talking (forgive the quality, all were taken with a phone over the years):  


![117_thumb[1]_thumb[5]](https://lh6.ggpht.com/-Q-Wi0Q5JSiY/VBGtTPy0sVI/AAAAAAAAqzE/ikGgk1KdkR8/s1600-h/117_thumb%25255B1%25255D_thumb%25255B5%25255D%25255B2%25255D.jpg "117_thumb[1]_thumb[5]")


The new 9/11 Museum looks so small from the outside, and you think it will only take an hour or so get through. Plan accordingly because this museum literally goes deep into the Earth and you can spend hours in there.
It is one of the most well done museums I've ever visited, especially considering the content. The beginning is a tour of the footings and walls of the towers (this wall below was one of the towers).
Don't miss the room in the middle in this part of the museum -- it holds photos of each of the victims as well as video about each one. There are no cameras allowed in this space -- it is most definitely a memorial.
There is a separate room at the end of the main part of the museum and it can be easy to miss -- but it holds most of the photos, artifacts and videos. It may not be suitable for younger kids but our (then) nine-year-old did fine. (There are parts of this room we steered him away from.) There are no cameras allowed in that area as well.
If you go give yourself plenty of time and be prepared for the heaviness in your heart you will feel as you walk through and when you leave. It is overwhelming and unavoidable.
I think every person that visits New York City should visit at least once.


This artwork signifies the color of the beautiful blue sky on that morning. There are 2,983 squares -- one for each person lost on September 11th and at the 1993 bombing.
God bless all those we lost on that day and their families. God Bless America.
 

If you have plans to visit NYC, be sure to check out my guide for the must-sees on a quick trip. This is especially helpful if it's your first time there.
Never miss a post by signing up to get posts via email.
Via https://www.thriftydecorchick.com/2019/09/eighteen.html Easy fixes to prevent (almost anything!) from sliding around in drawers, on the wall or on the floor!
I have a thing with things that don't stay put. Containers sliding around in drawers, rugs that don't stay put, pictures that don't stay leaning like they should.
At the least, it's just annoying. At the worst, like with rugs, it can be dangerous!
I have a few solutions that have worked SO well for us over the years. These work for items that lay flat and slide around, like in a kitchen drawer, and decorative items that you want to stay where they are on a shelf or leaning against a wall.
My first item is one I just recently discovered...
Museum gel/putty to prevent sliding
If you live in an area that is more prone to earthquakes, you've probably heard of this one.
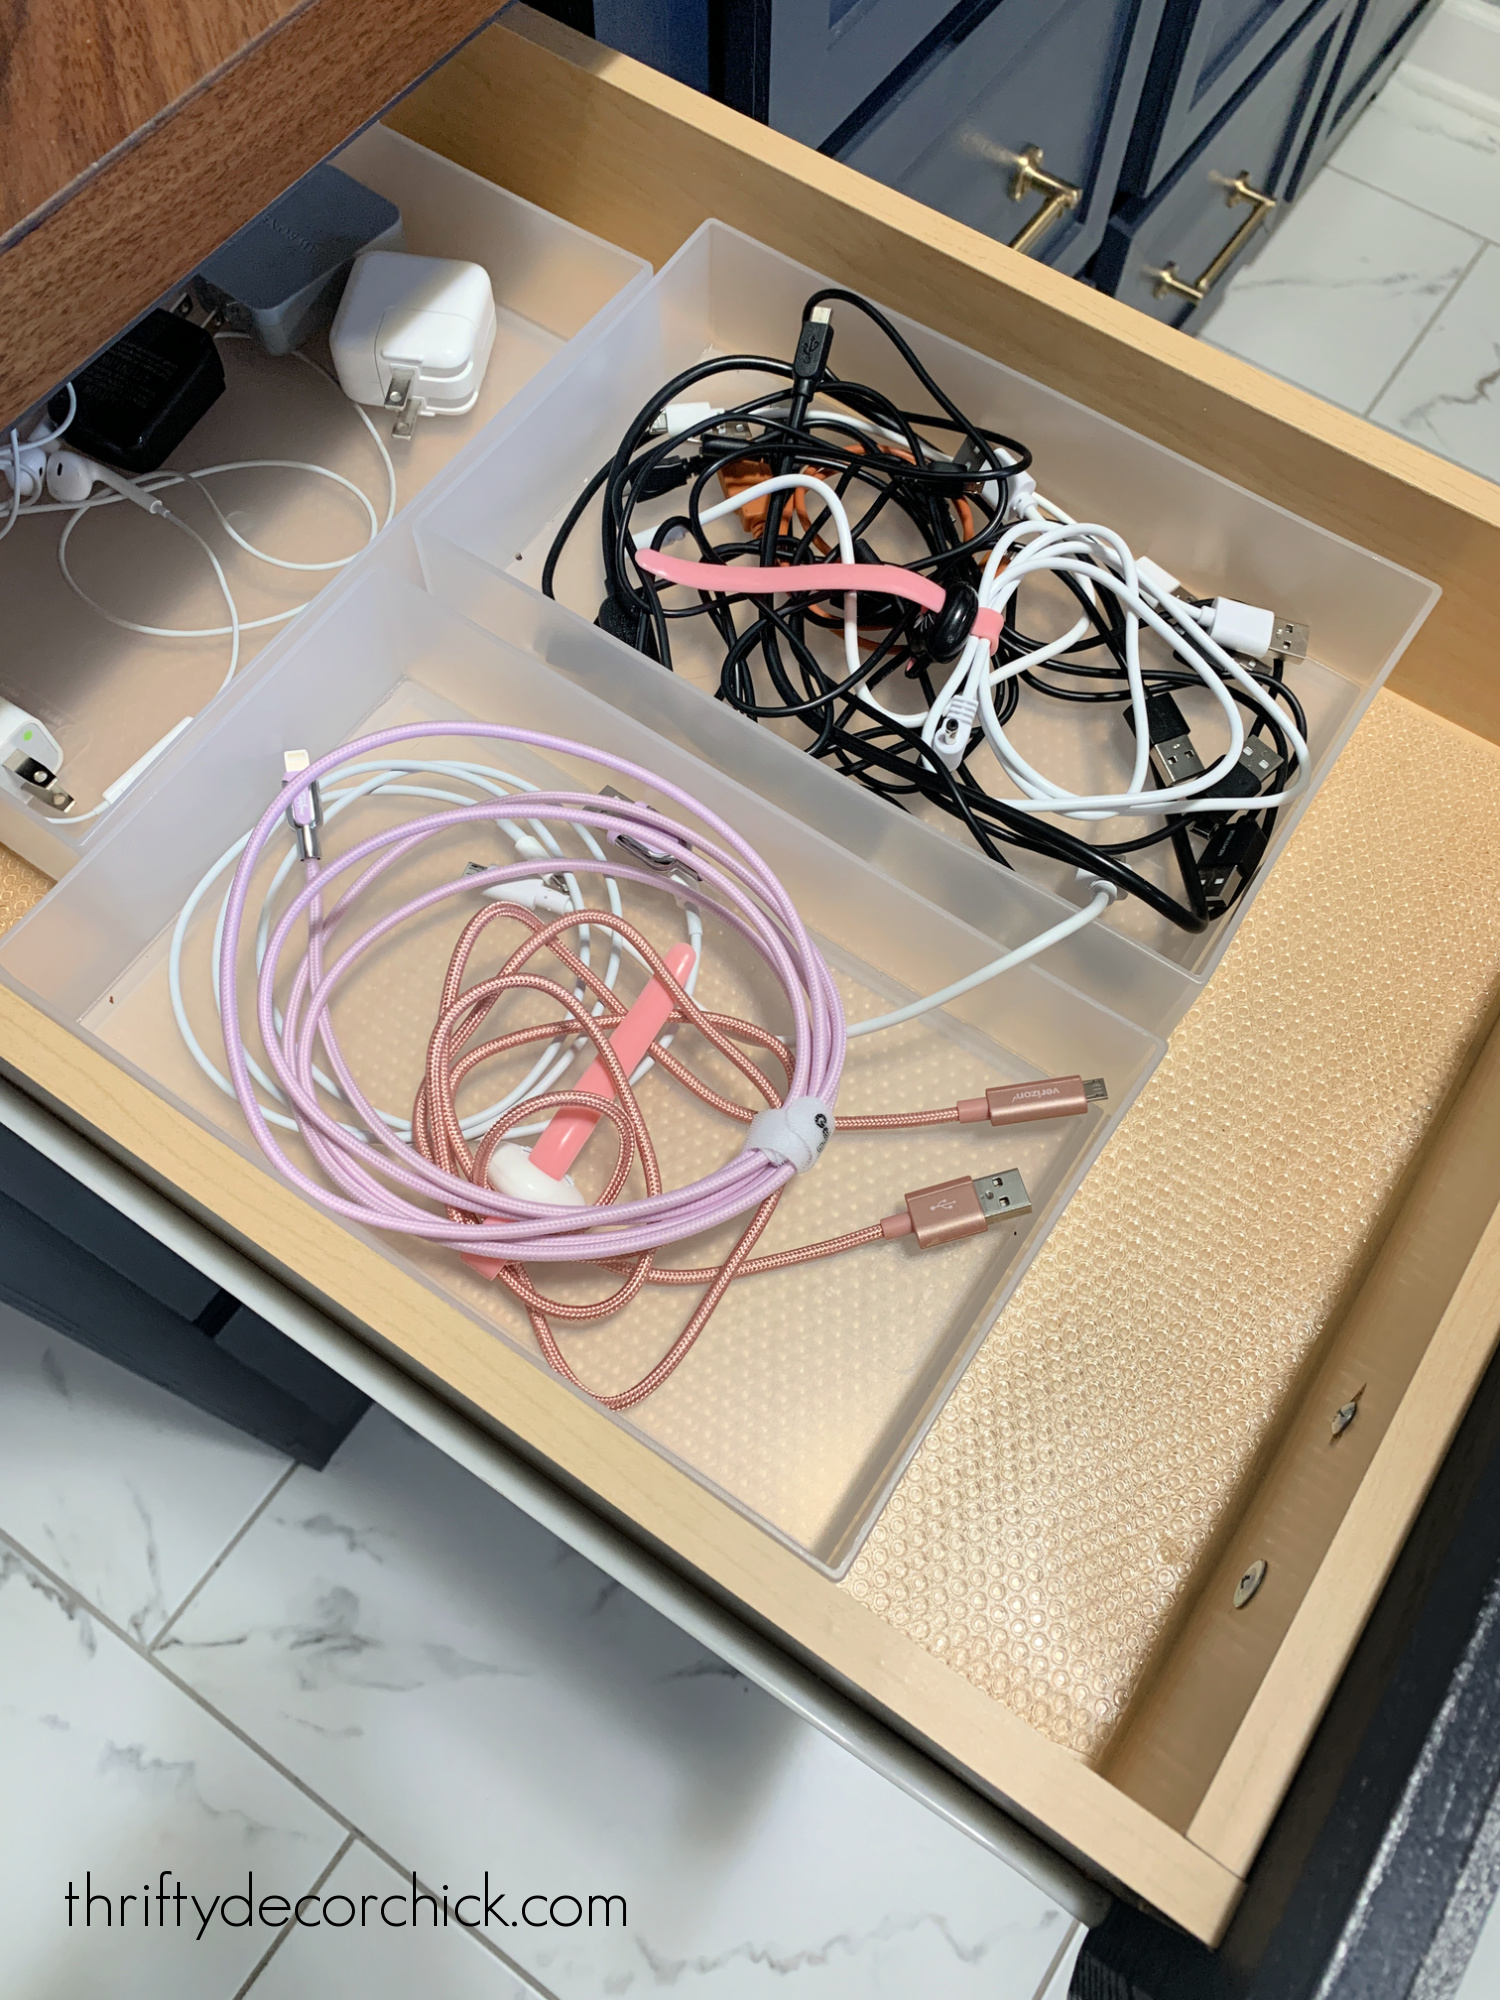
I LOVE having our new cabinet drawers in the mud room for tons of storage. They are one of the best additions I've made to our house.
But it was driving me a little crazy that these plastic organizing bins would slide around EVERY time we opened a drawer:
This post may contain affiliate links for your convenience.
See my policies and disclosure page for more information.
I added a drawer liner thinking that would help. Nope. The drawer liner and the bins would still slide around every time we pulled out a drawer.
Then I added little dabs of hot glue under the liner thinking that would help. NOPE. That stopped the liner from sliding but the bins didn't. ?
It's not a big thing, obviously. I mean...this is small in the scheme of life. But it drove me batty.
This cool museum gel came to the rescue:
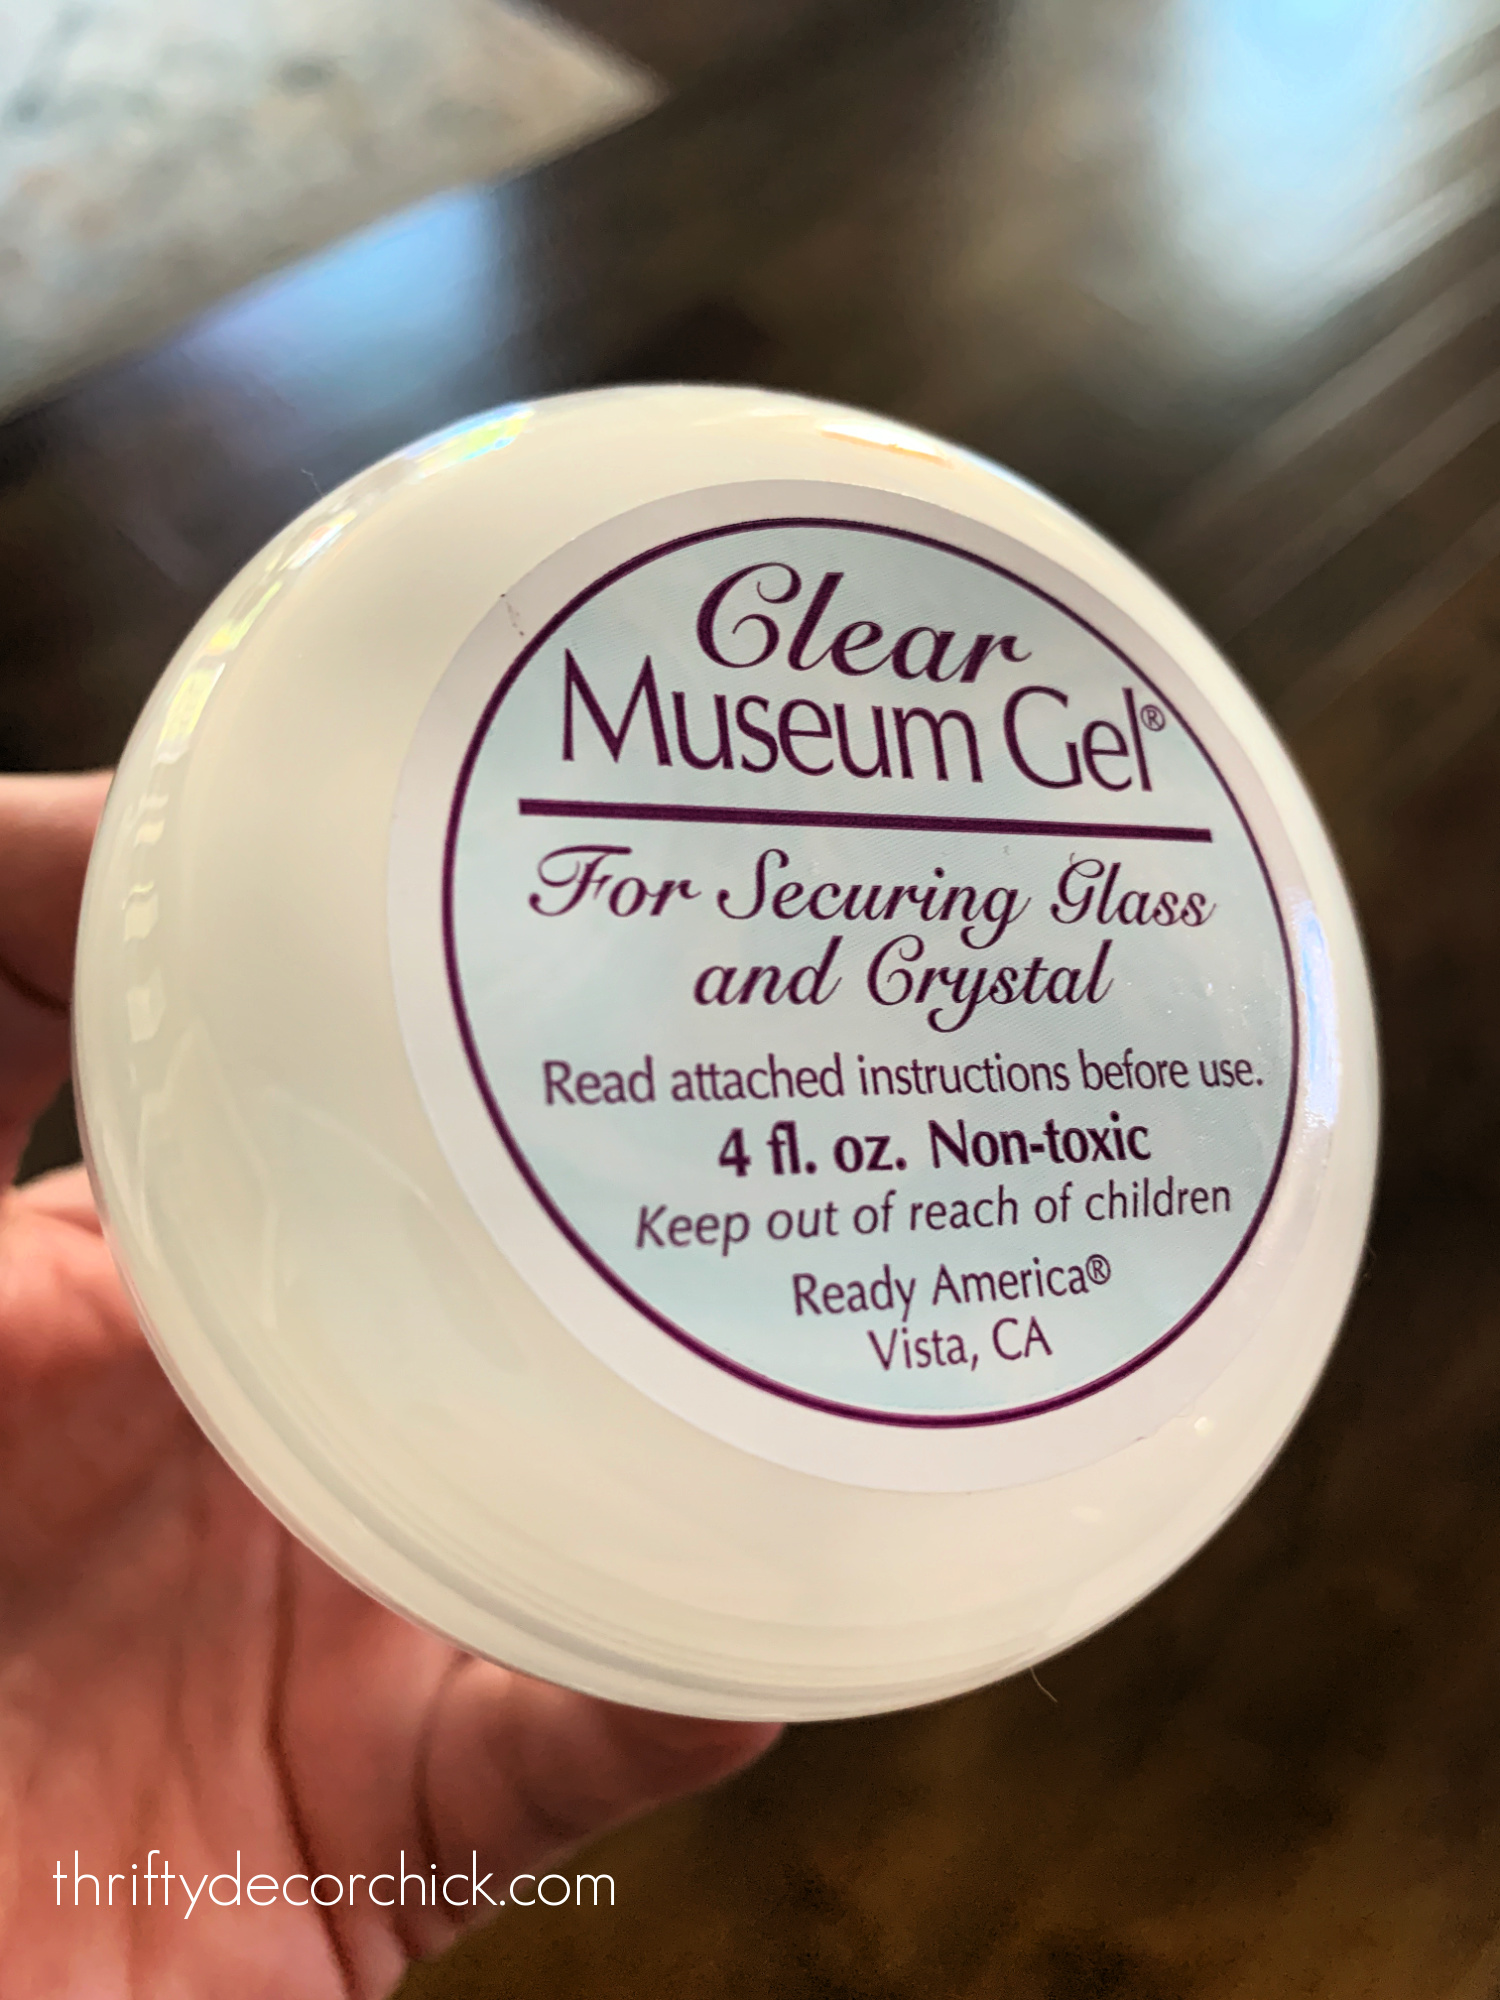
I got the clear because of our (mostly) clear bins for the drawers. It also comes in a putty color as well.
It's actually quite cool -- it levels out on it's own and is SO clear, it looks like water:
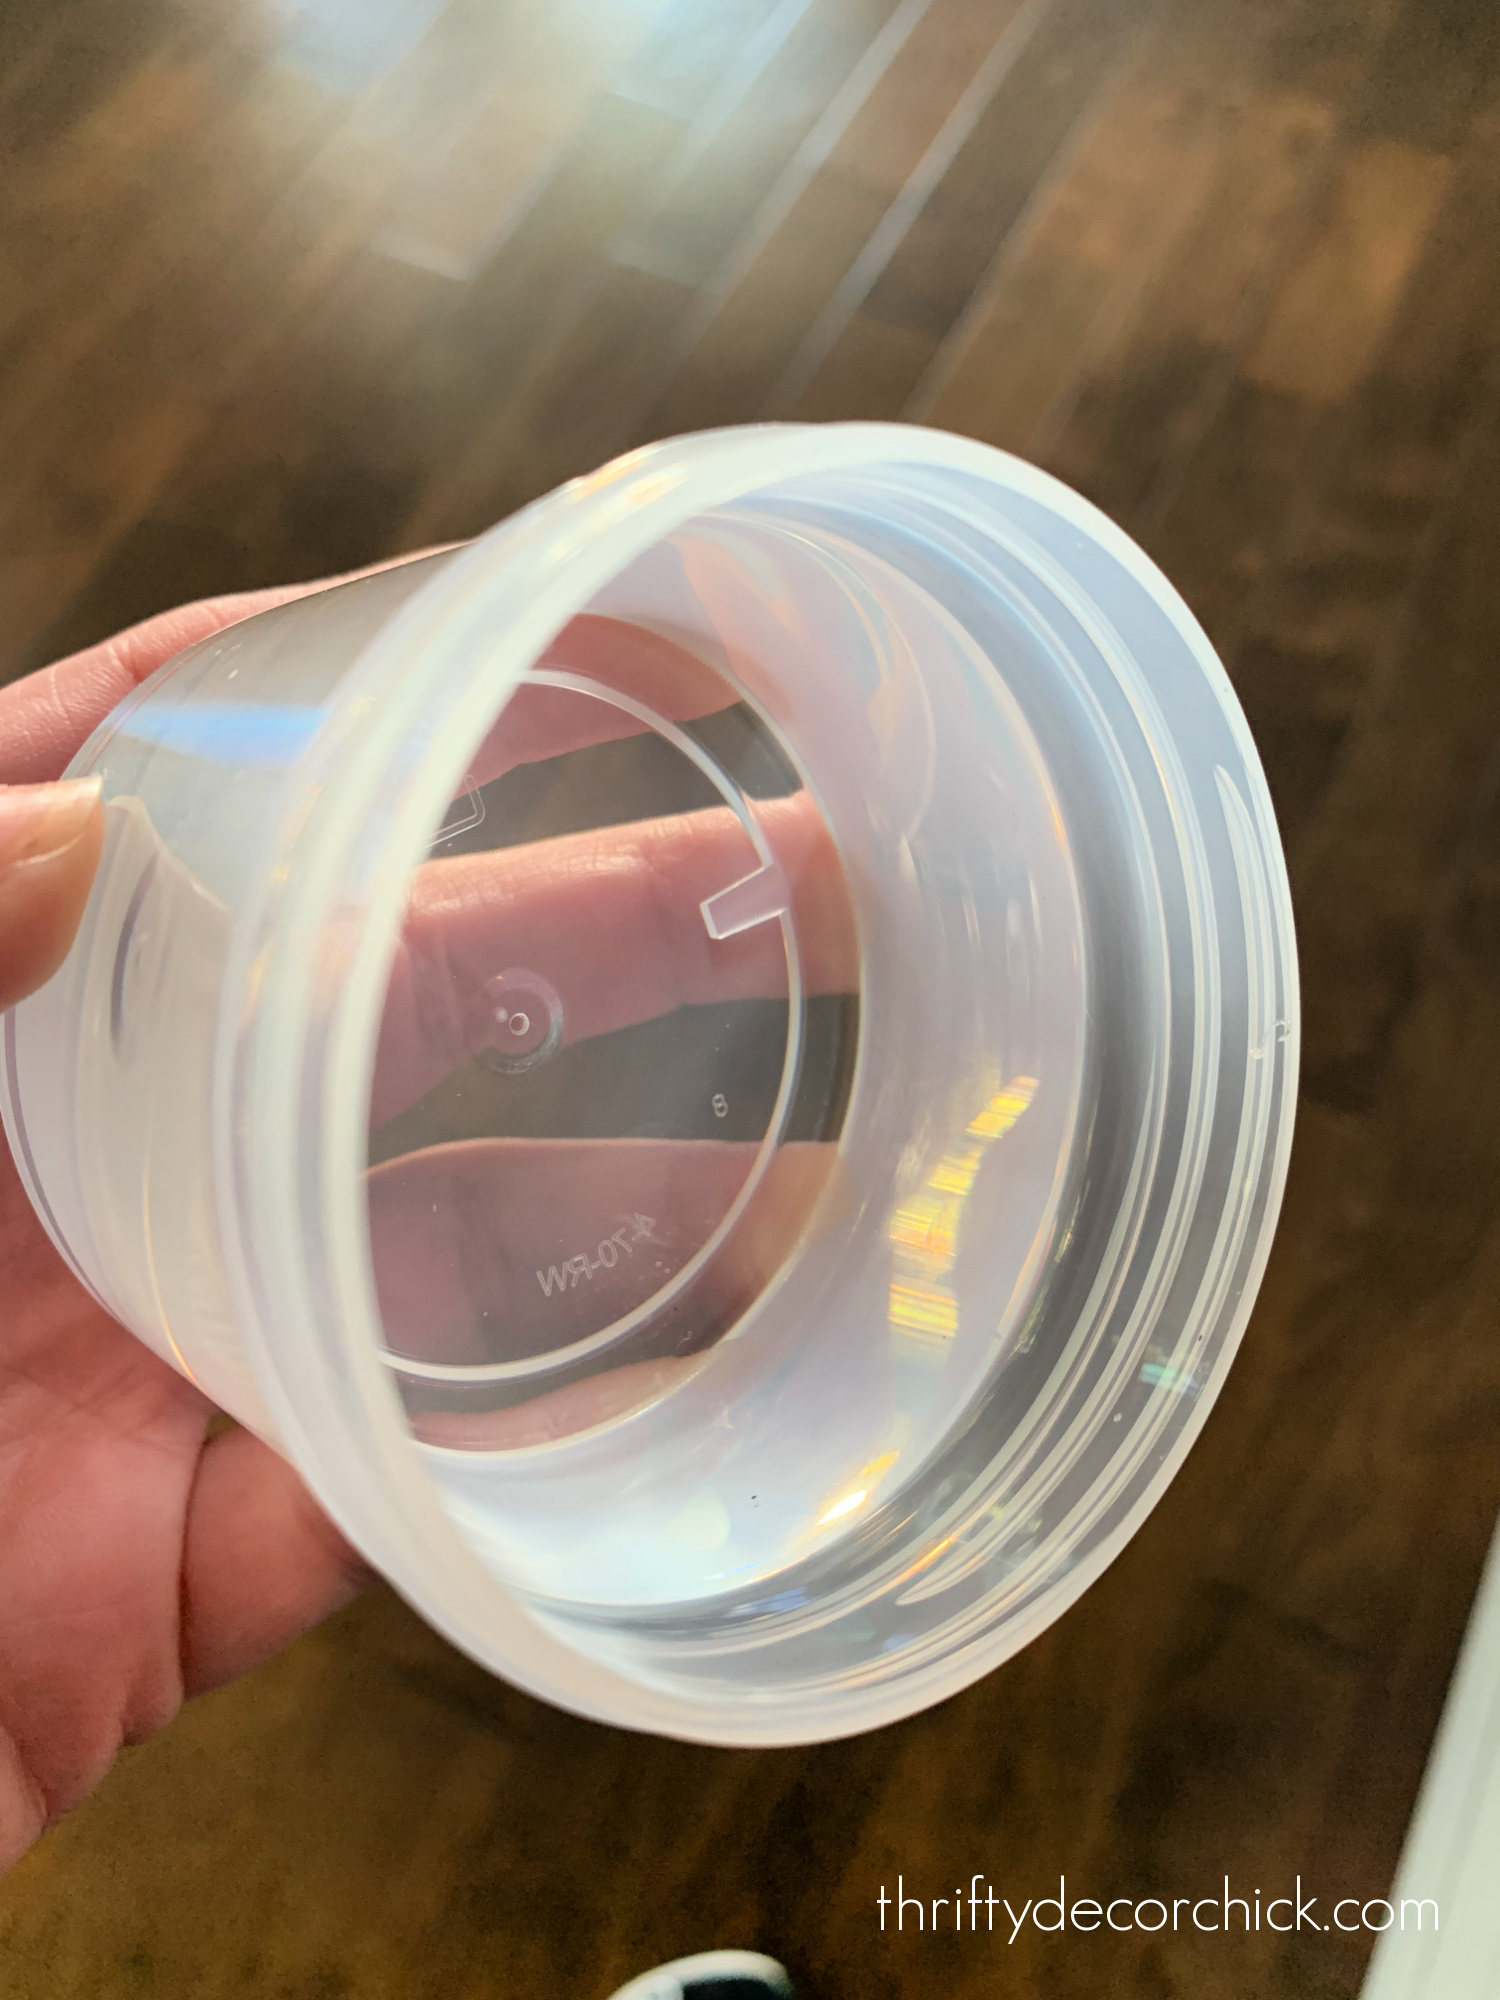
You'll need to dig some of the gel out and roll it up into smaller parts:
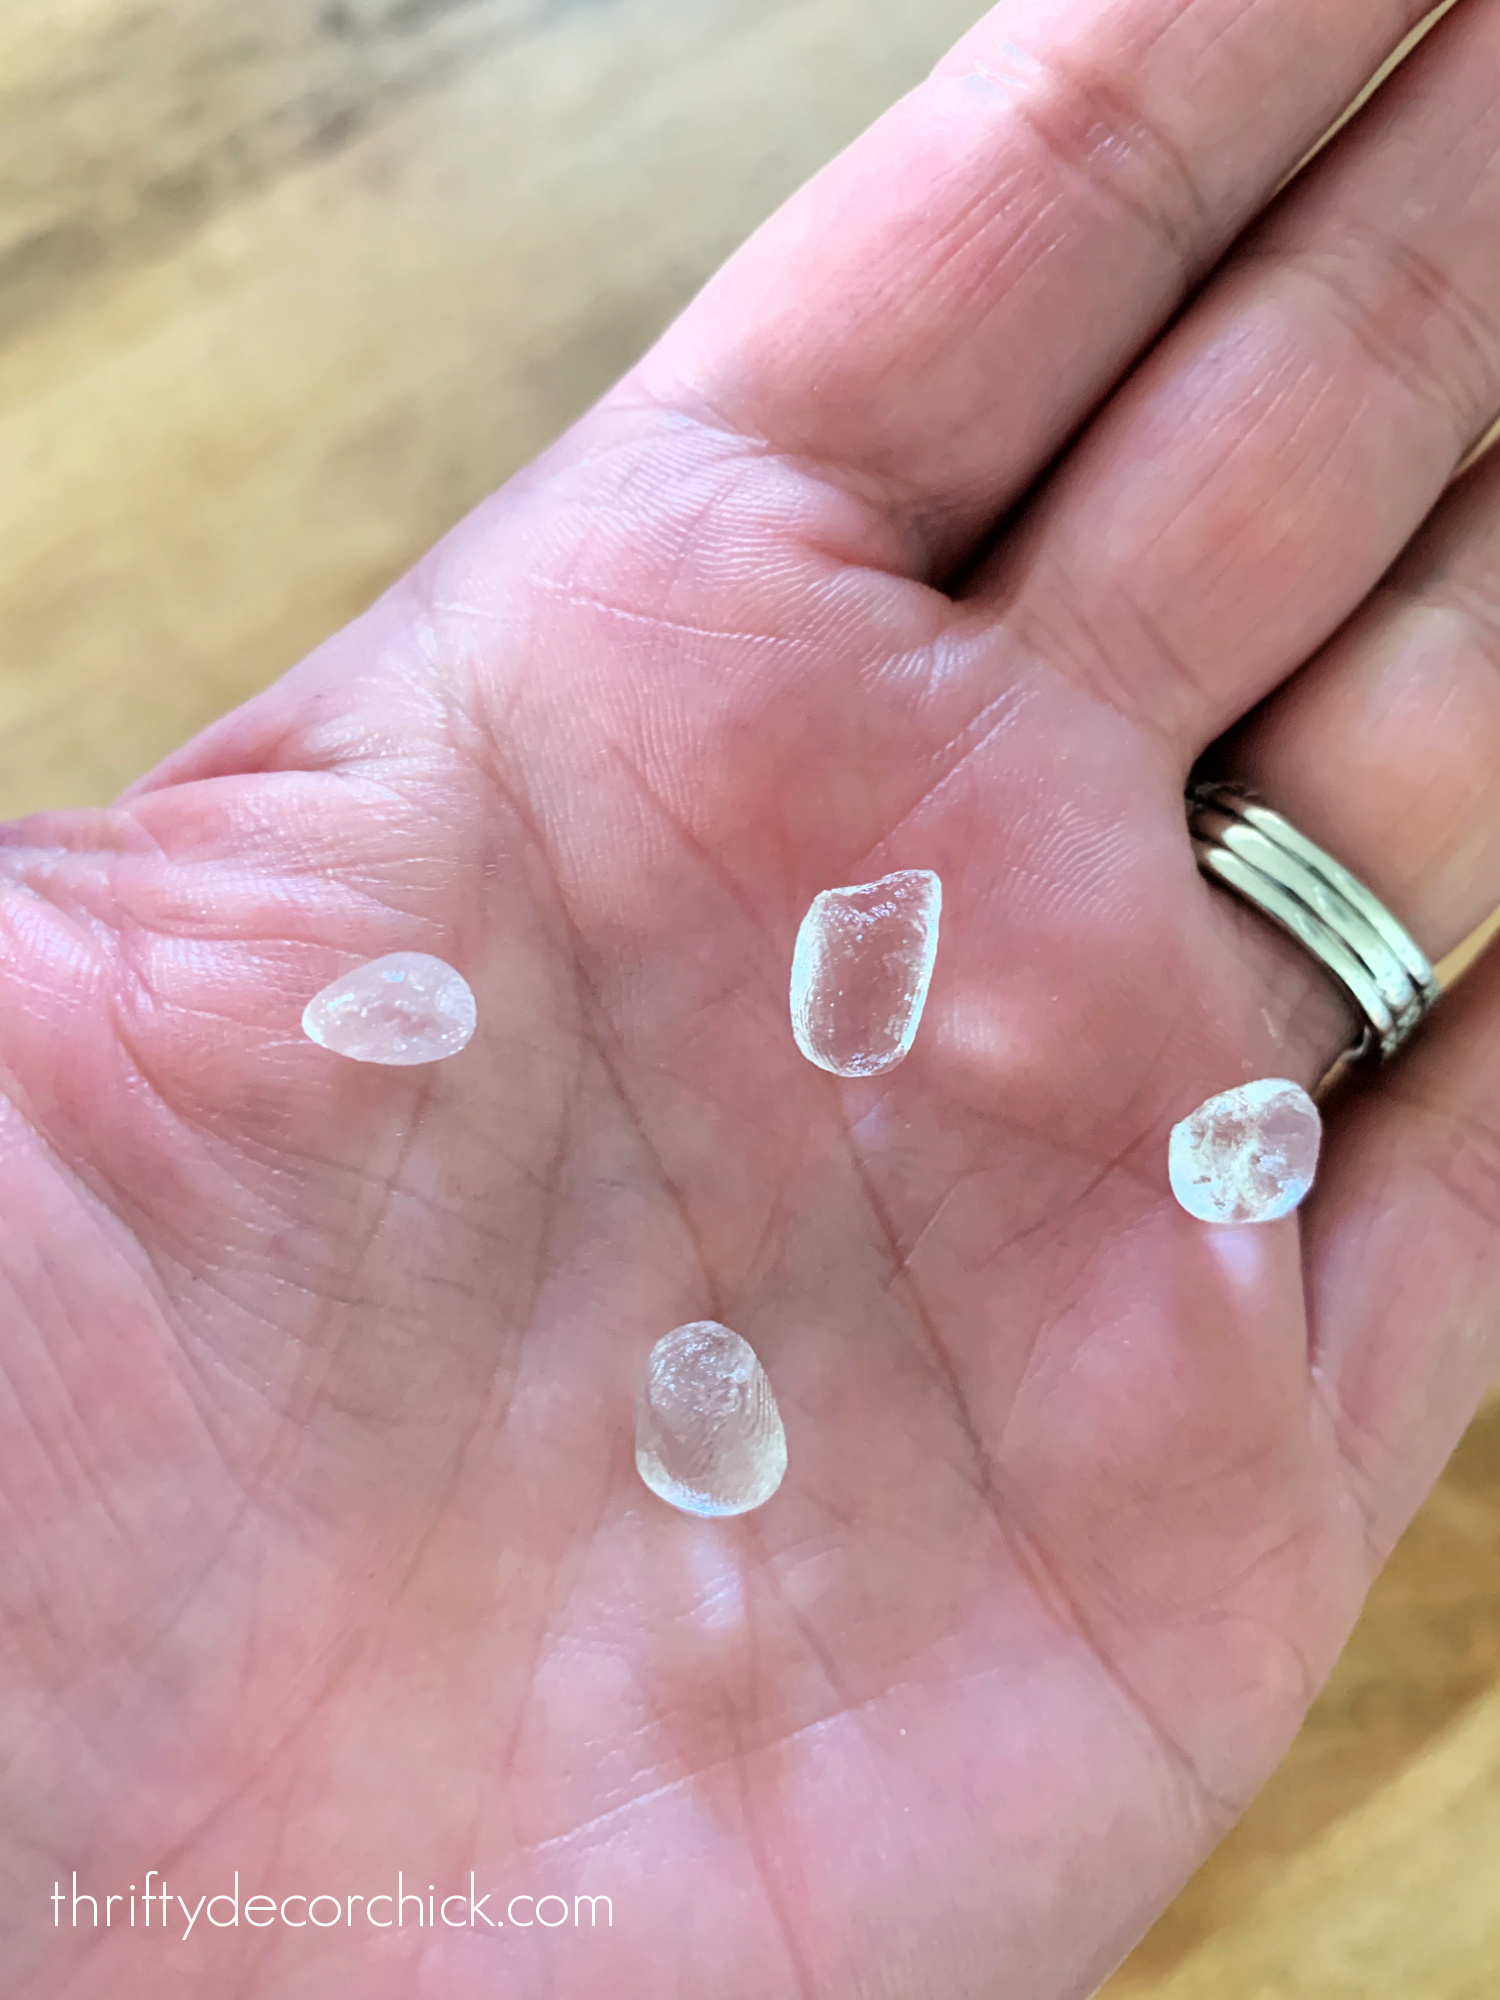
My lighter bins didn't take much, the bigger ones need a few more or bigger pieces of this gel.
It's not super sticky, so you'll have to do your best to get it under your item because it doesn't really attach at first, at least to the plastic bins. Press down and wiggle a bit to make sure the gel sticks well.
After it is touching the two surfaces it really grabs on. Helloooo...no sliding! I love it!:

This museum gel is so interesting to me...it helps to secure breakables in areas that experience earthquakes.
I love the ingenuity!
We have soft close drawers in the kitchen and bathrooms, but the items inside would still slide back every time we used a drawer.
This museum gel works great on smaller/lighter weight items:
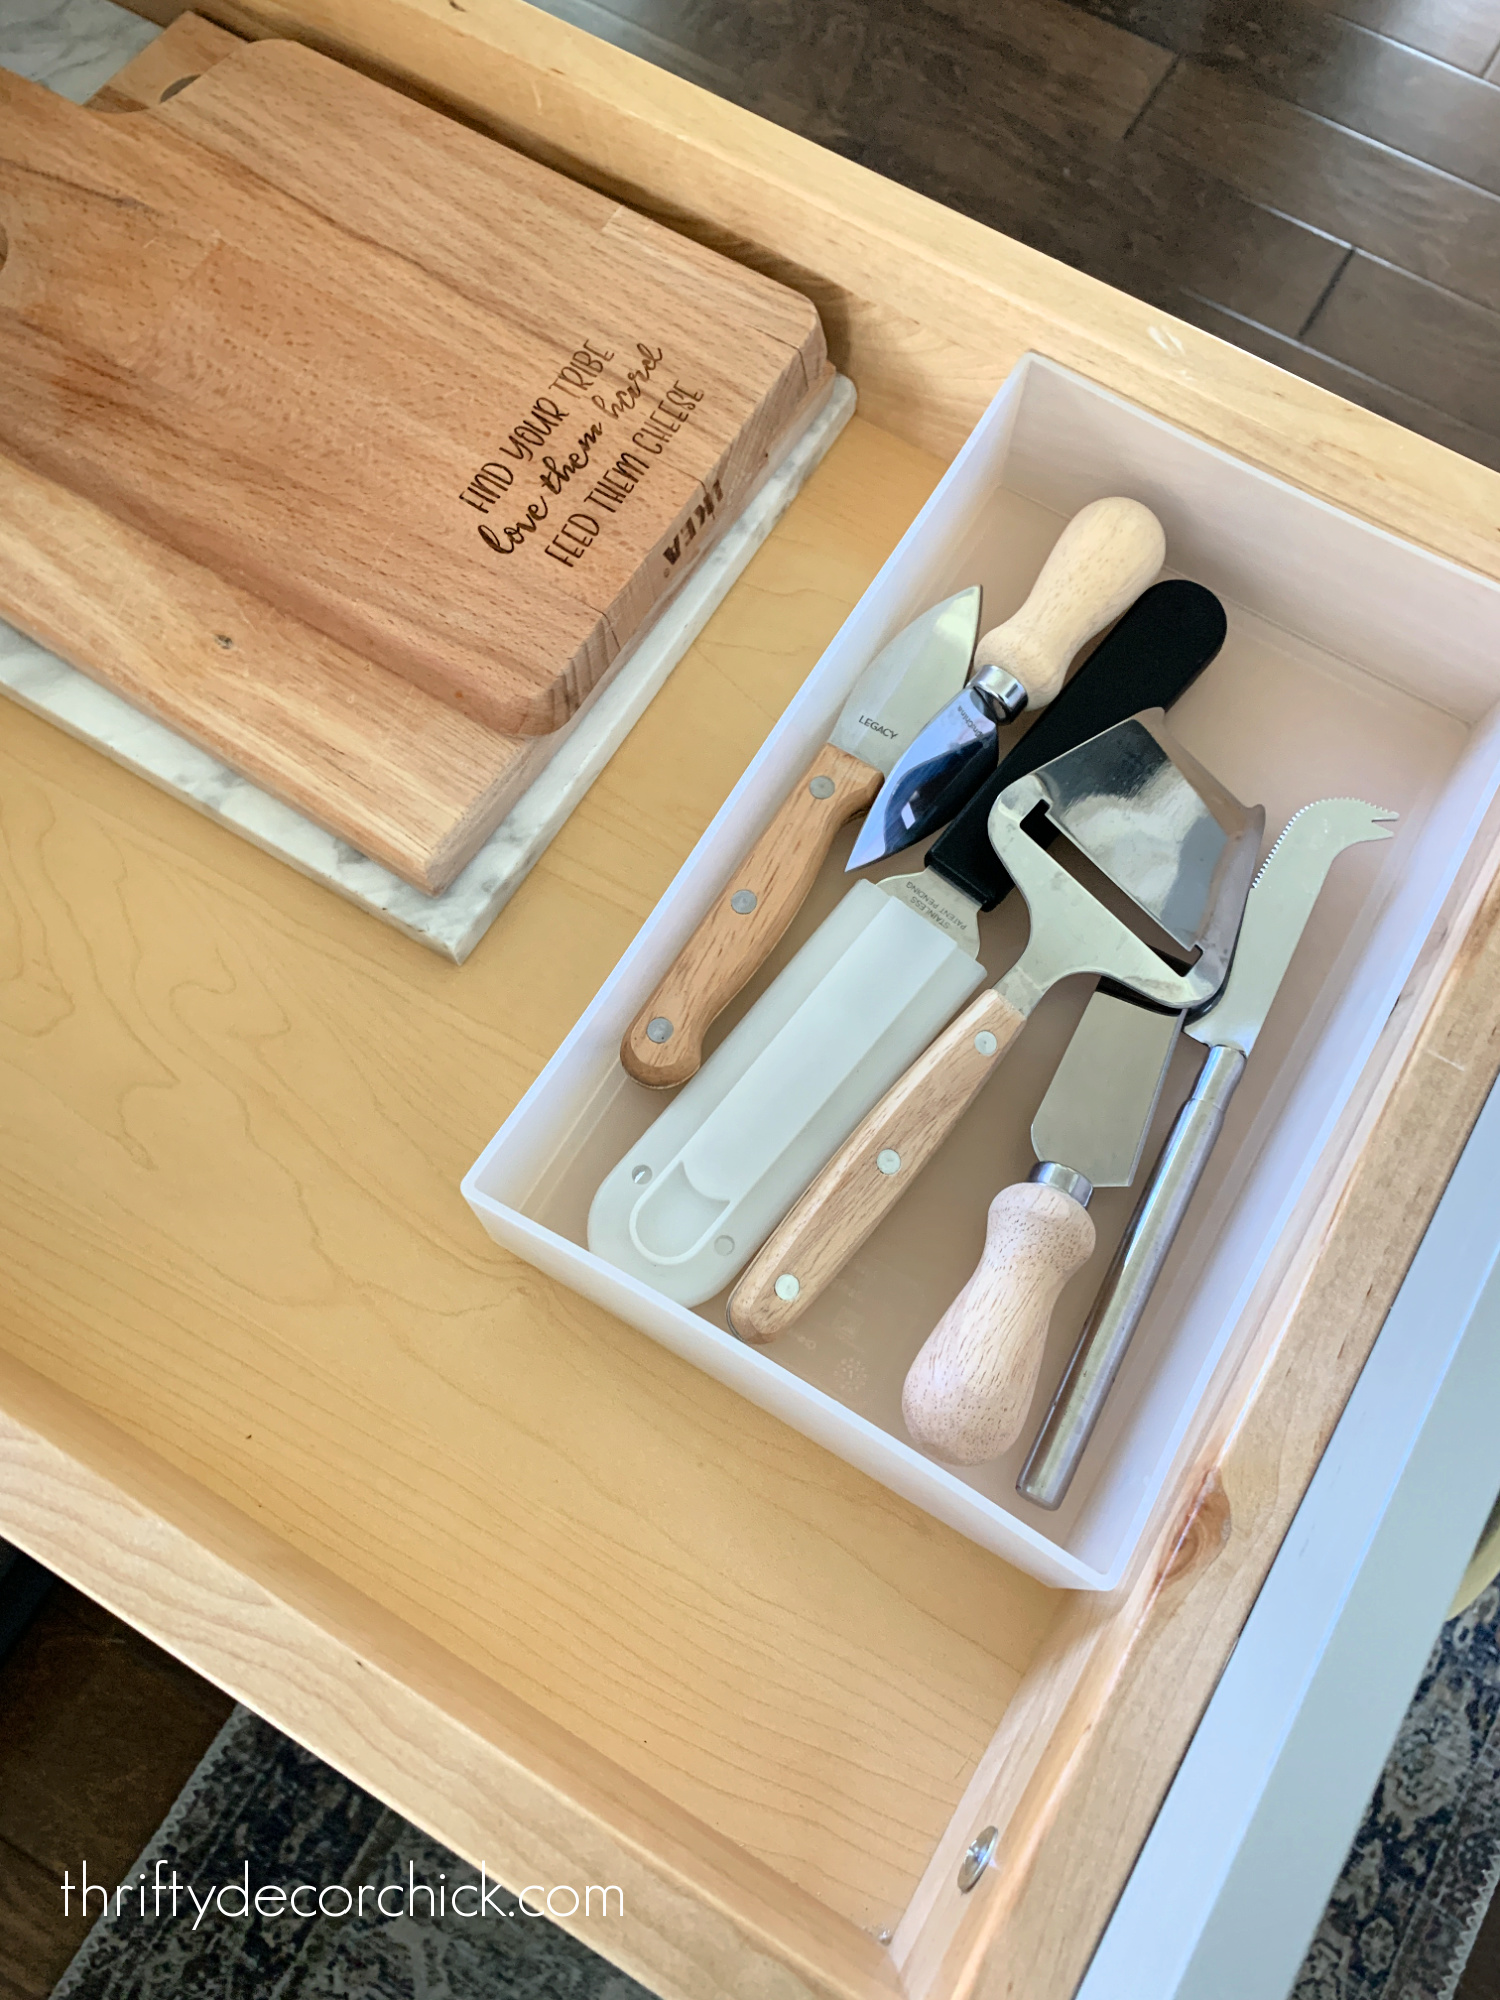
And heavier containers like our utensil organizer in the kitchen:

Rug grippers for hard floors
If you have rugs on any kind of hard floor, you know the terrifying feeling when you catch one just right and start sliding. ?
I used to only use rug pads, but found over the years that they didn't really secure the rugs like I wanted. They would still slide all over, especially on tile. And those pads are not cheap!
I tried this rug tape, and it always worked well at the beginning, but would start to fail the longer we had it down.
I decided to give these corner rug grippers a try a year or so ago and they work SO well:
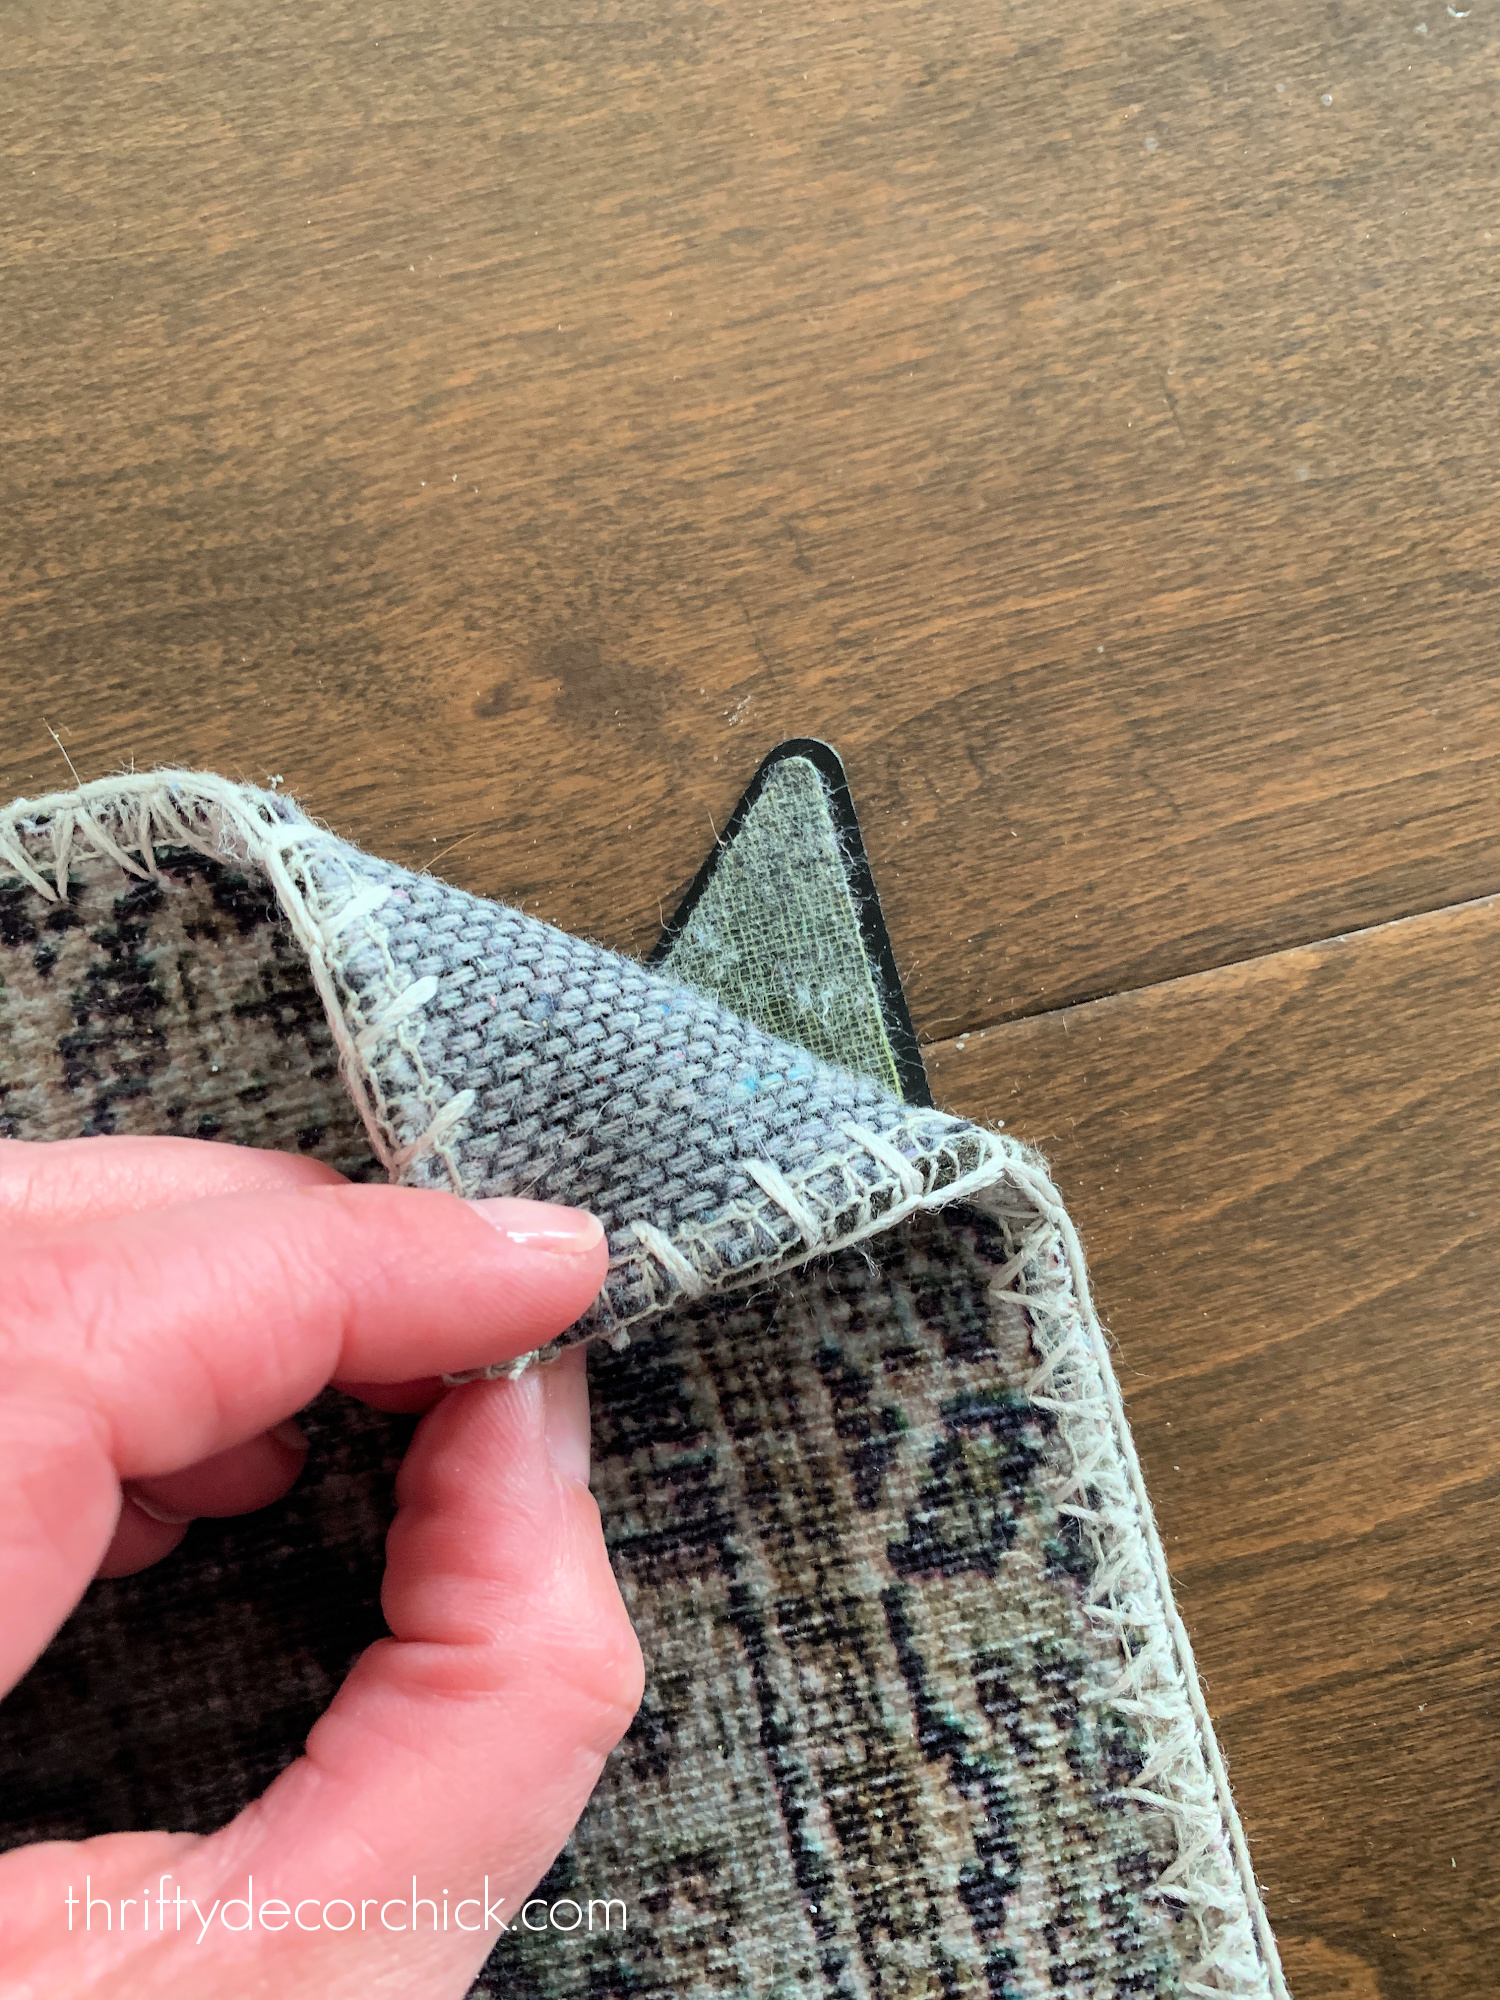
They are the best solution I've found to keep rugs in place on hard floors. They're shaped with angled ends to fit right into the corner -- one on each side. Keep in mind that you'll want two for each corner if you plan to try these!
Because they are made for the corners, the rug won't curl up there, which is always the most annoying part.
Pros and cons of these sticky rug grippers:
Art putty for securing frames and art
Looking for a vertical solution? Our leaning frames on my DIY picture ledges stay put just fine if they aren't touched. ;) But we've had a couple fall when someone runs by or hits the wall.
This solution is as easy as the clear gel, but this one works on walls instead. I used to use this same stuff for my posters back in college!
This mounting putty is strong stuff -- you hardly need any:
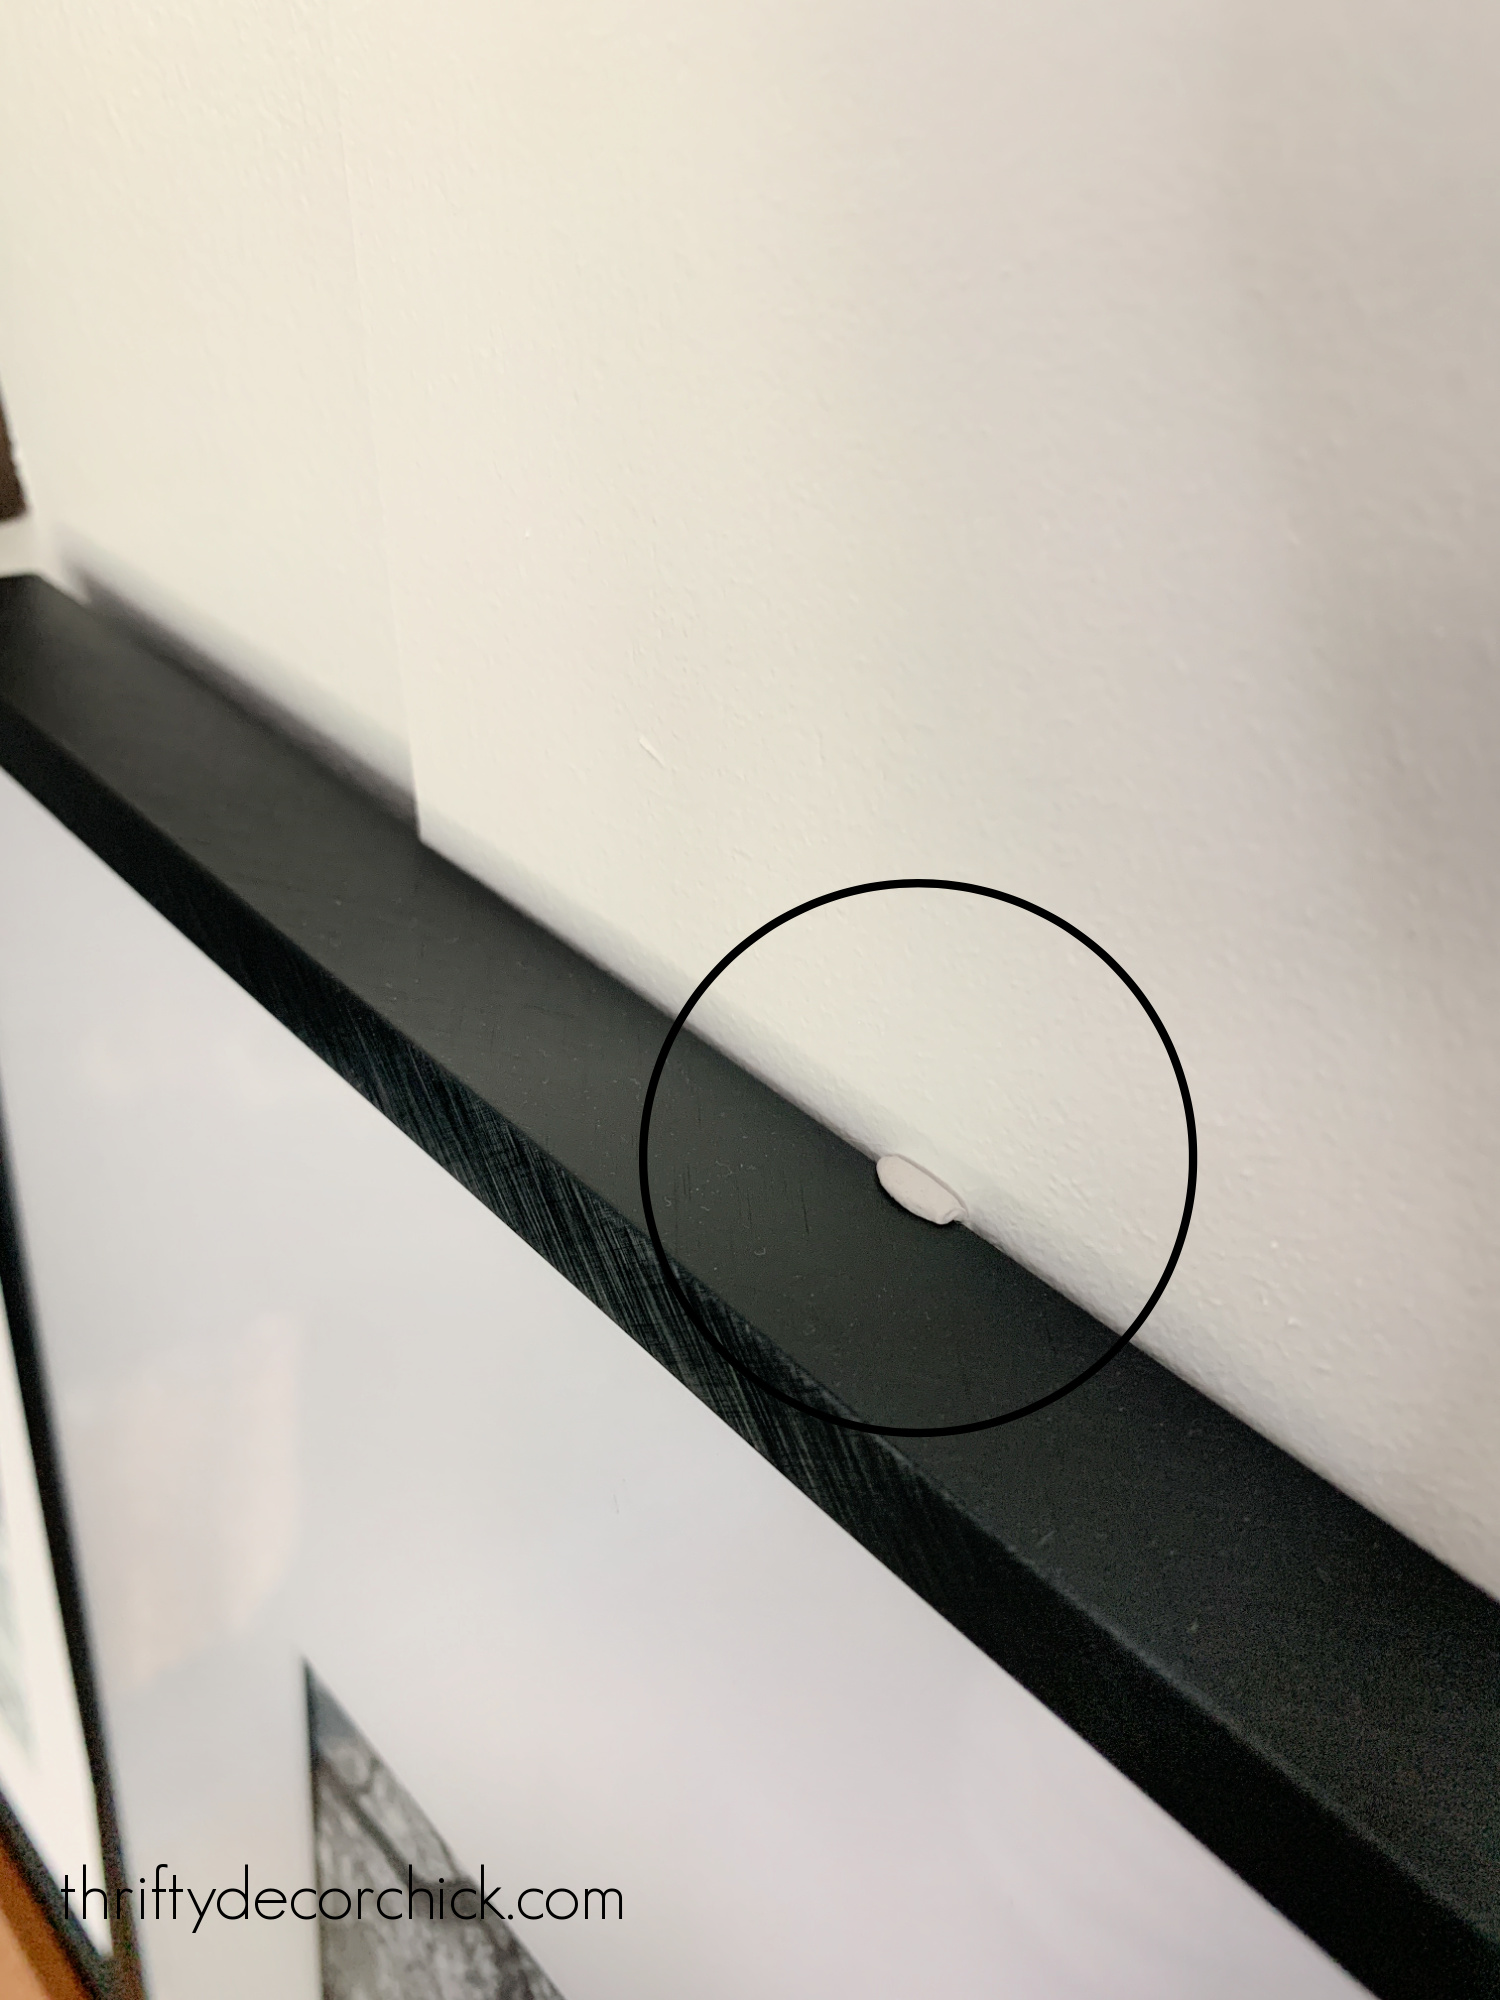
I just put a little dab behind the frame and lightly press it into the wall. They won't budge unless you make them! It's super simple to remove though.
This putty is also great to "permanently" straighten art that won't stay level.
When I used this on posters years ago, sometimes it would leave an oily mark on the walls, Now I don't notice that at all. I think if there were going to be issues with that, it would be on a flat finish paint.
Also, make sure your wall paint has cured before using this mounting putty!
How to prevent sliding couch cushions
Man, this one used to drive me especially crazy! If your sofa or chair cushions constantly slide out, the solution is SO simple!:
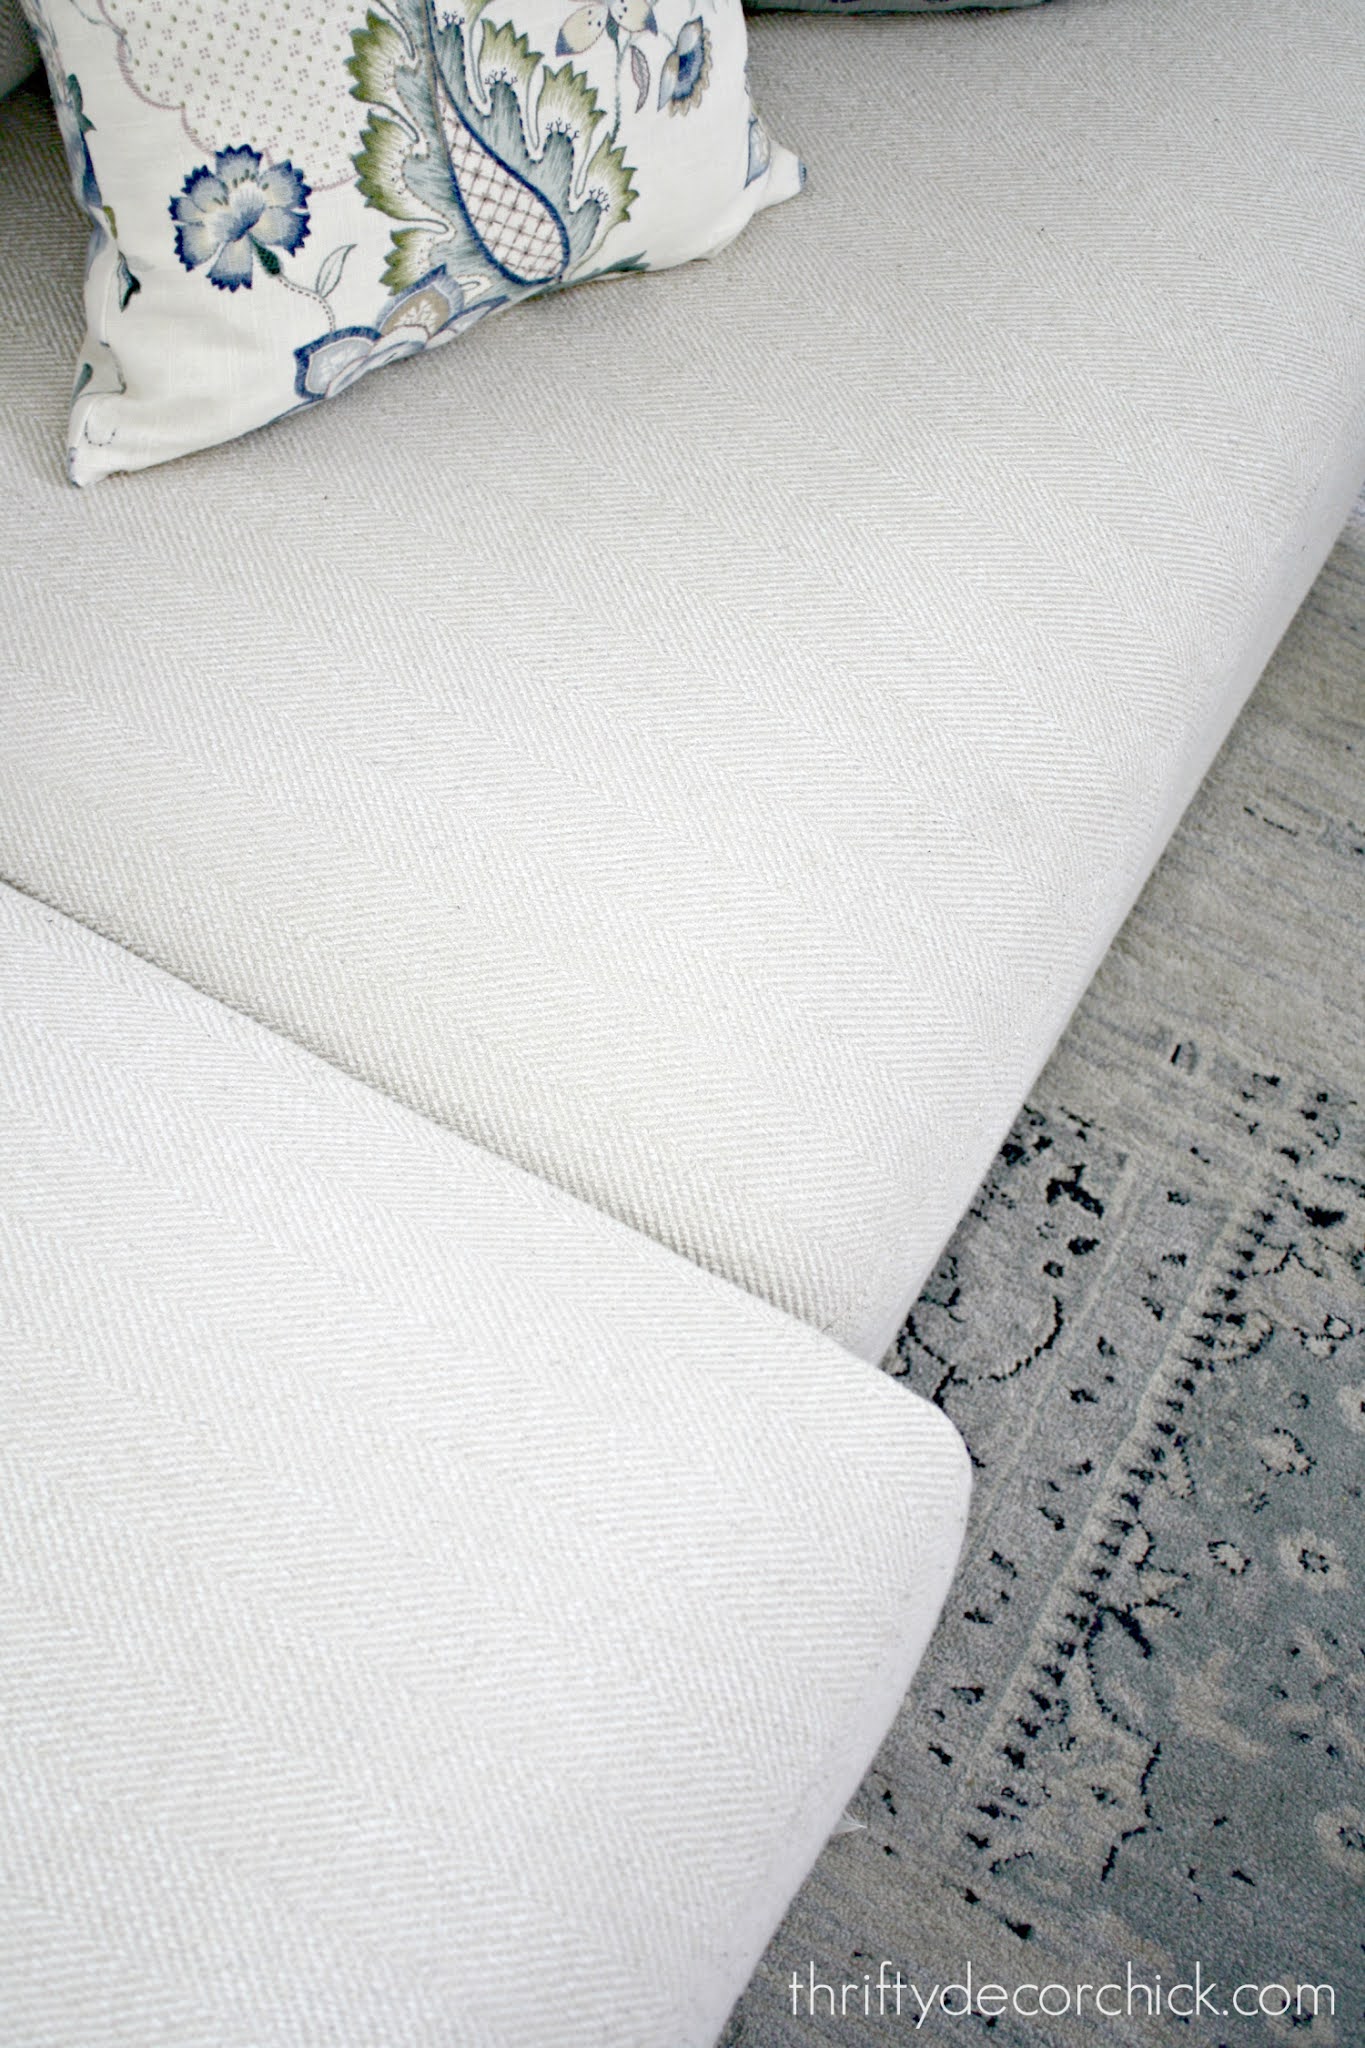
Yes, I use rug pads for the couch instead of under the rugs. ;) We're all messed up over here.
But it works! And you don't need a huge piece -- you can easily cut them to the size you need. It's an easy fix and instantly keeps your cushions from sliding all over.
Have you tried any of these tricks to keep things from sliding all over? I hope these help if you're bugged as much as I am by things moving around. ? They're all affordable and only take a few minutes to apply or install.
By the way, sometimes you want things to slide easier...our rattan baskets used to scratch up the shelves and built ins until I starting to cover the bottoms of the baskets:

They slide like buttah now. :)
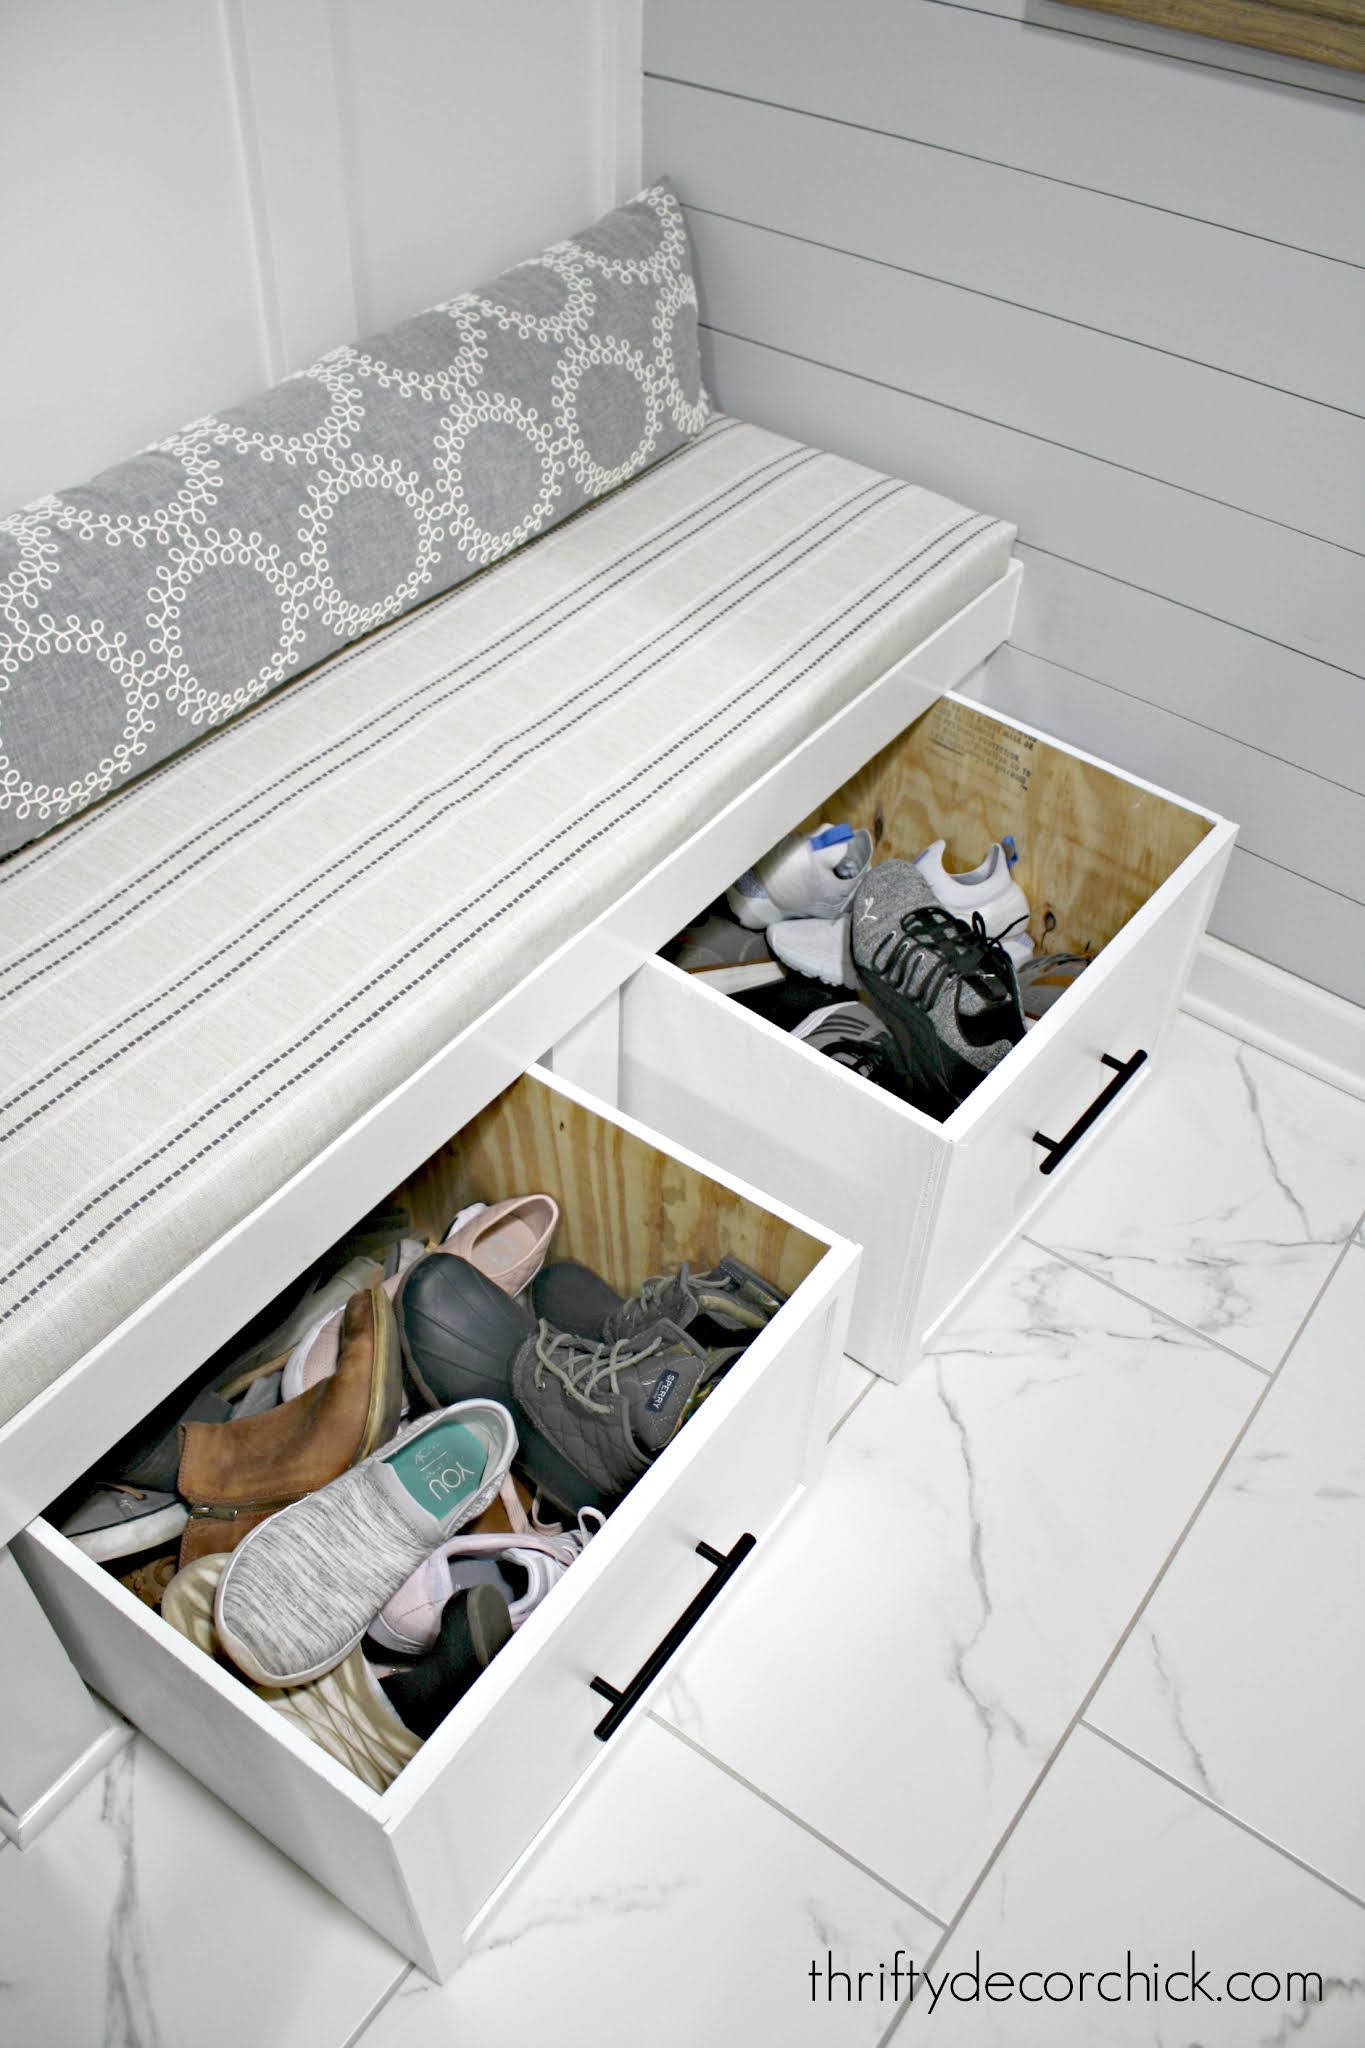
I also shared this easy trick that allows us to slide our DIY shoe bins in and out from underneath our mud room cubbies:
Never miss a post by signing up to get posts via email.
Via https://www.thriftydecorchick.com/2021/09/how-stop-things-from-sliding-around.html How our wood butcher block countertops have held up over the years. (And how to make them look brand new again!)
It's been nearly four years since we moved in to this house, can you believe it?
I've shared our wood butcher block counters a lot over the years because I get SO many questions about them! I can't tell you how often I hear from readers who are hoping to use wood counters in their kitchen, but a contractor talks them out of it.
Many will warn that wood counters are too difficult to maintain.
But that's simply not true. Yes, you CAN have wood counters in your kitchen and keep them looking great!
Our walnut island countertop came unfinished, and when our builder installed it they asked if I wanted mineral oil applied to protect them. I shared why the mineral oil didn't work on our wood counters here.
I immediately went back to my tried and true wood finish...Tung oil.
This is the thing...no coating will last forever on wood. Even polyurethane will wear down with a lot of use.
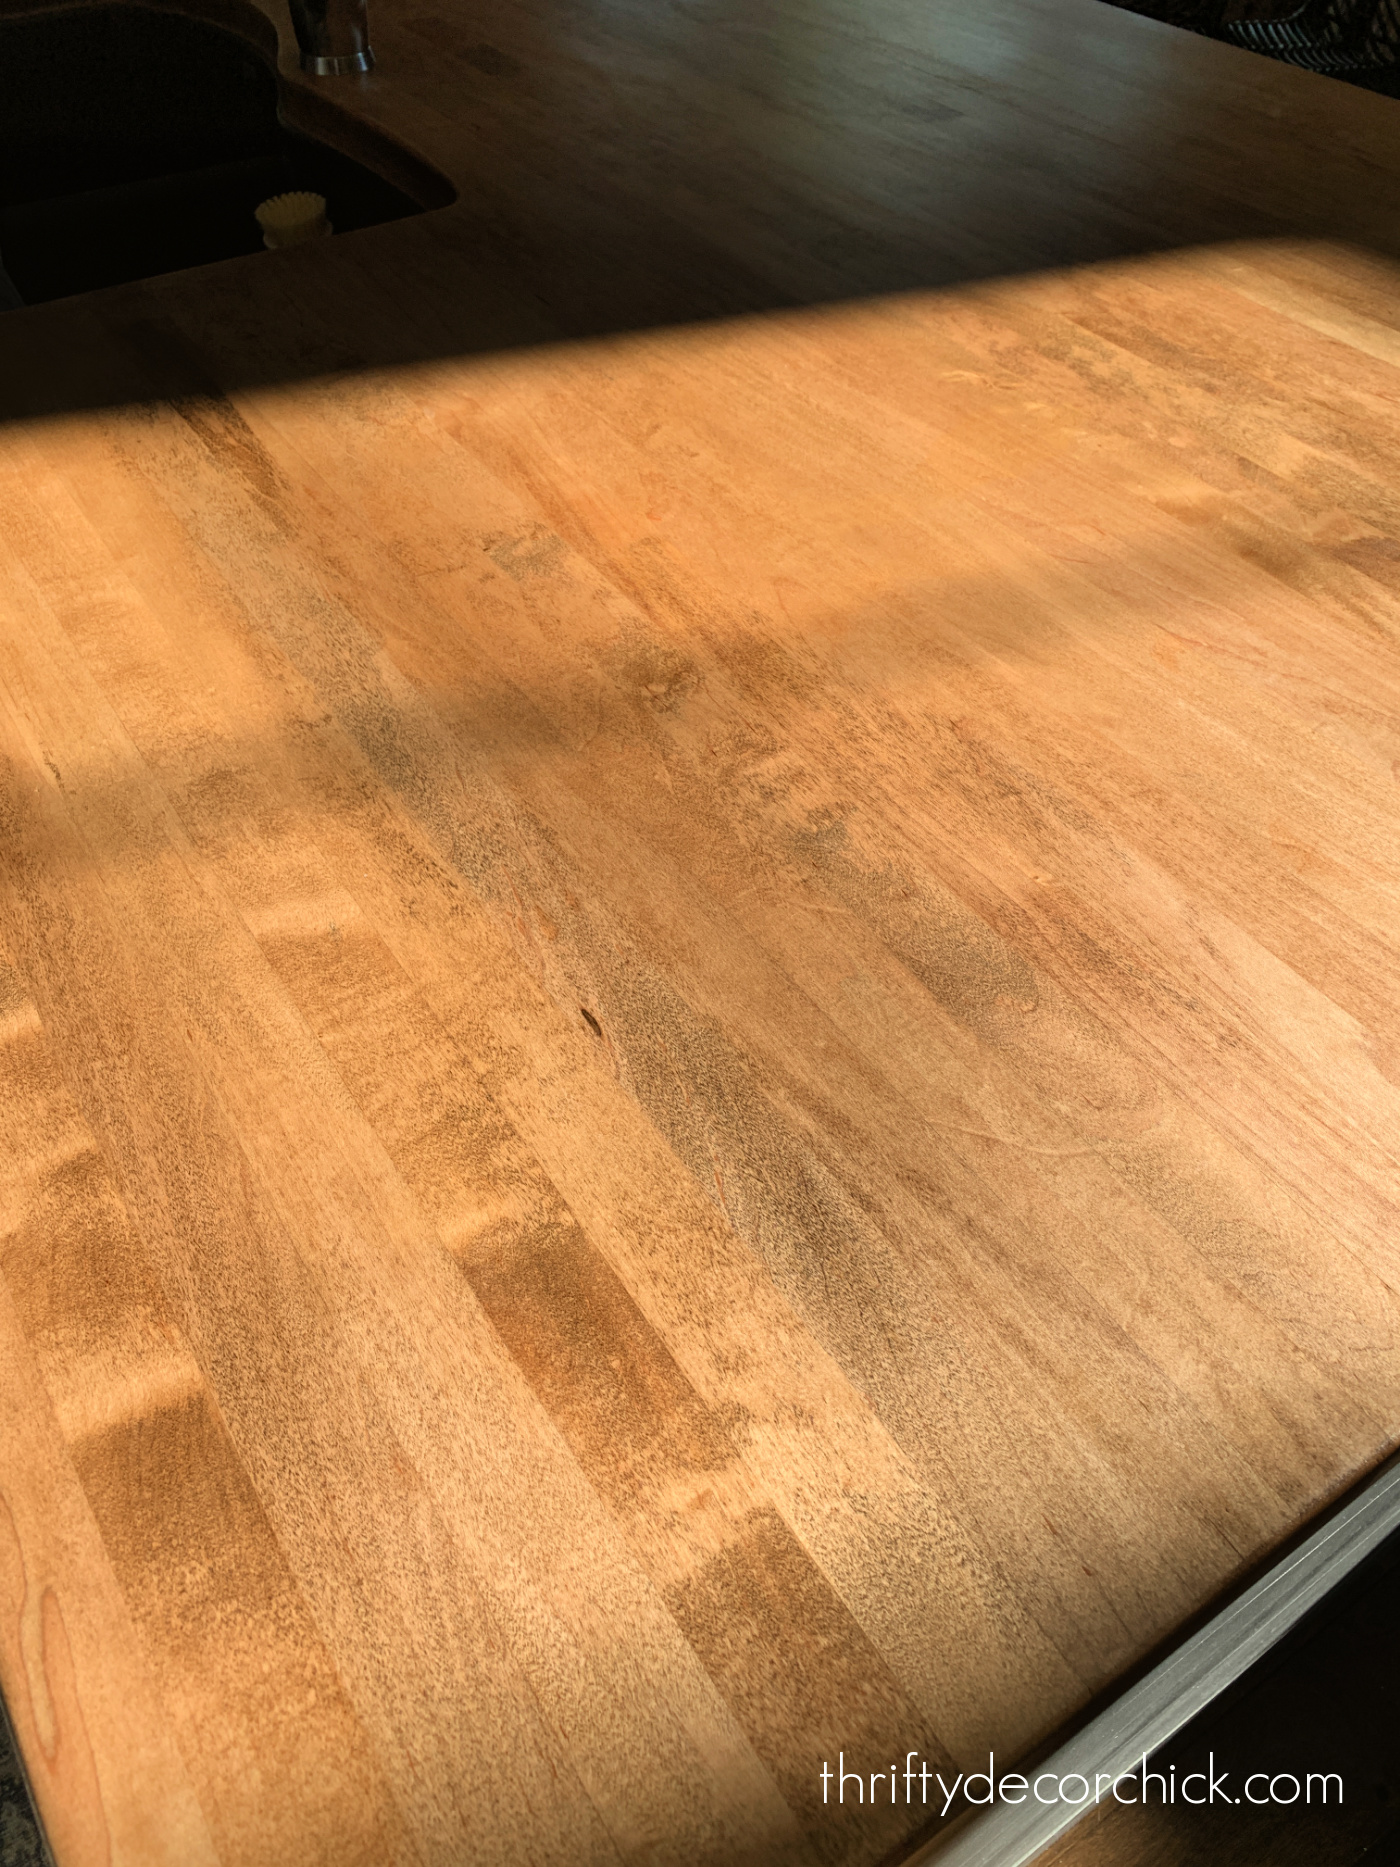
Ours were finally showing some wear. It's been a year and a half since I had recoated the counters with this oil. I try to do it every six months, at the most once a year. Even after all this time, 90 percent of our island counter still looked GREAT!
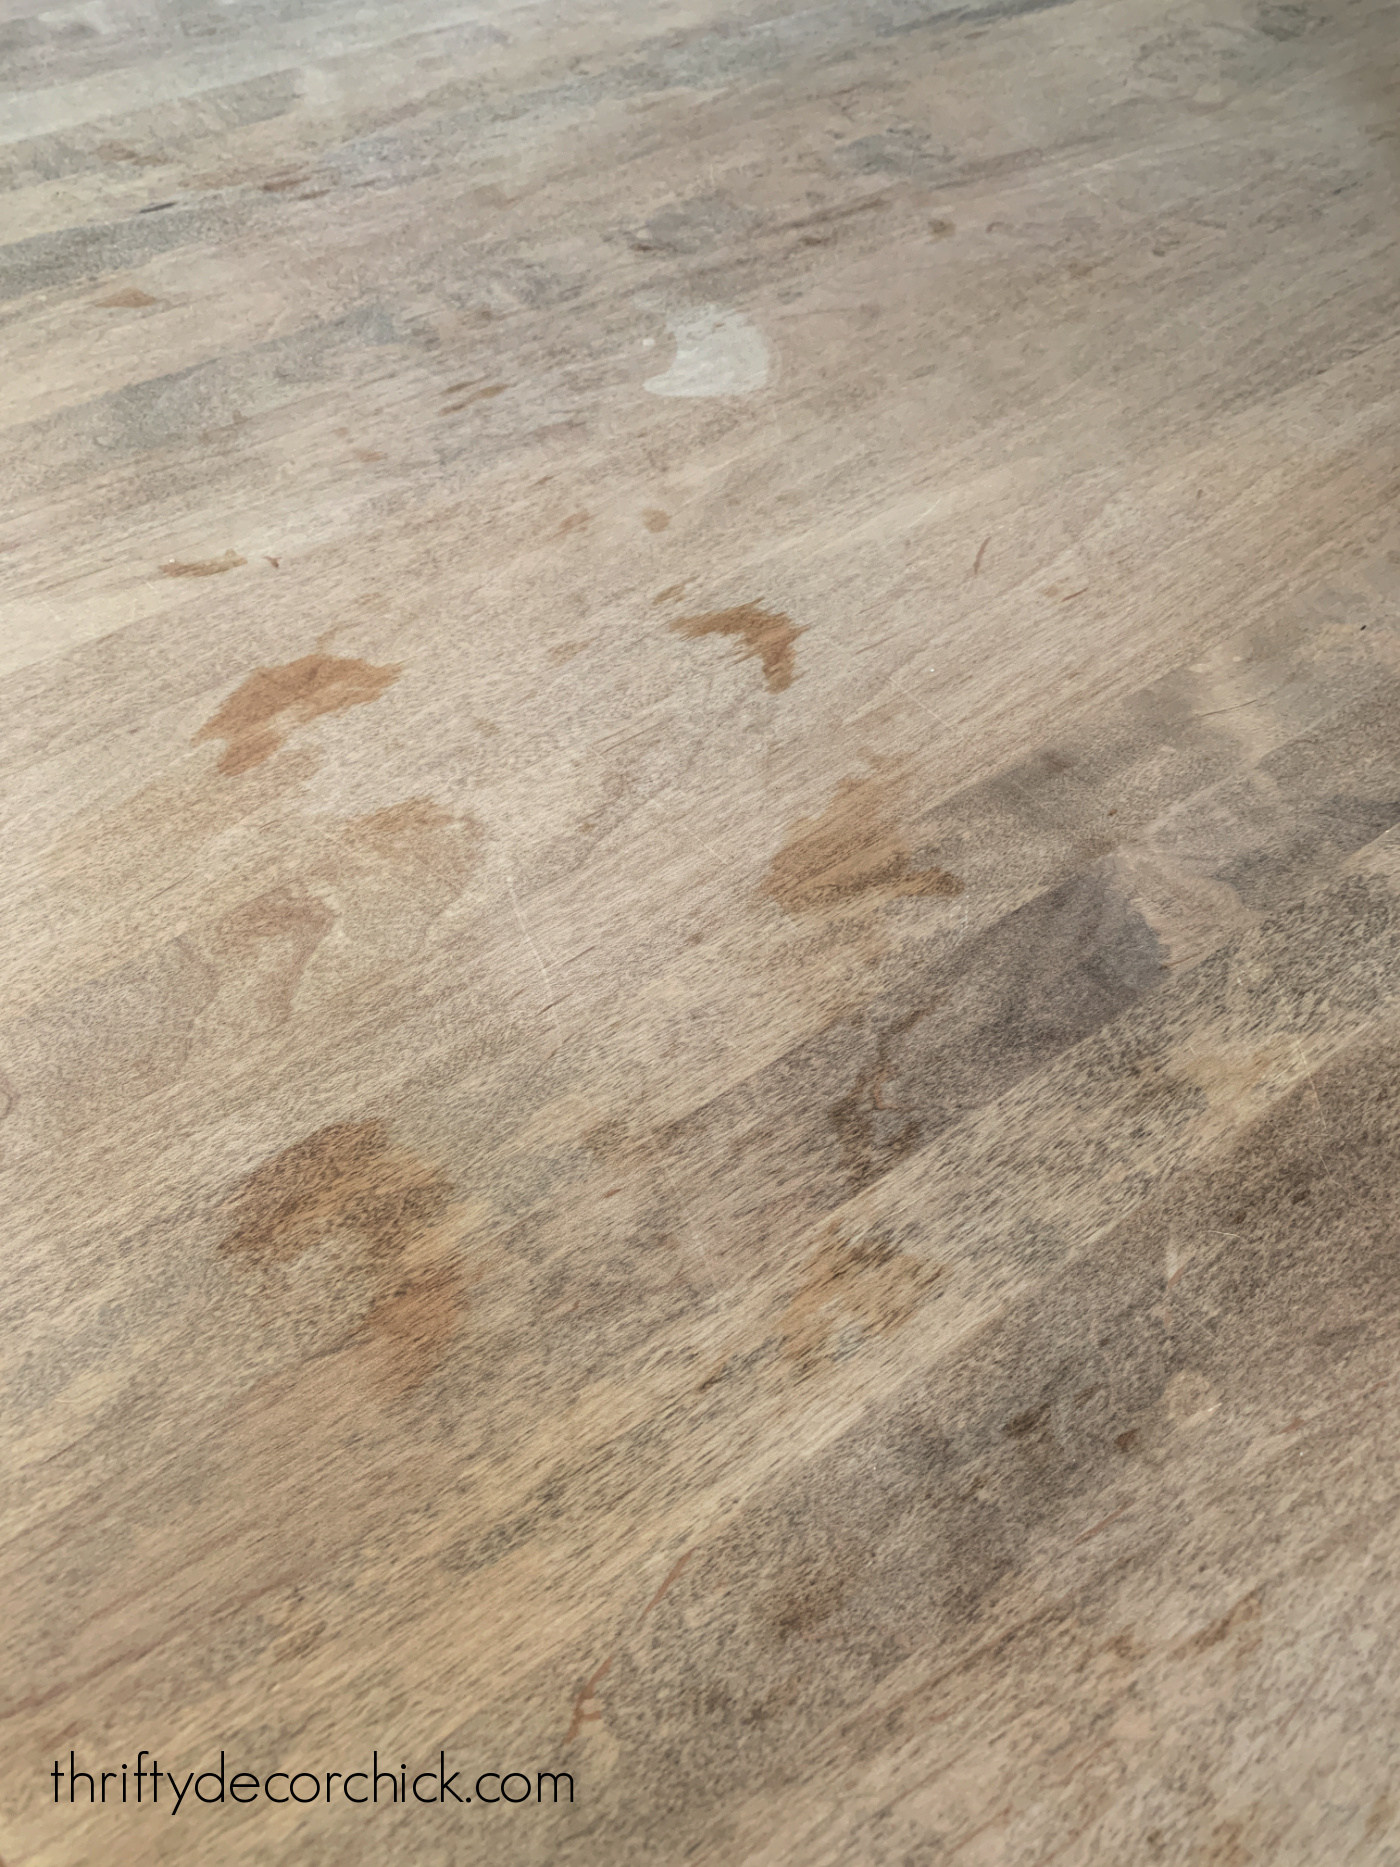
But we did have some stains in wood:
This post may contain affiliate links for your convenience.
See my policies and disclosure page for more information.
They were all on the counter closest to the fridge, so I'm guessing the stains were from oils from food.
I should mention, I don't expect (or want) our butcher block counter to be pristine. We don't cut directly on it, but I welcome the warmth of a slightly worn and distressed wood countertop.
Slightly is the key word. ? I'm fine with dings (we really don't have any), scratches (hardly any) and some darker stains. But because the finish had worn so much, these were extra noticeable.
Last time I reoiled the countertops I didn't have to sand -- if you don't have any major issues there's no need to. Just clean them well and reapply.
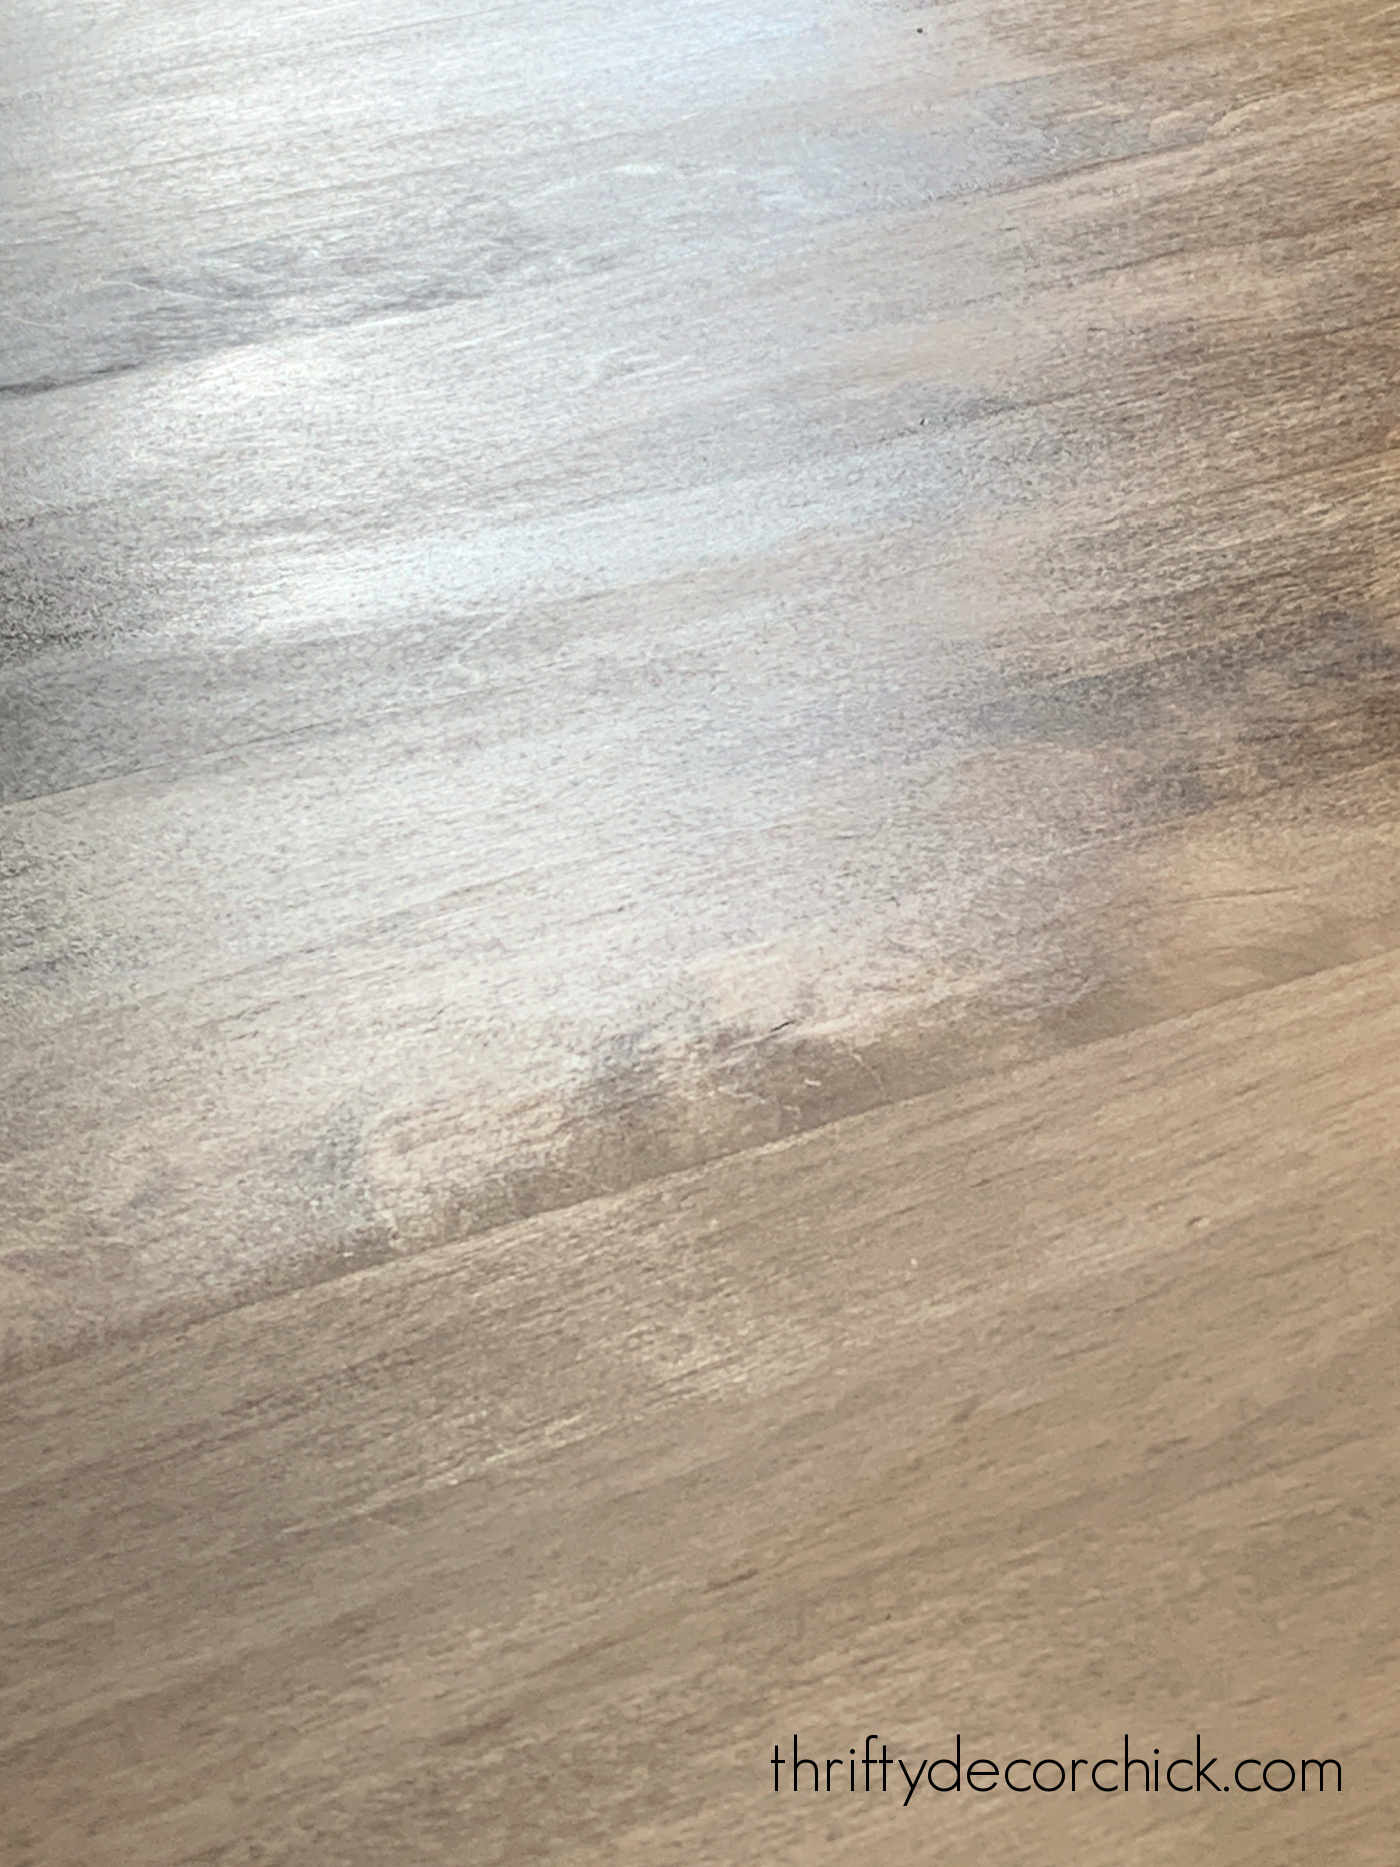
This time I need to do a light sanding first. I love my Bosch sander:
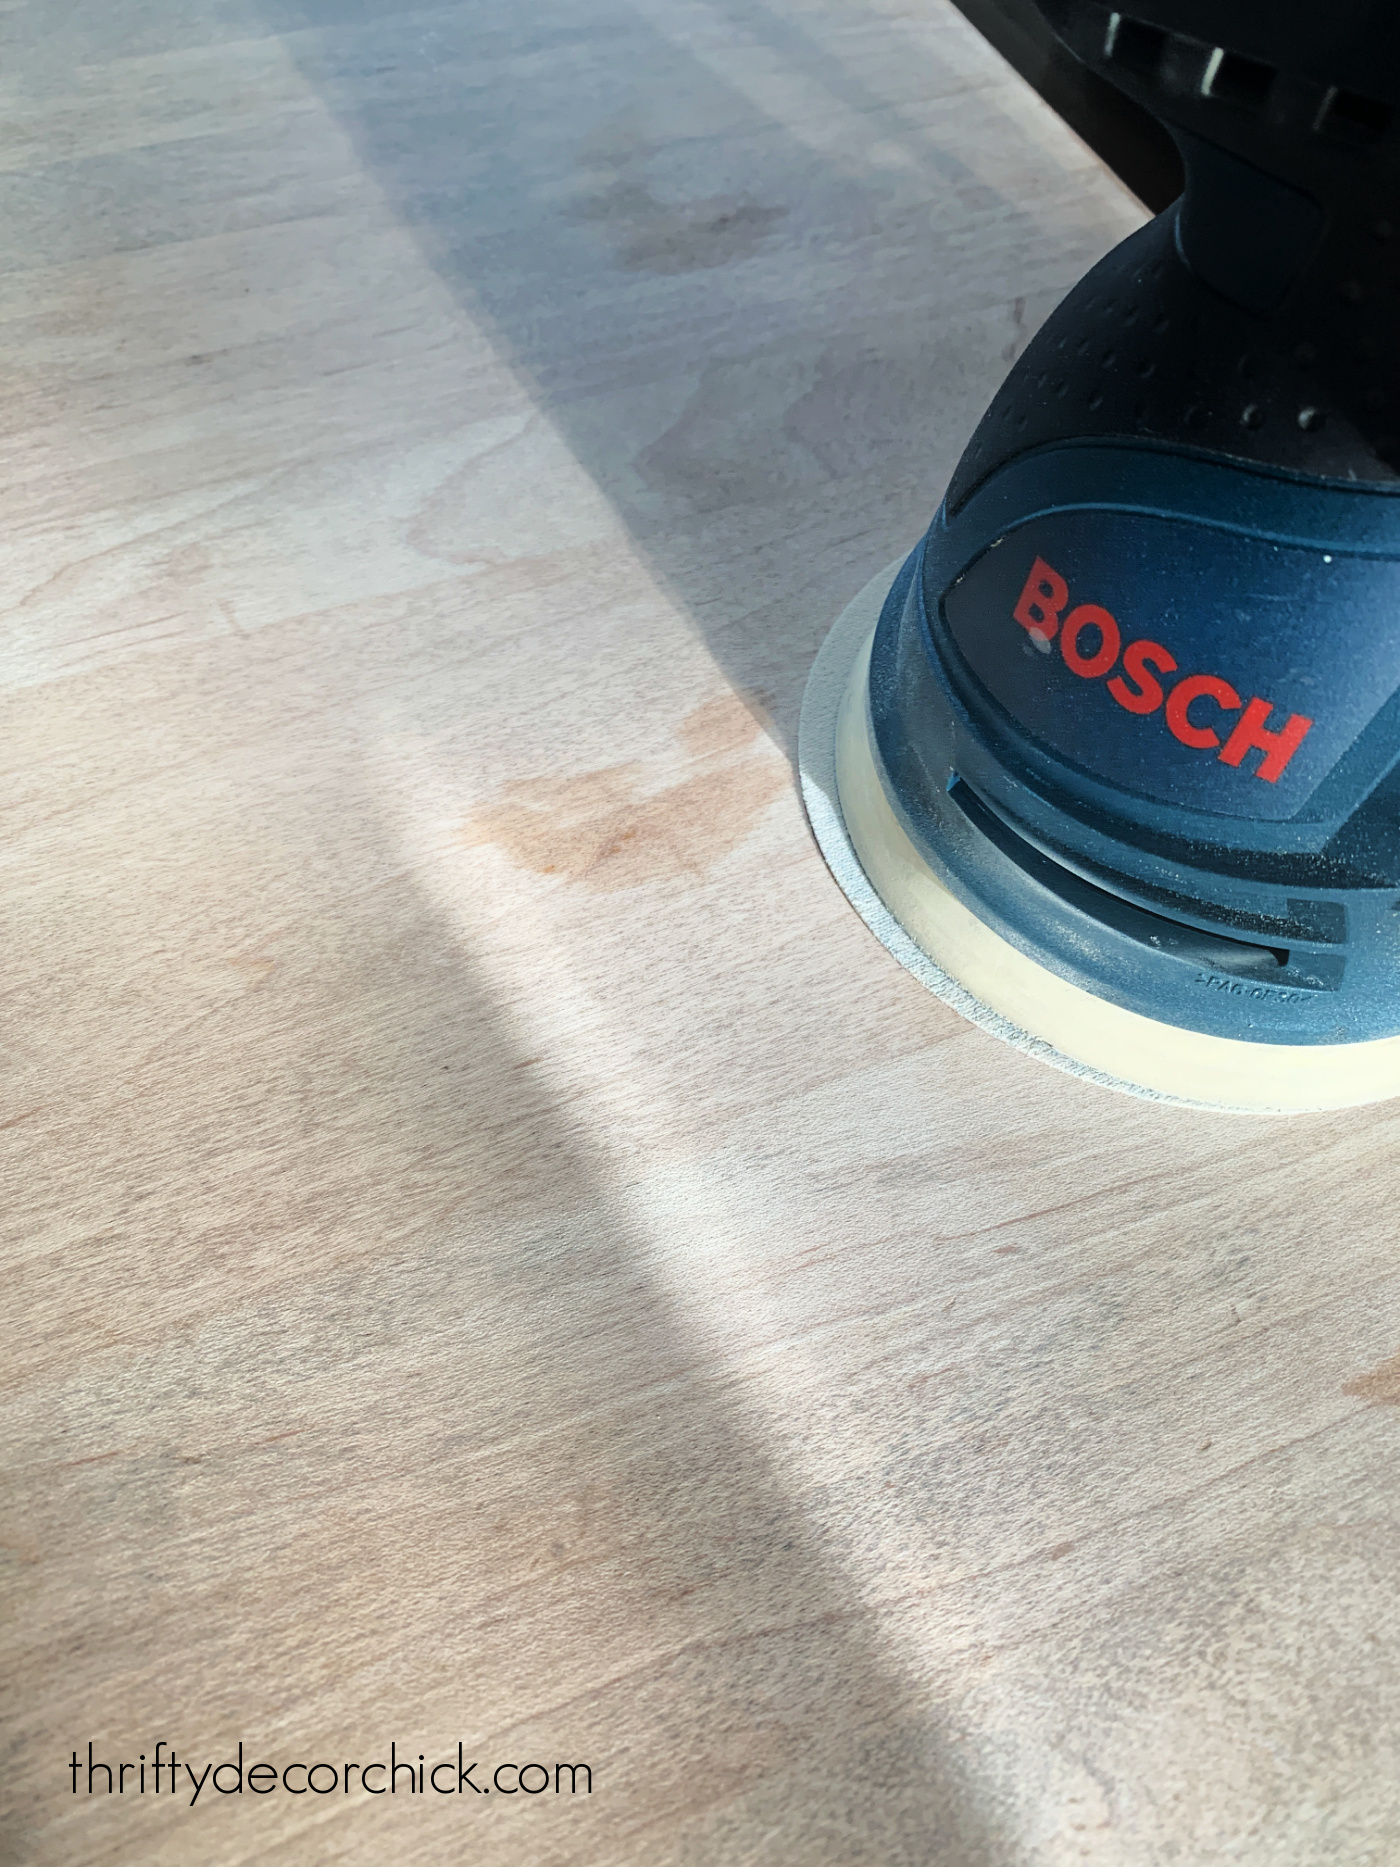
I used a fine grit paper (120 grit) and most of the marks disappeared immediately. There were a couple (pictured above) that were a bit more stubborn, but I figured the oil would hide them. (I was right!)
Since I had to sand, I needed to get the fine layer of dust off of the counters first. A tack cloth is ideal for this, but if you don't have one, try to avoid using a soaking wet rag to wipe off the dust. The moisture will raise the wood and you'll lose the smooth finish you just achieved by sanding.
Sometimes water popping is a good thing, but for just sealing counters you want to avoid it. Instead, use a slightly damp rag to wipe down the counters. This will keep the wood from raising.
After sanding and wiping the counters, all you need to do is grab a lint free rag and liberally wipe on your Tung oil. I like to pour it directly on the counter and then apply:
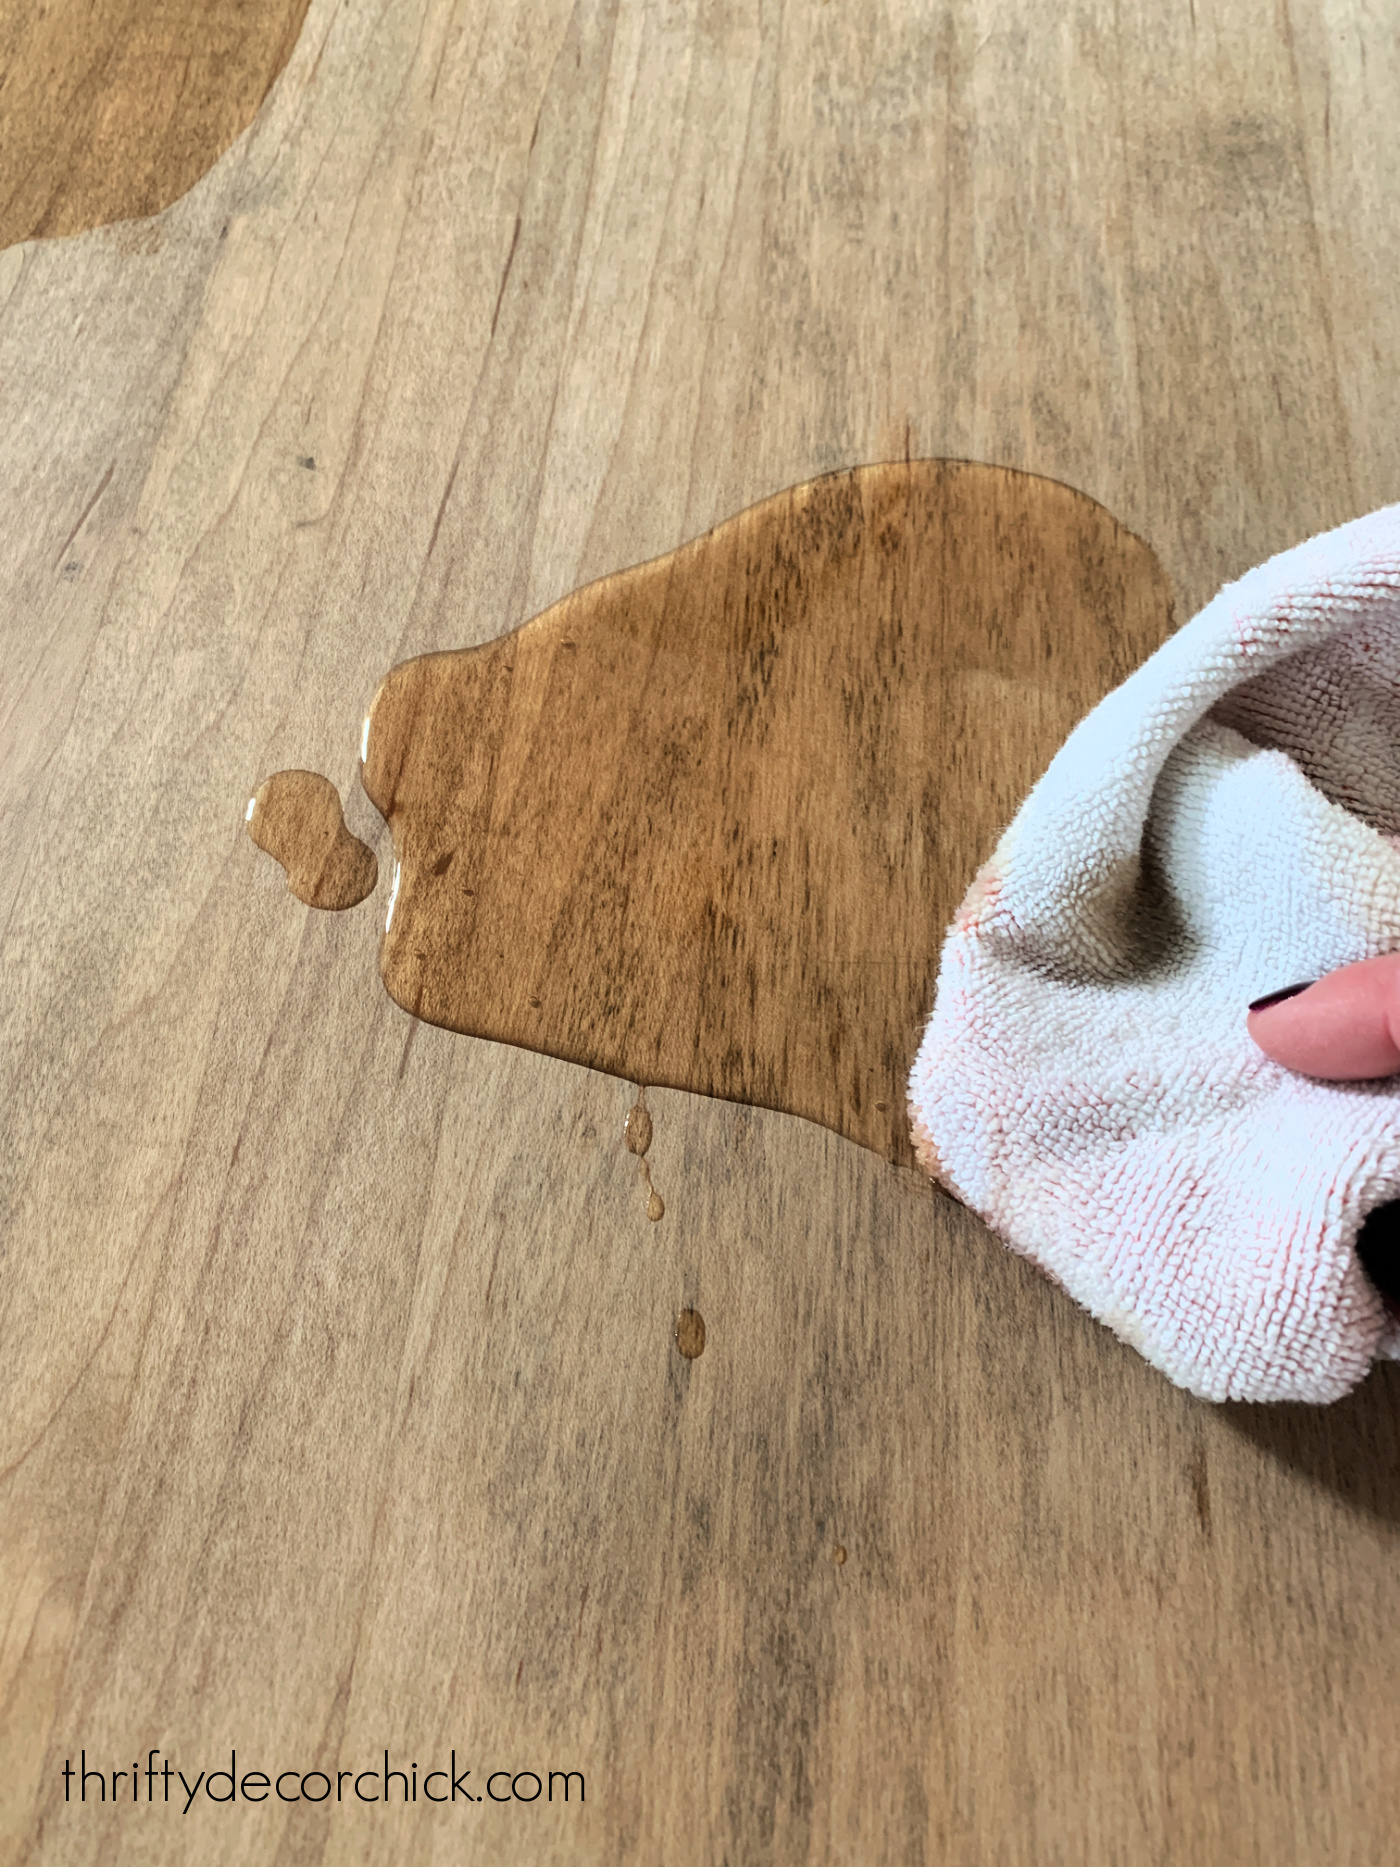
Unlike stain and spray paint, you can use a heavy hand with Tung oil. Don't be afraid to use a lot of it! You'll wipe it down to remove the extra anyway.
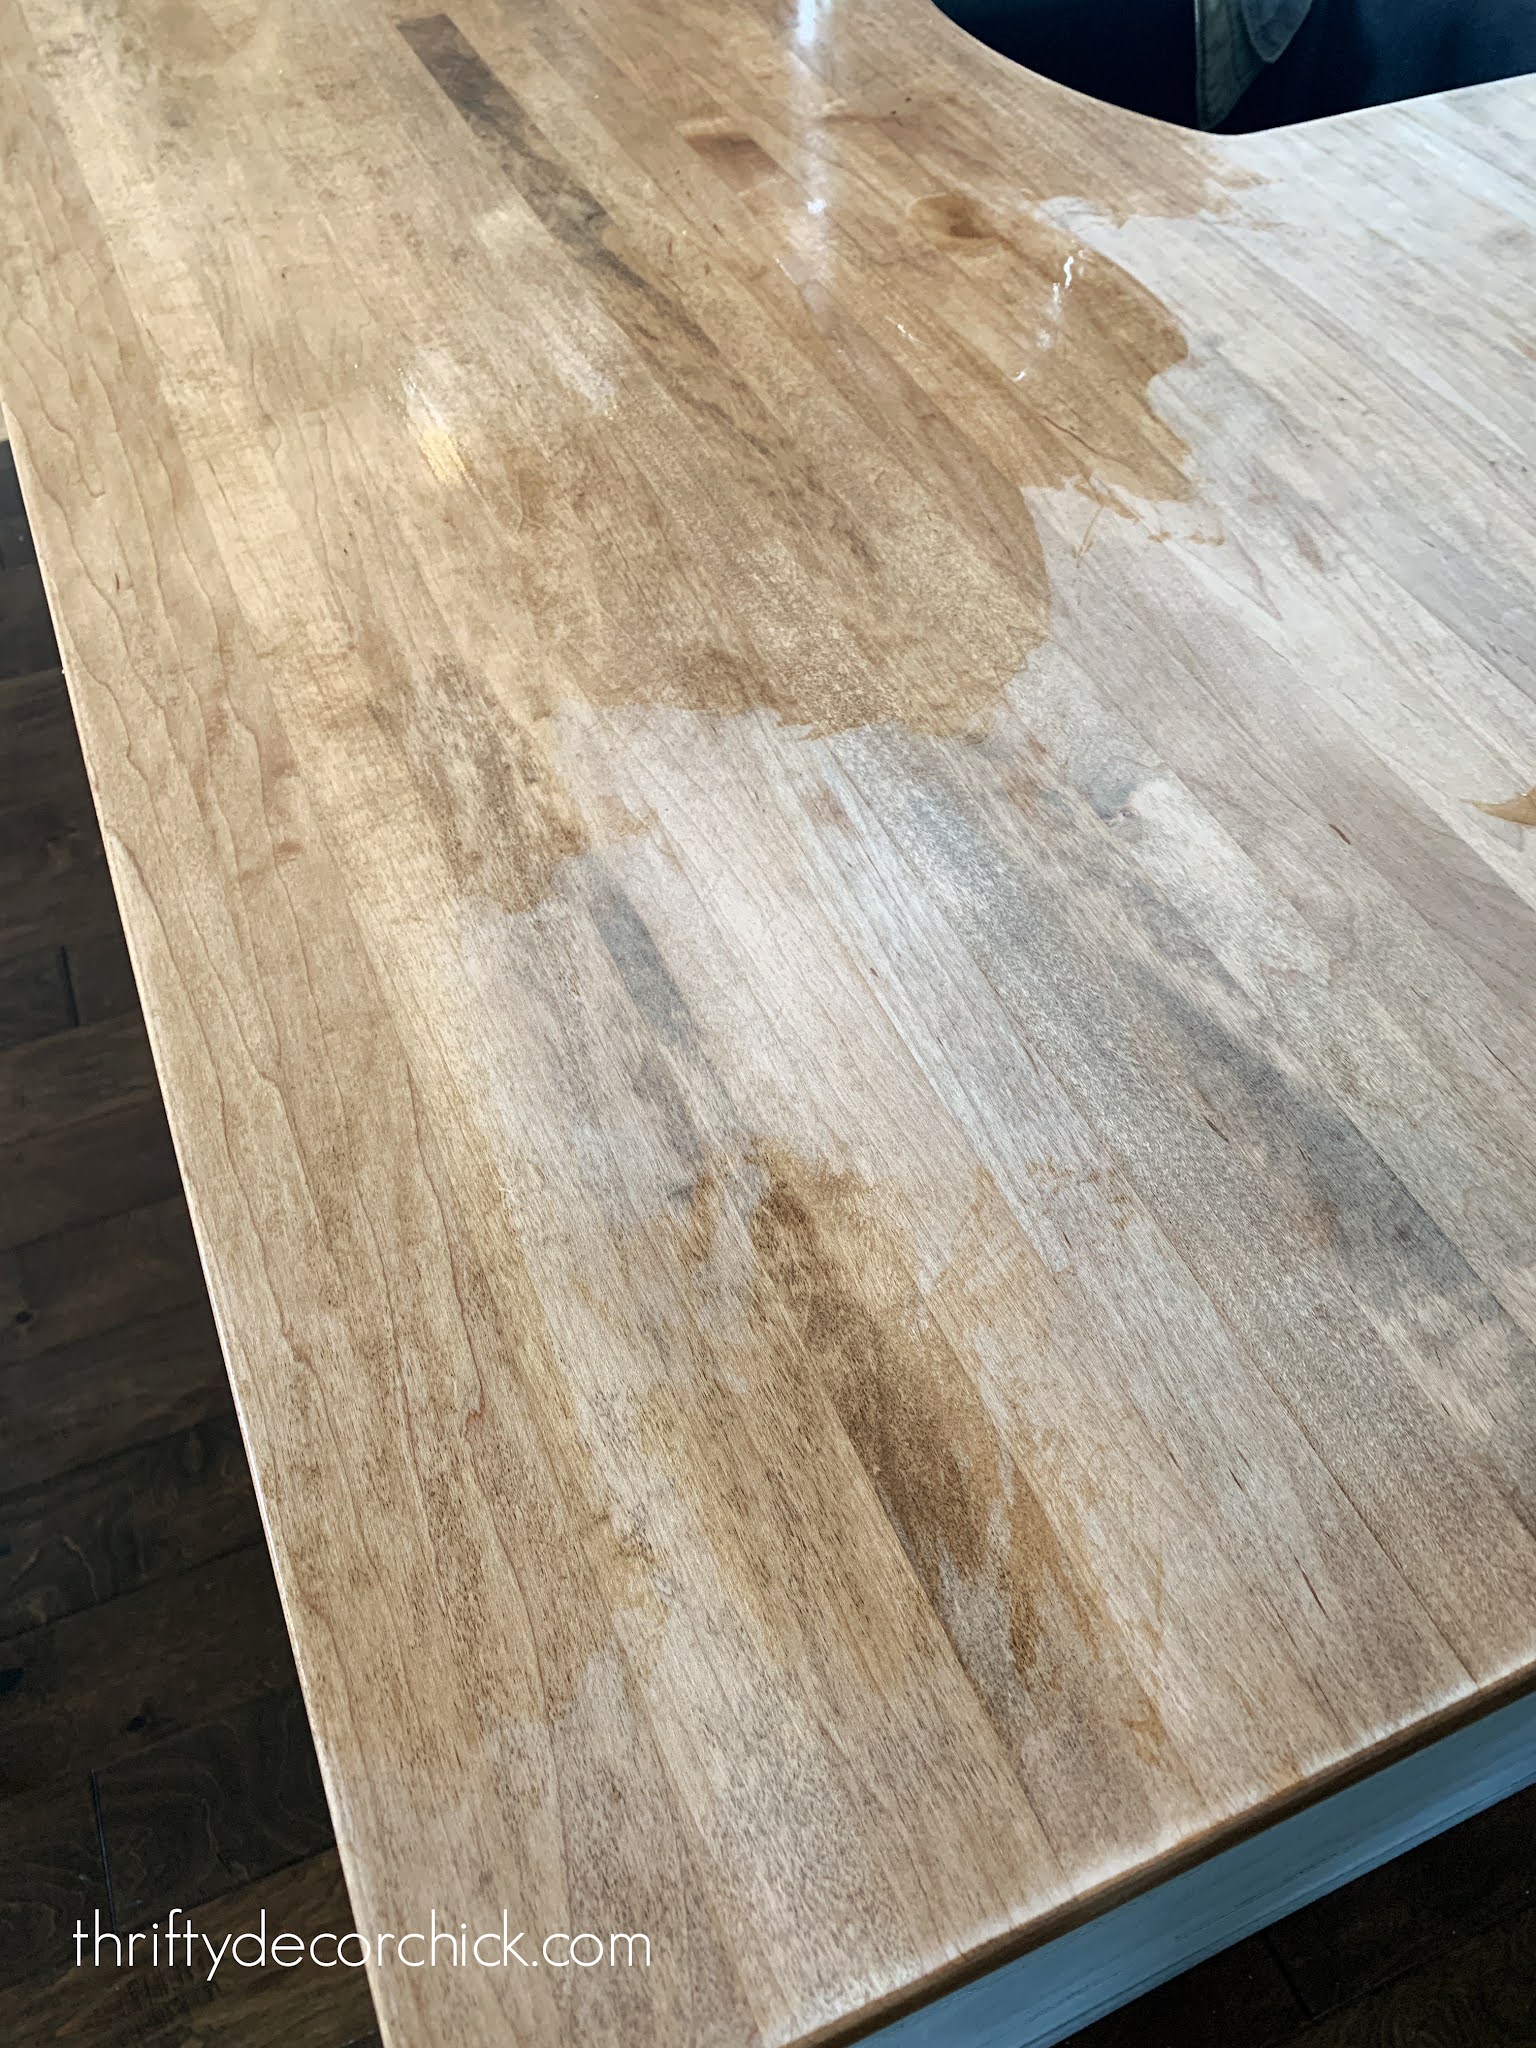
Use the light to see where you may need to add more Tung oil -- some spots in the wood will soak it up faster:
I've used all kinds of Tung oil over the years. My favorite was Formby's but they were bought by Minwax. I have used the Minwax oil as well and like it. This time I used the Watco brand because it's what I had on hand.
Isn't it crazy how much the oil warms up the wood?:
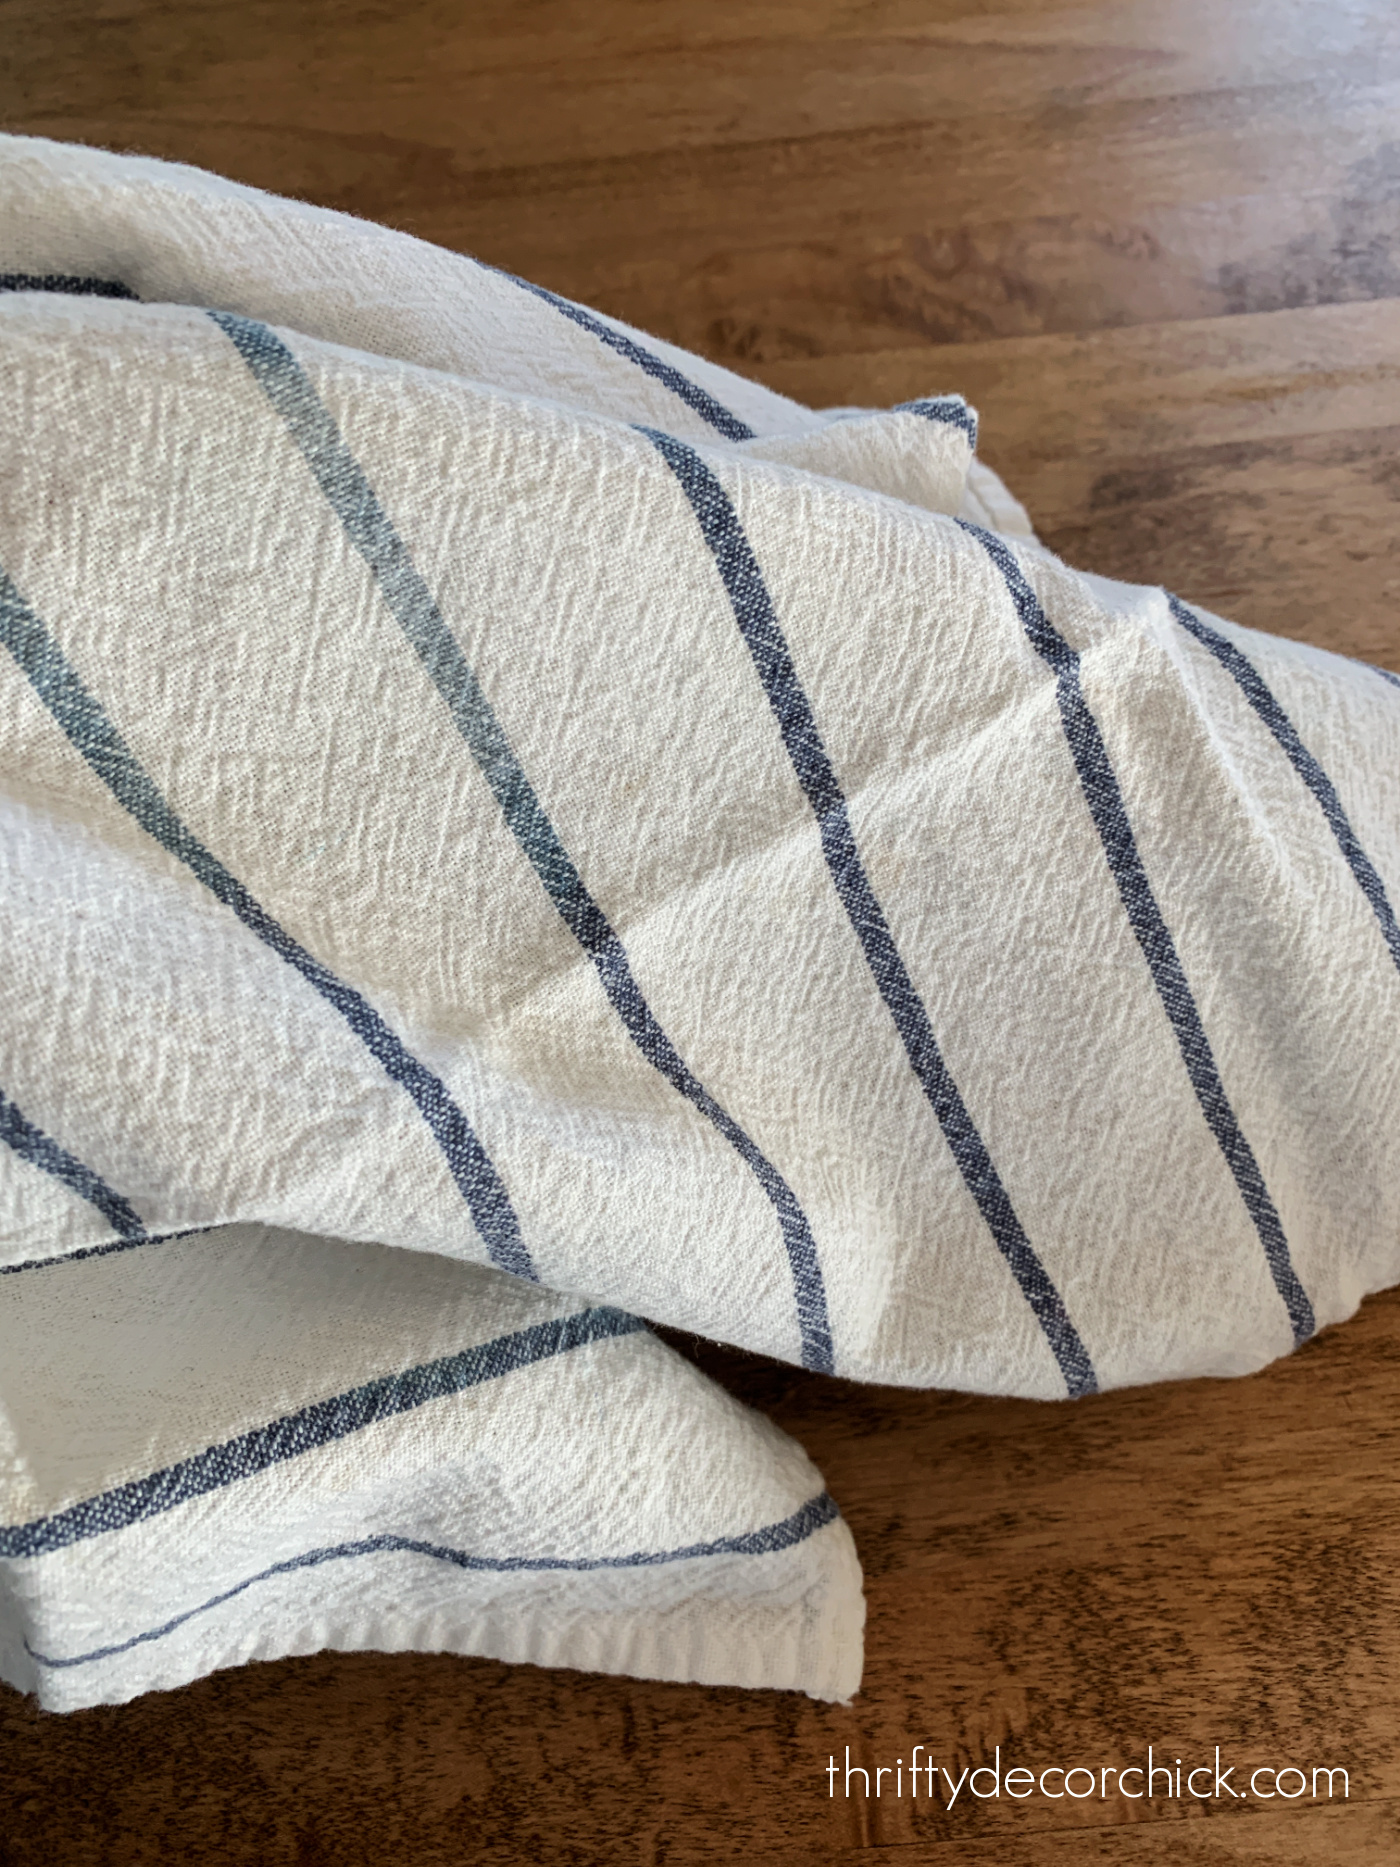
After letting it soak in for a bit -- anywhere from 5 to 15 minutes -- you'll want to start removing the excess and buffing the finish with another clean cloth.
I've found the super inexpensive kitchen towels from IKEA work GREAT! I use them in the kitchen and once they are stained they go in the rag pile.
They're also great for staining:
If you are oiling a bare countertop for the first time, you'll want to do numerous coats, at least 12 hours apart.
Once you've done it a few times over years, one coat will be sufficient each time:
And it won't take nearly as long to fully dry!
I oiled our counters first thing in the morning and by evening I was able to use the sink no problem:

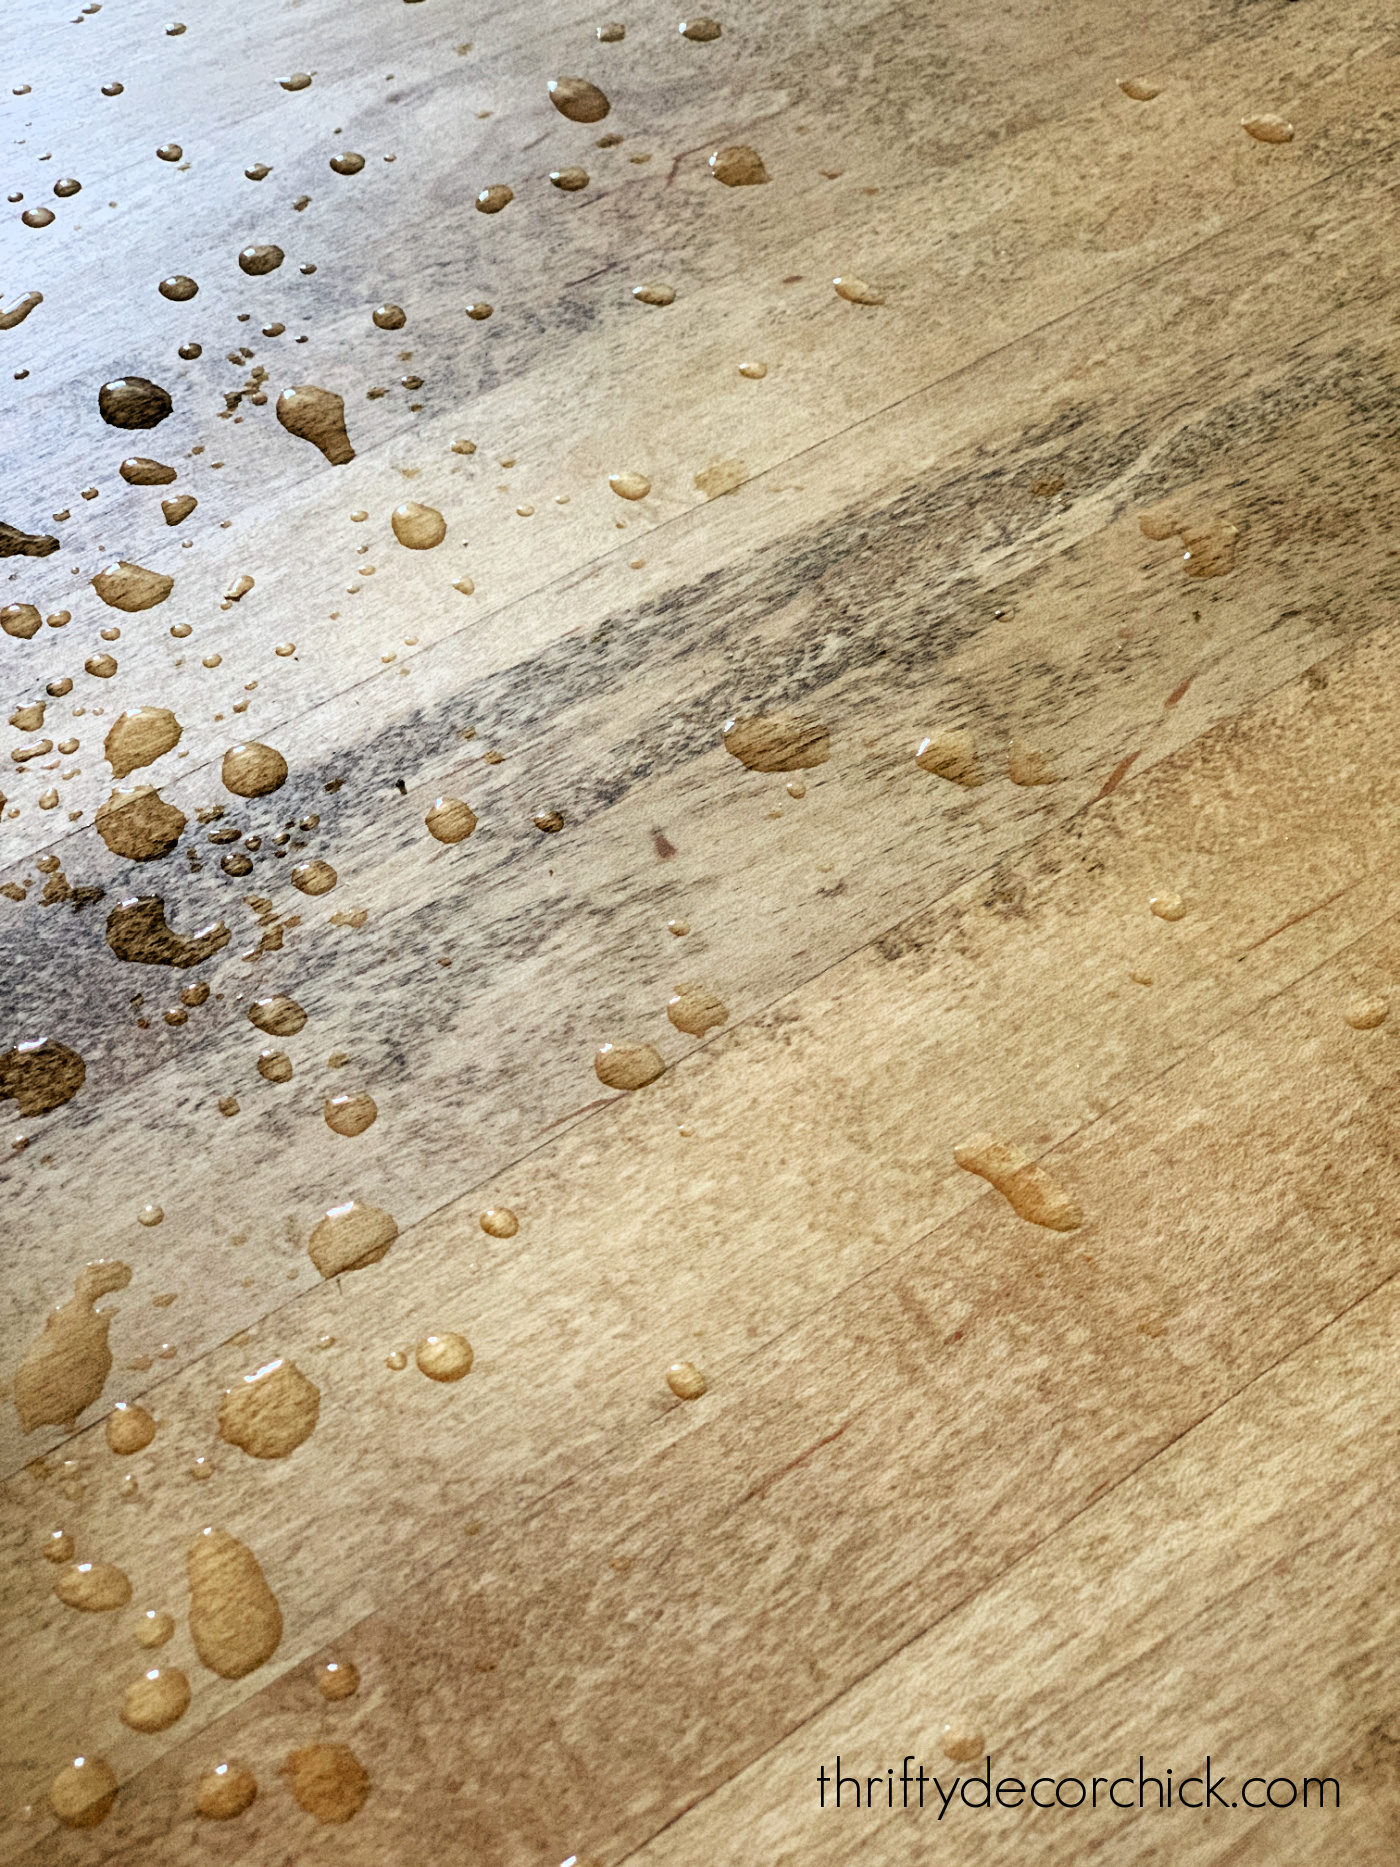
I cut some of our gorgeous hydrangeas and rinsed them in the sink. ?
They were dripping everywhere -- this is a visual of how well Tung oil protects against water. It beads up and doesn't soak in:
I still want to move our faucet handle to the front, over the sink. This is the only spot that I ever worry about because of the water that drips from our hands when we turn off the water:
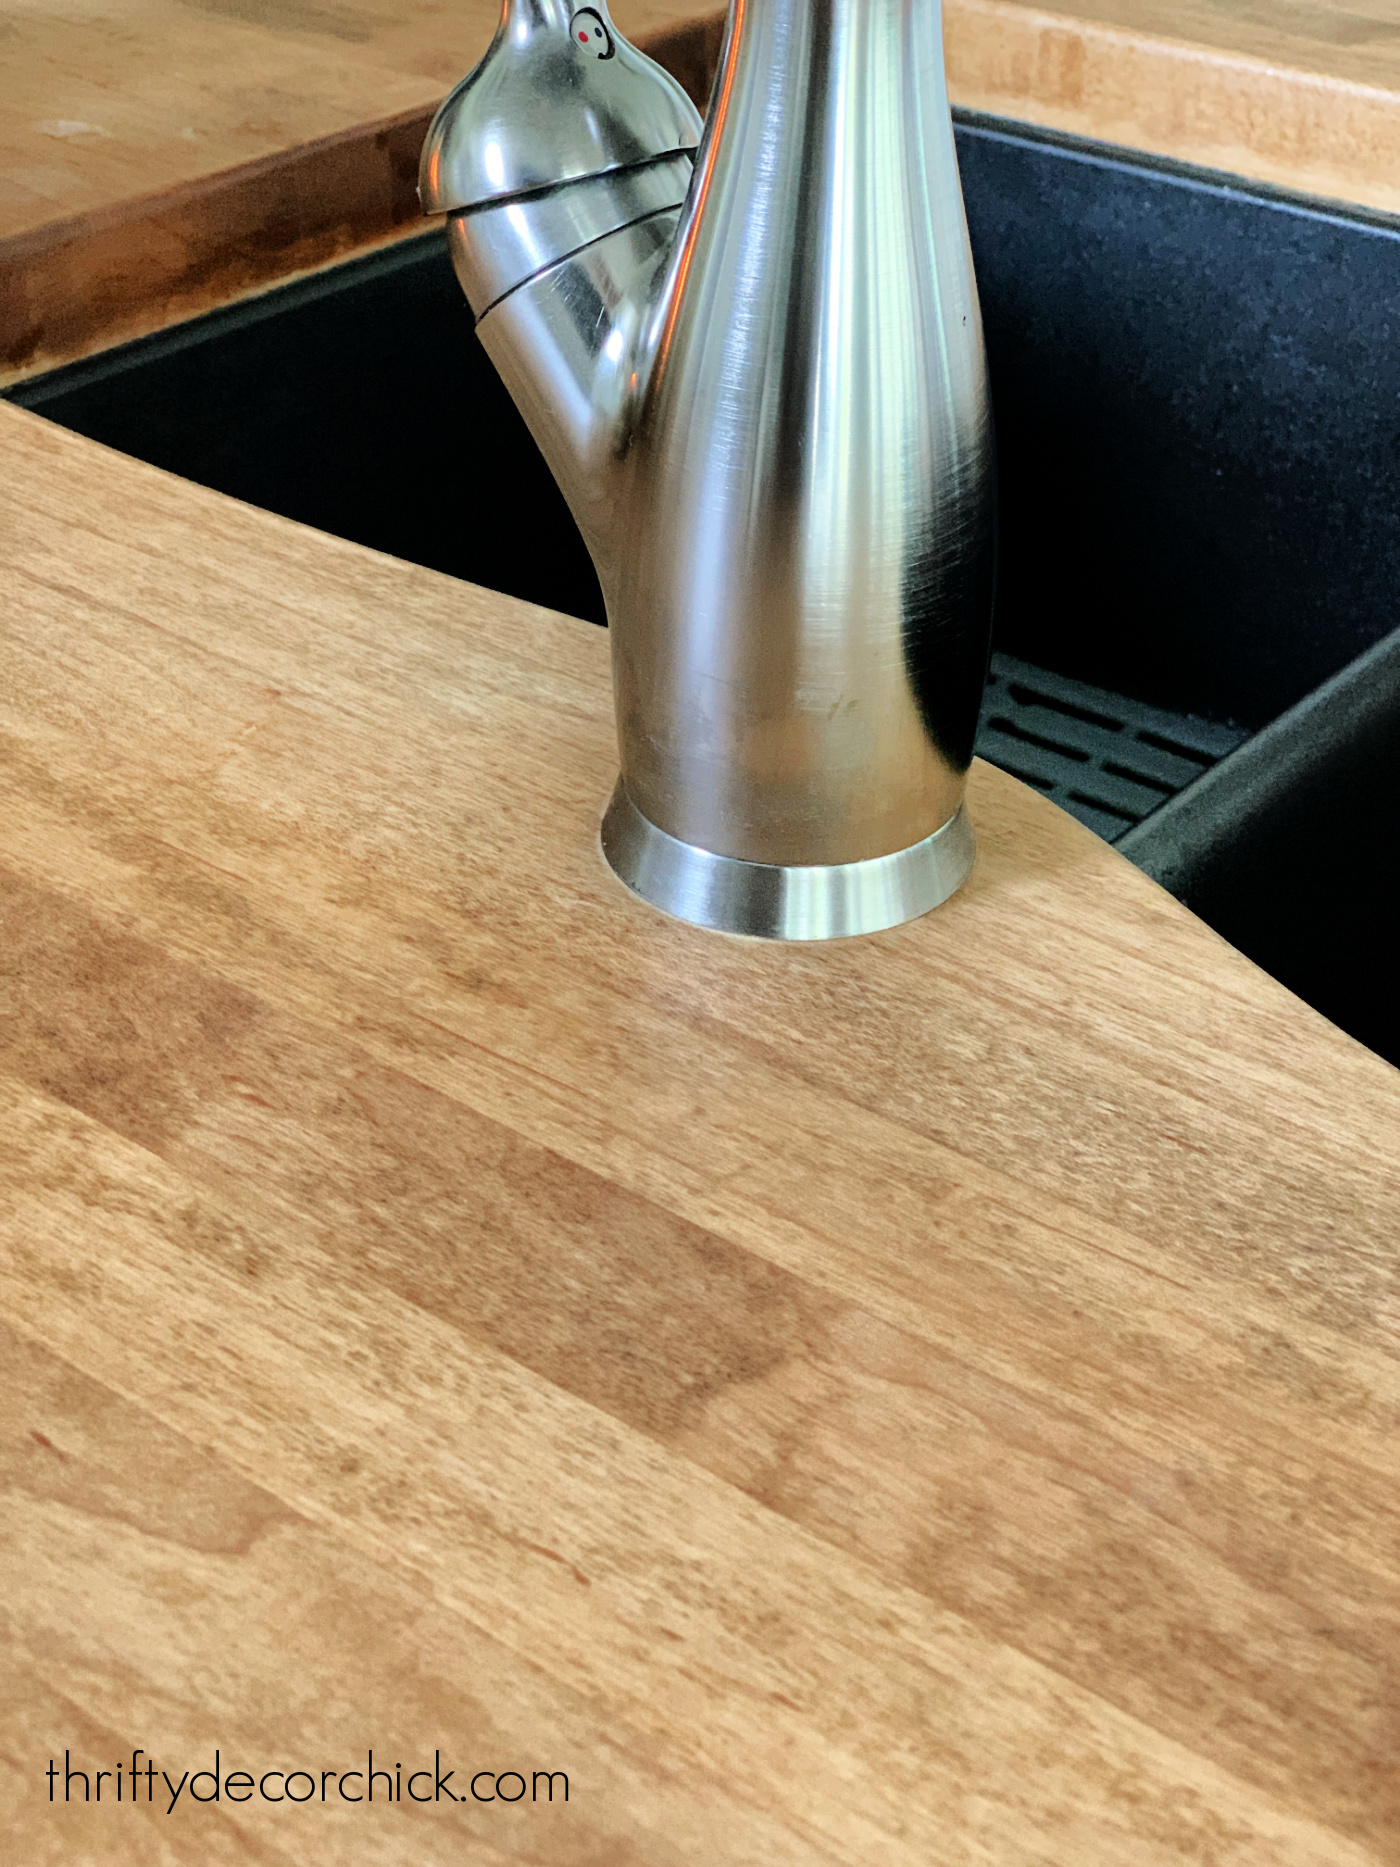
But as you can see, it's in fantastic shape, even after four years!
We try to wipe up excess water throughout the day, but don't always keep up with it.
The warmth of wood countertops is hard to beat!:


I LOVE it!
Oh, and as you can see, yes you can have an undermount sink in wood counters.
That wood around the sink has also held up beautifully -- just make sure to treat that part as you do the rest of the counters.
Here are some helpful wood butcher block countertop posts and tips:

Never miss a post by signing up to get posts via email.
Via https://www.thriftydecorchick.com/2021/09/how-our-wood-counters-held-up.html |