Tour our Christmas family room and many others in our 2021 blogger Holiday Home Tour!I'm joining in with some lovely home decor bloggers this week to showcase different rooms in our home.
Thank you to Jenny of Evolution of Style and the lovely ladies from 11 Magnolia Lane for hosting!
Today we're sharing family rooms -- hello to those of you visiting from Rachael at This is our Bliss!:

Be sure to continue on the tour by following along at the end of this post!
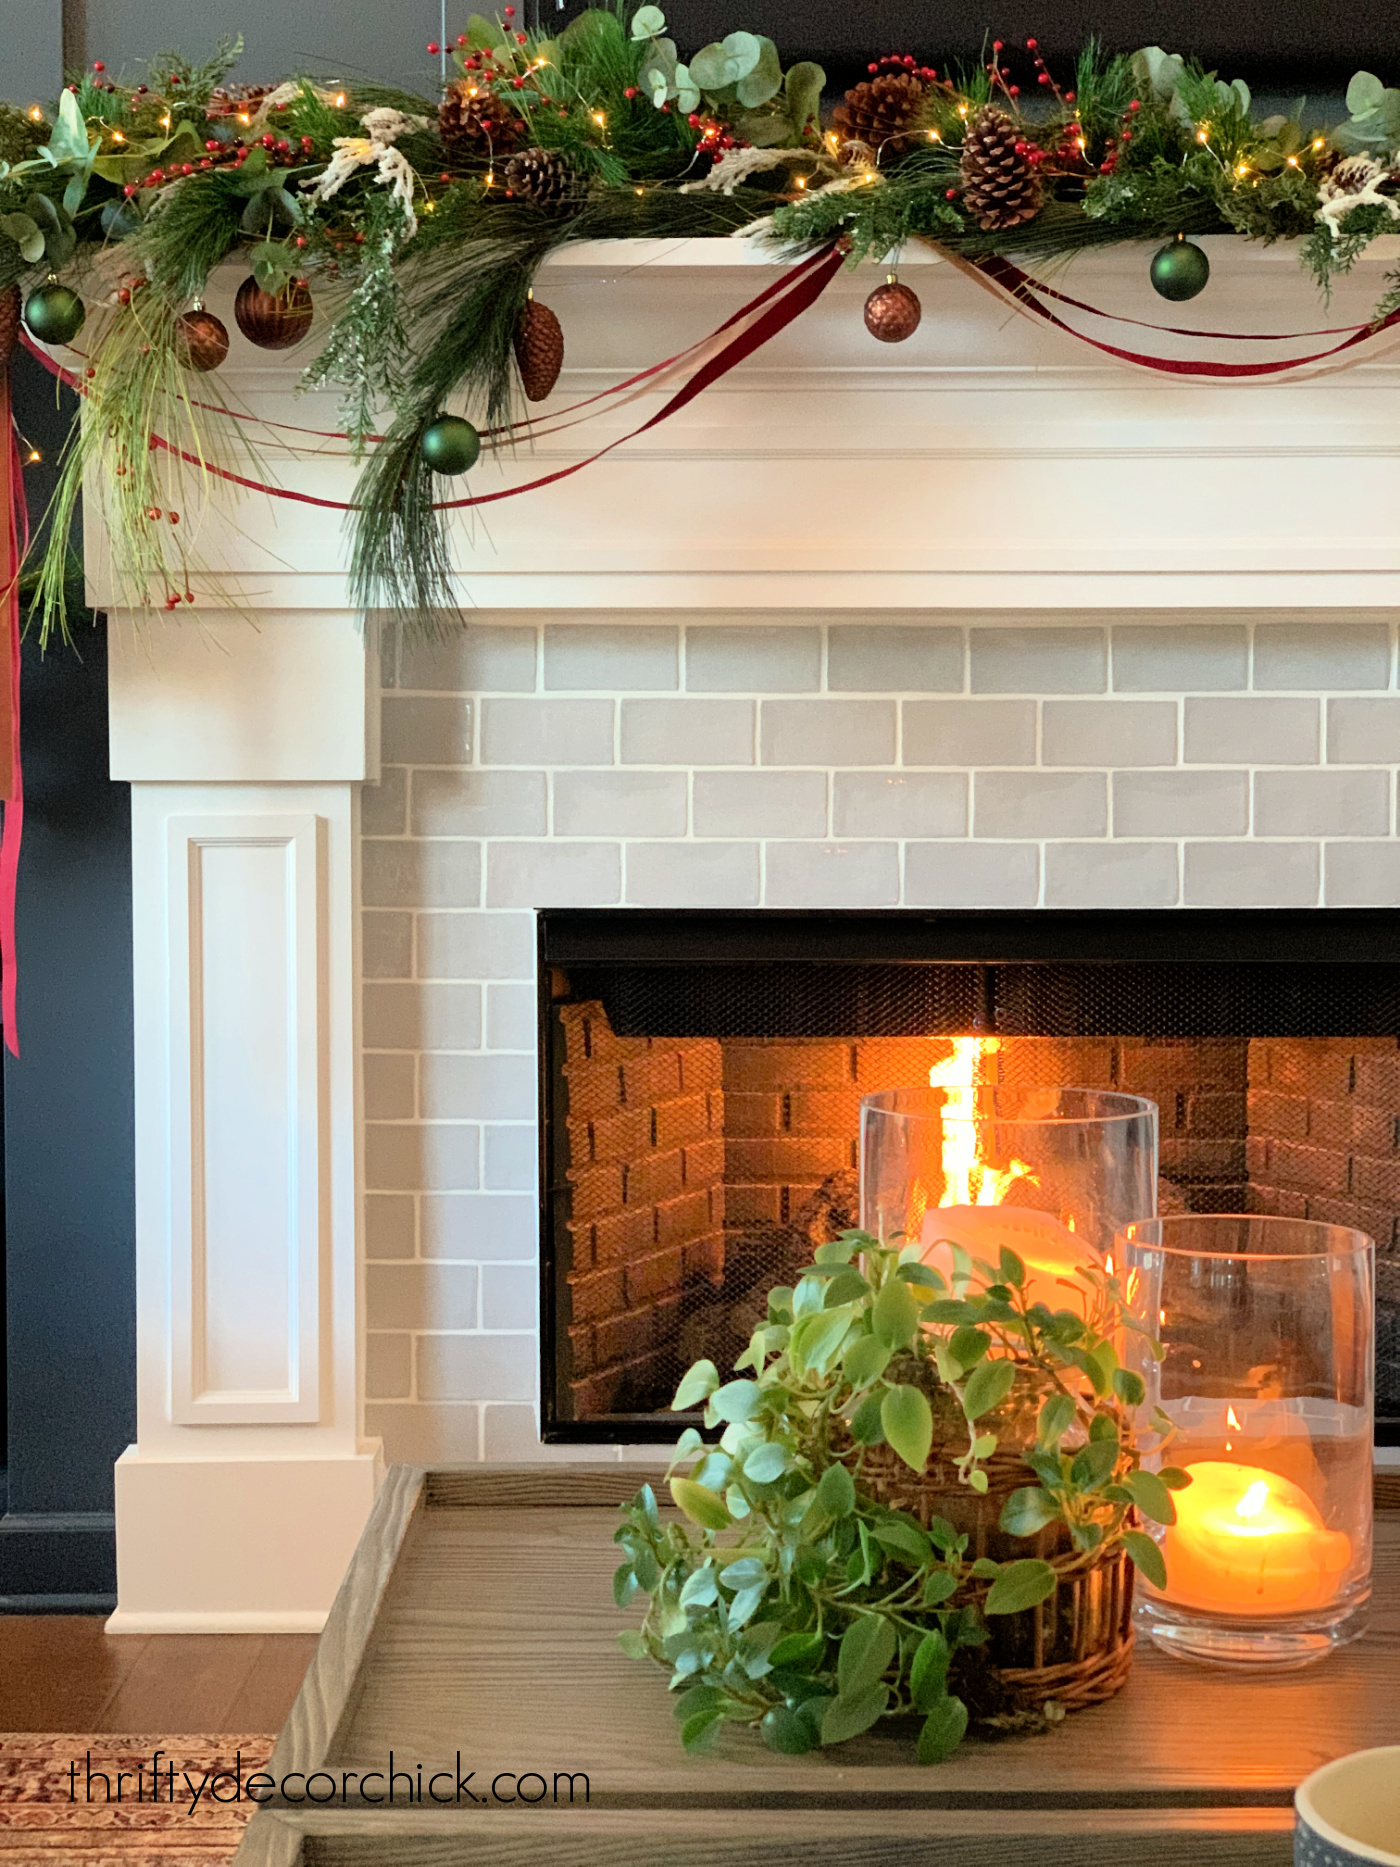
Our family room is always one of my favorite spots to decorate for the holidays, and for some reason it's usually the first room I tackle.
I have tried and true decorating methods for our stair railings, mantel and Christmas tree...and they haven't failed me yet!
Check out the links under the photos to check out some of my best tips!
I always include the same "ingredients" -- various greenery, berries and ornaments -- but I like to change up the look slightly from year to year.
I rarely buy new ornaments, but instead use specific colors more than others year to year. This year I wanted to tone things down just a bit and used a combination of green, gold and a few burgundy touches.
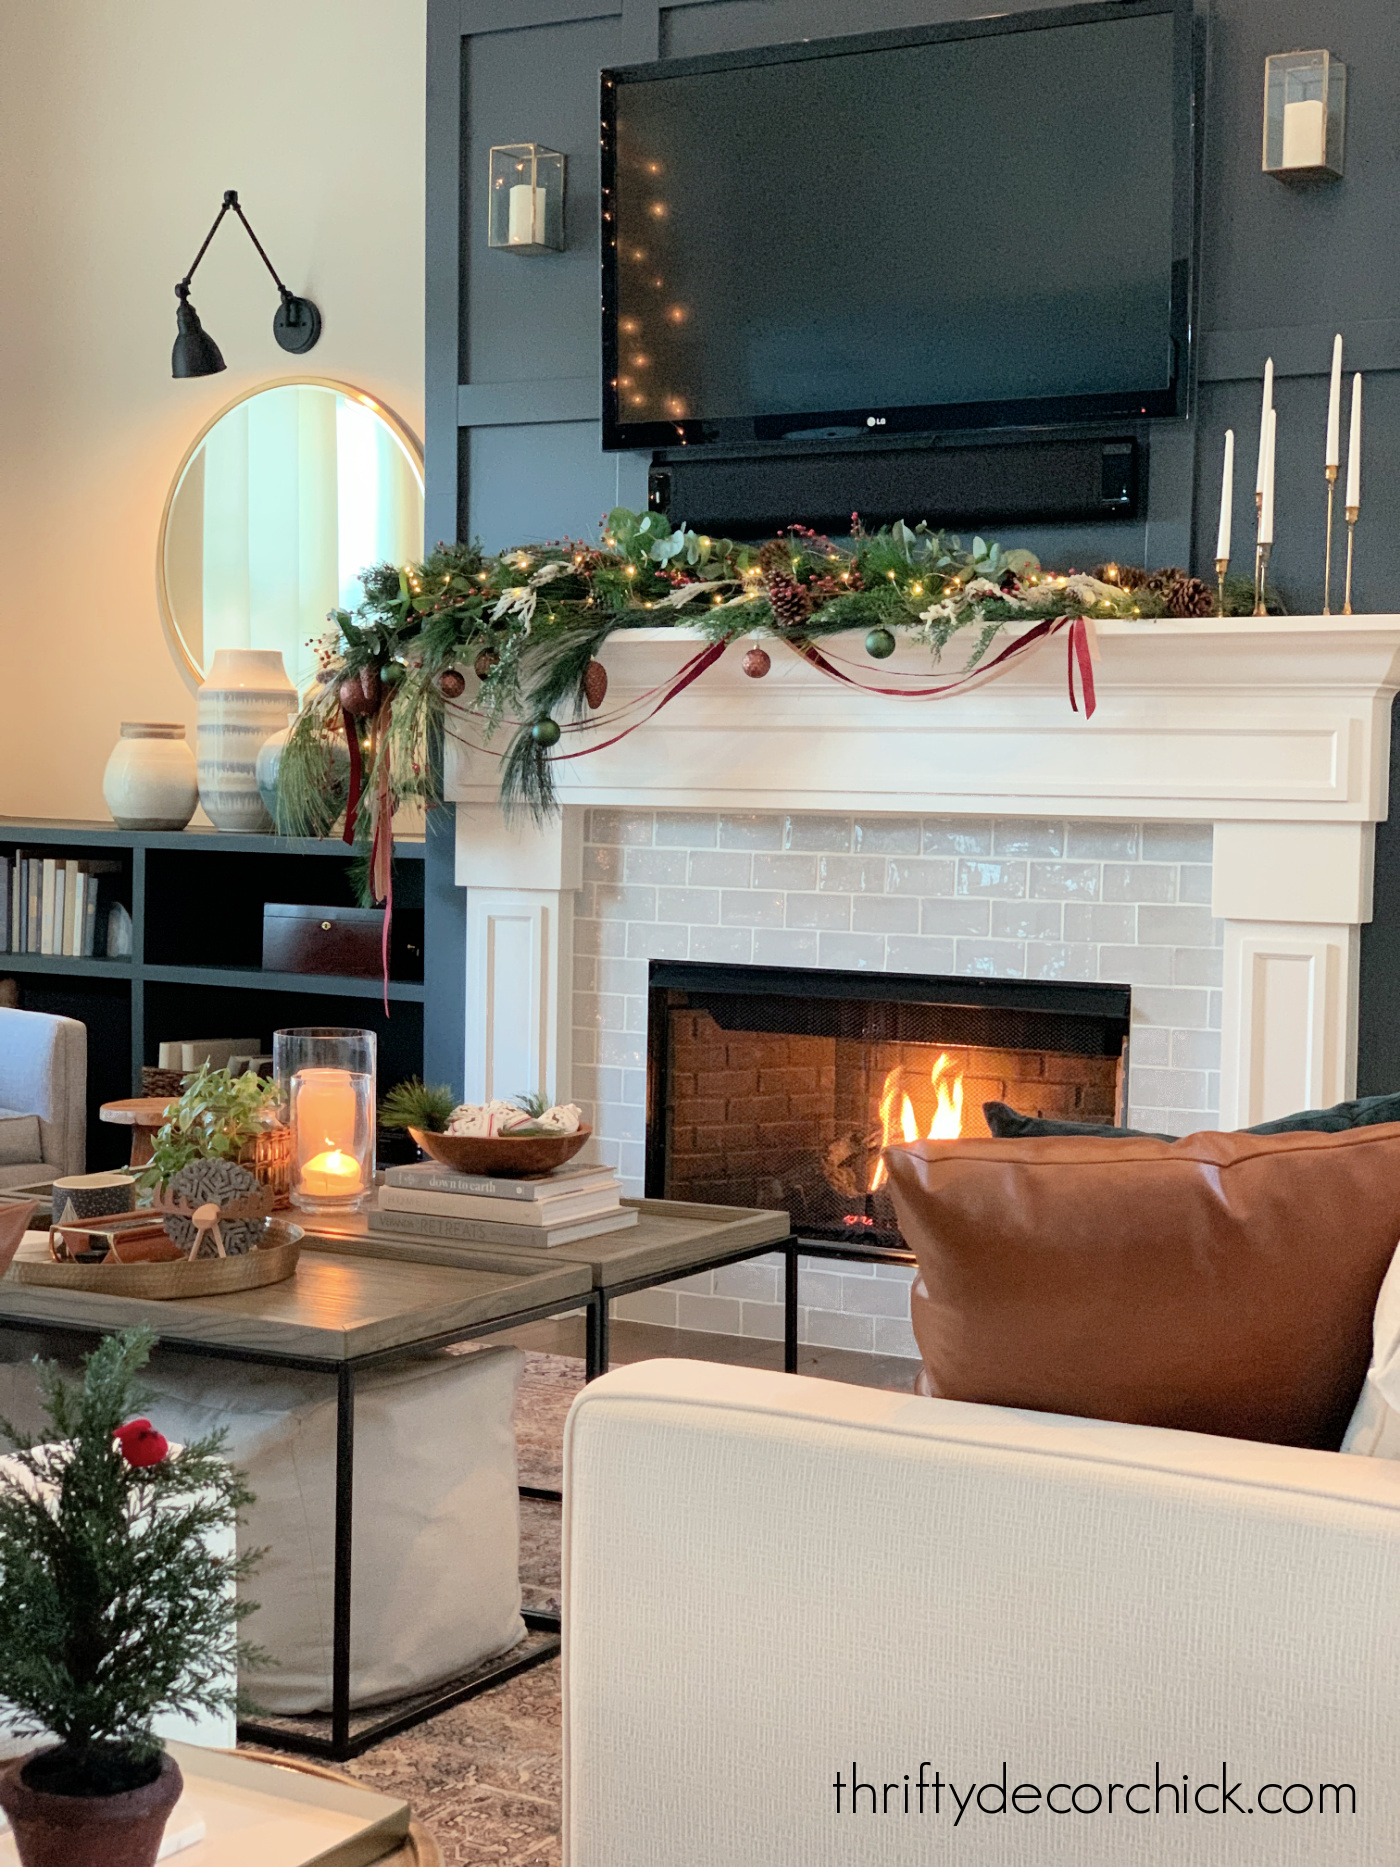
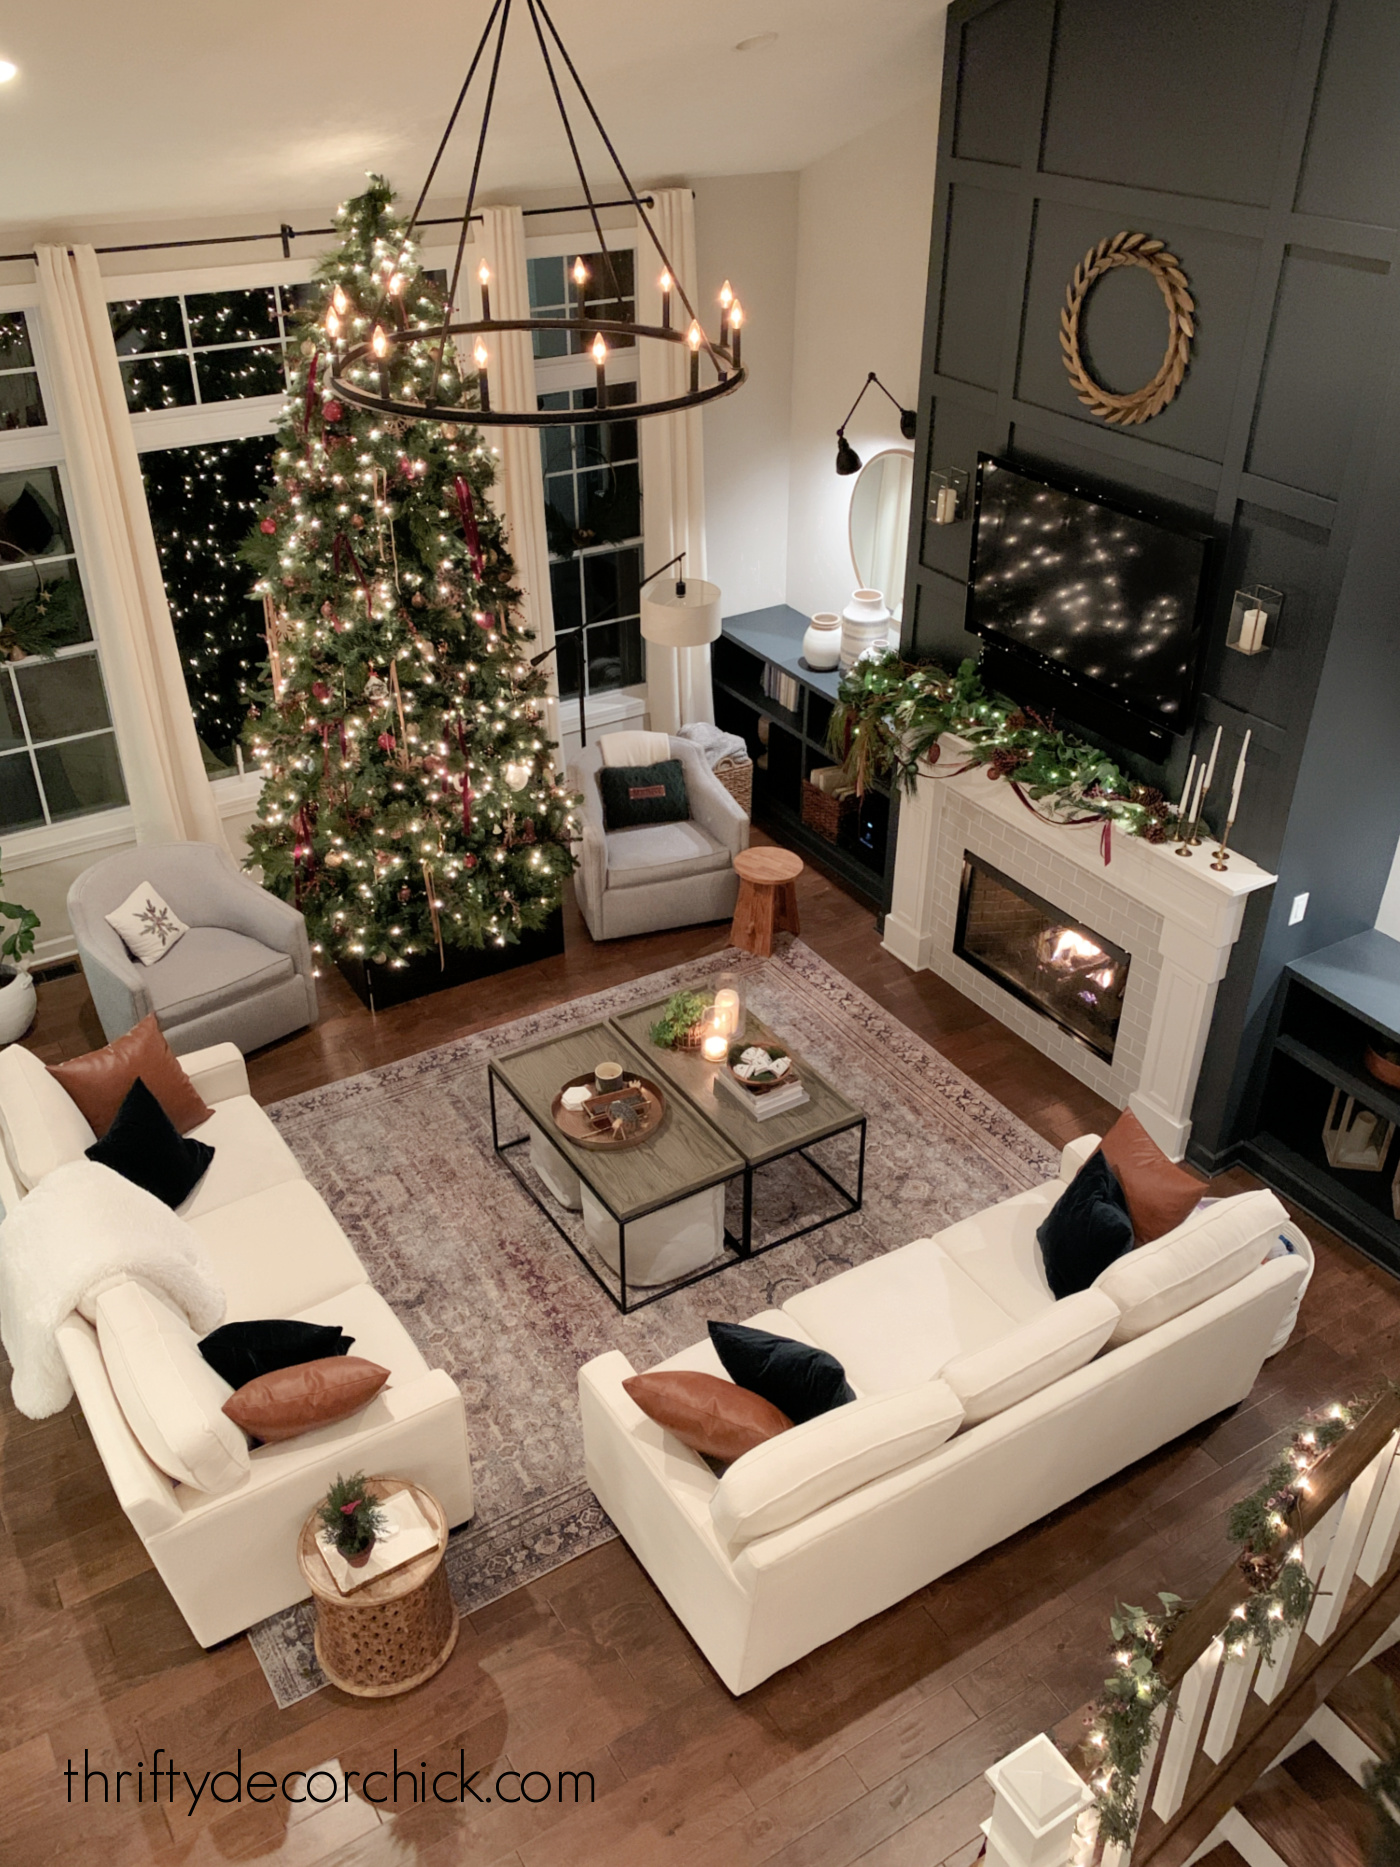
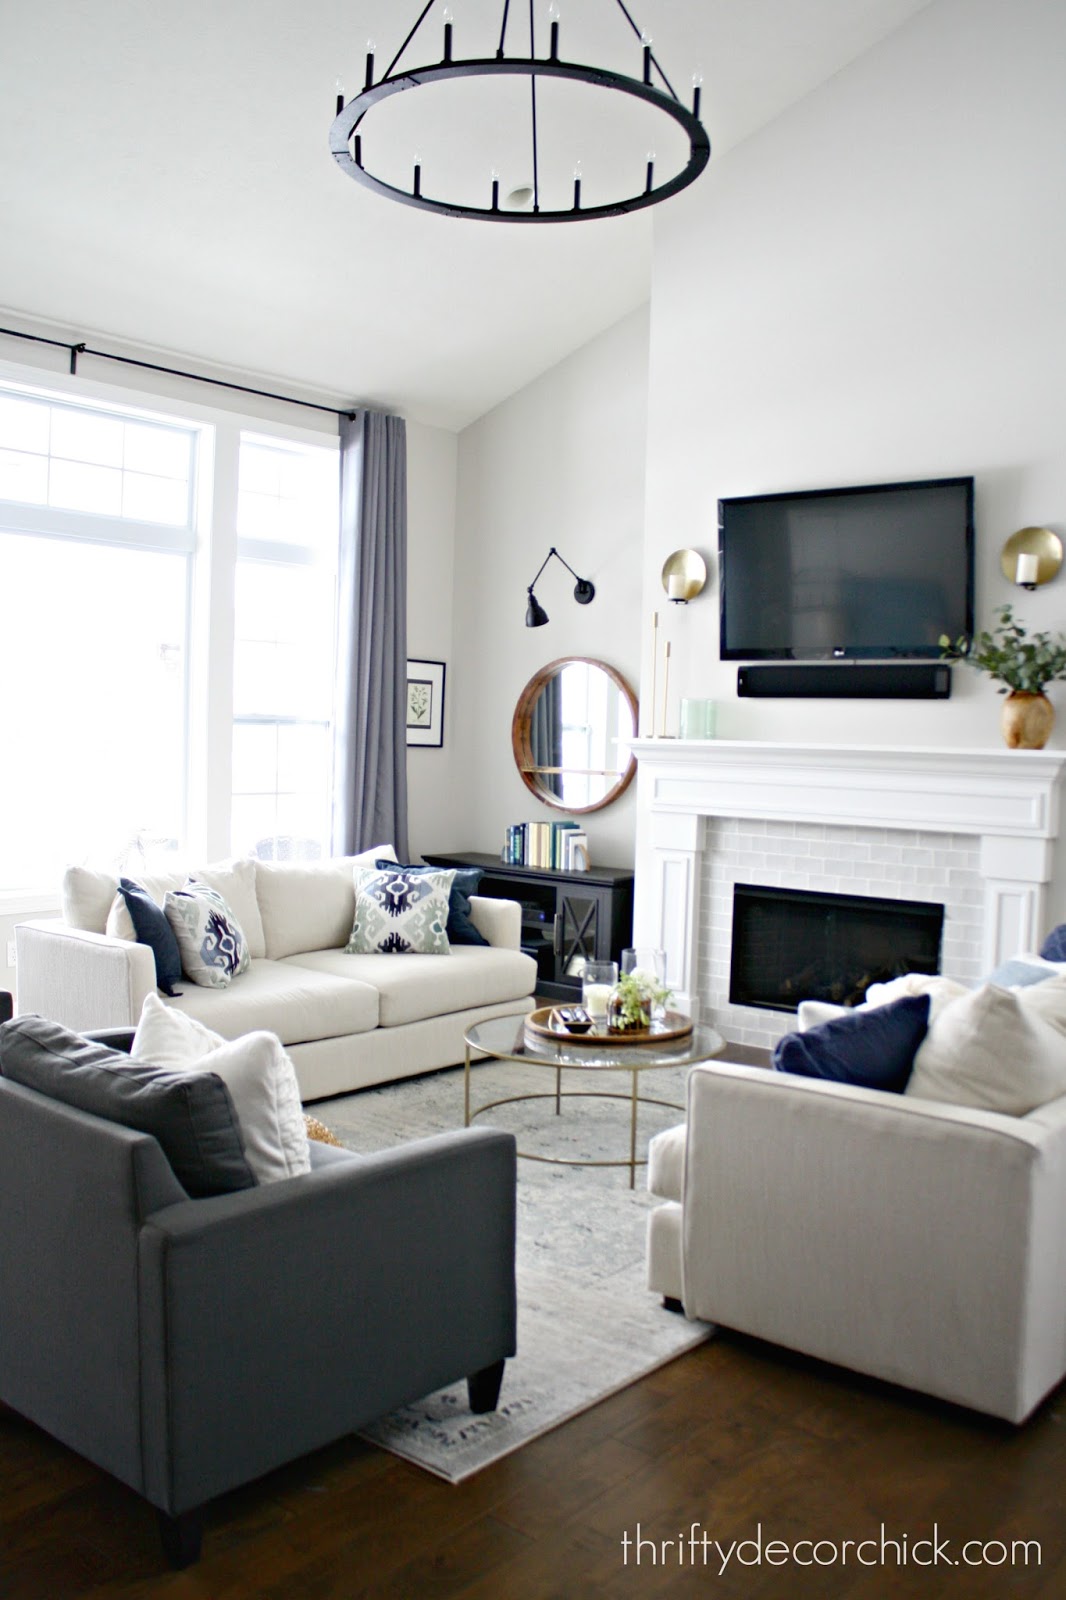
Our family room has soaring ceilings and a tall fireplace, so it's not an easy task to make this room feel cozy and warm...but I think I've accomplished it!
We love this space so very much! I hope you enjoy the family room Christmas tour!

This post may contain affiliate links for your convenience.
See my policies and disclosure page for more information.

Aren't those little reindeer feed bags adorable?? They're ornaments from the Target dollar spot. I snagged the last few just today!
I went with the asymmetrical look for the mantel this year...and if you know me you know how hard that was. ;)
But I absolutely love it and will definitely try it again in the future:

These adorable little brass bells are the perfect accent to Christmas decor:
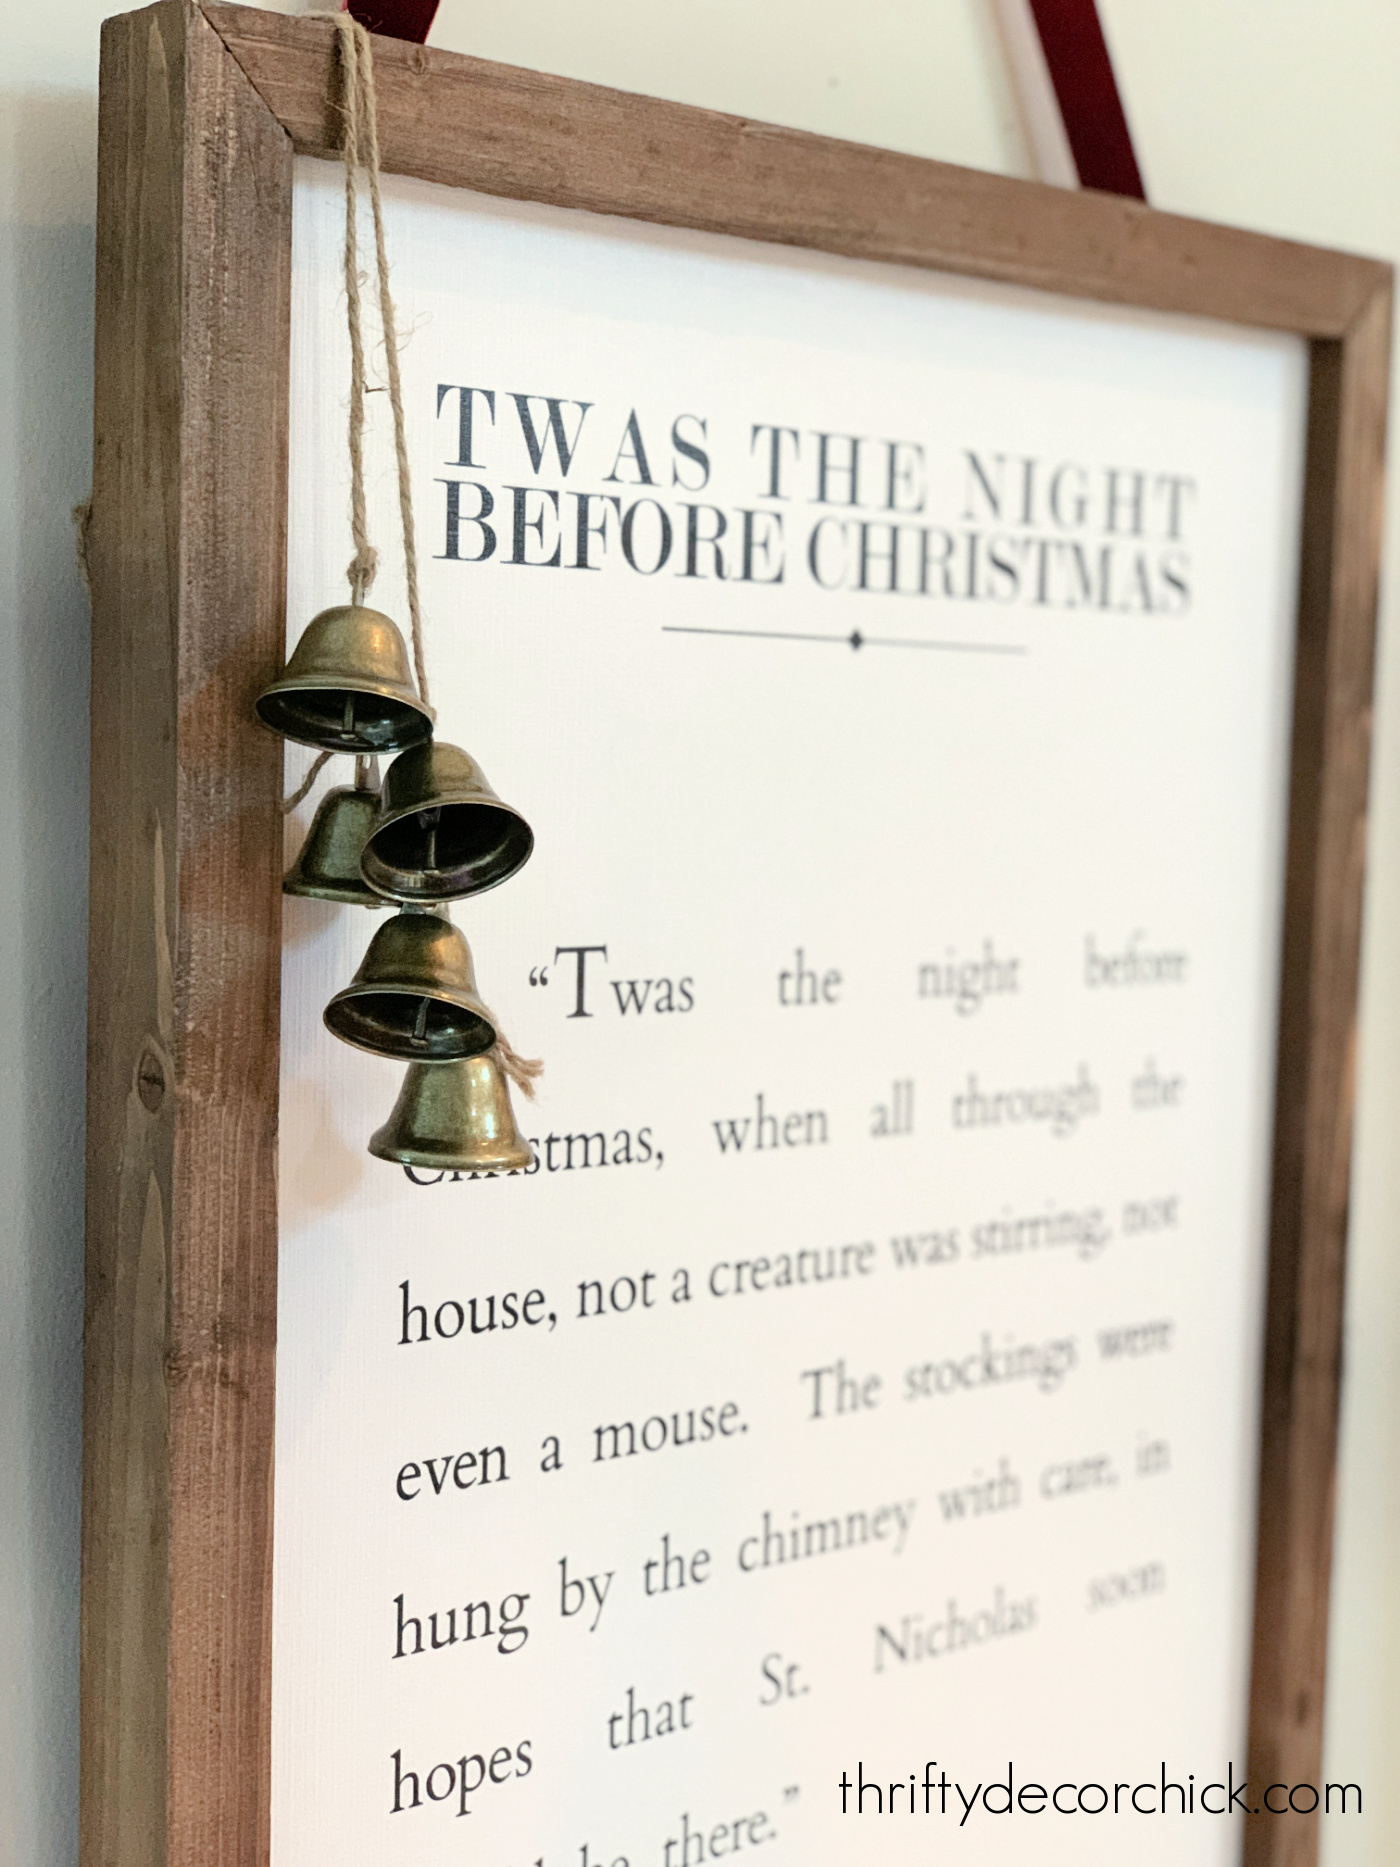
It was hard for me to not tie them onto everything this year!
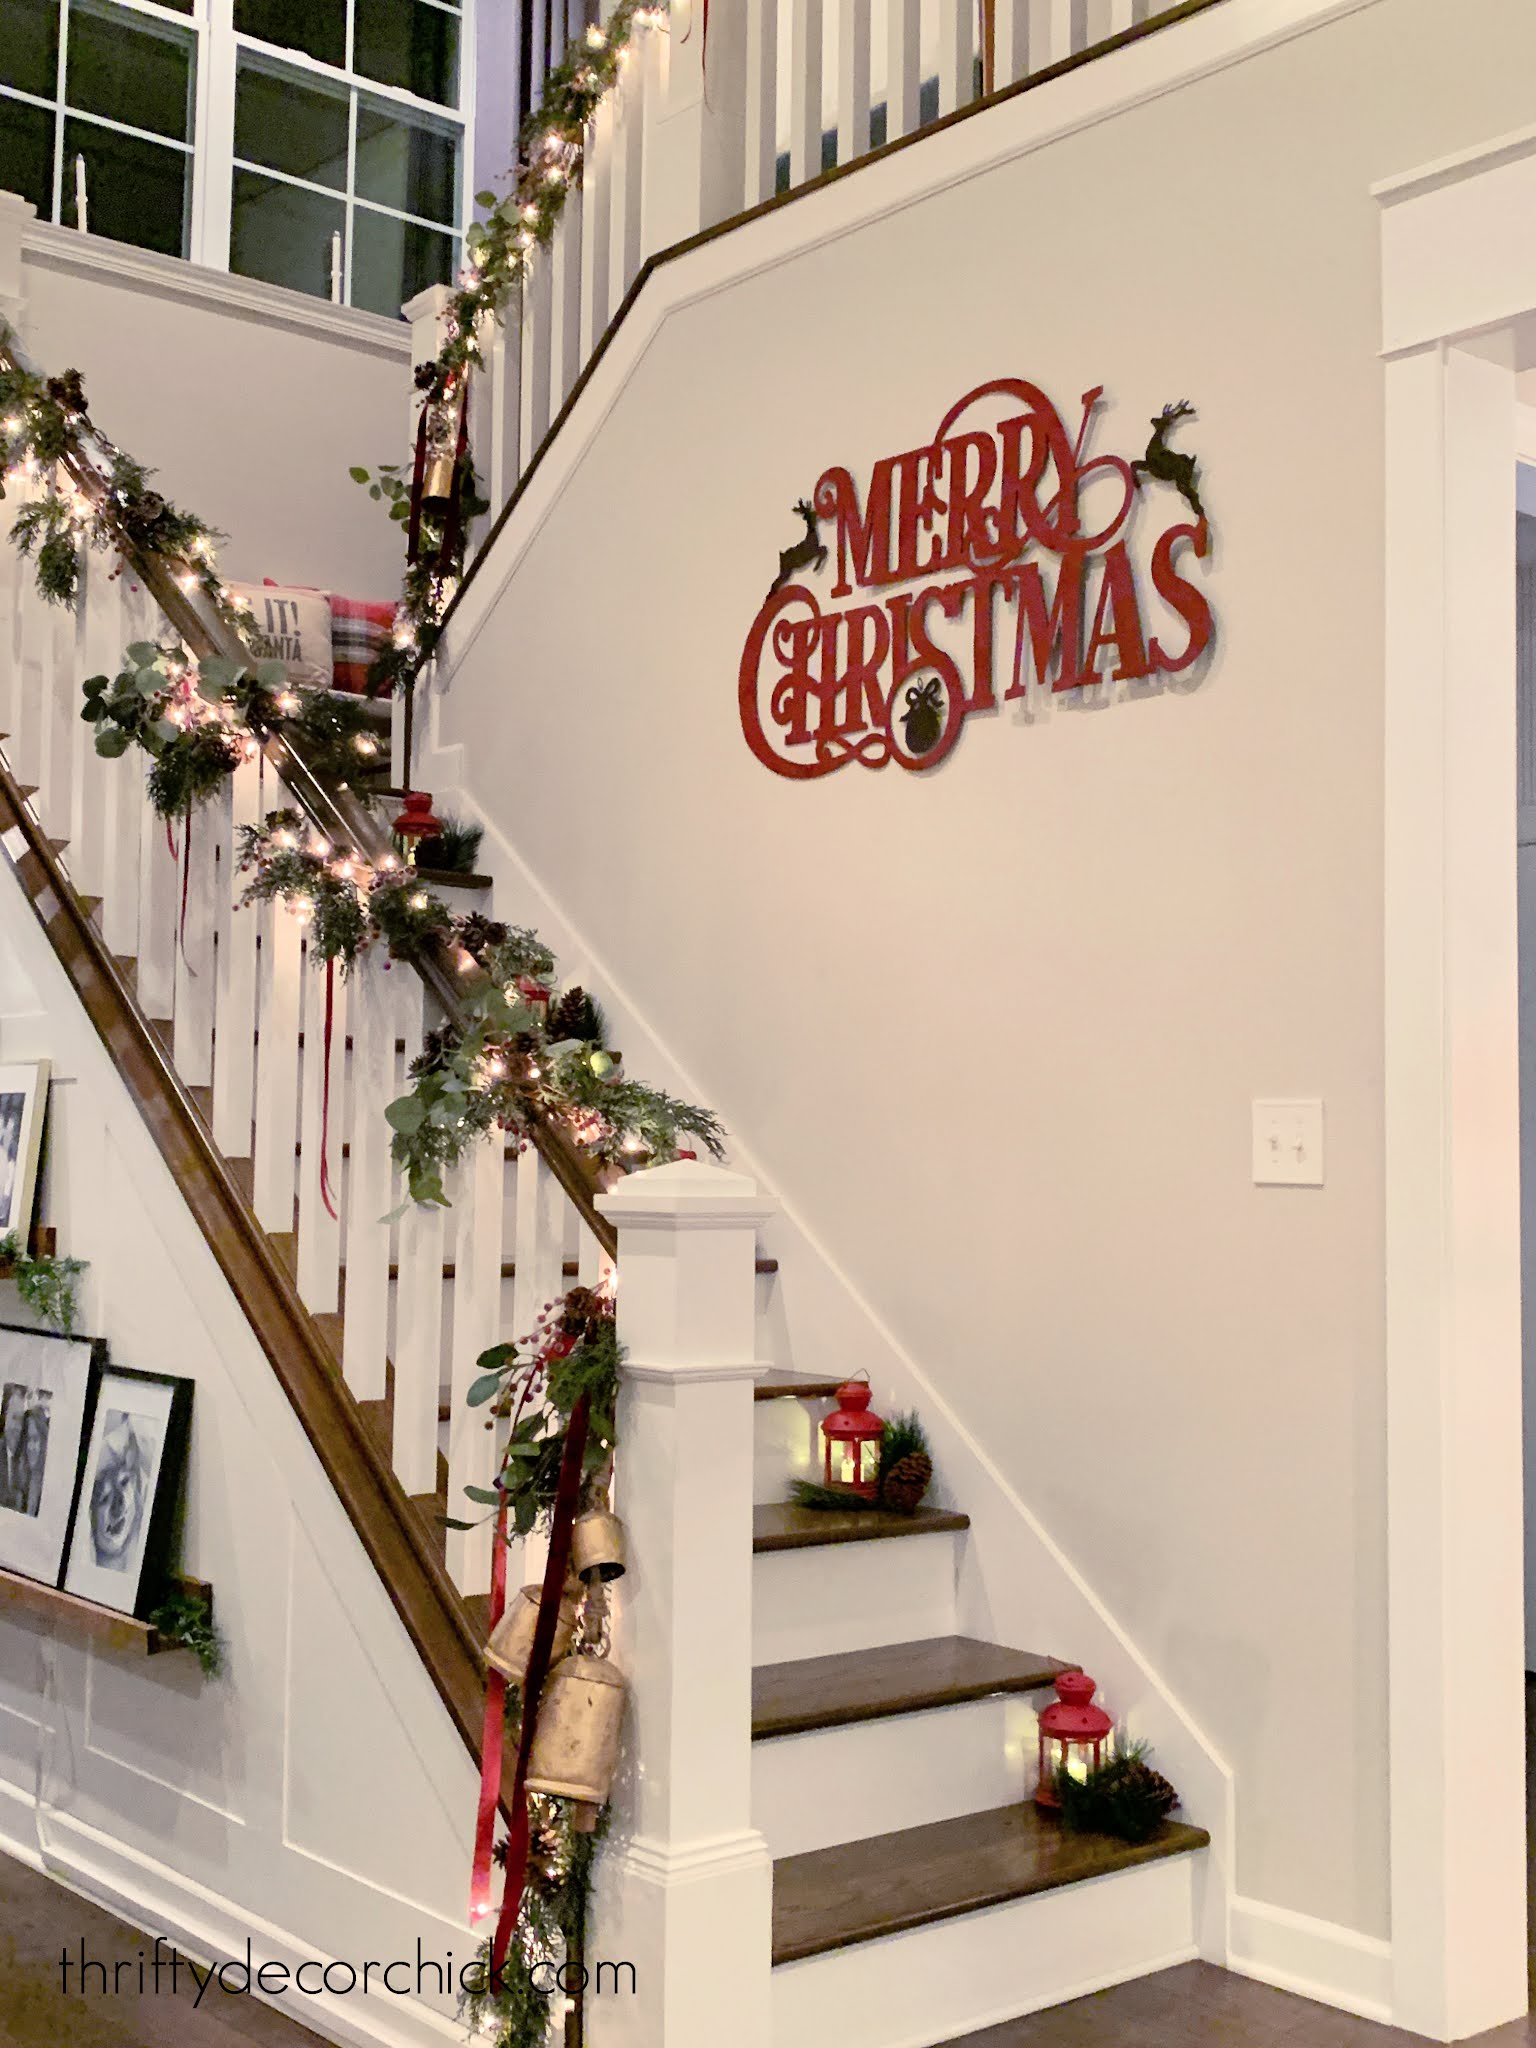
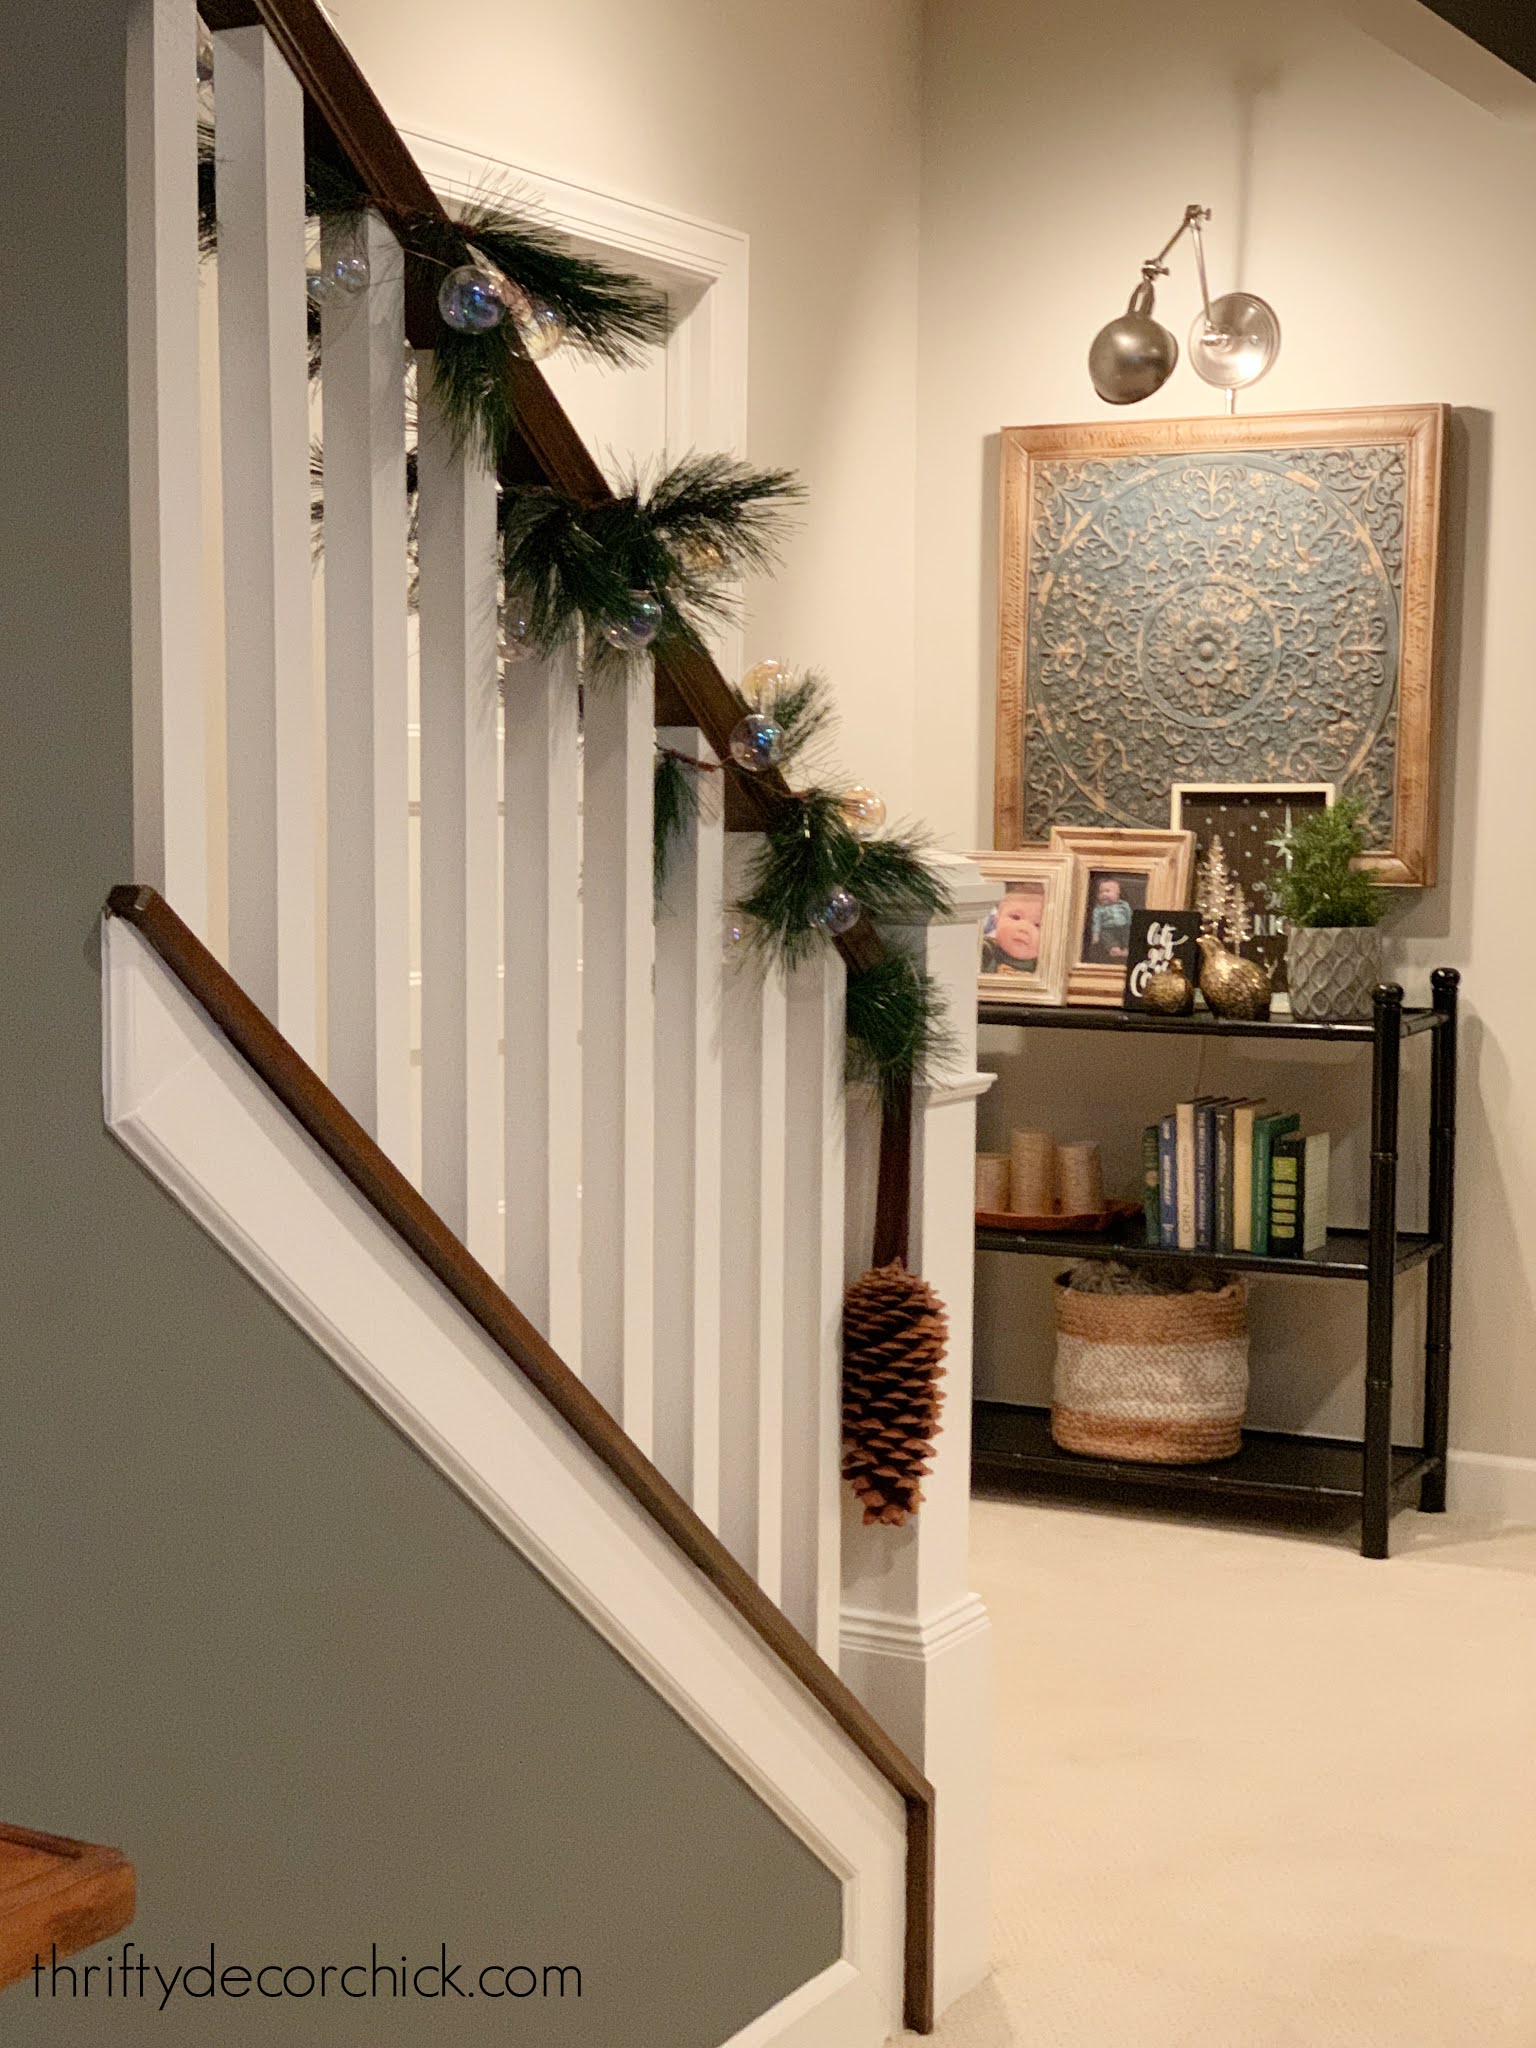
Our stair railing garland is one of those things that I change up just a bit every year -- sometimes I swag it, sometimes I wrap.
This year I was feeling the wrap. :) I added some berry picks and simple ribbon:
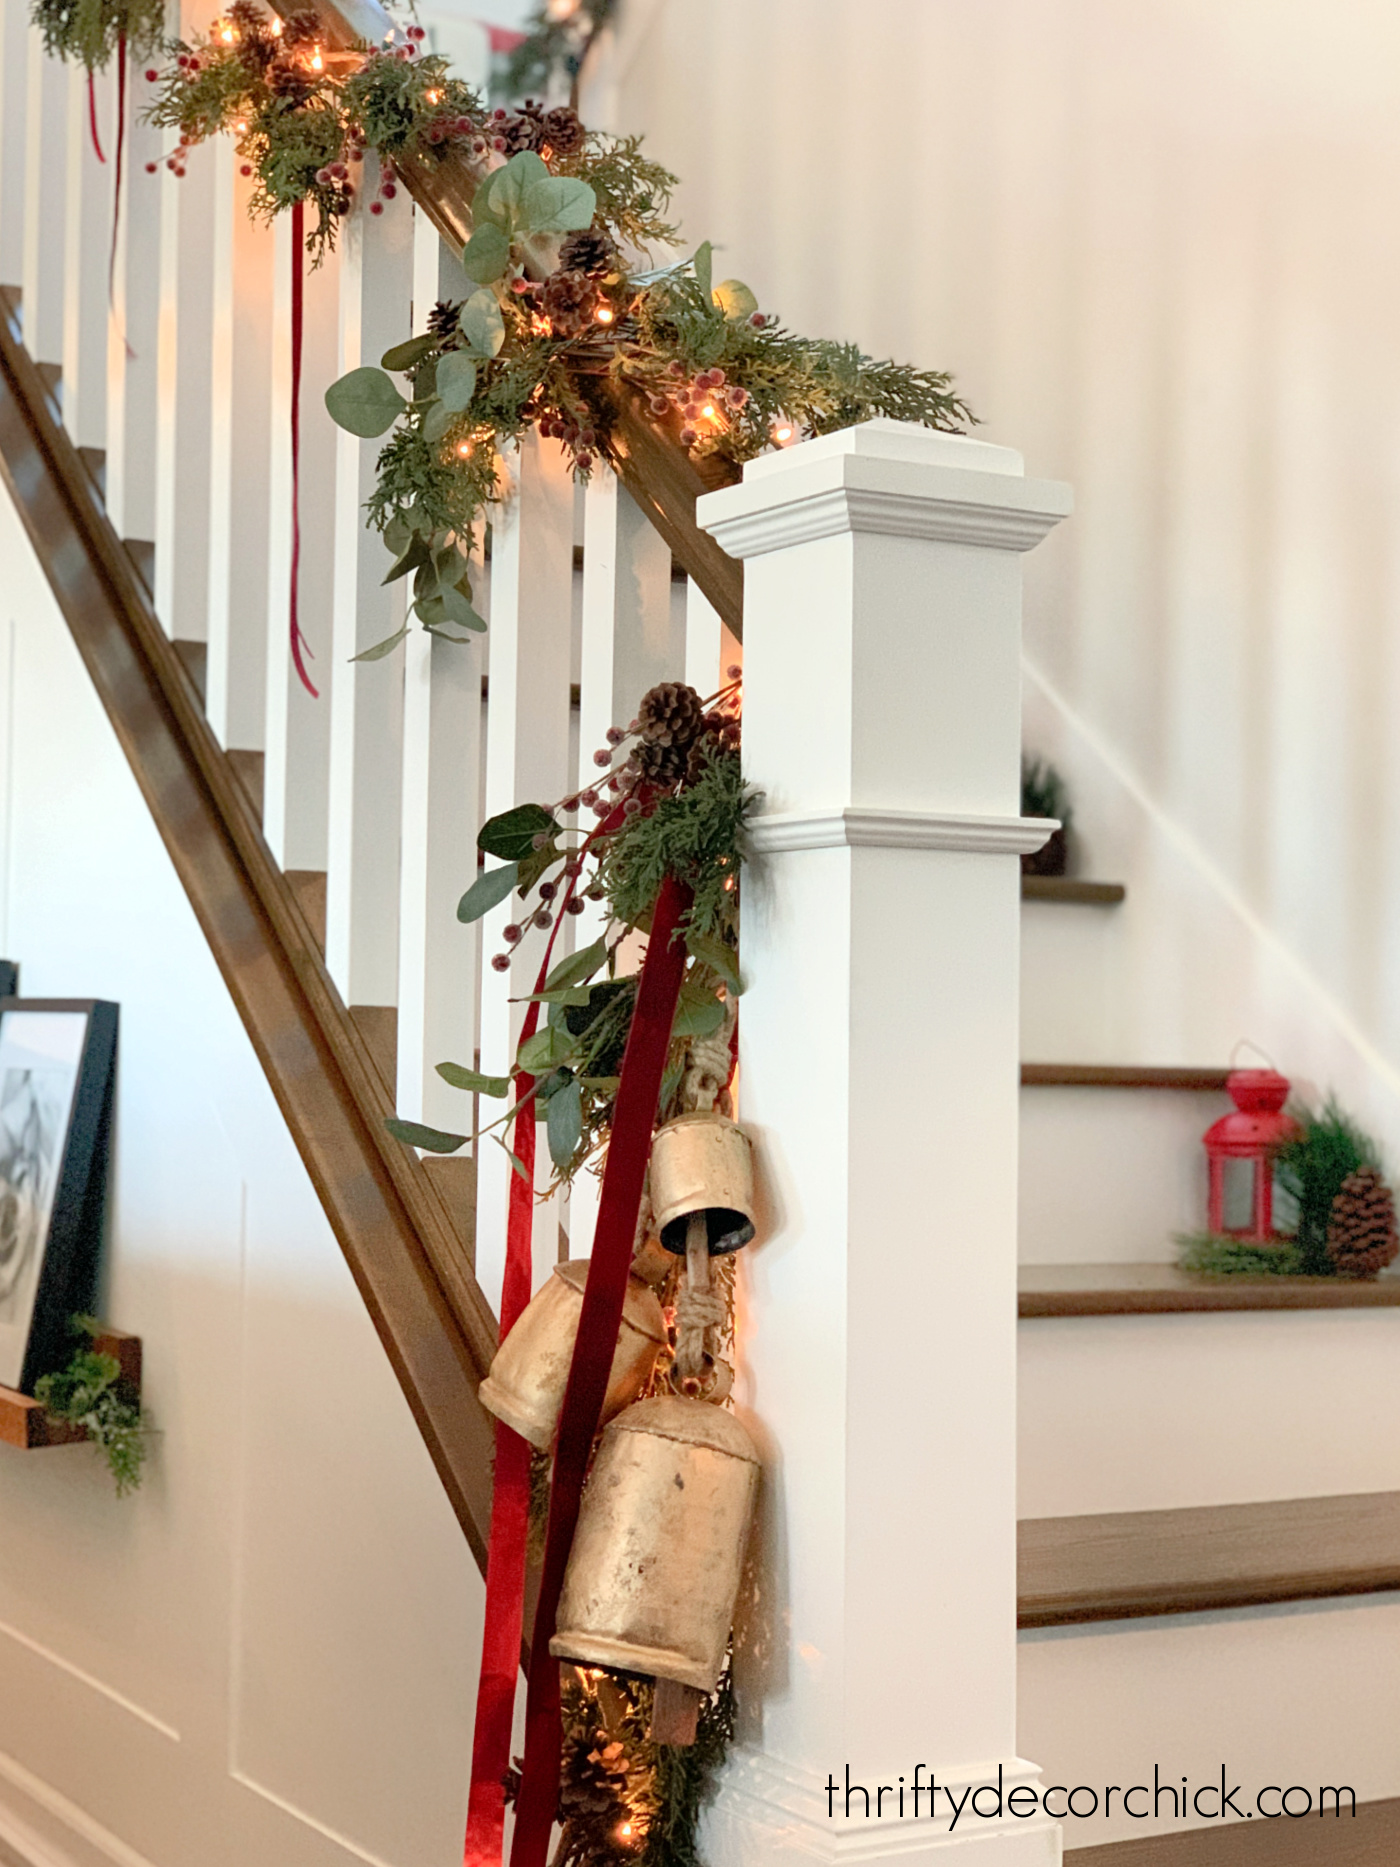
The garland was from the Hearth and Hand line years ago and I haven't seen it since.
It's a shame because it's really lovely! (And was affordable as well.)
This tall tree is my husband's favorite...every year when we're putting it up I'm begging for a shorter one and he's grinning from ear to ear:

He's absolutely giddy when we pull it out every year!
We moved our furniture around just a bit so we were able to put the tree right in the middle of the windows instead of off to the side like the past few years.
We kept asking each other why it took us so long to figure this out:
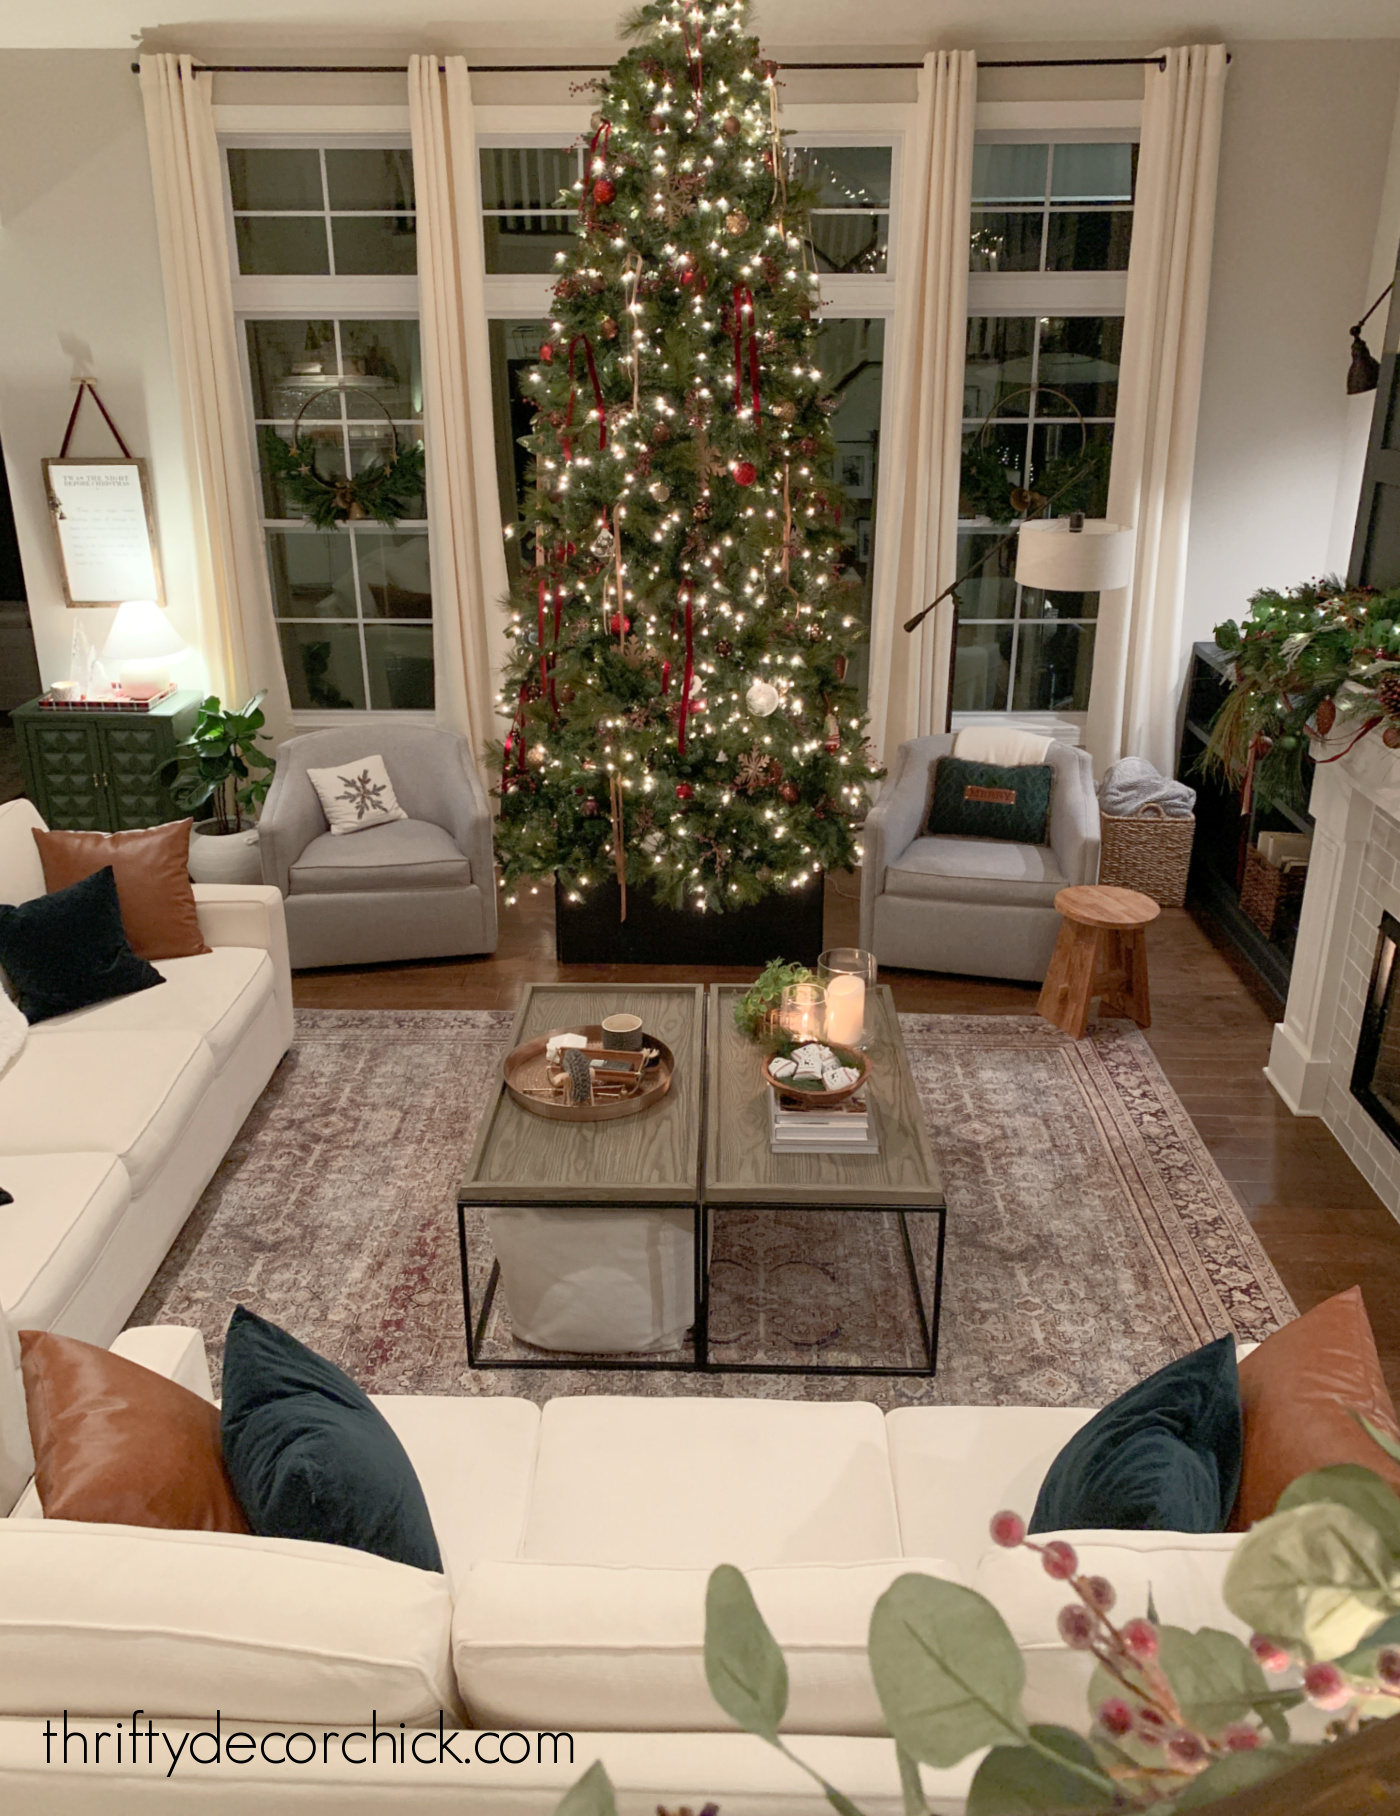
We LOVE the change...it showcases the tree so much better!
It feels so much more open this way, even with the added holiday decor:
I literally NEVER move furniture around, so it's fun to have a different layout for a bit.
I may have to move something else now. :)

We just love this layout!

As you can see, I took pics in both daylight and at night. It's hard to pick a favorite!:

By the way...no, we don't usually put a topper on this tree. I already risk my life decorating the top third of it. ?
I used a lot of ribbon in our decor this year and LOVE it.
I tied this velvet burgundy ribbon and this velvet ribbon in a camel color to the Christmas tree branches.
It turned out so pretty!:

The ribbon and berry picks filled it in nicely so I didn't hang nearly as many ornaments as usual:

We love how open this room is, but also love that it still feels warm and cozy.
The giant tree feels right at home!:
Thank you so much for joining me for our Christmas family room tour!
Now say hello to my friend Jennifer from Dimples and Tangles and check out her family room as well. :)
These talented bloggers are sharing so much gorgeous inspiration this week! Enjoy the holiday tours!
 Monday, November 29th (Front Porch/Outdoor Spaces)Southern Hospitality | A Blissful Nest | Most Lovely Things | Cindy Hattersley Design | Shine Your Light Monday, November 29th (Front Porch/Outdoor Spaces)Southern Hospitality | A Blissful Nest | Most Lovely Things | Cindy Hattersley Design | Shine Your Light  Tuesday, November 30th (Entries/Dining Rooms)11 Magnolia Lane | Sincerely Marie Designs | The Pink Clutch Blog | Summer Adams | Home by Heidi | Classic Casual Home Tuesday, November 30th (Entries/Dining Rooms)11 Magnolia Lane | Sincerely Marie Designs | The Pink Clutch Blog | Summer Adams | Home by Heidi | Classic Casual Home 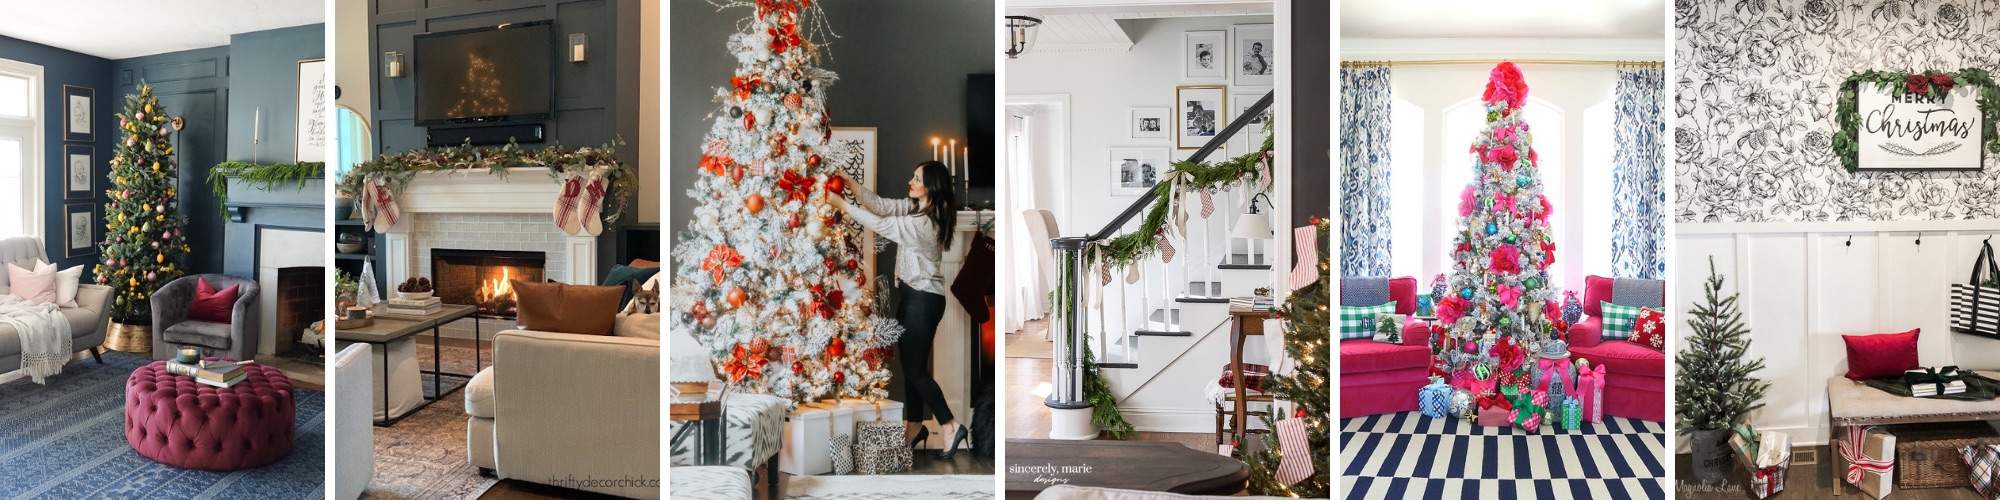 Wednesday, December 1st (Living Rooms/Dens)Sincerely Marie Designs | 11 Magnolia Lane | Sincerely Sara D | This is Our Bliss | Thrifty Decor Chick | Dimples and Tangles Wednesday, December 1st (Living Rooms/Dens)Sincerely Marie Designs | 11 Magnolia Lane | Sincerely Sara D | This is Our Bliss | Thrifty Decor Chick | Dimples and Tangles  Thursday, December 2nd (Kitchens/Laundry Rooms/Misc.)Evolution of Style | Sincerely Marie Designs | A Stroll Thru Life | Pink Peppermint Design | Setting for Four | Citrine Living Thursday, December 2nd (Kitchens/Laundry Rooms/Misc.)Evolution of Style | Sincerely Marie Designs | A Stroll Thru Life | Pink Peppermint Design | Setting for Four | Citrine Living  Friday, December 3rd (Master Bedroom/Kid's Rooms)Quarters One | Just a Girl | Postcards from the Ridge | Decor Adventures | A Stroll Thru Life | Country Road 407 Friday, December 3rd (Master Bedroom/Kid's Rooms)Quarters One | Just a Girl | Postcards from the Ridge | Decor Adventures | A Stroll Thru Life | Country Road 407
Never miss a post by signing up to get posts via email.
Via https://www.thriftydecorchick.com/2021/11/warm-welcoming-Christmas-family-room.html
0 Comments

Welcome to another round up of our favorite things...items I use and wear that I LOVE!
I gather a few of my blog friends once a year to share our favorite household and beauty items.
After you check out my favorites, you can visit each of the other talented bloggers at the bottom of this post to see theirs as well.
I love this post every year -- I always find great gift and household items that I end up using quite a bit!
This year I'm sharing all kinds of items that would work for gifts or to treat yourself. :)
This post may contain affiliate links for your convenience.
See my policies and disclosure page for more information.
Favorite clothing finds
I'm not a big clothing person, so when I tell you these are all great finds that look and feel great, you know I REALLY love them.
I picked up this faux black leather jacket recently and it will be a new staple in my wardrobe!:

It's lightweight, incredibly comfortable and super flattering. I want more colors now!
I've found some really comfy and cute sweaters over the past year that I LOVE.
This puff sleeve sweater is SO SOFT...I absolutely love wearing it because it's so comfortable:

It fits perfectly and looks great with both jeans or a cute skirt. There are SO many colors available too. You will love it!
This chunky turtleneck sweater (pictured below) is another favorite -- I get complimented on it EVERY time I wear it:

That one comes in a ton of colors as well. (I also have two others in this same sweater!)
The soft, fluffy pullover on the top right is my new go-to. I wear it all the time and even in place of a coat as it's getting colder.
It's so comfy and warm...and POCKETS!
The new "shacket" trend (shirt/jacket) is still going strong, and I loved both of these pictured. This cream shacket is lighter weight and looks great on.
So cute with a white tee and jeans!
Beauty favorites
I've fallen in love with so many items from the Truly brand. This neck and chest night mask is absolutely amazing:

It's not a mask you remove...you leave it on at night. It's very thick and creamy...it will feel like a lot at first, but then it kind of melts into your skin as you apply it.
It has made a definite difference in my neck and chest -- at the very least I don't wake up with lines from sleeping.
And it smells soooo good!
Their shave butter is another favorite:

I've never had smoother legs than when I use this stuff! I don't understand how they do it, but it's pretty amazing.
It's so light and fluffy and easy to apply. Of course, it smells wonderful as well.
I'm always surprised at how many people don't know about nail buffers. My mom always used one and I learned from her:
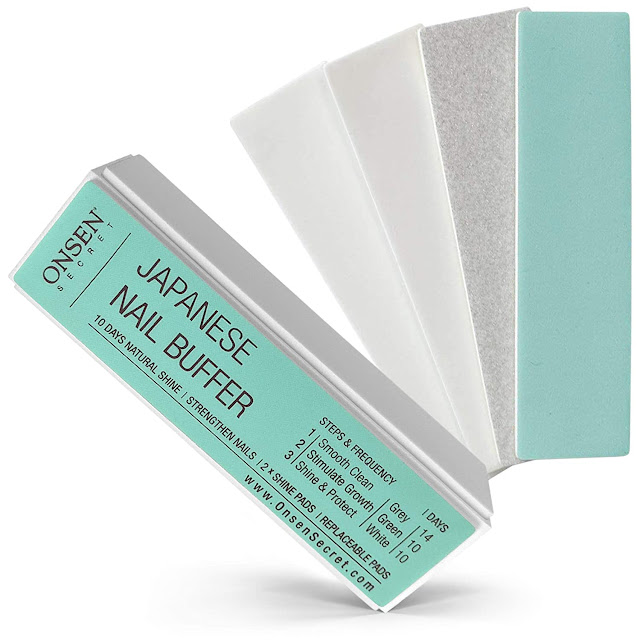
It's a quick and easy way to clean up the surface of your nails and make them crazy shiny. They look so much healthier and you'll look like you have clear nail polish on.
This nail buffer set is the best I've found and comes with replacement pads.
Favorite decor items
I've found some gorgeous pieces for our home over the past year!
This round rattan art set is my absolute favorite:

They are BIG and especially so when displayed together. But of course they'd look great spread out in different places too.
Love them!
The wood chains that were selling for nearly $100 each ? a year or so ago are now much more affordable.
I love my black version, but they also come in a few different wood tones:
This Loloi rug in olive and charcoal would work beautifully in every room in my house:
It's so versatile -- the colors are lovely and the design is muted just enough so that it doesn't feel busy.
It adds so much warmth to our family room and holds up incredibly well!
I've found some great, inexpensive pillow covers lately, and shared my favorites under $20 with you here:
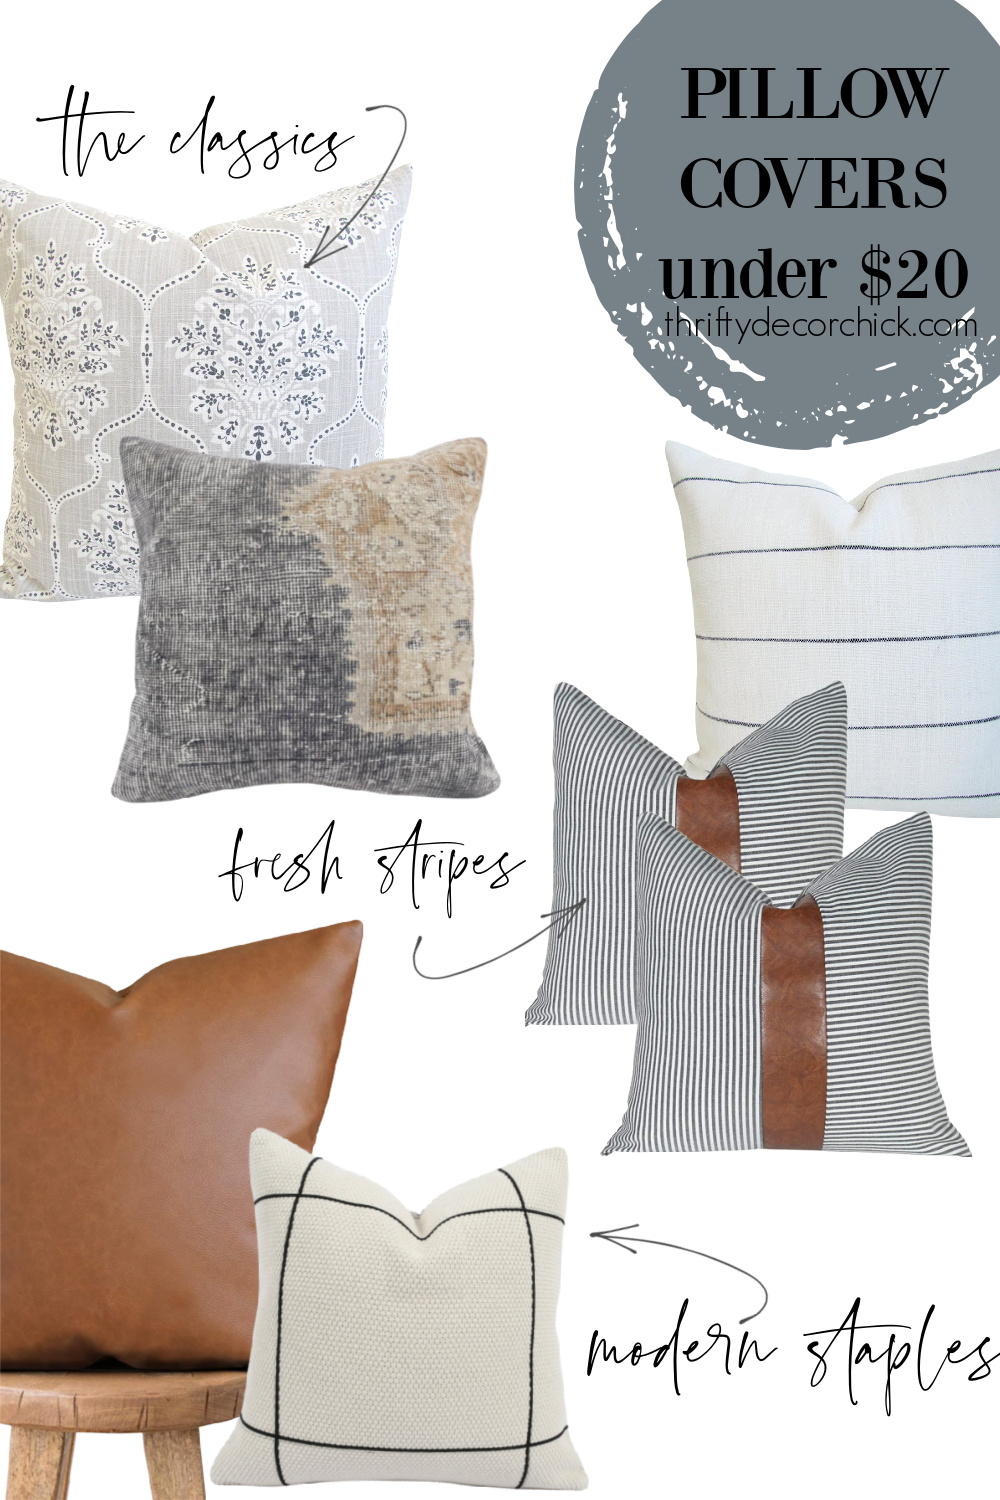
I have those faux leather covers in both our family room and basement. They are great quality and so affordable!
Household gadgets I love
I think these are my favorite items to share -- they are little finds that make life just a bit easier.
You guys loved these sliding drawers for under the sink as much as I did!:
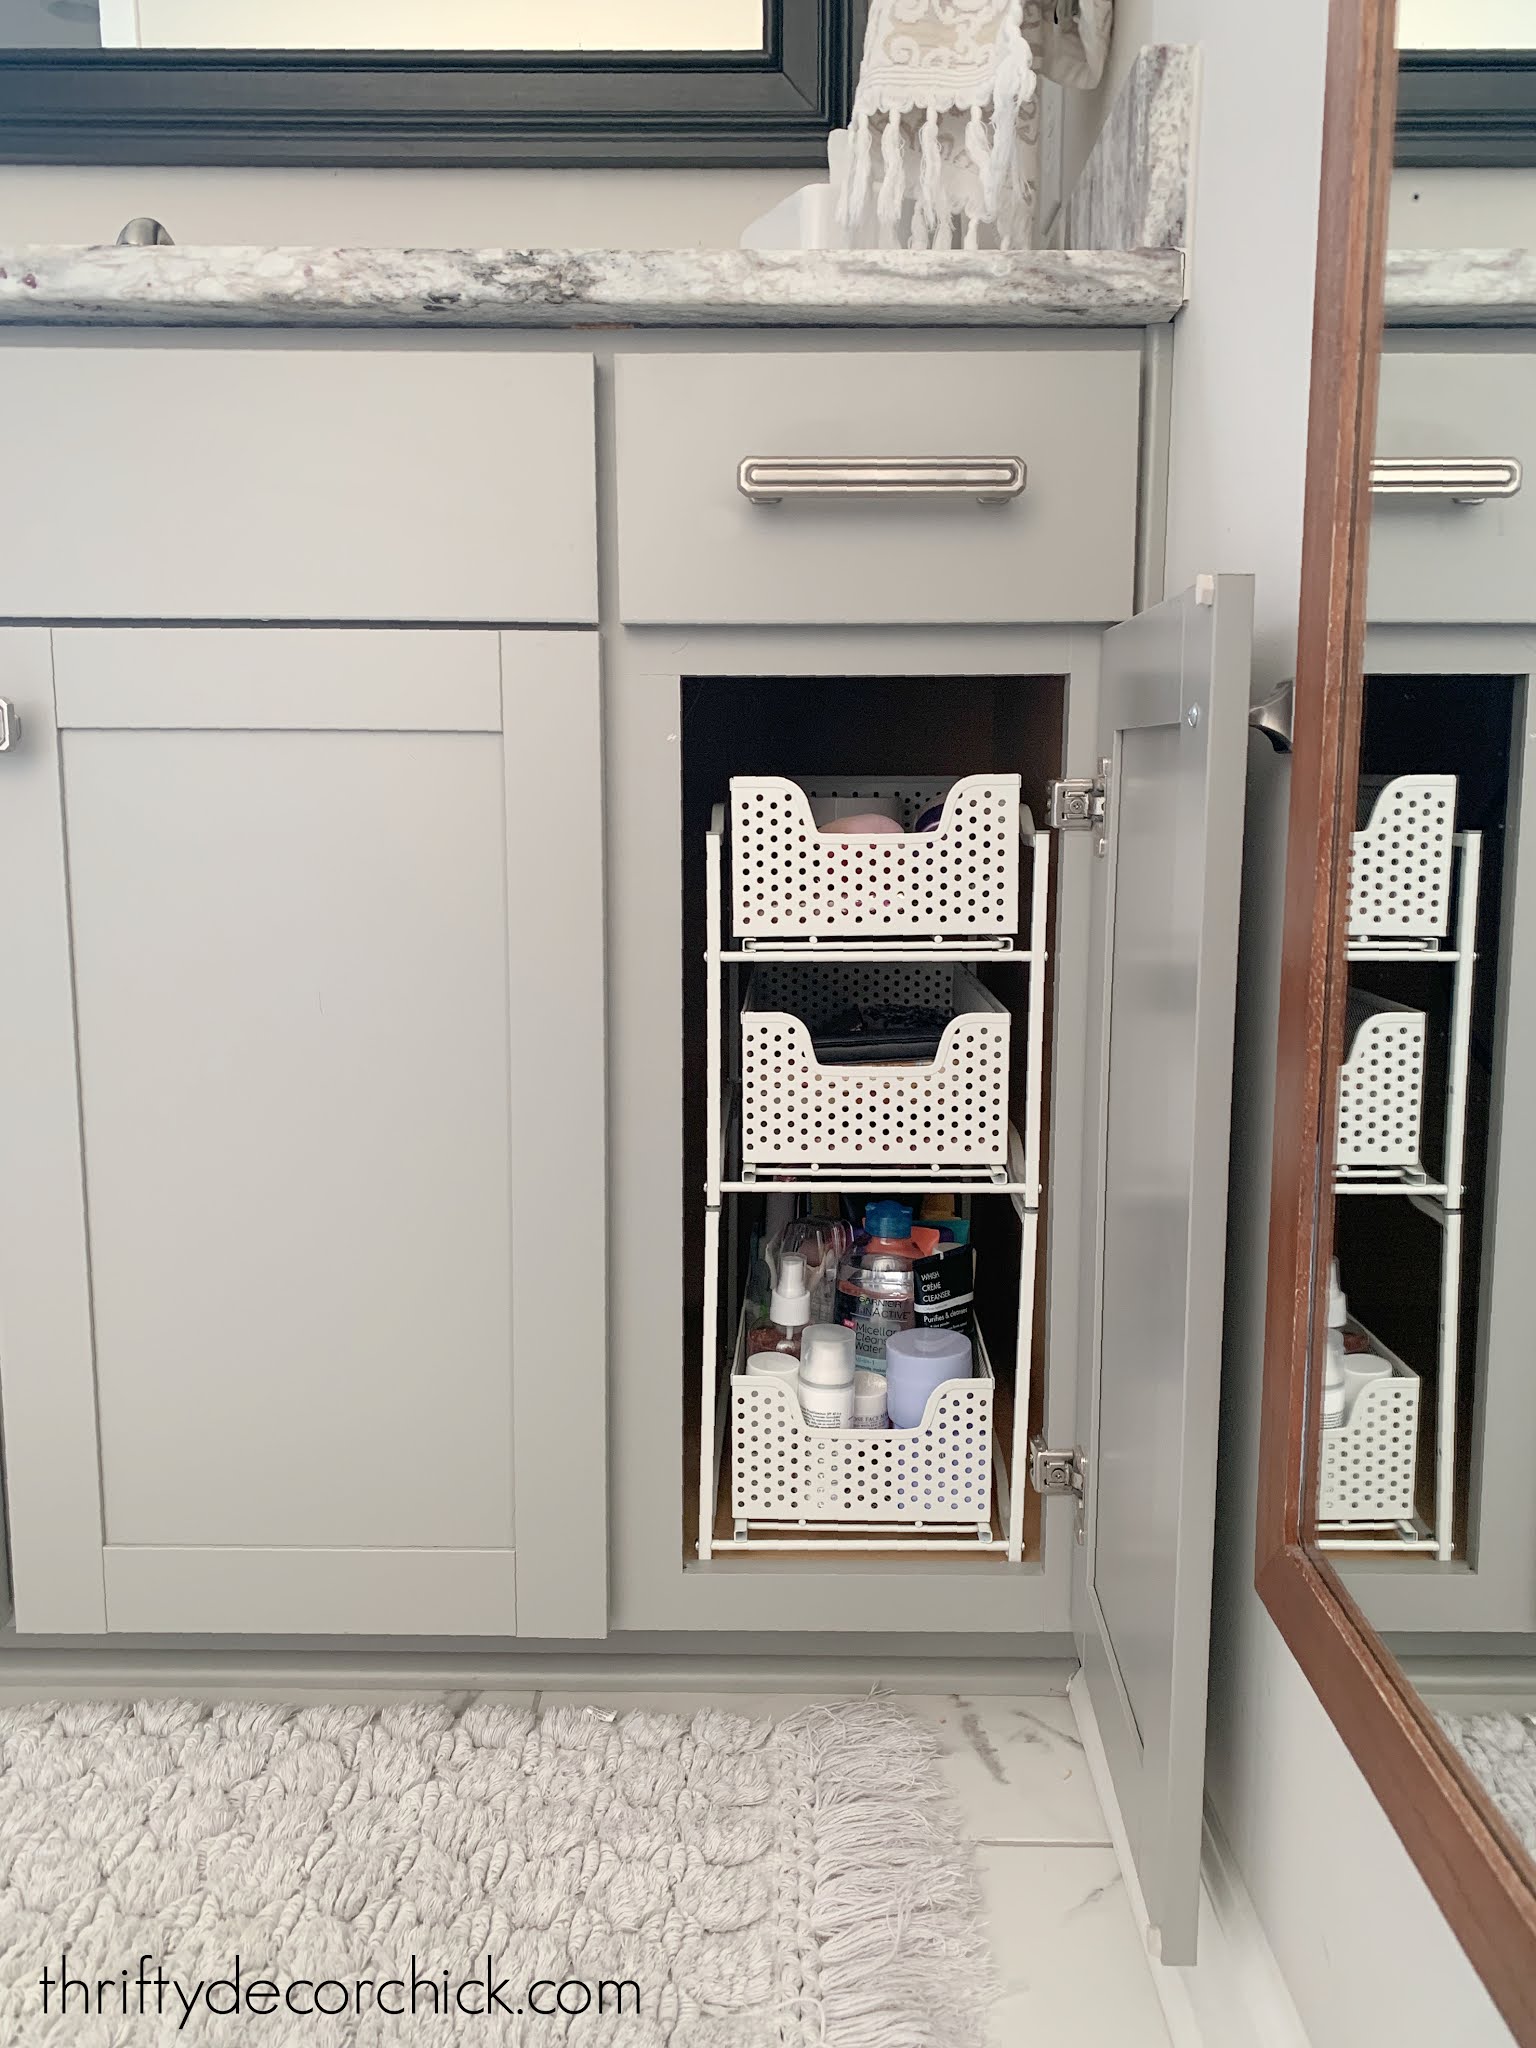
They make that awkward space under the sink so much more functional!
This handheld steamer was a hit as well:

I LOVE THIS THING. I shared how I used it to clean our window sills and door tracks, but it's also a great way to clean just about anything without harsh chemicals.
If you or someone you know is easing into DIY and wants to start with some basic tools, this cordless drill is my favorite:

It's powerful enough to handle almost any job, and is very easy to use.
The battery charges up fast and holds a charge for a long time. (And this set comes with the battery and charger!)
This small detail sander is another great starter tool. I use this all the time for quick projects or smaller, detailed spots.
I've shared this one before, but it's so cool, it's worth another mention:

No more matches or butane lighters needed! Just charge this electric lighter and it will light just about anything.
This is another one that holds it's charge forever...I'll leave it for weeks and it will still work.
If you use a metal tumbler for water all day like I do (this is my absolute favorite brand), then you'll LOVE this gadget!:
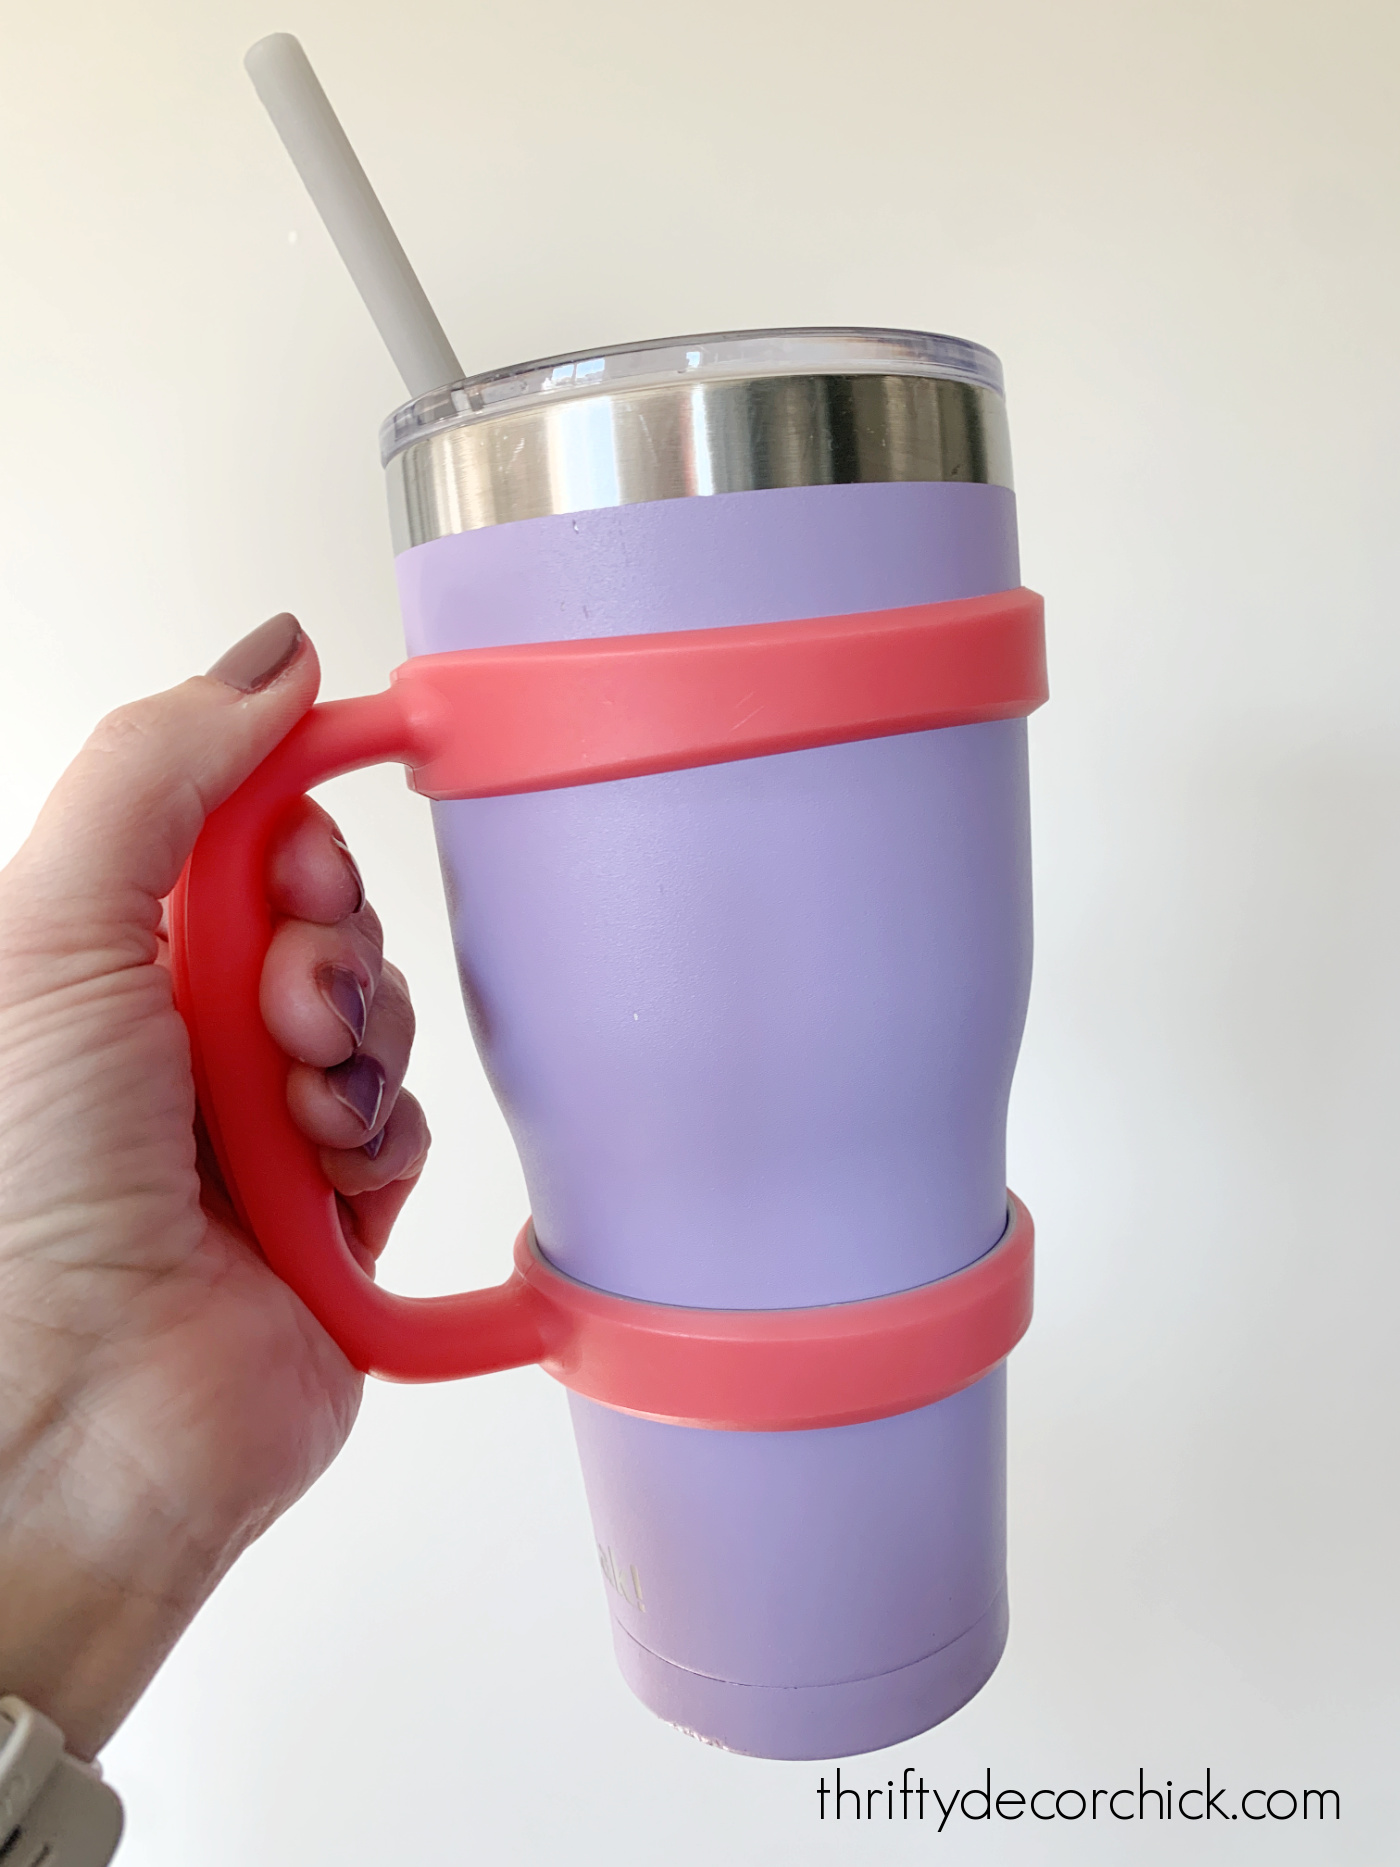
I like having something large so I don't have to refill constantly, but carrying it around is a pain.
This tumbler holder is SO awesome! It slips right over the bottom and fits perfectly!
It's sturdy and comfortable to hold, and is dishwasher safe. I take my tumbler everywhere with me with ease! (I know I sound like an infomercial, but I really love it.)
Finish it off with my favorite rubber straws that are plenty long and easy to clean. ;)
Are you a note taker? I don't think I would make it through a day without my notebook to jot down lists and project details:

If you haven't tried these U Brands pens, you must! They are so smooth and don't bleed through paper.
My hardcover notebook is lined inside. I love that it's so sturdy but small enough to throw in my purse.
They have a ton of design options too!
OK, this is a weird one, I admit. But if you sleep best in total darkness...you'll love it.
These black out stickers for those tiny, annoying lights on electronics are AWESOME:
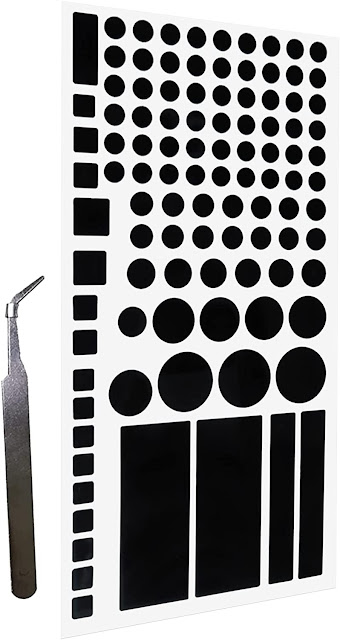
They come in various sizes and allow you to block the small lights that can be seen from space, but your electronics are still functional.
I LOVE them. What a great stocking stuffer! :)
If anyone you know 1. loves bananas and 2. packs lunches...this one is for you:

Oh, you didn't know you needed a banana keeper? Well, this is definitely one of those things you never knew you needed...until you have it.
This little banana container keeps them from getting smushed and brown. We use them for our son's lunches, but they would be great for on the go as well.
It's plenty big and easy to use. Also top rack dish washer safe.
If you're a lover of wine, you know how hard it is to get a perfectly clean wine glass.
These Riedel microfiber clothes make easy work of drying wine glasses:
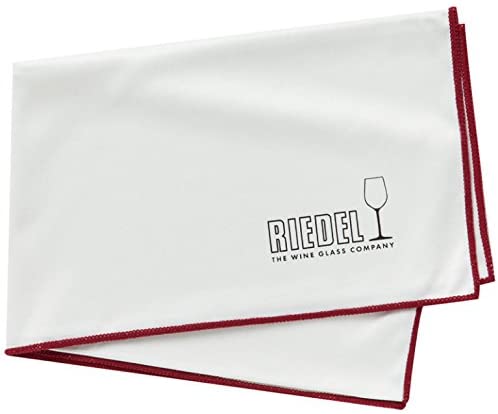
You get three in the set and they make our wine glasses spot free!
Of course, they are great on anything glass, even eyeglasses and phone screens.
We've used the Downy pellets in our laundry for years, and they make your clothes smell good for MONTHS.
I'll use it when washing out of season clothing, then pull them out months later and they'll still smell fresh and clean. Love them!
They have a new, "light" scent that I think smells even stronger than the other ones...which doesn't make a whole lot of sense, but I'm here for it ?:
It's such a clean, light scent and I actually sniff my clothes before I put them on to breathe it in. Our favorite is the ocean mist.
Soooo nice.
More fun gift ideas that I loved!
So much fun! Do you use any of the items I've mentioned? We use each one constantly!
Now let's check out what the other ladies have to add!
Anyone else shopping from home this year? Who am I kidding...that's me every year. ;)
Tuesday
Sarah at Thrifty Decor Chick
Diane at In My Own Style
Jennifer at Dimples and Tangles
Jenny at Evolution of Style
Jen at Rambling Renovators
Beth at Home Stories A to Z
Megan at Honey We're Home
Wednesday
Rhoda at Southern Hospitality
Kelly at Kelly Elko
Angela at Unexpected Elegance
Sara at Sincerely Sara D
Courtney at A Thoughtful Place
Chris at Just a Girl
Never miss a post by signing up to get posts via email.
Via https://www.thriftydecorchick.com/2021/11/TDC-home-decor-gift-favorites-2021.html Our four year before and after home tour!
Welcome to the before and after tour of our modern Craftsman home with tons of custom DIY touches.
Can you believe it...we've been in our "new" home for more than four years now!
It feels like we've lived here MUCH longer. Not sure if that's a good thing or not. ;)
While we were building I had so many people ask what I was going to do with myself in a new, finished house.
Haha!
Well...plenty. :)
I love sharing how our home has changed year after year! I'm sharing photos from when we moved in and how those rooms look now.
You know how much I love good before and after pics!
Keep in mind...working on our home is my job. I'm so lucky to be able to do this as my business...but I never want anyone to feel like this is the normal pace for DIY projects.
DIY is my passion, so I'd be doing it no matter what!
If you'd like to see how these rooms looked at the three year mark, check out our three year before and after tour.
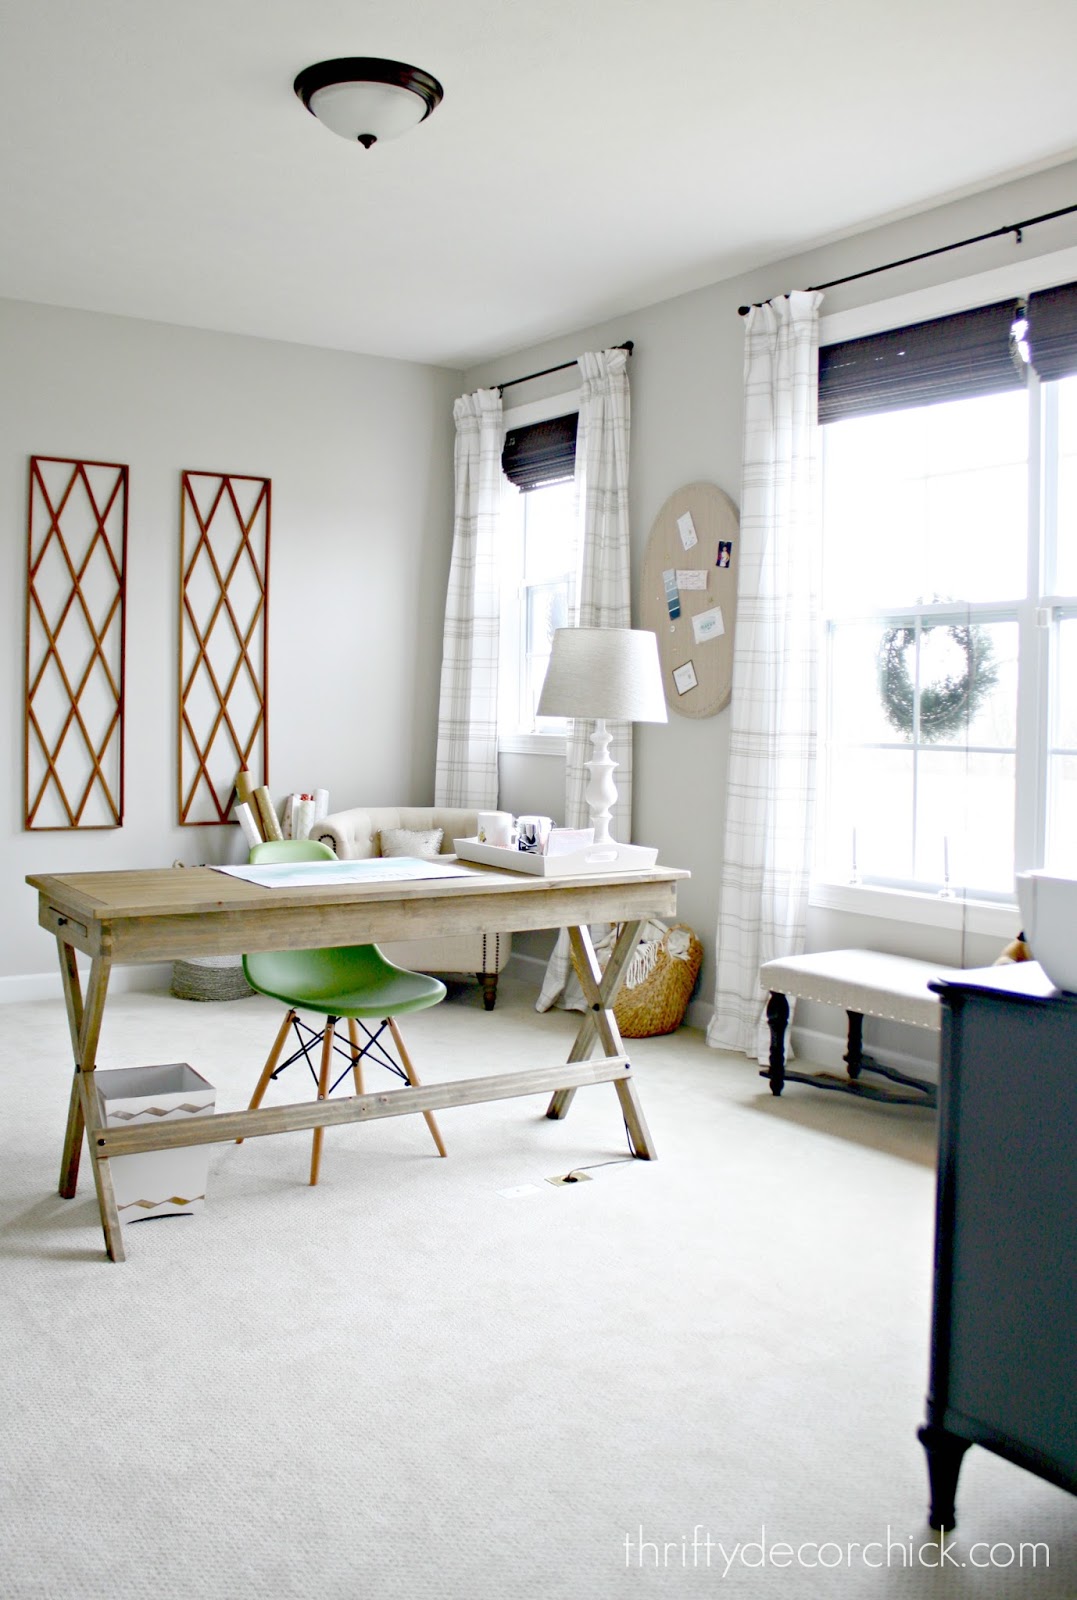
First up, let's take a look at how far my office has come!
Here's the view shortly after we moved in...after I stopped using it as our storage room. ;)
This post may contain affiliate links for your convenience.
See my policies and disclosure page for more information.
I knew all along I was going to build a wall of bookcases along the back -- it was calling out for it!
It worked perfectly with my plan to float my desk in the middle of the room.
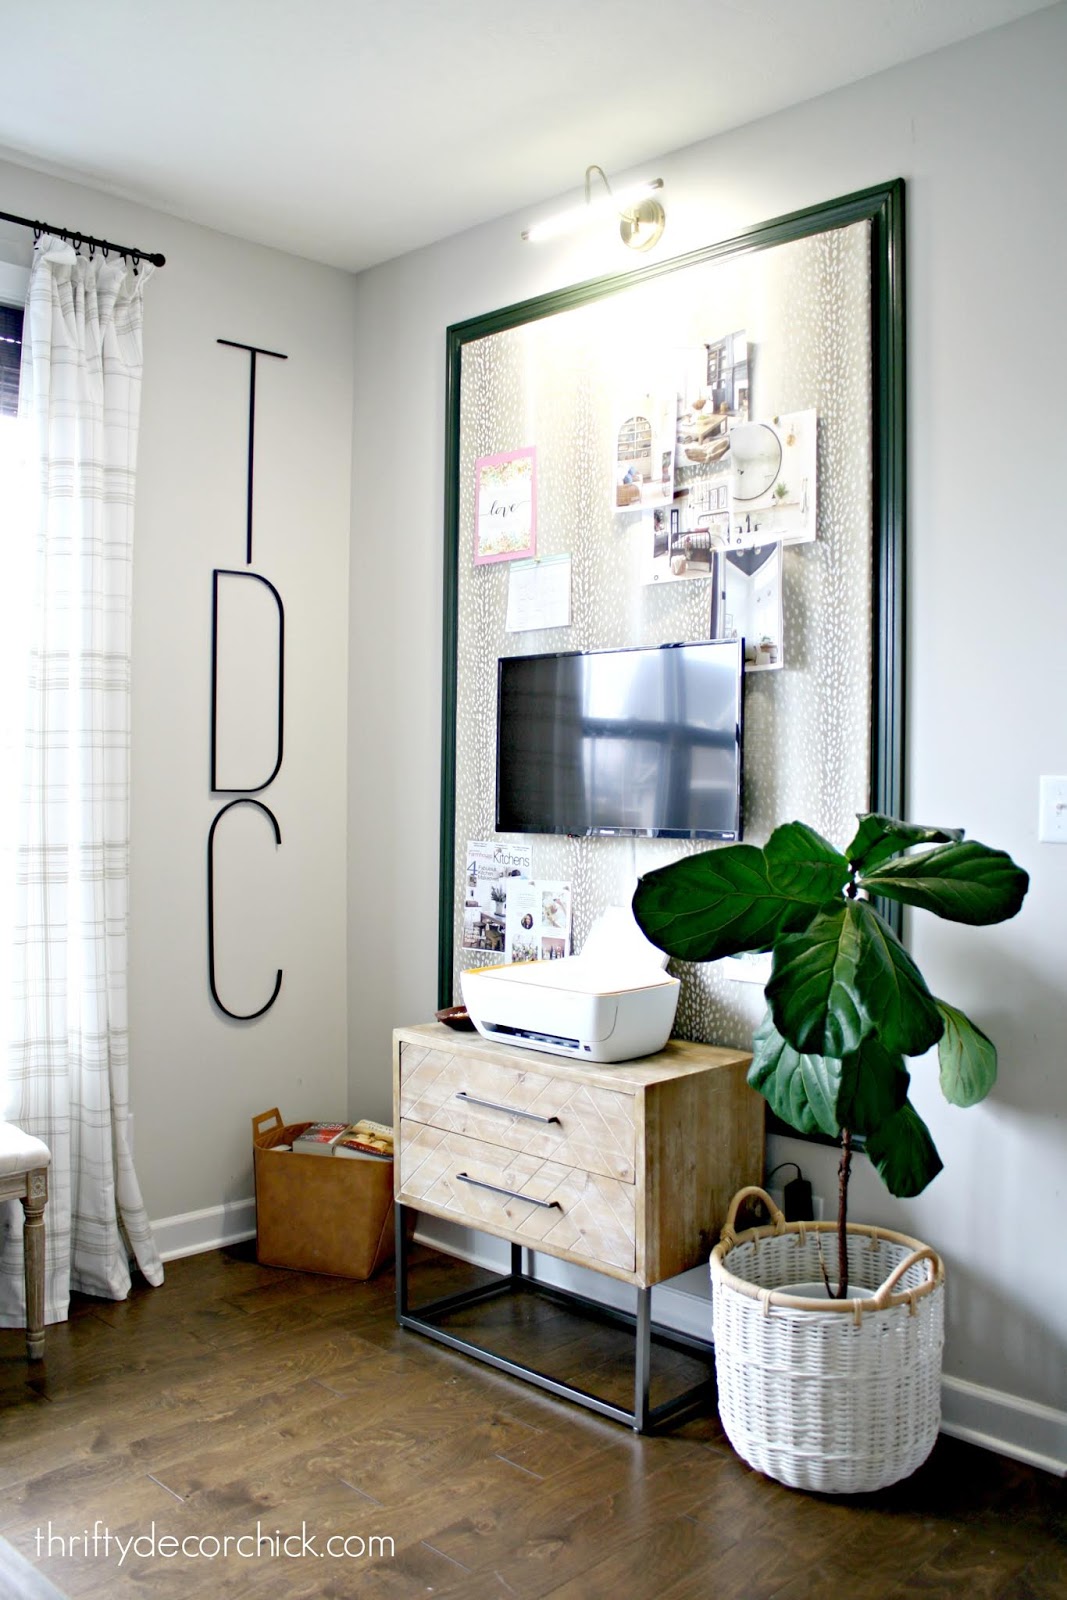
After that built in project and a few more updates, this is where we are today:
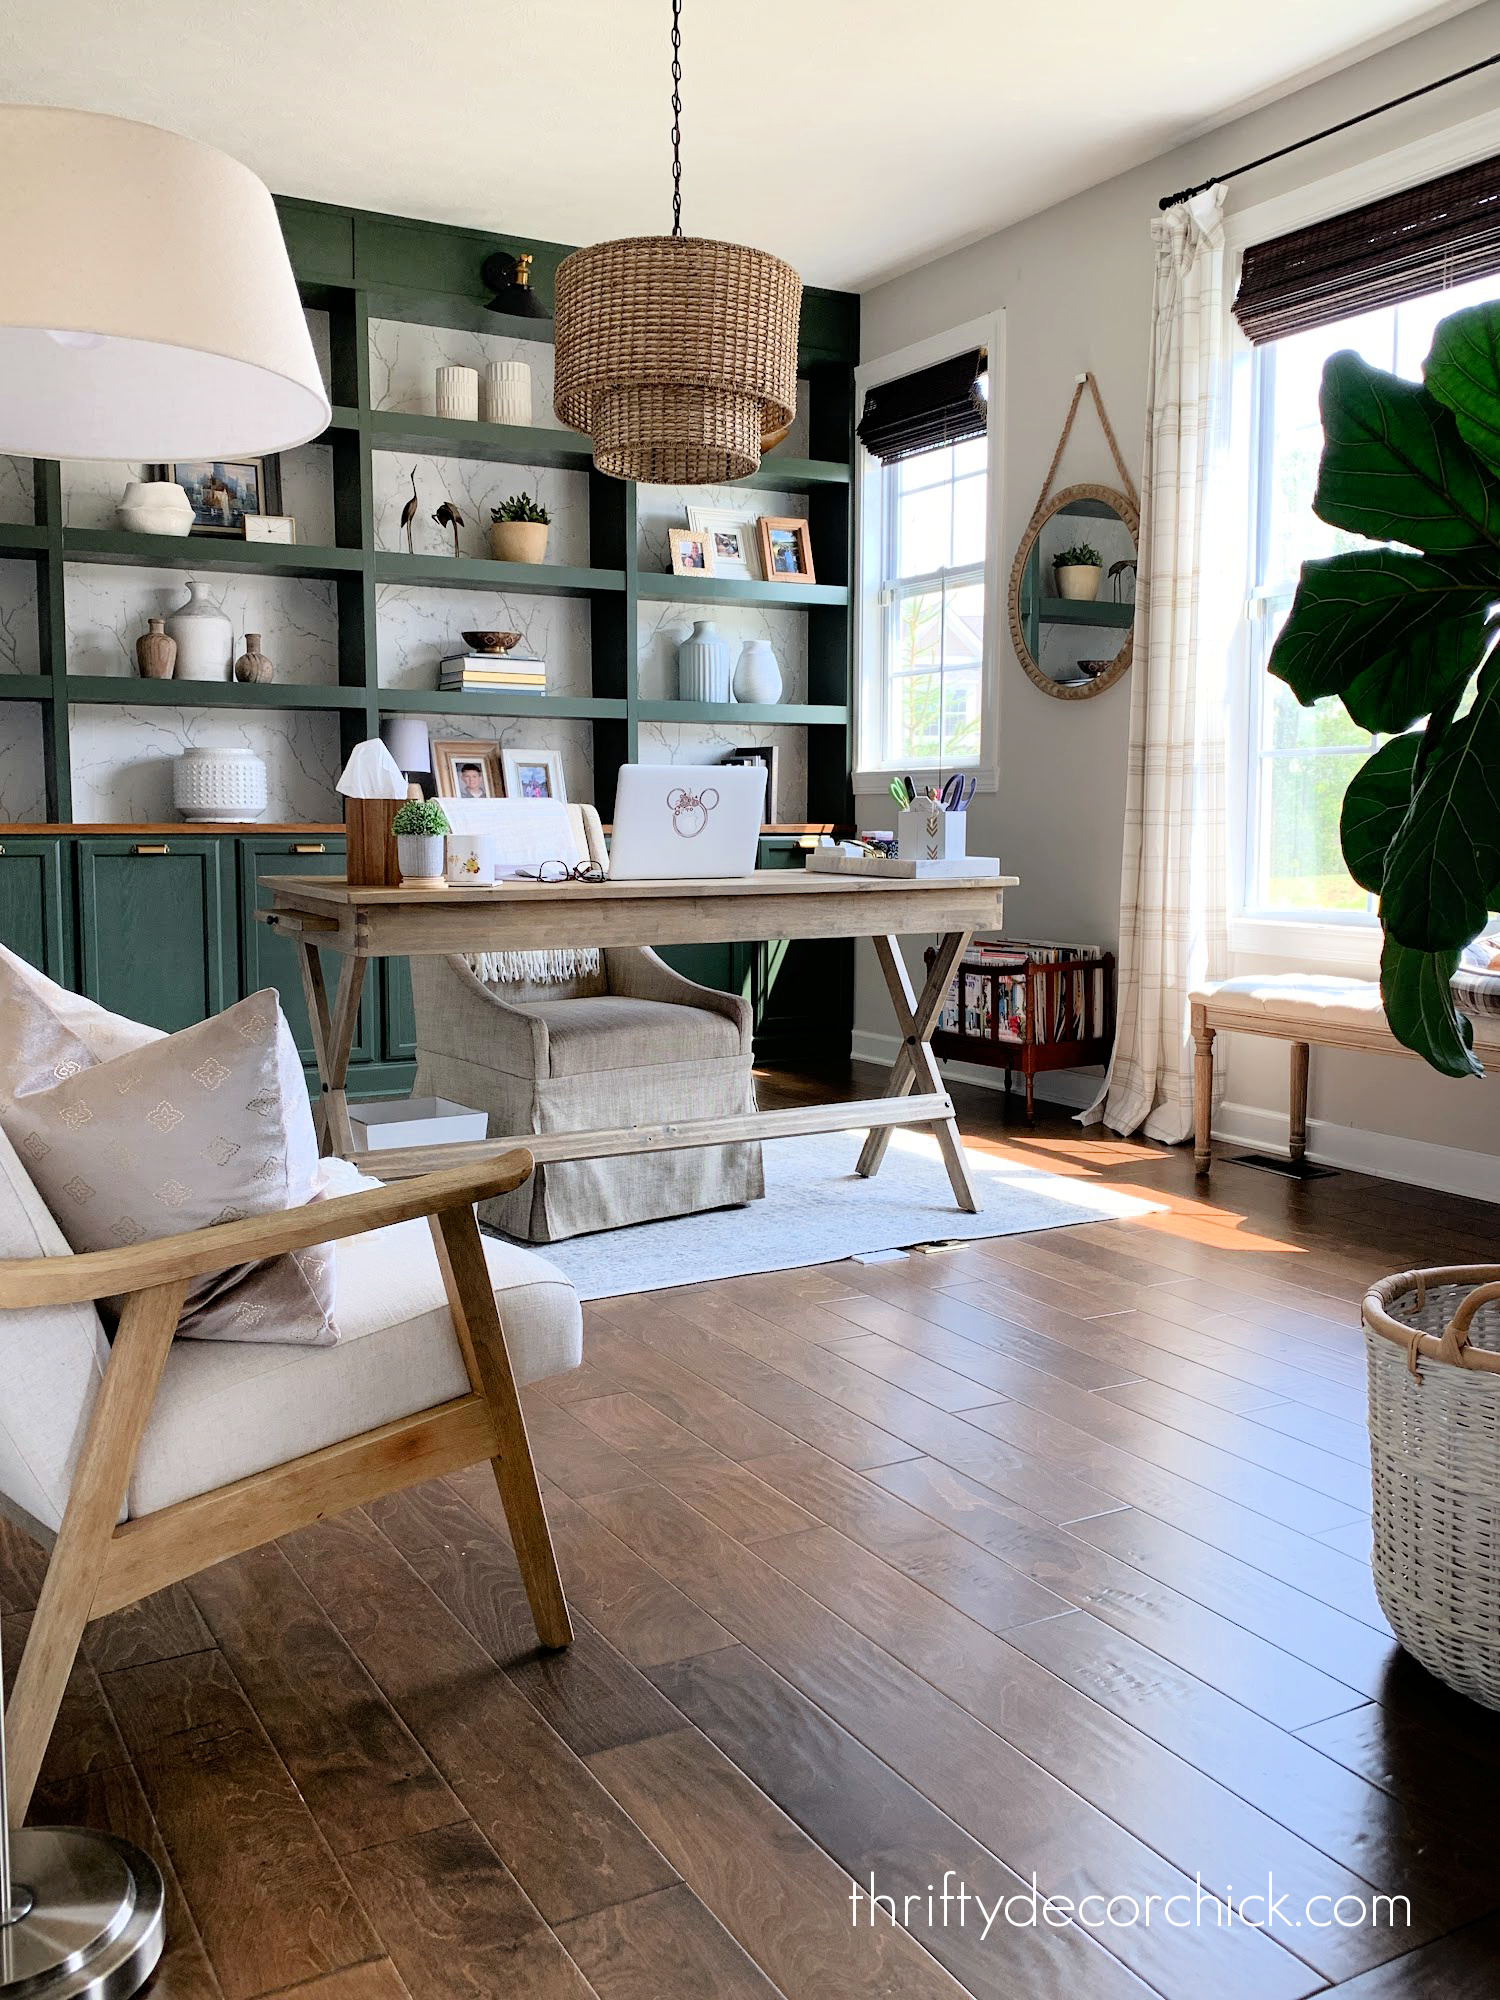
It's funny -- that rattan light fixture made all the difference in here. The smallest thing tied it all together!
My other favorite purchase for this room was that modern wood chair...can you believe that's from Walmart?
**That one is sold out right now, but this option in a darker stain is very similar.
The other side of the room was pretty plain before:
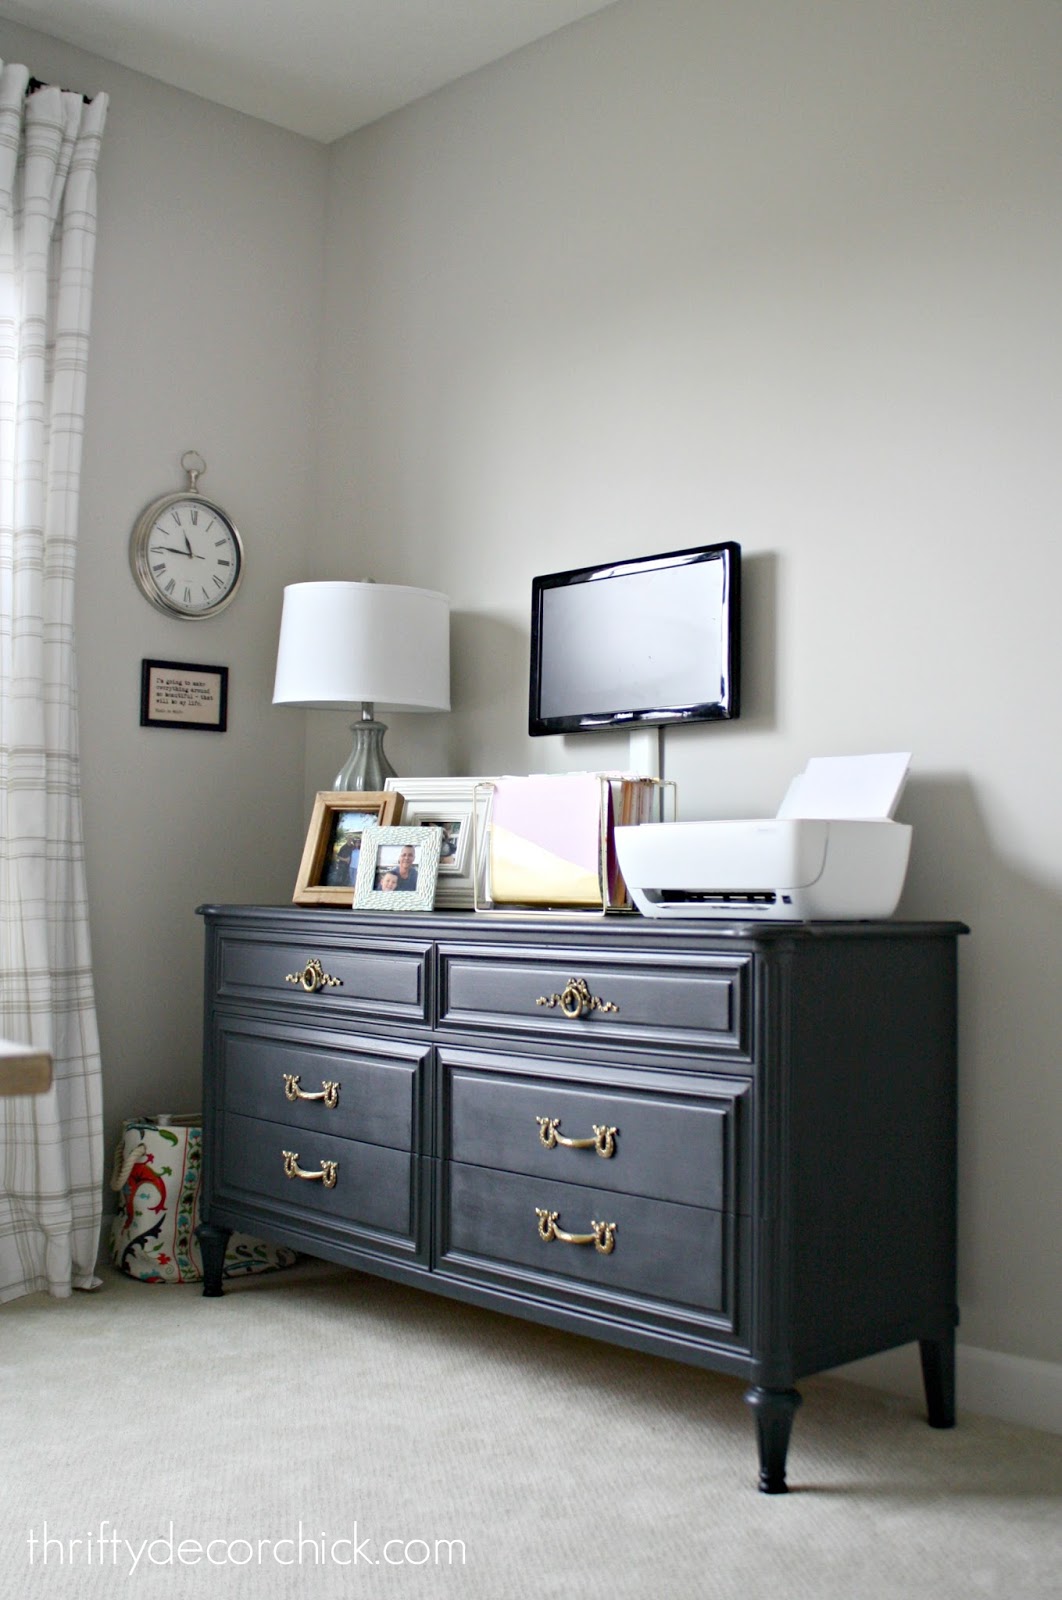
But my giant upholstered bulletin board made a HUGE difference!:
The Foyer
Our foyer hasn't seen a ton of changes, but the ones I've made make it feel bright and modern.
Here's the before -- at first I was putting every item in the same exact same place it was in our last home:

It's a new house, change is good! :)
I added a super inexpensive $15 board and batten wall and added molding like crown and new, thicker door headers:
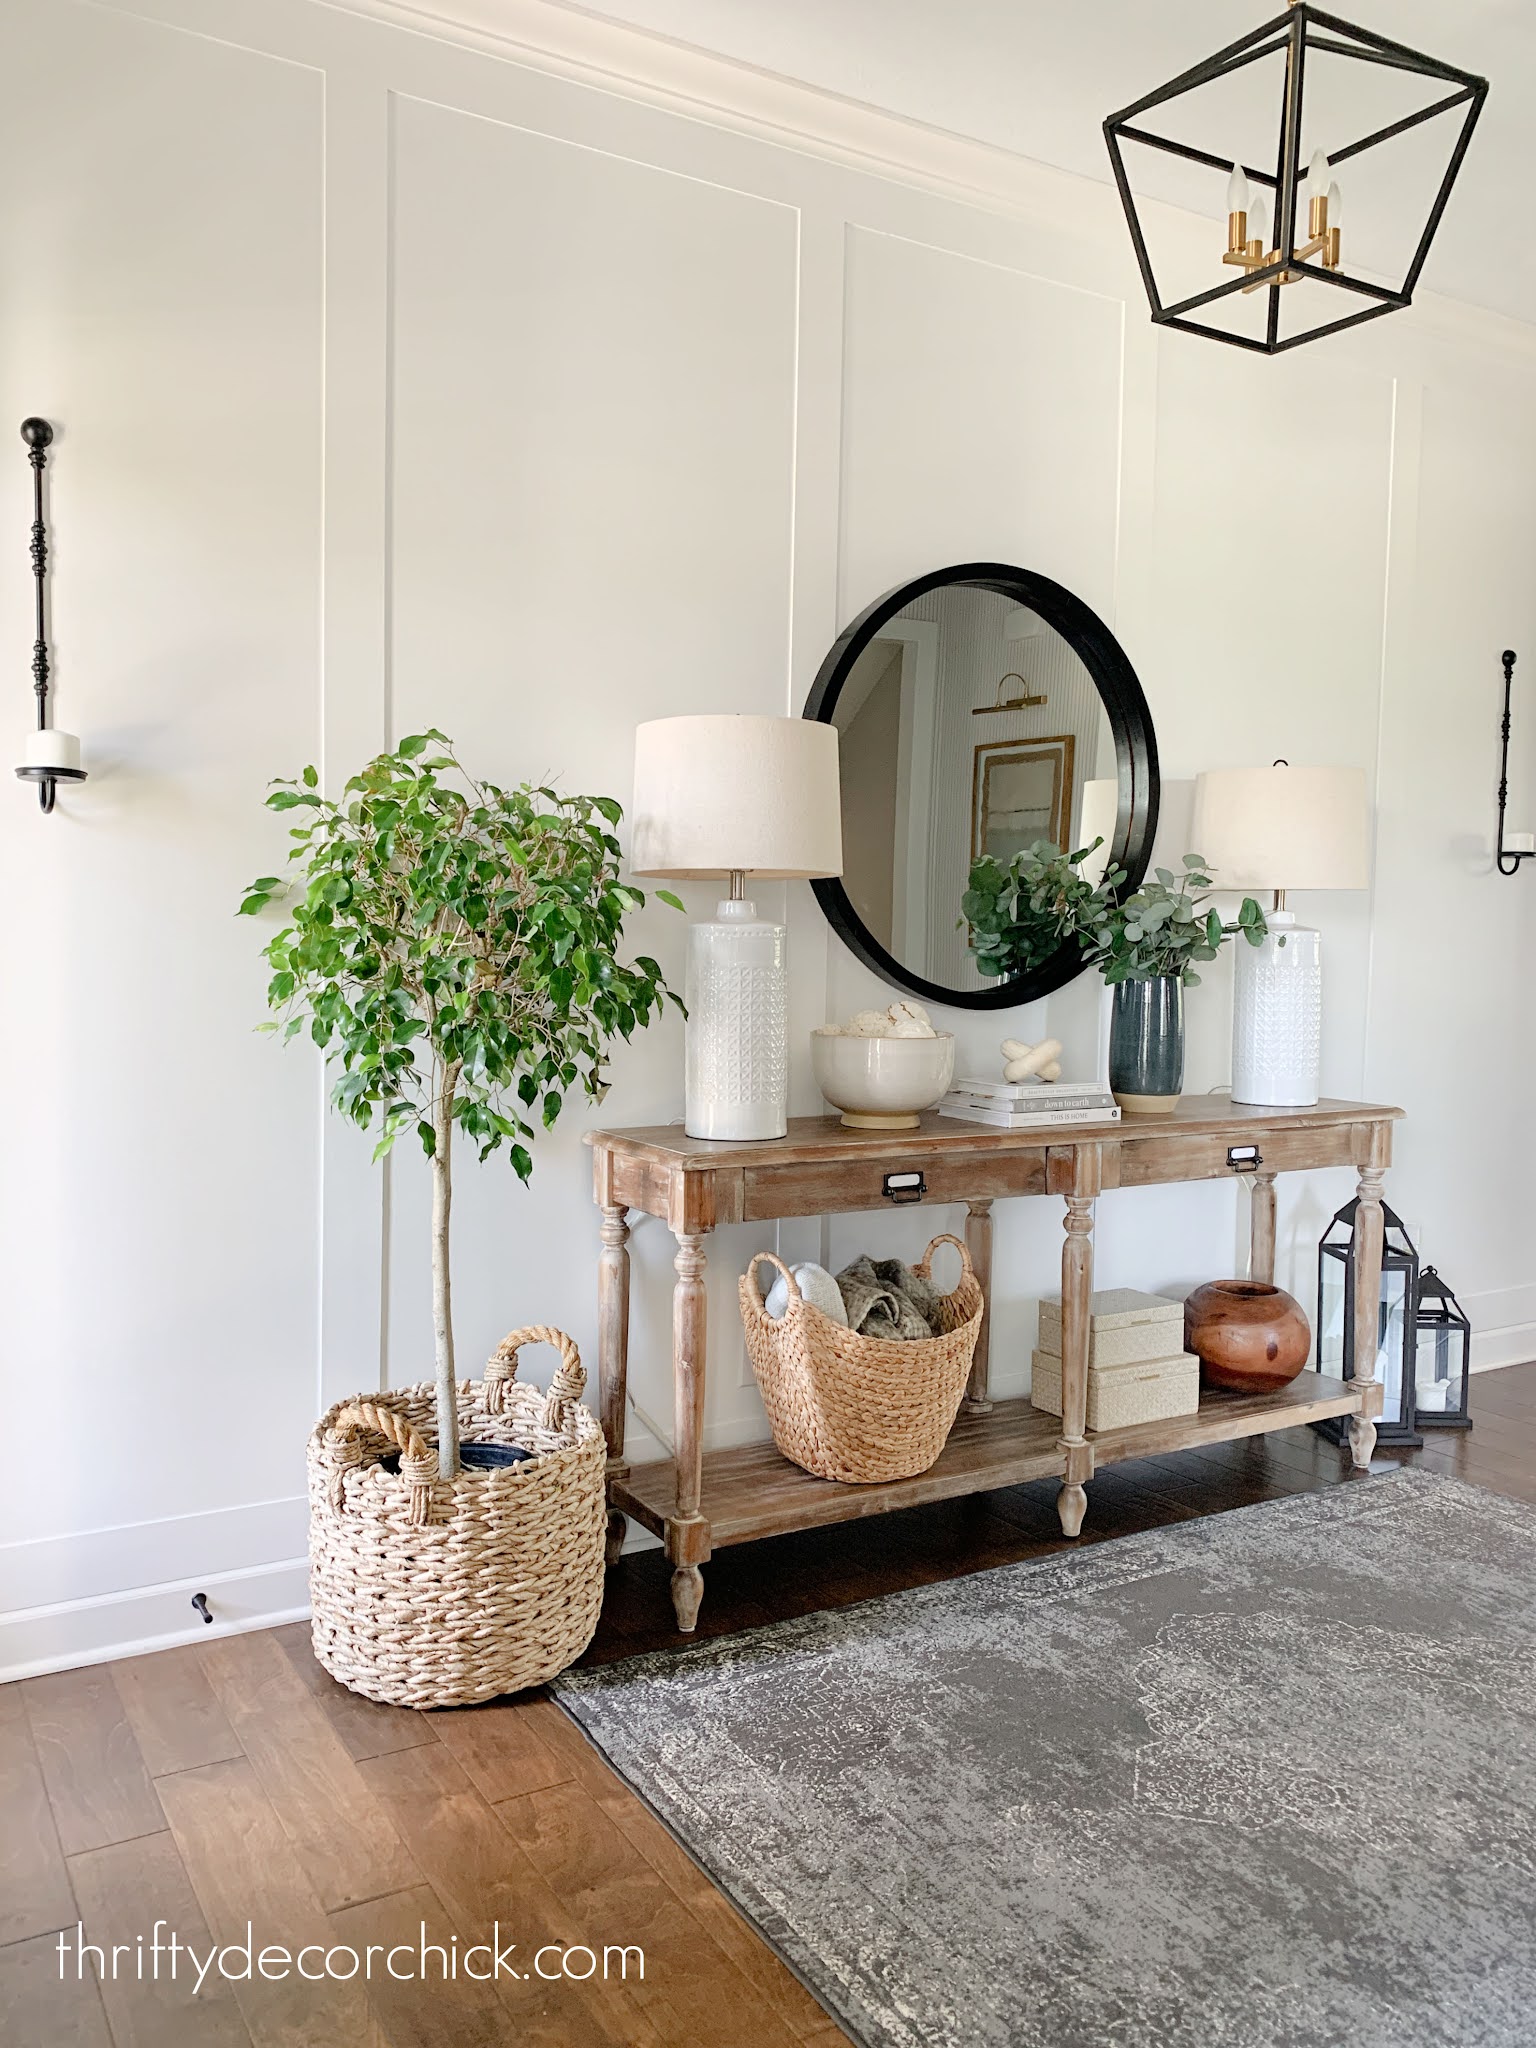
I also moved my favorite console table up to this spot and LOVE it here.
This space is the perfect example of how much trim and molding adds to a space! It feels so much more "us" now.
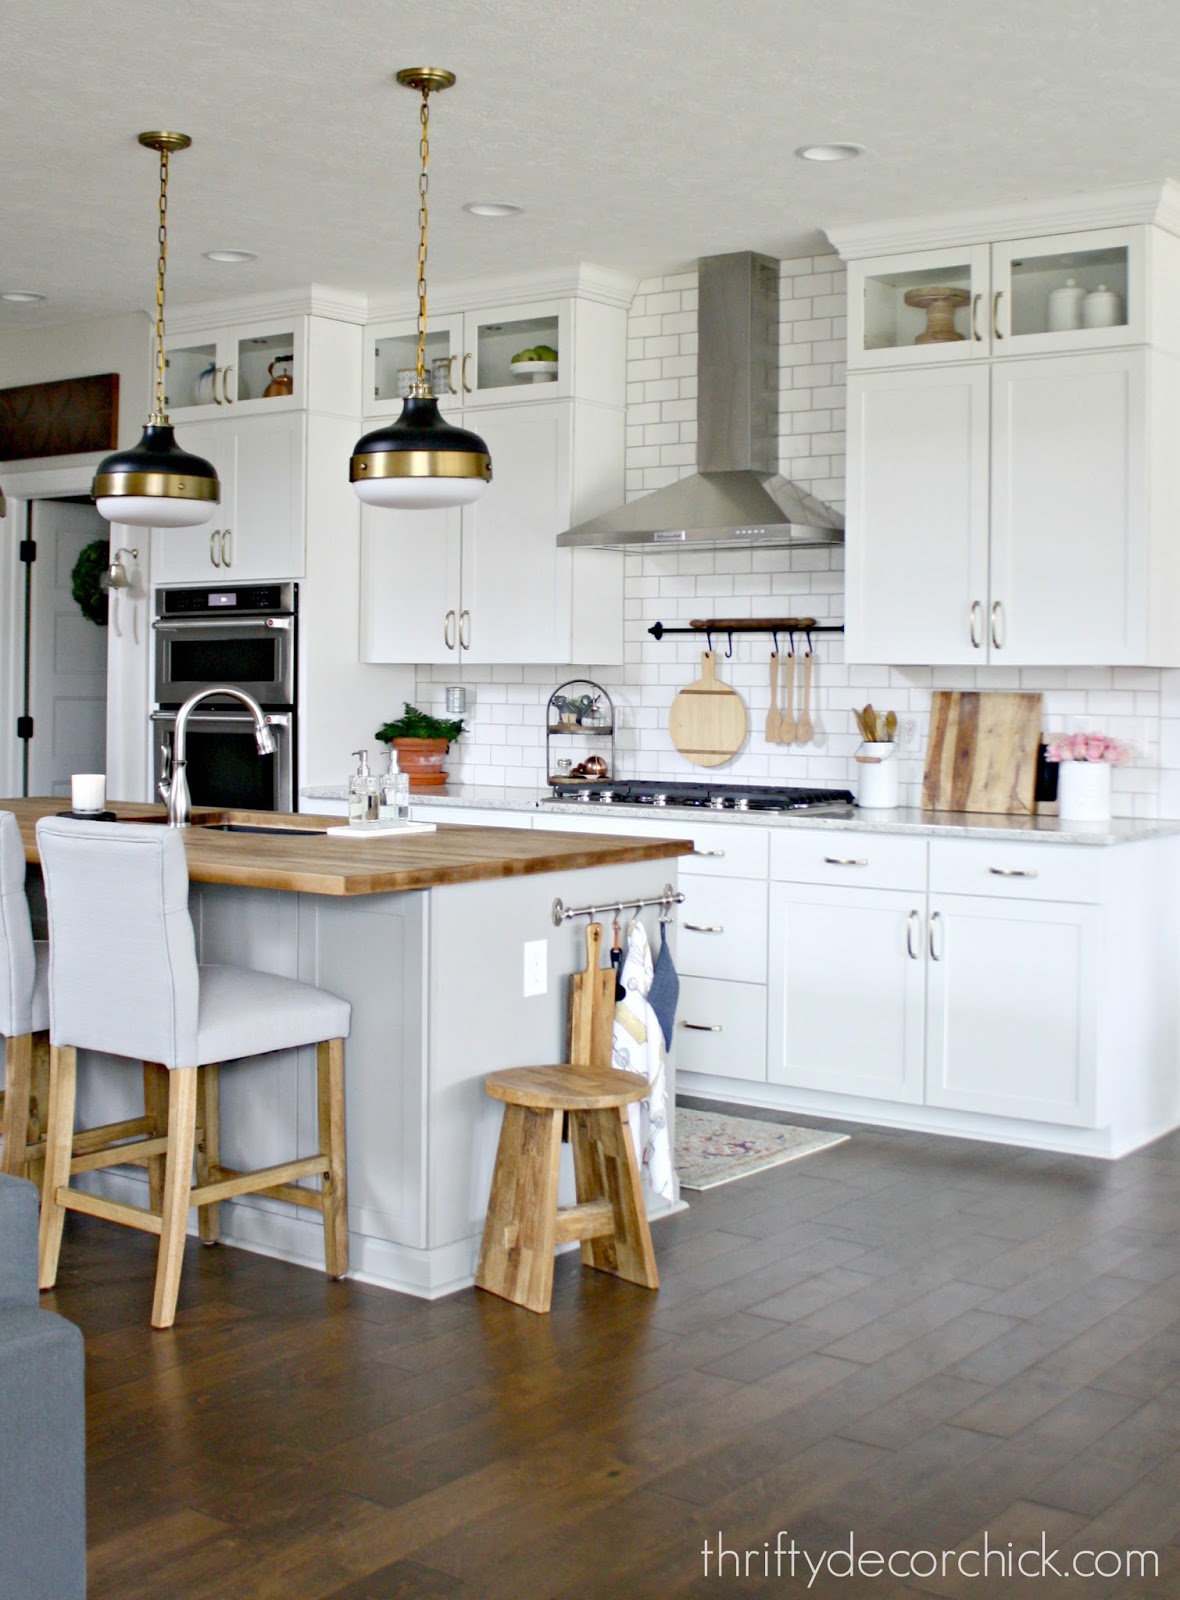
The Kitchen
Our kitchen was ready to go when we moved in, but I'm always on a mission to add character and interest in brand new spaces.
Here's a look at our kitchen four years ago:
It was lovely!
You know me though...
I've done so many small updates in here, too many to list!
But extending the sides of the island to the front and finishing off the sides of our basic cabinets were a couple of my favorites:
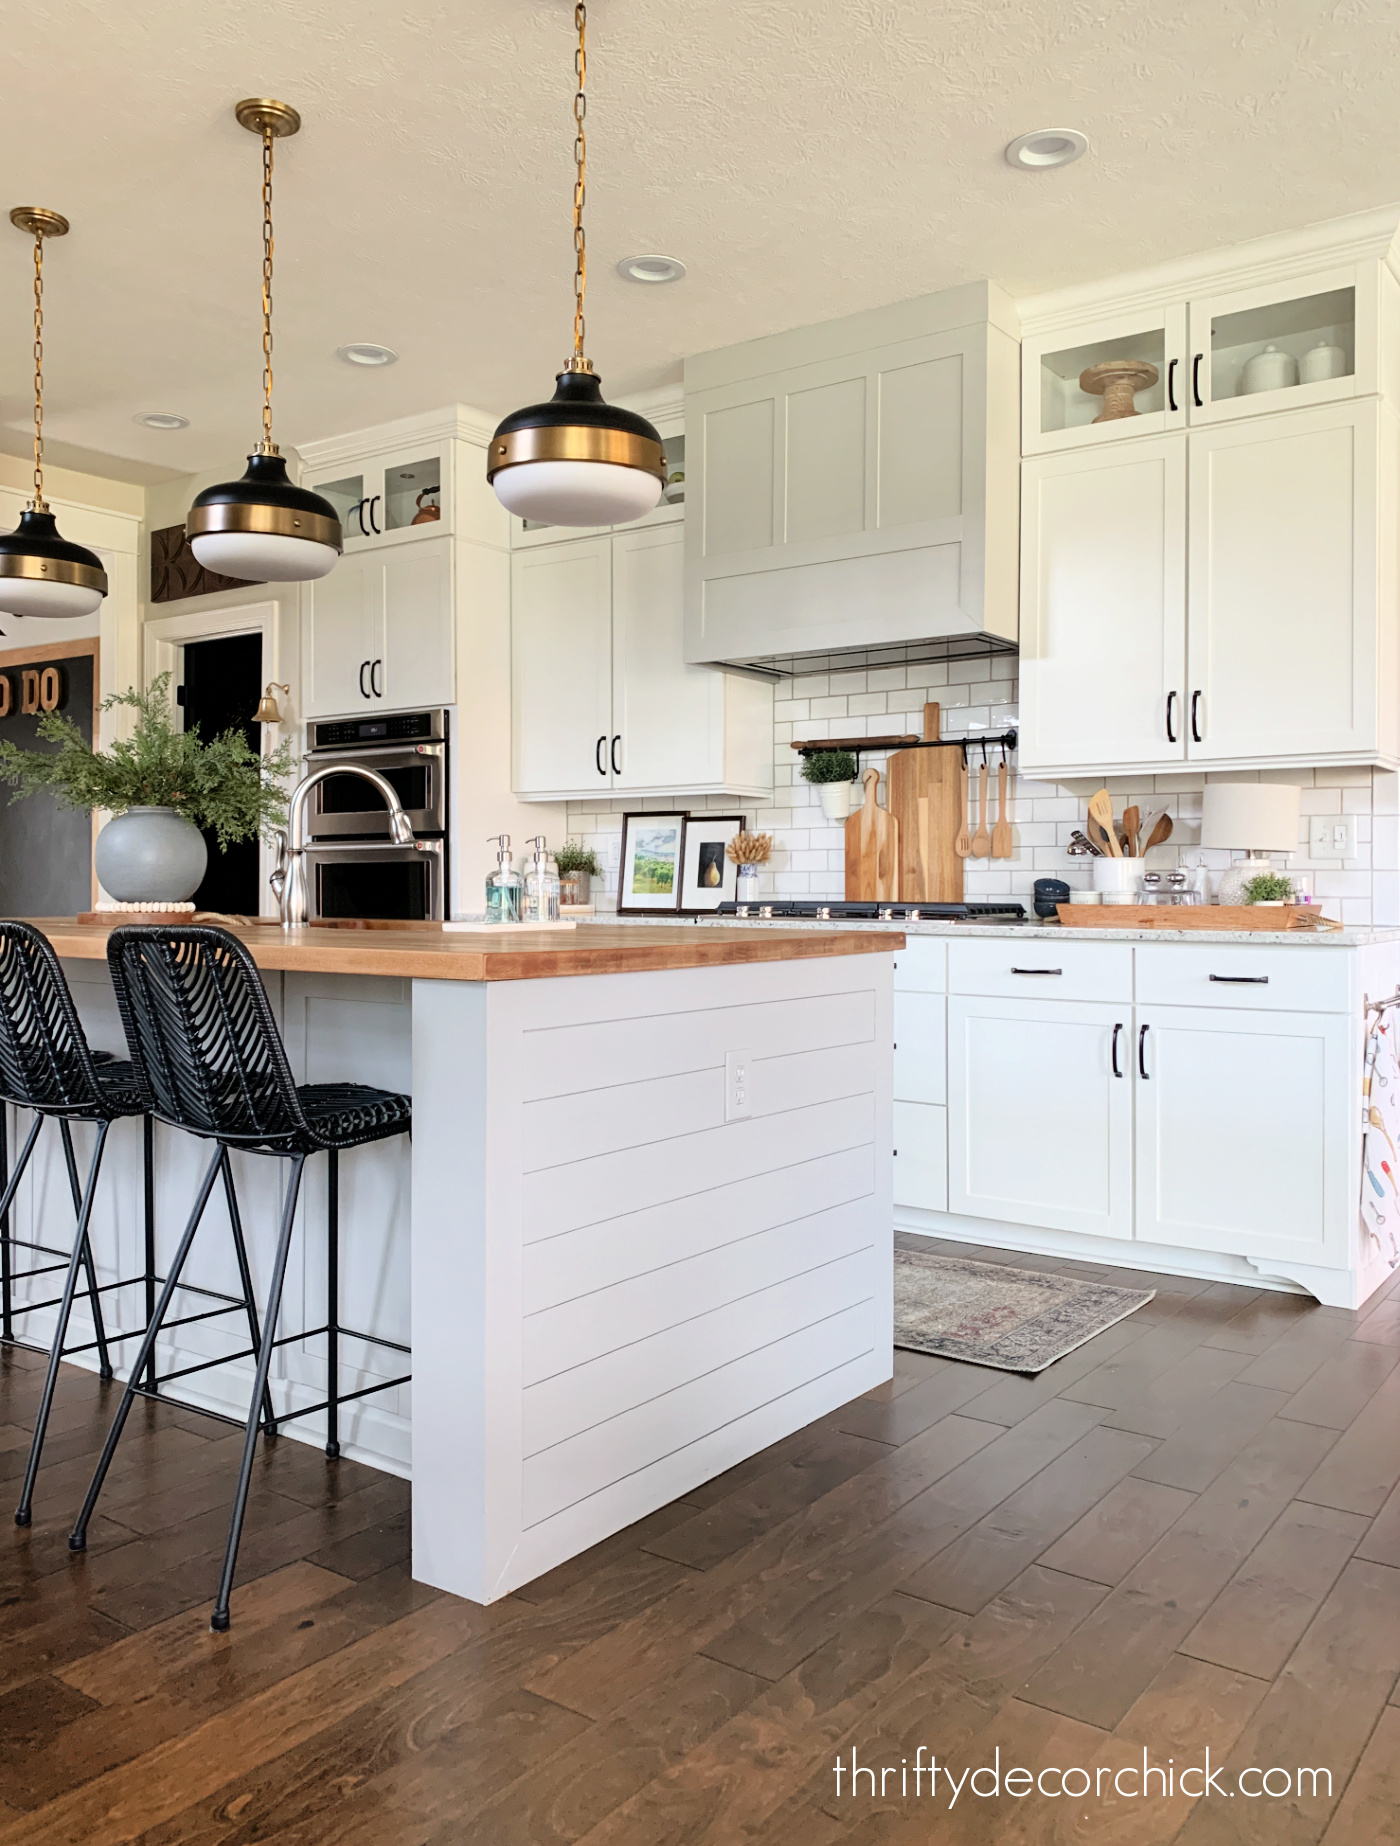
I also built a new wood vent hood right over our old one, and added little details like DIY decorative cabinet feet.
This is the side view before:
One of my most recent projects was building those thick floating shelves next to the fridge:
Our black and brass pendant lights were in my head from the start and I still LOVE them!
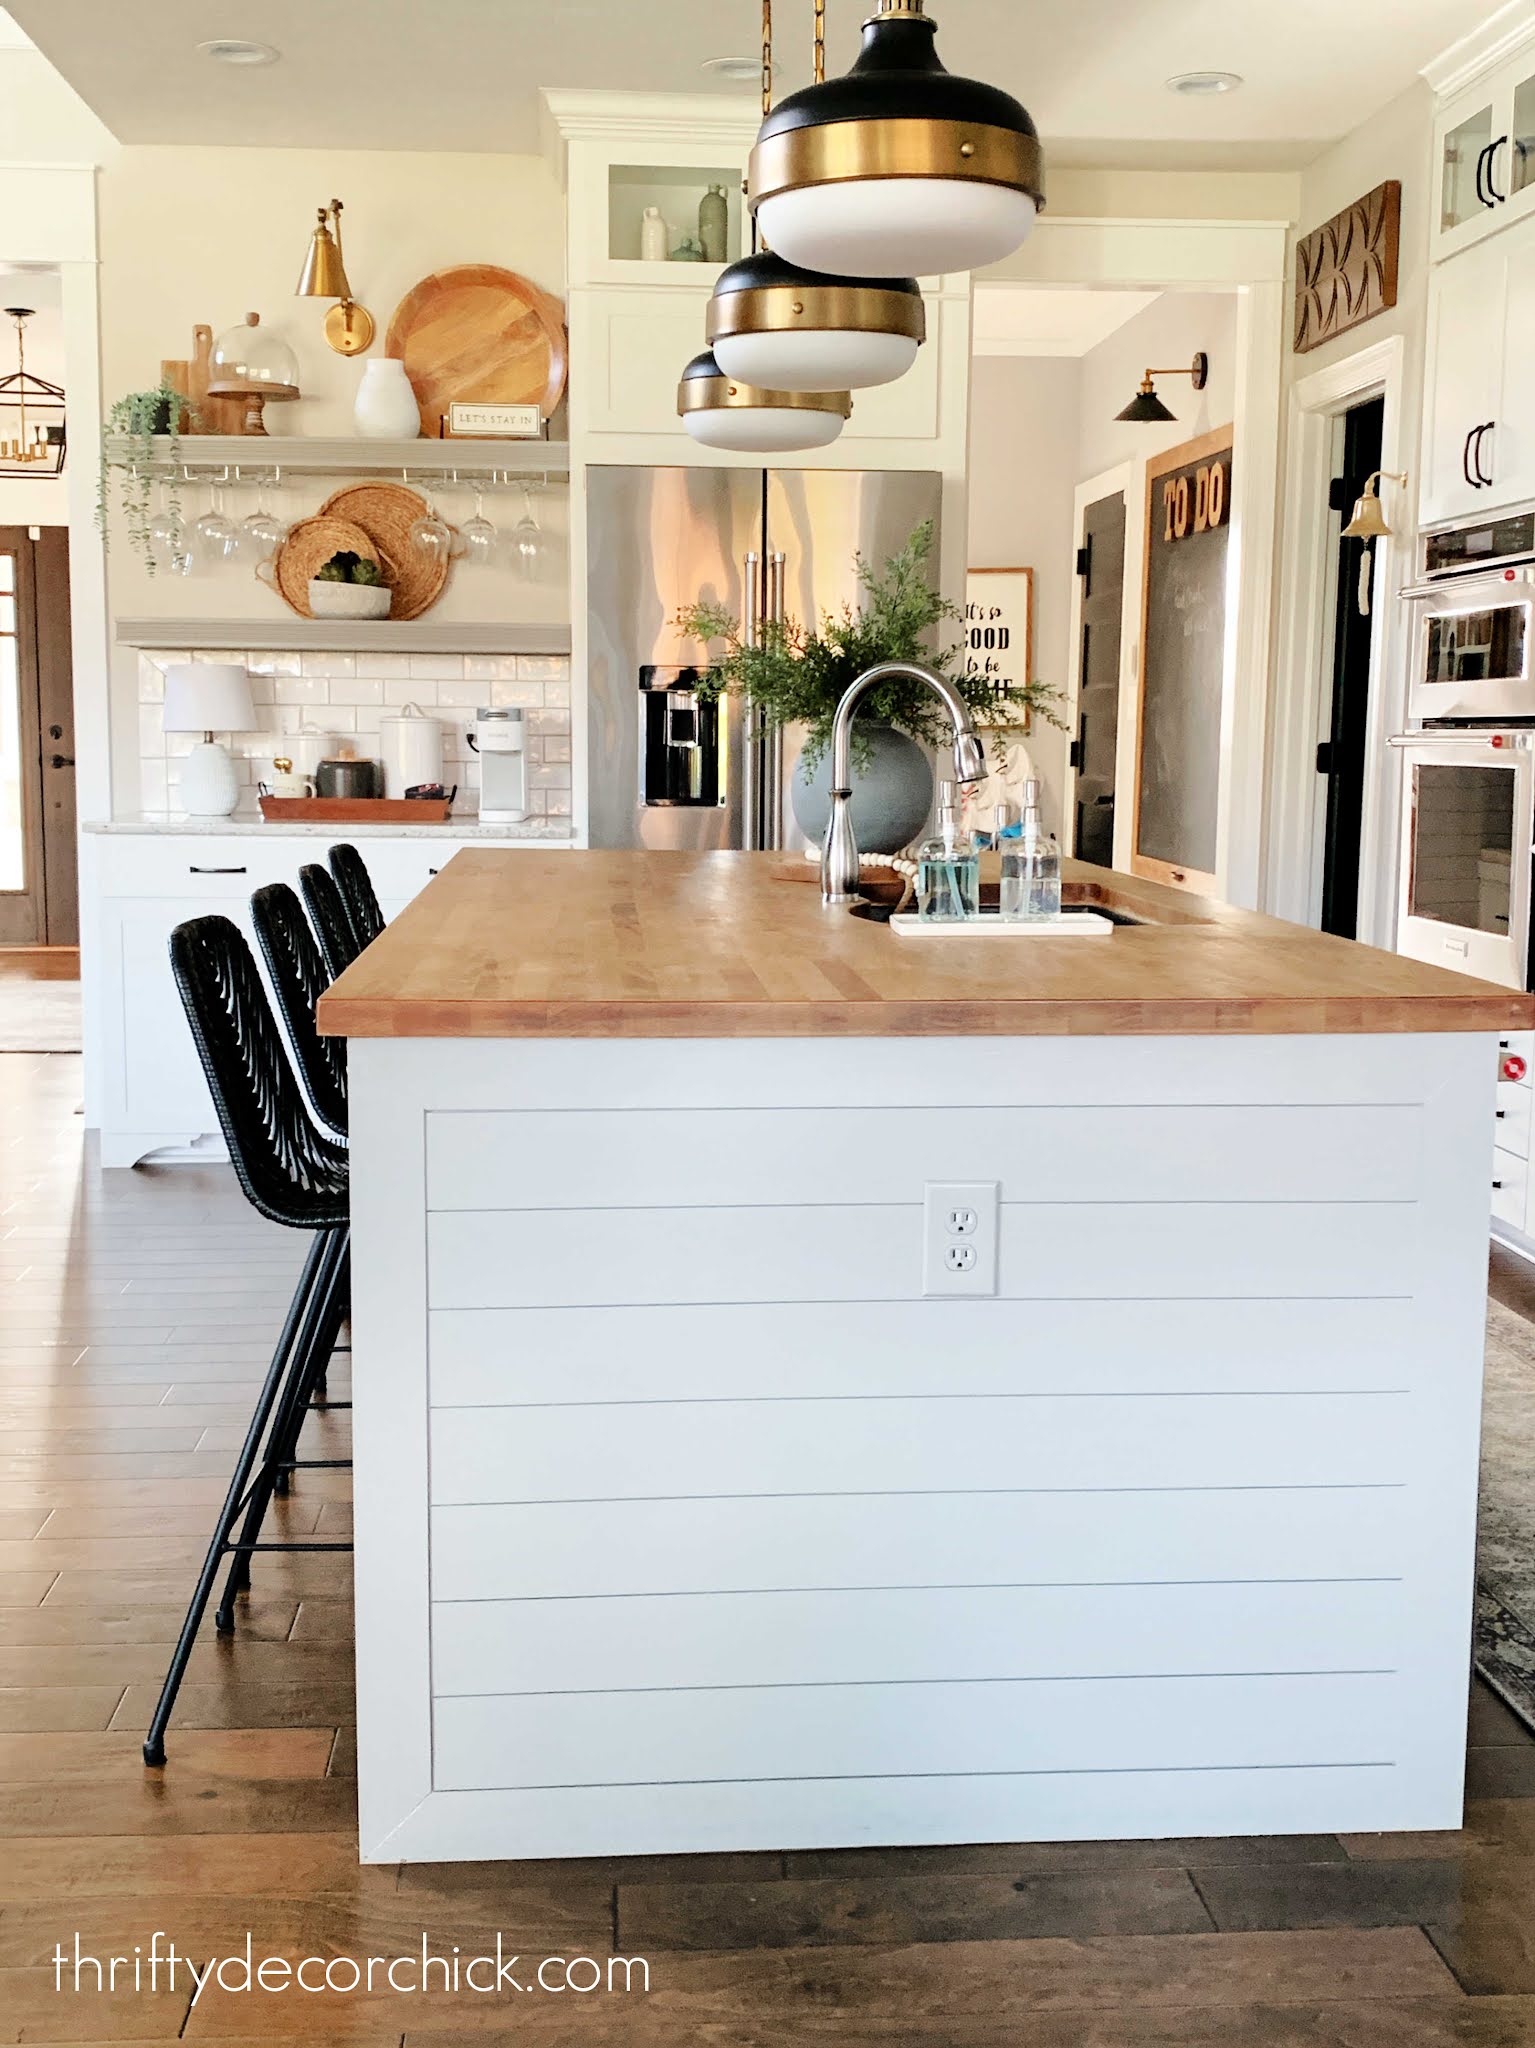
See how that extended island makes it feel so much more substantial? I'm so glad I tackled that project.
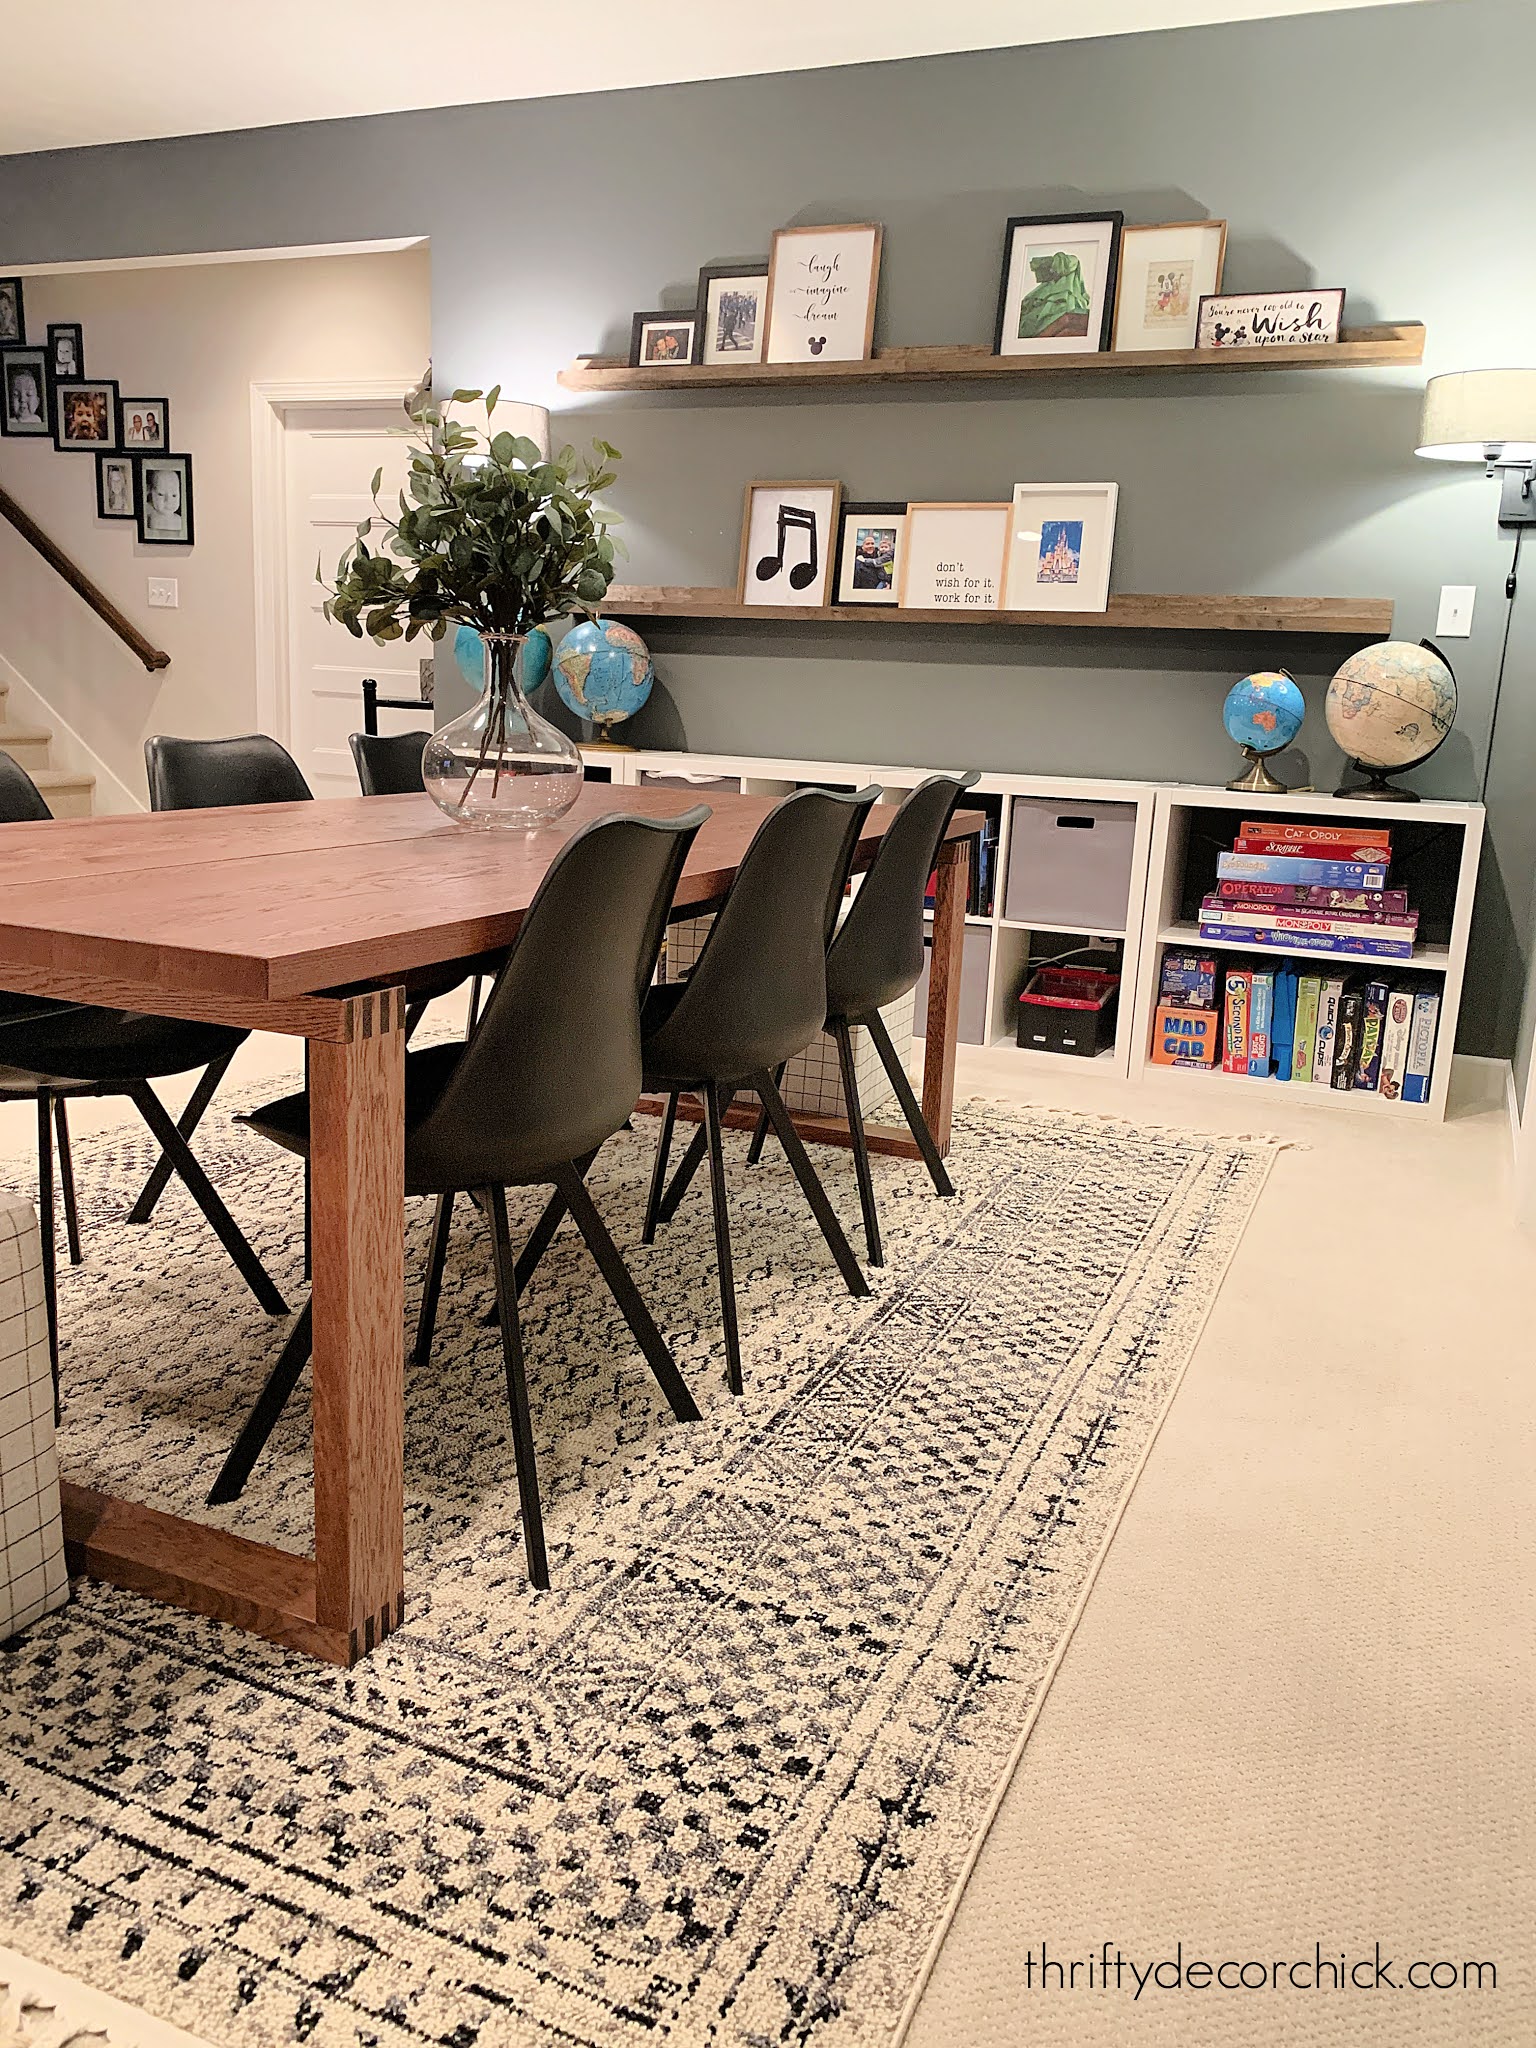
The Basement
I've worked on SO MANY projects down there. Let's take a look at some of the big before and afters!
The biggest was probably the largest DIY build I've ever done.
We have a really long wall in our basement family room that was calling out for something BIG:
So I built this built in entertainment center wall with kitchen cabinets:
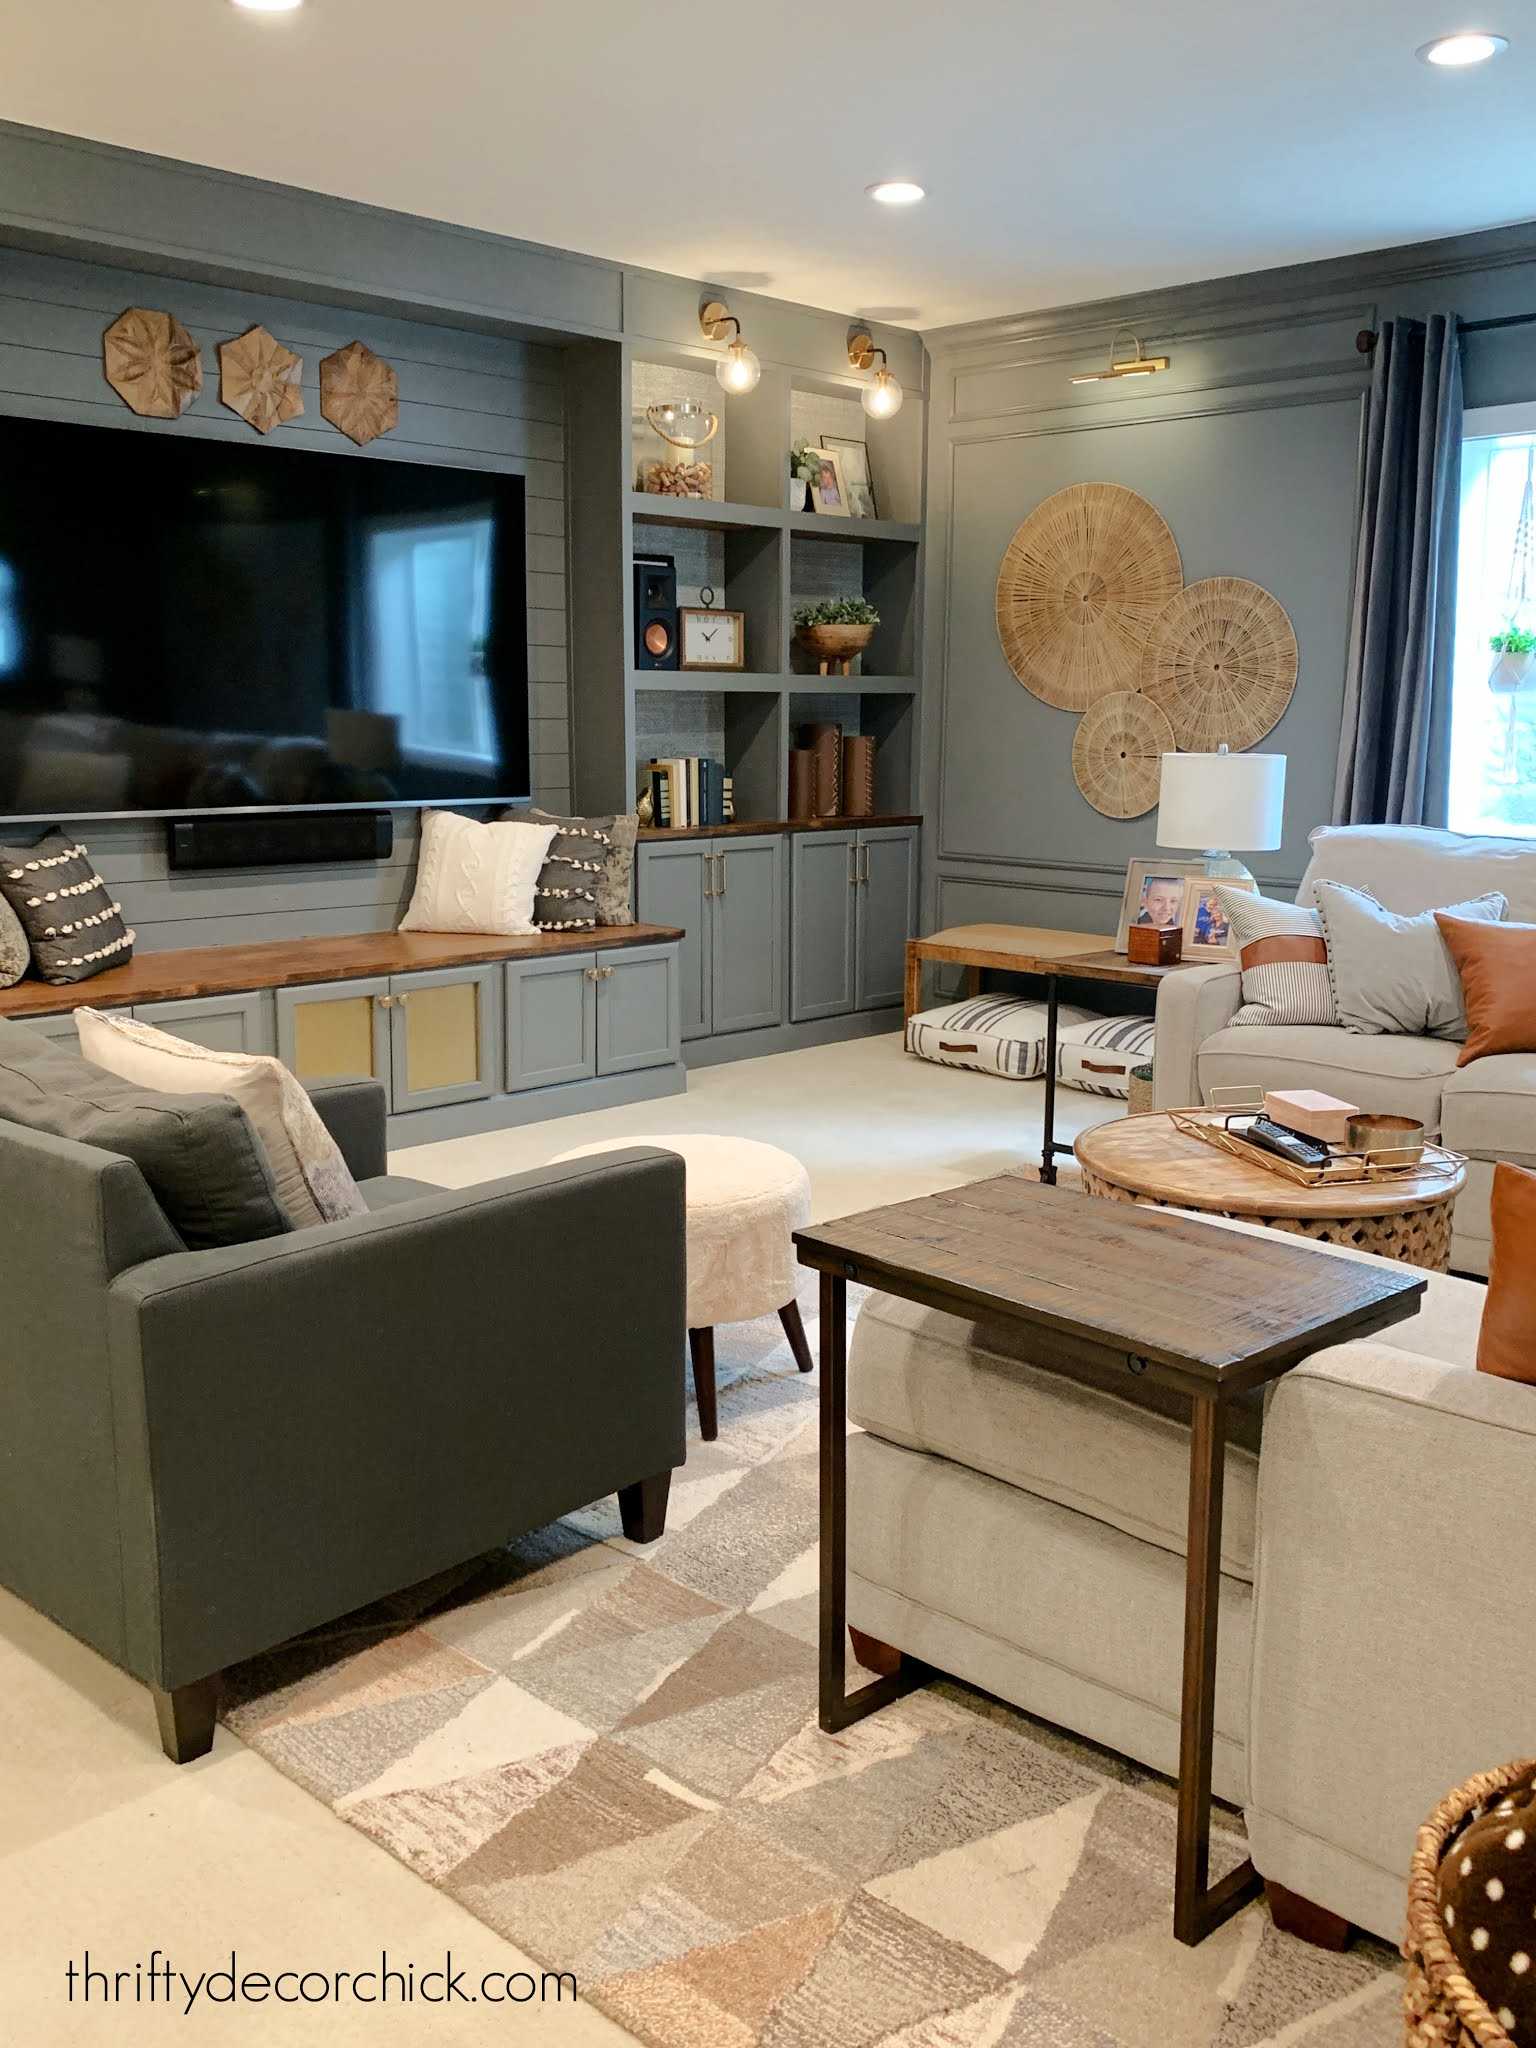
It's massive! Eighteen feet to be exact. I would have paid a small fortune to have someone build that for us.
Have I mentioned how much you'll save with a little DIY knowledge? :)
Our walls were all Agreeable Gray before:
I started with one accent wall, then eventually painted all of the walls in this moody Westchester Gray color:
I also added decorative molding trim boxes to the walls, and I can't believe what a difference that update made down here:
A few months ago I continued that look at the base of our stairs.
Here's how that spot looked before:
And now after I added a sconce, paint and molding to create a modern accent wall:
Last year we added a small wall down here -- we wanted to break up some of the open concept layout.
It allowed us to add a game table in the middle. What was once a blank wall:
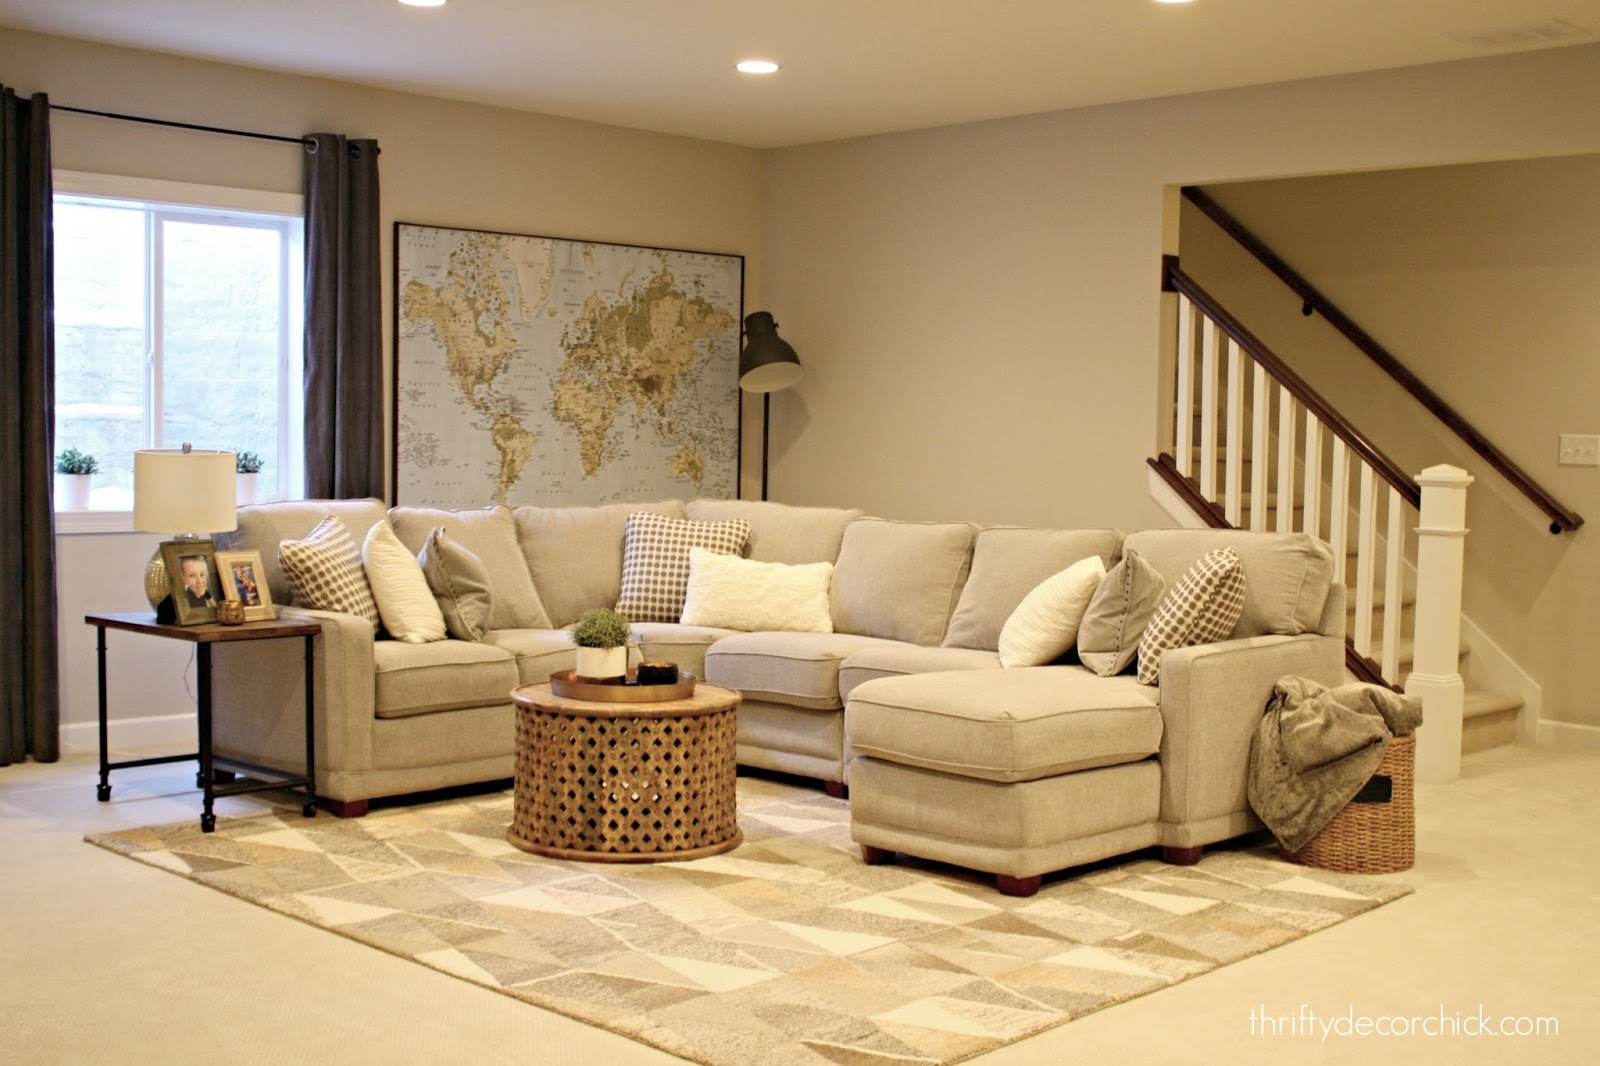
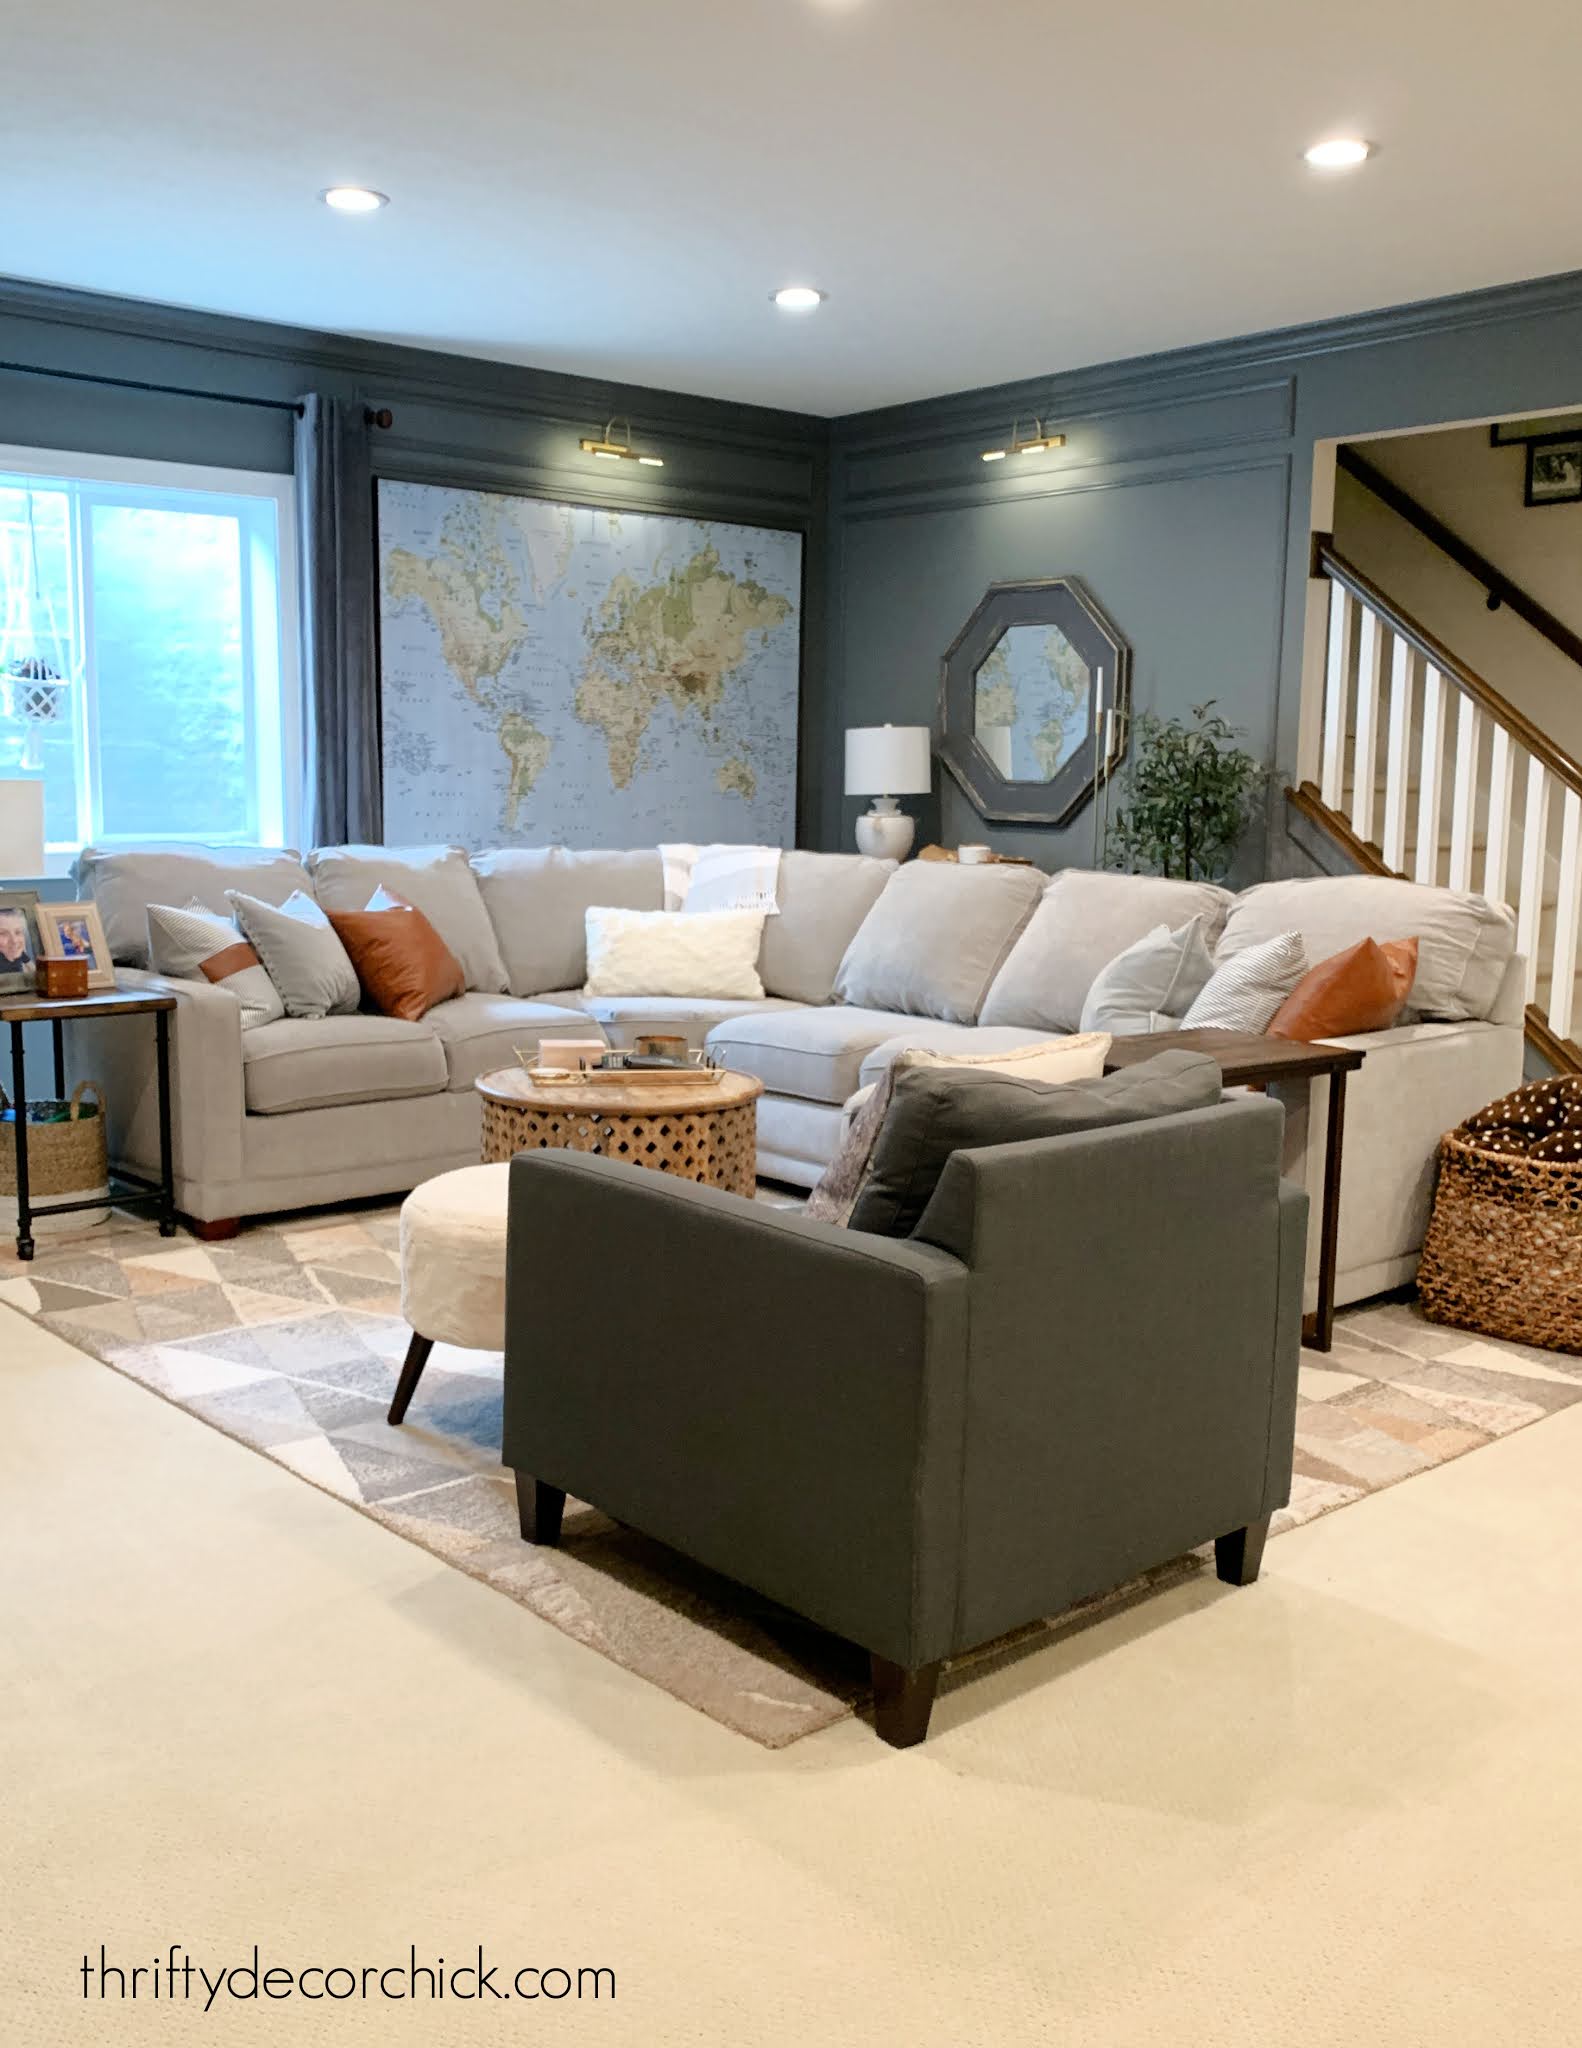
We are thoroughly enjoying our basement space, and will spend a ton of time down there this winter. :) I would hibernate down there all the time if I could! The Family Room
Our family room has been warmed up over the years with deep color and decorative trim.
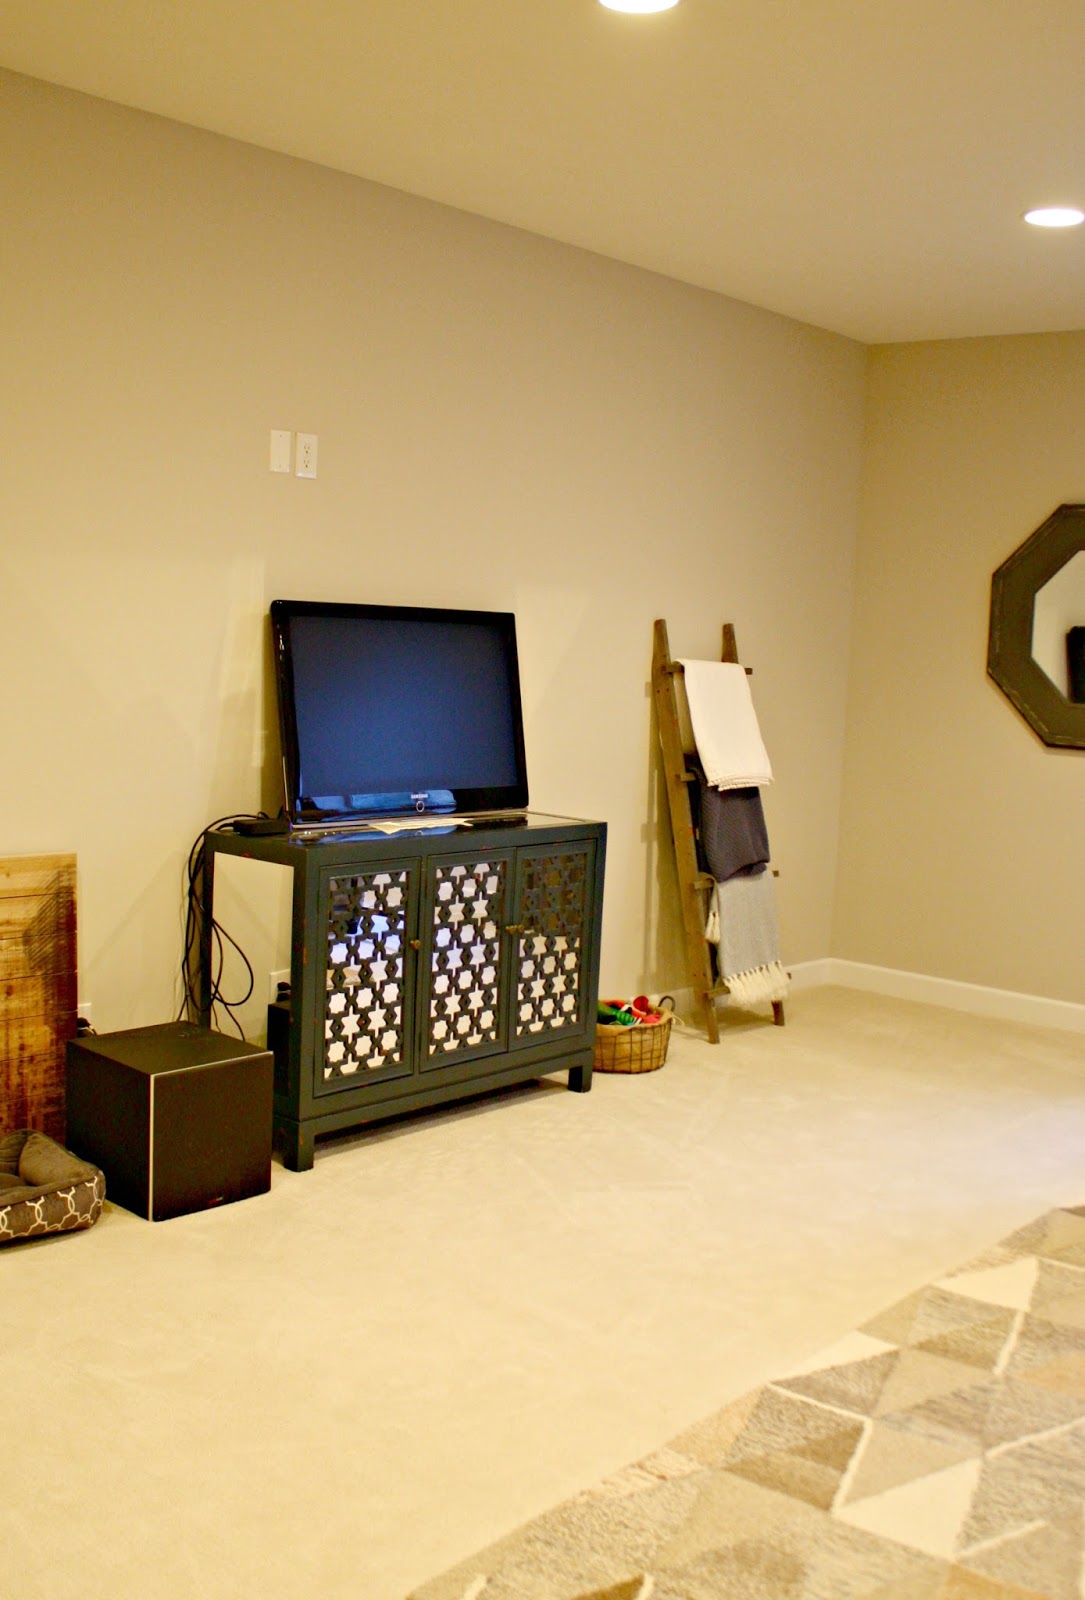
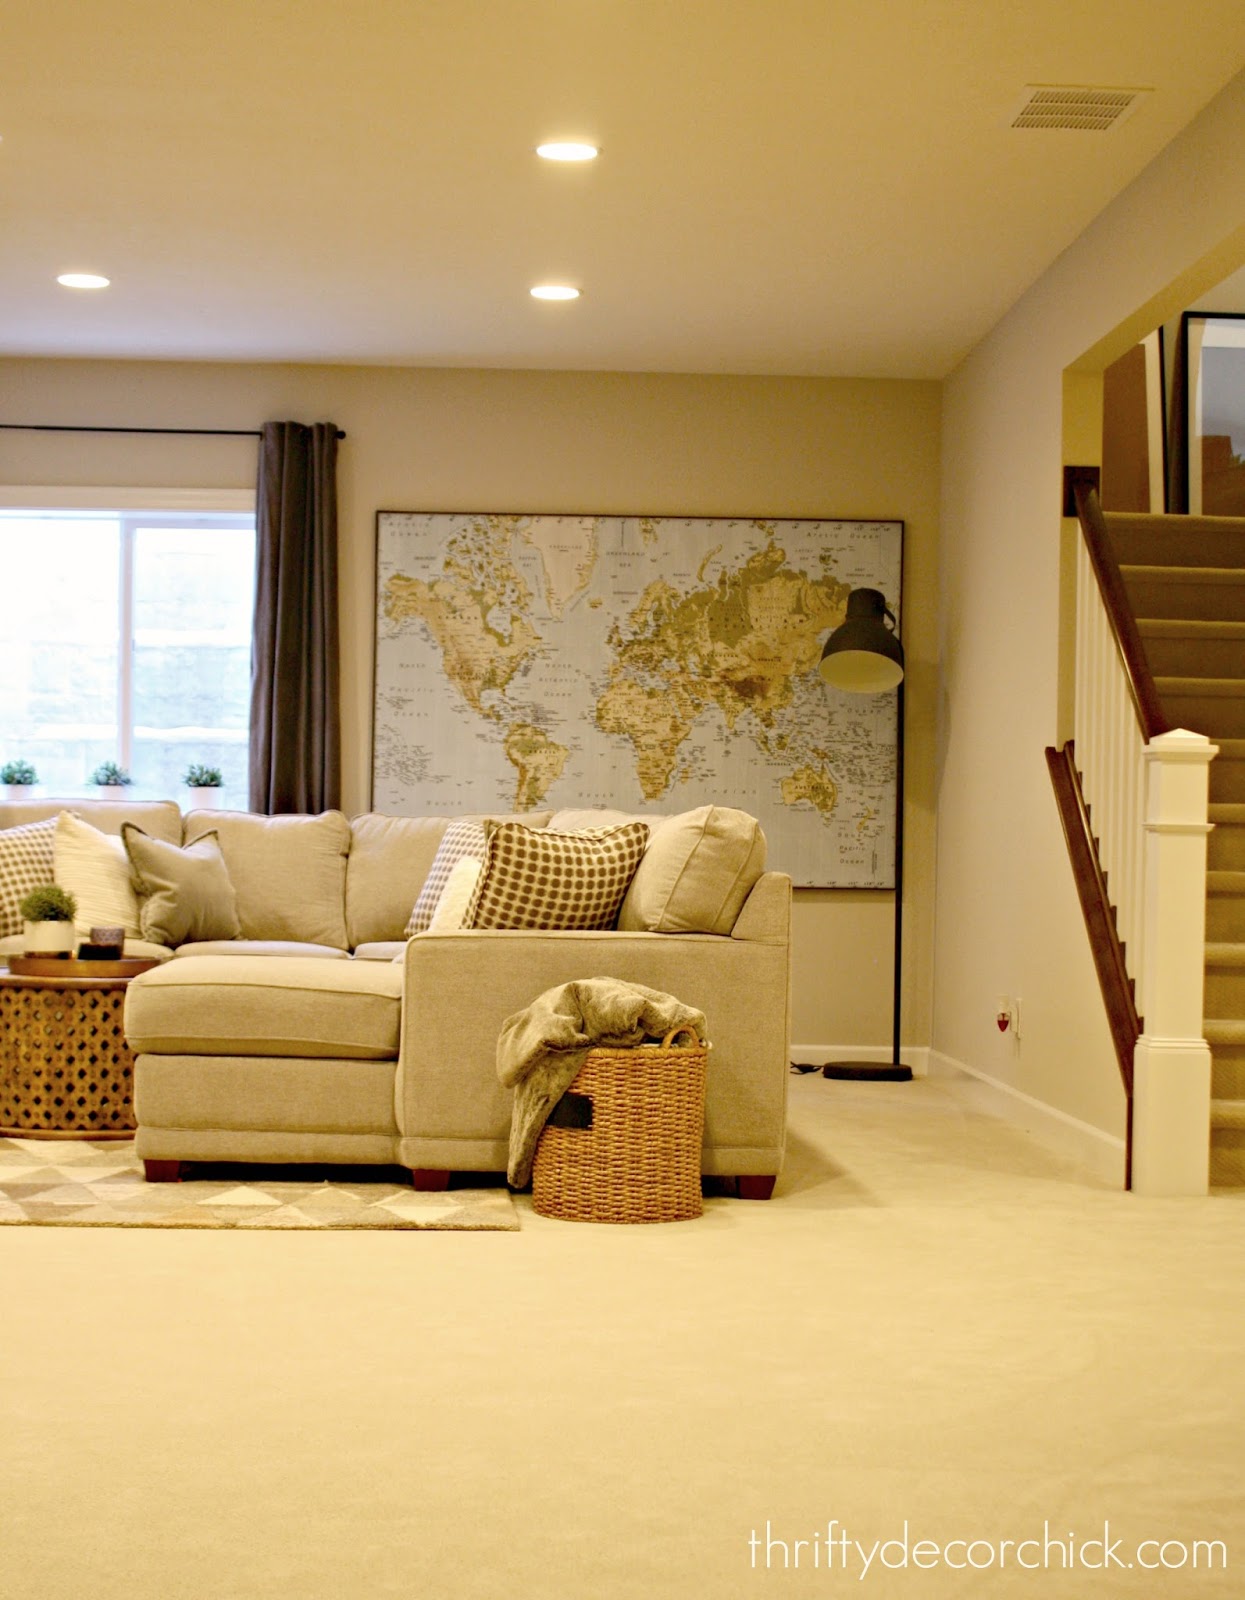
Here's how it looked shortly after we moved in:
And now with that moody dark Cyberspace color I love so much!:

It's funny, because this room is SO open and has tall ceilings, but I think it's one of the coziest spaces in our house.
We just love it!
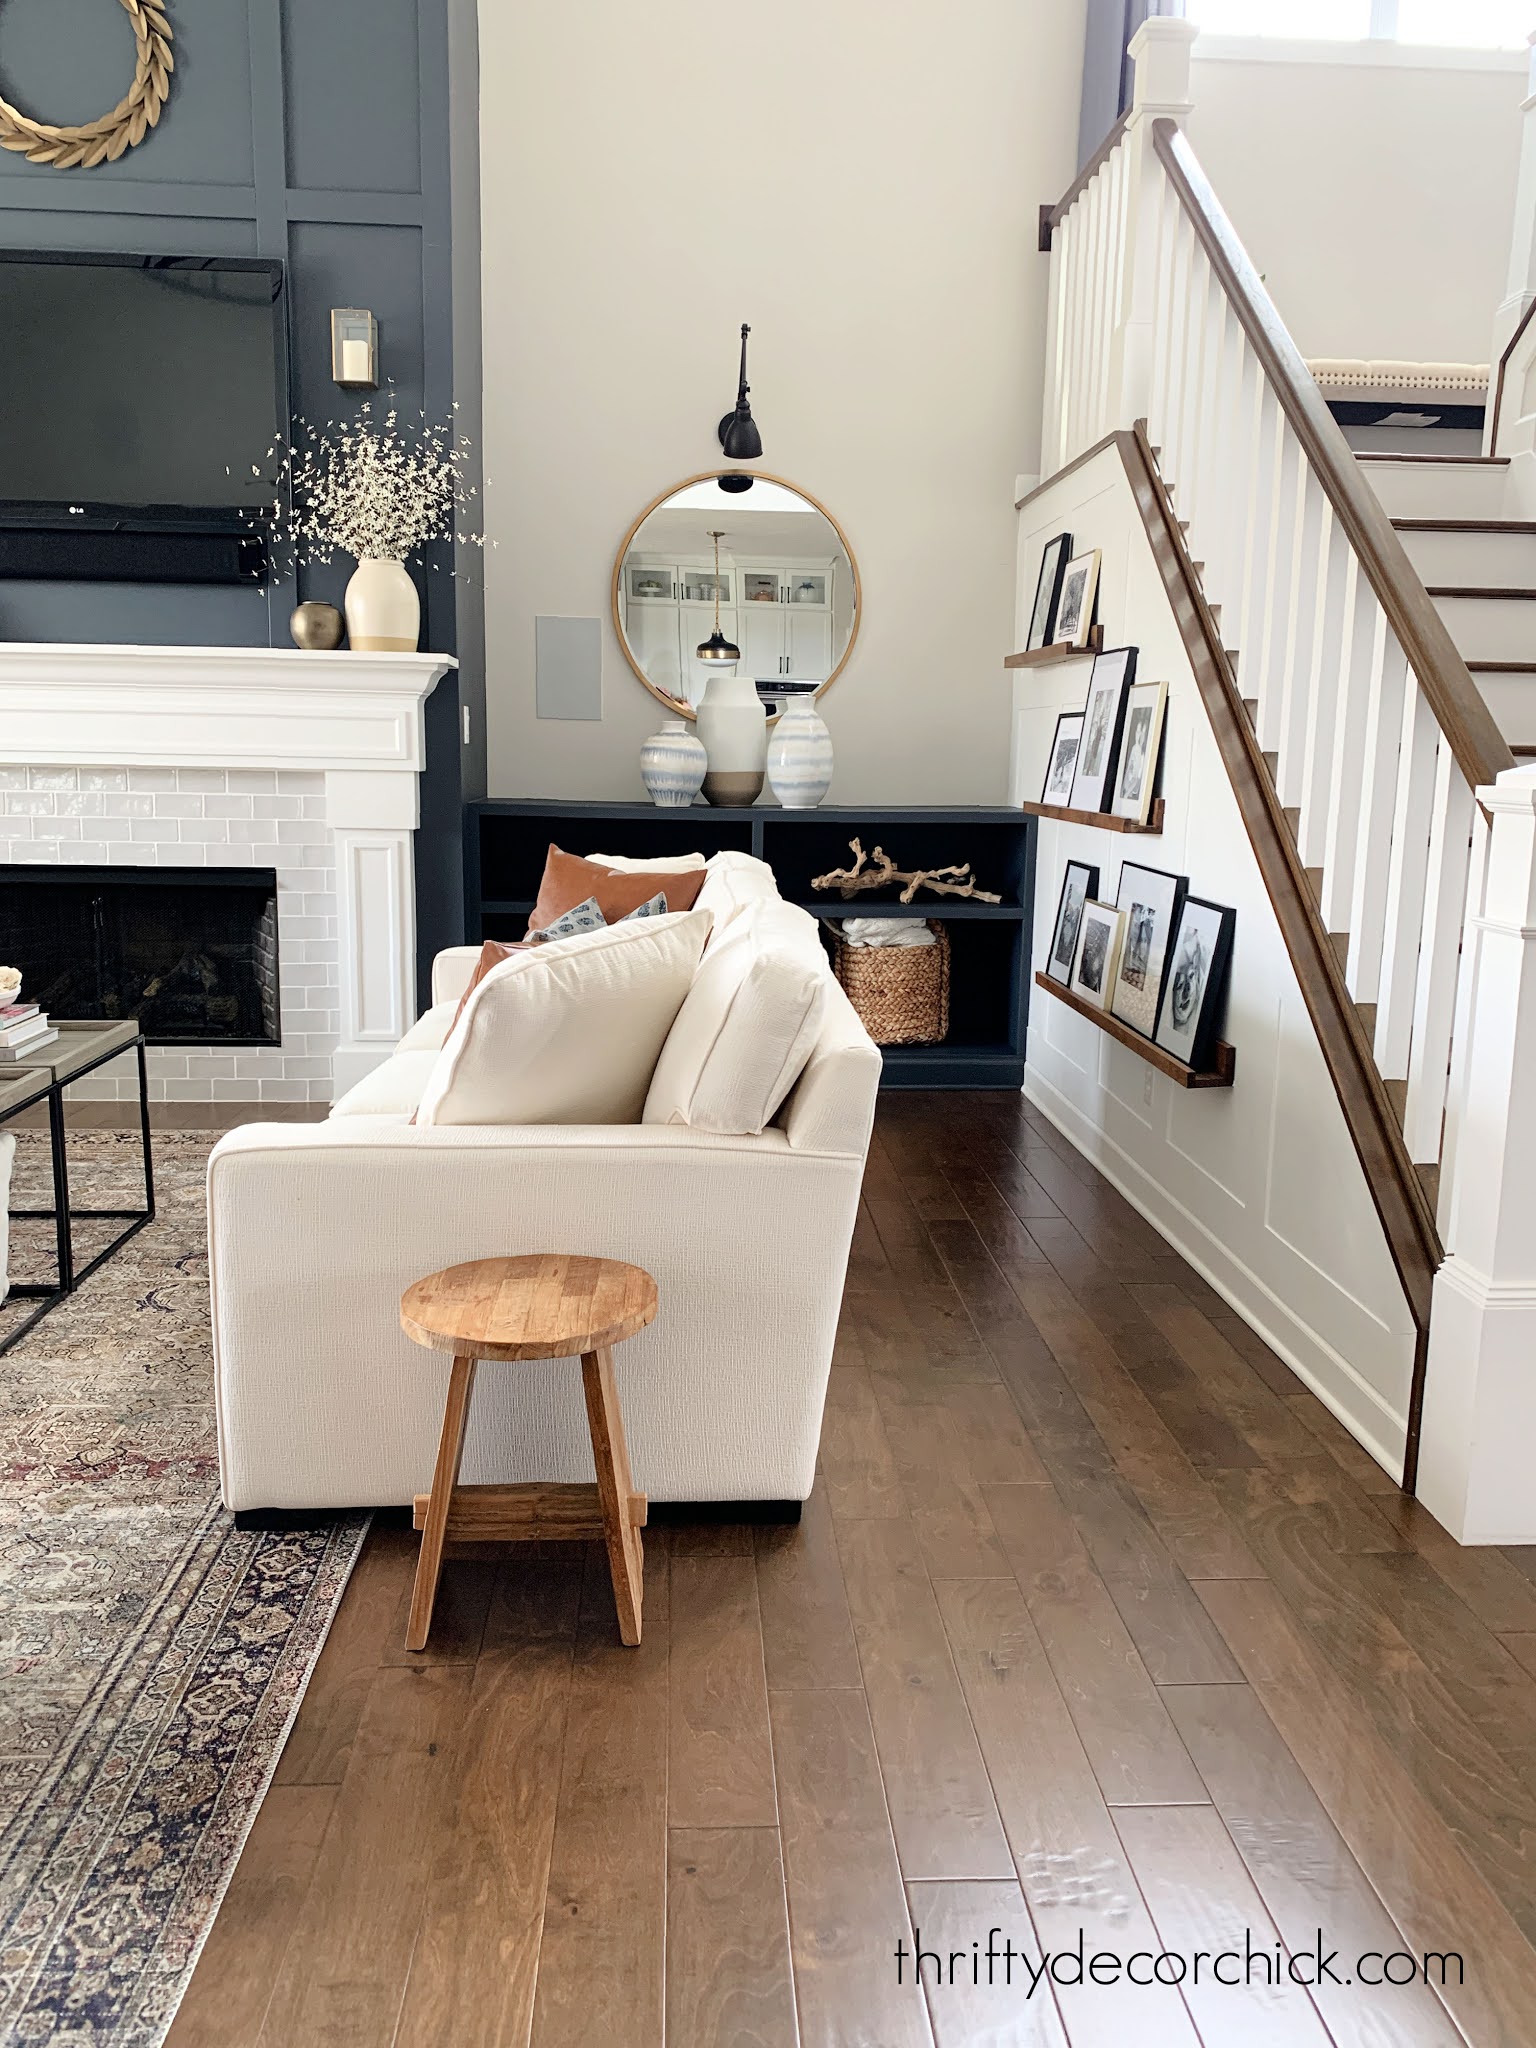
I get asked about that grid trim on the tall fireplace more than just about any other project.
I built bookcases on each side of the fireplace, and later added a board and batten wall under the stairs.
Here's how that area looked four years ago:

And that spot now:
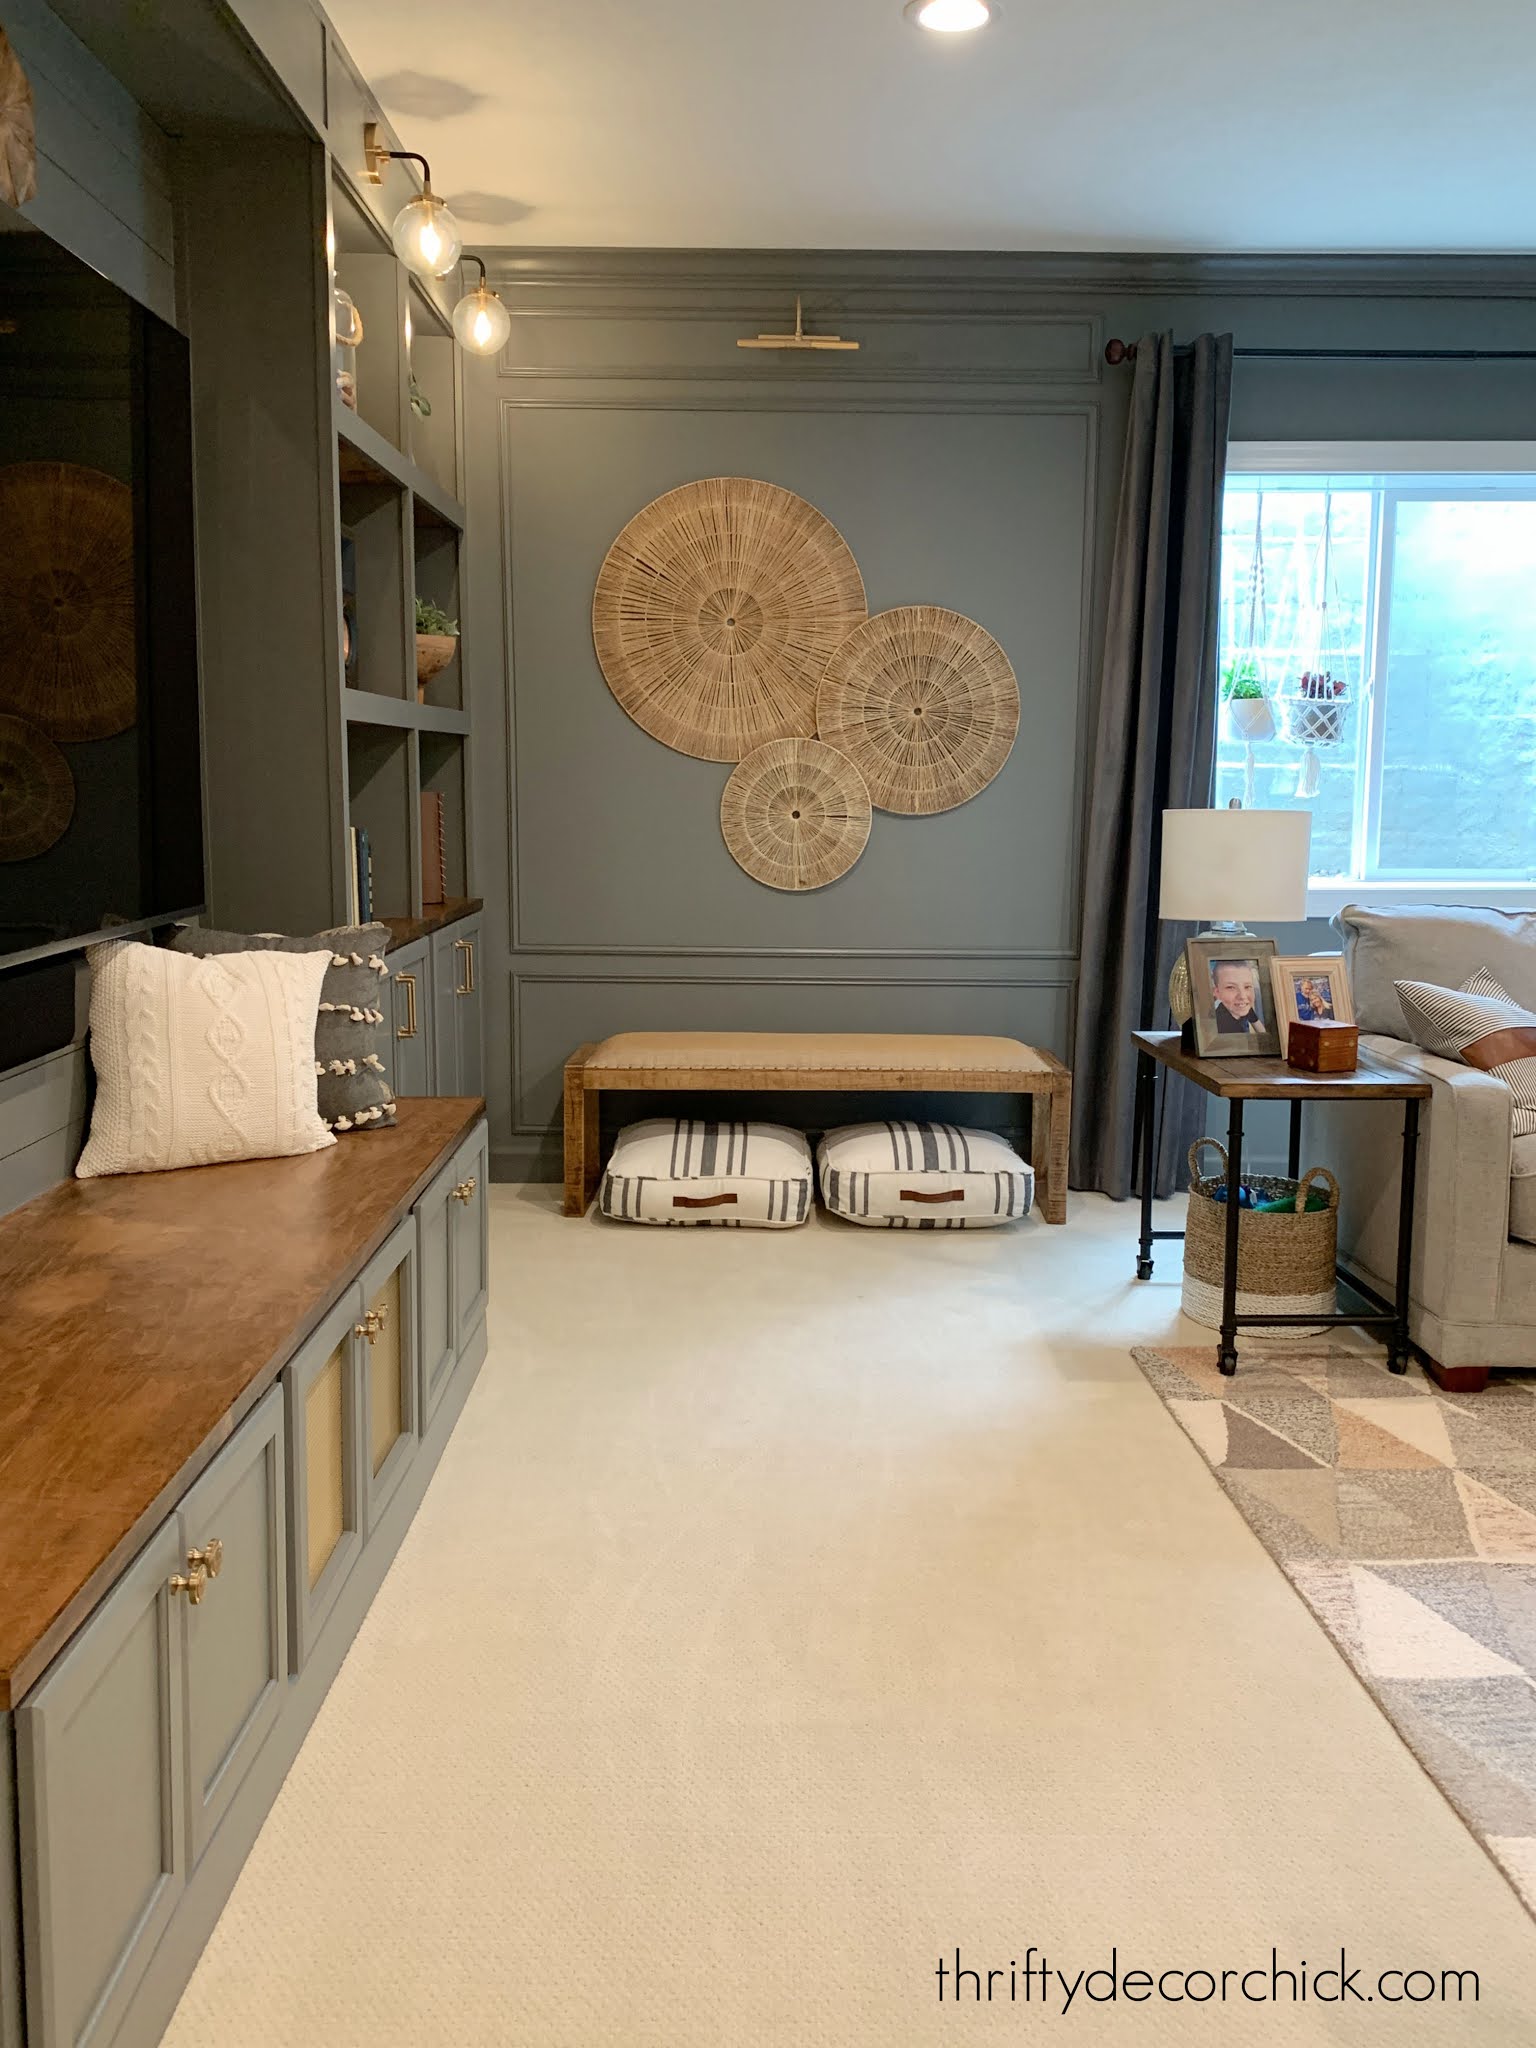
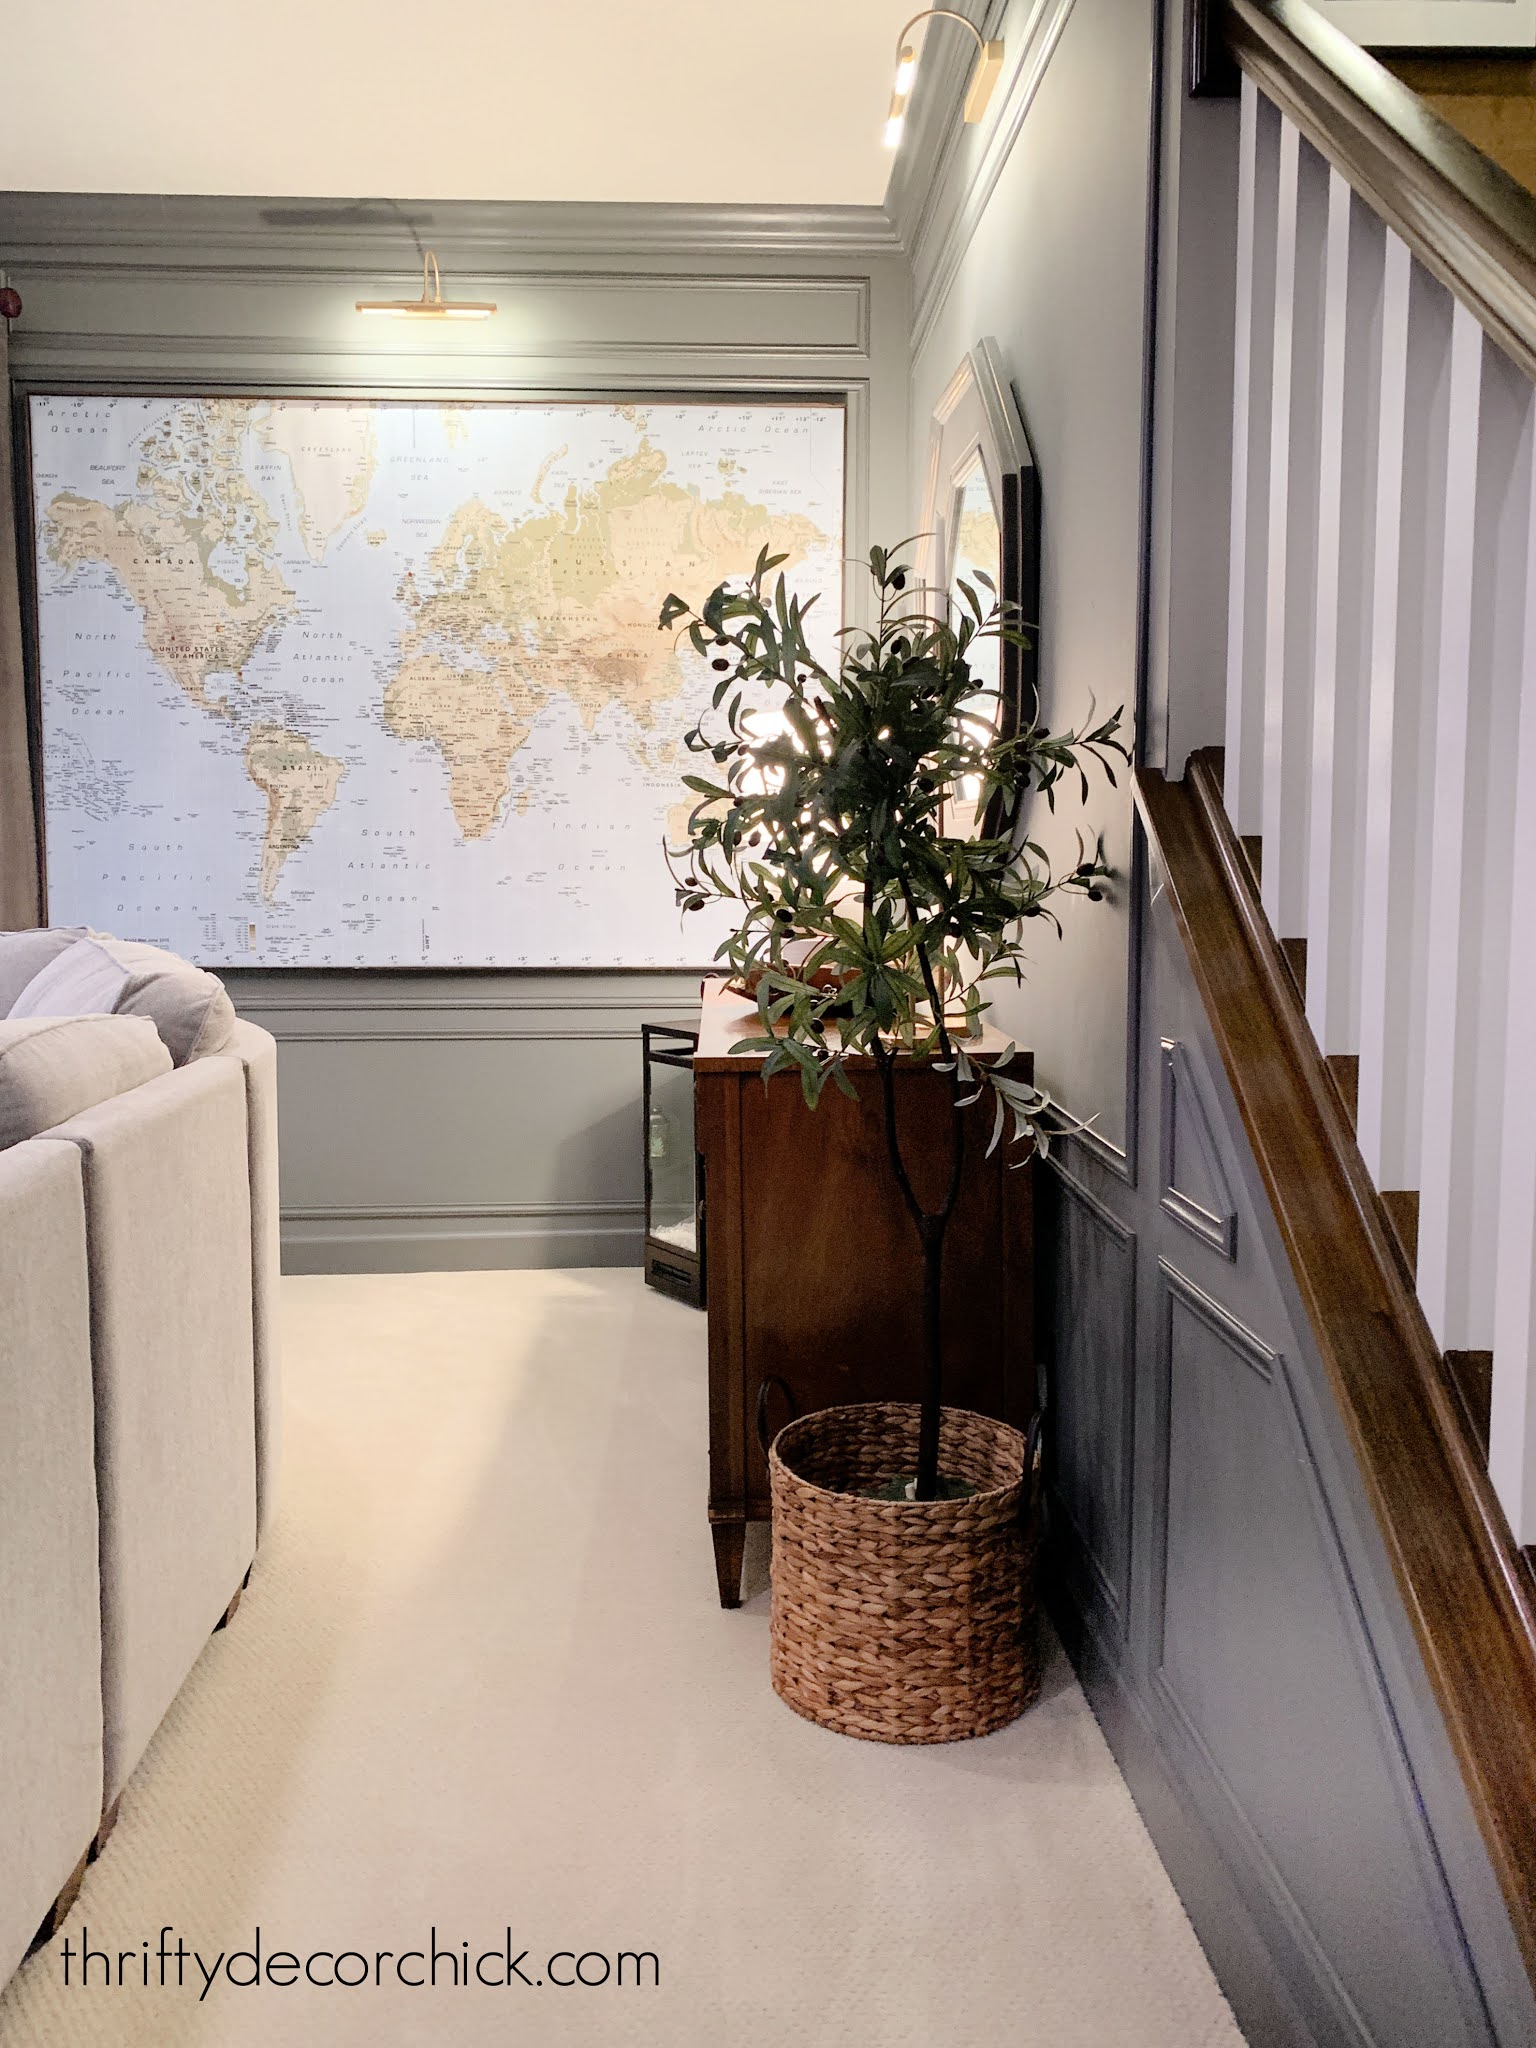
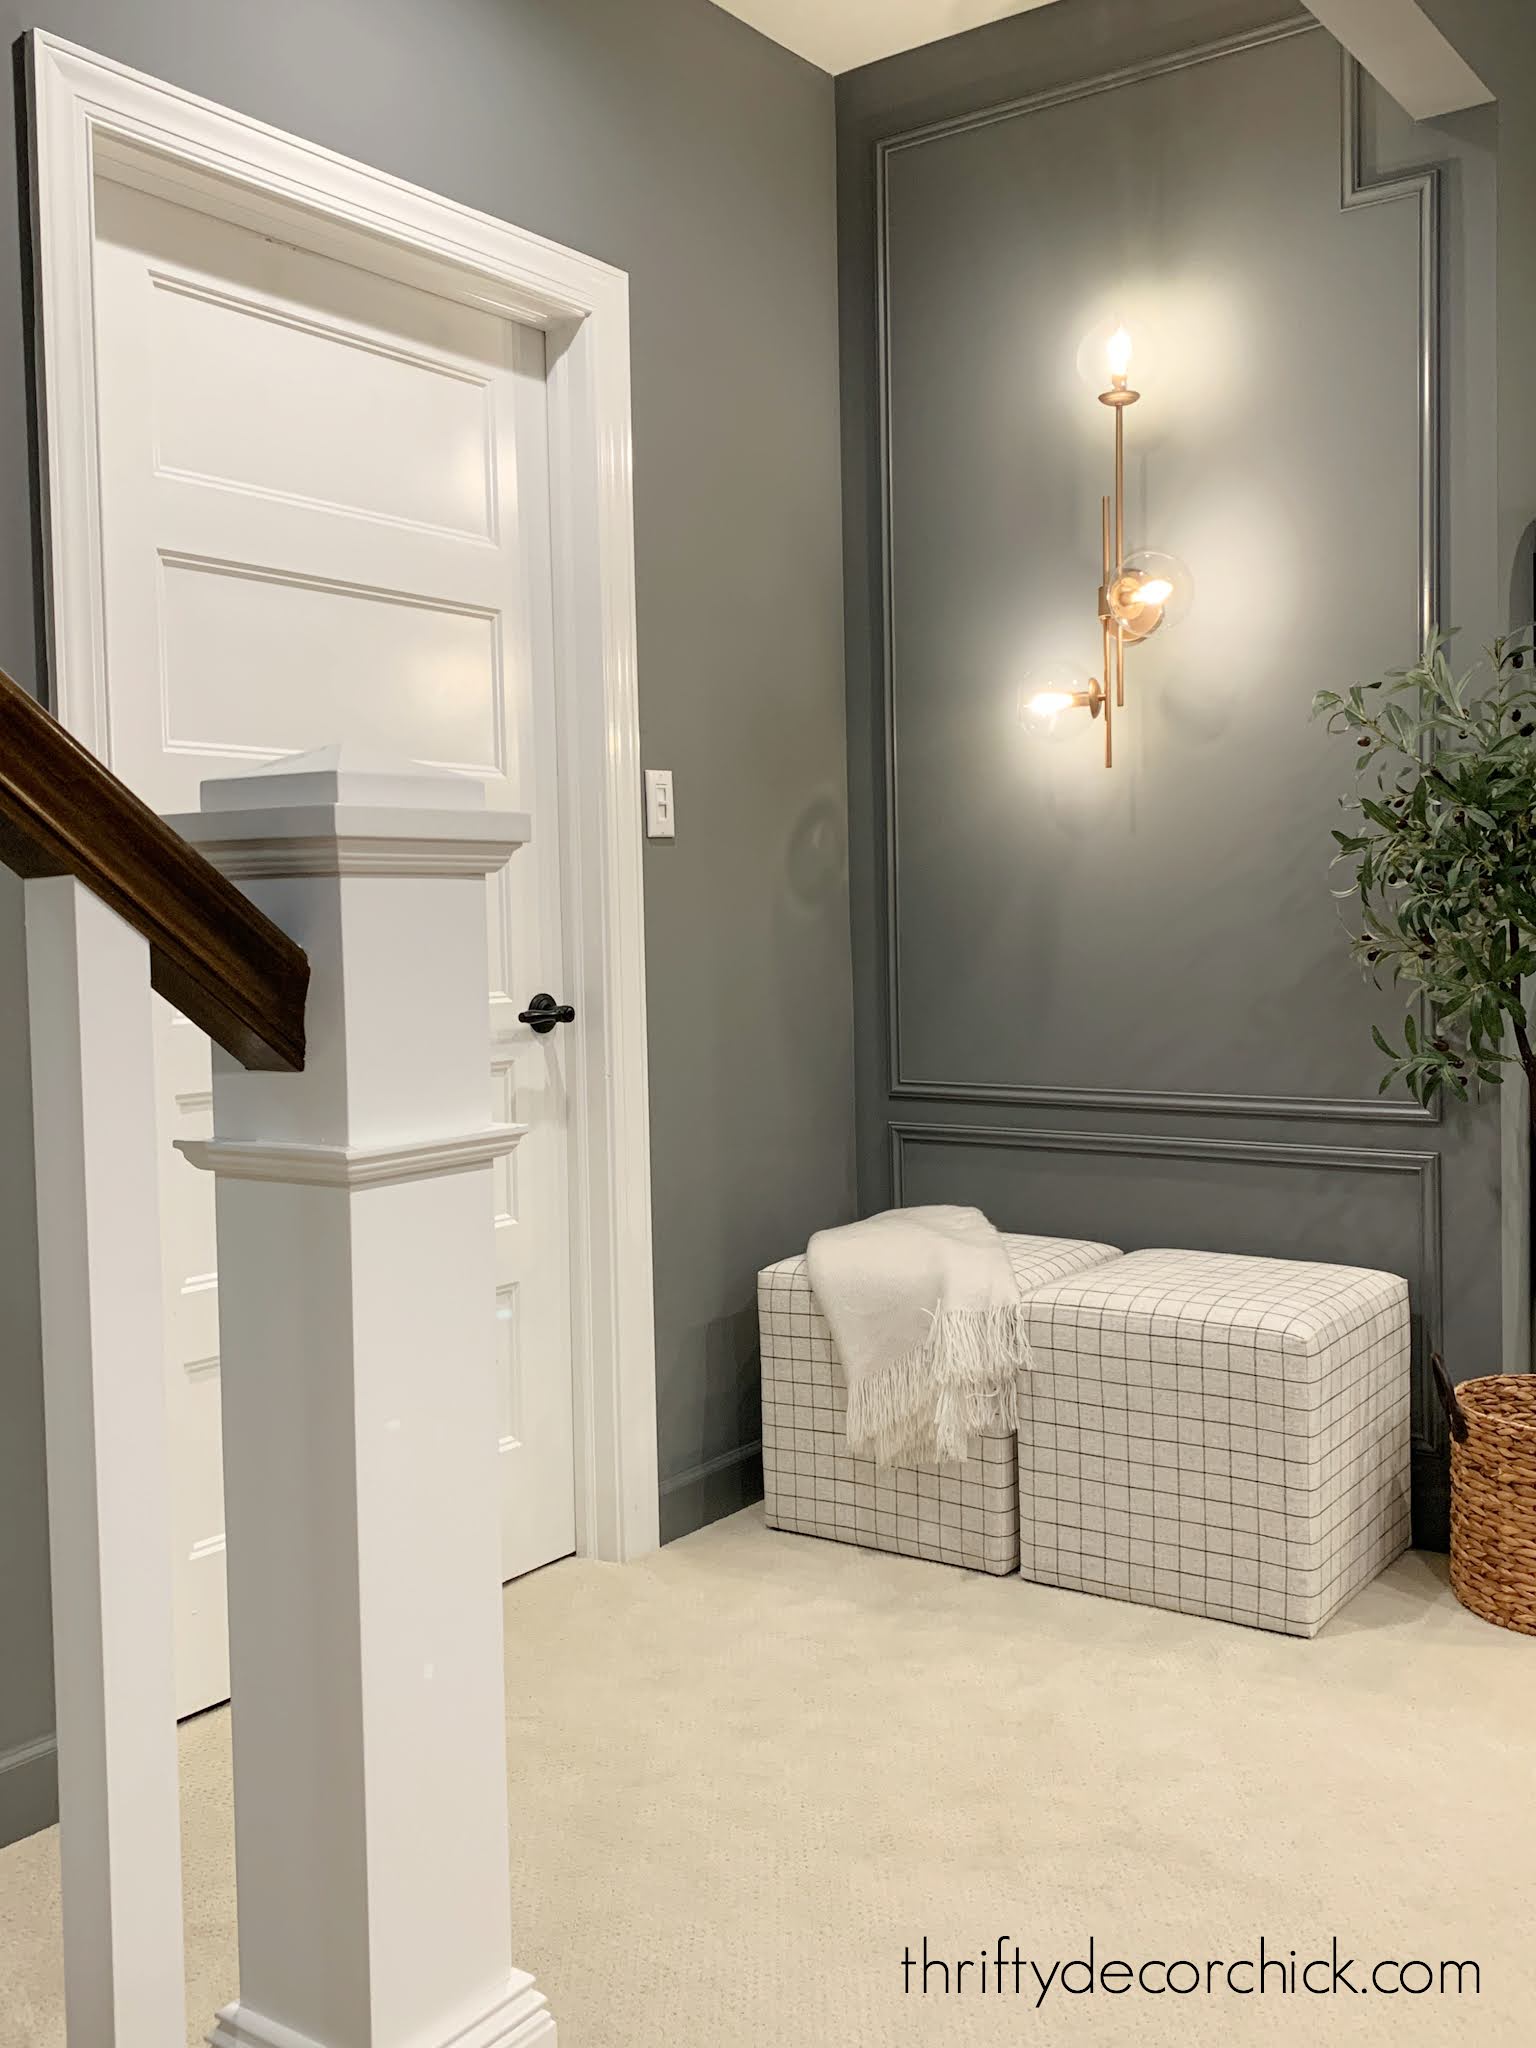
The Hallways and Nooks
This house has a lot of little nooks and hallways that we didn't have before, and I've really enjoyed giving them all special treatment!
Our basement stairway landing started out pretty plain:

But later got an inexpensive wood shiplap wall:

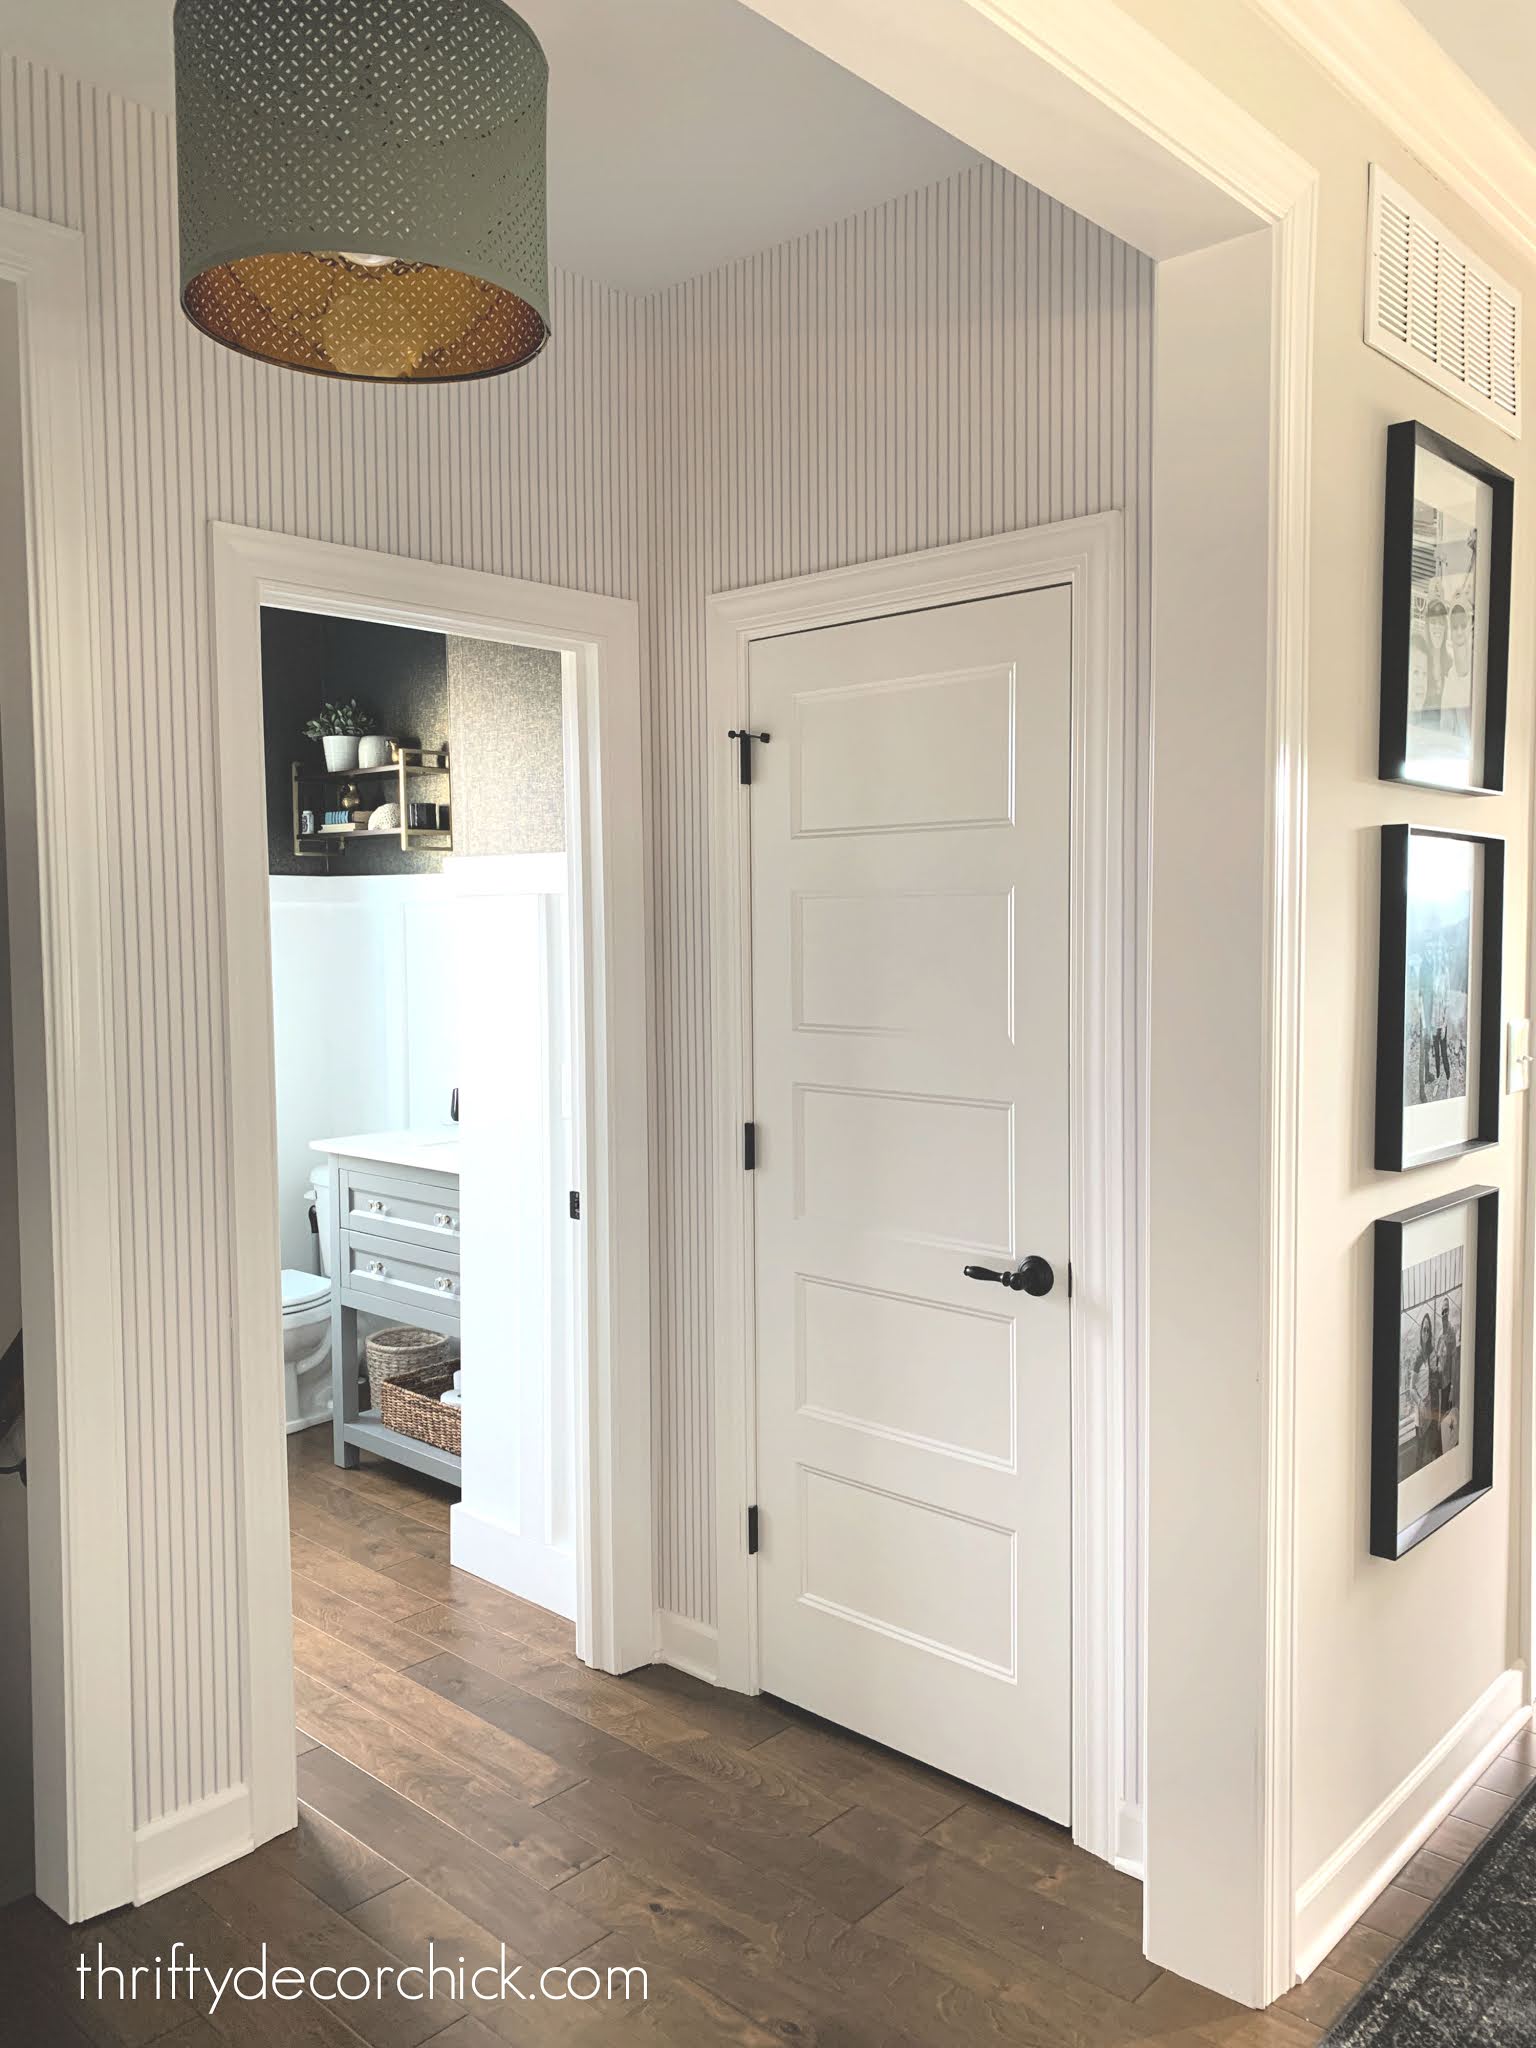
This little alcove off our foyer got a makeover with pinstripe wallpaper.
I LOVE how that turned out!:
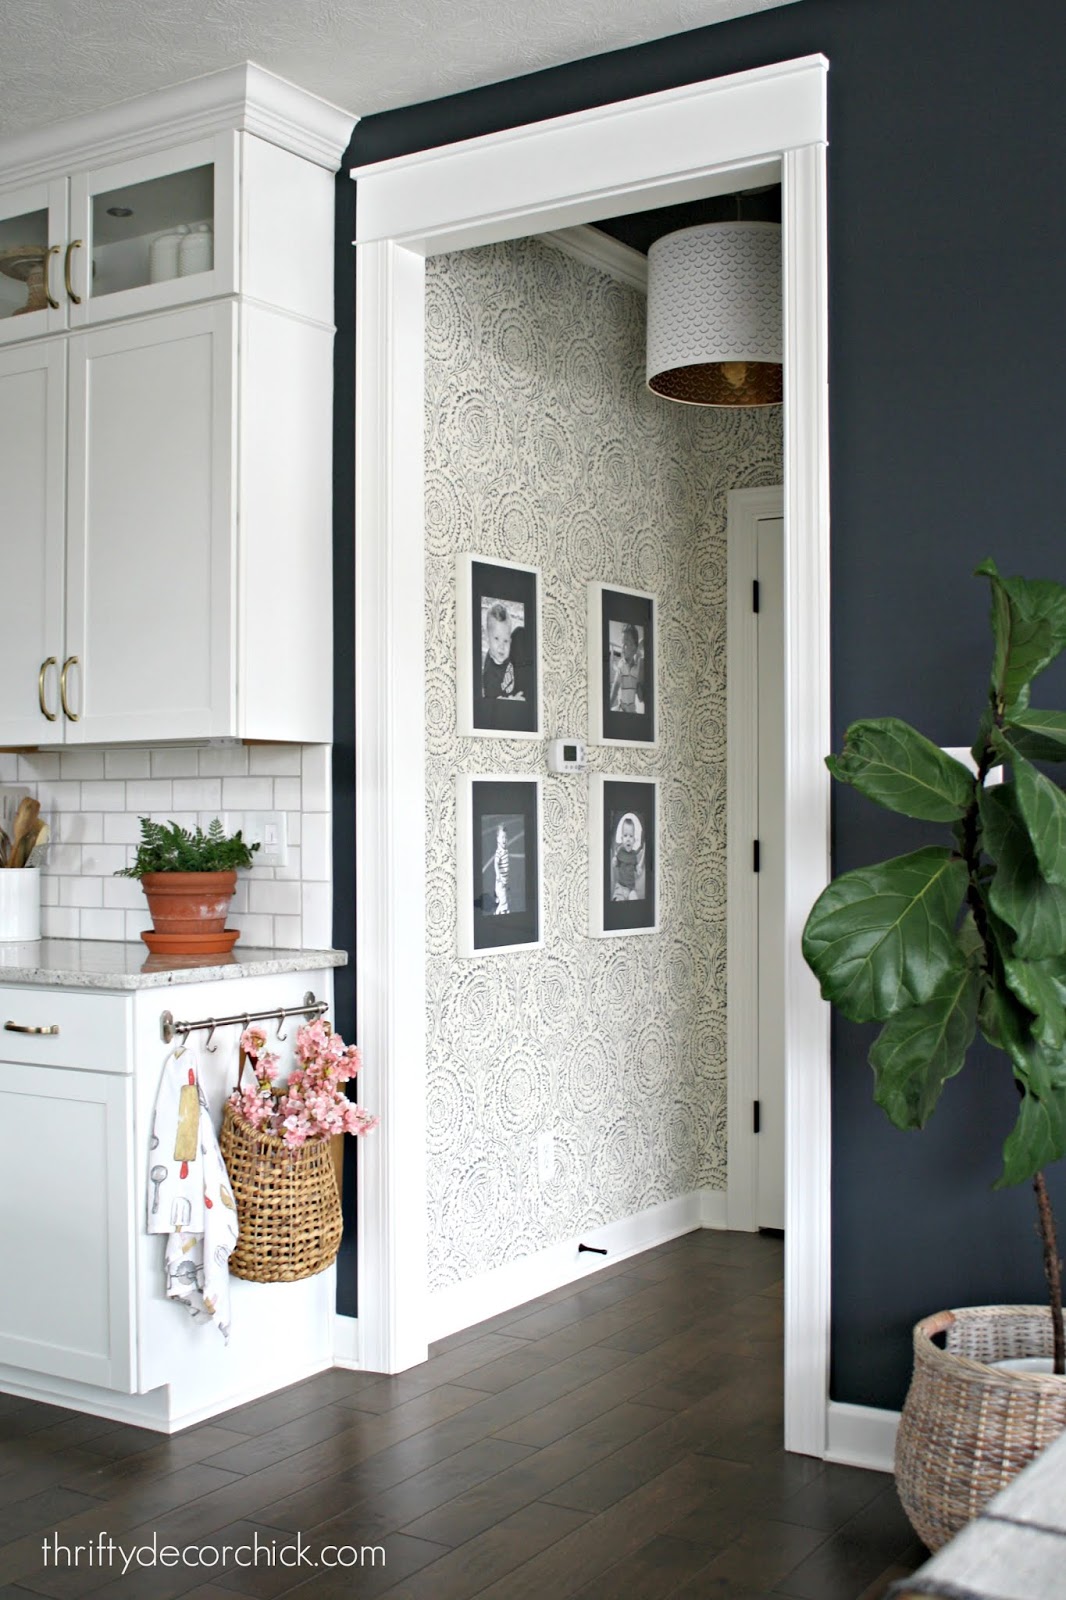
My first wallpaper project was in this little hallway:
And now it makes a statement with this beautiful blue and white floral wallpaper that I love so much:
Our Cozy Bedroom
Our bedroom had so much potential -- we loved all of the big windows and the tray ceiling:
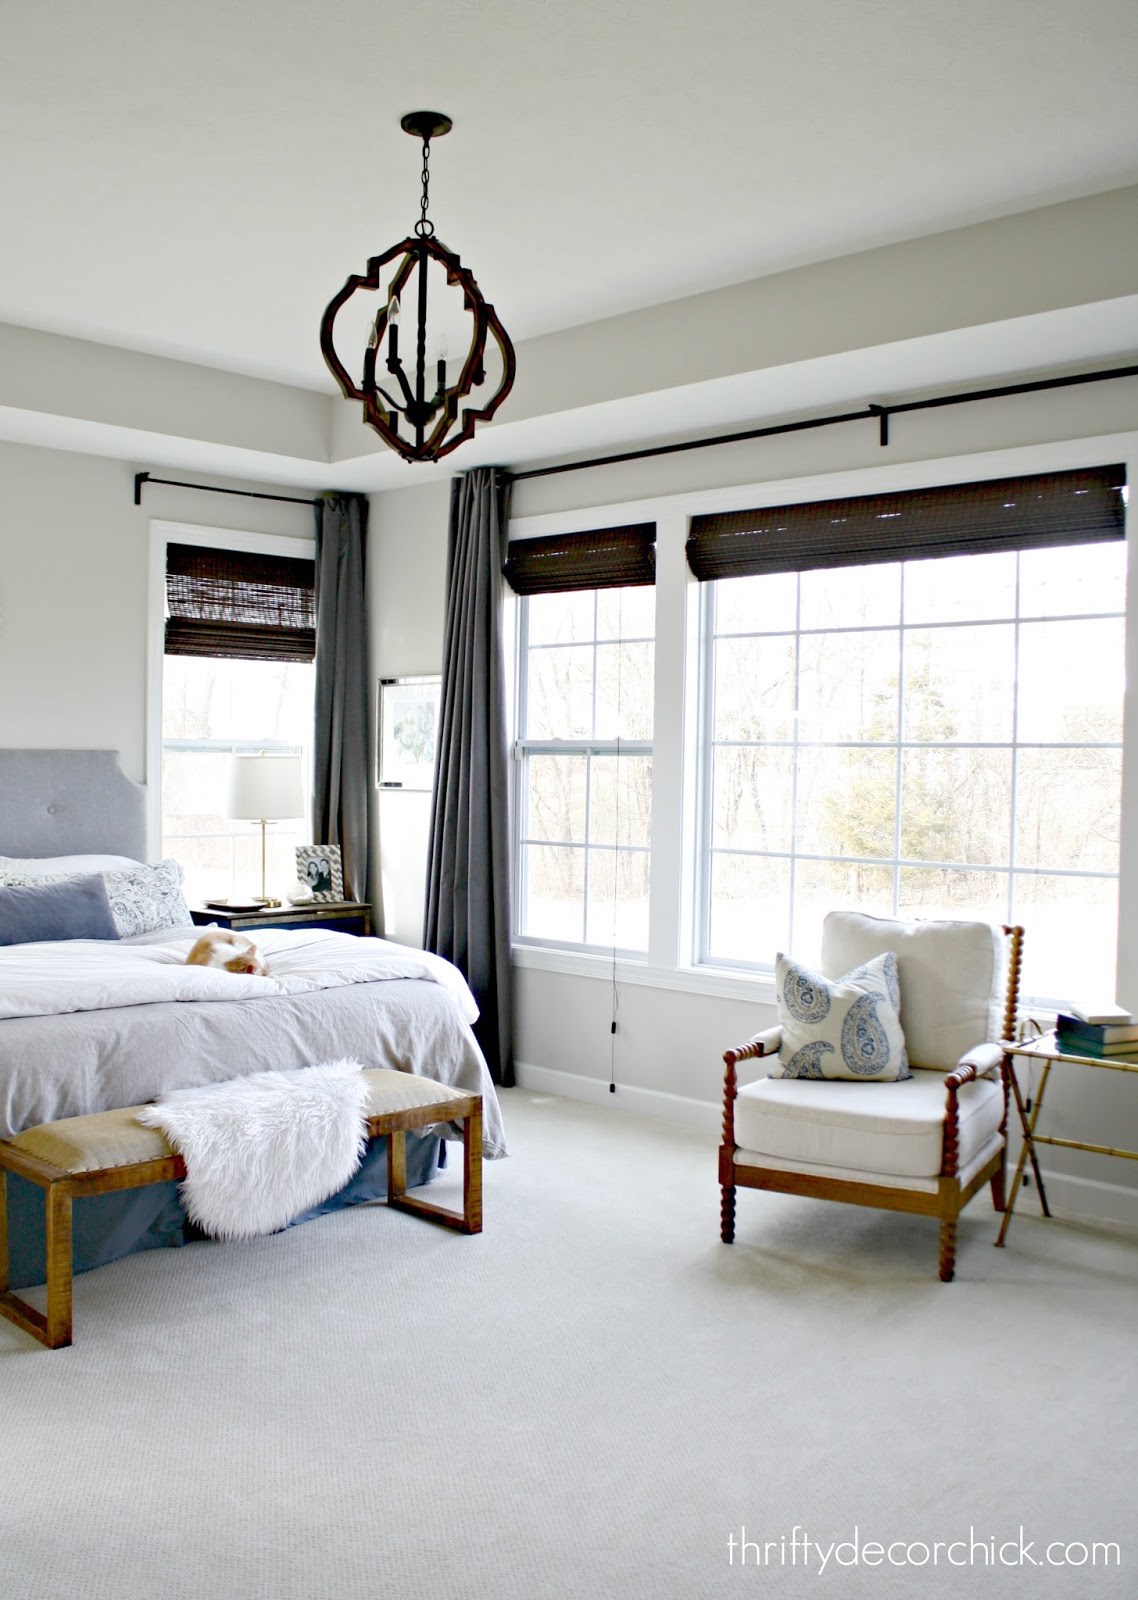
One of my first big projects in here was painting the ceiling a dark gray and then adding faux wood beams around the raised ceiling:

I later cozied up this space even more by installing peel and stick grasscloth wallpaper and a dark gray chair rail around the room:

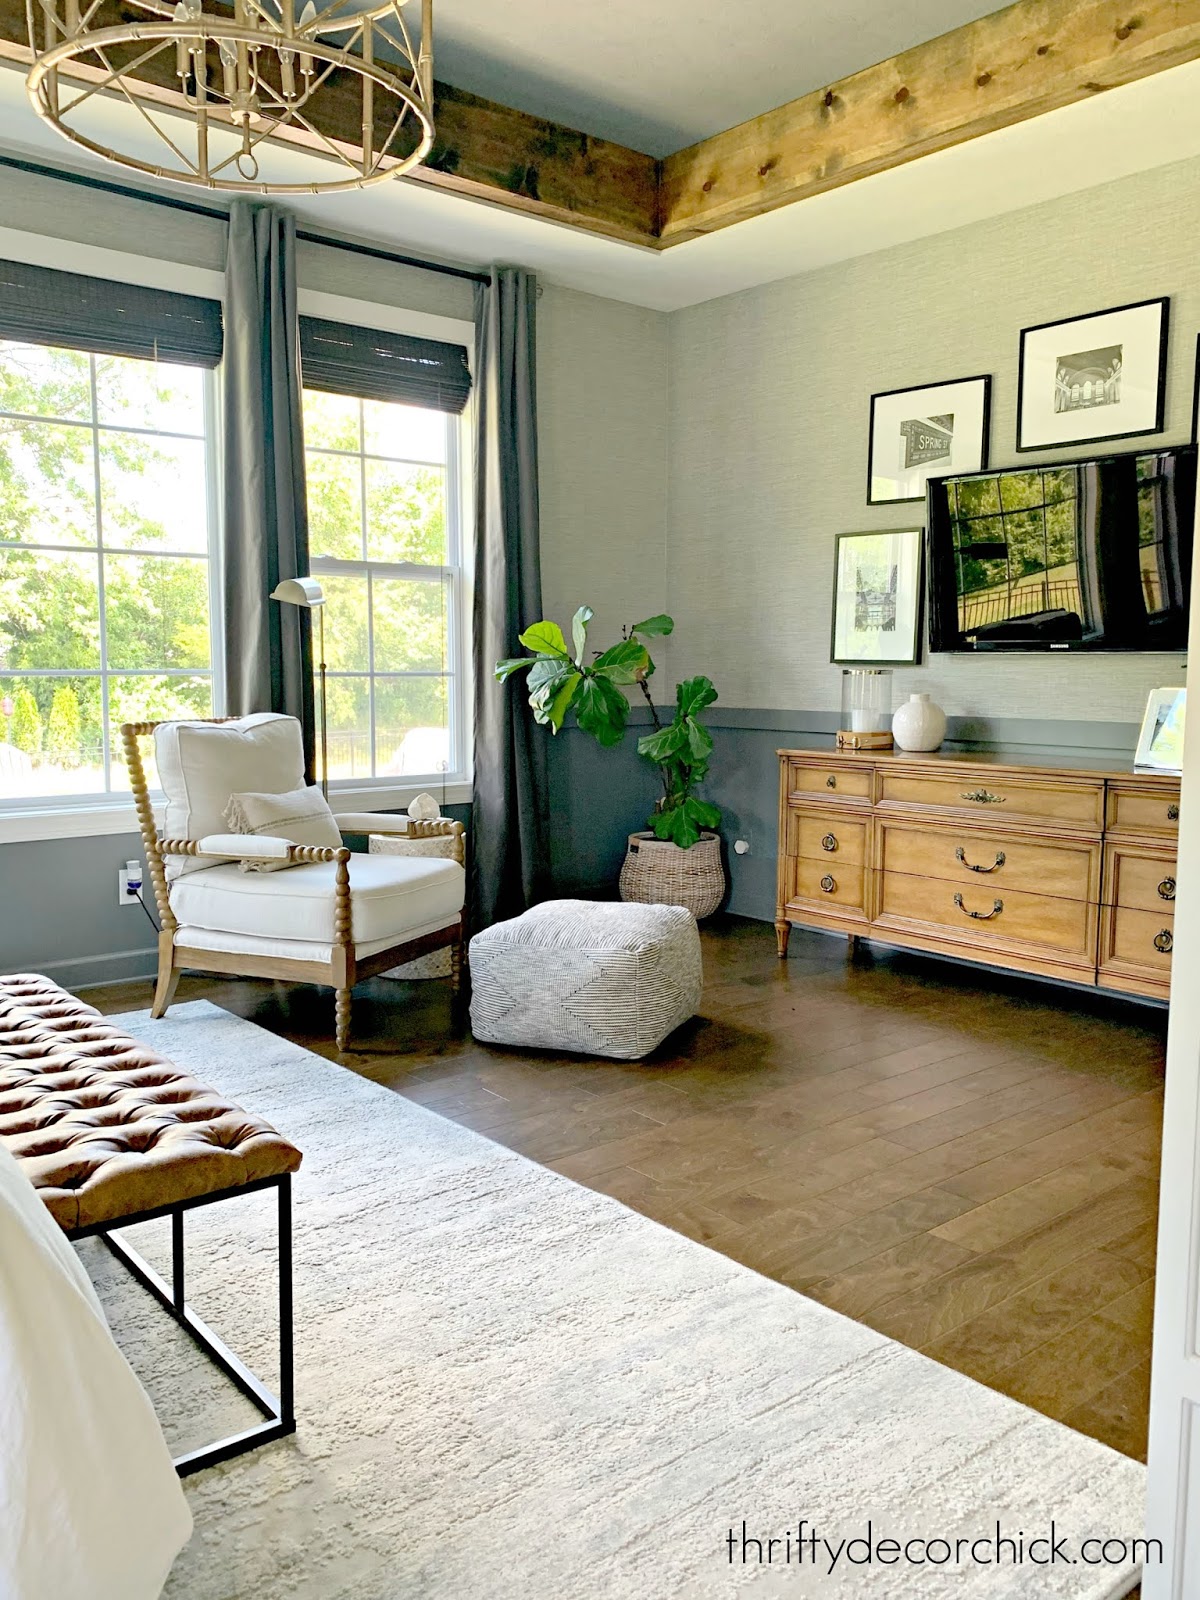
All of those changes have made this room so cozy and warm...it's such a calming space.
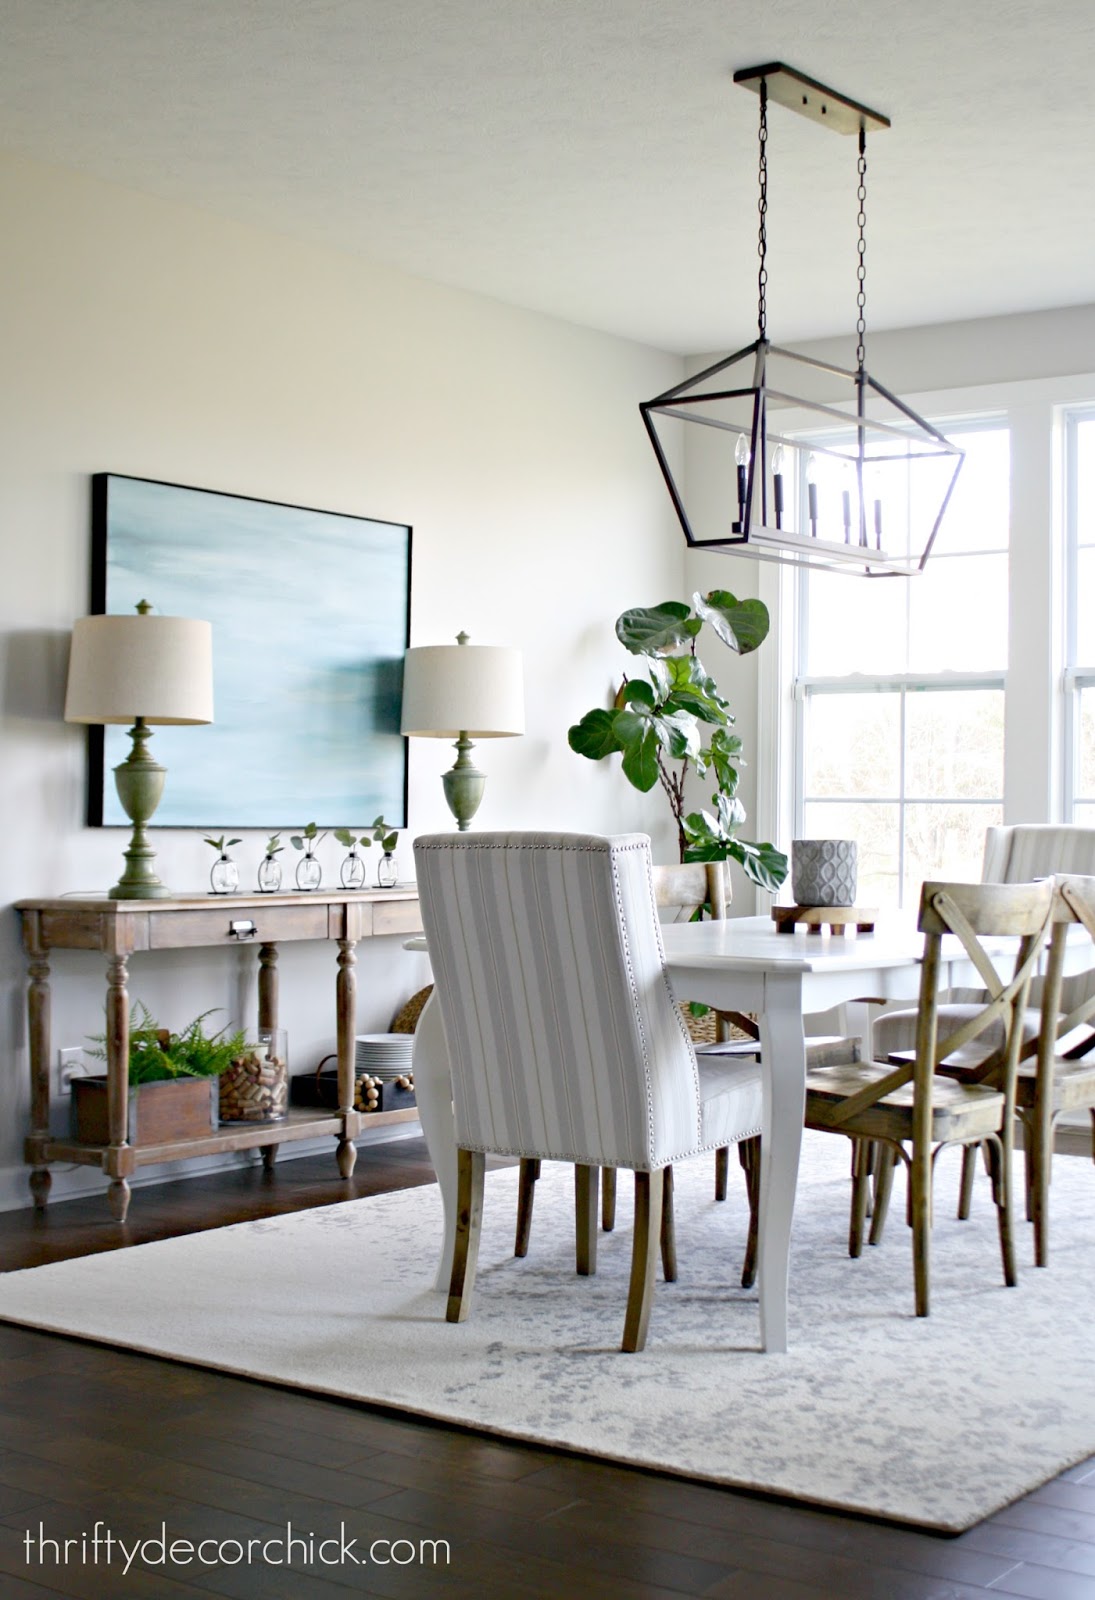
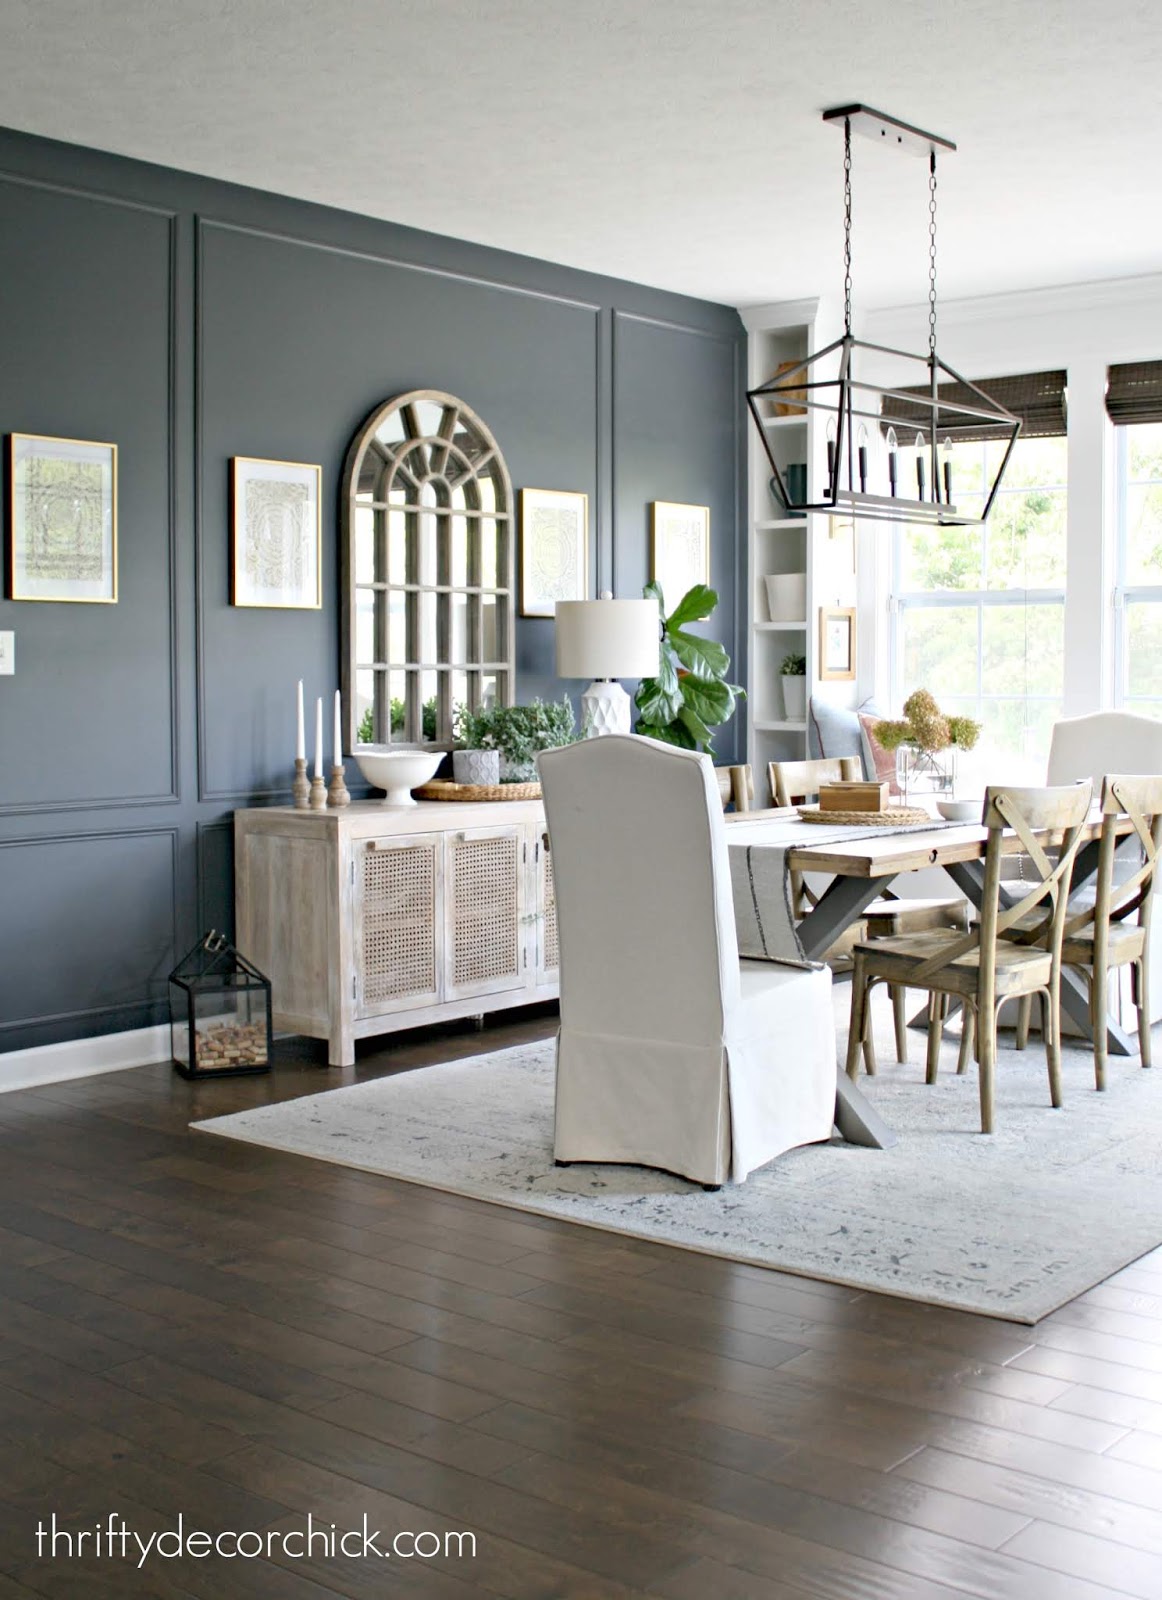
The Morning/Dining Room
Our dining area/morning room hasn't undergone any big changes lately, but it's come a long way in four years!
It's always been a pretty space:

I have a deep love of window seats and knew this room would be a perfect spot for one.
I even made to sure to adjust our light fixture placement because I was so sure we'd add one along the back wall:
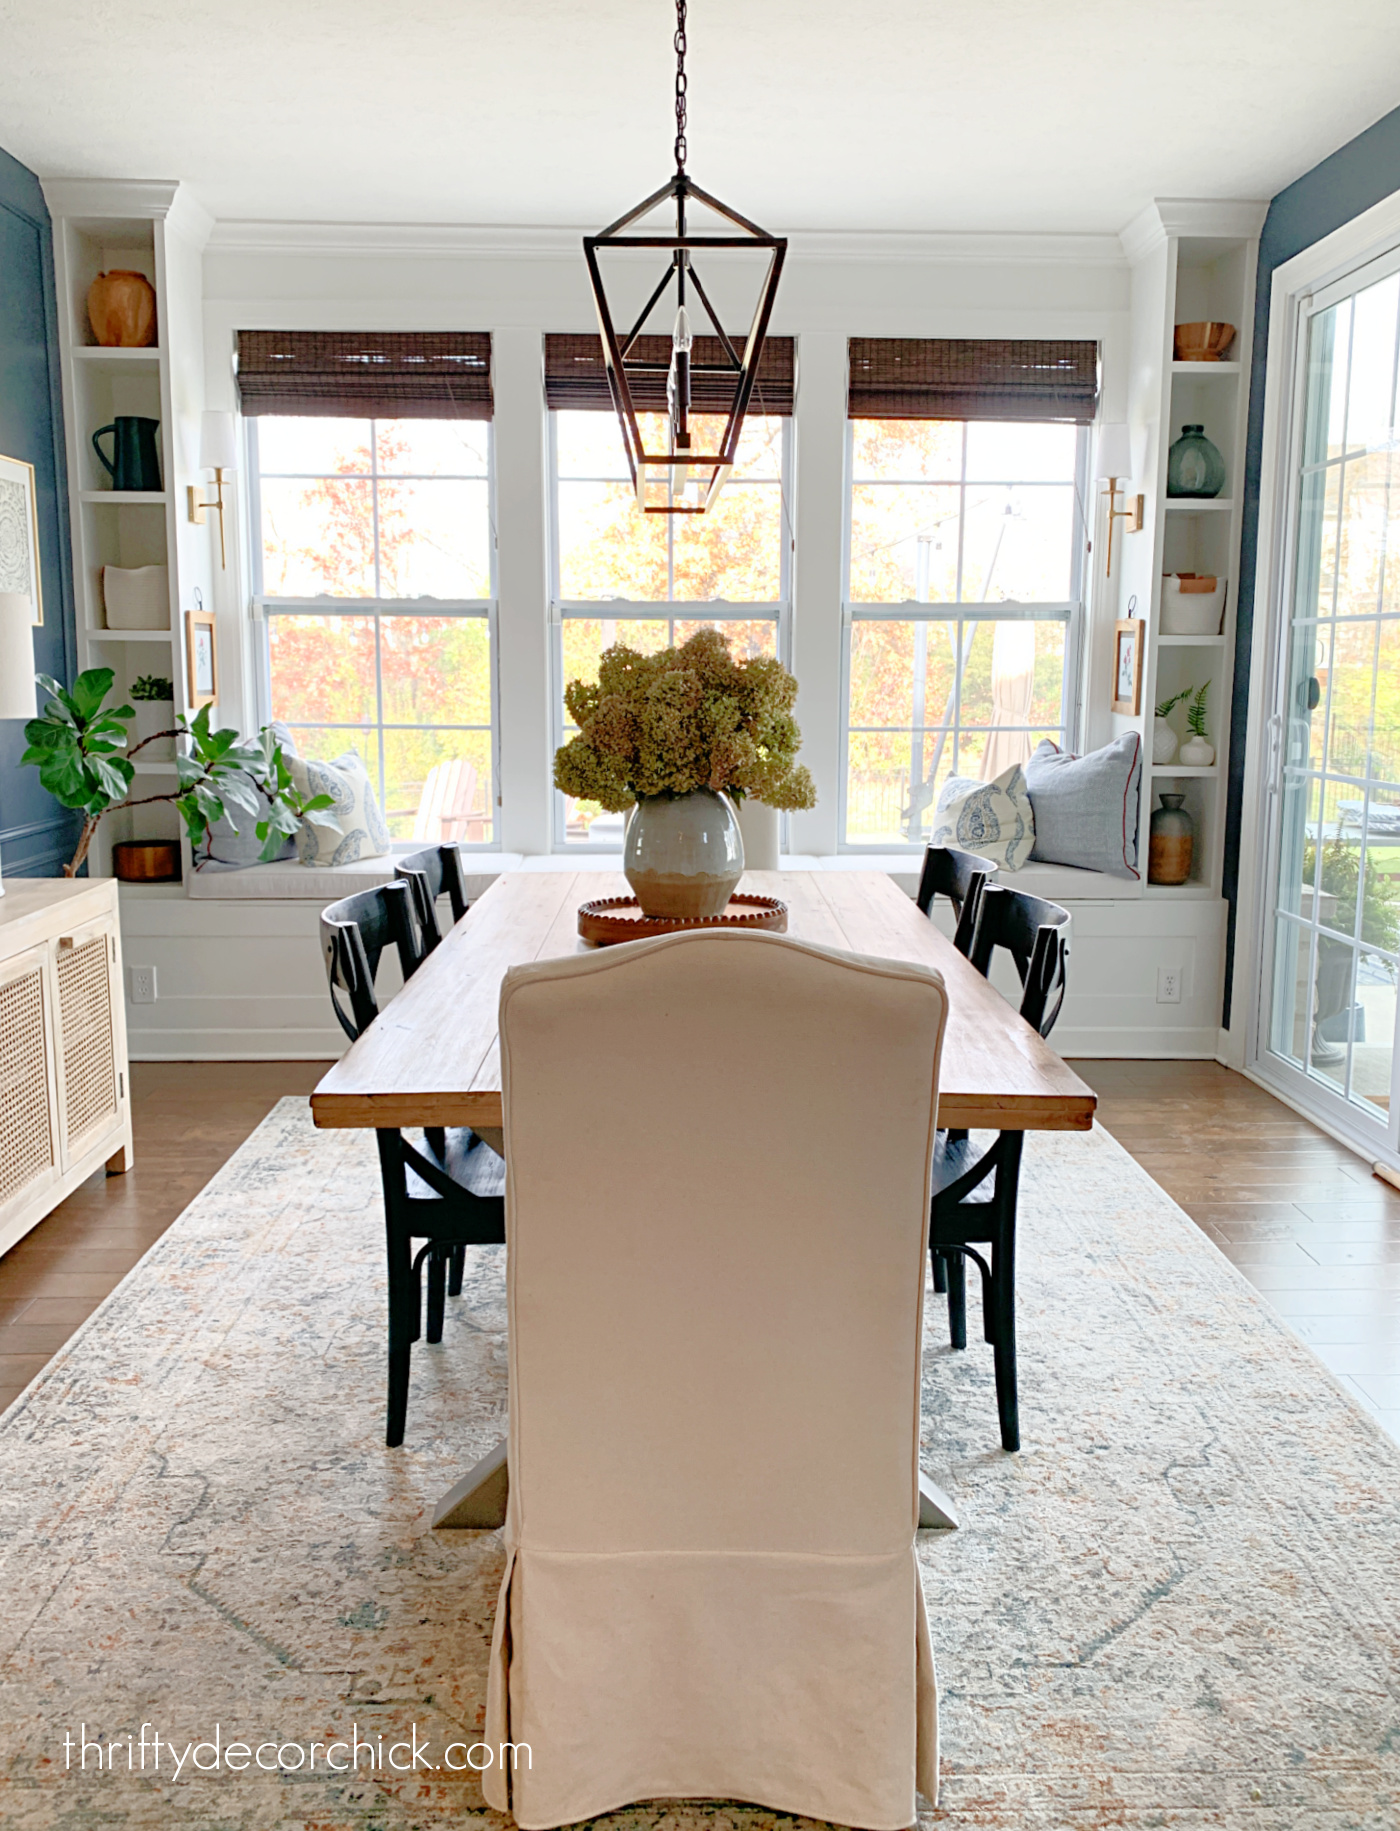
The window seat and bookcase combo added tons of character to this room!
I later painted the walls that same dark blue Cyberspace that is on the family room fireplace:


The window seat is very popular with the cats! :)
We love the cozy additions in here:
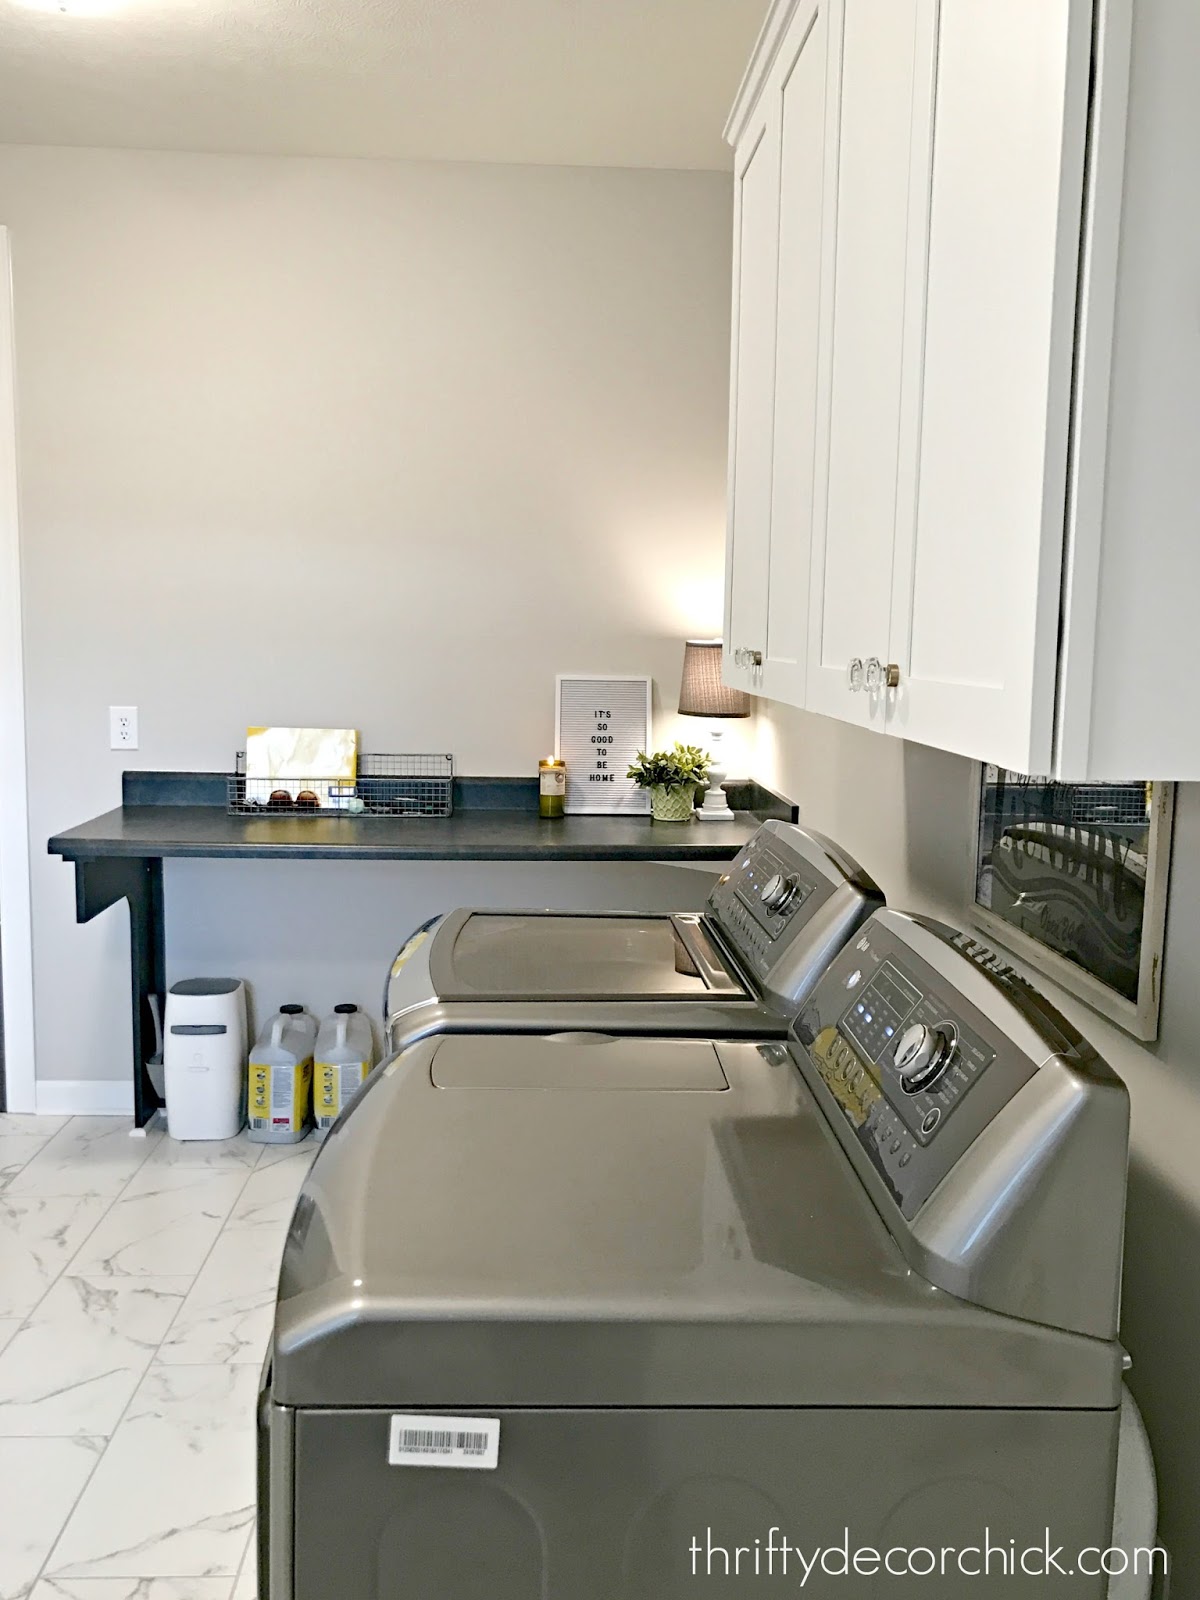
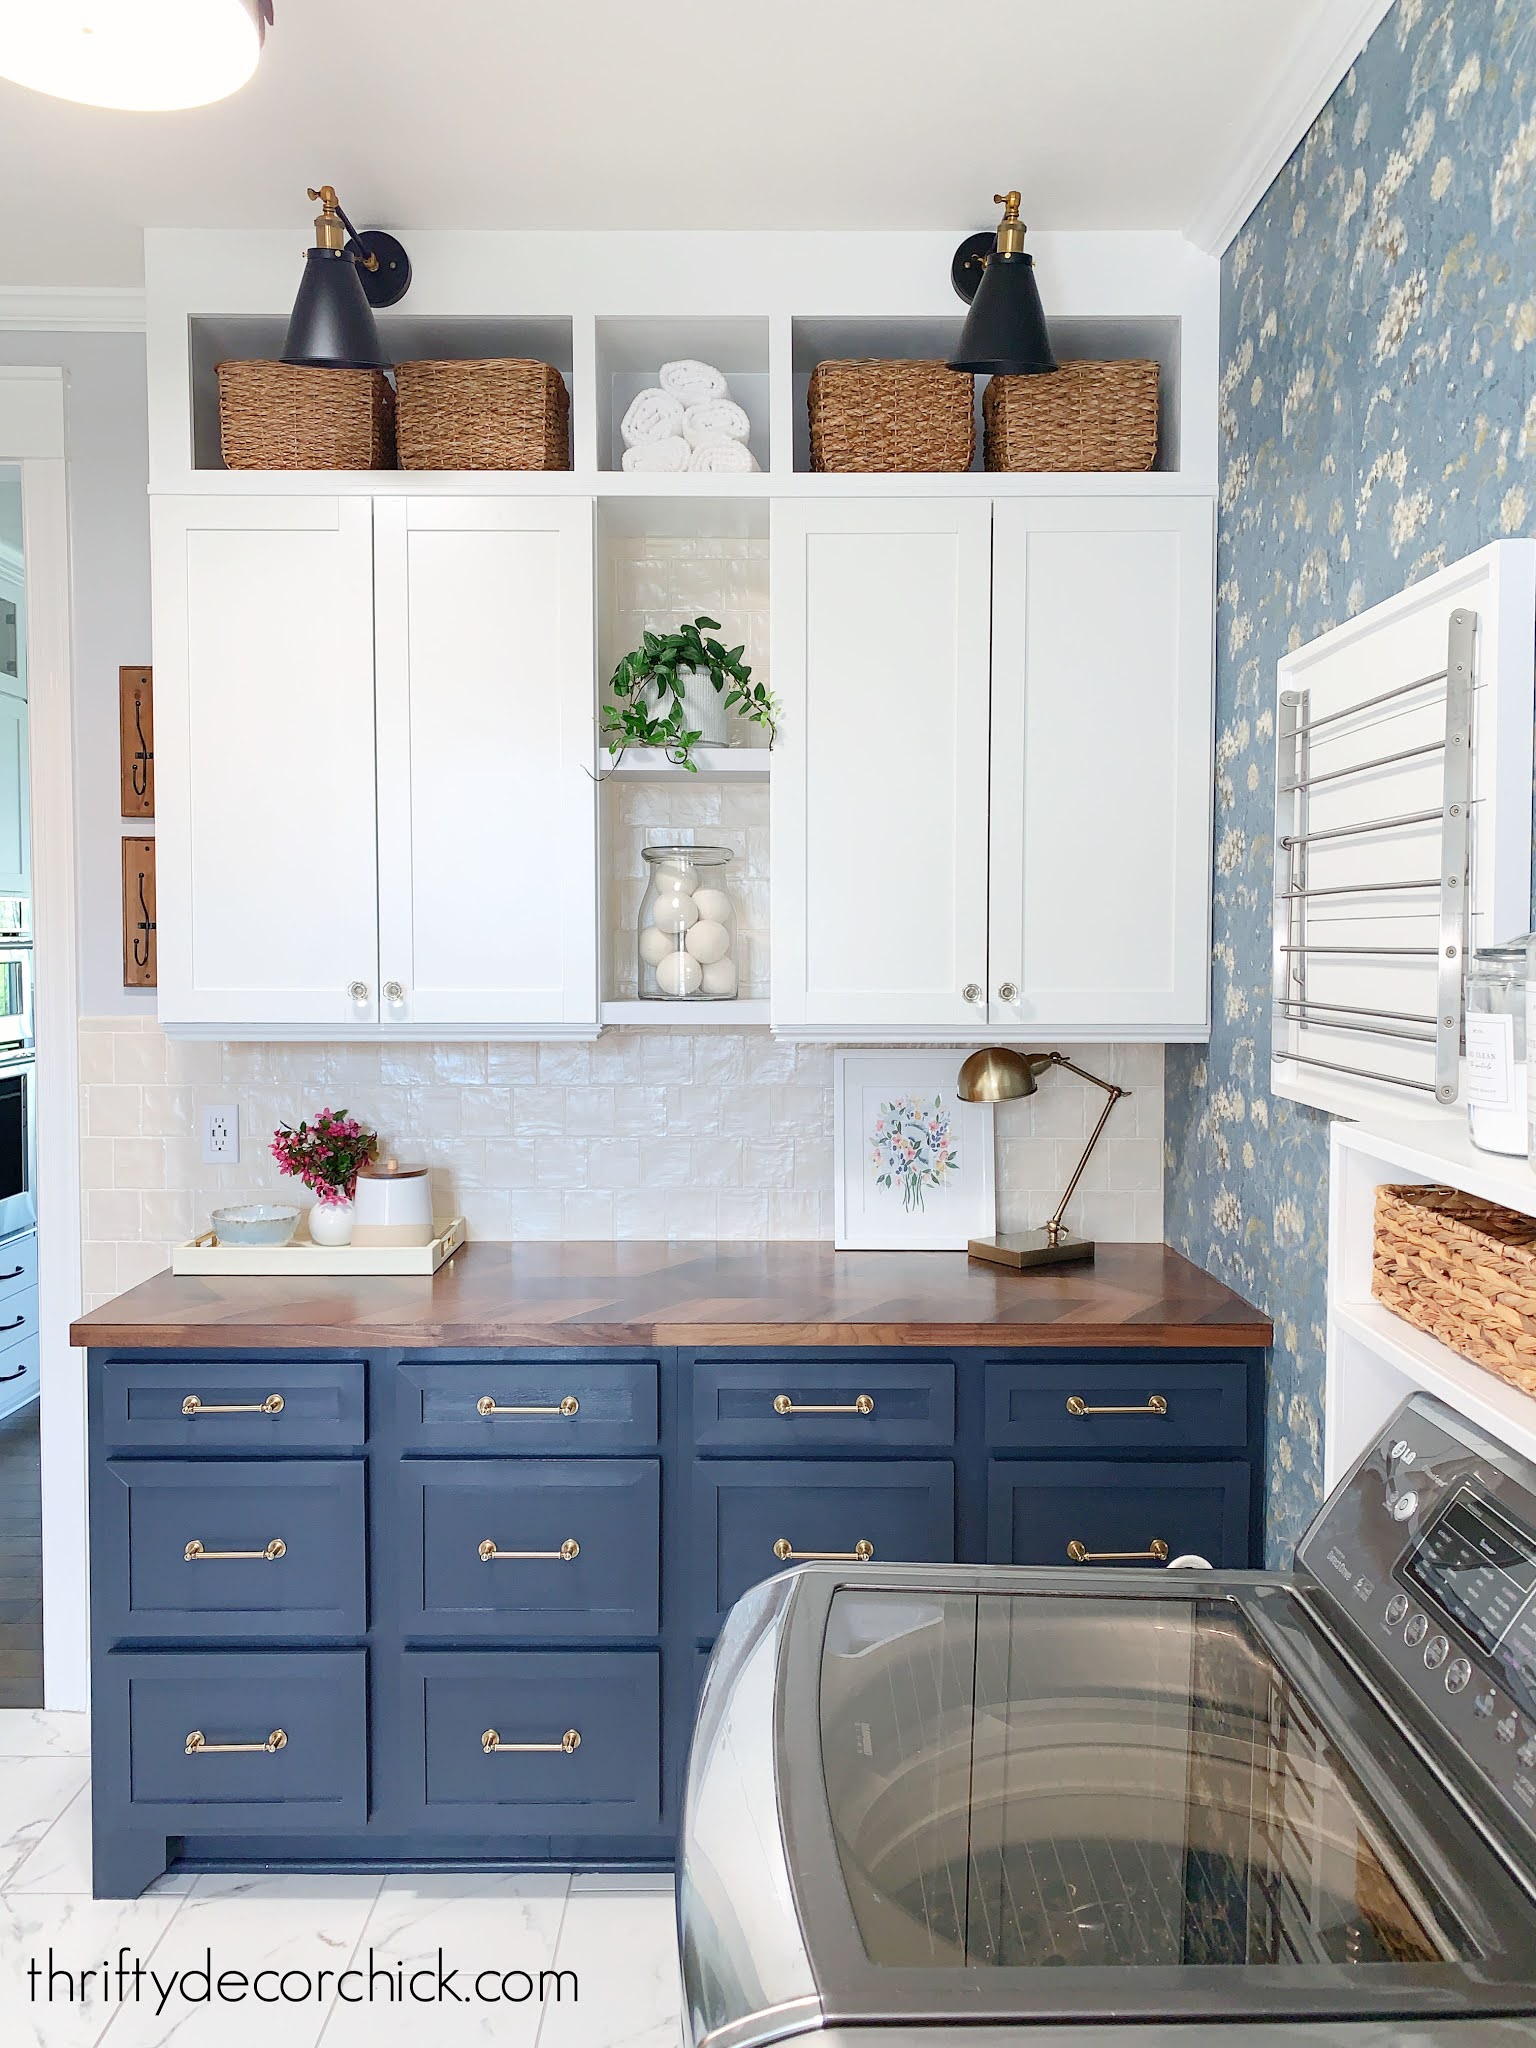
The Mud/Laundry Room Combo
I never thought I would say this after our teeny tiny laundry and mud room combo at our first house, but I LOVE having those combined now!
It's all about the space and layout...if you have enough space and a smart layout, the two work really well together.
I was on a mission to add a ton of storage in this room and that turned into big makeover!
We had this folding table to start:
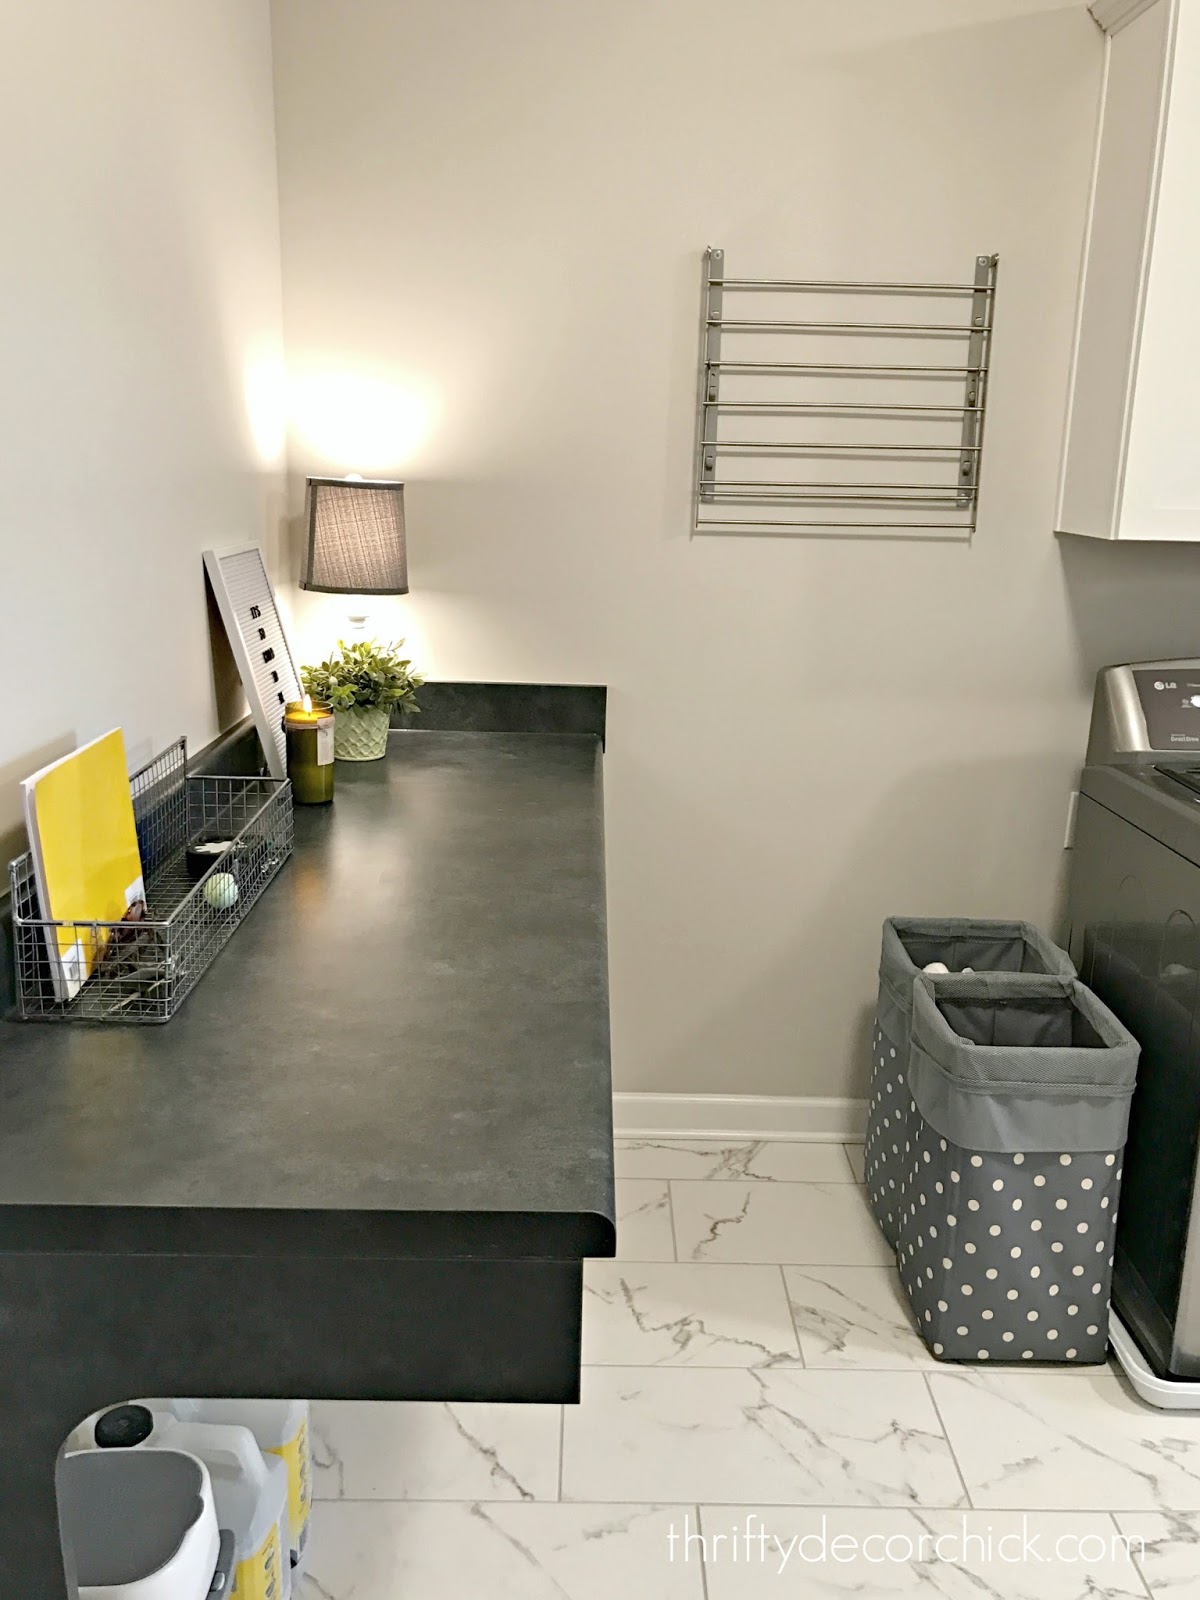
But this set of base cabinet drawers and uppers works SO MUCH better!:
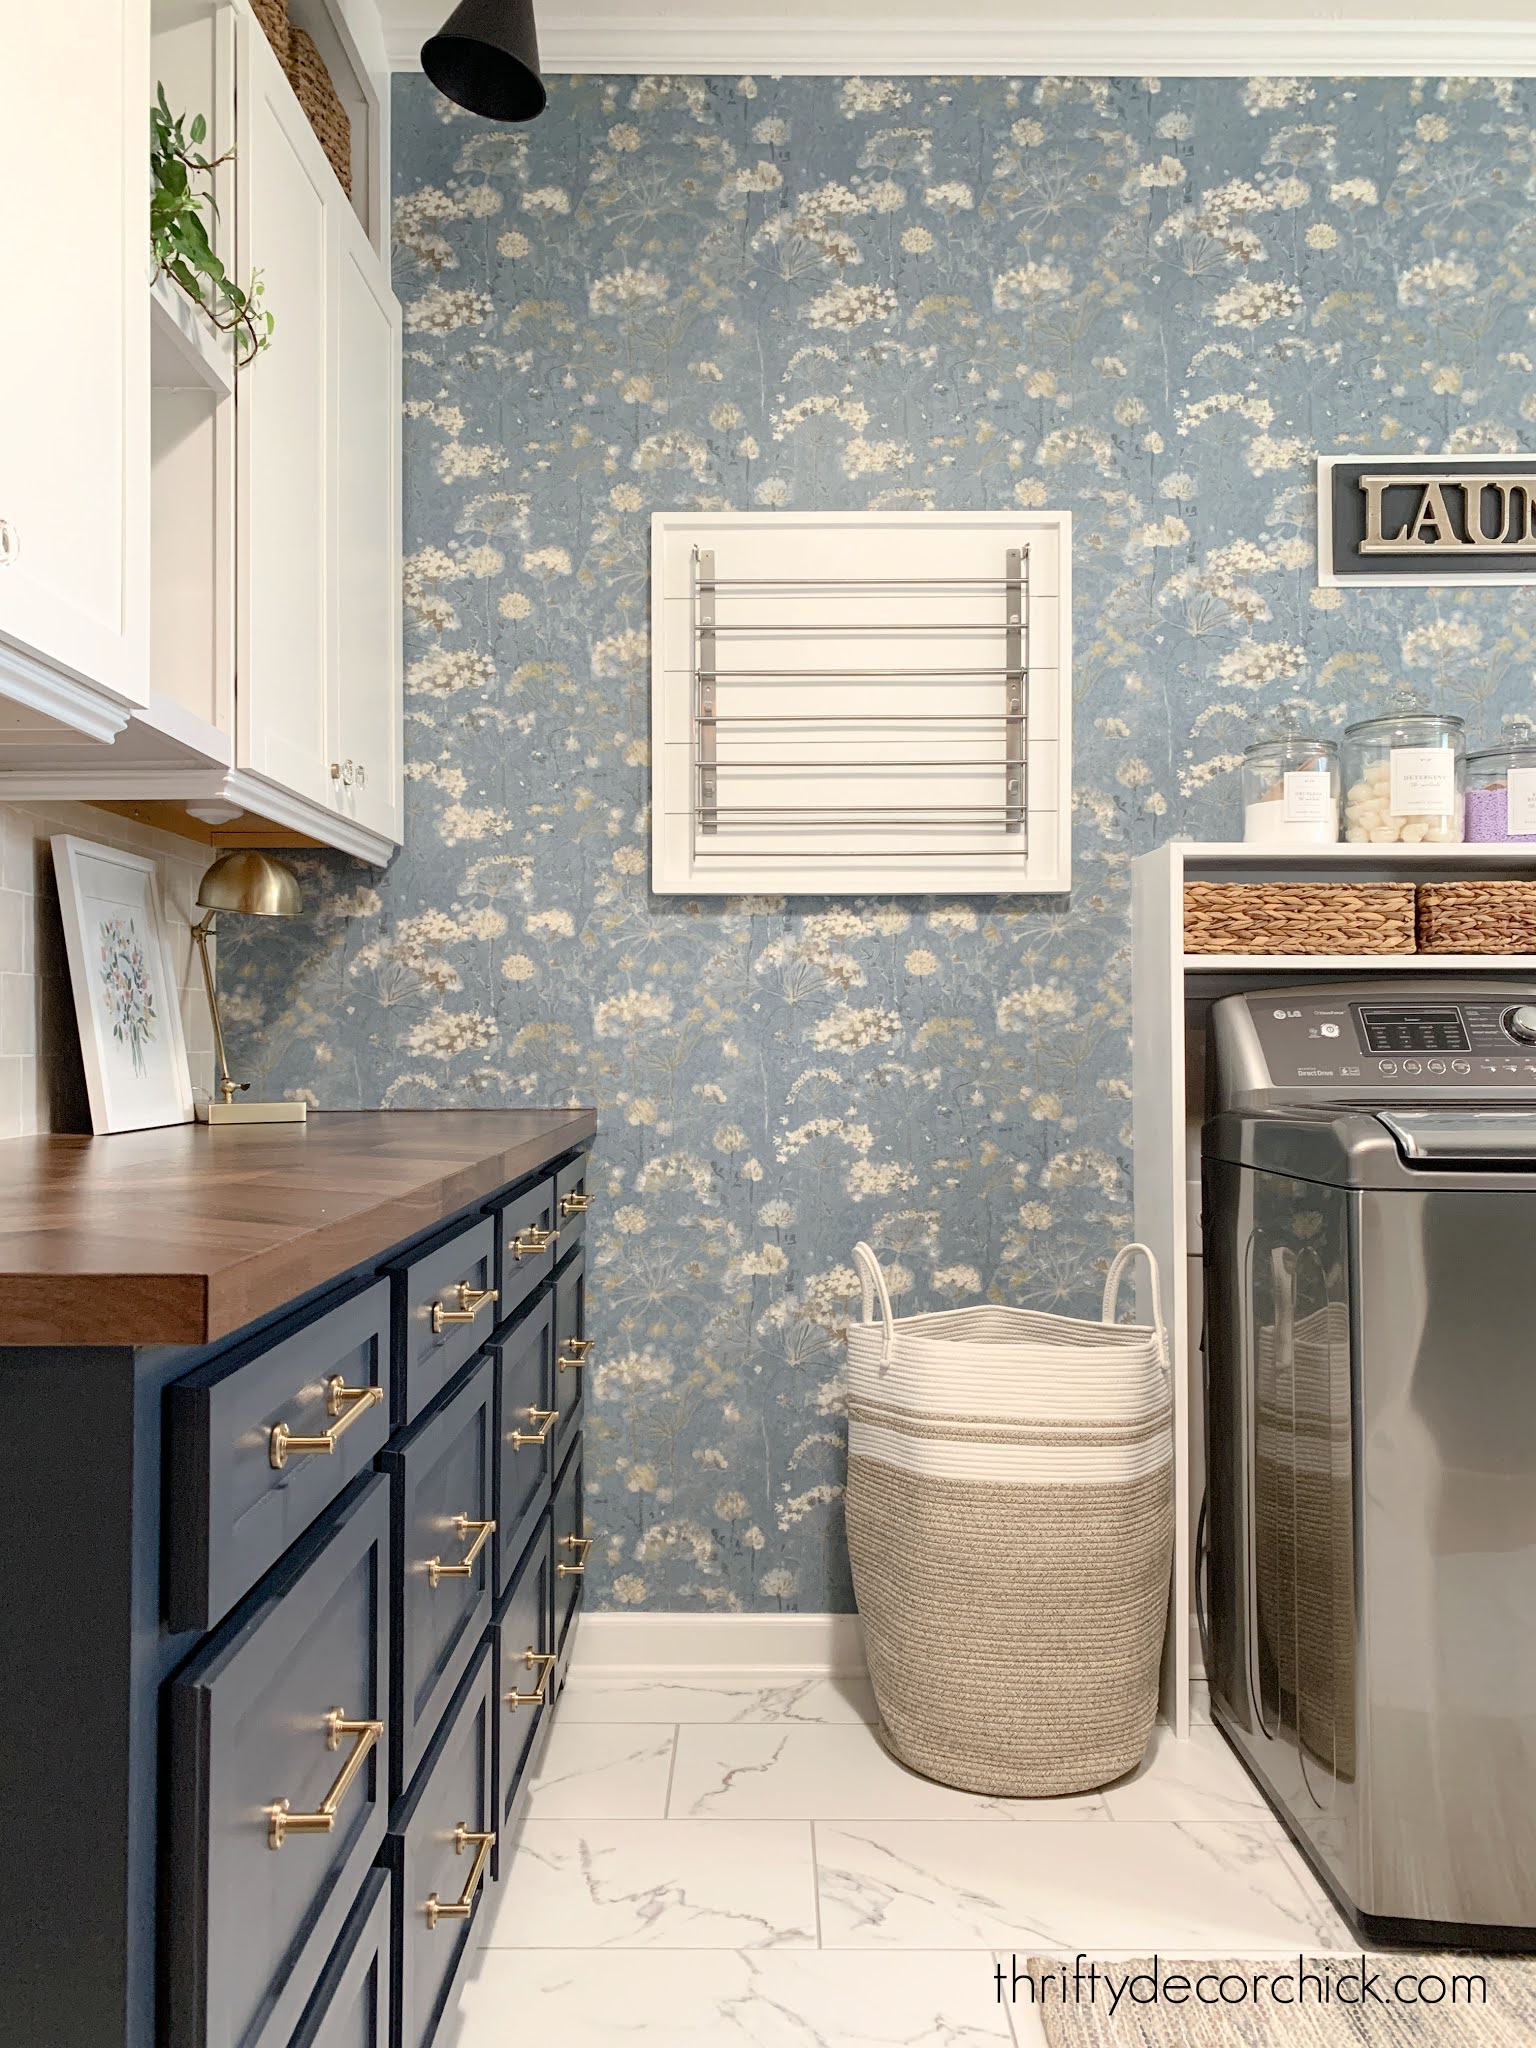
Here's another angle to see how much this room has changed!:
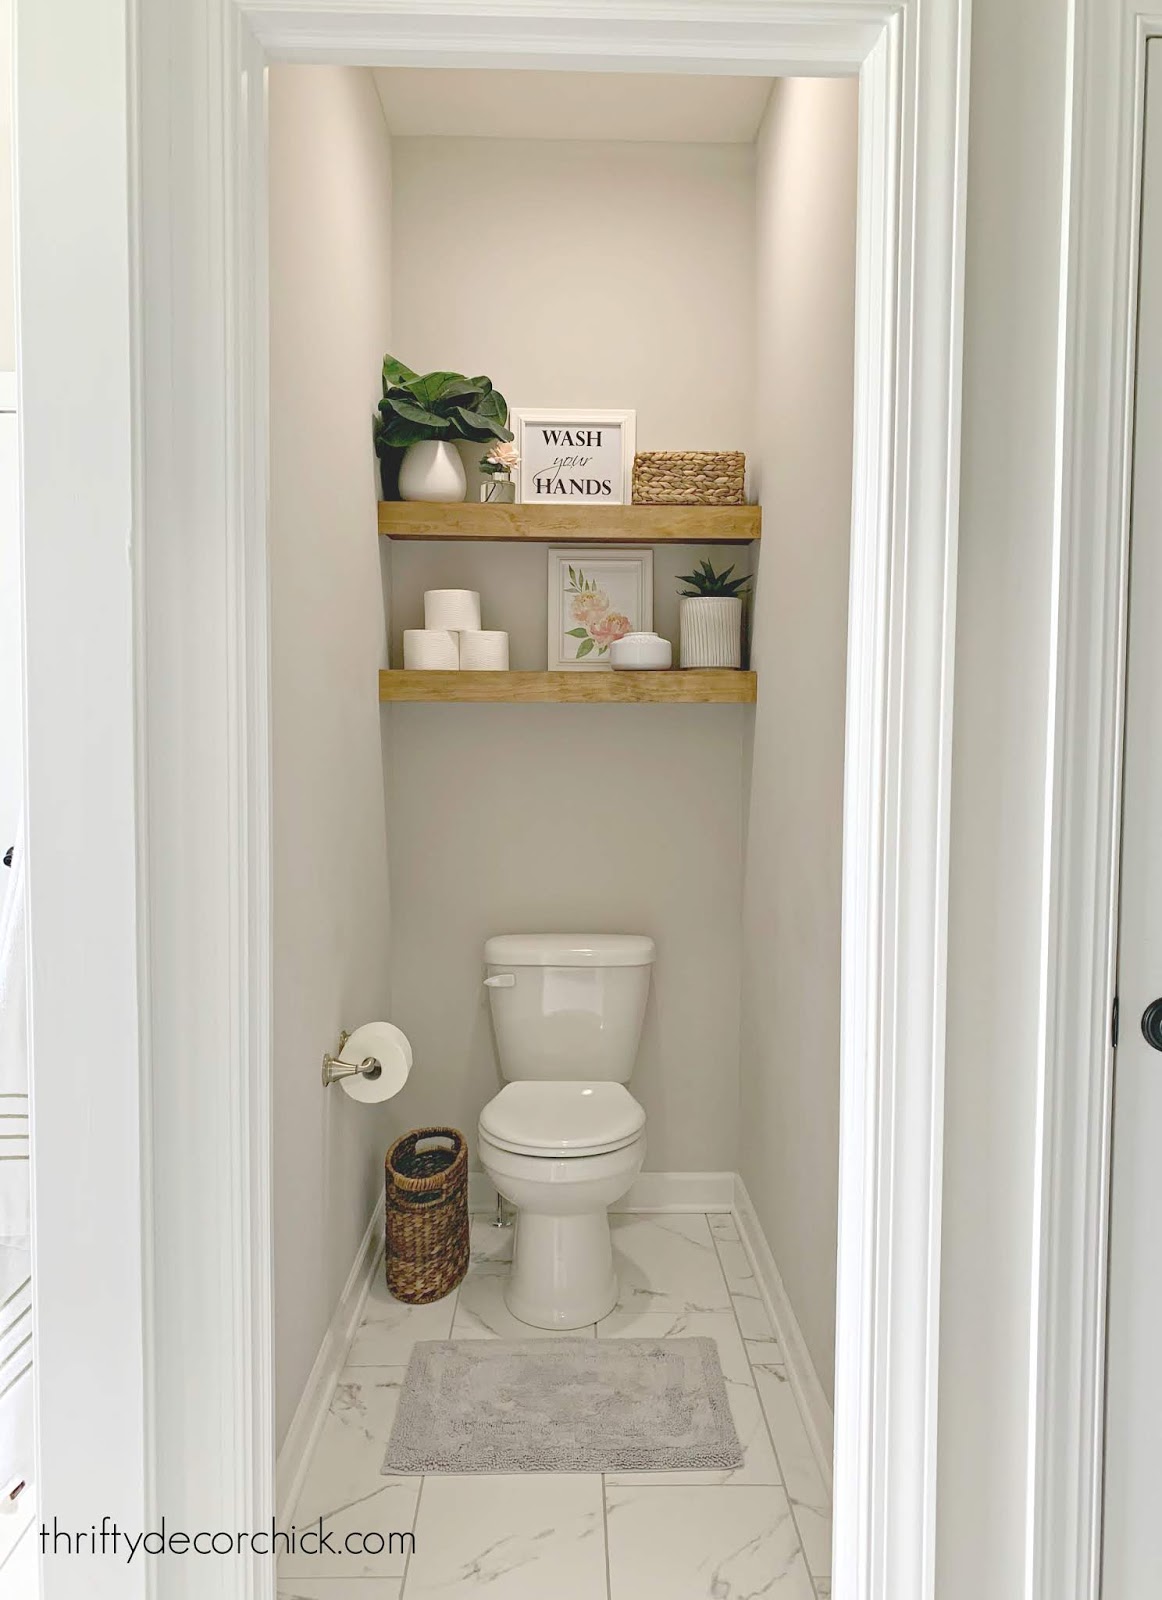
Wondering where the cat litter went? Check out the cat litter and cleaning supply closet. :)
You can see the whole redo and all of the details about our mud/laundry room here!
My Closet Makeover
I recently shared my closet makeover...this one looks great, but the way that it functions now is the real star.
I wish I had done this a long time ago!!
It didn't look bad before...but the problem was it never stayed like this:


I'm adding some decorative details slow but sure and can't wait to share how I've made this space even prettier!
The Back Patio
And finally, the one outdoor space we've tackled so far...the back patio.
We didn't have this when we moved in. I later designed a large, basic concrete patio with a round fire pit area:

You can read why we went with plain concrete without any fancy finishes.
And now our back yard is one of our favorite places to be! It is just DREAMY out there!:
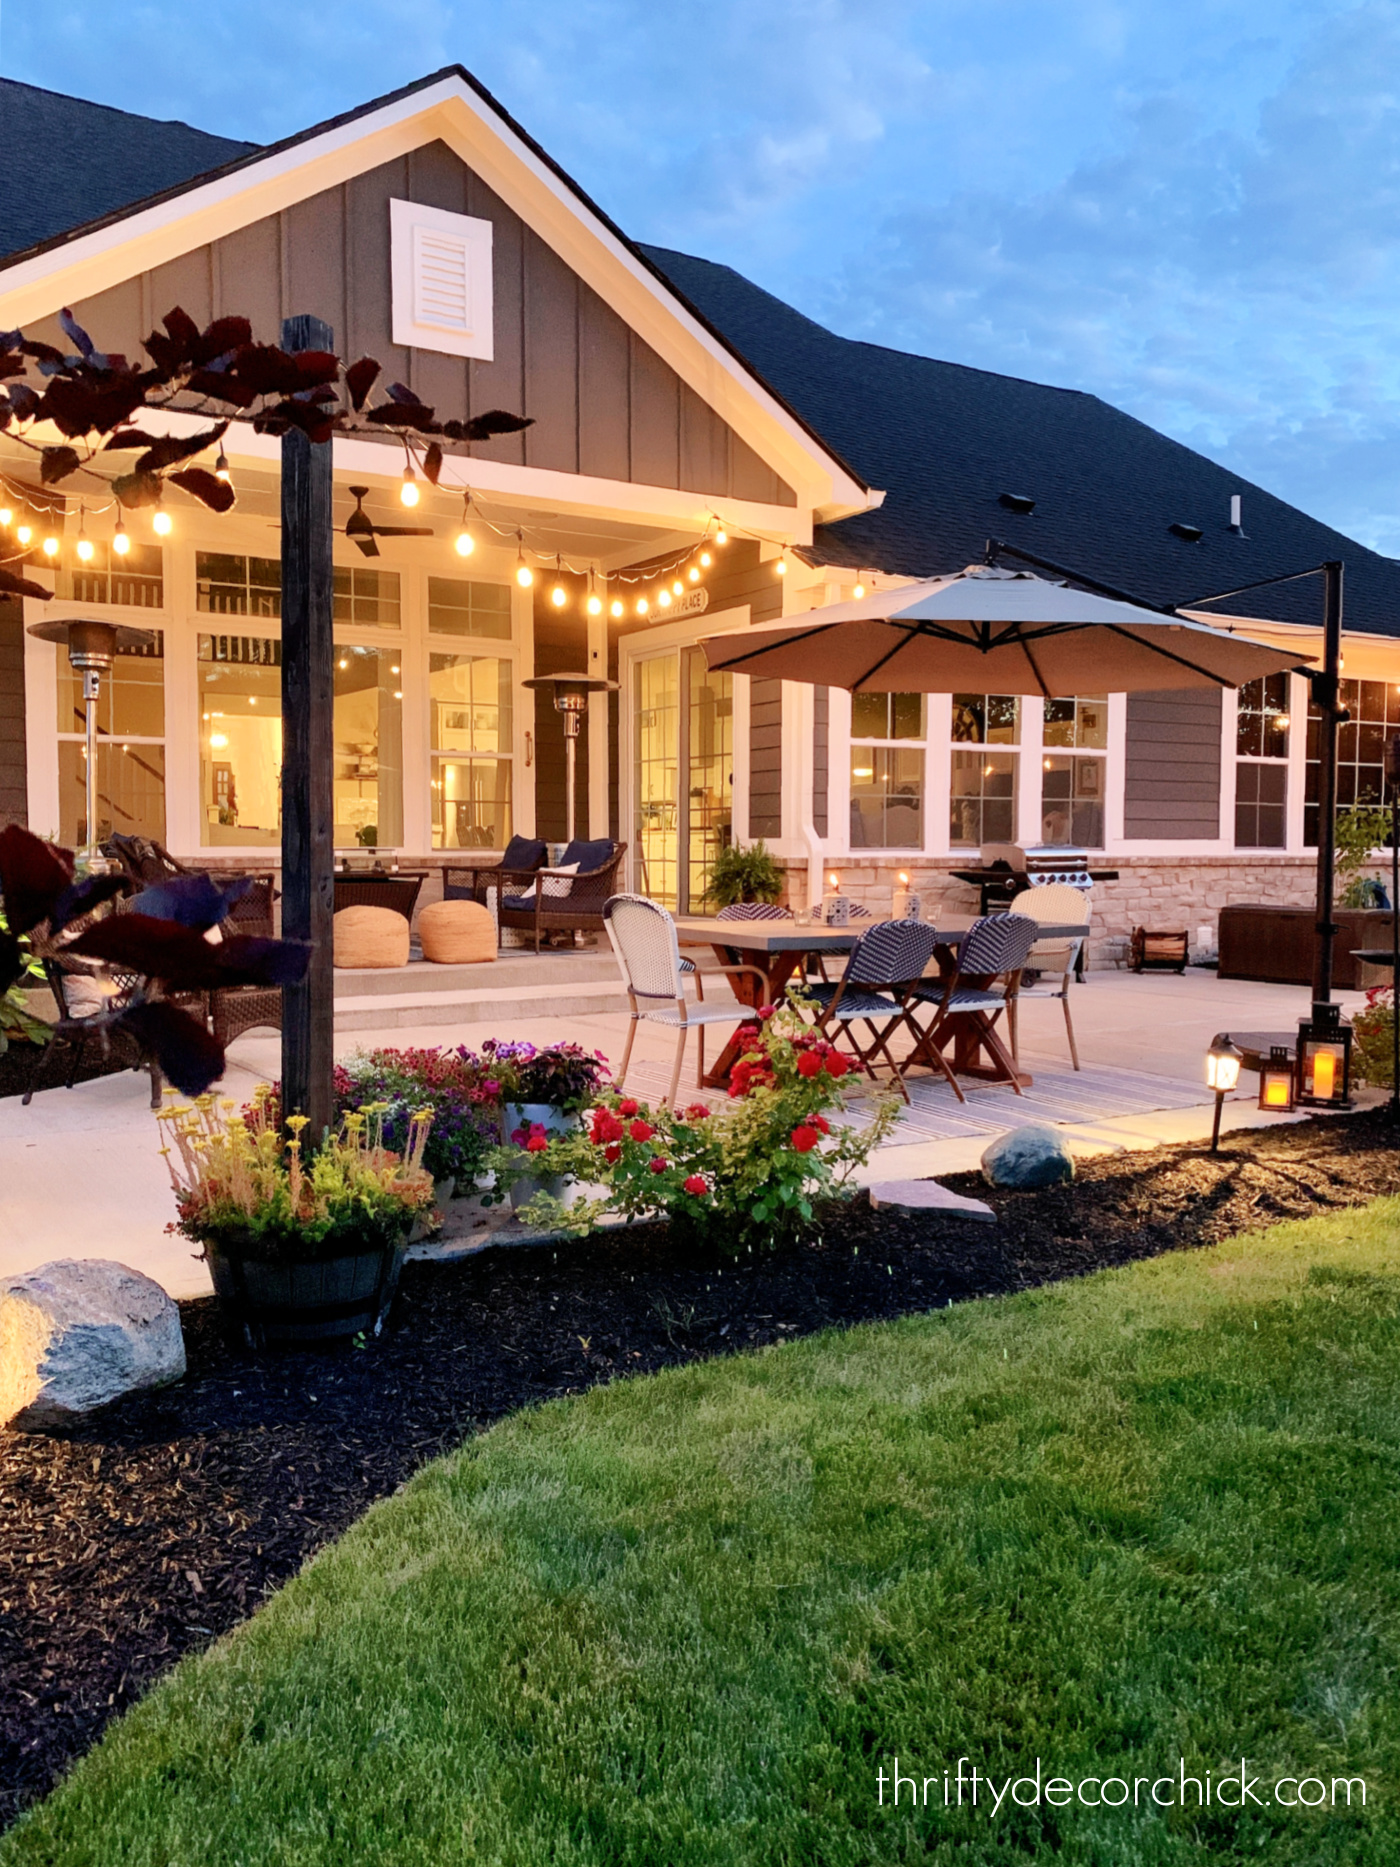
Adding those cafe lights over the patio was a game changer -- make sure to check out that tutorial if you don't have big mature trees and need something that will hold a lot of weight!
Whew!!! That's a lot, I know!
I'm always working to create a cozy and welcoming house that still feels classic and sophisticated. So far I feel like I've accomplished that.
We LOVE OUR HOME!!
It's so fun for me to look back at these photos, I hope they inspire you to create custom touches in your home as well.
If you have any questions about any projects or paint colors, let me know in the comments!
If you're interested in any of the items pictured, check out the shop our home tab for links to the items in all of these rooms.
Never miss a post by signing up to get posts via email.
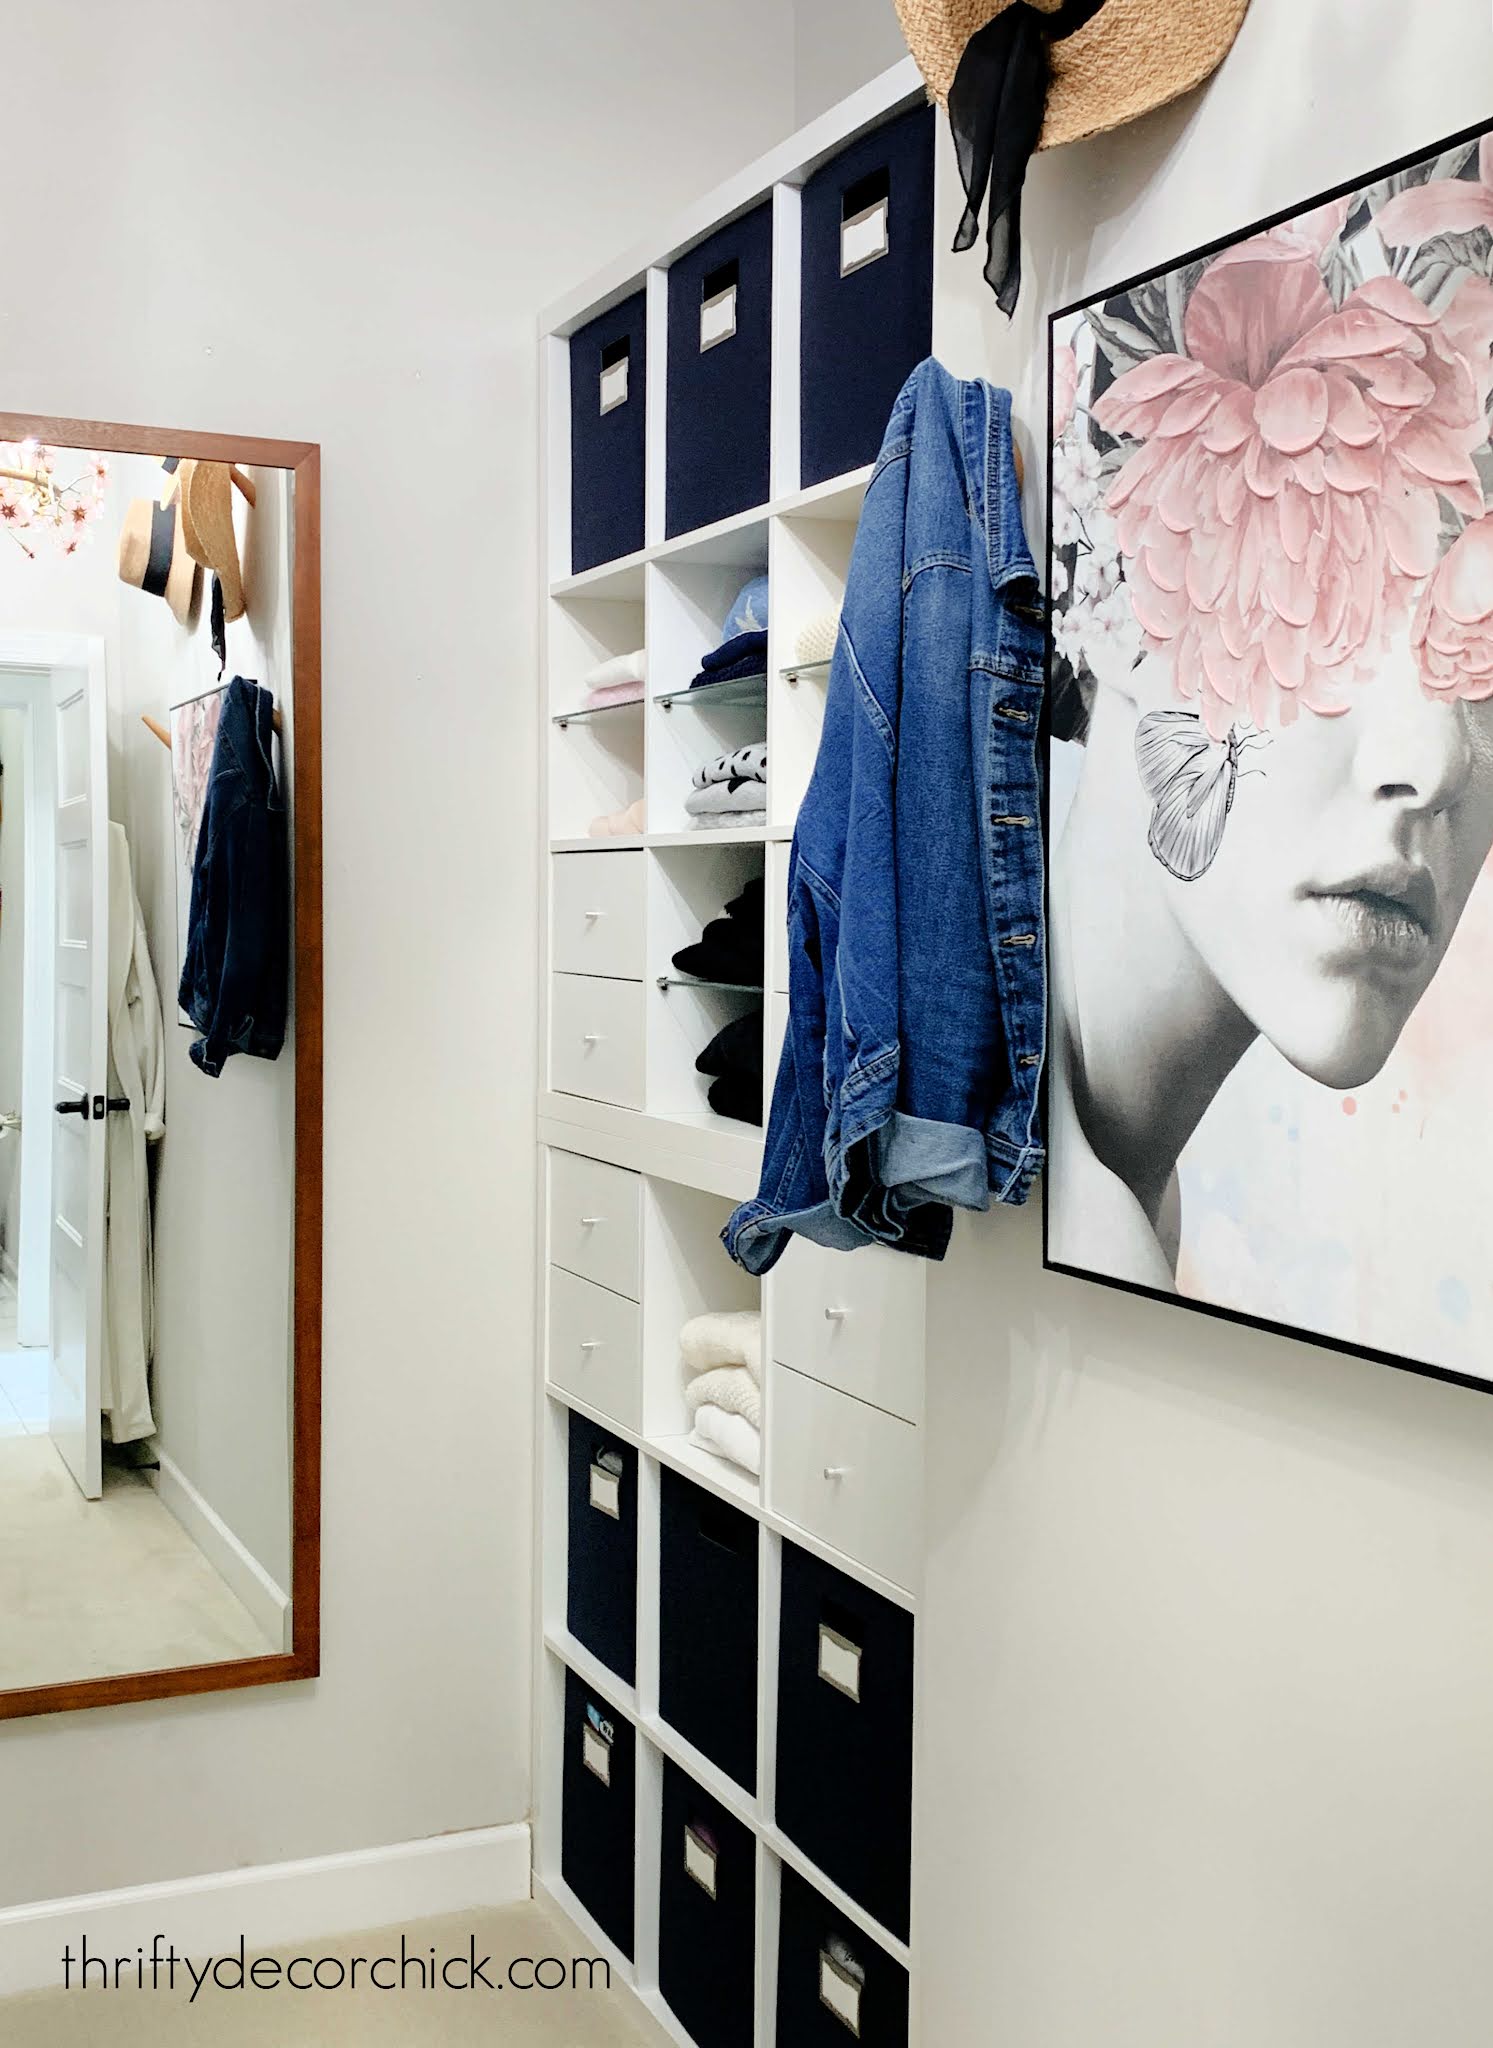
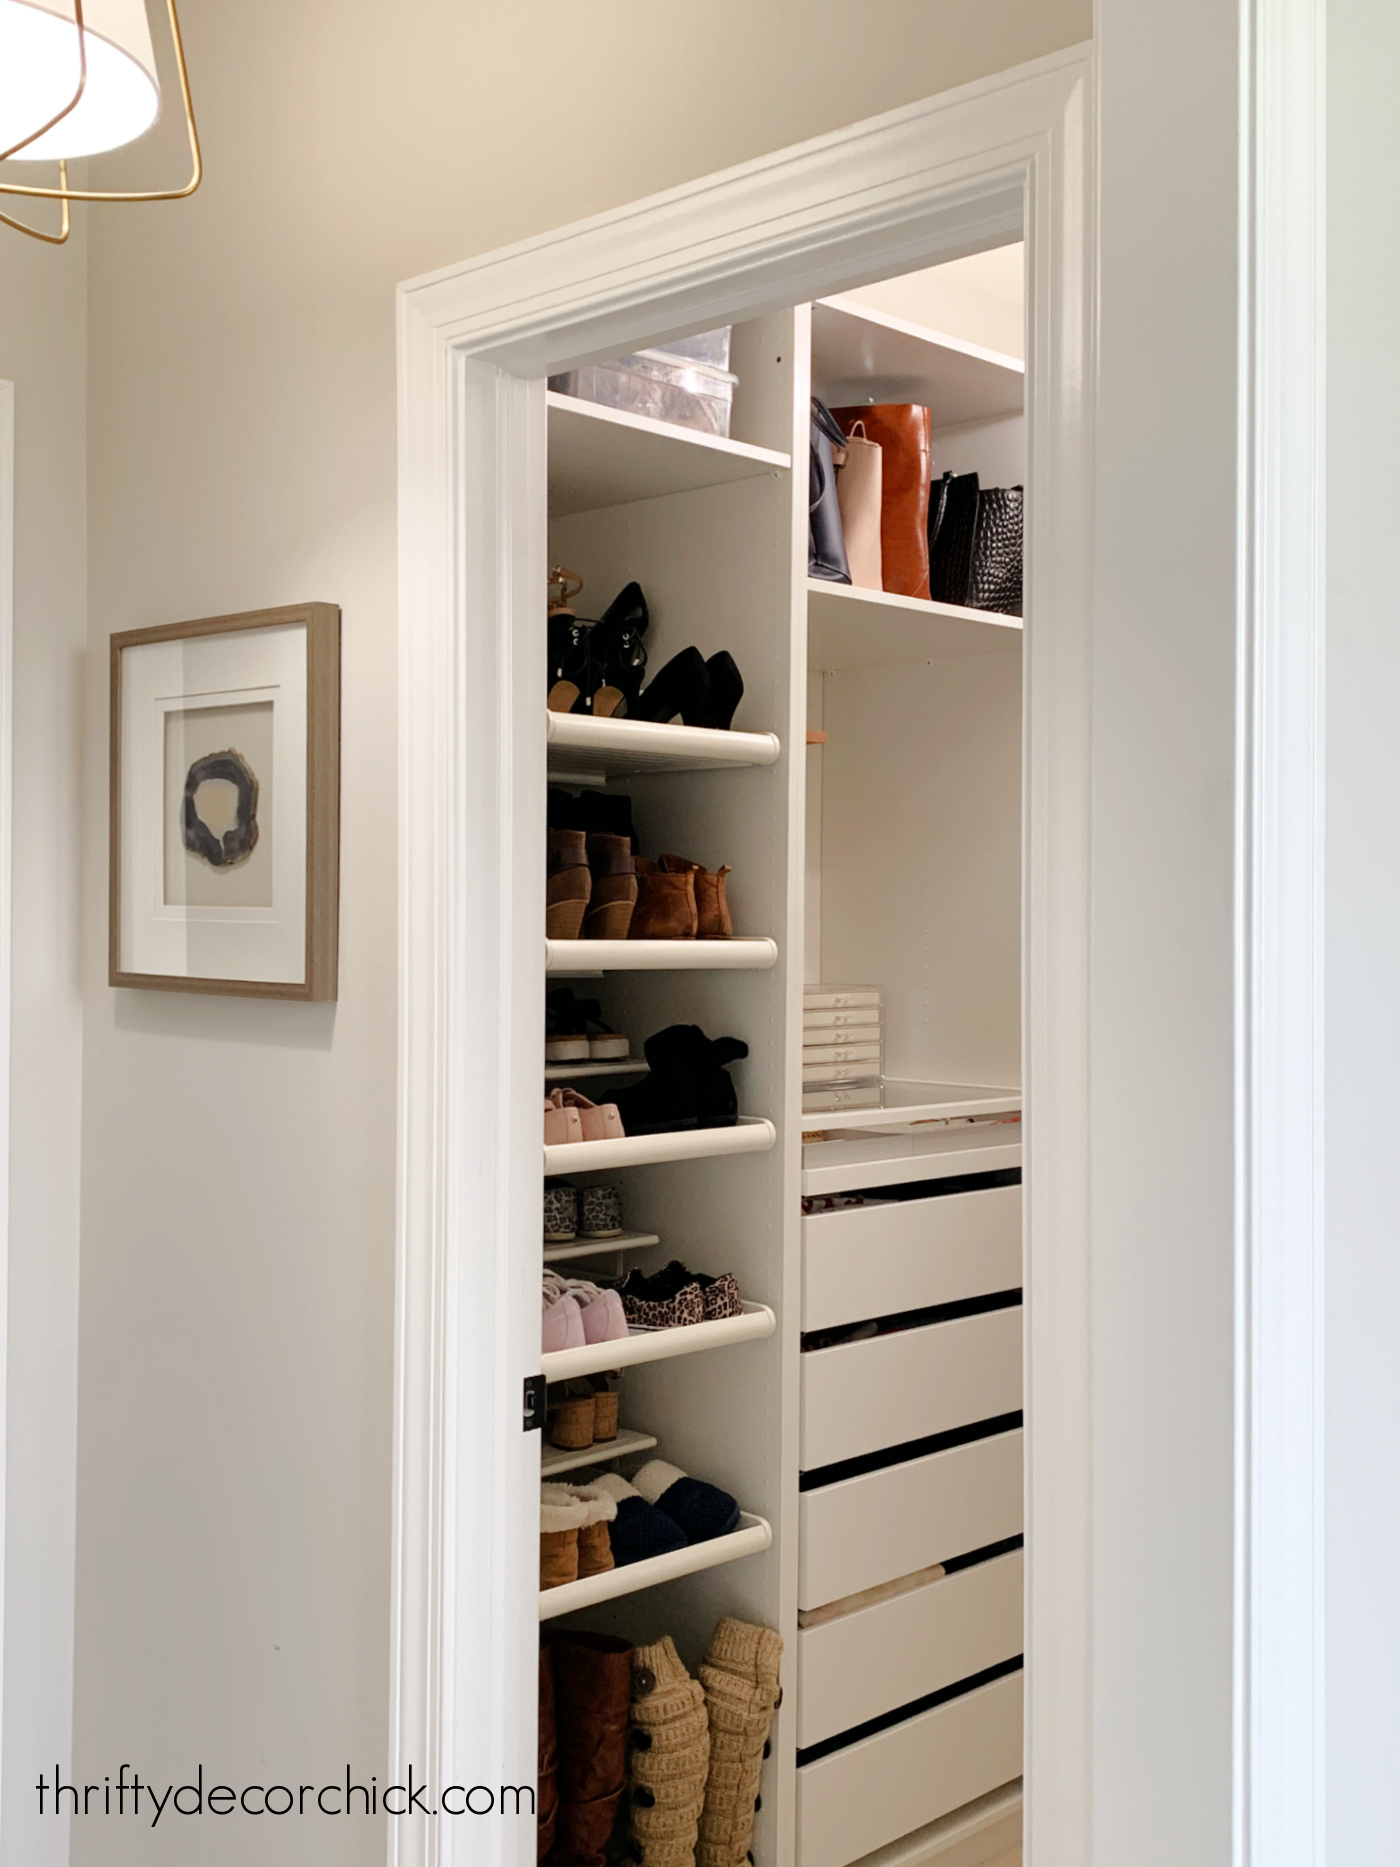
Via https://www.thriftydecorchick.com/2021/11/before-and-after-home-tour-4-years.html Custom DIY closet reveal with IKEA Kallax and Pax units for tons of storage.
I transformed my closet full of wire shelving into a perfectly organized space with these inexpensive IKEA options!
My IKEA closet makeover is finally done...at least the hardest parts of it. :)
I plan to customize this space even more, but it's already undergone a huge transformation and functions SO much better.
It is absolutely LOVELY to walk into my closet and find just what I'm looking for. This makeover truly has simplified my days.
Now there's a spot for every little thing. I can find what I need easily...and I can't even tell you how nice it is putting clean clothes away now!
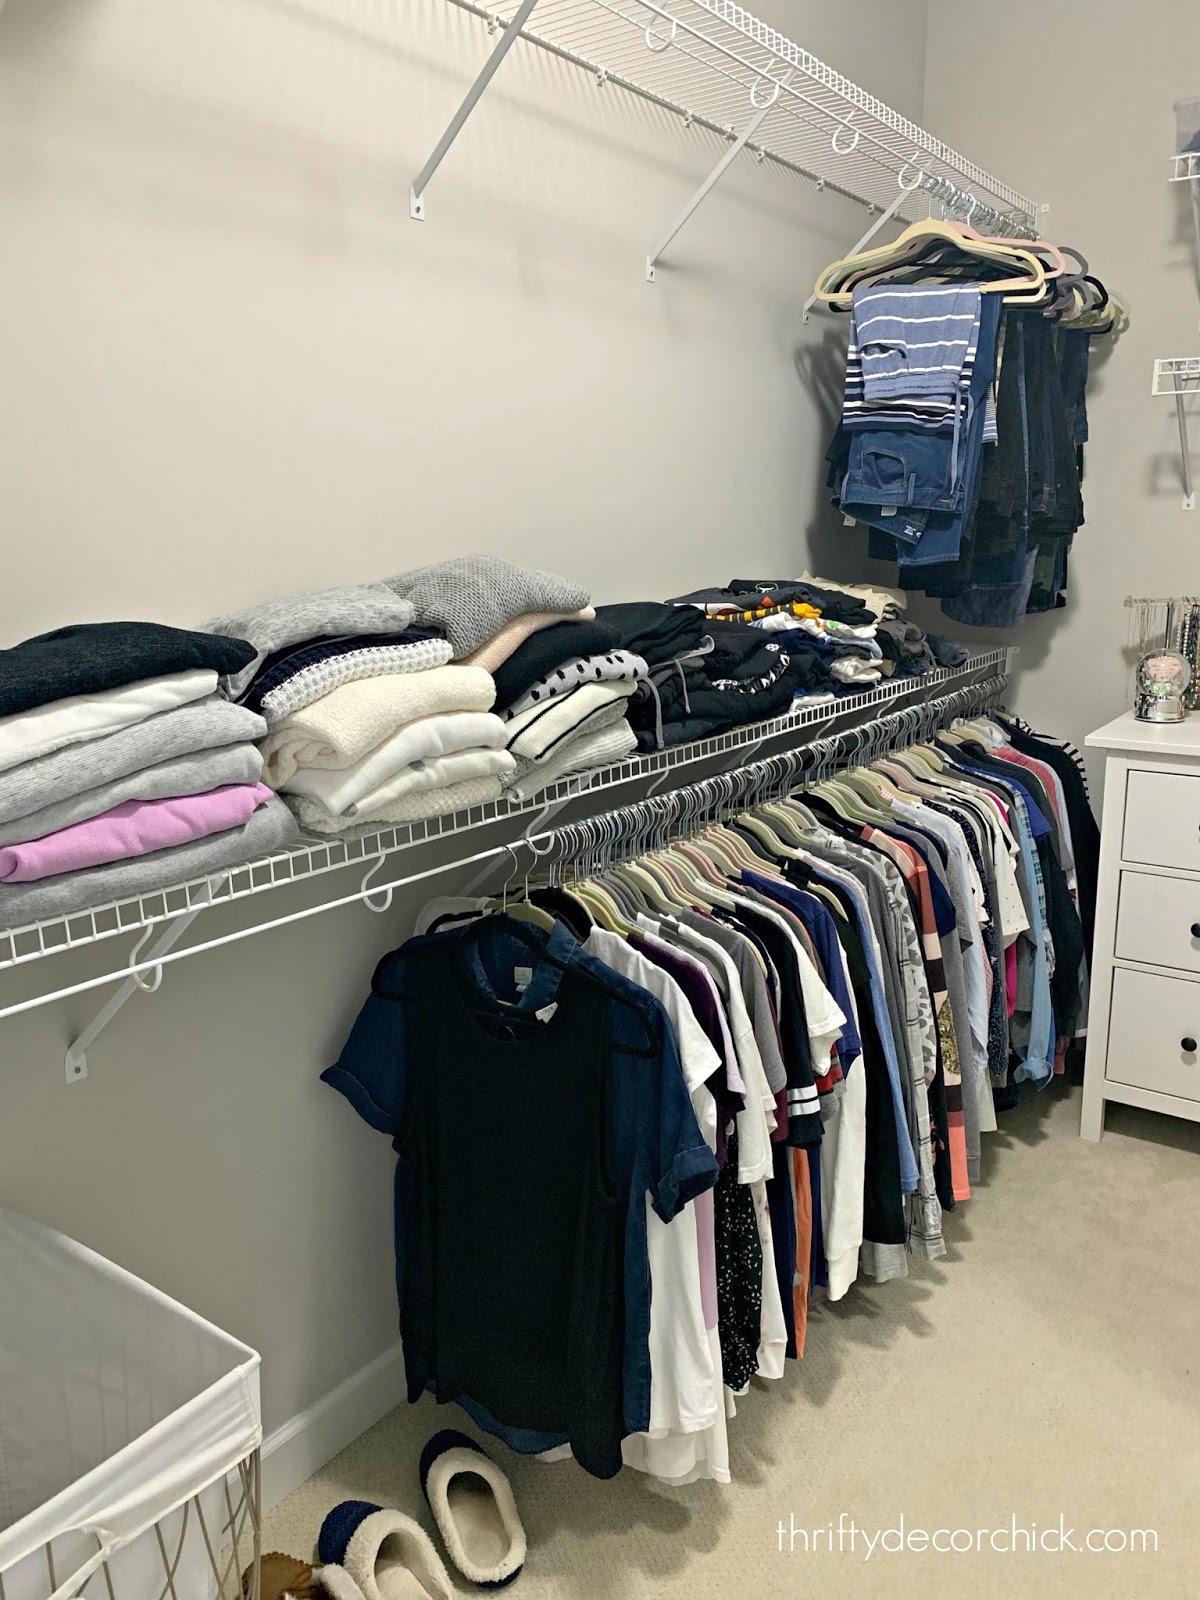
Fixing my problem areas
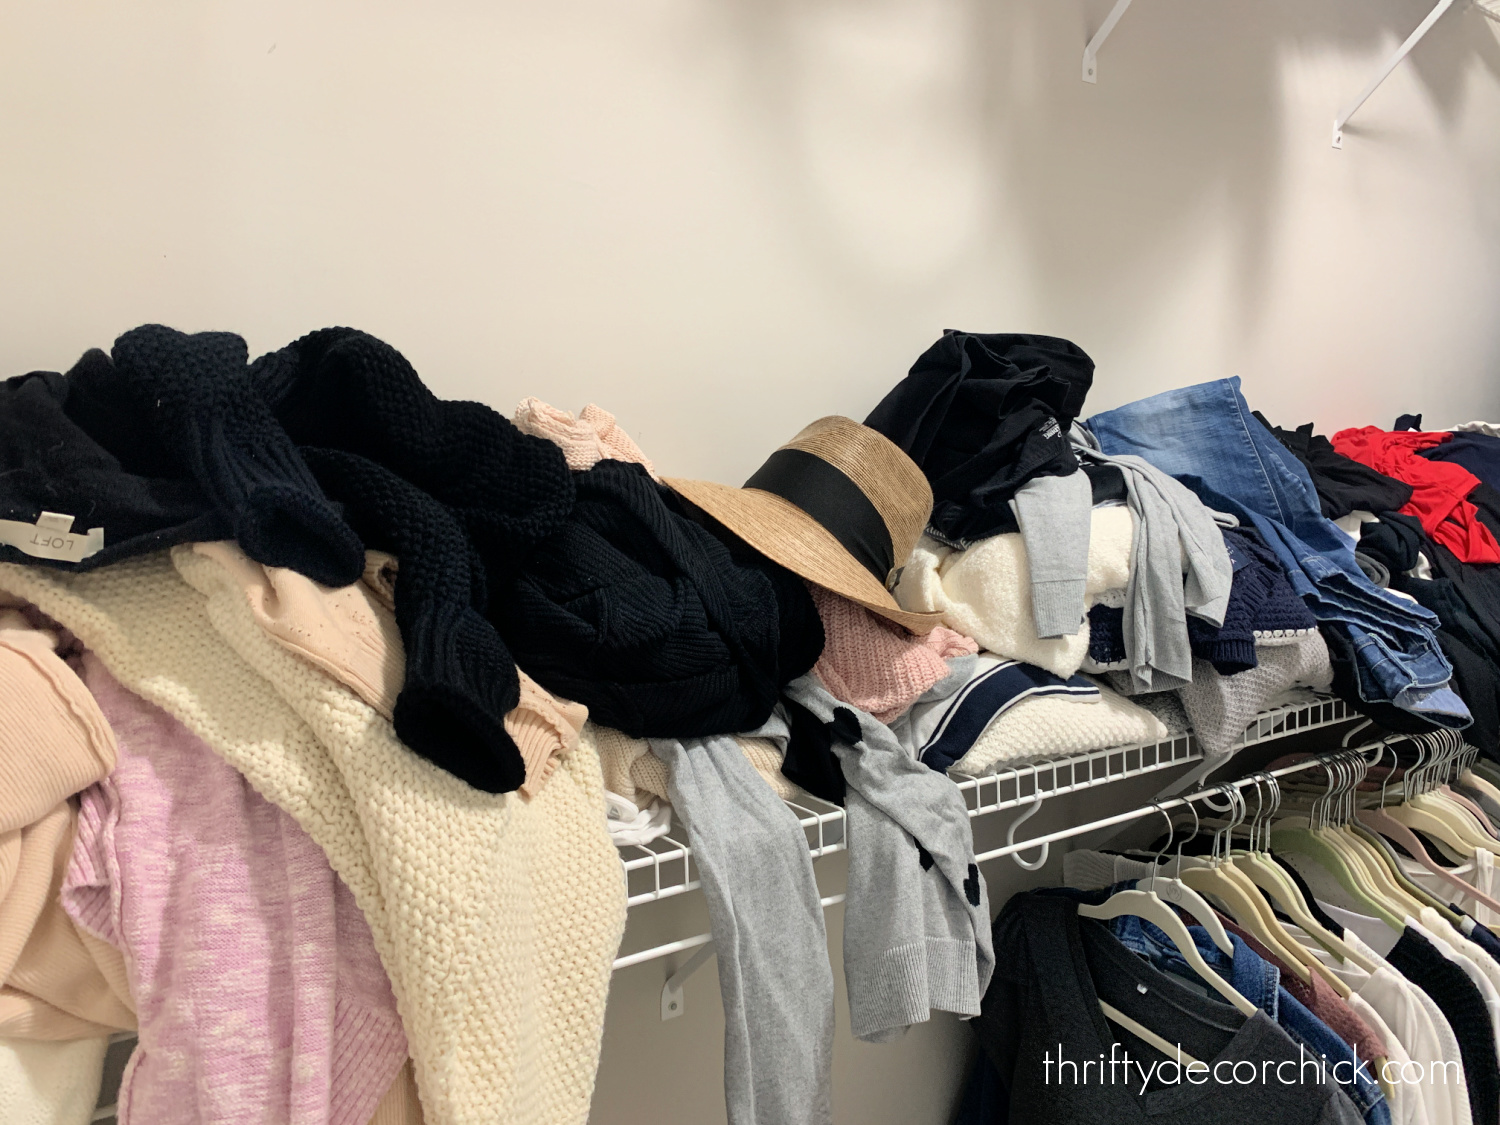
As you'll see, my closet is a great size...that was never a problem! It's long and had plenty of hanging space...too much really.
Here are a few before pics to show you how the wire shelving was installed:


There were some specific things I wanted to address in this makeover:
My very first step was to go through ALL of my clothes again so I knew how much storage space was needed.
I use the Konmari method to declutter and highly recommend it! It helps me decide right away what to keep.
Storage for bulky clothes
I shared the first part of this closet makeover with you a few months ago.
I felt like this corner was such wasted space! That little nook was the perfect spot for my plan:

I used two Kallax shelf units from IKEA and stacked them to create this wall of built in storage cubbies:

This post may contain affiliate links for your convenience.
See my policies and disclosure page for more information.
This has functioned SO WELL, I can't even tell you. Why did I wait so long to do this?
Those pull out bins are perfect for sweatshirts, thick sweaters and off season stuff like Halloween or Christmas clothing.
I also added some of the Kallax inserts that turn the cubbies into two drawers. These are great for smaller items like socks and sports bras.
I shared how to remove the wire shelving and more of this easy build in the link above!
I later added glass shelves inside a few of the open cubbies so I could break up the stacks of clothing a bit:

That way I don't have to adjust the whole pile when I'm pulling a sweater from the bottom!

I still need to label those canvas bin labels!
The drawers inserts were a great investment in this closet redo -- they are perfect for small stuff!
I hung these modern wood hooks on the wall to the right for my hats and jackets I wear most often:
I found the art at HomeGoods, but I think that may be going to back. I want something a little more understated in its place.I think it will be a bit much with the wallpaper I plan to hang on the back wall:
The pink wallpaper I had up was feeling too heavy, so I'll be replacing it. I didn't have much up yet, thankfully!
My new plan is going to be beautiful! In my head anyway. :)
For the left side of the closet with the double hanging rods, I changed my plan a few times.
Once I lived with the new cubby unit for awhile, I got the organization bug and I knew I wanted to make the entire closet work better.
Choosing a Pax unit layout
I did some research and decide to go with IKEA's Pax system. I had never used these products, but have seen many people create beautifully organized closets with them!
I'll go into more detail about the Pax frames in a later post, but you can pick from many colors and dimensions to fit your closet needs.
They have options in two heights (79" and 93"), two depths (13" and 22") and three widths (19", 29" and 34").
I chose the 93" height (because we have nine foot ceilings) and the 22" depth (because I wanted to be able to hang my clothes inside).
For the widths of the units, I had to do some measuring to figure out what configuration would work best. I ended up with one 19" unit, one 29" unit and two 34" units.
You can play around with the sizes to figure out a layout that works best for you! I have a bit of space left at one end, but I use that for our ironing board, so it worked out well!
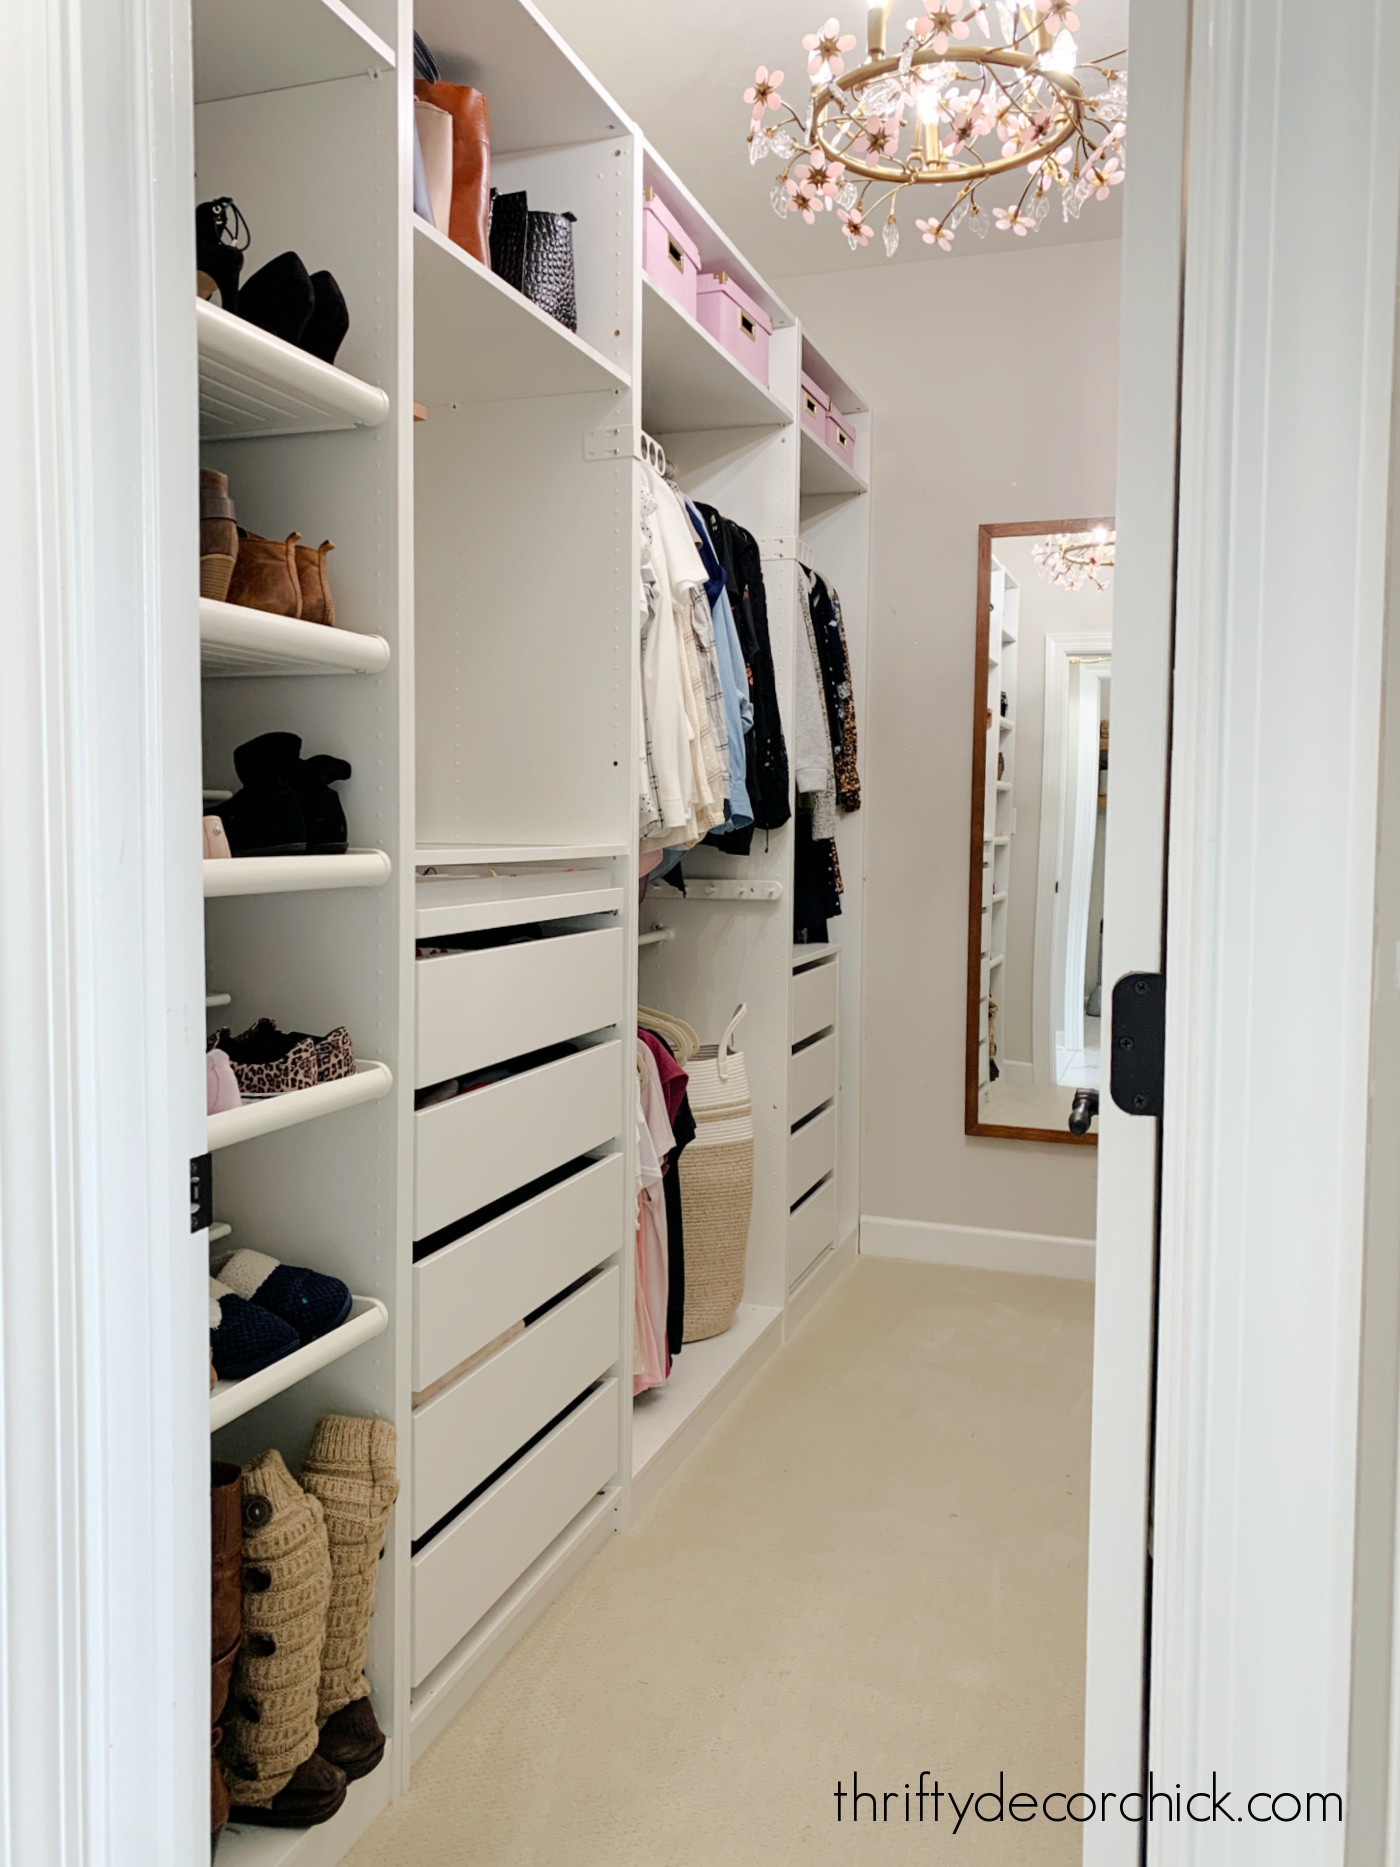
The finished closet layout
It wouldn't be right to share the finished closet without showing you the messy before, right??
This side of the closet was by far the worst...it annoyed me that I had so much space but wasn't really using it.
As hard as I tried, the folded clothes on the wire shelves always ended up in a mess:

I've learned over the years that disorganized spaces make me anxious and moody. It was frustrating to walk in this space every day!
Not how I like to start and end my day. ?
Thankfully, that mess is no more! After weeks of building and installing the IKEA Pax wardrobes, I have a much better view:
I'm SO thankful to have this beautiful, organized space now!:
You can add so many custom touches to the Pax units with their Komplement organizers! I'll go into more detail about those below.I set up the closet layout so that the items I reach for most are at the front. I wanted the things I don't wear as often to be at the back and things I need to grab quickly in the front.Pull out shoe shelves
Shoe storage was a big problem I wanted to fix:
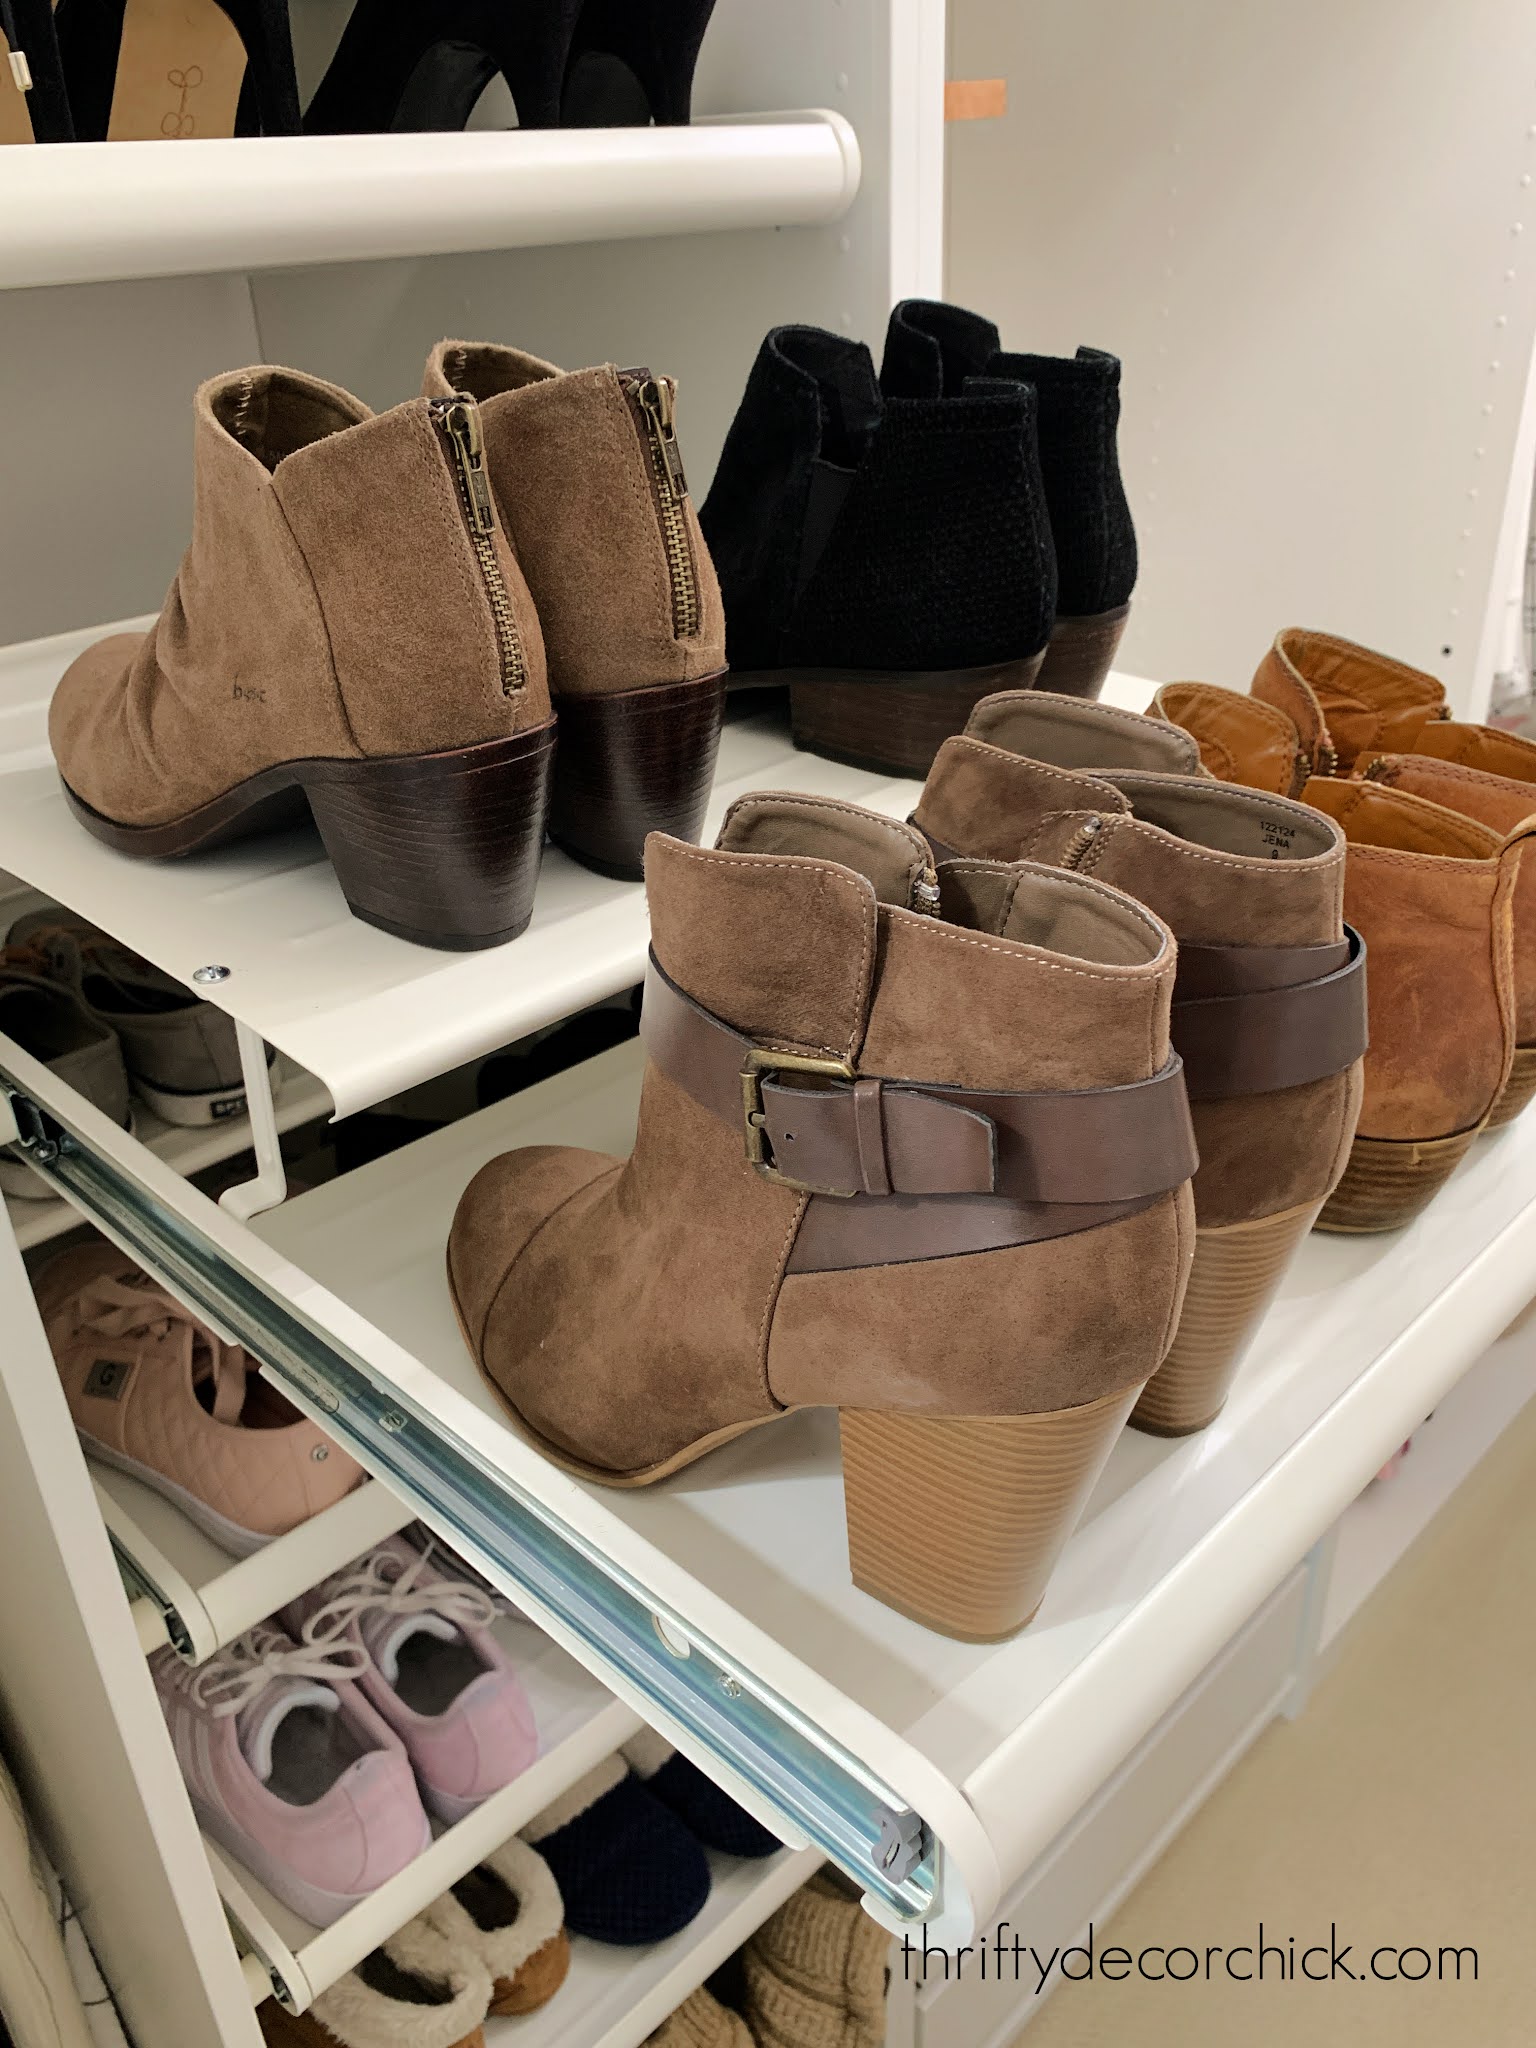
These Komplement pull out shoe shelves are awesome! You can get up to three pairs of shoes on the top level of each pull out.
I also like that they are protected a bit, so the shoes I don't wear as much won't get crazy dusty.
When you install these pull outs, figure out how much vertical space you'll need in between shoes. Taller boots and heels will need more clearance when you pull them out.
Drawers for folded clothes
While working on this closet makeover, I decided that it would be best to start folding more items instead of hanging them.
I used to hang almost everything -- jeans and t-shirts especially. I did it out of necessity since I didn't have a good spot for folded clothes.
Deciding to keep more in drawers has opened up SO much hanging space and just works better overall.I've discovered that I see (and therefore wear) more clothes when they are folded and stored with the sides up like this:
The Pax pull out drawers don't have much depth, and I was worried about that at first. But if you store your folded clothing as I'm show here instead of stacking, you're able to fit a TON inside.It is SO nice to have drawers with just short sleeved shirts inside, or work out clothes, lounging outfits...whatever.I can see what I have so. much. better.Storing clothes on their sides keeps your drawers more organized -- no digging through piles!
The Komplement drawers are all soft close, so no slamming! You know how much I love a soft close!
Jewelry vanity with mirror
I wanted a little spot with a mirror that would hold all of my jewelry in one place. I love how this turned out!:
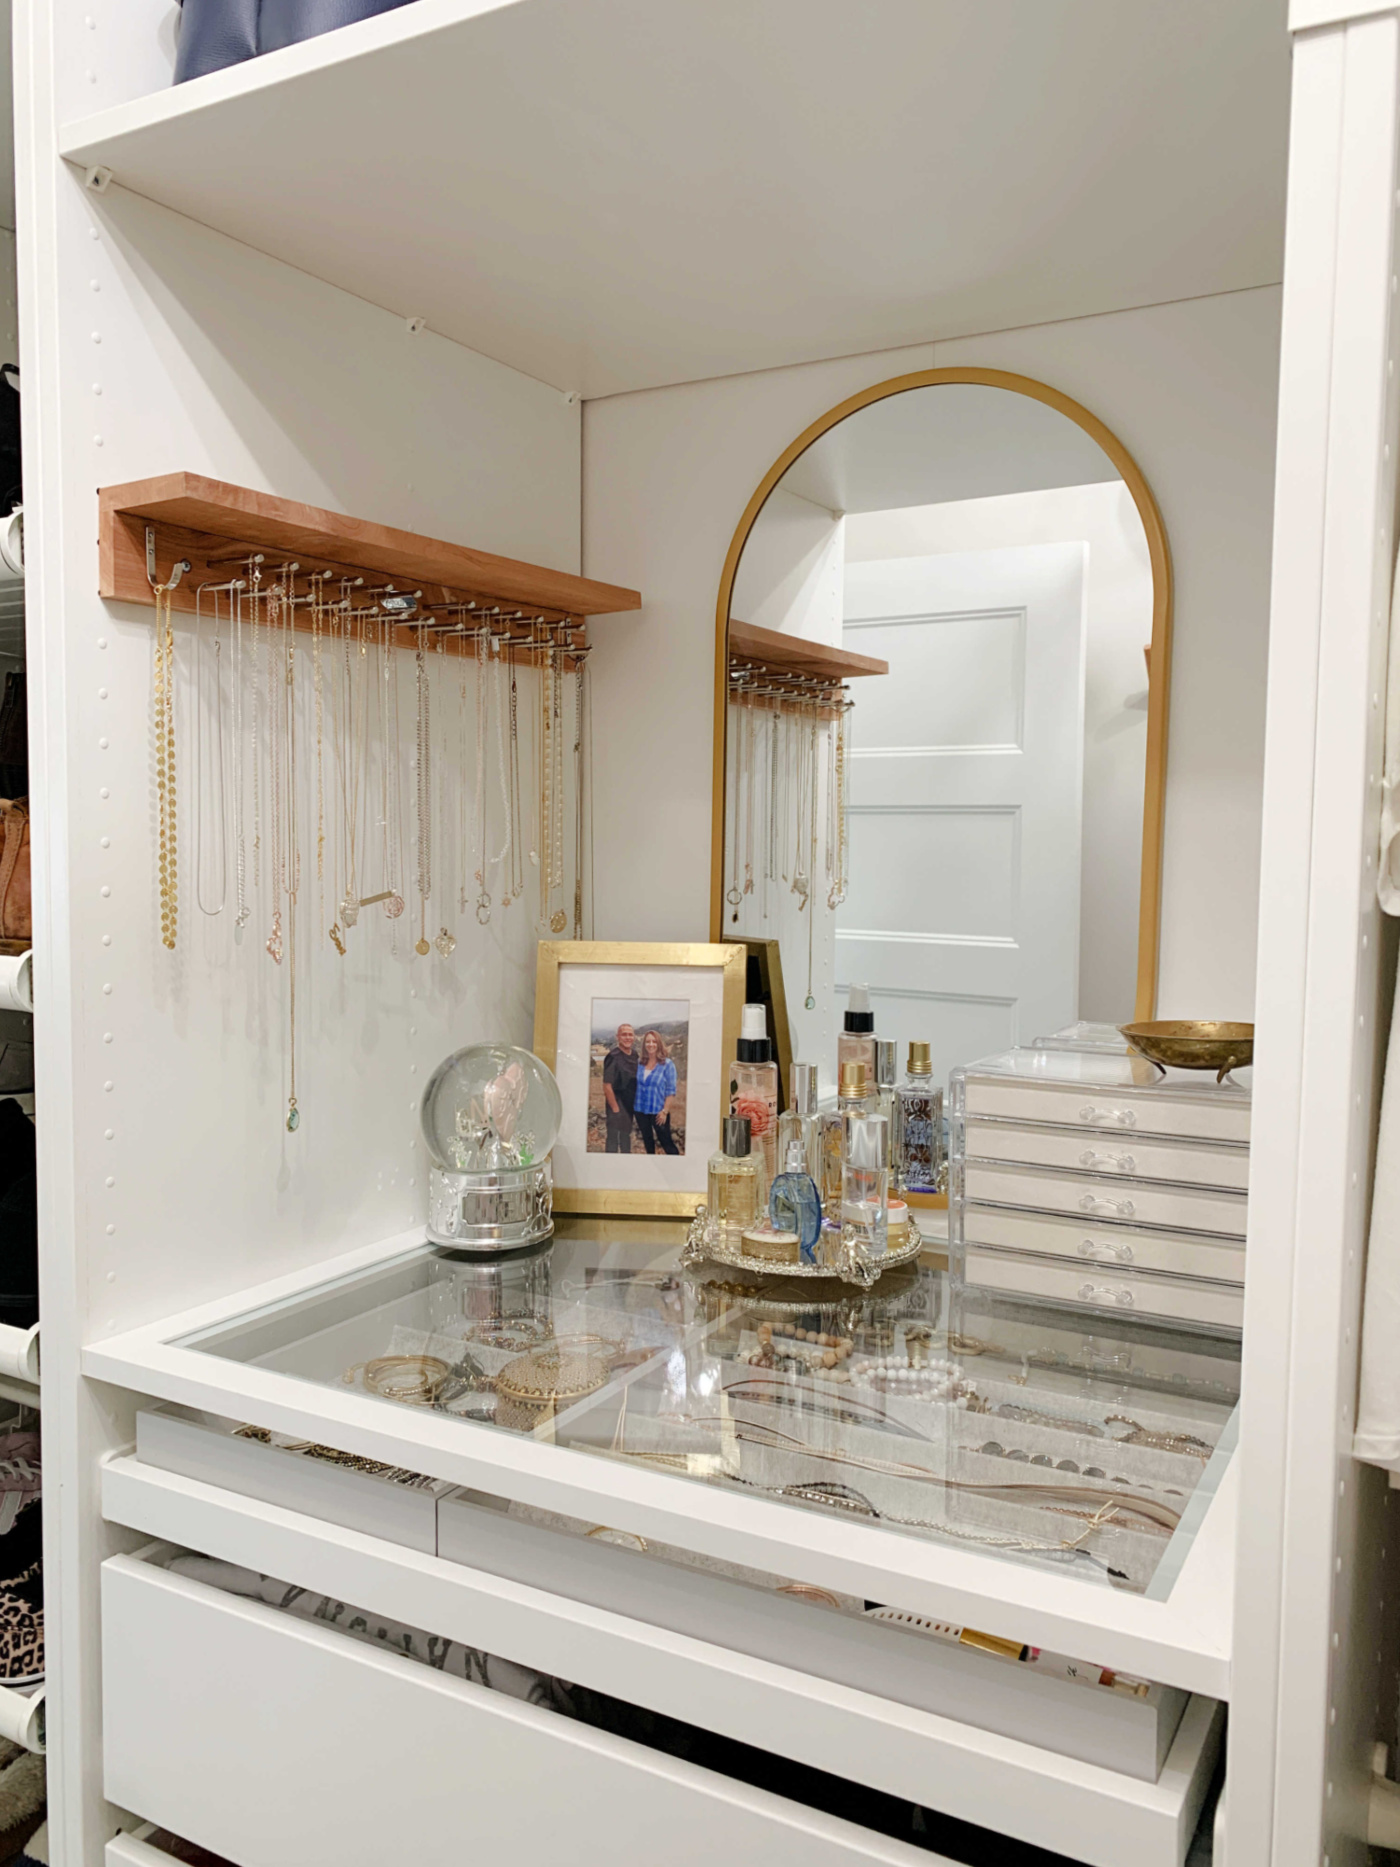
I still use that tie rack as a necklace holder -- love it.
I found a better solution for earrings -- this acrylic jewelry organizer holds a TON of them:
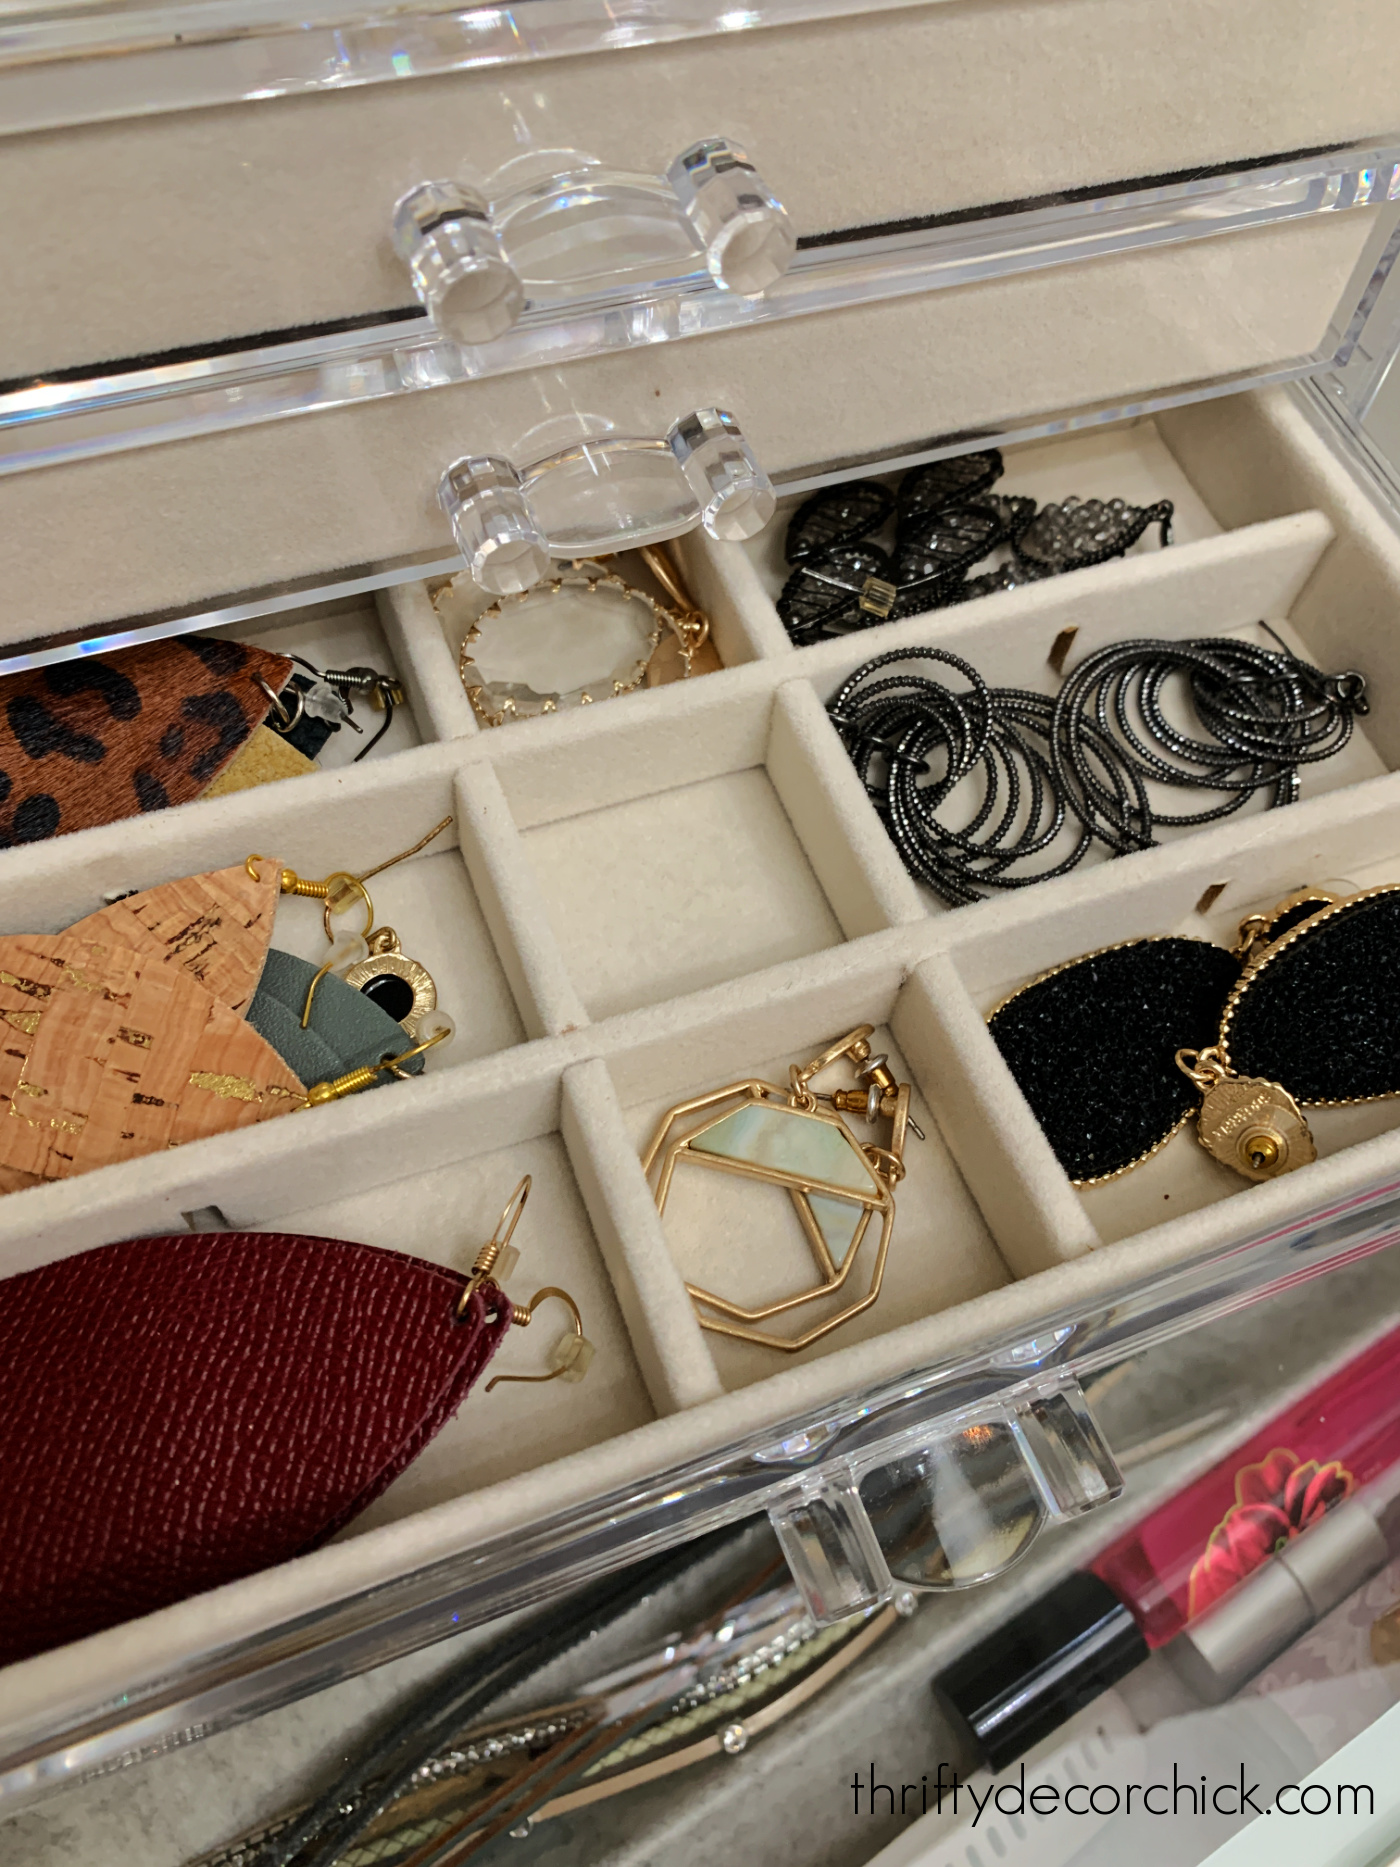
And I used a Komplement pull out tray with soft jewelry organizers for the inside:

I keep bulkier jewelry and accessories in those...I love this thing!
Longer clothes and extra storage
I installed one of the mid-sized Pax units at the back for my longer clothing.
I don't have a ton of dresses, so those hang on the right and longer cardigans and jackets are on the left of that section:

One of the Komplement options is an "L" shaped section you can attach inside the built ins.
This allows you to use what would be wasted space under shorter clothes:
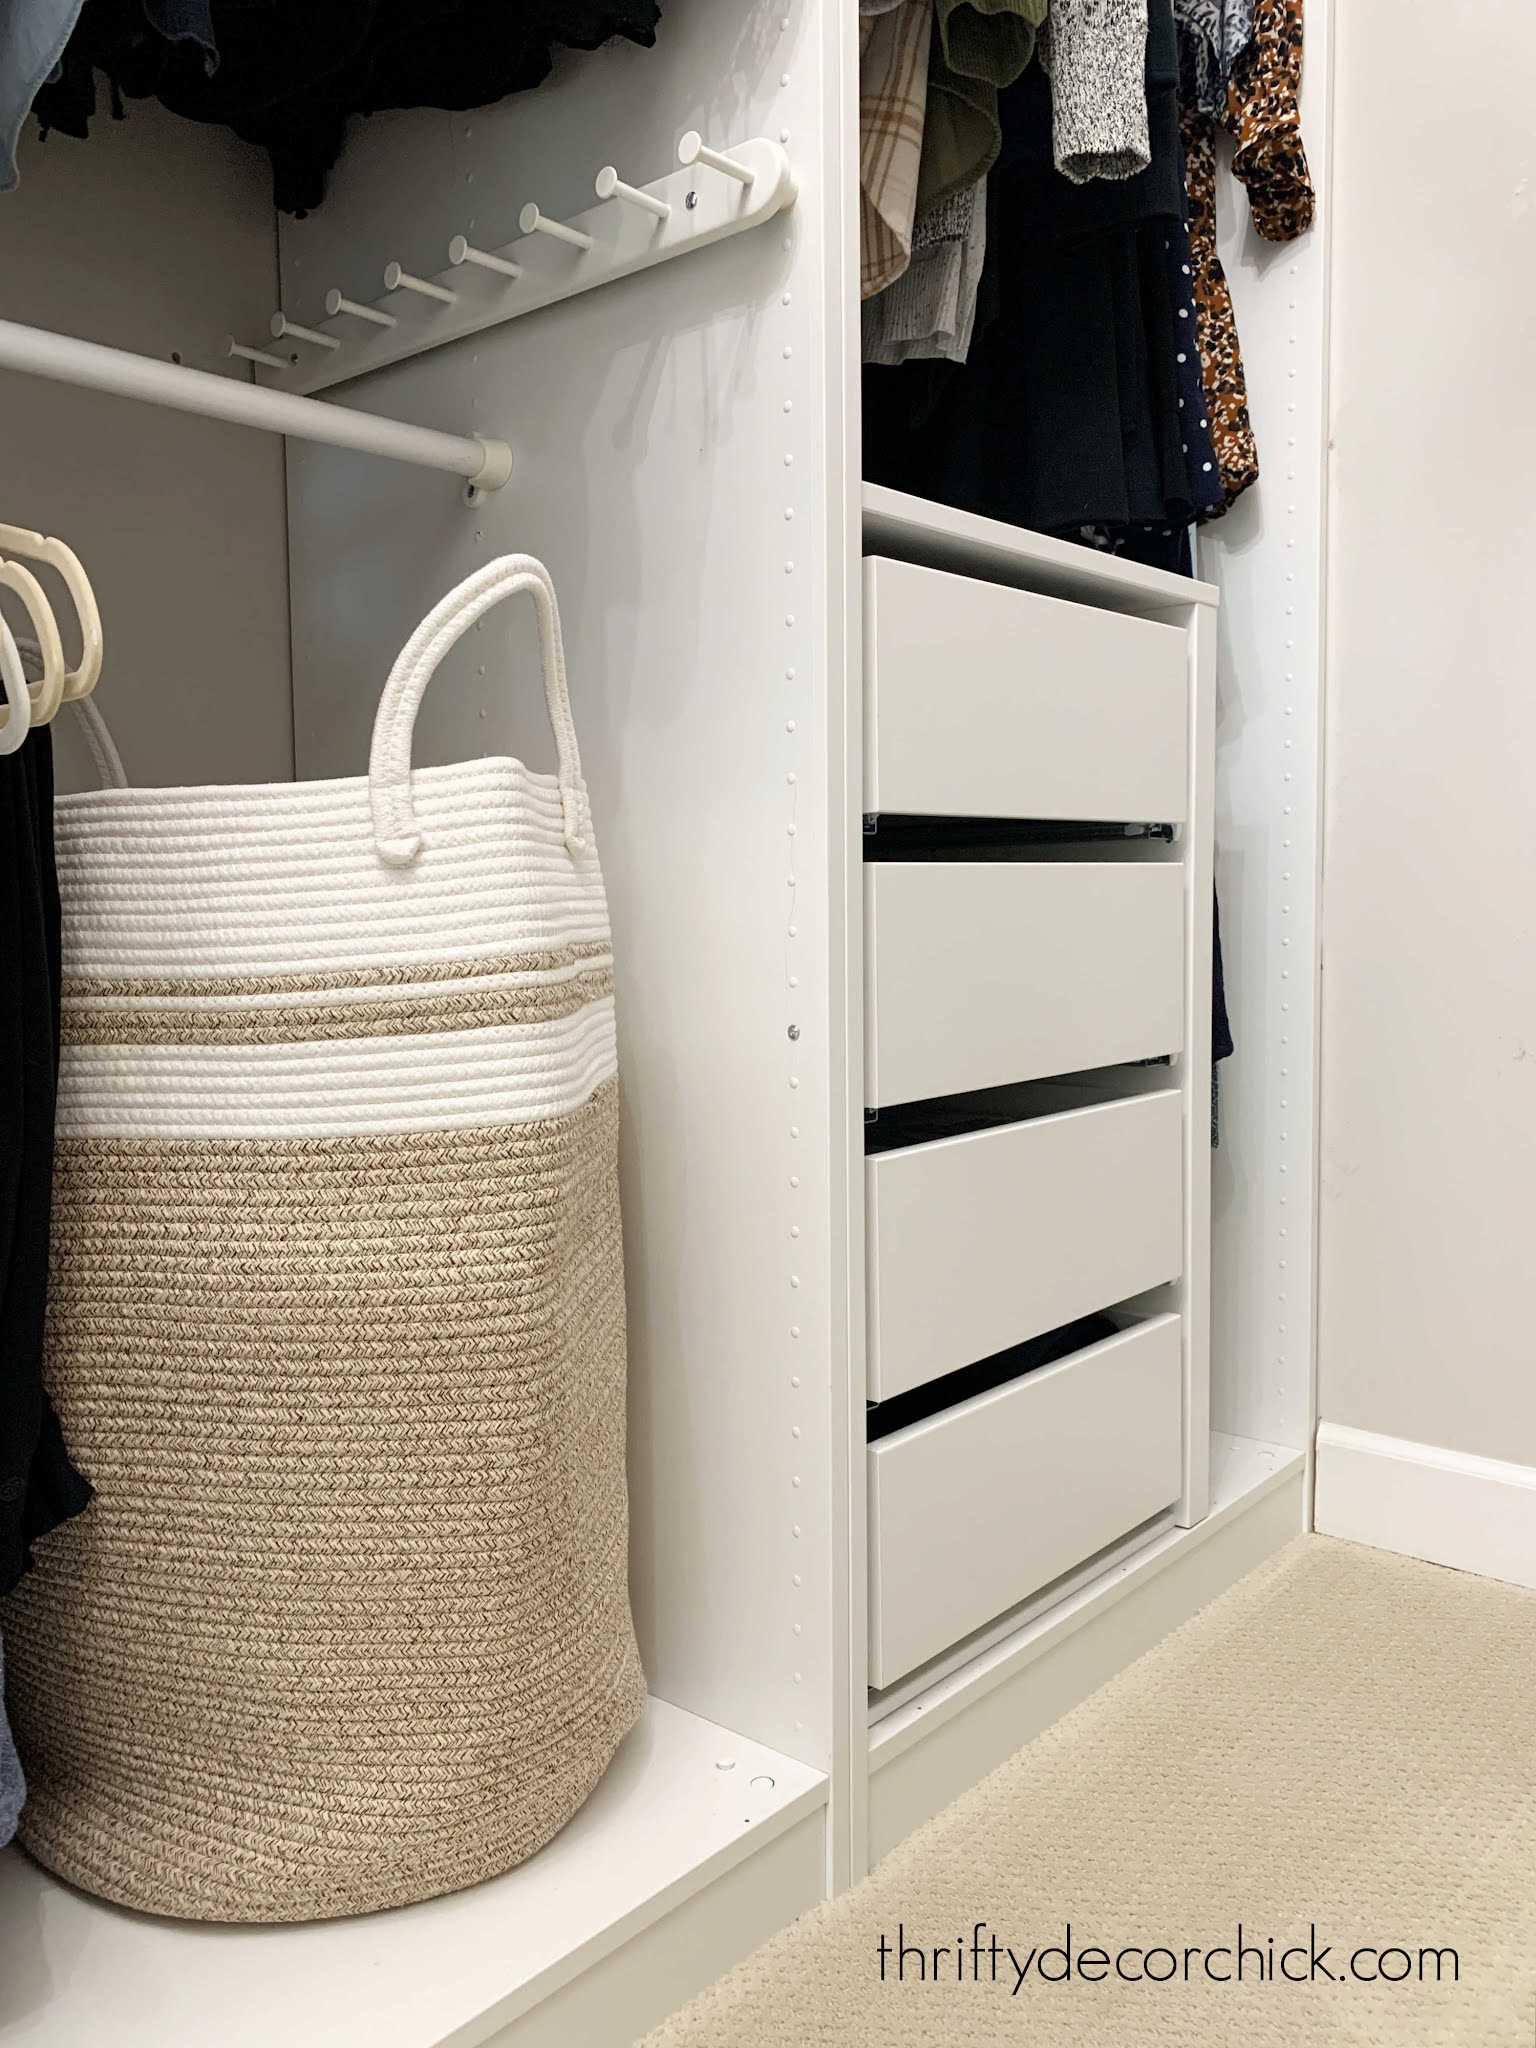
I LOVE the extra drawers! I use those for all kinds of random stuff -- clothes that don't fit just right, slippers, all kinds of odds and ends.
I store my purses (large ones are out, smaller ones are in the storage containers) and other random items at the top on the Komplement shelves:
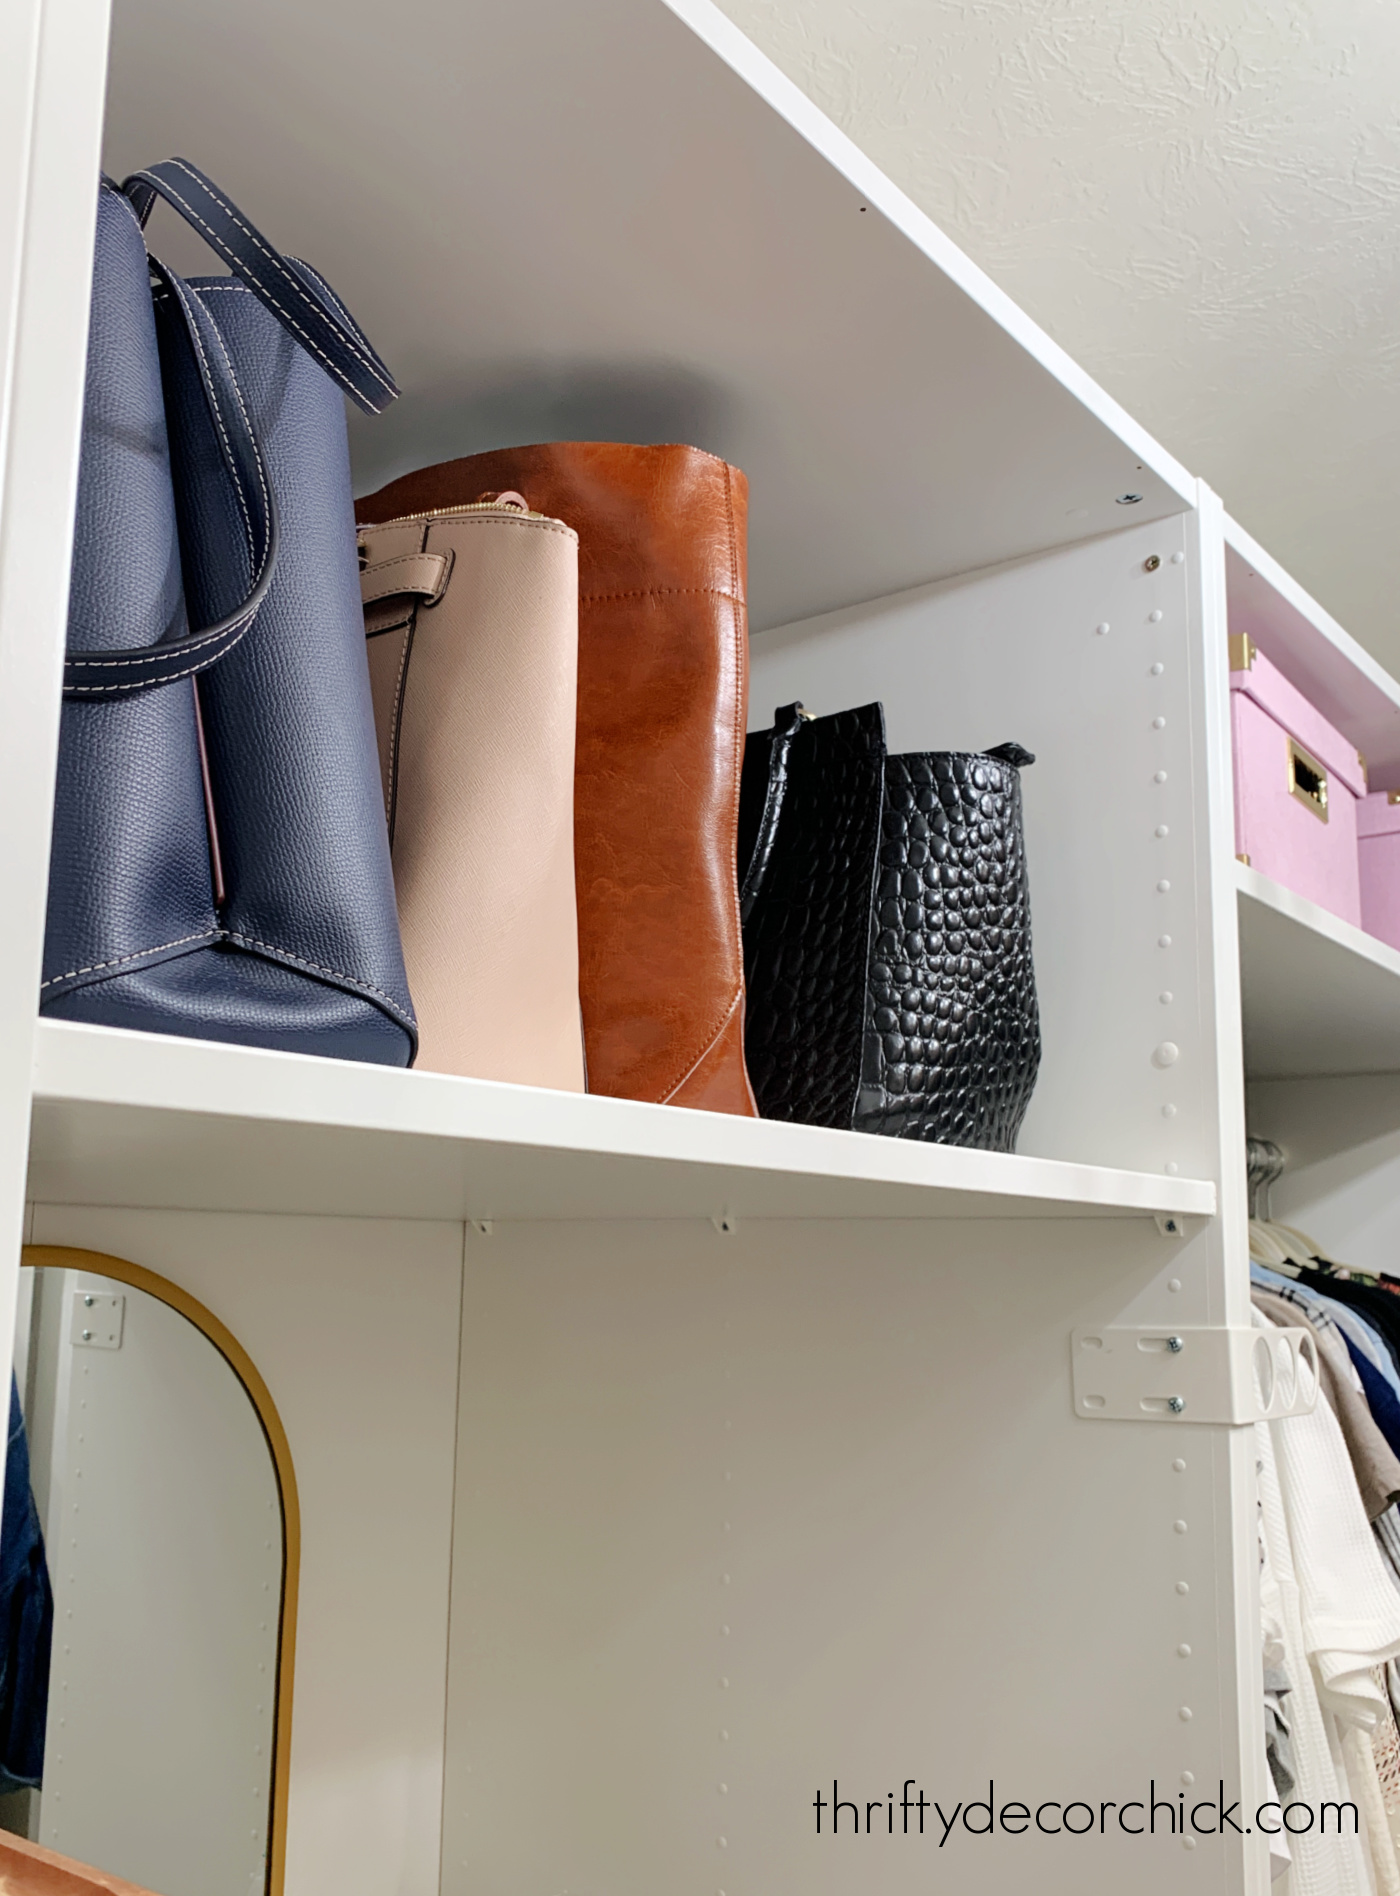
I don't need to access those much so they are up and out of the way.
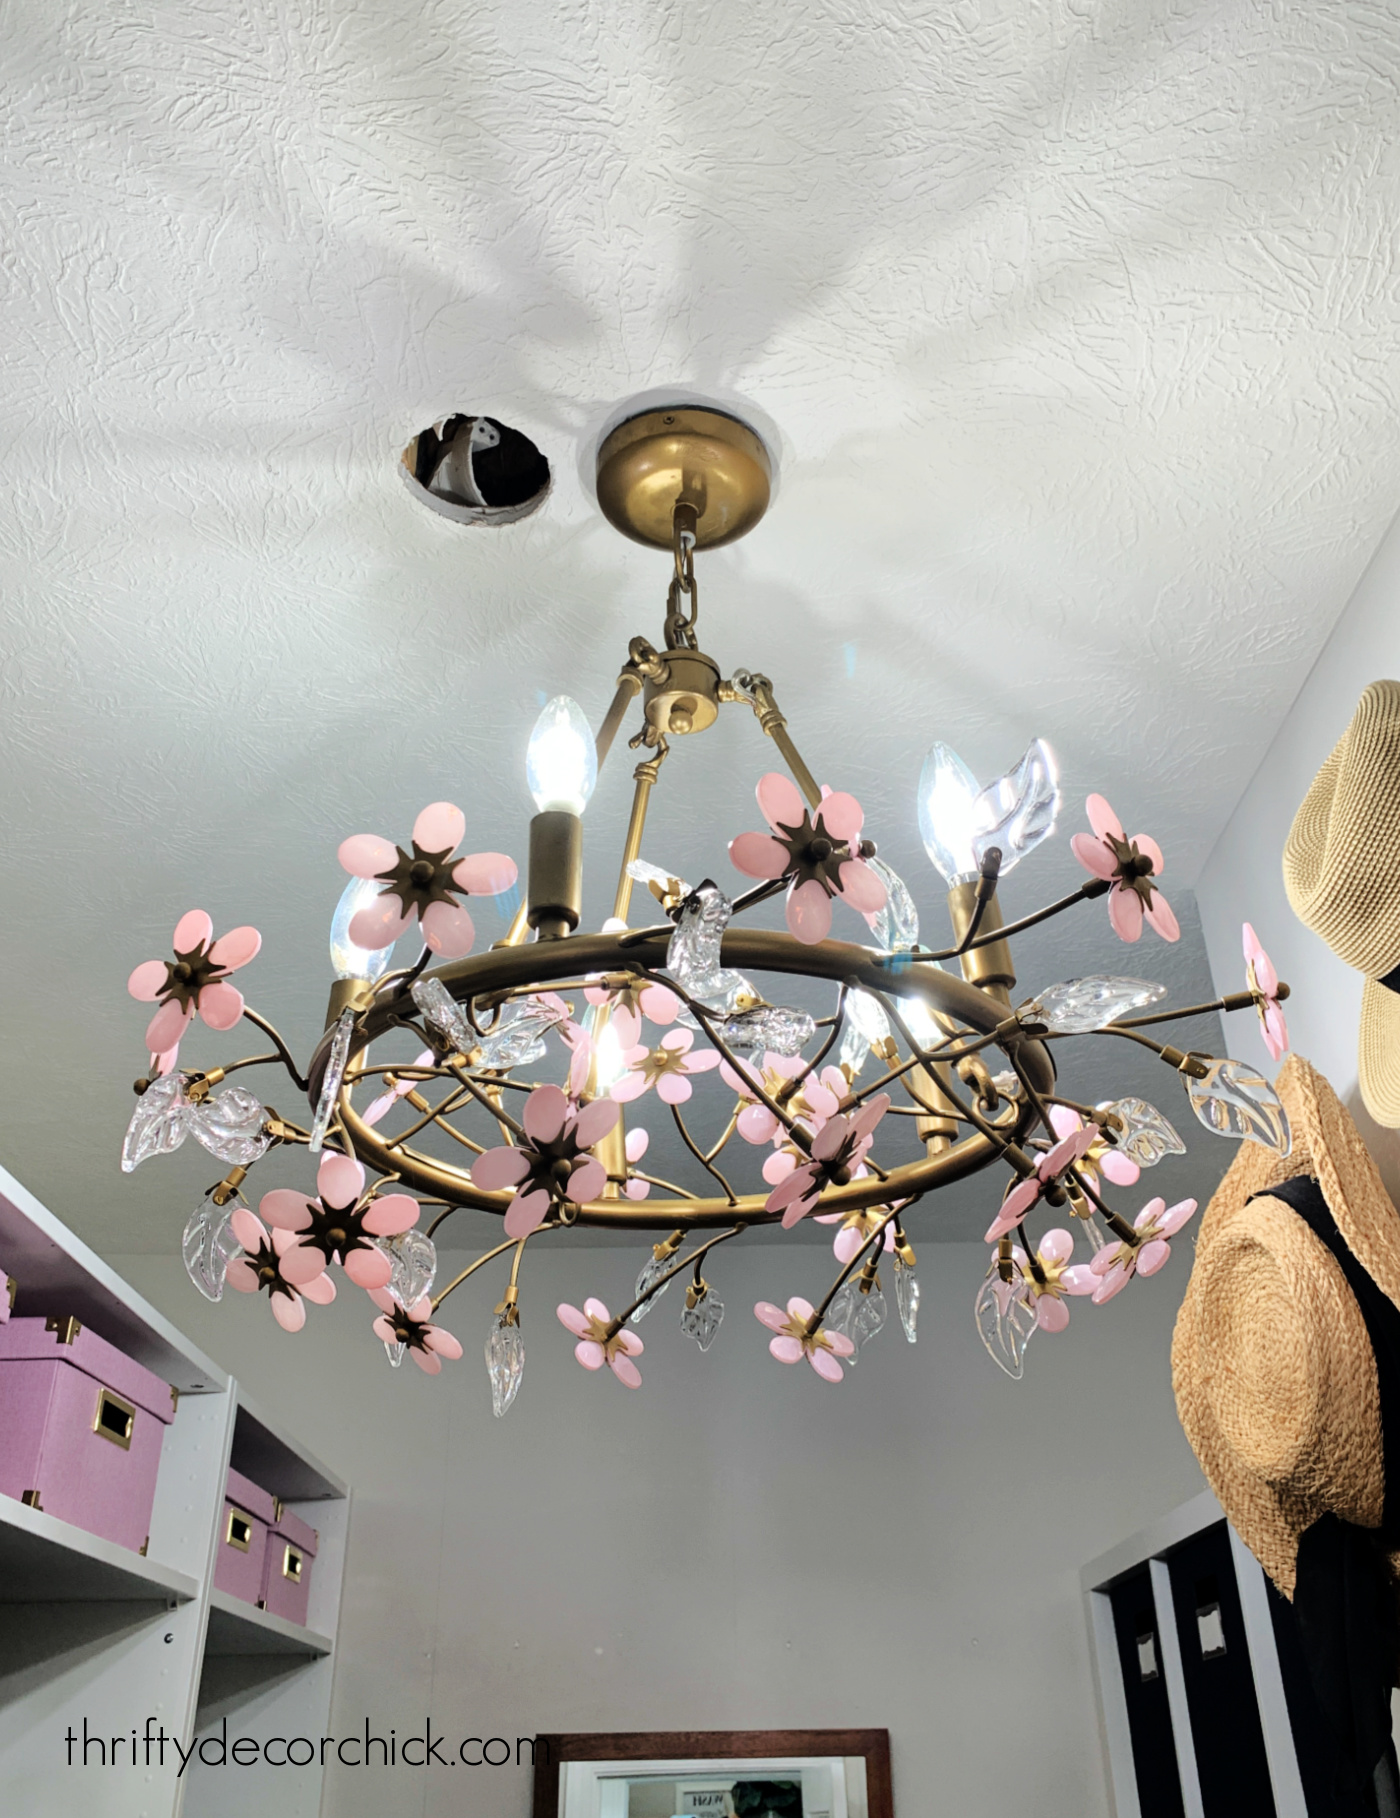
My splurge for this room was this Grace Flower chandelier from Pottery Barn:
As you can see, I had to move the light to the middle of the room. Adding the units on the left threw off the center of the ceiling.I still need to cover that hole! ?I knew as soon as I saw that fixture I knew I wanted to use it in here! I love how feminine it is...the flowers are so pretty.Thankfully I got it on sale, and then for awhile it disappeared off of their site so I thought it was discontinued.But it's back and they have a gorgeous flush mount version as well.This makeover required a ton of work and patience! Of course with all of their items, you have to build the IKEA Pax system before you can install, so that adds some time and effort.It's worth it because you're able to create a custom closet for way less than you'd pay elsewhere!Because stock is harder to come by lately, you may have to wait for items or change your design to use what is available.This took me WAY longer than it normally would just because I had to wait for so many items to come back in stock.But it was worth it! I can't even tell you how great it is to have this organized and pretty space! It has changed my days for the better in so many ways!Here's another look at the before and after shots of my closet!First, the underutilized back corner:And now with the wall of cubbies and shelves:The other side of the room was the real pain in my butt before. All that space and wire shelving:And now, so organized and pretty!:
My IKEA Pax closet is thisclose to my dream closet...but I'm not quite done with this room yet!
I have a bunch of ideas in mind to add a custom look to these IKEA Pax units. I'll be adding baseboards, crown molding and trim for one.
I plan to add a few other small additions to dress it up just a tad as well.
I will share that process soon!
Never miss a post by signing up to get posts via email.
Via https://www.thriftydecorchick.com/2021/11/diy-walk-in-closet-makeover-reveal-with.html FIVE ways to build DIY open shelves for your kitchen for both light and heavy duty needs.
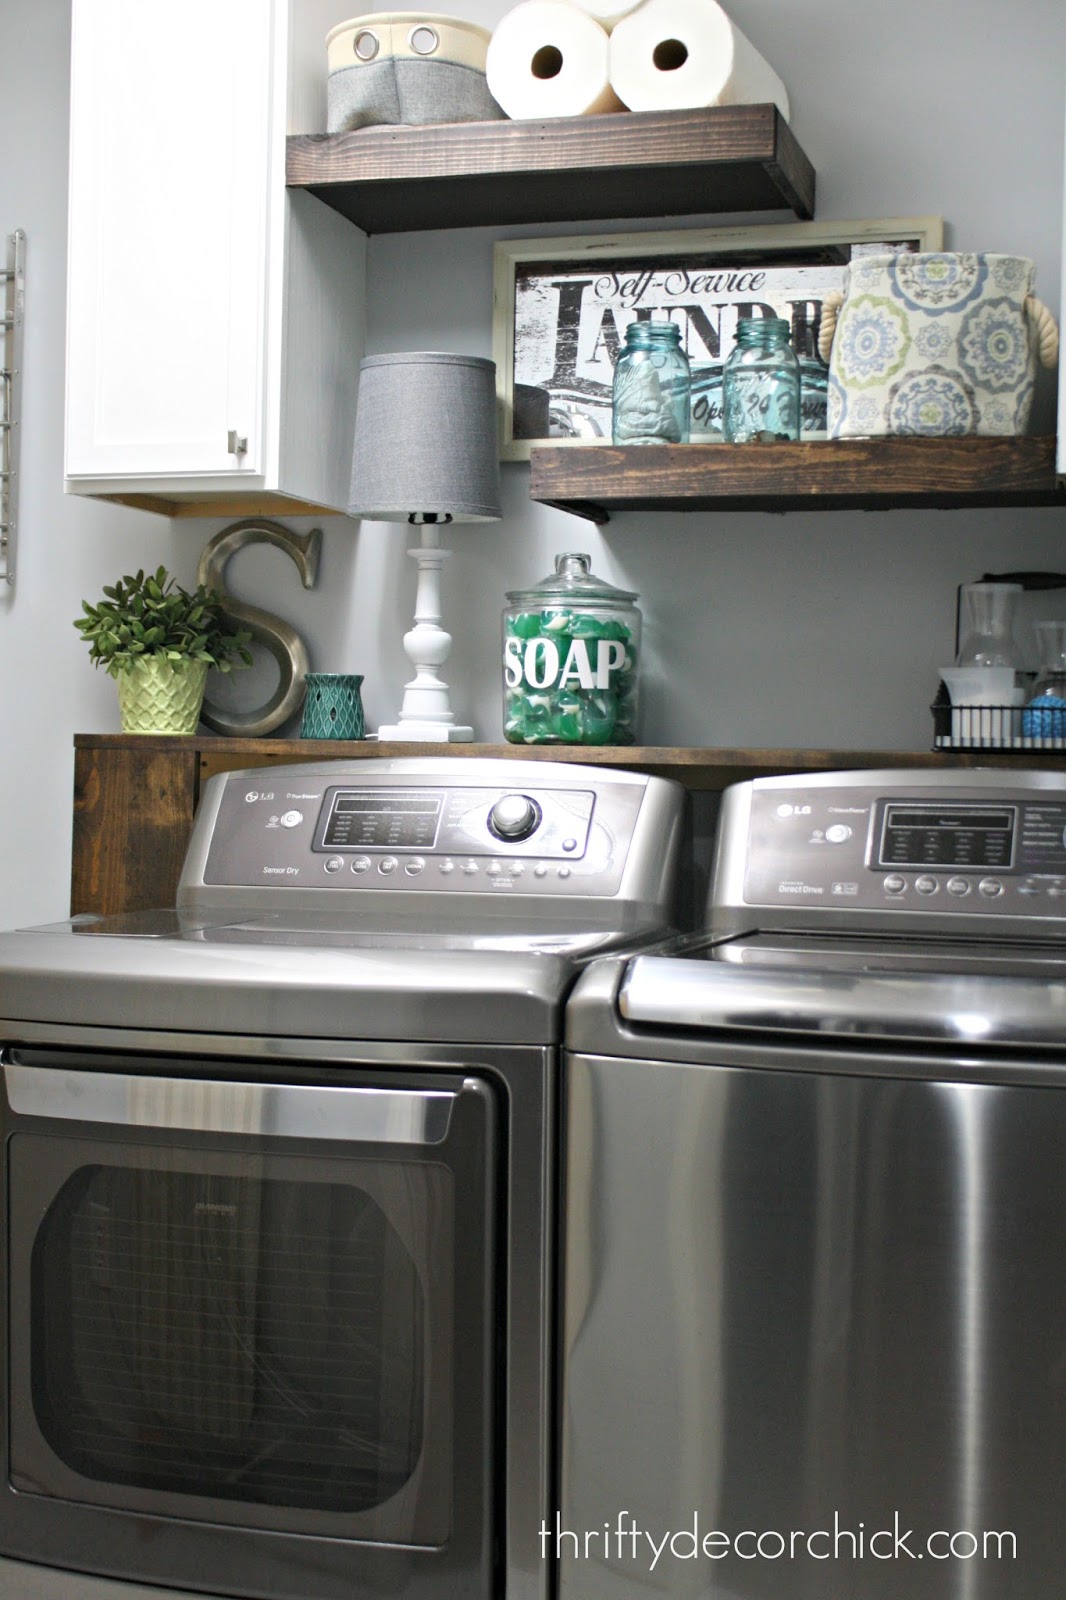
Do you want to add beautiful floating wood shelves in your kitchen?
They add a lovely custom touch to a space, but you'll need to make sure to use the correct tutorial if you're building these yourself!
Open kitchen shelving needs to be sturdy enough to hold the weight of dishes or decor.
I finally built the thicker, open shelving in our kitchen that I've imagined for years! I'm sharing how I built those and four more ways of building floating shelves for any room.
When we were building our home, I knew I wanted to create a little spot in our kitchen where I could add decor and some fun touches.
In our last kitchen, I removed some of the upper cabinets and replaced them with a gorgeous wood hood vent and a couple open shelves with metal brackets.
I LOVED them!:

If you have enough cabinet space elsewhere, they are a great spot to keep items like plates and bowls that you reach for most.
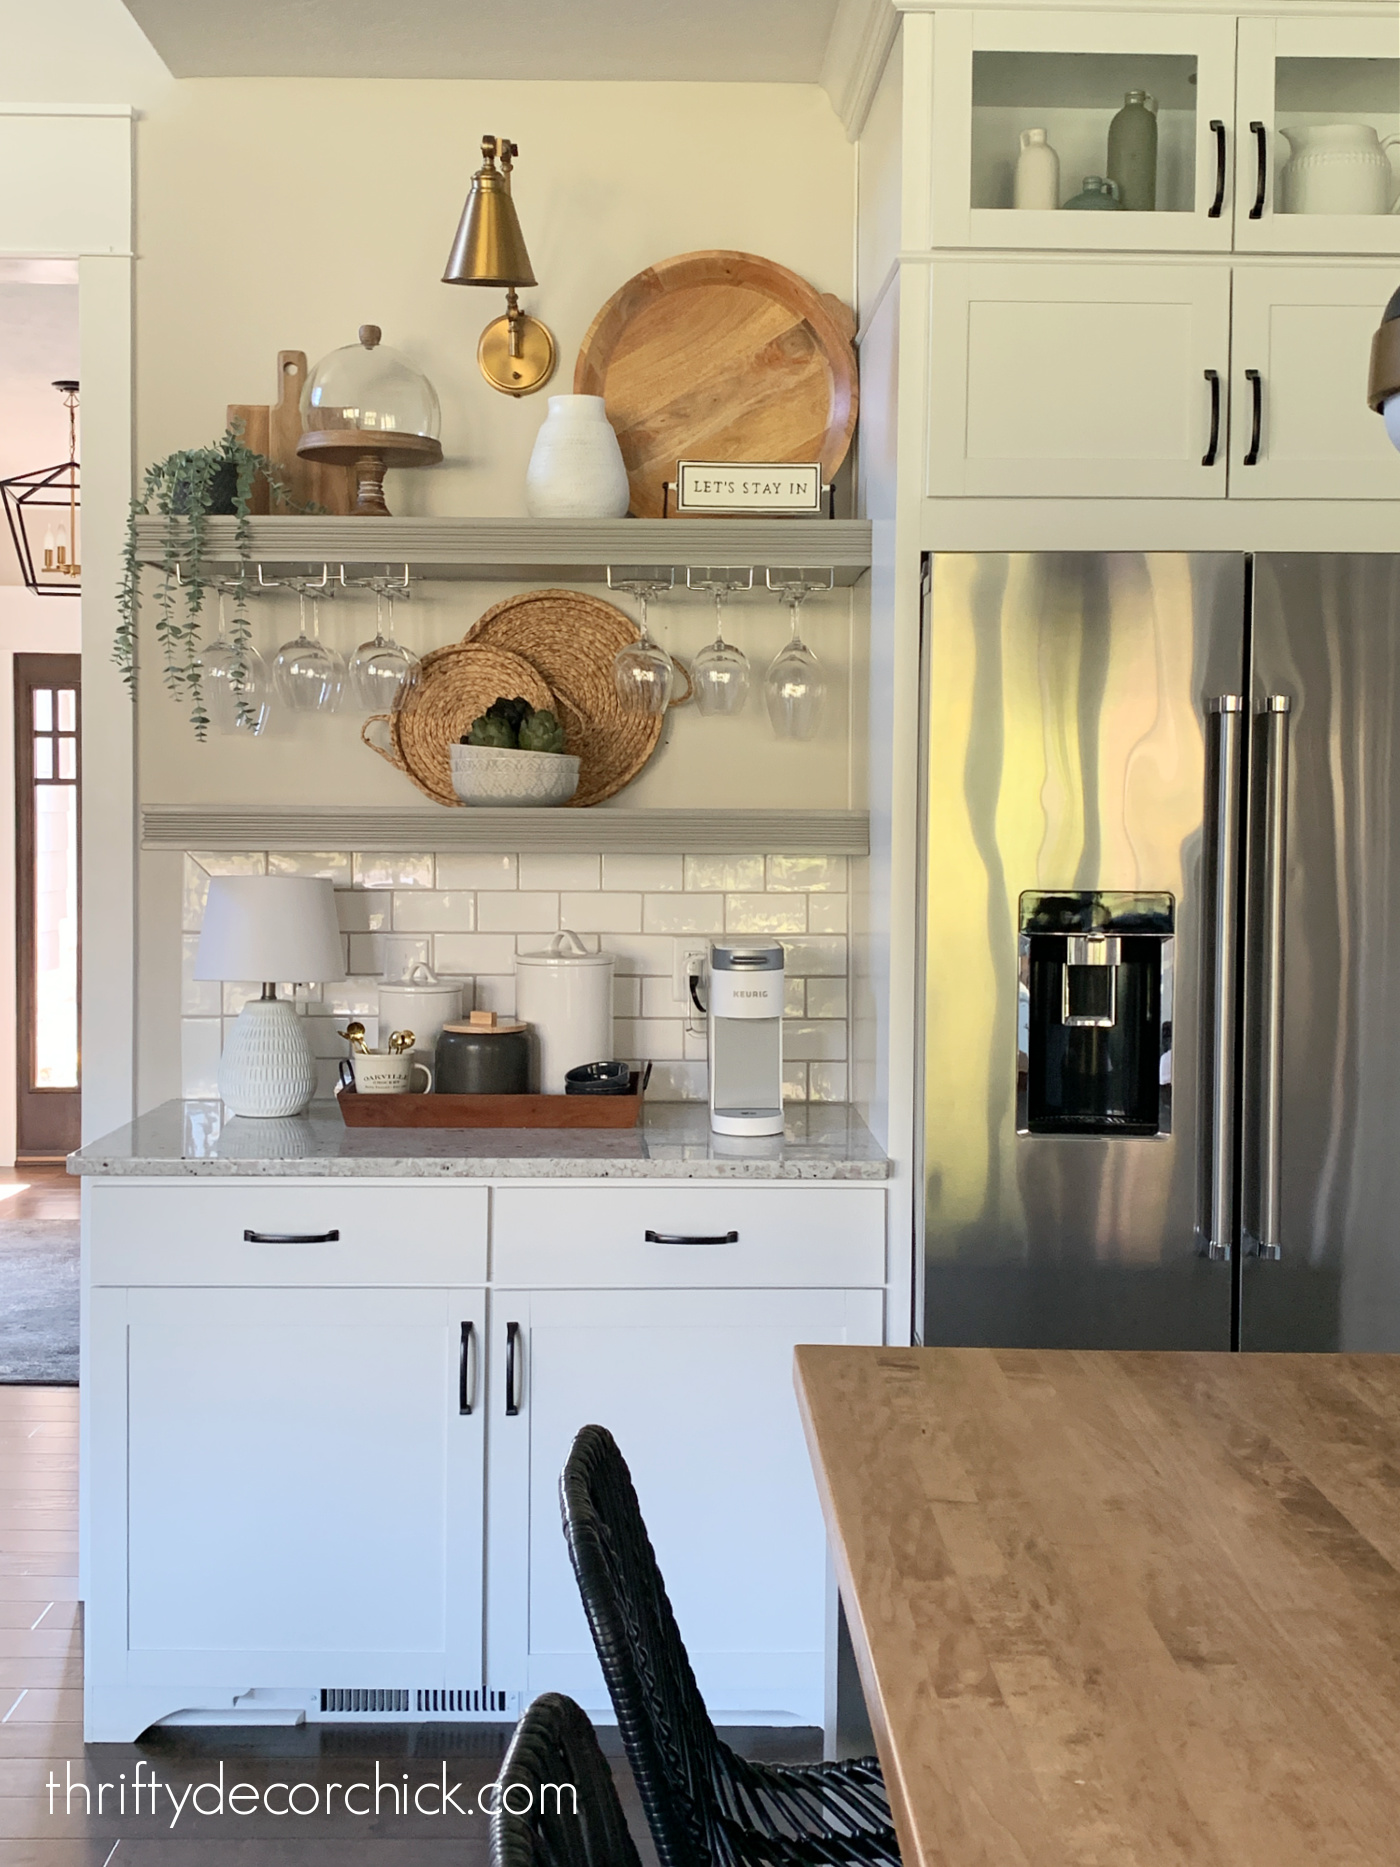
We had the perfect spot next to our fridge -- so instead of a set of upper cabinets, I had the builder leave this part open, with just a sconce instead.
I later added these super simple shelves made with 1x12 wood boards and some strong metal brackets:


This post may contain affiliate links for your convenience.
See my policies and disclosure page for more information.
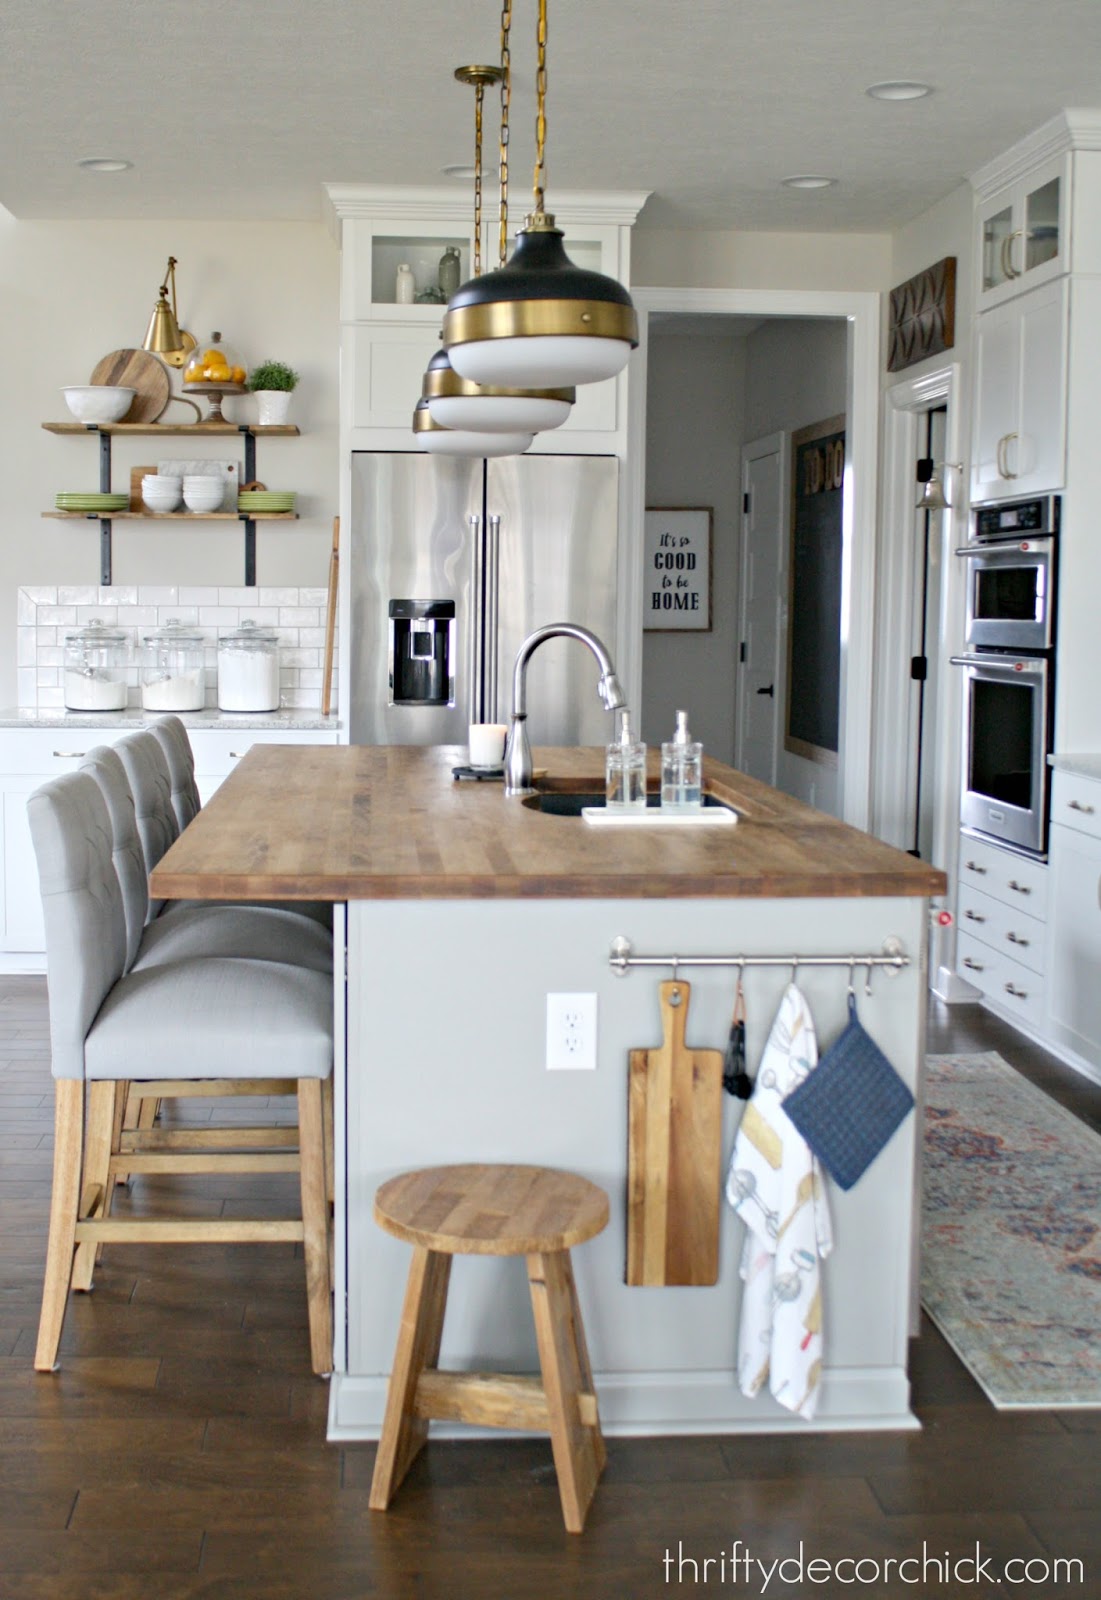
As we've lived in this house, we realized we could use just a bit more storage for our wine glasses. When we entertain, those are one of the things we reach for most often.
We considered adding skinny cabinets in that spot, with a couple small shelves in between.
But it was going to be SO expensive. It's not as simple as hanging cabinets, since we have the uppers with glass and lighting inside.
We'd have to have more electrical run for the upper cabinet lighting, plus with the cabinets and crown, it was way more than I wanted to spend.
Plus, I have an idea for big project I've been thinking about for YEARS...and cabinets there would make it impossible.
SO. I set off on a mission to build new shelves, but this time I wanted them much more substantial. And SUPER strong.
I've built open shelves in many ways over the years -- before you start this DIY, you'll want to figure how how you're going to use them.
What kind of wood shelves to you want?
There are tons of options when it comes to building wood shelves -- the right method depends on a few details:
*******************
Hanging shelves with decorative brackets is by far the easiest DIY option!
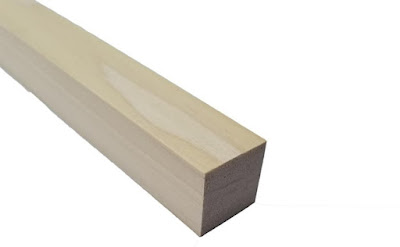
If you want thicker wood shelves made with just a piece of wood, you can use thick wood from a lumber yard. Most large "box" hardware stores don't carry quality options bigger than 1.5 inches.
Keep in mind wood labeled "one by" is really 3/4 inch thick, not one inch. This goes for a 2x board and so on...
A one inch thick board is actually .75 or 3/4 inches. A two inch board is really 1.5 inches, and so on.
One of my favorite examples of wood shelves like these in a kitchen is Nicole's from The House Diaries:

There are so many beautiful options for the shelf brackets! You can spray paint them any finish or color you want.
This option is by far the easiest! You'll want to use wall anchors if you can't get into a stud, but otherwise hanging the brackets is not difficult.
*******************
For shelves made with a piece of wood that will need to hold a lot of weight, metal rods are your best bet.
If you want a simpler look and want to hang a shelf with no visible supports, you can use hidden steel brackets like these.
They come in various lengths, and allow you to drill the supports directly into studs, so there are no worries about weight or stability.
Those brackets also come in individual options, so you can place them into studs wherever you want and drill into your shelves accordingly. (More on that in a bit.)
Pros and cons of using these metal rods for your shelves:
*******************
If you have two walls on either side, this project is super easy!
Try this method...
I prefer the look of thick shelves that make more of a statement.
If you have two walls or cabinets on both sides, this is a great beginner DIY project!:
I like this method because solid wood this thick is CRAZY expensive (especially with the cost of lumber now).
It's also easy and cheap. It doesn't take much DIY know-how, and you can customize the shelves to any size/thickness you want.
This version is heavy duty and won't budge! These can hold a ton of weight if you use my tutorial.
*******************
If you don't have side support and don't need to hold a ton of weight, use this one!
If you want chunky shelves that don't need to hold a ton of weight, or don't need to come out from the wall a large distance, this is a great option!
I've also used this method when I have support on one side, like a cabinet or a wall.
For this one, I add supports coming out from the wall like so:
You attach the supports to the part that goes against the wall before hanging.
Those hold up beautifully as well!
Click the link below the photos to see how I built each one!
Those work especially well if you don't need your shelves to be super deep.
If both sides don't have support, I wouldn't go much deeper than 8 to 10 inches.
*******************
My current kitchen project called for a method that makes them incredibly sturdy!
I wanted to make these much deeper (you'll see why in a moment) and even stronger than what I've built before.
So, I set out trying to figure a way to make these thick open shelves crazy strong...and I found it!
Instead of metal brackets, I used 1/2 wood dowels, and a bit of additional support as well. The combo made these deep shelves for our kitchen super strong and stable!
1. Figure out the thickness of your shelves
You'll need to do some math (sorry!). Decide on how thick you want your shelves to be first.
Then you can figure out the wood sizes you'll need.
I took some pictures to give you a visual of what I'm talking about.
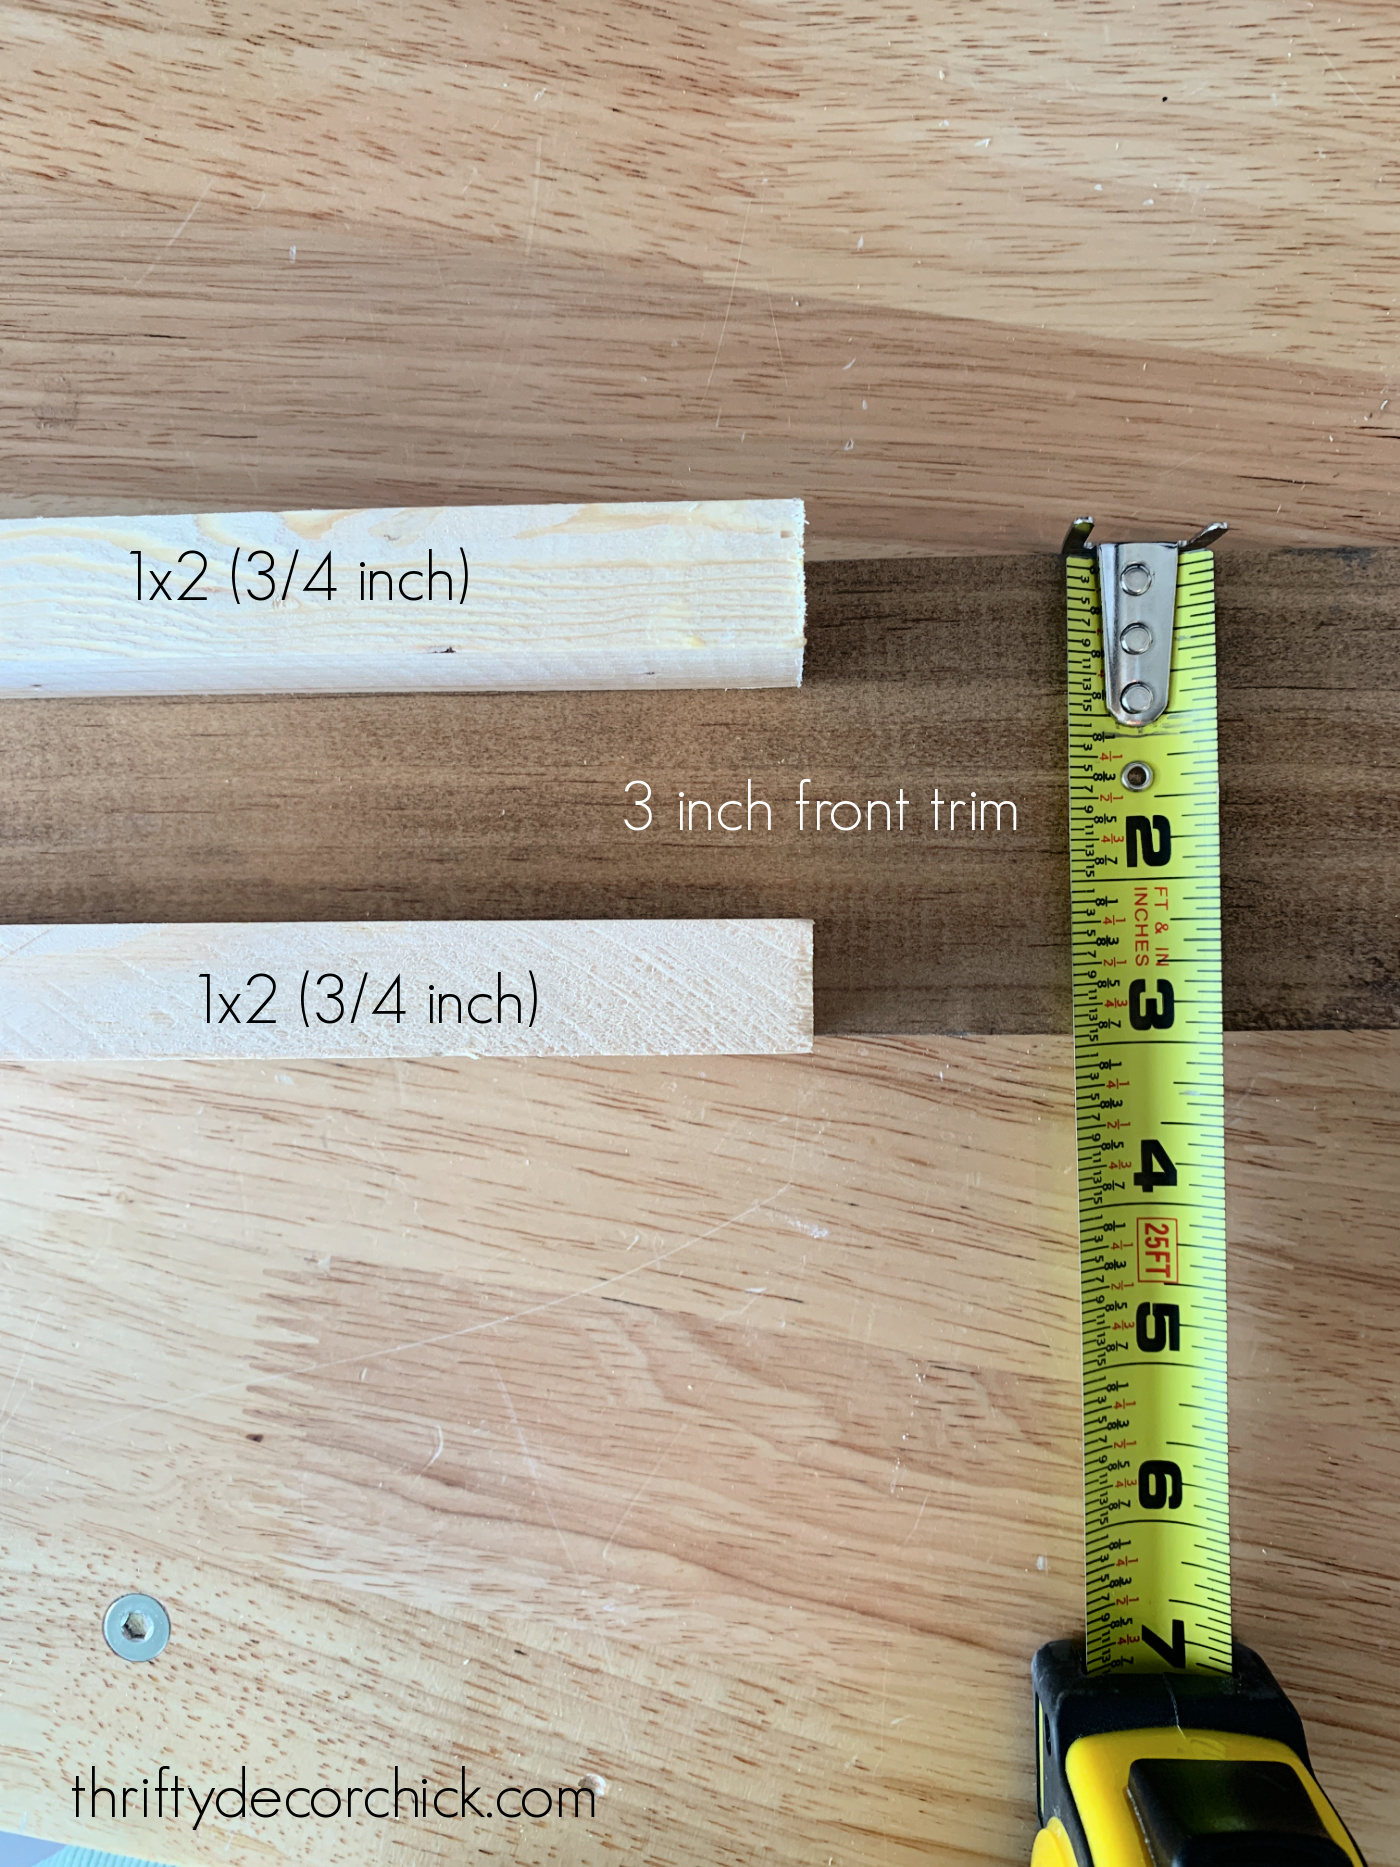
I wanted my shelves to be three inches thick. Typically I would use a standard pine board for the top shelf and the bottom:
You can find these ready to go at the hardware store in various lengths and depths. You can see more about how I build bookcase shelves here!
You don't want to see anything peeking out from the front trim, so your support piece and shelf/bottom can't be more than that size of the front.
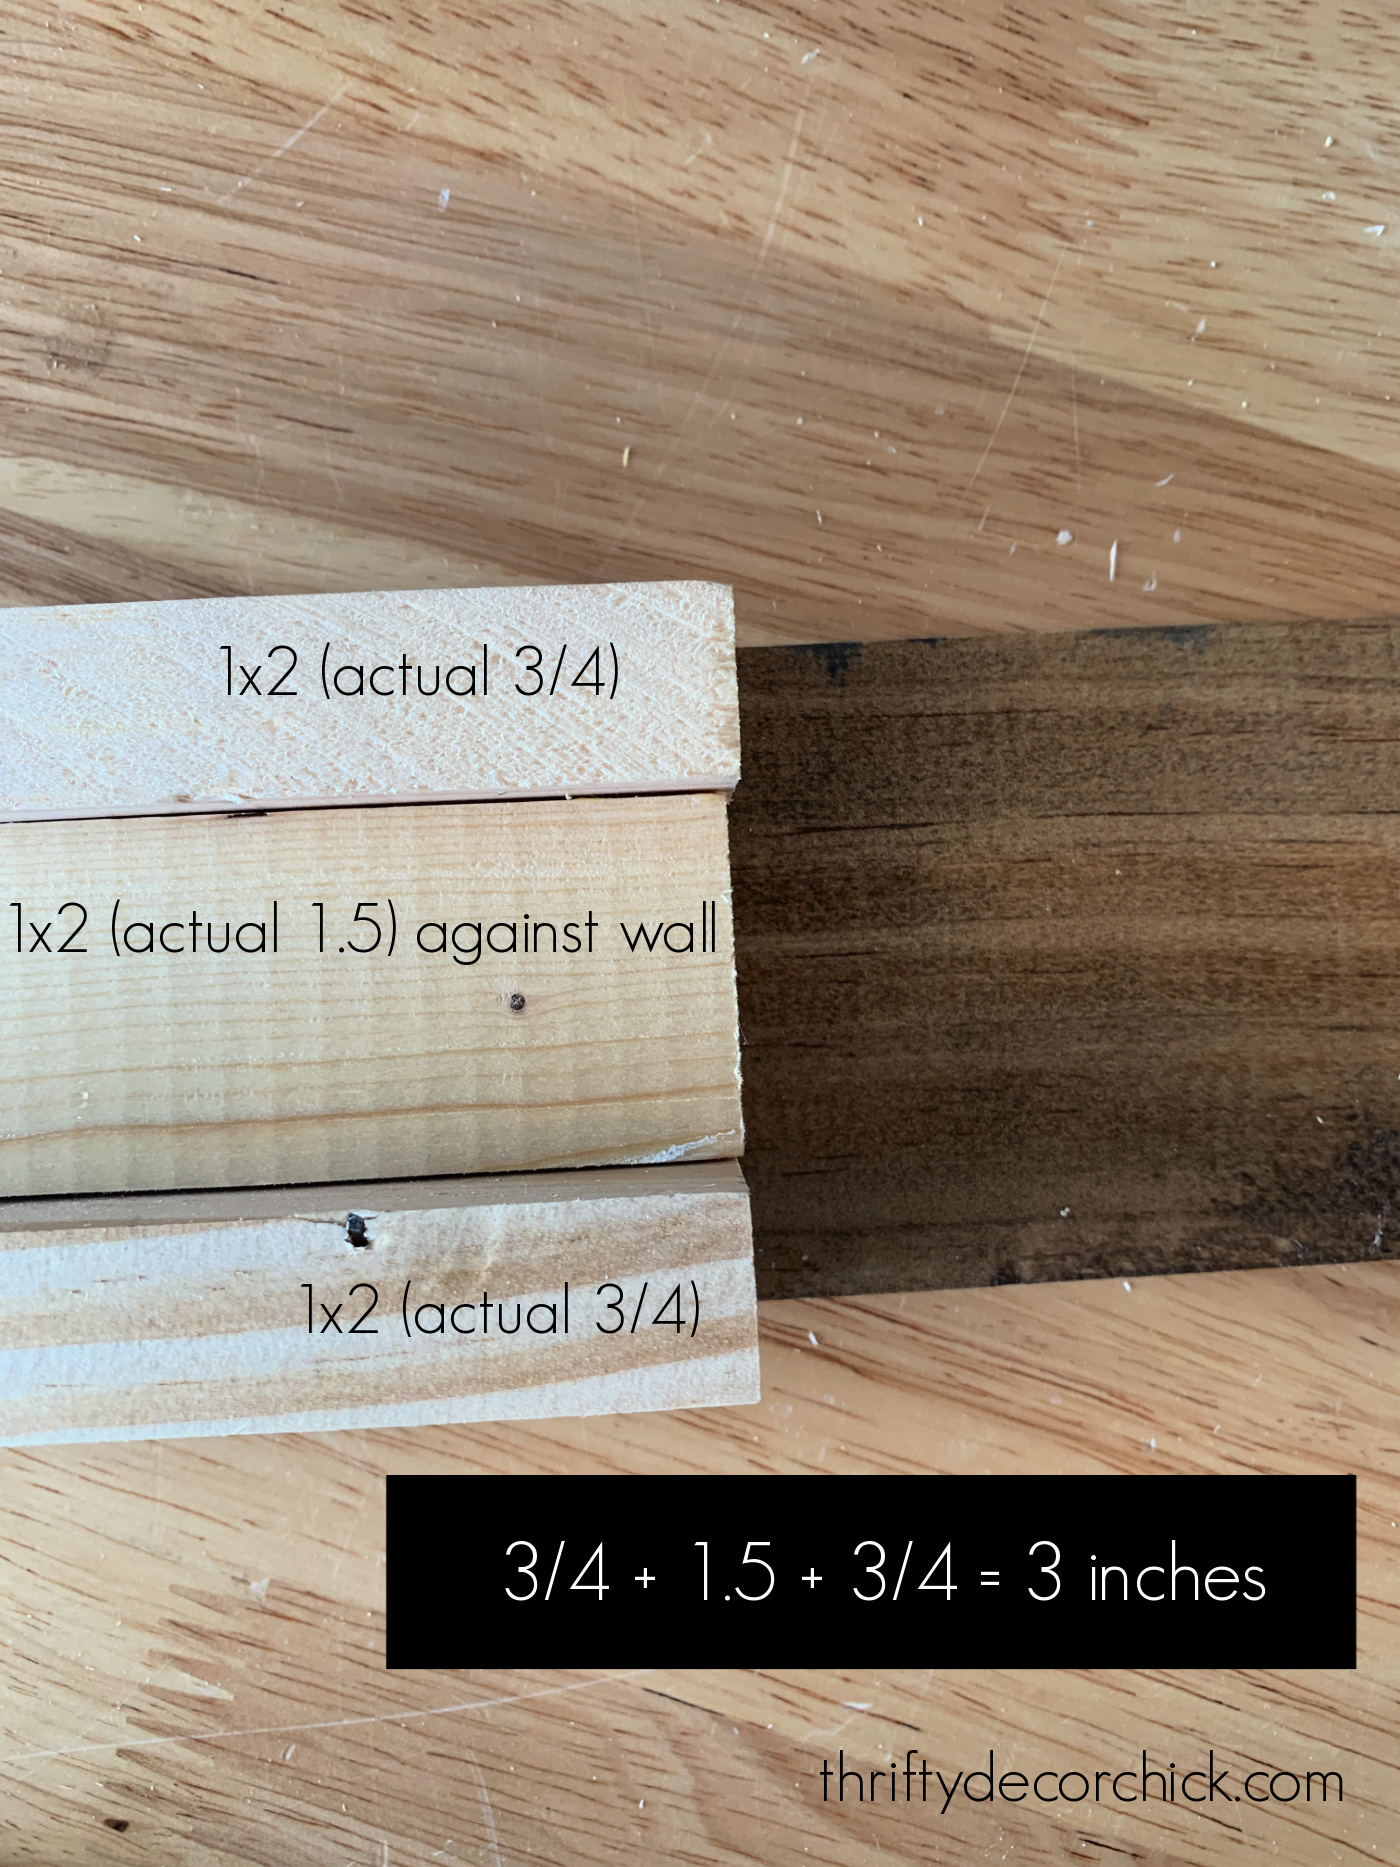
For three inches, it's an easy one -- I would just need to use a 1x2 against the wall for my support:
But I wanted these shelves to be as lightweight as possible, so I decided to use some scrap luan I had for the top shelf and bottom, instead of the thicker pieces I'm showing above.
The really thin plywood that comes in large 4x8 sheets would work as well!
The luan still works, because I could use a 1x3 as my wall support and then use the luan as the top and bottom:

If you're building floating shelves that have support on both sides, or won't be holding a ton of weight, this option would work great as is!
You'll see below that I added a bit more since my shelves were going to be 12 inches deep and needed to hold a good amount of weight.
Secure your support pieces to the wall
I used a stud finder and marked those locations on the wall to hang my 1x3 support board with long wood screws:
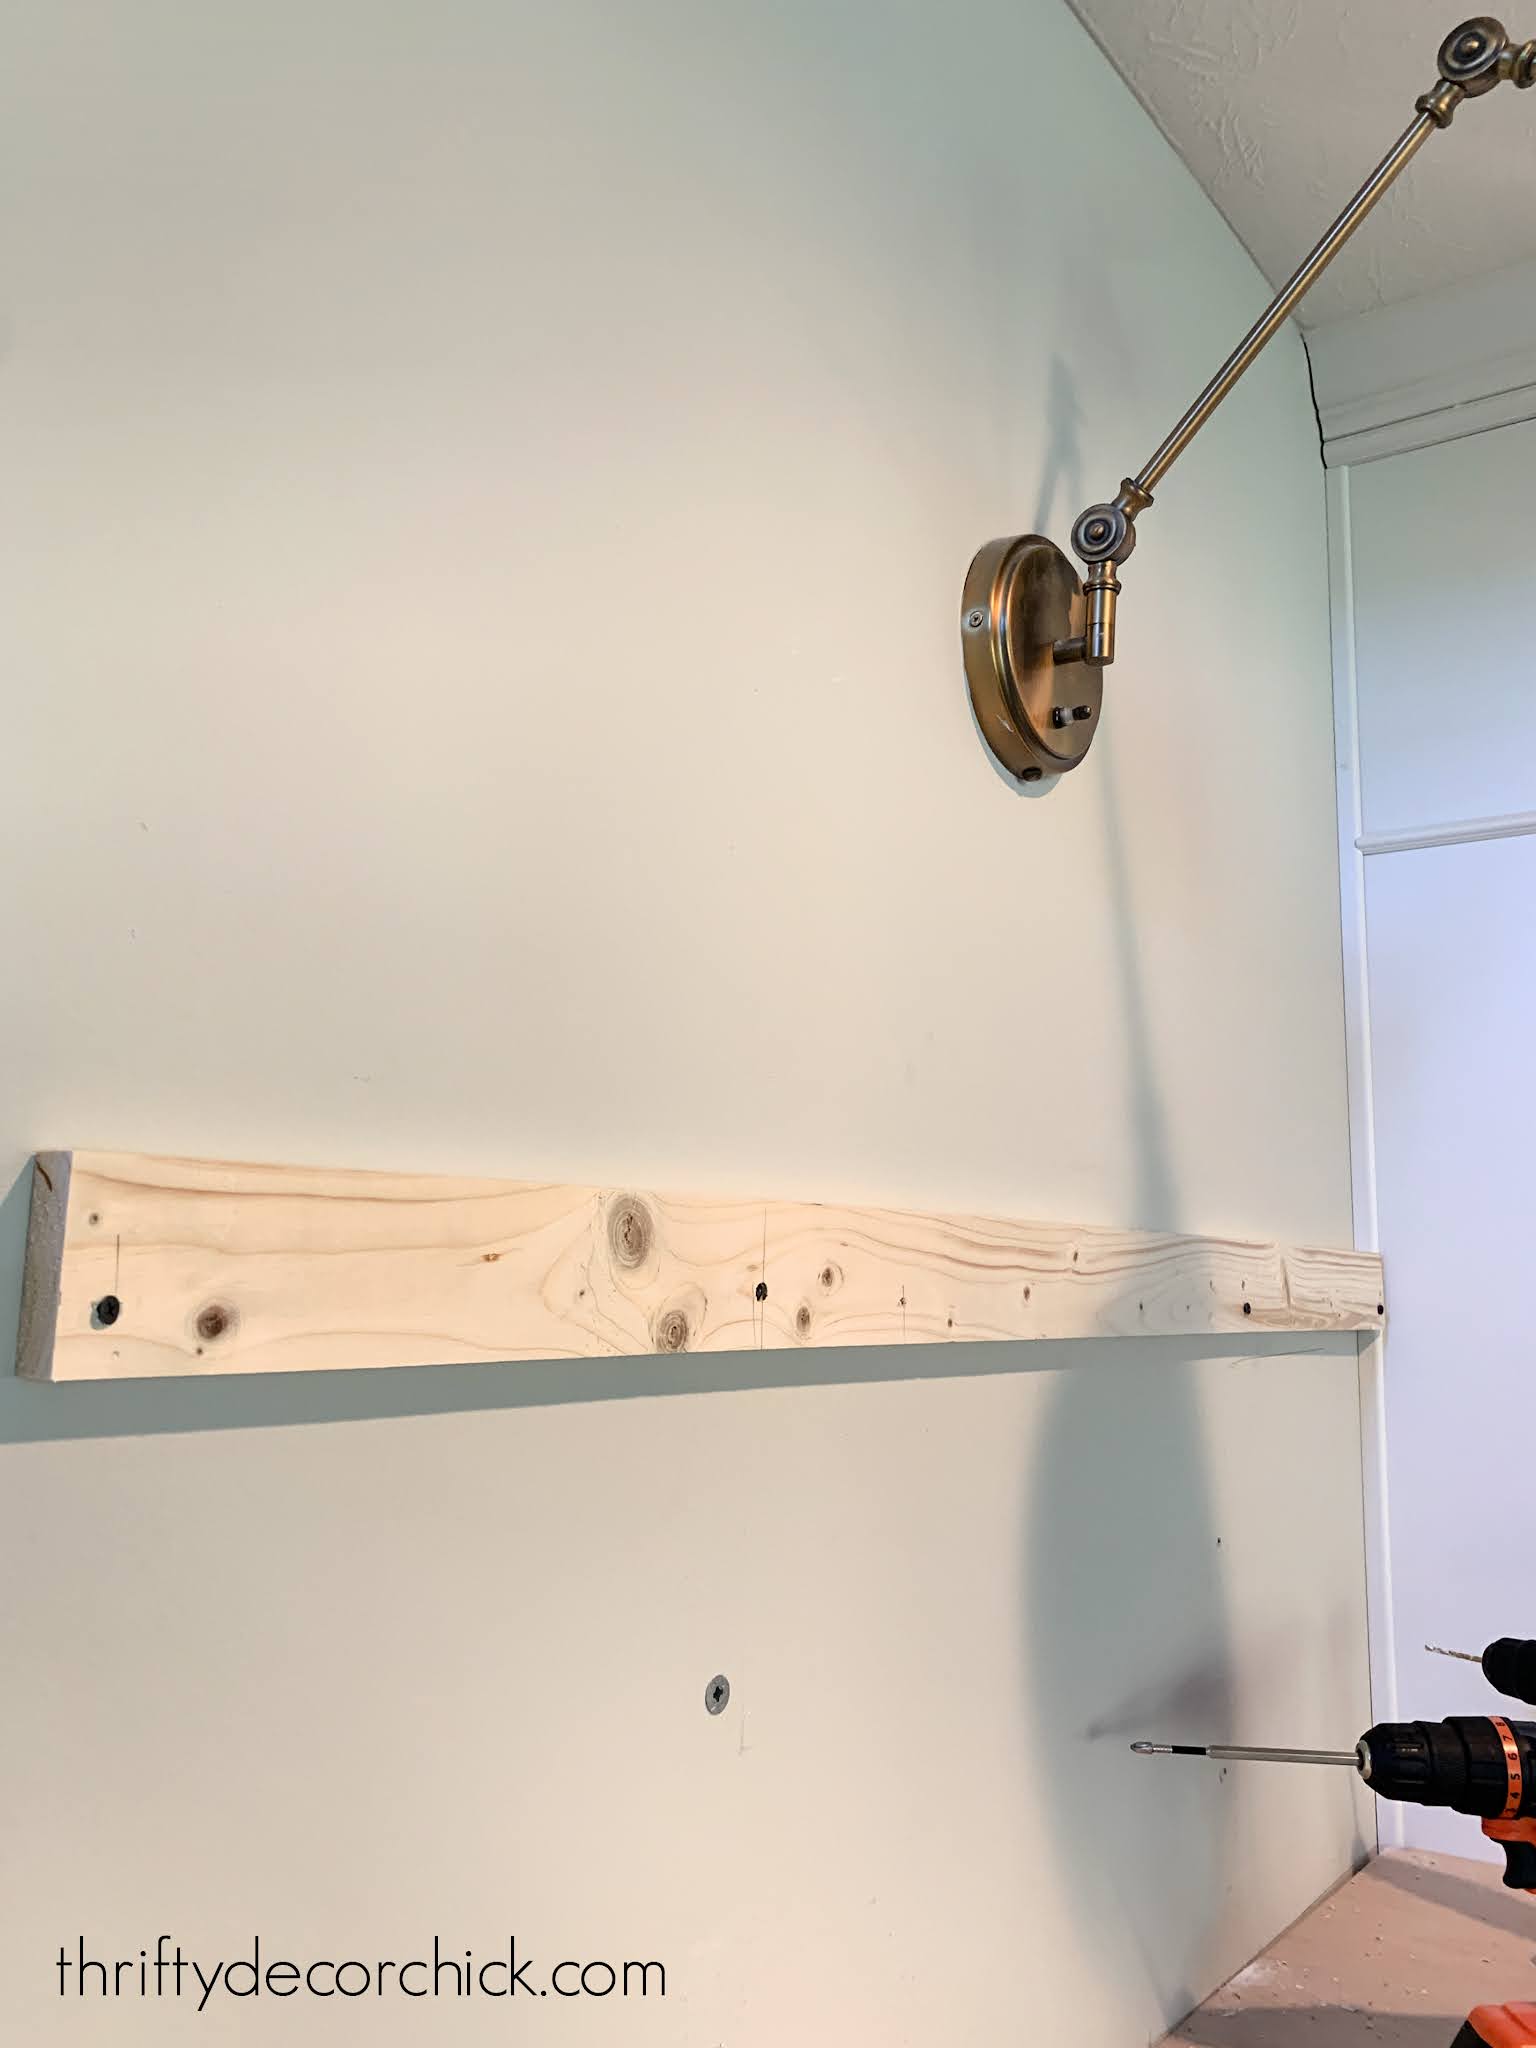
I took advantage of the fridge surround being right there and added a support on the side as well:

Use a level to make sure it is perfectly straight!
I know drilling into your cabinets is terrifying...be sure that these are staying! :)
If you do have to take them down, you can always cover the holes with decorative trim.
Prepare your shelf supports for dowels
I ended up changing the design a bit. Because I was going to use dowels inside the supports, I wanted to use thicker wood than the typical 1x3.
You'll see why below -- the dowels are 1/2 inch wide and I didn't want to split the wood when I pounded them in.
I could have used 2x4 framing lumber, but that stuff is heavy!
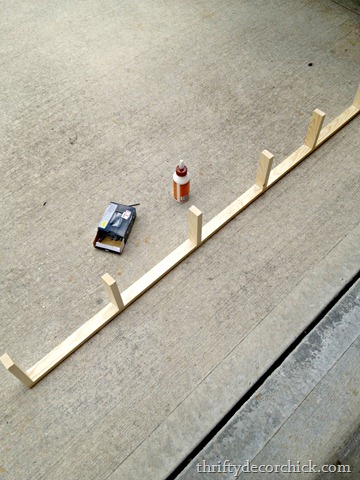
Instead I found these 1.5 by 1.5 square dowels to use as my supports:
They worked perfectly!
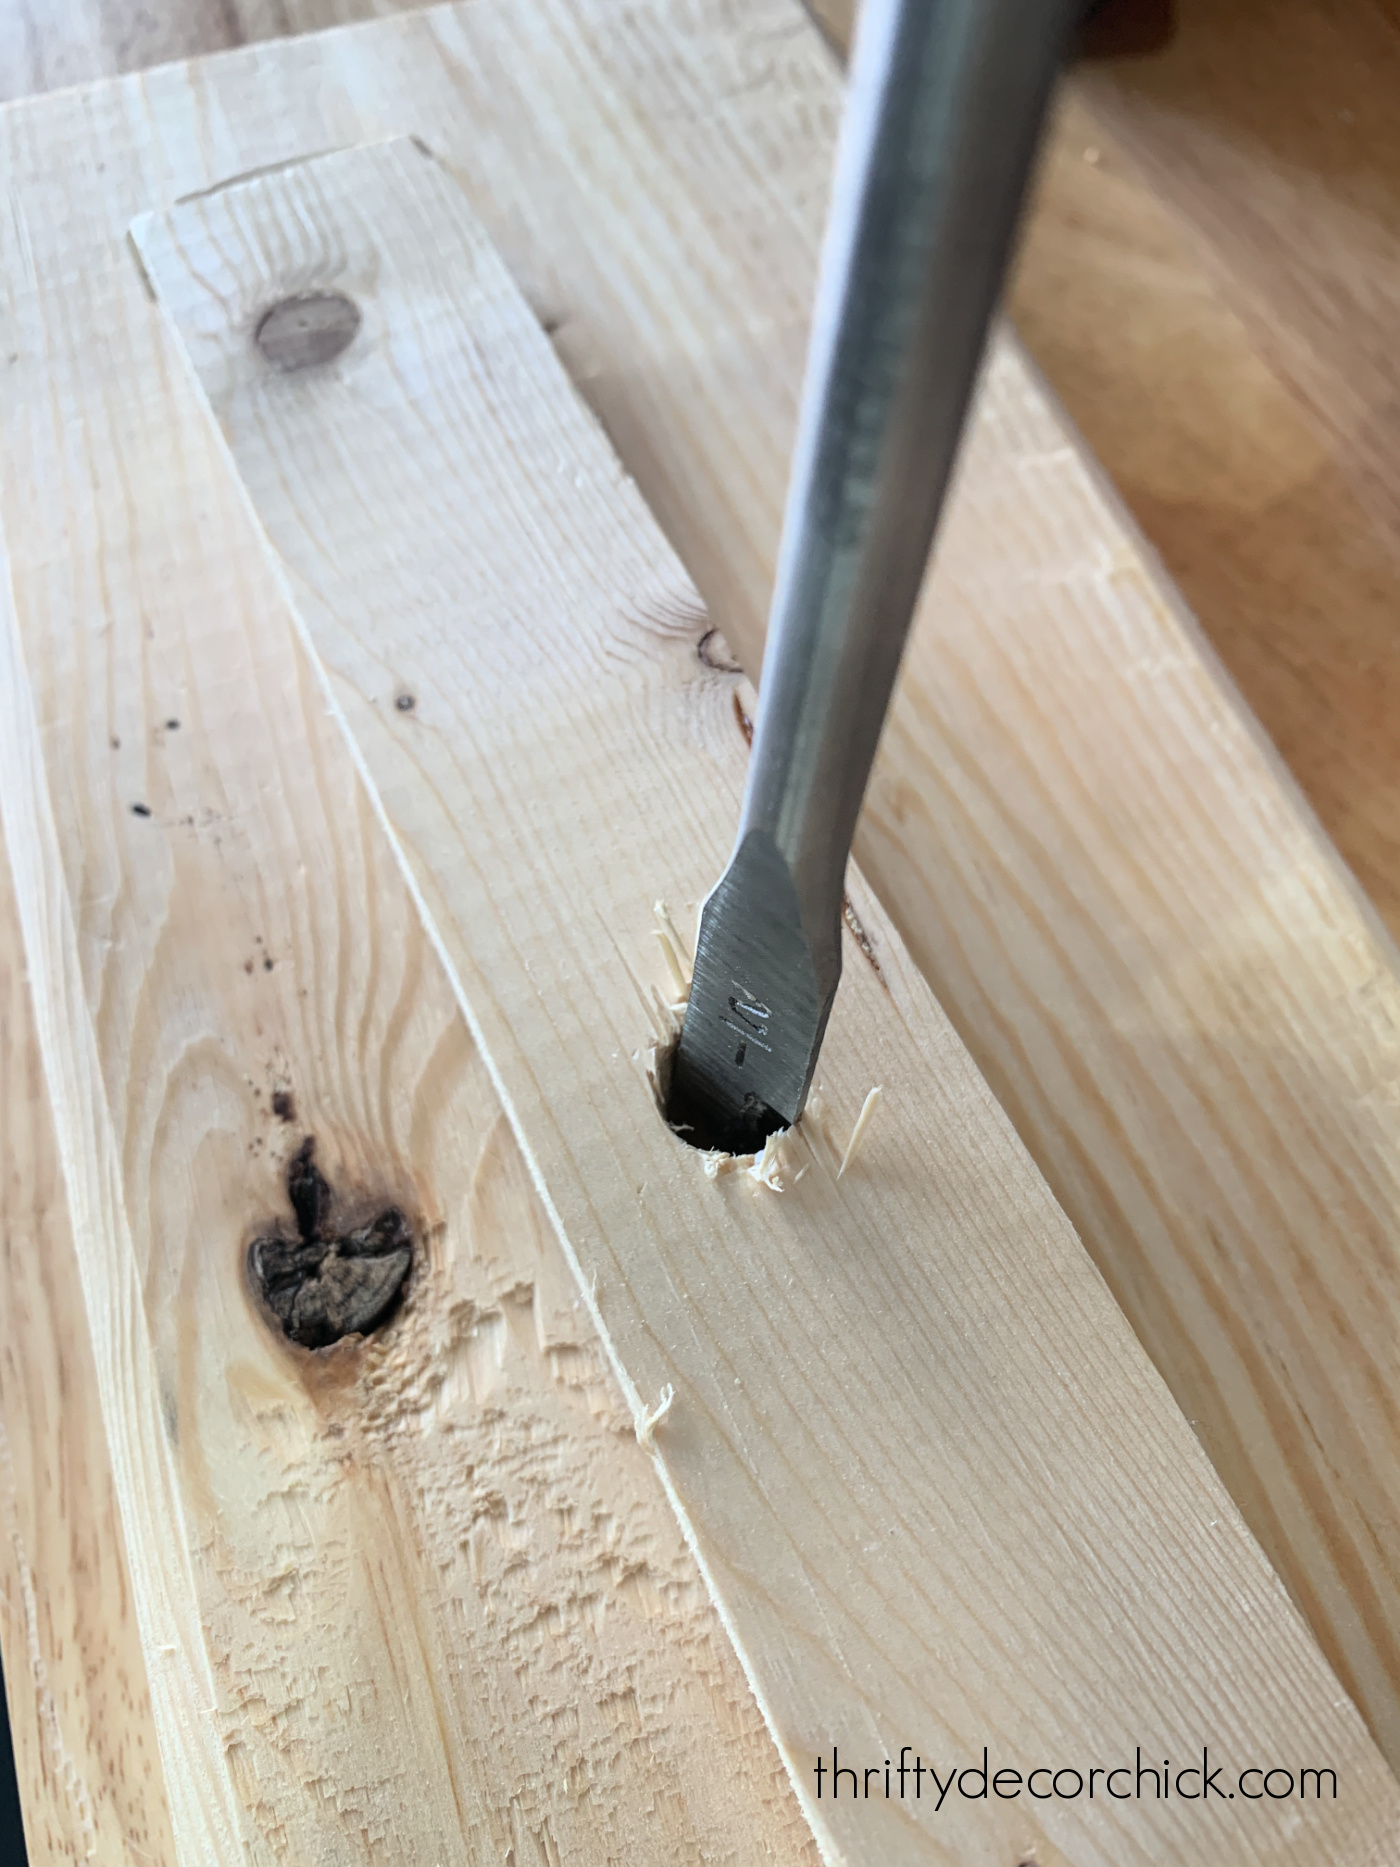
I cut them to the length that I needed, then used a 1/4 paddle bit to make a hole in the middle of the square dowel:

Do NOT attempt to hold the wood while you're drilling. It will spin out.
Instead, use clamps to hold it in place:

Those little quick grip clamps are so easy to use!
Go slowly and make sure to keep your bit going in as straight as you can. I prefer these paddle bits because I think they drill through much easier than other options.
If you have a drill press this part will be even easier!
This is where the round dowels come in! These act similarly to the steel brackets I shared above.
Cut your 1/2" dowel to size -- you'll want it as deep as the hole down the middle, plus about 3/4 inch sticking out:

These don't have to be perfect since you can easily cut the dowel down with a saw after they're inserted.
I added wood glue first and then pounded them in with a rubber mallet.
I used my Kreg pocket hole jig on each one so that I could also screw each support into the wall as well:
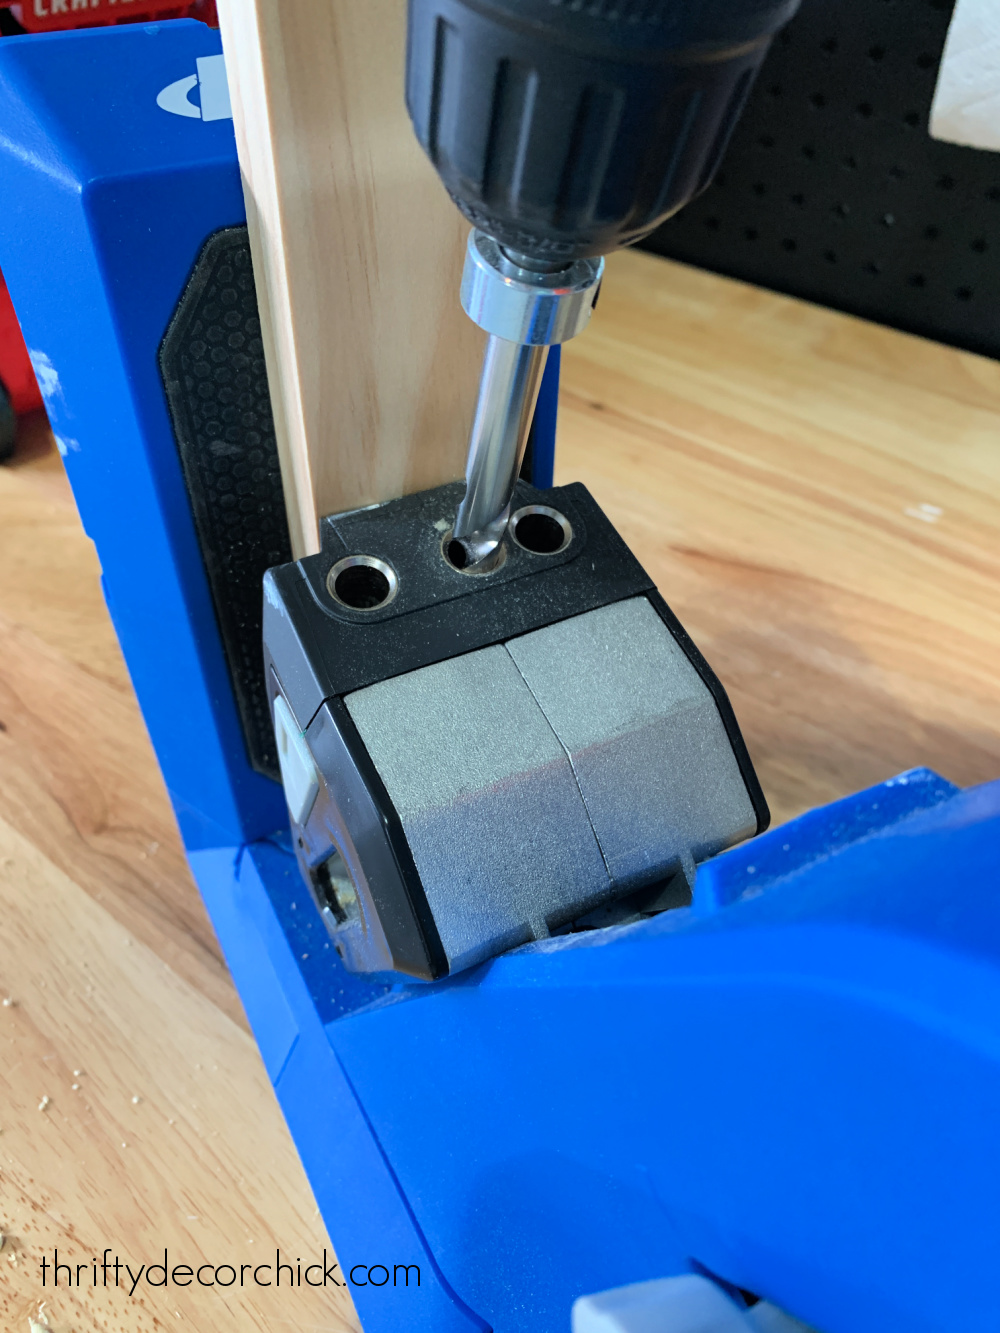
Install shelf supports with dowels and screws
Figure out where you want your supports on the wall, and then use the 1/4 paddle bit to drill a hole where they will go.
I didn't take a picture of this part, so this is a workshop pic to demonstrate:
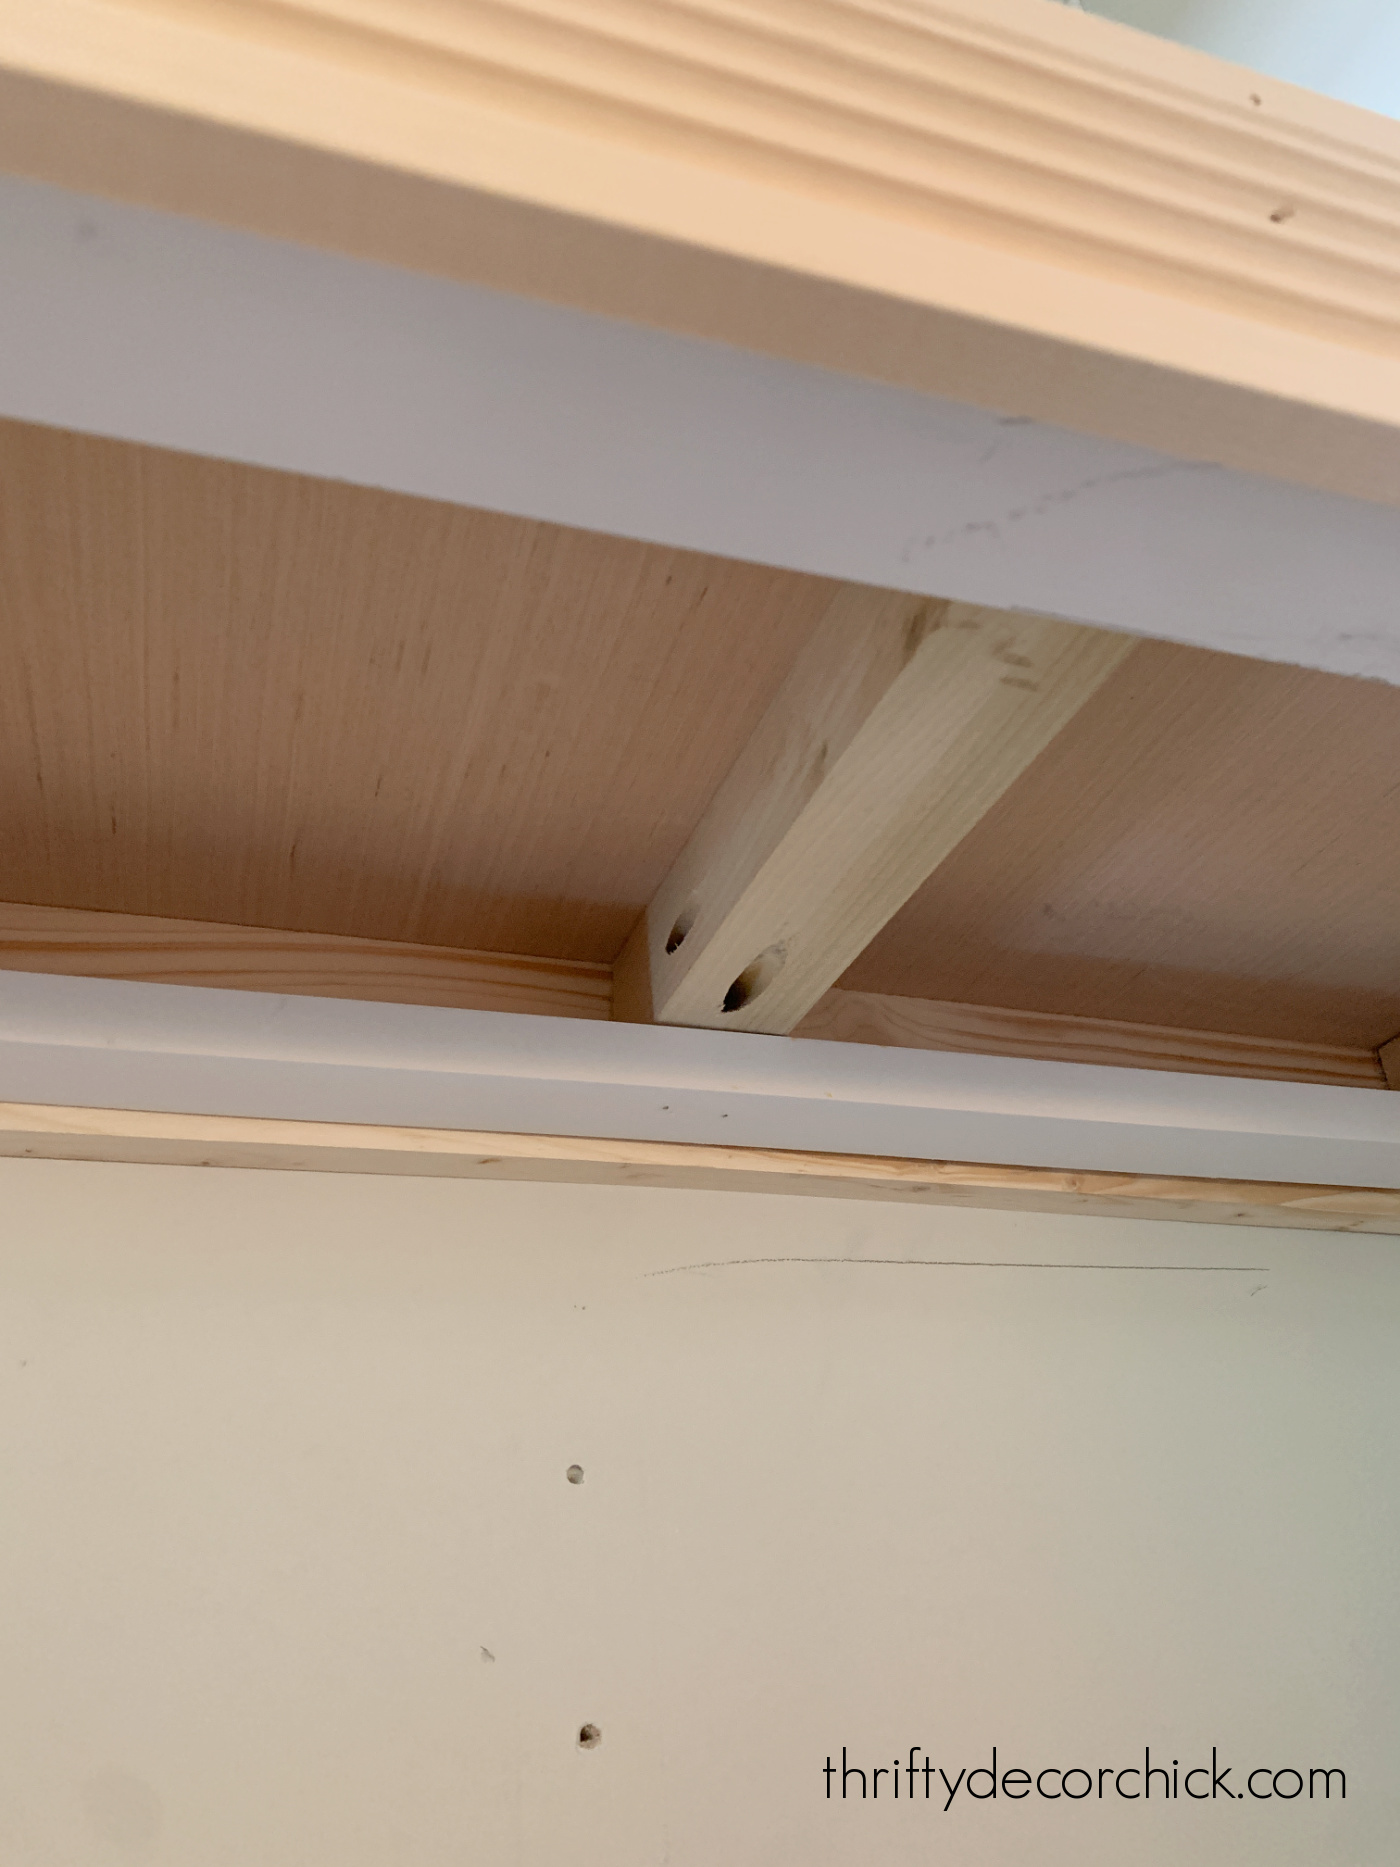
Grab some more wood glue and dab some on the end of the dowel before installing it into the matching hole in the wall support.
Keep going until you have them all in!:

I ended up adding one more support in the middle of the shelves because the luan is so thin. It can bow a little if the spacing between supports is too wide.
Use long screws through the pocket holes and into the 1x3 on the wall. In some spots, I got them all the way into the wall studs.
This helped to make things even more sturdy and I'm glad I did this extra step!
Be sure to check the level of your supports as a whole as you go! If they were off at all, I loosened or tightened the pocket hole screws to adjust them.
Remember...it does not have to be perfect! You can hide a LOT with the front trim and caulk.
If you don't have a Kreg jig, you can insert long screws at an angle into the supports to mimic the pocket holes. Use a drill bit to make your hole first, then insert your long screws.
This won't be quite as strong, but will help!
Install the top and bottom of the shelves
I measured the depth of my shelves -- from against the wall to the end of the supports -- and copied those measurements onto my luan:

Use a table saw, circular saw or a jigsaw to cut your long cuts.
A few dabs of wood glue and a nail gun with finish nails are all you'll need to install the top and bottom of the floating shelves, no matter how thick they are.
It was then that I realized using the square dowels as my supports (instead of using a 1x3) threw off my measurements a bit.
Remember this photo from earlier?:
Since my square supports weren't quite as thick as the one along the wall, I had to fill in some space before I put the luan on the bottom.
Otherwise it would have sat up underneath quite a bit, about an inch. It's not a bit deal though! I actually like a little bit of reveal, especially underneath.
But an inch was more than I wanted, and I figured a little extra support wouldn't hurt. So I used some scrap 1x2s along the front and back underneath:
Mine happened to be primed, but the inexpensive common pine will work fine.
It ended up being a happy accident, because that added some additional security from left to right. These things do not budge!
Add trim or wood to the front of your shelves
I chose a fluted wood trim for the front of the shelves and added that to the front and left side.
You can install this before or after your bottom piece is in -- I chose to add the trim first this time.
When I'm doing a project for the first time (in multiples), I iron out any kinks with my first one and then take photos of the second. :)
I was SO excited when the first shelf one was done -- the difference was huge!:

My plan all along was to stain these, but I wasn't positive I would like the look, so I waited until they were installed before starting the finishing touches.
Turns out I HATED the stain on that trim -- it didn't stain up well at all, even with a conditioner. I loved it on the luan (yes, you can stain luan!), but the trim is what we see the most.
Instead I went with a light gray paint the color of our island and DIY hood cover.
Before stain or paint, be sure to fill any nail holes and sand everything down with a fine grit sandpaper.
The main reason I wanted these shelves so deep (at least 12 inches), was because we wanted to add storage for our wine glasses:

I found those individual wine glass mounts at Lowe's -- they were the only ones I found nearby that were wide enough for the base of our glasses.
*Be sure to check that if you do something similar for your glasses!
I've been transitioning this little area to a beverage area of sorts. My husband started drinking coffee recently and he uses all kinds of stuff that needed a "spot":

Now we have all of his coffee supplies, hot chocolate needs and our wine glasses/openers all in one spot!
This area was mostly wasted space before, now it solves a few problems for us:

We absolutely LOVE how it turned out!
I love that I still have space for pretty things, but it adds storage and functionality as well:

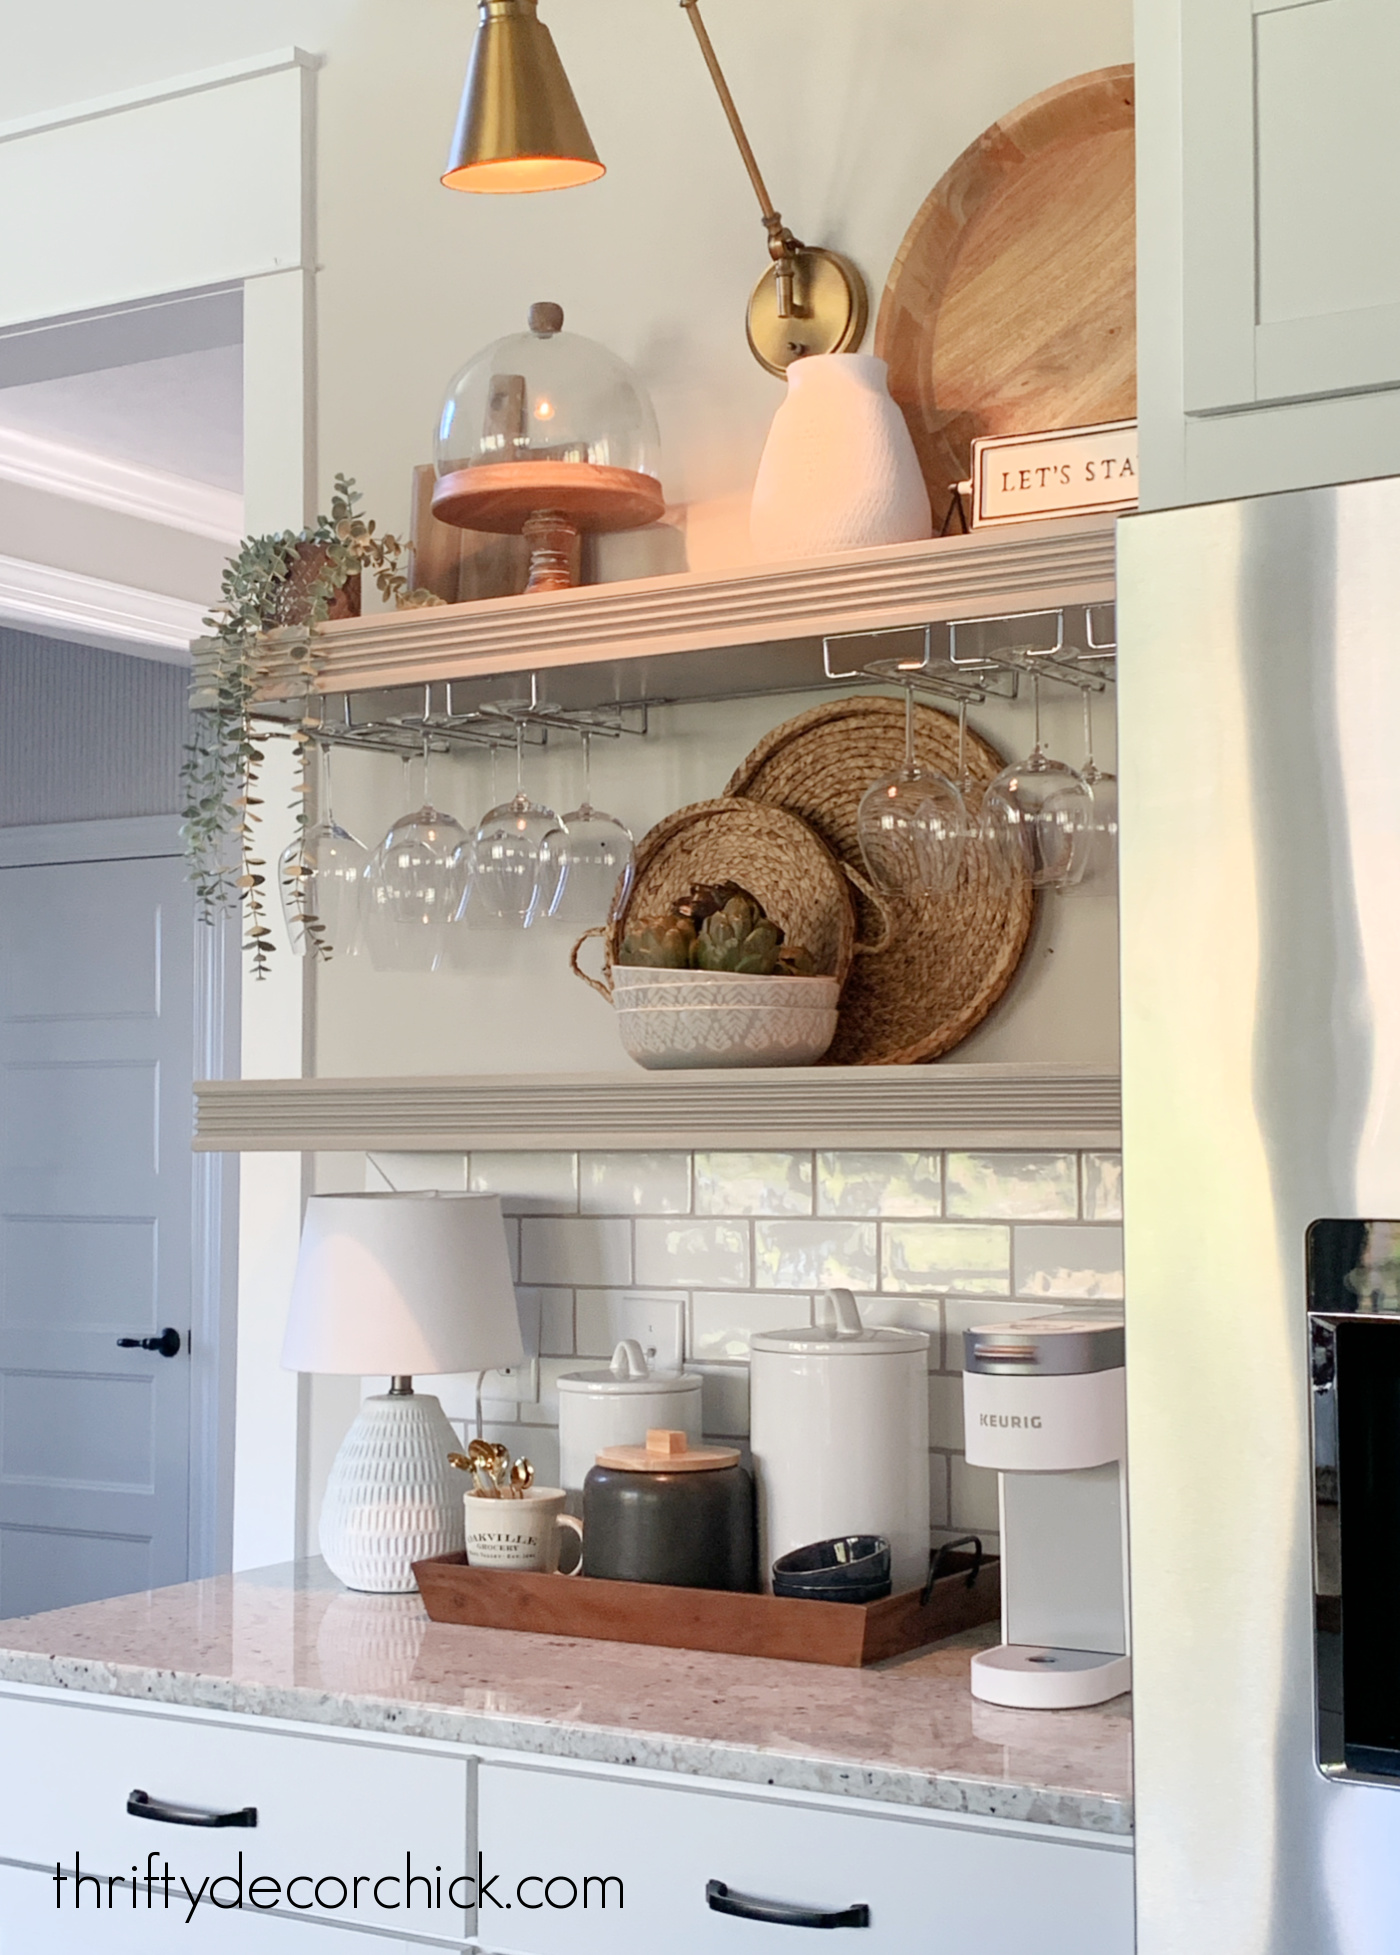
The wider, more substantial shelves look SO much better here!
It looks like it should have always been like that, which is the sign of a good project for me:

But wait, there's more! Well...there will be! :)
I'm extending the white tile backsplash all the way up the wall in between the new shelves. It will give it all a more finished, custom look and I can't wait to get that done!
Whoohoo, I love how this came together! Here's a reminder of how the shelves looked before:

I eventually moved the dishes back into cabinets near the dishwasher.
And how they look so far, with the bigger, longer built in shelves instead:

I can't wait to see how it looks with the subway tile as well!
Solid wood shelves can cost a fortune...I've seen them for as much as $700 for this width. You'll save a TON doing this on your own, no matter what method you choose!
I know I threw a lot of information at you in this one! If you have any questions, please let me know in the comments.
Never miss a post by signing up to get posts via email.
Via https://www.thriftydecorchick.com/2021/11/how-to-build-heavy-duty-floating-shelves.html This is the easiest (and most delicious!) slow cooker chicken and noodles recipe you'll find!OK my friends! You KNOW how I love a good crock pot meal. Many of you have tried the chicken and dumpling, creamy chicken and wild rice and mac and cheese crock pot recipes and love them as much as I do.Be prepared for a new favorite. This one may inch out my chicken and wild rice. It's that good.
This chicken and noodle recipe calls for the thicker noodles, so it's more of a hearty meal than a typical chicken soup. If you like a creamier "soup" that you can pile high over mashed potatoes, this one is for you!
I found this recipe floating around on Facebook years ago, but there was no source.
I could tell from the photo that there was more to it than the few ingredients listed. So I added a few and it was absolutely delicious.
If you're looking for a yummy, cozy fall or winter meal, this is one is perfect!
For a super easy dinner, pair it with some warm bread and you're set!
This recipe only takes two to three hours to make if you cook it on high:

This post may contain affiliate links for your convenience.
See my policies and disclosure page for more information.
Here are the ingredients for this delicious crock pot creamy chicken and noodle soup:
One pound chicken breast
(more or less depending on your preference)
Two cans cream of chicken soup
Two cups chicken broth
(I added slightly less than that for a creamier base -- again, your preference)
One stick butter
One 24 ounce package frozen egg noodles
(I used the Reames brand)
One tablespoon parsley
One tablespoon minced onion
1/2 tablespoon pepper
It really couldn't be much easier. I combined all ingredients but the noodles and cooked on high in the crock pot for 2.5 hours.
I removed the chicken to shred it with two forks, then put it back in along with the frozen egg noodles.
Let it cook for about 30-45 more minutes (taste your noodles to see if they're done to your liking) and that's it!
SO DELICIOUS!!
Possible additions and changes to this yummy chicken and noodle recipe:
The frozen noodles are what make this sooooo good.
You know I won't steer you wrong when it comes to recipes, especially Crock Pot versions! This one is absolutely delicious and was a breeze to make.
Let me know if you try it!
**P.S. You can find my pretty dinnerware here -- I bought the bowls ten years ago and they've held up beautifully. I recently treated myself to more of the dishes for my birthday. They were on sale and may still be! PIN THIS RECIPE FOR LATER: 
Never miss a post by signing up to get posts via email.
Via https://www.thriftydecorchick.com/2019/10/delicious-and-easy-slow-cooker-chicken.html |