|
Hello my friends! I hope you have a relaxing and enjoyable holiday week planned. We were supposed to be in Disney World this week but had to cancel our trip...we are so sad not to be there. I'm looking at the bright side -- at least we are able to relax this week and I will get all of the Christmas decor finished earlier than usual.
I have a tradition of sharing some of my favorite things on this week in preparation for holiday shopping -- which looks a little different this year for some! It's the same old for me because I haven't gone OUT to shop on Black Friday in...well, ever? ;)
I have some of my "old school" blog friends joining in with me and you can see their lists by visiting their blogs (at the end of this post). We've all been blogging forever and have known each other for more than a decade!
This post may contain affiliate links for your convenience.
See my policies and disclosure page for more information.
Here we go -- this is a round up of home, kitchen and personal items that I absolutely LOVE and use all the time! Some you've seen before here but most are new.
This LED garage light is a game changer! I've used two of these in our garage so far and want one more. I want it as BRIGHT AS THE SUN in there:
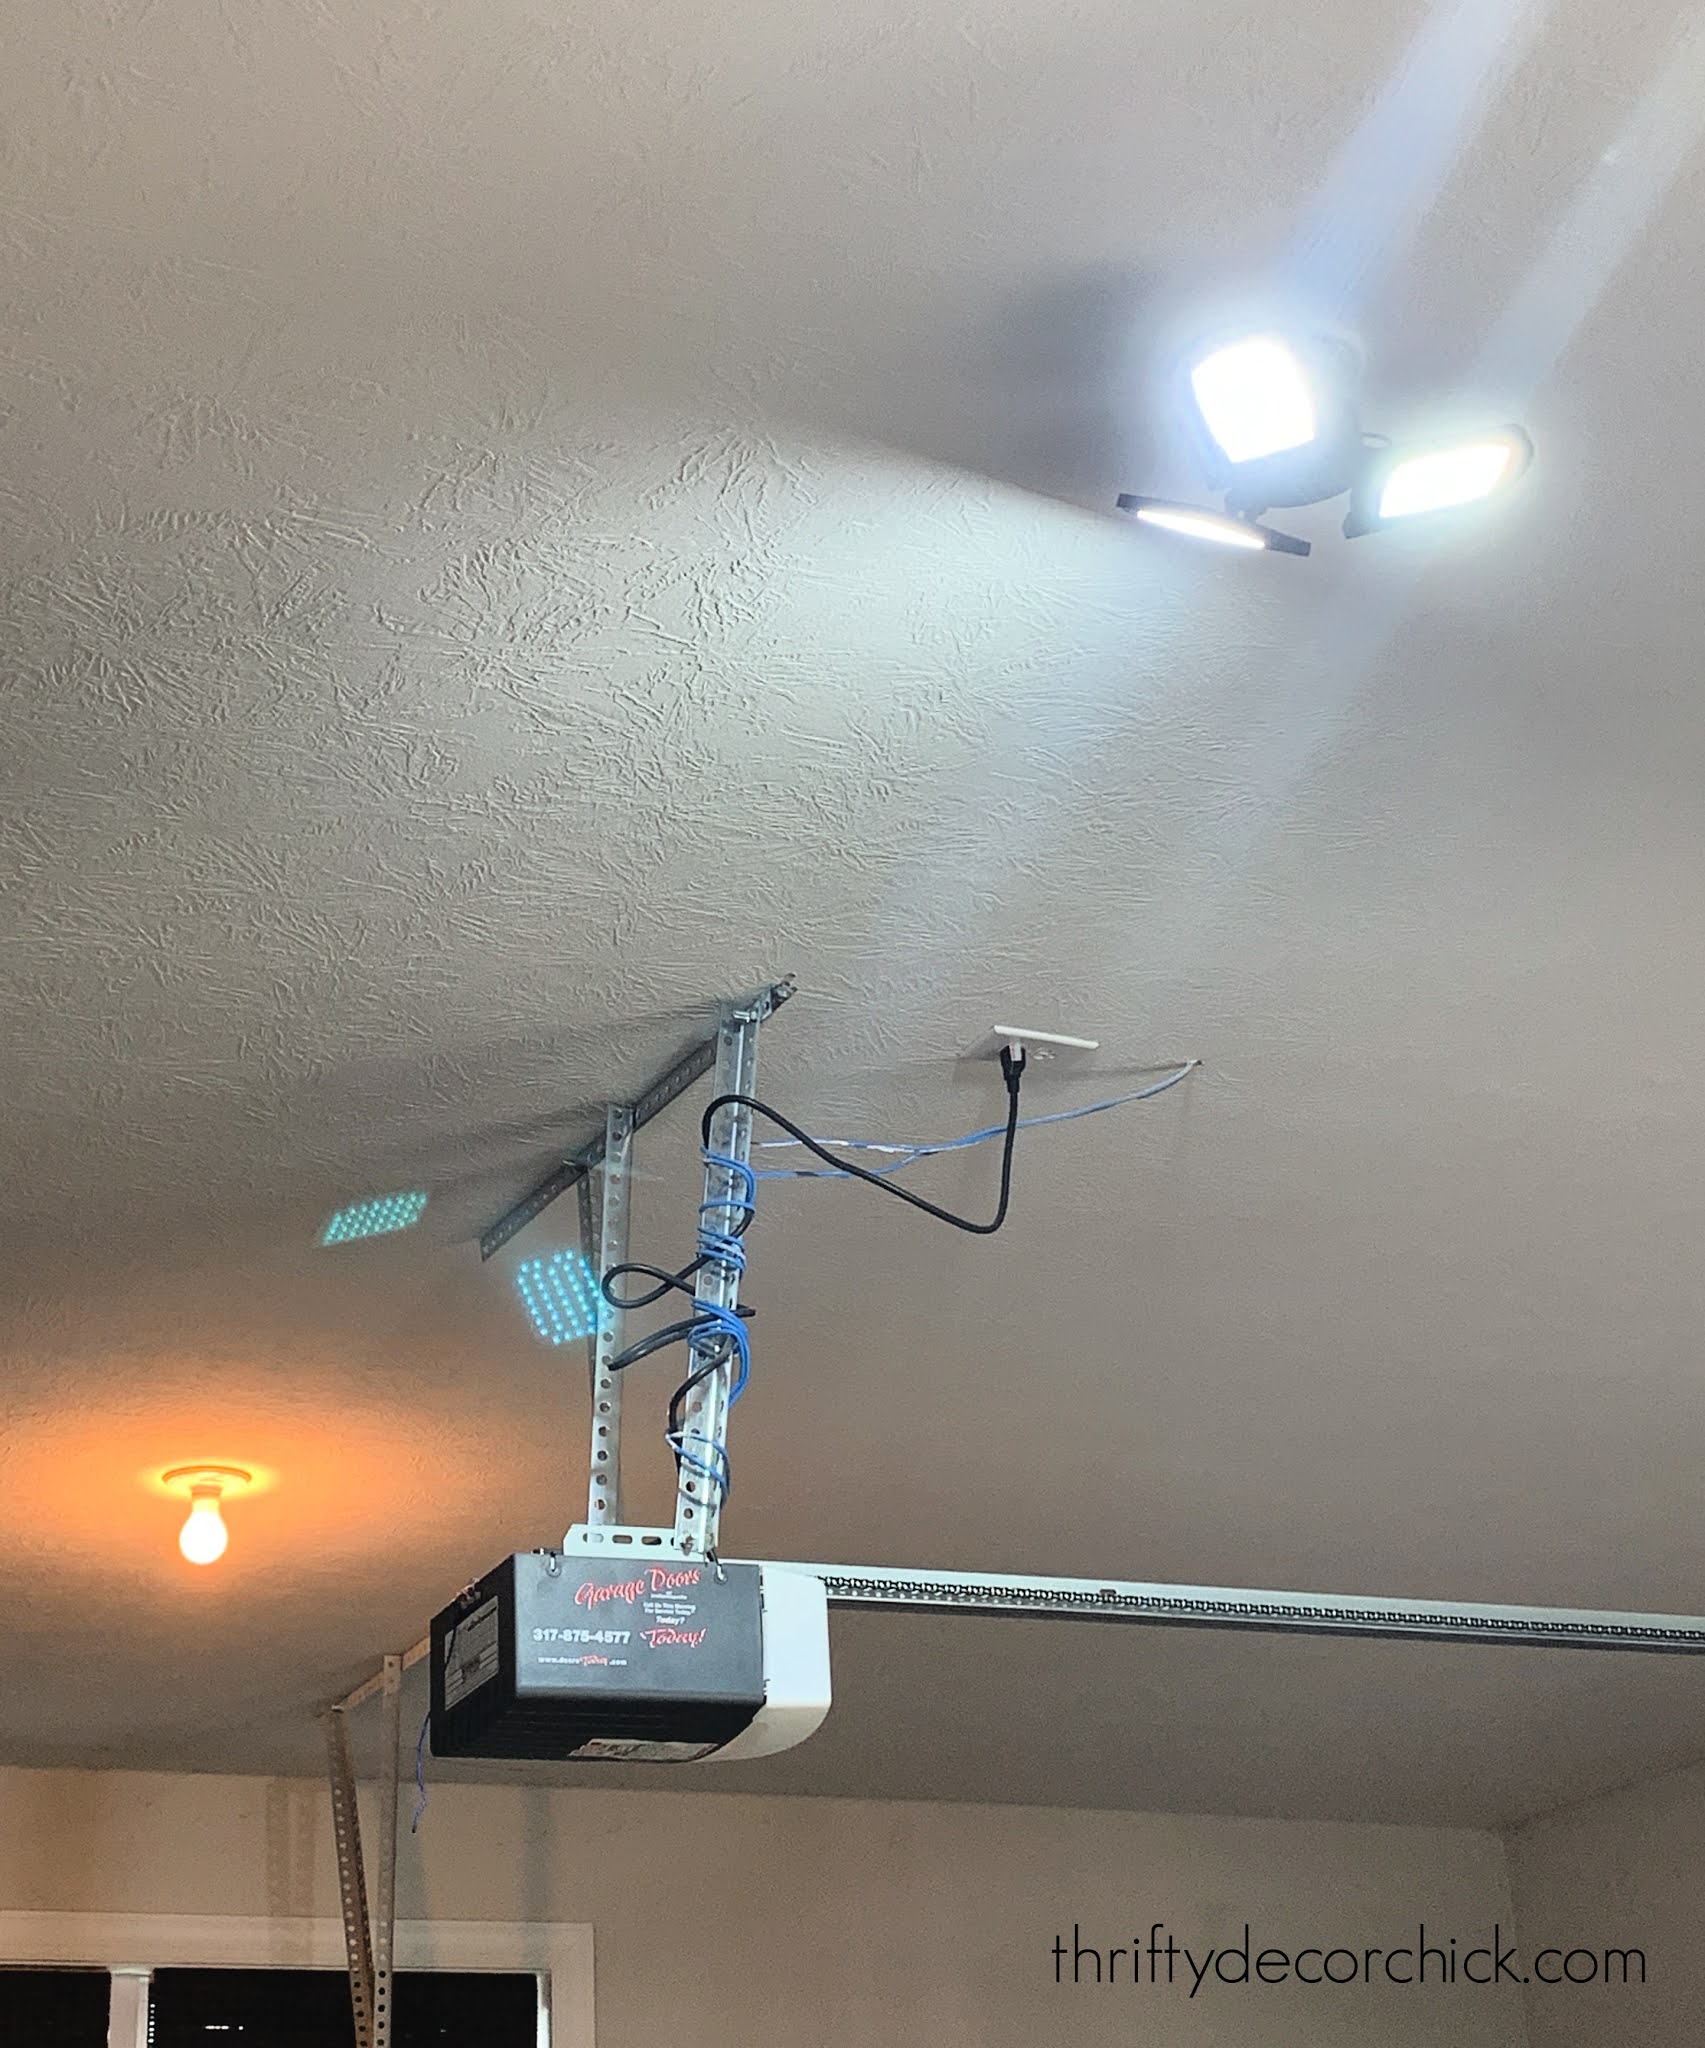
Seriously, they give off SO much more light and probably use less electricity than a regular bulb. It's also more of a daylight effect. They are so helpful in there when I'm working on a project. (I'm thinking of adding one to our basement storage room too.) You just screw them in light a light bulb!
I found this lighter at a friend's shop a few weeks ago and it is awesome! We get so frustrated when lighting candles with the regular click lighters. They seem to run out of butane so fast and I'm always searching for another one.
This solves all of that! It's an electric lighter -- you charge it up and push a button:

I giggle every time I use it -- it's just so cool. (There's a safety by the way, it has to be switched on.) We used it for a week before it needed recharged and that took maybe 15 minutes. It turns on every time and lights the wick super fast. I LOVE this thing!!
These faux leather pillows are my new favorite thing in our family room:

I'm very pleased with the quality -- they are super soft and have already held up great to animal claws. And they just look great! You get two in the package...love them!
I'm getting old...my feet hurt all the time! Ha! I splurged on this foot massager because it had such high reviews and it. is. awesome!!:

It's really powerful and you can turn up the pressure to your liking. I love the setting where it squeezes my feet. :) It even has a remote so you can control heat and the settings. My husband has basically stolen this from me already and uses it more than I do!
Our Loloi family room rug (you can see a peek of it above) is another favorite -- I talk it all the time because it's just that good:

I talk more about it here (with more photos). It is super affordable and looks fantastic! I love that it incorporates so many colors but also stays neutral.
These Seche nail products are game changers:

The top coat is especially awesome -- I use it right after painting my nails and they dry incredibly fast. I ca do normal stuff around the house within five to ten minutes no problem. I highly recommend if you like to paint your nails often!
I shared this adorable gingerbread house baking pan a couple weeks ago but it's worth mentioning again:

It's the cutest and makes making a sweet little edible Christmas village with ease! See how cute it turned out (and a few tips for perfect cakes) here.
A few years ago I shared some window candles we love, but over the years they've pooped out. About a third of them just won't light up anymore. I took a chance on these LED flickering candles and LOVE them!!:

They have a beautiful "flicker" option that looks like real candles and they run on a timer, so once they're set up you don't have to touch them again. I love that they come with suction cups so we don't have them sitting on the windowsills (the old ones would fall when we'd raise and lower the shades).
These are a bit spendy but seem like much better quality than the other ones we had (and those were more!). They are so beautiful in our windows during the holidays! (I keep them up well into winter as well -- they use so little power the batteries last forever.)
I shared this black and gold cookware recently as well and I'm even happier with it now! I've used it quite a bit over the past few weeks and it still looks brand new:

And it's just so...PRETTY. I feel so fancy having matching cookware! Adulting.
I'm a mascara snob -- I used to pay a pretty penny for stuff I liked. I was over paying that much though, so started researching to find other brands people love. I found this Essence brand and you can't beat the price:
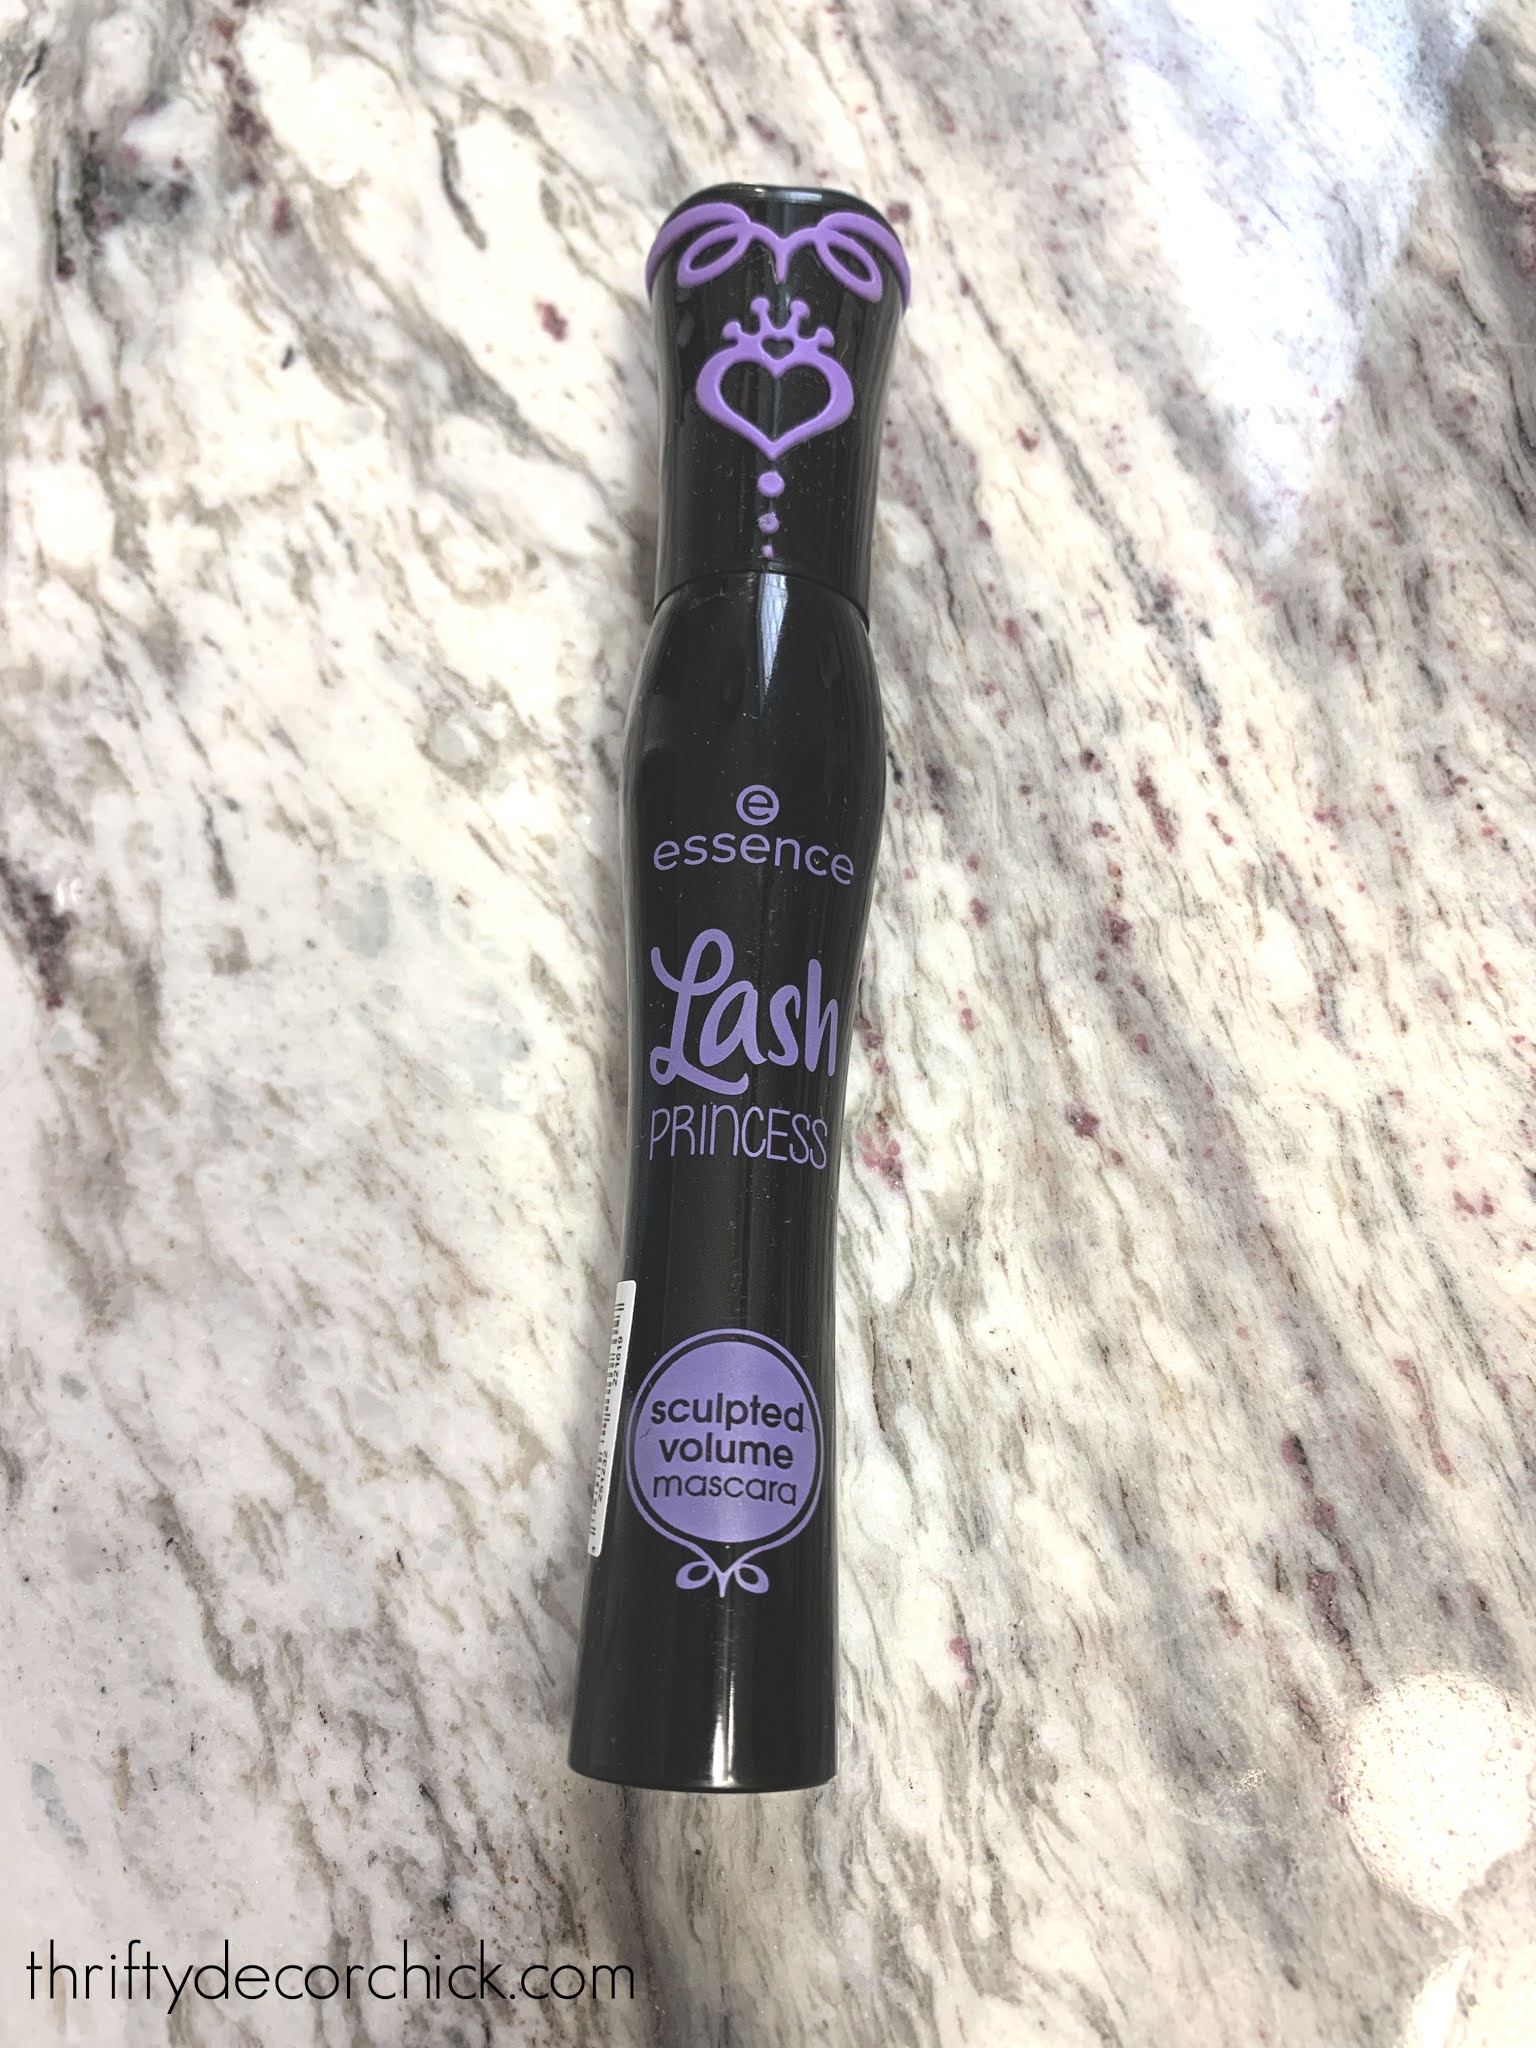
It comes in waterproof as well. Only $5!! It covers so well and the applicator gets every single little lash so they look incredibly long and full. It's good stuff!
This next one is a biggie but I can't say enough about these sofas:


They are the Radley sofas/sectionals from Macy's (27 percent off right now!) and I'm so impressed with how they hold up. We sold this one (at our old house) to the new owners and it still looks so good! (They are friends of ours and we see them often.) Food and drink wipes right off, the fabric doesn't get worn and the cushions don't get squished easily.
We got super inexpensive sofas when we moved into our new house and they have worn horribly. ? I'm so disappointed. We've been watching to see when the Radley goes on sale and ended up ordering two of them a couple weeks ago. I cannot WAIT to get them!!
I got these reusable grocery bags last Christmas and I use them constantly:

If you're an Aldi Nerd they are a must! :) But I use them everywhere. If I forget to bring them in to the store they are still helpful because I can throw a bunch of bags in each one and carry it all inside on one trip. They are great quality and hold up a lot of weight.
And finally, one more home decor item that I love! Every time I share a photo of our family room I am asked about this lamp:

It's from Target and I love the cantilever design. It's a classic design that would fit in with almost any decor, plus it has a built in dimmer! LOVE!
I hope you enjoyed some of my favorites in this year's favorites round up! This is always a fun post. Hopefully it gives you some ideas for your loved ones (or...yourself) this year.
Now you can take a little blog tour and see what my friends are sharing as well! I always find something I can't live without. ;)
Sarah (me!) at Thrifty Decor Chick
Chris at Just a Girl
Rhoda at Southern Hospitality
Myquillyn at The Nesting Place
Brooke at All Things Thrifty
Stacy at Stacy Risenmay
Stay healthy and happy my friends! I hope you have a lovely Thanksgiving and I will "see" you next week!
See more of our home here. To shop items in our home, click here! Never miss a post by signing up to get posts via email.
Via https://www.thriftydecorchick.com/2020/11/my-must-haves-for-home-kitchen-and-more.html
0 Comments
Hello all! I hope you're staying healthy and happy!
No matter how you're celebrating the Thanksgiving holiday -- I say do it up right! If there was ever a year to be extra, this is it! I thought it would be fun to do a tablescape since I haven't done one in forever. I did two looks...one more neural and one with color.
I absolutely love how they turned out! Both are simple table displays that could easily be changed up just a bit for Christmas as well.
For the colorful look I started with this fall scarf draped over the table and then added everything on top:
This post may contain affiliate links for your convenience.
See my policies and disclosure page for more information.
You don't have to just use table linens for a tablescape, just like you can use linens to make other stuff around the house too! ;) Change it up with a thin blanket or seasonal scarf draped over the table instead.
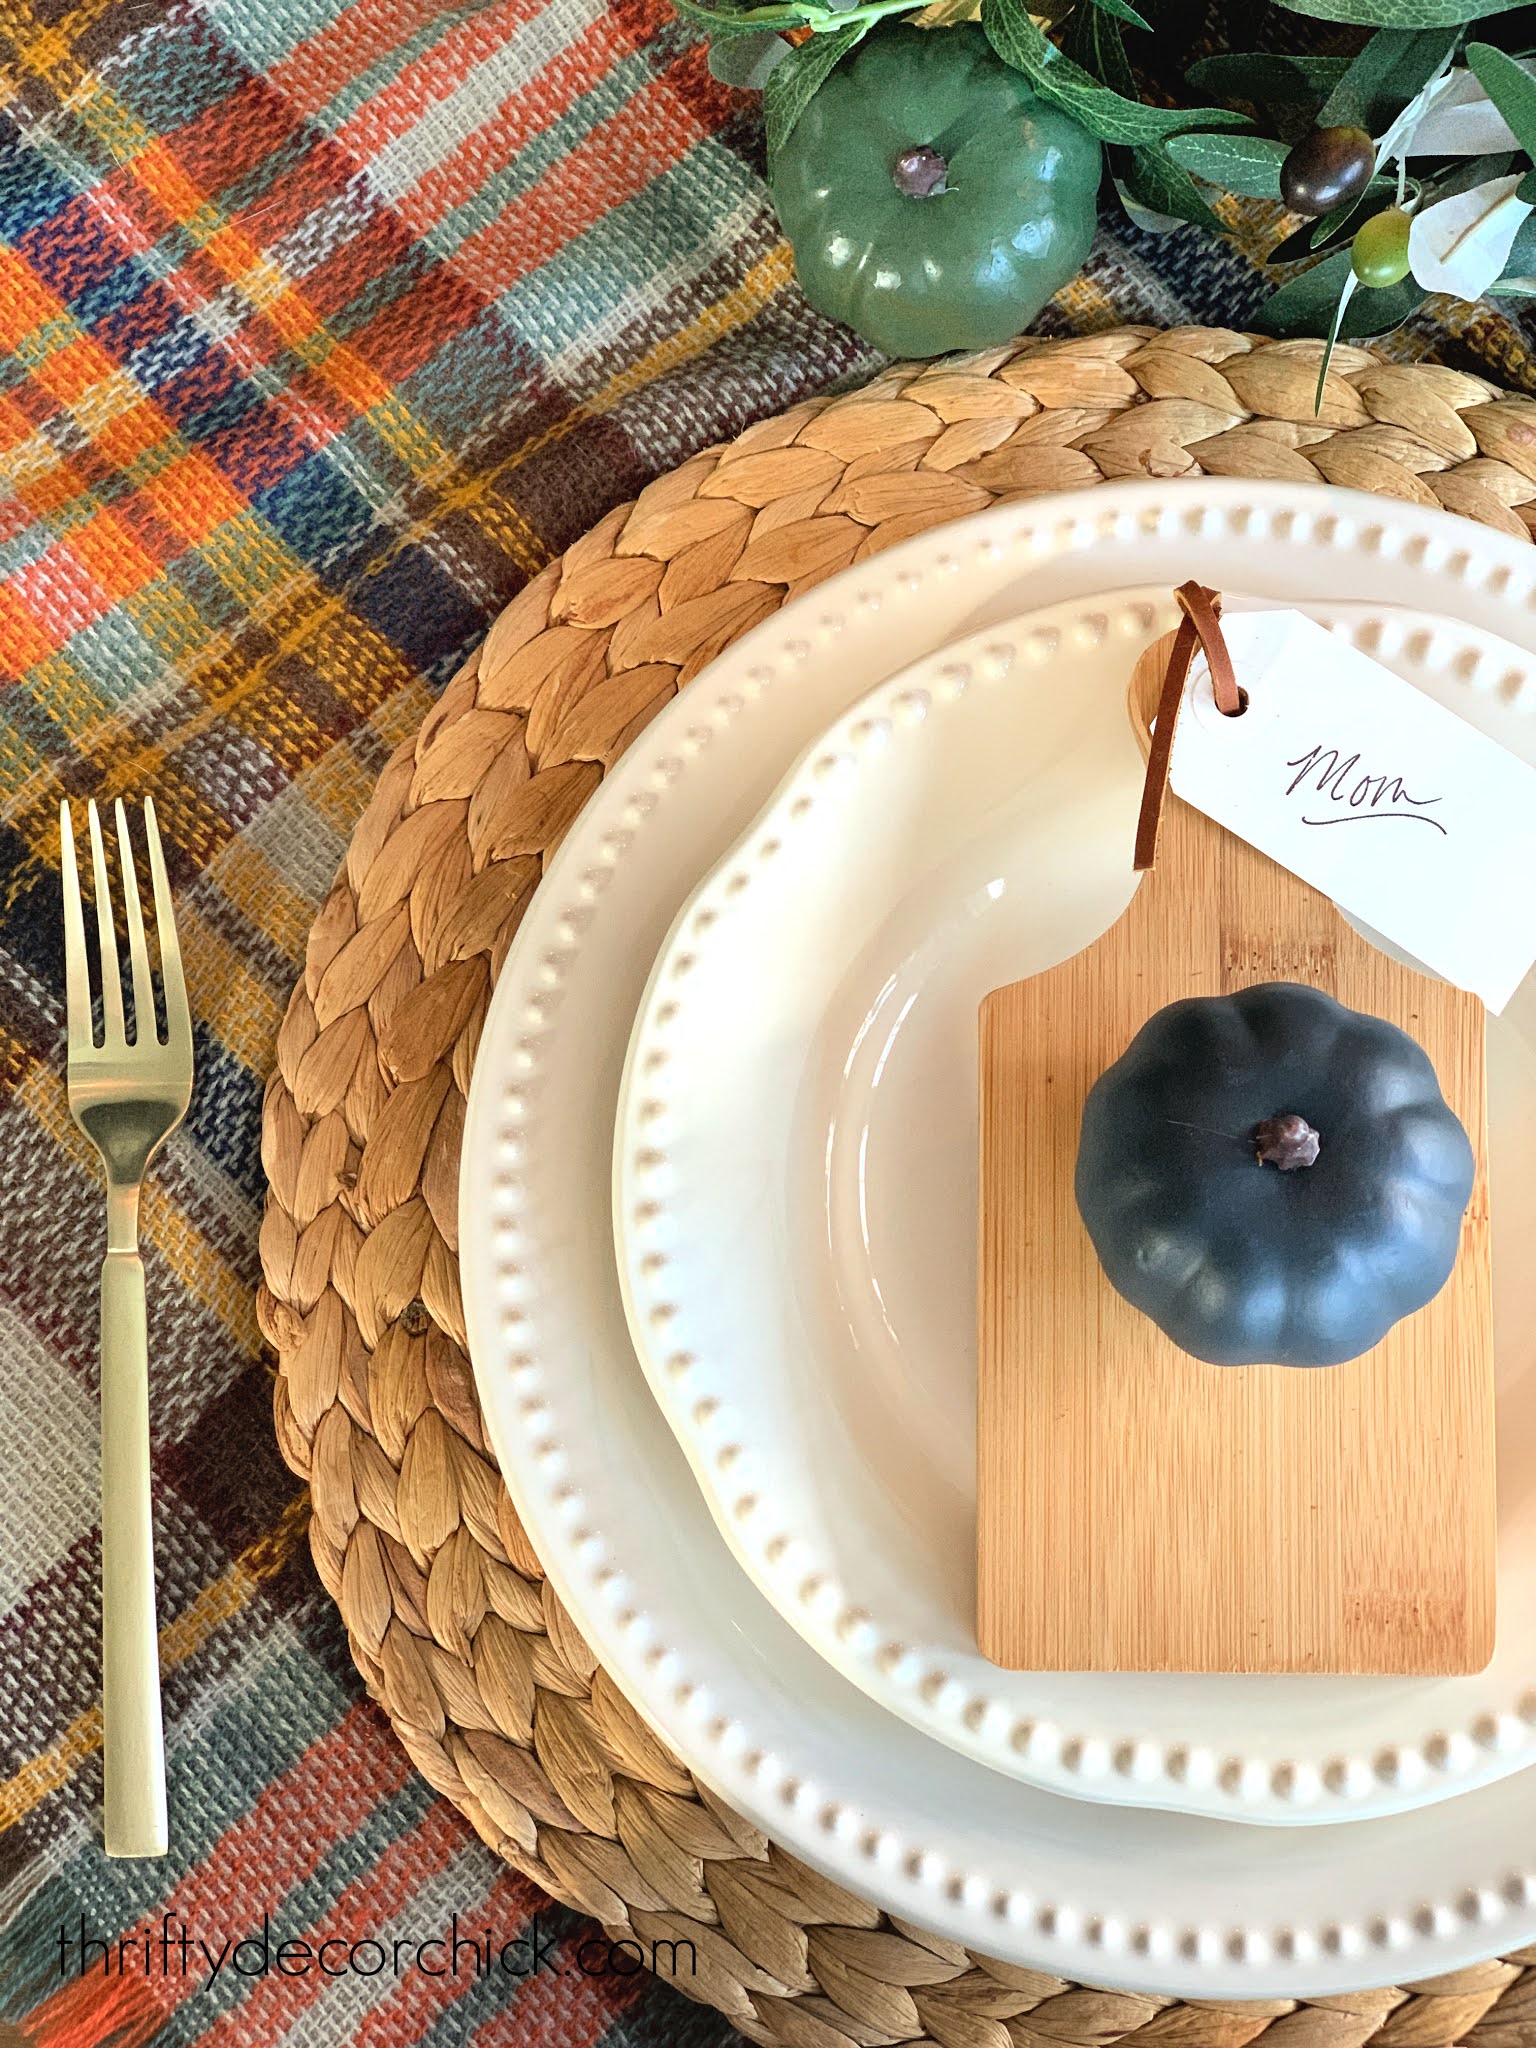
I use a ton of dark blue and green in our house and thought it would be pretty to incorporate those colors. I used this chalky Krylon spray paint in the color Anvil Gray to coat a few of the faux, bright orange pumpkins I have in my stash:
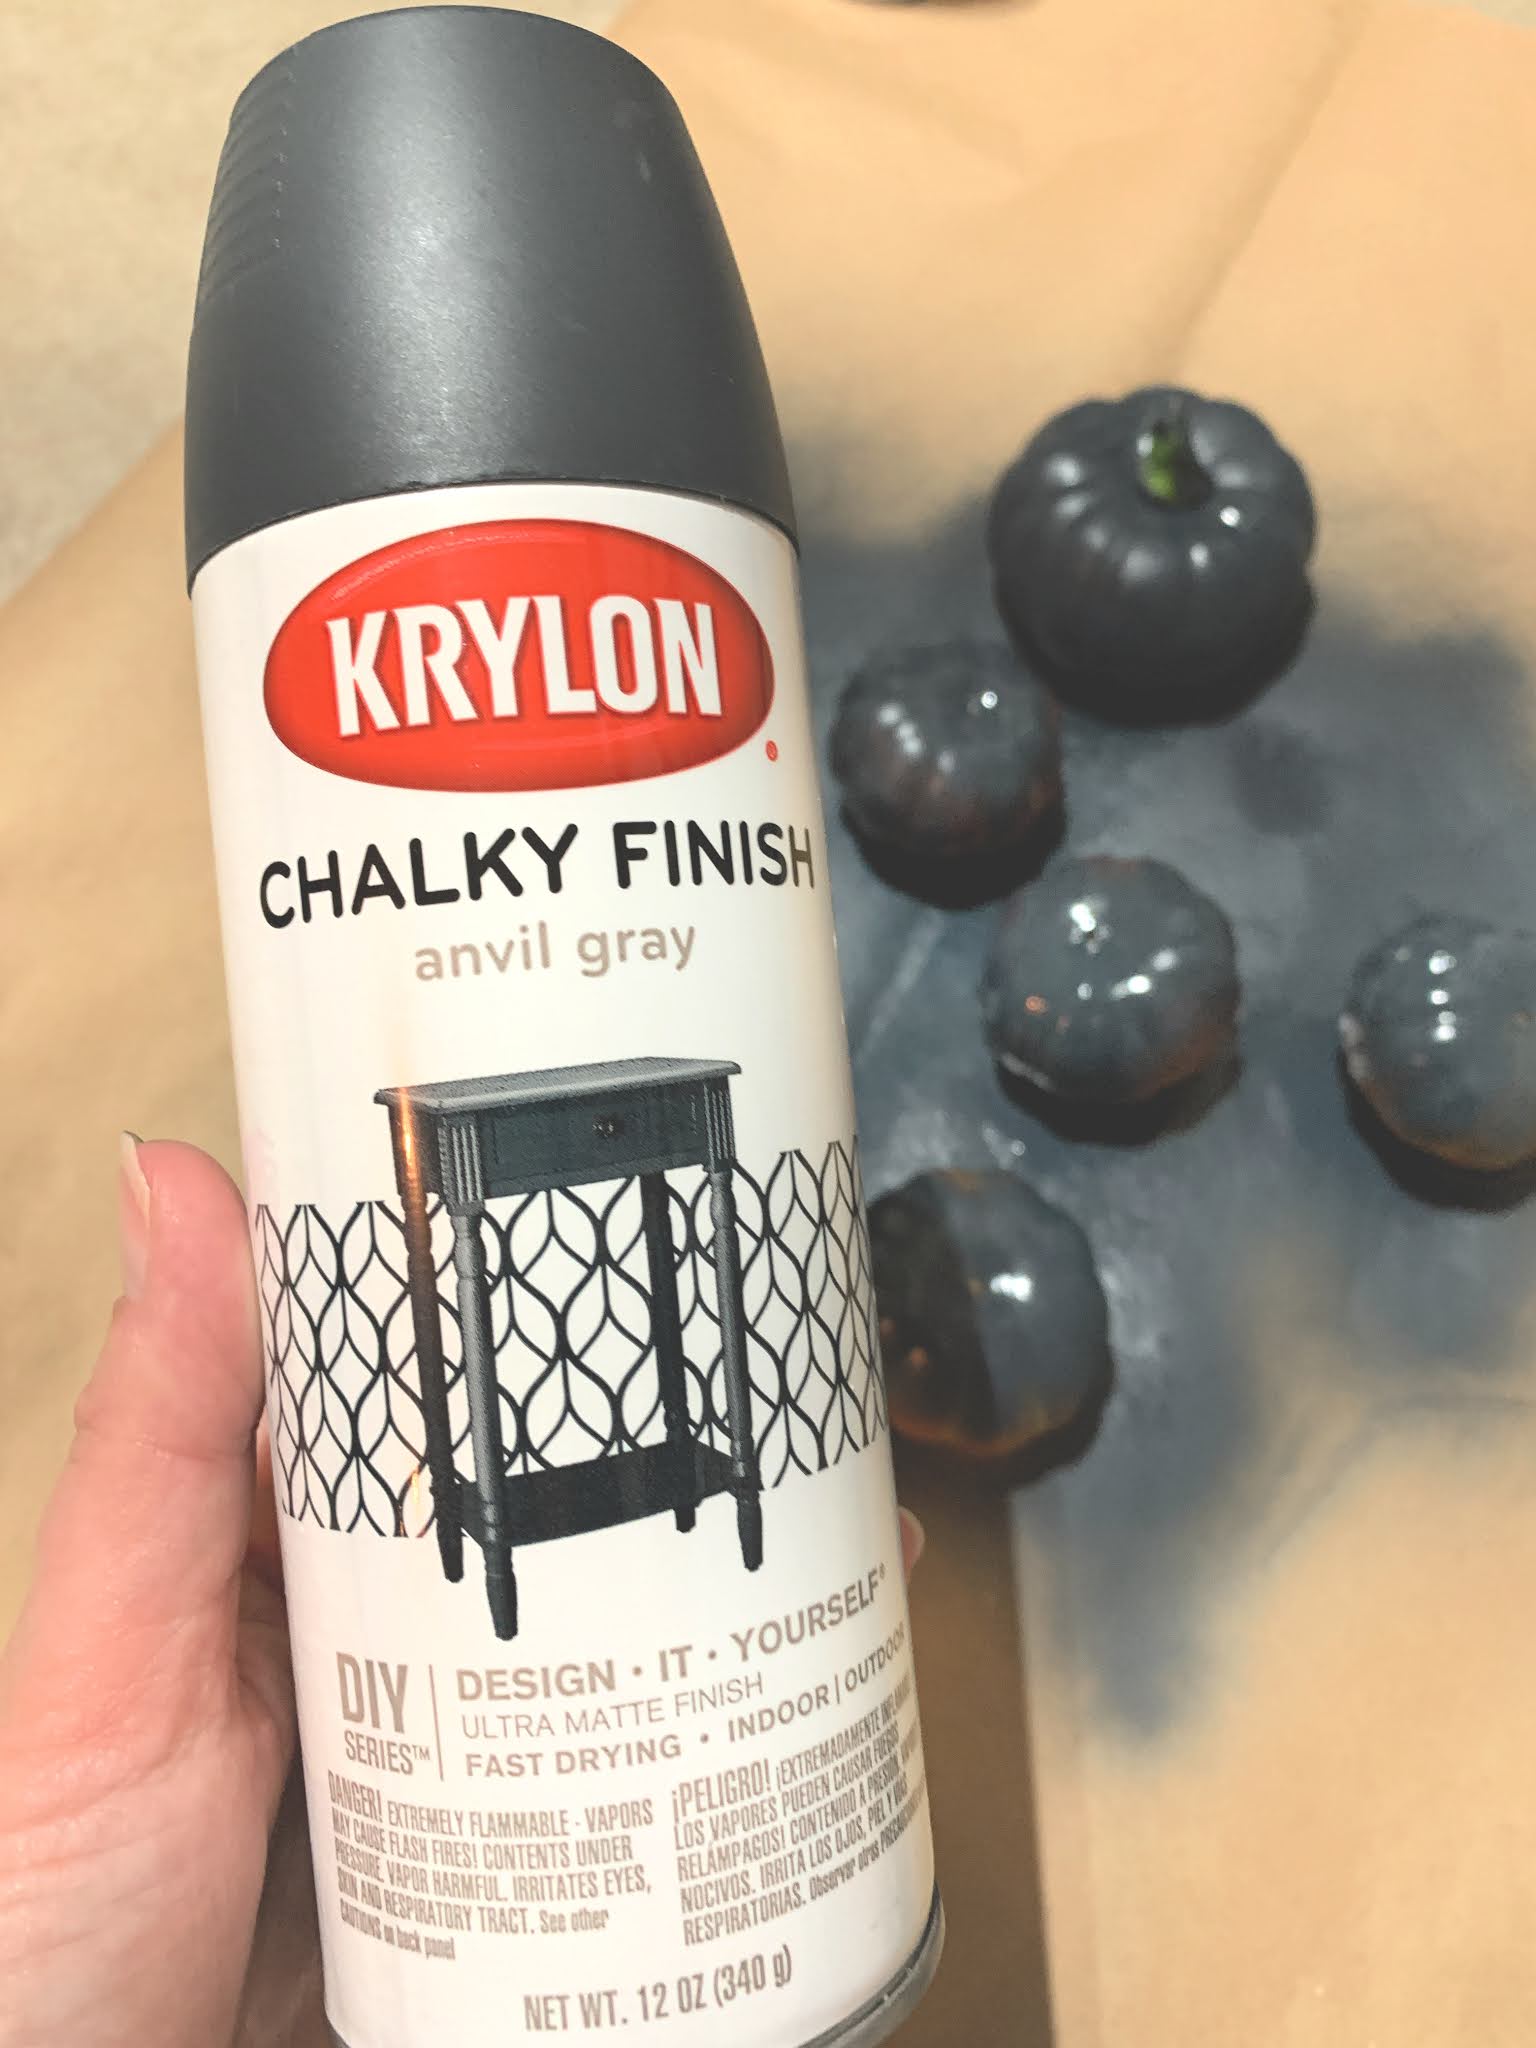
I LOVE this color and am trying to figure out where else I can use it!
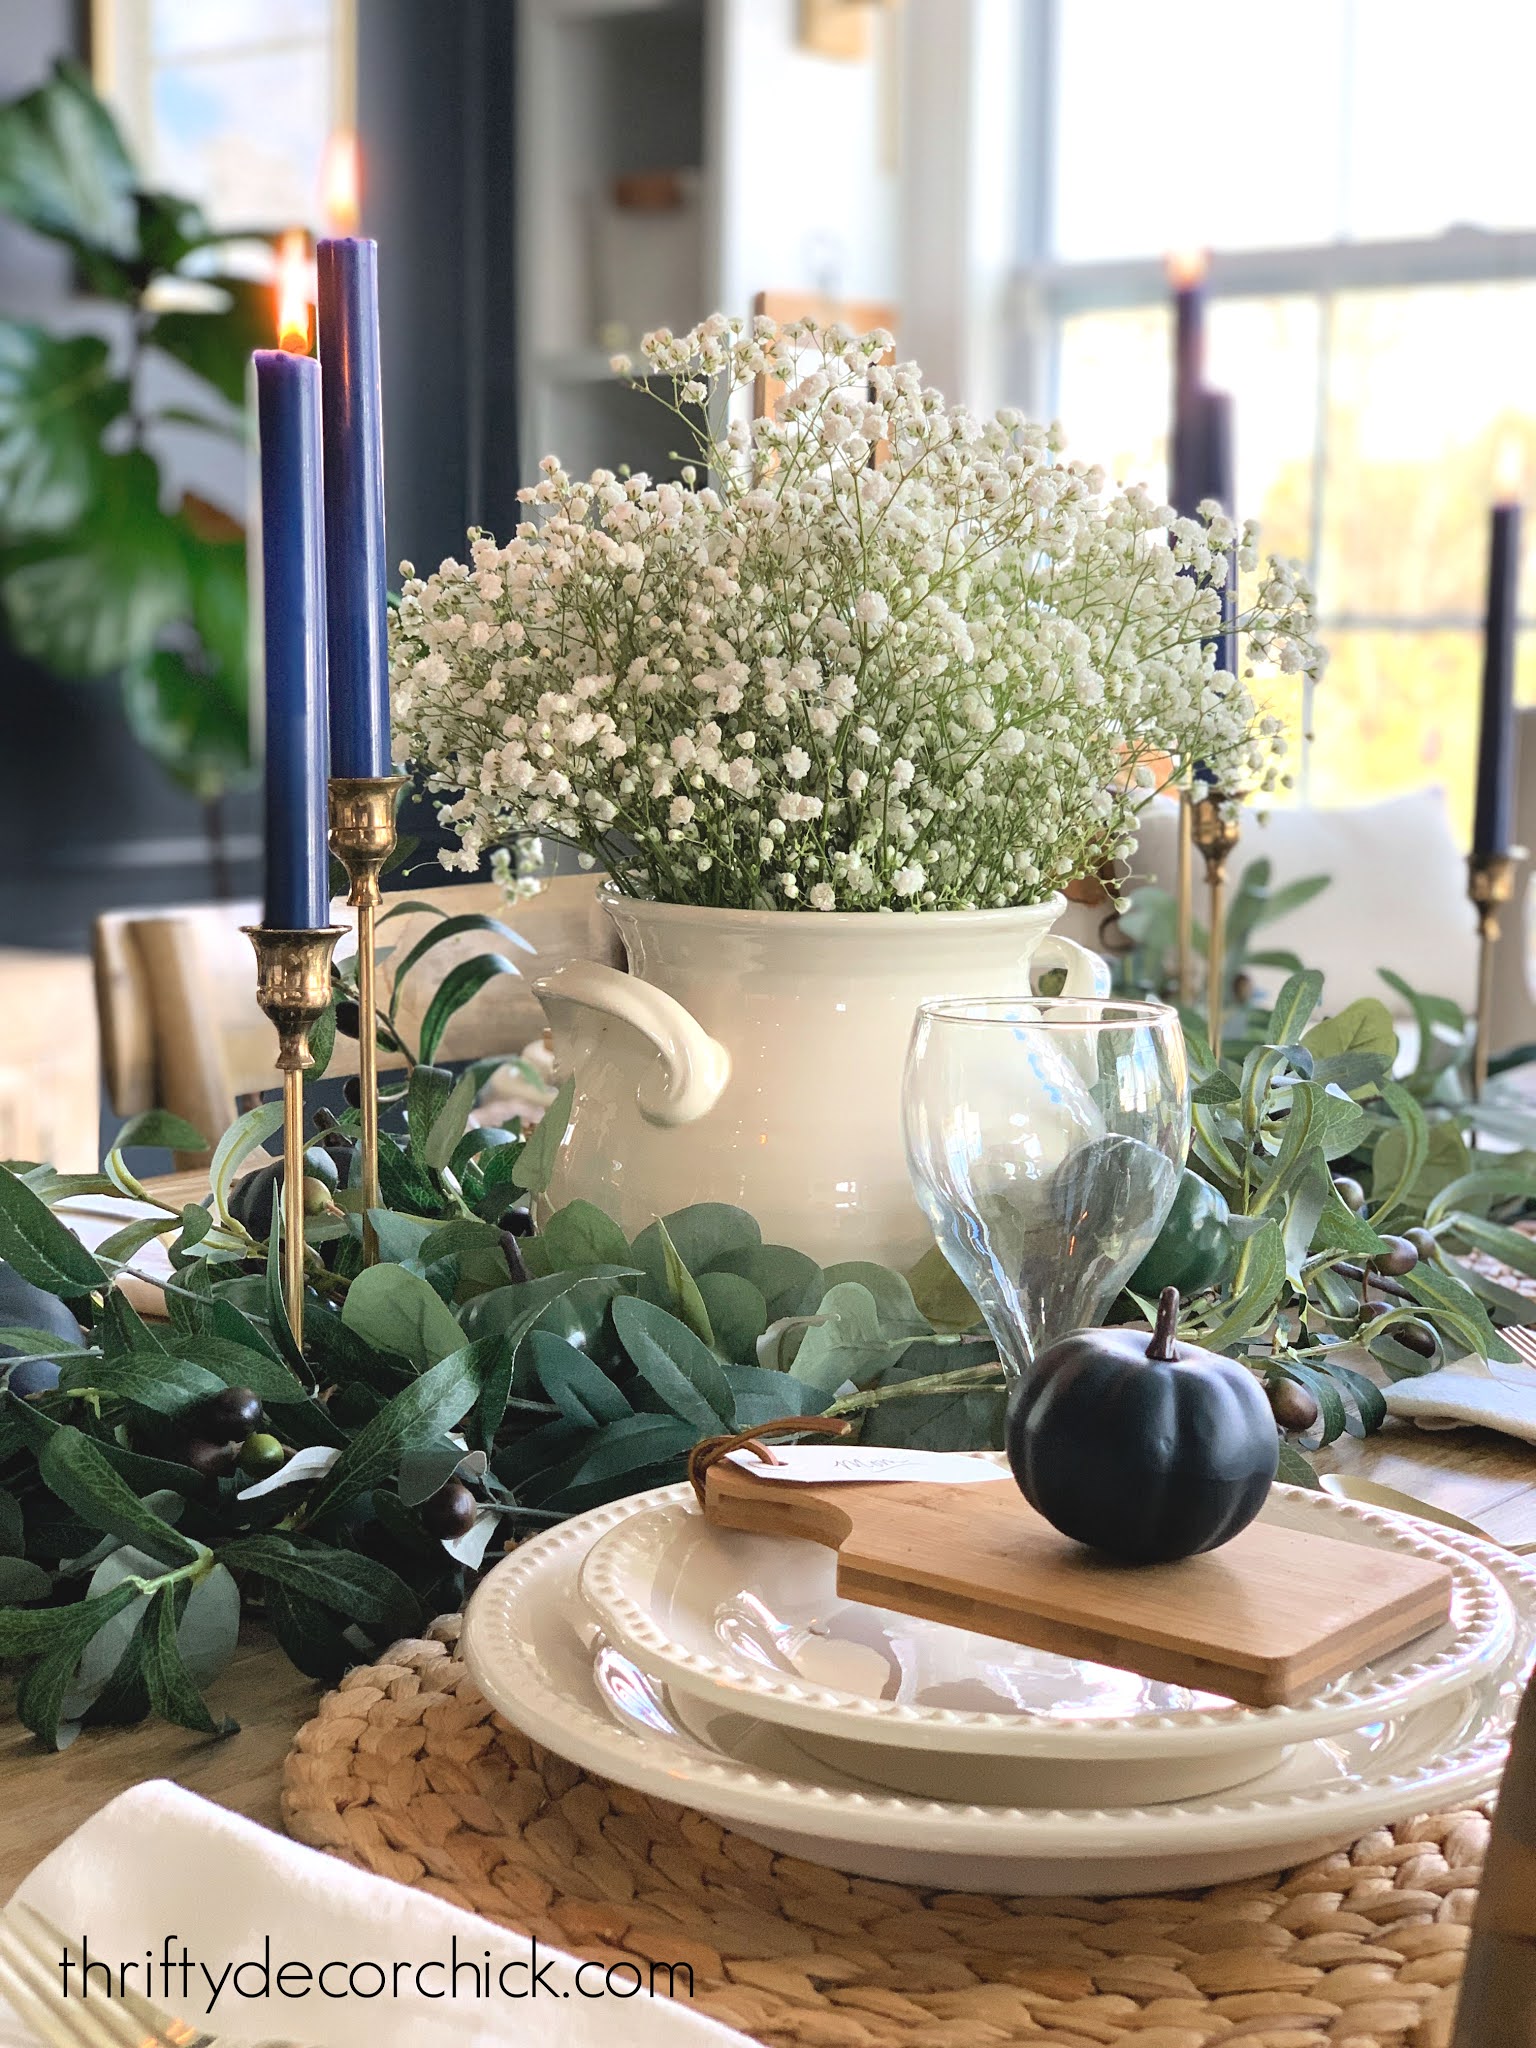
I layered up my favorite dishes and added those simple tags to mini cutting boards with leather string. (Found those boards at Hobby Lobby half off -- $2 each!):
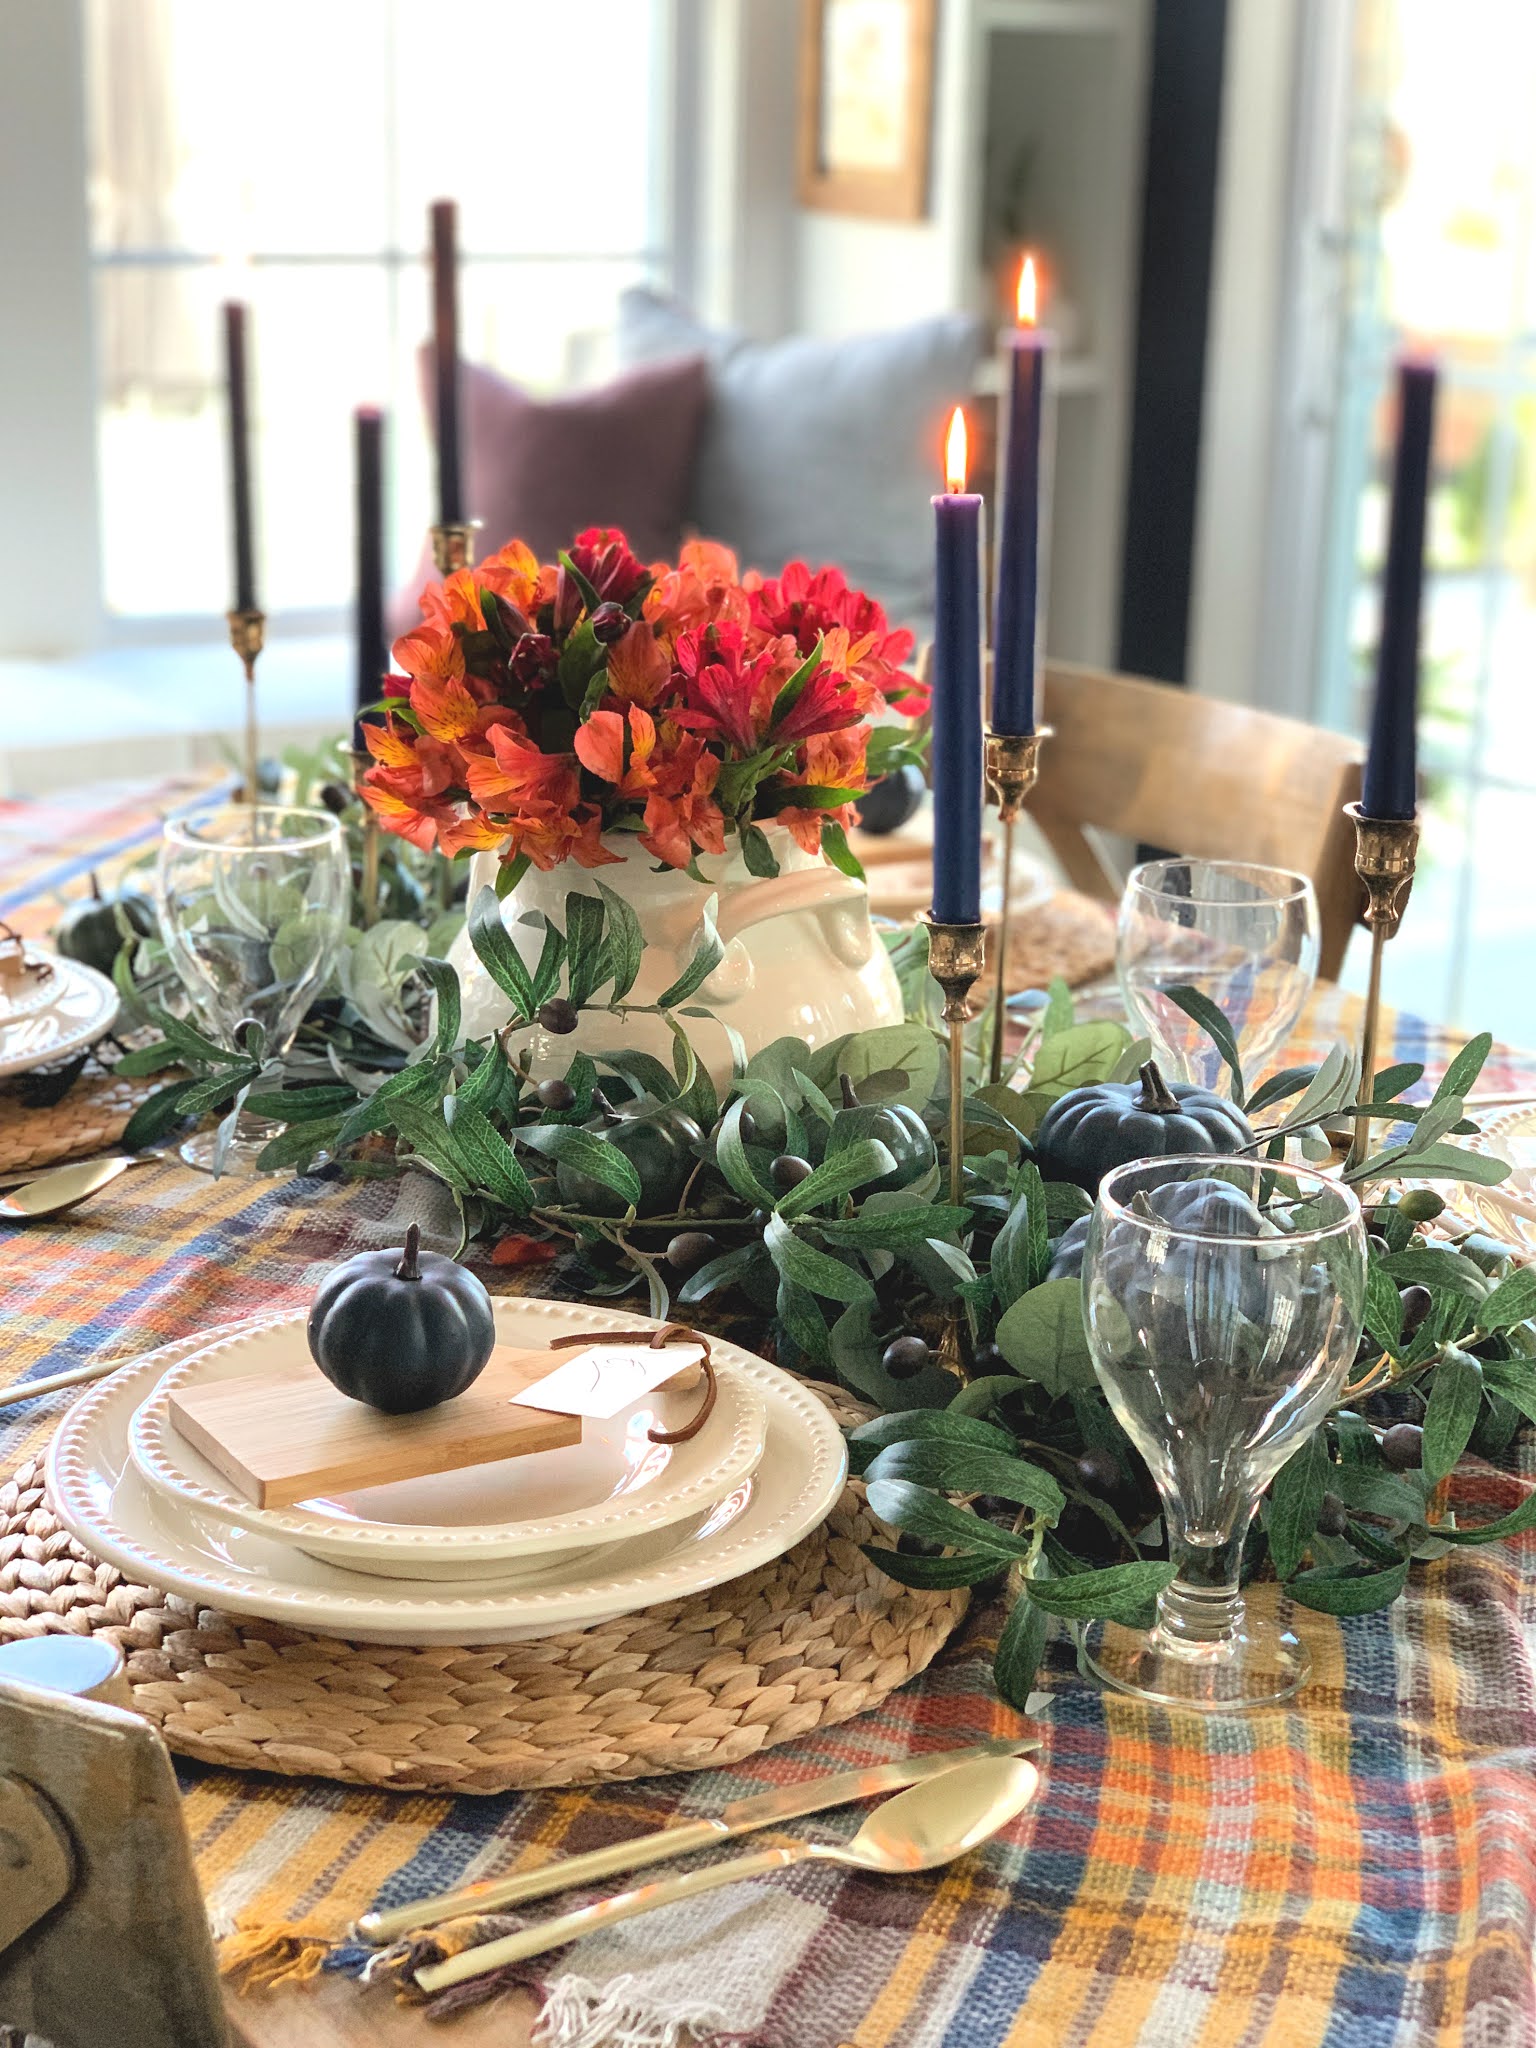
I layered my olive branches and a few eucalyptus leaves in the middle and it turned out beautifully! I'll list everything I used at the bottom of the post in case you're interested.
Those brass candlesticks are a staple -- I use them all year round. They are a classic! Mine are vintage but you can find similar brass candlesticks here.
The "vase" in the middle is a soup crock. ;) You can see here how I added some of the blue and green pumpkins throughout the greenery:
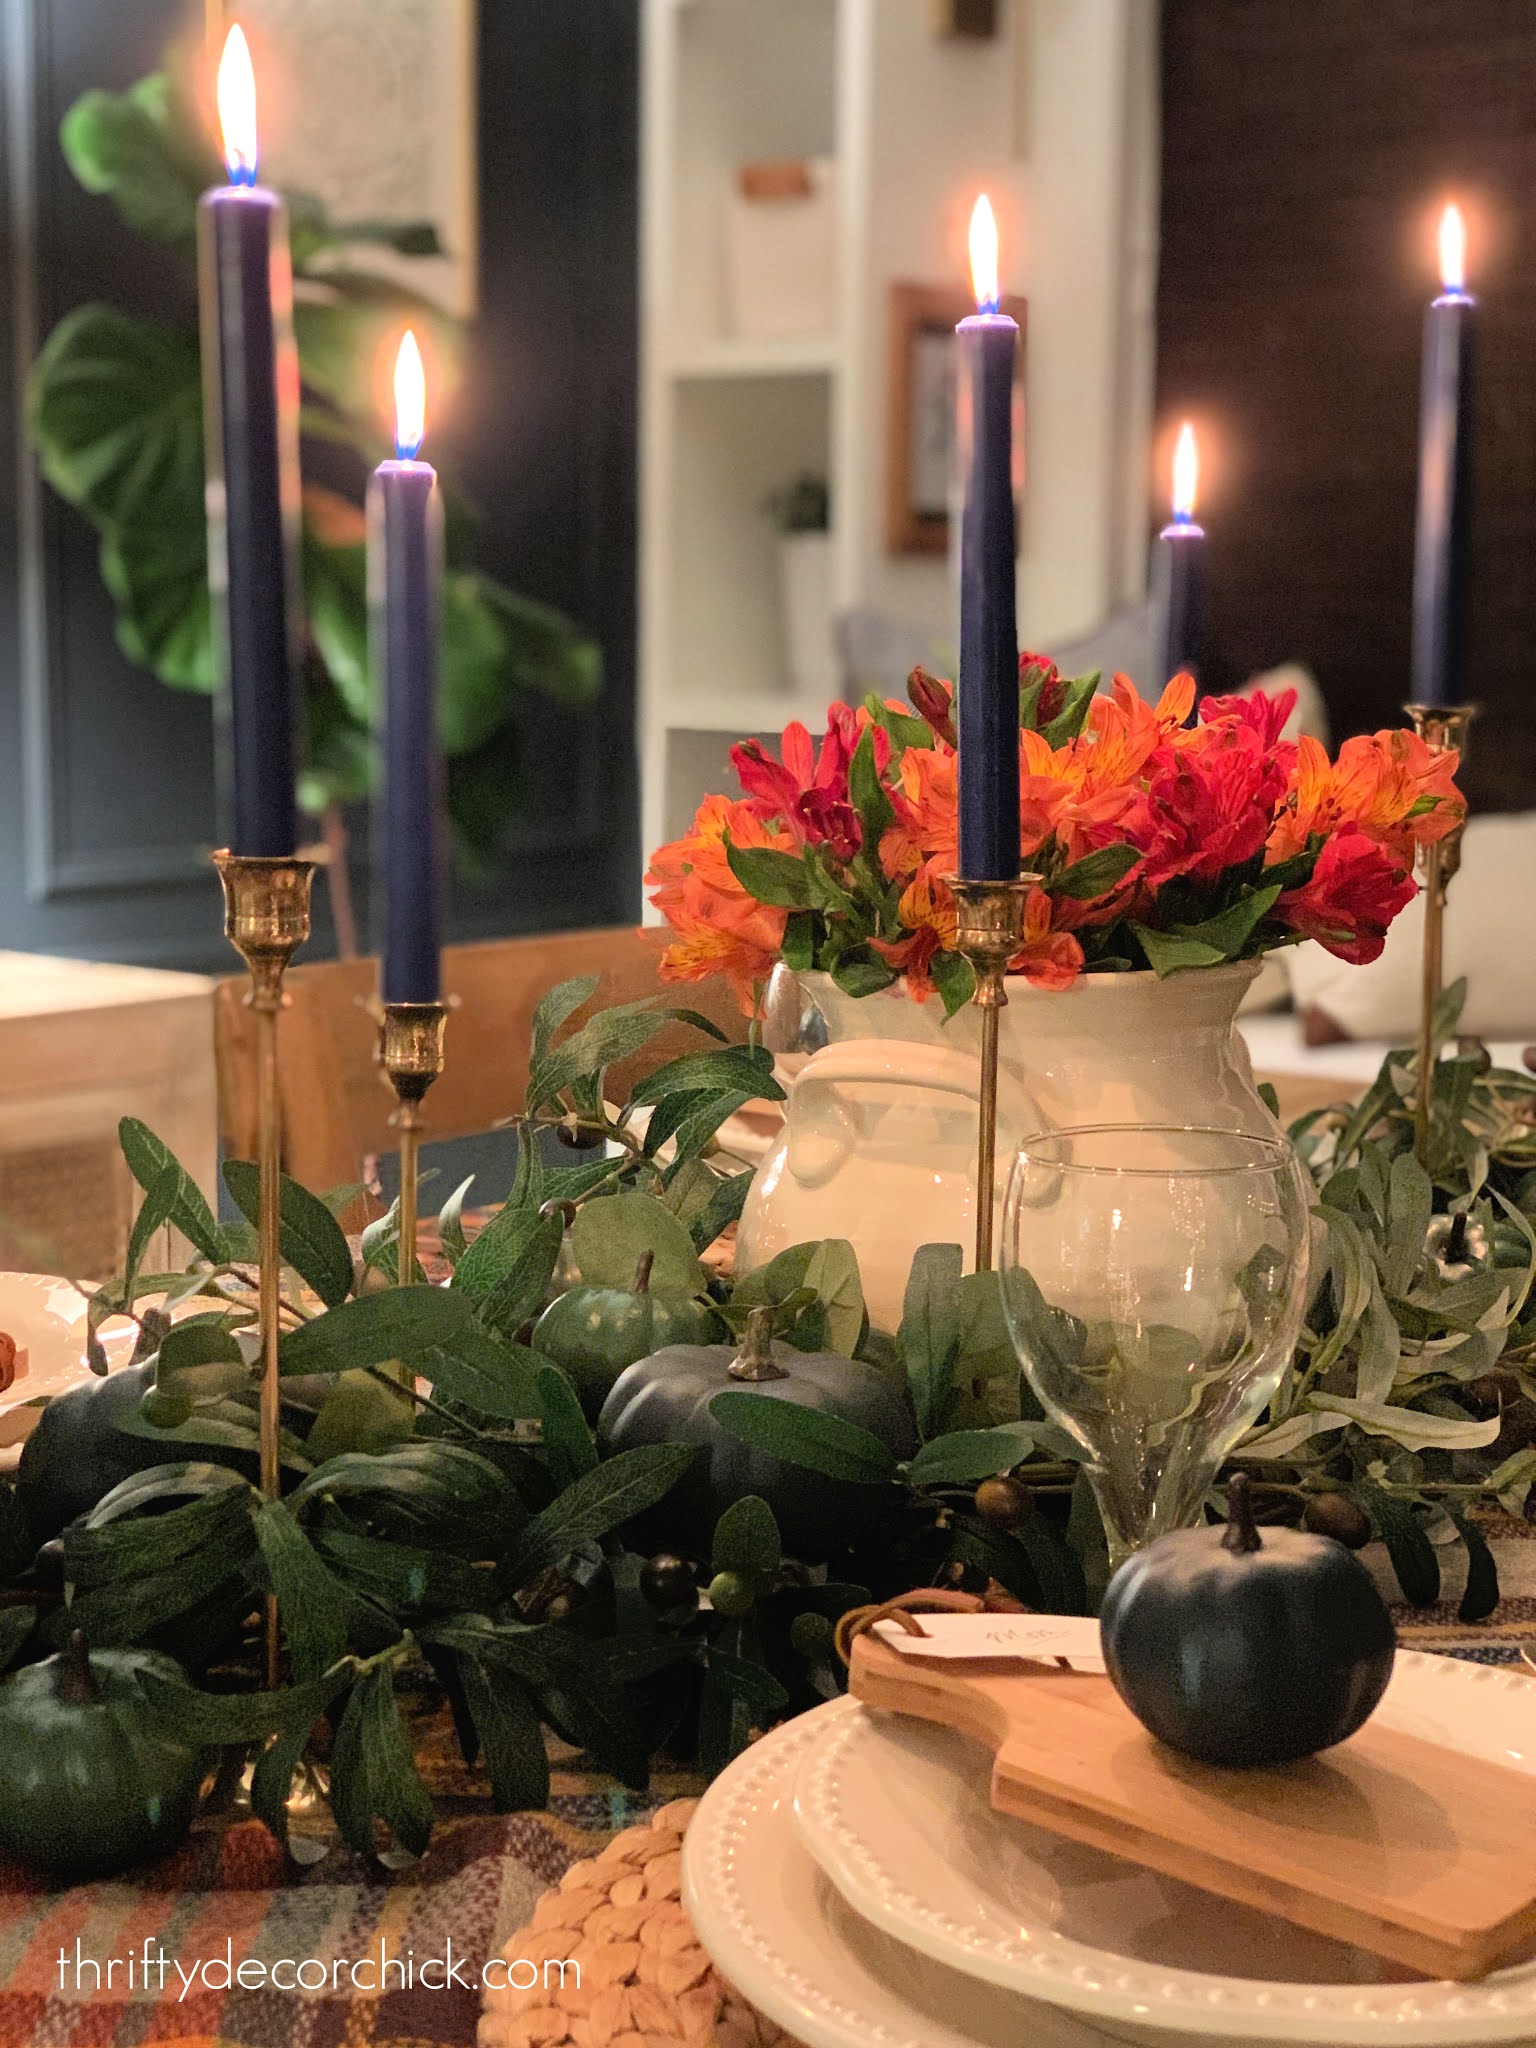
I had to get a night shot! There's nothing better than candles right?
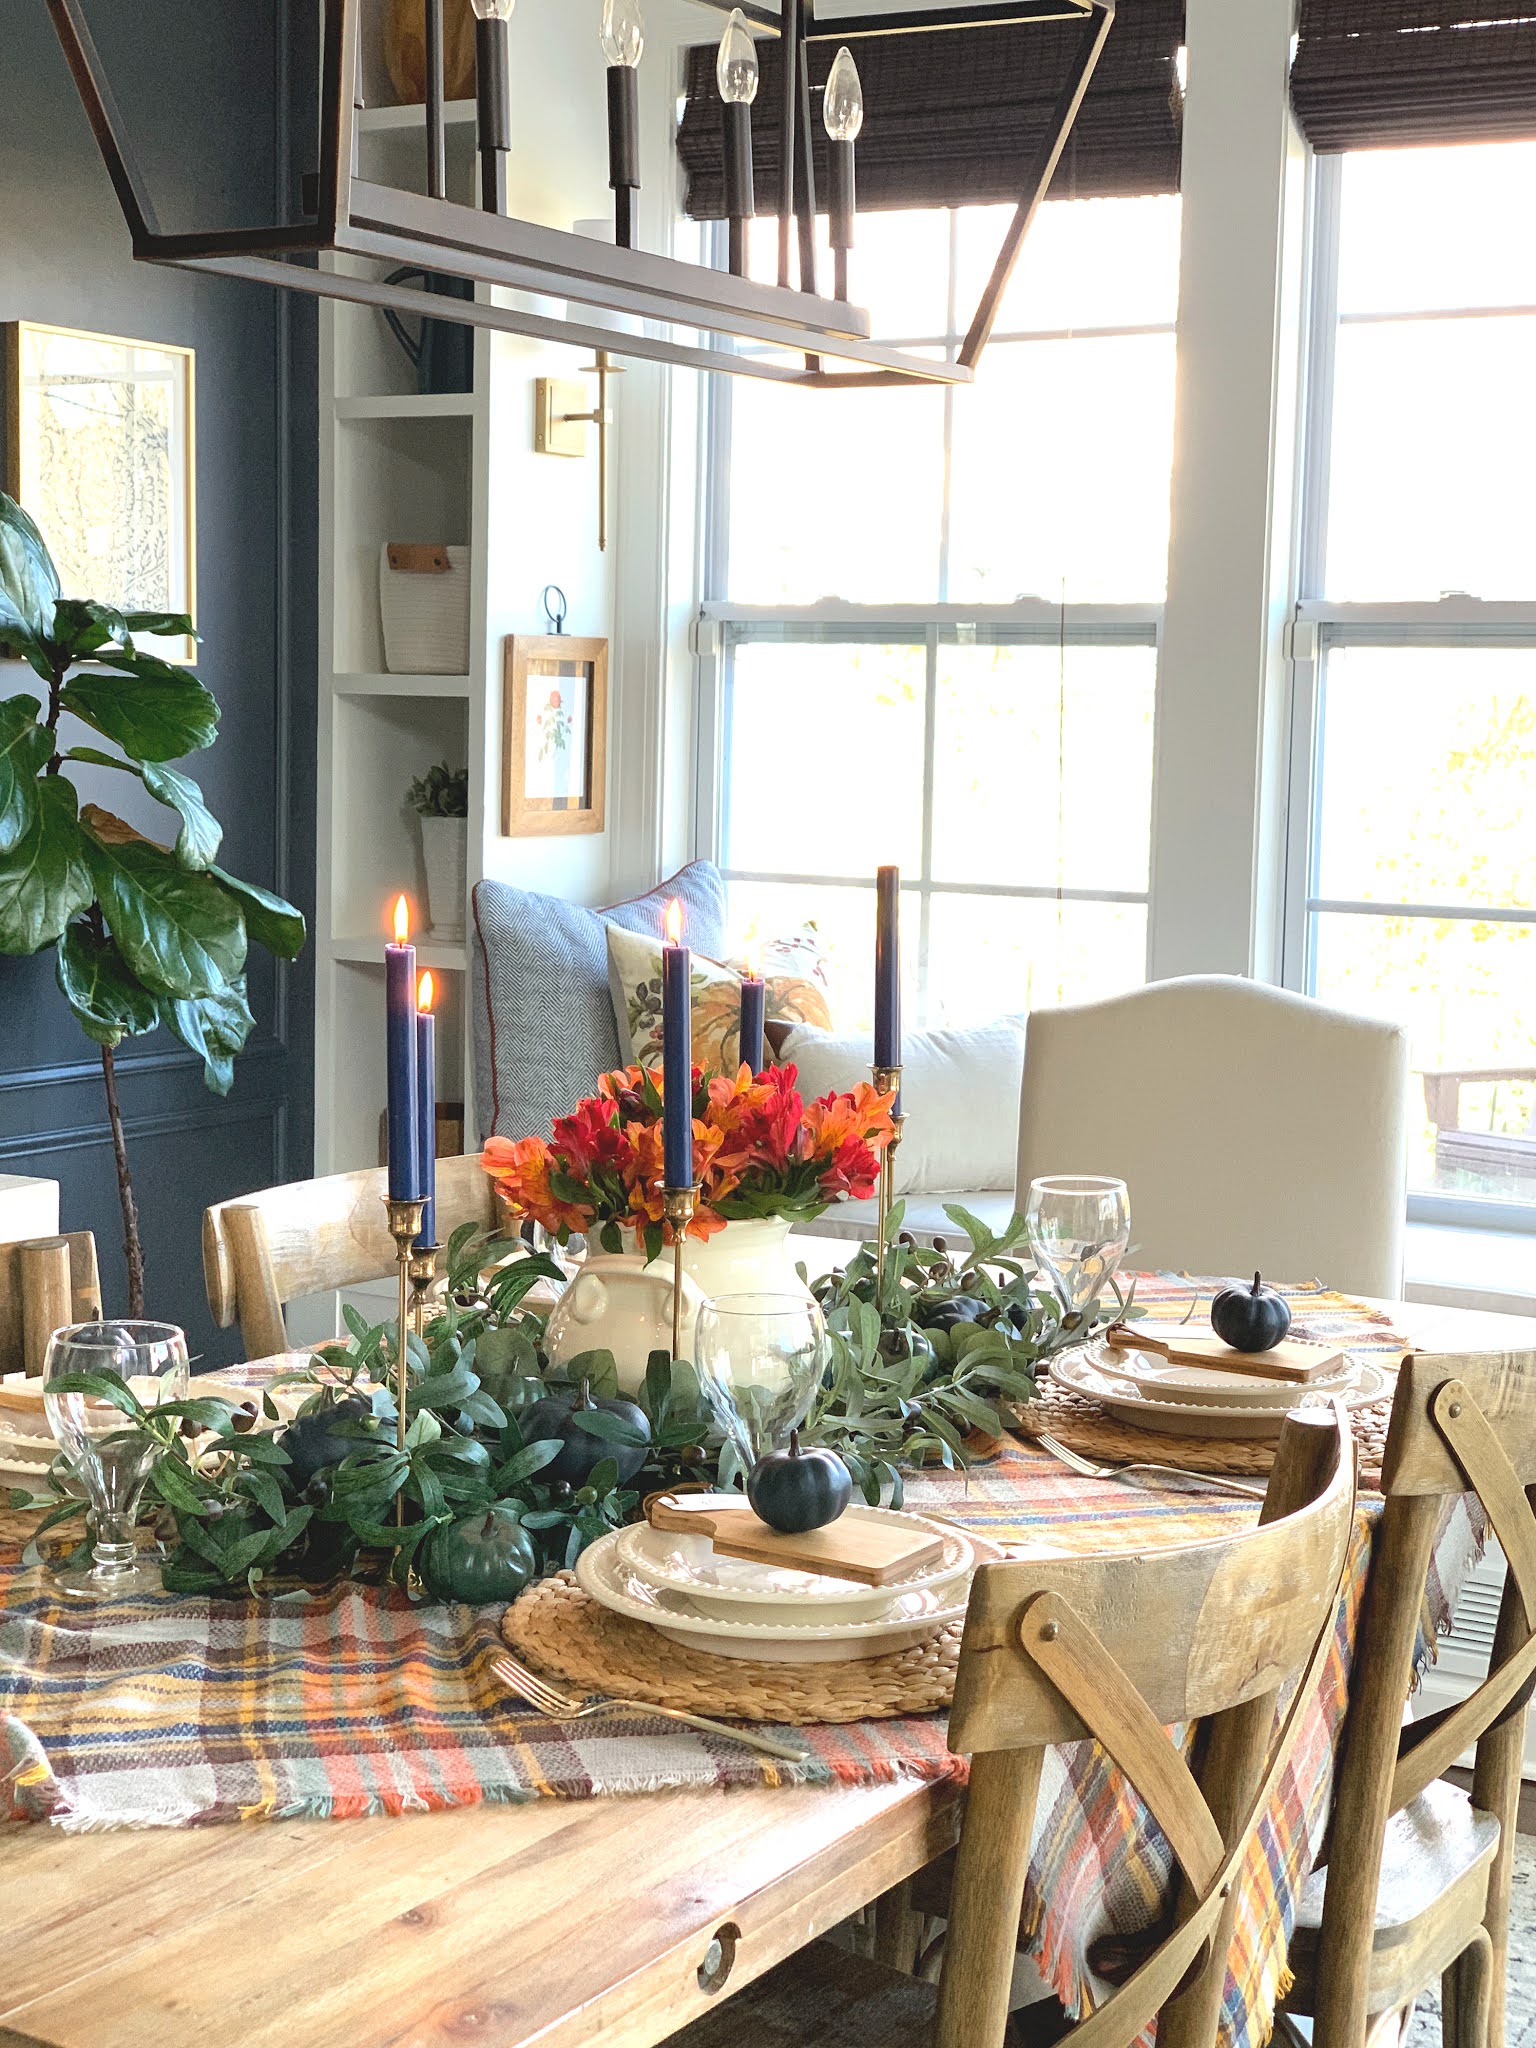
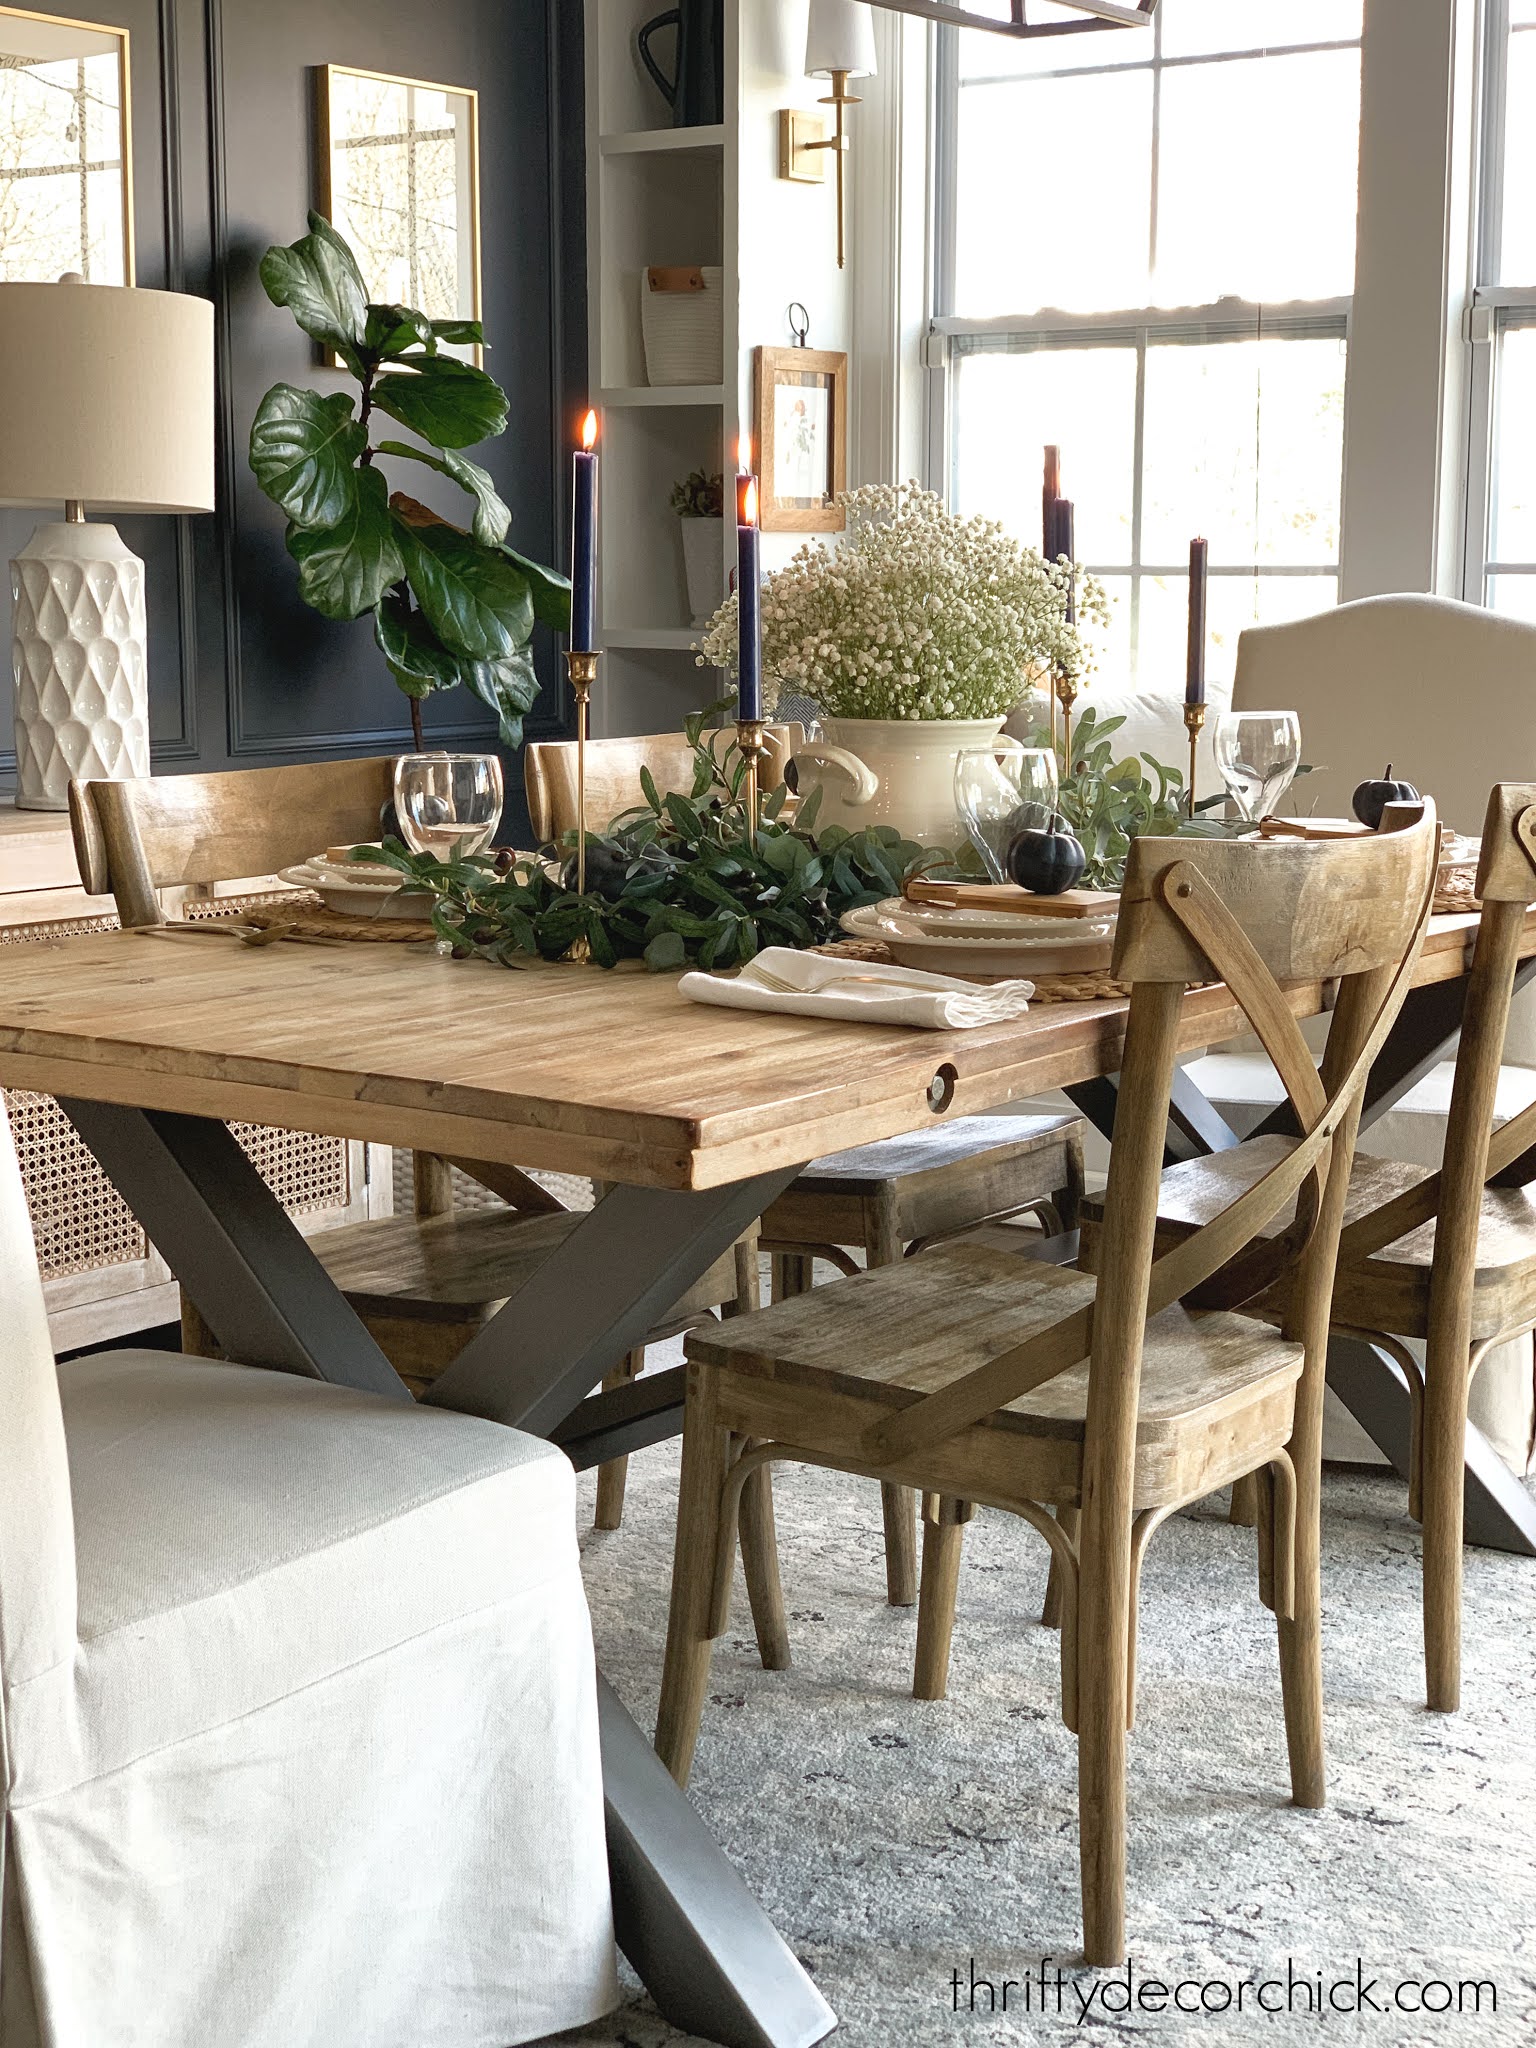
Here's a full shot of the colorful Thanksgiving tablescape:
For the softer version I removed the scarf and left the bare table:
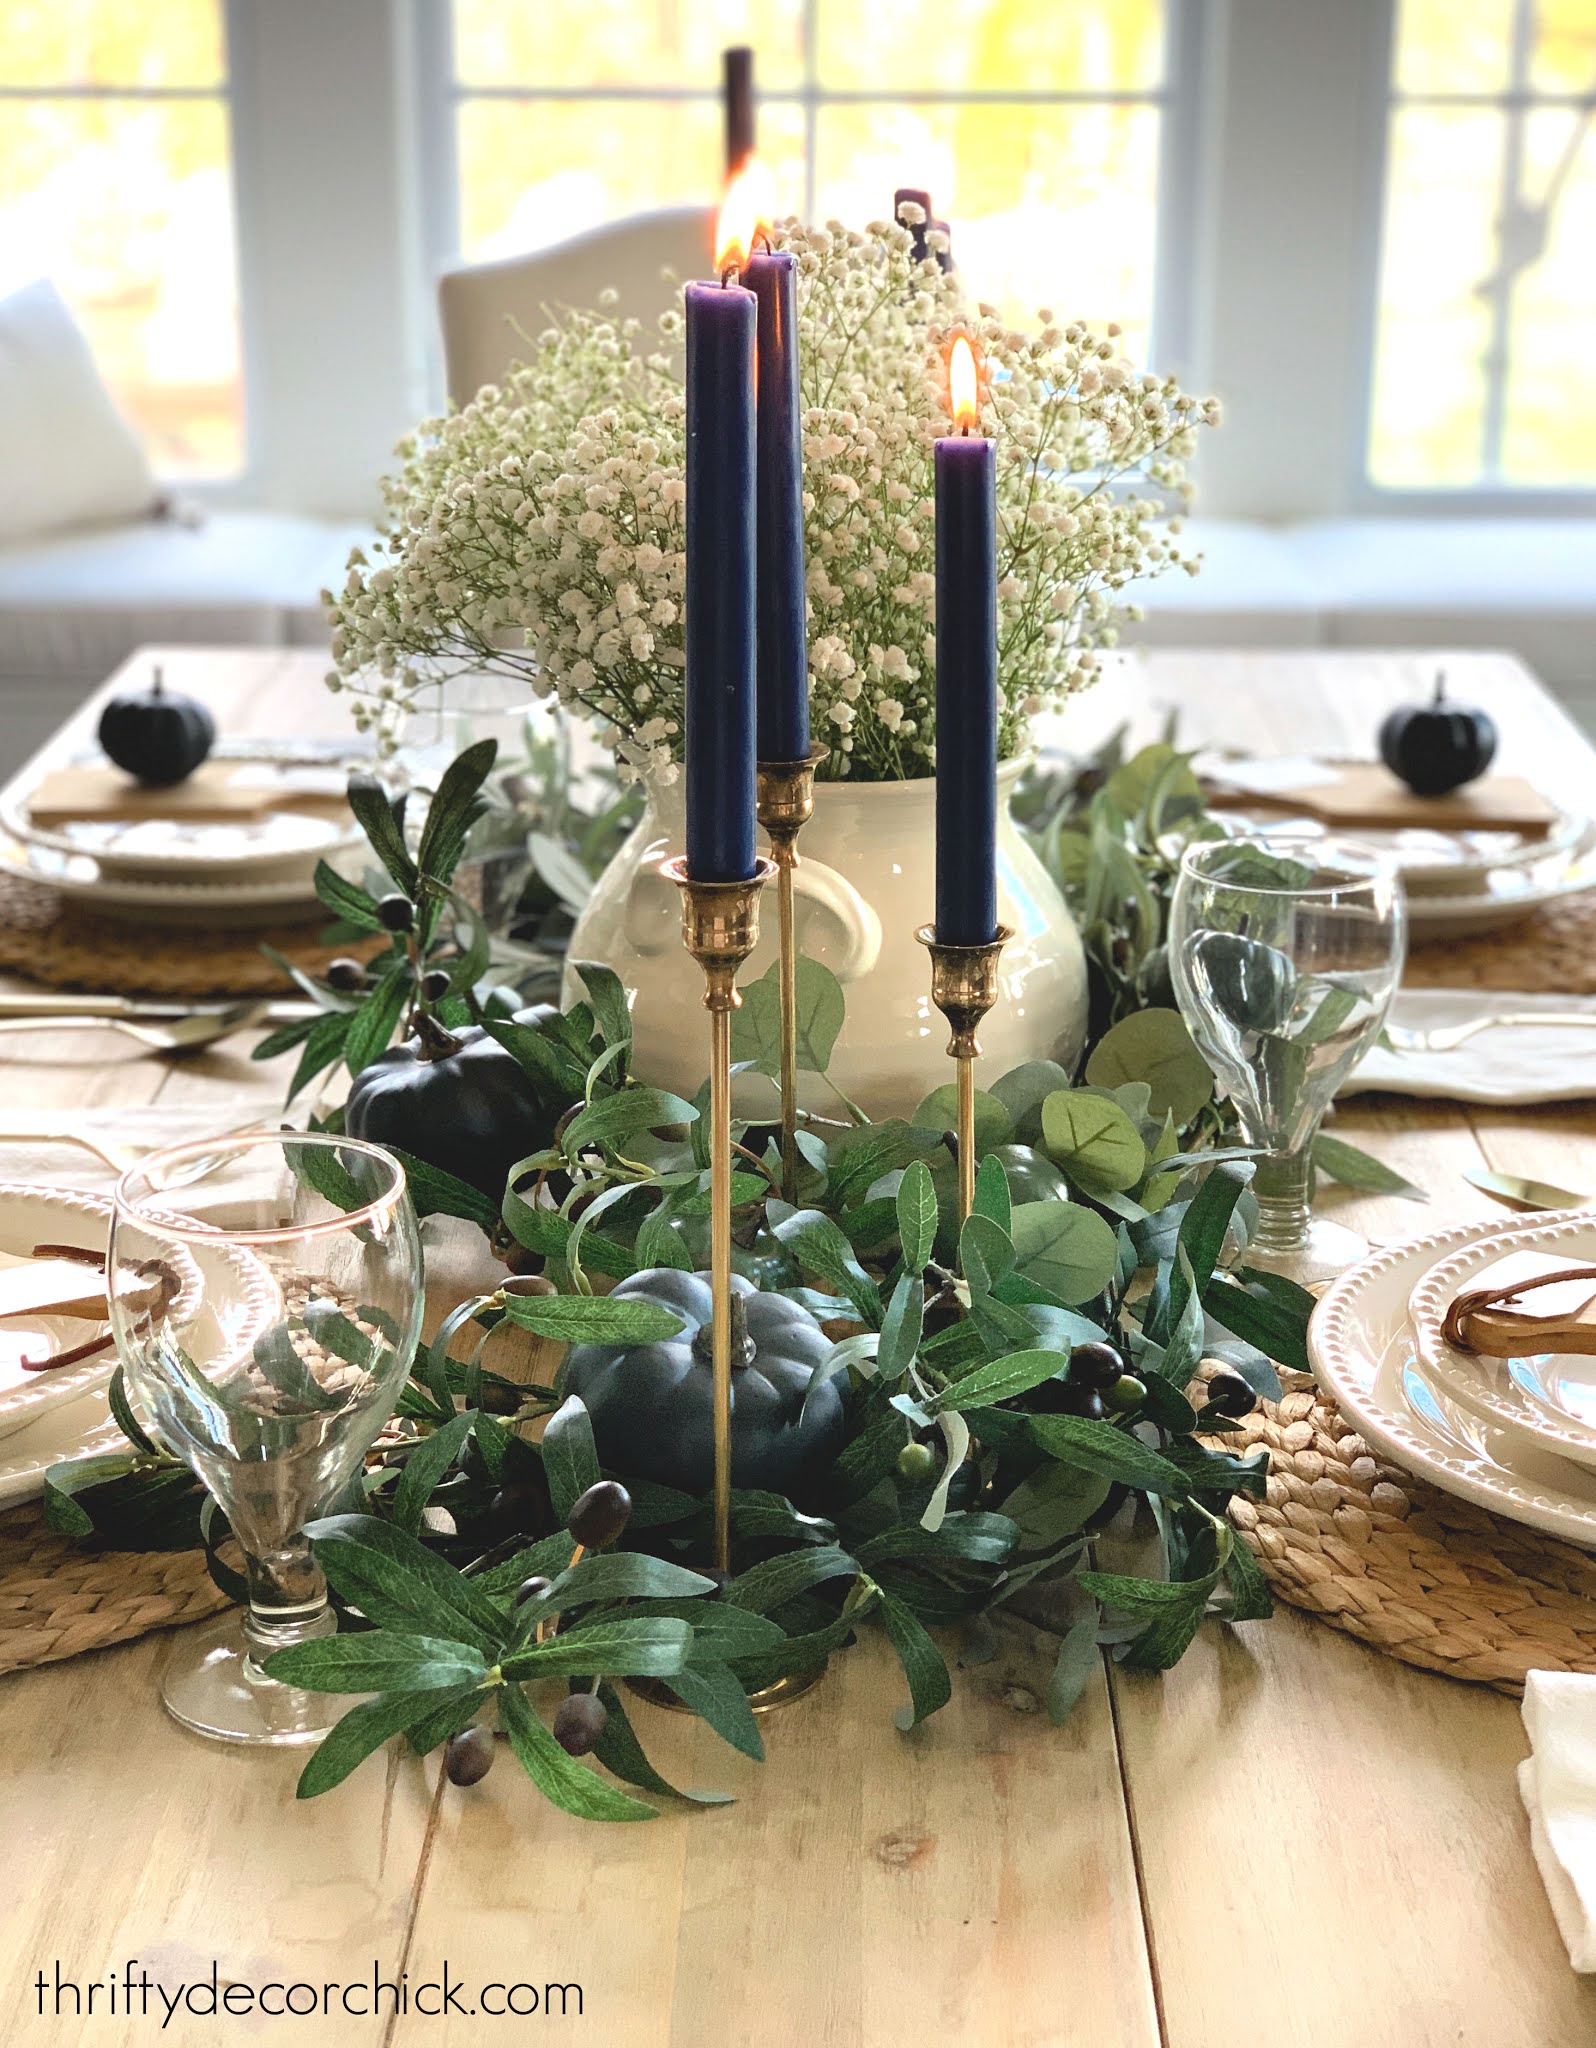
I think the wood shows off the greenery even more!
Have you ever used baby's breath alone? It's so beautiful and so underrated. I've done this a few times over the years and it's lovely:

Isn't that champagne colored flatware so pretty? They were only $2 each at Target! Perfect when you don't really need a full five-piece set.
If you're celebrating turkey day with your immediate family or extended, it doesn't take much to dress up the table. Hopefully these simple tablescape ideas inspire you!:
As I mentioned, this could easily be switched up for Christmas! That greenery works beautifully all year.
You can save these Thanksgiving tablescape ideas for later by pinning this image:

What are you cooking up for your Thanksgiving meal this year?
Our table was from a local shop in Indy, but I link a similar one below. Our water goblets are from Goodwill. You can click on the photos to get the sources. :) If I forgot anything please let me know!

See more of our home here. To shop items in our home, click here! Never miss a post by signing up to get posts via email.
Via https://www.thriftydecorchick.com/2020/11/simple-elegant-thanksgiving-tablescapes.html
I've started to pull out some Christmas decor and it's been fun get it all out! I want to enjoy the twinkling lights even longer this year, and I'm looking to a much slower pace this December than usual. It will be so nice to have it all done in the next week or so!
I decorated our mantel a couple days ago and thought I would share how I get a fluffy and full mantel without spending a ton.
I've seen so many gorgeous fluffy greenery and garlands shared online recently...but some are one to $200 EACH! I don't mind putting some money into items like this that I know I'll use year after year -- but that's way too much for me, especially knowing I'd want more than one.
Instead, I shop the half off sales at craft stores this time of year. They've never failed me! I use a few different kinds to give the mantel the fullness and variety I want. (I'll share some pretty and inexpensive garland options at the end of this post!)
My first addition is this long needle pine garland and I'm pretty sure I found this at Hobby Lobby. They always have a great selection and it's on sale all season:

I like that it has the berries on it already!
I use two because our mantel is so long. Because of that I lay them in different directions so they spill off the sides like so:

This post may contain affiliate links for your convenience.
See my policies and disclosure page for more information.

Next I layered on another one, this time with pinecones:

I had to laugh because I've never taken off the tags...they disappear when it's all done. That one went right in the middle to build up the center.
I've used eucalyptus in my Christmas decor for years now and it's such a lovely addition. It adds another layer that looks great!:

There's really no rhyme or reason -- just stick it in and fluff! I like symmetry so I'll usually add one at one end and do the same at the same spot on the other side:

Then it's time to fluff it up even more with more greenery picks -- I like the white "snow" on these because it breaks up all that green:

It seems like a lot, but these are so cheap this time of year! Even better -- grab them after Christmas! A ton of my greenery and holiday decor is from those after holiday sales.
My last additions are inexpensive berries and pine cones placed here and there:

The cones and berries add texture and color that finishes it off beautifully! (I also stick those berries in our trees.)
I build it up in the middle and taper things off to the sides just a bit. The end result always makes me so happy!:

Since we don't have an outlet over the mantel (one thing I forgot when we built!), I use the battery operated fairy lights I shared with you last week. The batteries last a long time because they're LED:

Last year I added some red beaded garland that I may still put up. I usually add some candlesticks as well, but I'm liking this slightly simpler look this season:

See how I added that grid trim to the fireplace wall here
I mean, as simple as six layers of garland can be. Ha!
The mantel is one of my favorite things to decorate every Christmas:

It really is easy too -- just lay it on there and start sticking in the extras. Fluff it up and tuck in some lights! It took me maybe 30 minutes to set this up.
This gives me the look of the fluffier garlands from Crate and Barrel or Pottery Barn that run $100 a piece! Plus I just love adding the layers and textures for more interest:

I gathered a bunch of similar garlands and berries for you as well! I hope this will help you build the fluffy Christmas mantel of your dreams! ;)
Check out this post to see some of my staples that make Christmas decorating easier!
You can click on the photos below to get to them as well:
See more of our home here. To shop items in our home, click here! Never miss a post by signing up to get posts via email.
Via https://www.thriftydecorchick.com/2020/11/decorate-with-greenery-Christmas-mantel.html
Hello my friends! I found an adorable baking pan a few weeks ago and it immediately went into my online cart. I thought it would be SO cute for holiday baking.
If you've ever tried traditional gingerbread villages and ended up with a crumbled mess...this method is for you! This baking pan is SO stinking cute and the little village turned out better than any other we've tried.
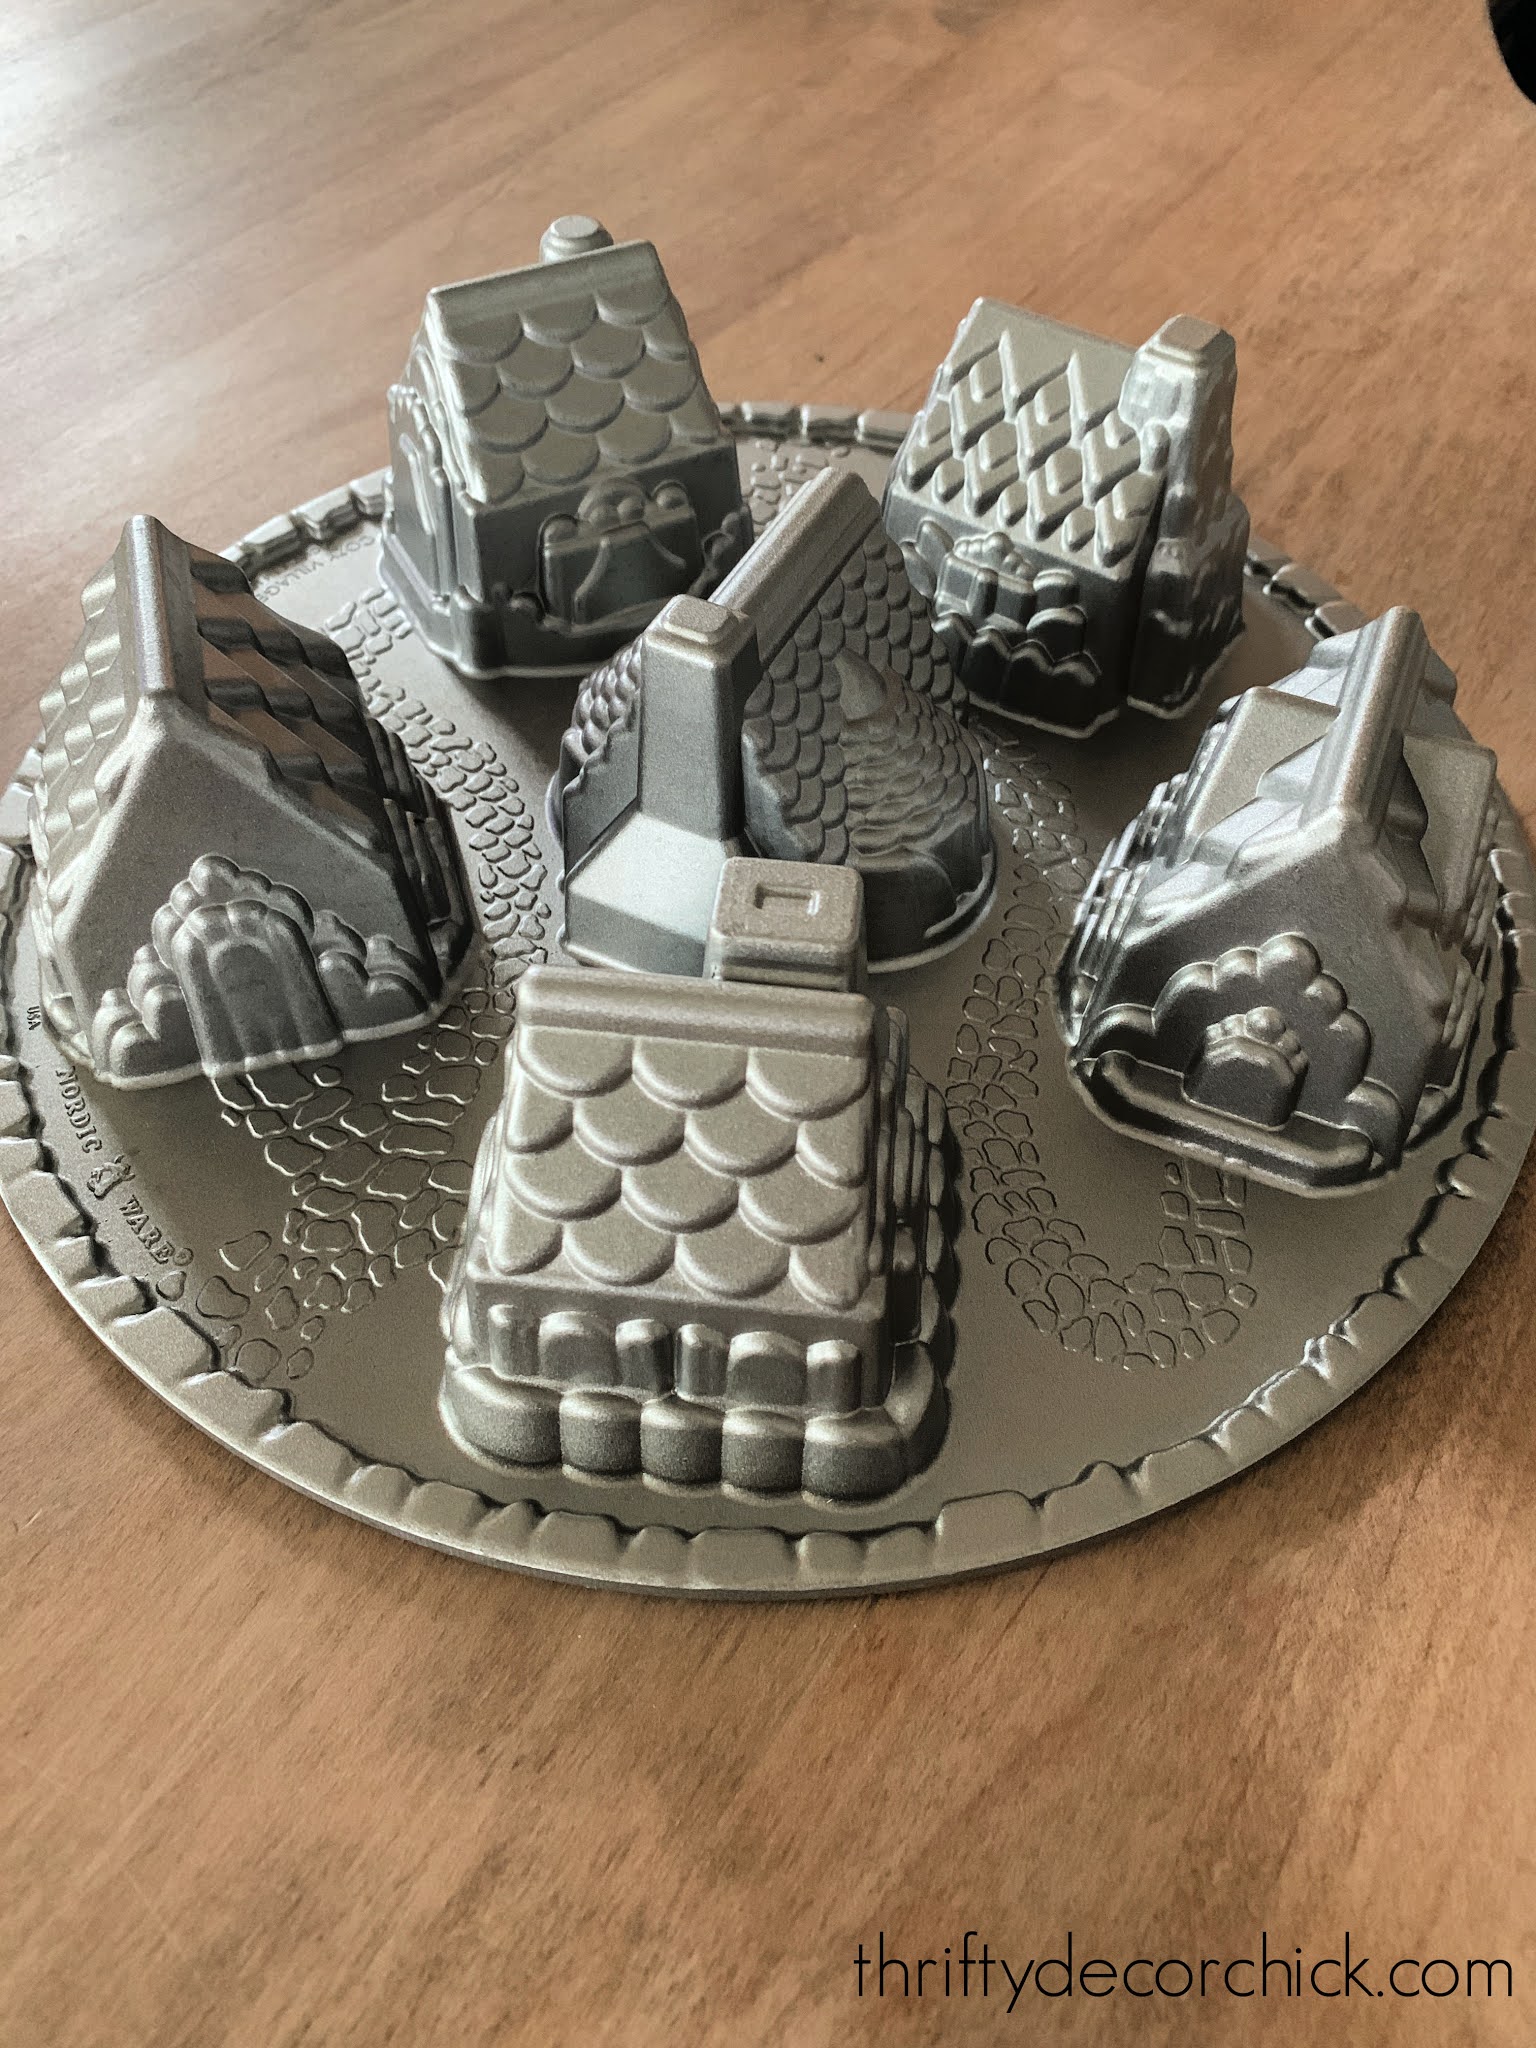
This is the pan I found:
This post may contain affiliate links for your convenience.
See my policies and disclosure page for more information.
It's the Nordic Ware village baking pan (you can also find it here!) and the detail is just adorable! You can see why I fell in love.
I planned to hold off a bit before trying it, but when it arrived I was too excited to see how they would turn out. I read the instructions that came with the pan and it said to use a non stick spray with flour in it...this is important!
I found this flour baking spray at the grocery store and used a box cake mix to make the village:

I sprayed inside the houses generously and then filled about 3/4 full:
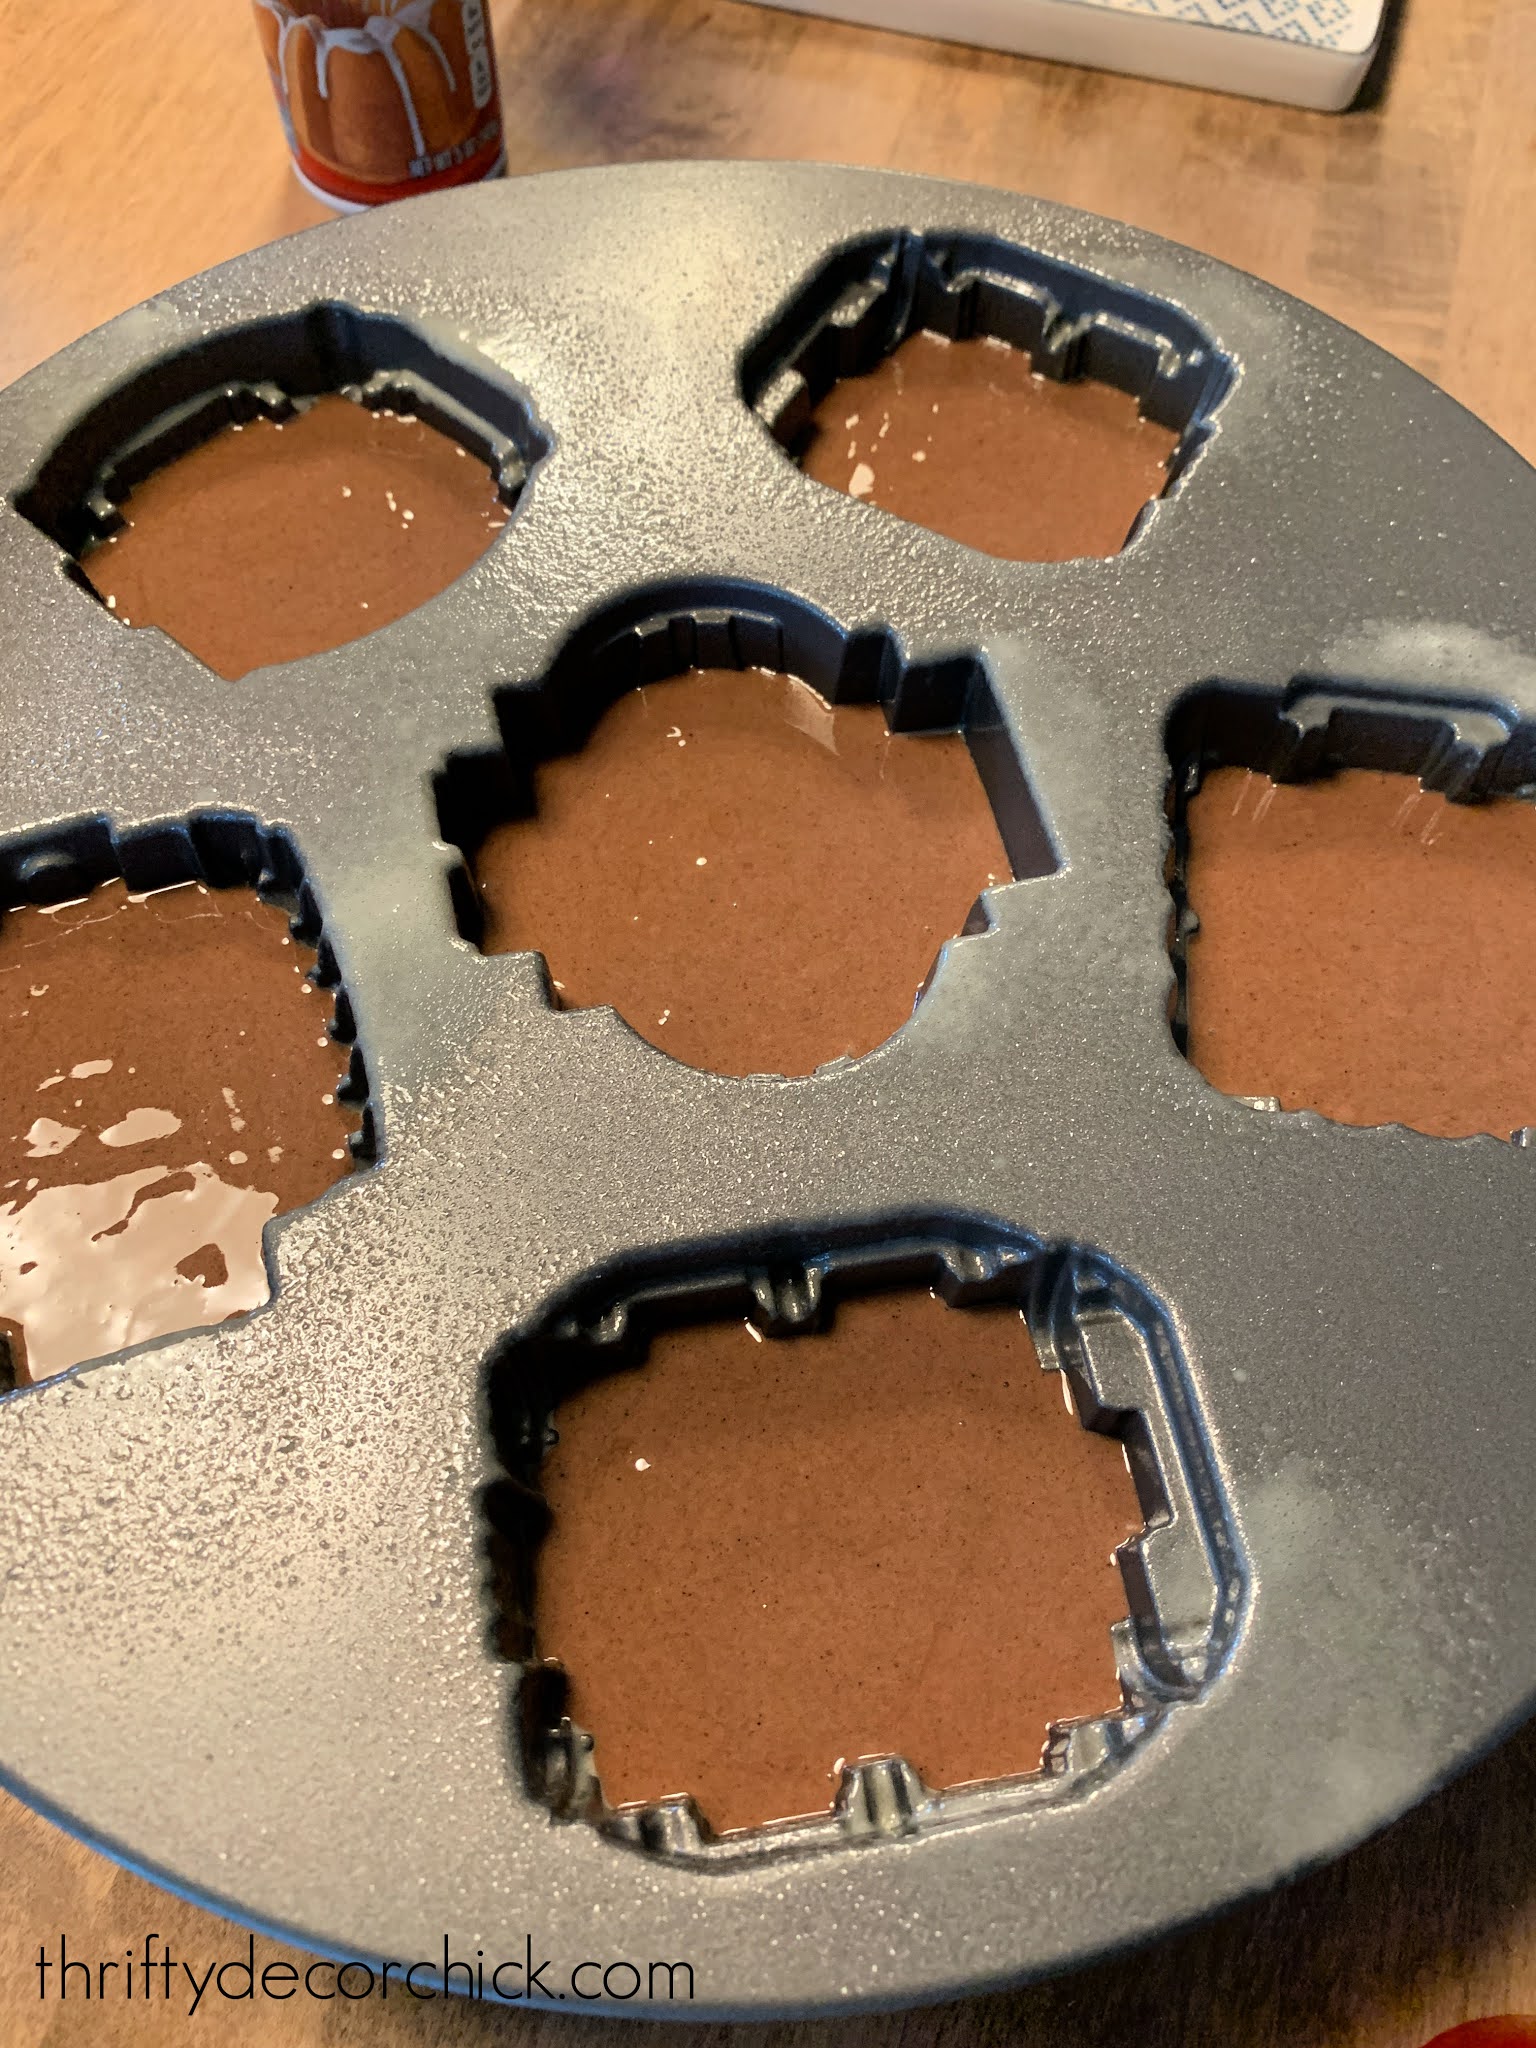
Well, a little more than 3/4, but it's a bit difficult to determine that with these because of the shape.
I did have some overflow, but that's an easy fix! I let them cool for about 15 minutes before cutting off the bottoms:

We immediately ate that part. ;)
I took a cookie rack and placed it on top and then flipped it over...sweating while I did it because I was so nervous they would stick:

No fear -- they came out perfectly! Ugh...so cute!! I sifted some powdered sugar on top for a snowy look:

If you're fancy you could pipe some detail with frosting. I am not fancy. ;)
I grabbed a pedestal and sprinkled some powdered sugar around that before placing them on. I mean...come on! How cute is this?:

They would be so cute sitting out at a Christmas party...but people may not eat them because they look so good:

I grabbed a cloche and tucked it all under there so we can keep them for a few days:

So simple! I made the cake mix as directed and the village was baked to perfection at 25 minutes. I had plenty left over that I used for a small round cake as well.
As I was making these I wondered if the pan would work for a more permanent Christmas village -- maybe with cement or polymer clay of some kind? (Of course I wouldn't use it for baking after that.) I may have to try it with another pan sometime.
What a fun Christmas addition! I had to share it with you. :)
See more of our home here. To shop items in our home, click here! Never miss a post by signing up to get posts via email.
Via https://www.thriftydecorchick.com/2020/11/the-easiest-christmas-village-that.html
I like to share Christmas projects and decor in November so you can plan for the season ahead of time. I usually start to pull decor out earlier than most, but this year I've heard I am not alone! So many friends in real life and online are decorating early this season and I'm thrilled about it!
We all need to enjoy the pretty lights and warm fuzzies even longer this year...I am here for it!
I went into Target the other day and was giddy with all of the new Christmas decor. It's like they knew we'd need the pick-me-up this year. There are so many fun items and I had a blast looking around (and buying a few things).
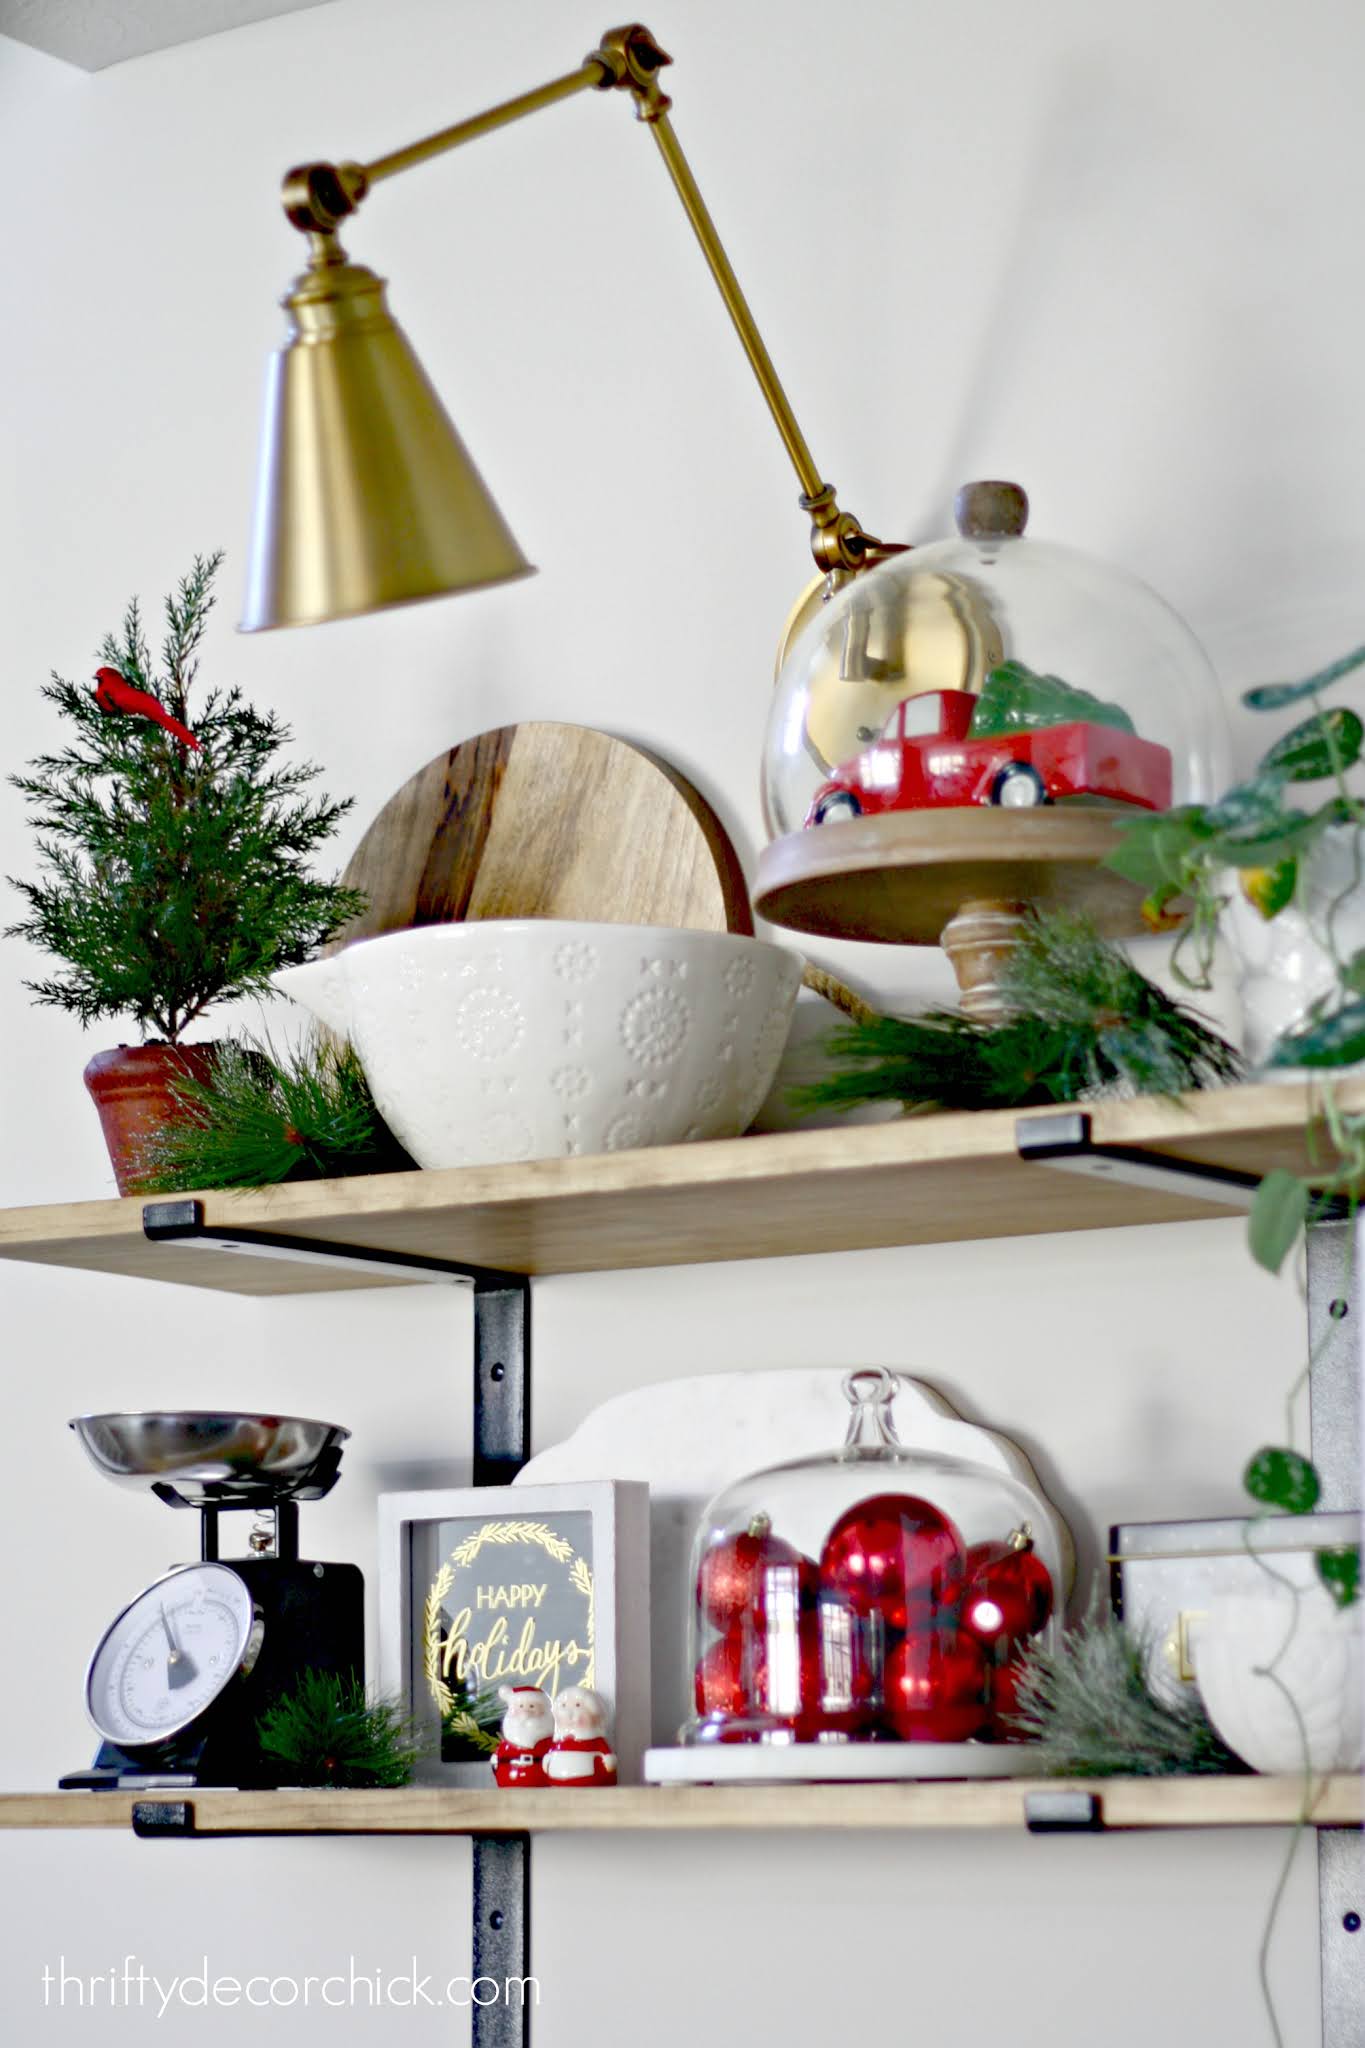
I noticed a ton of decorative trees in particular -- so many beautiful options this year! Over the years I've gathered more and more trees for the holidays...they have become one of my favorite items to use in my Christmas decor.
I shared these gorgeous glass trees last year:

But I'm also a sucker for wooden ones as well:

And I have a ridiculous amount of regular tiny trees I use all over the house:
This post may contain affiliate links for your convenience.
See my policies and disclosure page for more information.
I gathered my favorites in the Target Christmas decor section to share with you. I was thrilled when I saw these gorgeous glass trees (pictured above) were back!:
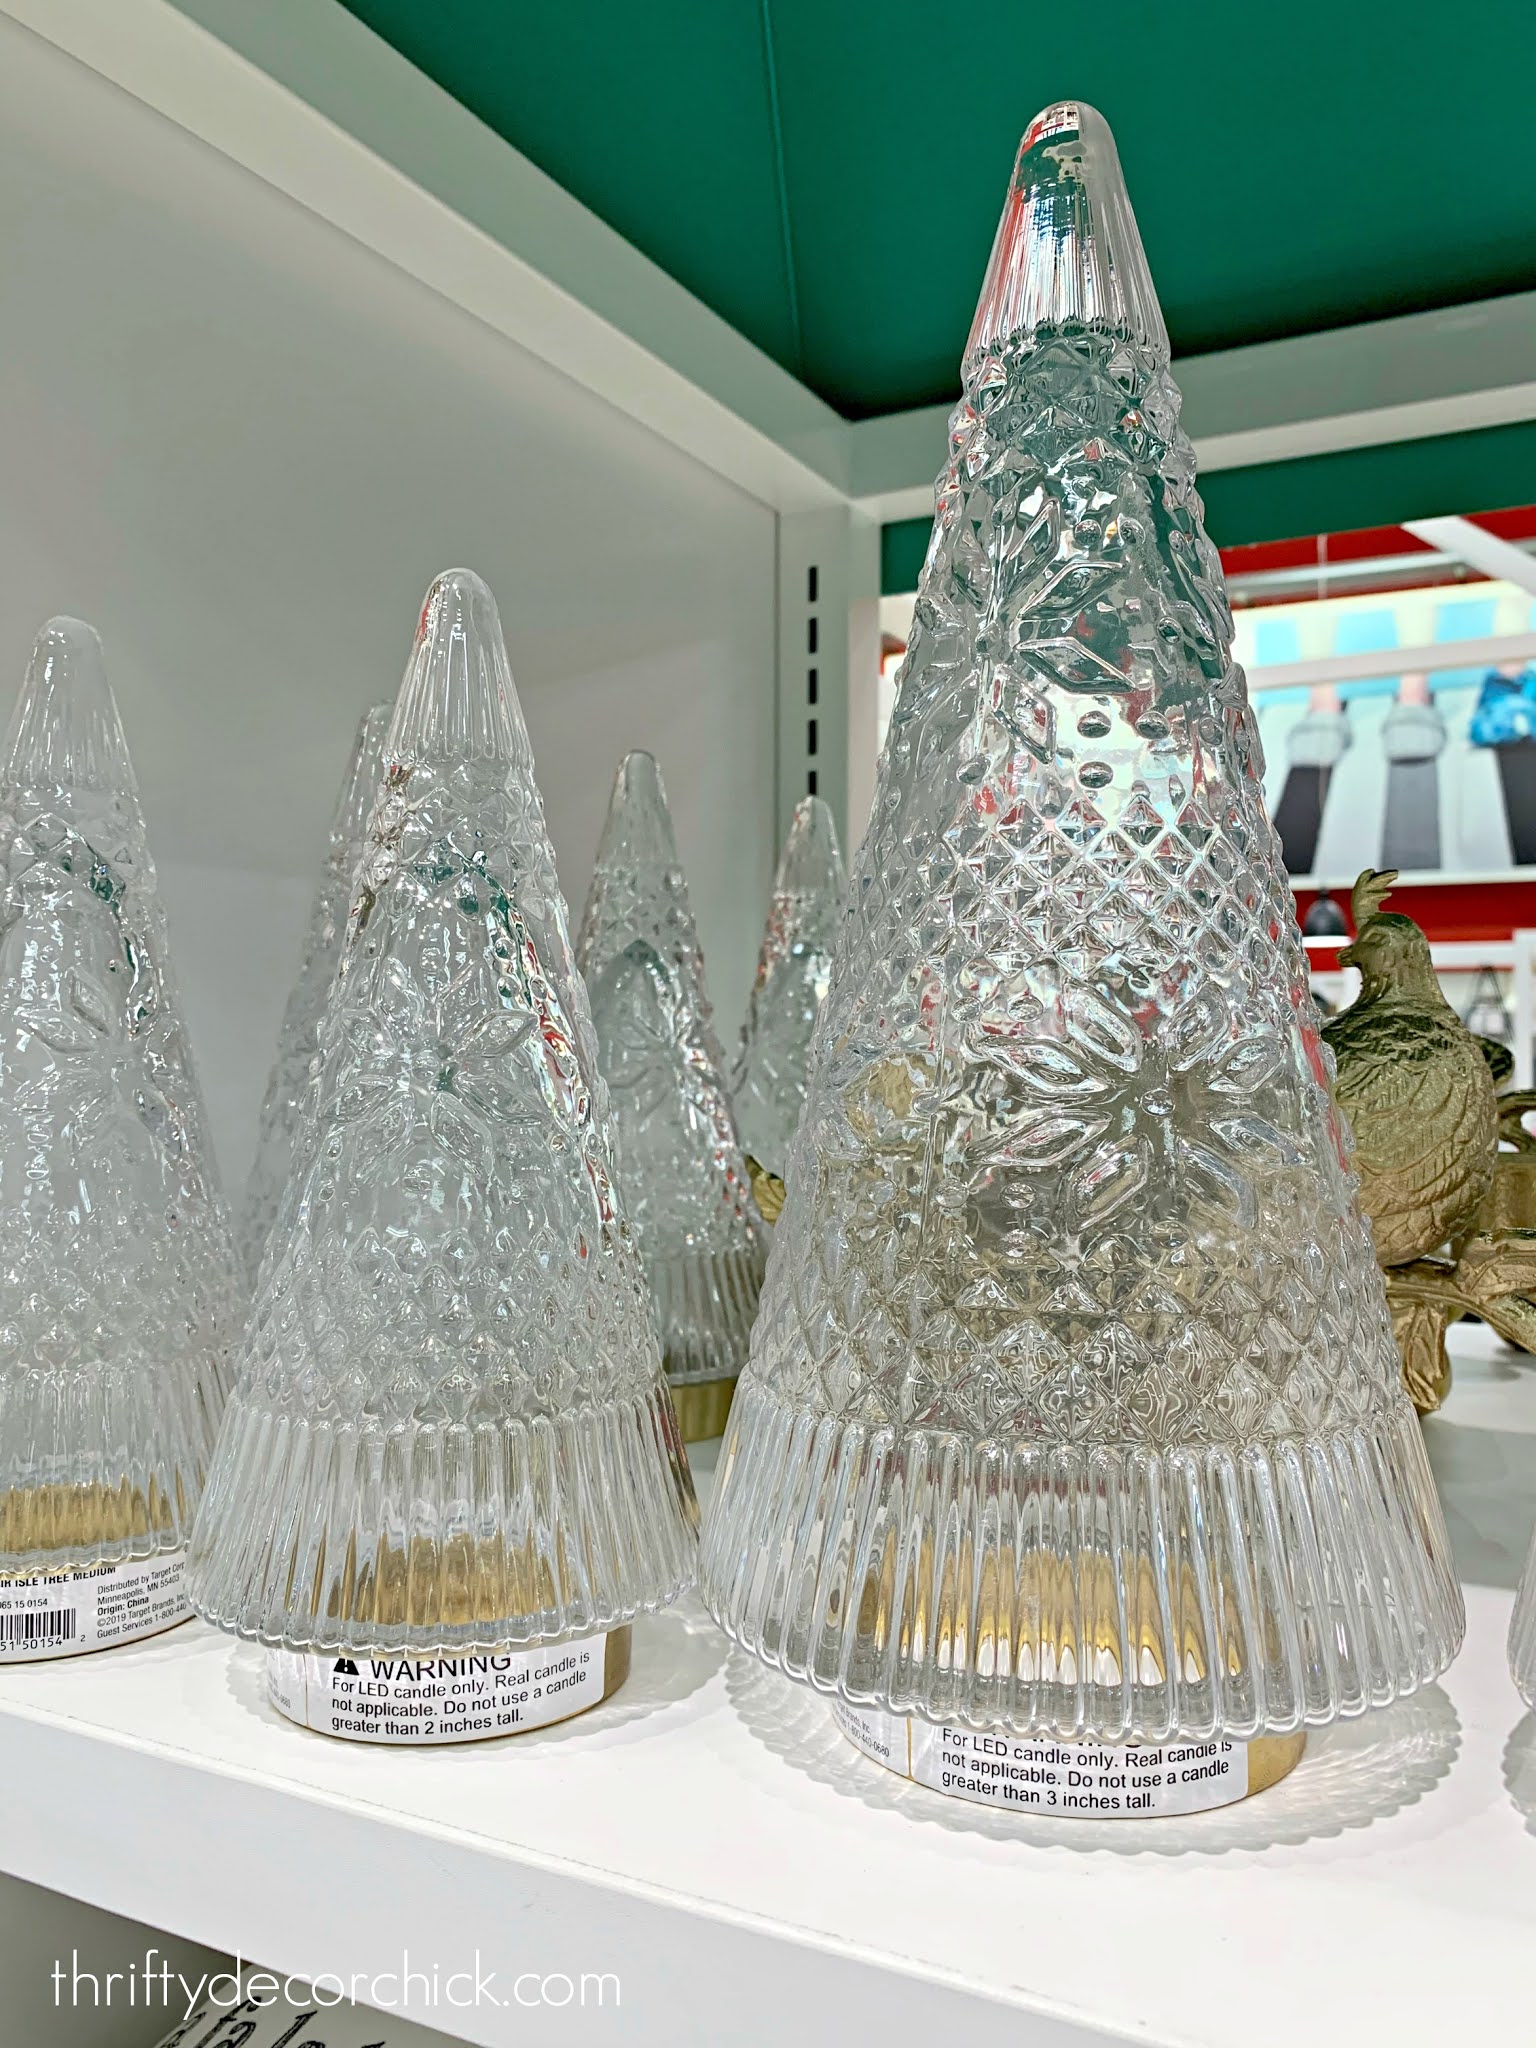
They are just so lovely! I absolutely love them. I placed a faux candle under them last year, but I have another idea for you below.
These glittery trees were a favorite as well -- they come in this smaller size and a tall version as well:

Those are so sparkly and pretty in person! They also come in a lovely green color.
These silver trees have the look of mercury glass and the simple design would fit in with any decor:

I love that ALL of them come in two different sizes -- perfect for layering. It also comes in this smaller size.

I thought it would be fun to add some twinkling lights inside -- so I picked up a couple of these battery-operated LED strands to put inside the two we already have:

They come in all kinds of color options:

I found some more decorative trees in the store that I loved as well. These berry versions are adorable:

And I grabbed a few of these basic Hearth and Hand pine trees:

The prices were great! They would look great dressed up with those tiny battery lights...or just by themselves.
I thought these tinsel trees were super cute too!

They come in a couple different sizes in each color.
Oh! I almost forgot the dollar spot! There were SO many tiny tree options there:

So fun!! I was going to share more cute Target stuff, but the trees took over. If you haven't been I think you'll have fun, even just to browse. It was much needed and I realized how much I'm looking forward to decorating this year. We all need it!
I'll be back with more holiday content soon!
See more of our home here. To shop items in our home, click here! Never miss a post by signing up to get posts via email.
Via https://www.thriftydecorchick.com/2020/11/Christmas-decorating-trees-from-Target.html
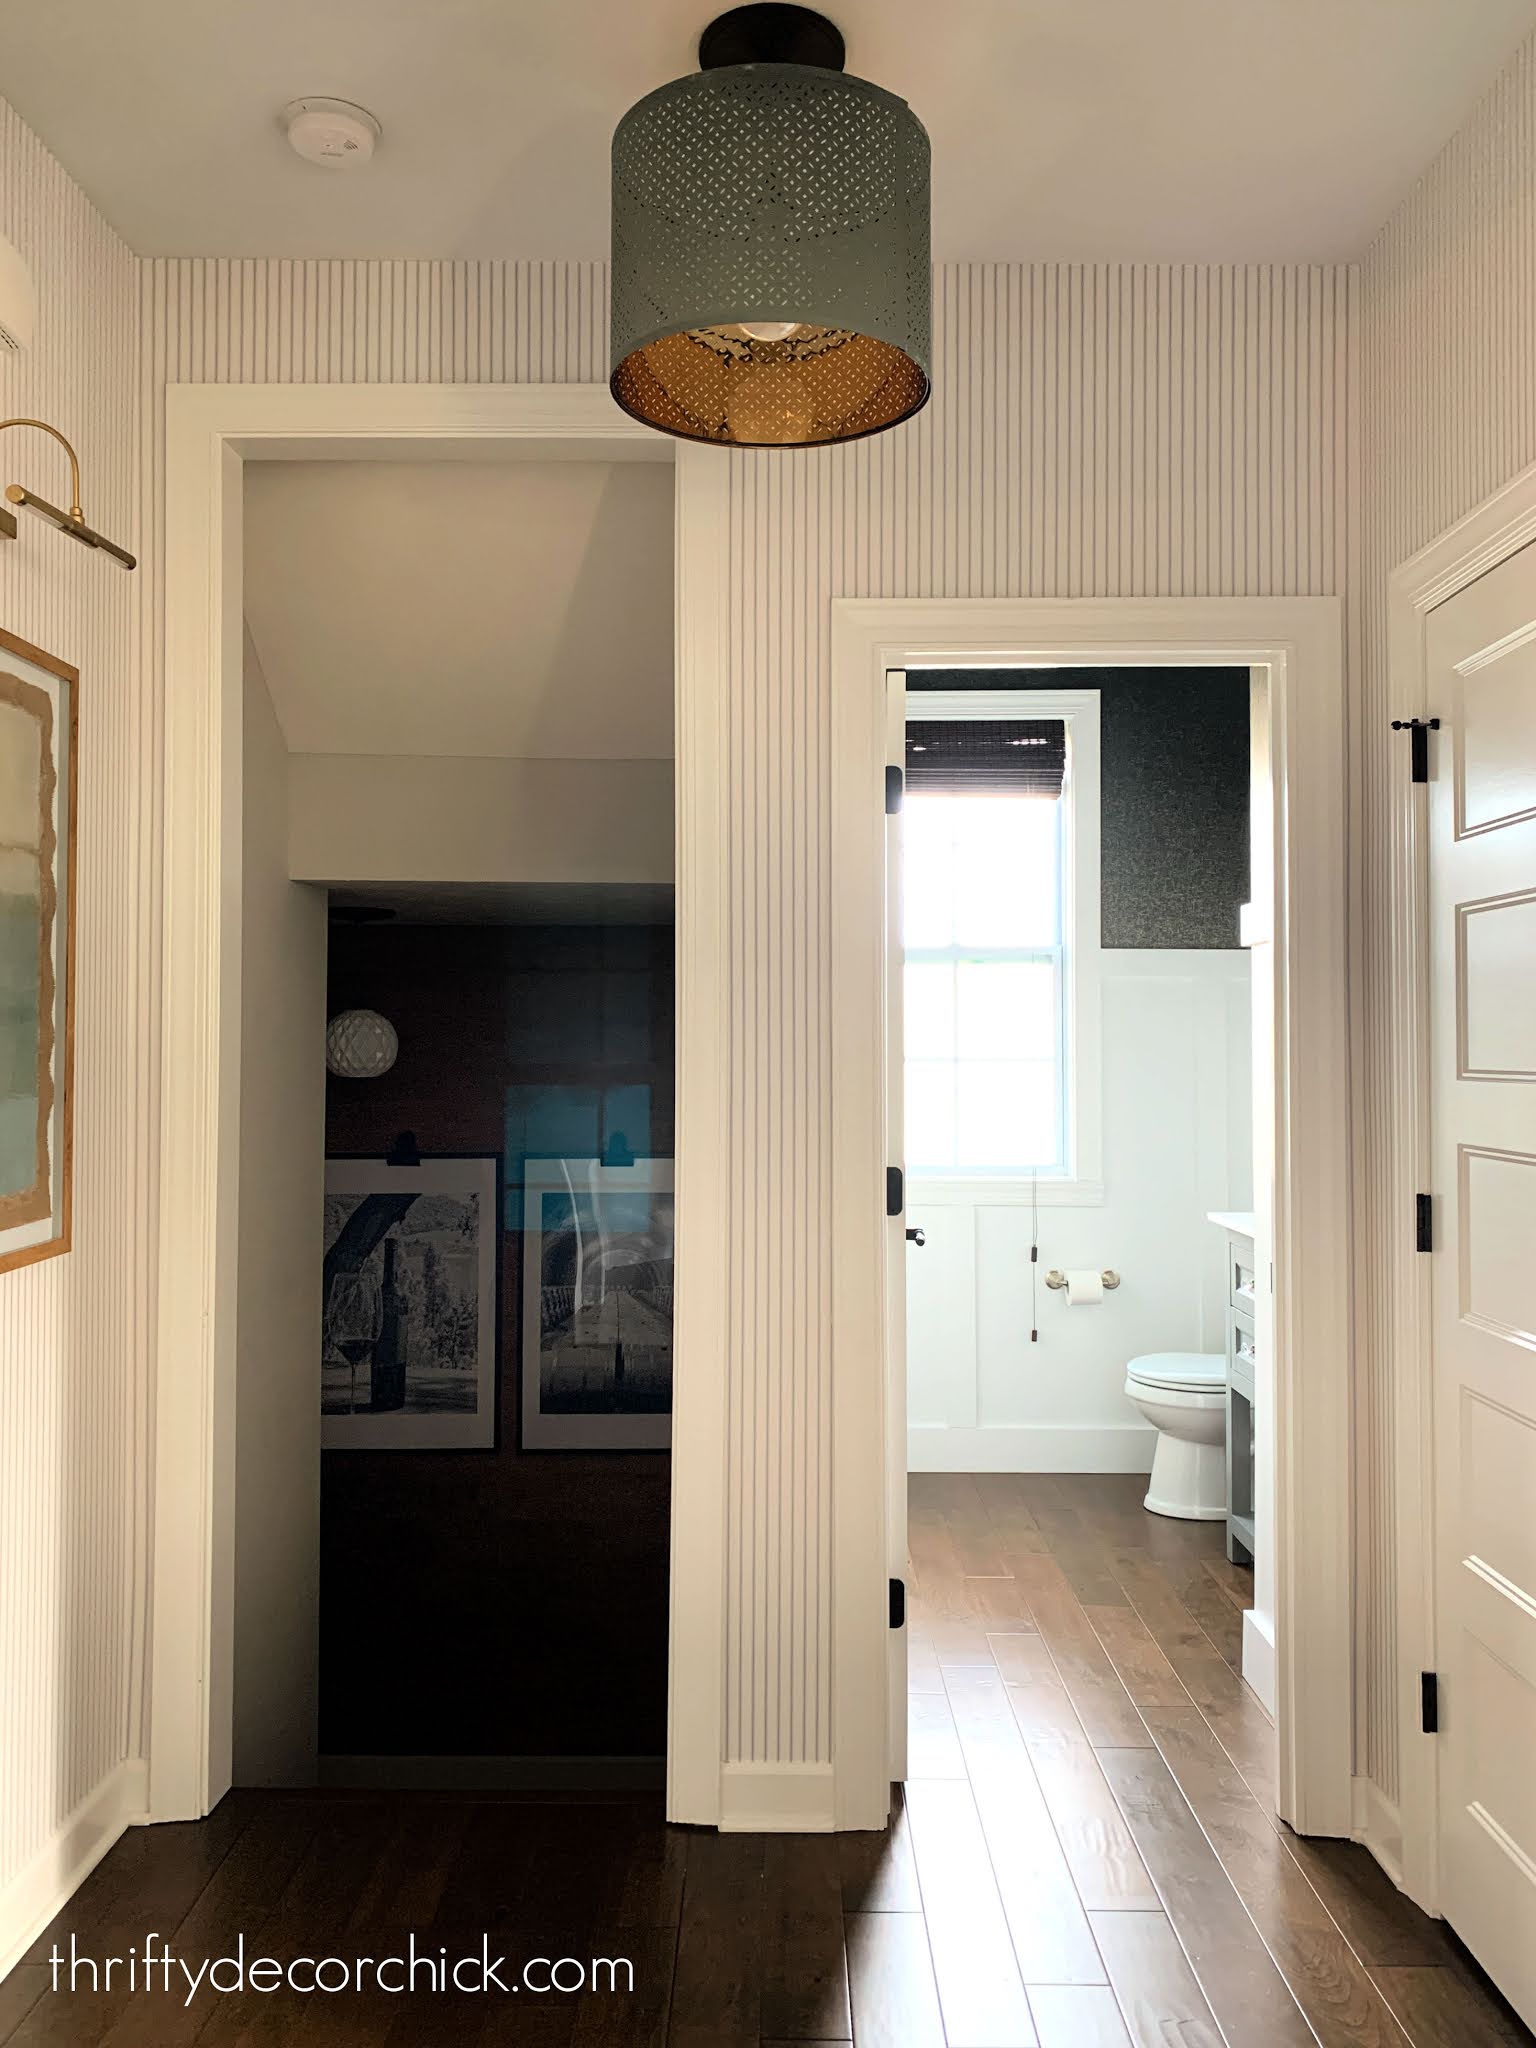
I finally finished up the little hallway updates I've been working on for a couple months! This nook is just off our foyer and I wanted to dress it up a bit.
Here's how it looked for years:
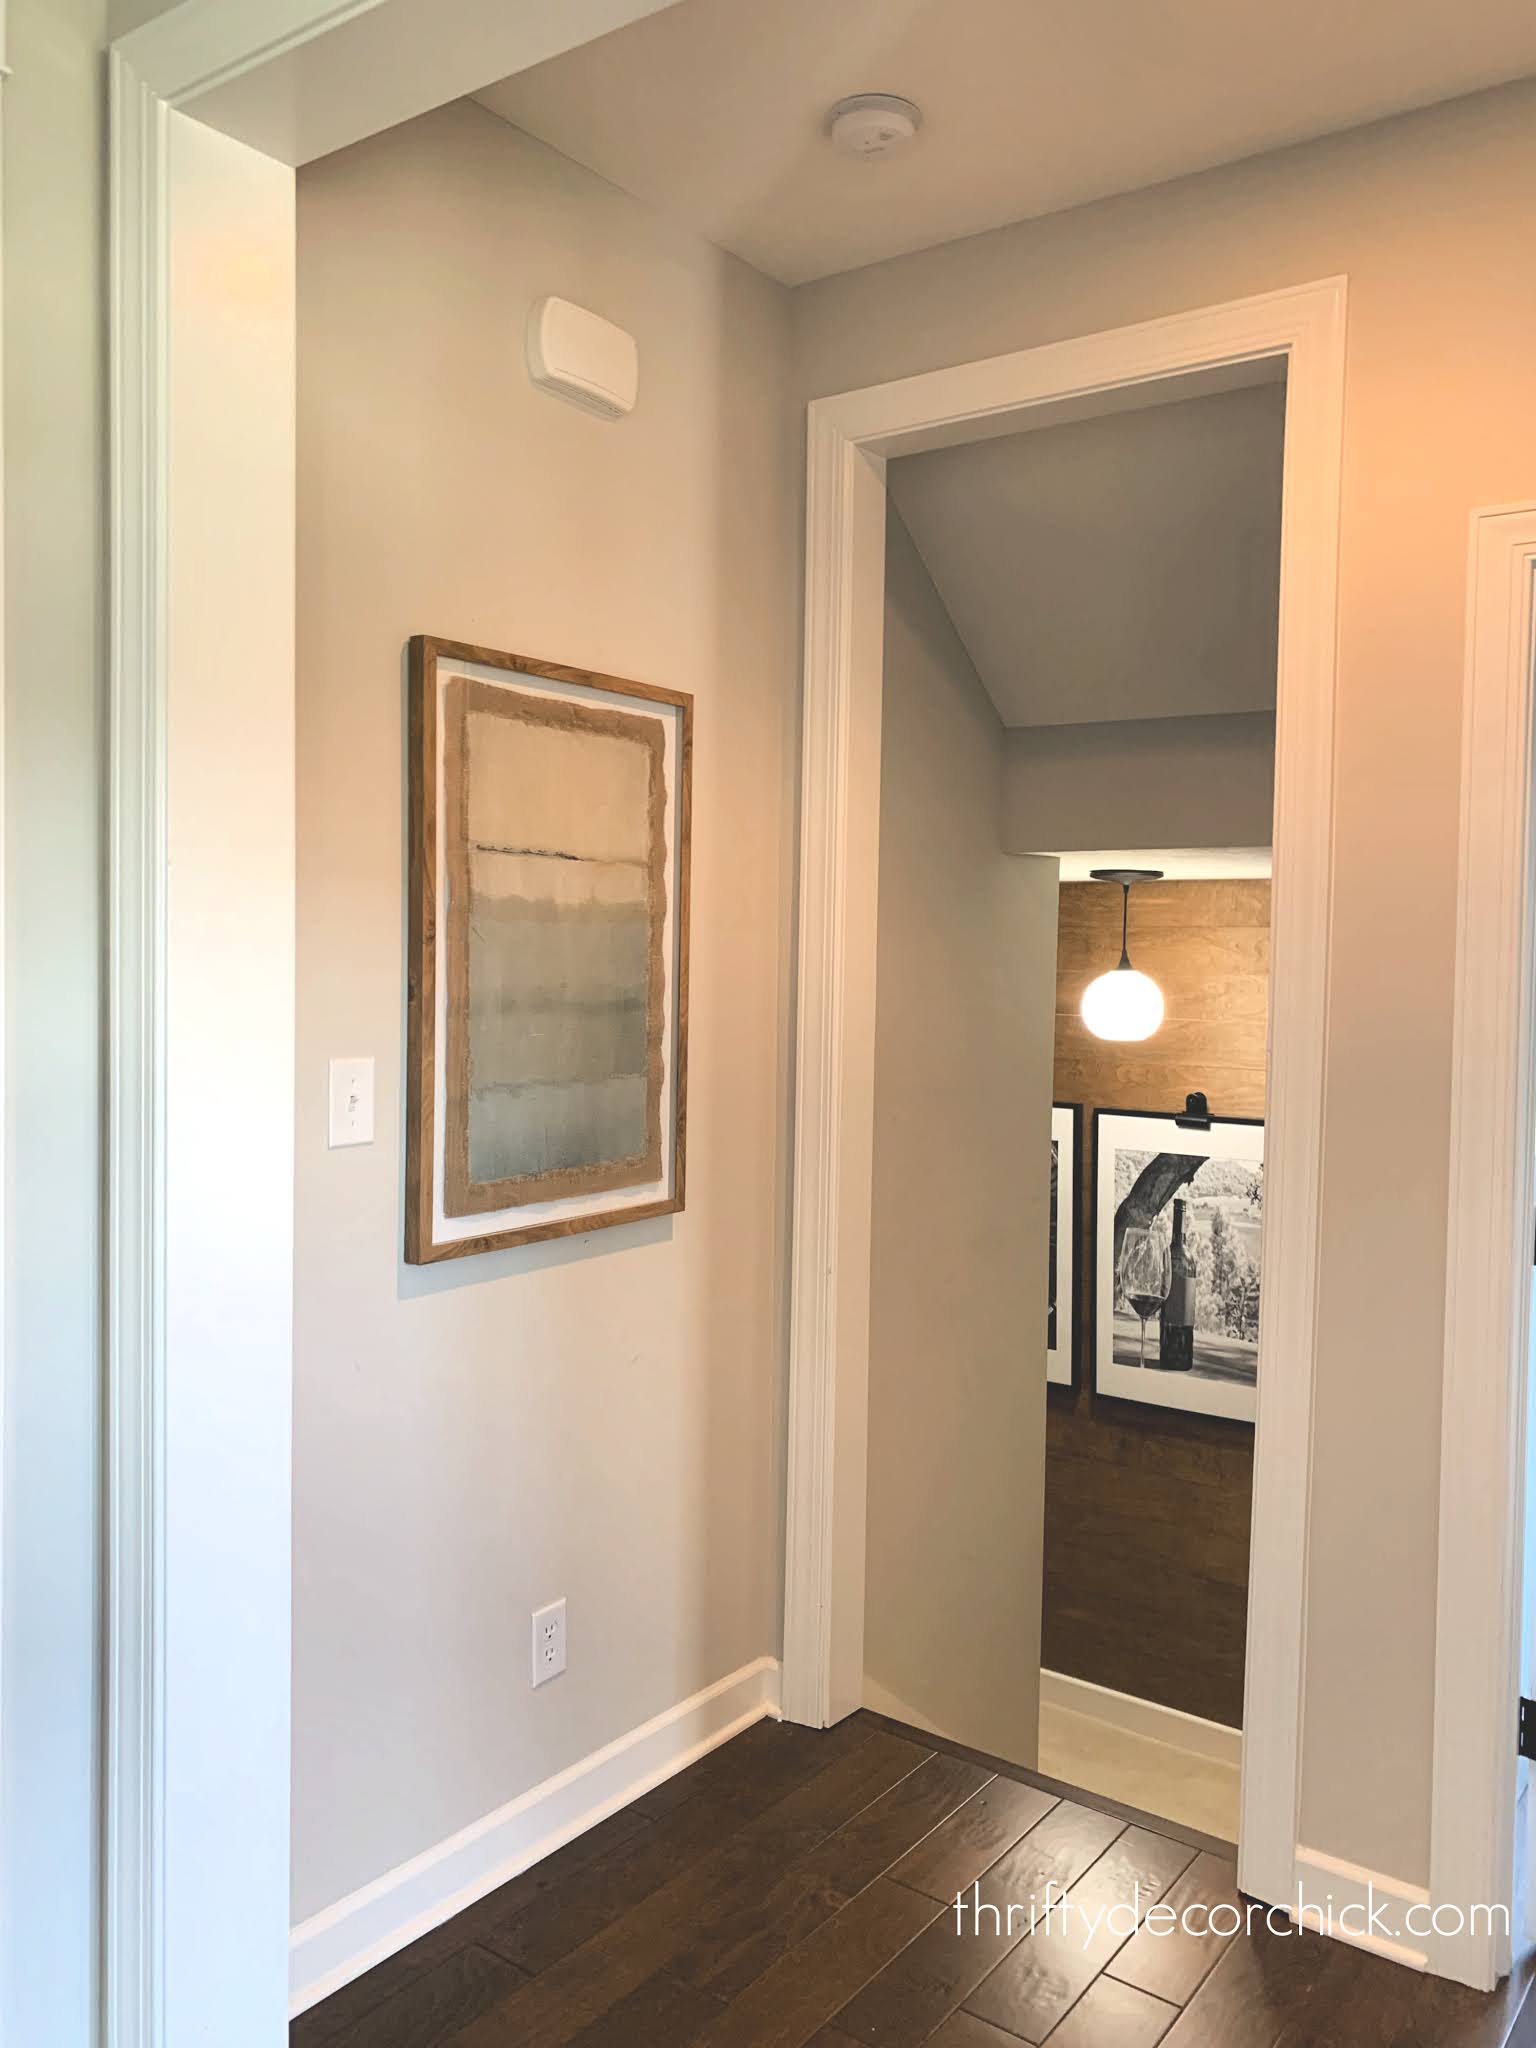
I shared how I added that art light without electricity and how I changed out the recessed light with a lamp shade fixture:

I also painted that ceiling the same pretty blue as the foyer ceiling. (North Star at 50 percent.)
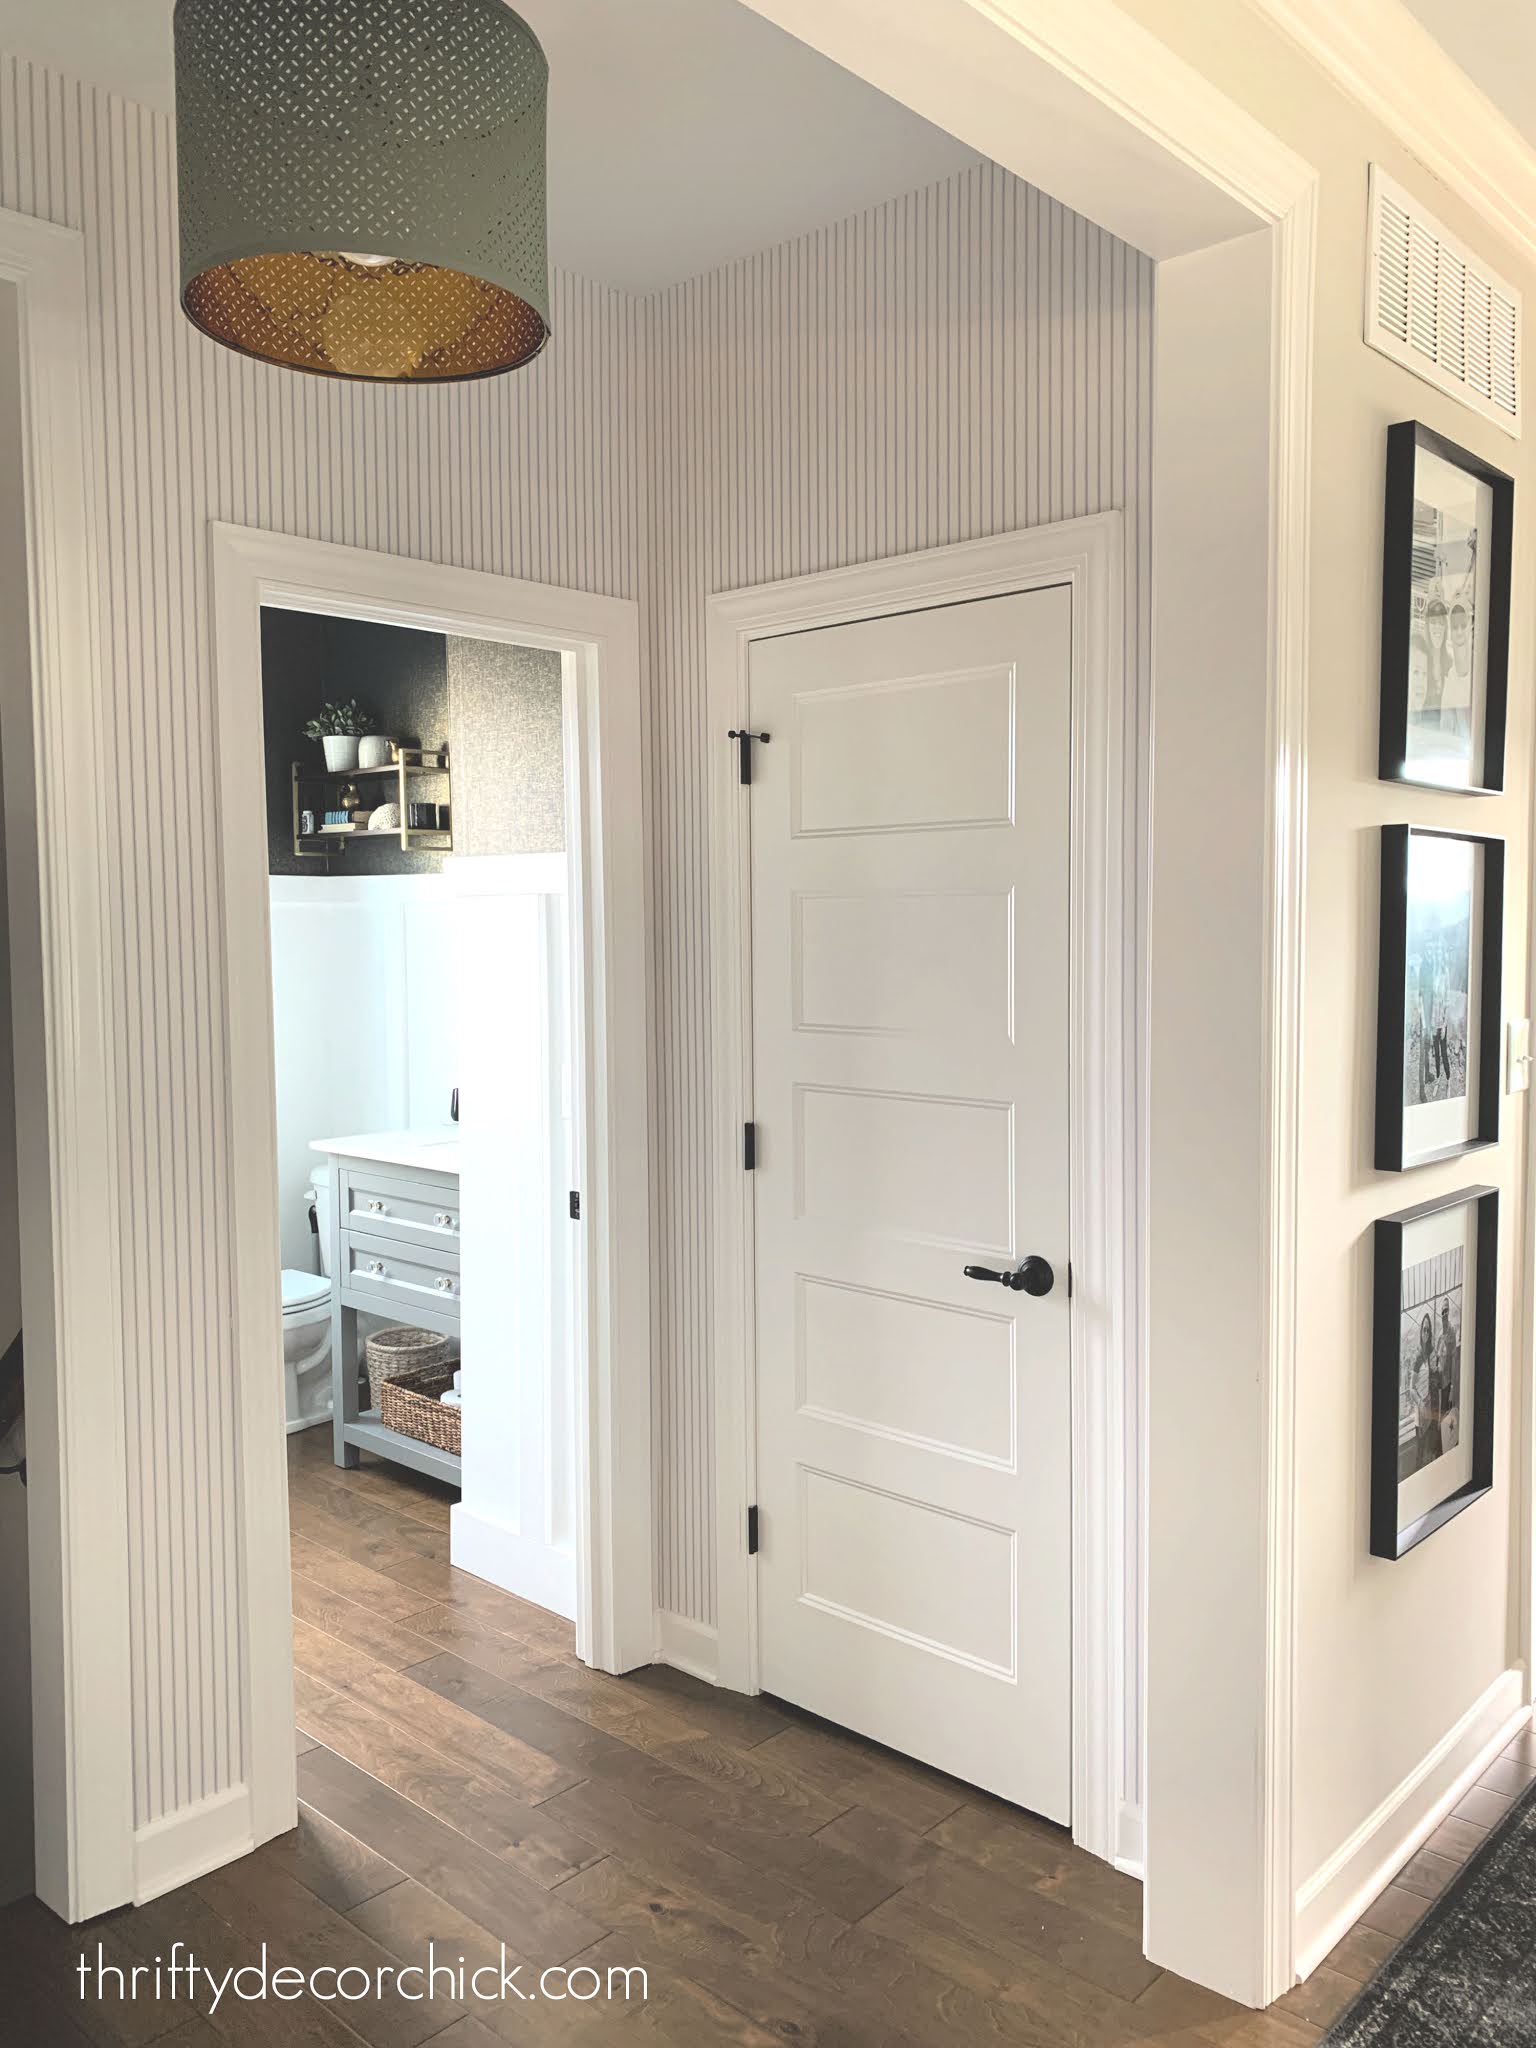
The biggest part of this project was the wallpaper I picked out for this space. I've now added wallpaper to FIVE rooms in our home and I love it!
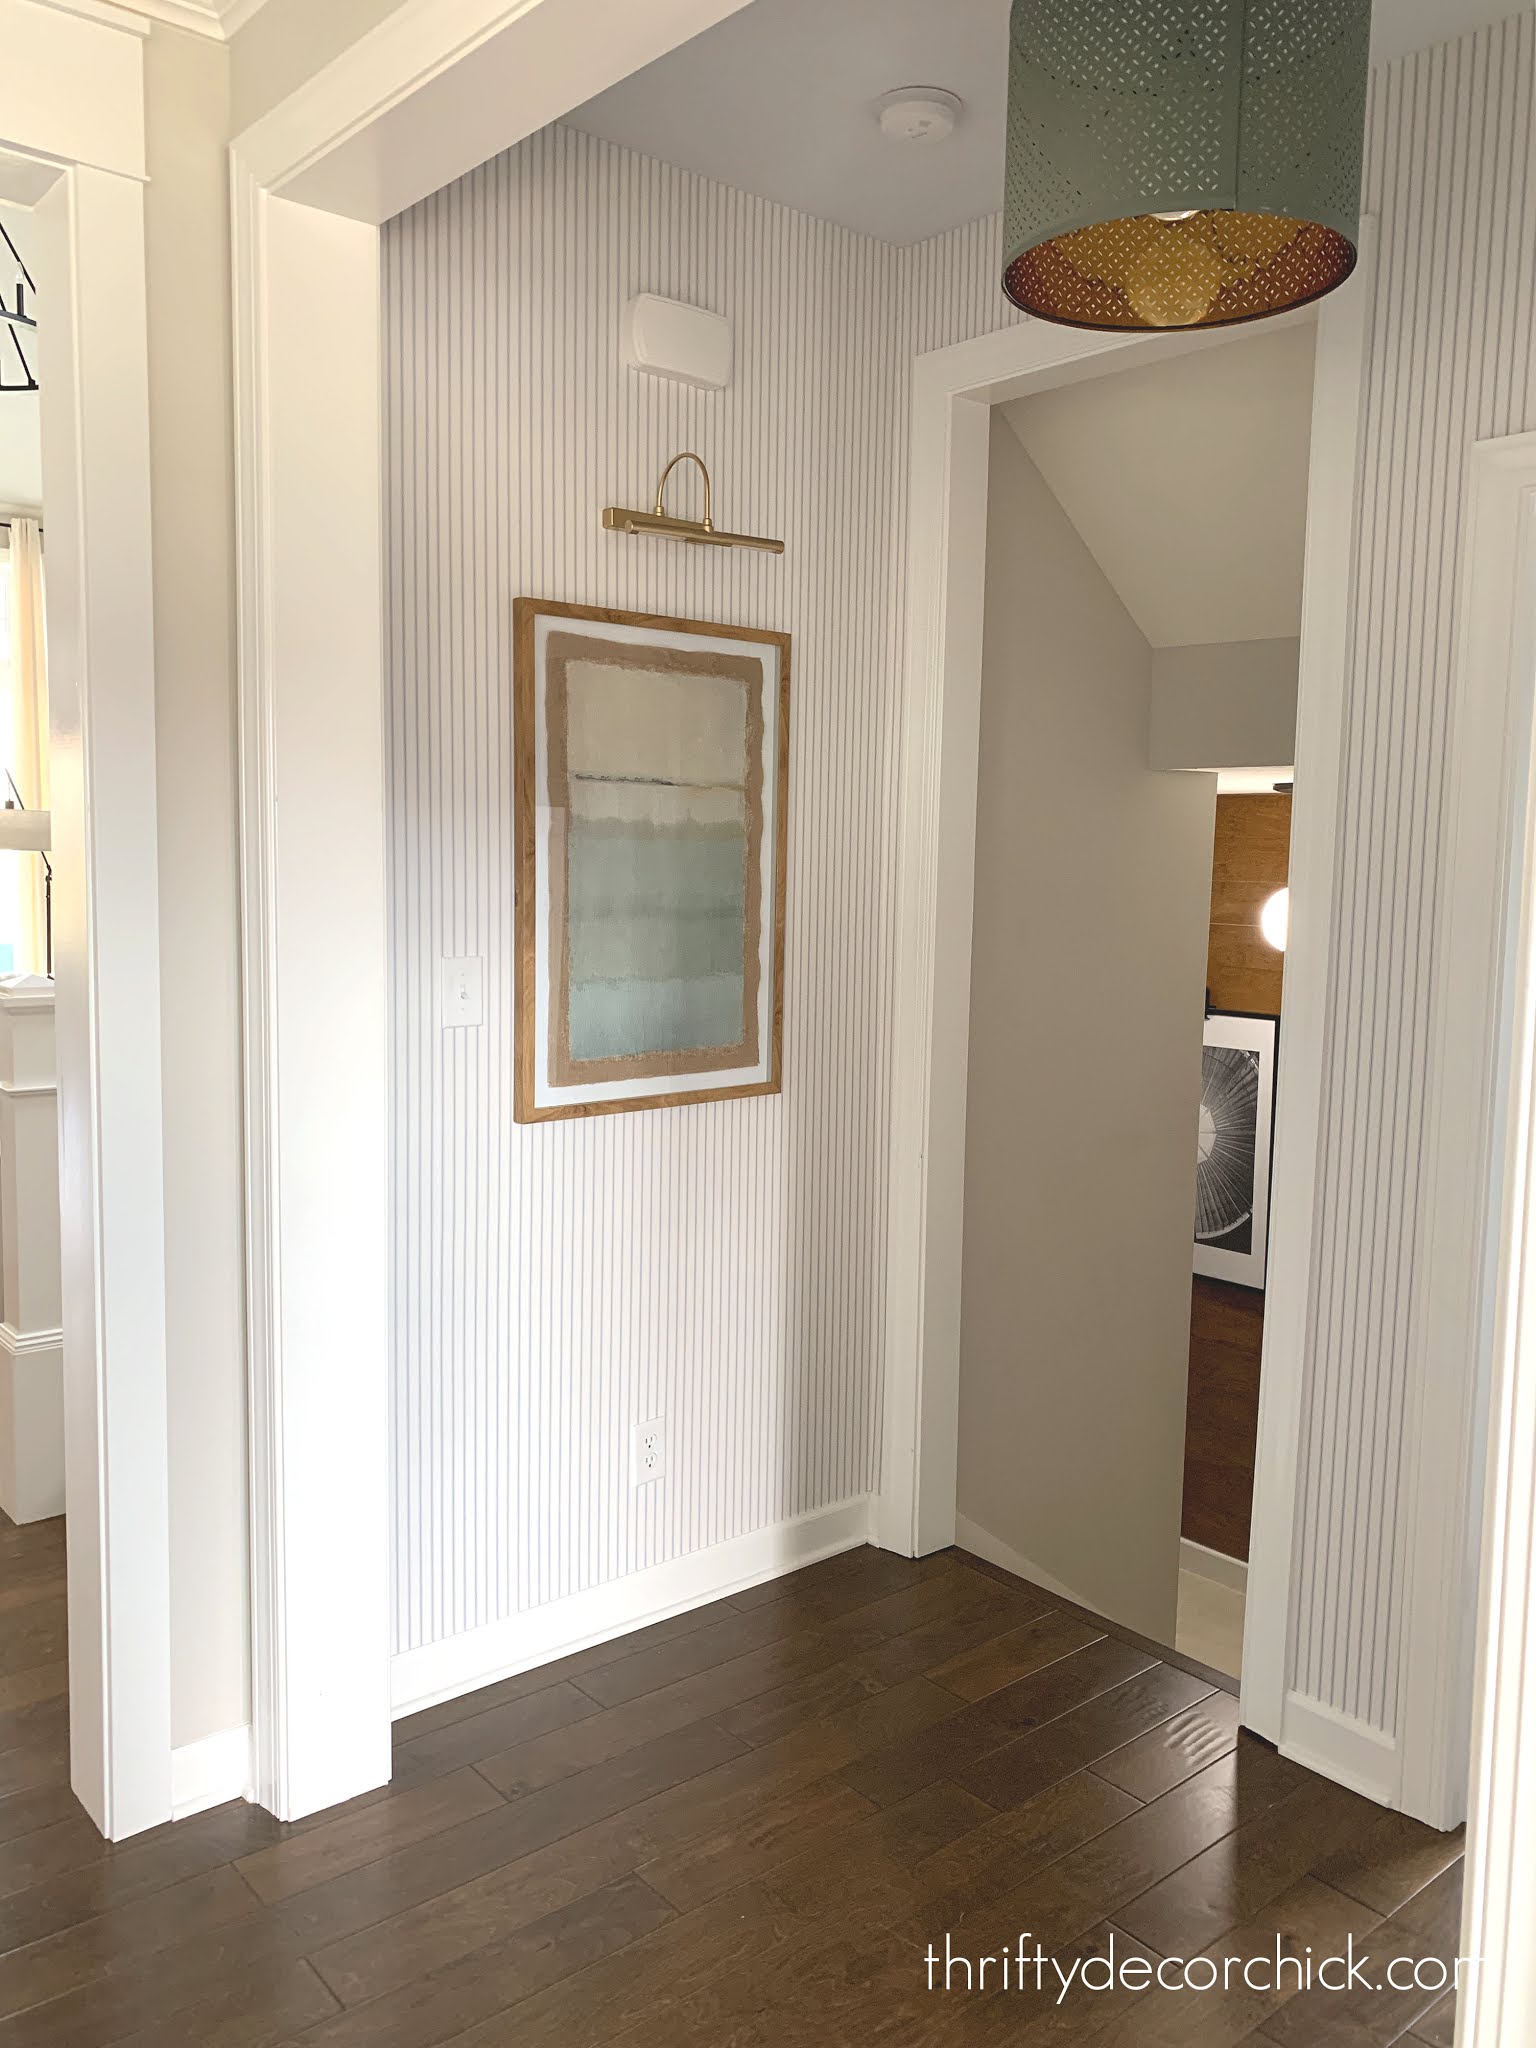
I used a very classic pinstripe pattern in blue and white:

This is a regular paper that needs to be pasted -- but that part is easy! See my tips on how to wallpaper here!
It fits in perfectly and is just the look I wanted!:
This post may contain affiliate links for your convenience.
See my policies and disclosure page for more information.
This wallpaper is called Norwall Simply Stripes in blue and it's not peel and stick like most of the wallpapers I've used. See how to install this regular paper at the link above. (It's not as hard as you think!)
The great thing about striped paper is the "repeat" -- which is the design that you'll need to match up as you're installing -- is all the same. Papers with designs will require more rolls because you have to match them up to the prior piece as you install. The stripe was much easier so I used way less than I thought I would need.
The bad part about striped wallpaper is you need to make sure it's perfectly straight, even if the walls aren't! It took me about seven hours over a couple days, and I'm SO pleased at how it turned out!:

Those doorways though...the absolute worst! And I had four to deal with. Sometimes I use a full piece of paper all the way down and cut it as I go (more difficult in my opinion), and sometimes I use a piece for the top and then do another long skinny piece down the side:
Total cheater-non-wallpapering-professional way of doing it, but you can never tell where I do it! ;) You'd have to run your hands along it to feel where they meet up. I'm actually kind of impressed (with myself) because the stripes look dang good!
The bonus of a more patterned wallpaper is that it's even easier to patch pieces together -- the striped isn't quite as forgiving, but you really can't tell at all:
I absolutely LOVE the classic look of the pinstripes! It's so fresh and pretty. And it will stand the test of time.
It looks beautiful with our white trim, doors and black accents:

And ties in beautifully with the foyer right next to this space:

I'll share all of the projects and resources for this space at the bottom of the post!
If you have any questions about the wallpaper process, I'm happy to share! So many of you have commented that you've taken down old borders or designs from 40+ years ago (I'm realizing as I type that the 80's are now 40 years ago??) and couldn't bear the thought of doing it again.
But the two more permanent wallpapers I've installed in our house were designs I thought long and hard on and are classics that will stand the test of time. The others are peel and stick wallpaper that should be easy to remove down the line. We will see!
I'm so pleased with how this bright and pretty space has turned out!:

Again, the name of the product is Norwall Simply Stripes, but there are many that come up when you search it online. The same design is named so many different things, so here are three links of the same design...
Here are some of the items pictured:
And you can check out all of my other wallpaper projects here!:


See more of our home here. To shop items in our home, click here! Never miss a post by signing up to get posts via email.
Via https://www.thriftydecorchick.com/2020/11/pretty-pinstriped-foyer-reveal.html
Hello there! I've been busy working on some projects that I can't wait to show you! And the Christmas stuff will be coming out soon. I don't even want to hear how early it is -- let me have my joy this year! ;)
I don't think I've ever blogged about cookware before. But here I am. Ha! I couldn't resist sharing this with you because I am SO impressed with it and it's just crazy pretty. Yes, pretty pots and pans. I love when form and function meet!
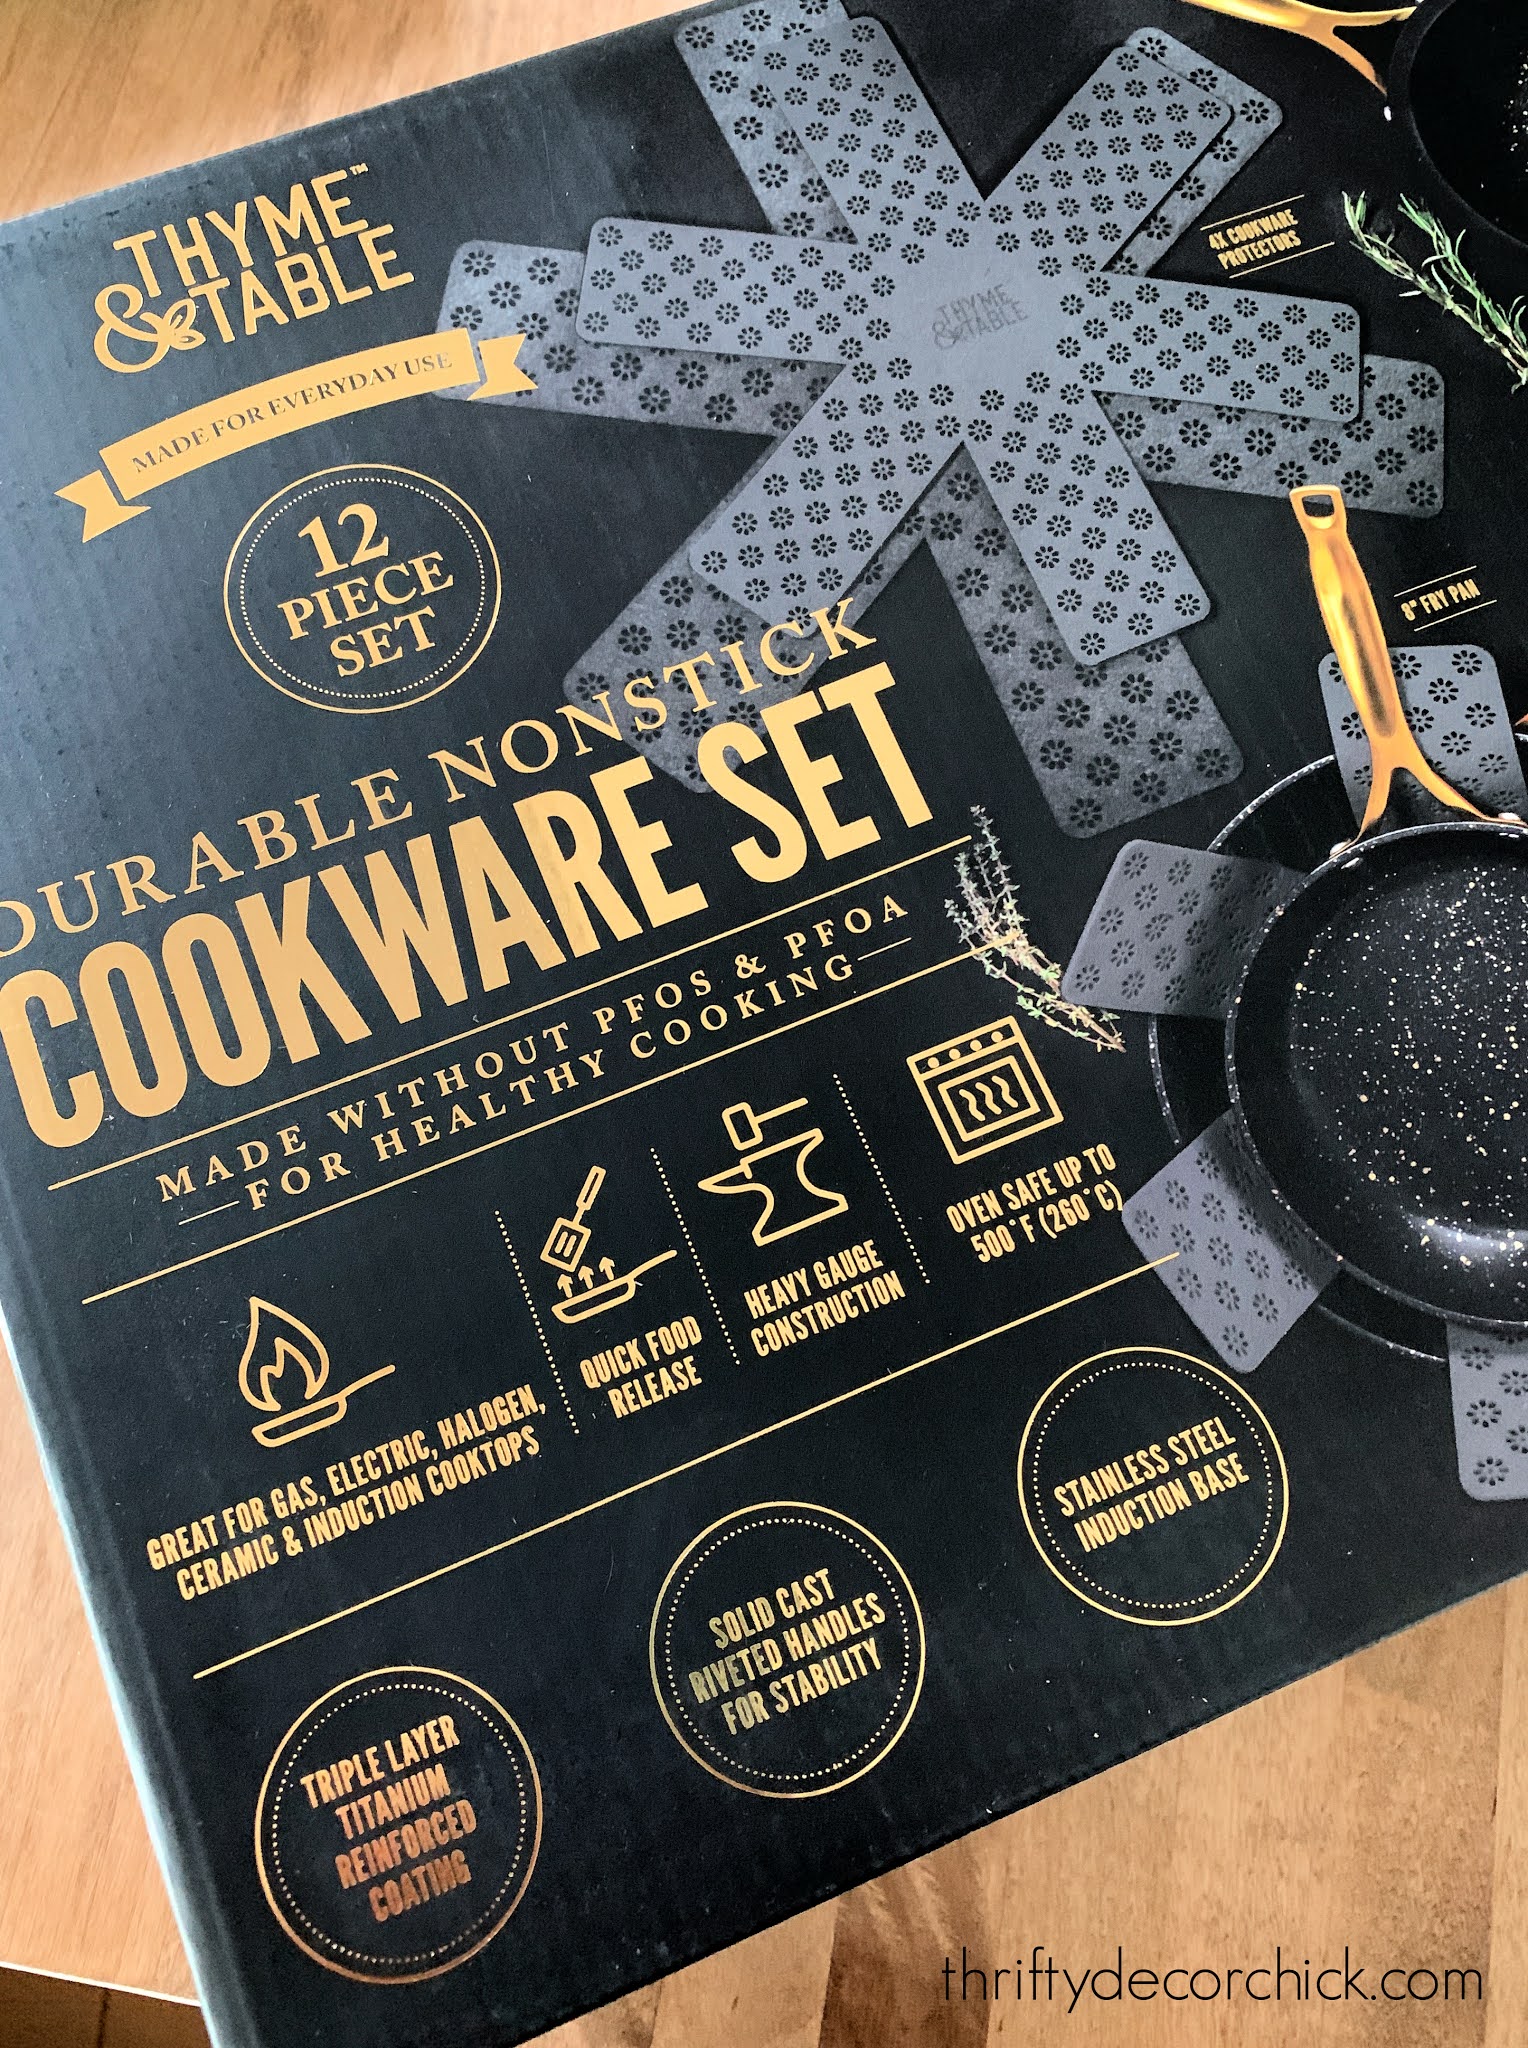
A YouTuber I follow recently shared these pretty pans and I immediately went to find them online. They were SO lovely -- there are a few color options but she picked the black and brass option:
This post may contain affiliate links for your convenience.
See my policies and disclosure page for more information.
They're the Thyme and Table brand through Walmart -- I hadn't heard of them before so even though I was all googly eyed about the looks, I went through the ratings first. It had nearly five stars so I hit the purchase button and waited patiently for my set to arrive.
I was even more impressed when I opened them up! They are truly beautiful. So weird to say that about cookware!:

I've been looking to replace our pots and pans for years, but didn't want to spend a ton of money. We've had ours for so long I can't even remember when we purchased them.
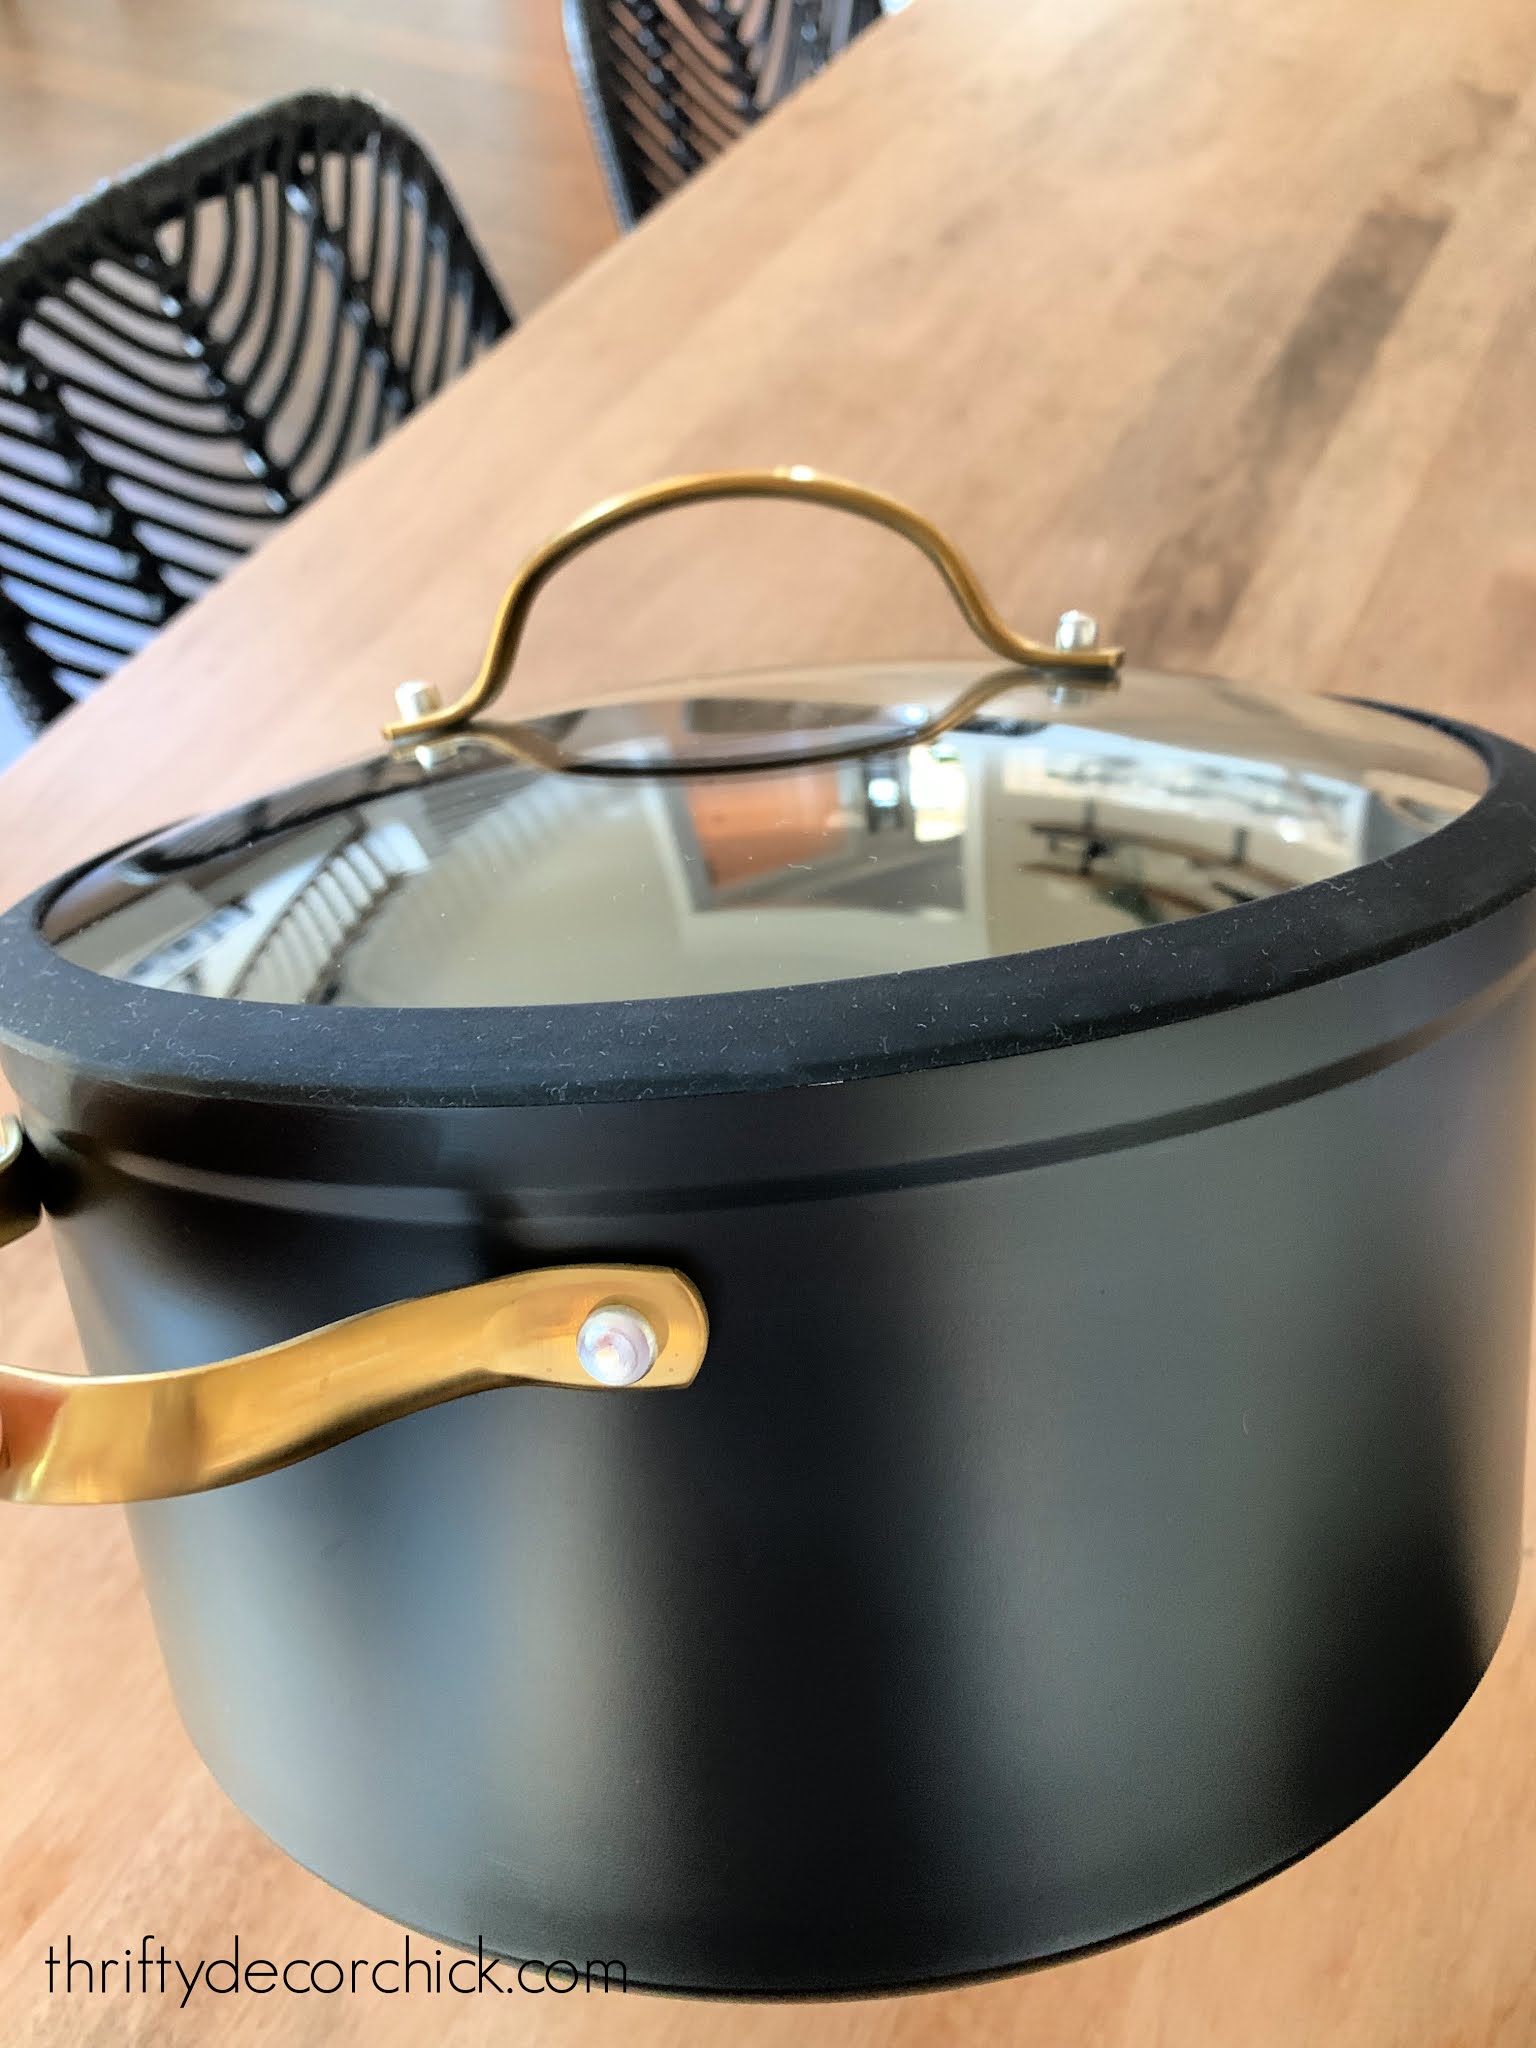
I knew as soon as I saw this set that it was the one! I mean...look at them!:
They also come in a pretty navy blue and brass, stainless and blue and there's also a rainbow set that's really pretty.
But I was taken with the classic look of the black and brass. I love the speckled gold inside:
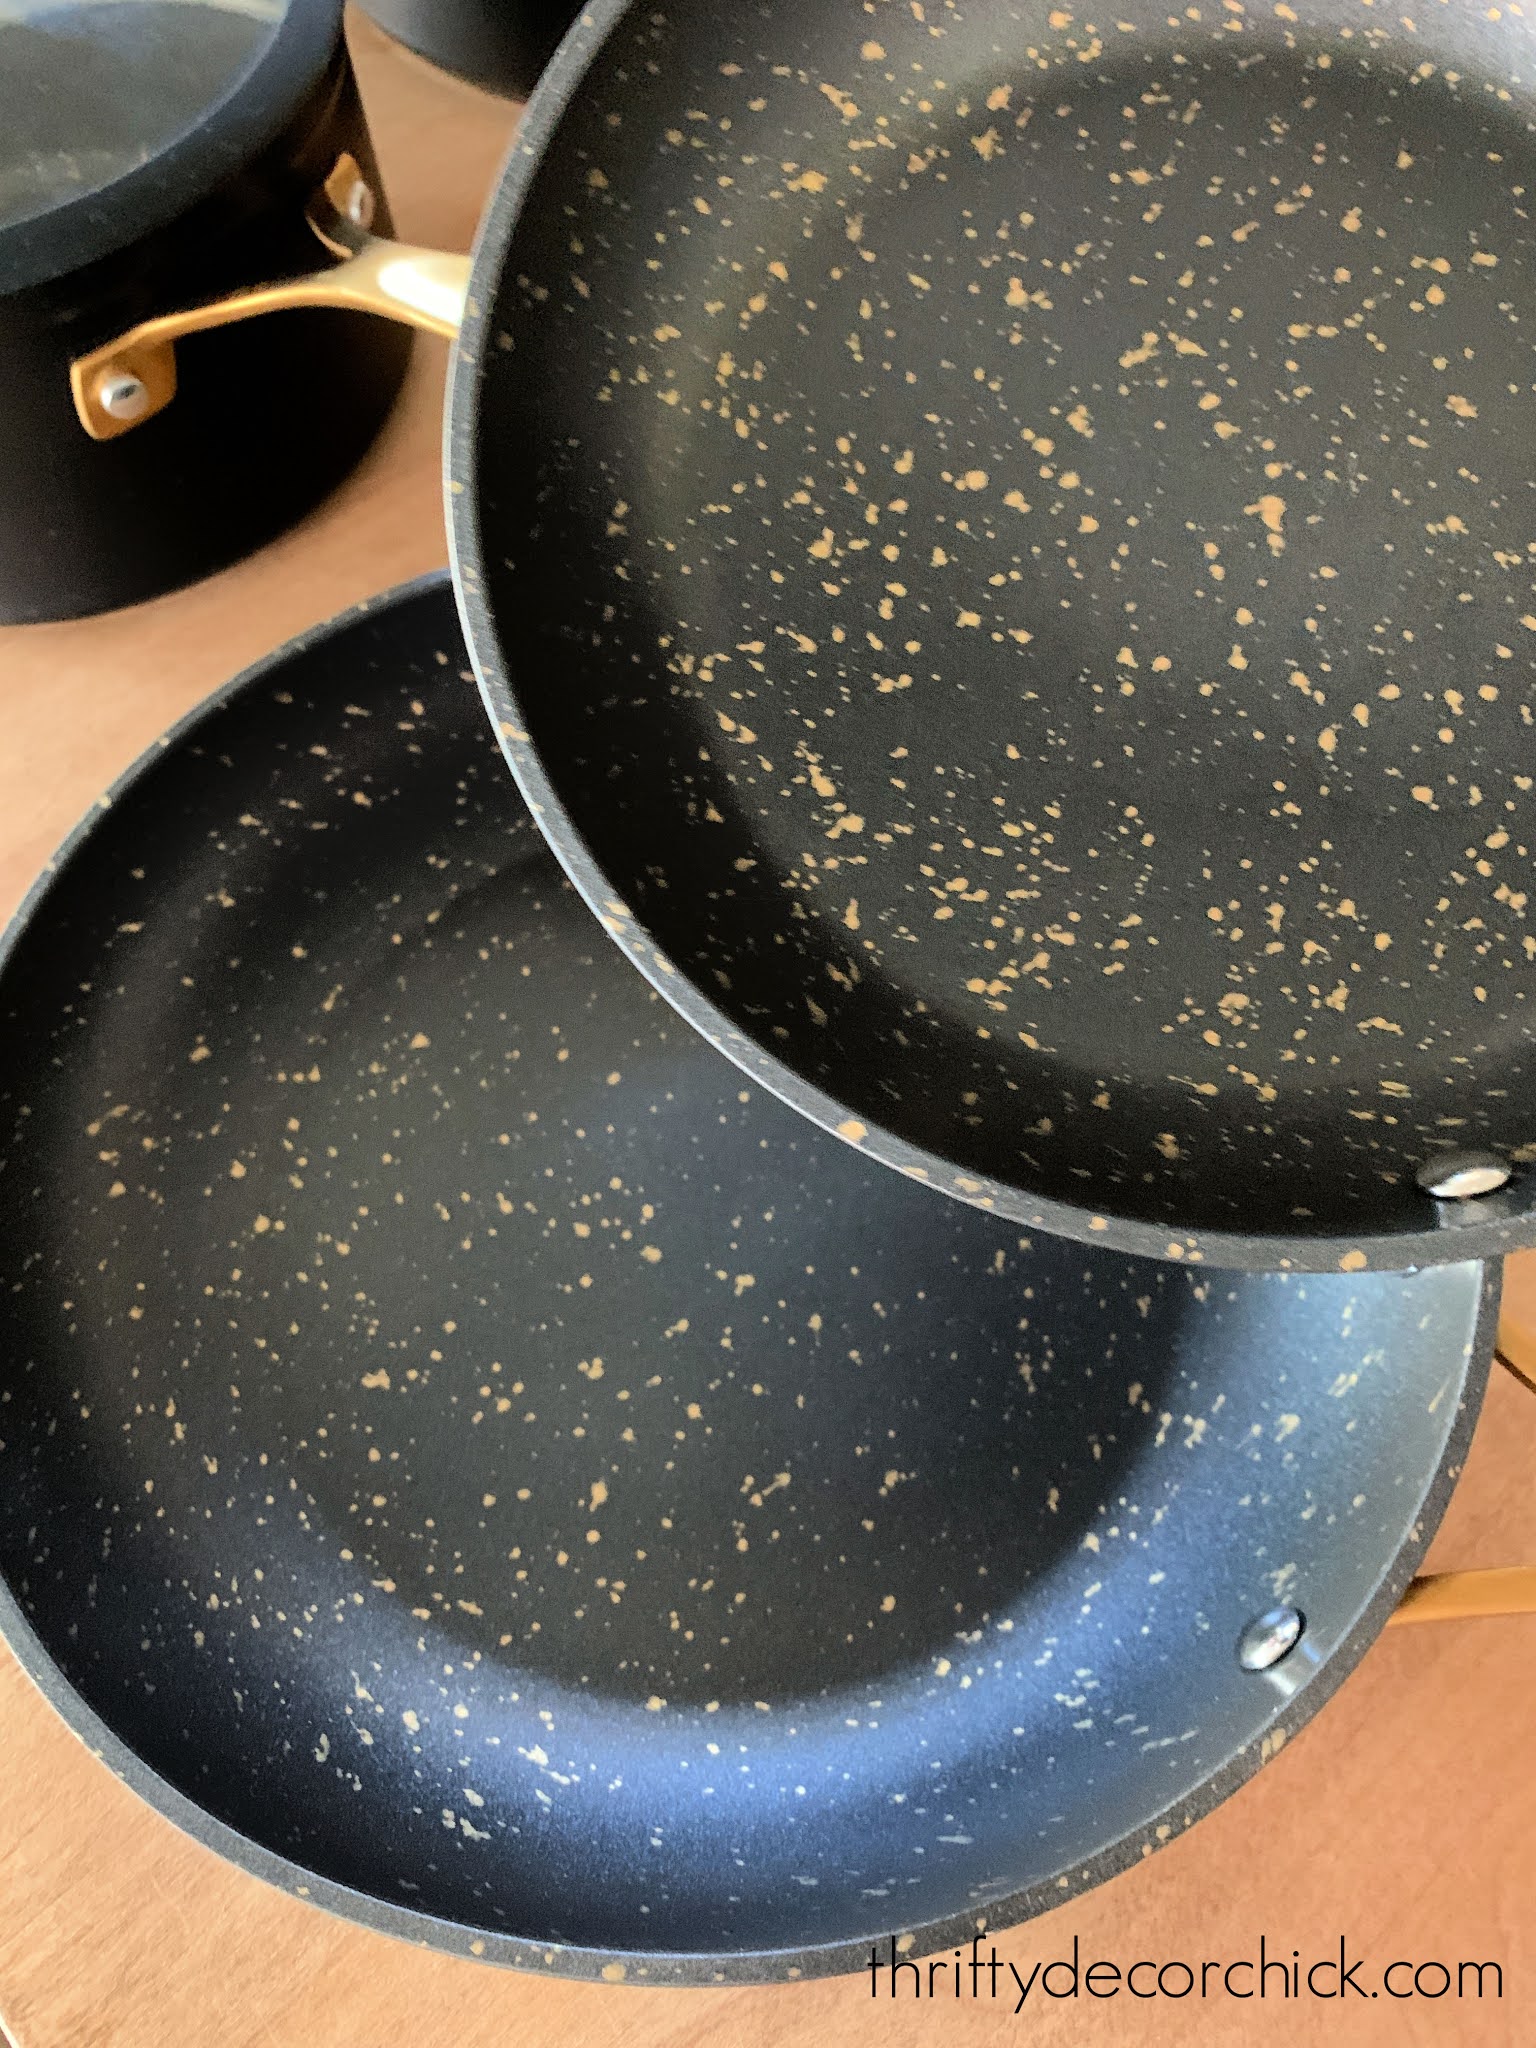
The set also comes with four protector pads:

I was so pleased with the set I ended up purchasing the five quart sauté pan as well. (The set comes with the 3.5 quart size):

Aren't they lovely? They make me happy and I get a little giddy when I pull one out to cook. Hey...if it helps make cooking more fun, go for it, right?
By the way, I know I keep talking about the looks, but they perform really well too. I've used a few of the pans and they cook evenly, nothing sticks (so far) and they are crazy easy to clean. I love them:
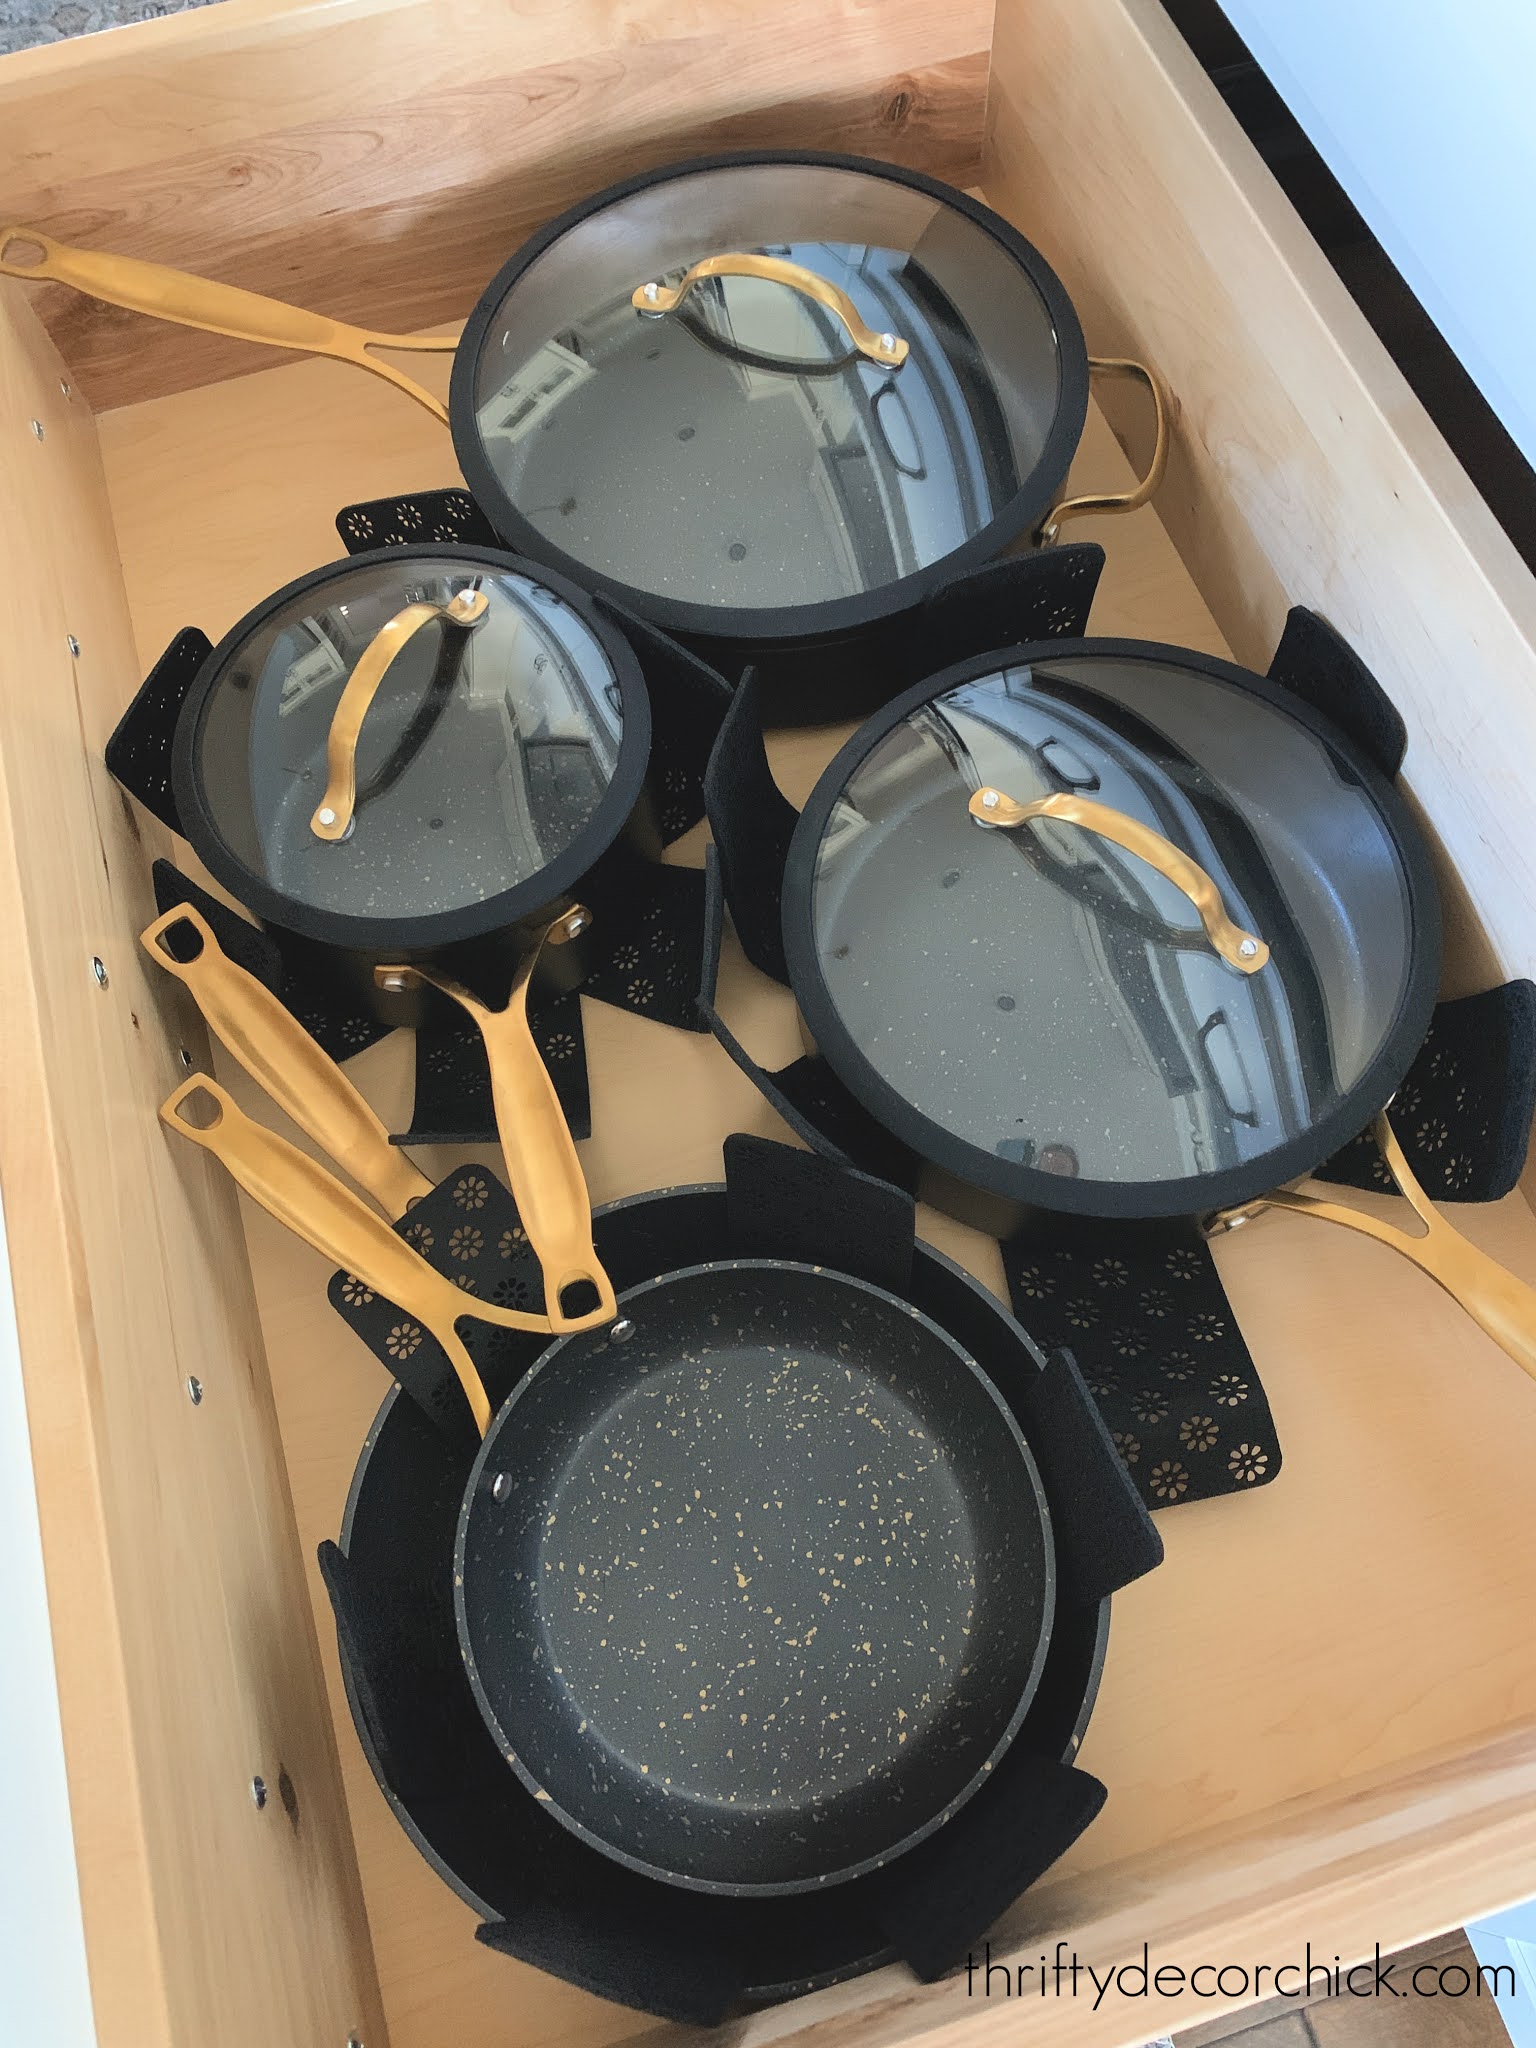
I usually use the protectors only between pans, but this time I placed them underneath as well. Hopefully this will keep them from rubbing against each other.
I'll let you know how these hold up over time! I got two sauté pans with lids, two skillets, two sauce pans with lids and a dutch oven with lid for under $130. The big set was under $100.
I feel like an adult now -- it's the first time in 45 years I've had a matching set! These would make a GREAT gift this holiday season. Have you seen this beautiful cookware? I'm not sure if they sell them in the stores or not.
Here are the links again if needed:
See more of our home here. To shop items in our home, click here! Never miss a post by signing up to get posts via email.
Via https://www.thriftydecorchick.com/2020/11/the-most-beautifulcookware-yes.html |

