Simple and helpful tips for organizing a messy coat closet.
Our coat closet has been a mess since we moved in (almost four years ago) but I haven't made the time to address this spot until now.
It felt right tackling it now with school starting and our normal schedule beginning again. I always crave structure and the ease of organized spaces at this time of year, don't you?
I was thrilled when Big Lots asked me to work with them this year! I was so thankful to be able to utilize a few of their organizational items to get this coat closet functioning well and looking good.
This spot feels like the final frontier as far as organized closets go in our house. Our linen closet looks great and the mud room cat litter and cleaning closet is my favorite ever. ? This one has been a pain for years and I was excited to get it looking good.
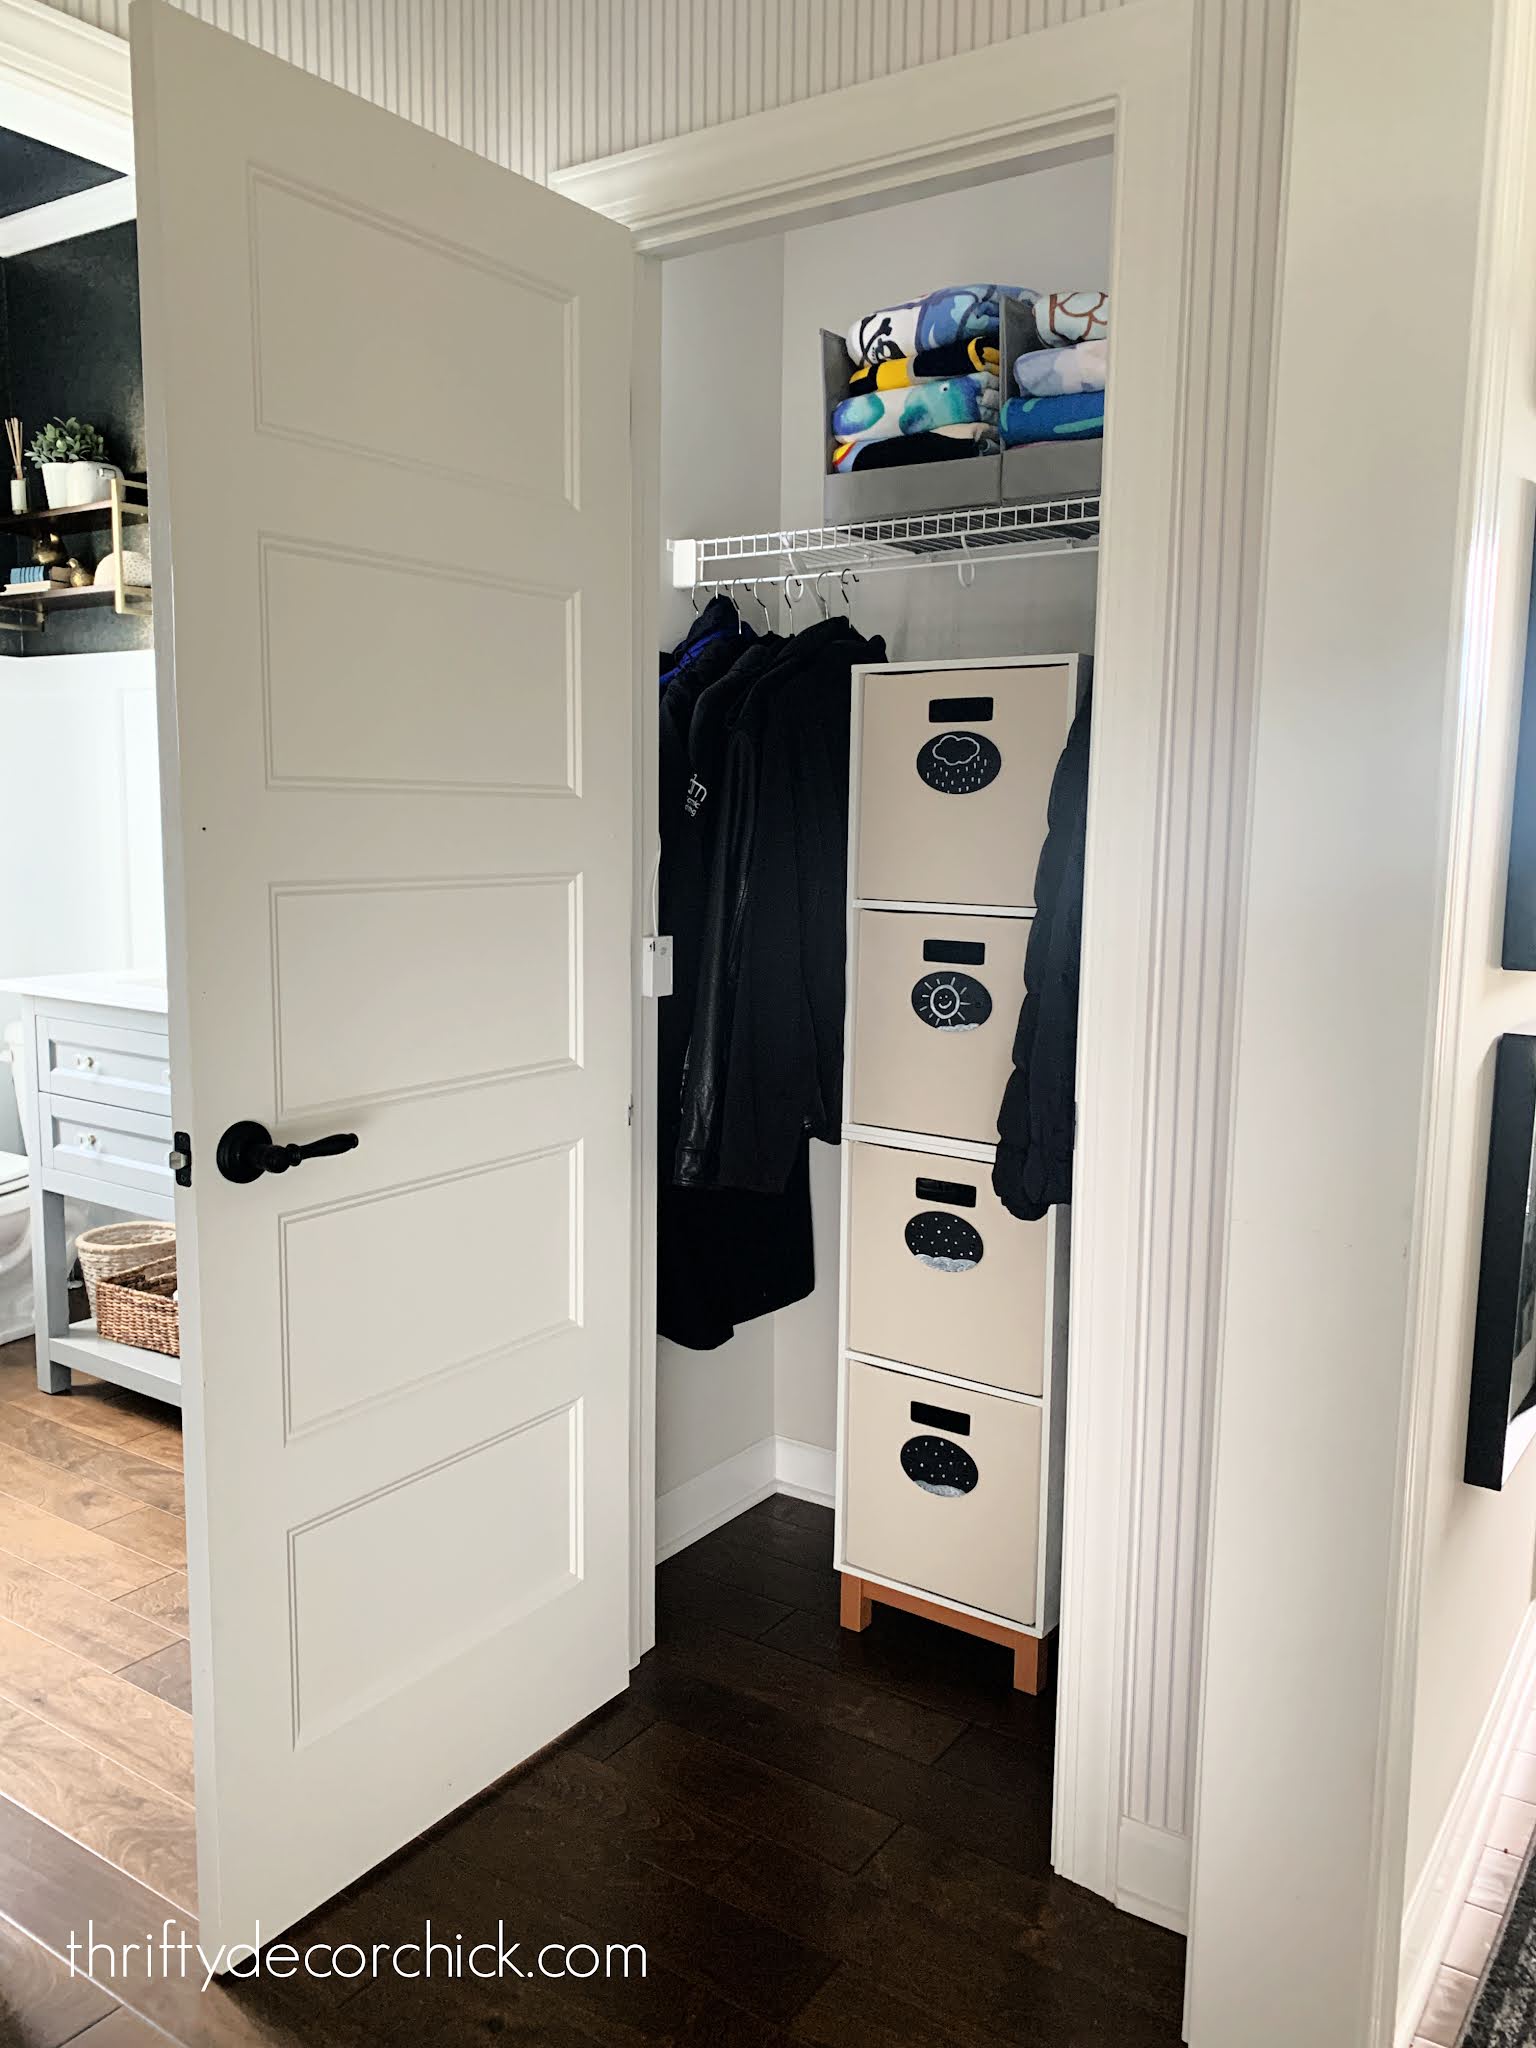
Behind this door was a disaster that I've been stuffing things into for the past few months:
It looks so innocent, until you open it!
OK, it's not HORRIBLE. Well...maybe:

I'll admit, the linen closet was way more of a "Monica" closet than this one.
This hall closet doesn't even include most of our winter gear like gloves and hats -- those live above the built in cubbies in our mud room.
We do keep coats, jackets, boots, beach towels, pool stuff, extra bags, all that jazz, in here. See how nice it looks stuffed onto the top shelf?:

When I start decluttering and organizing a space, my first step is to remove as much as I can so I can see what I'm dealing with:

This post may contain affiliate links for your convenience.
See my policies and disclosure page for more information.
I sit on the floor and start sorting out items by category, and then decide what to keep and what to donate.
The first items to tackle were the beach towels. I wanted to keep them up on top for easy access, so I used these awesome stacking sweater units for the top shelf:

They come with a bracket so you can stack them, but we only needed the two.
I LOVE these things and can't wait to use them in my closet someday soon. They would be great for sweaters or sweatshirts!:

Notice how bright it is up there? Ahhh these motion sensor LED lights are the answer to a huge frustration for me. I so wish we would have added some kind of lighting in our closets!
I stuck the sensor on the door frame and then ran the LED strip (it's sticky on the back) on the walls around the trim inside:

It works so well -- you can set how long you want it to stay on. I have ours set to 20 seconds. I got another strip to put in our linen closet as well.
The rest of the random stuff was sorted into winter boots and gear, rain stuff like ponchos for when we travel and umbrellas, and then all the beach/pool items like sunscreen, beach toys and water gear.
Once I got everything sorted, I realized we wouldn't need a ton of storage to get everything organized. Funny how when you're throwing stuff into the top of the closet it looks like a TON.
I found these white cubby storage units and wanted to stack them on the side of the closet in the back. When I got them assembled and slid one in, I realized there wasn't enough room to pull the cubbies out with them on the side.
SO I had an even better idea -- I wanted to stack them right in the middle instead. But this wire shelf bracket was in the way:
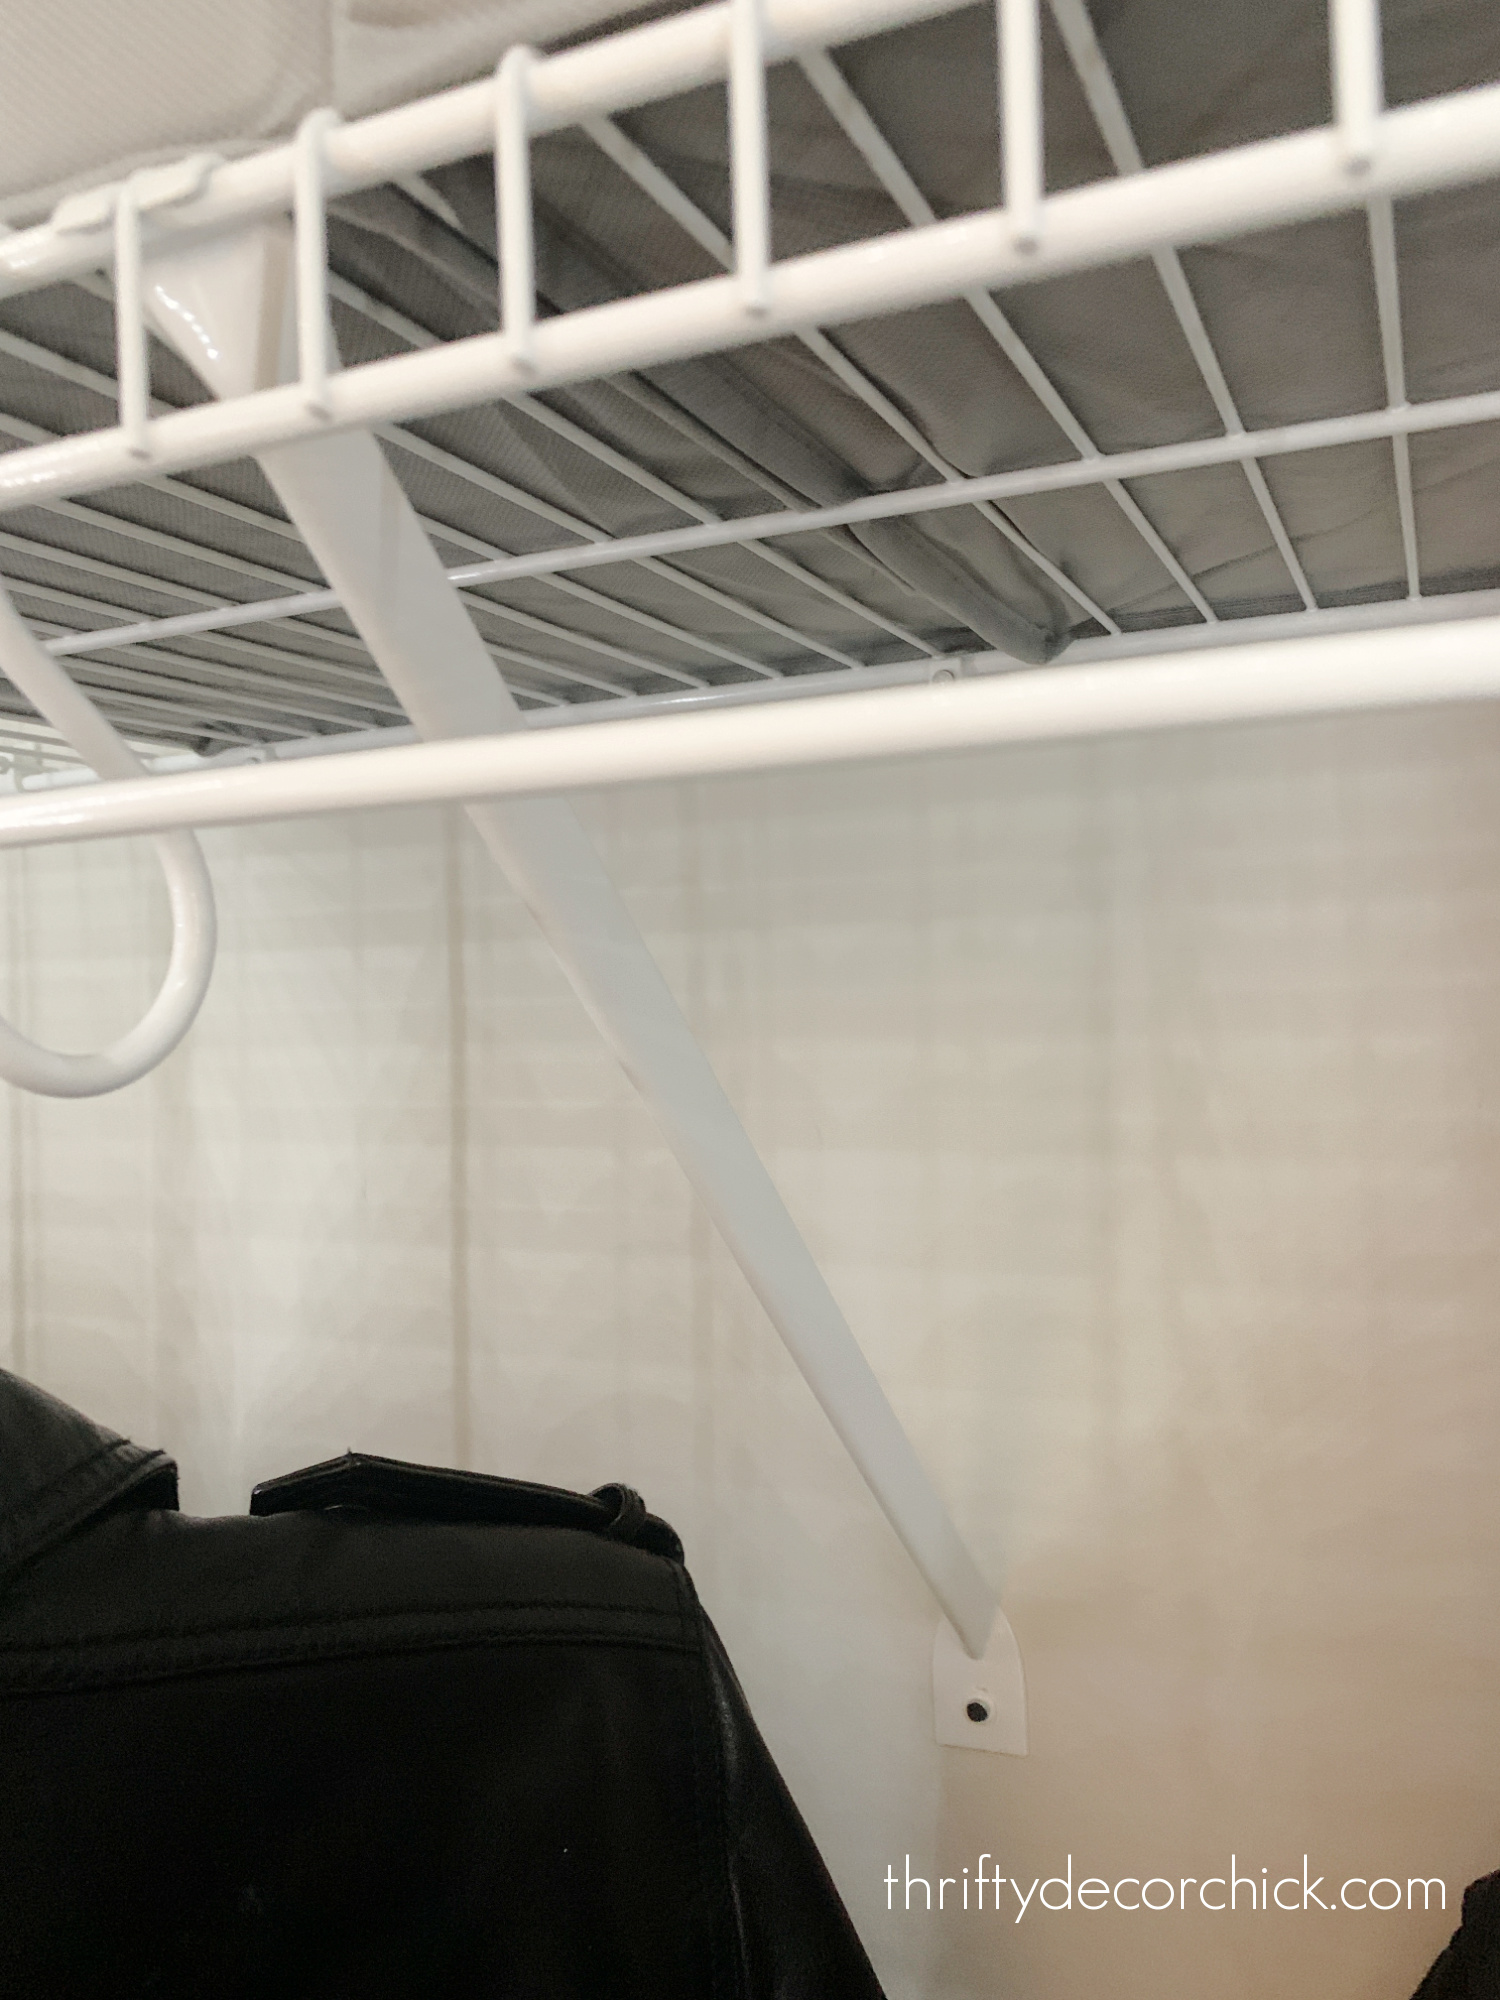
This was a super easy fix! I picked up a new bracket for a few bucks and then installed them both closer to the walls instead of in the middle, so that spot was now clear.
Perfect!:

You can see that I didn't install the wood feet on the bottom of the top unit so I could stack them.
I plan to replace the wire shelving with wood someday...but for now I'm working with it. :)
I drilled two holes into the bottom of the top cubby so I could attach the two together:

They are made of melamine, which looks great and is super easy to clean, but they are slick! The top one would not have been secure without connecting them.
The cubby units come with brackets you'll want to secure into the wall behind so they don't topple over -- especially if you choose to stack them like I did!
I grabbed two sets of these storage bins for the units:

I really like the neutral color and they are HUGE! I had to double check that they would fit inside the cubbies because they are so large.
Colby loved the new storage, of course:
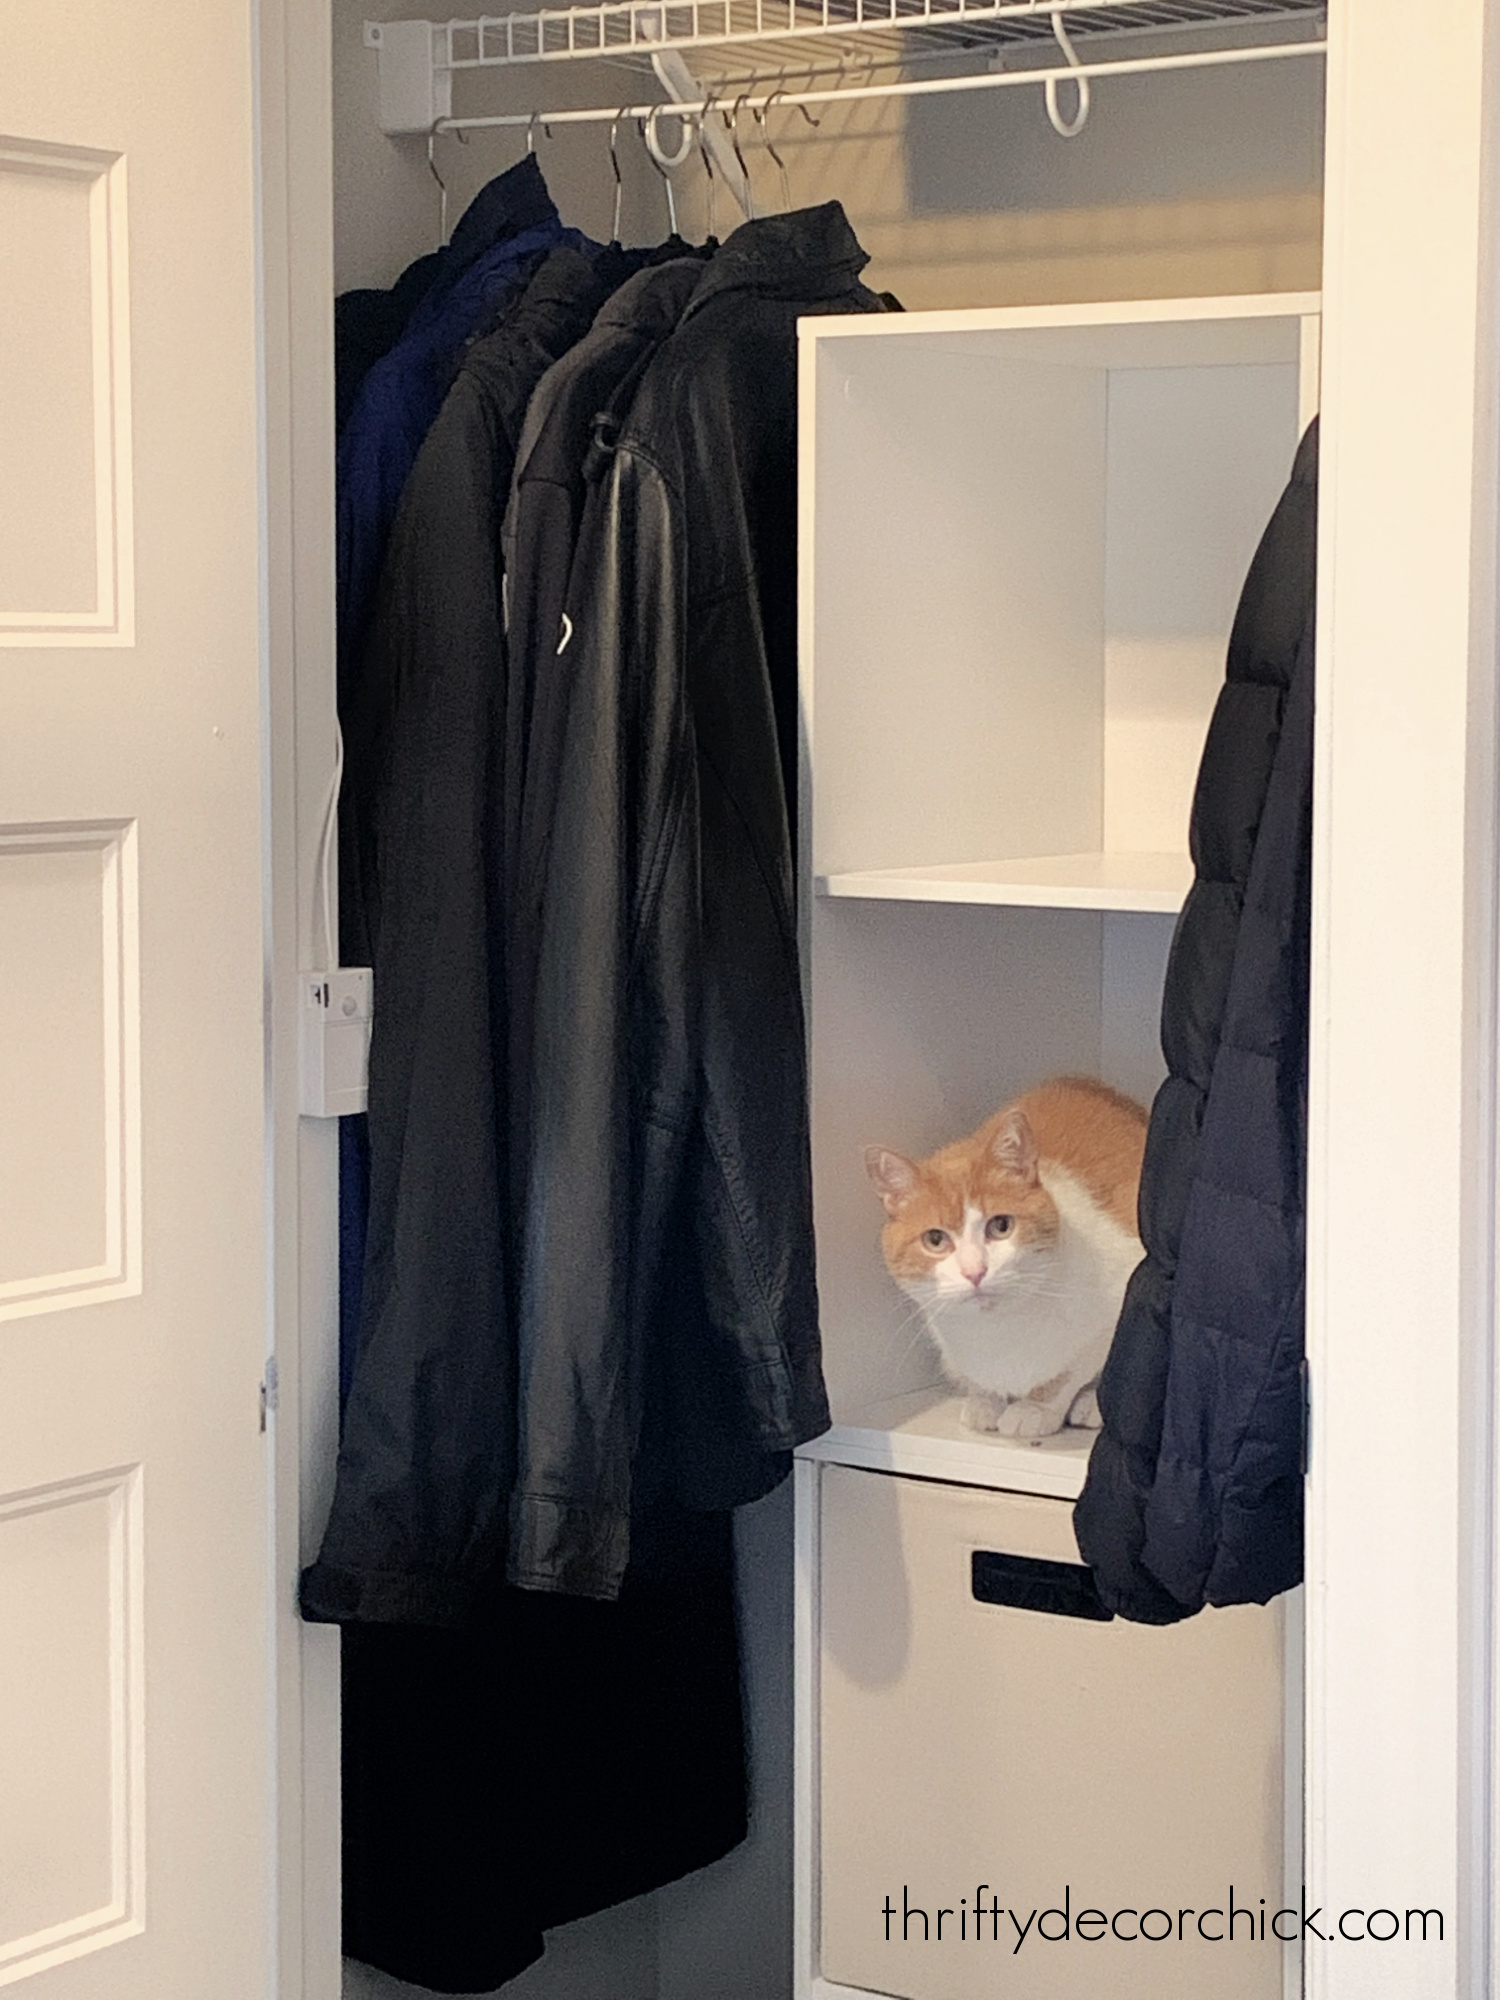
We went through our coats (I feel like we had a TON) and got rid of enough that the storage shelves fit perfectly in the middle without the coats feeling smushed.
Our coats are hanging in the mud room all winter anyway -- we rarely need to grab them from here. The great part is we now have some space for additional coats when people come over!
I don't think we've ever been able to hang our visitor's coats in our coat closets. ;)
I LOVE all of the storage, but we needed to know what was in each bin. It would've taken four months of me pulling out three of the four before I'd remember what was in each one.
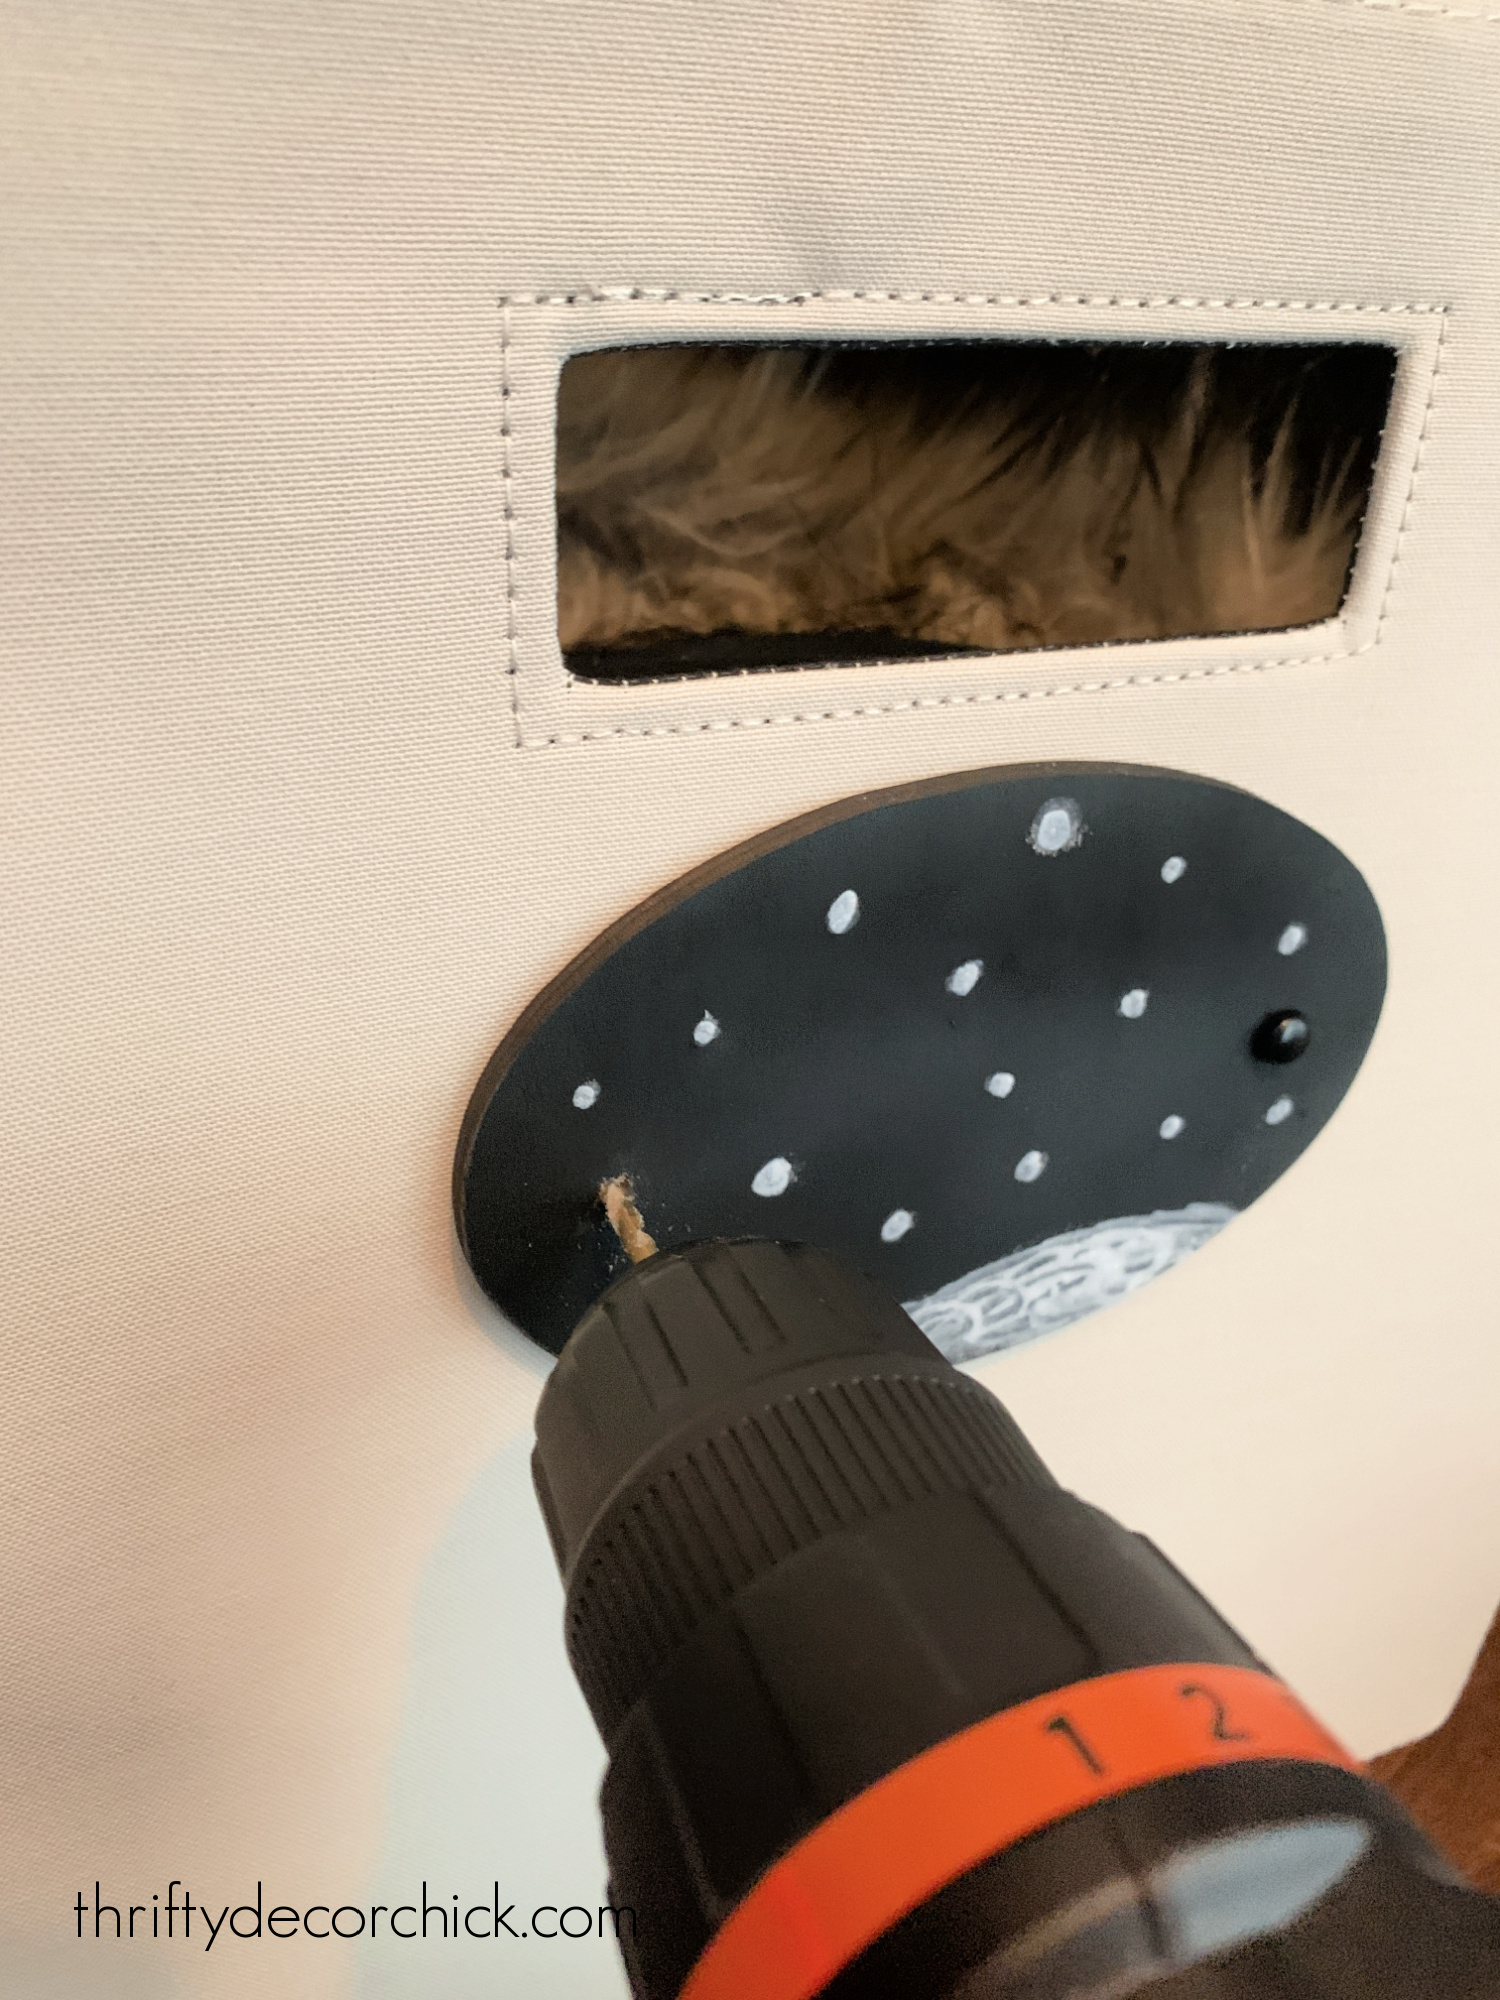
I had some oval wood shapes from the craft store in my stash (I was going to make ornaments with them last year), so I drilled a hole on each end and then painted them with chalkboard spray paint:

Instead of words like "winter" and "summer," I did a little seasonal art instead.
After I drew all over them with chalk, I realized I didn't want them to wipe off, so I sprayed a clear coat on top of each one. And the chalk drawings disappeared right before my eyes.
COOL.
Thankfully I could still see a shadow of what I drew when the clear coat dried, so I was able to do it again, this time with a white Sharpie marker.
I held them up and drilled into the cubbies:
And then attached them with long brads that went through the wood label and the cubby:

It worked great!
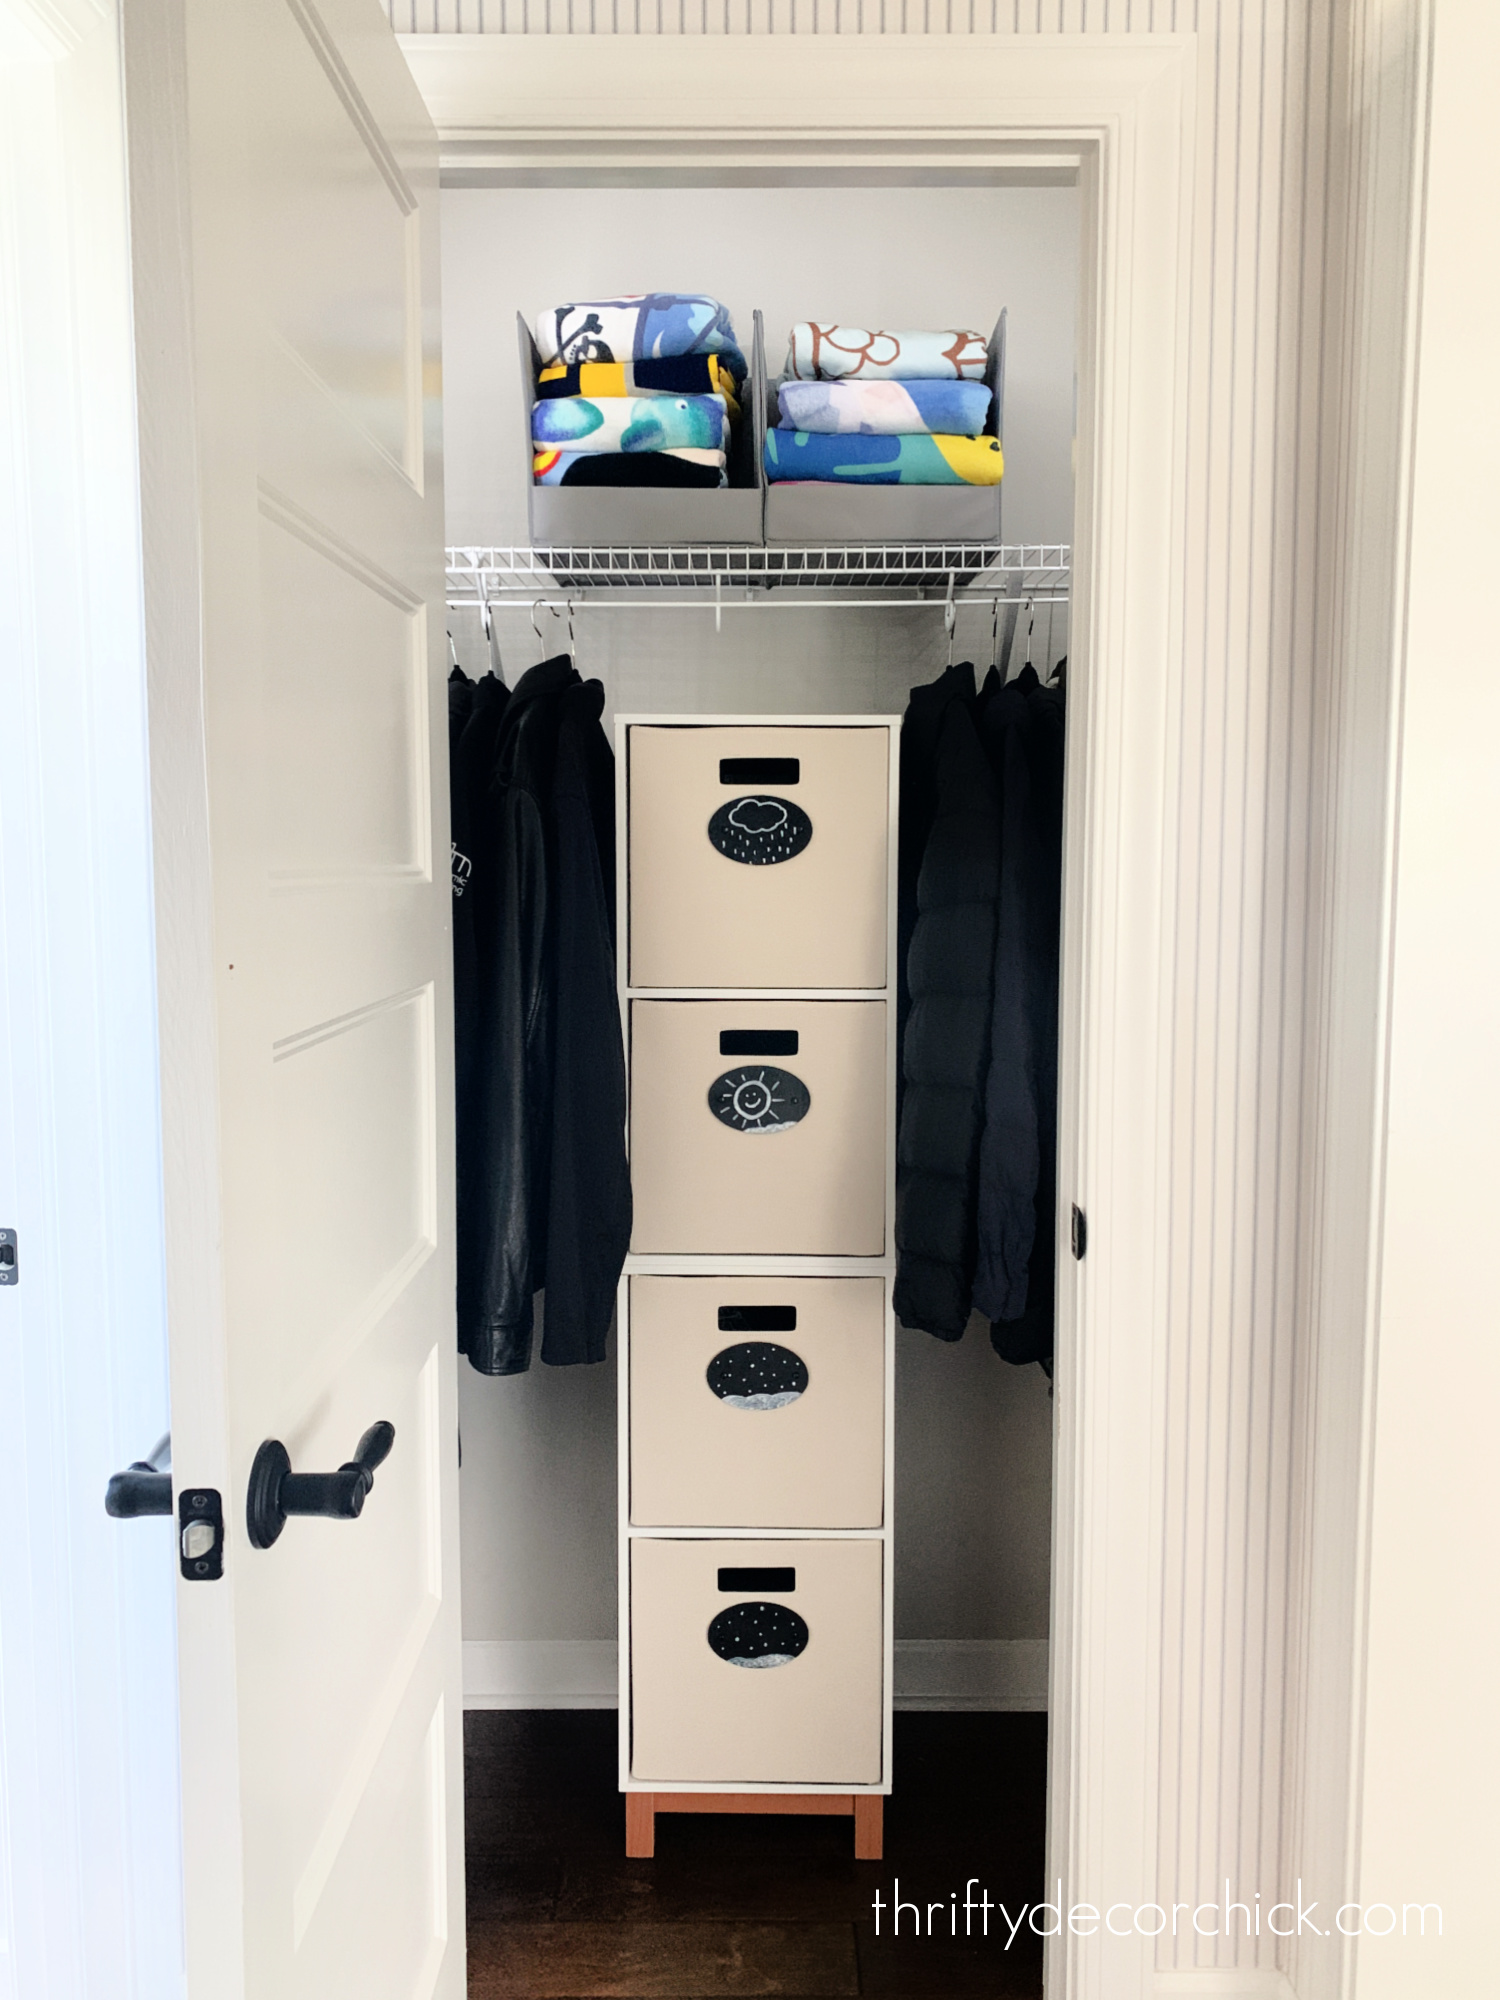
Now we can see what seasonal gear we're reaching for -- winter boots or pool goggles?:

As my niece would say...adoyable! I love them. :)
The cubbies hold a TON so that was all the storage we needed.
Other than a few coats we donated, almost everything that we started with stayed. I moved a back pack up to our son's closet and the large umbrellas out to our garage where we can let them dry after using them.
We also had some reusable bags that I moved to the mud room cabinet drawers so we can grab them on the way out.
Now this closet is SO wonderfully organized and functional...you know how happy this makes me! I love that we still have plenty of floor space if needed:
Occasionally I open the door just to see the lights and great organization. ;)
You know this is the best part -- the before and after:
Ohhh yes...the best!
Any coat closet organization tips you use and love? See the organization hacks I used for the winter gloves, hats and scarves in the coat closet at our old house!
This post sponsored by Big Lots but all opinions are my own.
I only work with companies and products I know, love and would recommend to you.
Never miss a post by signing up to get posts via email.
Via https://www.thriftydecorchick.com/2021/08/messy-coat-closet-organization.html
0 Comments
TONS of beautifully organized closet makeovers with clothing, jewelry and shoe storage.I've got major closet organization on the brain lately! I have most of our smaller closets under control, but I didn't want to tackle anything permanent in our clothes closets until we lived with them for awhile. I find it helps to see how we use the spaces before doing anything too drastic.
My husband and I are lucky to have our own closets -- neither one is HUGE, but they are plenty big for what we need! The key is to make the most of the spaces we have and make them super functional.
I've shared my jewelry and shoe storage, and it's been working well:
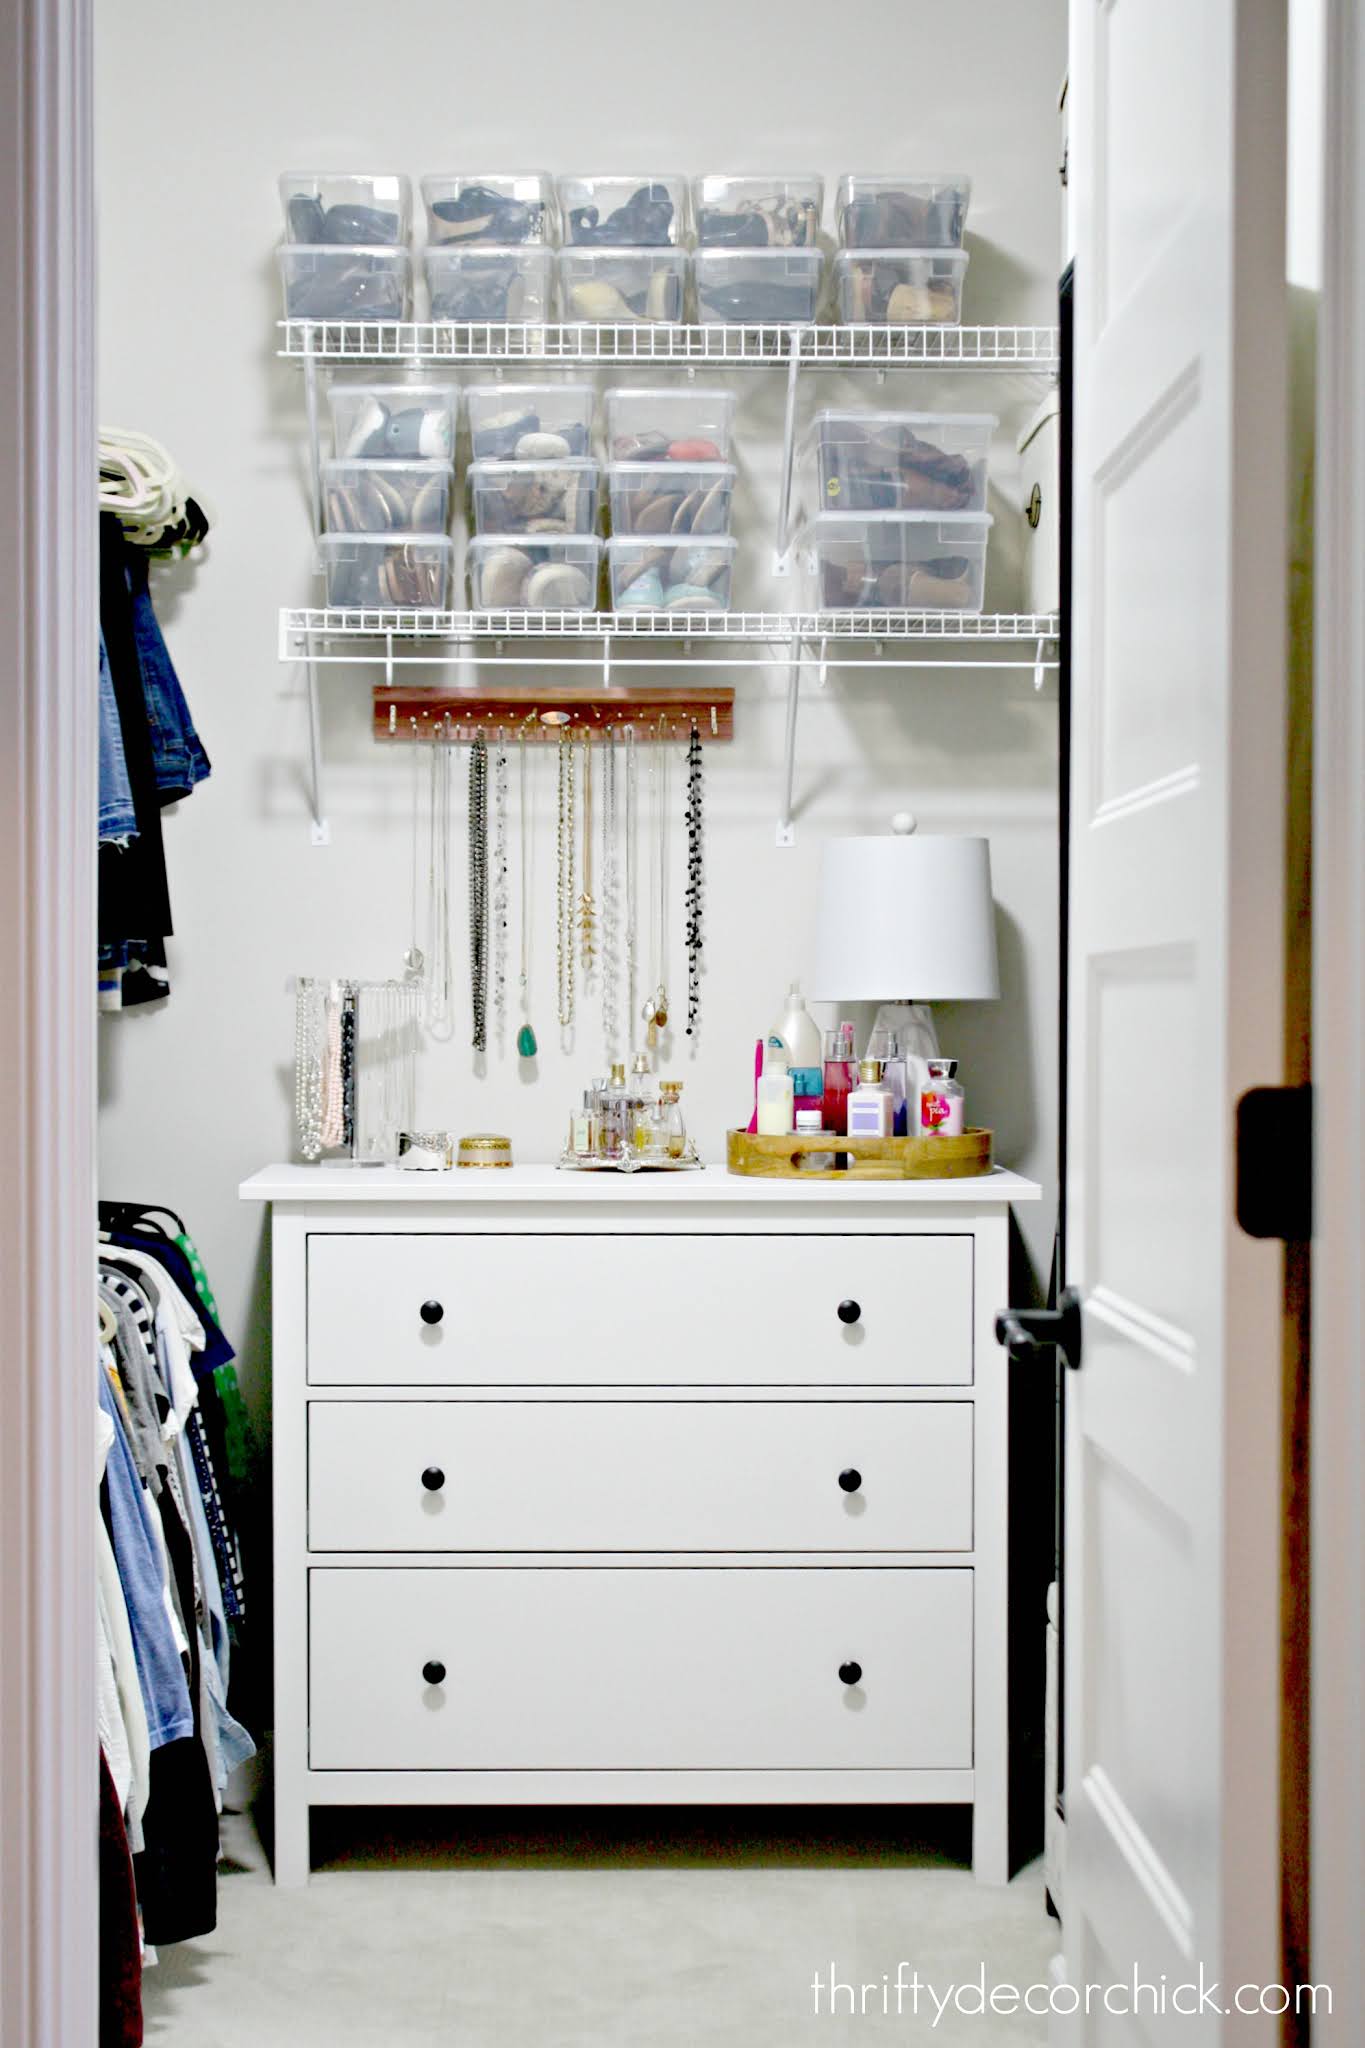
Not much else in there functions well, but hey...I have that at least! ;)
I'm sure many of you won't be surprised that I used kitchen cabinets for our closet makeover at our old house:
This post may contain affiliate links for your convenience.
See my policies and disclosure page for more information.
I'm not sure if I would use cabinets again or not...just because the base cabinets are so deep and take up a lot of floor space. If I did, I'd want to install fully extending drawer slides so we could access ALL of the cabinet drawers.
I have a bunch of ideas rolling around in my head for when I decide to tackle my closet, but for now let's take a look at these awesome DIY closet makeovers from some very talented bloggers!
Build it from scratch
If you have the know-how, a custom closet build will give you all of the functionality and storage you're dreaming of.
Ashley built her closet from the ground up and it is a stunner:
All of those drawers are what dreams are made of! :)
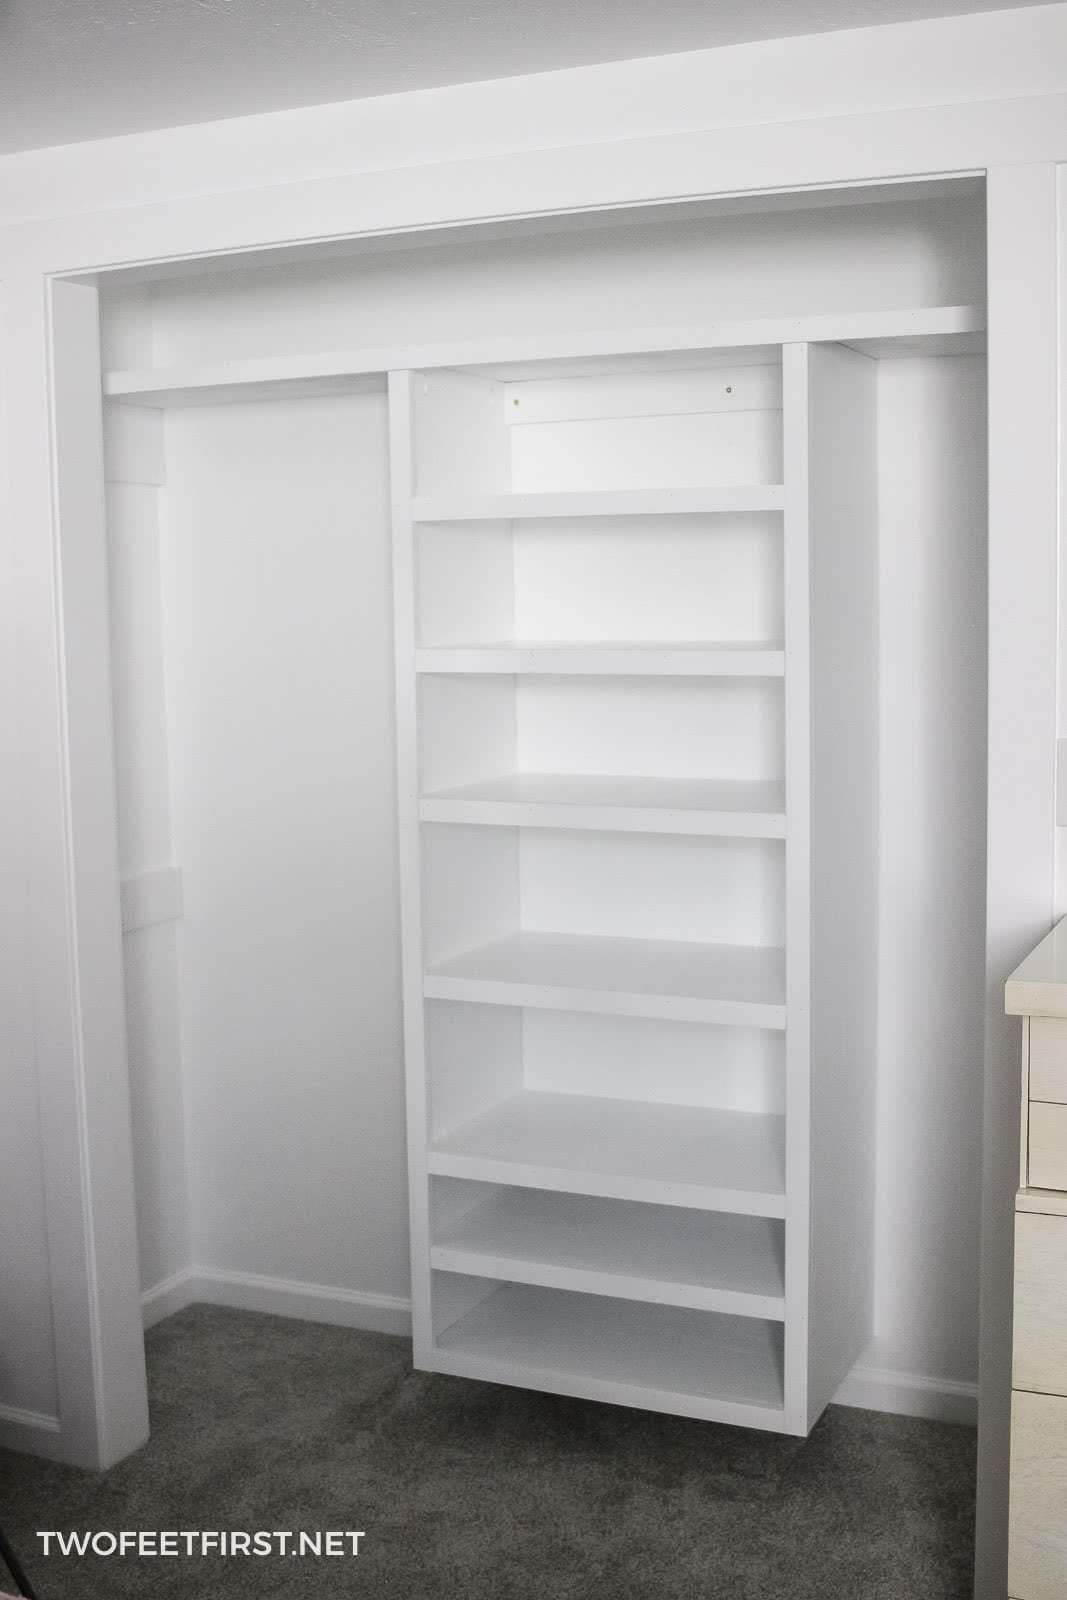
If you aren't a high level DIYer but can do the basics, this "box system" closet organization is also a brilliant idea!:
If you can build wood boxes, you can make custom shelving for your exact needs.
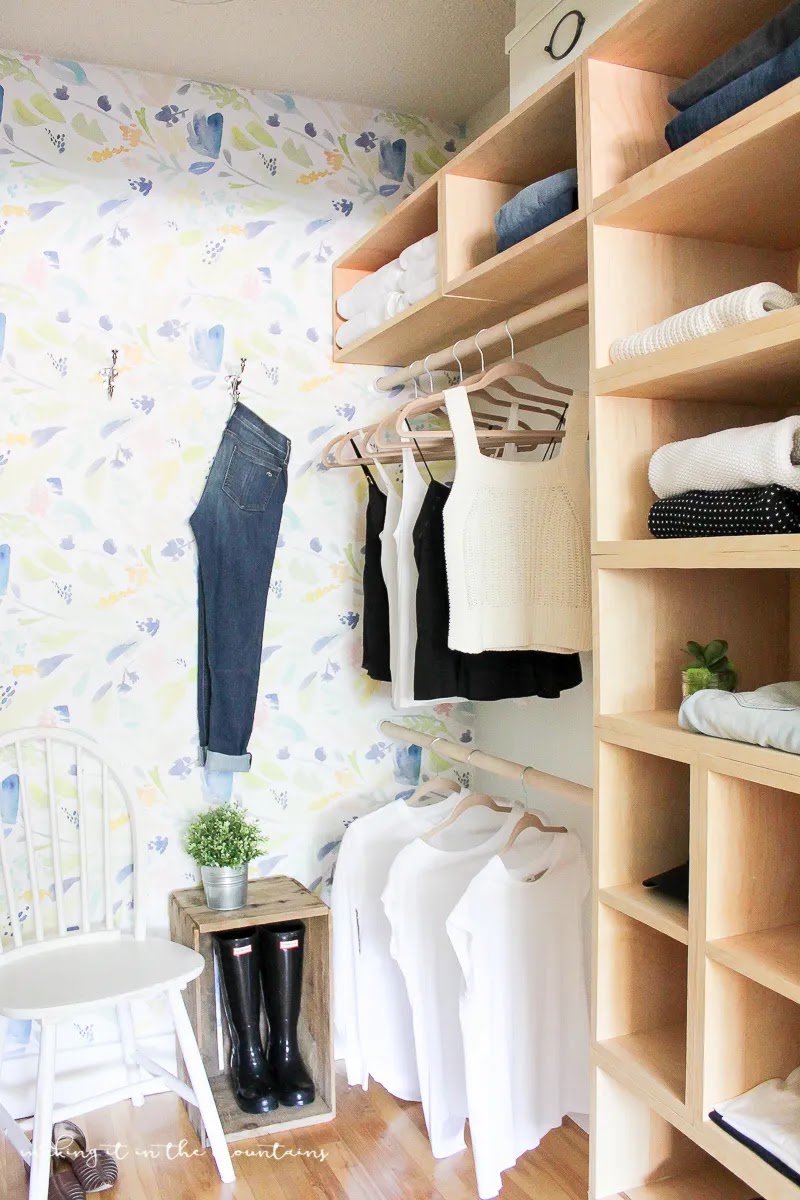
I love the natural wood in that closet and this one as well -- it's a coat closet but you could create the same segmented organization for hanging and folded clothes:
Carrie used $75 of MDF to build a tower in the middle of her closet with shoe storage on the bottom:
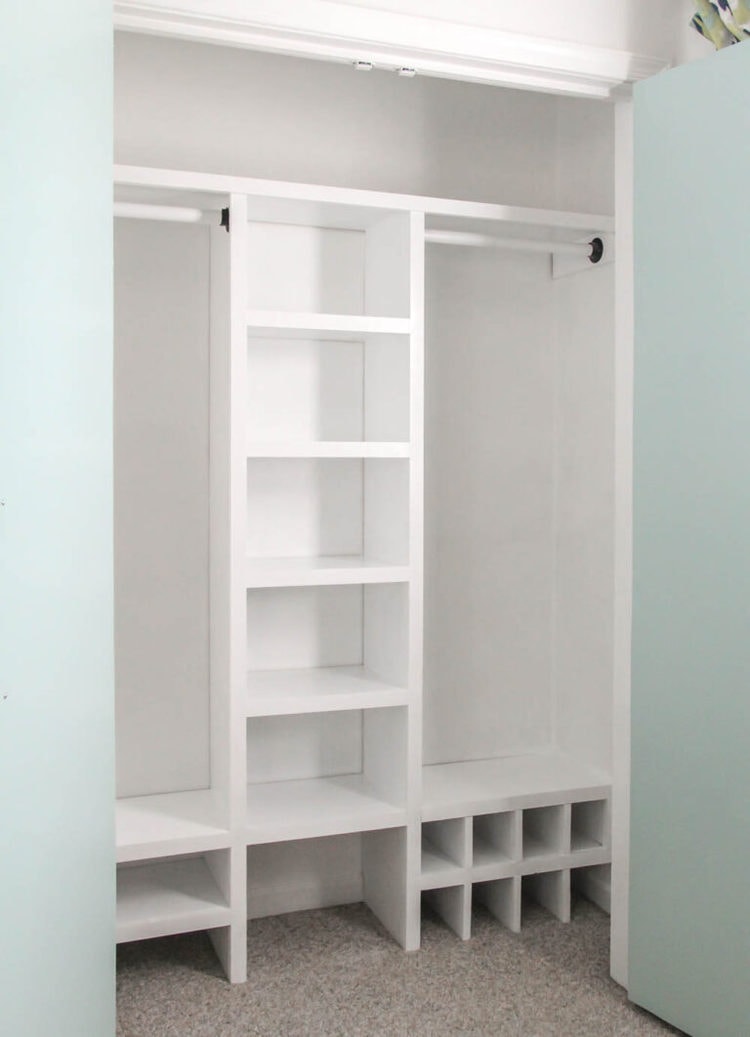
This "floating" shelf version is even simpler and won't break the bank:
Oh my, look at those lovely solid shelves. I can't wait to lose all of our wire shelves!
Vineta shares how to create custom closet drawers with French cleats and plastic tubs:
You'll save a ton of money if you create built in closet units like these!
IKEA Pax closet builds
Of course no closet round up would be complete without the IKEA options! There are so many ways to customize these for your specific needs.
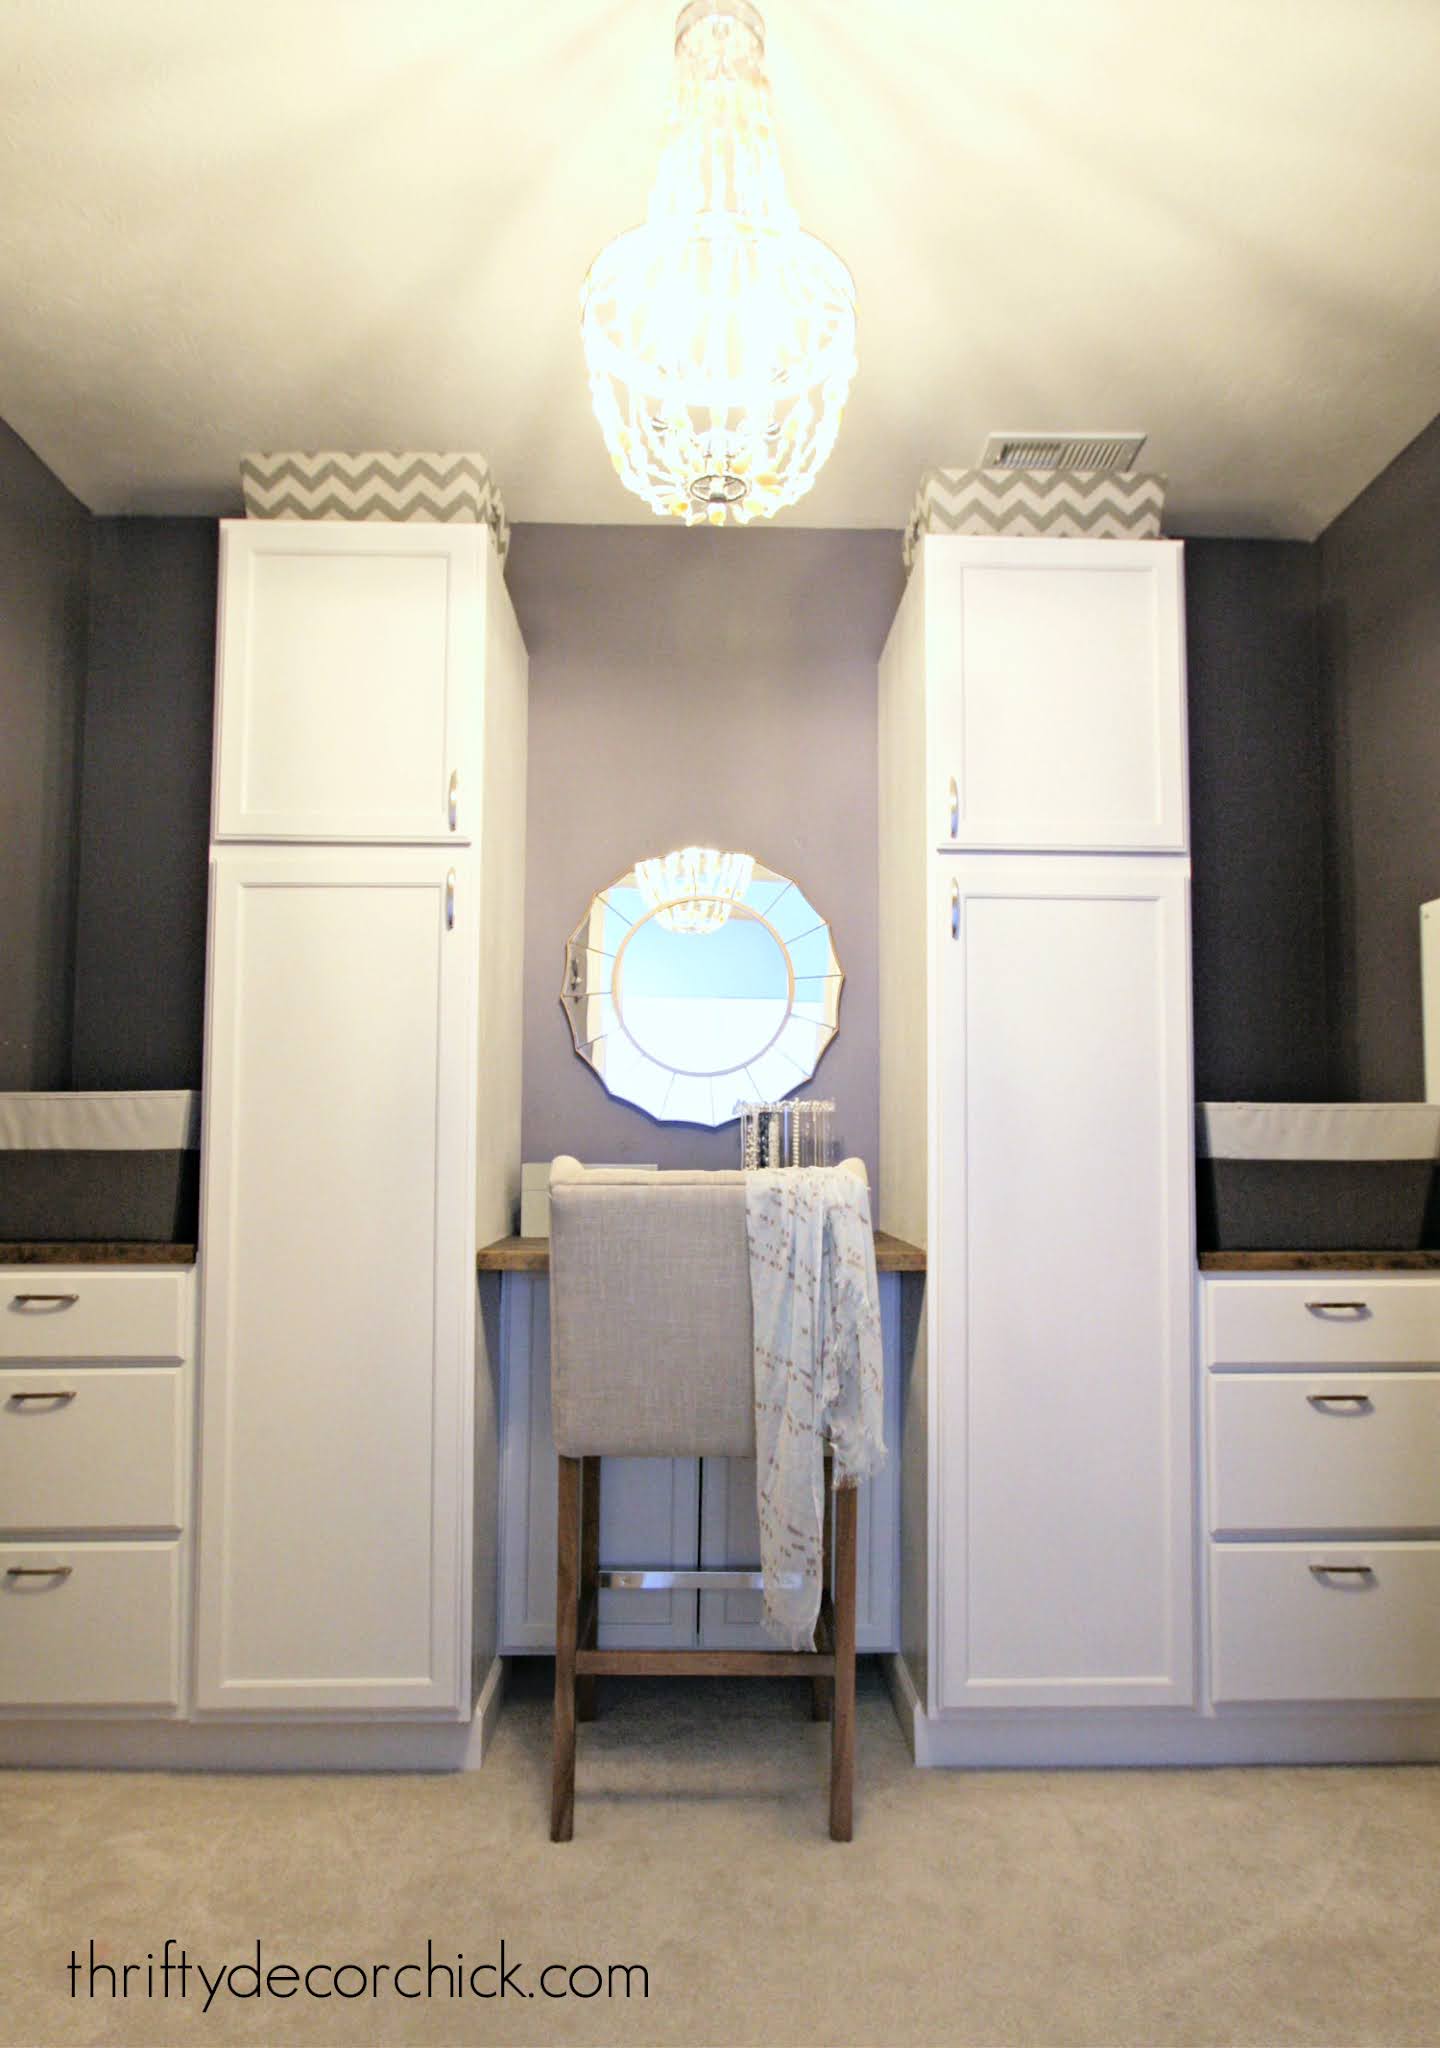
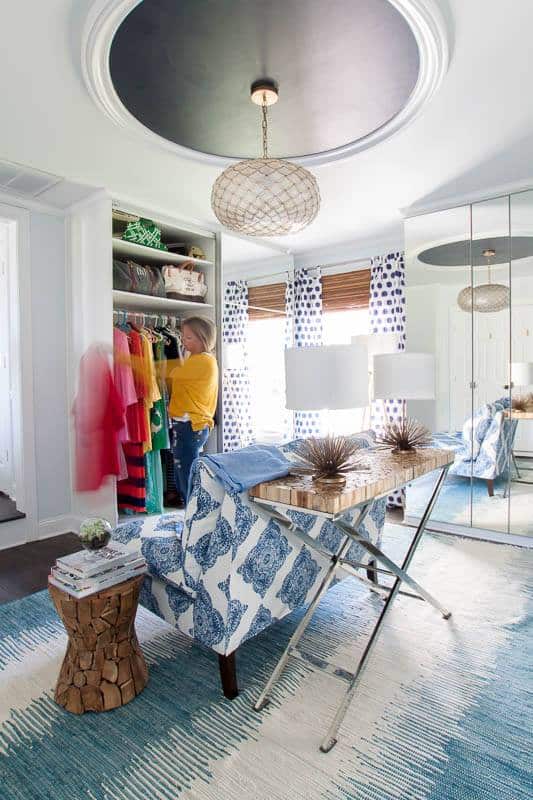
This IKEA Pax closet has to be the most organized closet I've ever seen!:
SO awesome! Her husband's side is just as beautiful!
I LOVE the IKEA lighting options for their closet units:
Soft task lighting makes everything look better!
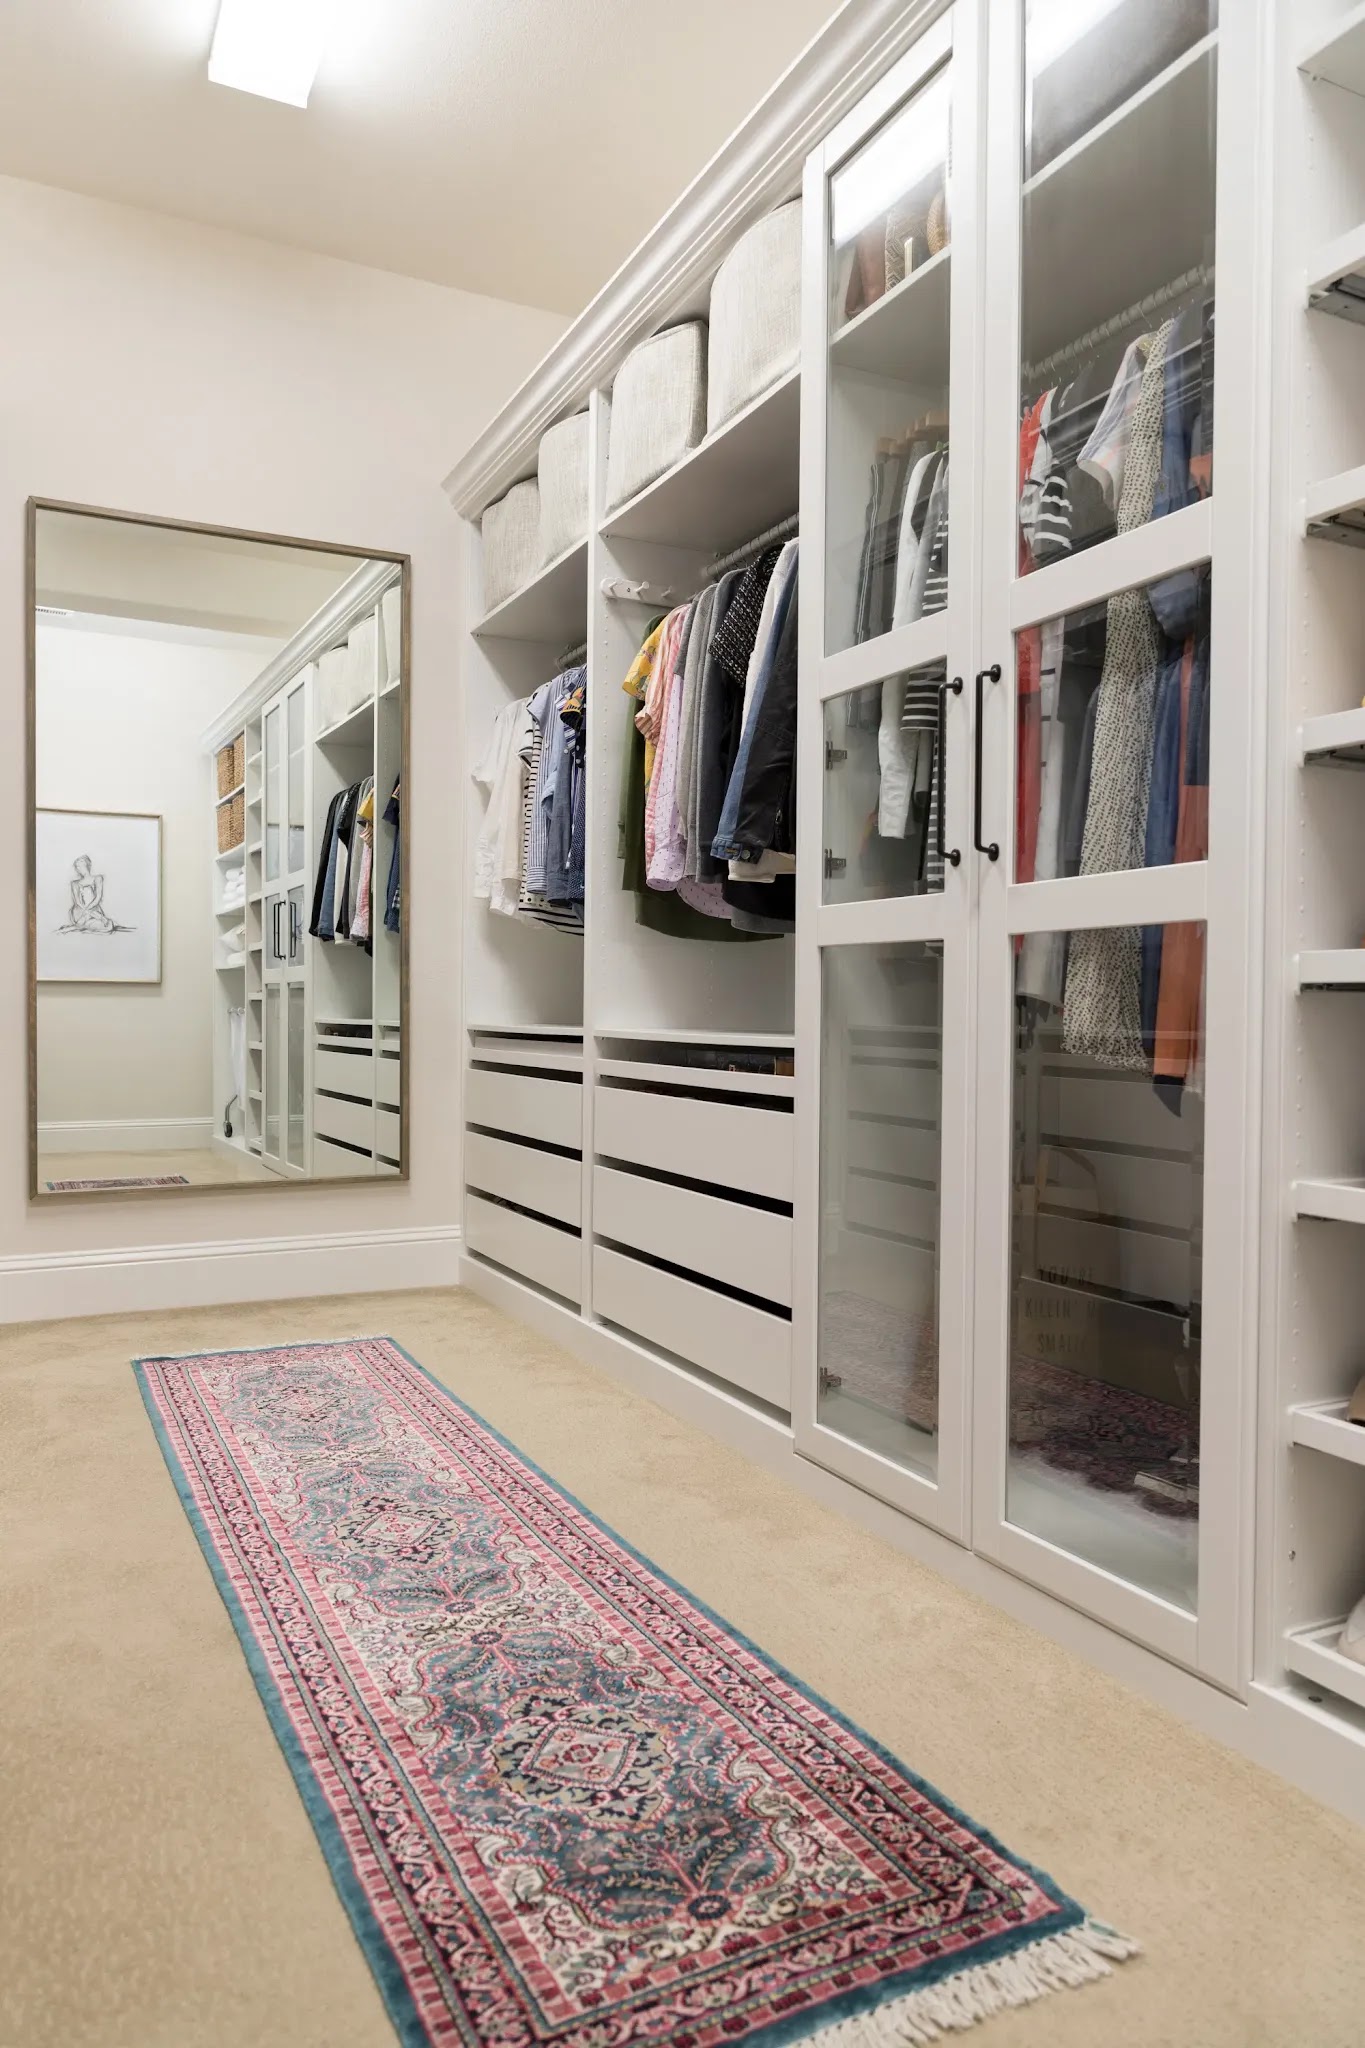
Heather took her time and gathered secondhand Pax units to create this beautiful closet:
I love the mirrored front panels! Those would be perfect for a smaller closet where there isn't room for a full length mirror.
Jaime used an IKEA dresser and built it in so it looked like a custom unit:
This is definitely an option I'm considering for my closet!
Organized kid's closets
Even though the kid stuff is smaller, there always seems to be more of it. :)
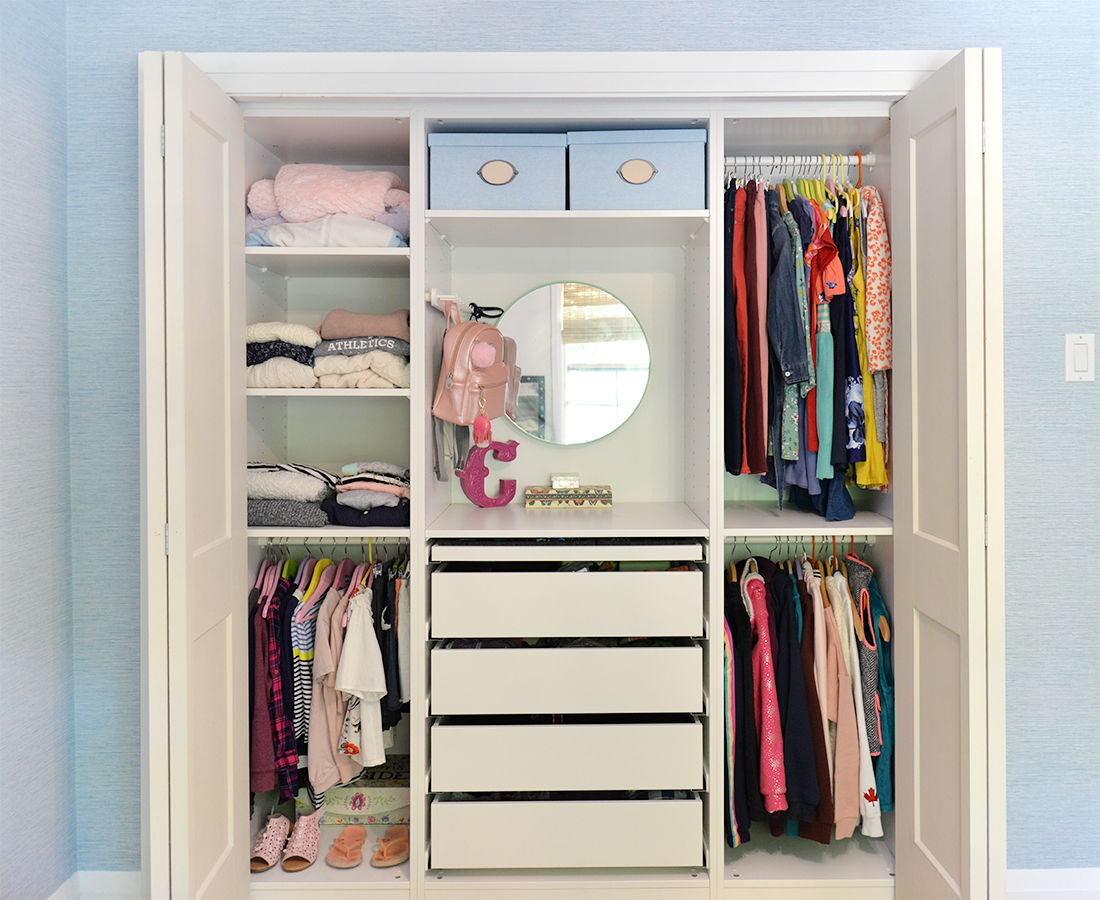
Jen used an IKEA unit to create a lovely closet for her daughter:
This teen closet was built from scratch and I love the pretty gold details!:
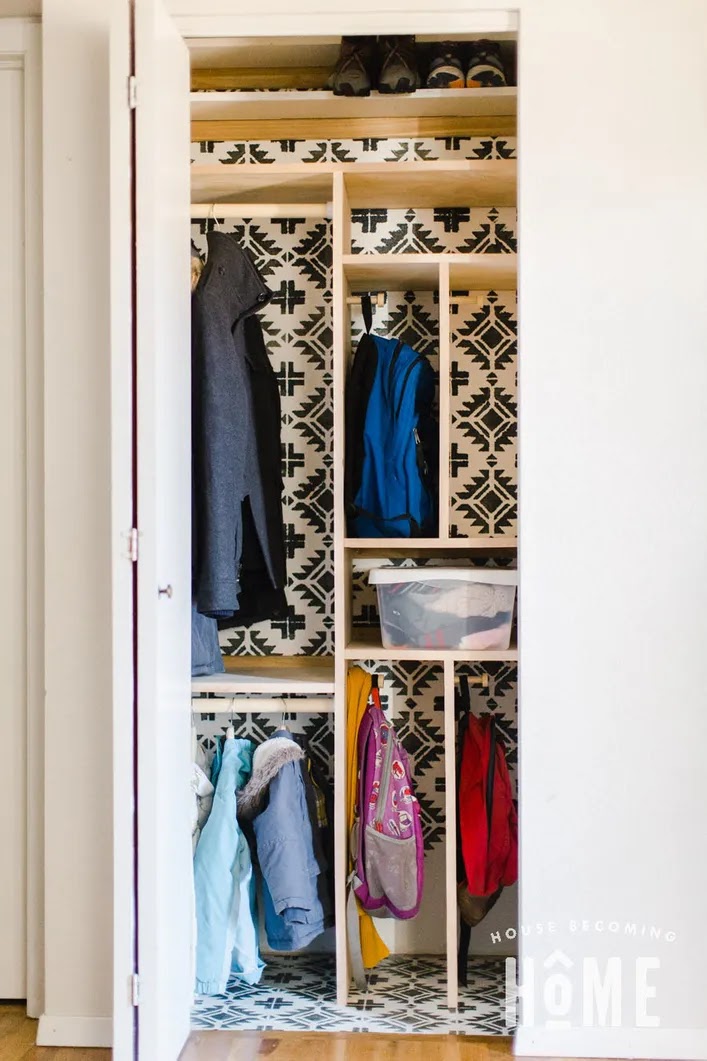
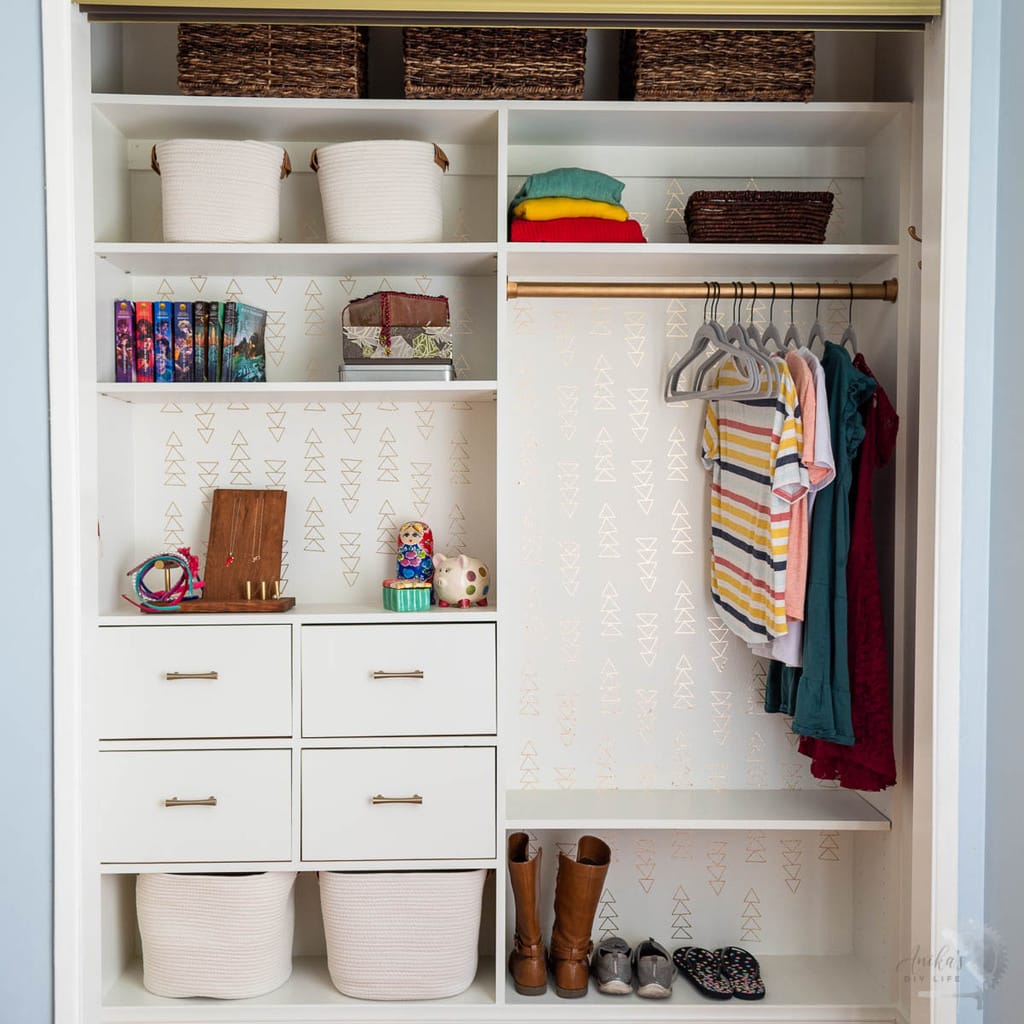
I adore this sweet boy's closet -- how cool is that book shelf on the back of the closet door?:
I love the blue and gold wallpaper accent as well. ?
The husband's side of the closet
We can't forget the spouses!
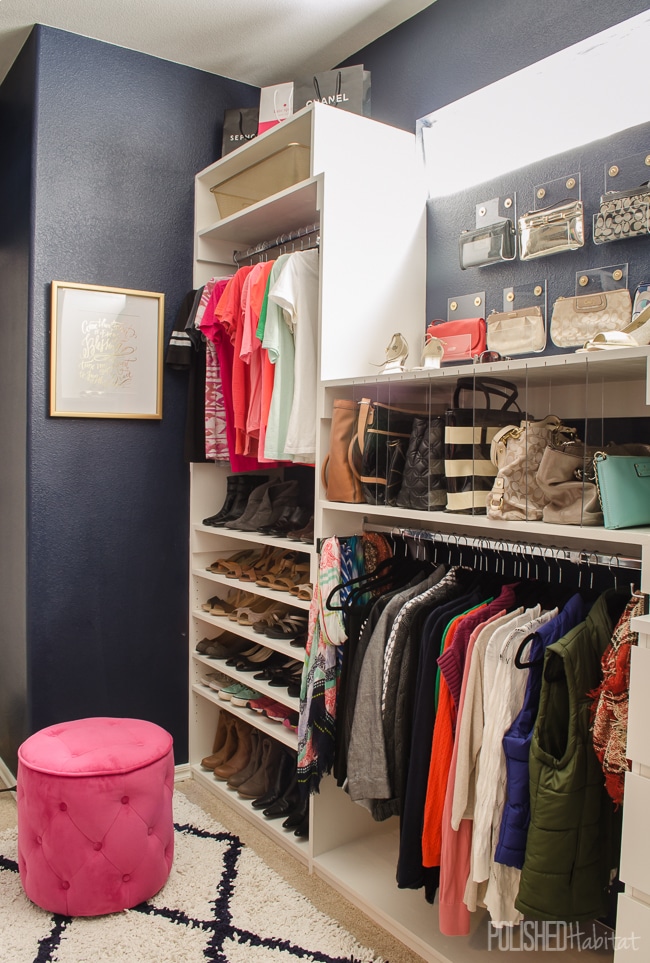
Maria shared how they made one large closet into a "his and hers" that meets both of their needs:
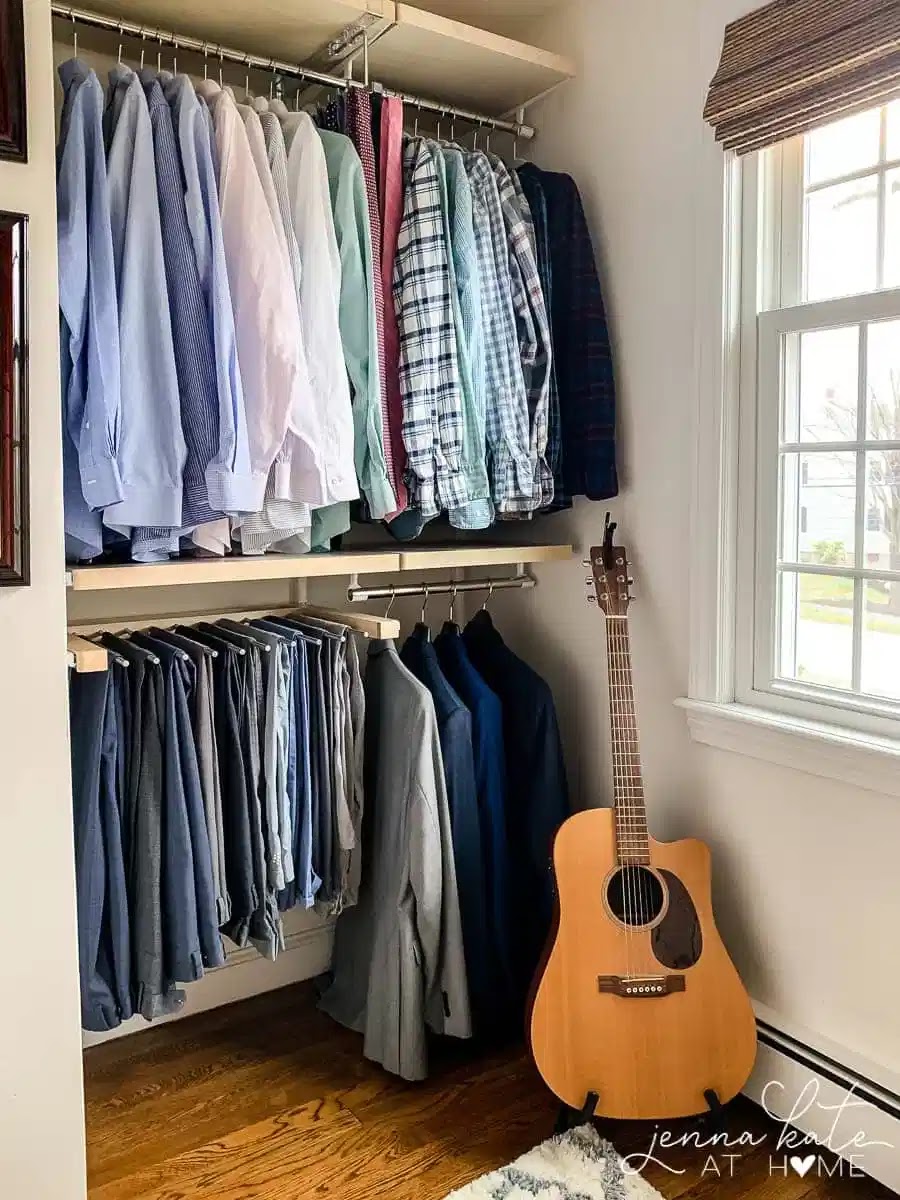
Jenna Kate used closet storage that attaches to wall brackets to create this custom closet for her husband:
I love the pull out pant hangers -- brilliant.
I'm planning to start with my closet and then I'll tackle my husband's... you know, when I work out the kinks. That's what I always say anyway. ;)
Organizing the small stuff
Whenever I see a closet great makeover, the little details are always my favorite part. I love seeing how people organize the small stuff like shoes, jewelry and purses.
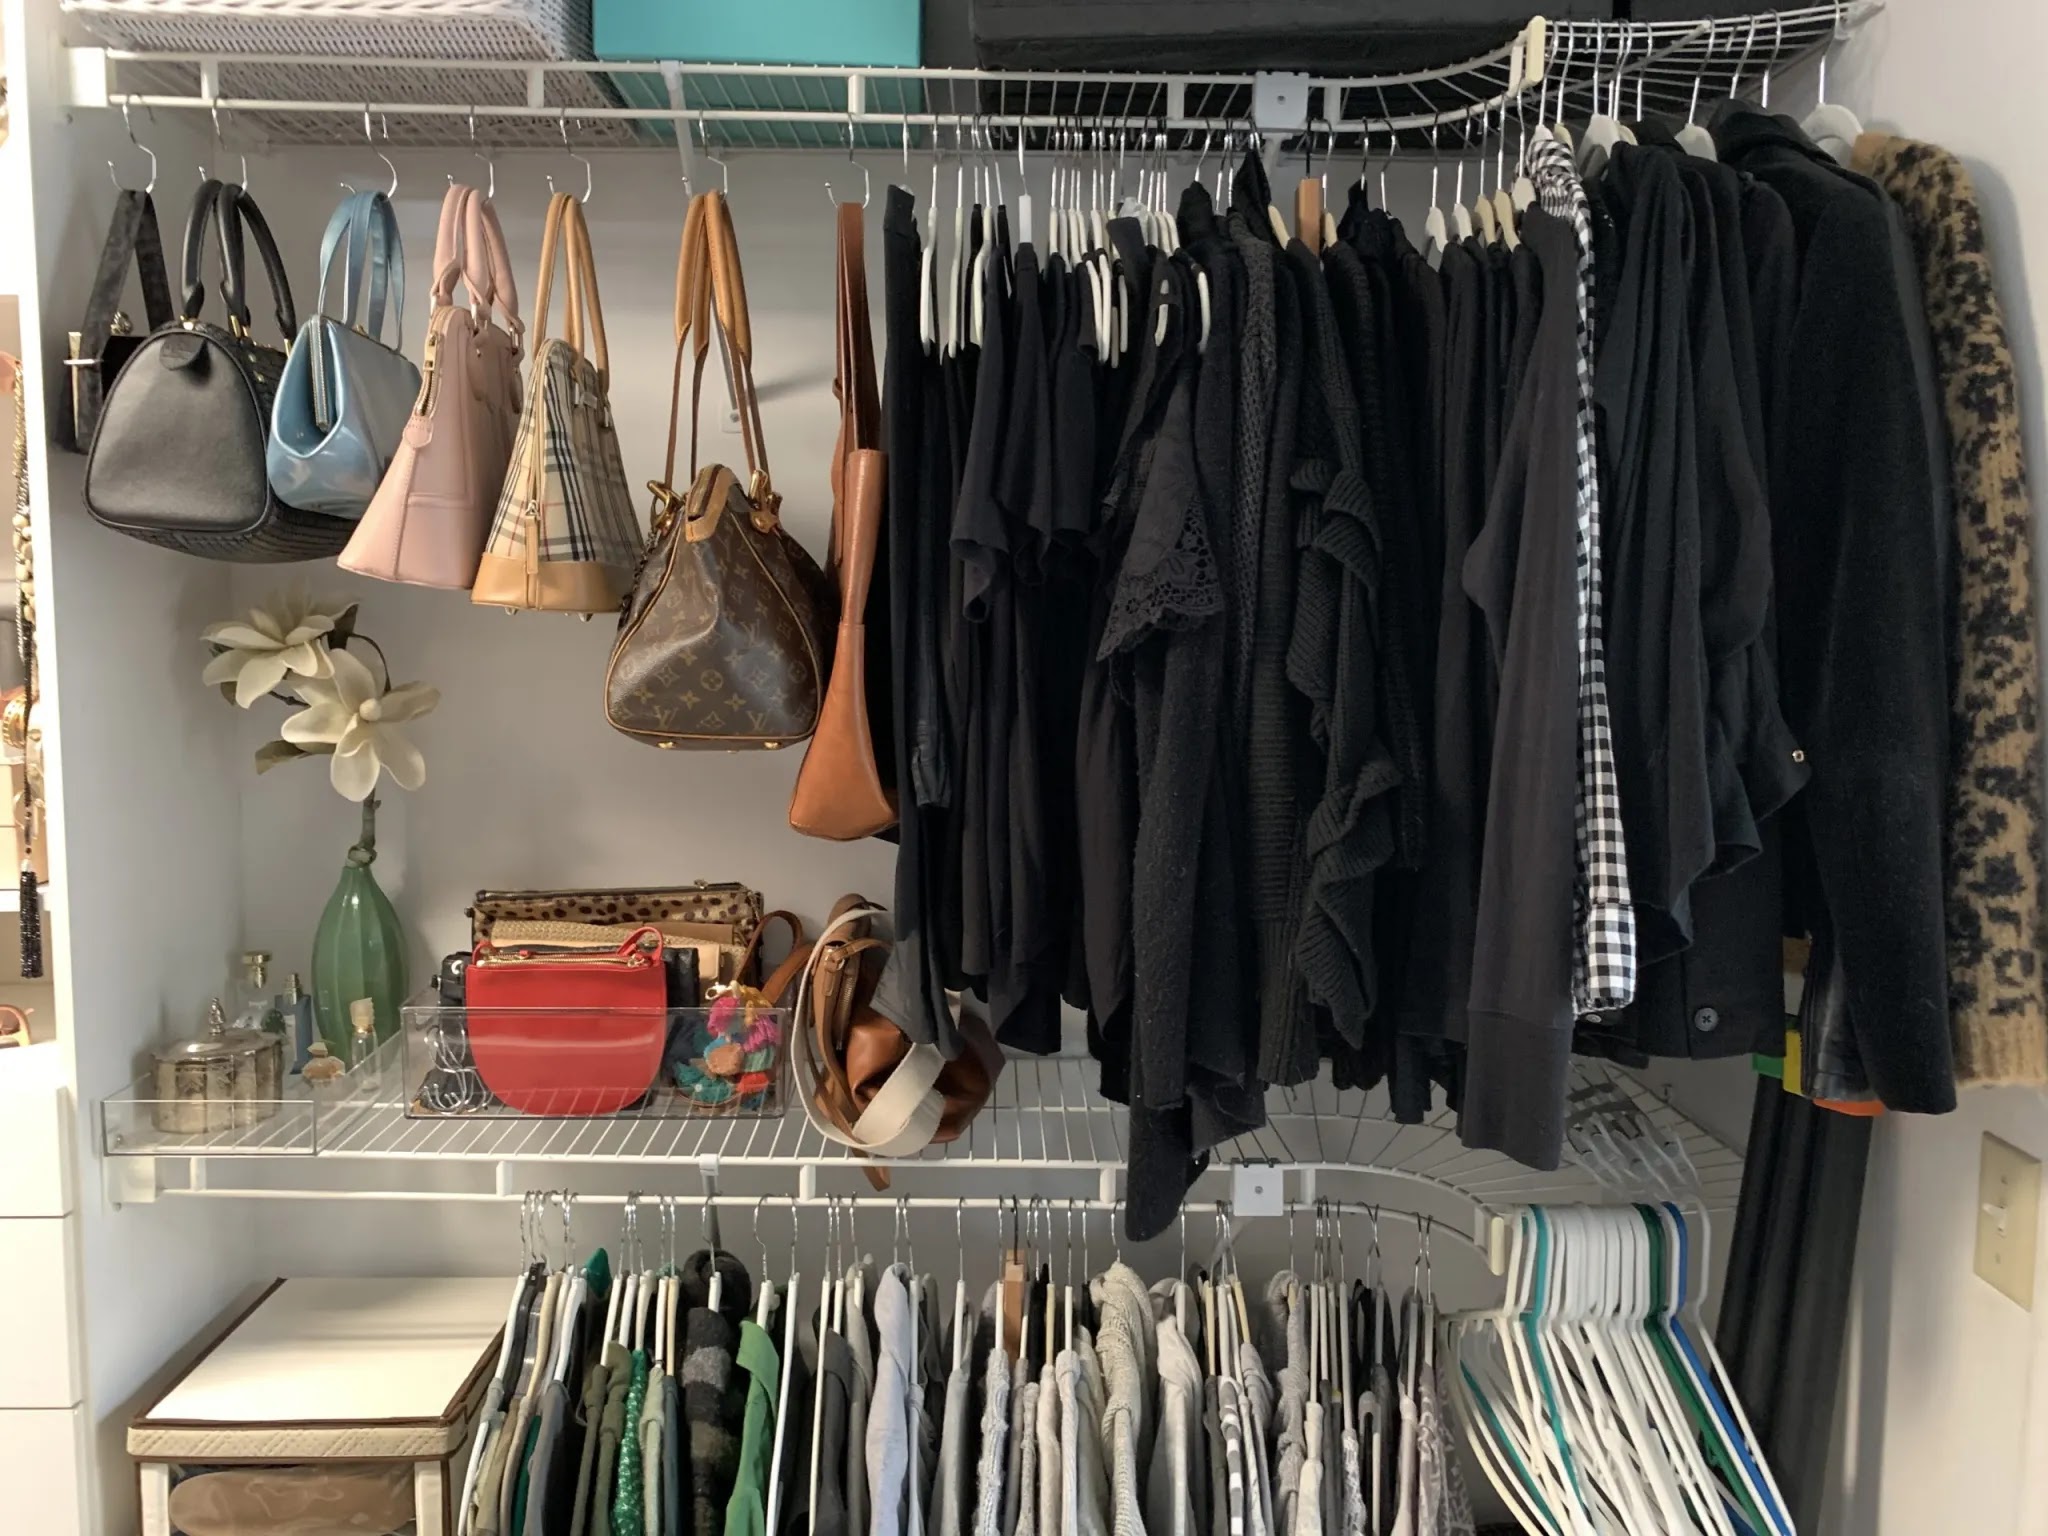
Melissa's wall of small handbag and purse storage makes me happy:
I also loved these simple hooks to hang purses:
If you have extra hanging space this is a great way to keep everything out where you can see it.
Christina's wall of DIY jewelry organizers makes my heart happy:
So simple but so smart!
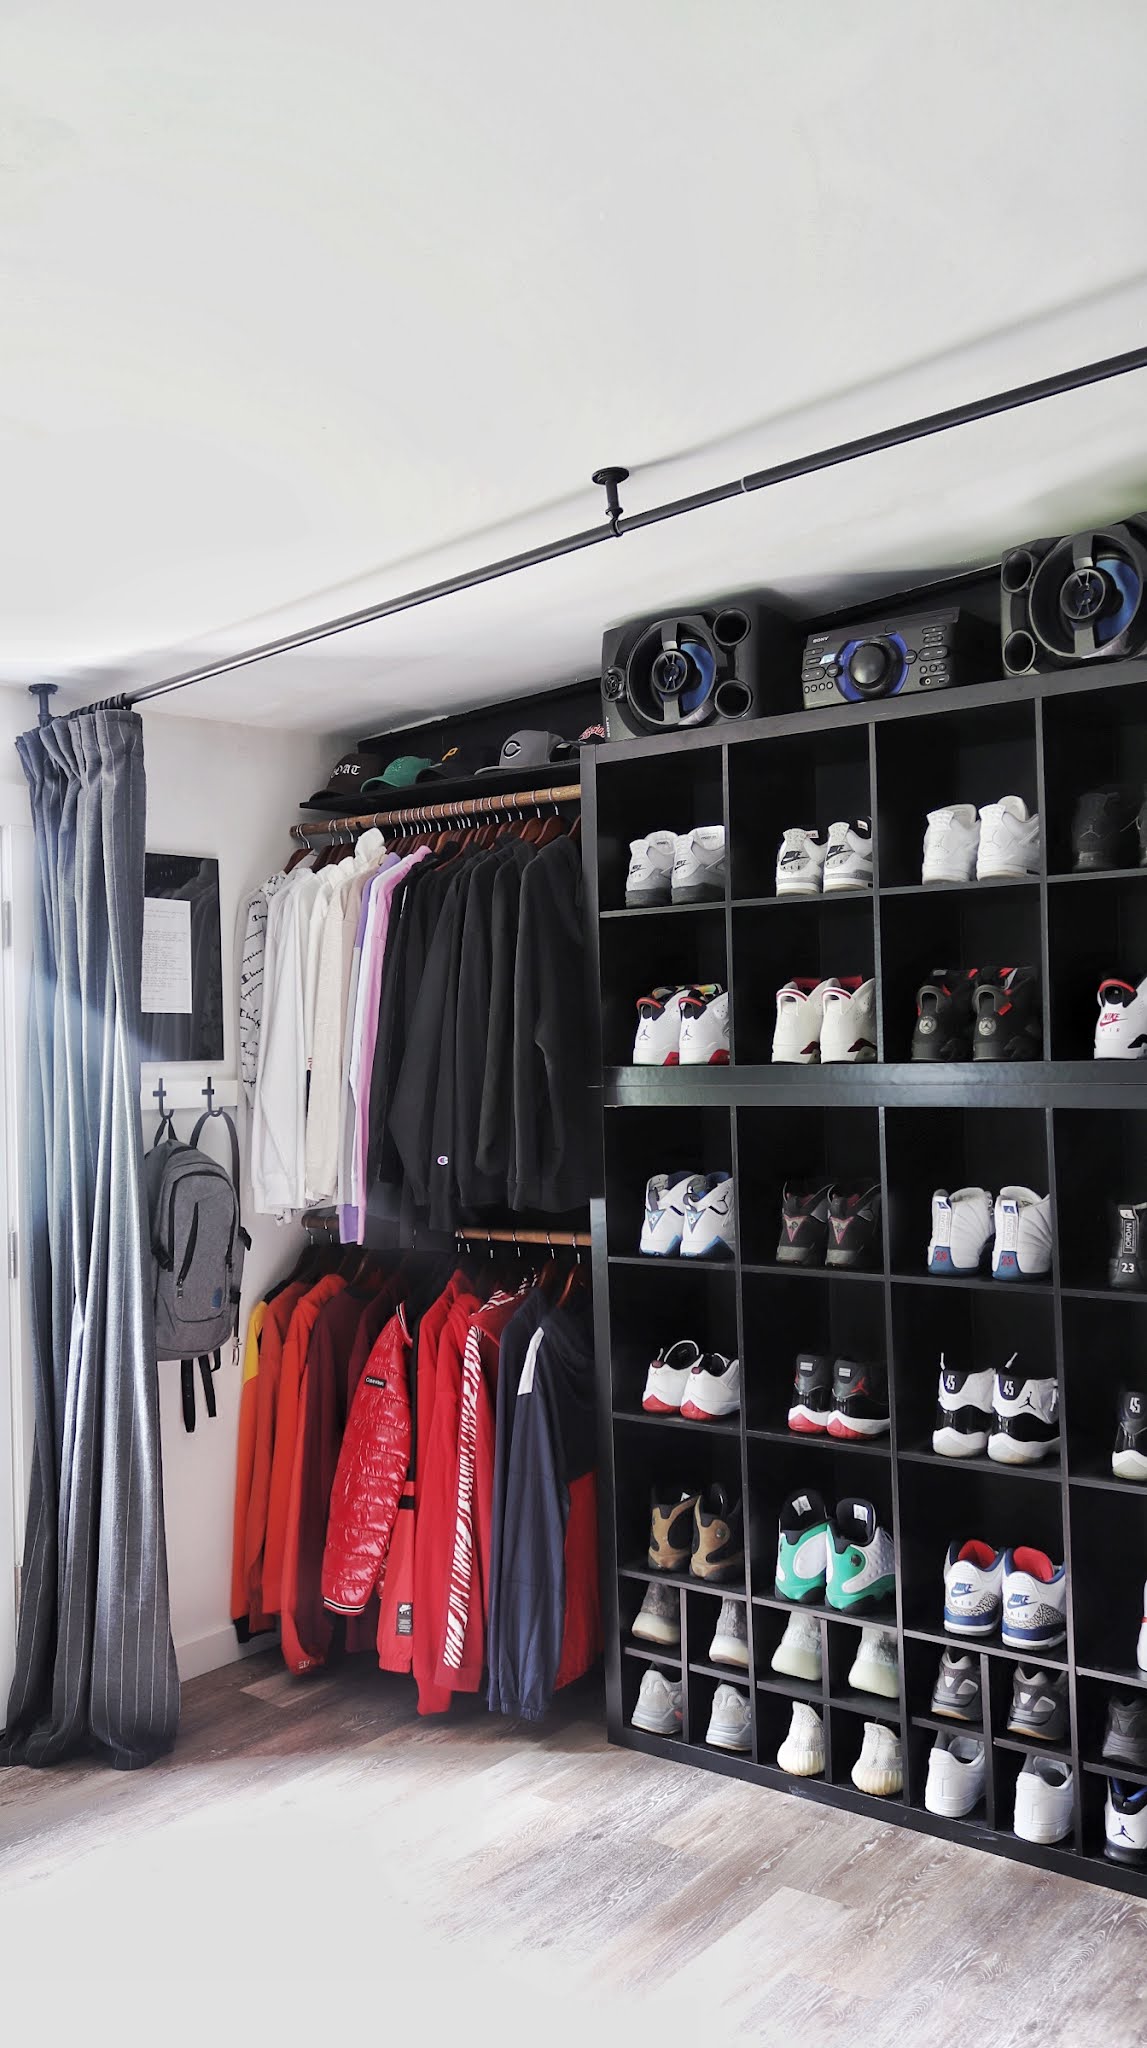
THIS one is brilliant! Carli used square cubby organizers to create tons of sneaker organization for her son:
How smart is that! They are perfect for bigger shoes like these -- it would also make great storage for sweaters and sweatshirts.
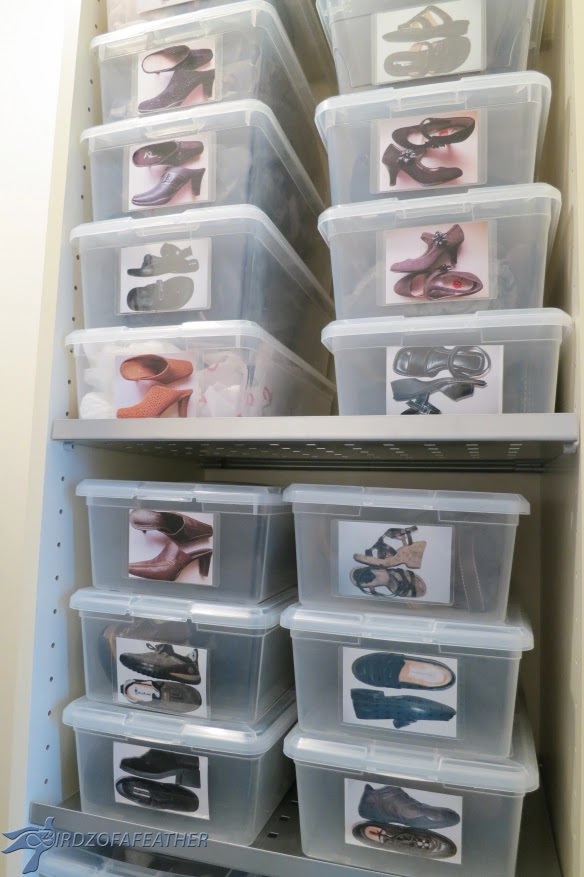
And finally...another smart idea for shoe storage. I use these see through bins for our shoe storage as well, but it can still be difficult to see what's inside sometimes.
These shoe photos on the front are the perfect solution:
How smart! You'll quickly be able to find exactly what you need.
I love all of these closet organization projects! They are giving me so many ideas for our closets...hmmmm.
Have you used any of these closet ideas? Any you use and love?
Never miss a post by signing up to get posts via email.
Via https://www.thriftydecorchick.com/2021/08/20-DIY-custom-closet-organization.html This delicious homemade Crock-Pot applesauce recipe is only three ingredients!My friend Cristina shared this easy Crock-Pot recipe with me years ago. When I asked how she made it, she was all, "Oh I just throw the apples in a pot with some cinnamon, it’s totally easy" and my mind was BLOWN. I had no idea! So I did a little research and found she was totally right. (Not that I didn’t believe her of course.) You can make it even easier than I did -- check out some of my tips later in the post.
Here’s the recipe I use in my Crock-Pot – I throw it all in and come home to applesauce.
You can’t beat that.
Three ingredient homemade crockpot applesauce
Ten to 12 apples -- peeled*, sliced, cored
1/2 cup sugar*
Cinnamon

This post may contain affiliate links for your convenience.
See my policies and disclosure page for more information.
The first step is the only one that takes time – peeling, coring and cutting up the apples.
Thankfully I have an apple peeler/corer/slicer:
 This one is called the Peelota. Ha! I don't think they're made anymore, but this apple peeler is beautiful and will hold up even better than my plastic one. It ROCKS:  It makes quick work of getting the apples cored and peeled.
The apples looked like this when I was done peeling and slicing:
 I just cut the apples in half from the top. If you don’t have a peeler, you’ll want to slice them up or cut into large chunks.
This slicer/corer is super handy for cutting apples into easy pieces:
What apples are best for applesauce?
Almost any apple is fine! It depends on your preference -- sweet or tart?
Red Delicious apples don't heat well and will not turn out as well in applesauce.
All you do is dump the apples in the crockpot and sprinkle on as much cinnamon as you like:
 I add a couple dashes of nutmeg too -- YUM!
The original recipe calls for 1/2 cup of sugar, but I find you can use less and it's just as delicious. You may not even want to add it -- taste test the applesauce a couple hours in to see if you want to add some sweetness.
No need to stir while cooking -- just pile them in, put the lid on and set the Crock-Pot to cook on high for four hours.
The smell while these cook is AMAZING! Who needs candles? Just make applesauce every day!
We like it chunky (name that movie) so I call it done after about four hours. Watch yours to see when to take it off of the heat: 
It is especially delicious warm right out of the slow cooker. It's like a dessert really -- have you ever heated up your applesauce?
|


|
| Sources for items in this room |
You'll need a metal (for a more industrial look) basket or a woven version. I gathered a bunch of wicker options that would work beautifully!
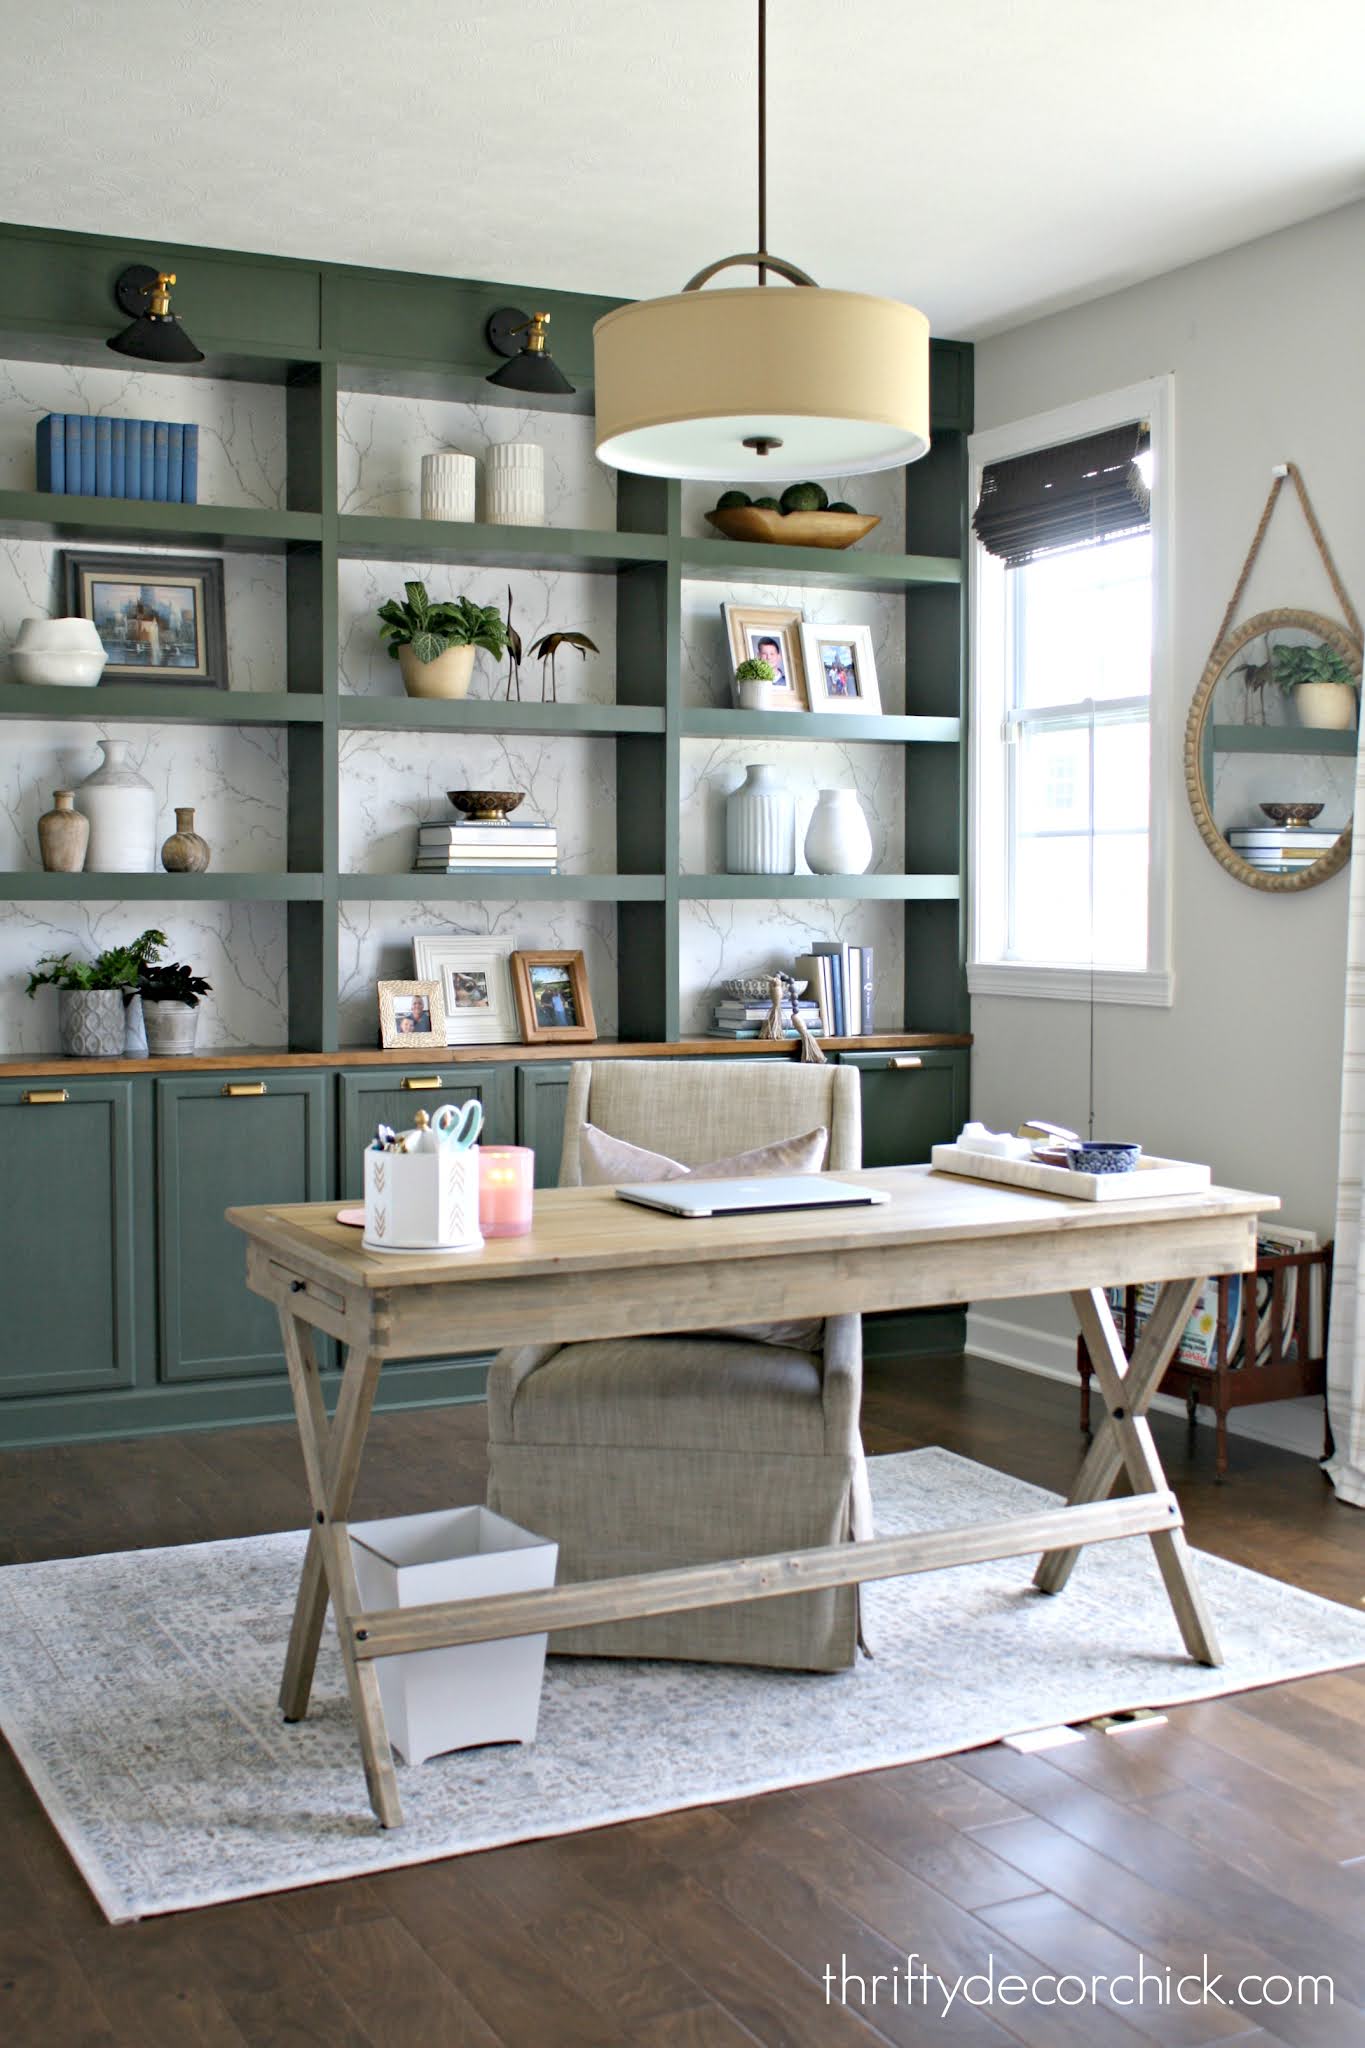
I didn't make my own this time because I need more light over my desk than one bulb can give, and most I found only have the one.
You can easily hang pendant lights from a recessed light two ways. Check out that post to see how it's as easy as screwing in a light bulb or how to easily convert a canned light so it can be wired for a light fixture.
If you don't have electrical in your ceiling, swag cords work great. You plug them in on the wall and then use ceiling hooks to swag them where you want your light to hang.
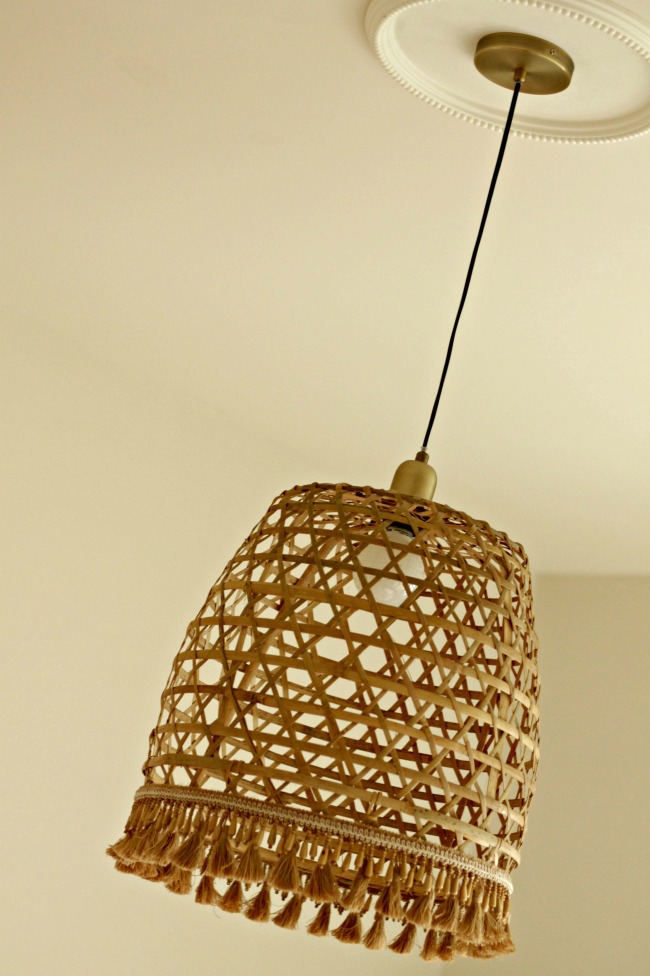
This rope swag kit is so cool and gives you a more custom look than a regular cord:

They also have this gold cord swag kit as well.
I gathered a bunch of pretty basket lights under $200 (most well under $100) that can be wired or hung with one of the adaptors I mentioned above:

Wouldn't they look amazing over a kitchen island? Love.
I found some beautiful DIY basket pendant tutorials to share with you as well! This really is a simple project.
Jen's gorgeous basket light over her desk is one of my favorites:

|
| City Farmhouse |
I love Sarah's wide basket light -- the size is perfect:

|
| Lemon and Bloom |
The CUTE trim Carmel used on her basket pendant has my wheels turning:
|
| Our Fifth House |

|
| Unexpected Elegance |
Toni made a really cute metal basket pendant:

|
| Girl, Just DIY |
And Heather did a smaller version to cover a basic flush mount fixture:

|
| Heathered Nest |
See more of our home here.
To shop items in our home, click here!
Never miss a post by signing up to get posts via email.
Via https://www.thriftydecorchick.com/2021/08/rattan-wicker-basket-pendant-lights.html
These ten DIY hacks will make your next painting or wood build project easier!
I've gathered my favorite little hacks and tips for home DIY projects to share with you! They are tricks that save money and make projects go much smoother.
I use ALL of them consistently and they help a ton, whether you're staining, painting or building.
My summer of slothdom is about to end my friends! If you've been reading for awhile you know how I do. Heat makes me...tired. And grumpy. But mostly really lazy tired.
I'm already dreaming up a bunch of DIY projects I want to tackle now that a normal schedule will be upon us again soon.
That had me thinking about these DIY tricks. Some of them are pretty basic, but I wish I would have known about them in my early do-it-myself days.
Never forget a paint color
We've all been there -- you need to touch up a spot, or you love a color so much you want to use it again. But did you use eggshell or satin? Was the color Storm Cloud or Stormy Clouds?
I started using this easy way to keep track of our paint colors at the old house.
Use a sharpie and label the back of your switch cover with the name, sheen and brand of your paint:

This post may contain affiliate links for your convenience.
See my policies and disclosure page for more information.
This is super helpful, especially if you're used similar colors throughout your house, or even a different sheen.
If you need more for touch ups, knowing what type of paint you used will be especially helpful. Different formulas may look noticeably different even though they're the same paint color and sheen.
Insulation tubing to fill holes
This skinny insulation tubing can be used for way more than just filling gaps in doors and windows:

It's the perfect way to fill large gaps in trim or along the floor.
Since it's so easy to manipulate, you can cut it to the size you need and squish it into the smallest spots:

It's especially helpful when you have a big gap you want to caulk over -- you'd have to use a TON of caulk. With caulk you have to fill, then and wait over and over again as it dries, fill more, let it dry, etc.
With this it fills that in, you'll save all that caulk and you can fill in with a bead of caulk right over it.
This would also be another great way to fill large holes in the wall! I have a method I've used for years, but a tiny cut of this may work even better.
Paper bag instead of sandpaper

I really love this for after the final coat of polyurethane or protective finish on wood -- when you don't want to ruin the finish by sanding (even with a fine grit), but you do want to knock down the little bits that keep your finished product from being completely smooth.
Just "sand" all over the surface with the paper bag and it will knock all of that down and leave you with a perfectly smooth surface and no marks.
You can use this paper bag trick over a DRY painted surface as well!
Make cheap wood look much better
I use expensive pine for almost all of my DIY builds. I used it on my office built in bookcases and my giant entertainment center wall in the basement.
You can use "common" pine or select pine -- I use select pine for the areas you'll really see...like the trim on the front of bookcases.
Common pine is the most inexpensive and will have more knots and imperfections:

A lot of the time I will just roll on my paint heavily in those areas and let it go at that. You can see here that the paint didn't fill in that rough spot enough.
If that doesn't cover it well enough or I want a really professional look and feel (aka I'm trying to be patient), I use a putty knife and wood filler to fill in those spots:

I use spackle that I use when I fill holes these holes and it holds up just as well.
Use the putty knife to push the filler in and then lightly sand before painting again. You won't even notice the imperfection when you're done!
Shims are your friend
Wood shims are small strips of wood that are thicker on one end and really thin on the other.
I shared how I use shims to install cabinets -- they are a must to help get the cabinets level and even as you install:

You can use them underneath, behind and in between to get everything perfectly flush.
But they're also super helpful for built in projects and getting the front trim looking super professional:

See how seamless those front frames are on the bookcases? That front trim is the most important part in my opinion -- it's what you see more than anything else!
If your trim doesn't match up perfectly, you can use shims to bring the trim forward and flush with the rest.
I didn't take the time to do this on my office built ins. To fix it and bring the front of the shelves forward just a bit, you'll want to tap the thin end of the shims behind that trim until it brings it forward enough:

By the way, it's not the end of the world...most of the time only you will notice these small imperfections. (And anyone else who does gets a cookie...)
You may have to do it from both the top and the bottom, but it will work! When you have the shim where you want it, score it with a razor and snap off the end with the thin part still behind the trim.
Use caulk to fill in any gaps the shims created on the top of the shelf. (On bookcases most will be above your head anyway.)
Picking the perfect piece of wood
The more you spend on wood, the less you'll have to watch for imperfections. It's worth it to me to spend (a lot) less on pine and spend a little more time digging to find "cleaner" boards.
Watch for large knots (they may pop up or out of the wood over time), sticky sap (that is impossible to get off) and missing chunks of wood.
If you find a board that checks all of those off the list, you'll also want to check the wood for bowing. A piece will look great on the shelf, and then you'll get it home and realize it's so horribly uneven you can't get it to lay flat.
You can avoid this by holding the board in front of you on the floor and eyeing it right down the middle:

You'll immediately be able to tell if it's straight and flat.
If you look closely, you'll see that my board is slightly bowing at the end -- just a bit of a bow that goes to the right. This doesn't bother me at all if I'm using the wood for front trim, as I know I'll be able to secure it well enough.
I always check my skinnier molding pieces for bowing as well. If it's thin enough you'll be able to straighten it out during install, but some pieces should be avoided all together.
Check wood boards from all sides, as the wood can bow all kinds of ways.
Get uniform spacing
If you're adding a vertical or horizontal shiplap wall, you really want to make sure your spacing between each board is exactly the same throughout the project.
If the spacing isn't consistent you will notice that small imperfection more than you think.
I have found a coin is an easy way to get that perfectly thin, consistent gap between each shiplap:

You'll want to move it down the plank as you nail it in. Sometimes I use a penny for a smaller break, sometimes a nickel.
Scrap wood cut to the length you need is also GREAT way to easily keep measurements consistent when you're installing a trim project:

I find it especially helpful when installing wainscoting. I keep my "jigs" nearby and hold them up on the wall as I nail in the trim.
They make it MUCH easier to keep continuous distances throughout your project:

Cutting a hole in the middle of wood
Sometimes you'll need to cut a hole for an outlet, switch plate or vent on the wall. A jigsaw is the best way to cut those smaller, detailed spots:

It's easy to do when your cuts are on the side of the board -- just start cutting with your jigsaw from the side.
But if you need to cut a hole in the middle of the board, this trick is helpful. Do NOT try to start a cut with a jigsaw directly on the wood. It will rattle all over and potentially snap the blade.
Instead, use a drill and drill bit to drill holes into your wood as a "starter" for the jigsaw:

That way you can slip your jigsaw blade into the hole and start a straight cut. I like to use four holes so I don't have to do any curved cuts.
Use scrap to protect your projects
I tend to keep way too much scrap wood...I've learned to let go over the years but it hurts my soul a little bit every time.
I do keep some scrap because I've learned it's hard to finish a lot of DIY projects without it!
When you have a board that is going to fit just a tad too tight into a spot (and you really don't want to go cut millimeters off of it for the THIRD TIME), use scrap pieces to pound your trim into place:

Here I'm holding the scrap underneath the trim and hammering it into place till it is level. If you tried to do this directly to the nice trim part, you'd dent the sides or front with your hammer or mallet.
You don't ever want to force your wood where it won't fit, so if it's way too long cut it down.
A piece that is thisclose to fitting, you can easily maneuver it into place by pounding it with your scrap wood. And your good wood will still look great!
If you look closely, you'll see that I also use scrap to write down my measurements. Especially helpful if you're going up or down steps to cut your wood and you tend to forget the exact measurement by the time you get to the saw. :)
I also use scrap wood pieces to remove trim -- if you put too much pressure on a crowbar it will dent or break the drywall:

If there's much resistance as you push the crowbar back to pull the base away, it will dent your walls. Place a thin piece of scrap wood behind the crowbar and the wood will disperse the pressure.
You can see how to remove baseboards without damage here.
Easily clean paint brushes
And finally, the little paint brush cleaning tool I couldn't live without! (Now they are made to clean rollers as well!)
I use this brush cleaning comb every time I clean my paint brushes:

|
If you use it consistently, your brushes will last a very long time. It has saved me hundreds of dollars over the years!
I share a bunch more painting tips and hacks in this post.
Do you use any of these simple DIY hacks? I use them on ALL of my projects, big to small. I'm sure I've forgotten a few, but these are my favorites.
Any others you use consistently? Feel free to share in the comments. :)
See more of our home here.
To shop items in our home, click here!
Never miss a post by signing up to get posts via email.
Via https://www.thriftydecorchick.com/2021/08/top-10-diy-hacks-and-tips.html
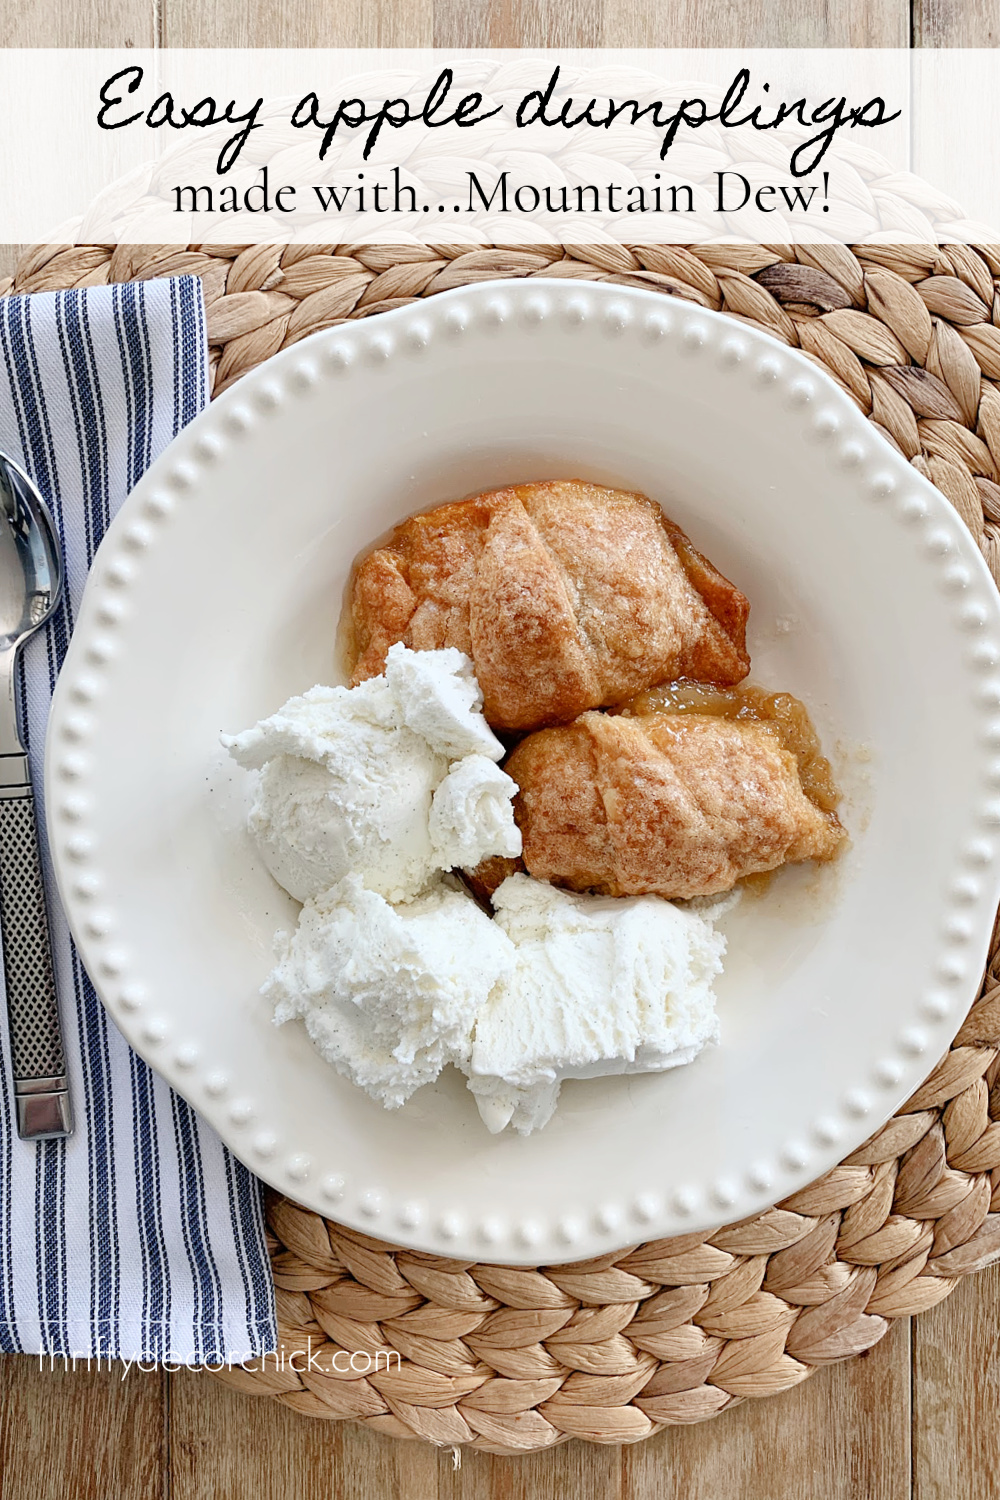
This apple dumpling recipe is made with Mountain Dew and is absolutely delicious!

Yes, these apple dumplings have odd ingredient that made me pause the first time I made them. Soda? Won't they get all mushy and gross and taste like...soda?
But I went with it and I'm so glad I did! How can something so simple and easy taste so good?
SO. GOOD.
These sweet dumplings take about ten minutes to prepare and 40 or so minutes to bake.

Here's what you'll need to double the recipe for a larger group. This option makes 16 apple dumplings:
Easy Mountain Dew apple dumplings (16)
Two Granny Smith apples
Cinnamon (as much as you'd like)
Two packages crescent rolls
One tsp vanilla
3/4 cup sugar
3/4 cup brown sugar
Two sticks unsalted butter, melted (just do it)
Twelve ounces Mountain Dew
I rarely make that many dumplings (mostly because I know I'd eat them all).
So I prefer to half the recipe as follows:
Halved Mountain Dew apple dumplings (8)
One Granny Smith apple
Cinnamon
Dash of vanilla
1/4 + two tbsp (or six tbsp) sugar
1/4 + two tbsp (or six tbsp) brown sugar
One stick unsalted butter, melted
Six ounces Mountain Dew
(see below for more info on the soda amount)
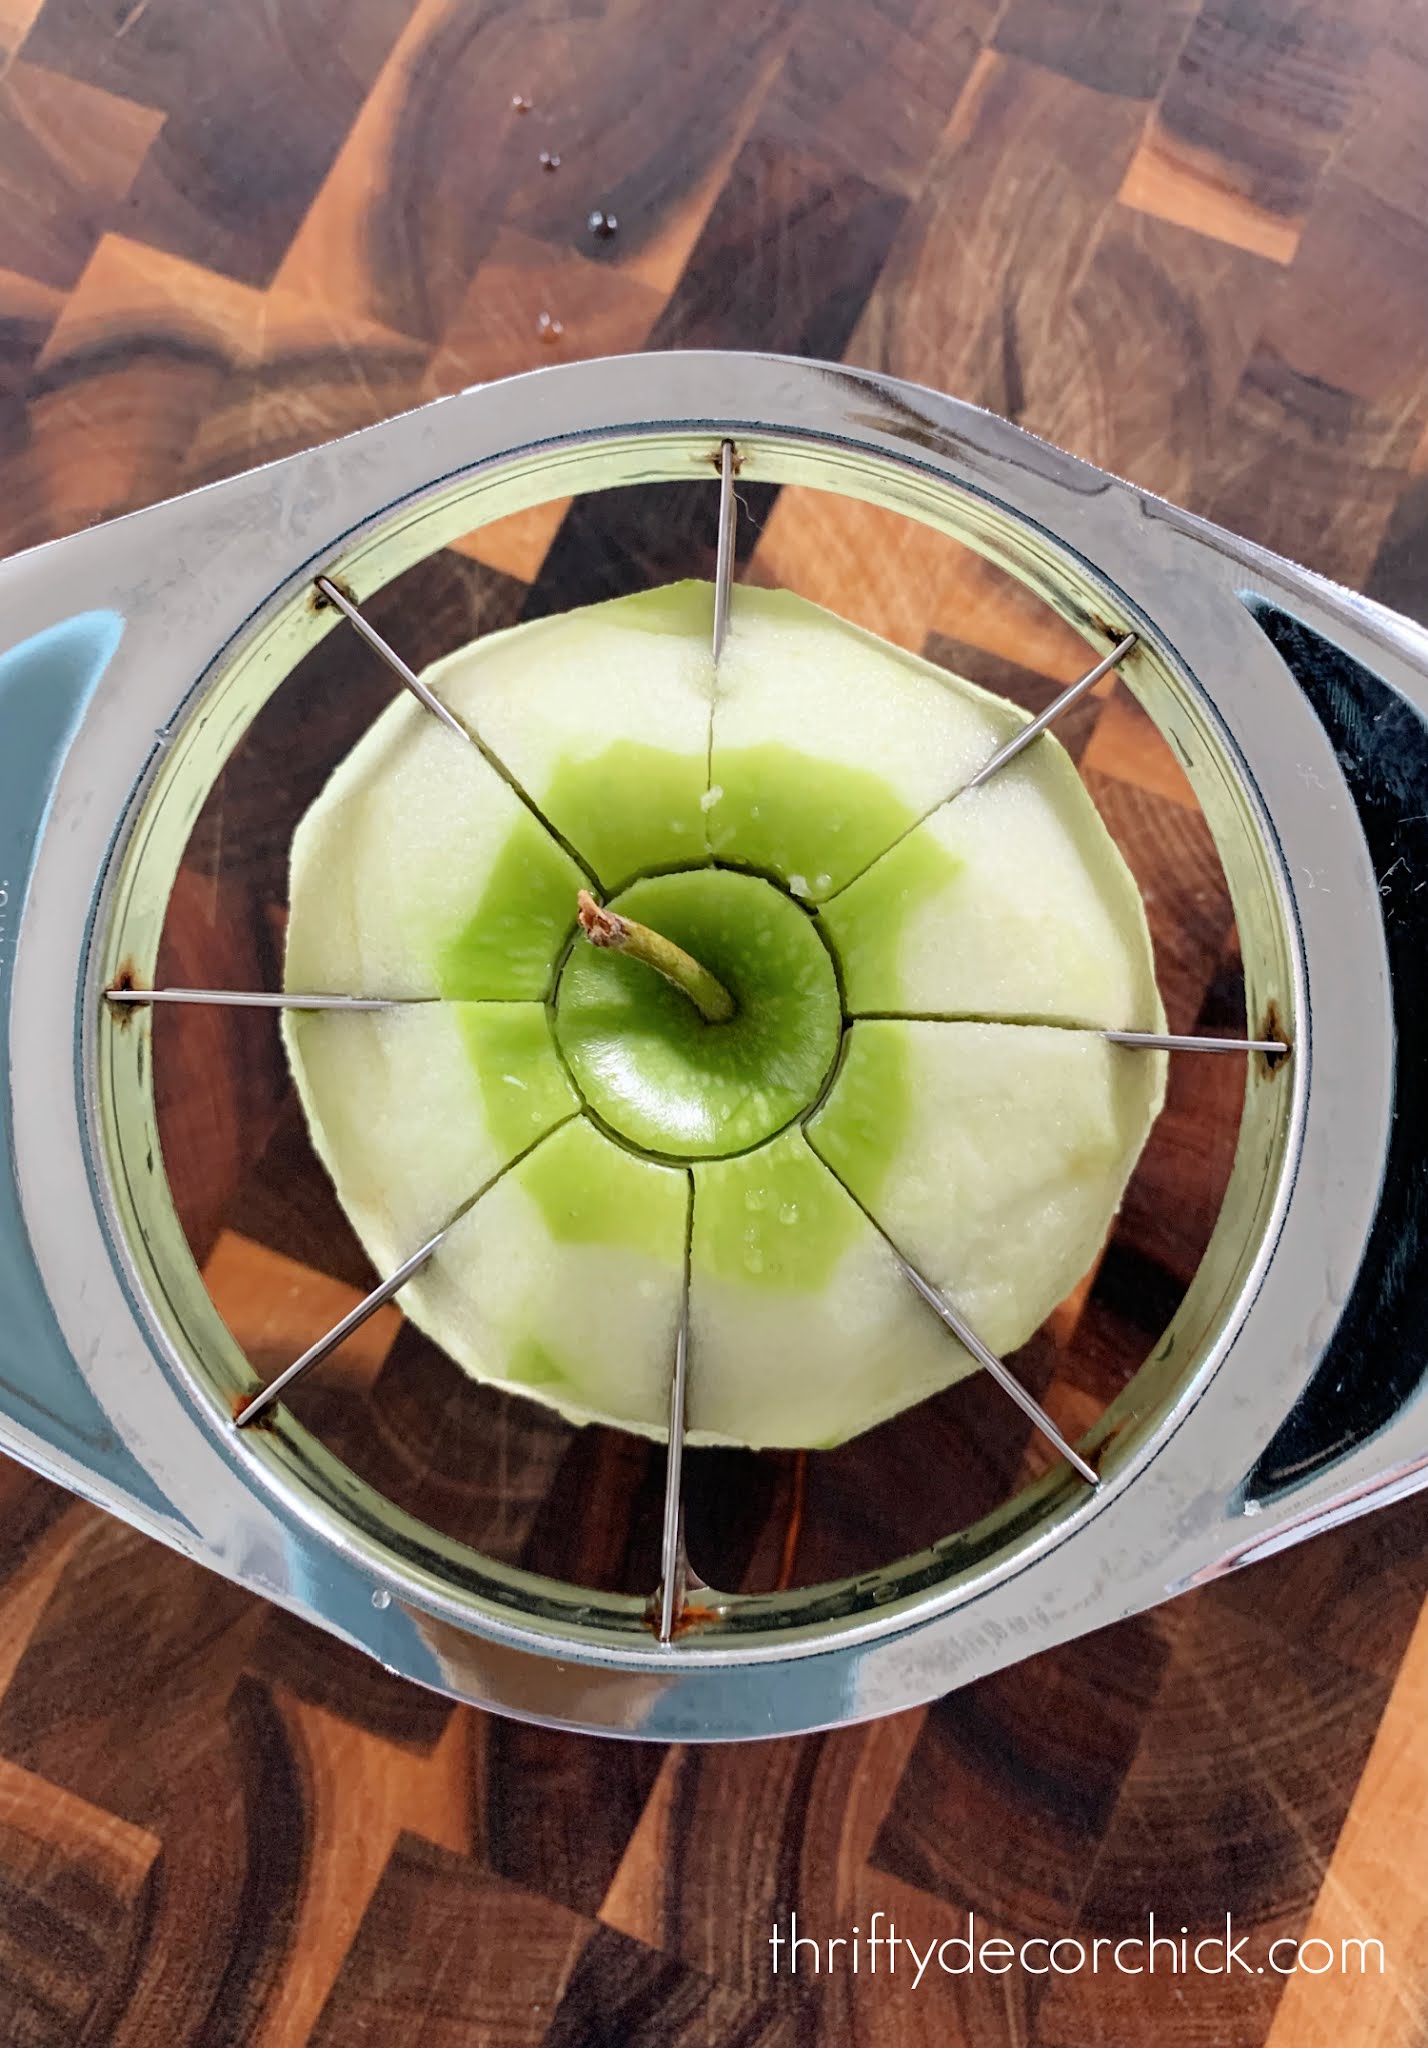
To start, preheat your oven to 350 degrees. Peel and slice your apple(s).
I peel first and then slice using this apple slicer/corer that makes cutting the apple into sections super easy:

You'll have eight perfectly cut slices for your eight crescent rolls.
Lay out your crescent rolls and wrap your apple slices:

I add the cinnamon before rolling them up.
Wrap them up well and place in a 8x8 or 9x13 dish:

Either size pan works -- you may want to adjust the amount of soda you use for each size. I'll share more on that in a bit.
I close up the ends of the dumplings so the apples are completely covered.
Mix the sugar, brown sugar, (melted) butter and vanilla in a separate bowl.
It will look like thin applesauce:

This part is where I think I made these even more spectacular, on accident years ago. ;)
We didn't have enough sugar the first time I made this recipe, so I figured brown sugar would work as well. I used half brown sugar/half sugar instead of all sugar like the original recipe called for.
I think that little change makes these extra AMAZING.
Spoon your applesauce sugar mixture over the dumplings:

Did I mention these aren't the most appetizing before baking? Push on my friends.
Finally, pour the Mountain Dew into the pan around the apples:

When I use this smaller 8x8 pan I don't use quite half of the Mountain Dew. Just enough to cover the bottom of the pan. If you're using a larger dish, you can add more as it will take more to cover the bottom.
Bake the dumplings in a 350 degree oven for 35-50 minutes. I know that's a wide window, but it will all depend on your oven and how crispy you want them to be.
I bake them closer to 50 minutes. If you want them extra crispy on top, I recommend doing the same:

I doubted these when I first saw them out of the oven -- they looked like they would be total mush all the way through.
But I persevered.
And added some ice cream:

Vanilla ice cream really should be an additional ingredient. It's almost mandatory. :)
They are SO GOOD. I cannot express the deliciousness of these easy apple dumplings.
The best of both worlds...the bottom is mushy, the apple is tender:

And the top is crispy and flaky!

You will not be disappointed! YUM.
I may have eaten a couple for lunch today.
Variations on these delicious apple dumplings...
- If you don't have Mountain Dew, any clear citrus clear soda will work! Sprite or Squirt should taste just as good.
- Drizzle caramel or sprinkle powdered sugar on top for a little extra somethin'.
- I hear peaches are just as delicious in this recipe!
- Many of my readers overseas don't have crescent rolls -- you can use a puff pastry or any refrigerated dough.
Go get some apples and brown sugar and make them immediately. You can thank me by sending a few our way. ?
Have you tried these easy apple dumplings yet? Any other easy dessert recipes I can’t live one more day without?
Pin this one for later with this image!:

Via https://www.thriftydecorchick.com/2011/12/thank-you-pinterest.html
