|
Hey there! I'm back! I'm feeling almost normal again and our kiddo is off to camp for the first time ever this week...so I'm hoping to have a lot of time to get stuff done. If I don't keep busy I'll cry. ;)
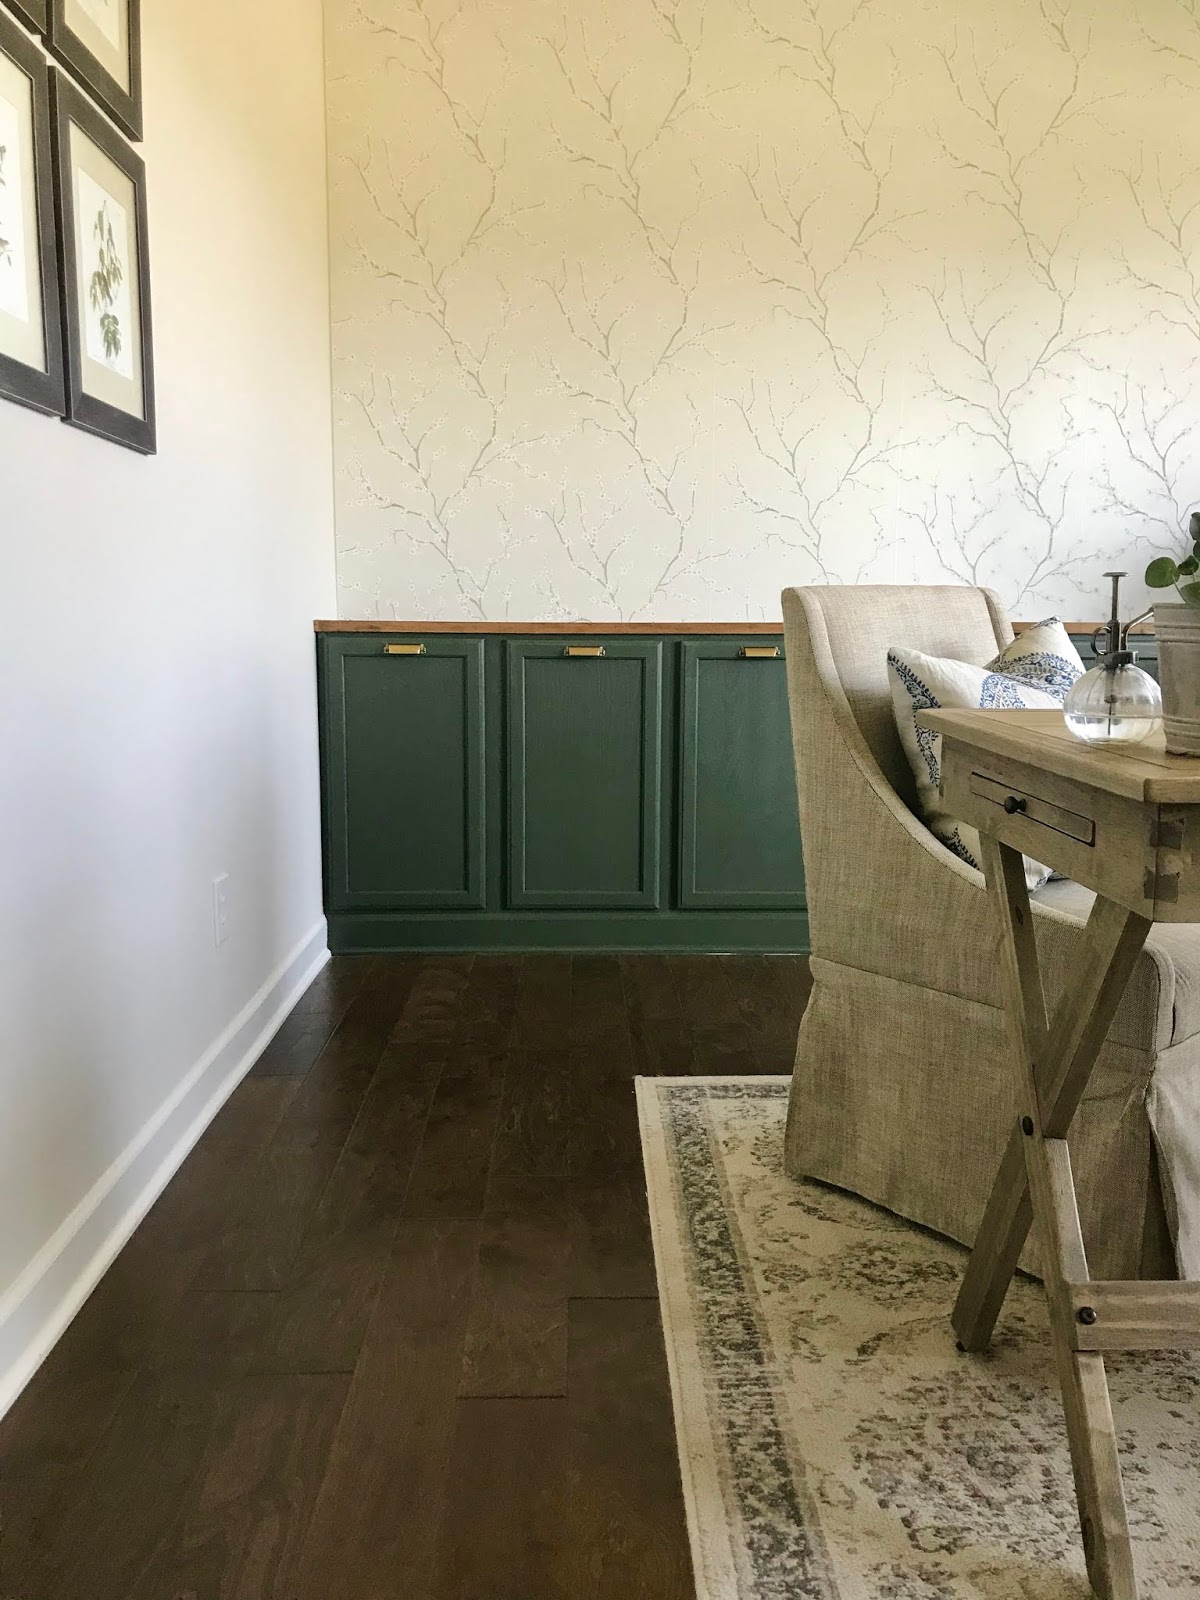
I had a few hours of energy last week in the midst of feeling like poop, so I tackled more of the office built ins. You can read more of this process by checking out the earlier posts, including how I made the kitchen cabinets look built in, the cherry blossom peel and stick wallpaper I picked and how to install it and the name of the pretty green color I picked.
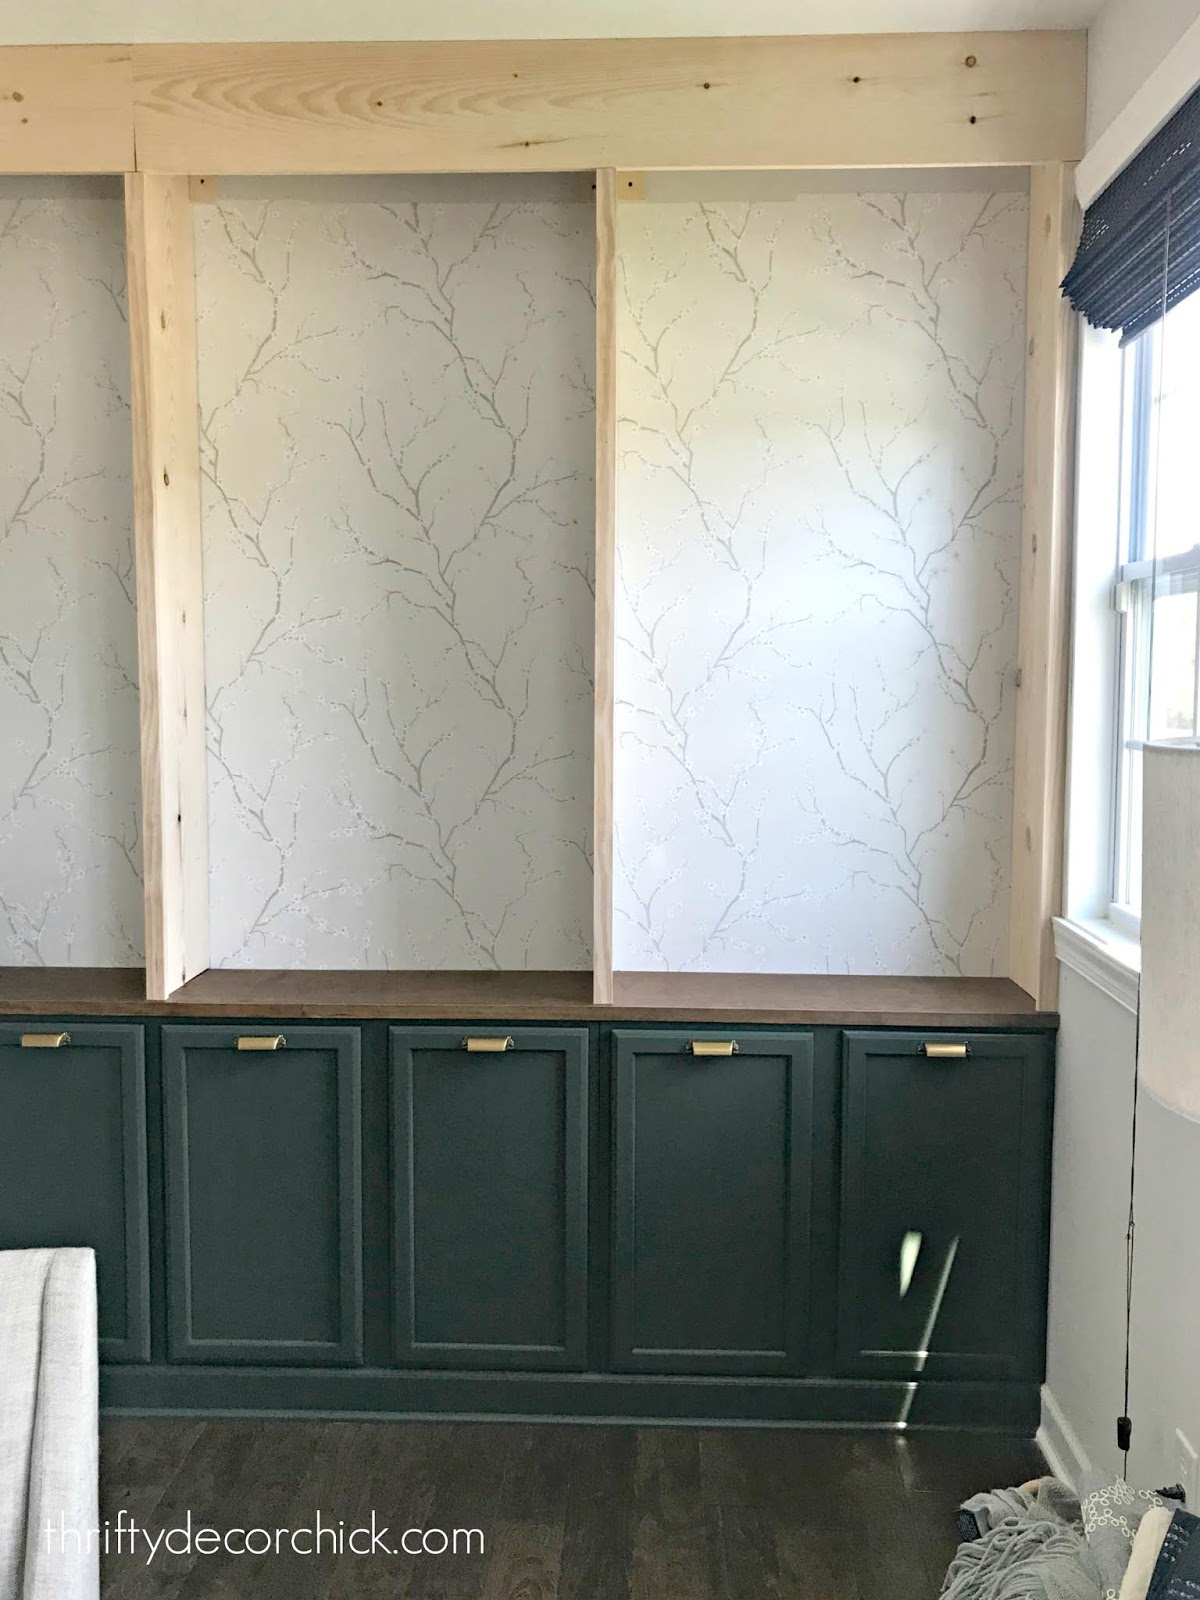
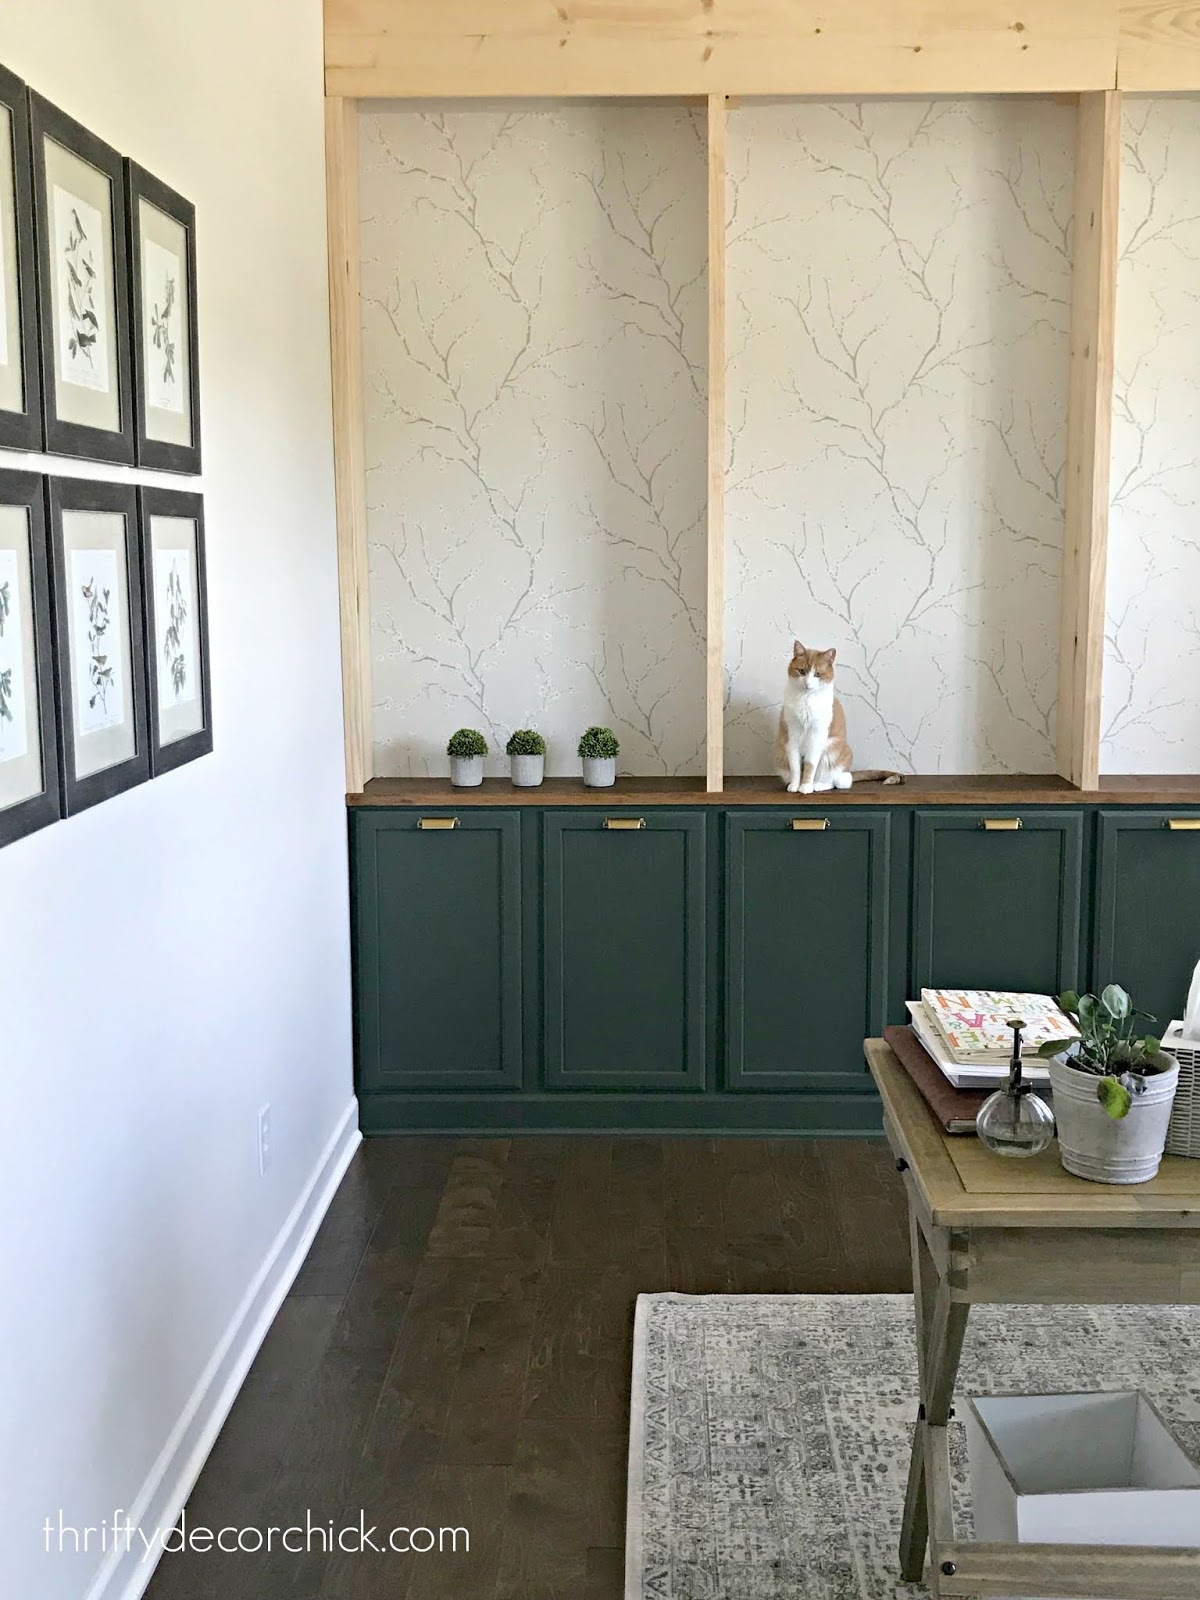
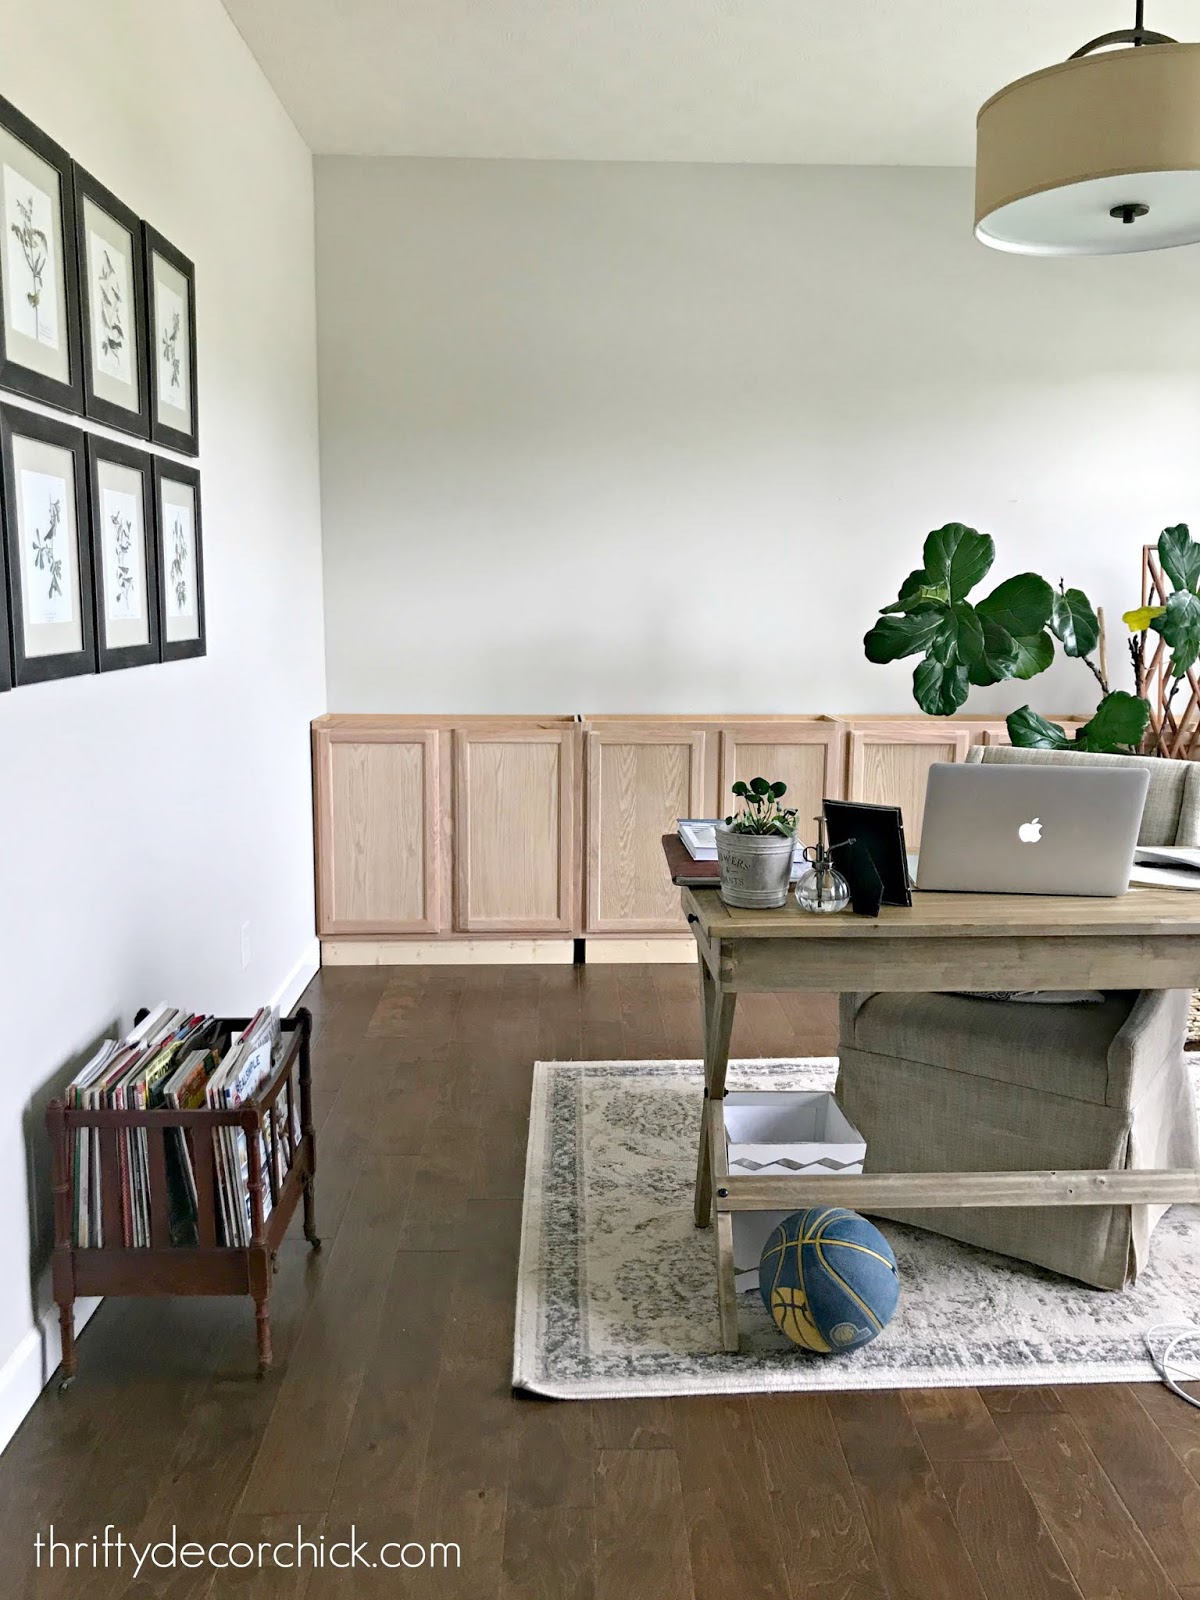
This is how the wall of bookcases (well...almost bookcases) looked last I left you:

I'm SO so happy with that deep green color! It's so beautiful, especially with the wallpaper.
This post may contain affiliate links for your convenience.
See my policies and disclosure page for more information.
I love our wall color (agreeable gray) with this color scheme so it will be staying. That saves me a ton of work! I later added the brass hardware I found here (affiliate) and it was already starting to look more finished: 
They are cup pulls and traditionally go on drawers. I love them installed on the middle of the cabinet doors instead!
Then it was time to start the bookcase section on the wall. You can see how my Dad and I did that last time, but I did it differently. My hubby was out of town and I knew I'd be doing this on my own, so I went a different direction.
Because we built one big piece last time and had to lift it up into place, I had to try something different. And it worked great! I think it was actually easier overall.
Step one: Install support pieces
On each wall, I marked where the studs were and screwed the pine boards (1x12x6) into the walls:

For the three vertical pieces in the middle, I used scrap wood to create supports at the top of the wall. I would install one side, then nail the long board into it at the top, then attach the other support piece on the other side:

I made sure the six foot board was perfectly straight as I did this. You'll notice the boards to not go to the ceiling (neither does the wallpaper), because that part will be hidden later.
It won't seem as though the supports are solid enough at first...but each additional piece of the bookcase puzzle continues to add support and makes them more and more sturdy.
I also nailed into each board at the bottom, into the countertop:

You can't see them because I angled the nail gun. Just that additional step gave them tons more support.
Step two: Attach the header across the front
I installed two additional 1x12x6's across the front of the bookcase supports with nails and screws:

This is what I mean by each step adding making them more sturdy! Already you can't move the supports at all -- they won't budge.
An additional bit of support will happen when I close up the underside up there. I will install scrap wood along the back and front and then close it up with a piece of wood at the top of each shelving unit.
Step three: Add finished trim to front
After the header was up I went ahead and added the 1x2 trim to the front of the supports to beef them up and hide unfinished edges:

It went SO fast...I kept saying under my breath that it was too good to be true. Usually when I think that to myself, something bad happens, but it continued to go smoothly!
Here's where I'm at so far!:
This is the thing that I try to emphasize every time I take on a large project like this...you don't have to do it perfectly. A professional carpenter would balk at my method, but that's OK. :)
The final result will hold up to just as much and will look great! After I add the wood under the header, I can start painting the bookcase. I'm trying to break up the painting as I go so it's not so overwhelming at the end.
The final part of this build will be the most expensive and time consuming and that is the shelves. The addition of the shelves (that will be secured into the walls and the supports) will add that final bit of support. As I said, every step of the process makes them more secure.
This guy already loves hanging out on here. He's like, come on Mom, finish so I can climb all these shelves will ya??:

I just noticed his eyes match the cabinets. ?
Here's how it looked when I started:
And here's where it is now!:
Even though the shelves will take some time, they aren't difficult. After I get this part painted I will be SO CLOSE to done!
Overall this build has gone much faster than last time I did this, even with illness that sidelined me for two weeks. If I work on it as much as I hope to over the next week, I think I can be done by early July.
Thanks for joining me on this DIY process! It's been a blast to work on! If you have any questions that I haven't covered, feel free to ask in the comments.
See more of our home here. To shop items in our home, click here! Never miss a post by signing up to get posts via email. Via https://www.thriftydecorchick.com/2019/06/diy-office-built-ins-step-four-how-to.html
0 Comments
Hello friends! We had nothing planned on both Saturday and Sunday and I was so excited to get a ton done on the office bookcases...but then I got sick last week and haven't stopped coughing since! I'm finally starting to feel somewhat normal again and eased into some DIY with this quick project yesterday.
I had no idea IKEA sold doors for their Billy bookcases -- did you? I never noticed them the hundreds of times I've walked through the store. ;) A couple weeks ago I saw a picture online with them on the bookcases and I knew I had to go find them.
Our son's room is very much in between right now and is on my list for this year:

I feel awful that it's sat halfway done all this time. Instead of building in bookcases in his room (like I did at our old house), I wanted to keep the floor plan more open for the future, so I went with Billy bookcases instead.
Now that our boy is bigger I want him to have more say in his room. It's his personal space and should feel like that. That means finding a spot for lots of tchotchkes that he likes to collect. I love that he has these things that mean so much to him...but having it ALL open was bugging me just a bit.
These long doors saved the day! They are called OXBERG from IKEA:


The doors instantly "calmed" the room.
As I mentioned, this room isn't even close to done, so there's a ton more I want to do! But this simple update made a big difference!:

They also have longer doors with glass on the upper section. We almost got those, but they felt more appropriate for a family or dining room, not so much a bedroom. And he wanted to be able to access his shelves a little easier. I believe you can also get a tall door that covers the whole thing. All are great options if you want to hide as much as you want to display in a space. ;) I'm excited for my plans in here! It's going to be a very cool room when we're done with it: 
Overall I'm thrilled with these though! Did you know you can buy doors for the Billy bookcase? I can't believe I didn't realize it until just recently. I like to share quick tips like these that may help you too! *You can find the sources for items in this room here! **Be sure to check out my five IKEA favorites for under $10 each here! See more of our home here. To shop items in our home, click here! Never miss a post by signing up to get posts via email. Via https://www.thriftydecorchick.com/2019/06/hiding-some-of-kids-collectibles-in.html
I'm excited to share our summer home tour today! My blog friend Marty from A Stroll Thru Life is hosting summer tours all week, so be sure to check them out at her site. SO many beautiful blogs and inspiration! If you're coming over from 11 Magnolia Lane, welcome! Christy and Amy are so talented.
I don't do a lot of summer decorating specifically, but I have added some lighter touches and a little more color over the past few weeks. And of course, bunches of flowers!
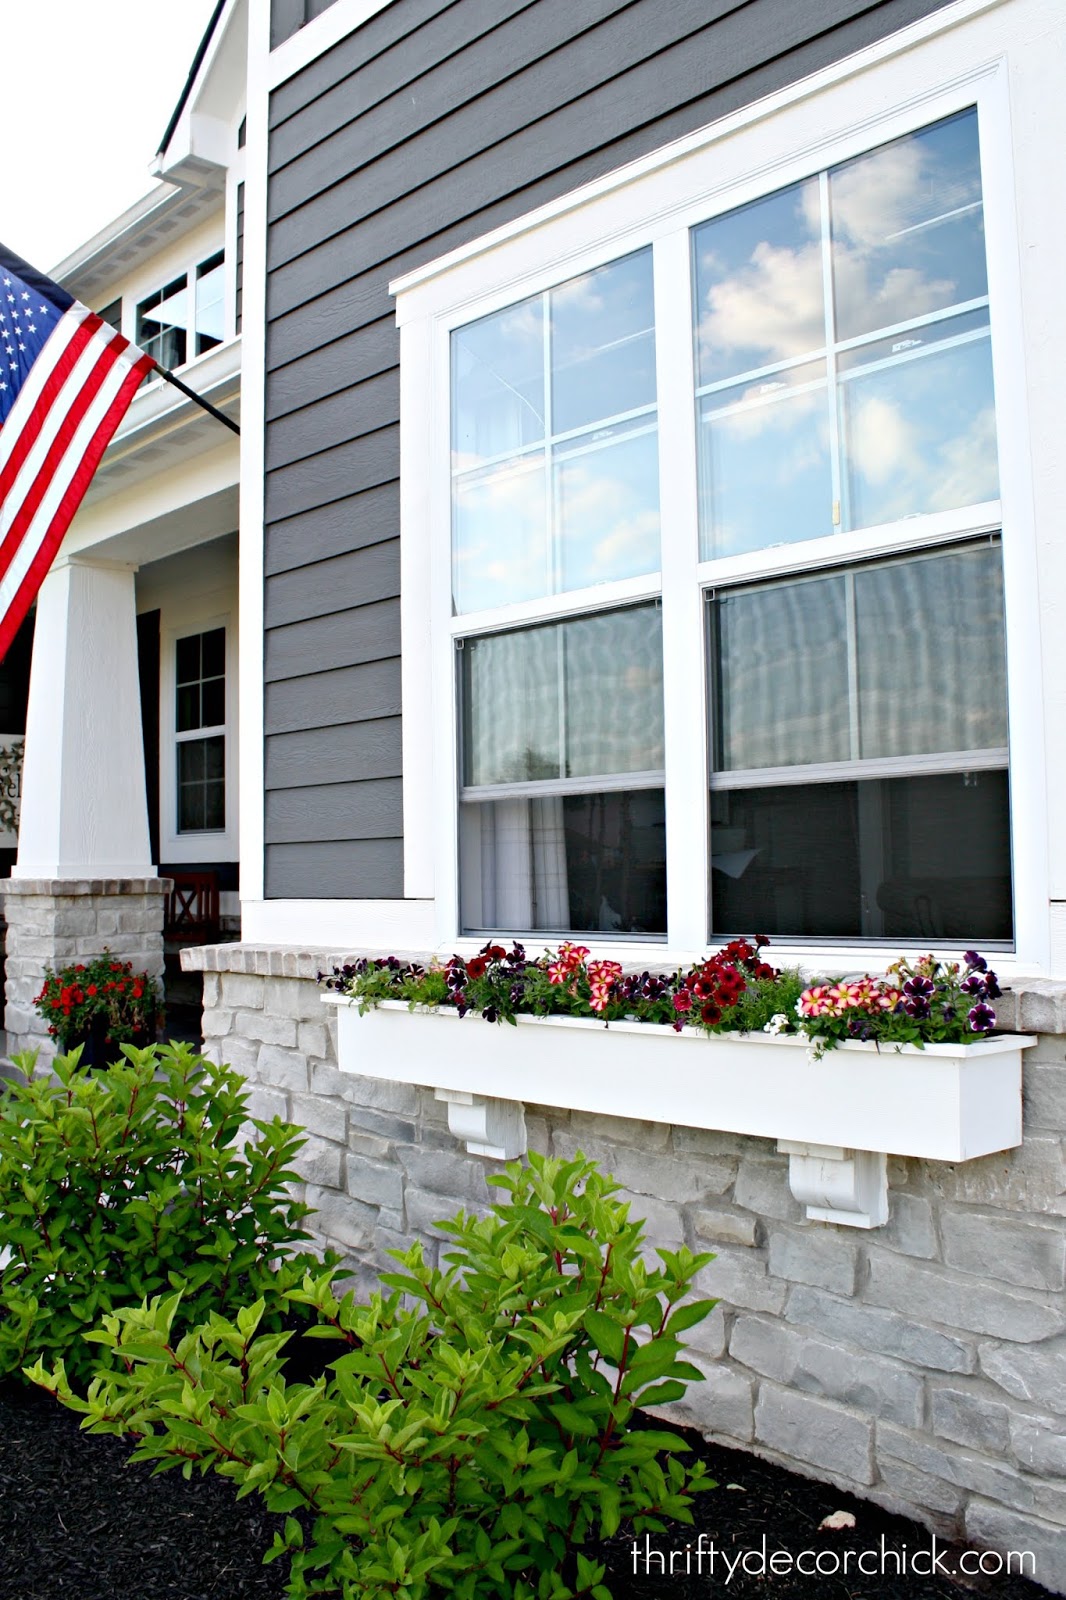
First up, the outside...I planted the front porch planters and window boxes a couple weeks ago. I always go back to my tried and true flower -- the petunia. They fill in so beautifully and start spilling over within a few weeks...my favorite!
I always know summer is here when we hang the flag again:
In a couple weeks these window boxes will be twice as full! I added some asparagus fern as well, which grows like crazy and will be spilling over in no time:
This post may contain affiliate links for your convenience.
See my policies and disclosure page for more information.
You can see all of the info on our modern Craftsman exterior here!
The foyer has fresh peonies, thanks to Trader Joe's! I had some dark pink peonies from my bushes here a couple weeks ago -- that color bloomed early for me:

I changed out the light here a few weeks back to a hanging fixture:

I found it at Menards and it was super affordable. I love the flush mount that was here (it's now in our pantry) but always felt like the foyer needed something larger. I LOVE it.
I recently started a laundry/mud room makeover and I'm so thrilled with it. I don't "style" my photos often -- what you see here is what it looks like all of the time. ;) But it was fun to add some summer touches because, YAY, the coats are gone for a few more months:
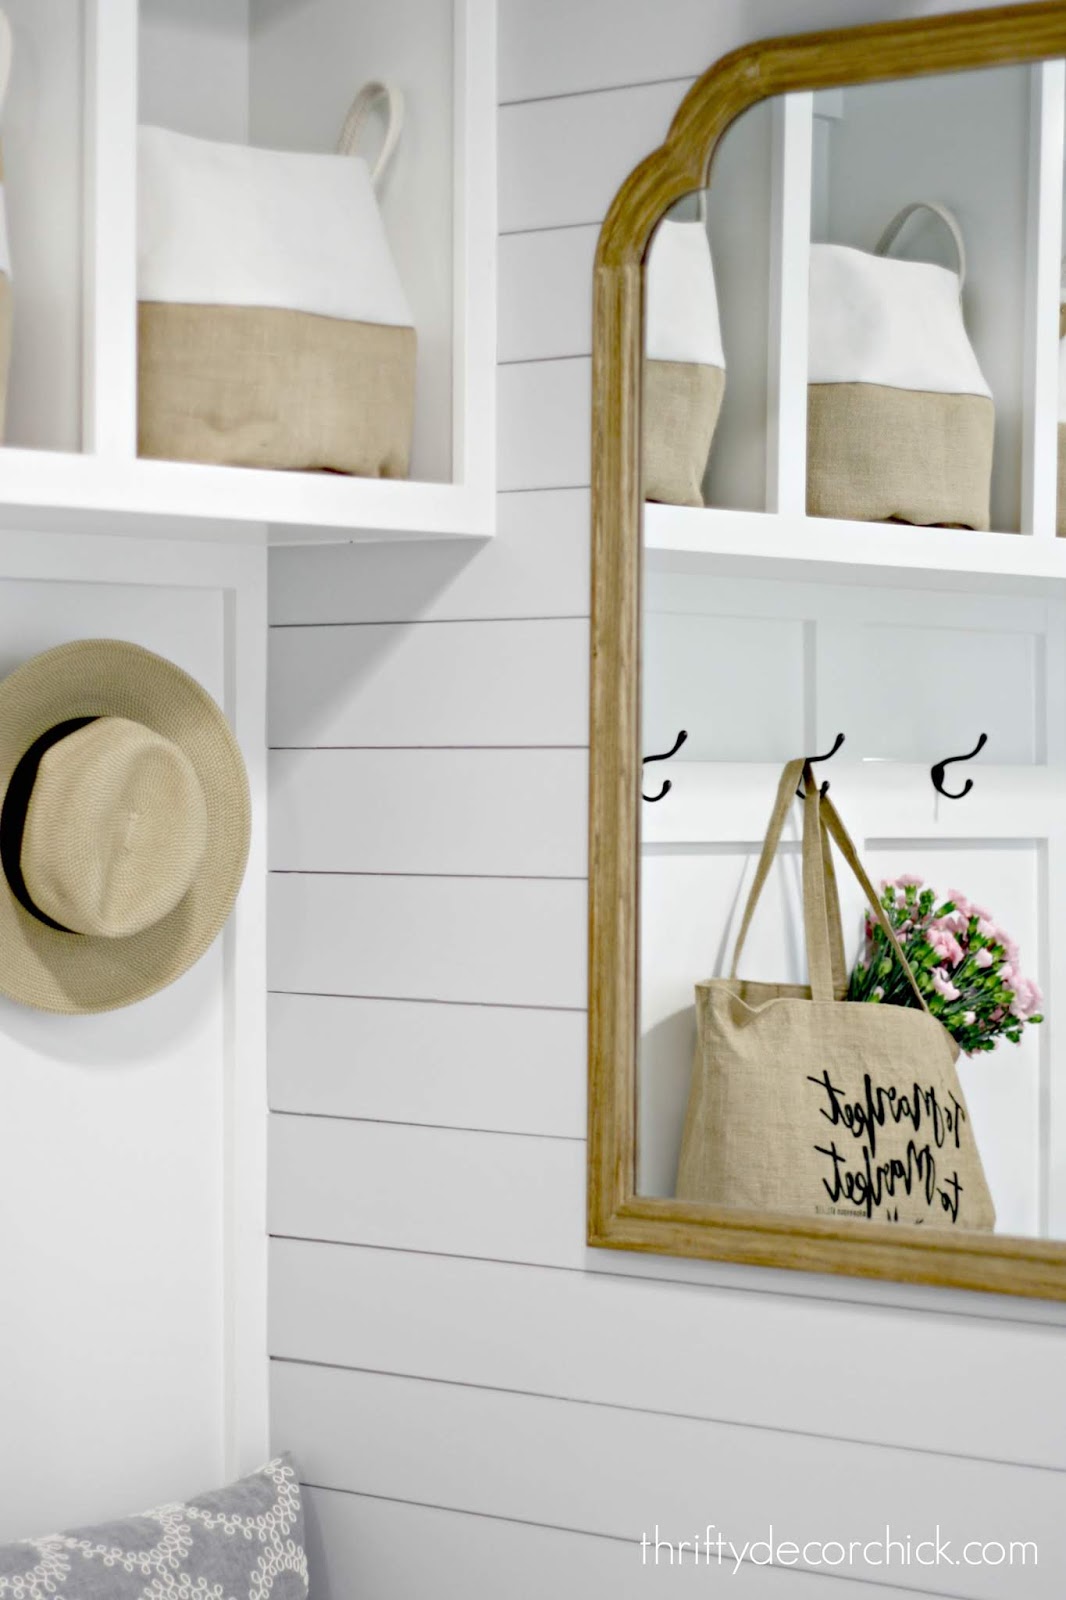

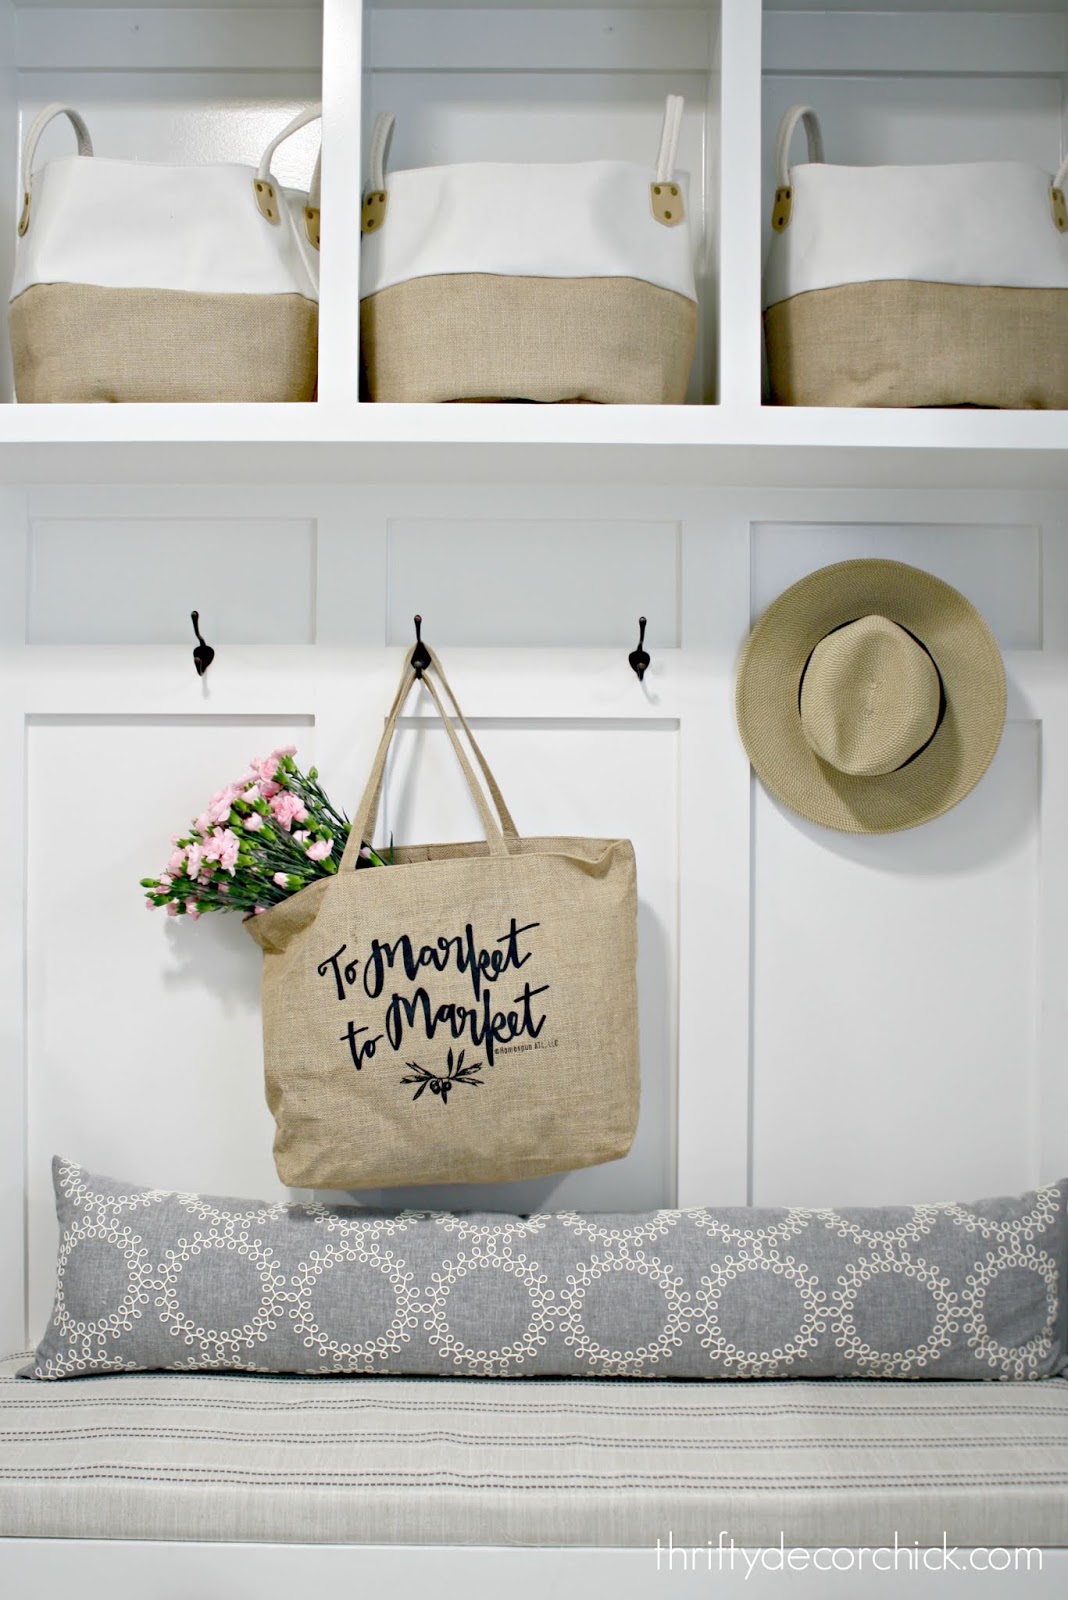
Be sure to check out that no sew cushion project if you're not a fan of the sewing machine! ;)
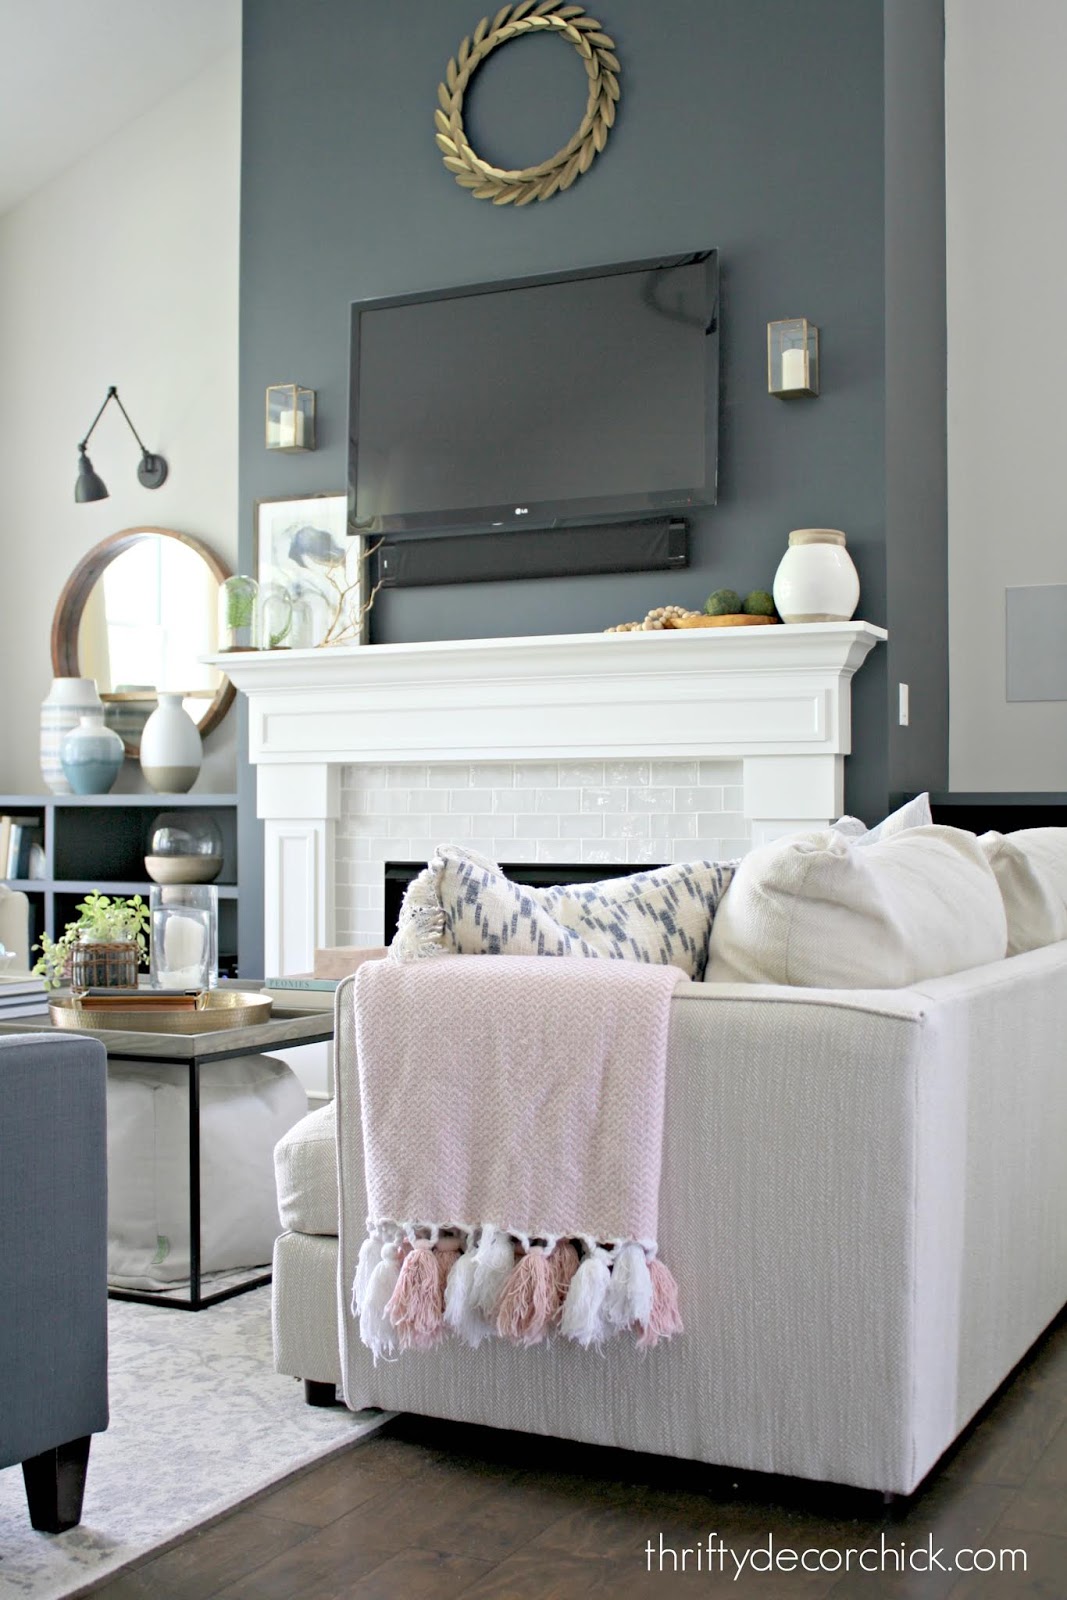
I added more flowers (TJ's again) to our family room:

And over the past few months I've added some touches that just happen to have a lighter, summer vibe. I found these beautiful beads at a local pop up shop:

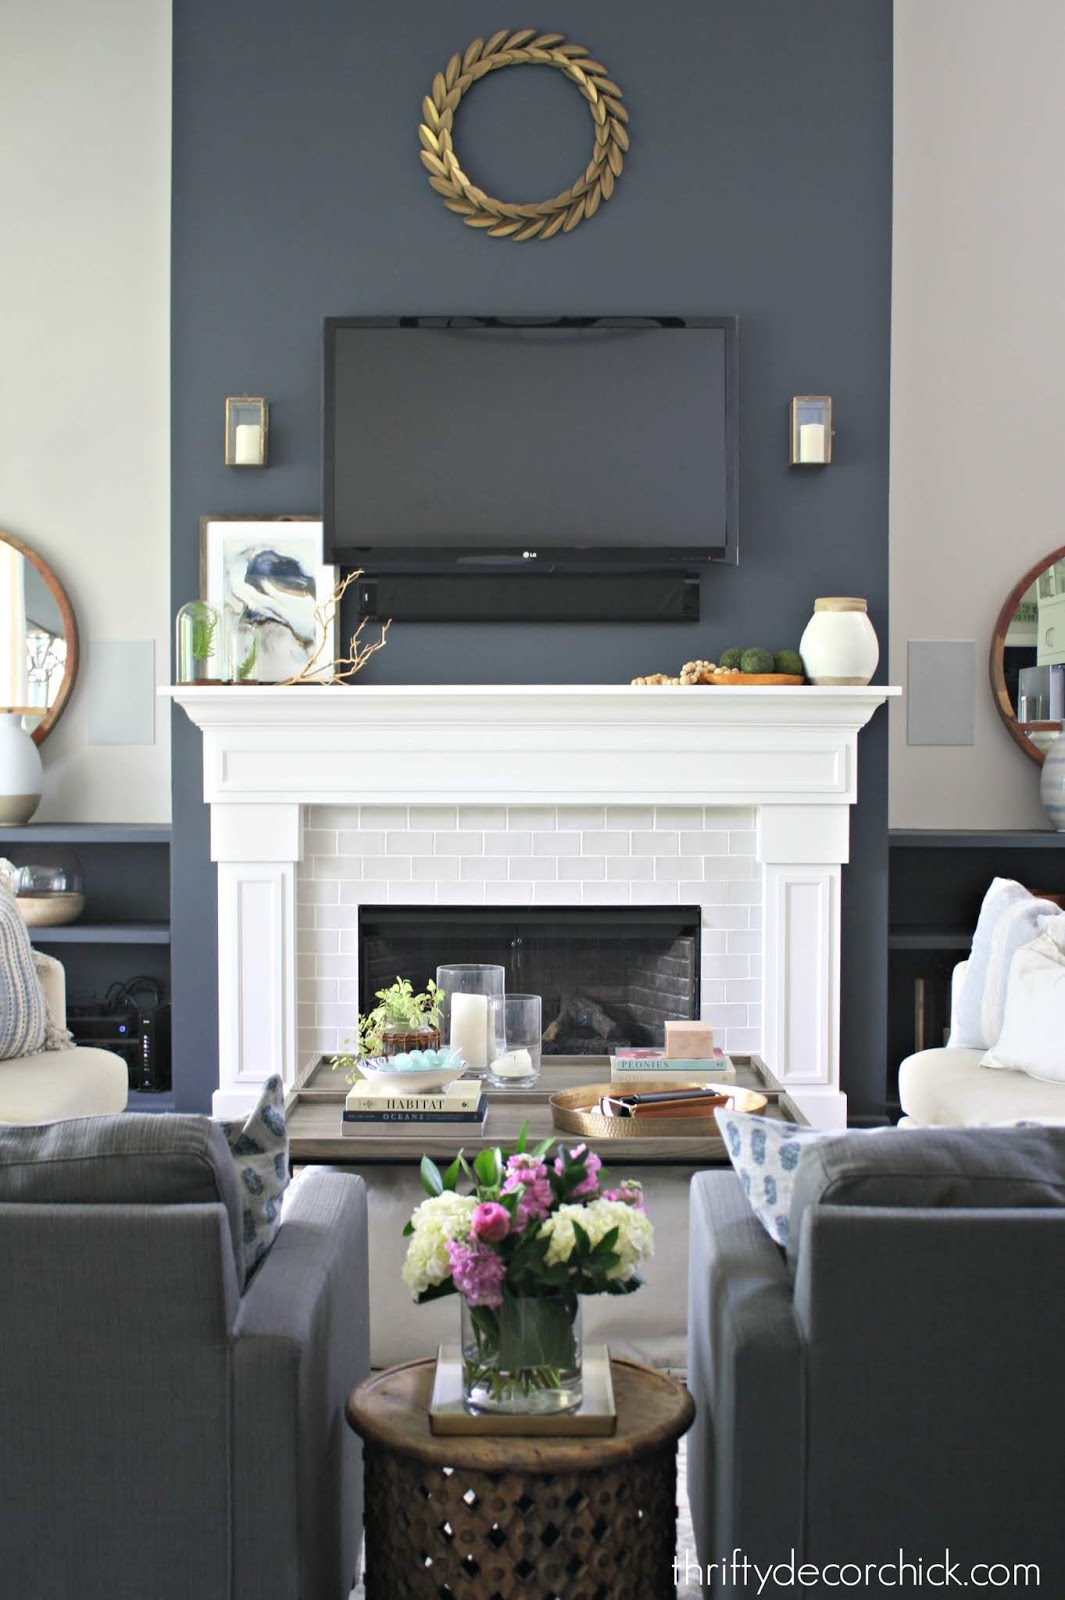
The bowl was from HomeGoods and it has navy blue (that I have on the fireplace wall and built ins) and aqua -- perfect!
I've had this little vignette up for months now, but it works so well for summer. The cloches are from Ikea and I snipped the ferns off of some faux sprigs and stuck them in there:

Summer always brings out the color pink around here. I don't use it a lot otherwise but in the summer it just feels right. Little touches here and there:

A little color, some plants and some pink and I think the house is summer ready!
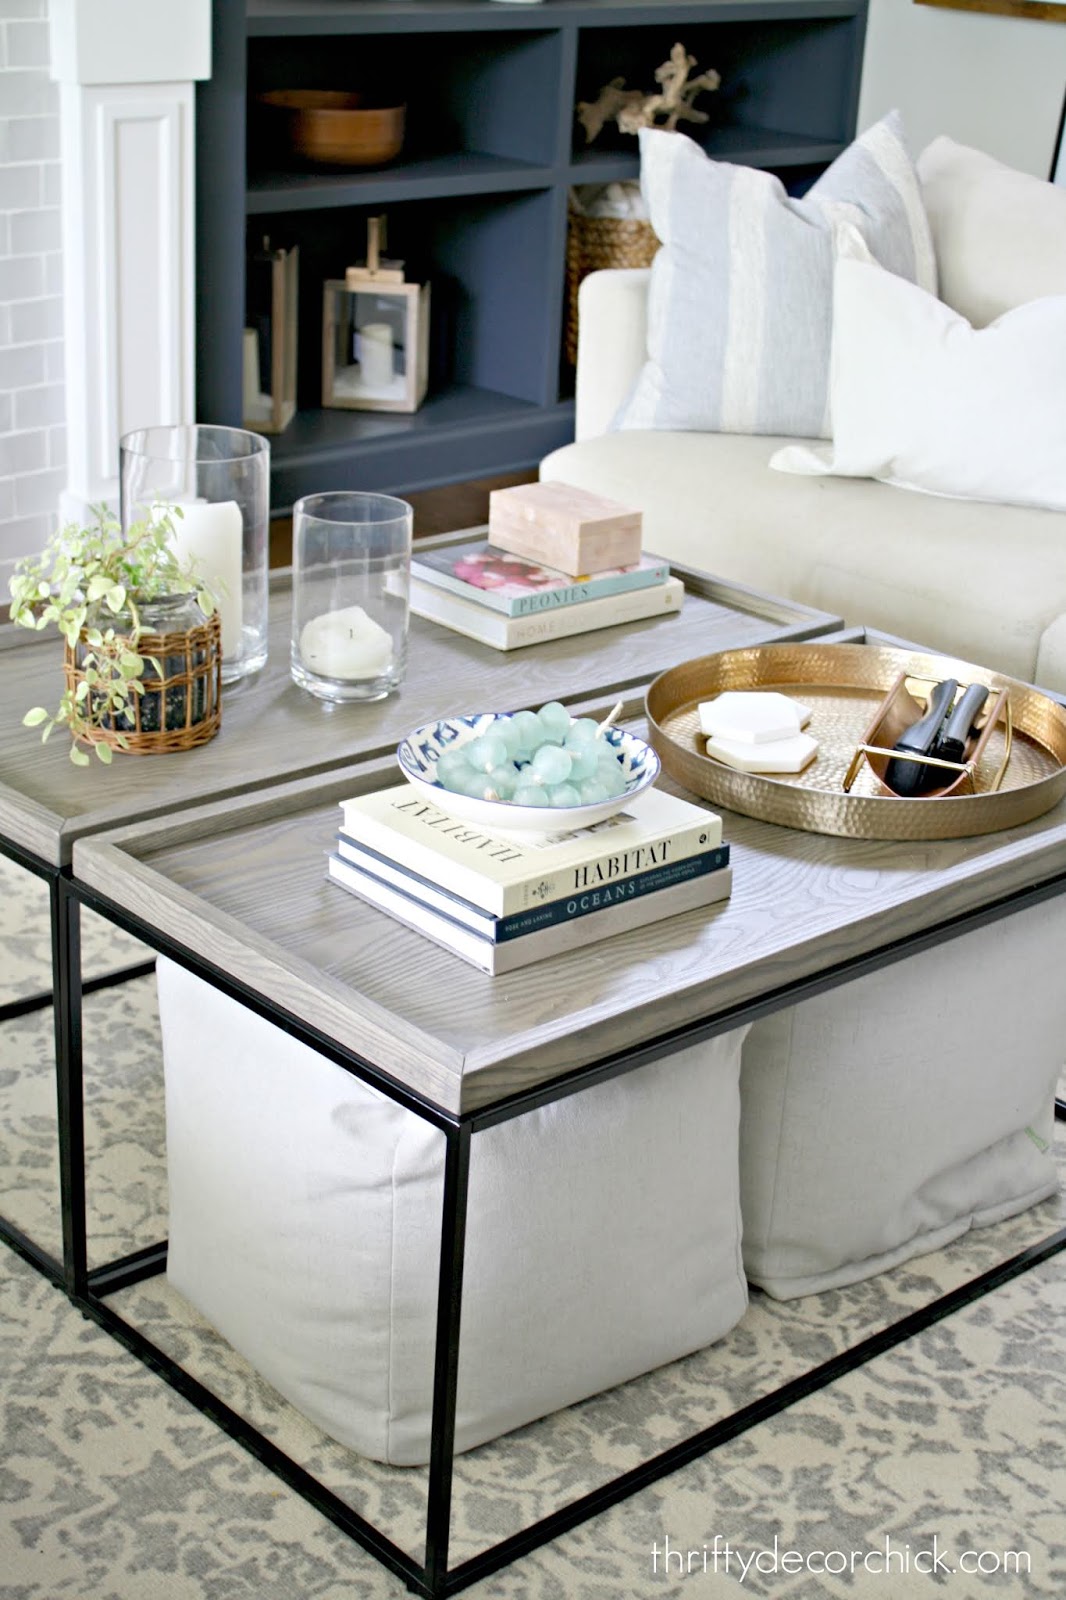
See my solution for a much cheaper but huge coffee table here!

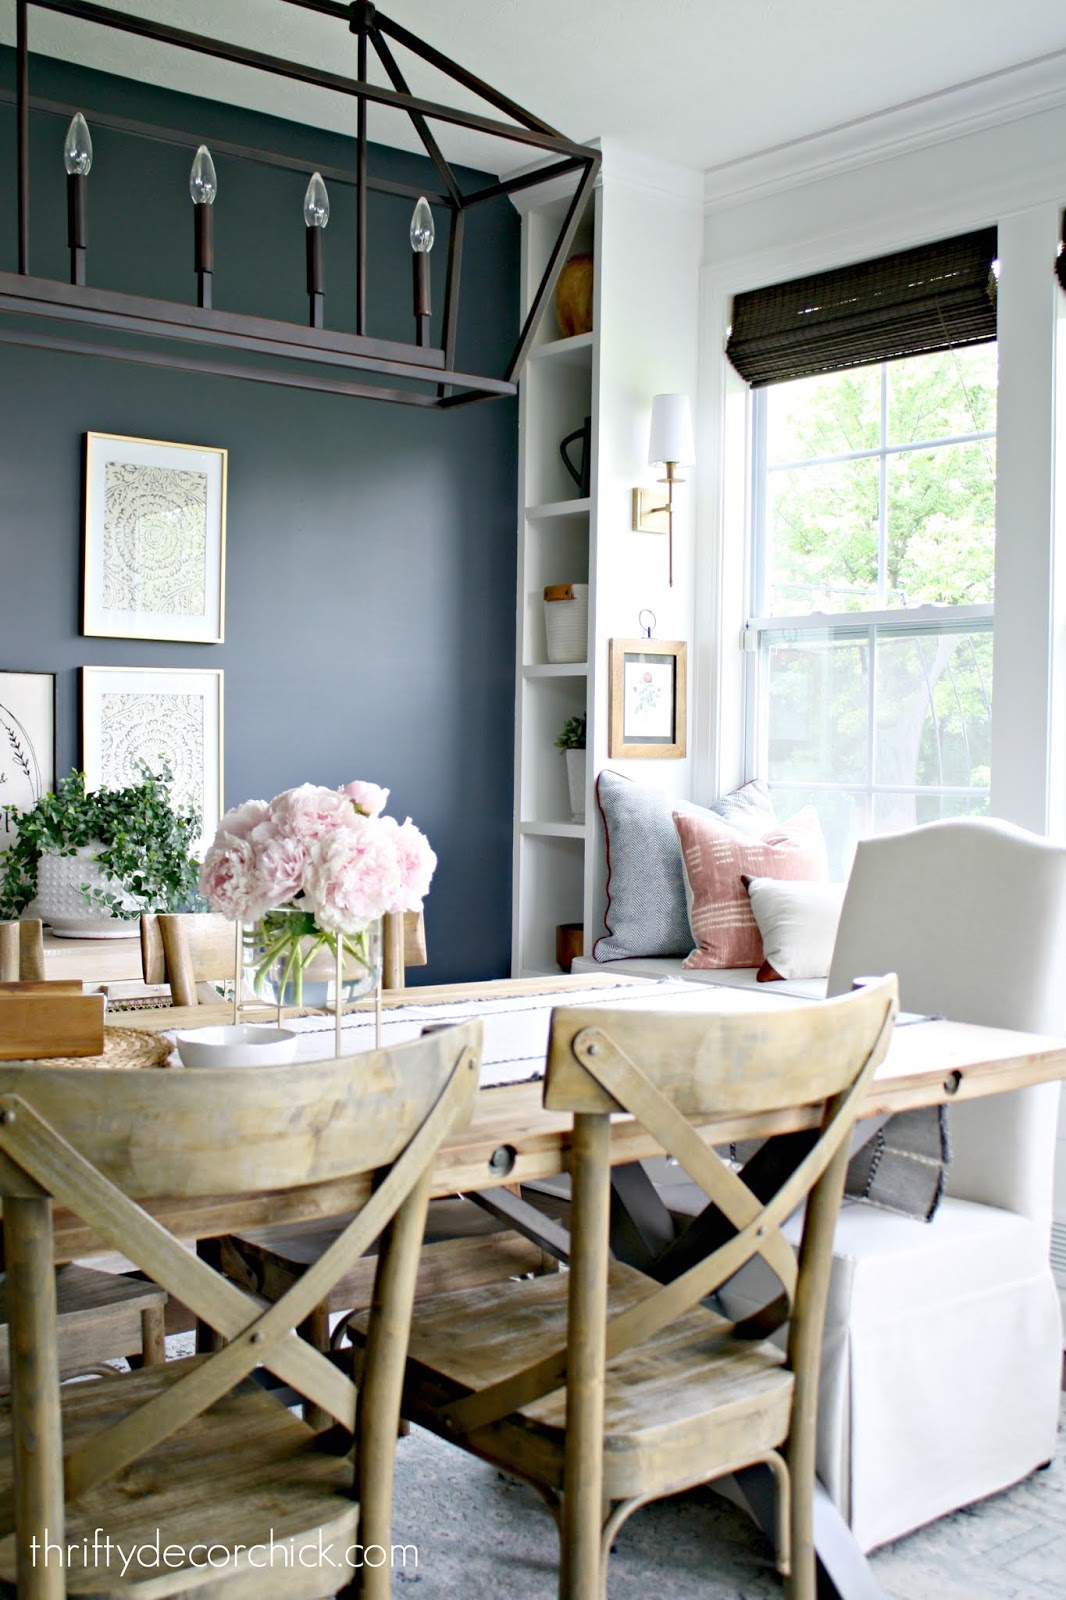
I added more pink to the dining/morning room with a couple DIY pillows and some flowers:
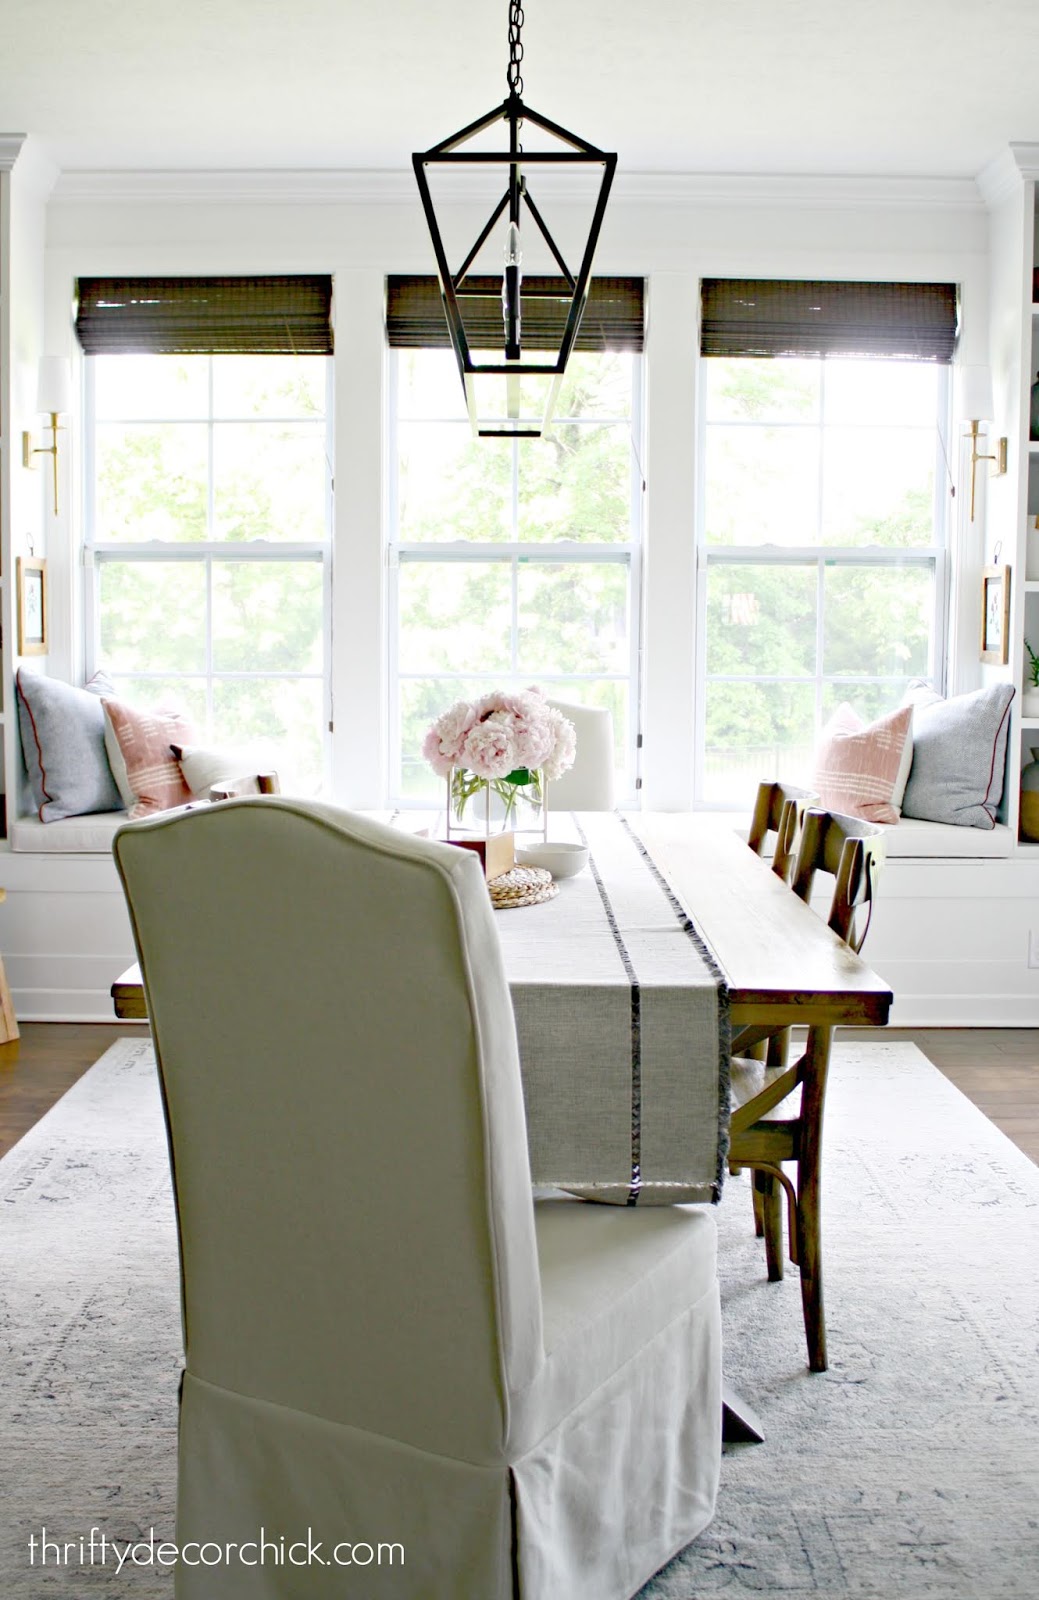
If you've been reading for awhile you KNOW how I love a good napkin pillow. ;) I made the pink pillows with these discounted Pottery Barn napkins. I used a neutral fabric I had in my scrap pile for the back so I could get more than one out of the two napkins.
Pink and blue are so lovely together, right?

My light pink peony bush was STUNNING this year! I cut them a little too late, but they were still so beautiful:

If you'd like to read more about these beauties, check out my tips for growing peonies here. Goodness I LOVE the pop of light pink against the dark blue walls! 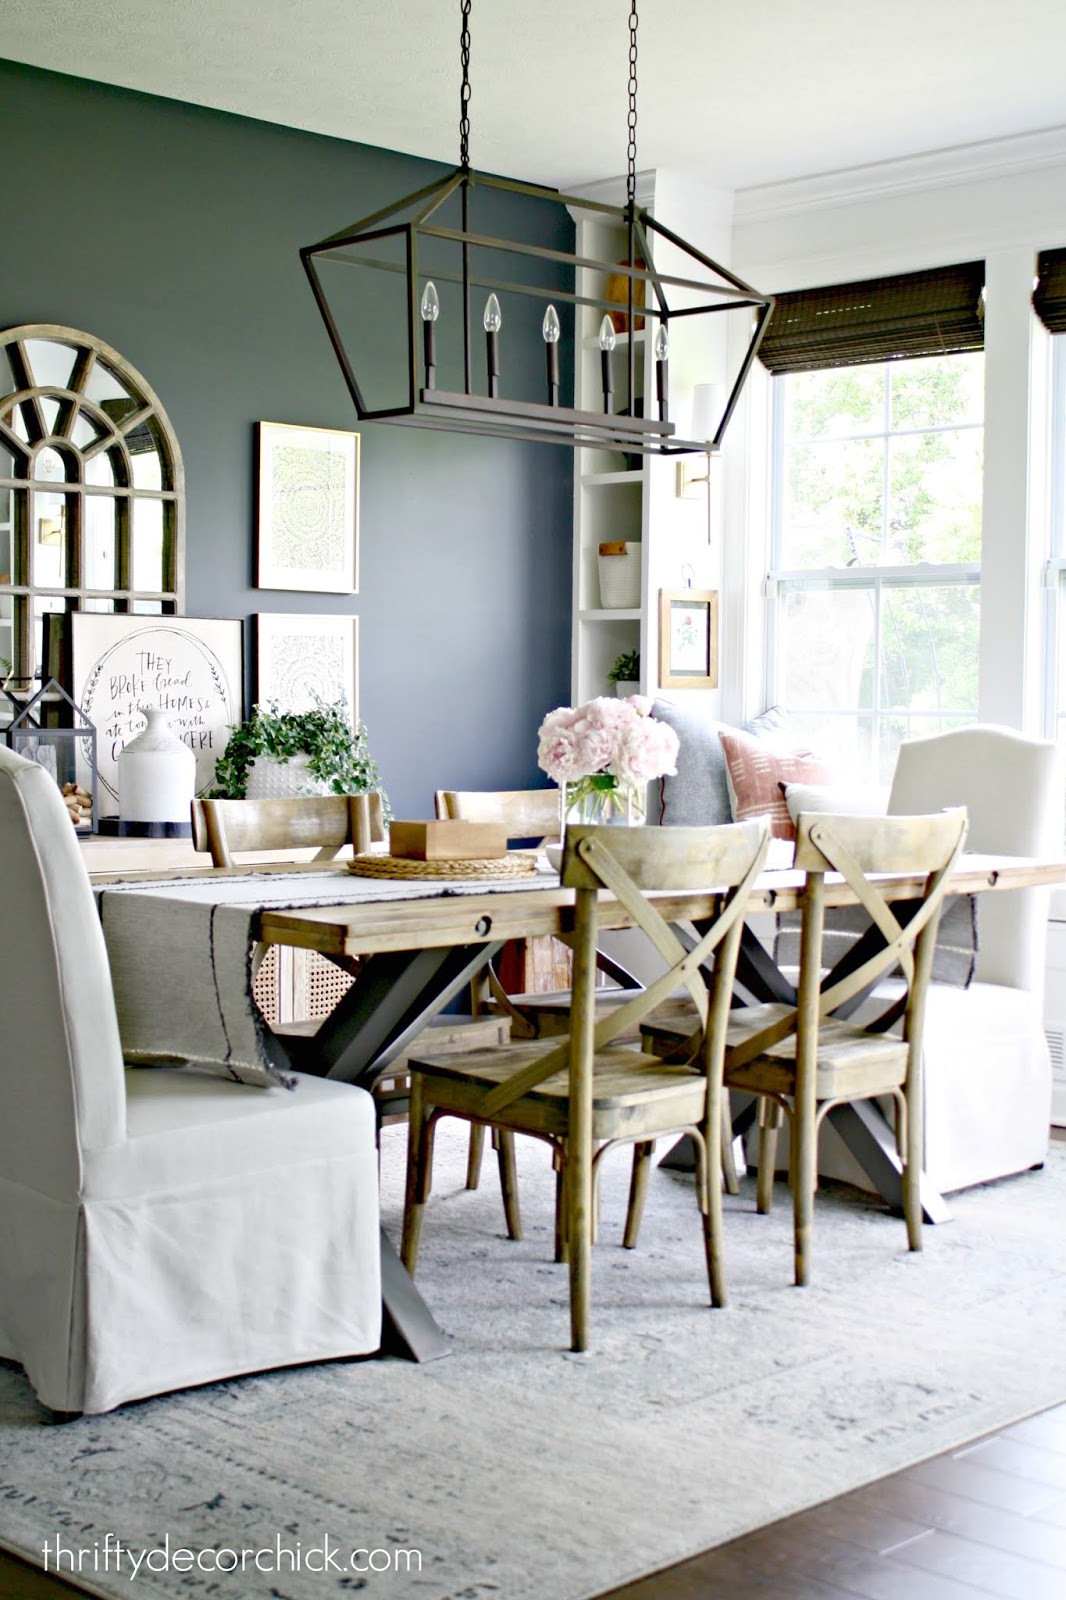
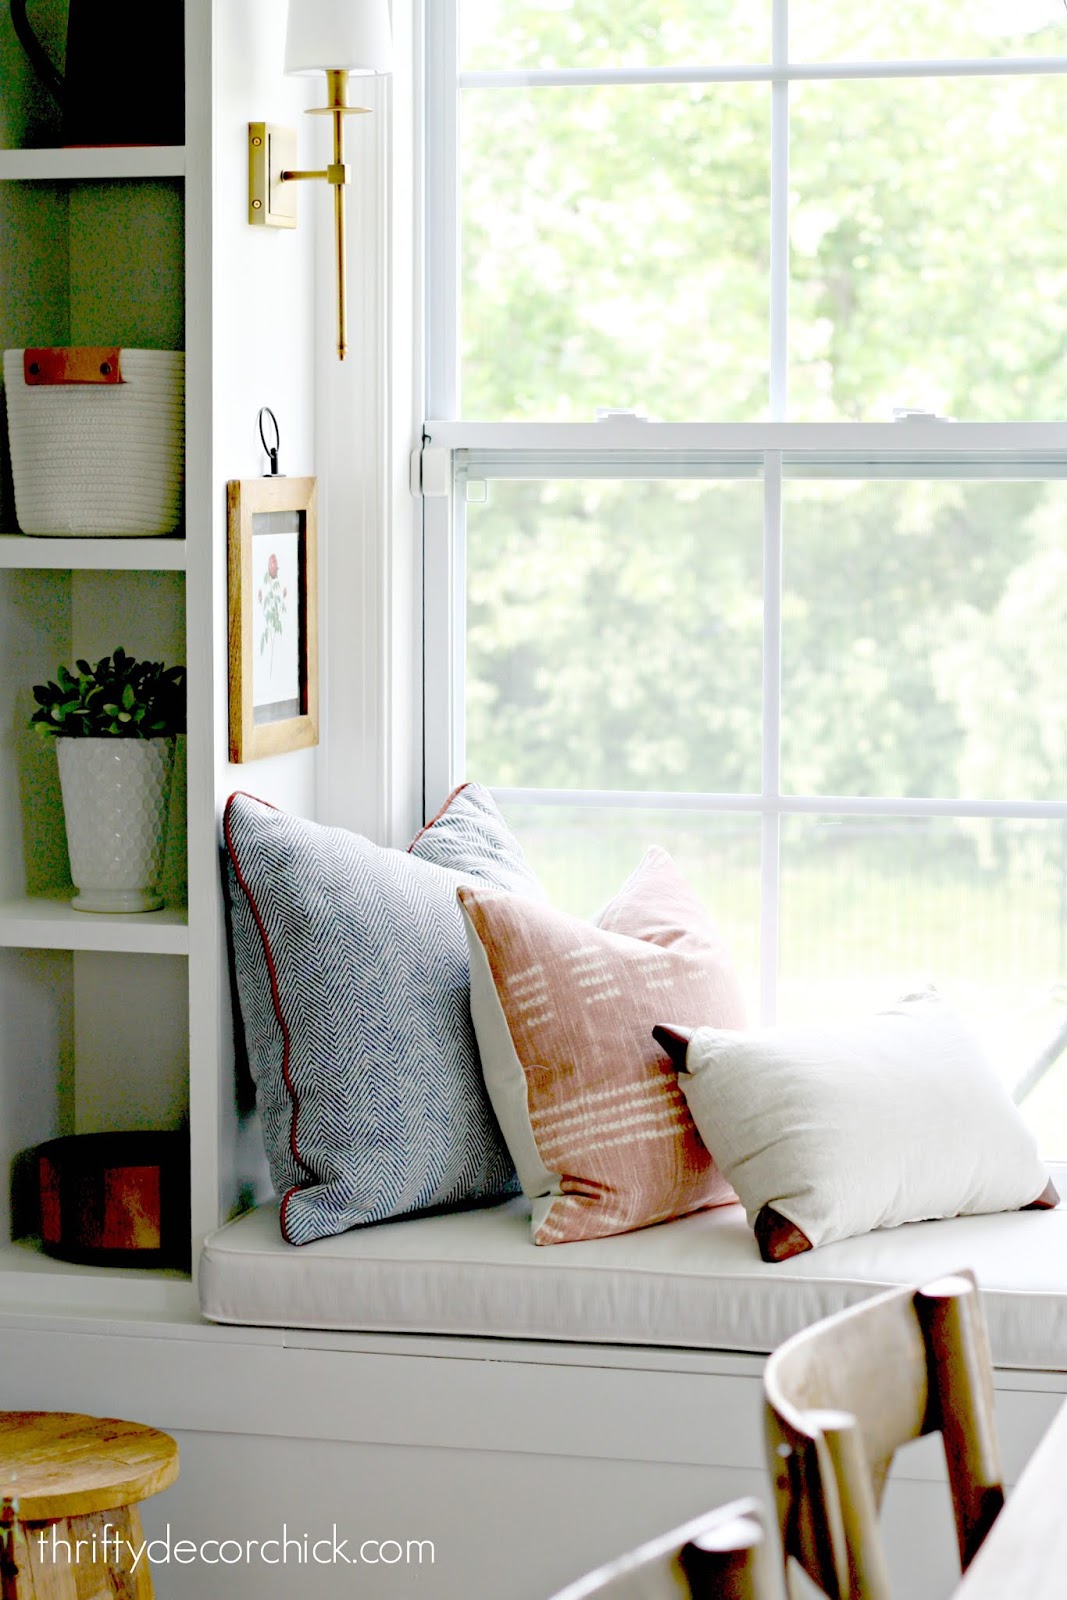
Pillows are one of my favorite ways of changing things up for seasons or holidays. The window seat has already seen quite a few pillow changes:
I have to say, my favorite part of the summer is having our boy home all day with me. He's such a young man now and I'm trying to soak up these long lazy days with him: 
Thanks for joining me on the summer tour! Next up is Deb at Seeking Lavender Lane -- I can't wait to see her gorgeous new home decorated for the summer! See more of our home here. To shop items in our home, click here! Never miss a post by signing up to get posts via email. Via https://www.thriftydecorchick.com/2019/06/summer-home-tour-2019.html
So if someone asked, would you say you're a lover of color in your home? Do you like a softer, neutral space, or one with deeper colors? I've always said I'm the former for sure...but then I looked at this shot of my office progress (I shared on Instagram), and I got to thinking:
The more I thought about it, the more I realized I am a fan of color in our home. Much more than ever...especially when you compare this house to our last one.
I LOVE the look of all light rooms when I see them online or in photos. At least most of the time -- they have to have some wood or black to ground the space, otherwise they feel sterile to me.
But every time I've considered going all white for a room, it never sticks. It's just not me. I can appreciate it for sure, but my style is changing a bit. I've noticed that I prefer a big pop of color, but it's always on the walls. Not all the walls mind you. Just one or two. Try to keep up here. ;)
It's a trend I've noticed in our new(ish) house. I guess I've never really thought about it...I just do what I want in each space and try to make our home feel cohesive overall. But the more I spend time in my office with the green built ins, the more I realize I'm definitely changing and enjoying even more contrast in our home. I'm really attracted to deeper colors that play with lighter furnishings and lots of wood tones.
I just think wood looks so sharp against a dark color, like the long shelves I added to the game storage wall:

Some don't consider gray to be a "color" but I disagree. There are SO many different takes on gray, and each will create a different feel in a space.
That dark gray color on the basement wall is called Westchester and it's a favorite. It's a solid gray -- no purple or blue tones to it. I love it. I first used it to create our dramatic ceiling in the master:
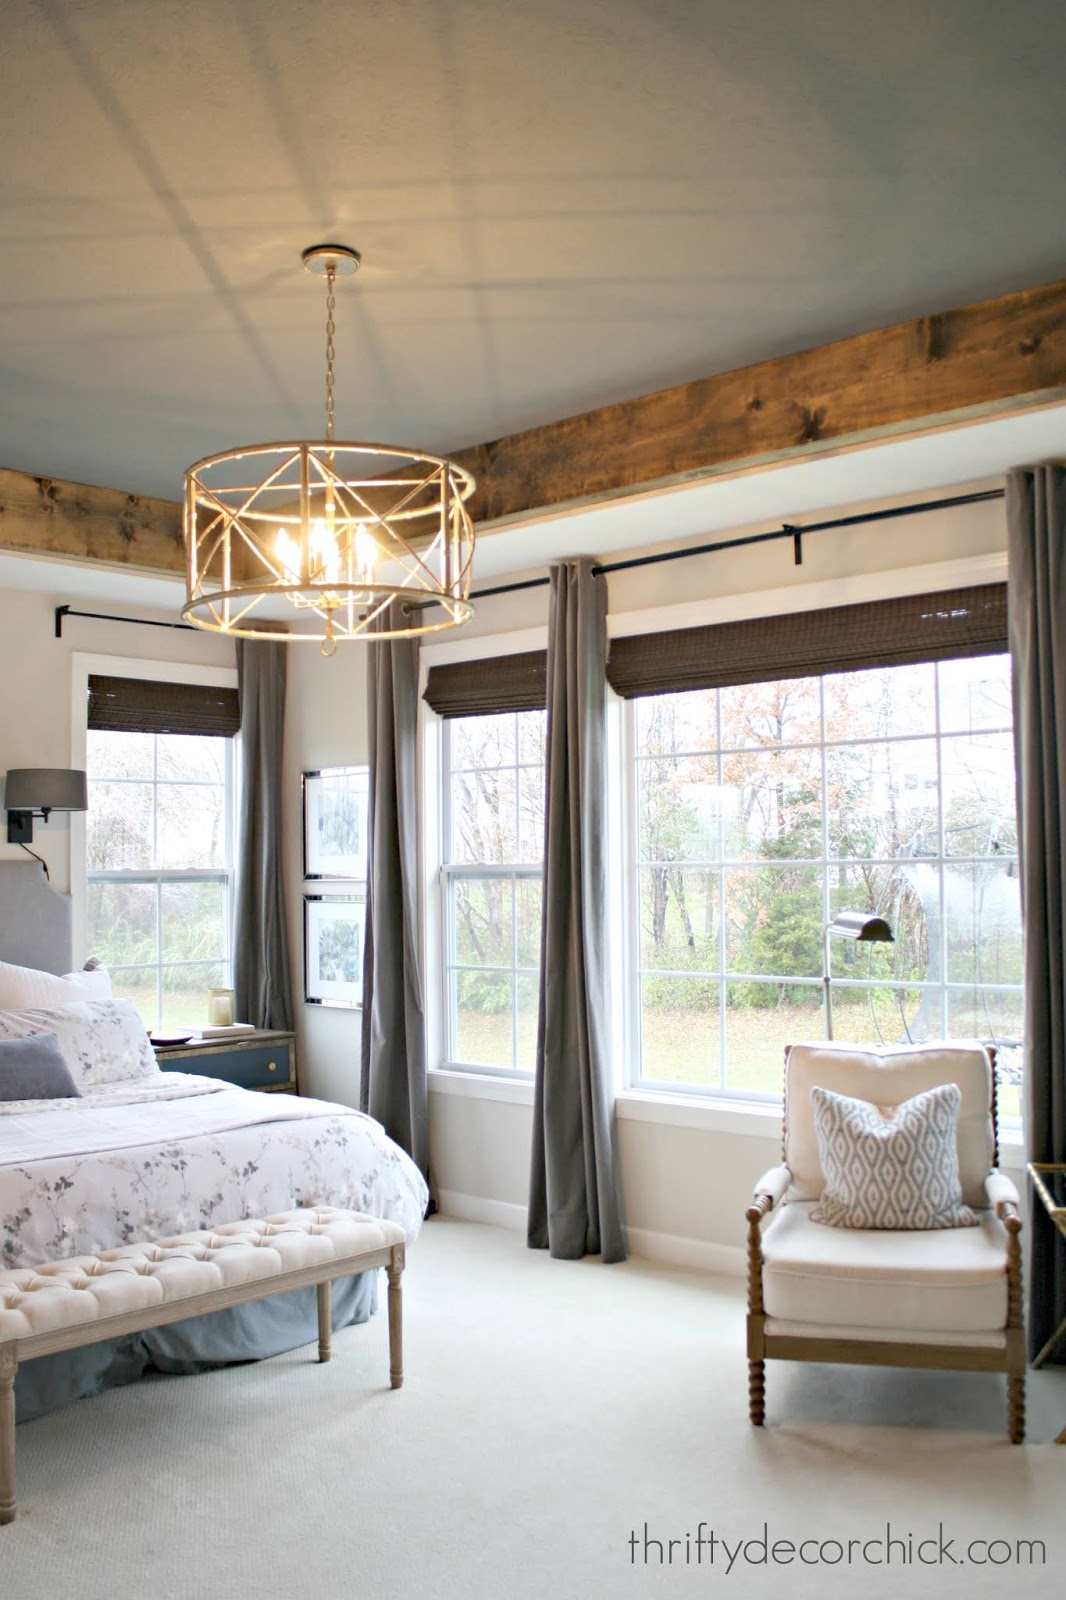
I am so drawn to the deeper tones lately...but not in the whole room! I hear accents walls may be going out of style but I'll hold onto them with a death grip. Our master just happens to have the accent wall on the ceiling. :)
The board and batten powder room is the first space I tackled after moving into this house and I immediately went with the dark blue wallpaper and ceiling:

Other than our son's bedroom and an accent wall in our master in the last house, I can't remember anywhere I went so dark before.
Maybe it's because this floorplan is a little more open? It's a bright home for sure, with lots of natural light. I feel like the openness and sunlight really allows me to go more dramatic on the walls.
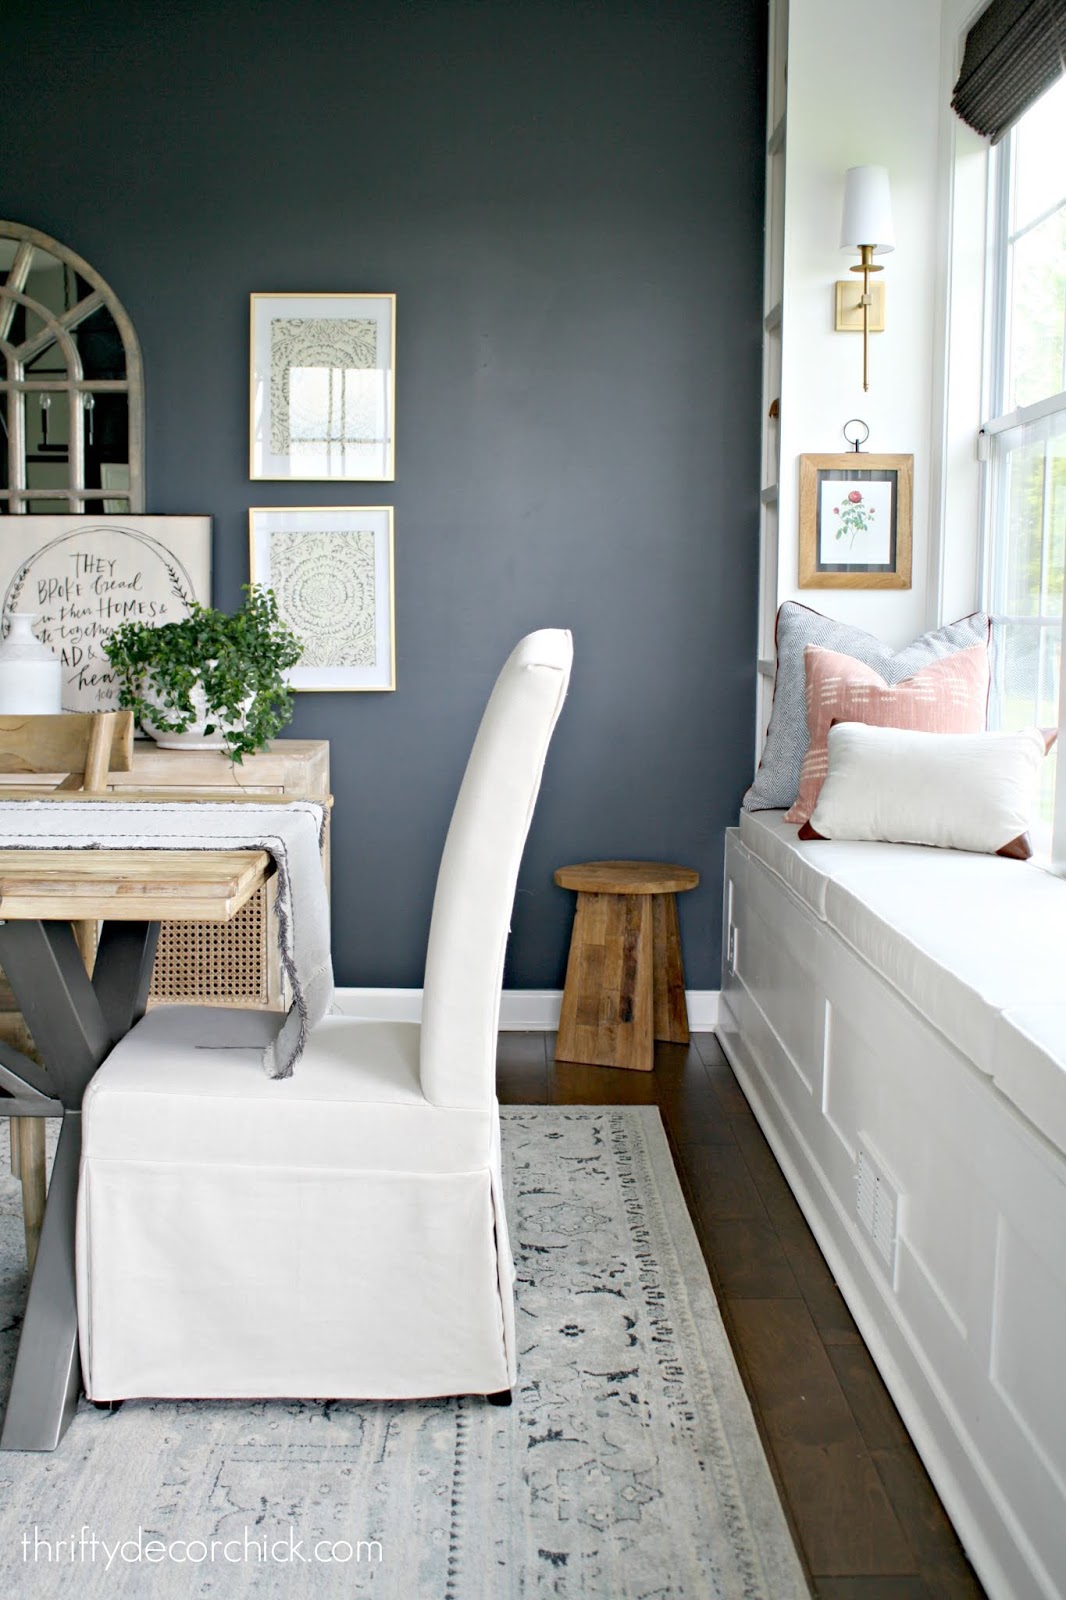
Our dining space has dark walls, but I balanced it with a wall of white built ins:

I think the key to bringing in color without it taking over is just that...balance. First and foremost, I want our home to feel calm and cozy. I don't want anything jarring, but I think you can accomplish that when you balance the deep colors with lighter accents elsewhere.
The TALL fireplace wall and built ins in our family room aren't overwhelming because I kept everything else light and neutral:

Overall I use very little color in our furniture or accessories...but that gives me room to create some drama with color elsewhere.
It's funny how our styles change over the years, right? I feel like this is an update of my decorating style ten years ago -- but now I'm using darker tones that I consider neutrals (blue goes with anything) instead of orange, yellow or brown walls. ;) (If you've been reading long enough you know which spaces I'm talking about!)
I think I can safely say you'll never see those colors in our home again. But who knows -- I used to hate the color blue and look what happened! Ha!
If love a neutral room but crave some contrast and color like me, it can be done in a fresh and updated way! Don't be afraid to add some deep tones to your home too. I already have plans to use the rest of the dark green paint elsewhere in our house. ;)
So what are you -- a white and bright lover, or do you prefer more color in your home? Or are you a mix of the two like me?
Via https://www.thriftydecorchick.com/2019/06/how-to-add-bold-paint-color-and-keep.html
Coming at ya with a late night post because I couldn't wait to share the built in bookcase color! ;) The paint is still drying...I'm not good at keeping things to myself for very long, as you can tell. Ha!
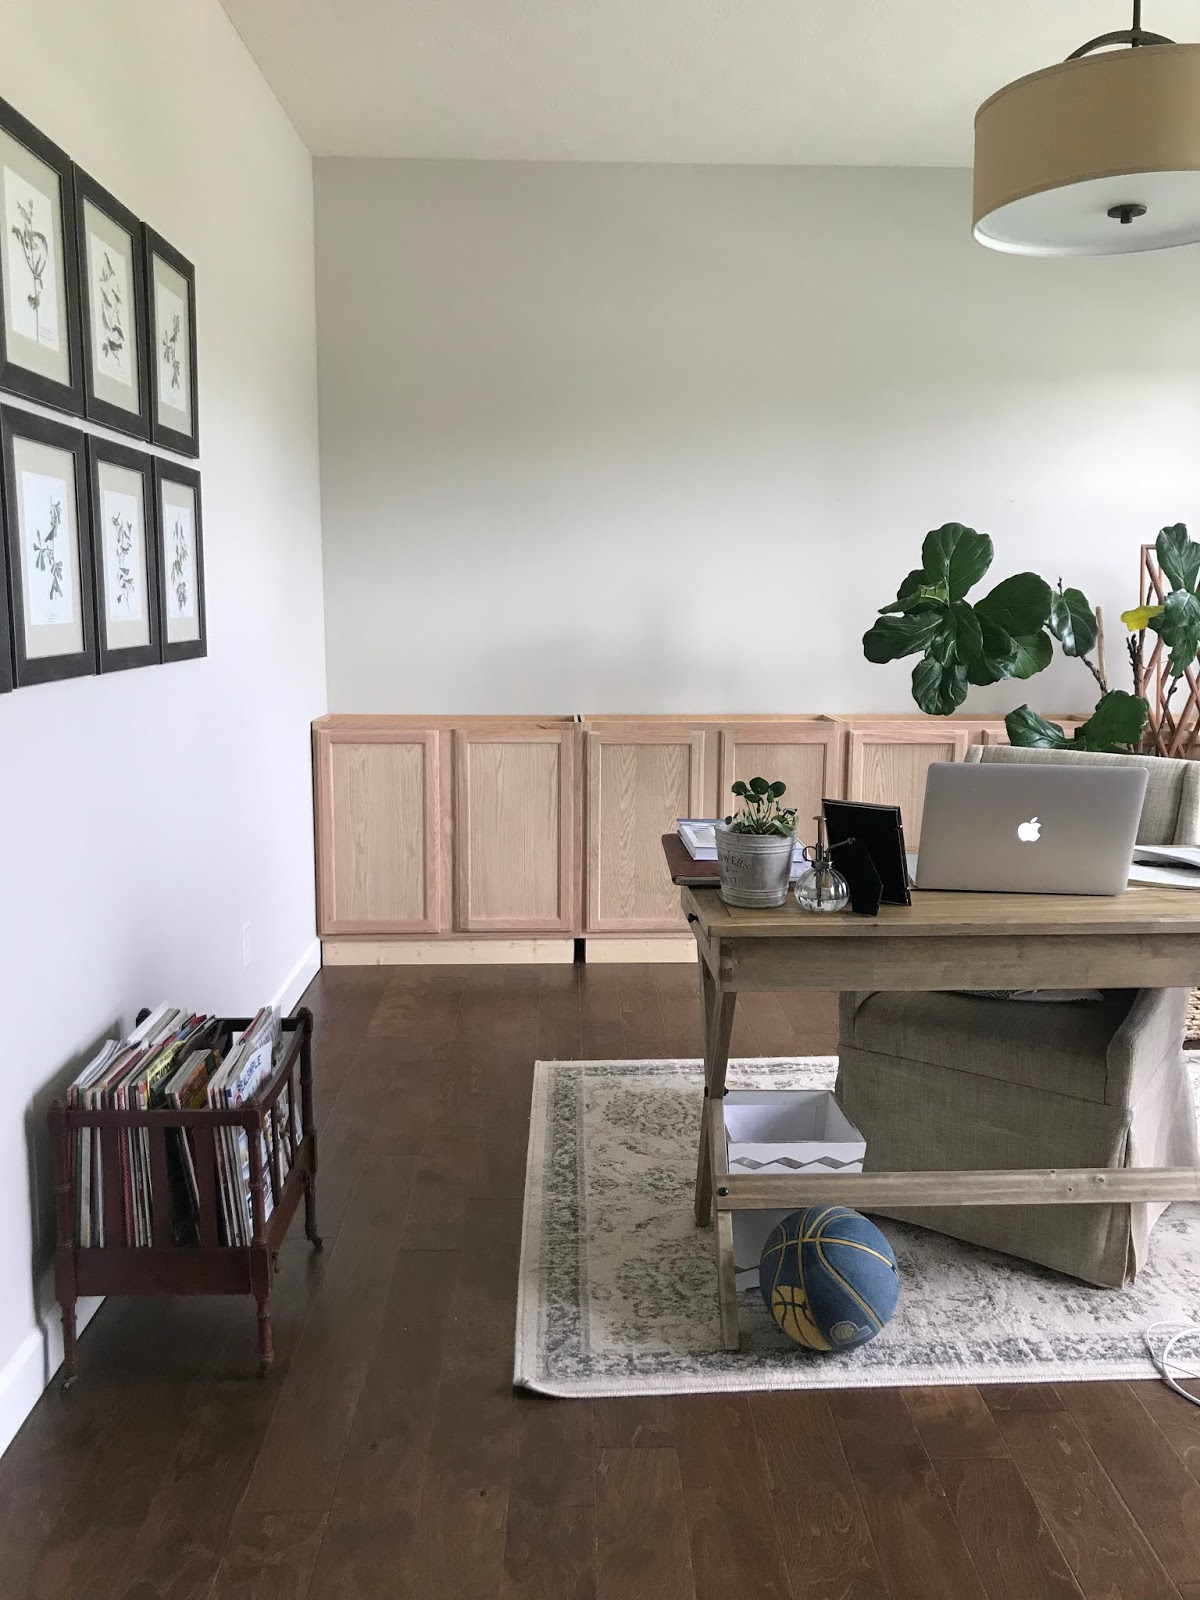
I had a full afternoon/evening to start the painting today and I worked my tail off! This is where I left you earlier this week -- the cabinets were in, baseboards installed and the wallpaper was about halfway up:

That wallpaper is still my favorite thing about the room! Goodness it is so pretty!
None of you guessed the built in color, which surprised me! Although I'm not surprised so many of you thought I was going with blue -- you know me well. ;) Remember the little vintage table in our family room I painted last year?:
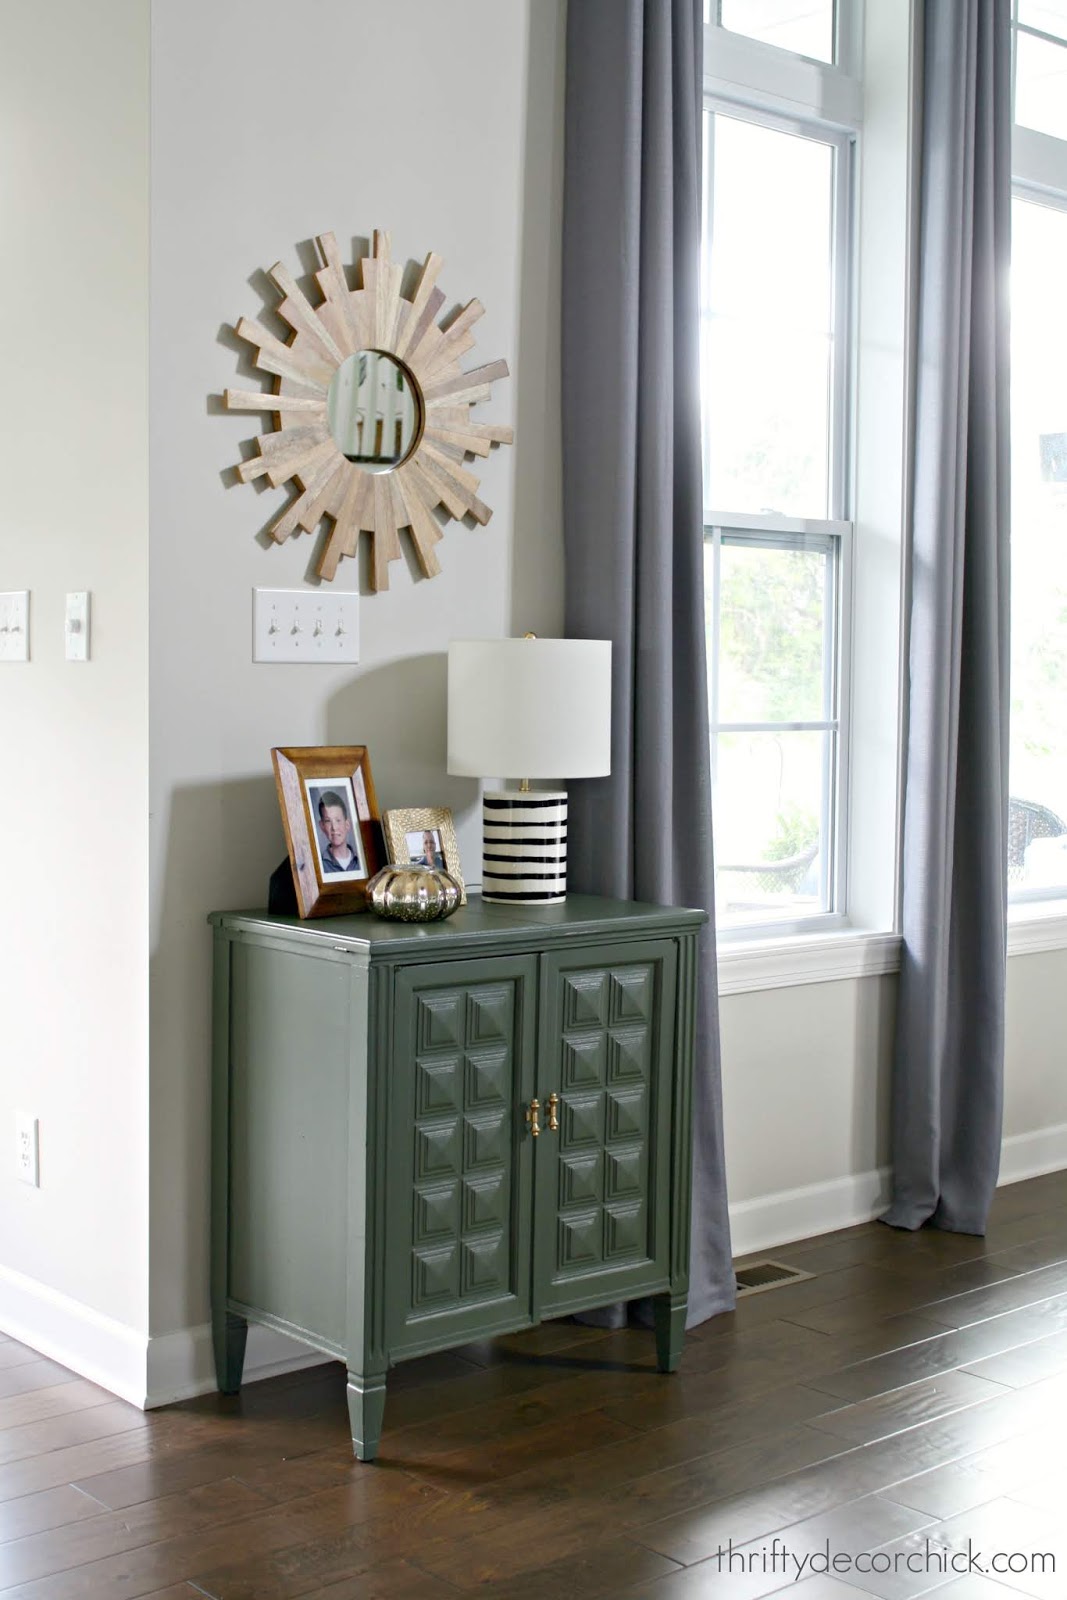
You can read all about that transformation here. Originally I planned to paint the bookcases a dark gray, but after living with this green color for awhile, it was calling my name. I knew it would look SO good in the room.
This post may contain affiliate links for your convenience.
See my policies and disclosure page for more information.
It's a Benjamin Moore color called Vintage Vogue and I have it mixed at Sherwin-Williams. I got a little bit more than halfway done today and I absolutely, positively LOVE IT: 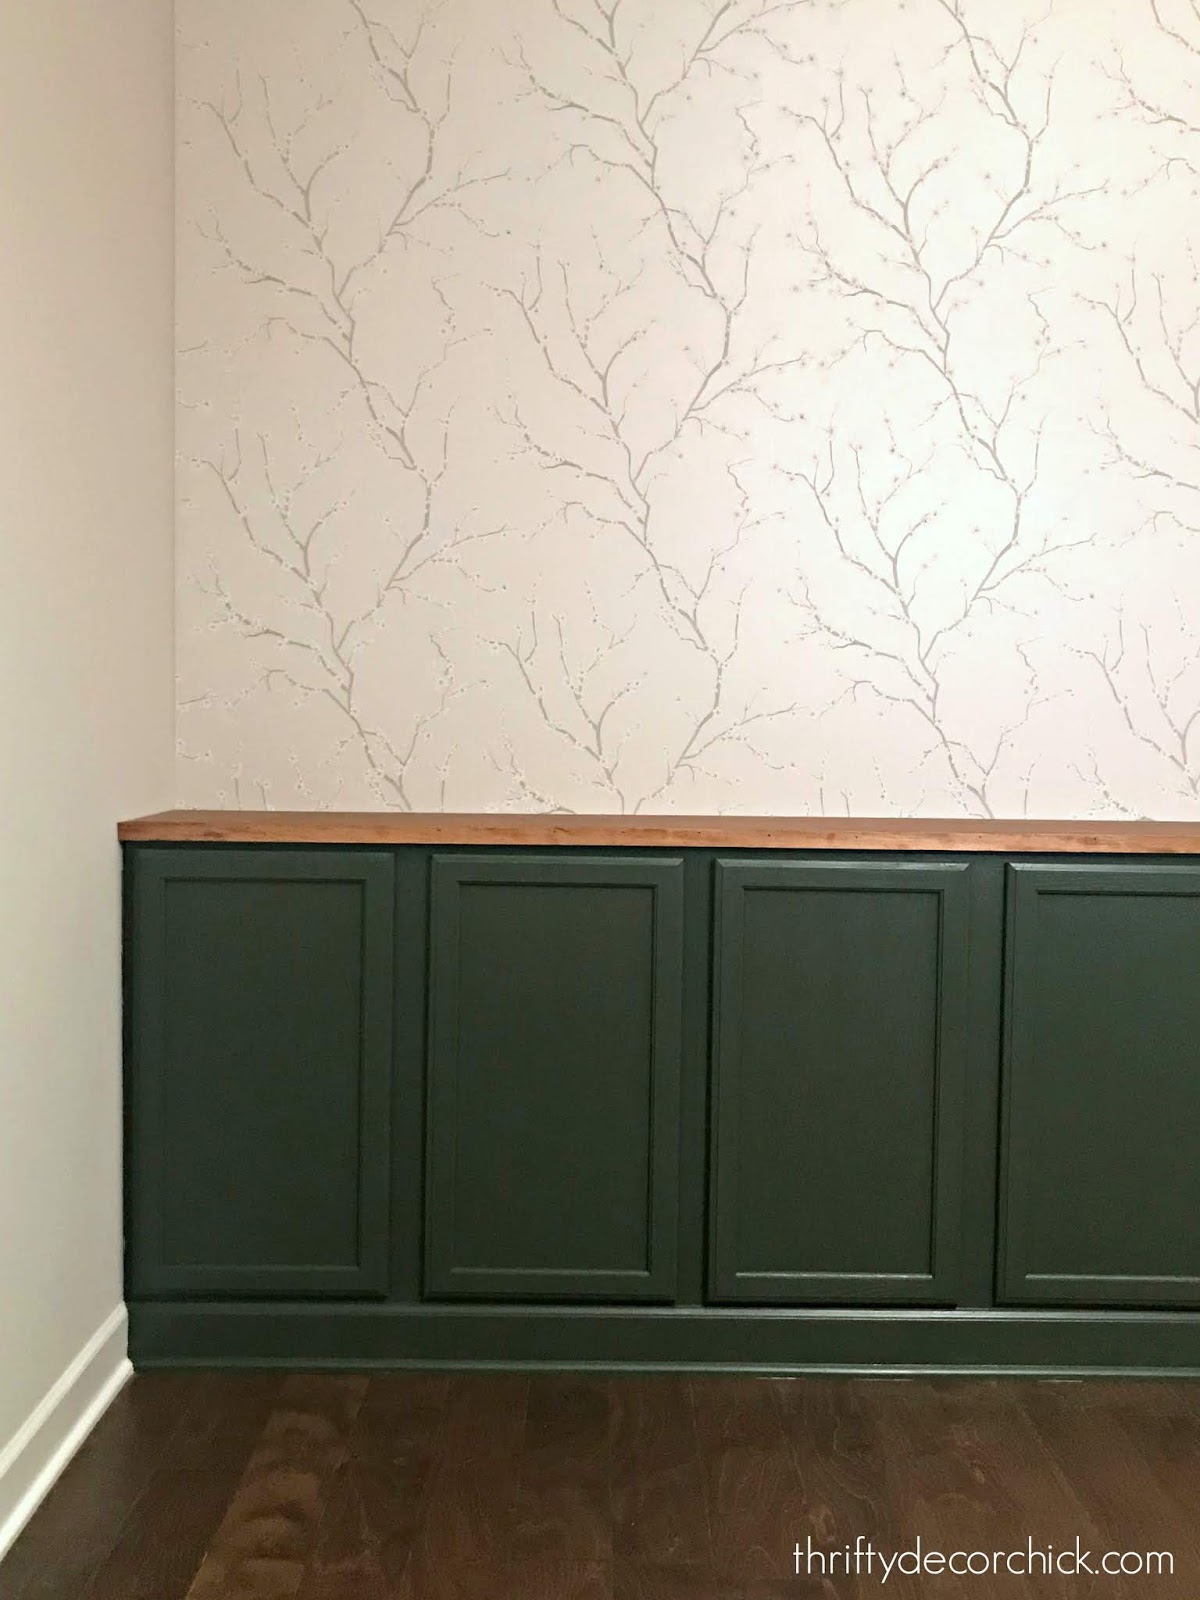
Bear with me -- these are nighttime shots. I wasn't planning on posting today so I didn't take pics any earlier. But I'm so excited about the progress so decided to share! It's coming together just as I saw it in my head.
As soon as the wallpaper arrived this week, I held it up against the little table the family room and totally fell in love. They look so lovely together. The wallpaper doesn't have green in it really. The branches could perhaps go a little green but I think they're more gray. Keep in mind things don't always have to match exactly...they just have to "go." :)
As you can see I also got the counters and trim installed. I still need to fill some holes and do one more coat of stain on the front trim. I ordered this brass hardware (affiliate) for the doors and they arrived this week: 
Usually cup pulls are used on drawers, not doors. But I think it's going to look really sharp when I get them in. Gotta let the paint cure a bit first.
I knew the deep green would look great in here when I realized I had so many items with that green tone in the room already. The butterfly print by the windows has it throughout. And these bird prints on the gallery wall have it all over as well:

See how I got those art prints for free (they used to hang in our old living room)! I still love them.
This weekend I plan to finish up the painting on the cabinets. I'm SO GLAD I decided to paint this as I go. It's daunting to have to paint all of it at once.
After the cabinets are painted and the hardware is in, I'll start the supports and header on the bookcase. Once those are up I'll already be so close to done! So far this has gone MUCH quicker than last time...I hope I didn't just jinx myself saying that!
If you'd like to catch up on this project you can see the progress at the links below:
See more of our home here. To shop items in our home, click here! Never miss a post by signing up to get posts via email. Via https://www.thriftydecorchick.com/2019/06/the-office-built-in-paint-color-reveal.html
Hello there! I'm back with updates on my office built in bookcases! So far our summer has been jam-packed, so I've only had a couple hours here and there to tackle this project. It's going faster than I thought (famous last words) so even in that brief work time I've gotten a lot done. It's still not looking particularly pretty, but I feel like I've accomplished a lot!
The peel and stick wallpaper arrived early this week and it is GORGEOUS! I'm so happy with it! I couldn't wait to show it to you.
Last time I left you, this is how the room looked with the start to the bookcases:
Be sure to check out the first steps of the DIY built ins here to see what has happened so far.
This post may contain affiliate links for your convenience.
See my policies and disclosure page for more information.
Next up, I had to cut a hole for the outlet on the wall. I measured the placement and then cut a hole with my Dremel cutting tool (affiliate):

That little tool makes quick work of cutting, especially on the thin backer board on these cabinets.
I was going to have the outlet moved up to above the cabinets like I did in the last house, but decided it would be fine just leaving it inside the cabinets instead. I'll drill a hole through the countertop for lamps or any other electronics I may put there. That way...NO CORDS. Whoot!
Not having that run saved me some cash for sure. Next up it was time to install the cabinets -- which I didn't take photos of because it's basically a very boring process of finding your studs in the walls and drilling screws through the back (and sides) of the cabinets to secure them. I also connected them to each other with screws.
I'm no pro at that but it always turns out pretty well. They are in there good and aren't going anywhere. After they were in the walls I was able to start the baseboards across the front. I explained more about this in step one, but this shows you the process:
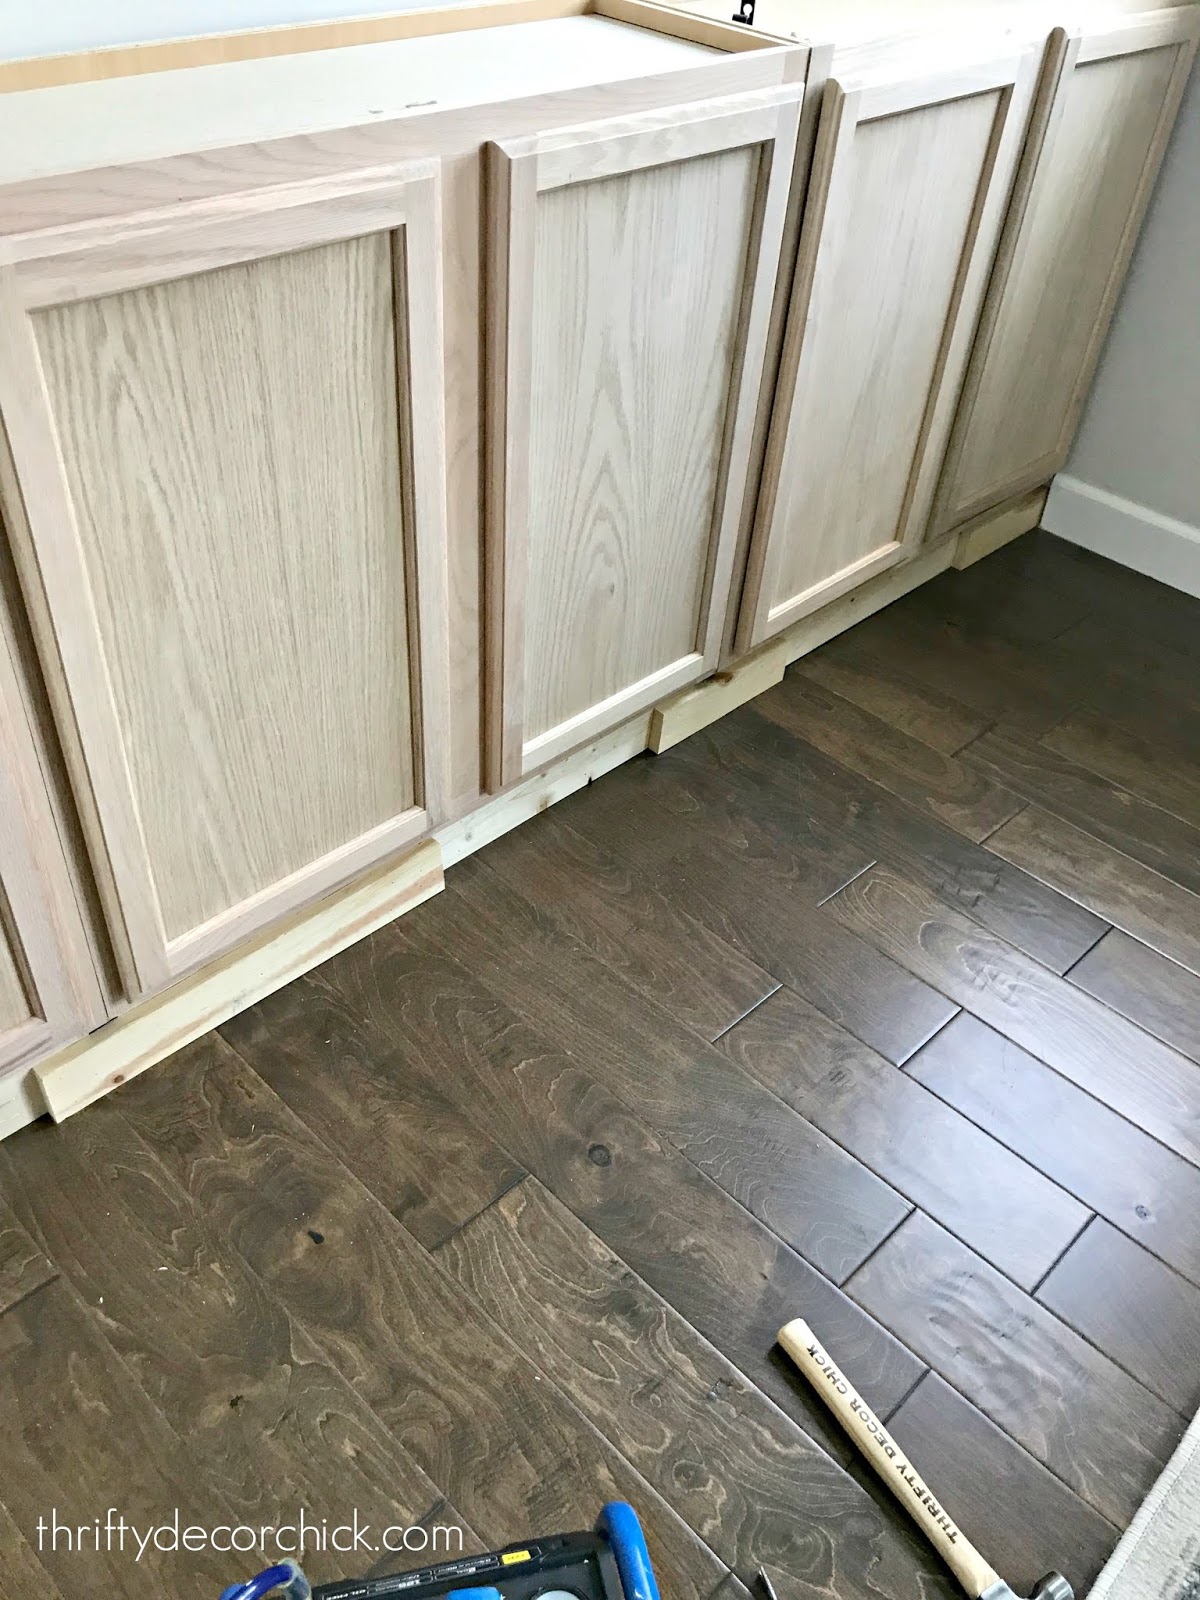
I nailed scrap wood to the toe kick I created last week, and that gives me a flush surface to attach my baseboards to. If you don't do this, the base will cave in at the bottom because there would be nothing behind it to keep it straight. I hope that makes sense!
I took the base off the back wall and reused it on the front of the cabinets. Saved me some money!
Last time I did built a bookcase like this, I used butcher block for the "counter" on top. Because I don't have a table saw, I'm at the mercy of paying someone to cut it down. Not a huge deal, but I didn't want to pay someone to do it when I knew I could make something else work on my own. Instead of butcher block, I grabbed a 4x8 piece of birch from the hardware store and had it cut down at the hardware store. (I needed it to be 12.5 inches thick and you can't find that size already cut.) I fit them to the top (I'm using two pieces to span the 12 feet) and the seam between the two will go right in the middle of the cabinets. The seam will be hidden by the vertical wood supports on the bookcase. I preconditioned the wood (don't skip this part, more about that here!) first: 
And then stained them with one of my favorite colors, Provincial by Minwax. It goes so well with our hardwood floors:

I will get a couple coats of poly on them before I start the bookcase part of this build. The rough edge of the wood will be covered and stained as well, so you won't see the seam between the two pieces from the front at all.
Next up...my favorite part!! The beautiful wallpaper. Last week I shared the cherry blossom wallpaper I was considering and I went ahead with it. I wish the sun was out today because this photo doesn't truly show how pretty it is:

I didn't expect it to have some sheen to it and was pleasantly surprised. It's just gorgeous in person!!
I shared how to install peel and stick wallpaper here, so check that out if you are considering this product. I find it pretty simple to install -- it goes up quickly once you get the hang of it. I ran out of time today to finish it up but here's a look at it so far:

Goodness, I wish I could express how pretty it is. It's called chin cherry blossom peel and stick wallpaper and you can find it here! I got the beige version but they have a few colors. I got four rolls just in case, but I don't think I'll need that many for this wall.
Here's a look at the wall last time I updated you:
And here it is now with the start of the wallpaper!: 
I will install the counters after the wallpaper is done. I installed this first for a couple reasons. Well one really. ;) It is SO much easier to hang it without shelves up. I considered waiting till just the vertical supports are up, but even that would be more work.
I don't plan on changing this out for a very long time...I mean a LONG TIME. But when I do I can use a sharp razor to cut around the wood to remove it. This stuff cuts easily. But again...I don't plan on that happening in the near future.
The other reason I did it now was so I didn't have to be a perfectionist with it as I installed -- at least at the top and sides of the wall. The bookcases will cover the edges. That makes it the install much faster.
I didn't go all the way to the top because that will be a header with crown and the lights over the bookcases -- I'm trying to conserve as much of the wallpaper as possible. I'm keeping the built in color a secret...at least till I update you next time. ;) By then I'm hoping to have the bases painted.
Thanks for joining me on this process! I always strive to show you the steps along the way instead of a before and after. :) If you'd like to see this process from start to finish in our last house, you can see all of the steps here!
See more of our home here. To shop items in our home, click here! Never miss a post by signing up to get posts via email. Via https://www.thriftydecorchick.com/2019/06/the-gorgeous-wallpaper-on-office.html |
