|
Hello my friends and happy Christmas week! After this publishing this post all I have to do is wrap some presents...and then I'm done! Are you ready for the festivities?
This Christmas means more than ever...because #2020, of course. I think we can all agree, even with the good this year (and we've had a lot of it) -- it's been rough. We're ready to celebrate this season in a big way and then say SEE YA to this year.
I haven't mentioned it here, but a few months ago my sister and I lost our mother. We had a difficult relationship with our mom for most of our adult lives...but for most of our childhood she was an incredible mother. She truly was my hero.
The loss has made me hate this year even more, and yet extra thankful for our blessings. My word for this year...bittersweet.
I went nuts with the Christmas decor (at least for me), because I wanted to really celebrate the season. I finally got the house cleaned up and took a ton of pictures. Bear with me as I share it all with you!
I hope you enjoy and get some inspiration you can file away for next year! (You can easily pin any of the photos by hovering over and clicking the blue "pin it!" button.) If I have sources for items and projects I'll share those under each photo.
Enjoy!

This post may contain affiliate links for your convenience.
See my policies and disclosure page for more information.


I hope you all have a safe, happy and magical holiday!! I'm so thankful for you all and grateful you return to follow along project after project. :)
See more of our home here. To shop items in our home, click here! Never miss a post by signing up to get posts via email.
Via https://www.thriftydecorchick.com/2020/12/warm-tones-Christmas-home-tour.html
0 Comments
Looking for an easy and delicious cookie to make for the holidays? I'm a traditionalist at heart -- the tried and true cookies are my favorite. My sister passed on her favorite snickerdoodle recipe to me years ago – it’s a quick and easy one and I usually have everything on hand to make it. If you can’t tell by now, quick prep and easy ingredients are my staples when it comes to cooking and baking. I don’t share many recipes on the blog but when I do you know it’s good and easy to make! These are perfect for the holiday season, but I wouldn't say no to these any time of the year!: 
YUM! Here's what you'll need to make these snickerdoodle treats:
-- Easy snickerdoodle cookies --
1/2 c. butter, softened
1/2 c. shortening
1 1/2 c. white sugar
2 eggs (room temp)
2 teaspoons vanilla extract
2 3/4 c. all-purpose flour
2 teaspoons cream of tartar
(see below if you don't have tartar handy!)
1 teaspoon baking soda
1/4 teaspoon salt
For the topping: 2 tablespoons white sugar I used my mixer for this recipe but I hear you’ll get an even fluffier cookie mixing by hand. I was doing this quick so didn’t want to mess with that – and they still came out plenty fluffy. :) Before you start, preheat your oven to 400 degrees. Cream together the butter, shortening, sugar, eggs and vanilla. Then blend in the flour, cream of tartar, baking soda and salt. The dough will be thick but easy to work with:
This post may contain affiliate links for your convenience.
See my policies and disclosure page for more information.
Did you know if you don’t have cream of tartar, you can substitute two teaspoons of lemon juice or vinegar for one teaspoon of the tartar? Good to know! After mixed well, shape them into balls and them roll them in the cinnamon sugar topping:
Pop them in the oven for eight to ten minutes and that’s it! I did eight minutes on the dot for each batch and then immediately put them on another tray to cool. (These stacked cooling trays are awesome!) The cookies came out PERFECT. The recipe says this makes 48 cookies but I made mine bigger so I ended up with about 30. We now have 26 left. Oops.
I think snickerdoodles are the perfect Christmas cookie! The first time I tried this recipe I was surprised with how easy they were to make. Maybe baking isn’t that hard? ;) I may have had one for breakfast:
Do you have an easy Christmas cookie recipe you love? Feel free to share it in the comments! You can pin this recipe for later using this image: 
This easy cake "gingerbread" village is another delicious and super easy dessert for the holidays!: 
See more of our home here. To shop items in our home, click here! Never miss a post by signing up to get posts via email. Via https://www.thriftydecorchick.com/2014/12/the-perfect-christmas-cookie.html
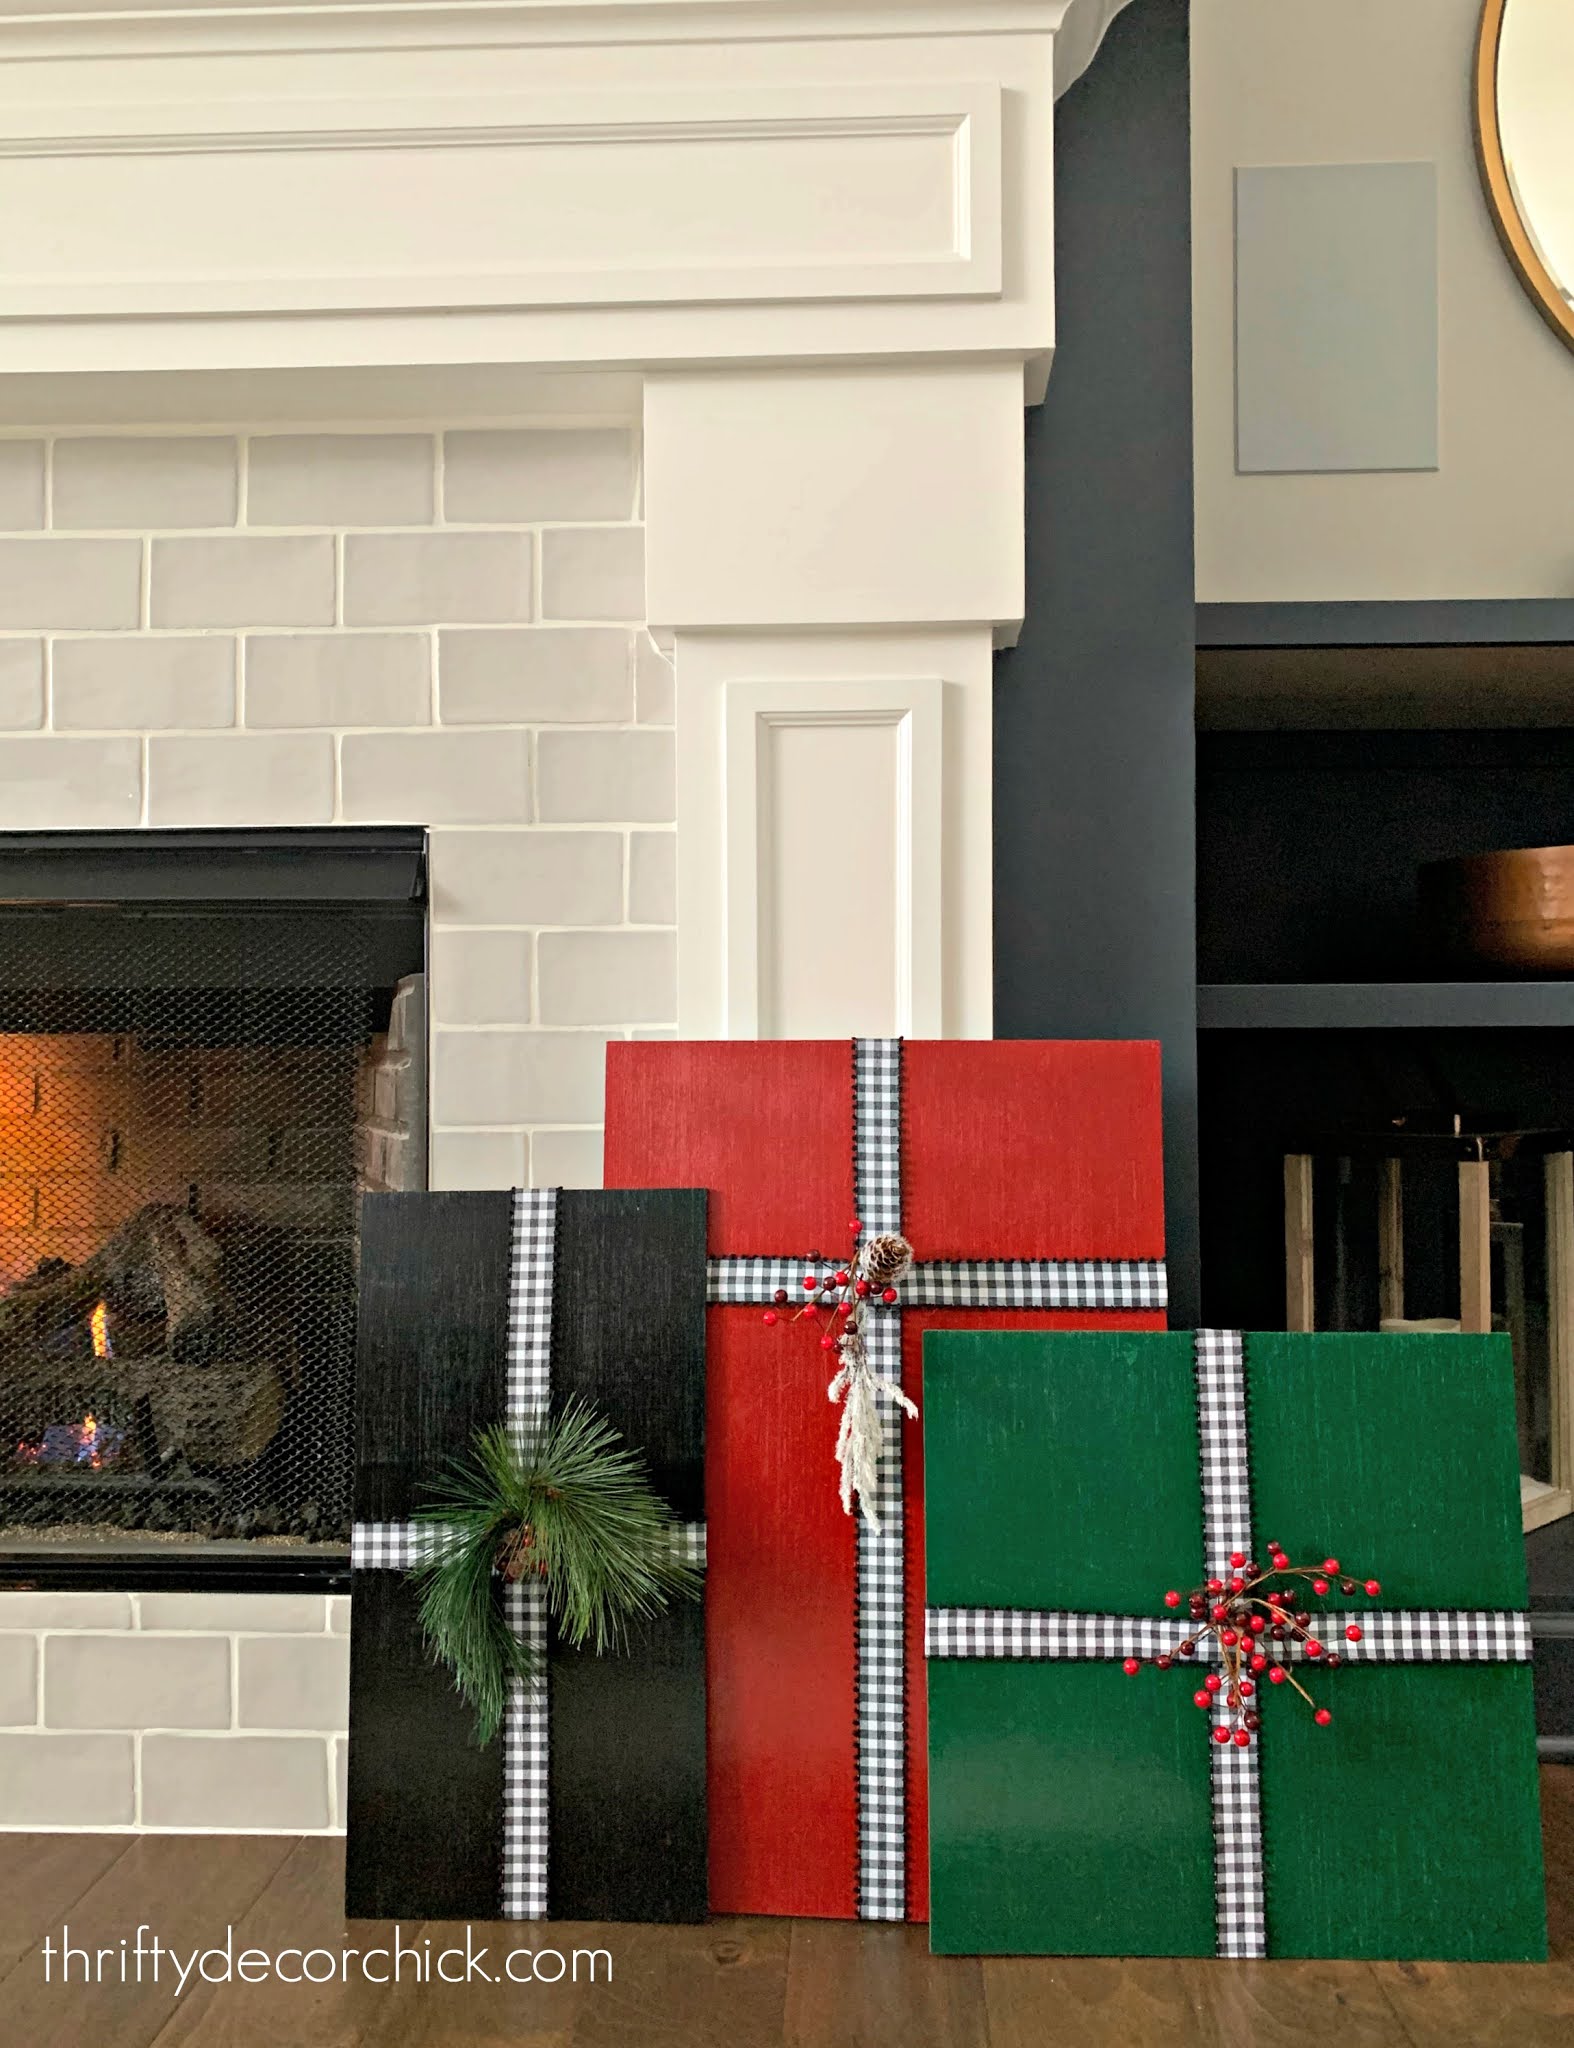
I think one of the easiest ways to add some festive touches around the house is with art -- of course they look great on the walls, but some holiday frames layered on a countertop, bookcases or picture ledges also goes a long way!
I've shared a ton of ways to do that for really cheap over the years, but I made some new ones this year so I figured I'd do a round up of all of the fun ways to make Christmas art.
I shared a few of them last week -- those involved glitter and that was super fun! Some of these are even simpler. :)
Gift bags (cloth or paper):
It doesn't get easier and cheaper than making holiday art with gift bags -- especially if you shop the after Christmas sales!
I just take any pretty gift bag -- this one was less than $2:

And figure out the best size for my frame.
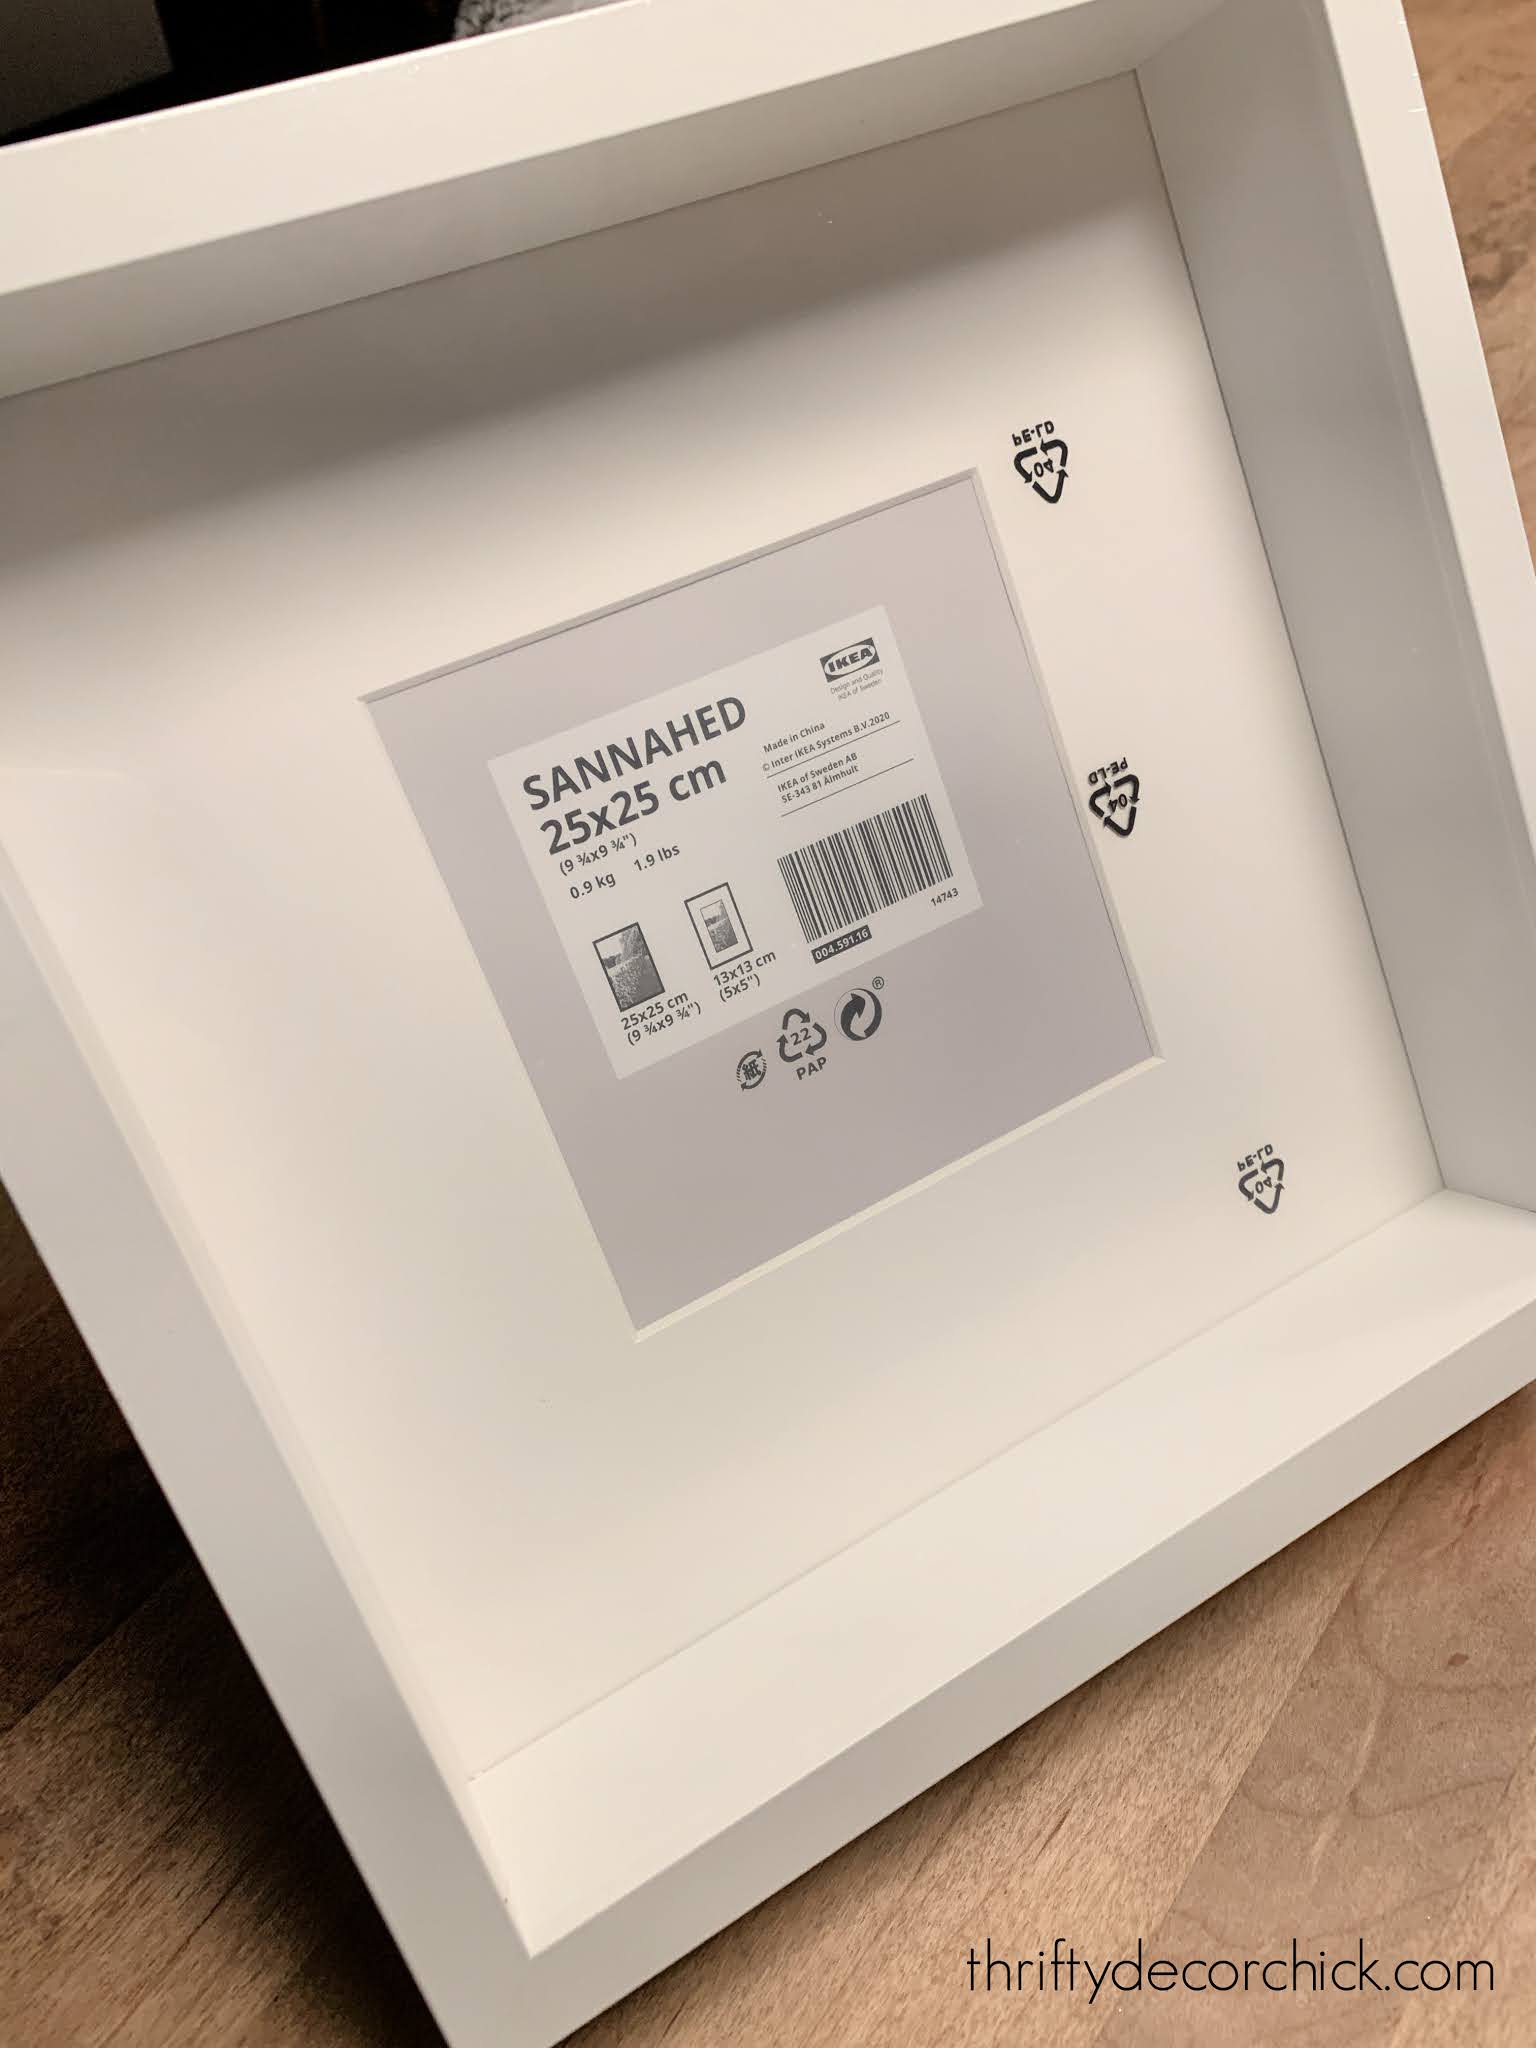
The Sannahed and Ribba IKEA frames work great for this because the design is simple and both are shadow-box like. Plus, cheap! This one was $5:
I spray painted it a gold color and cut the front of the bag to fit:

I've done this for years! It's an especially easy and fun way to decorate a kid's space.
I found this one in my wrapping stash:

And just threw it on top of another photo that was already in this frame:

This post may contain affiliate links for your convenience.
See my policies and disclosure page for more information.
That's the great thing about these -- you can buy frames specifically for them, or just cover the photo in the frame and take it out when you're done. (Or put it behind for next year!)
You can see the ways I've used fabric Christmas bags in our decor here!
Free printables:
I know, I go on about these every year (all year!) but here we go again. :) Free printables are such an easy way to change up your seasonal decor. You can see some of my favorite round ups here and here.
I made these myself years ago -- they always stayed in these frames, I just pulled them to the front for Christmas:

I always like to print some out for our kitchen frames:

This year I looked back on an old printable post and found some that I loved for my office. I have these botanical prints framed currently:

I downloaded some holiday patent printables to use this year.
I sent them off to the drug store to be printed so I get could a heavier, glossier look (and all that color would have used up our printer ink):

LOVE them! I paid more for these, but I'll have them for years. I just hung them with gold washi tape -- no need to even take the frames off the wall!
I think there are nine patent prints available, but I used five of them (two each) for this display:

Chalkboard holiday art:
Chalkboards are FUN! Take advantage of them during the holidays and do something creative! It doesn't take a lot to add a little something.
I shared my simple snowy chalkboard art with you last week:

Years ago I showed you this super easy image transfer trick -- if you aren't artistic at all you can use that to copy images you love onto your chalkboard:
I shared how we display our holiday cards on a door years back -- it's a fun way to show them off:

I was
So instead I flattened it out and framed it!:

It helps to iron it first and then I use a quick layer of spray glue to get the towel flat. You can reposition easily.
I sprayed the mat on that frame the green color from my Thanksgiving tablescape -- it matches the green in the towel perfectly! What a fun addition in the kitchen, right?:


They make me smile big when I pull them out every year! It only takes a few bucks worth of materials to make some really adorable snow art.
Wood cut outs from the dollar spot or dollar store make for easy art too. I showed you this glittery version last week -- I glued it right on top of gift wrap and framed it:

The dollar store had some really cute window clings this year and they got me thinking:

I used that same wrapping paper as a backdrop and stuck the window clings on -- well I tried. ;) I quickly realized they're only supposed to stick to...windows.
I improvised and used spray glue instead. It worked like a charm!:

I just lightly sprayed the back of the clings before laying them down on the paper.
I didn't realize till after I had stuck the first one that it would have been even easier to frame the window cling as is! I could have just cut the edges off and that's it. But if you want to fit a certain frame size, the spray glue makes it easy to make this art.
I placed most of this year's projects on the long DIY picture ledges I made for our basement last year. You can see that and the easy game and toy storage here. This is where we put our Christmas village as well -- it's such a fun spot!:

Most of these easy art ideas cost less than $10 each and are such a fun way to dress up your walls for the holidays! I just love them!
See more of our home here. To shop items in our home, click here! Never miss a post by signing up to get posts via email.
Via https://www.thriftydecorchick.com/2020/12/easy-DIY-Christmas-wall-decor-ideas.html
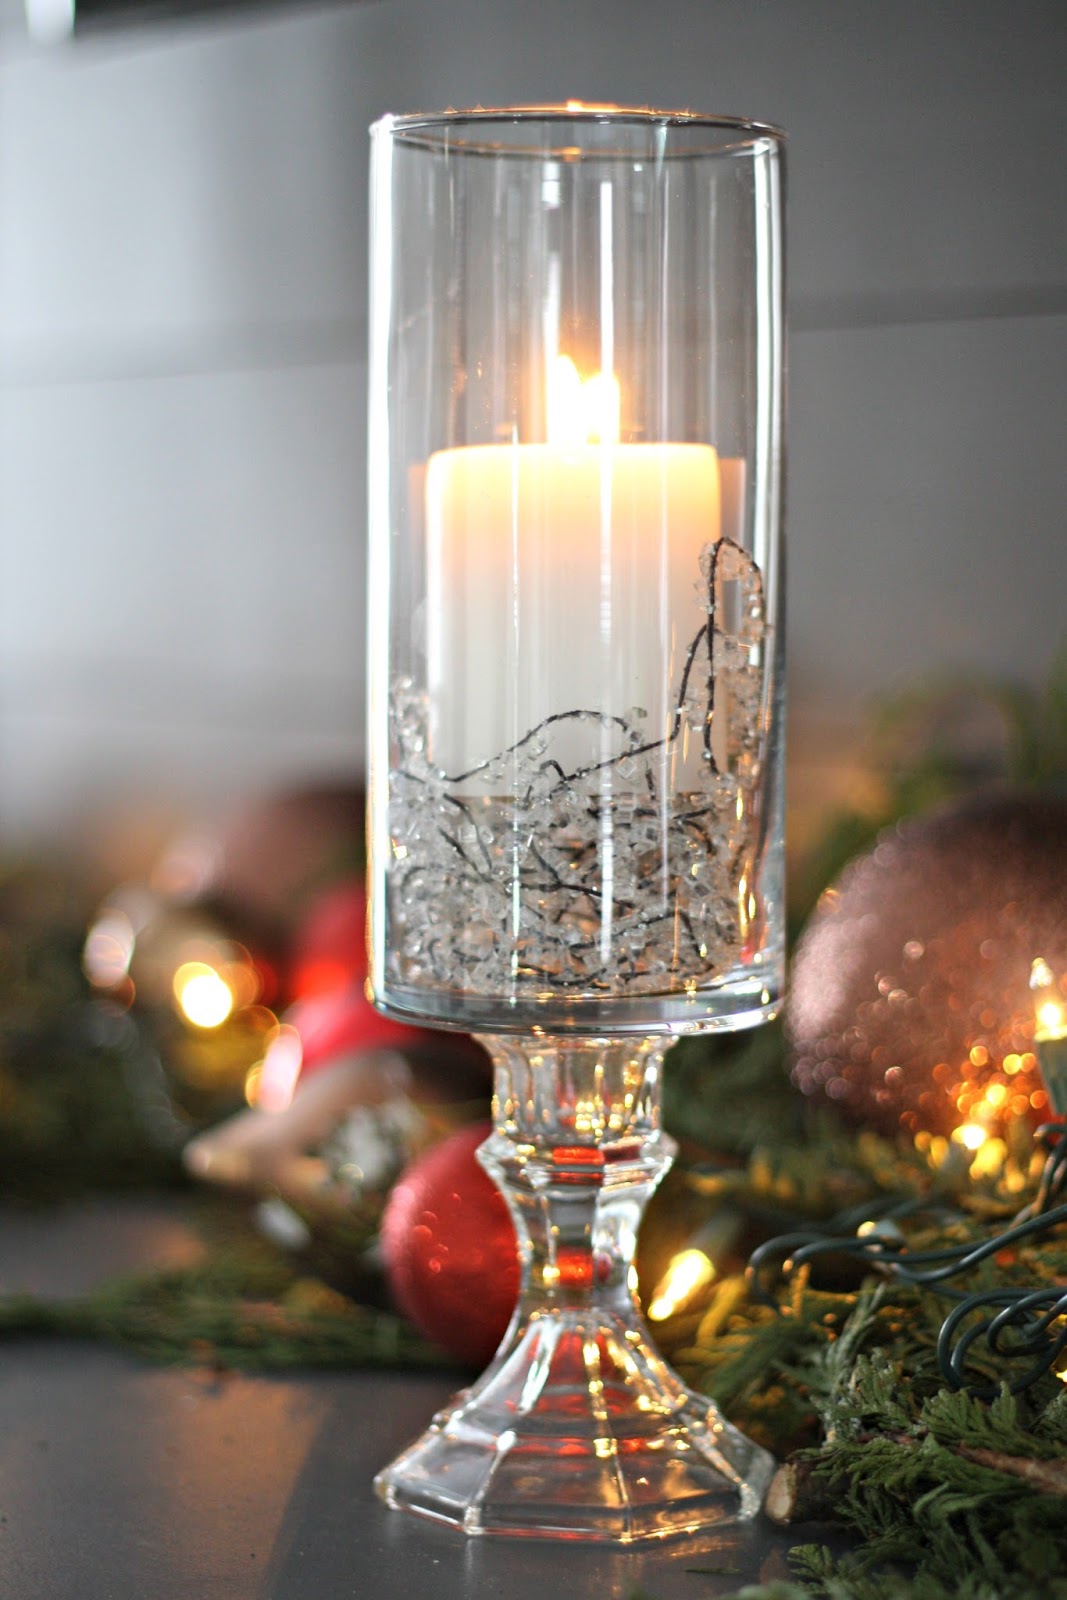
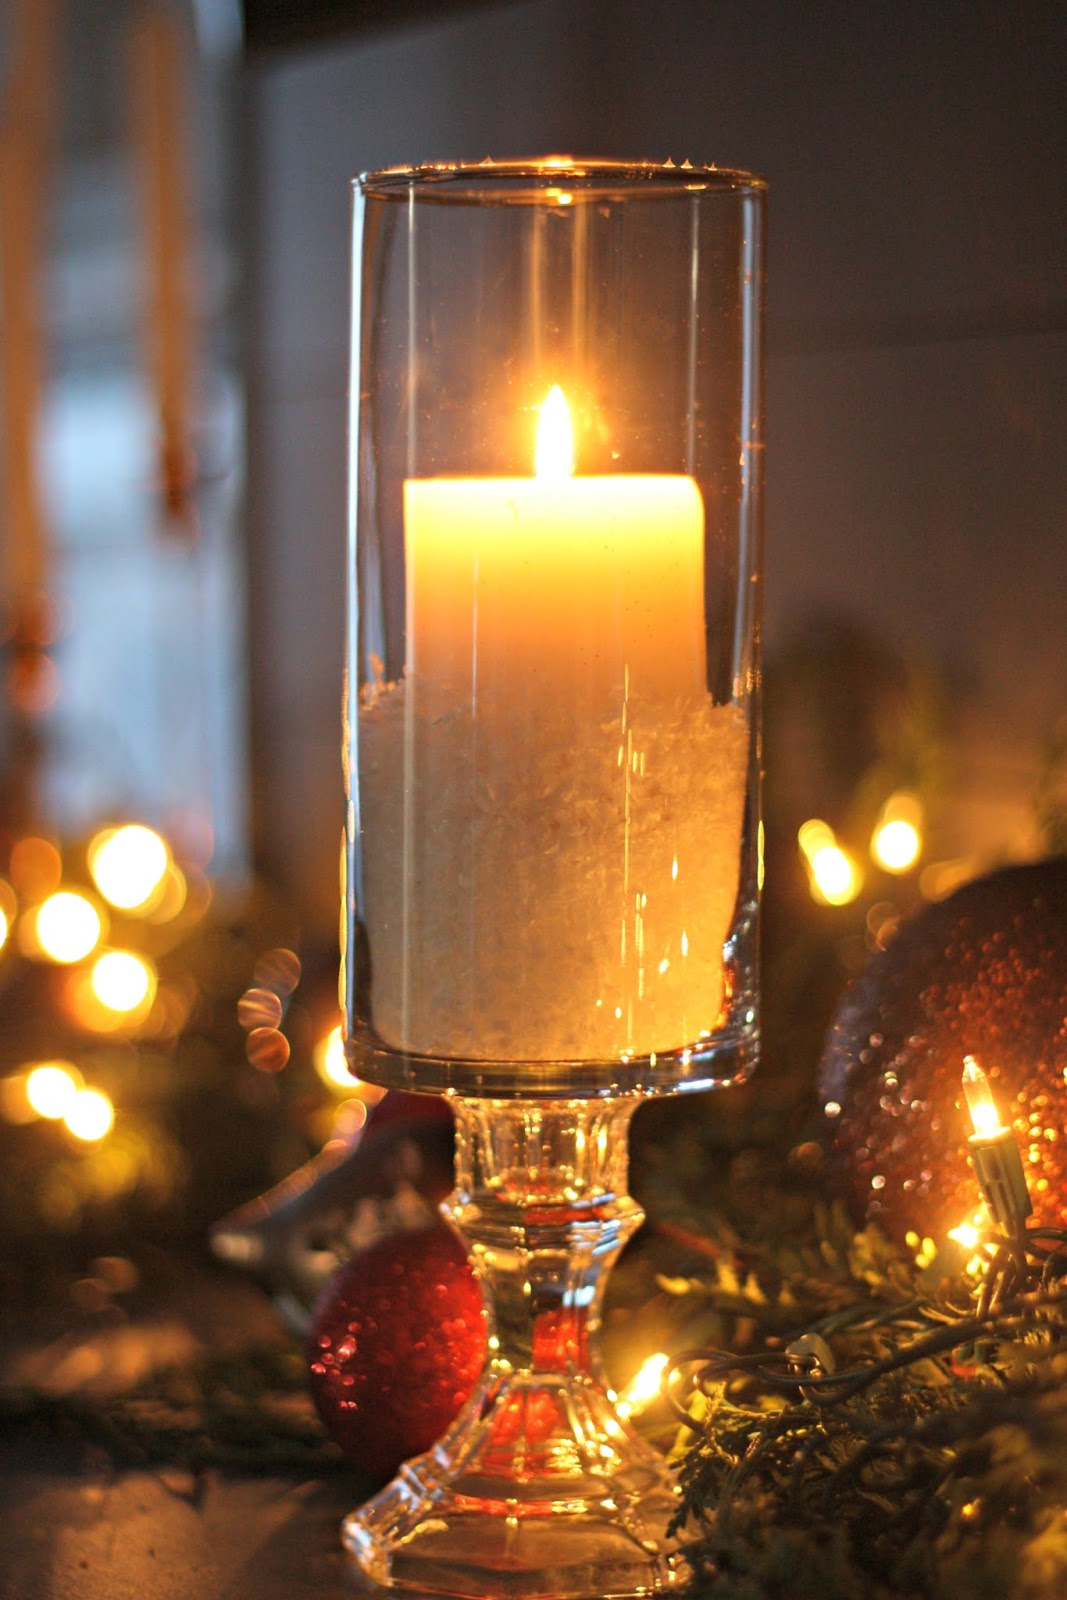
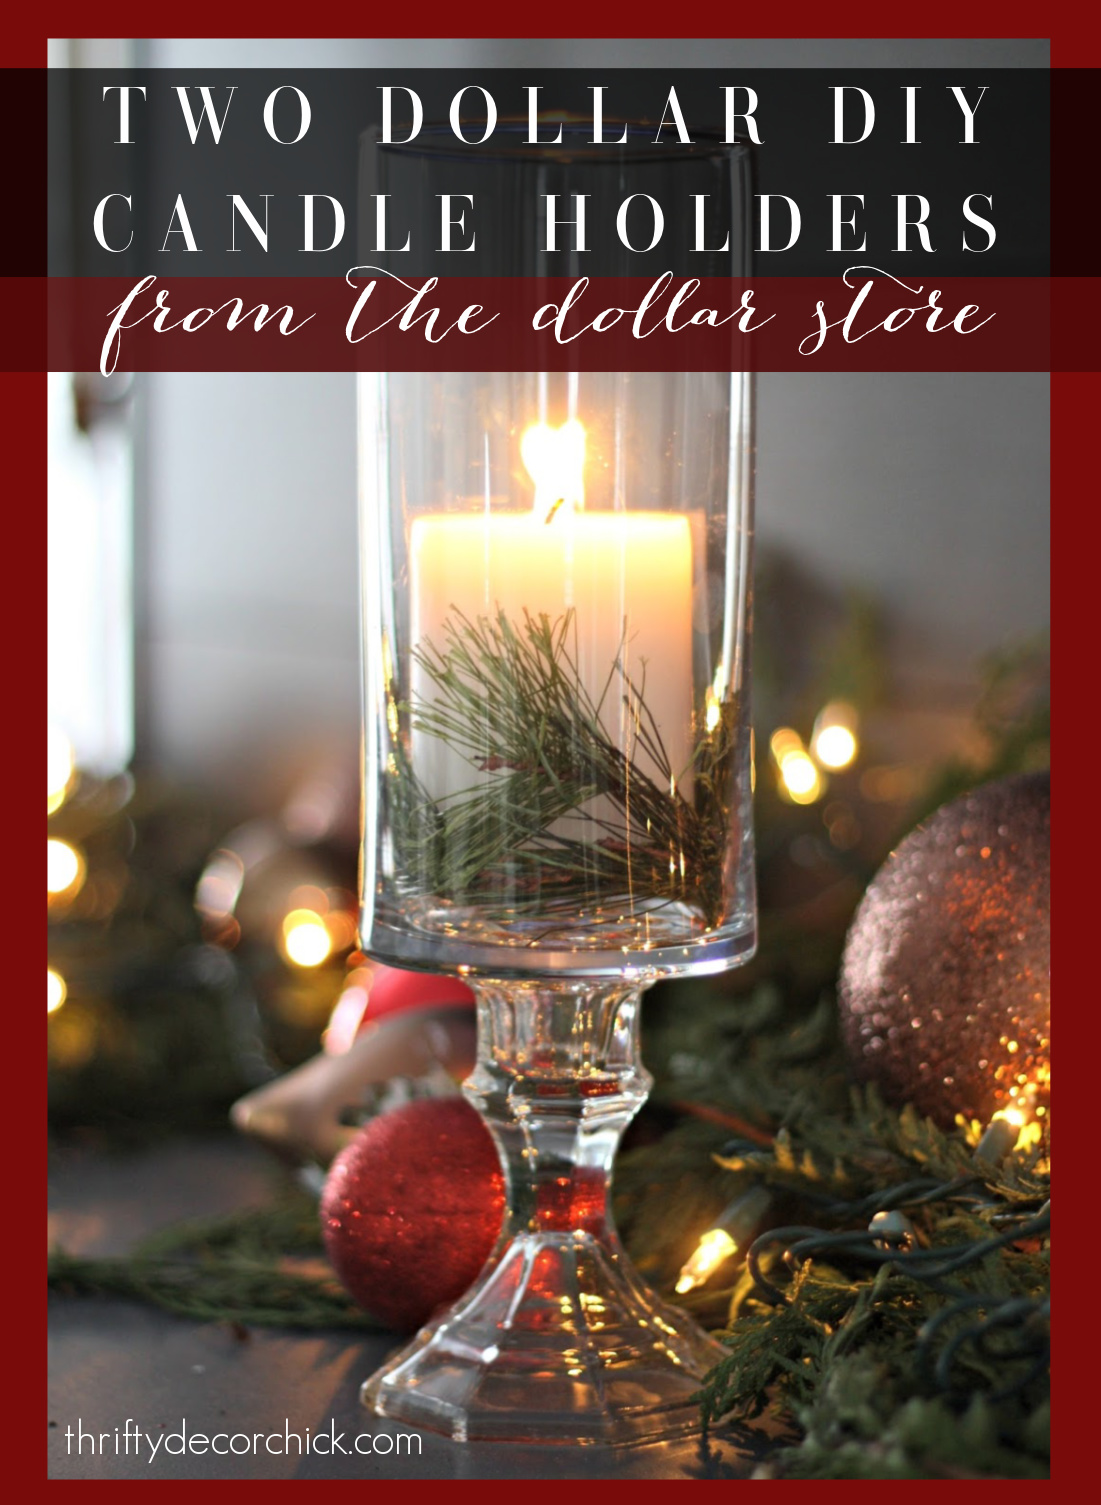
I'm continuing my dollar store candle DIYs with this beauty! You can see the snowy candles I shared earlier here.
This is such a good one folks...I actually made these years ago and I can't believe it's taken me this long to make them again! One of them broke a few years back and I never got to making a new match.
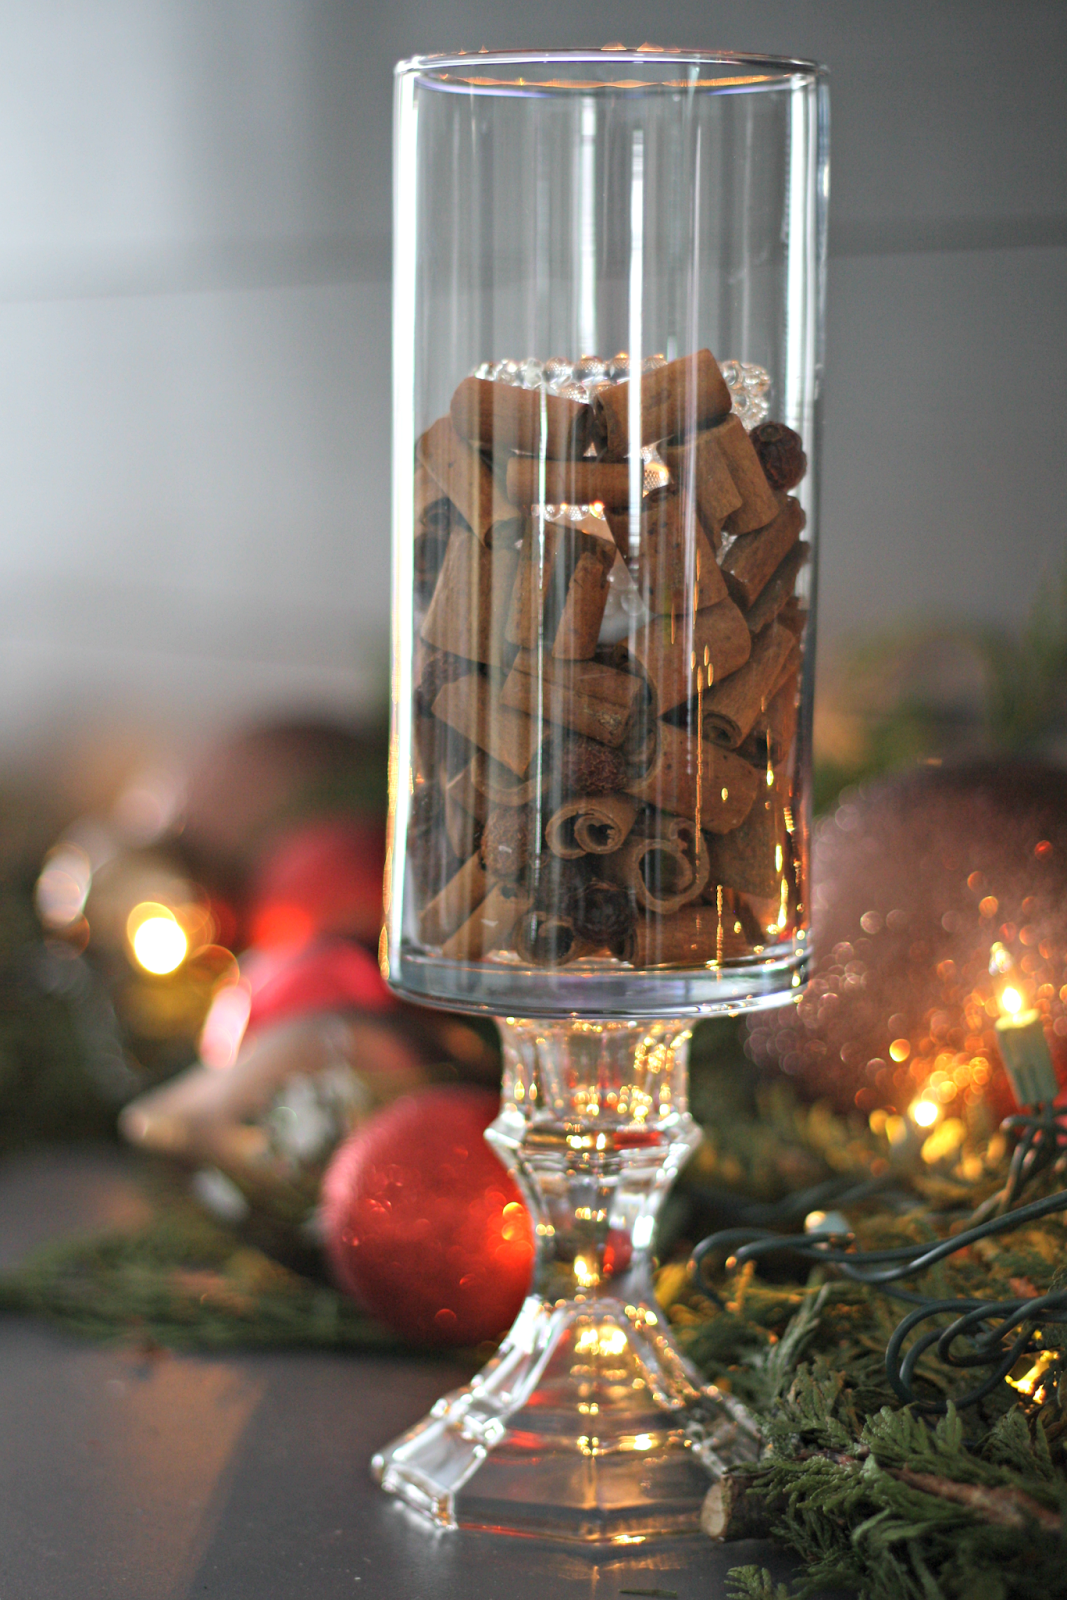
I started over with two this time and they are so pretty! You'll need two things from the dollar store -- a glass candlestick and a glass cylinder candle holder:

This post may contain affiliate links for your convenience.
See my policies and disclosure page for more information.
You can use any glue that will adhere glass. There's a few out there so just do what is easiest. This time I used this aquarium sealant I had from a past project:

Just few put a few little dabs along the top of the candlestick holder:

And center the larger candle holder on top. Leave it alone to cure for the recommended time -- my sealant said 24 hours so even though it was sticking fine within 20 minutes, I left them alone for awhile.
There are so many possibilities with these candle pedestals! I threw a few together to show you the different options for Christmas. I used cinnamon stick filler and nestled a glass votive inside with a tealight candle:
I love the simple look of some glittery berries too:

This is where I must say -- remember to never leave these unattended! If you want to use something like these berries I'd recommend a battery-operated candle -- I was using what I had to share these options with you.
I had some pretty glittery strands that I put in the bottom:
This simple one with a few sprigs of greenery is a favorite of mine!:

I love the fake snow in the bottom -- how pretty would that be with red candles? I wish I had red!:
I ended up using some gold sand I've had stored away -- it's so pretty!:

I felt like the new stacked stone fireplace needed some candlelight and these are perfect!:

These are super pretty with just the candle too! No need to add more -- but it's fun to dress them up for the holidays.
At two bucks a pop you could make a ton for a beautiful centerpiece on a table or buffet! They really are so pretty:

This is one of my favorite dollar store DIYs! You can do so much with them! They'd be pretty and simple gifts too. Do you have any dollar store decor hacks you love?
Here's an image to pin if you are interested in saving this project for later:
See more of our home here. To shop items in our home, click here! Never miss a post by signing up to get posts via email.
Via https://www.thriftydecorchick.com/2016/12/beautiful-diy-pedestal-candles-using.html
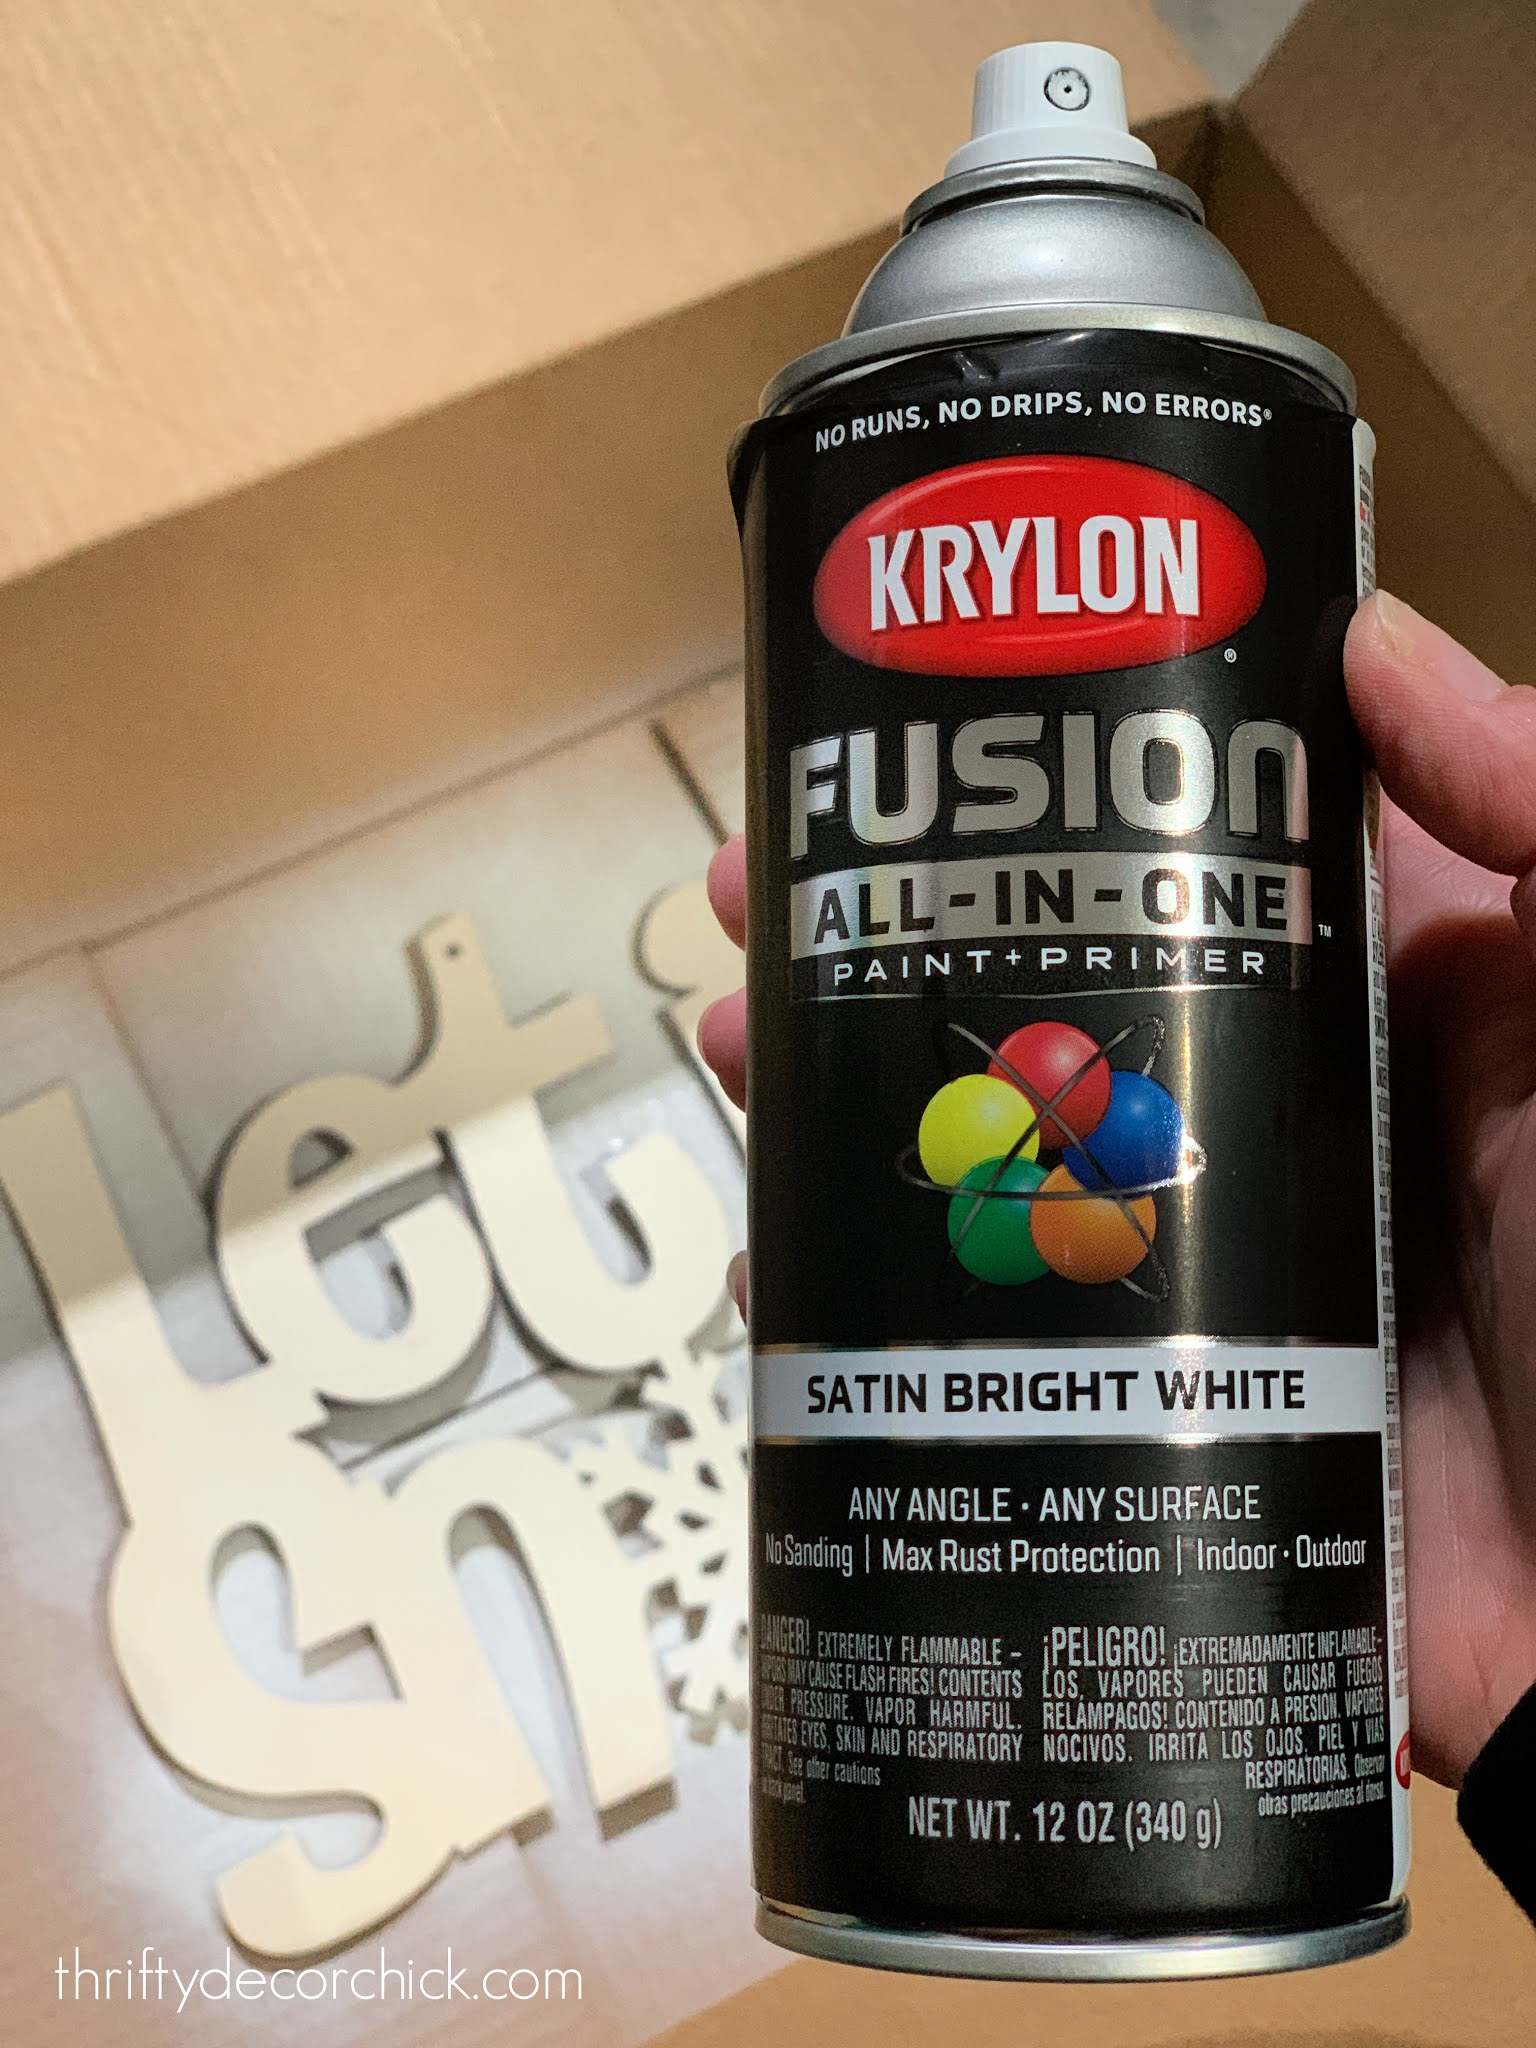
Oh my goodness, I've had more fun than ever decorating for the holidays this year! My husband keeps commenting on how festive the house is. (It is every year, but I've had a blast working on some crafty projects this season.)
I have been working with Krylon spray paint this year and have completed a bunch of smaller and bigger transformations -- you can see our painted kitchen hardware here, our outdoor makeovers and the little touches on our Thanksgiving table here!
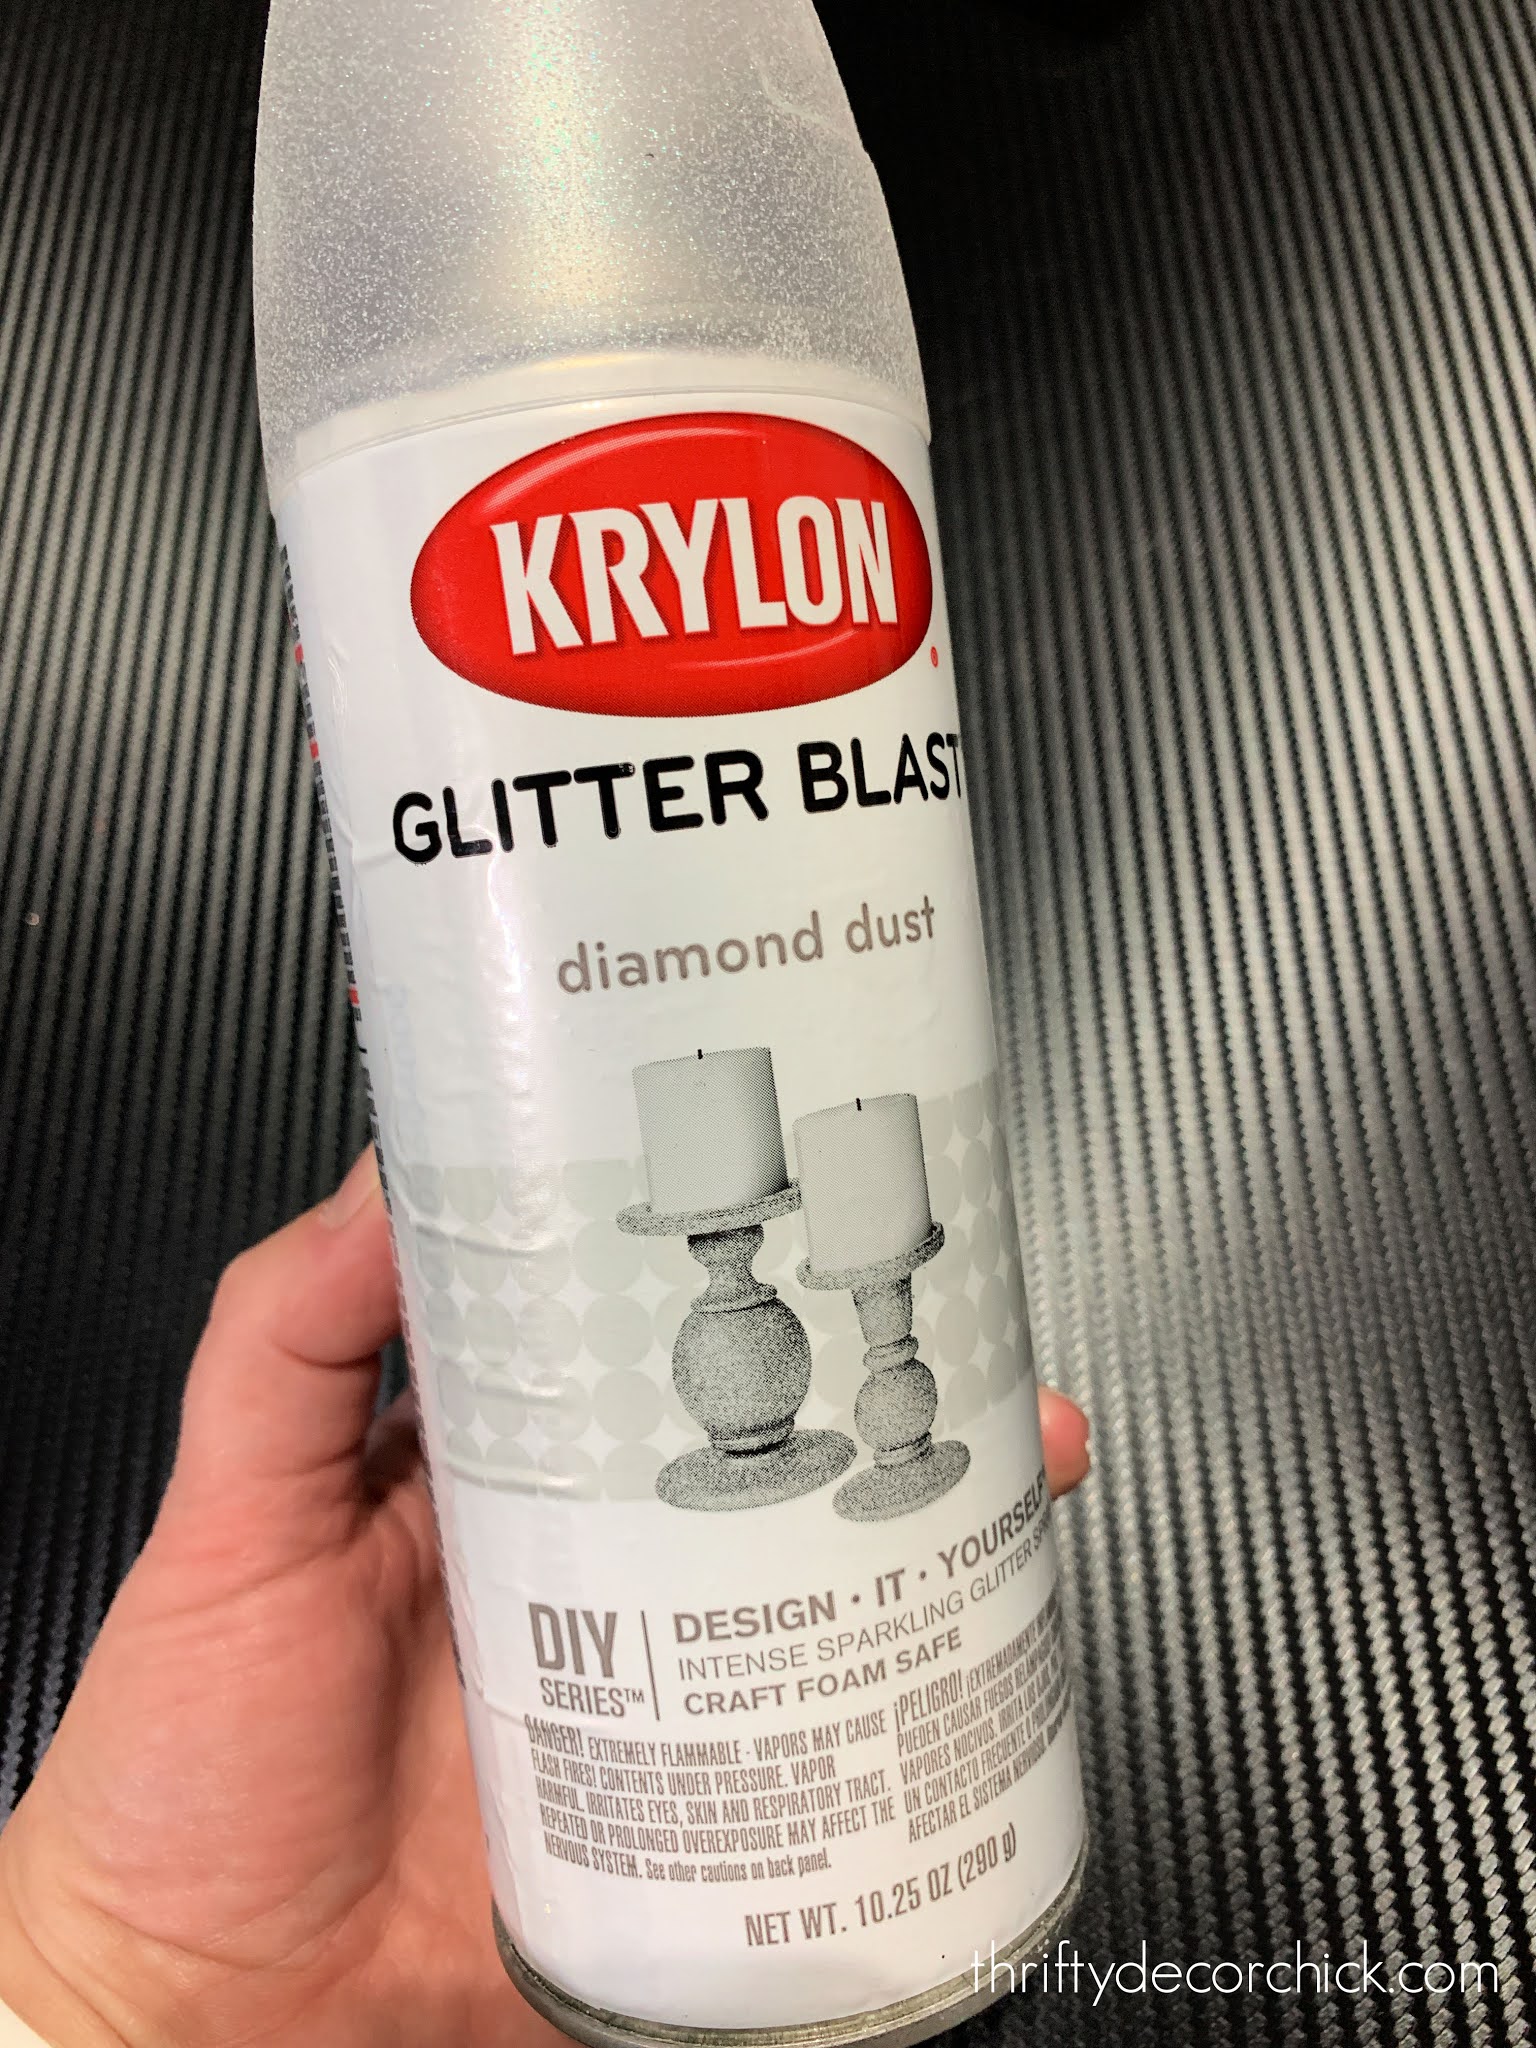
This one was probably the most fun because it involved GLITTER. The good kind that sprays where you want it, not the stuff that gets all over the place and haunts you for months. ;) Krylon has a fantastic Glitter Blast spray paint that I loved!
These are all super easy and REALLY inexpensive projects! My first project was in our mud room. We have a giant chalkboard I built soon after we moved in and I wanted to add some fun touches. I started with this wood sign I picked up at the dollar store:

I gave it a couple coats of the Fusion All-in-One paint in their Satin Bright White color:
SO FUN. It goes on so easily and dries super fast.
Look at that glitter!:

It's hard to see in photos further away but it glimmers in real life. I'm so impressed with this product.
I drew some simple pine trees and snow on our chalkboard and hung the little sign next to them:

The trees take seconds to draw -- the key is turning your chalk on it's side. :)
I just love it -- even our 13-year-old commented on how cute it was:

Next was a simple sign for our basement. This was another dollar store cut out:

This one got two coats of the Krylon Fusion paint in Gloss Red Pepper:

By the way, those Amazon boxes make for an easy spray paint spot!
When that was dry it got some glitter, this time in their Cherry Bomb color:
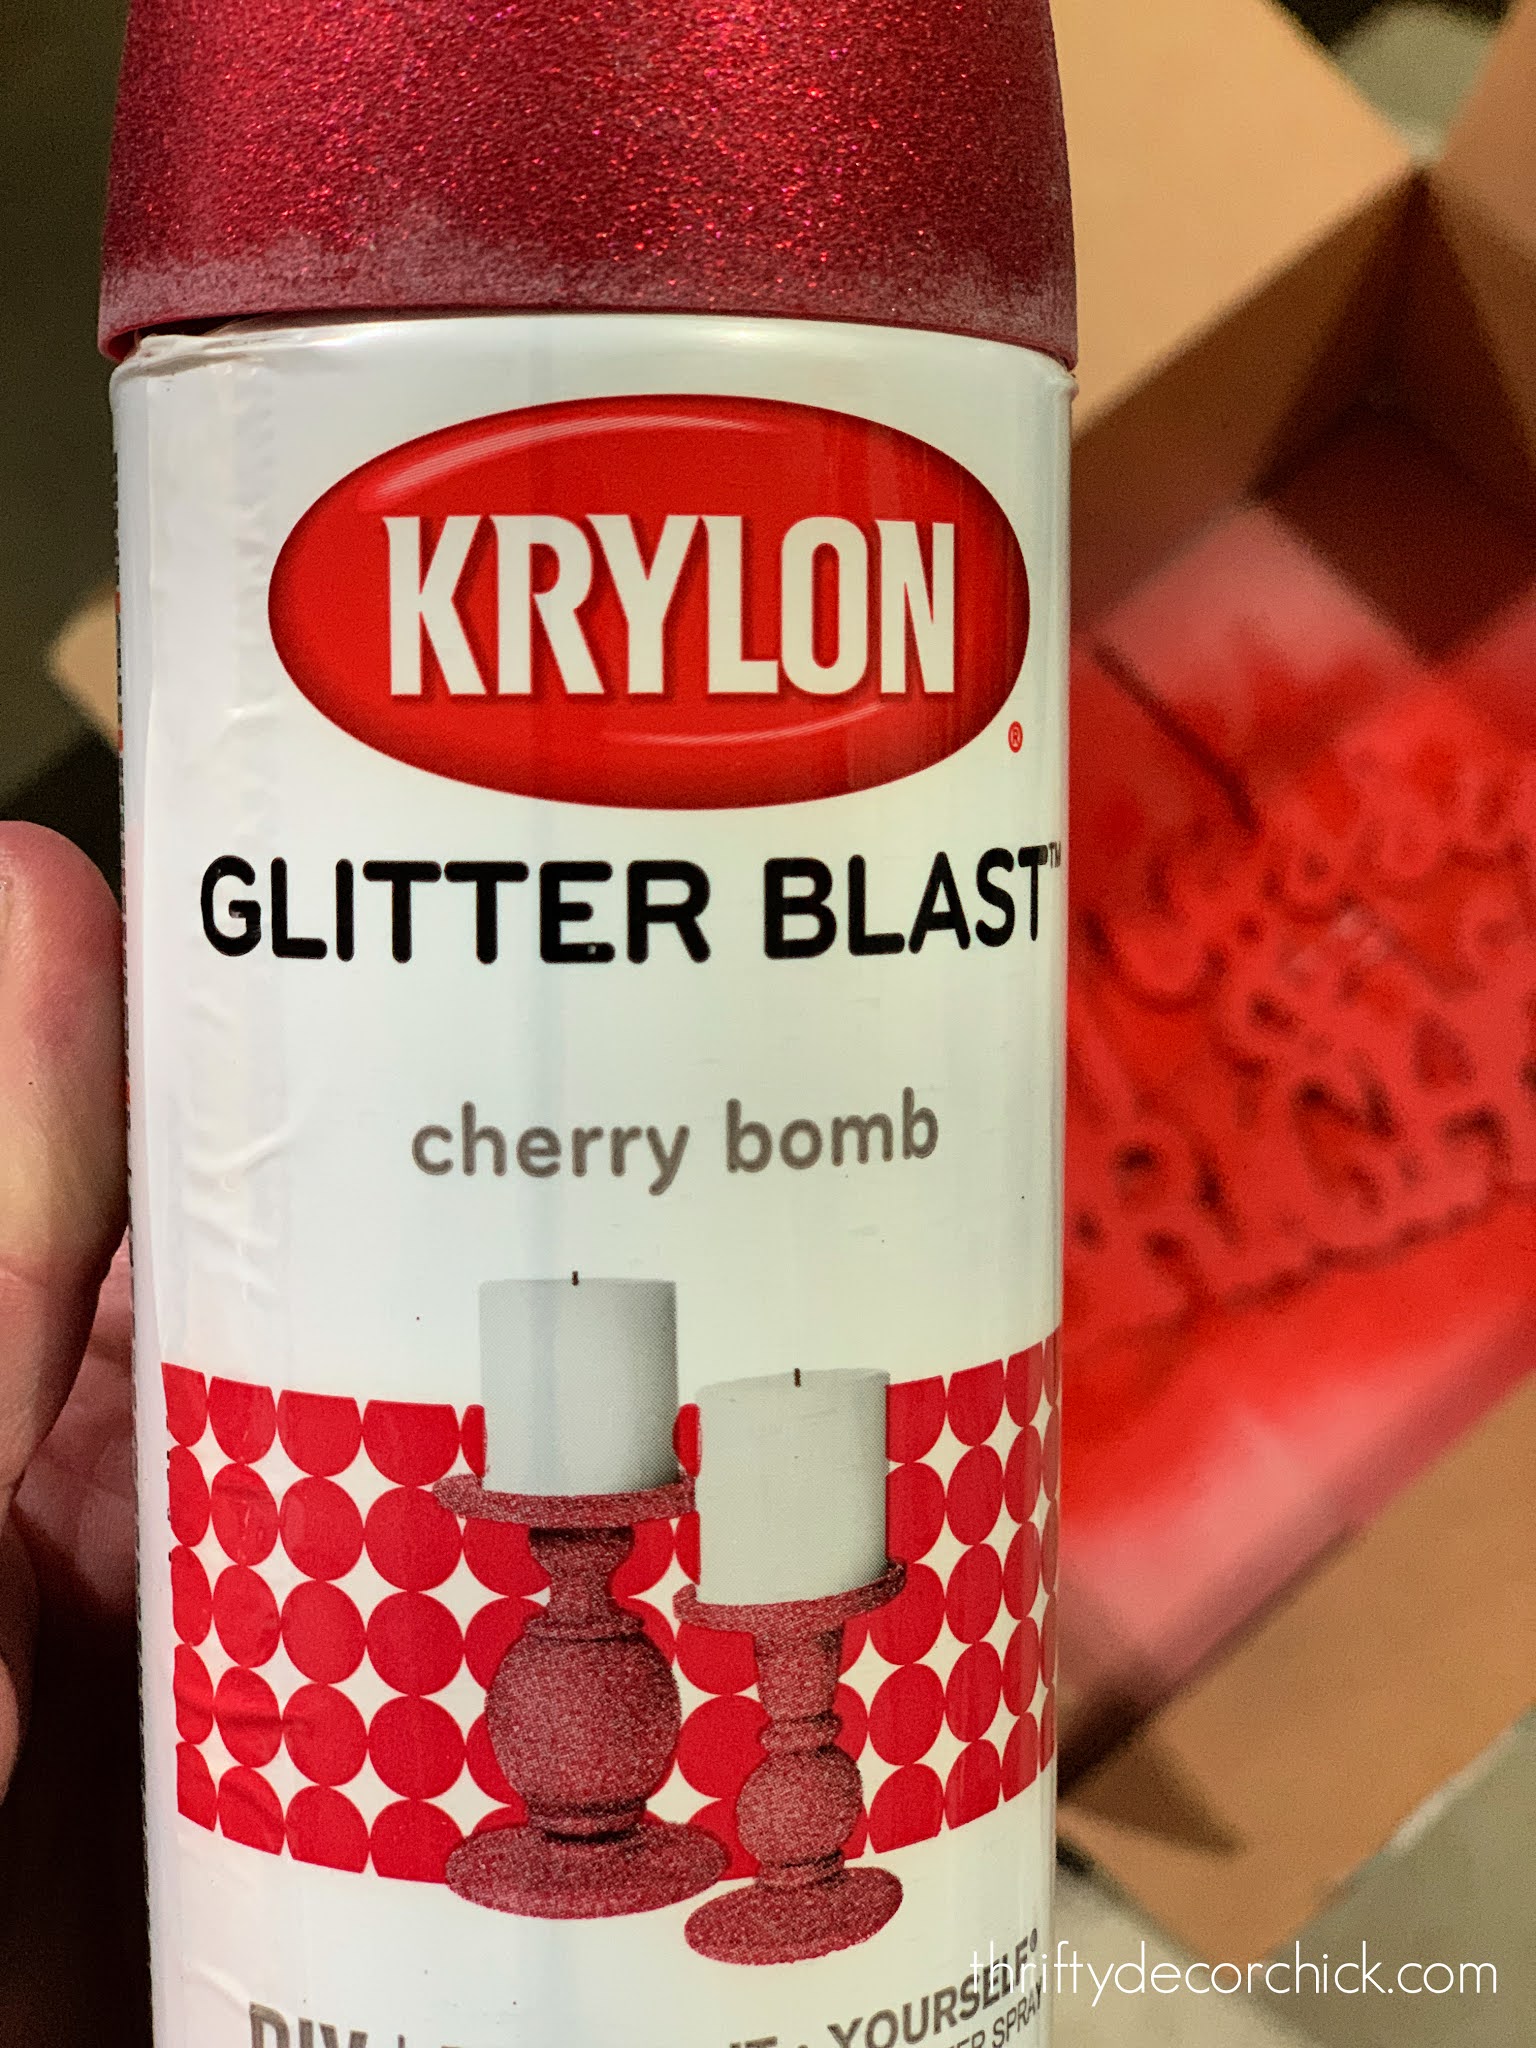
If you've used glitter spray paint in the past and not had good luck, you'll be pleasantly surprised with these products. They go on like a dream and the nozzle stays clear use after use. They cover well so you use very little.
SO pretty!:

I used an IKEA Ribba frame (they are the best!) and some birch wrapping paper as the background:

You can see how I used that birch paper for pretty holiday candles here! I'll show you where this ended up in our basement next week. :)
I also sprayed our stocking initials with the glitter spray as well. We all need a little bling here and there:

My final super simple project started with a wood laurel wreath from the Target dollar spot:

I used the Krylon Fusion All-in-One spray paint in Satin Black (that I used on our kitchen hardware) for this one.
After the black paint dried I added a couple quick coats of the Diamond Dust Glitter Blast spray on top. I used a free printable and hung the wreath on top for a simple display:

It is SO beautiful on top of the black! The red glitter would be pretty as well.
My giant upholstered bulletin board got some simple Christmas decor and I just love it:

I really love that the glitter stays put -- I planned to add a top coat to these but it's not needed. It doesn't have any fall out at all and sprays so easily.
So much fun! It has made my heart happy to work on these crafts this season. It's been healing in a way, after this crazy year. :)
You can see all of the awesome Krylon products and more inspiration here!
This post sponsored by Krylon but all opinions are my own. I only work with companies and products I know, love and would recommend to you.
See more of our home here. To shop items in our home, click here! Never miss a post by signing up to get posts via email.
Via https://www.thriftydecorchick.com/2020/12/glitter-holiday-craft-art-ideas.html 
Hello there! I'm joining in with a few of my blog friends to share one of our favorite rooms dressed up for the holidays! If you are new to TDC, welcome and if you are coming back, thank you! ? You can see more from each of the ladies joining in at the end of this post.
I was super into decorating our basement for Christmas this year! I've painted the walls in here a cozy dark gray, and I kept going with that comfy vibe with the decorations.
We have a huge, SUPER comfy sectional down here that's the centerpiece of the space:

This post may contain affiliate links for your convenience.
See my policies and disclosure page for more information.
Do you think we have enough pillows? I'm not sure.
I mentioned those faux leather pillow covers in my favorite things post this year -- I got them for our family room and loved them so much I got a couple more for down here as well. They look so good for the cooler months especially. (I'll link those and everything else at the end of the post.)
This room was the perfect spot for my DIY Santa hat cones:

That cute craft went nuts all those years ago when I made them. They still look great ELEVEN (whoa) years later!
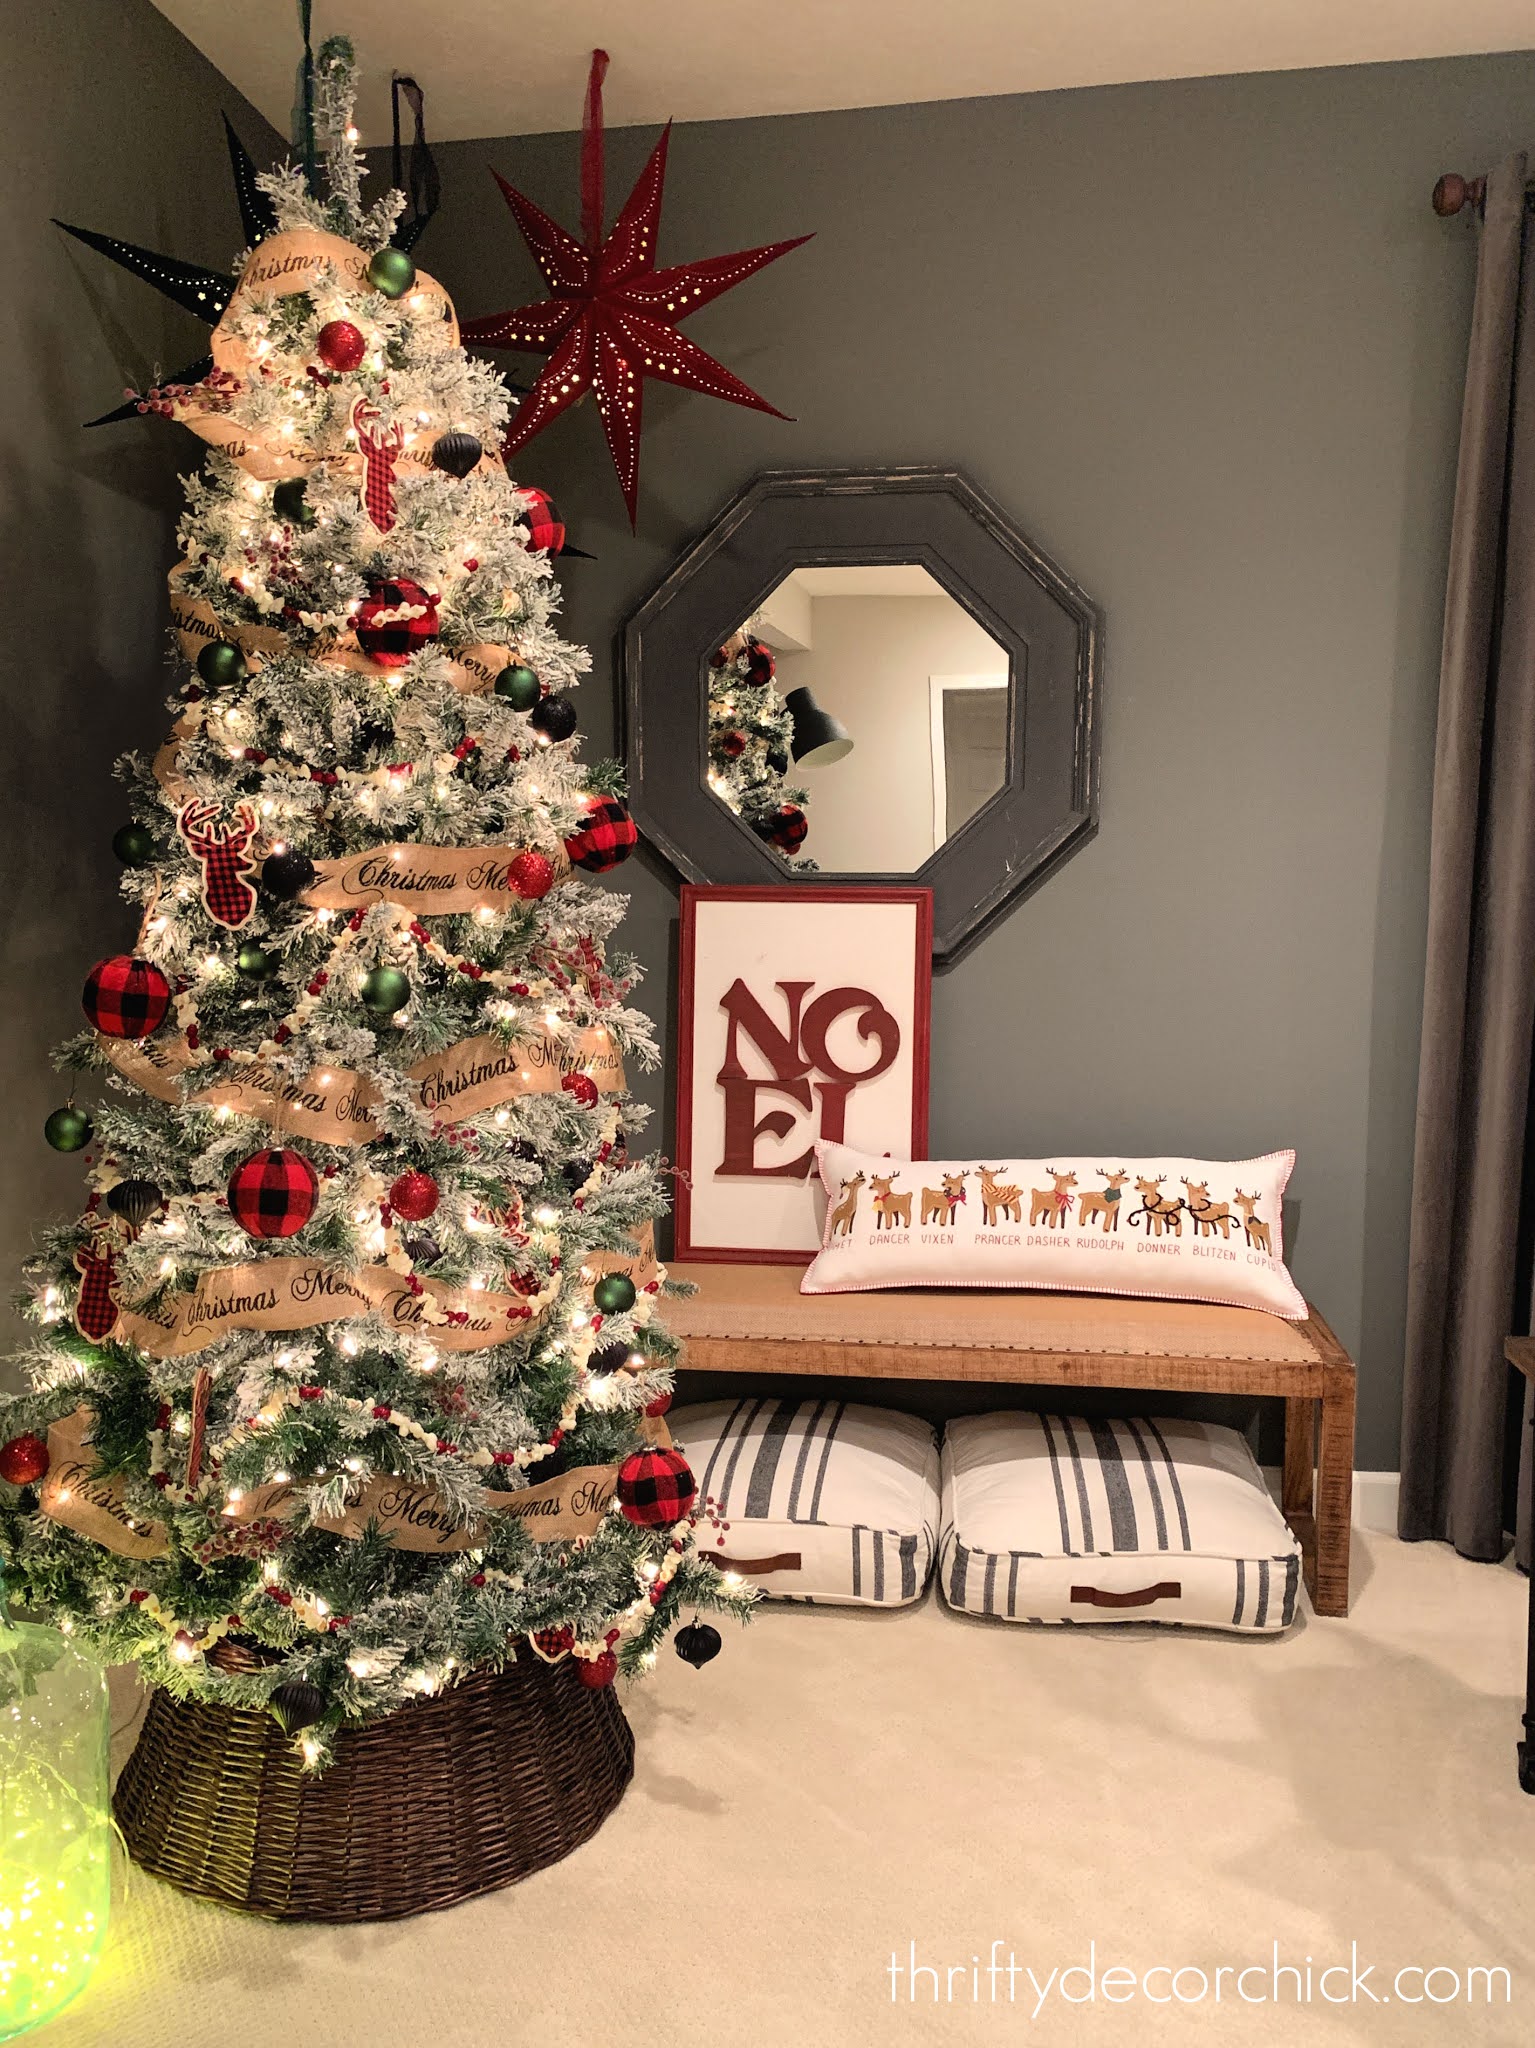
I shared the tree last week -- it's my favorite one in the house. I especially love the adorable berry and popcorn garland:

I have BIG plans for that side of the room -- I've known what I want to do since before we moved in. Just need to find the time... and money. ;)
That cute reindeer and Santa garland was from Michael's and I thought the map was the perfect spot to hang it!:

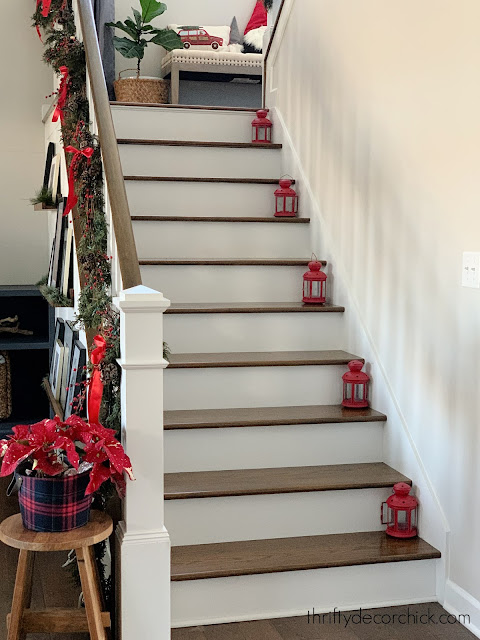
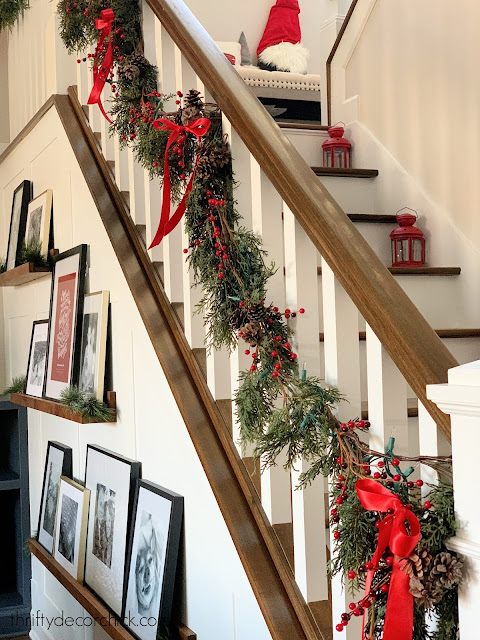
Here's a better look at our stairs down to the basement:

This is our view as we walk down the stairs:

That bamboo table was a second hand find that I fixed up -- we used to use it as a bar cart. It may turn back into that eventually.
I plan a to add some more details to these walls next year, but the dark gray has really made a big difference in here. We love it!:

That giant IKEA map art is one of my favorite finds ever. Unfortunately they don't see this one anymore, but they still have this version. (I'll include a couple other options below as well.):

The nine prints on the wall are all Disney art. They have a retro look that I love:

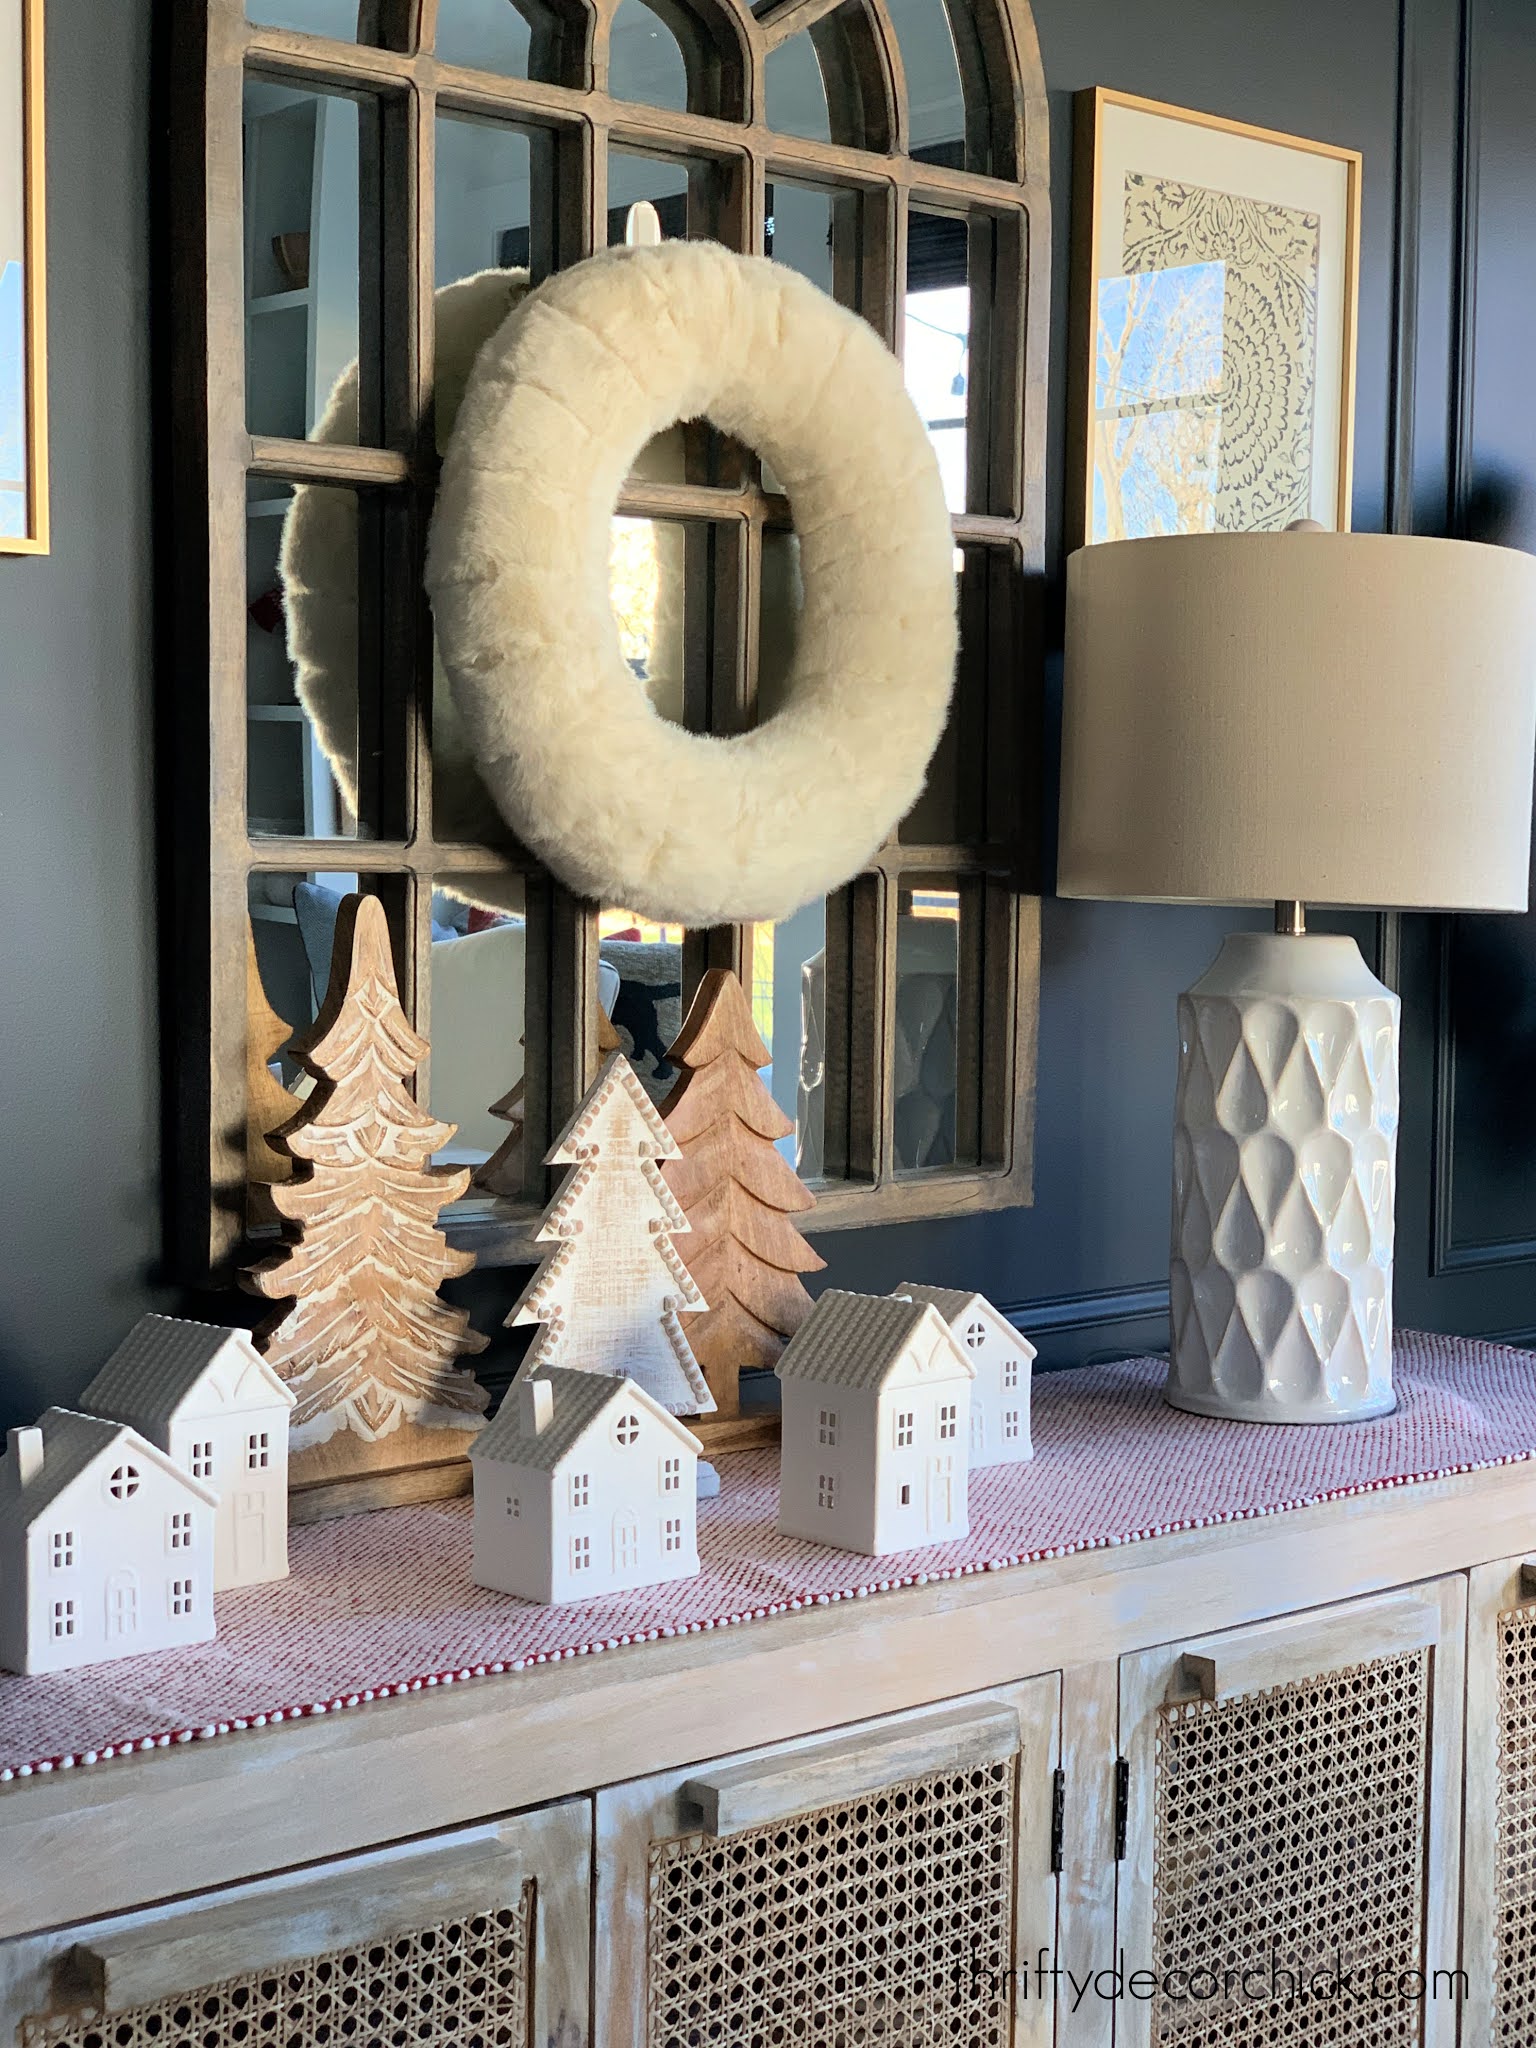
If you missed those adorable fluffy trees on the table you can see how I made those here.
We spend most of our evenings down here from November to March. It's our little cocoon away from the world!:

I'm so very thankful for this spot, especially this year. I hope you enjoyed it as well. :)
Here's more info on some of the items and you can click on the photos to get to links as well:
House on coffee table is from Walmart but I sprayed it red :)
Rug is from HomeGoods (years ago)
Drapes are Sanela from IKEA
Wood and metal side table I fixed up

See more of our home here. To shop items in our home, click here! Never miss a post by signing up to get posts via email.
Via https://www.thriftydecorchick.com/2020/12/rustic-basement-Christmas-tour.html
I've had so much fun decorating our basement for Christmas this year! It's already such a cozy space, so I went with that and used a lot of traditional holiday colors and softer textures. It has a slightly rustic vibe and we just love it!
I got new ornaments for the tree down here because I've never loved what I had on there before. We have a flocked tree and for years I had metallic tones on here that felt cold. I found some really cute items that warmed it right up, and it's our favorite tree in the house this year (yes, there are numerous trees!).
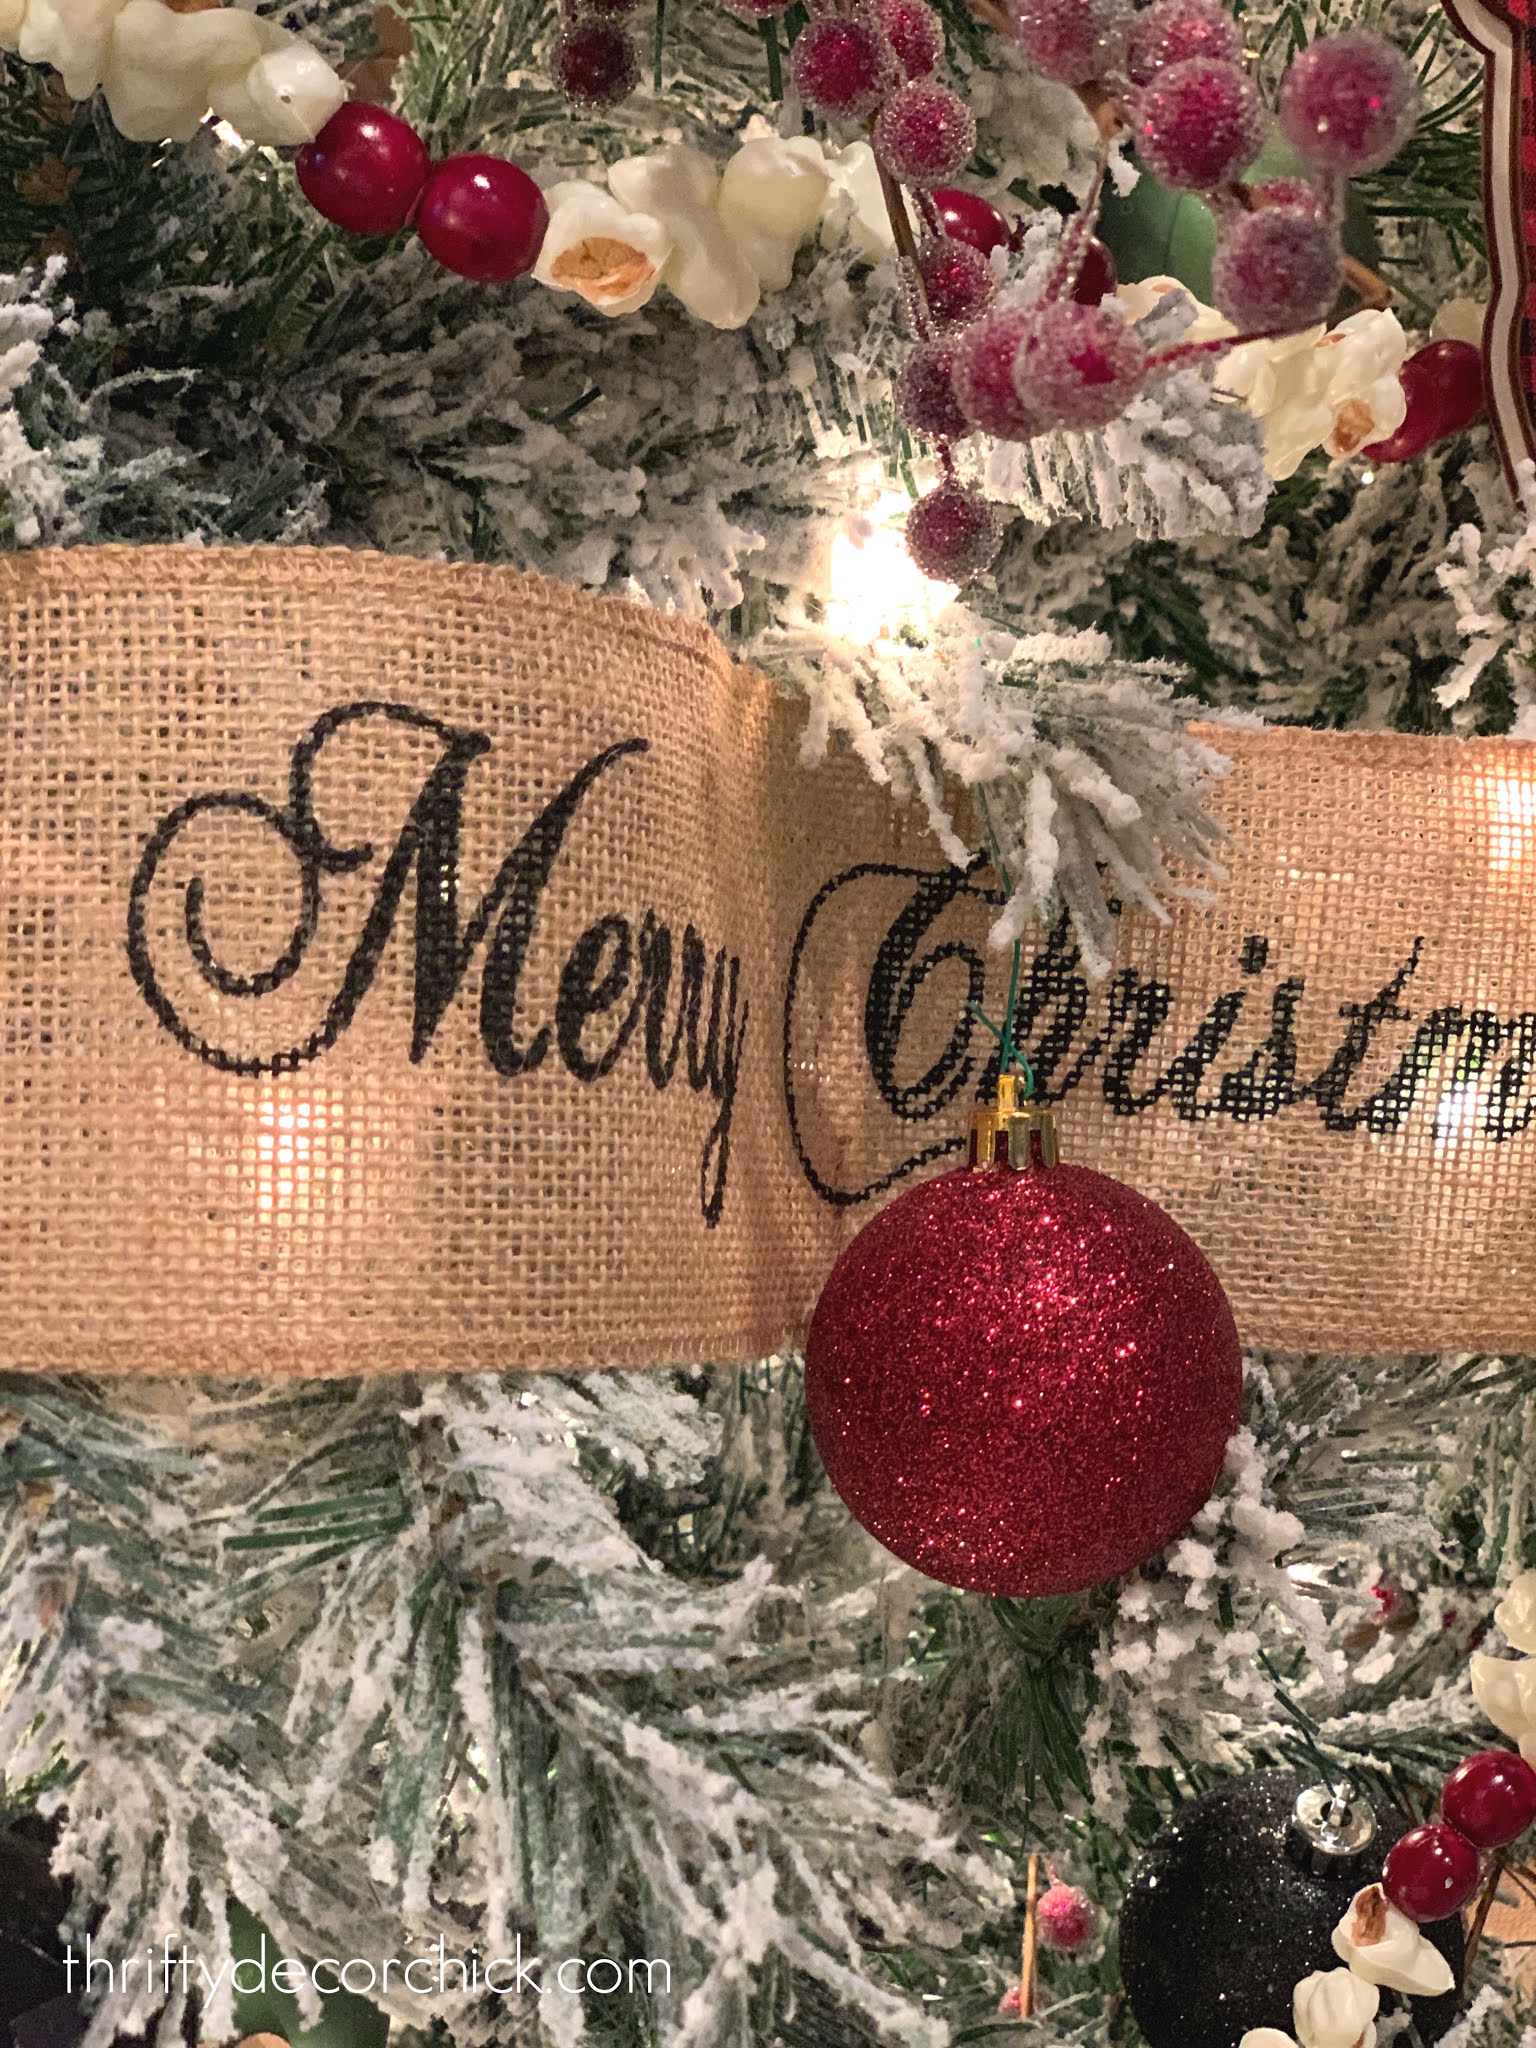
I've had this burlap Merry Christmas ribbon for years and draped that in the tree first:
This post may contain affiliate links for your convenience.
See my policies and disclosure page for more information.
I've had it forever but found a similar one (in red, love it!) here! I bought red and black gingham fabric covered bulbs that instantly warmed up the tree as well. (I'll share similar products at the end of the post.)
I went through every bit of our Christmas decor this year and weeded out stuff we don't use anymore -- that's when I found these reindeer cut outs in the same gingham design:

They are wood and sticky on the back -- I left the paper on the back and then drilled a hole into each one to use them as ornaments:

I can't remember where I got those, but I think maybe it was the Target dollar spot years ago.
My favorite find this year is this adorable berry and popcorn garland -- too cute!!:

I filled in the rest of the tree with red, green and black ornaments and hung these large velvety stars behind it in the corner. I found those at Hob Lob as well:

The stars are so beautiful! I just love them. I love all of it! :)
You can see how I made that Noel knock off art here (I made that forever ago!). That cute lumbar pillow was a HomeGoods find:
I'll show you the rest of this room next week -- it's just the best. We've spent every evening down here for the past couple of weeks.
I believe this tree was from Walmart, but we've had it for a long time now. This flocked tree is super similar, it may be the same one. I finally love how it's decorated...only took me about six years! ;)
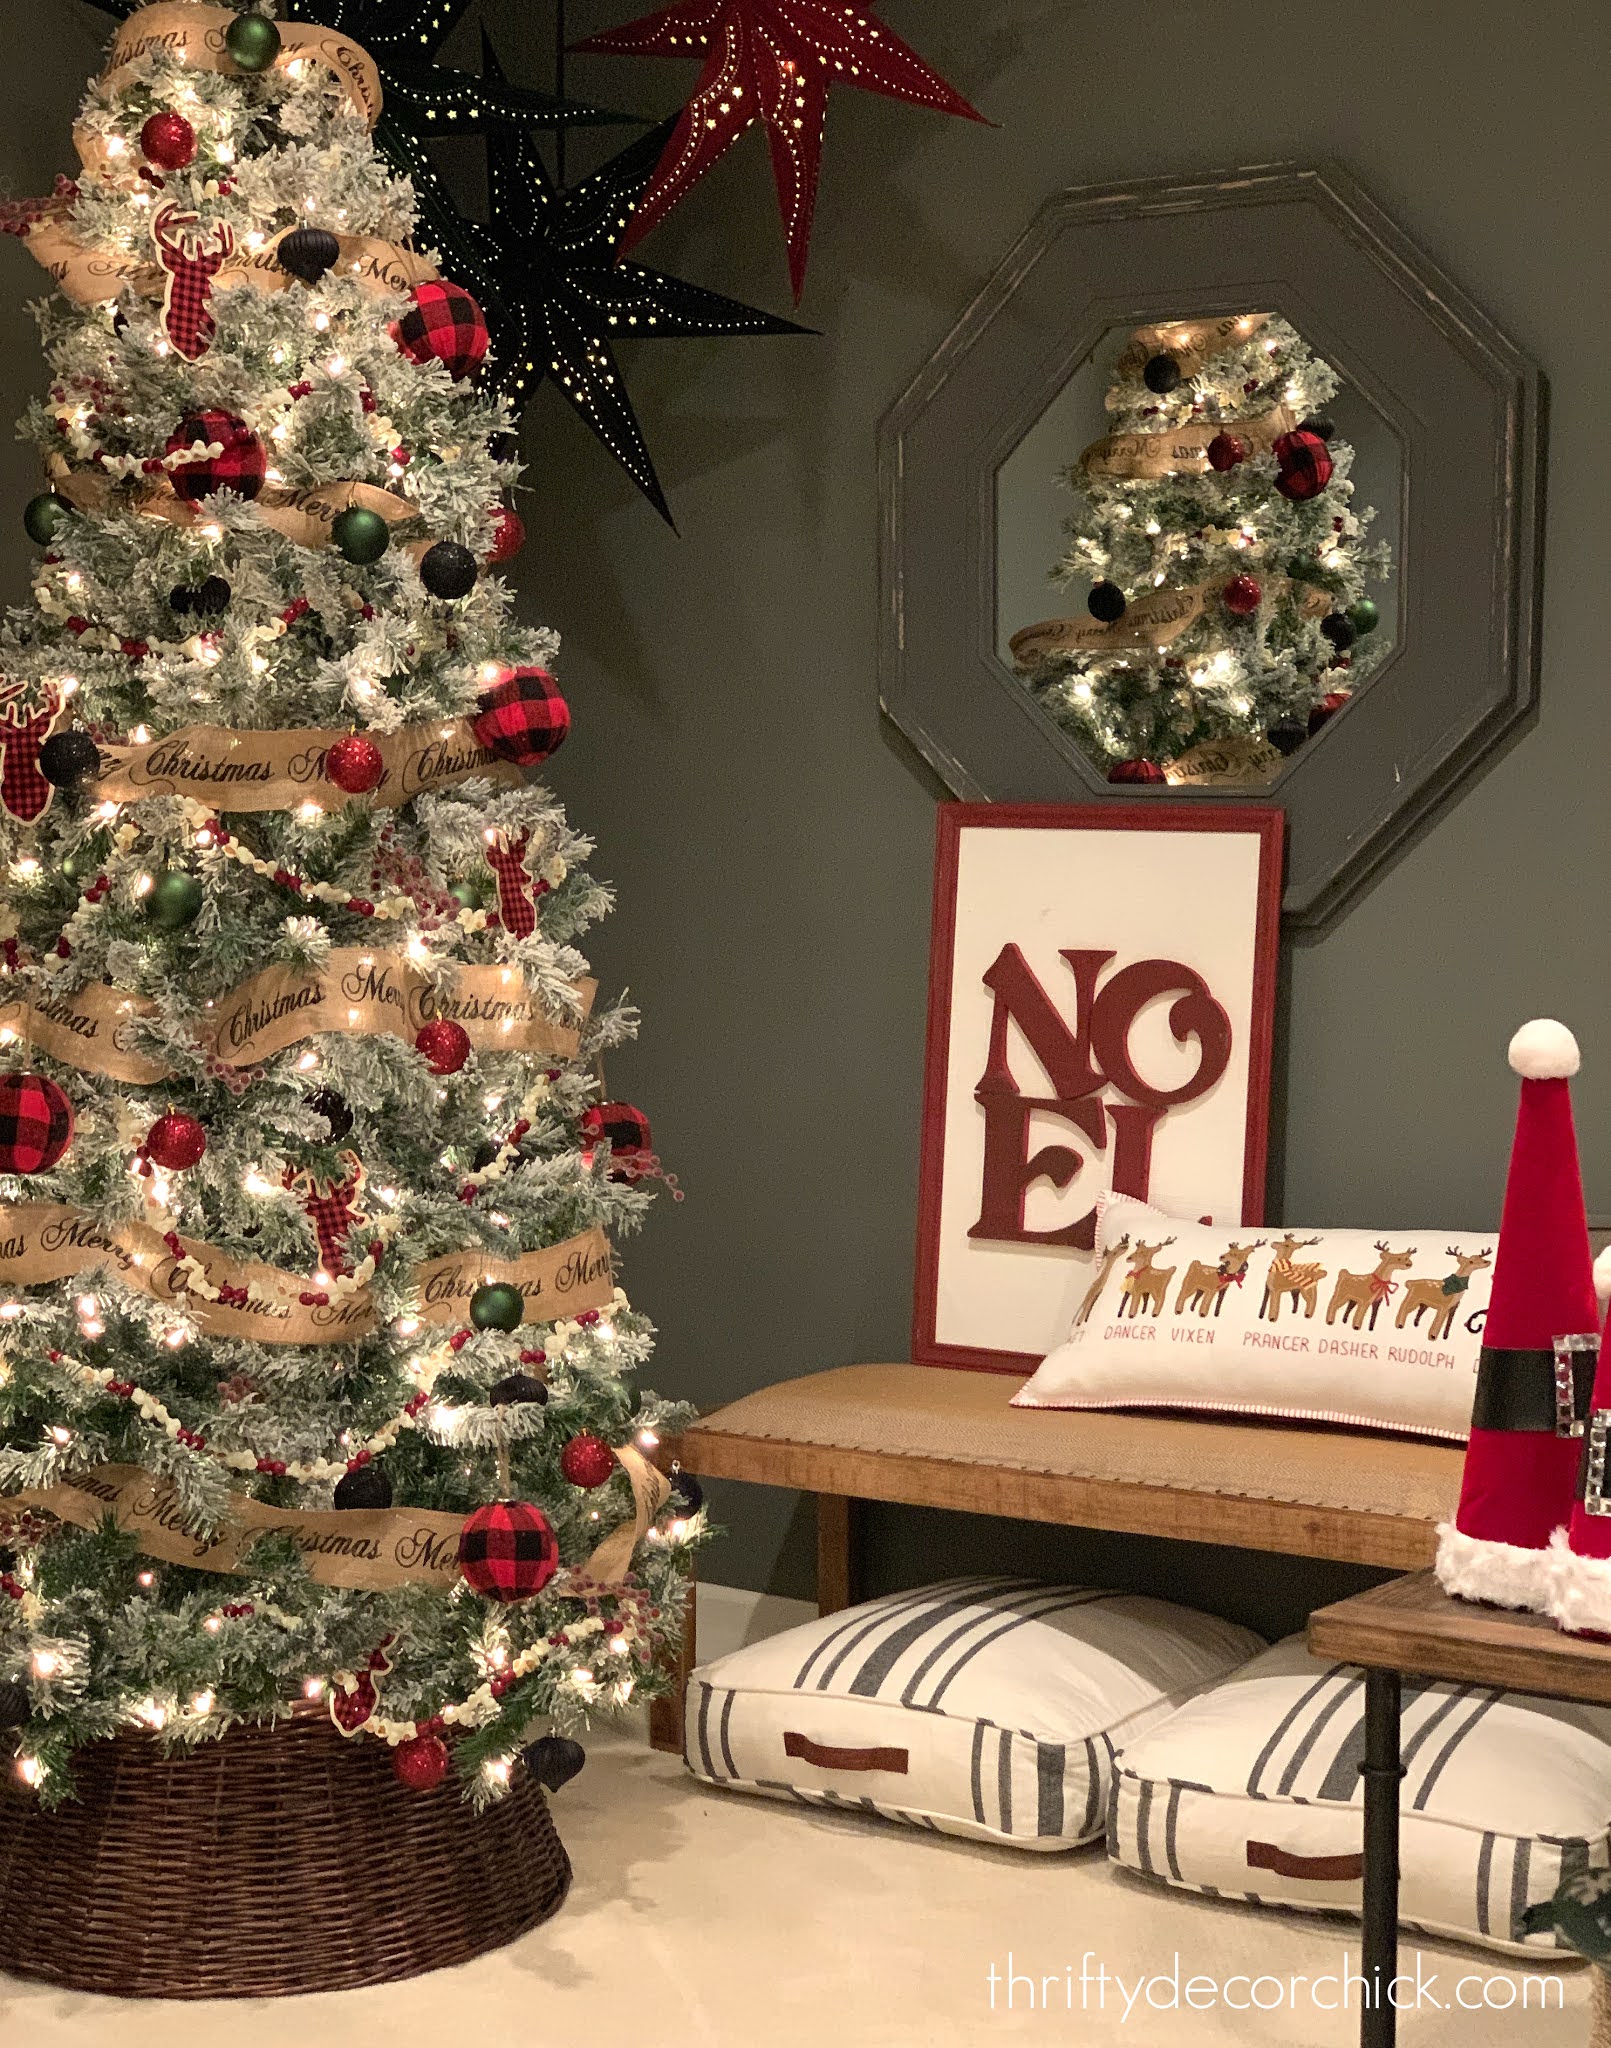
If you have more than one tree, do you have a favorite? I love the traditional decor on this one, but I think the black accents are what really pulls it together. It's perfect down here with the moody wall color! (See more about that dark gray wall color here.)
You can shop similar products here!:
See more of our home here. To shop items in our home, click here! Never miss a post by signing up to get posts via email. ;
Via https://www.thriftydecorchick.com/2020/12/red-black-gingham-Christmas-tree-decor.html
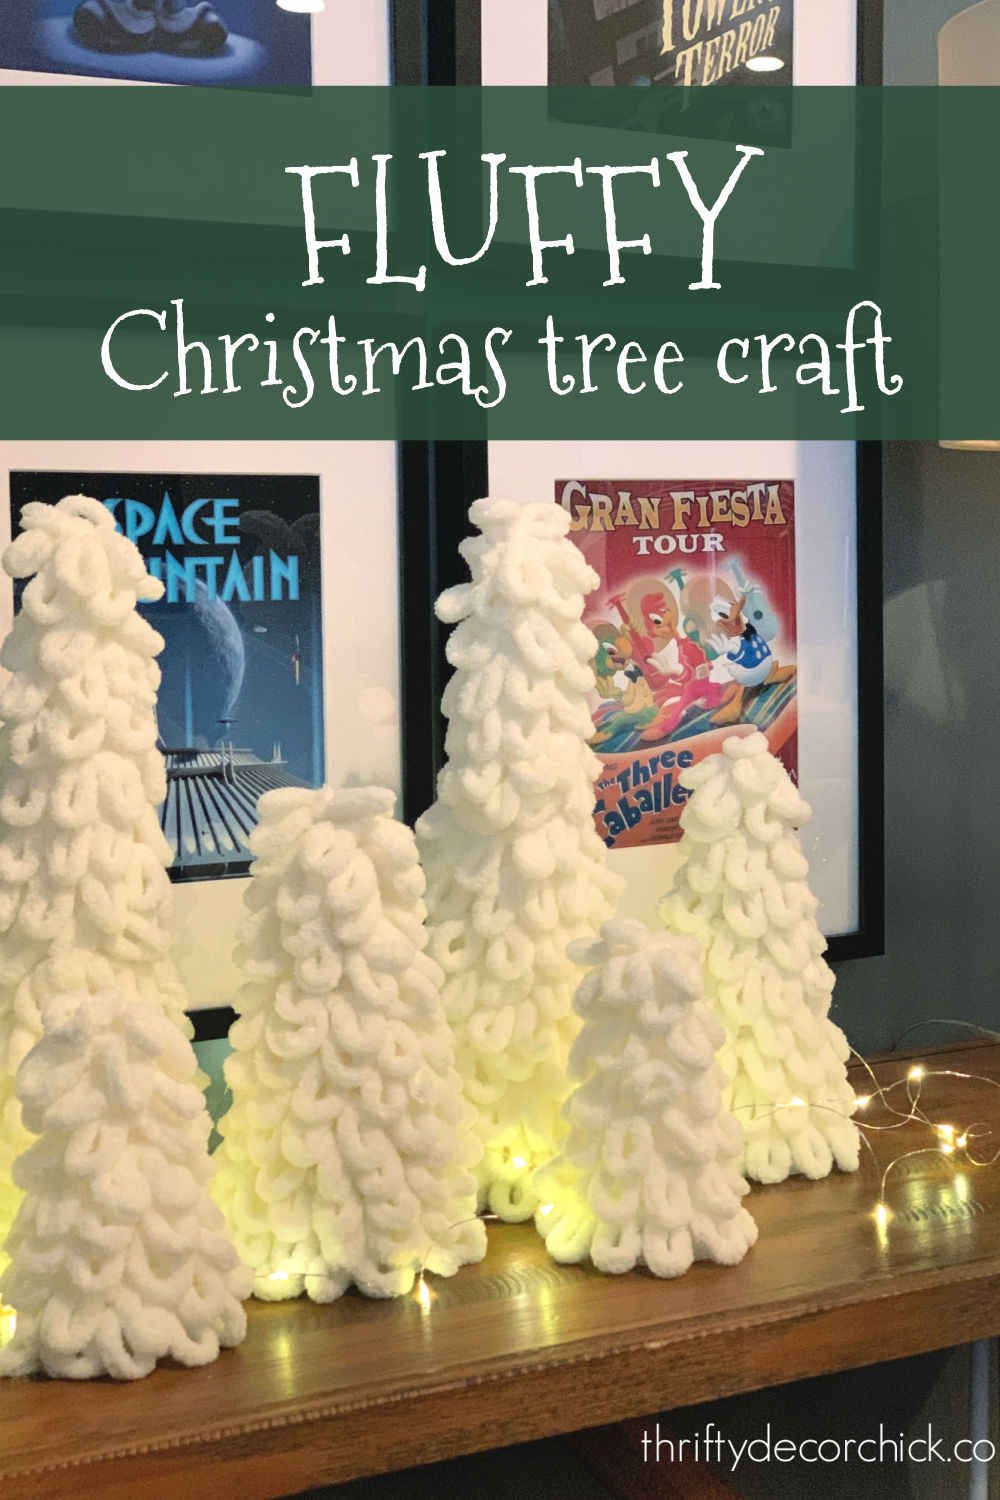
I hope you had a relaxing weekend and stuffed your bellies! I got a ton done around here, including finishing up a really cute yarn Christmas craft. I couldn't wait to show you because I just think these are the cutest.
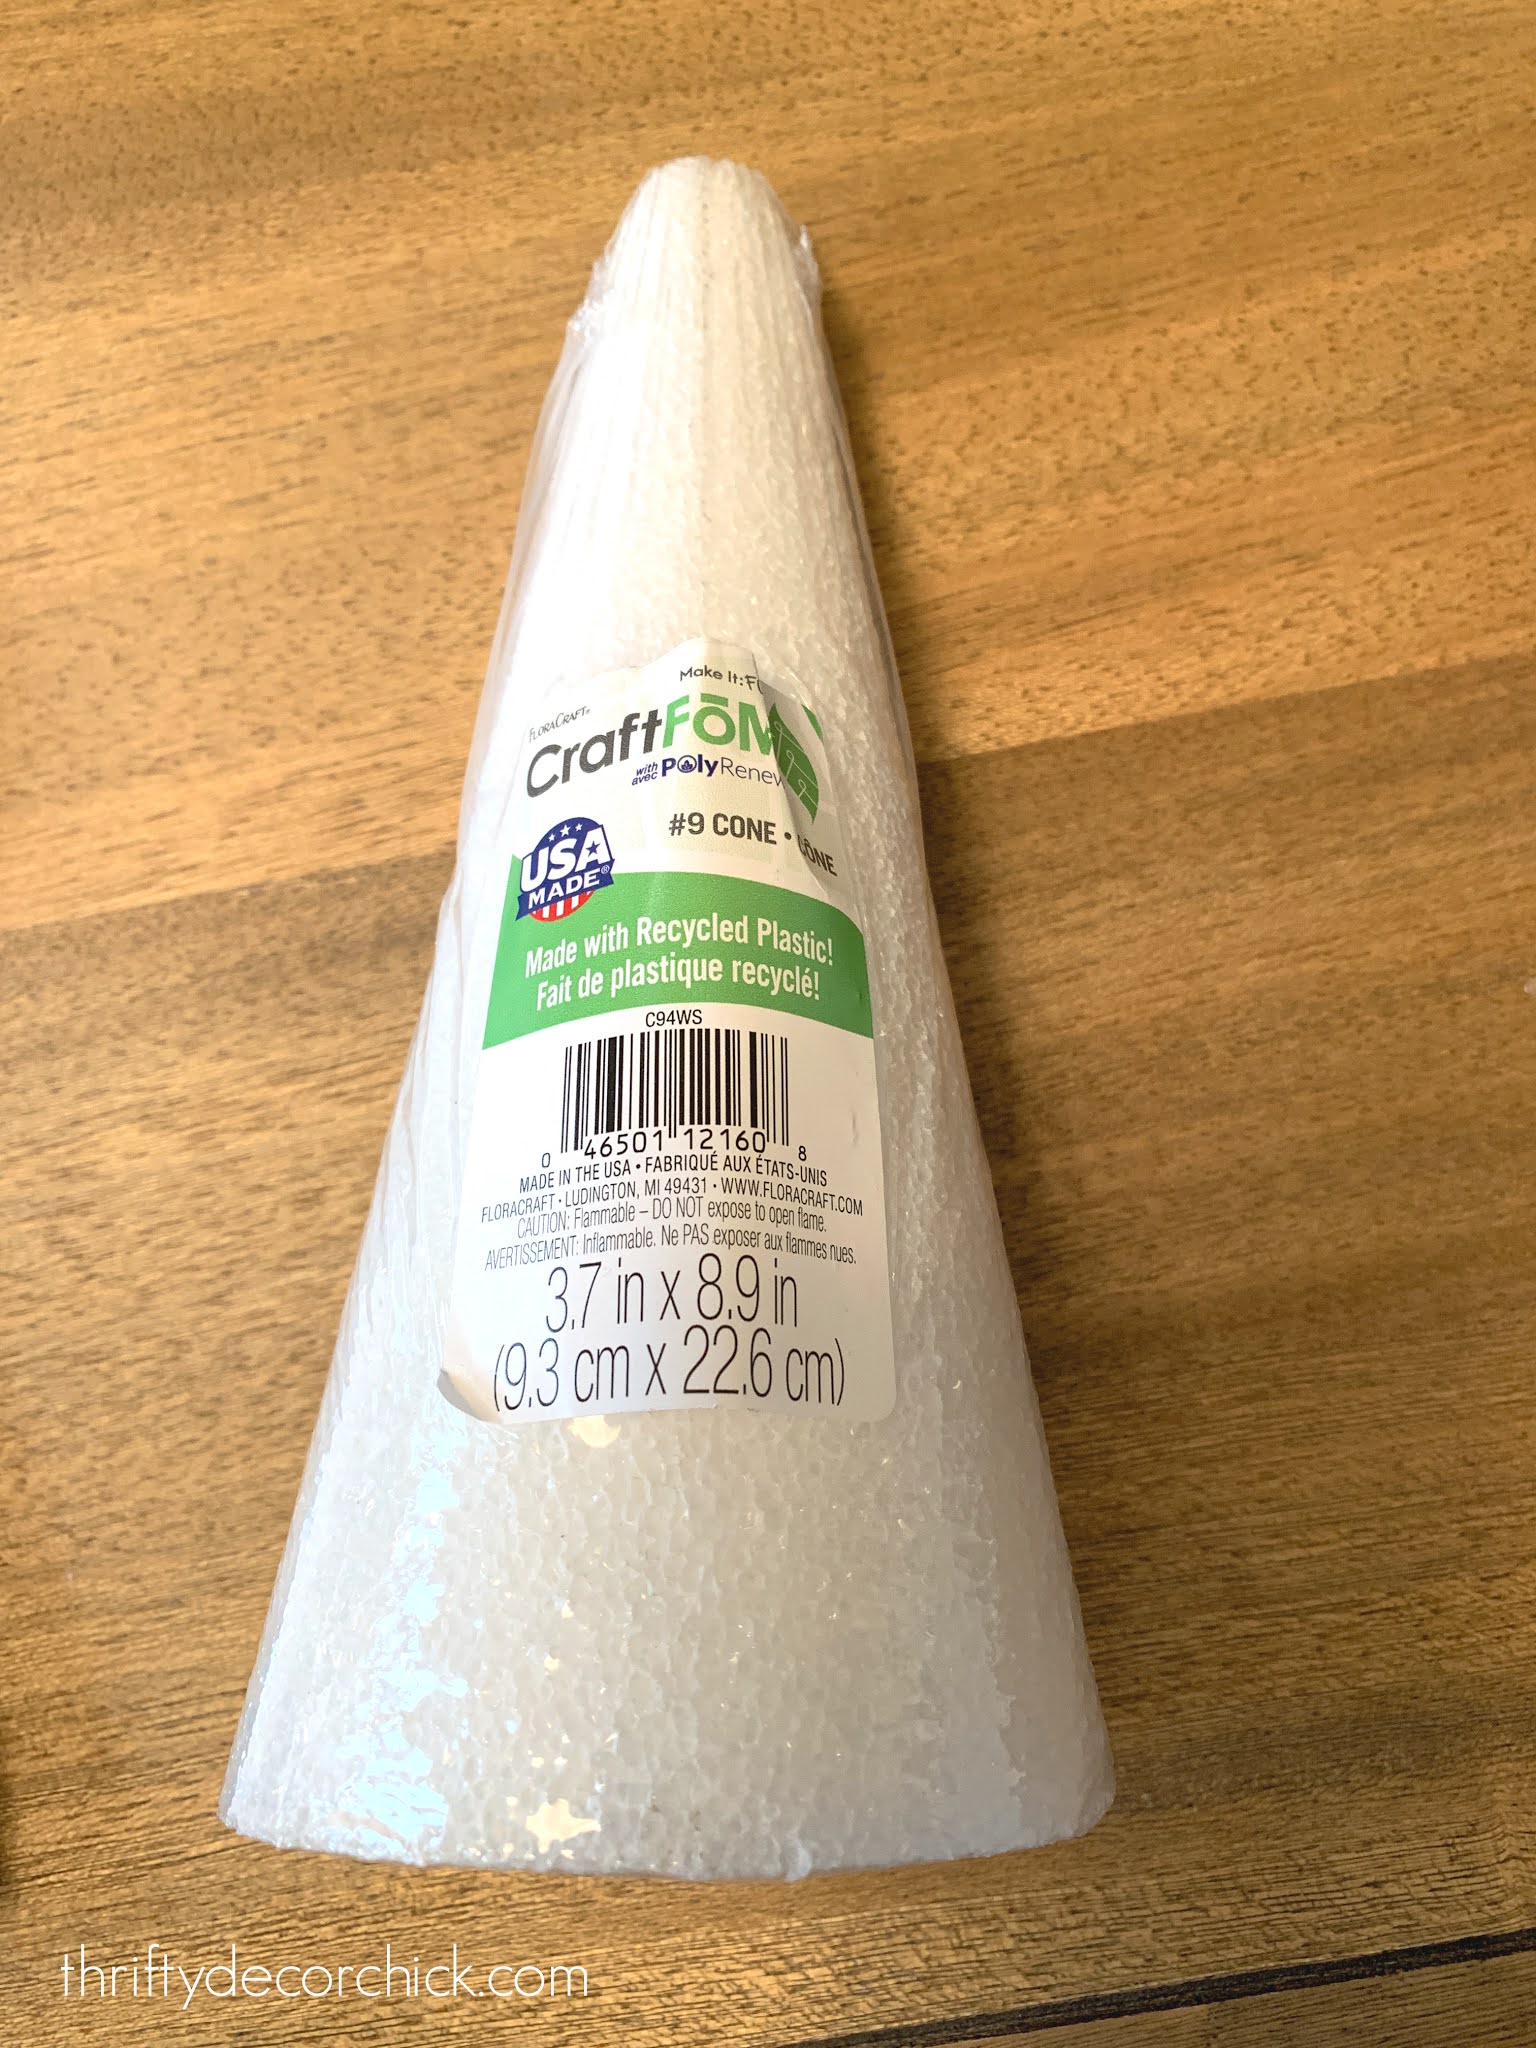
I wanted some new holiday decor for our basement but didn't want to spend a ton of money -- I came up with this idea and they turned out better than I imagined. I was going to use basic yarn on Styrofoam cones, but wanted a fluffier look.
Enter this finger knit yarn I've had forever -- for the blanket I still haven't made yet, ha!:
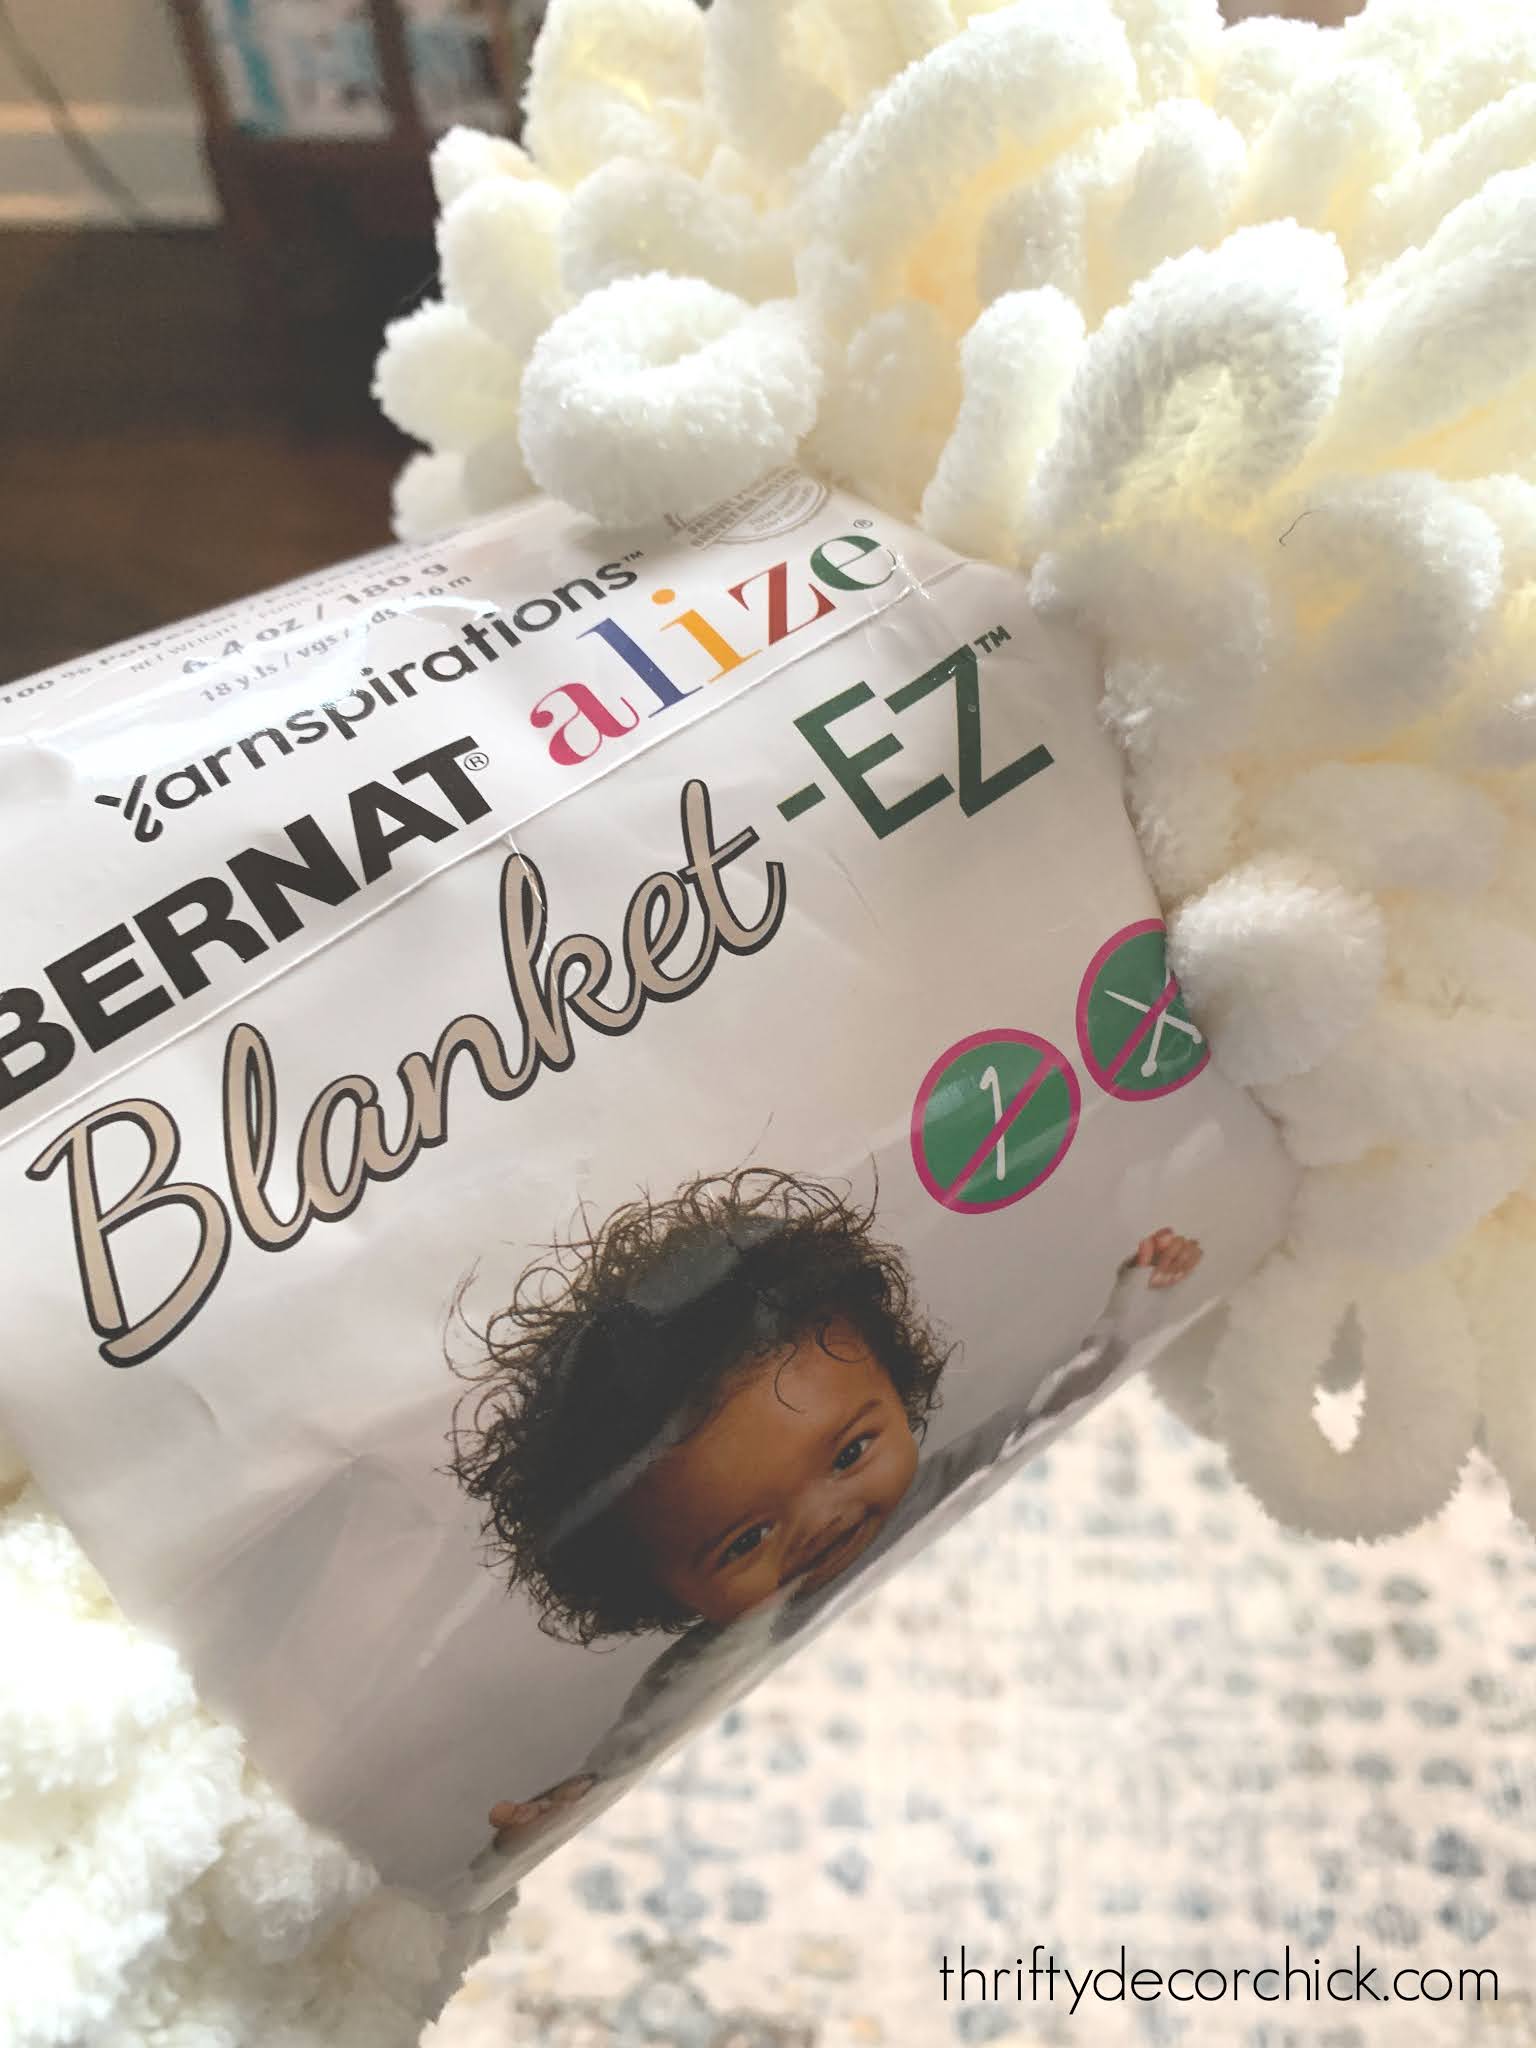
It is SO so soft and fluffy and I had an idea -- I wondered how it would work wound around the cones instead of regular yarn. Well, I'll tell you...it worked ADORABLE. ?
This post may contain affiliate links for your convenience.
See my policies and disclosure page for more information.
I started with basic craft foam forms:
And used my hot glue to attach the yard at the base first:
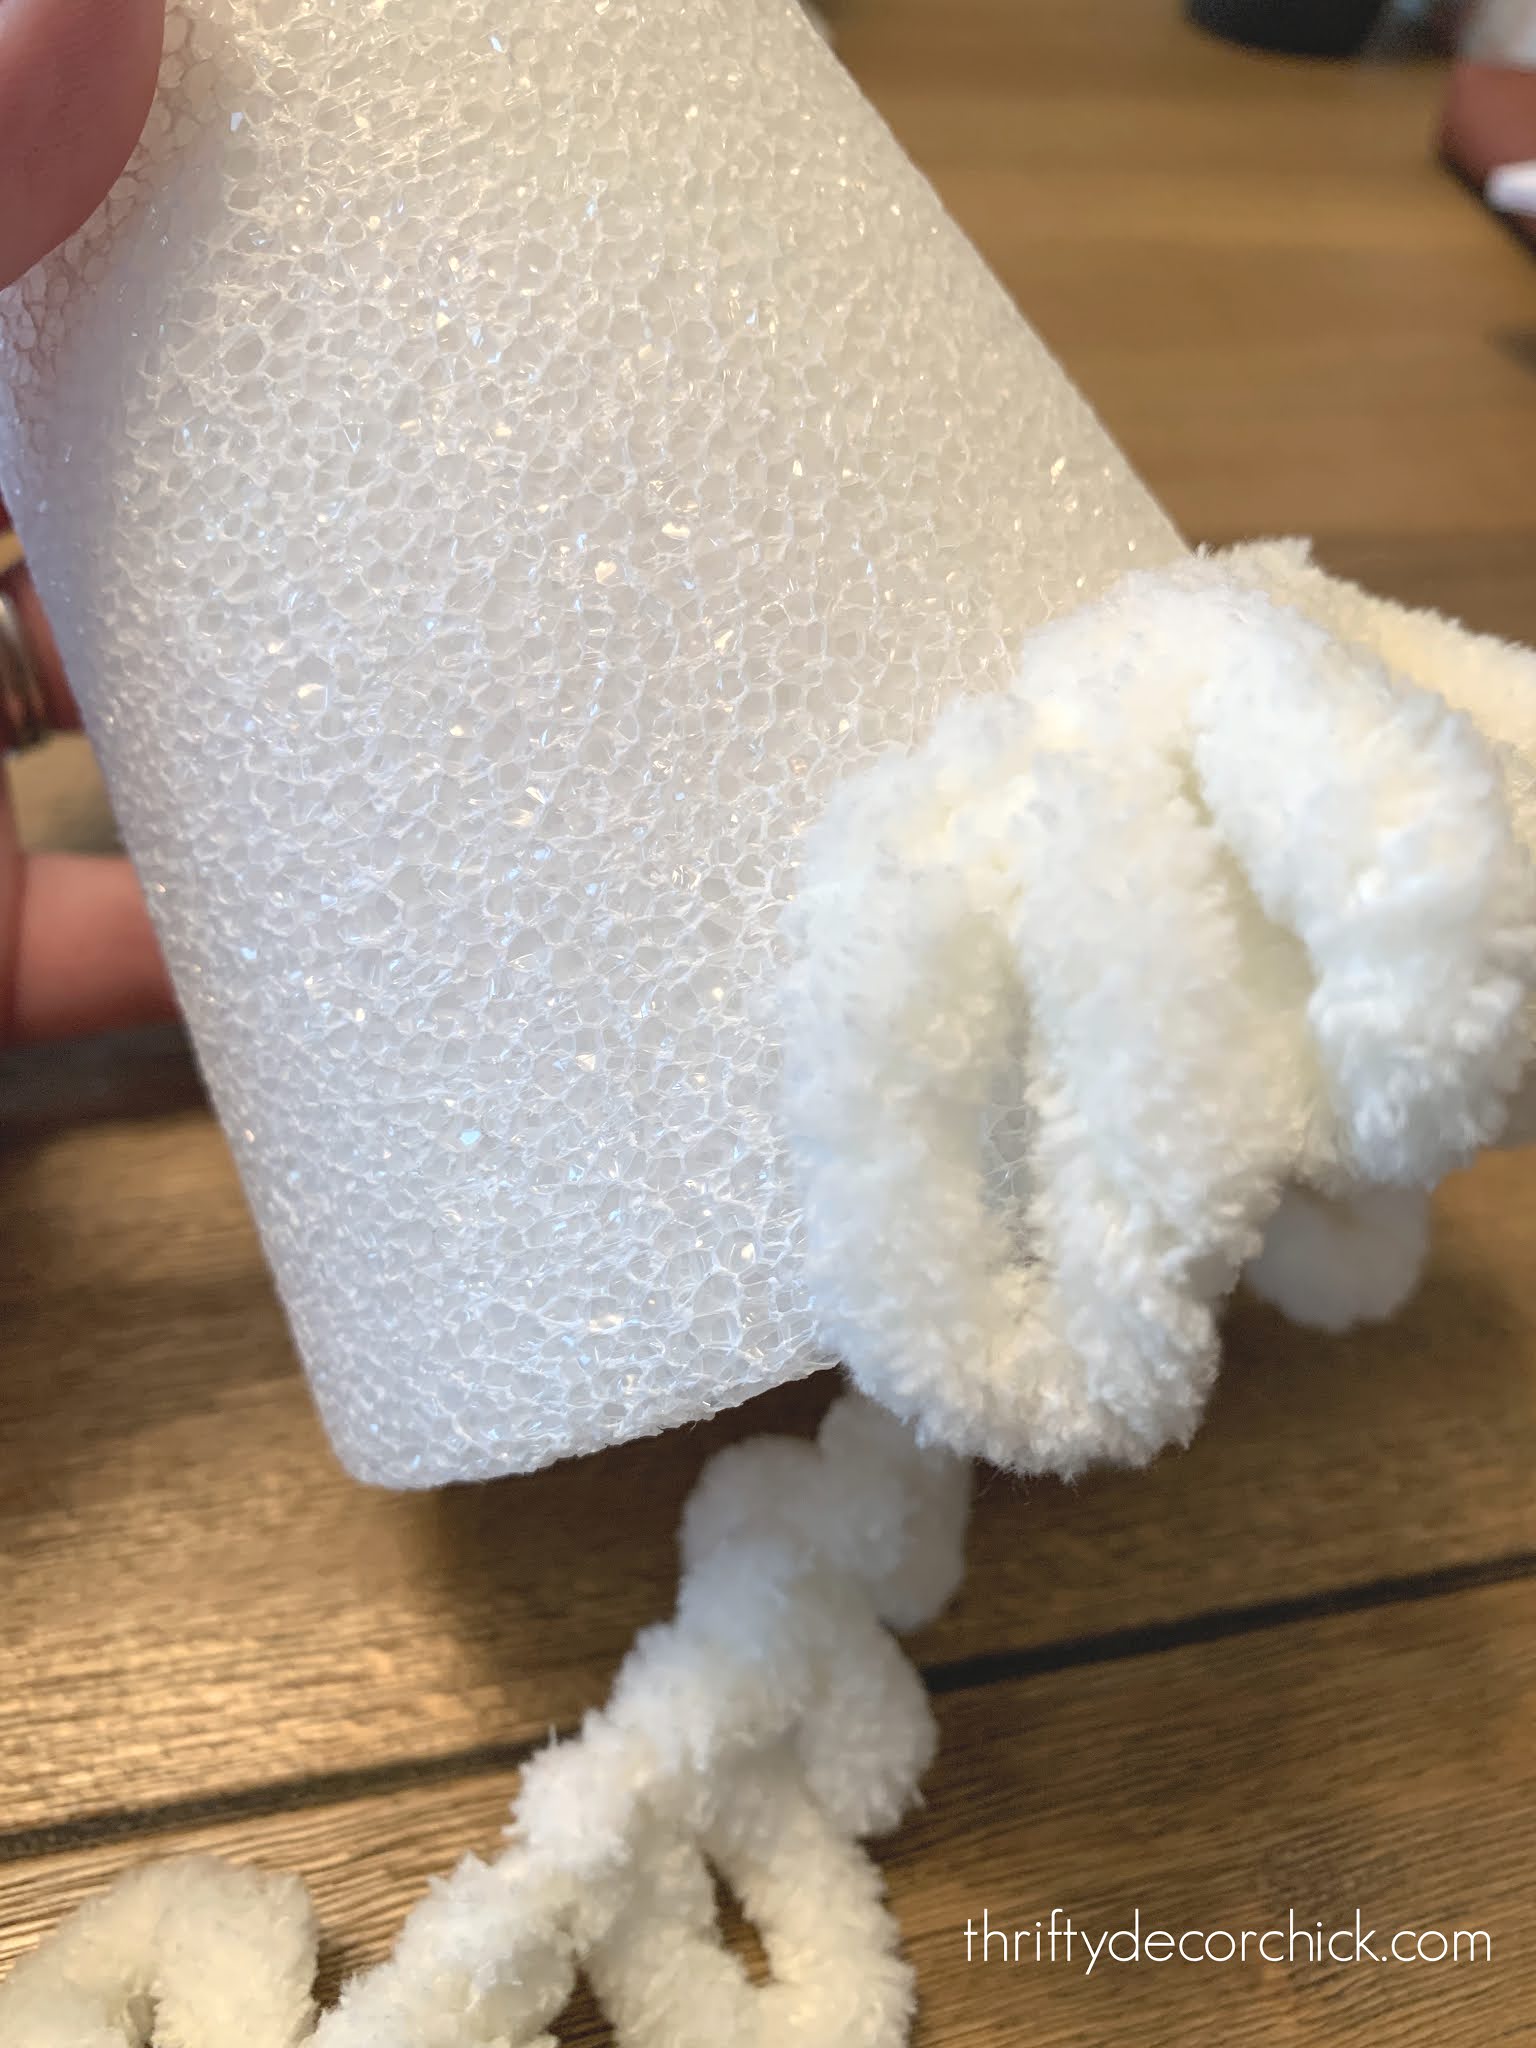
I started about an inch from the bottom because this yarn drapes so much.
I went up about 3/4 to an inch each pass around the cone:
I just kept wrapping...this was a great mindless craft to do while watching TV. They go together fast:

That's it! I did three different sizes -- one was about six inches, one was 11 inches and the final was about 17 inches but I cut those two down a bit:
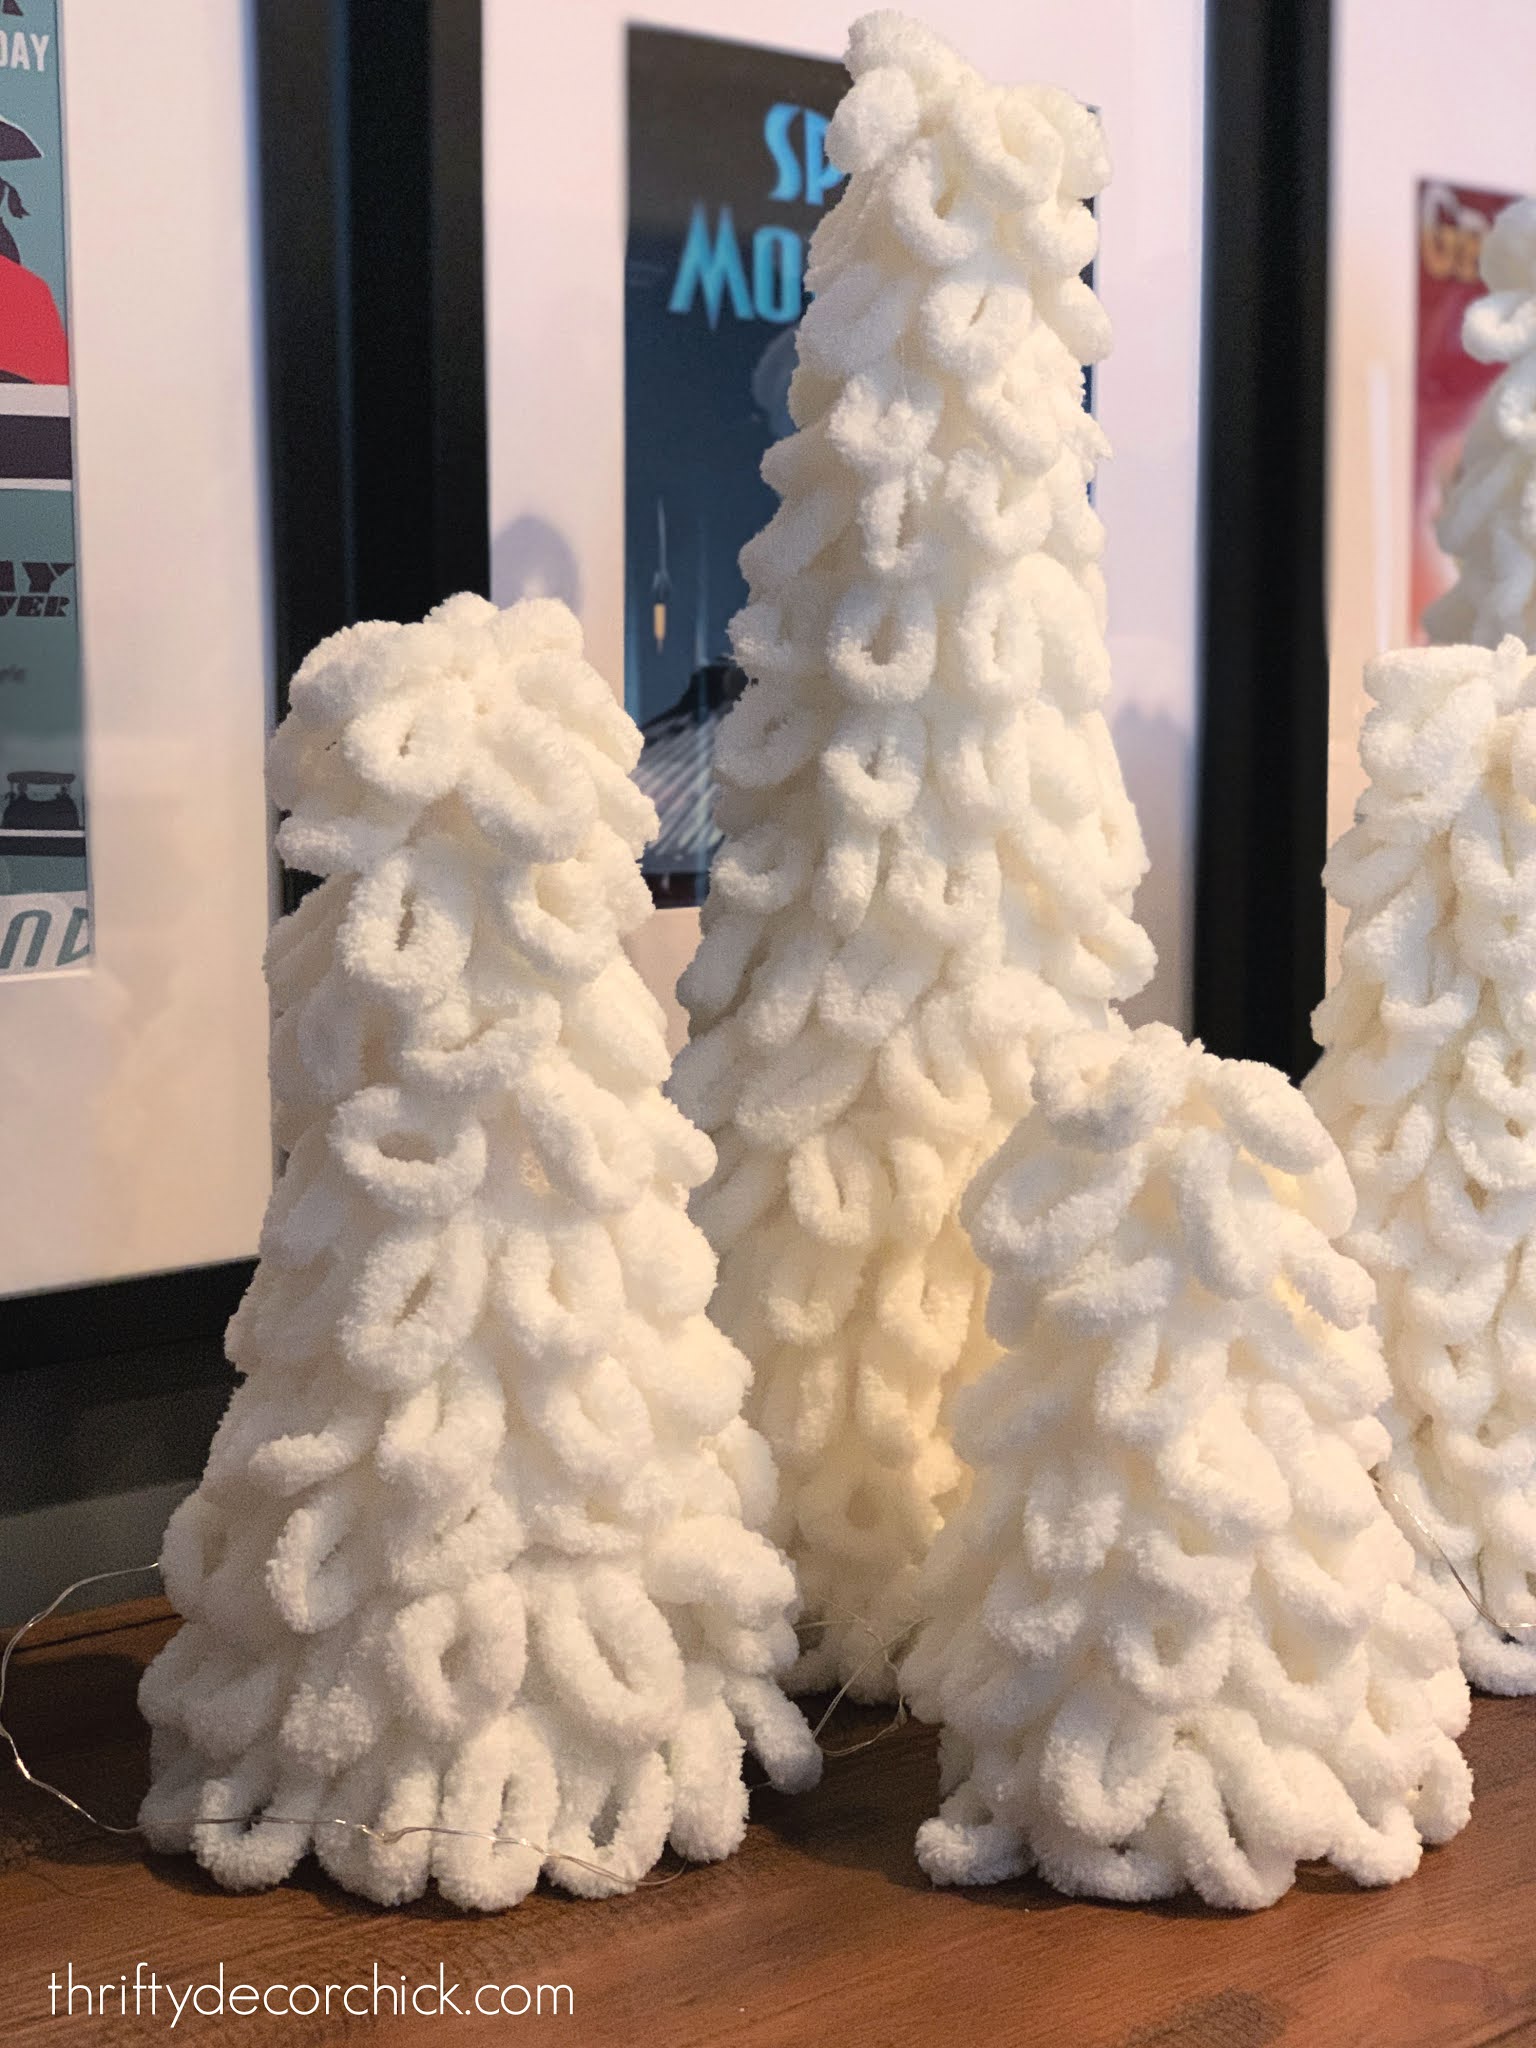
You can find all of the foam cones I used here! I used one skein of yarn for all the trees and had a bit leftover.
It's like a snowy, fluffy forest! :) I think they are the cutest. You don't even have to do anything to cover the white foam -- it disappears behind the yarn:

I giggled every time I finished one. They are adorable and SO easy and inexpensive! The foam products are often on sale, or you can use a coupon at one of the craft stores.
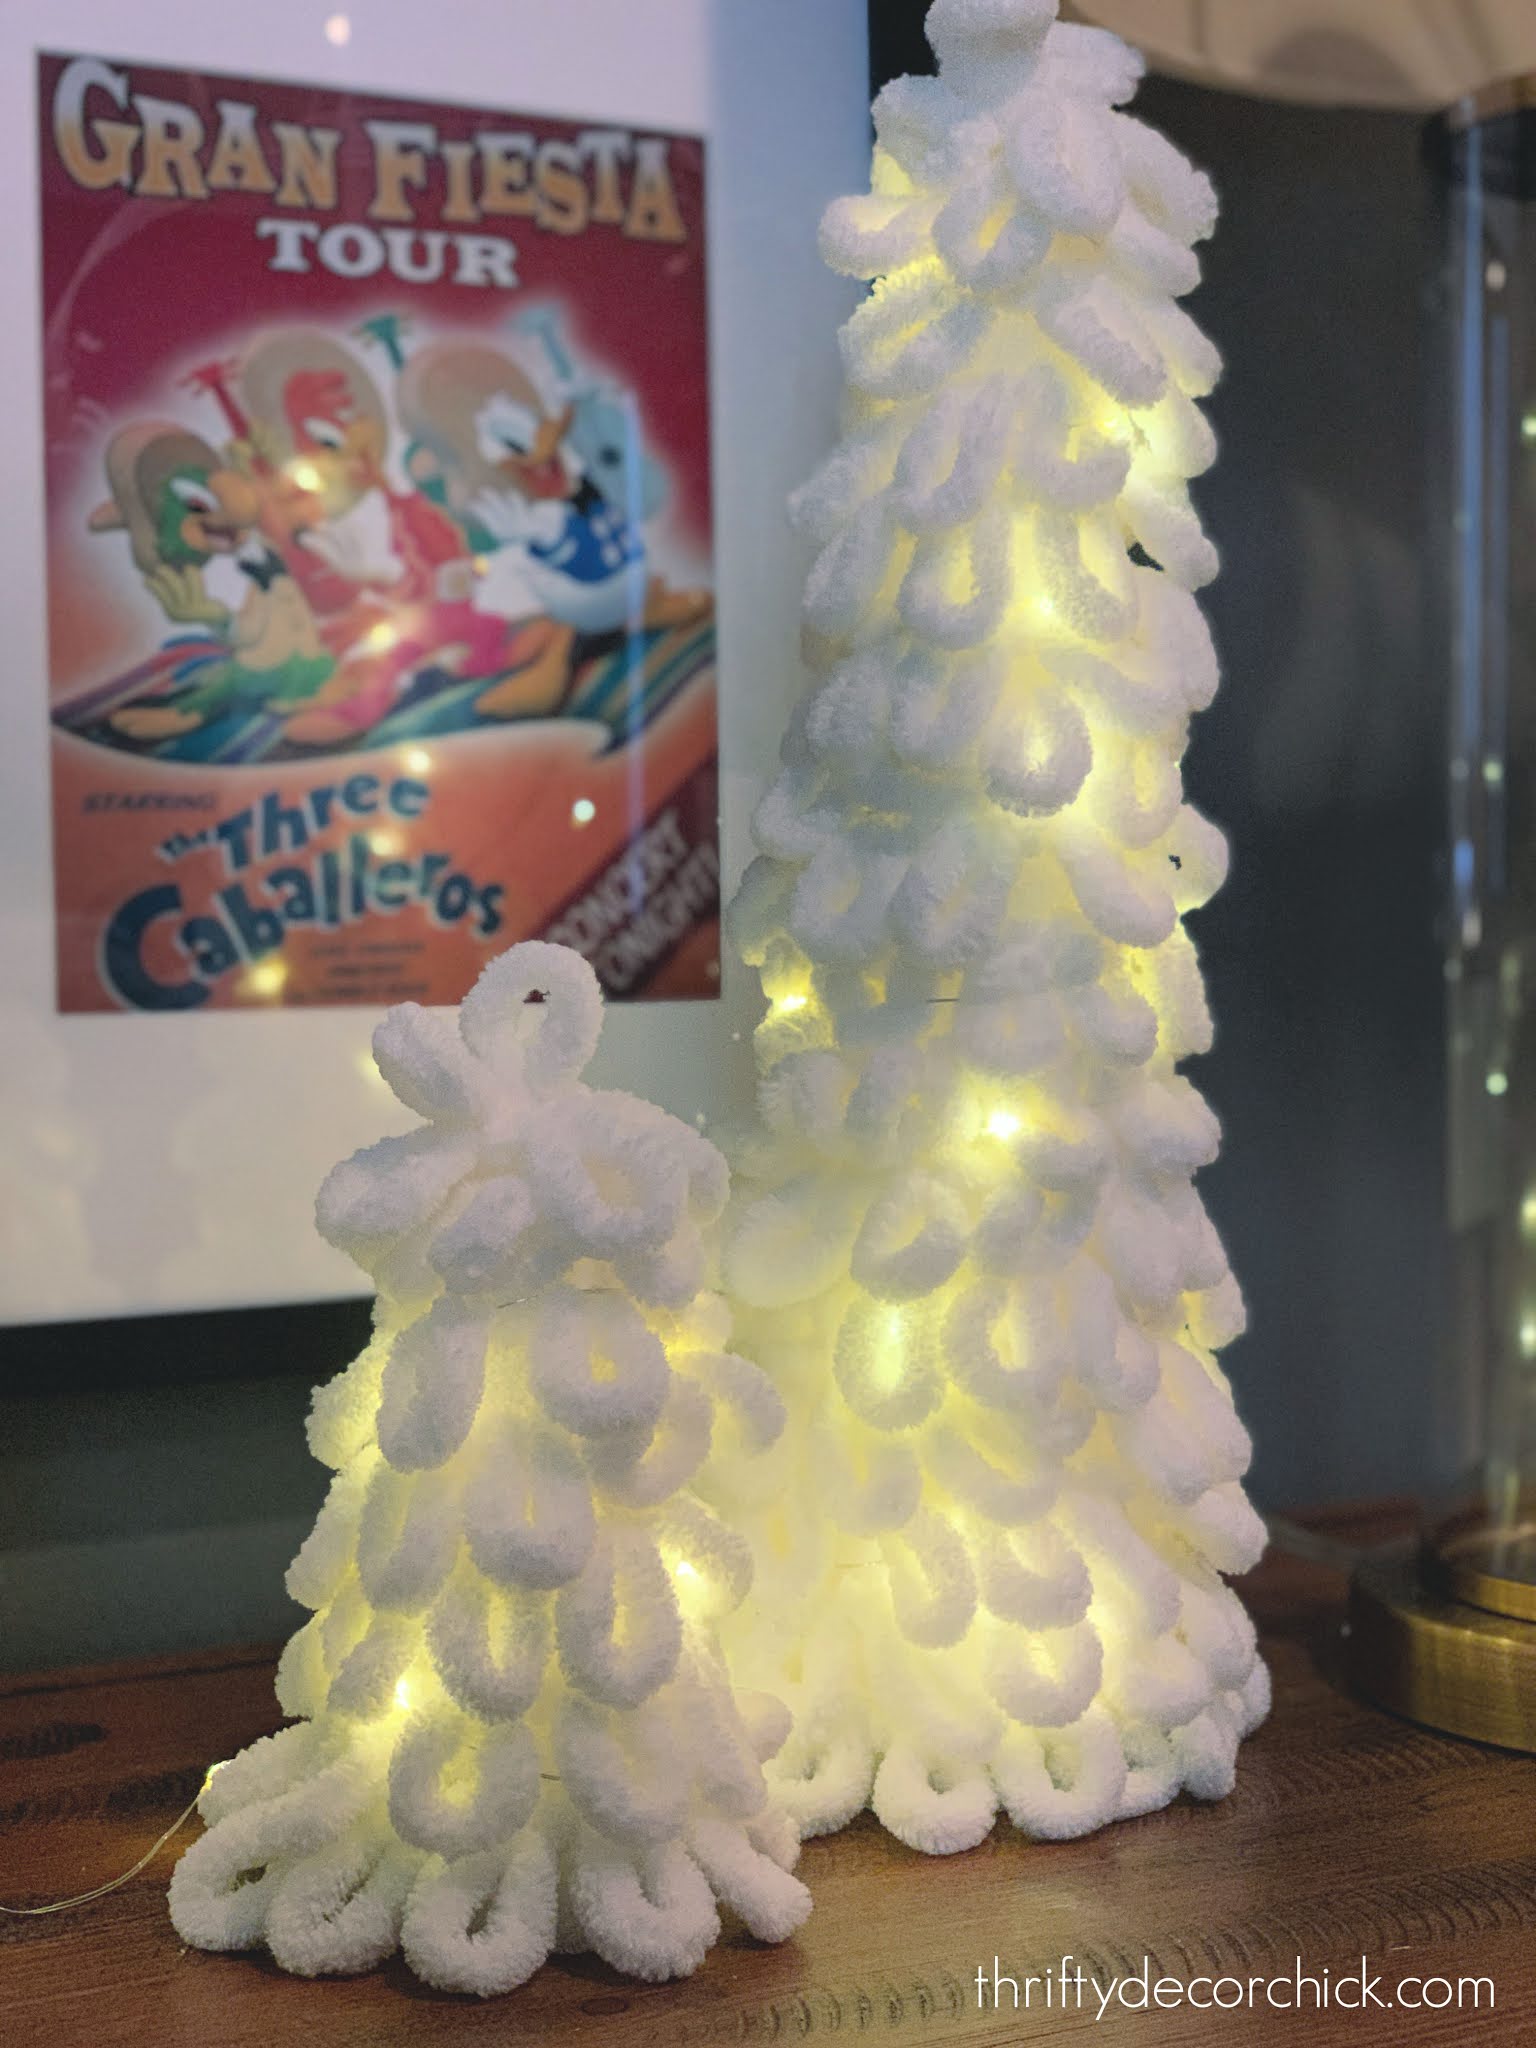
I added some of the fairy lights I showed you here for a bit of twinkle:
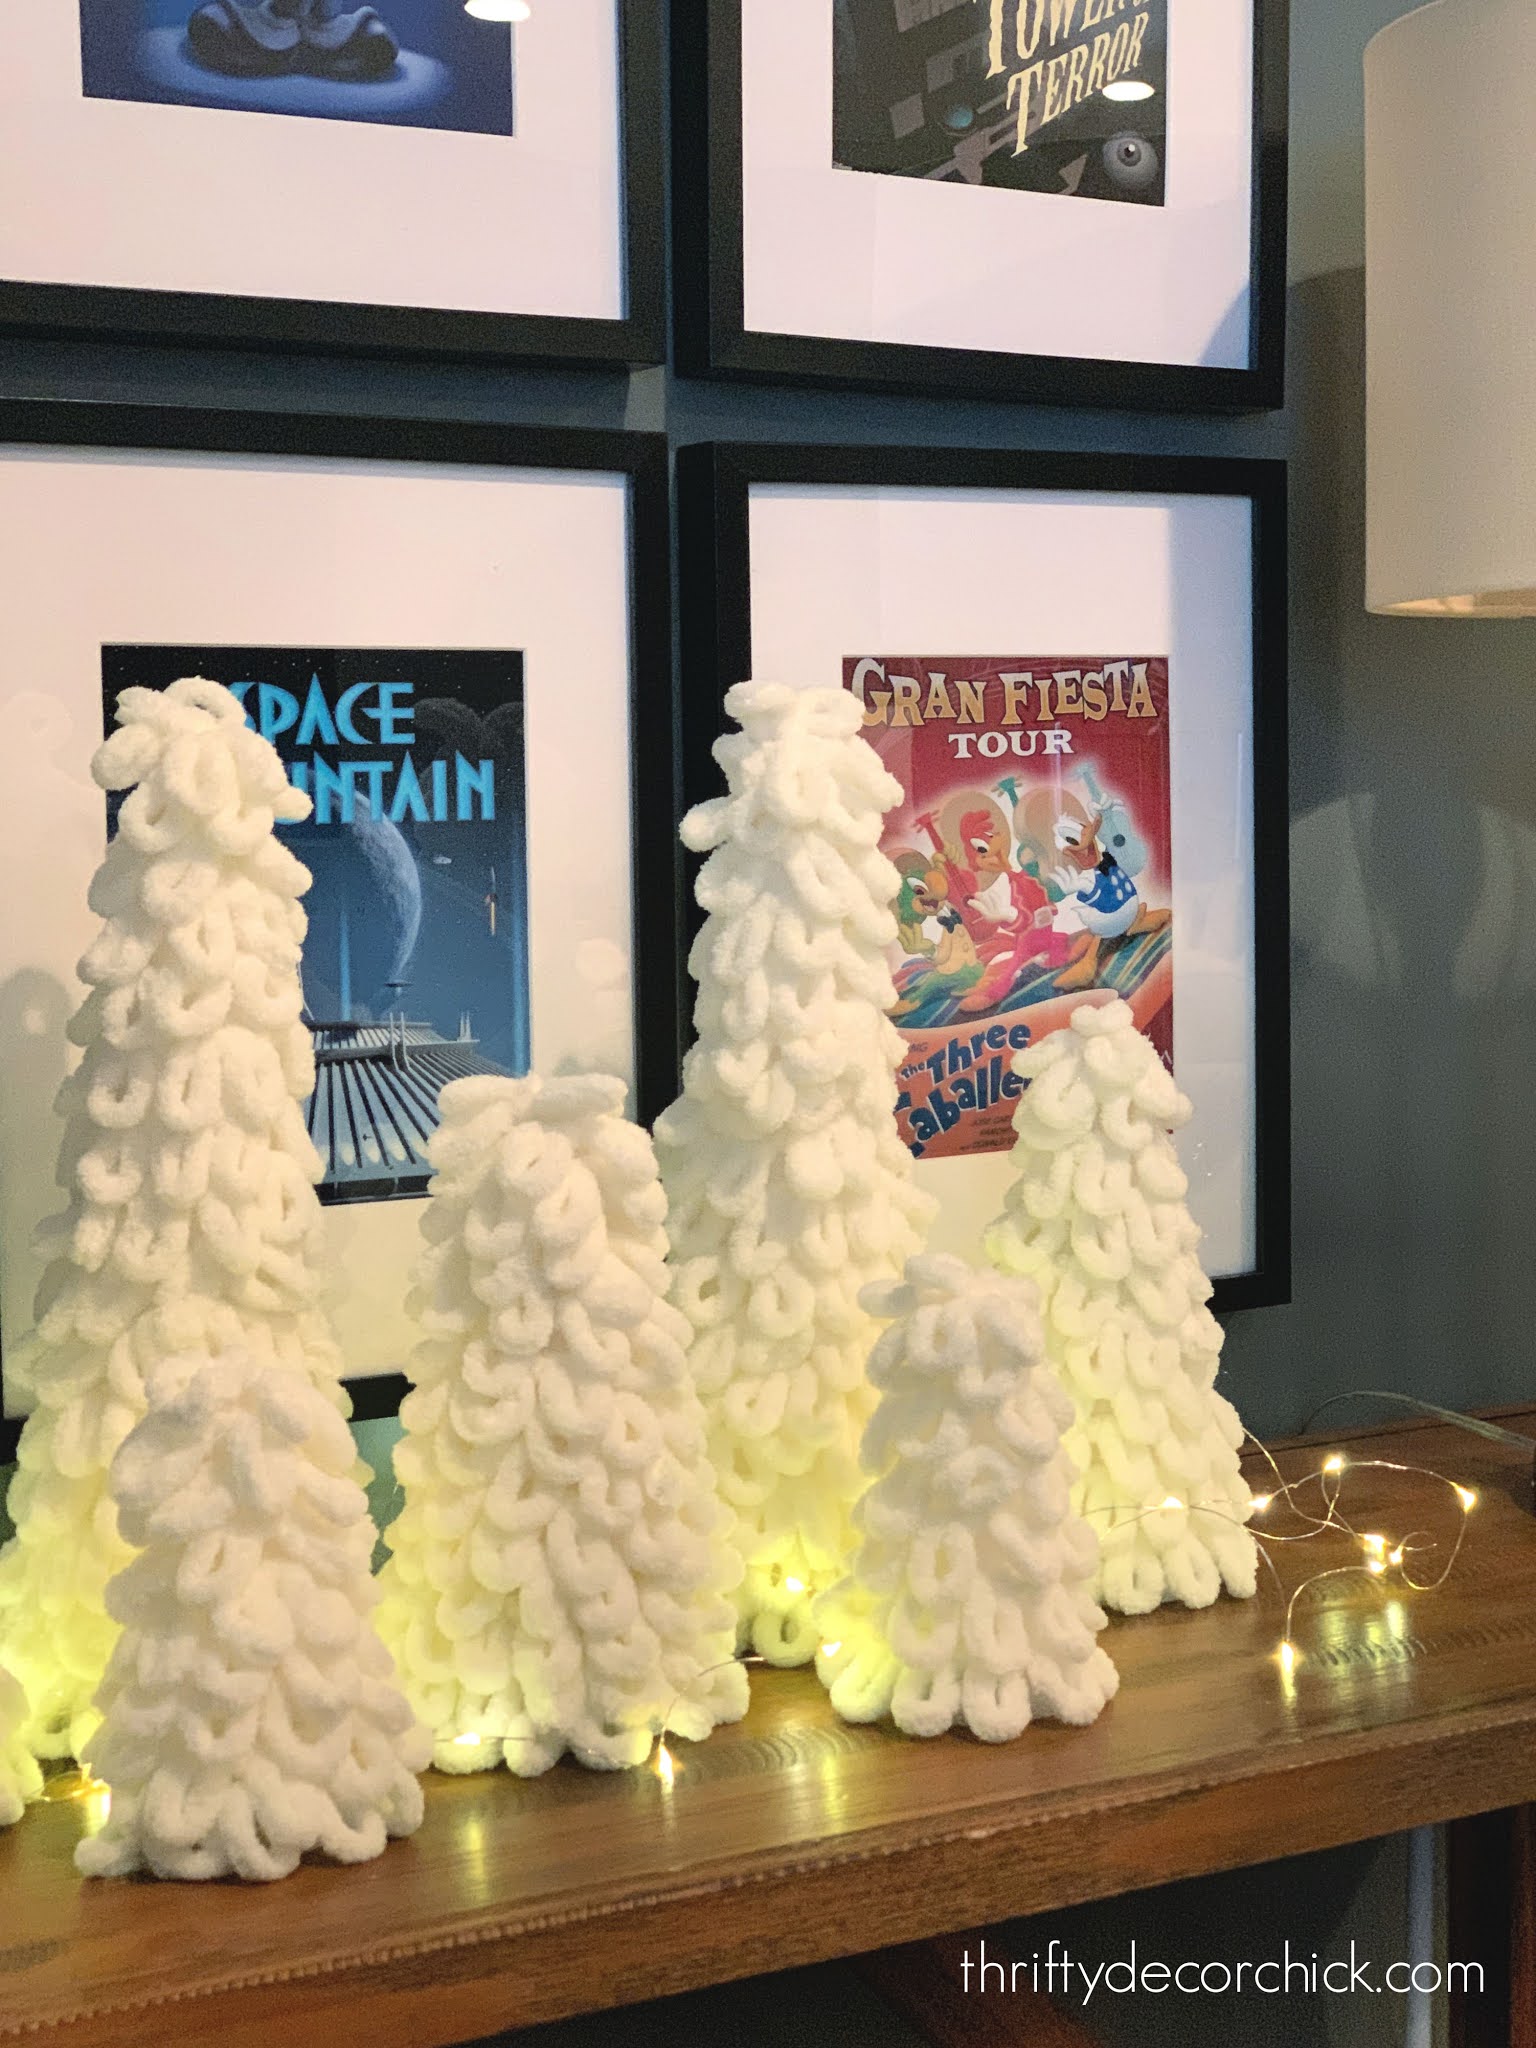
You can also have them glow from "inside" by running those tiny lights under the yarn around the tree:
And if you want a pop of color you could stick in red beads here and there in the yarn to look like berries.
I wanted something simple but fun on this table in our basement and these were perfect. I went super cozy and a bit rustic down there so they fit right in!:

I love our "snowy" fluffy trees. I bet these would be really cute in a green yarn as well for a mixed white and green forest. I used the Bernat brand finger knit yarn (here are all the colors they offer!) but the cream seems hard to find right now. This one looks identical, you just don't get as much.
You can pin this craft for later using this image:
Now I'm off to make a scarf with the remaining yarn I have! ;) Check out a bunch of my favorite, easy Christmas crafts here!
**You can see more about the Disney prints hanging above the table in this post.
Via https://www.thriftydecorchick.com/2020/12/fluffy-yarn-Christmas.html |