|
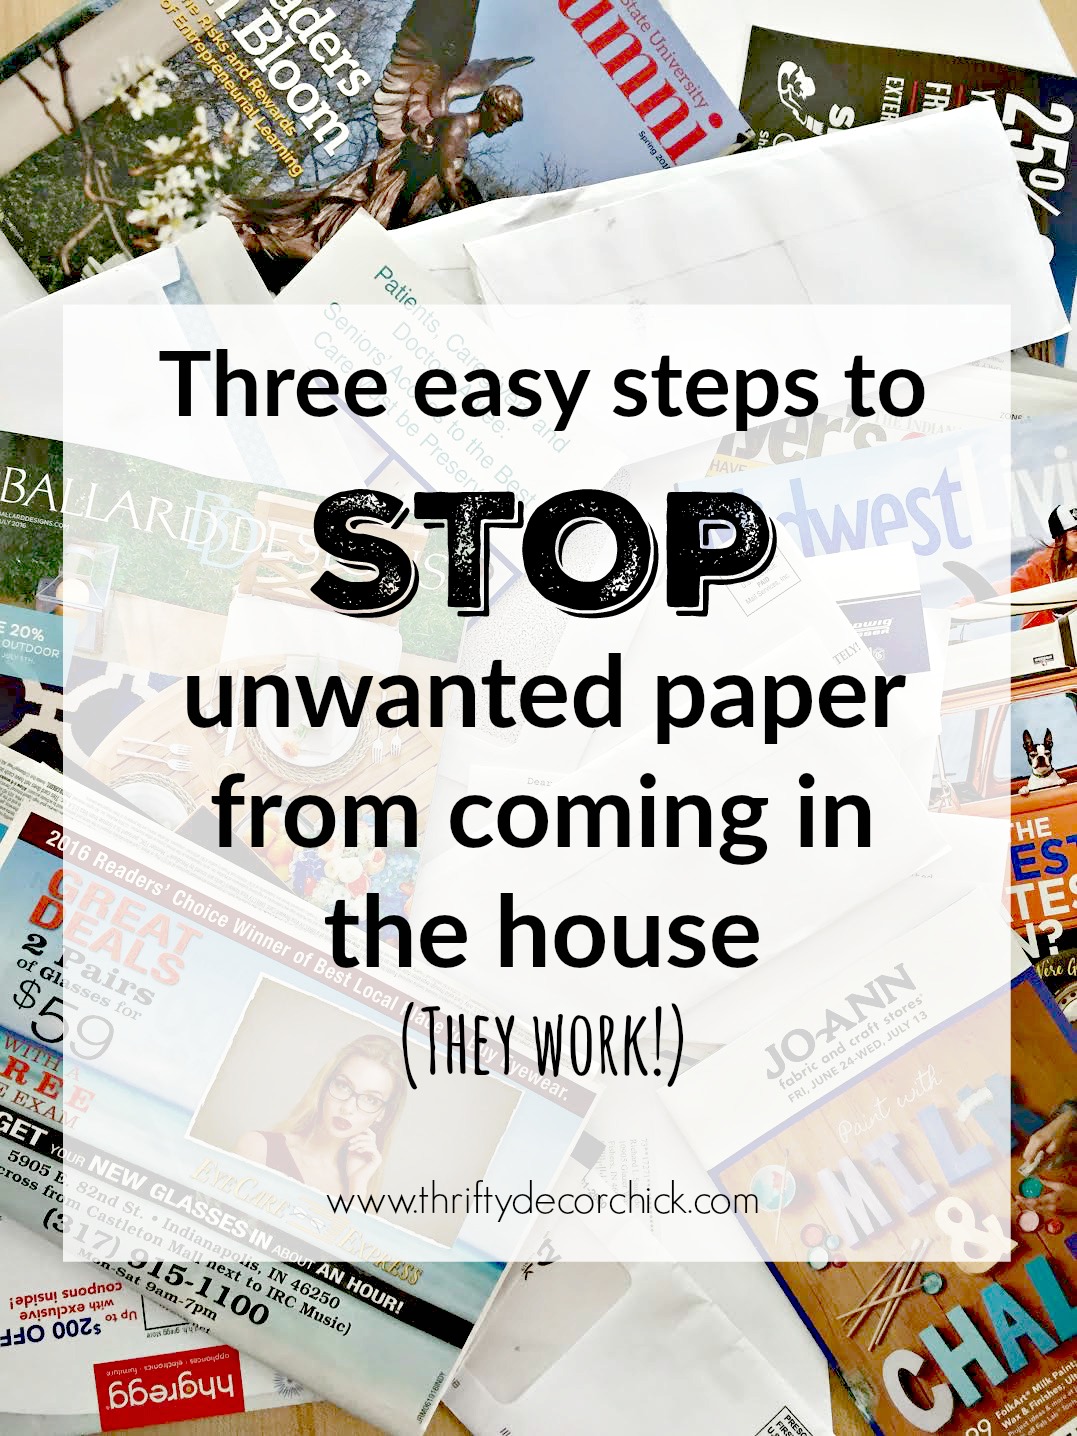
I know many us are tackling the to do list at home lately, right? One of my items has been to go through paper files we haven't touched in years. Our file cabinet was overflowing (and the piles next to it were as well!).
I finally got through all of it and everything is organized again. While working on it, I was reminded of these helpful tips that have helped to lessen the amount of paper and junk mail we bring into the house.
This is another aspect of the huge purge I completed years ago. My biggest nemesis when it comes to clutter has always been PAPER. Can I get an amen?
It's the thorn in my side, the pain in my neck, the fly in my ointment:

This post may contain affiliate links for your convenience.
See my policies and disclosure page for more information.
But you know what? Over the past couple of years I've mostly conquered it. Almost. Enough that I don't feel like it piles up on the counters anymore.
These are my tips on mail specifically -- when it comes to papers from school, good luck to you my friend. :) Ha! No, that stuff immediately goes to a spot in our mud room that I'll show you in a minute.
This is for those of you who want to try to control the paper and lessen what you bring into the house. These tips work and I promise your paper load will lighten if you try them yourself!
Step 1: Go electronic for billsIf you can go electronic -- do it. We have gone paperless with many companies, but still have a few to go. I'm slowly going through the utilities, investment companies, bank statements and everything else we get on a monthly basis. I used to hesitate when it came to not getting a paper statement, but I'm slowly getting with the times. I realized, how often do we really look at them? Bank statements more so than anything else -- but I think it's far more secure to keep them virtually than on paper. (I know that can be argued but in general.) Also, it takes mere seconds to log on to see a specific statement. I used to keep them all in the file drawer and that took a lot more time to dig through. Most companies will gladly switch you over and I find it far easier to keep up with. And LESS MAIL. That is our goal folks! Step 2: Unsubscribe from catalogs and junk mail
You may not have heard of these sites, but they are extremely helpful in lessening the amount of mail you'll get. I'll go into detail about each one below...
Catalog Choice: Opt out of catalogs that come in the mail.
I looove a good catalog. They are my jam. But sometimes we grow out of them, just don't care to get them anymore, or get on a list we don't want to be on.
If this is the case for you, try Catalog Choice. I've used it for years and it works: 
You have to create an account and then you can search literally hundreds of catalogs to unsubscribe. It's awesome and within a couple months they will stop coming to your door.
I made the mistake of signing up for Restoration Hardware once…and if you get them you know that their catalogs are RIDIC. I feel like I kill a tree every time they send them out. This is a great option to lessen the load in your mailbox and in your house.
DMA Choice/Do Not Mail: Opt out of junk mail in all forms
Did you know you can opt out of all kinds of offers and junk mail? It helps lessen the paper you'll bring into your home tremendously. I use DMA Choice for many marketing mailings. Sign in and you can opt out of catalogs, credit offers and magazine offers:

You can edit your choices at any time!
Then you can go and unsubscribe from pretty much anything else at the National Do Not Mail list: 
This one gets pretty specific -- chose exactly what you want to get offers on. Can you imagine not getting a million political mailers this fall? That dream may be realized. :)
Opt Out Prescreen: Stop all credit and insurance offers
Years ago credit offers filled up our mailbox. Then when we paid off all of our debt (and knew we wouldn't be opening credit accounts), we knew we could do without them.
Opt Out Prescreen allows you to unsubscribe from credit and insurance offers easily and quickly: 
You'll have to opt out every five years, or they'll add your name back to the list. They do offer a lifetime option now, but you have to mail that in.
Remember you'll need to do this for each of you in the home who get mail. Marketers focus primarily on women in the household so even if just the female does it, it will help tremendously.
Step 3: Get rid of paper before you walk in the door
I keep bins by the garage door -- one for paper recycling (mail without our name or account numbers) and one for shredding (everything else). My goal is to get rid of 90 percent of the mail before I even walk in the door. Most of the time it's 100 percent. ;)

IKEA has nearly identical ones as well! I remove the lids so I can easily chuck stuff inside.
When I keep up with getting rid of most of our mail before I even walk in the house, the paper clutter is kept to a minimum.
What does make it in goes directly into this paper organizer in the mud room: 
That one from Target isn't available anymore, but this one is similar (and has drawers!).
All of these tips work to bring you less mail and paper to begin with. You can tailor them to what you want and can alway go back and edit most of them if you change your mind.
I can guarantee the paper you'll bring into your home will lessen within two to three months. And that is the first and most important step to getting control of it!
Do you have any tips when it comes to mail? If you have any tips on organizing receipts for tax reasons, I'd love to hear them!
See more of our home here. To shop items in our home, click here! Never miss a post by signing up to get posts via email.
Via https://www.thriftydecorchick.com/2016/06/how-to-stop-unwanted-junk-mail-in-three.html
0 Comments
It's funny, but one of my most commonly asked questions here on the blog is about our plants! It never fails that I'll get messages or emails about plant care when I share a room that has one in it. Today I'm sharing the biggest mistake I find so many are making when it comes to their house plants.
I shared my tips on how to care for fiddle leaf trees here. I have a BUNCH of them and have figured out what makes them tick. They are much easier to grow than you'd think!
Over the years of honing my plant growing craft, I've figured out the one bit thing that keeps our fiddles and other house plants thriving:

See the master bedroom reveal here!
Sunlight is important of course! That varies quite a bit depending on the type of plant.
This post may contain affiliate links for your convenience.
Fiddles love sunlight -- I've read many times over the years that they don't love direct light, but mine have thrived in it:

I find fertilizing isn't necessary in most instances -- I don't do it a lot. Maybe once or twice a year, if that? In general ours do better in the summer months and slow down in the cloudy, winter months.
I also don't add anything special to the soil to help it drain -- half the time I leave the plant in the pot it came in for a year or so!:

Here's the most important tip! I think you'll be surprised at what's killing your houseplants...
I know many think the more water the better, but you're probably watering them way too much. People are always shocked when I tell them I only water my fiddles every two to three weeks...sometimes longer!
And each time I don't give them as much as you'd think. My largest plants get two cups of water at the most:

Smaller plants get much less.
If you're having problems keeping your plants alive, I'd be willing to bet the amount of water you're giving them is the culprit. I know it goes against what we feel is right -- it just feels good to water them often, right?
But overall indoor plants will do much better when you either wait longer between waterings, or water much less once a week. Your houseplants will thank you!:

Huge DIY fabric bulletin board
Once I learned how little the fiddles needed, I started putting all of our plants on the same watering schedule and guess what? They THRIVED.
It really hasn't mattered what plant it is...they've ALL done much better with way less water:

That ivy is growing like crazy!
The only plant I've found that needs to be watered more than every two to three weeks is the fern. I find them to be finicky, but overall even with those I water less than I used to.
Pretty earth-shattering, eh? I think most plants do much better when you ignore them a little bit. Of course they like to be talked to once in a while. ;) I think we tend to care for them too much and that's the biggest reason we fail at growing healthy houseplants.
Do you have any great plant growing tips you've found helpful? Do you water your plants a lot or a little?
P.S. Did you know you can purchase fiddle leaf plants on Amazon? Of course if you don't have a green thumb, faux is the way to go!
Pin this image to save for later!

If you love the fiddle leaf, be sure to check out this post with bunch of fiddle leaf care tips:

See more of our home here. To shop items in our home, click here! Never miss a post by signing up to get posts via email. Via https://www.thriftydecorchick.com/2020/07/why-are-my-houseplants-dying.html
Hello there! I'm back to share our summer master bedroom tour along with a bunch of other bloggers hosted by my friend Marty at A Stroll Thru Life. She has gathered a talented group sharing their beautiful summer bedrooms this week. (See the full list at the bottom of the post!)
Our master bedroom has undergone a bunch of changes since we moved in, and I finally finished up the painting in here a few months ago. The room wasn't completely done then, but after gathering some items from around the house, I'm calling it finished for now. And I'm so thrilled with it! I choose gray grasscloth on the walls and dark trim underneath, so I thought making this room light and summery would be a challenge. Turns out you can totally have a cozy room and still make it lighter for the summer months! My first step was to change out the bedding. A few months ago I found this light duvet cover from Target and went from there: 
Confession time -- we rarely make our bed. (If you've been a long time reader you know it's just not our thing.) Half that battle has been all of the euros and decorative pillows I've added in the past. I hate dealing with them anymore!
I decided to do away with most of them and went with just two euros and one throw pillow, along with the bed pillows that we actually use:

This post may contain affiliate links for your convenience.
See my policies and disclosure page for more information.
I'll link all of the bedding below, so check that out if you're interested! The lighter bedding made a big difference, but I grabbed a few other items from around the house to lighten things up: 
We got that geode on a spelunking trip years ago, but it has a lighter feel like a seashell. It's quite beautiful up close -- I love it!
The green trees outside our windows are the best summer accessory though!:

The rest of the decor is light and sparse -- I tend to go "lighter" with decor in the summer months anyway. The fall and holidays are my time to add more stuff. :)
I was going to paint this dresser but decided against it for now. I really love the wood tone against the gray:

My fiddle leaf loves this room! It's so big I've had to tie the branches together because they spread out so much. Go here to see how to keep your fiddles thriving!
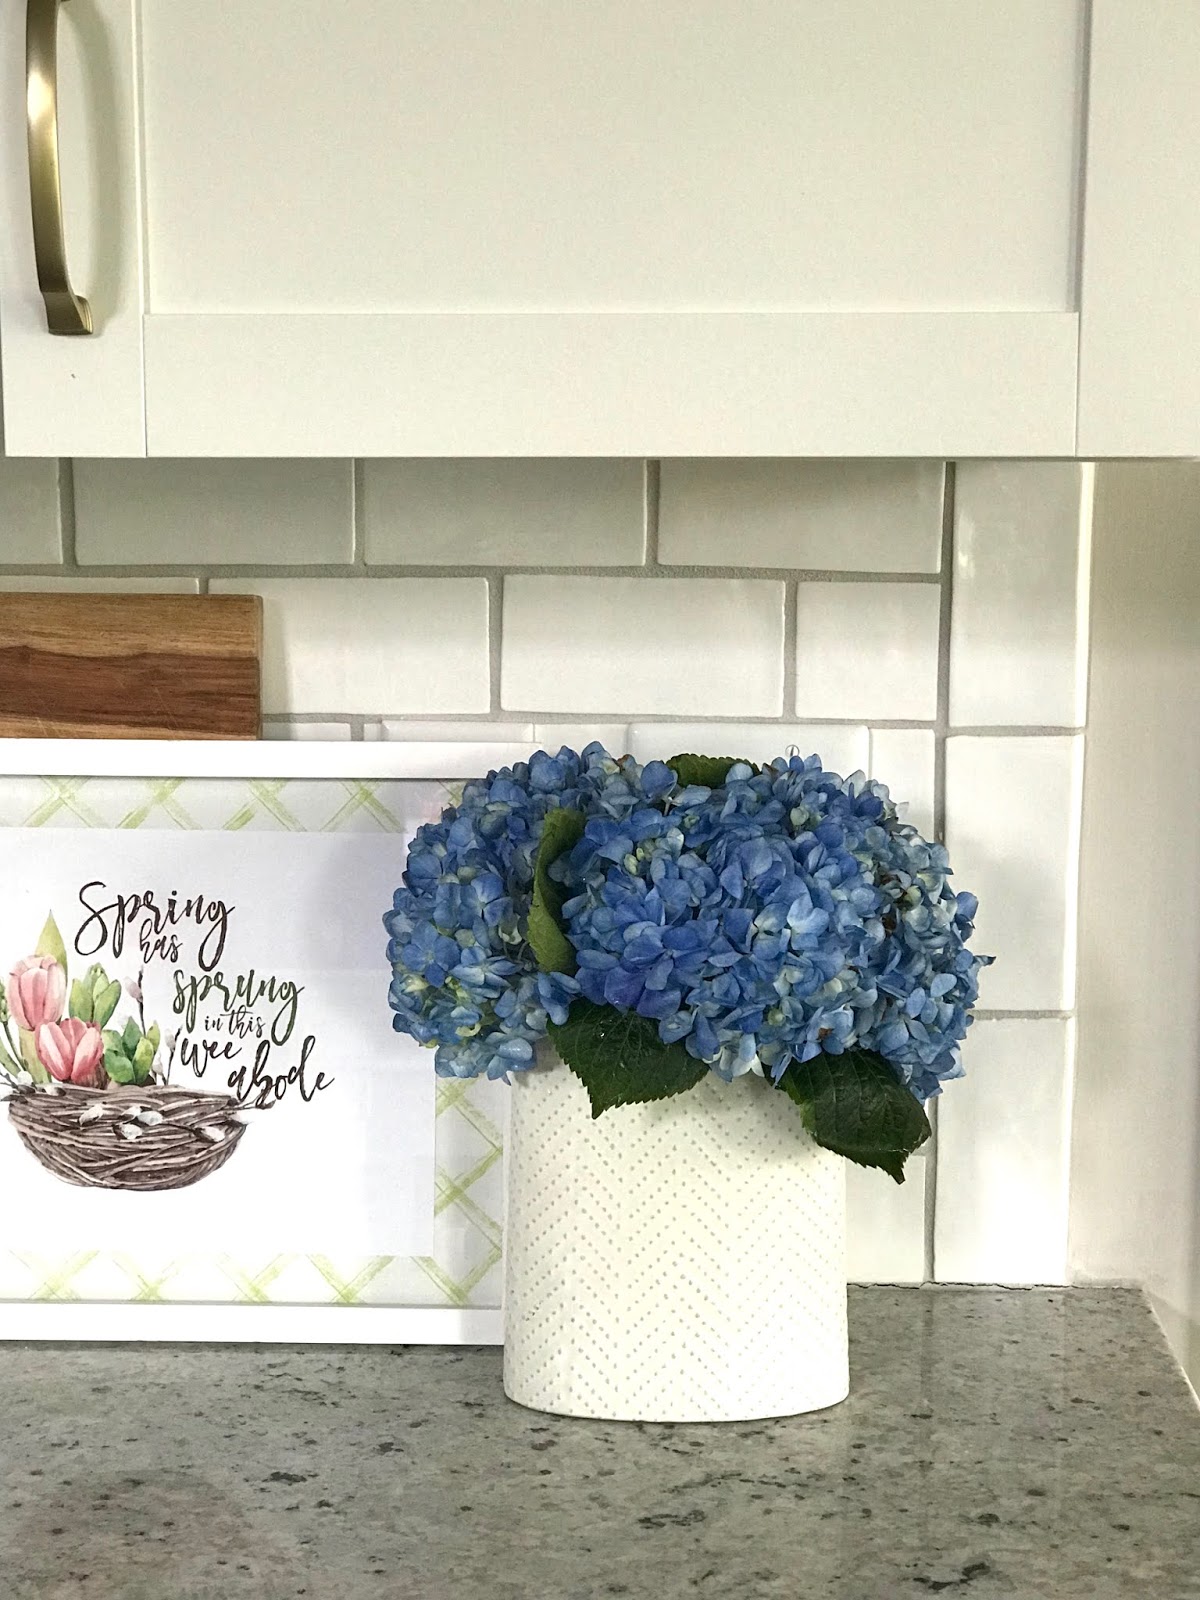
A simple vase with hydrangeas from the garden lighten things up too. I still love the IKEA dressers I made into nightstands. This is such a great way to create tons of good looking storage next to the bed:

The peel and stick grasscloth wallpaper I added last year adds so much coziness to this space.
I'm obsessed with wallpaper lately -- I've added it to a few rooms in this house and haven't regretted it one bit:


The first project we tackled in this room was the dark gray ceiling and the wood beams (that aren't really beams).
The tray ceiling was calling out for something and this upped the cozy factor big time!:

Do you see Colby hiding? :)
I later painted the trim and walls under it in the same color as the ceiling, Westchester Gray by Sherwin-Williams. I was able to go dark with the paint and drapes because we have so many windows in this room:

There are five windows to be exact. (One is a large picture window.)
If you've read for awhile you know how much I love symmetry. It makes me happy!:

I love the sound of a fan at night, and especially in the summer the breeze is welcomed. You can find options that look good enough to keep out all the time at HomeGoods! That fan is always on the nightstand.
We use hanging sconces on the wall instead of lamps on nightstands to save space -- and they work way better for reading!
I love the combo of wood tones, cozy gray paint and lighter accents in this room! I'm a lover of contrast:


Check out this post if you're wondering how to decorate around your TV. Adding a few simple frames takes away from the TV as the only focal point:

Lighter bedding and a few neutral accessories make even a dark and cozy room feel lighter and brighter for the summer months!
Here's the bedding we used:
And you can see most of the items in this room below. Just arrow through and click the photo you're interested in:
Be sure to check out the beautiful bedrooms these bloggers have shared this week!:
Monday Lineup - July 20 
A Stroll Thru Life , 11 Magnolia Lane , Remodelando La Casa
Tuesday Lineup - July 21

Wednesday Lineup - July 22

Thursday Lineup - July 23

Friday - July 24
 See more of our home here. To shop items in our home, click here! Never miss a post by signing up to get posts via email. Via https://www.thriftydecorchick.com/2020/07/adding-summer-touches-cozy-bedroom.html
I'm back with another delicious and easy salad -- this one is perfect for the summer months, especially if you grow your own herbs and veggies! I think a lot of us have been in the kitchen way more than usual lately, right? This salad is super easy to throw together. It's also a great one to make in large amounts for get togethers, because it can be made well ahead of time.
I planted a garden for the first time in YEARS this summer. I've missed it so much! I have big plans to add a set of permanent raised gardens that I hope to tackle later this fall or next spring.
I use a loose square foot gardening method -- you'd be surprised at how much you can fit into a four by four foot space! Especially if you plant veggies that grow up or vine like tomatoes and cucumbers. This year I started off with the basics again -- a few herbs, two kinds of tomatoes and a ton of cukes!:

This is the smallest one I've picked so far -- most of them are twice this size.
I forgot how many cucumbers one plant produces so I have a TON right now. I remembered loving this recipe when I've had it at restaurants, but I've never made it at home till recently! It's SO fresh and yummy, and if you have a garden you may have most of what you'll need growing in your backyard. I only have to buy a couple ingredients for this when I make it.
I'll list the ingredients and how much I used, but the measurements for this will depend completely on your preferences! It's incredibly easy and quick to throw together: 
Here's what you'll need to make this fresh salad:
Cucumber Tomato and Onion Salad
Two cucumbers, chopped
Four tomatoes, chopped
Half red onion, chopped
1/4 cup feta cheese
One+ tbsp parsley
One+ tbsp dill
Two to three tbsp olive oil
1/4 cup red wine vinegar
Salt to taste
The three main veggie ingredients give this salad great crunch and the marinade gives it wonderful flavor and a bit of bite that is delicious!
Like I mentioned before, the ingredients should be adjusted to your tastes. Add more feta if you want (so good) and I like more red wine vinegar than most recipes I've found. I also LOVE dill so I add more of that as well.
Taste it as you go to see if you you want more of an ingredient!

This is delicious right after preparation, but even better a day or two later after it's had time to marinate in the vinegar and herbs.
I've seen recipes that include avocado as well! If you're not a feta fan, mozzarella would be a great option as well.
Have you tried this healthy and easy salad? It's addictive! I can eat all of it in one sitting. :)
Here's an image to pin and save for later:

Check out this delicious ramen noodle salad as well -- if you like some crunch you will love it!:

See more of our home here. To shop items in our home, click here! Never miss a post by signing up to get posts via email.
Via https://www.thriftydecorchick.com/2020/07/cucumber-tomato-onion-salad.html
I’m back today with a super quick tip that brings wilting flowers back with minimal effort. If you love hydrangeas as much as I do (and who doesn’t, for real) then you’ll love this tip. I hear it works for other flowers like roses as well.
I used to hate when I’d buy a bunch of flowers at the store (or cut them from the yard) and then they’d droop within a day or two. This little trick allows you to keep them (hydrangeas at least) for a week, sometimes more. Here’s what I’m talking about -- see the sad little one on the bottom left?:  Before this trick that one would have been tossed in the trash. Sometimes it happens within a day of bringing them home! Well, as you can tell from their name -- hydrangeas LOVE water. It’s kind of hard to give them too much (at least after they’re cut). The first thing you’ll want to do to plump them back up is snip just a little bit off their stem. (This, along with fresh water, helps prolong flowers in general.) Then you just soak them in water! I fill the sink just enough to immerse them. They tend to float so sometimes I'll weigh them down with something if I have a bunch I'm fixing. Here’s that droopy one and another one that was looking sad in their bath: 
This post may contain affiliate links for your convenience.
See my policies and disclosure page for more information.
I use cool water. You’ll want it to cover them most of the way. I push them down in the water so I don’t have to use a ton of it. Make sure the flower and the stem are both in there. Timing is different for every one -- some perk up in 20 minutes, some I leave in there for an hour or so and just check back to see when they are plump again. Here’s the same flowers after they’ve soaked up the water:  Awesome, eh? It’s like magic! :) You can do the same flower more than once -- just be sure to clip some off the stem first. These are about a week old:  And each one has been bathed at least once. :) It’s different every time I buy or cut them really -- some hydrangeas last for five days without needing a bath, some need it within a day or so. When I mentioned this trick on Facebook, a reader mentioned a method she uses -- she said to snip them down and replace the water in the vase with HOT water, then put the flowers back in. I tried that because it would be a lot faster, but it didn’t work for me. The first photo with the droopy one up above is actually after I tried that method. (Hours later.) It's fun to see the before and afters -- wouldn't it be nice if it was this easy to get everything beautiful again? :) It always surprises me how different they look: 
Any tips you use to prolong the life of your flowers? If I don’t have the packet of flower preservatives that come with them, I’ll sometimes use ground up aspirin. I’m not sure if it really helps or not. I’ve also heard clear soda and even vodka work in the water as well. Cheers! Here's an image to pin for later if you'd like to save this trick: 
Find that beautiful white pitcher here! I love using it as a vase.
And check out this post for a TON of tips on how to grow hydrangeas!: 
See more of our home here. To shop items in our home, click here!
Never miss a post by signing up to get posts via email.
Via https://www.thriftydecorchick.com/2015/05/quick-fix-plumping-up-flowers.html
Hello my friends! I'm getting back into some DIY projects that have been on my list for awhile. I s l o w l y replaced the door and window trim in our old house and I've started to do it in this home as well. I have six doors done and about six to go! (See why I'm not doing all of them below.)
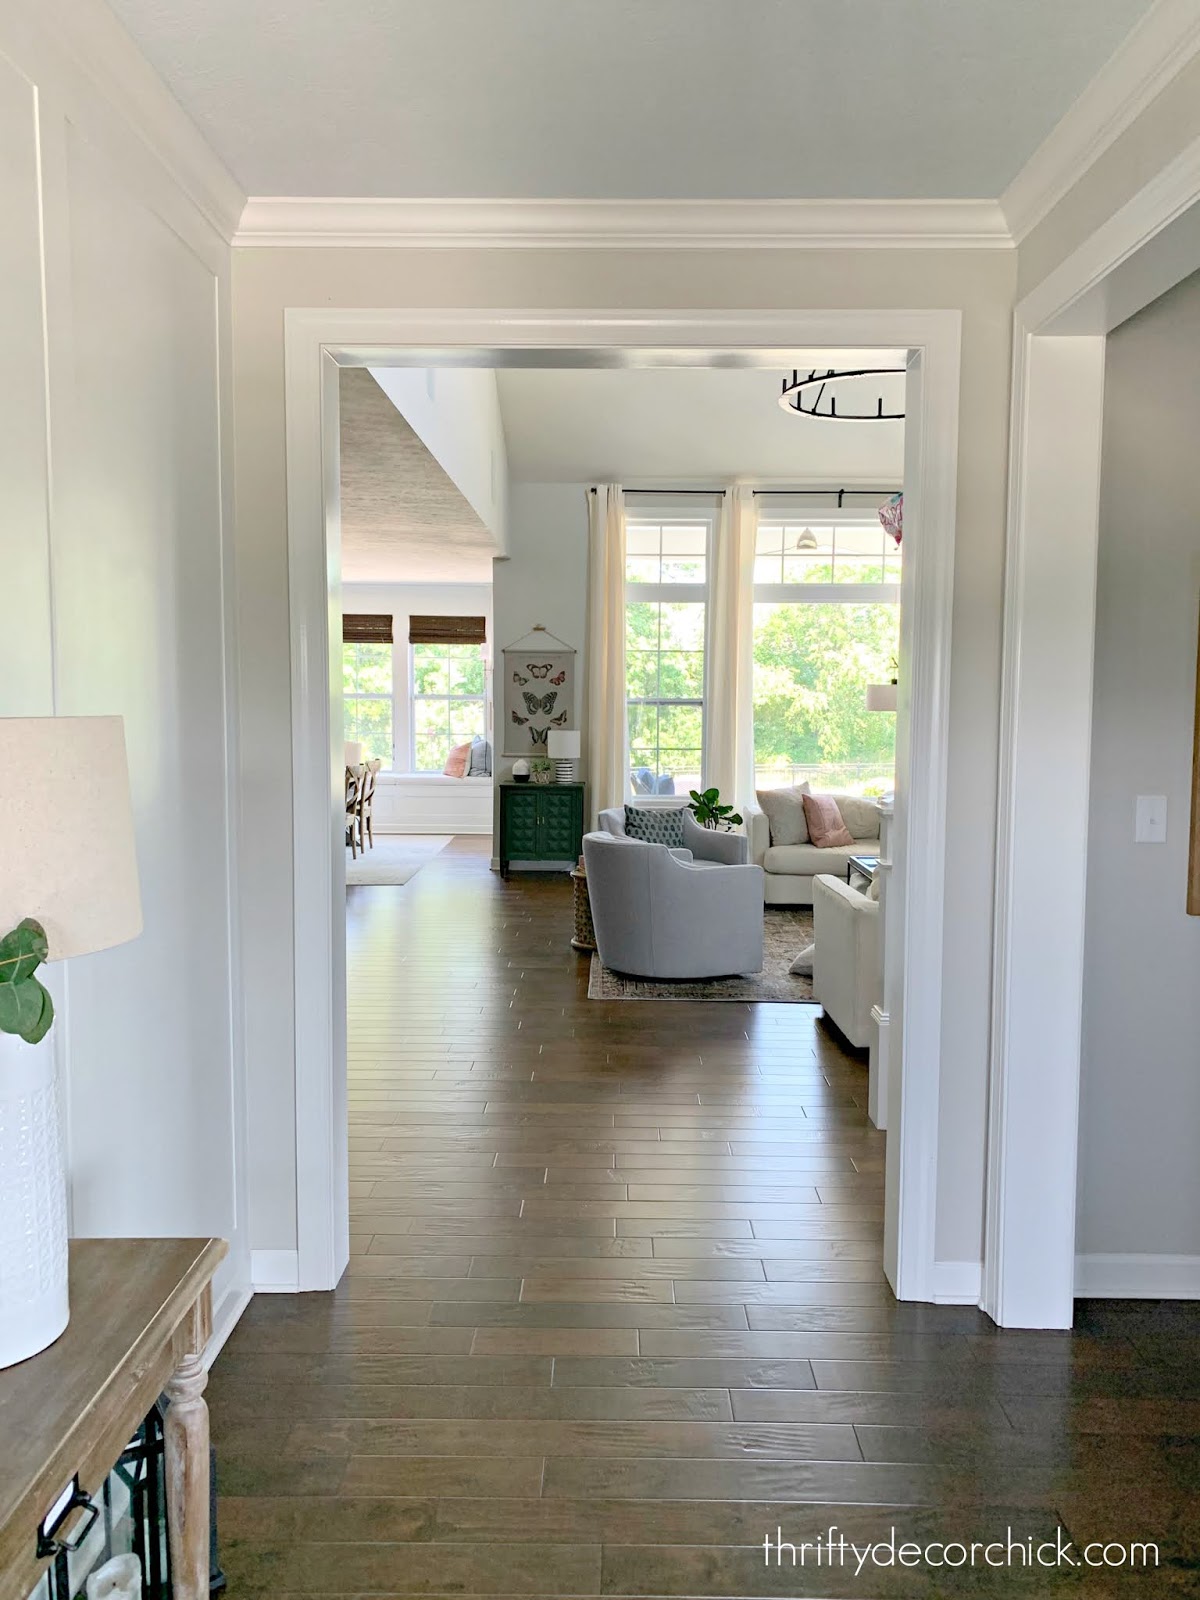
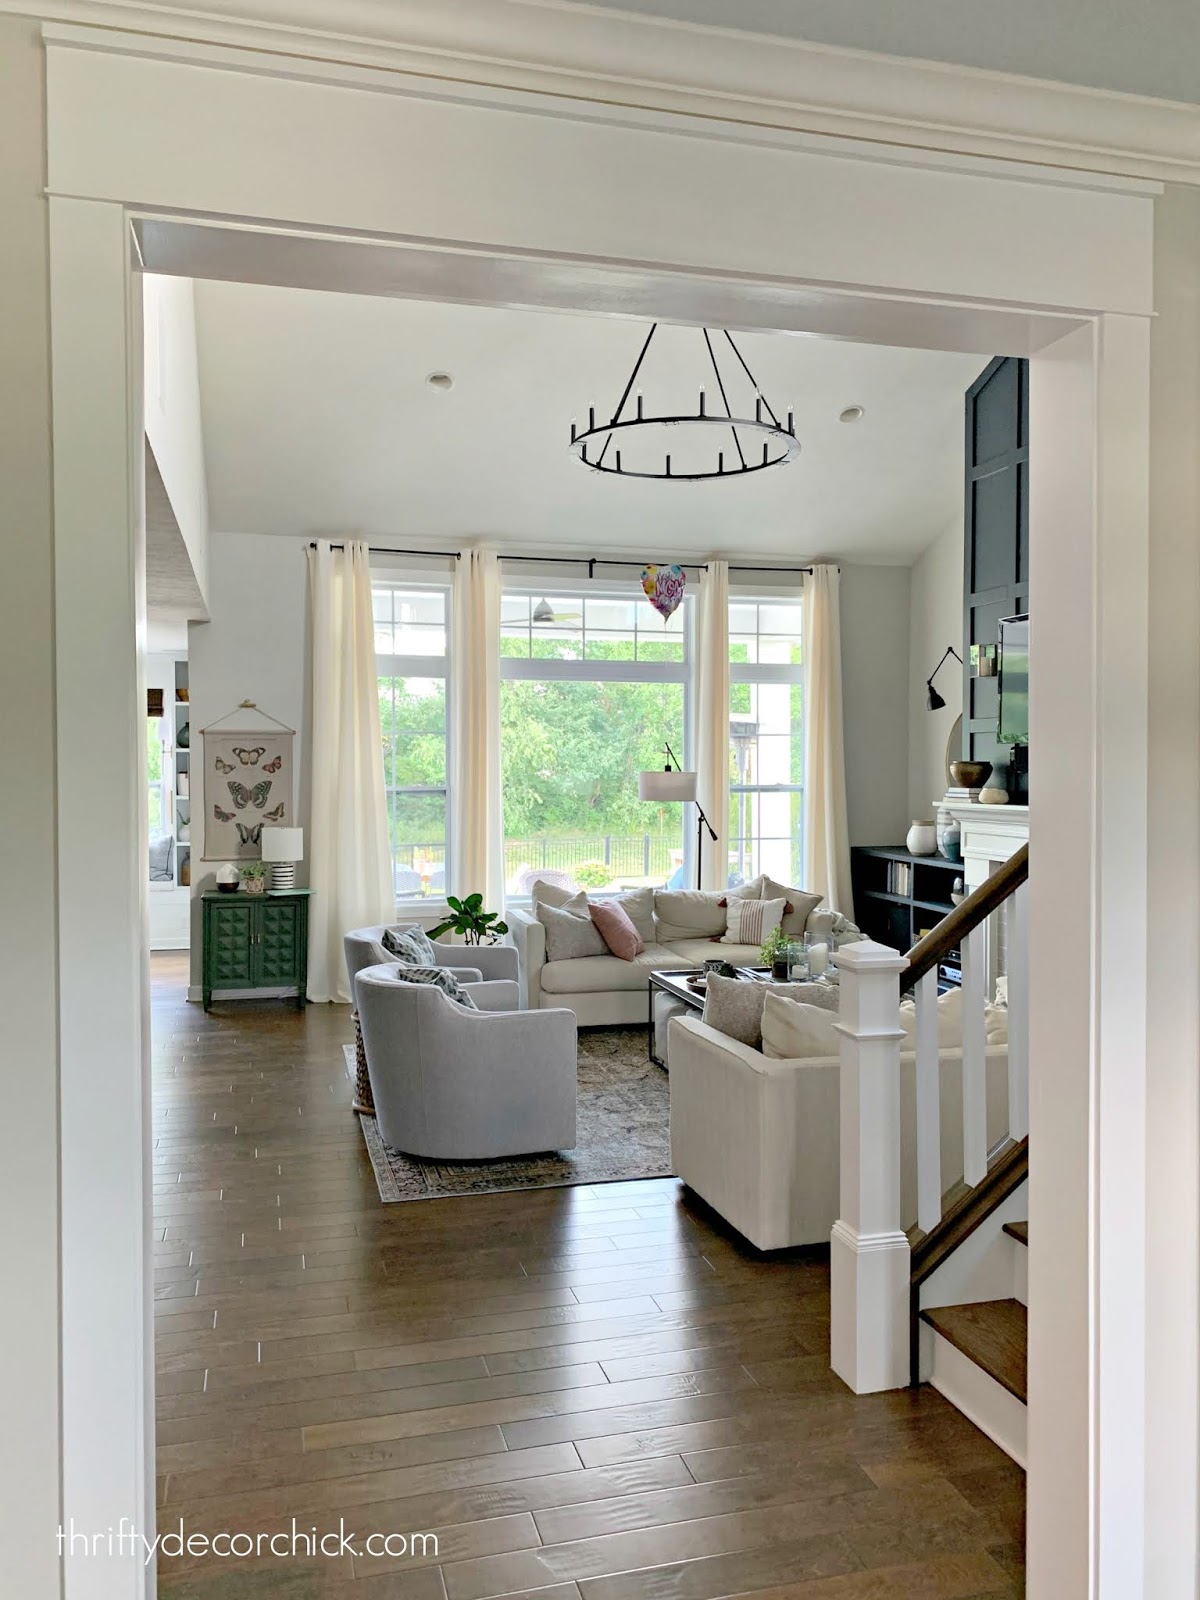
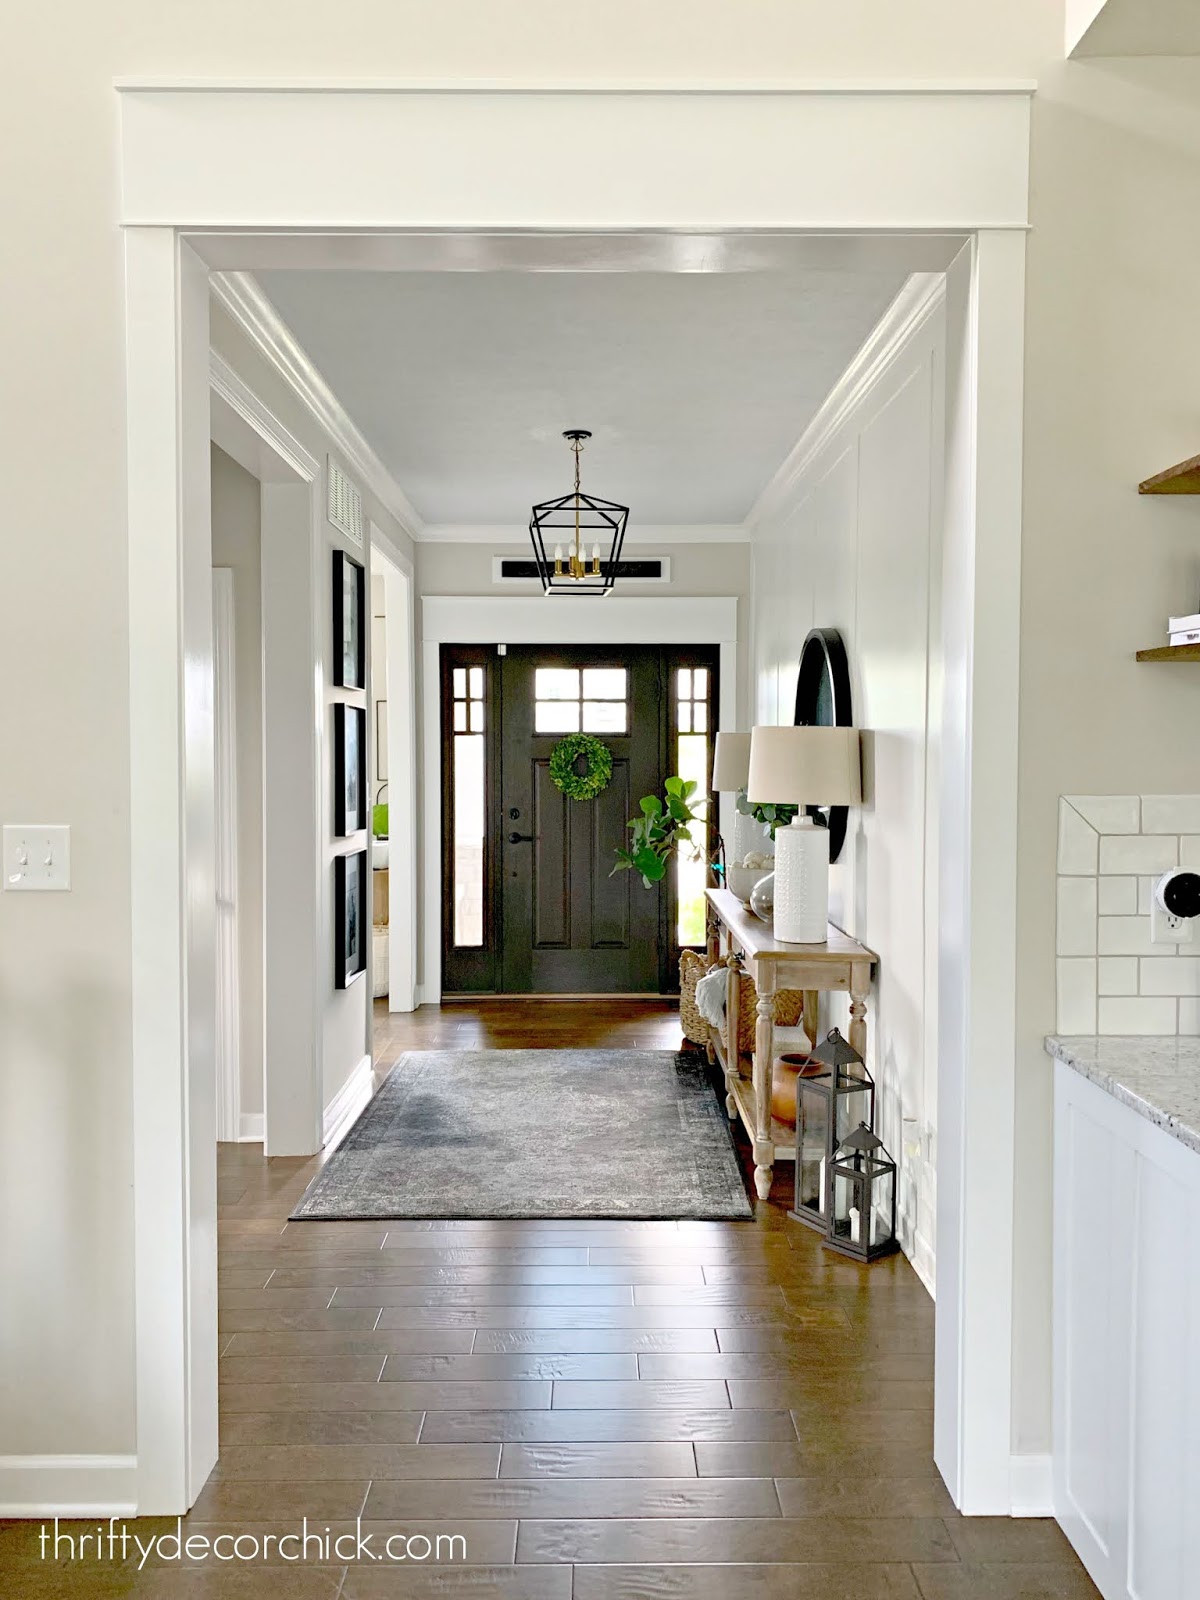
I've shared how to add chunky trim to windows here and give doors the Craftsman look here. Over the years I've found a slightly easier way to do this that I'll share in a bit. This weekend I finished up another spot in our foyer. I added my chunky Craftsman trim around our front door last fall: 
And last year I also added a really thick header over the doorway into our great room:
But I still had the other side to finish up:
This post may contain affiliate links for your convenience.
See my policies and disclosure page for more information.
I had leftover wood for the main header part, so just had to purchase a few pieces. I'll list those at the end of the post so you'll have a shopping list ready if you'd like to try this!
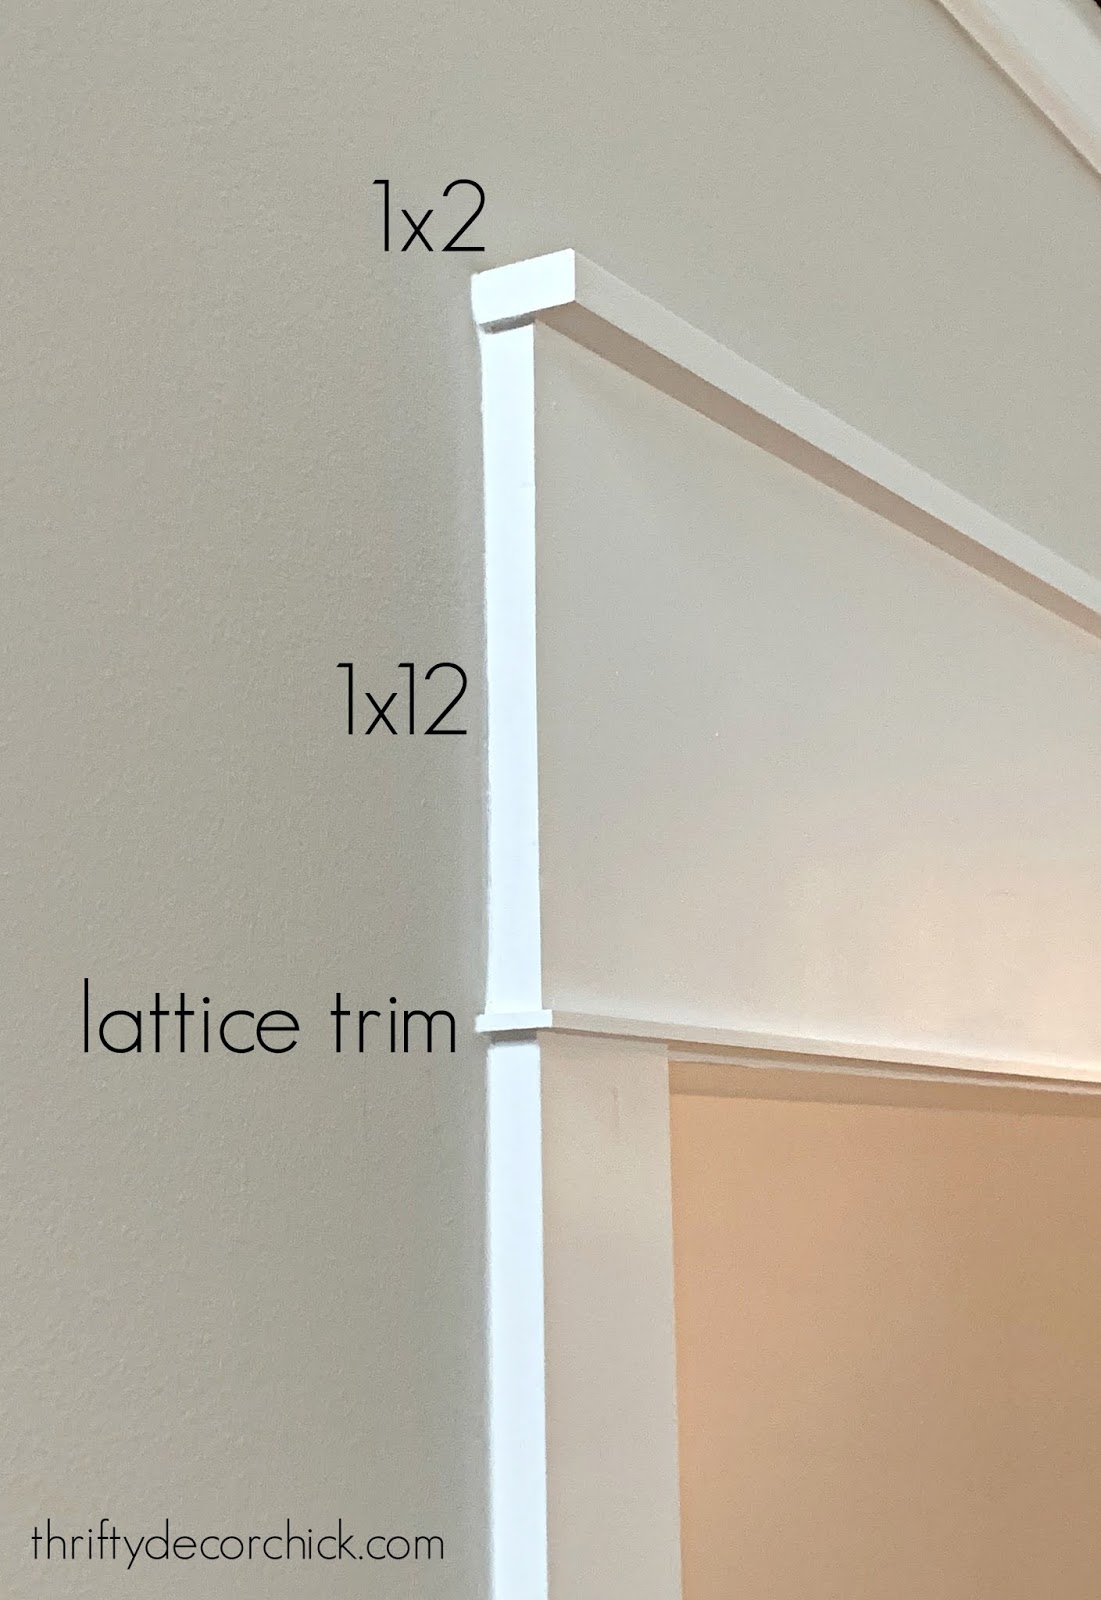
Most of the work when replacing skinny doorway trim with thicker stuff is in the removal of the old trim. You'll need a utility knife to cut the caulk around the trim, as well as a hammer and pry bar to get the trim off the wall.
After that you'll need to replace the side pieces (see more about that in a minute) and build the header. Lately I've been building that header, then caulking and painting before installing it over the door. It's easier to paint when it's not up high!
I'm always surprised at the difference the thicker door trim makes -- I absolutely love it!:
We have a LOT more doors and open doorways in this house than we did in our old one, so I've come up with a plan on what I'll be adding. I think installing the thicker trim over every door would get to be a little much.
I plan to add this Craftsman door trim (sometimes called farmhouse trim) to our exterior doors (like I did over the front door) and then on the main open doorways like this one:

I will be leaving the trim on smaller doors as is. At least that's the plan for now! Just the larger doors will take me another year. ;)
There's something about this addition that makes the whole space feel grander. It's a detail that people may not be able to put their finger on...but it gives a home an elevated feel for very little work!
Here's how the other side of the doorway looks:
I've found a little shortcut that has helped both the cost and time it takes to do this! Our old house had thinner trim on the sides of the doors, but here it's a bit thicker. So for most of the taller doorways I've started just taking the top portion off and replacing it with the new header.
I shared how to just replace the top of the trim here -- this oscillating tool is a must have if you're going to do that:


It is SO much quicker and will save you money on trim! Go here to see more about how I did that!
It looks just as good too -- the thick header is what makes the biggest impact anyway:


And on the other side as well:

I plan to keep this method going with all of those open doorways. If you have any DIY experience, this is an easy project!
As I mentioned, I also added thick trim around our old windows and it made a HUGE difference:

Those windows didn't have any trim to start, so it was a noticeable difference having that beautiful accent.
We have window trim on our windows at this house, so someday I may replace the tops and bottoms to start chunking them up a bit. We'll have to see!
I spent about $20 for this doorway, because I had the biggest piece in my wood pile. Here's what you'll need to do this at home:
1x whatever thickness you want for middle of header
lattice trim for under the header
I use primed mdf for the sides of our doorways when needed (you can use 1x4's as well but they cost more)Have you added this to your home? It gives our house so much more character! It's such an easy way to update open doorways that just have drywall and no trim too. See more of our home here. To shop items in our home, click here! Never miss a post by signing up to get posts via email. Via https://www.thriftydecorchick.com/2020/07/this-diy-project-will-add-ton-of.html
Hello there! I hope you had a wonderful and safe holiday weekend! I'm ready to get back into some DIY projects after a few weeks of slower summer days.
I've got one in the works, but I was reminded of one of my favorite room makeovers ever yesterday that I shared on Instagram. We lived at our old home for 14 years, which gave me a lot of time to make over spaces (sometimes a couple times). ;) I thought it would be fun to gather my top five room makeovers to share with you! I made over pretty much every room in that house, but I'm only sharing the BIG redos that I did mostly or all myself. (I've done a ton in our new house already, but we've only been here 2.5 years so these makeovers are more involved and dramatic.) You know how much I love a big before and after! Loft craft room/officeFirst up, our loft started out as a play room for our son. I remember my readers loving those long picture shelves I hung (on a very tall ladder!):
You'll notice a definite trend of dark to light in these makeovers. I was a huge fan of reds and golds 12-15 years ago.
This is that same view after this space got a makeover from top to bottom:
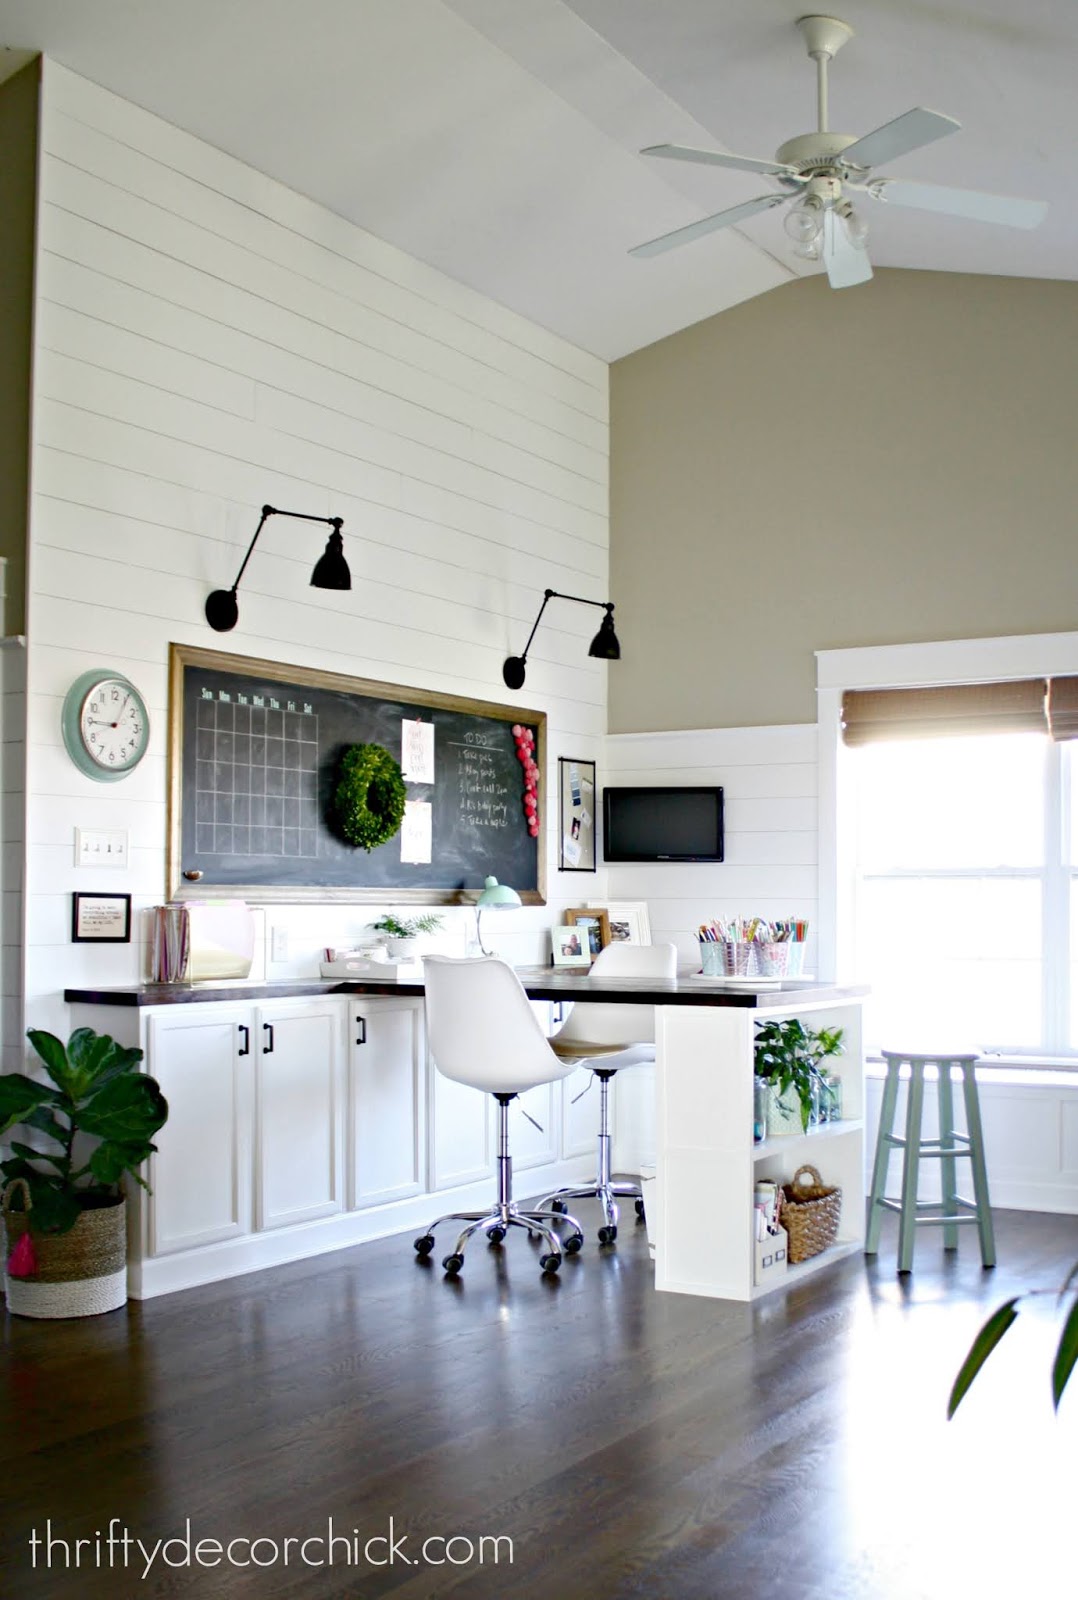
I planked and painted the walls, built the wall of craft storage with kitchen cabinets, built the big chalkboard and that desk as well.
The other side of the room got the same light and bright treatment -- this is it before:

And this is that space after all of the new trim and art:

See more about that book nook here!
This ended up being my office, but that huge double desk made it so my husband could work here often, as well as our son. We used this spot a LOT!
There were so many fun details in this makeover. You can see the full craft room/office reveal here and all of the sources here!
Mud room makeover
Ohhh this is a good one!! I HATED our mud room/laundry combo. I mean, loathed. I took this "real life" photo to share how it was always such a mess:

As much as I tried, getting our shoes, outdoor gear and laundry necessities organized well just wasn't happening in this spot.
When we started finishing our basement I decided to move the laundry room down there. BEST IDEA EVER. I installed beadboard around the whole space and built the upper and lower storage:

I went out of my comfort zone with some brighter colors in here for a couple years, but this soothing blue/gray and white combo was where I ended up.
Having this open space when walking into the house was a game changer for us:

You can see this full mud room makeover here and see where the laundry went here.
Complete kitchen redo
My biggest room redo ever was our kitchen. It got a bunch of updates over the years, but about five years ago I decided it was time to completely redo the space. I worked SO dang hard on it!
Here's an early look at the bay window area that used to have a door to the deck:

And this is how it looked after we moved the door and then had a window seat put in:

Moving the table made all the difference in here. It opened up things tremendously and let me extend the island a ton.
Here's the dark kitchen before:

And after all of the changes I made...taking down a wall of cabinets, building up the remaining to the ceiling, extending the island to house the microwave, painting them all with a sprayer and tons more:

I'm not sure I've ever worked so hard on a room in my life! It took almost a year from start to finish, but I did most of it myself and paid for it all in cash (as we do with all of our projects). Modern farmhouse bathroom makeoverOK, this next one may be a tie for the hardest I've ever worked...it's hard to say. This bathroom was a fraction of the size and didn't have as many huge projects...but tiling. Whew! It's hard stuff.I always hated that separation in our son's bathroom and my plan from early on was always to take the wall down: 
I know some families with multiple kids really like the separate spaces, but we didn't need that.
And I think you'll agree that opening it up was worth it!:

Tiling those floors was HARD work. And tiling the wall behind the vanity wasn't too bad, but grouting it was horrible. Not going to sugar coat that one. ;)
But it was SO worth it! I built and stained the vanity and did all of the trim and painting as well:

You can see the whole before and after of this modern farmhouse bathroom here. Find links to the projects and items used in this post.
One of my biggest pet peeves in homes (especially my own) is wasted space. We used our dining room maybe twice a year:

A few years after moving in, I started to develop an idea to change up this space into something that was still pretty, but something we'd actually use.
One day I started the dining room turned library transformation and never looked back!:

Moving our laundry room to the basement, moving the back door in the kitchen and getting rid of our dining space were the three best things I did in that house!
The bottom storage was SO useful -- I used it for all of our serving and entertaining supplies. But most importantly, we actually used this room SO much more!:

I preach this all the time, but my favorite makeovers all involved making changes that made the spaces work best for OUR family. I know the family that lives there now appreciates them too! Unless you know you'll be moving soon, I encourage you to make your home the way it serves you and your family best. Don't be afraid to make big changes! :) Have you repeated any of these big changes/makeovers in your home? See more of our home here. To shop items in our home, click here! Never miss a post by signing up to get posts via email. Via https://www.thriftydecorchick.com/2020/07/my-top-five-huge-diy-room-makeovers-ever.html |
