|
Hydrangeas are one of my favorite flowers, but I didn't used to be so great at growing them. They hated me because I didn't know what they needed. :) I’ve learned a ton about the beautiful hydrangea over the years and wanted to share my knowledge with you!
Overall hydrangeas are actually very easy to grow and take care of! They need very little care (see what they do need a lot of below) and will give you tons of beautiful blooms. Tip one: Patience is neededThe sleep, creep, leap saying about plants is so true. The first year they don’t do much, the second the come along a little bit and the third they leap!This limelight hydrangea is an example of one that absolutely took off after a few years. This is how it looked the first two seasons (it didn't even bloom): 
And the third year it started to take off!:

You can see how much it grew just a couple of years later: 
This post may contain affiliate links for your convenience.
You should see this one now! It covers that whole window. Overall, with hydrangeas you just need to have patience. Hang in there...they will reward you with beautiful blooms eventually! Tip two: Don't give them too much sunMany hydrangeas like a good mix of sun and shade. Preferably sun in the cooler mornings and shade in the hot afternoons. These were planted on the afternoon/evening sun side of our home and did NOT do well:  
I’d had these for two or three years at this point. Not one had ever bloomed, they all barely grew, it was just sad. I moved them to morning sun (afternoon shade) and look at the difference!:  The one on the left grew a TON from where it was (it was the smallest one). They don’t have a ton of blooms in this photo because I cut so many. ;) These are the mop head variety, and they have really strong, beautiful leaves too:  
The leaves on that pink plant are especially hardy, dark and pretty. Some can handle sun more than others though. I found some PeeGee trees on clearance years ago and was so excited -- they are basically a hydrangea tree. These thrive in lots of sun!:  The Pee Gee tree is a panicled hydrangea, like the limelight I first showed you. They have cone shaped flowers that get HUGE:  Limelights like sun as well! If you are having problems getting yours to grow -- try moving them to a spot where they’ll get some rest from the heat in the afternoon. **By the way...if your plants are not blooming, they probably need more sun. :) Tip three: Water, water, waterHydrangeas need MEGA water. I mean, it’s in their name. :)
I just watch my plants -- if they start to wilt at all I know they need water. We are in Indiana and I find they will do fine without regular waterings until about mid July when things get dry and hot. After that I keep an eye on them. And of course, water newly planted hydrangeas or those in pots often! They need a lot of moisture, but watch how you water them too. If you can, water at the base of the plant (not with a sprinkler) so the water goes right to the roots and doesn’t sit on the leaves. Tip four: Plant at the right time of yearBecause hydrangeas need so much water, it's best to plant them in late spring or fall if at all possible. It’s a lot of upkeep to keep them healthy and hydrated if you plant in the heat of mid-summer.You won't believe how much our plants have grown at this house! Look how tiny they were exactly two years ago: 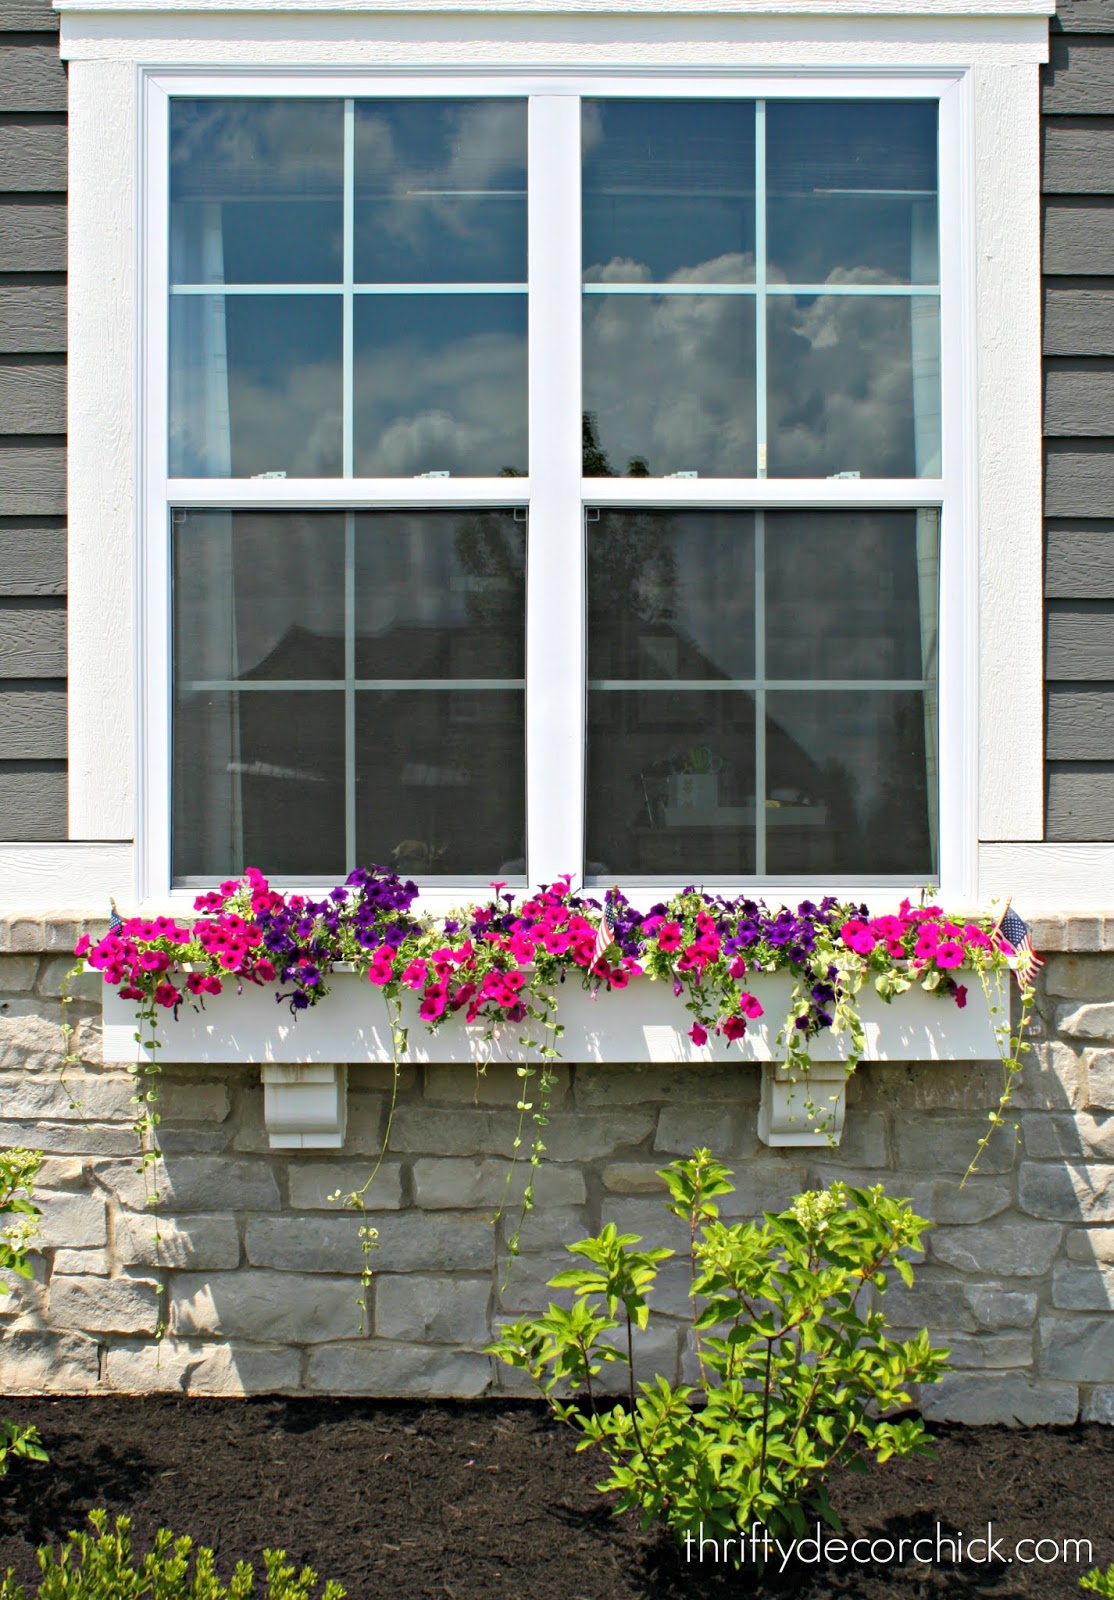
Look at them now!:

The window boxes got hit by a bad frost so they are very slow going this year. (I covered them all well but they still hated it.)
Another before and after -- you can see the difference on both sides of our sidewalk:


Early summer planting would be a good bet so you can enjoy the blooms all season, but you can get some killer deals later in the fall too! Tip five: Hydrangeas don't need pruningI don’t prune (or cut down) my hydrangeas -- although you should clean some up a bit. Some hydrangeas grow back from the ground (on new wood), and the stalks they bloomed on the year before can be removed.This can be tricky because sometimes it’s hard to tell between the two. This is an example of the type that grows on new wood:  The blooms on new wood come from new growth at the base of the plant. I always pull those old stalks out of the ground (or cut them down) in the spring or early summer. You can leave them, but I think the plants do better when those are removed. You won't want to prune these at all during the bloom time in summer. If you'd like to clean them up after the blooms die away, you can do so late summer or winter before the buds start to grow and open. Some grow right back on old wood -- meaning they bud on stalks from the year before. Lace caps and mop heads (big round blooms) are a one that grow on old wood: 

If you do want to prune old wood varieties, do so immediately after they flower (but don't do it much past mid-summer). But it's really not needed -- hydrangeas of all kinds do well without much work! By the way, the endless summer variety bloom on new and old wood -- so if that confuses you, they are a great option! Bottom line, you don't have to touch hydrangeas much to have them do well! Whew – I’ve learned a lot over the years! I hope these tips help you grow this pretty plant! I was determined to figure out what made them tick because hydrangea are one of my all time favorites and I LOVE having them to cut and bring inside: 

The limelights and Pee Gee blooms turn the most beautiful pink/green in the early fall -- they are just gorgeous! I used them in this post years ago:


Are you a hydrangea lover? Any great tips I’ve missed? See my easy tip for plumping up wilting hydrangeas here!: 
You can pin this image to save these tips for later!: 
See more of our home here. To shop items in our home, click here! Never miss a post by signing up to get posts via email. Via https://www.thriftydecorchick.com/2013/07/growing-hydrangeas-not-killing-them.html
0 Comments
Since we moved into this house nearly three years ago I've become an avid bird watcher. I think it's because we have such big picture windows and we can easily see right out to the back. I find great joy in watching them and keep adding to their accommodations around our yard. I've officially turned into my father. :)
Is this what happens when you get older? Ha! Or maybe I'm just enjoying the simple things more as I age. Let's go with that. I wanted to show you a few of the things I've picked up for the birds lately and then some favorite items I've used for years. You know, in case you want to become a bird geek like me. I didn't show you a close up of the new bird bath when I shared the patio tour last week: 
This post may contain affiliate links for your convenience.
See my policies and disclosure page for more information.
It's actually quite cute. I found it at Lowe's and it's a bird feeder with a planter underneath:

I love it! I thought the combo of the two was such a good idea.
The birds love it too! It's pretty shallow so I do have to keep up with adding water every few days.
I found this solar fountain for the bath and was super impressed with how well it works!:

It just floats around -- if it's in full sun it works great. It does not hold any kind of charge, so as soon as it hits any shade it will stop working.
See how high it throws out the water?:

It comes with different caps to change the fountain if you'd like.
We don't keep it out there all of the time because it tends to float to the edge so the water is thrown out of the bird bath. If it runs out of water but is still in the sun the motor will keep running -- and it can get loud!
I plan to add tie a rock or something to the bottom to keep it from moving around so much. I'm super impressed with how powerful it is though! It would be great in a small water feature.
I found this Adirondack chair feeder years ago at Lowe's and it's my absolute favorite:

The birds love it even more! It's so easy for them to fly up and eat what they want.
Unfortunately I can't find anywhere but Tractor Supply anymore. Lowe's and a few other places used to carry it. As you can see, our Blue Jays love it. :)
The cardinal couple we have nearby visits often as well:

Sometimes they knock some of the seeds out, but they always eat what lands on the ground too. I like having this one close to the house so we can see the birds up close.
Another one of my favorites is this tire swing bird feeder:

I've had one for years just because it is seriously the cutest thing ever. It's very small though, so you'll need to fill it often.
I prefer open feeders because I can fill them so easily. These basket-type hanging bird feeders are so convenient:

We have a ton of squirrels around here, but I never see them on these. It could very well be I'm just not seeing them, but we don't seem to have a big problem with them eating everything.
This cute little bird house option from Magnolia is another one I plan to get soon:

That one and the tire swing would be great for smaller, younger trees!
I got this window bird feeder for my Dad last year and I like that you can see the birds up so close! I also love this camper bird feeder -- how cute is that!
Here's a list of the bird feeder/products I use and love again if you're interested in becoming a bird nerd like me:
Are you an avid bird watcher? I mean, in your backyard at least? :) I actually considered buying some binoculars the other day so I can see some of them better. ? You better believe when we plant more trees in the back I'll be adding more feeders! See more of our home here. To shop items in our home, click here! Never miss a post by signing up to get posts via email. Via https://www.thriftydecorchick.com/2020/06/im-officially-bird-nerd-my-favorites.html
Hey there! I had the most delicious salad last week and immediately asked for the recipe from my friend. It's crunchy and sweet and has...ramen noodles! Weird, right? Hang in there, I promise it's so good!!
As I get older I find I like more foods than ever. Do you find the same? I don't know if my tastes have matured over time, or that I'm just trying more foods than I used to. Up till a few years ago I didn't even like avocado -- now I could eat it with a spoon.
I actually avoided this salad at first because I didn't like most of the ingredients. Everyone raved about it though, so I had to give it a try. It was all over then...I hoarded the rest of it for myself and couldn't get enough. :)
So I knew I had to share it with you! After some searching I realized this is a very popular recipe, but can vary quite a bit. It's a perfect dish for picnics or get togethers, especially in the warmer months.
This ramen salad is cold and crunchy and full of flavor:

It's very quick and easy to put together! As usual, I have some edits and thoughts on the ingredients, so stay tuned.
Here's the list of ingredients:
Easy ramen noodle salad
2 packages chicken ramen noodle soup mix
1 lb cole slaw mix
1 pkg broccoli slaw
1 cup sunflower seeds
small bunch green onions, chopped
Dressing:
1 cup vegetable oil
1/2 cup sugar
1/3 cup rice vinegar
2 chicken ramen seasoning packets
I mixed the cole slaw and broccoli slaw together first:

I couldn't find actual broccoli slaw, so I used a bagged broccoli salad instead. I didn't include all of the broccoli and chopped up what I did use.
Then I mixed in the sunflower seeds and chopped onion:

This post may contain affiliate links for your convenience.
See my policies and disclosure page for more information.
The awesome crunch in this salad comes from the sunflower seeds and the ramen. (You can see a few cranberries that were in the seeds from the salad mix I used.)
I put the noodles in a baggy and then pounded them up a bit:

The bag is helpful for another reason that I'll share in a minute. Hold off on adding the ramen till the end.
Mix up the dressing -- I tried using less sugar than the 1/2 cup at first, but after tasting it I used the full 1/2 cup.
Also, I only used one ramen chicken seasoning packet just to cut down on the sodium. It tasted just as good with the one!
Mix it all together and ENJOY the light, sweet, crunchiness of this delicious salad!:

Find our dishes here (they have held up for years!) and chargers here
I made this for me (my family won't touch it, even though I KNOW THEY'D LOVE IT) so I knew I'd be keeping the extra for later. I like the crunch of the ramen, so I kept that out. I'll keep it in the baggy and add it in when I eat the salad.
I should have left the sunflower seeds out as well -- just something to consider. If you are making this for a big group, I'd leave the seeds and ramen out till right before you serve. Or you can add them and then add the dressing right before serving.
I should mention that I don't like cole slaw or broccoli, and sunflower seeds are not an item I'd reach for...but I LOVE this salad. It is SO dang fresh and yummy.
Have you tried this ramen noodle salad? Am I the last to this party?
** I mentioned above that some random cranberries made it into mine because I used the sunflower seeds from the bagged salad. I think cranberries would be a lovely addition to this salad.
Here's an image to pin for later if you'd like to save this recipe!:

See more of our home here. To shop items in our home, click here! Never miss a post by signing up to get posts via email. Via https://www.thriftydecorchick.com/2020/06/delicious-ramen-slaw-salad-recipe-yes.html
Hello my friends! I hope you're all doing well. Thank you so much for the kind comments on our backyard patio. :)
I'm back with 20 more awesome outdoor do-it-yourself projects today. I put the call out to my blog friends and they answered with a TON of great ideas for outside. You can find the first 20 DIY outside project ideas here if you missed them!
As always, you can click on the blog name under each photo to get to more details about each project.
I planted a veggie garden this year for the first time in forever, but eventually I'd like to make a permanent spot with a lot more planting space. I loved these raised planters surrounded by pea gravel:

I love the sound of walking on pea gravel. Is that weird? It's so soothing to me.
This cute A-frame plant stand would be a pretty addition to the front porch:
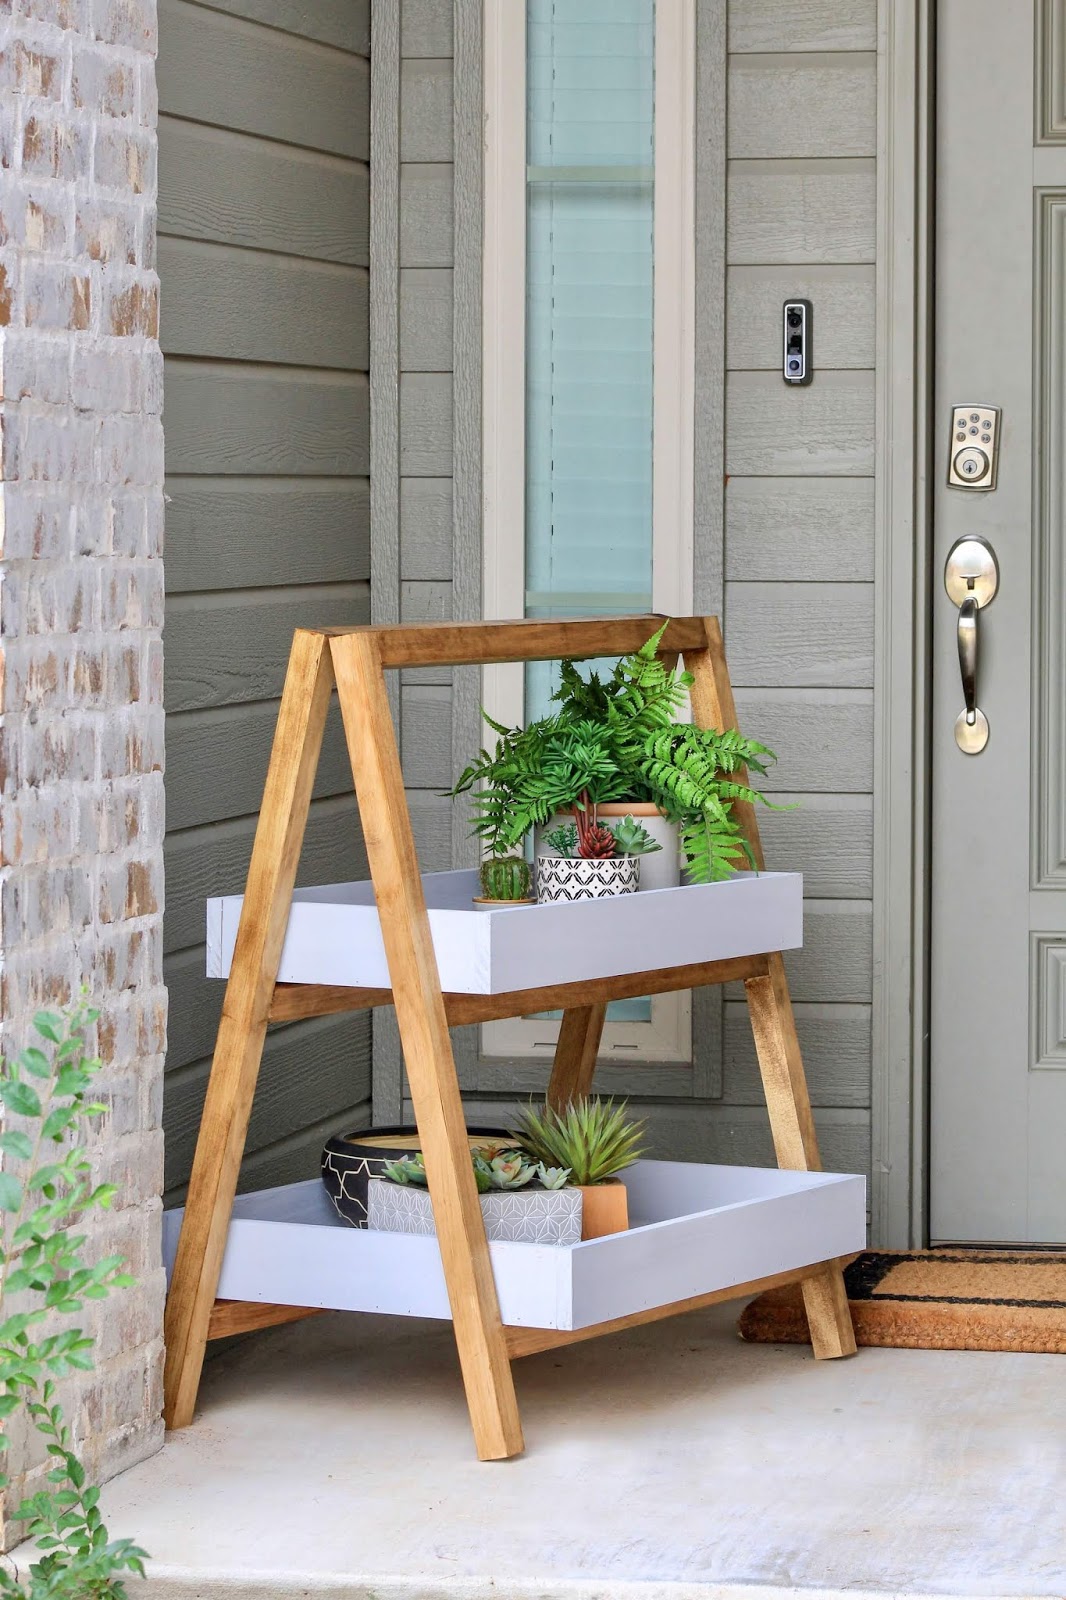
But it would also look great out back -- it could double as a drink or food holder as well! Or even a different kind of nightstand. :)
These outdoor drapes are made with a different material than I've seen used before, and I love the dark trim accent!:

I think these DIY solar lanterns are SO cool! What a great idea:

They'd look great hanging from a fence or pergola.
A DIY outdoor playhouse (with plans!) would be a blast for any child:

I mean...I wouldn't say no to it. And I'm in my 40's.
I love this idea for decorating outdoor flower pots:

I used the same method to make my own decorative knobs years ago! The possibilities are endless.
This modern sofa build could be changed up to fit any outdoor decor with stain or paint:

I love the look of raised planters made of wood, but I also like the idea of using stone:

These raised gardens with stone have softer, more organic lines. If you're looking for big planters at a good price...well, good luck. Ha! This is a great idea using buckets to create outdoor planters: 
Do you have a big empty wall on the outside of your home? This modern wood slat wall is super sharp: 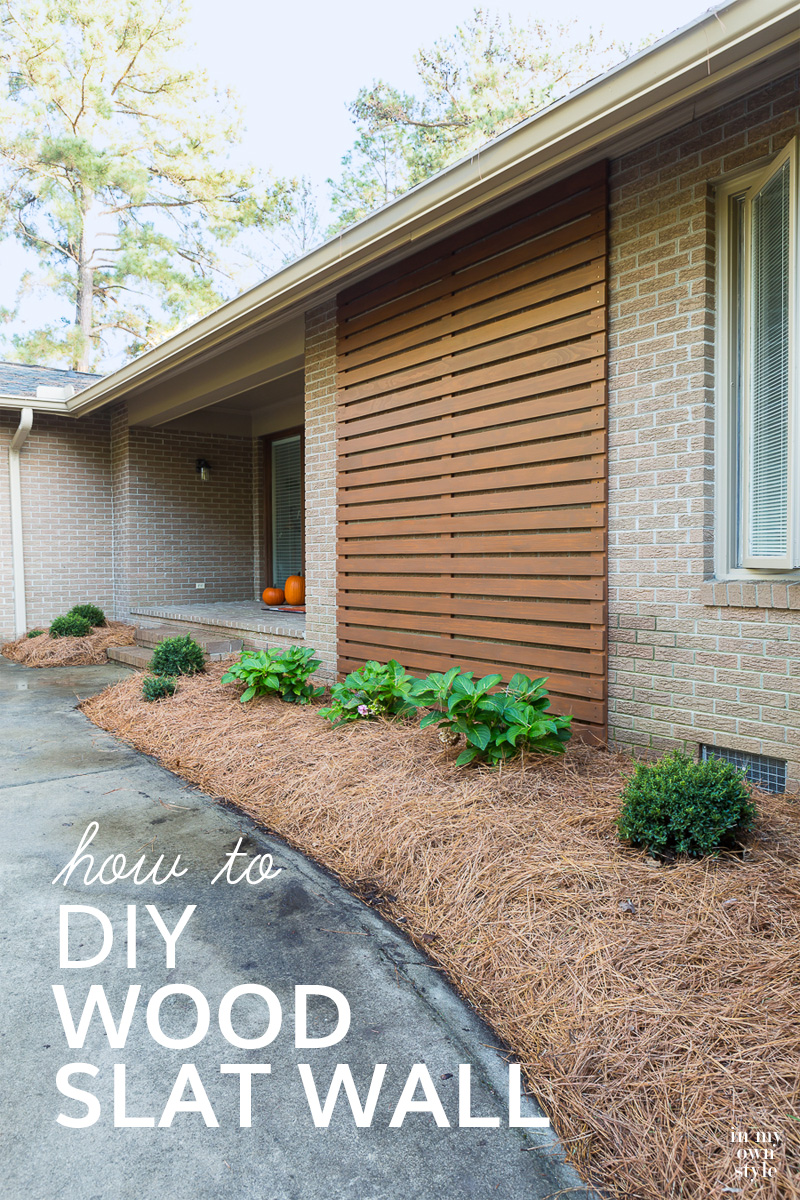
Saying "sharp" makes me feel like my mother. ? This is another one I may try -- putting permanent poles in the ground for a hammock: 
We have a metal stand that falls apart when we move it so this would work so much better! I'm a hydrangea NUT (go here to see my tips on growing hydrangea plants) and last year I started growing them in our patio planters -- yes, you can do that!: 
Keep in mind they need more water in planters than in the ground -- and I plant mine in the ground in the fall instead of bringing them in. This is another project on my to do list! Because we don't have any mature trees around the patio, we'll have to make these cement filled planters to hold outdoor lights: 
The bonus is, if you don't fill them completely, you can still use them as planters. (As Shannon did here.) I love this little stair step flower planter idea that would be great for herbs as well: 
What a great knock off outdoor side table -- for a TON less!: 
If you have a brick house you're thinking of painting, this is a great tutorial: 
There's something about a white porch with black accents...I love it! I love a good upcycle! Can you tell what this plant stand was before?: 
I really loved this idea too -- a wood bench for the front yard with house numbers: 
It also serves as a planter! How cute! If your outdoor space is limited, go up with your garden! 
Fill them with wave petunias that will spill out with tons of color. This is another great way to grow herbs. And last, but not least, this is a helpful tutorial for adding a DIY flagstone pathway: 
SO MANY great ideas! Every time I share a round up of my fellow blogger's projects I walk away with a longer to do list. Have you tried any of these at your house? Be sure to check out the first 20 exterior projects here! See more of our home here. To shop items in our home, click here! Never miss a post by signing up to get posts via email. Via https://www.thriftydecorchick.com/2020/06/twenty-more-beautiful-exterior-diy.html
It's finally patio season! We've had really lovely weather here lately and have been enjoying our outdoor spaces SO much. We had a backyard patio installed last summer that we've been loving this year.
We pulled everything out of the garage and set back up earlier this spring. I got the flowers planted in the pots recently and they've had time to start filling in. We also picked up a couple new items for the patio recently and now it's such a sweet and soothing retreat.
I just shared this space last summer, but I'm so pleased at how it's coming together this year I thought I'd do an early summer tour.
I finally got a garden planted for the first time in forever and I'm so excited about that! It's way in the back of the yard though, so I also planted some herbs in pots on the table so I can run out the back door and grab them for meals:
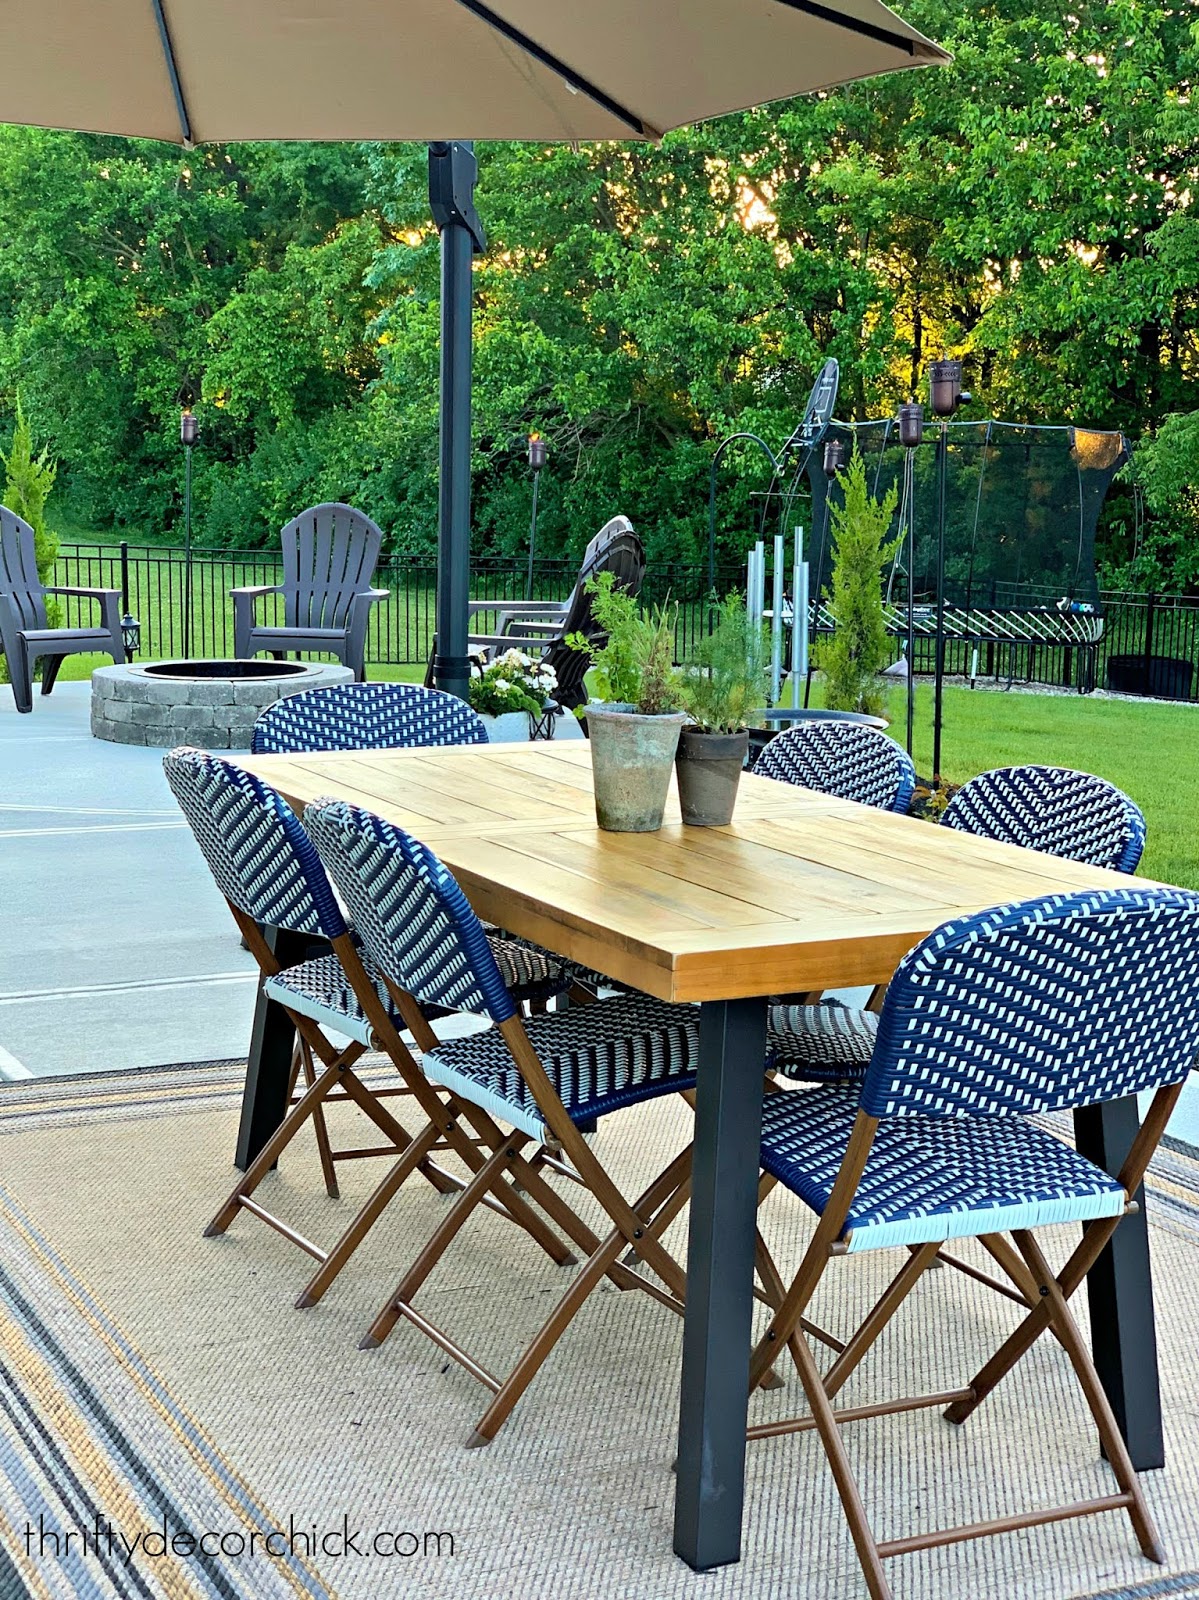
I refinished that wood table earlier this spring and it looks brand new! The table isn't huge but we've had a ton of people around it and it's worked out fine.
(I'll share all of the sources at the end of this post in case you're interested in anything.)

This post may contain affiliate links for your convenience.
See my policies and disclosure page for more information.
It's not crazy heavy, but it's held up to strong winds just fine. The sound is SO lovely.
Our covered patio is perfect for really hot days -- I love having so many seating options out here!:


Quick note on our exterior paint color -- it's called Knight's Armor and like so many gray paint colors, it looks more gray in lower light/shade and leans more blue in the sun. You may notice how different it looks in photos of our exterior! I love both versions. :)
The fire pit is so much fun -- we've hard large groups out here and it's such a great space. We absolutely love it!:

I got a bunch of plastic Adirondack chairs on clearance late last summer and only four have survived: 
These are so light and go flying even in the lightest wind. The also break very easily. We're hoping to replace them with wood chairs this summer, but those are not cheap!
I like that we can fit so many around the fire:

My husband misses the outdoor fireplace we had at our old house, but I prefer the fire pit. The fireplace is more of a statement piece, but you have to sit close to get the warmth of the fire.
Like a lot of us this year, the finances aren't going to allow for a ton of updates back here. The budget is tight. :) But I do have one large project I hope to tackle next week, and we are planning on adding a few trees around the patio.
I haven't planted much (the rose bushes are sloooow going this year) but I hope to get more plants in the ground as well:

When we add the trees, we'll probably extend the mulch out in a few spots to soften things up a bit.
I'm excited to get the trees so I can start some shade gardens again. I've missed my hostas! :) Gardening is one of my passions and I haven't done too much of it yet in this house:

I can't wait to see how our pretty patio looks in a few months! We absolutely LOVE our backyard retreat!: 
Do you have a patio or deck in your backyard? Have you been enjoying it lately? We've been especially grateful for it this year. As promised, here's a list of the items and projects you can find on the patio:
 See more of our home here. To shop items in our home, click here! Never miss a post by signing up to get posts via email. Via https://www.thriftydecorchick.com/2020/06/early-summer-backyard-patio-tour.html
Hello my friends! I'm healing well from my procedure and hope to get back to DIY projects this weekend. I can't wait!
I like to keep busy, so it's hard for me to sit still most days. When things started shutting down a few months ago and we were at home, I started working on projects that had been sitting on my to do list for quite some time.
I got through a TON of them and it feels so good! I thought it would be worthwhile to do a quick recap of the bigger projects in case you missed one. Keep in mind as you read through them that this is my job and my passion. I get a lot done because of that. :)
Hopefully these will inspire some fun projects in your home!
I finally finished up the painting in our master bedroom -- I added the wallpaper and trim months ago and was dreading all of the painting. I had plenty of time to tackle it!:
It's so nice to have this done! I just have to paint one more outlet cover that I forgot about. ;)
I made some updates to our garage doors that didn't break the bank, but they made a big difference!:

I plan to add more hardware to the doors soon. :) I absolutely love those lights!
Since we were cooking at home a LOT more, I shared a few of my favorite kitchen gadgets we use every week:

That is the best popcorn popper!
I also finished painting most of our mud/laundry room...again, after a year of it being halfway done:

That blue gray color is so soothing and peaceful. Perfect feeling as we walk into the house.
I had a few electrical/lighting projects on my list forever. I shared all about dimmers, USB outlets, sensor lights and more here:

Our outdoor table was in bad shape after being out all fall. ? I sanded it down and refinished it -- now it looks better than ever!:

It was way easier than I thought it would be. Letting the natural wood shine makes the process even simpler.
Our family room ottomans were deflating...it will happen with anything filled with foam. I shared how to refill poufs to make them look like new again:

It's such a minor thing but makes a big difference!
If you have a window or sidelights on a door that you'd like to cover, but keep the natural light, this next one is for you. I have a trick to make windows private but keep that light shining through:

And it's SUPER cheap!
I painted another door black, this time in the kitchen. If you want to paint your doors, be sure to check out the tutorial:

I planned to keep painting more doors, but I got sidetracked. I'll be done in five to ten years. ;)
Pulling out my spring decor really boosted my mood early on. You can see my little spring house tour here:

More recently I built some quick floating shelves for our water closet in the master. I also made a couple other changes that made a BIG difference:

I made these with scrap wood so they were completely free! These are a great beginner project if you're dipping your toes into do-it-yourself stuff.
I shared how we incorporate Disney-themed decor in a more sophisticated way with these cool Disney parks prints I hung in the basement:

Those prints all have a retro feel that we love.
And finally, I shared how to treat a butcher block, or wood, counter so that it holds up to almost anything! If you do it right from the start wood counters should last you a very long time:

I learned this trick from my Dad and it has not failed me through years of having butcher block counters. :)
I've also done a bunch of organizing over the past few months. I may share more about those projects as well.
Have you tackled anything fun while at home more? (If you were actually home more than usual?) We both work from home, so it wasn't a huge change for us, but with no appointments or social things I got a lot more done than usual!
See more of our home here. To shop items in our home, click here! Never miss a post by signing up to get posts via email.
Via https://www.thriftydecorchick.com/2020/06/all-projects-i-accomplished-while-safe.html
Hello there! A quick update on me -- I underwent skin cancer removal on my face last week so I've had to take it easy. I thought it would just be until I get my stitches out this week, but it may be longer. But I'm healing well and am glad to have the procedure behind me and be cancer free!
Because I have to sit around more than usual, I'm dreaming up everything I want to tackle when I can get at it again. I've gathered a ton of AWESOME outdoor DIY projects to share with you! These are fun ideas that will spruce up any deck or patio. They range from lighting to building to planting.
I have so many I'll have to split these up into two posts. This one is the first 20 outdoor DIY additions I think you'll love! You'll find a link to each one under the photos. Enjoy!
If you're like most of us, you have neighbors. Neighbors you may love, but want some privacy from occasionally. ;) This tutorial is helpful if you already have a structure to build onto:

And this outdoor privacy wall is free standing:

I planted garden a couple weeks ago for the first time in years! I'm so excited about it. Although long term it would be nice to have everything up higher for easier access. This raised veggie garden tutorial is the answer!:

I love that there's a spot for hanging plants as well!
This DIY hanging plant stand is such a cute idea for a front porch:

I love the chalkboard accent you can change out with the seasons!
This is another project I've considered over the years -- outdoor curtains help keep the bugs out, but also just pretty to look at:

Outside spaces are the perfect place to add some fun colors! This stenciled outdoor table is an easy way to do that:

I LOVE the look of vines growing in a diamond pattern on the side of a house. I keep trying to find the perfect spot for it on ours! Check out how to do this below:

If you have some sad looking concrete, this product will make it look new again -- and it's not paint!:

If you're handy, building outdoor furniture will save you tons of money. (Exterior furniture is SO expensive!) This outdoor sofa/bench is made with 2x4's:

I love that live edge accent!
This outdoor lounge chair looks great and is easier to build than you'd think!:

And this porch swing is made with all 2x4's as well!:

We have the perfect spot for a porch swing -- someday I hope to add one!
These DIY wine bottle solar lights are a great way to upcyle and add some pretty twinkling lights to the backyard:

Lights of any kind add SO much to an outdoor space!
Of course, your backyard will need some color. These are cute planting ideas using farmhouse-style planters:

I love this idea of adding an aged look to brand new planters:

These DIY wood slat planters would fit in perfectly with a more modern exterior:

If your patio furniture needs some TLC, check out this outdoor furniture refinishing tutorial:

You can also see how I refinished our outdoor table in a natural tone (no stain needed) here: 
What a unique way to upcycle and hang your ferns or flowers!: 
How fun is this? See how to make your own outdoor movie screen below: 
And this outdoor bar would go perfectly with a movie night! ;) 
This makeover started with plain grass and ended up with a custom firepit and gravel seating area: 
You can see our stone fireplace kit we got at a big box hardware store here: 
SO many fun ideas, right? I love all of them! Have you added any of these projects to your patio or yard? You can see all of our outdoor projects and spaces from this house and from our old house here! See more of our home here. To shop items in our home, click here! Never miss a post by signing up to get posts via email. Via https://www.thriftydecorchick.com/2020/06/twenty-fun-diy-projects-for-backyard.html  It's strawberry season! A friend recently shared her strawberry freezer jam recipe (and how unbelievably easy it was), and I knew I had to try it! We picked strawberries on a gorgeous day here in the Midwest:  It was a big-fat-white-clouds-in-a-perfectly-blue-sky kind of day – lovely!! We  And took home a ton to start the jam recipe. Making this jam is SO incredibly easy! I got extra just in case, and ended up with about five pounds of berries (but did not need all of it):  This post may contain affiliate links for your convenience.
See my policies and disclosure page for more information.
After rinsing and cutting off the stems, I used a potato masher to smash up the berries to two cups (smashed):  I didn’t even chop up the strawberries first. I had to start with about 2.5 cups (maybe a little more) of berries to get the two cups smashed. Then, add to the mashed berries FOUR cups of sugar:  Yes, that is only two. Add FOUR. I had to force myself to pour it all in. But I hear it’s totally worth it in the end so just close your eyes and POUR. :) Mix it all together, and keep mixing for about ten minutes:  Take a package of Sure Jell and mix it with 3/4 cup of water on the stove: 

After it starts boiling, let it boil for one minute. Keep stirring!:  Take the mixture off the stove, add it to your berries and sugar mixture, and stir for about three minutes. Then take your cute little jelly jars: 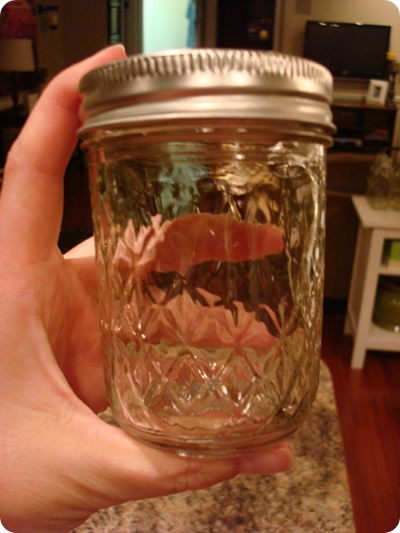 And fill them up, about a half inch from the top of the can: 
Let them sit at room temperature for 24 hours, then you can freeze them. I plan to bring them to cook outs and Fourth of July parties throughout the summer as gifts to the hostess – maybe with some yummy bread on the side. Have you tried homemade strawberry jam? I had no idea it was so easy! Here's an image you can pin for later: 
And if you like strawberries you'll LOVE this strawberry pretzel dessert!:

Via https://www.thriftydecorchick.com/2010/06/before-and-after-party-strawberry-jam.html
Hey hey! I've got a cute DIY lettered sign to share with you today! This has been in the works for weeks -- I had a scrap piece of wood cut down a couple months ago and painted it...and then let it sit while I tackled other projects. This is how I do things around here.
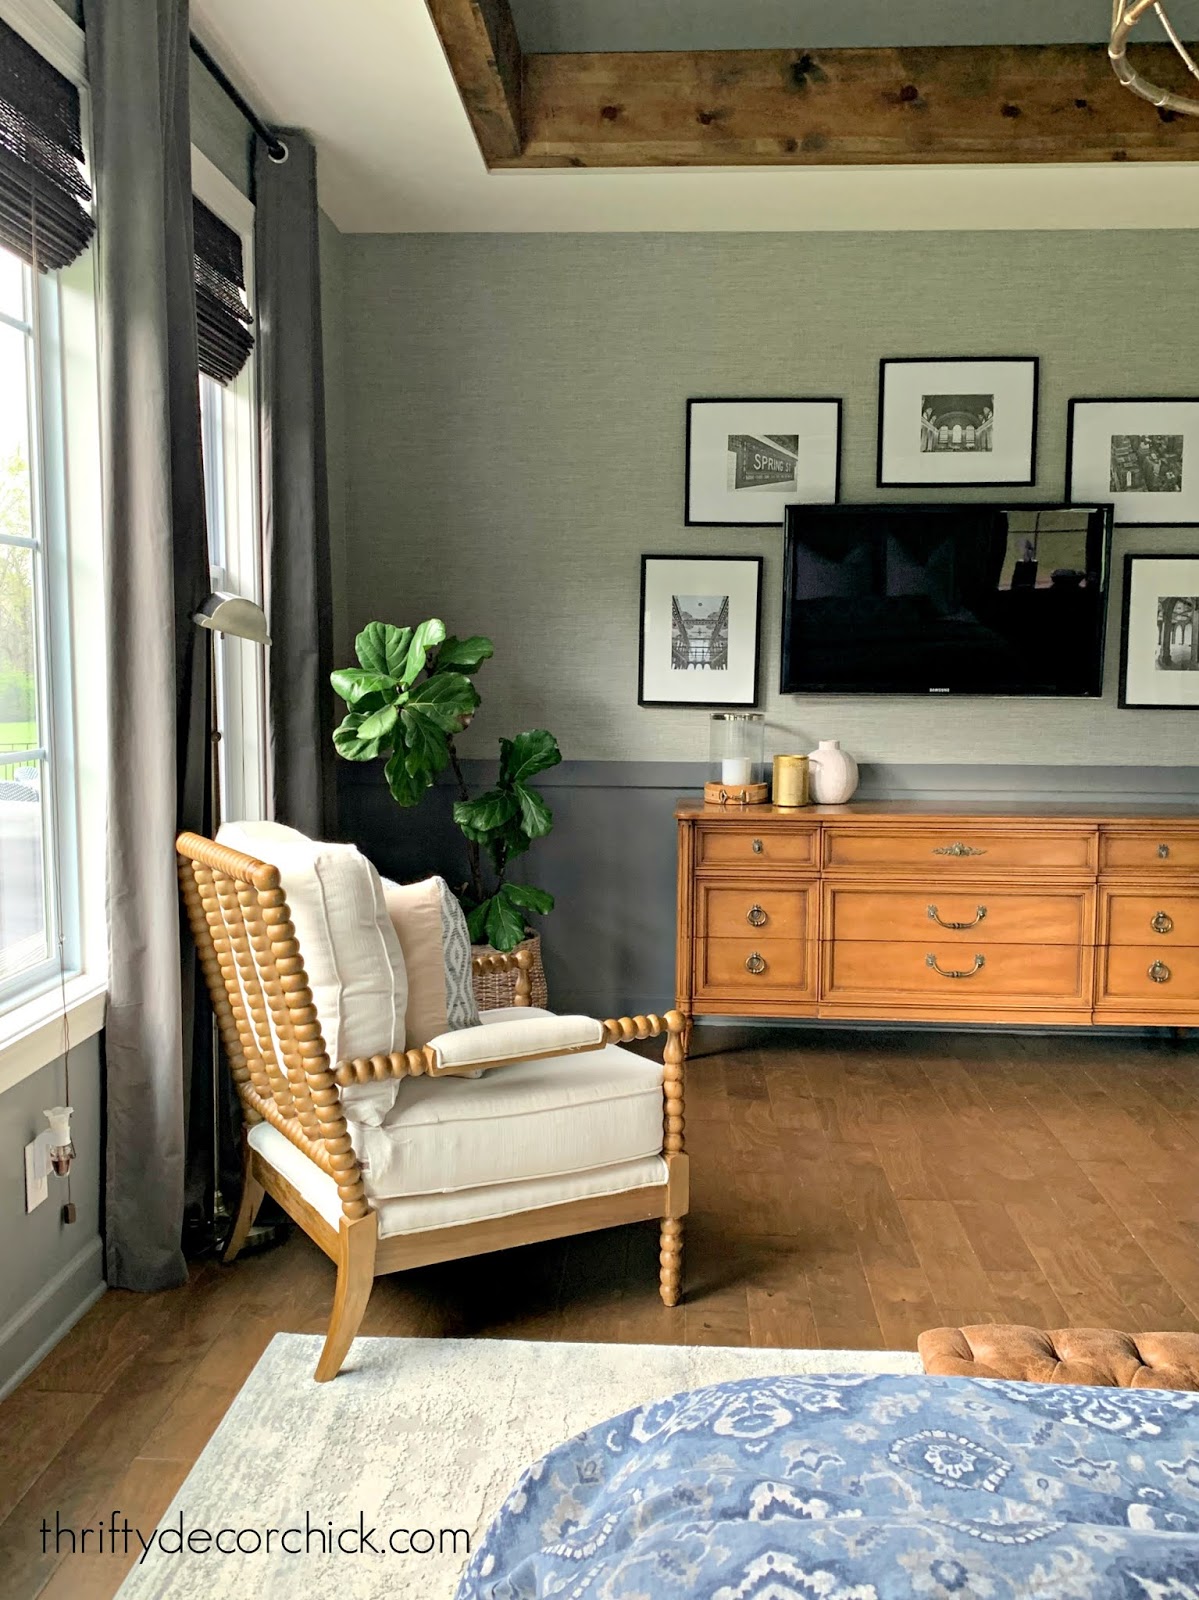
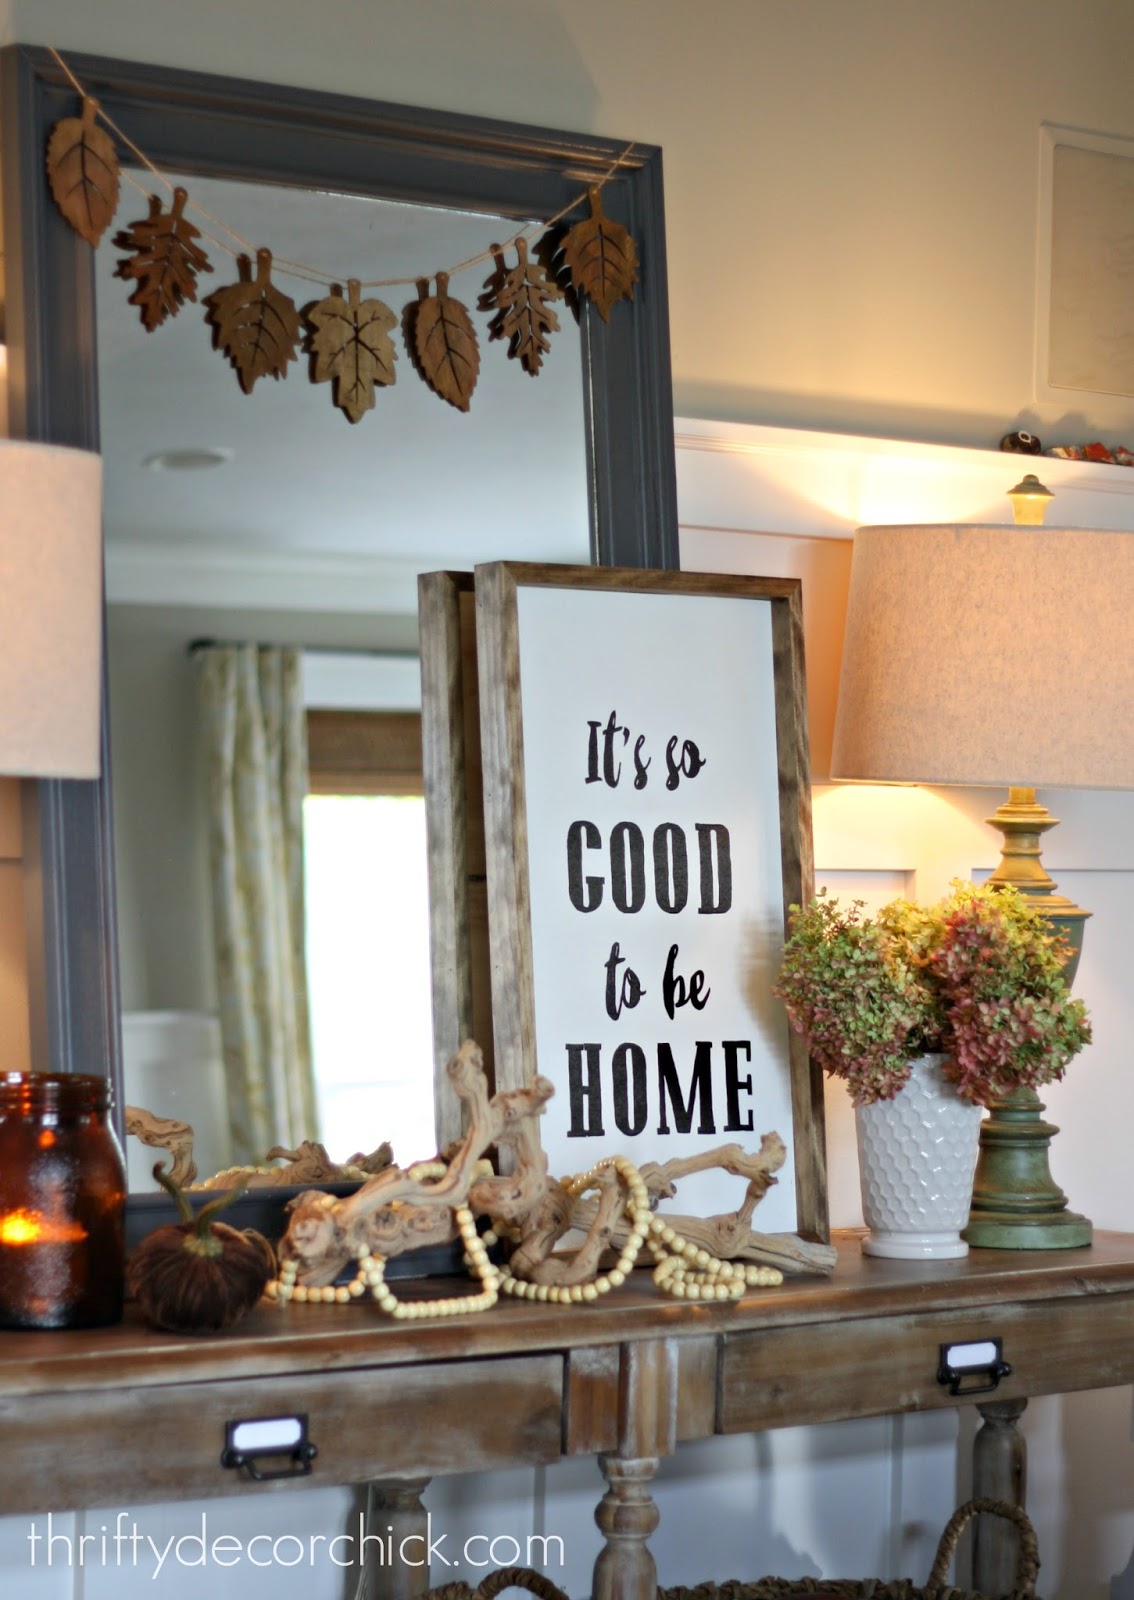
The other day I finally sat down at my computer to finish it up. I saw this phrase on a sign in a store and knew I wanted to make my own. It's perfect for our family room:
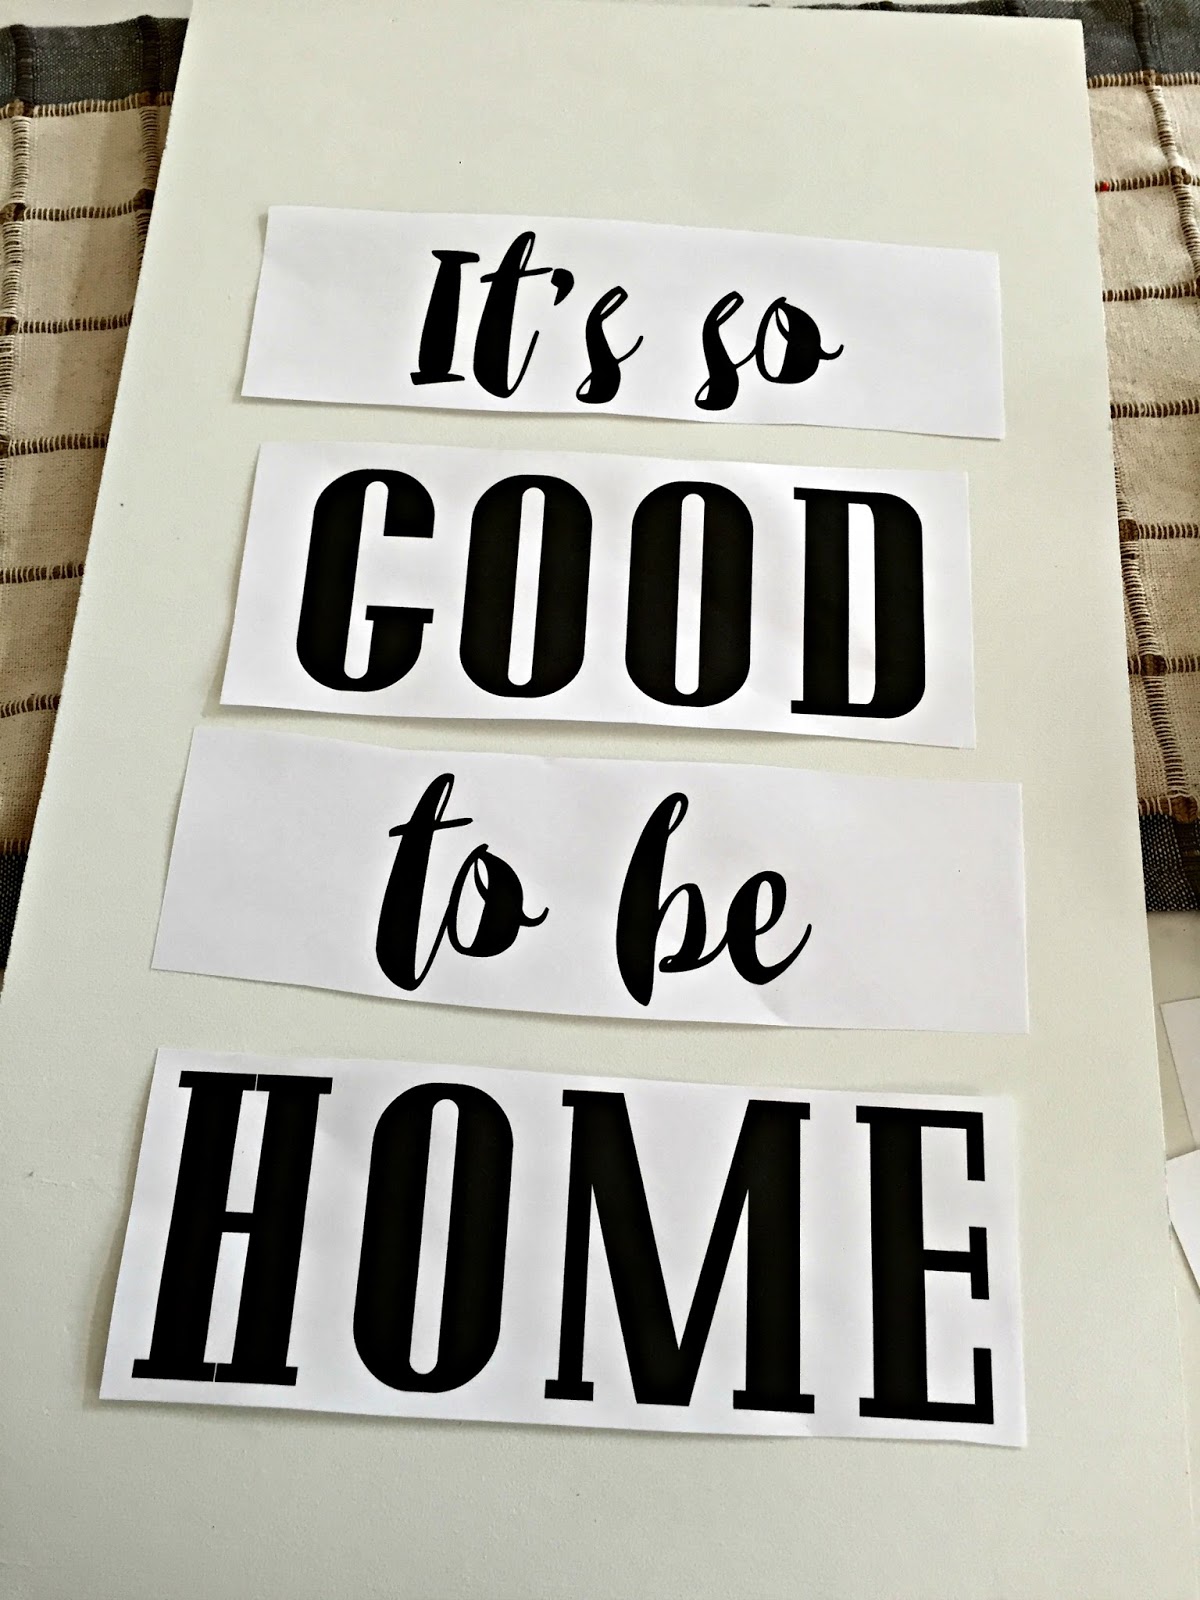
The sign is about 14 inches by a couple feet so I played around with the size of the words to fit the wood. I used two fonts -- the script is free one called Stonestick. Do you recognize the other font? Once I say it you'll be all oh yeahhhh...it's the Pottery Barn font and you can download that for free too. (Just do a search and they should come up.)
(This is a popular post I've updated to share again.)
I've shared a couple different lettering techniques for signs over the years -- this is a stencil version and this one is perfect for chalkboard lettering. For this sign I did another technique similar to the chalkboard version.
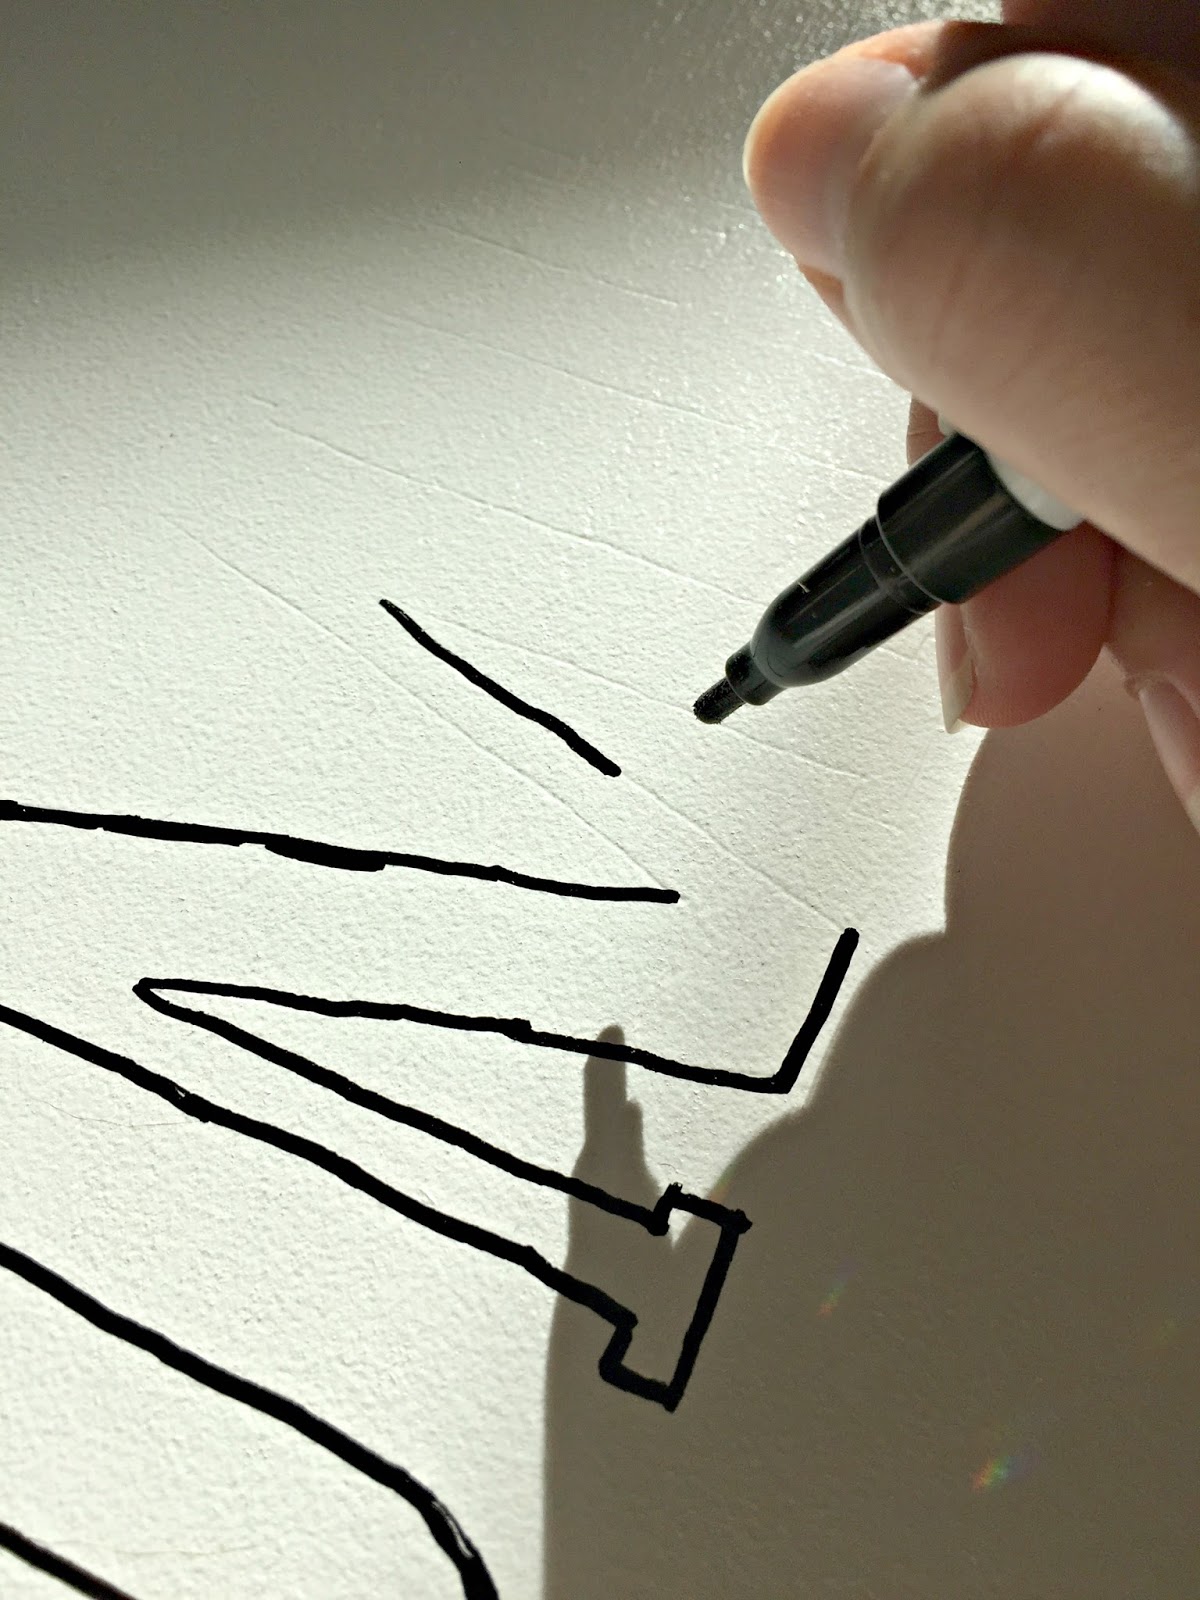
I cut out the words to space them out how I wanted (as you can see above) and then taped them to the wood. Then I traced the words with a pen:

This post may contain affiliate links for your convenience.
See my policies and disclosure page for more information.
You want to press hard enough so that the pen leaves an imprint on the wood. It's not crazy hard -- you can pull up the paper to see how it's doing during the process. (Just make sure to lay it back exactly in the same spot!) I used a cheap ball point pen for this.
Here's how the words looked after I traced:

Do this on a sunny day or near a light so you can position the wood in a way that makes it easy to see the imprint.
I used these Craftsmart paint pens and followed the imprint to paint the letters onto the wood:
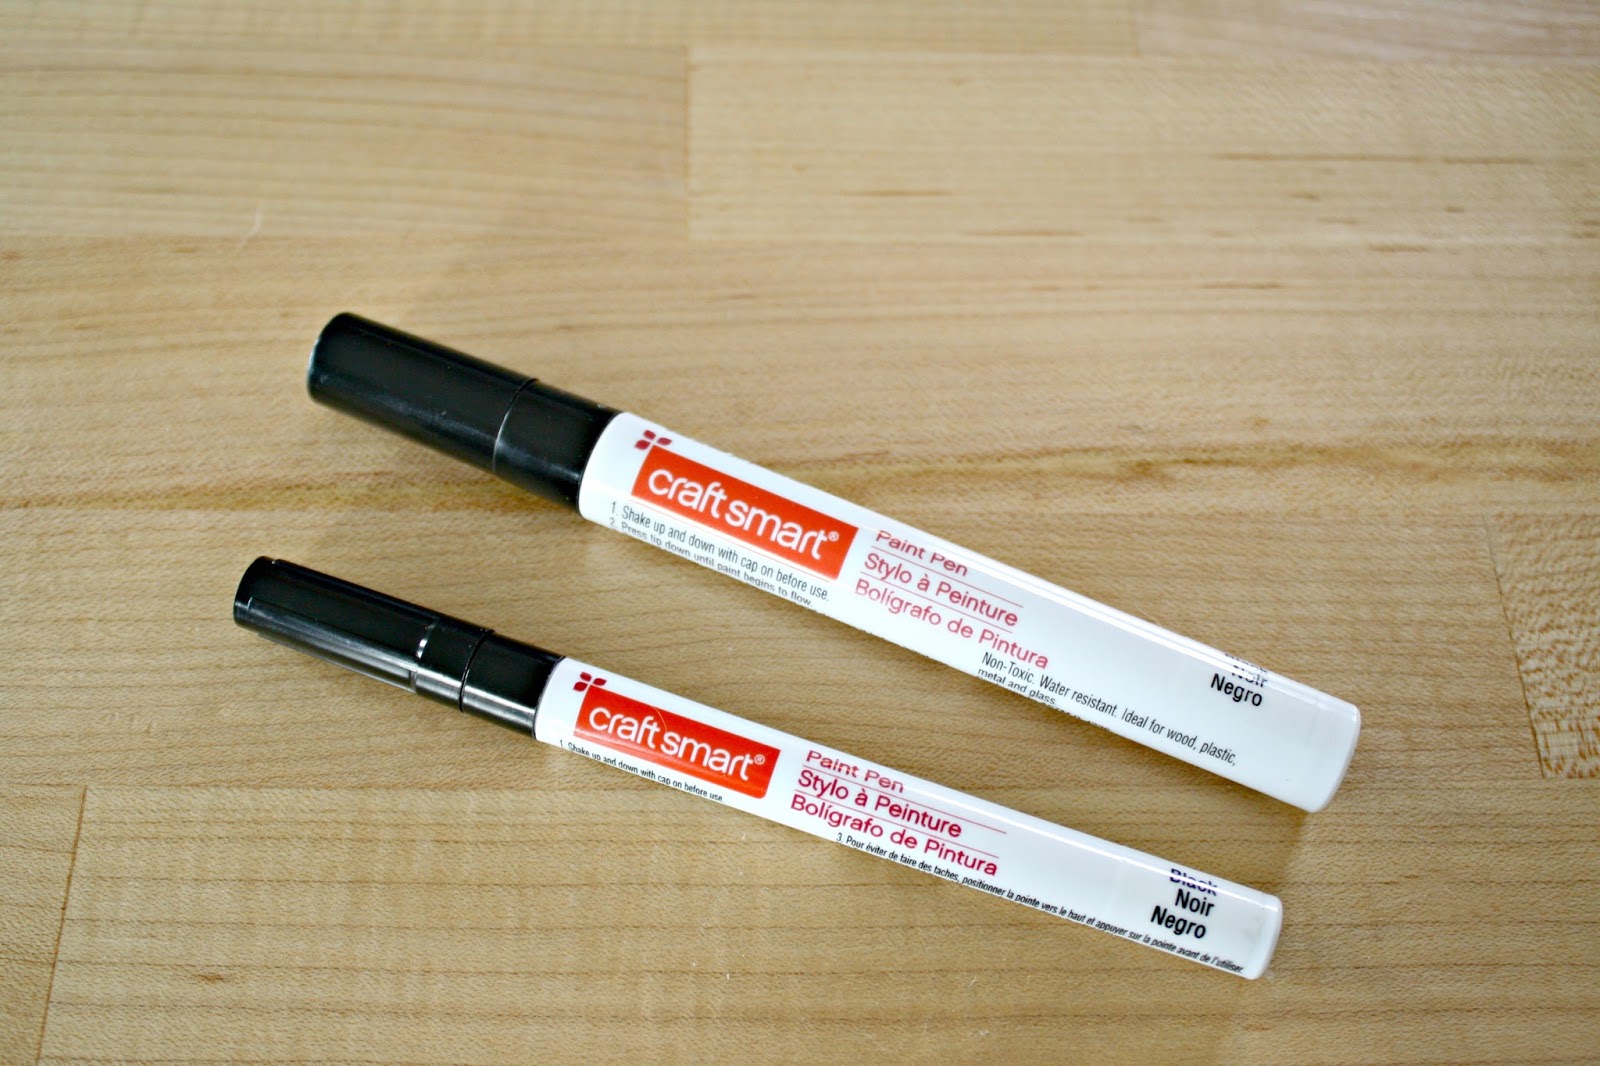
I've also used the Elmer's paint pens in the past -- here's the medium tip and here's the fine tip version. (It's easiest to have both. More on that below!)
You can use a brush but you need to have a really steady hand! I'm not that talented. :) I prefer the paint pens because you can really control your writing:
As you can see, it doesn't have to be perfect because you'll be filling it in. You can make adjustments as you go and that's another reason I like the pens -- it's way easier to make small fixes.
I used the thin paint pen for the tracing and smaller areas and the larger one for the bigger letters:

That's it! It just feels like you're coloring. :)
I stained a piece of wood in one of my favorite stain colors (Provincial by Minwax) and framed the art with it.
Oh my goodness. I love it!:
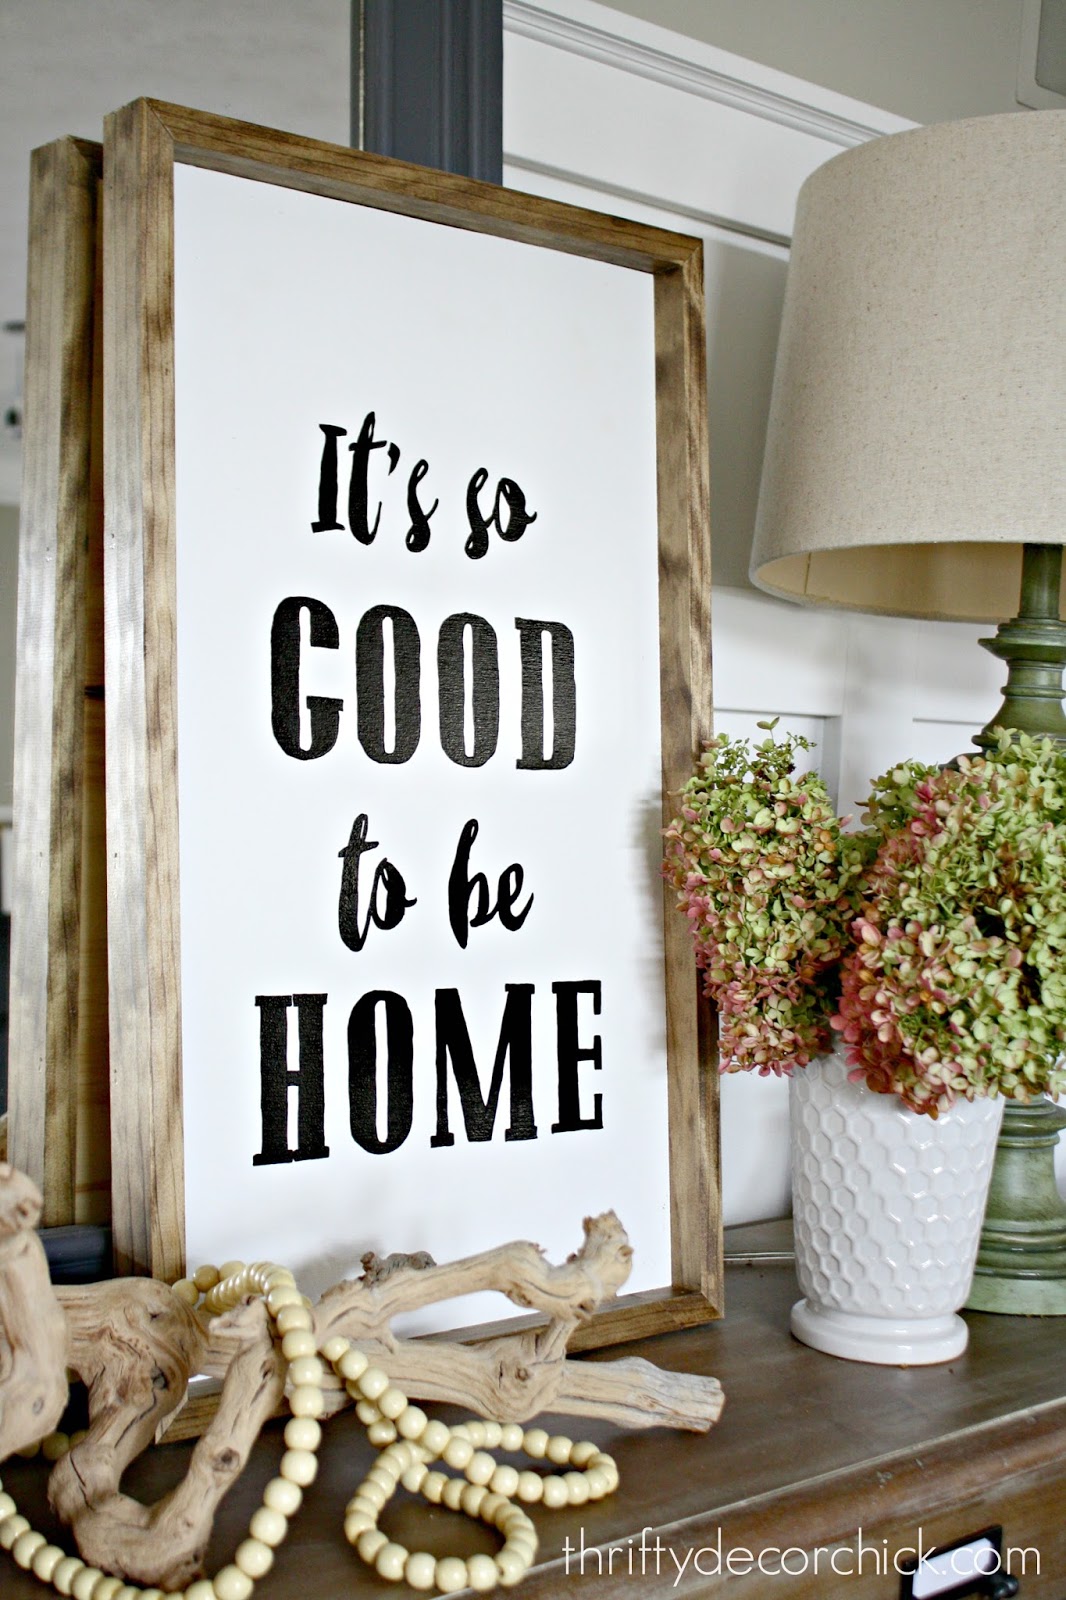
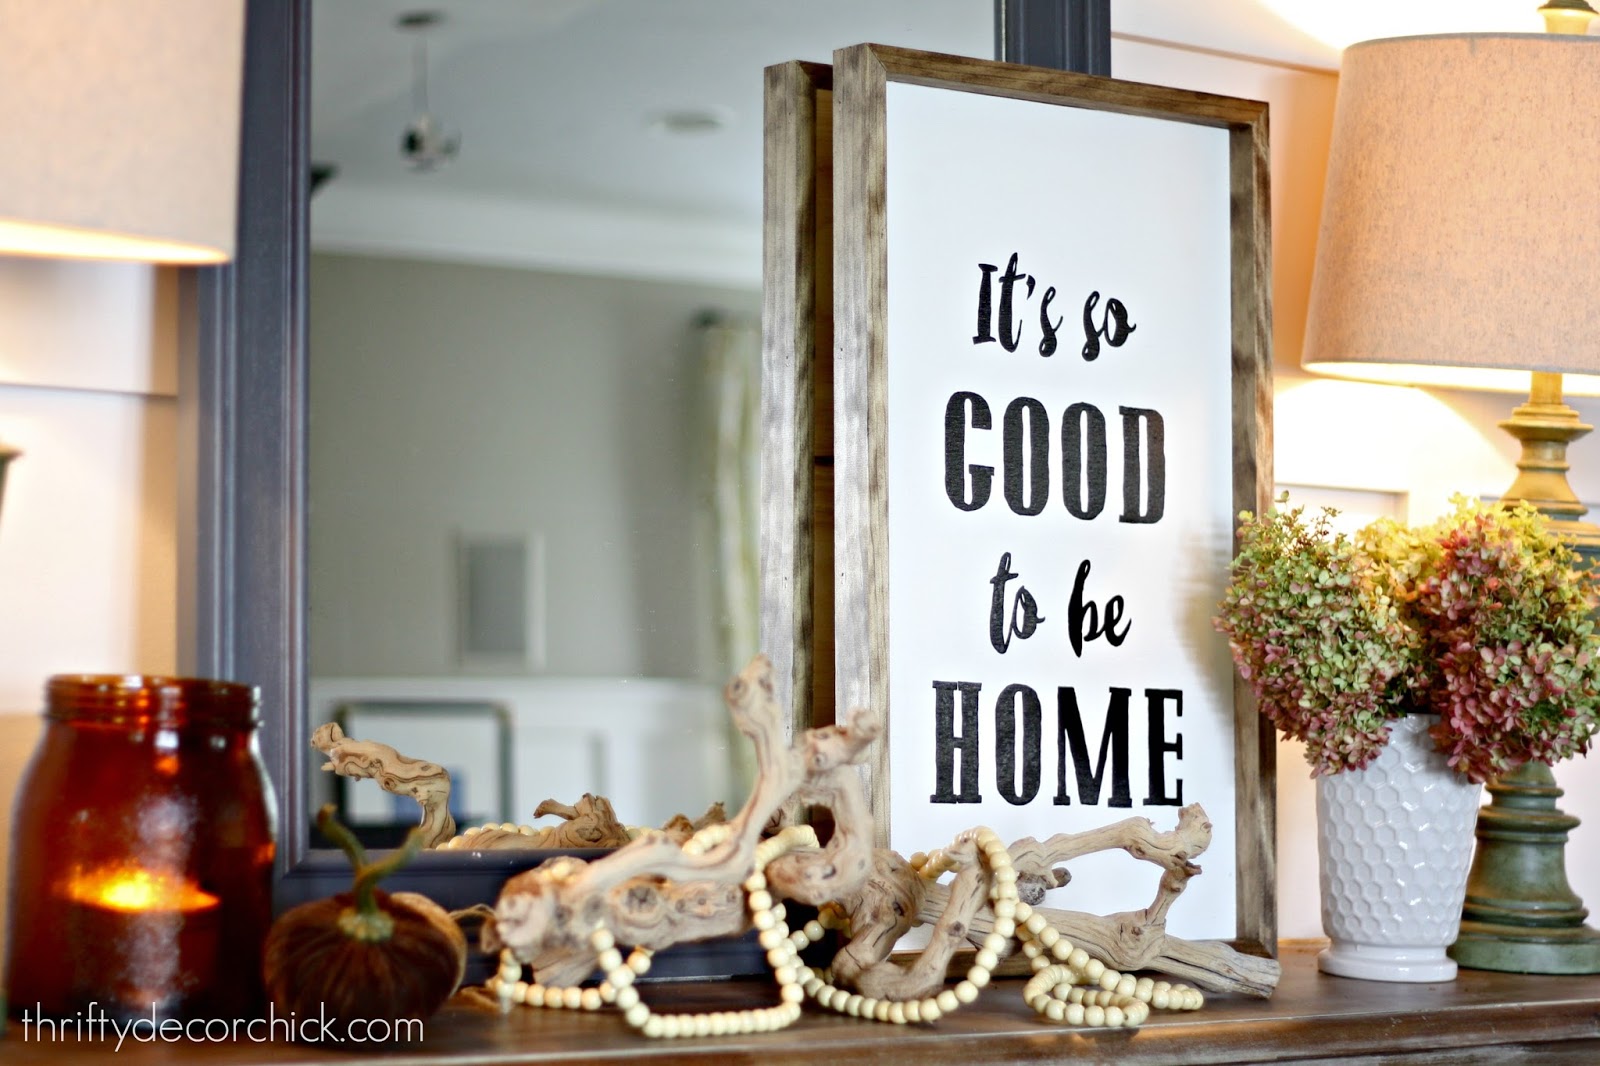
It will stay up all year but it looks perfect with the warm seasonal decor, right?
So cozy!:
I love the combo of the two fonts -- and I have to say, I like my version even better than the one I saw in the store! I'm really digging that Pottery Barn font.
It leans against the large mirror I made years ago. This Everett hall table is still one of my favorite pieces in our house. I love the pretty finish on it and the hardware I added years ago:
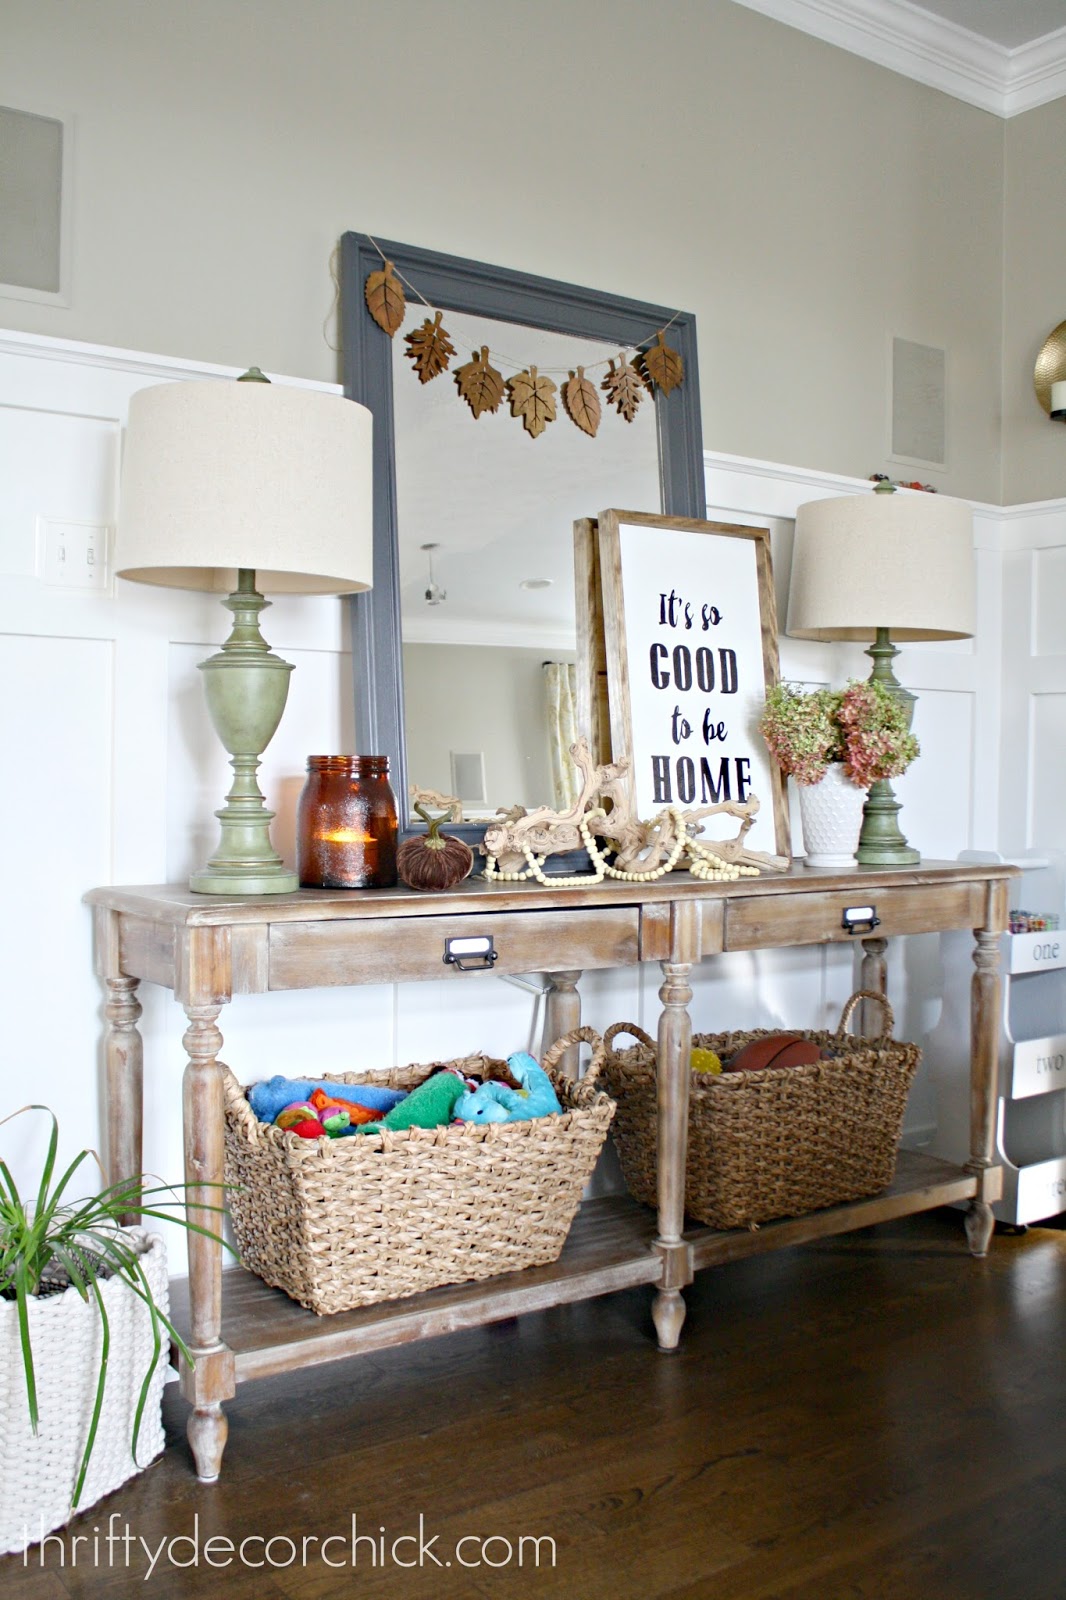
We see the sign right when we walk in the house and it makes me smile every time! And yes, those baskets hold dog toys and basketballs. Form and function at it's best!
It's simple but sweet -- it is always SO good to be home!
If you love the look of signs that are so popular right now this is such an easy DIY project -- it just takes time. I finished the tracing, letters and filling in under an hour while I watched TV. This cost me the price of the piece of wood for the frame and the paint pens -- after coupons it was less than $10! I hung this sign in our new home as well -- here it is in the mud room/laundry combo: 
Here's an image to pin for later if you'd like to try this yourself!: 
See more of our home here. To shop items in our home, click here! Never miss a post by signing up to get posts via email. Via https://www.thriftydecorchick.com/2016/11/its-so-good-to-be-home-diy-art.html |
