Review of Home Depot's Lifeproof LVP flooring in dusk cherry.
After more than five years, we finally have flooring in our basement kitchenette! When we moved in, I figured we'd finish out that space sooner than later, so I didn't have the carpet extended to that area.
I had big goals to add the flooring right away, but that did not happen. Here we are five years later. :)
First of all, I should have known better -- it takes me forever to research and decide on big purchases like this.
Also, I didn't consider that flooring should be installed after base cabinets. So that spot has sat with cement and scrap carpet since we moved in.
Years ago I saw this LVP flooring at Home Depot and fell in love with the Dusk Cherry color:
This post may contain affiliate links for your convenience.
I may earn a small commission when you make a purchase through links.
See my policies and disclosure page for more information.
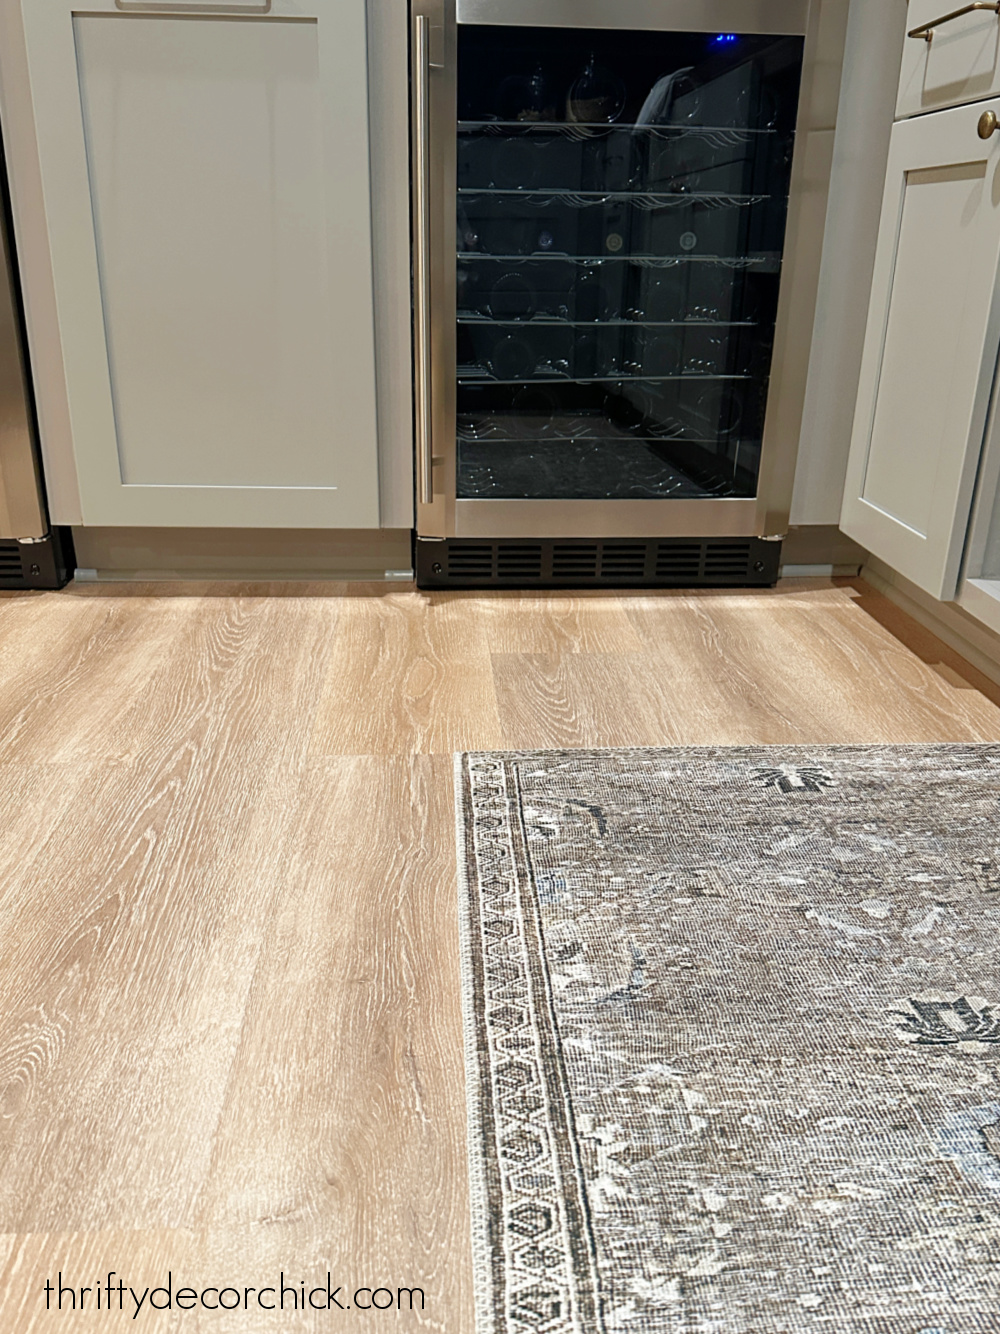
The Lifeproof luxury vinyl plank flooring (LVP) I picked is perfect for a basement, or anywhere you may have water issues. They are waterproof and are incredibly easy to clean.
I've had the little sample of this flooring for YEARS (I actually used it as a coaster on my desk to see how it would hold up to water!) and it was finally time to purchase it last fall when we started on this kitchenette.
There are so many great tutorials online on how to install click lock LVP flooring, so I'll share the resource I used. Instead of a step-by-step instruction, I want to share some tips about the installation and our thoughts after we've lived with this flooring for awhile.
Important details about this Lifeproof LVP flooring:
This flooring isn't difficult to install...as far as actually laying the flooring and clicking them together. Once you get going it goes quite fast and gets much easier.
Physically it isn't the easiest DIY project -- but all flooring is hard on the body in my opinion. I'm getting old! ?
I watched this helpful Youtube video before starting the install. They share some great tips that answered a lot of my questions!
Before I started anything, I scraped the concrete floor to remove any plaster or paint splatters from the building process.
Once I got that cleaned up, I started in the left corner of the room with my first plank.
Starting at the left is important because of the tongue and groove location on this flooring!
Your planks will not click together easily if you start at any other spot.
You can use a regular miter saw or to cut this flooring (or use a razor to score and snap it), but I was able to borrow one of these vinyl flooring cutters:
This content is property of Thrifty Decor Chick LLC. If you are reading this on any other site other than https://ift.tt/BXGdehq or one of the blog's social media platforms, please contact TDC immediately (thriftydecorchick at gmail dot com). Any other use of this content is strictly forbidden.
Via https://www.thriftydecorchick.com/2023/01/review-of-Lifeproof-Home-Depot-LVP-dusk-cherry-flooring.html
0 Comments
How to make an artificial olive tree for less.
If you love the look of decorative trees in your home, but don't have a green thumb to keep real plants alive or the budget for an expensive fake store-bought version, this tutorial for a faux potted olive tree is for you!
I've wanted a tall plant for the basement for sometime -- we do get a good amount of daylight down there, but not enough that I could keep something alive.
I have real fiddle leaf figs all over our house (see my tips for taking care of fiddles here) so I wanted something different. I started searching fake olive trees instead, but found they are pretty expensive. The best version (with good reviews) I found was $115.
As I was searching online, I came across tutorials for fake, do-it-yourself olive trees. Huh. I never even considered it, but it got my mind going. I combined tips for this faux olive tree project from here and another tutorial (no longer online).
This faux tree DIY was especially inexpensive because I got all of my supplies at half the cost. Look for sales and use coupons!
Step one: Figure out your tree trunk
I started with the "trunk" of the tree. I could have easily gone and cut a thick branch off of a tree. I was going to do that, but then I realized how cold and snowy it was outside. I really didn't want to go forage in the woods.
So instead I check out the "dried naturals" section at the craft store. They had actual (thin) wood trunks, which cracked me up that we can buy part of a tree at the store. But I wanted something that looked a little more natural and organic than just a straight branch.
I figured those white branches on the left would be perfect:
This post may contain affiliate links for your convenience.
I may earn a small commission when you make a purchase through links.
See my policies and disclosure page for more information.
The package came with three branches (for MORE olive trees obvs) and I used the biggest one.
I spray painted it brown...and was surprised when it looked real! You can use any brown paint -- craft paint even.
I suggest using a matte paint finish for a more realistic look. Step two: Attach your olive stems
I already had olive stems that I use throughout the year in our decor, so I didn't want to use those. Instead I grabbed bundles of olive branches instead:
Read the full post
This content is property of Thrifty Decor Chick LLC. If you are reading this on any other site other than https://ift.tt/zbrutQ4 or one of the blog's social media platforms, please contact TDC immediately (thriftydecorchick at gmail dot com). Any other use of this content is strictly forbidden.
Via https://www.thriftydecorchick.com/2021/02/DIY-fake-olive-tree-for-less.html Three ways to customize the outside of your refrigerator with additional storage!
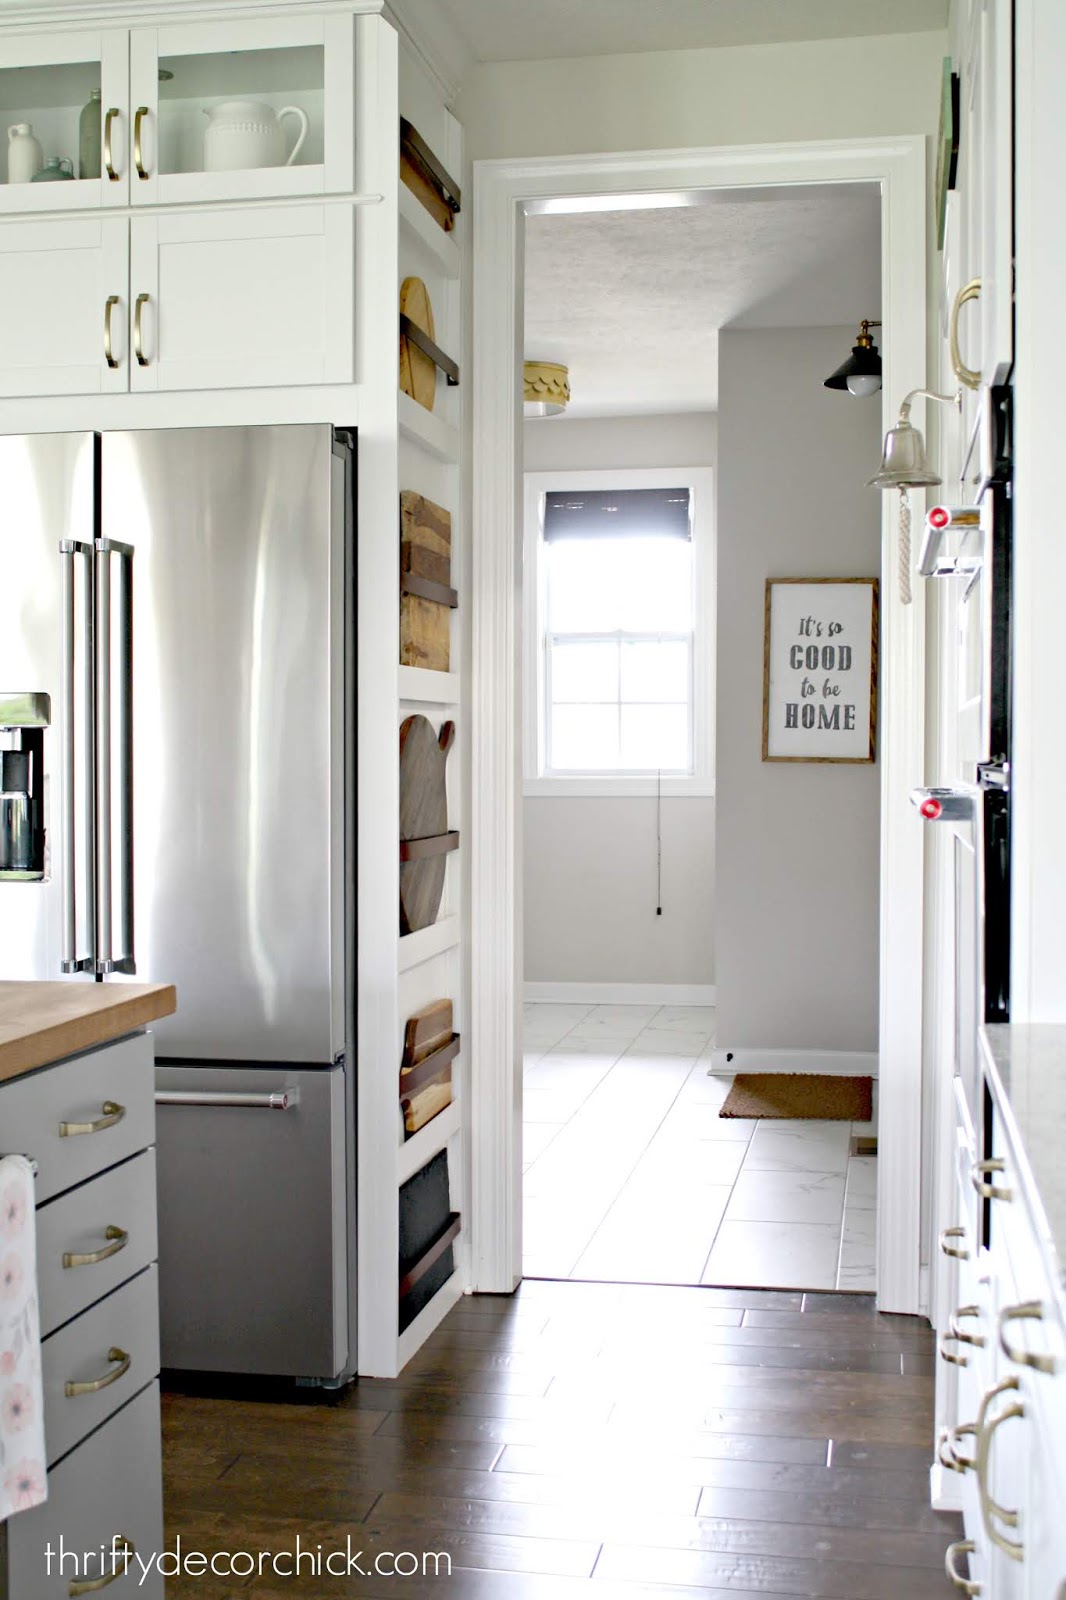
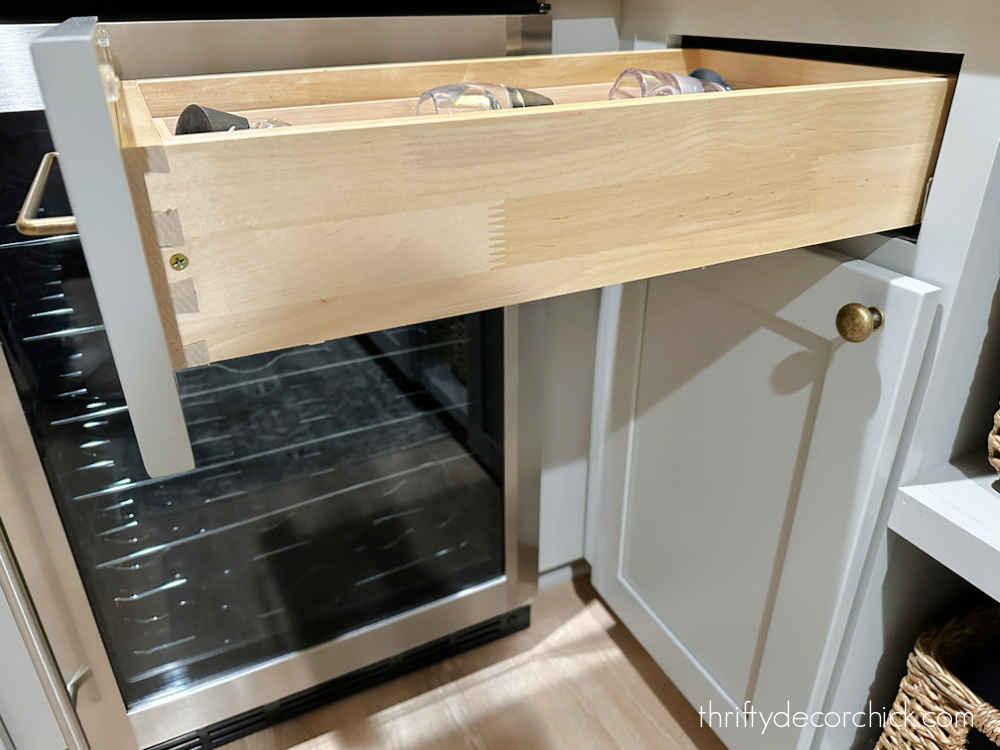
I love finding smart ways to add storage around the house, especially in the kitchen! I really enjoy figuring out ways to make better use of an underutilized spot.
When I shared the start of our basement kitchenette last week (and listed the pros and cons of store bought kitchen cabinets), I mentioned the difference enclosing a refrigerator can make in a kitchen.
One of the first DIY projects I worked on in our old kitchen was adding a DIY enclosure around the fridge. This makeover will go a long way to making a kitchen feel more custom and updated.
PLUS, there are so many ways to add storage when you "build in" a fridge! I'm sharing the ways I've done just that.
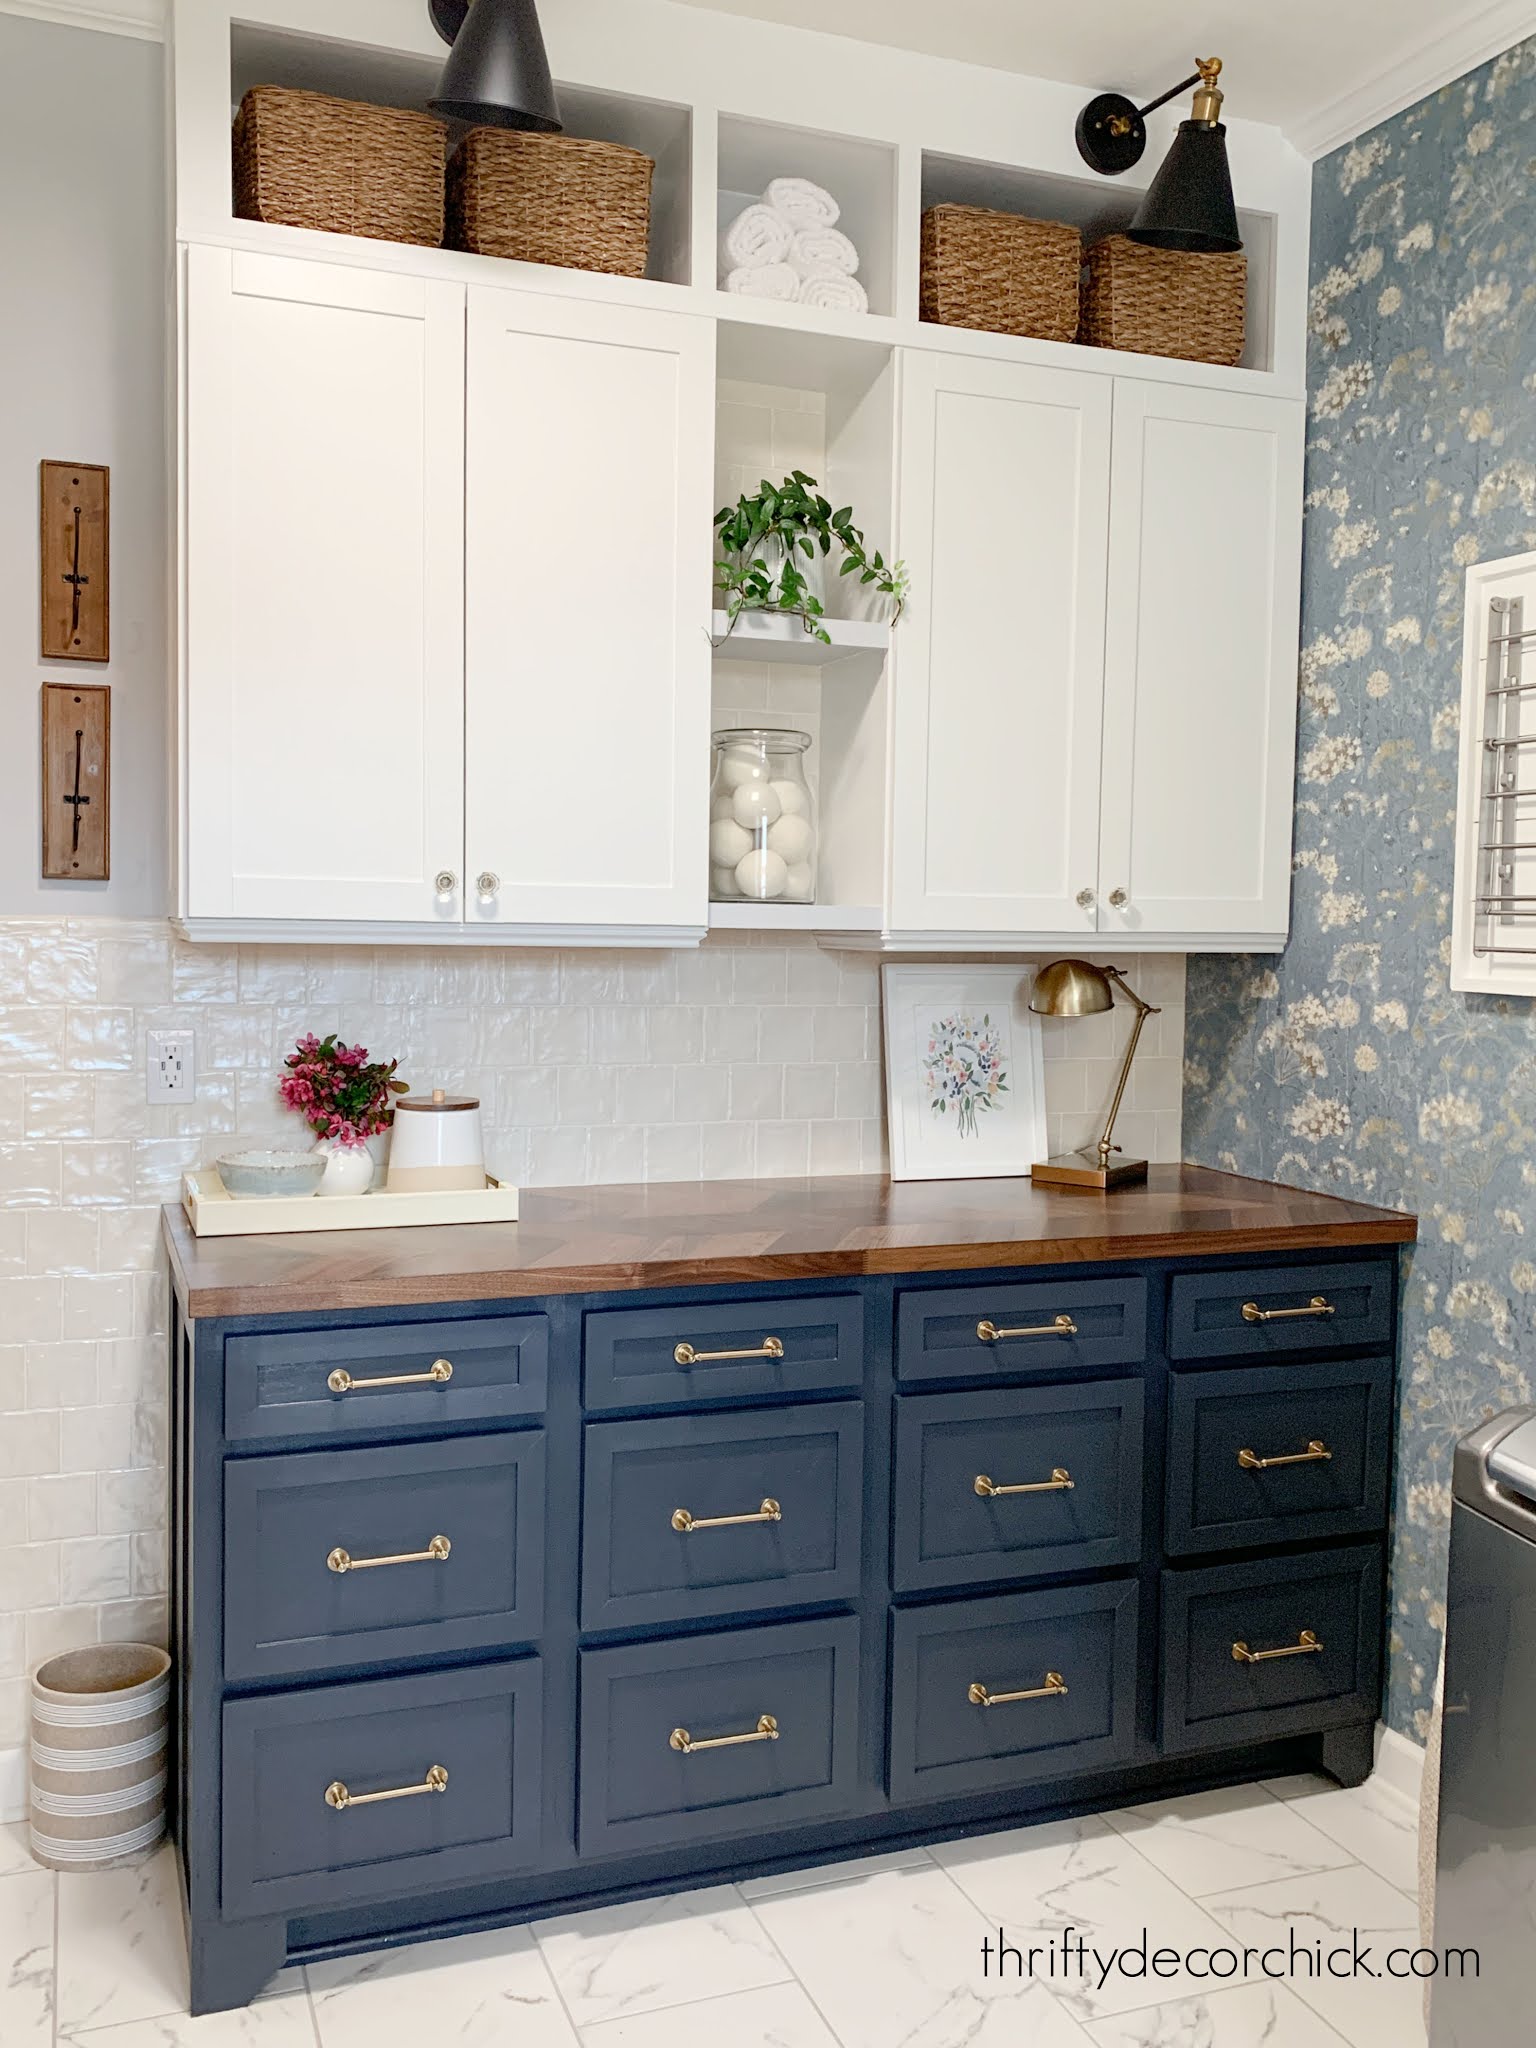
1. Add or extend the cabinet above a refrigerator.
If your fridge doesn't have any cabinetry, adding a cabinet at the top will go a long way to updating it.
In our last kitchen, we already had a cabinet above but it was the same depth as the rest of the cabinets:
Not super useful when you have to climb on top of the fridge to get to it! Ha!
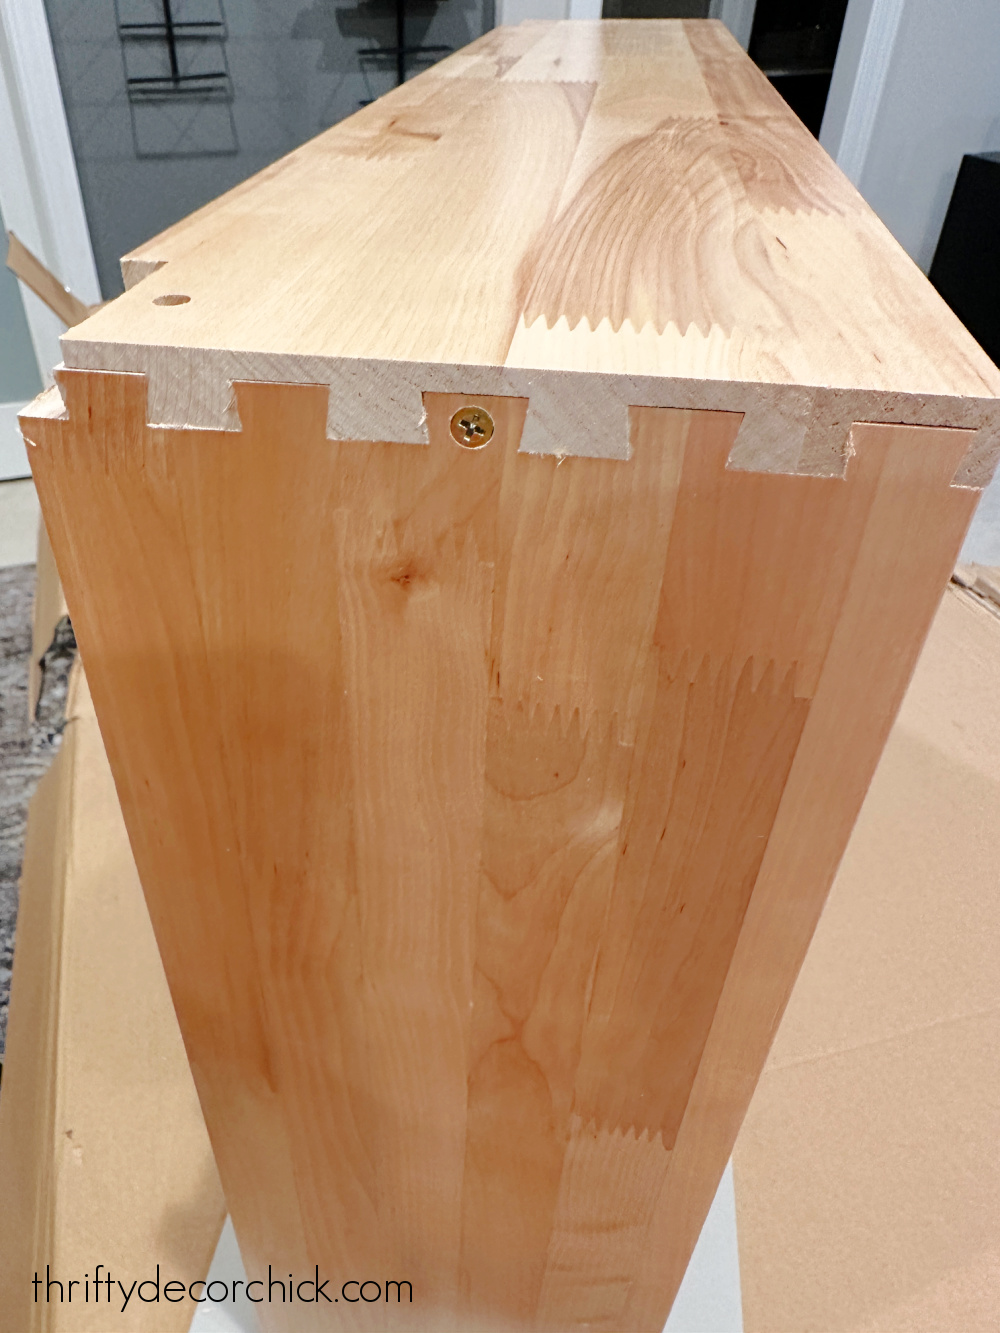
So I figured out a way to extend that cabinet to the front without moving the original one. It worked so well!
This post may contain affiliate links for your convenience.
I may earn a small commission when you make a purchase through links.
See my policies and disclosure page for more information.
As you can see, I was able to move the original cabinet doors to the one I built.
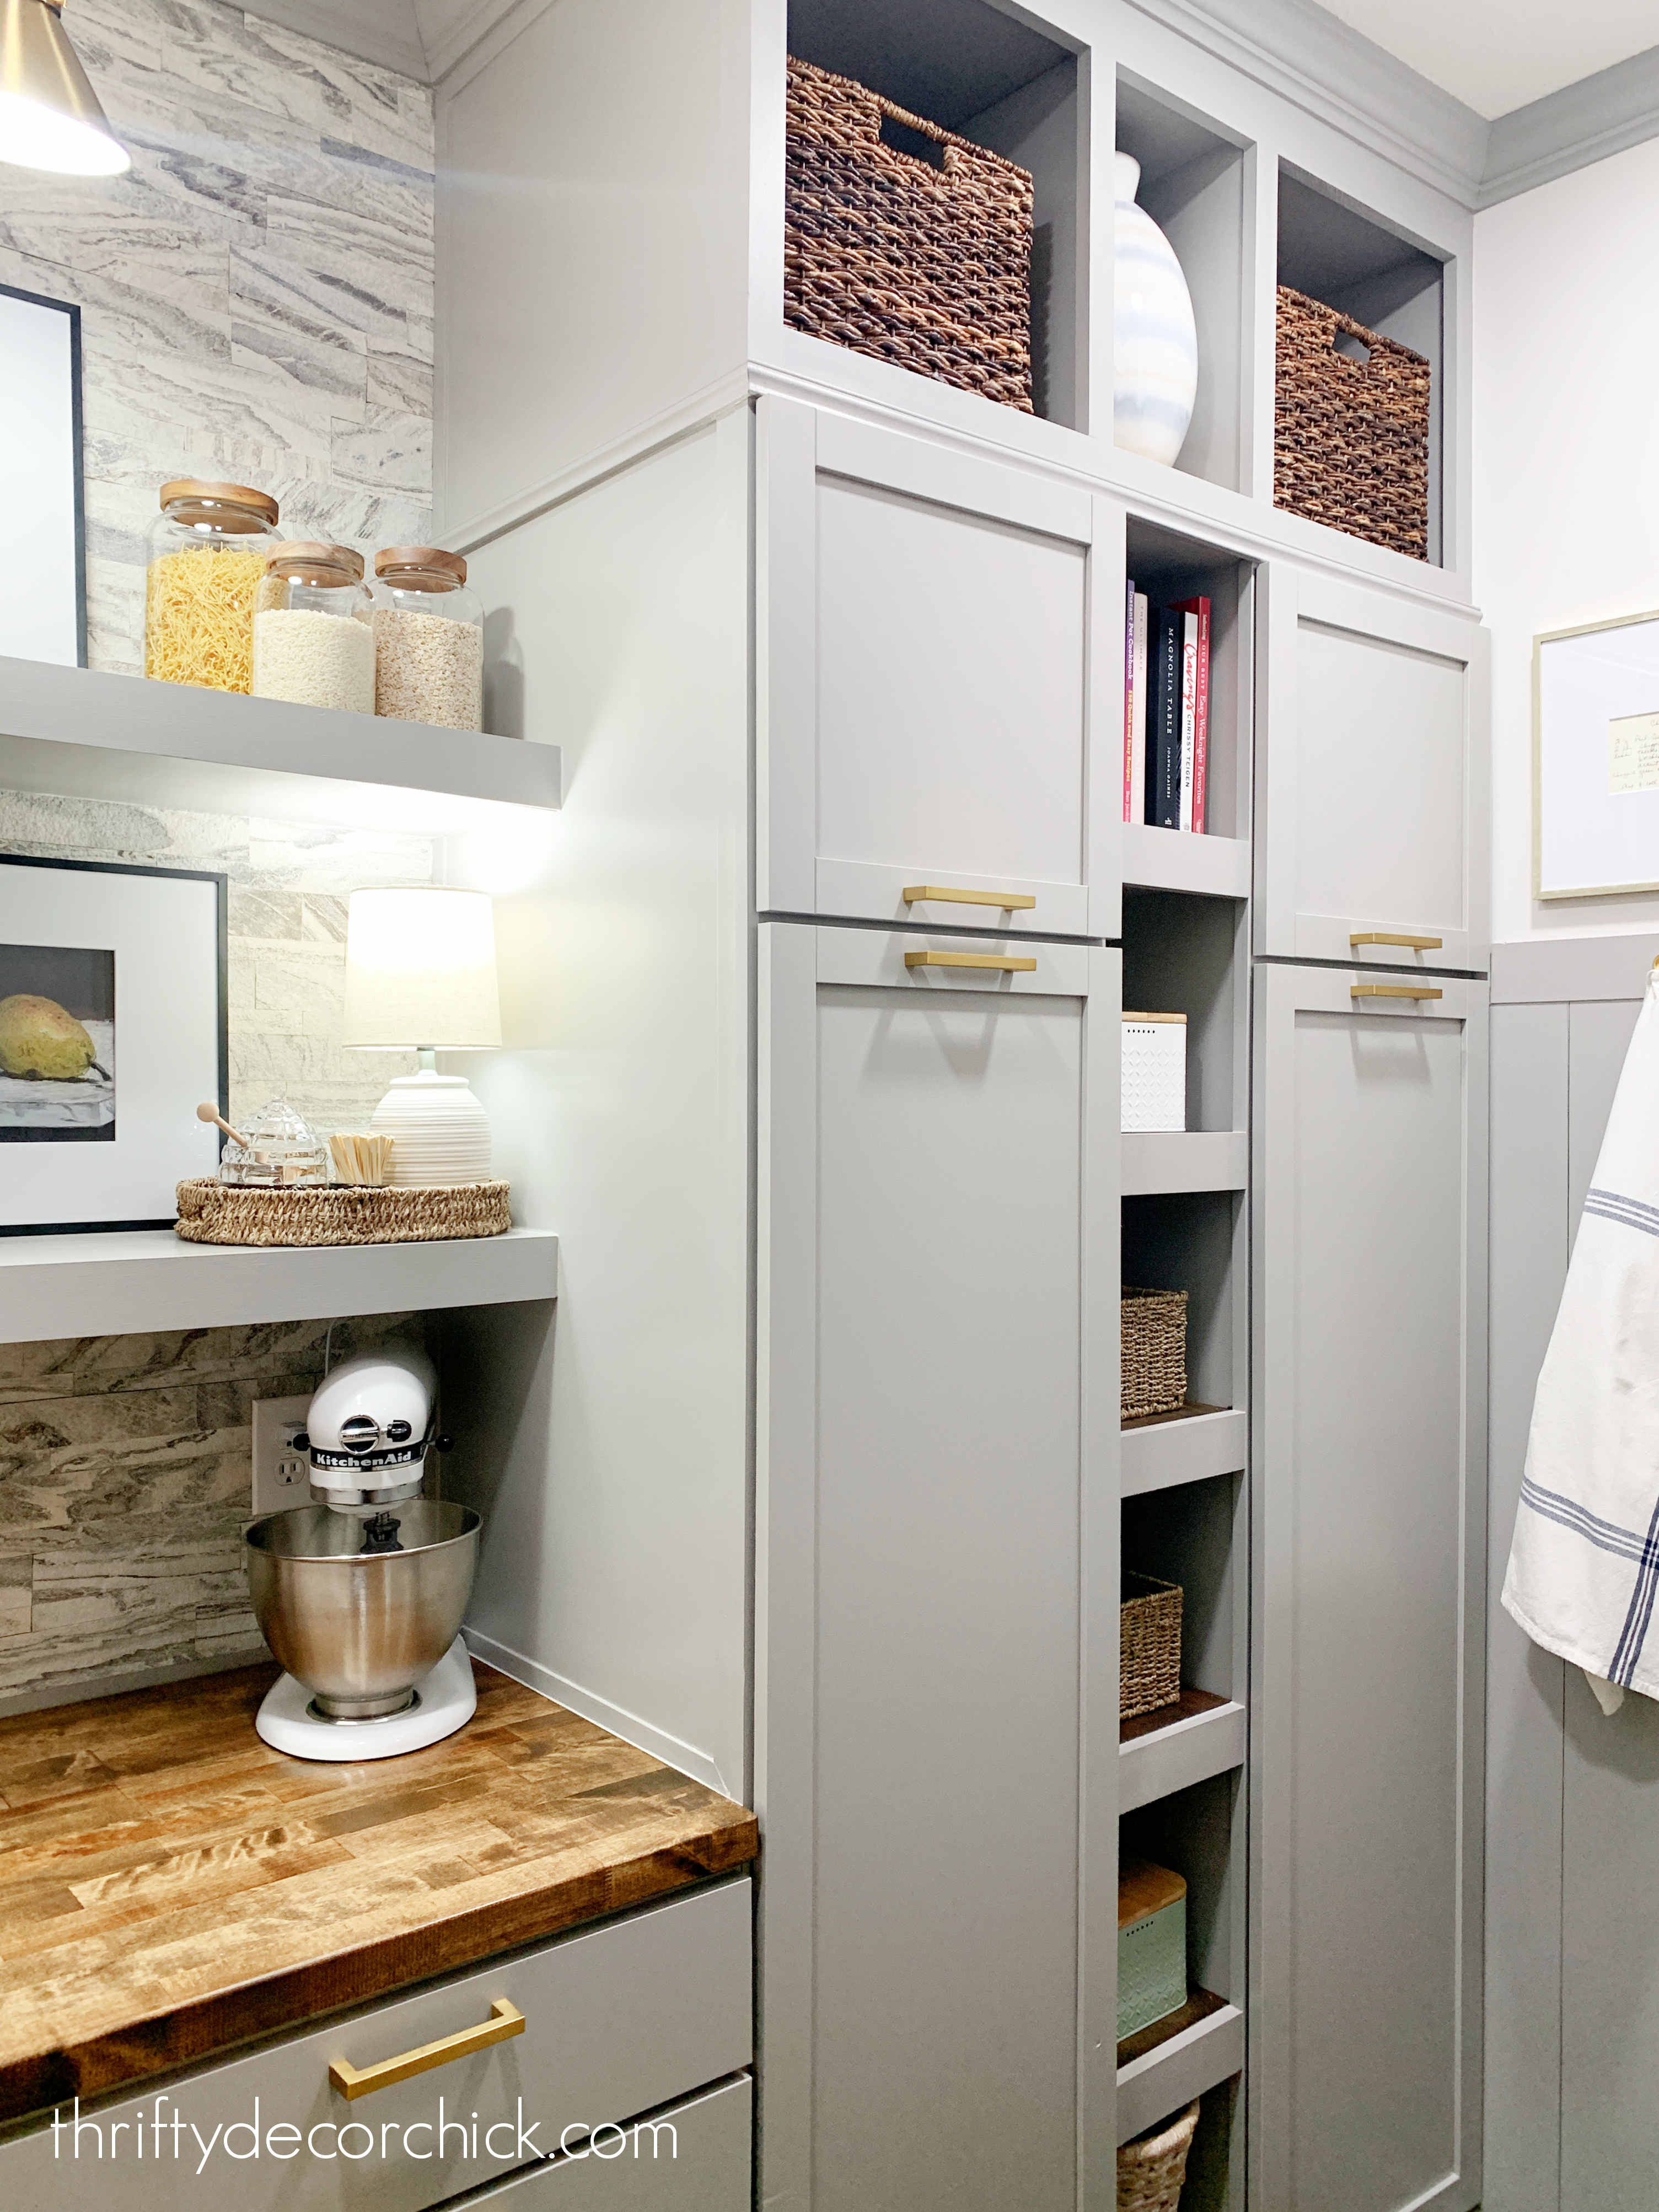
I think some of my readers probably wondered where the heck that project was going after seeing the photo above, but after taking the cabinets all the way to the ceiling and adding pretty trim, it came together beautifully:
If you purchased your cabinets from a big box store, you may be able to find matching side panels to match.
If not, use a 4x8 foot wood panel cut in half to create your own! (This will always be cheaper than buying the "matching" panels.)
You can add a refrigerator enclosure if it's against a wall, placed in between cabinets or standing alone.
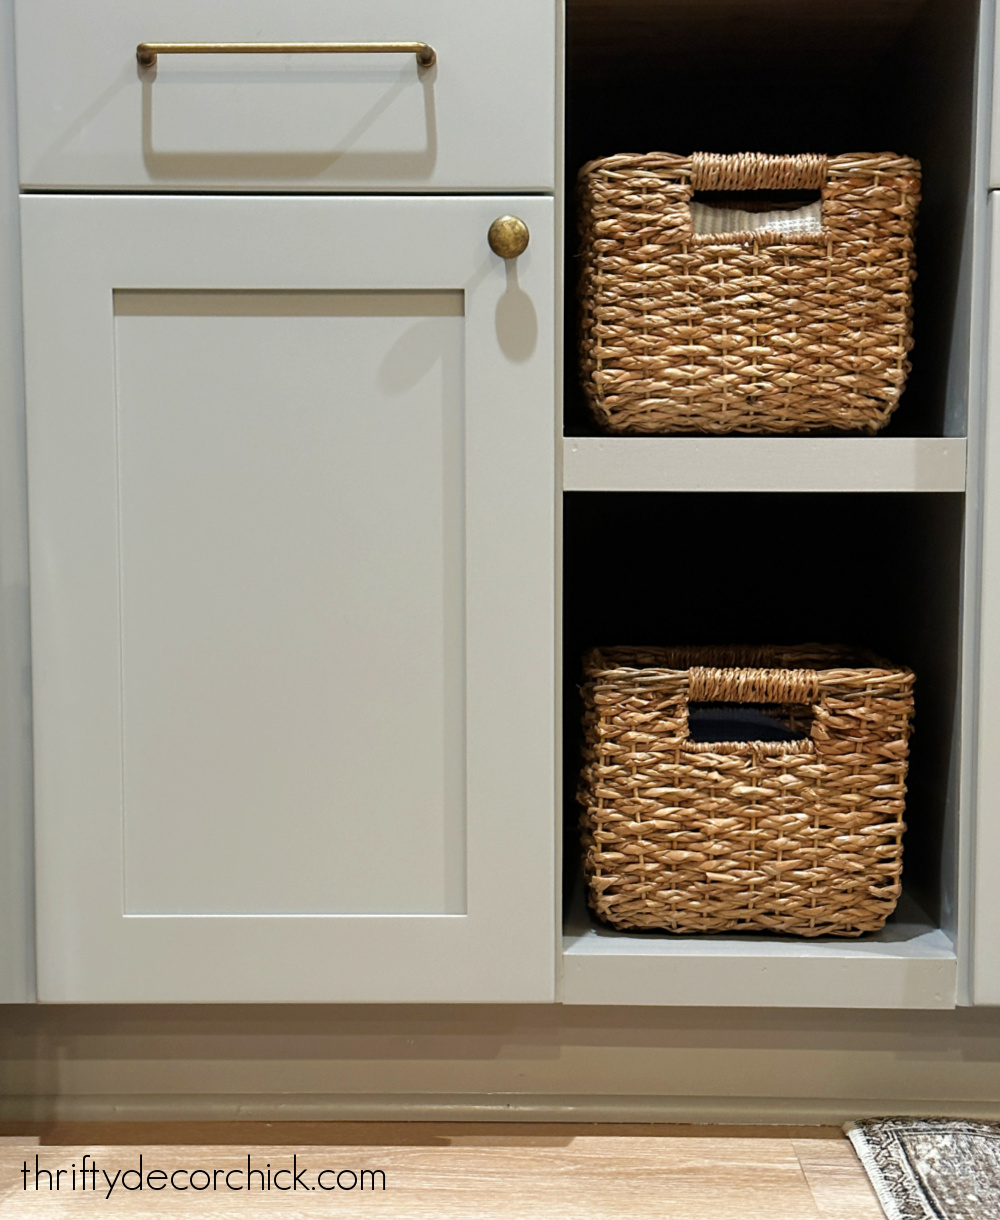
2. What to do with the space above the fridge?
If you add a cabinet above, congrats -- you have some new storage space! :)
In our last kitchen, I shared how I used that cabinet for long and awkward baking dishes or cutting boards:
In our current kitchenette, we used a sheet of plywood for the side panels:
I saved more than $100 by using this instead of the finished panels that match the cabinetry.
We purchased a side by side fridge for this spot (they are SO much cheaper than the French door options!) and after it was installed, we had a good ten inches of open space between the top and the cabinet above.
I knew I could make that space useful, so I started by nailing some scrap wood into the sides as support strips:
And then I cut down some wood that fit under those supports to close it off and create a shelf.
My original plan was to add a piece of wood on the front that we could flip up and access the inside of our new shelf. But I couldn't figure out the right hinges to make it work.
So I went back to my scrap pile and decided to finish if off by making a box I could slide in to cover all the ugly parts (you could see the hardware under the cabinet and the supports I had just installed).
I nailed in a couple more scrap parts to along the back and sides to attach my new insert to:
I painted the box before sliding it in and nailing, and then trimmed out the front to cover the rough edges.
Now that awkward space not only looks better, but is a useful spot!:
I still need to fill in some gaps around the trim, but this little detail is almost done!
3. Add pretty storage to the side of the refrigerator.
This is one of my all time favorite kitchen DIY projects!
Enclosing the refrigerator creates a wall if it's open on one side...and after living with ours for a couple years, I wanted to utilize that empty vertical space.
I ended up creating this decorative cutting board and plate storage on the side:
I LOVE this wall now! It's such a sweet little detail in our kitchen, and it's USEFUL. I love when form and function meet up so beautifully!
I created little shelves with leather strips to keep the cutting boards from falling. For a little decorative detail, I hung scrap wood on the back for a shiplap look, but you can also use beadboard, wallpaper, an accent color...whatever!
Instead of leather, wood dowels or a decorative metal bar like this pretty brass curtain rod or a metal hanging rail are great options as well.
On the basement enclosure, I had that same empty wall that was calling out for something. I grabbed a pile of pretty cutting boards I've had in our storage room and decided on a way to display them.
By the way...yes I have too many cutting boards. I KNOW. ? But we always grab one for entertaining or when we're having snacks and watching TV.
I decided to hang them on this wall for easy access. You can use cup hooks to hang cutting boards, but I was a little extra and used a few of the antiqued brass knobs I installed on our cabinets.
Knobs can be used so many ways other than for cabinet hardware! I showed you the many ways to use knobs or cabinet hardware as picture hangers here.
To do this you'll need a double ended screw called a hanger bolt that has a pointed side (that screws into the wall) and a flat side (that goes inside the knob):
I drilled pilot holes into the wood panel, then screwed the knobs in.
They are super secure and hold all of our cutting boards:
I love the brass detail!
The wood tone looks great against that gray, and it ties in nicely with the new floor (that I still need to show you!) and the wood accents on our entertainment center:
I hung most of the boards with leather string I had in my craft stash:
There you go! I hope these give you some ideas for your own refrigerators. Who knew they had so much potential? :)
Of course there's nothing wrong with just leaving them as is, but I love to figure out ways to use unused space.
Never miss a post by signing up to get posts via email.
This content is property of Thrifty Decor Chick LLC. If you are reading this on any other site other than https://ift.tt/rR7I6o8 or one of the blog's social media platforms, please contact TDC immediately (thriftydecorchick at gmail dot com). Any other use of this content is strictly forbidden.
Via https://www.thriftydecorchick.com/2023/01/three-clever-ways-to-add-storage-around-refrigerator.html How I saved on our kitchen renovation by purchasing unassembled kitchen cabinets.
I'm breaking down the differences in quality and pricing among the four types of cabinets available from most big box hardware stores.
I've used three of the four options for my DIY projects over the years and have come up with a favorite!
After much research on what type of cabinet to use for our basement kitchenette project, I decided to go with unassembled kitchen cabinets for the first time ever, and I'm so glad I did! I'll be sharing the benefits of these easy-to-assemble cabinets.
I showed you the plan for our basement kitchen last fall, and have been hard at work since then. I have so much progress to share!
Because this is the first time I've started a kitchen space from scratch (see my big DIY kitchen renovation from our old house!), I did a lot of research before starting.
One thing that shocked me was the price of quality assembled cabinets. It seemed they were increasing in price by the day! ?
I didn't consider custom cabinets just because I can add so many of the fancy details myself.
I've always used in stock unfinished cabinets for my DIY builds, partly because I'm usually impatient and want to go get them when I want them, but mostly because the price is fantastic and they can easily be updated a number of ways.
But I wanted a little higher quality for this space, so after looking at options for our new kitchen, I decided on unassembled cabinets:
This post may contain affiliate links for your convenience.
I may earn a small commission when you make a purchase through links.
See my policies and disclosure page for more information.
We choose the Hampton Bay Avondale shaker cabinets from Home Depot. I found you get a lot of the bells and whistles of higher end cabinets, but they cost way less because you're doing most of the work. :)
I set up my cabinet assembly on our long dining table in the basement with a big drop cloth and scrap cardboard from the cabinets on top.
The only hard part of this cabinet building was getting them down the stairs. The boxes were HEAVY (these are made with plywood instead of the cheaper furniture board the less expensive versions are made of).
For the larger cabinets, we opened them up and took the parts down in trips.
Once down there though, the process was pleasantly easy and quick. I'm one of those weirdos who doesn't mind furniture assembly, so this was almost fun for me...like a puzzle.
After a couple I had the process down by heart. I was thoroughly impressed with the quality -- the drawers have dovetail joints:
You don't need any fancy tools for this cabinet assembly. A mallet and drill or screwdriver is all you'll need.
The sides slide together and then are easily joined with the provided corner braces and screws:
And the cabinets come with everything you'll need -- including soft close drawer and door hardware:
When I got going, the process went quick! I assembled nine cabinets in a couple days -- the smaller ones only took about 30 minutes each. The more complex drawer units took about 45 minutes to an hour.
Let's look closer at the different cabinet options.
I'm breaking down the three types of cabinets I've used and their price, plus throwing in details of more custom options as well.
(These are based on Home Depot's pricing just because that's where I've purchased from most often.)
1. First up, the unfinished cabinets.
These are what I use to make ALL of my DIY built in units:
They come unfinished and are very basic. No frills, no soft close, no paint.
The units are typically made of particle board, which is not great, but I've found it holds up just fine for DIY projects like these built ins.
They are inexpensive and very easy to update yourself!
I like using these for bookcases like this because I don't have to worry about priming and painting over a paint finish. I can finish them however I want.
2. The second option are assembled and painted in stock cabinets.
This option is what I used for our pantry -- I installed the Hampton Bay Courtland Laminate cabinets:
These cost more than the unfinished versions, but come assembled and painted. And they come in a few more configurations (sizes and options) as well.
This option doesn't come with soft close drawers or anything like that, and are also made with cheaper materials.
Overall I wasn't thrilled with the quality on these and wish I would have gone with the versions I used in the basement. The pantry cabinets are holding up just fine, but the basement kitchen ones have all the bells and whistles!
3. Unassembled cabinets (what I used for our kitchenette).
These are by far my favorite of the three I've used in our home, because of the quality and high end details that are included.
It's the little things -- the drawers are FULLY extendable. This is a detail on our kitchen cabinets that I love! You can access everything in the drawer easily:
They also come with soft close drawers and doors. No need to DIY the soft close yourself!
The assembly wasn't hard at all -- a beginner DIYer could easily do it. It may take more time if you've never assembled furniture.
Home Depot provides great instructions and how-to videos for these as well.
4. Special order custom cabinets.
I've never used custom cabinets in our homes, so I can't speak to them personally. But they can be made to fit your room specifications and the drawer and door design options are endless!
Custom cabinets can also be built with useful organizational additions like pull out shelves, spice racks, etc.
As expected, these are usually the most expensive of the four options.
Comparing the price of these cabinet options.
Let's talk pricing, as it varies quite a bit depending on what you pick!
I gathered prices for two cabinets (a base cabinet with drawers and a 36" sink base) to compare the pricing for each. (Again, these are all Home Depot cabinets.)
Thirty-six inch wide sink base:
Thirty-six inch drawer base cabinet:
For the most part, the unassembled cabinetry goes waaaay further for the money.
I highly recommend going with the unassembled cabinets if you're looking for a deal and don't mind the extra time and work they entail.
I made a helpful graph so you can see the pros and cons in one spot:
I should mention, IKEA is always a great option for cabinets, but I'm overwhelmed every time I look into them. There are so many options and parts, it freezes my brain. :)
Not to mention they usually end up costing more than the hardware store options I've used.
We had our cabinets installed by contractors and I'm so glad we did. I've installed many cabinets, but not with the number of corners and spacers we needed for this space.
Here's a peek at how they came together:
We started with these cool brass pulls that are installed over the top of the drawer fronts, but they were a little modern for my taste, and they were so jiggly.
I replaced them with these antique brass finish pulls and knobs and they work so much better!:
My little built in shelves work so well for us! We had some awkward space available so I decided to use it for baskets.
Instead of using the fridge enclosure parts available in this cabinet collection, we used plywood ripped down to size to frame it out:
I shared how to enclose an existing refrigerator years ago -- this is one DIY project that will go a long way to adding a custom look to your kitchen!
You can see a bit of the flooring in these pics. I finally got that installed over the holidays and I can't wait to show you.
I've been eyeing this dusk cherry luxury vinyl flooring (LVP) for years! I'm SO happy with it:
So much to catch you up on! I'll be sharing more progress soon!
Have you used any of these cabinet options in your home? I'd love to hear your experience.
Never miss a post by signing up to get posts via email.
This content is property of Thrifty Decor Chick LLC. If you are reading this on any other site other than https://ift.tt/xXZCkSY or one of the blog's social media platforms, please contact TDC immediately (thriftydecorchick at gmail dot com). Any other use of this content is strictly forbidden.
Via https://www.thriftydecorchick.com/2023/01/best-cabinet-options-from-big-box-stores.html How I'll be tackling my biggest messes in the new year!
The Christmas decor is put away, the garage is cleaned up and organized again, and it's finally time to take care of my three biggest problem areas in our home!
I LOVE this time of year! I really enjoy our simpler, clutter-free home after the holidays. (Although I was way more sad than usual to take down all of the decor this year.)
Since I started incorporating the Konmari decluttering method years ago, I rarely do major, intensive purges anymore. Because of that giant decluttering (that took me months!), I now constantly monitor and get rid of things we don't need or use.
Also, a couple years ago I worked on a few BIG projects that allowed us to create permanent homes for so many items around the house!
When I did the mud/laundry room makeover, I created all of this new storage for laundry, cleaning and utility items:
And I completely decluttered and reorganized our garage and all of my tools as well:
This post may contain affiliate links for your convenience.
I may earn a small commission when you make a purchase through links.
See my policies and disclosure page for more information.
Both of those spaces have been a godsend and have helped to keep our home more organized and clutter-free.
But I've avoided a few problem areas...or problem things that have piled up, for YEARS now. Some have always been an issue for me, and some I've pretty much ignored since we moved into this house in 2017.
I thought I would share my vices in case you're considering tackling some of yours in the new year as well!
Let's start with the easiest one!
1. Magazines and catalogs.
If you've read TDC for awhile, you know my love of home decor magazines and catalogs. I like to keep inspiring decor images and project ideas that I find, but I haven't taken the time to sit down and really look at them in a looong time.
My collection isn't as bad as it used to be -- Pinterest and Instagram has helped to curb my love of home decor magazines. I rarely buy them anymore, but you wouldn't know that by the piles I had around!
The other day I decided this was going to be one of things I was going to sort through once and for all.
I walked around the house and gathered the piles to put in one place:
Read the full post
This content is property of Thrifty Decor Chick LLC. If you are reading this on any other site other than https://ift.tt/HU9r1xA or one of the blog's social media platforms, please contact TDC immediately (thriftydecorchick at gmail dot com). Any other use of this content is strictly forbidden.
Via https://www.thriftydecorchick.com/2023/01/tackling-my-three-big-clutter-spots.html |
Brittany TuckerSales Representative at Custance Brothers Woodworking Archives
April 2023
Categories |