|
Hello all! Thanks so much for you kind comments on the island makeover I shared earlier this week! I'm so happy with it and it's always fun when you enjoy something I've done. :)
I told you I'd share more about our pretty new stools that I got at At Home:

This store used to be called Garden Ridge, and I actually blogged about it years ago here. They carry a ridiculous selection of home decor items. I mean, you name it and they have it -- it's a fun spot to visit.
We bought our outdoor pillows and cushions there numerous times over the years. Their outdoor furniture and cushion selection is CRAZY good. But today, I'm focusing on their insane amount of chair options. I'm talking upholstered chairs for living spaces, desk chairs, stools of all sizes, dining chairs and outdoor options.
I looked and looked and looked at new counter stool options for weeks. I searched online, looked on Instagram, Pinterest...and everything I found that I liked was either way too expensive, or it was the wrong size. Mostly just too expensive. ;)
I was looking at a few options online and some local stores, and then it hit me...duh! At Home has a HUGE selection. I went into the store and was thrilled with what I found. I'm sharing a bunch of them with you today!
By the way, this is not sponsored, I just love sharing good finds with you all.
First up, the round options I loved:

Most of these are counter stools, but there are a few bar stools mixed in as well. They have them labeled so it's easy to determine (other than just the height). I LOVED the one in the middle and brought one home to try.
We loved the adjustable seat, but for comfort reasons didn't go with it. But I may use them in our basement kitchenette someday, I loved them that much. The others were awesome as well, and had bigger seats that are a little more comfy.
These were all very comfortable! I loved the pleather versions for easy clean up:

The one on the left is another one I'm considering for the basement. I love that color!
I love that they have TONS of different styles. These brass options would fit in perfectly with more modern decor:

I love the wide seat on the blue ones. The blue and emerald green are so pretty!
These upholstered options were comfy:

The two round versions turned, which is fun. Those in the middle were very similar to what we had before.
These wood and metal combo options would fit in perfectly in a farmhouse style kitchen:

You can't go wrong with the square metal option -- they fit in well with almost any style!
I took some pics of their dining chair options when I was there too. By the way, these are all photos of the chairs that I liked -- they had a TON more. I loved all three of these for different reasons:

I loved the wicker for the end of a table and it looked comfy. The cane back is a classic, and that blue with the wood back was a favorite of all of them! It would look great at a desk!
I loved the look of the metal and wood ones on the left, but they weren't super comfy:

Those metal chairs on the right are HUGE right now and have been for years. I don't see those going out of style anytime soon. Because they have such a great outdoor selection, I had to include some of these too. I loved every single one of them. Someday when we have a big patio, this is where I'm shopping!: 
I'm not sure how some of them would hold up to the elements, but man, they're pretty!: 
I liked how roomy they were -- all had very large seats. :)
Here are a few more favorites -- I'd use any one of these. That middle one would be perfect cushion and it came in a gray wash as well:

I can't speak to the quality -- I mean, I wouldn't expect these to last 20 years or anything, but who knows. I really hope our counter stools hold up because I just adore them. Have you shopped At Home for anything in your home? It's definitely a fun place to browse. Give yourself some time if you haven't been, because it's huge! Have a great weekend my friends! Check out this post for the best place to find decorative knobs and hardware too!: 
See more of our home here. To shop items in our home, click here! Never miss a post by signing up to get posts via email. Via https://www.thriftydecorchick.com/2019/03/the-best-place-for-huge-selection-of.html
0 Comments
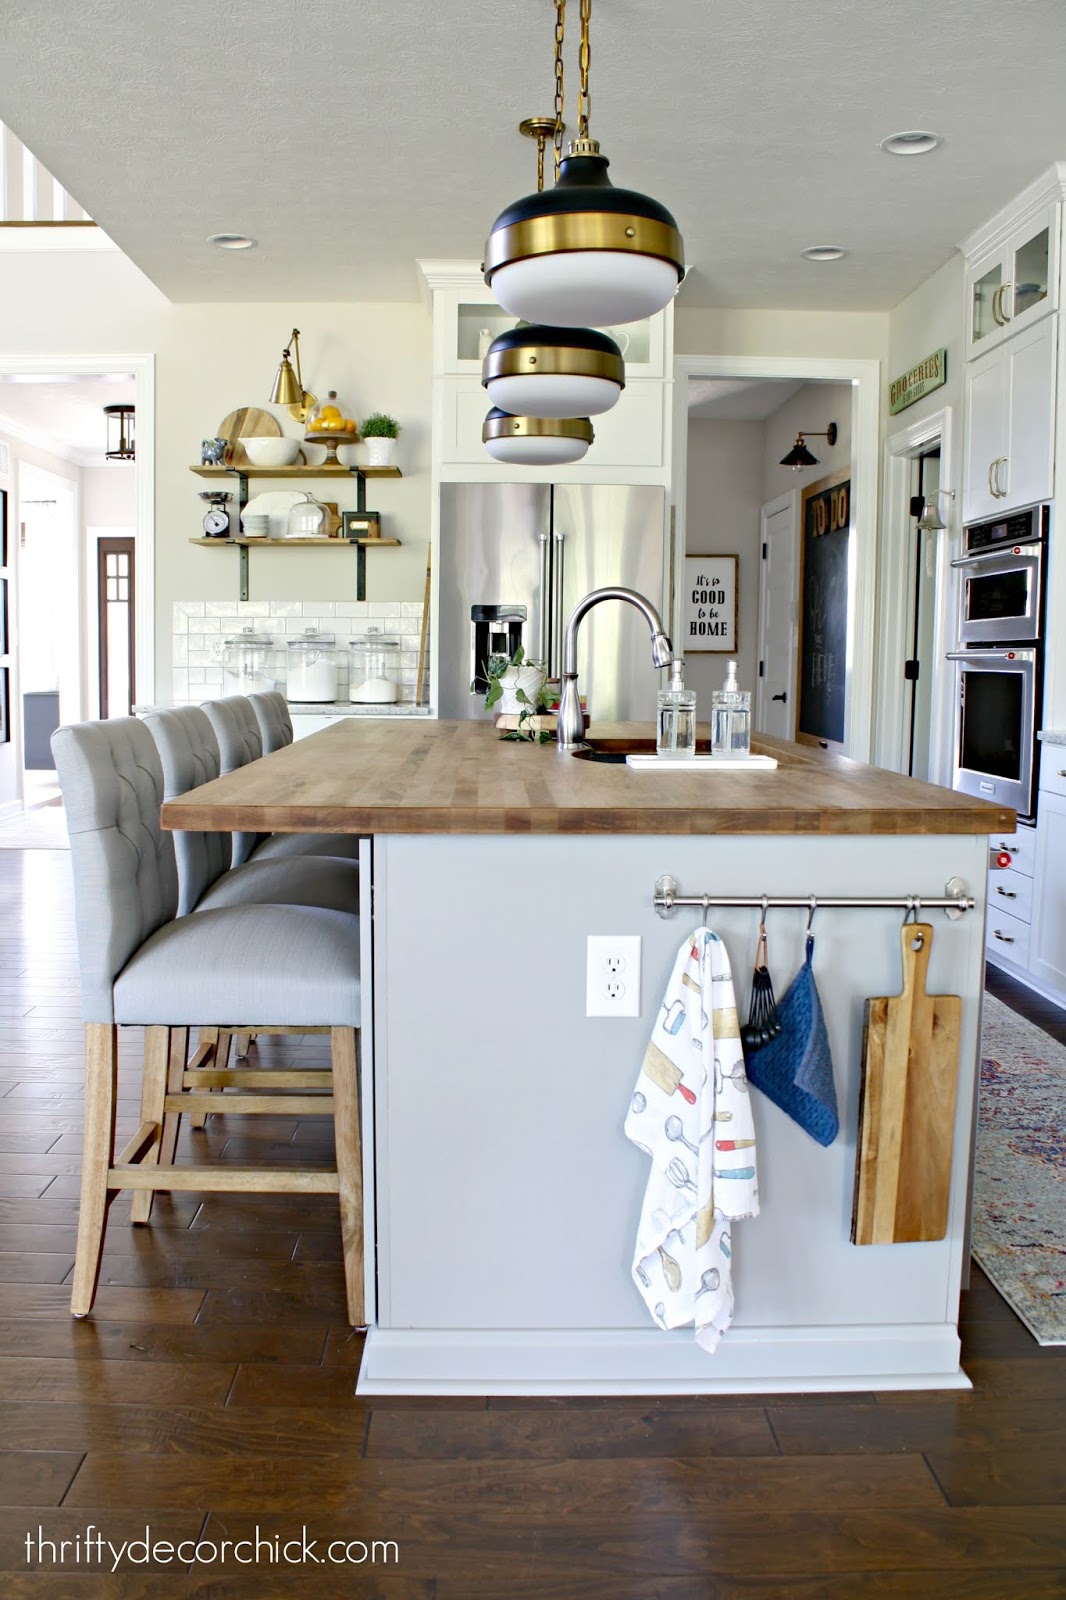
Hello hello!! The island makeover is done! I'm so excited to share it with you. :)
I think I confused some of you on my last post when I shared the build of the new sides on the kitchen island. To clarify, this is where we started:
We love the size and the wood countertops, but otherwise it was fairly simple design.
Last year I added a little detail on the sides of the island with some trim and even that little bit helped. But as I mentioned last week, I really wanted the look of the island that I built in our last house:
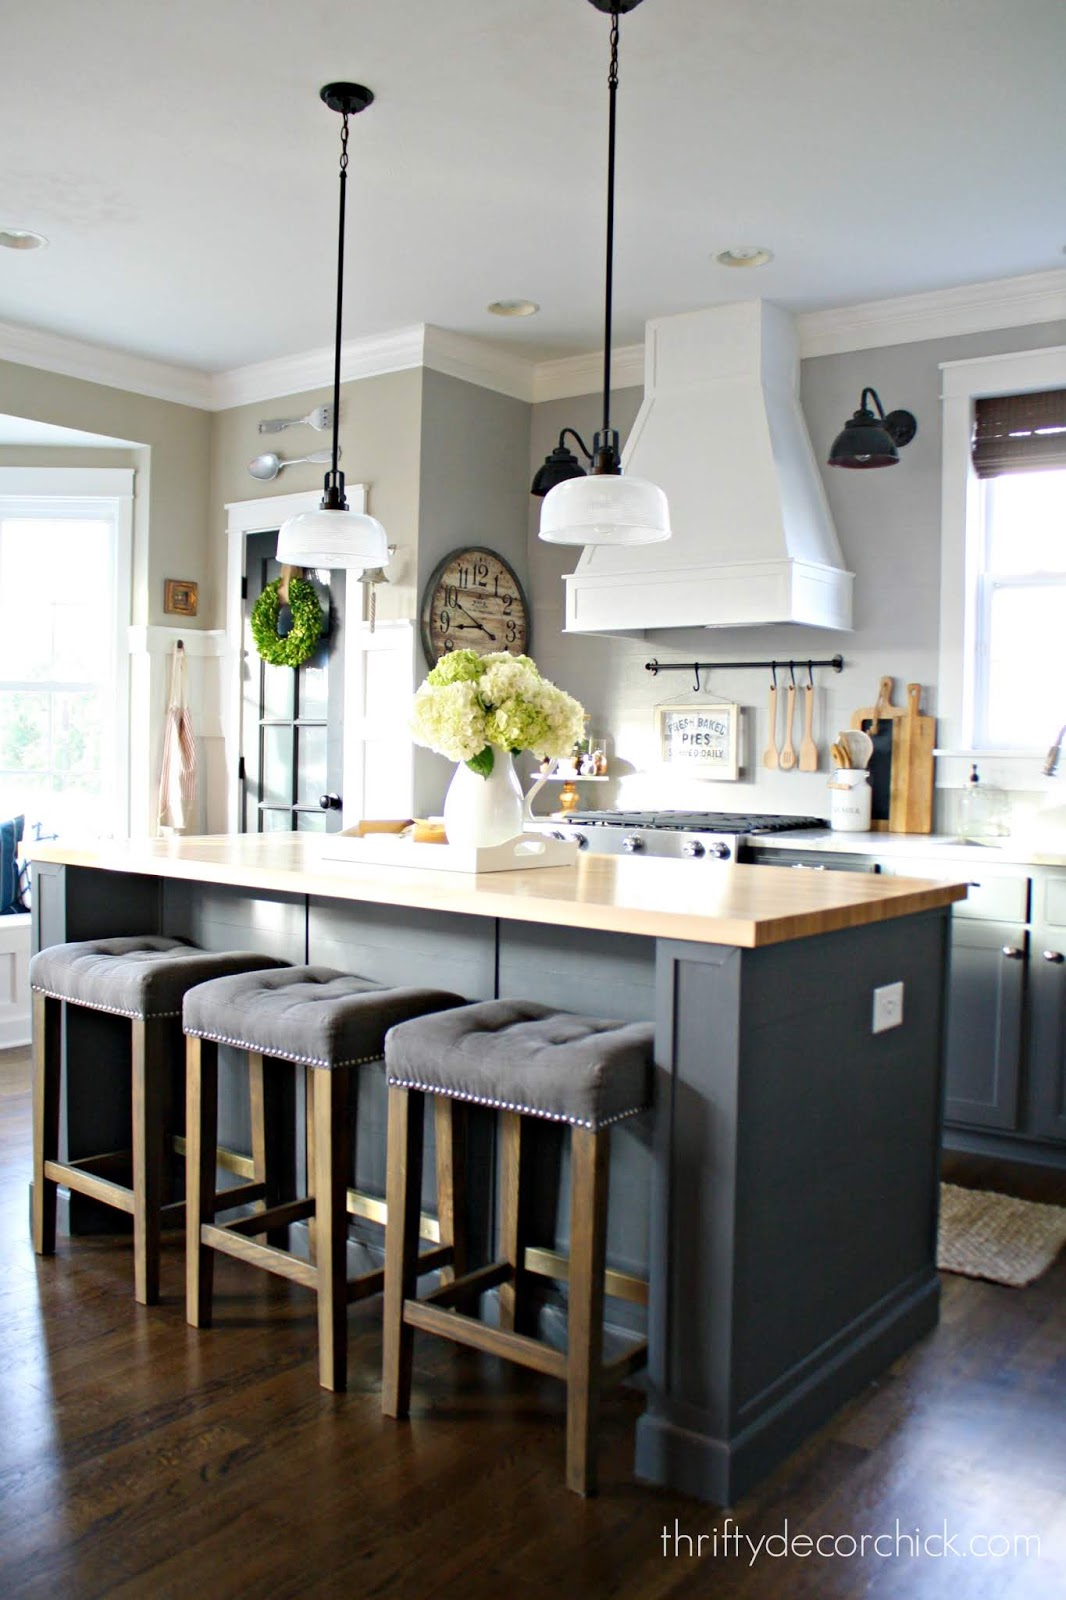
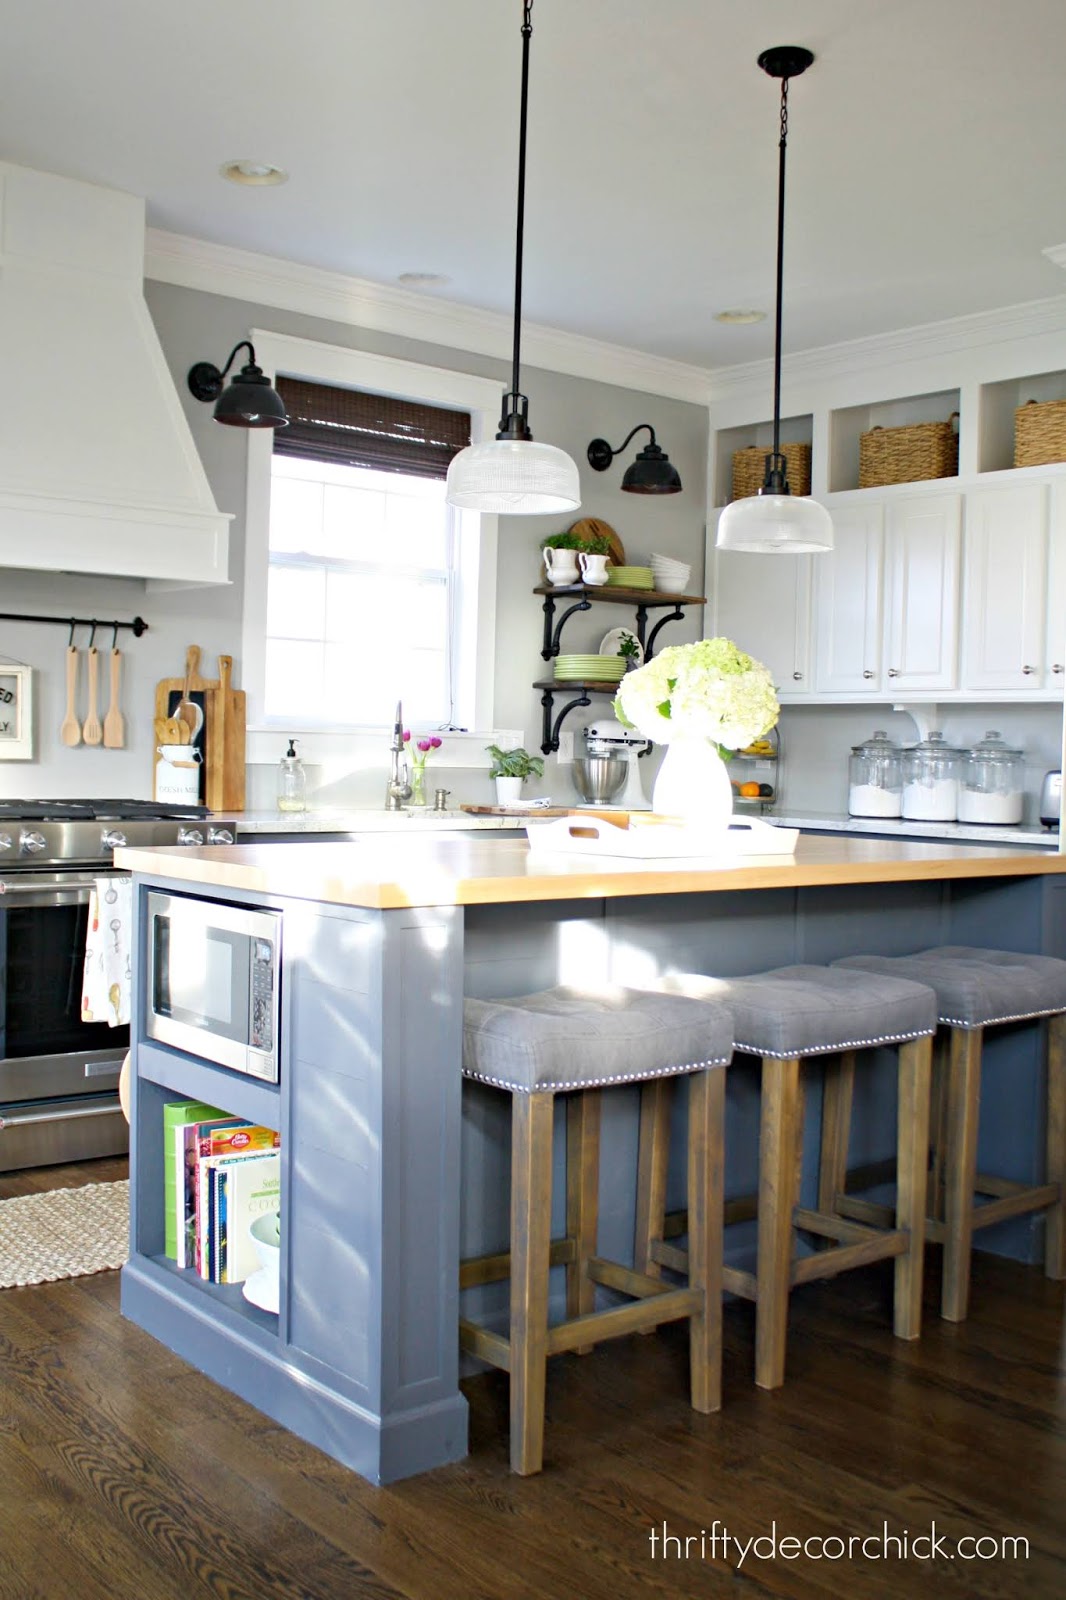
I gave that island a custom look by extending it quite a bit and adding a bunch of storage (and a spot for the microwave). My favorite part was how I brought out the sides of the island and gave it more substance. I LOVE when an island is sort of enclosed like that -- I feel it adds more presence in the room.
As I mentioned last week, I didn't think that would be possible with our island with our current island because we have cabinets that run along the front. But I came up with a way to make it work!
Last I left you, I had built the plywood sides of the island that spanned the whole width -- from the front edge of the countertop to the back:

I framed it out with some trim, then thankfully I had plenty of leftover planks from another project to finish up both sides of the island!
I painted everything to match the island (I color matched a cabinet door last year) and the finished result gives the whole island SO much more presence:
I LOVE IT!! Just what I wanted!
I didn't want to block the end cabinet doors on the front and this solution worked perfectly! I created "legs" that wrap back around, so the cabinet has plenty of room to open:

You can see a photo of the door opening in my last post about the build.
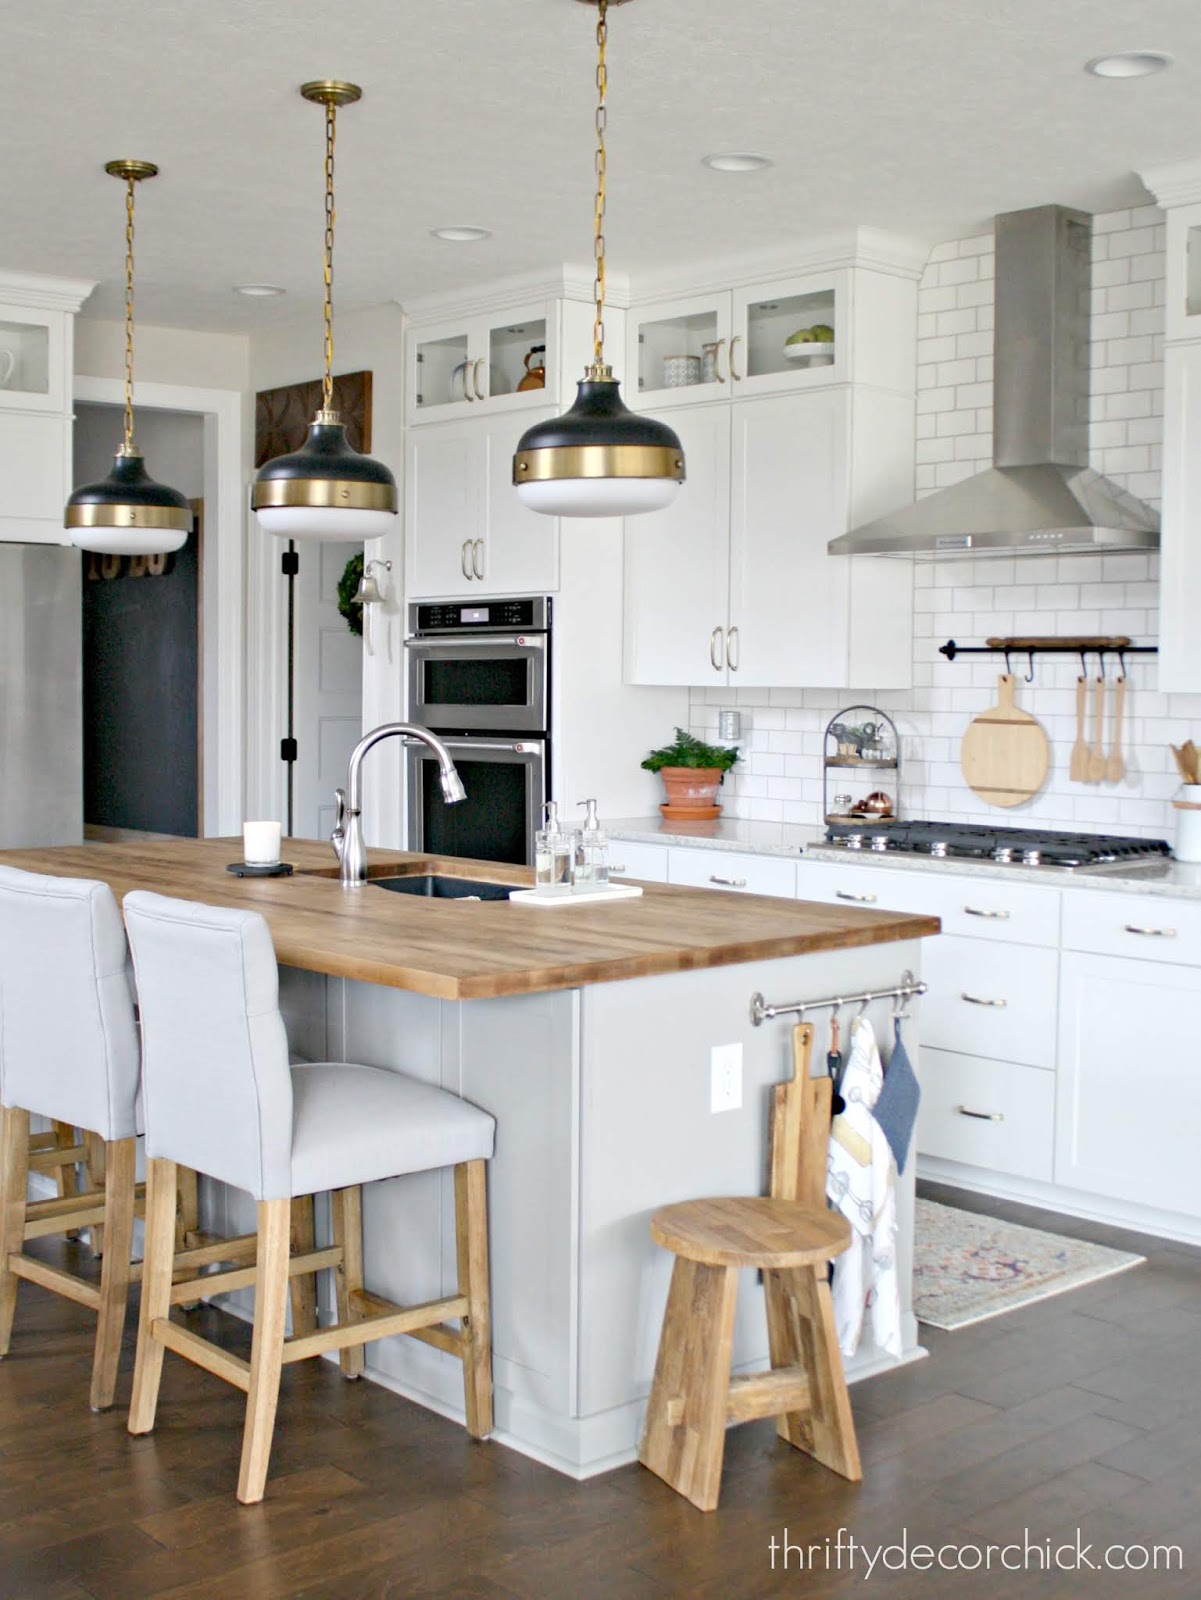
Can we talk about those stools? ? Goodness I love them!! I've had a love hate relationship with our upholstered stools since we got them. They were so comfy, but the cats used them as jungle gyms and were constantly climbing them. Their claws tore them up. Plus, we have one cat who will knock over any glass on the counter within seconds -- it's his sixth sense, like an alarm goes off in the house alerting him. Ugh! Anyway, I was tired of cleaning spills off the fabric.
So I found these at At Home (more on that later!) and I absolutely LOVE THEM. They fit our kitchen so much better. And they are still incredibly comfy. Bonus -- the cats haven't been on them once. I think they're afraid of them. ;)
Here's a front view of the island before:


I mentioned last week that I love the extra support this provides too. It always worried me a little bit when someone would lean on the counters. I don't think about that at all now.
Here's a look from this side of the island before:
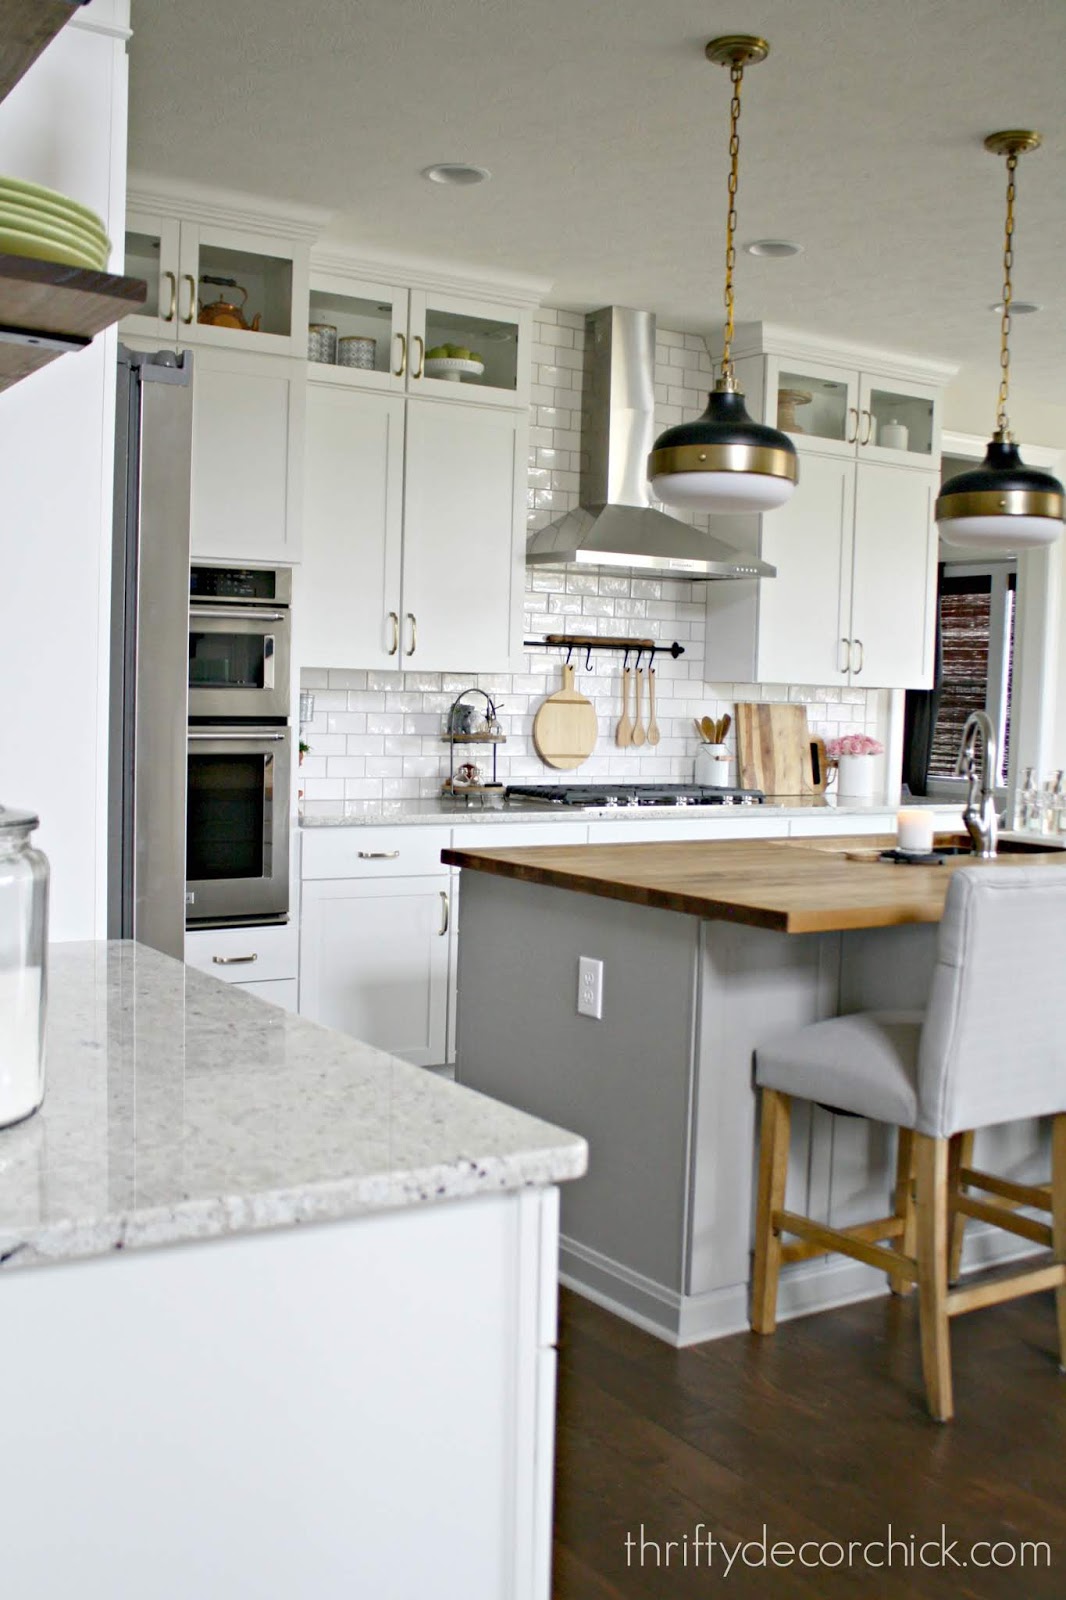
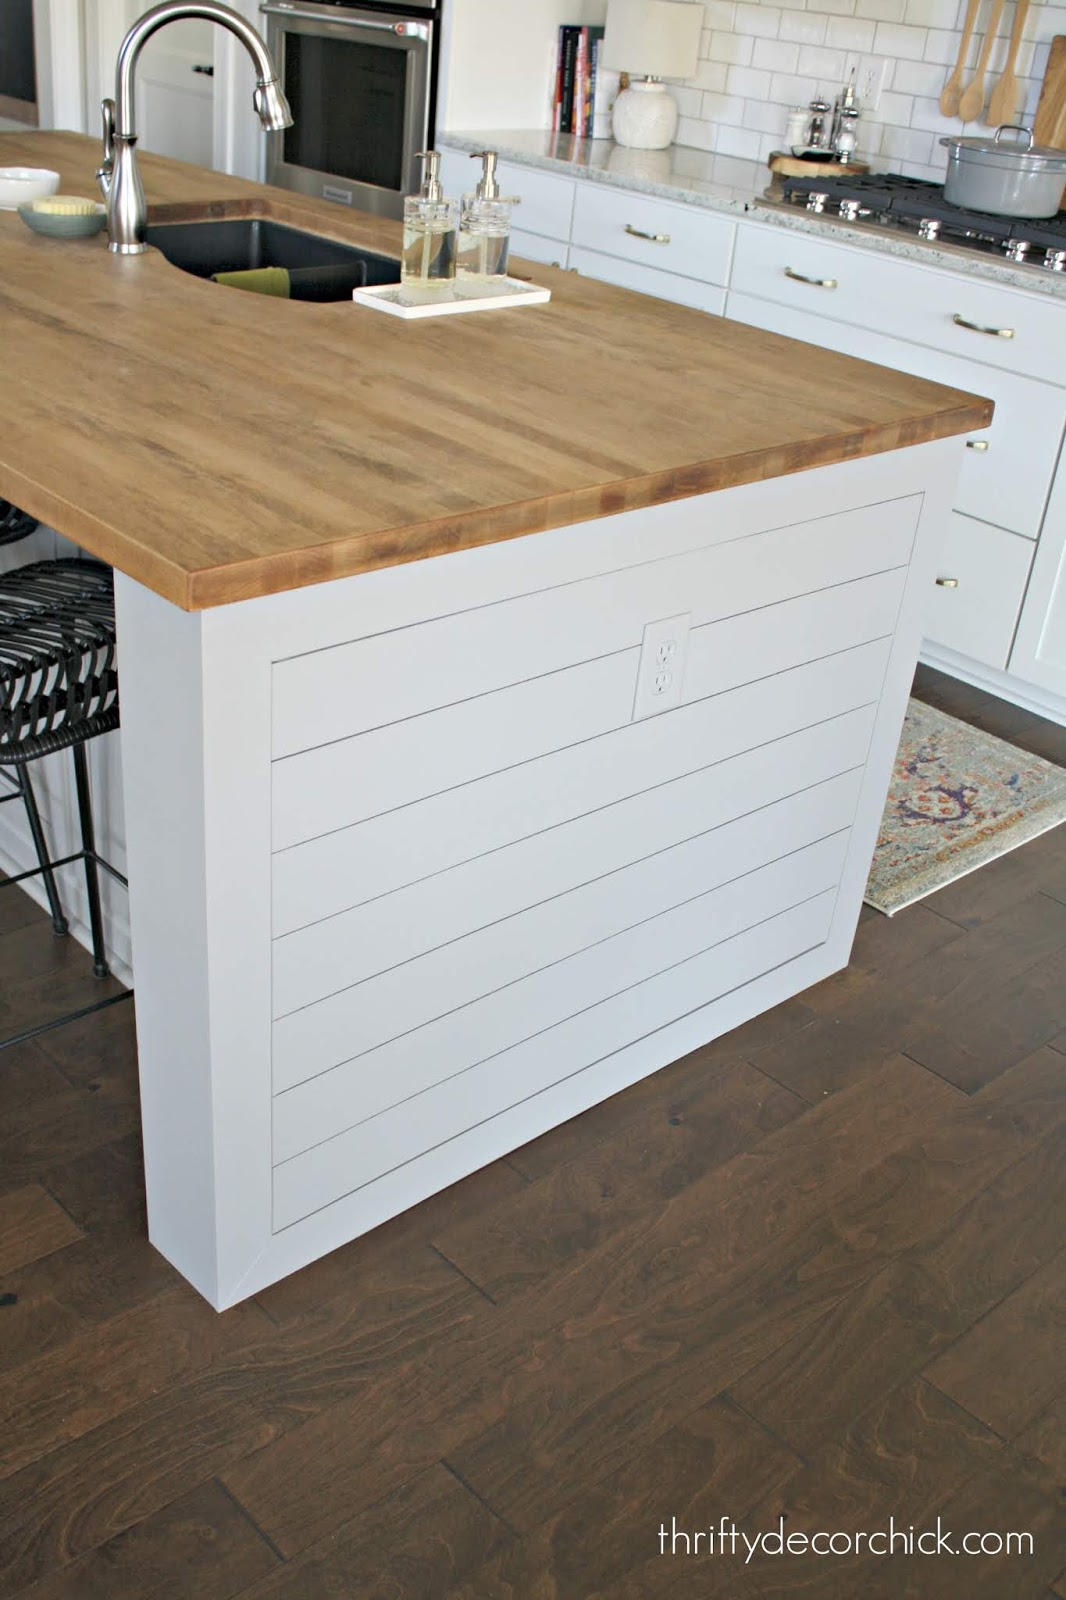
And here's how it looks now:

I think it's a big difference, but at the same time, not in your face different, right?
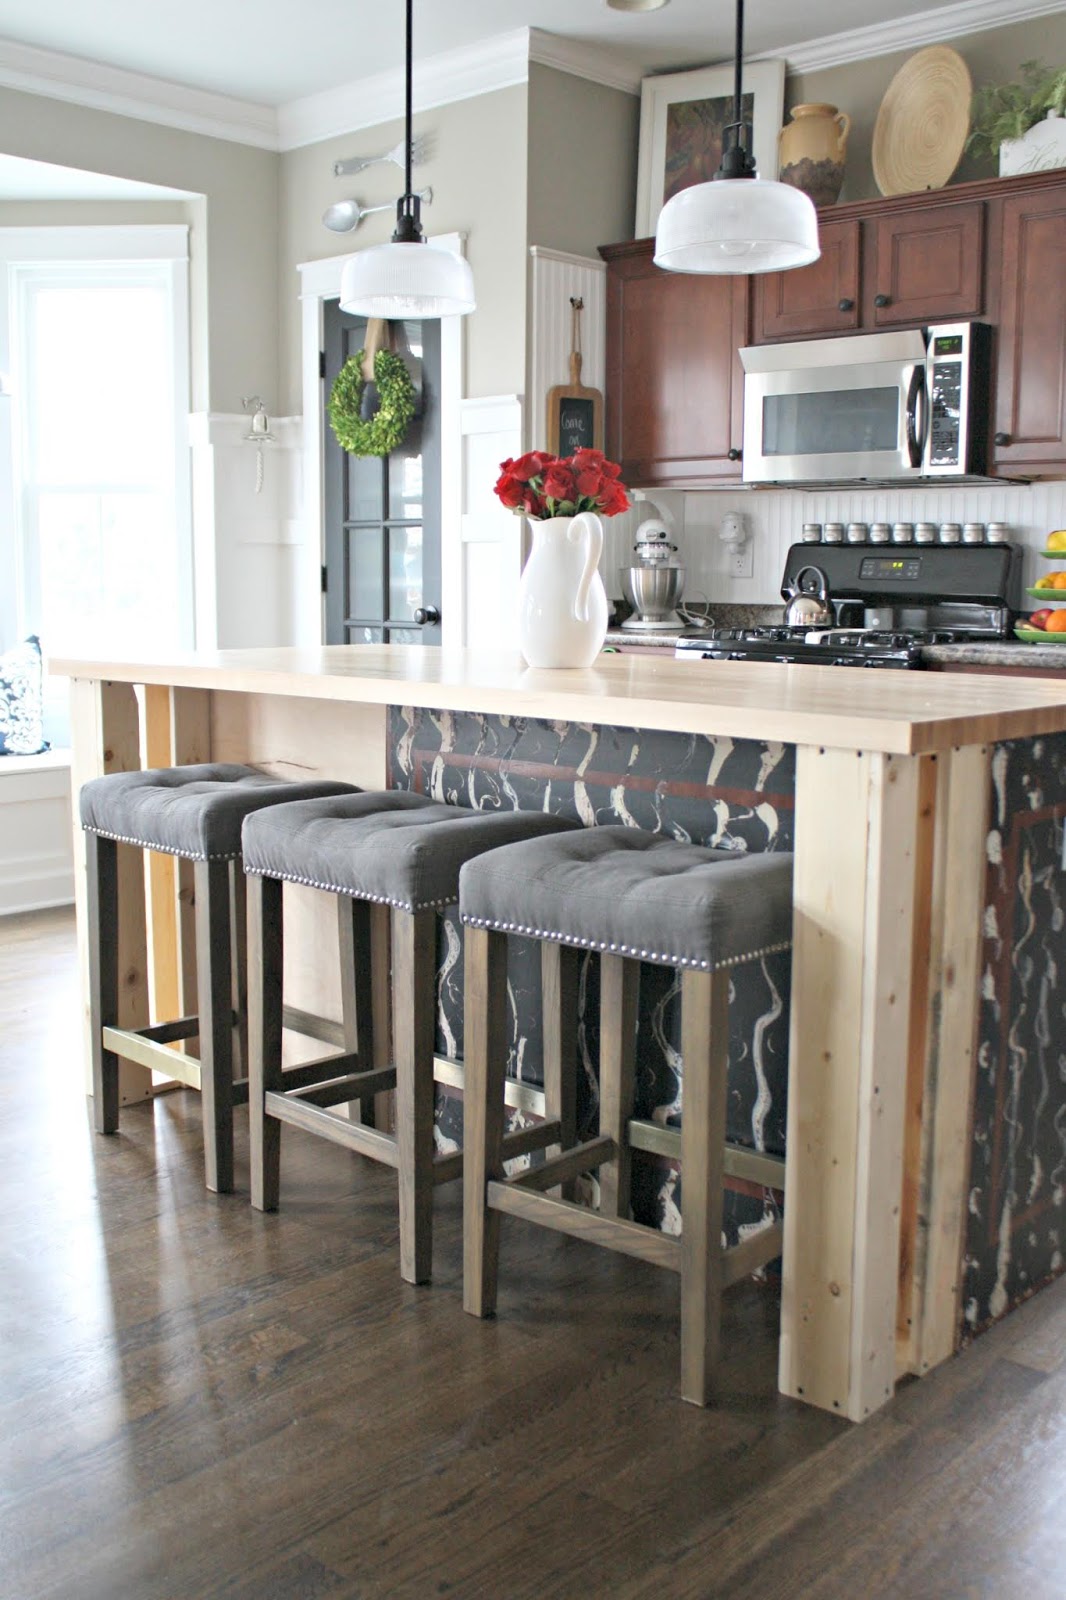
I used the planked look on the ends because it's a favorite of mine and I hadn't added it in the house yet! Because of Joanna Gaines this is well known as shiplap, but many of us were planking walls well before Fixer Upper. ;)
I think shiplap works well with so many decor styles -- farmhouse of course, but it goes modern when paired with the right accents as well:

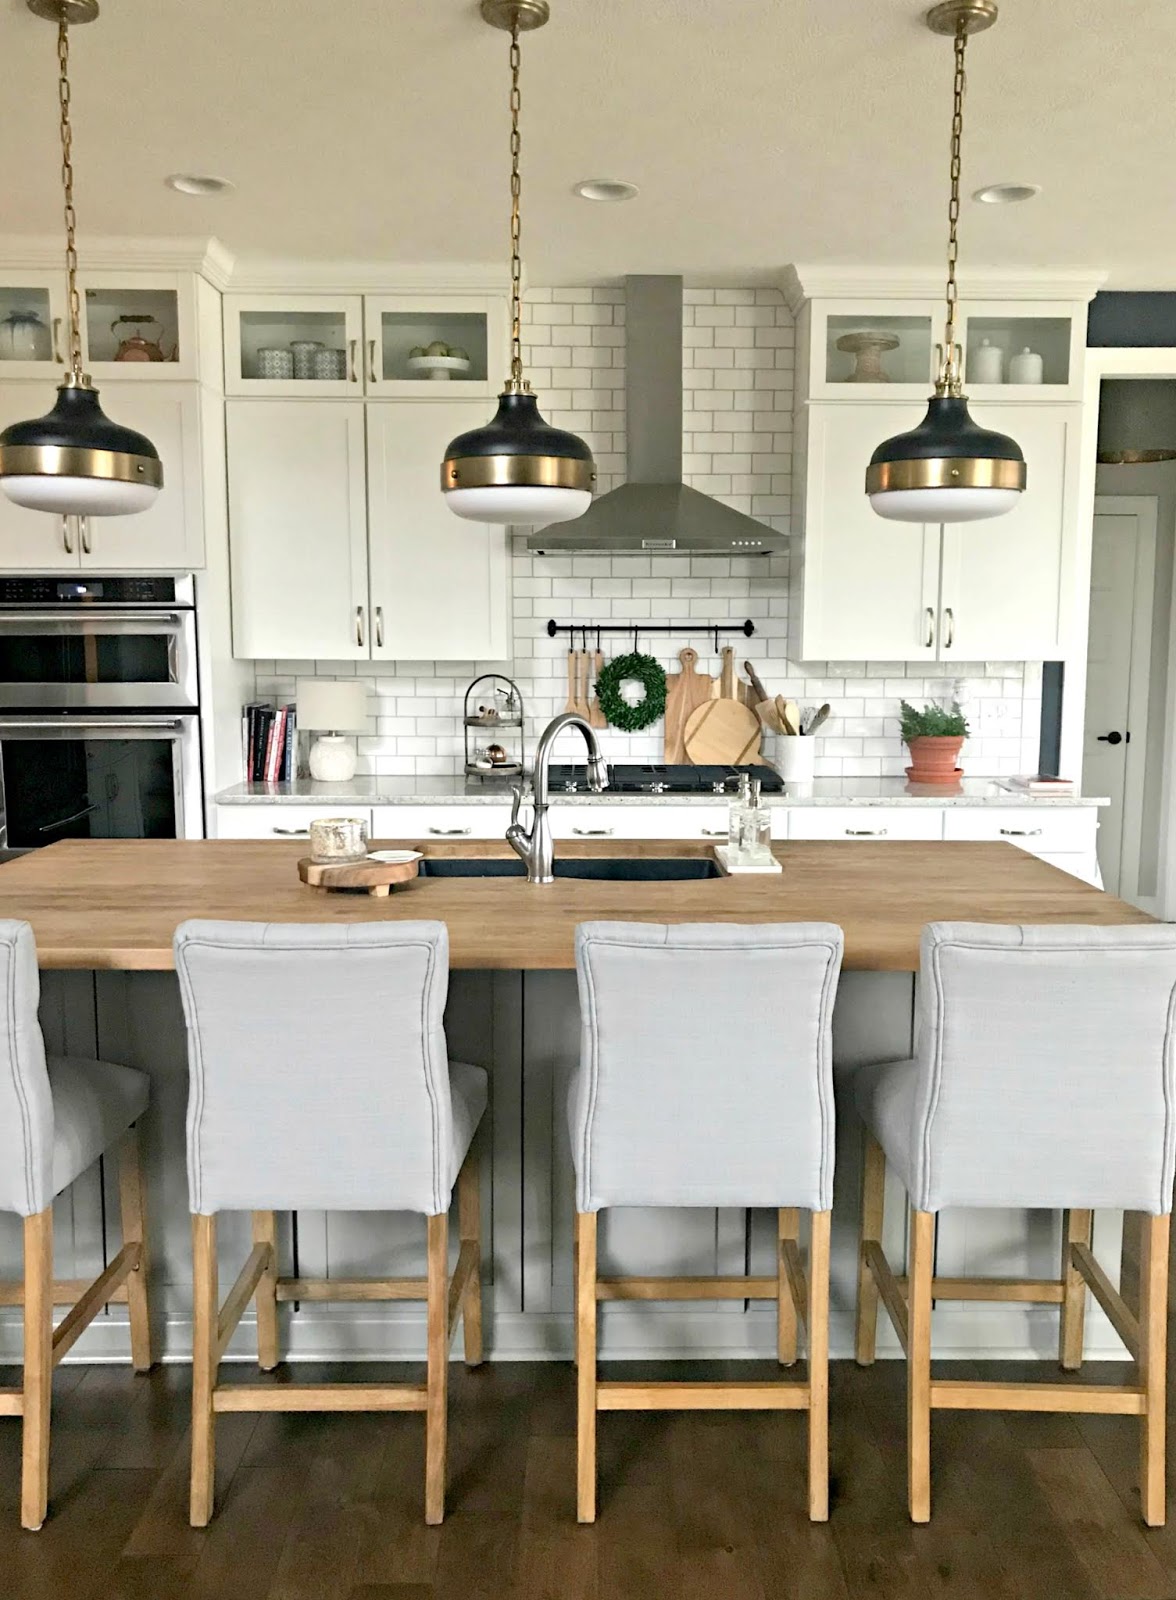
I looove how those stools tie into the black on the lights. ?
I spent $85 total on this build. It went waaaaay quicker and easier than I thought it would, and was much cheaper than I thought it would be too. (Hence why I went ahead with the new stools now instead of later.)
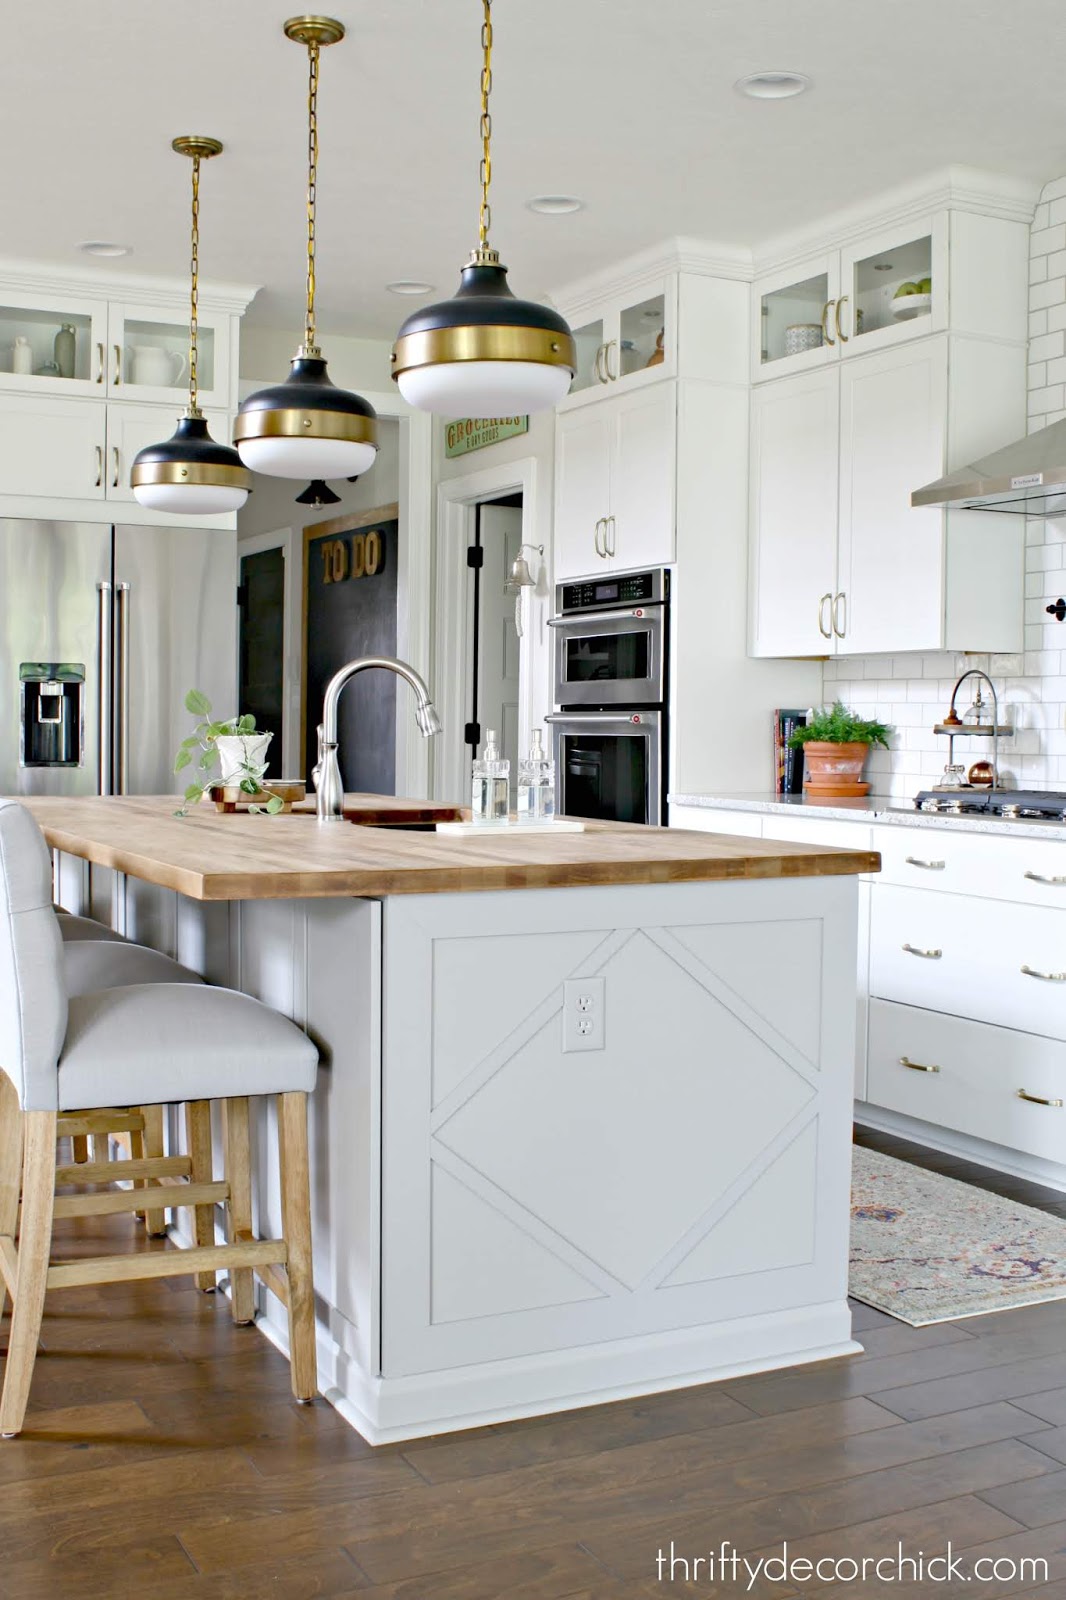
By the way, I purposely didn't add hardware to those cabinets underneath so they wouldn't look like cabinets quite as much. Without hardware they look more like panels across the front:

Here's one more before for you from the other side:
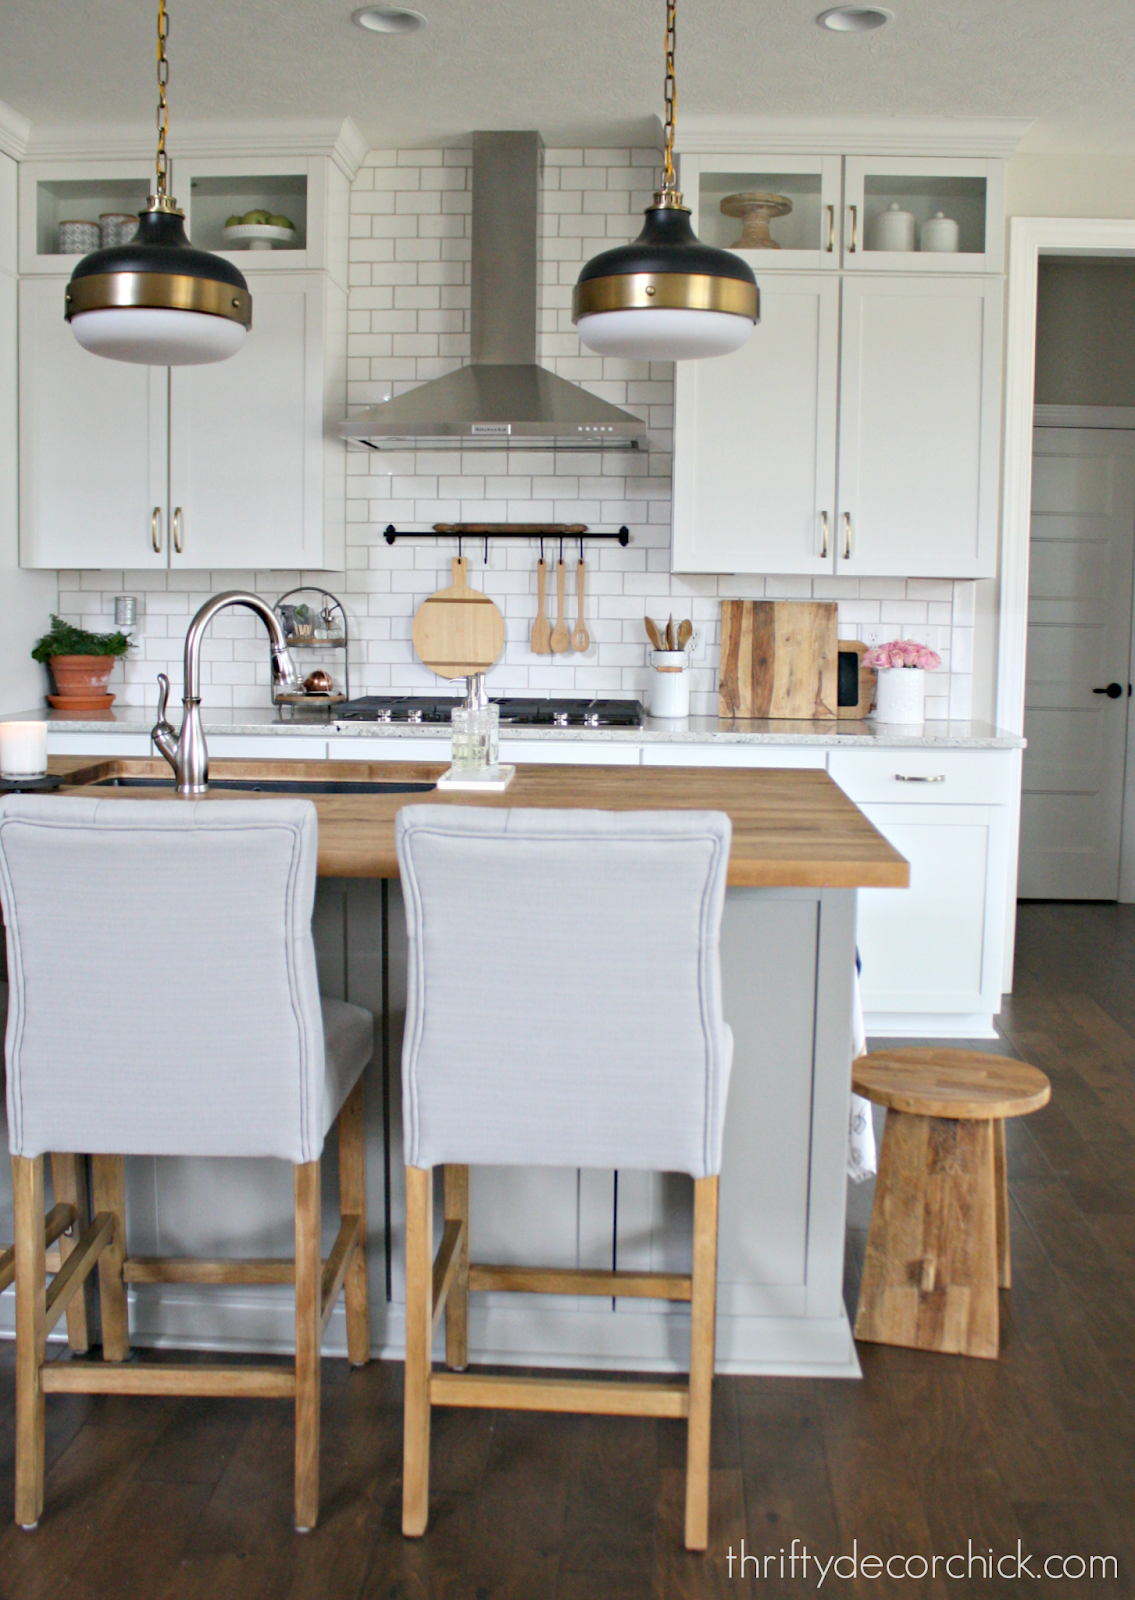
And with the chunky sides and new stools: 

You know what I always say -- if it looks like it should have always been like that, it was a good transformation! This felt right immediately -- I'm so glad I decided to tackle this one!:

I am SO happy with how it came together, especially with little effort and under $100! 
I'm working on some smaller projects in the kitchen to add even more character -- I hope to share those soon!
Have you tried adding some detail to your kitchen island? I think it's such a great spot to customize in the kitchen. It's a focal point and it's fairly easy to create some interest! I shared a bunch of ways to add character to a kitchen island last week if you missed that post. :)
Let me know if you have any questions! If you're interested in anything in the kitchen you can find many of the items below (affiliate links included -- see my disclosure info here):
//
!function(d,s,id){var e, p = /^http:/.test(d.location) ? 'http' : 'https';if(!d.getElementById(id)) {e = d.createElement(s);e.id = id;e.src = p + '://' + 'widgets.rewardstyle.com' + '/js/shopthepost.js';d.body.appendChild(e);}if(typeof window.__stp === 'object') if(d.readyState === 'complete') {window.__stp.init();}}(document, 'script', 'shopthepost-script');
//  JavaScript is currently disabled in this browser. Reactivate it to view this content. JavaScript is currently disabled in this browser. Reactivate it to view this content.
See more of our home here. To shop items in our home, click here! Never miss a post by signing up to get posts via email. Via https://www.thriftydecorchick.com/2019/03/pretty-kitchen-island-transformation.html
Hey hey! I've been hard at work on the kitchen island makeover! I'm excited to share the first part of the build with you. :) I'm breaking this up into two posts because, 1. I'm not done just yet and 2. It's a picture heavy project.
Yet again, this project turned out to be MUCH easier than I thought it would be. Sometimes I work things up in my head and make them harder than they are! I've been mulling over this idea for more than a year and went through a bunch of options. Weeks ago I had a different plan and almost hired it out -- but when I decided on the exact look I wanted, I figured out I could easily do this on my own!
Here's how the island looked till earlier this week:
Perfectly lovely! I just prefer to have something under that overhang -- I think it finishes the look of an island to have a leg or something there.
For months I was planning on adding legs, but more I looked at inspiration pics the more I thought they might look awkward there. My preference was always to do something like our old island, with the chunky sides that come out and make a little "alcove" for the stools.
The problem is, we have cabinets under the island, so I couldn't do what I did before:
I thought the only way to do that would be to add on to the sides, and that would require a new countertop -- not happening!
So I thunk and I thunk and it came to me! I started searching for examples of what I was planning and found a few photos similar to what I had in mind -- sides that came out and then kind of jut back in, so the doors can still be opened. Does that make sense? It will in a minute. ;)
I sat down with my notebook and started drawing out what I wanted to do. That's when I realized it was going to be much easier than I thought! I started by removing the lattice pieces I had put on the ends of the island -- just that little detail made such a big difference. I forgot how plain it was before!:
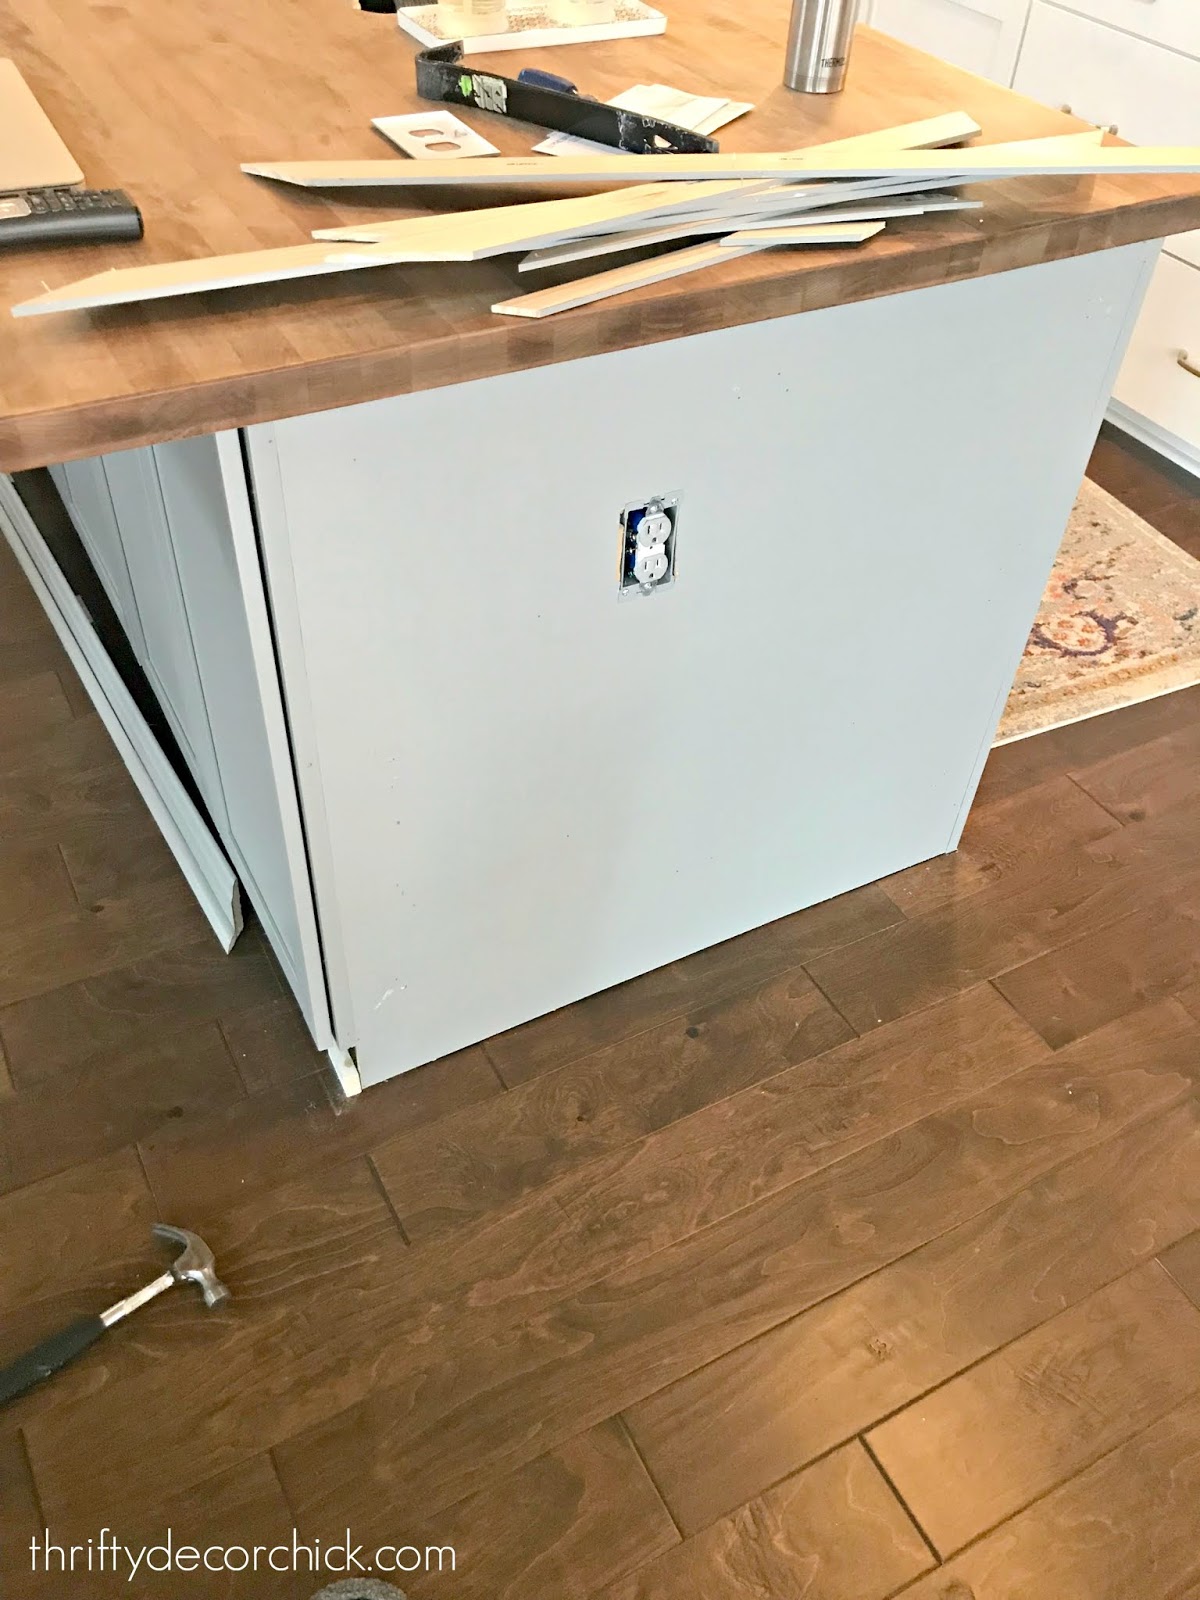
As you can see, I had to remove the baseboards from the whole island. The long piece on the front under the cabinets had to be cut down (I later reinstalled that one):

I had two pieces of basic plywood cut to the size I needed -- one for each side. I had about 3/4 of an inch of space available on both sides under the counter, but still wanted to have a bit of a reveal. I didn't want the sides of the island to go right up to the edge of the countertop. So I went with quarter inch plywood to keep the sides from getting too thick. (I knew I was going to add more on top of the wood too.)
I had to mark where a hole for the outlet -- to do this you need to transfer the measurements onto the wood. I use a large bit to get started, then cut with my jigsaw:

By the way, these pics are from both sides of the island -- they may go back and forth a bit. :)
I pulled the outlet through so it was flush with the plywood, then nailed the wood onto the island.
Then it was time to build the "legs" -- I bought a 1x6 for the front and a 1x3 for the sides. I wanted the six inch piece to go on the front and be clean -- I didn't want to have to add any trim to hide where things joined up.
So I wanted the plywood to butt up to the back of the front piece, but the plywood was too thin to nail into the side to secure it. (This is where things may get confusing -- hopefully with the pics this makes sense!)
To address this, I took a piece of scrap wood and nailed it to the back of the 1x6 -- leaving a 1/4 inch reveal that the plywood would fit up against (see the arrow):

So then I could just slide that over the plywood, and it allowed me to nail the plywood into the side of the scrap piece:

You can barely even see the seam where they meet up on the sides of the island, but that was later covered anyway.
By the way, the added bonus of this project is that the countertop is supported. I know they're built to hold a good amount of weight, but it always made me a little nervous to lean onto that part of the butcher block!
From the front the "leg" is nice and clean -- now you can see now how it was coming together!:
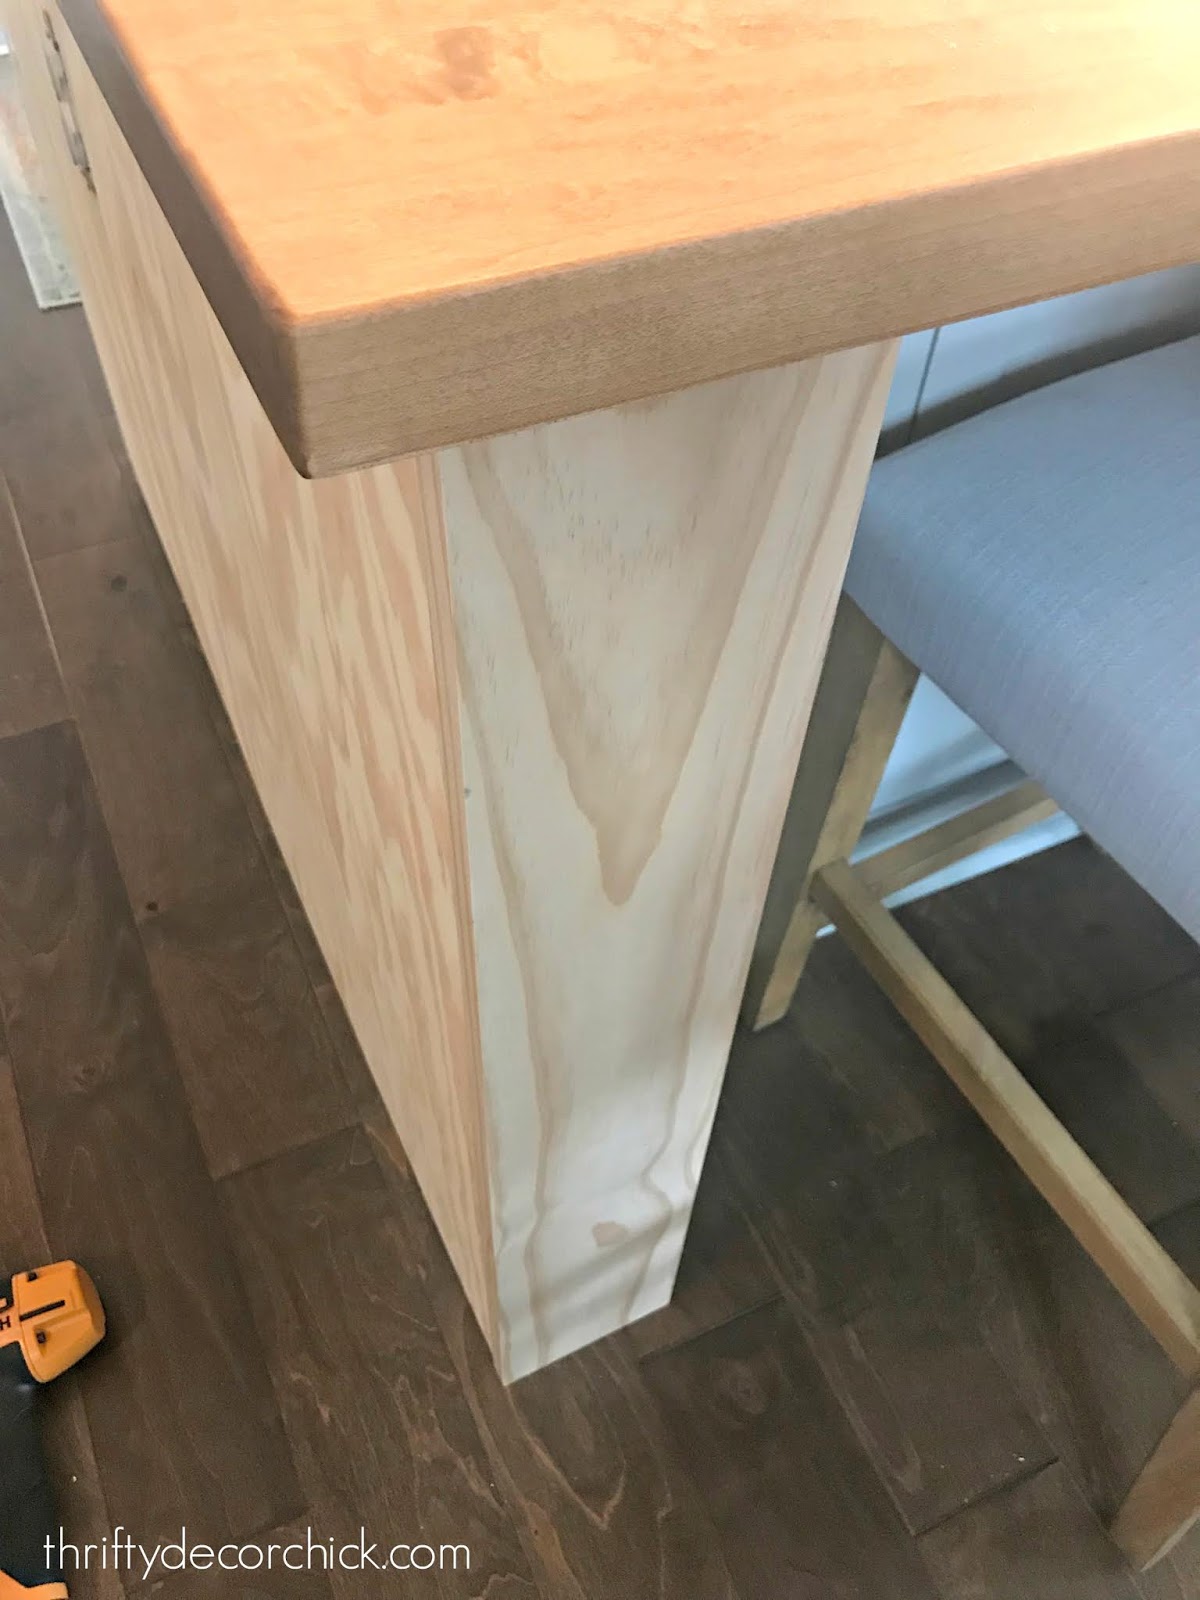
See how the panel seems to be a bit off, when you look at the hardwoods? I'll show you how I addressed that in a second.
The next step was to add a side to the leg. I used the 1x3 and nailed it in from the front. The size of this whole piece is just preference -- but I kept it this size so the cabinet doors would still have plenty of room to open:

I played around with different sizes before I bought materials. Making the leg any wider or deeper would keep the door from opening as much.
I had the build down, but of course the legs weren't attached to anything, so they moved around.
To fix that, I cut down some scrap wood to fit inside the legs and nailed one into the floor (the only small holes in our hardwoods if this ever comes down for some reason) and into the top under the counter:

Before I nailed those in, I looked at the flooring to adjust a bit and make sure it was perfectly even with the side of the island. So where it was off a bit in that photo above, the spacing is now perfect.
The small scraps make it extremely secure -- there's no budging it. It also gave me something to nail the side piece into for additional support.
To start the finishing it off, I used three inch lattice trim (I can only find that width at Menards) around the edges of the whole thing:
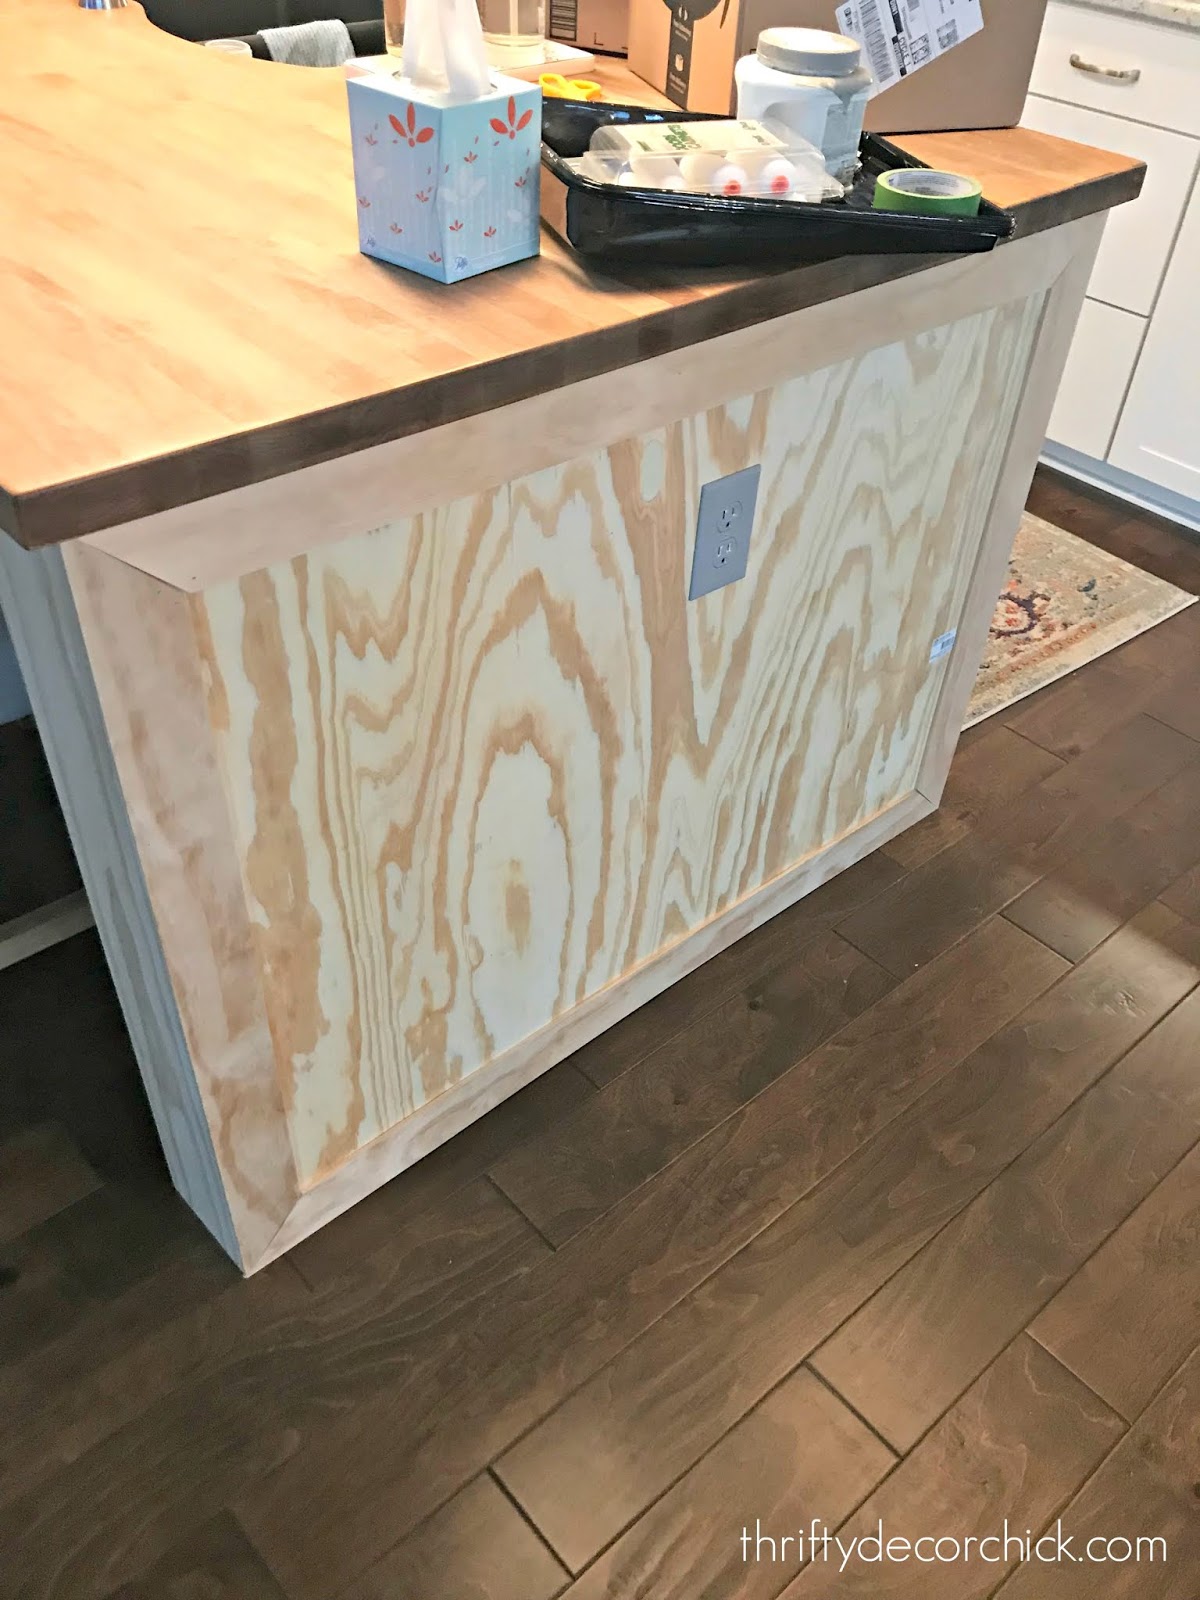
And that's where I'll leave you today! I'm nearly done and will share the final result next week. I LOVE IT!!
And yes, I covered that plywood. :)
Here's a pic showing how we can still easily access the cabinets. They open plenty!:

We don't get into these often, but I'm pleased that we still have full access to the end cabinets.
So far I've spent $85 on the entire project. At most I'll spend $100 -- I'm hoping I have enough scrap to finish up without having to spend that extra $15. :)
I'm SO thrilled with it! Now that the sides are finished it looks so much more substantial in the kitchen. It looks like it always should have been that way, which you know is always a good sign!
I'll be back with the last few details and the reveal next week! Have a great weekend!
See more of our home here. To shop items in our home, click here! Never miss a post by signing up to get posts via email. Via https://www.thriftydecorchick.com/2019/03/how-to-customize-plain-kitchen-island.html
Most of you won't be surprised to hear this...but I'm about to begin a new project on our kitchen island. Many of you know I've had a thing with tweaking our kitchen islands over the years. I think it's such a great way to add a custom touch to a kitchen.
Islands are such a centerpiece to a kitchen and I've found with most of my projects that it doesn't take much to make them really shine. Forever ago I added beadboard to our old island and then painted it black. Later I took butcher block from IKEA, paint and trim and transformed it again: 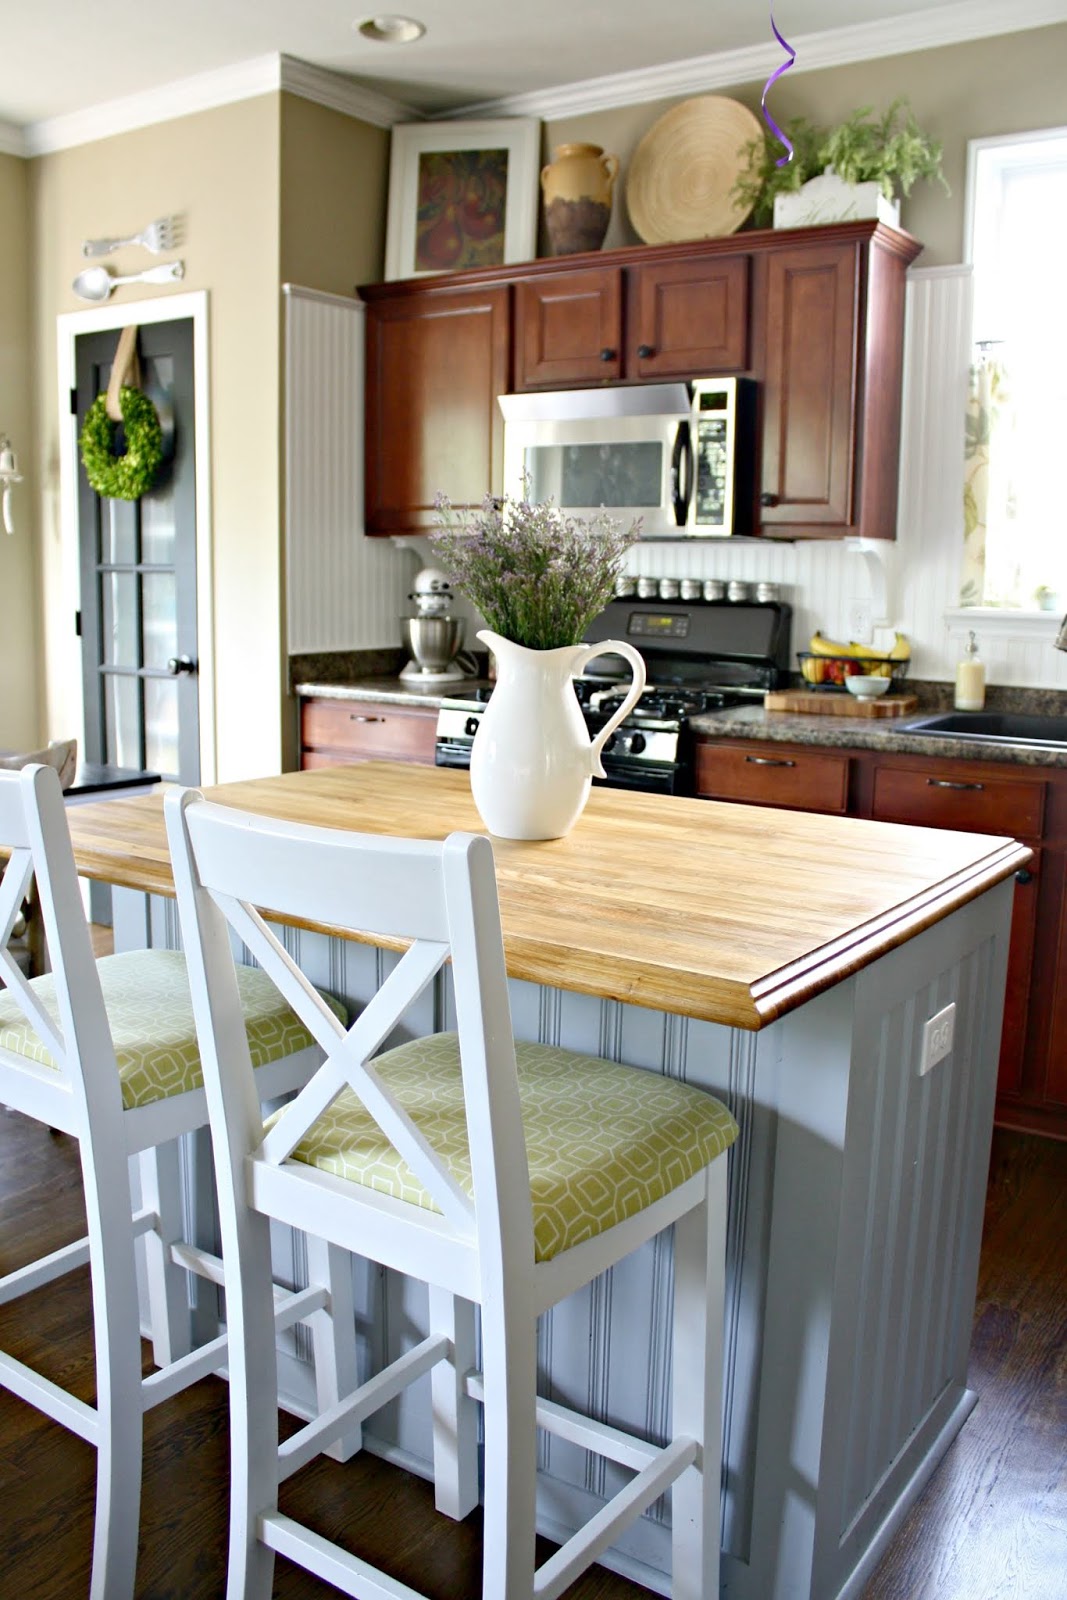
When I started our kitchen renovation at that house I knew I wanted to make a bigger change. We moved our kitchen table over so that meant a much bigger island.
It always looks worse before it gets better!:
The finished result was a MUCH bigger island with tons of storage:

I added wine storage, a spot for a long towel rod that held various items, and a bookcase at the end of the island that held our microwave:
In our new house I knew I wanted to repeat the wood counters and those have held up beautifully. We have a HUGE island which we LOVE. Love love love. It is pretty basic as far as the cabinets and design. Last year I added a small detail to the ends of the island to dress it up a bit: 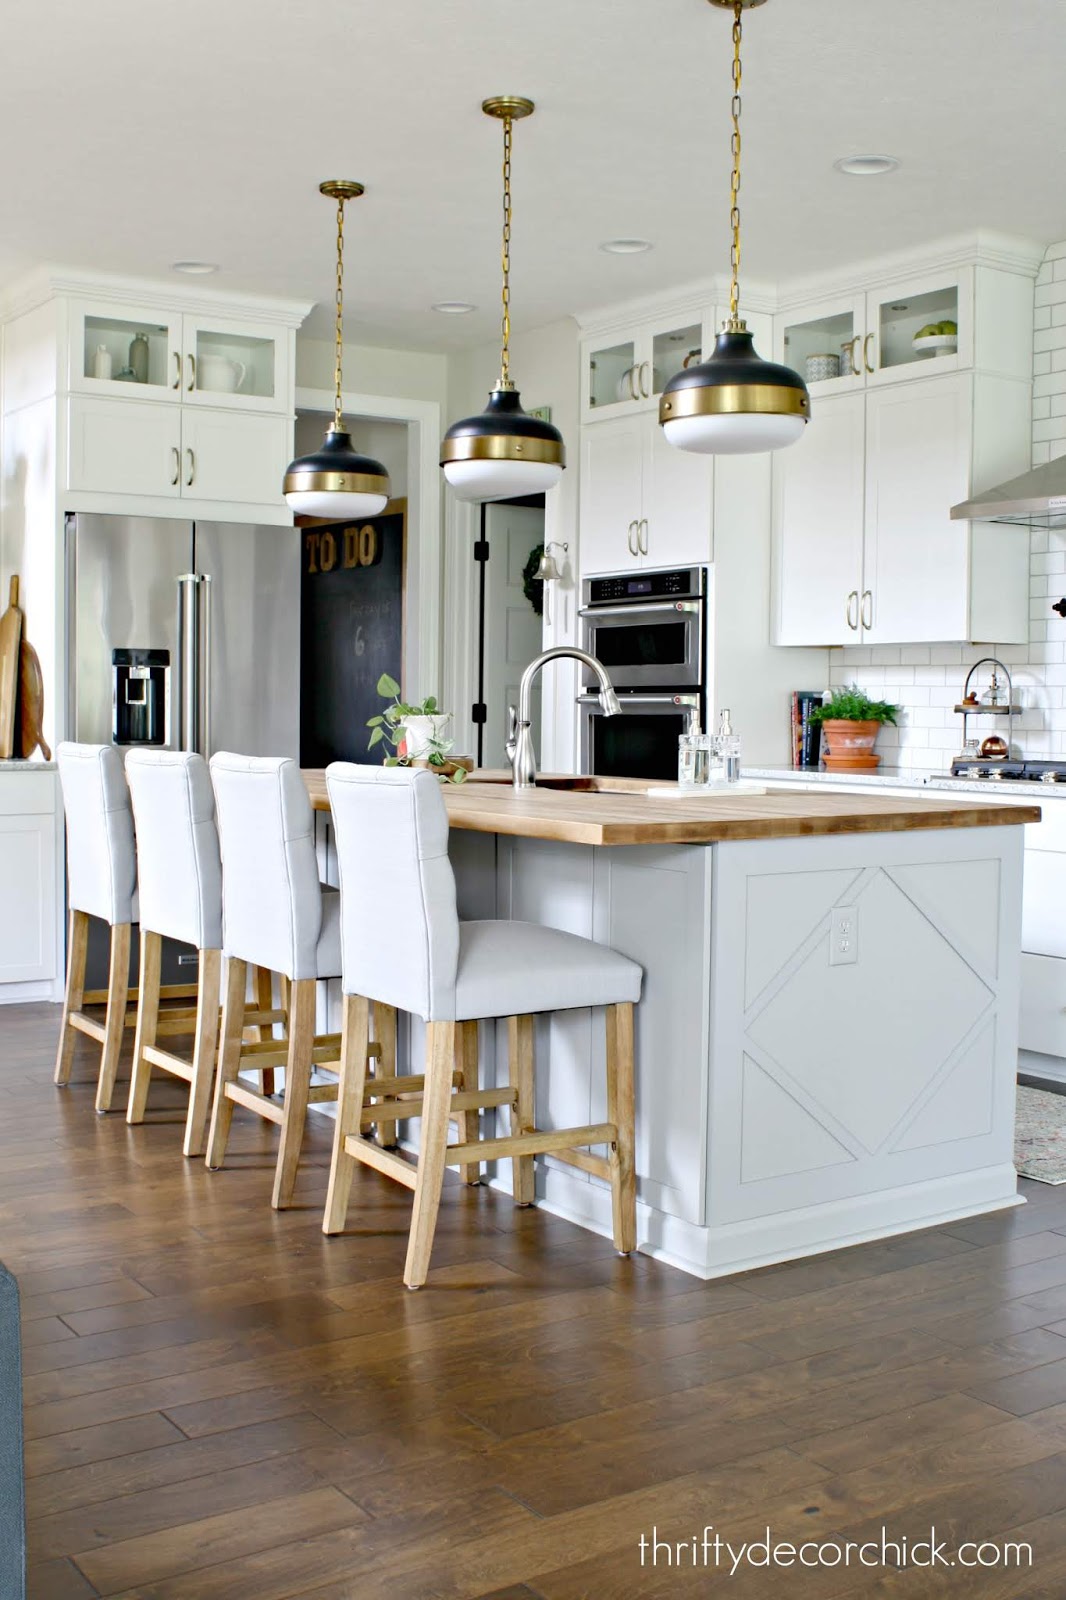
I've known from before we moved in that I'd eventually add to it...but like most of the big projects I tackle, I wanted to wait it out to figure out exactly what I wanted to do.
I'm so glad I did! I knew I wanted to add some kind of "legs" to the island, so I've been searching for ideas for over a year. I prefer some kind of base under the counter -- the design we had on the old island with the sides is my preference.
I thought it wouldn't be possible because we have the cabinets underneath that open. We don't have to access them often, but I do love the extra storage. I thought about adding legs, but instead came up with a new plan that I'm planning to start this week.
In my head it looks SO GOOD. I'm just hoping it turns out like that. ;) Of course I'll share that whole process with you, but for now I've got a bunch of great island transformations from other talented bloggers.
These kitchen island ideas run the gamut -- modern and traditional, from scratch to adding to existing. All of them are beautiful examples of ideas you can incorporate in your own home!
This is one of my favorites -- what a beauty with those big, chunky legs!:

I've found recently that you can find some great wood leg options on Amazon. I love how long it is too -- and that pretty light gray color.
I love this one because it is absolutely a doable DIY project -- if you don't have an island built in, why not build one you can move? This simple version would still hold plenty of stuff:

I've always thought my DIY potting bench would make a beautiful island, especially with the wheels!

This was a great idea too -- they added onto their island and now have a table in the kitchen: 
I almost did something similar in our old kitchen years ago -- I was very close to extending out the countertop so we could have seating off the island instead of in the bay window area. If you're tight on space this is such a smart option! If you have a sink or stovetop in your island and don't want people to see the messes (or just want more eating area), this is a great way to do it: 
They added on to their existing island and built a taller bar top. The added molding makes this look like a custom piece! If you don't have an island, there are many ways to create one with store-bought cabinets: 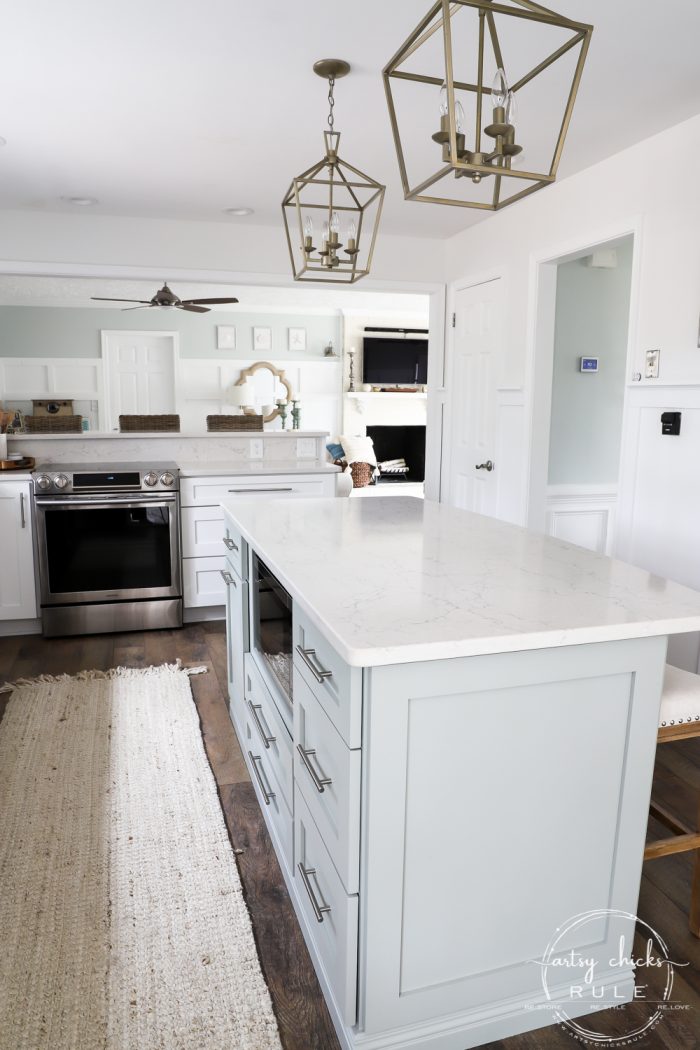
You don't always need cabinets to create an island where the wasn't one. This table became a lovely island and can be rolled out of the way if needed: 
I just love that pretty detail on the ends of the table! And the long towel bar is a perfect touch. Jennifer found an old sewing table that ended up being a lovely kitchen island as well: 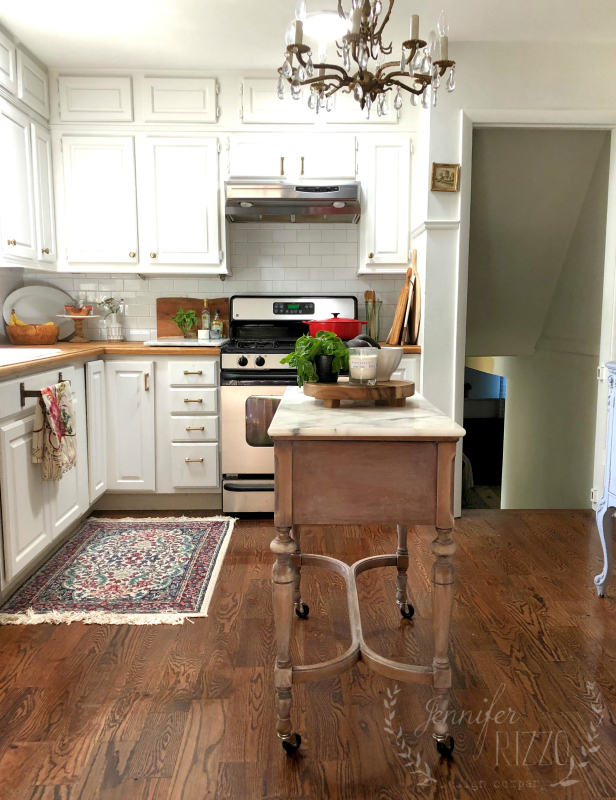
Isn't that pretty? Because it's a smaller size the counter wouldn't be too horribly expensive. And finally, don't underestimate the power of paint and new hardware -- they can completely transform an ho hum kitchen island!: 
If you're loving a dramatic color but are afraid to incorporate it on the walls or ALL of the cabinets, add it to your island. I think the island should be one of the show pieces of the kitchen and this is a great way to accomplish that! Great transformations, yes? I love seeing what my fellow bloggers accomplish with some sweat equity. Have you added any custom details to dress up your kitchen island? I hope to update you soon on my own progress. :) See more of our home here.To shop items in our home, click here!Never miss a post by signing up to get posts via email. Via https://www.thriftydecorchick.com/2019/03/diy-tricks-to-customize-kitchen-island.html
Well hello! I hope you've had a great week! One of my big goals for this year is to finish a BIG project in my office. I cannot wait to get this started!
Most of my books and craft supplies are in the basement storage room and I'm excited to get them put away. To do that I need to build a wall of bookcases...but to that I had to start with the floors. Here's a look at my office how it looked last week:
We priced out putting hardwoods in here when we were building (and having the builder do it) -- but there's a point in the building process where you start sweating at the thought of adding one. more. thing. I figured if I wanted hardwoods later we could do it for less anyway.
When we moved in we liked having some carpet again. It didn't last long. ? I'm remembering why we got rid of most of it at our old house. Hard floors are so much easier to care for with animals. Our dog did a number on this carpet right after moving in (I think due to stress of the move initially).
So anyway, we've known for awhile that the hardwoods were going in here, but the budget didn't allow for it till this month. I made some calls a few weeks ago and found out our hardwoods were discontinued. Whaaaa wahhh. After a bit of panic, I made some calls to the manufacturer, Diamond Living, and they were incredibly helpful. Within a day I had a call from a store here in Indiana that had some boxes left. We got enough for my office and our master for later. Whew!!
I pulled up the carpet myself (if you need tips on how to do that you can see how I removed carpet from our stairs here) and then we had someone install them for us. Wow what a difference!:

I still have to install and paint the quarter round, but we are loving the floors!! It looks like it should have always been like this, which is always a win in my book.
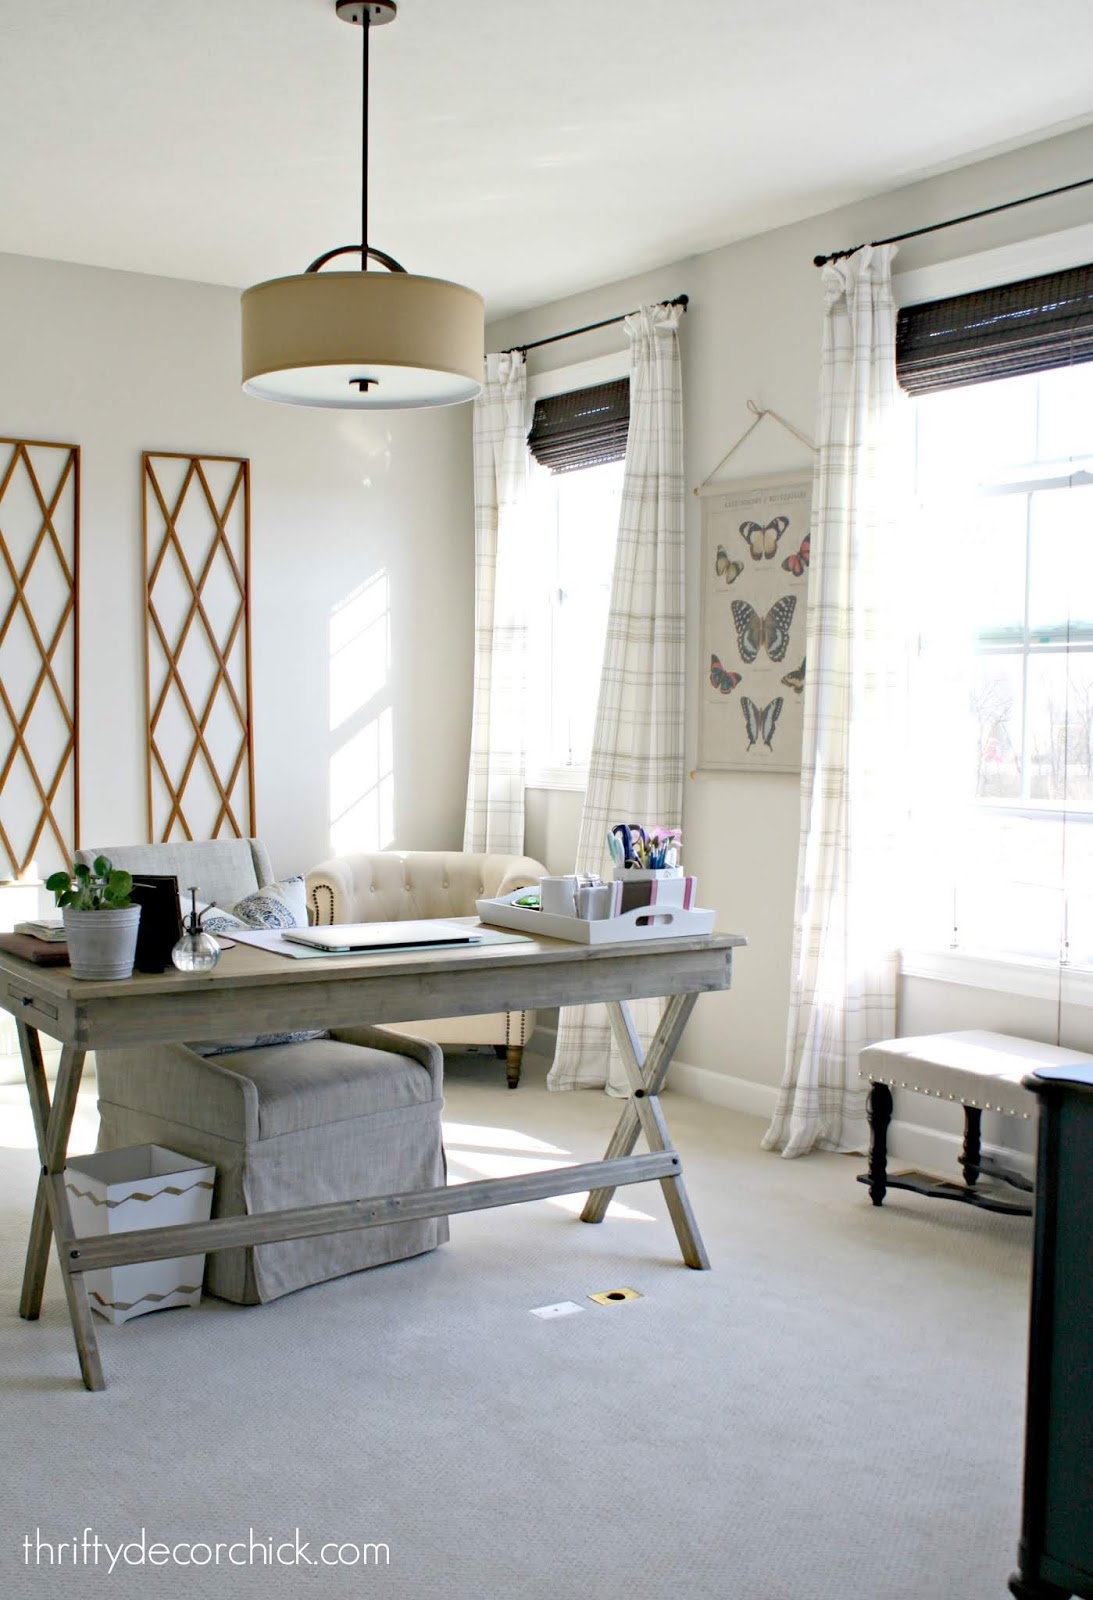
The rug used to be in our foyer, and it was SUPER inexpensive. It wore pretty quickly, but that's perfect for this spot (at least for now) because I needed a thin rug for my rolling desk chair:

I feel like the room needed the contrast of the wood floors:

But this view is going to change significantly soon!
Now comes the FUN part and I can hardly wait to get started! The big project will be on this back wall:

First up, I need to have electrical run for lights. This wall is almost exactly the same width as the bookcases I built at our old house:

So I'm planning on using four cabinets and four lights again. The bookcases themselves will be very similar -- but because I don't have to deal with a thermostat and light switch like I did before, the shelves will be spaced out more evenly.
I plan to do the wood top again, but this time I'm going darker with the built ins -- not sure on the color just yet!
I need to find lights soon and these are all options I'm considering. Thankfully over the years the options for affordable "library" lights have improved greatly. You can see the lights I used for the old bookcases here. I had to get creative!
I love this option -- it has the adjustable arm (affiliate) I love but doesn't take up a ton of vertical space:

You have to watch traditional swing arm sconces on bookcases because the header isn't usually deep enough to accommodate the arm height. This one would work well though!
I also love this sconce with the pretty slope, but it may be a little too big:

And these are smaller options that would work well too! They are identical to the sconces I have in our mud room:

So once I get the lights run I'm on my way! I'm hoping to do that this month, then I can start installing the cabinets. I use upper cabinets for the bases, and you can see how I make them look built in here. I use uppers because they don't take up as much room, and they don't have the drawer that traditional base cabinets have. I used kitchen cabinets a LOT in our old house -- you can see all the ways I used cabinets as built ins here. As always I'll take you along for the ride! This project will take a few months to complete -- it's a doozy. But it will be so worth it! Have you built any bookcases using my tricks? :) See more of our home here.To shop items in our home, click here!Never miss a post by signing up to get posts via email. Via https://www.thriftydecorchick.com/2019/03/new-floors-in-office-and-big-project-im.html
Hey there! I'm back with a fun spring project. :) I know Easter is a good five weeks away, but our weather drastically improved along with the time change, so it's feeling like spring! Knowing the Midwest, we'll have snow again at some point...but I'm enjoying it for now.
I got this idea when I was browsing online recently. I can't remember where I found it, but I found the cutest bunny wreath -- and I knew I could replicate it for less. Turns out I spent a little more, but mine is double the size. I call that a win! And it's just stinking adorable. Or adoyable as my niece would say.
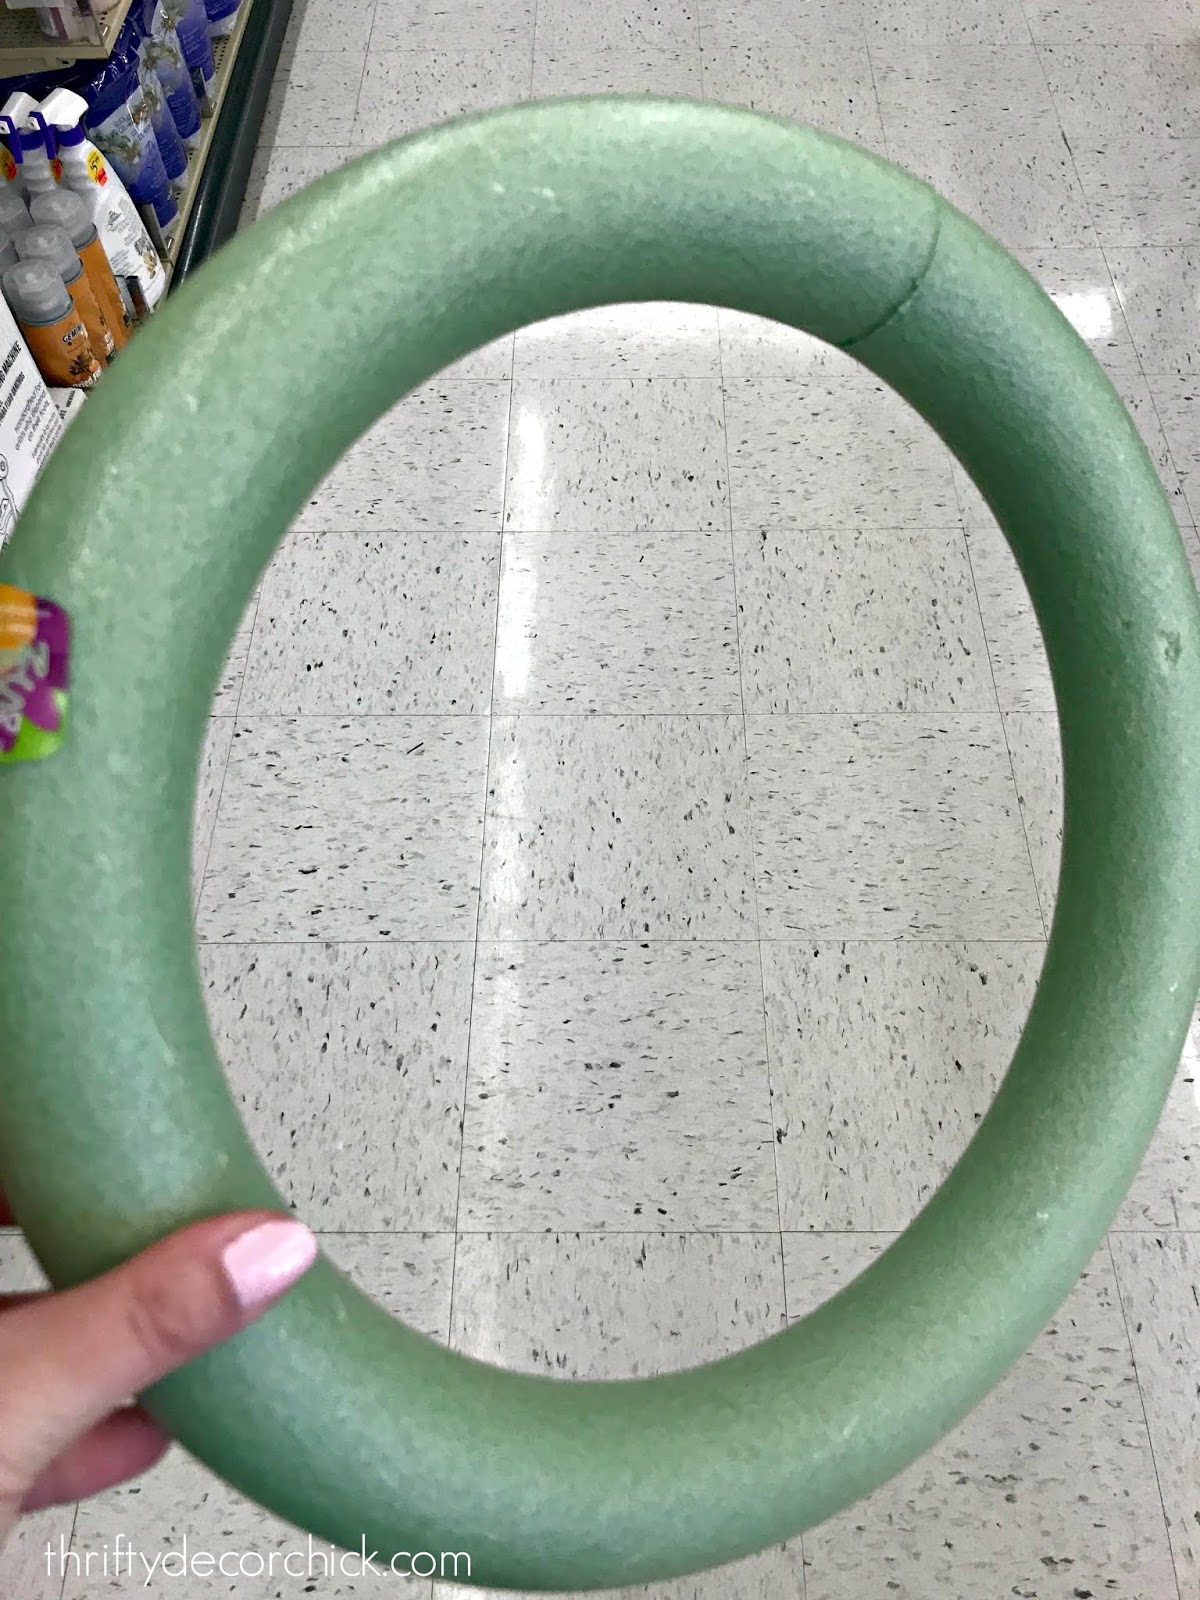
I'll list all of the items I used on this project at the bottom of the post, but here's how it came together! I started with a foam wreath form from the craft store. Mine is 14 inches:
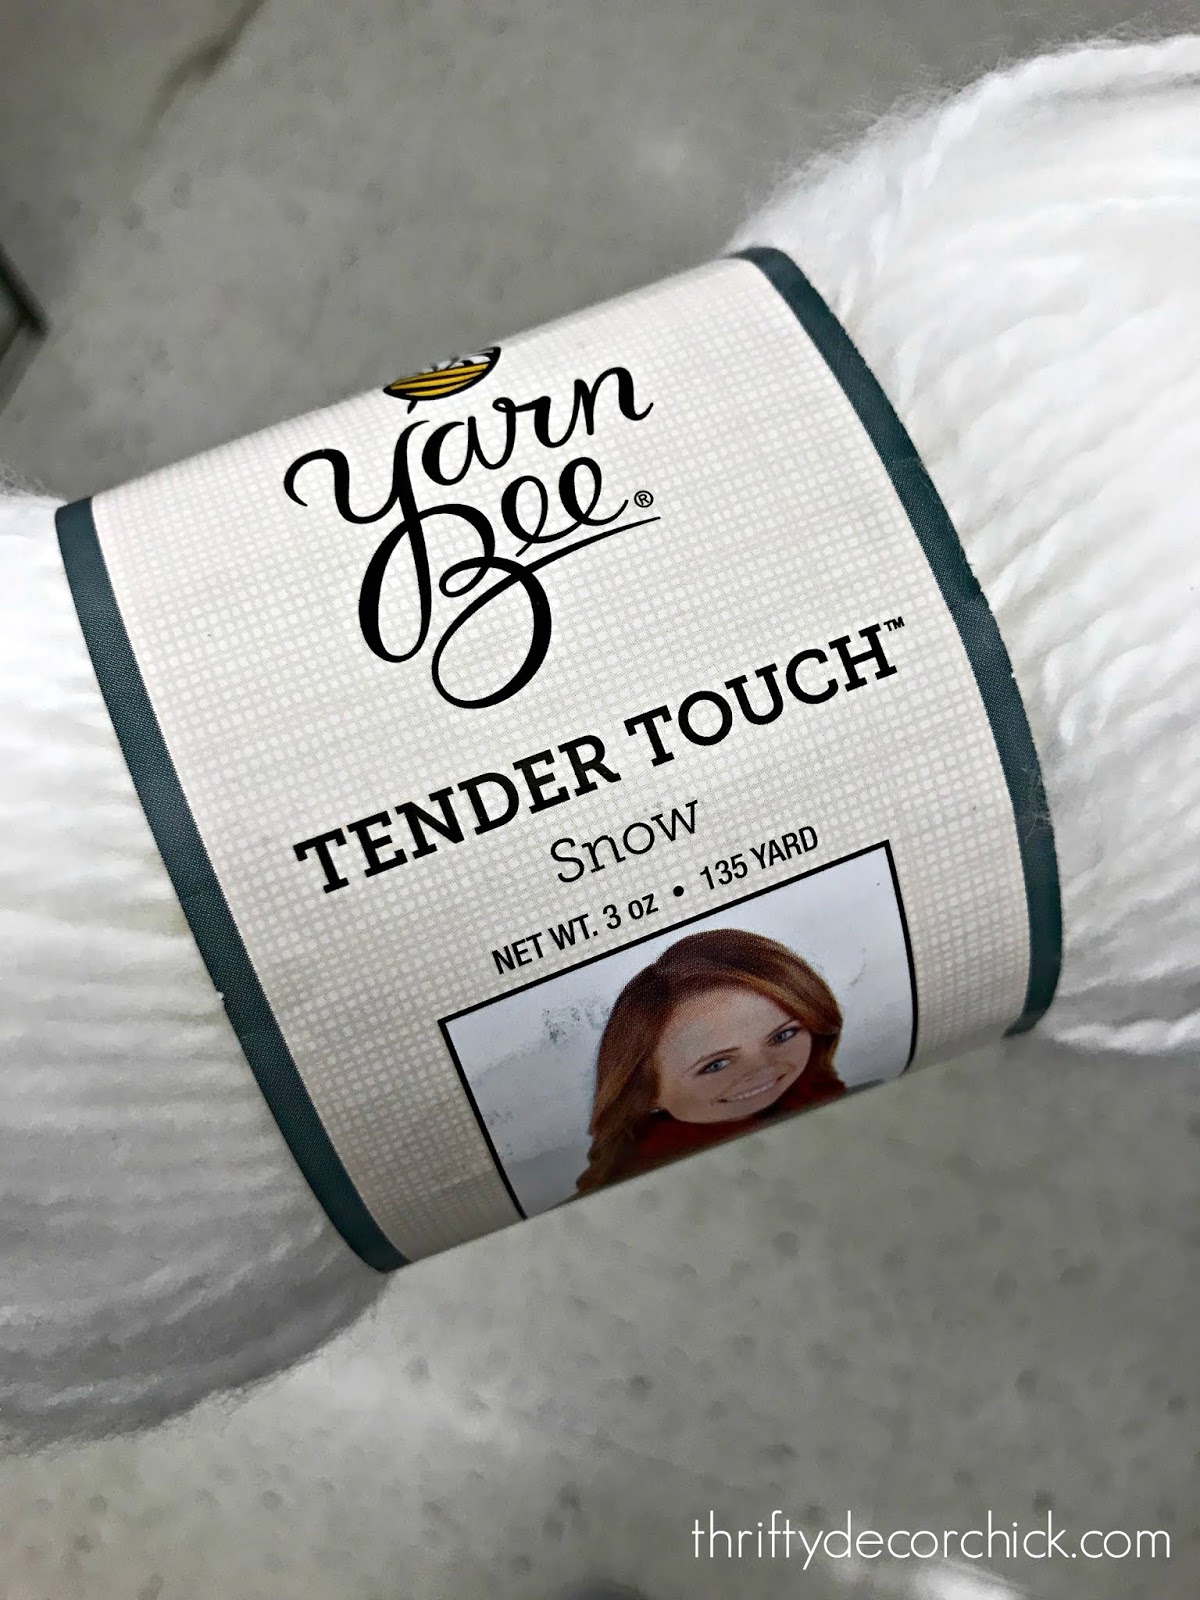
Then I found some soft yarn in white:
I quickly realized I needed something that was the same size all around. I grabbed my level and used that to wrap the yarn: 
You're left with a fluffy yarn ball. Usually you'd trim these down a bit so the pieces are even, but I didn't worry about that yet: 
I could have hot glued these on, but I knew that would be a mess, so I opted for these floral pins instead:
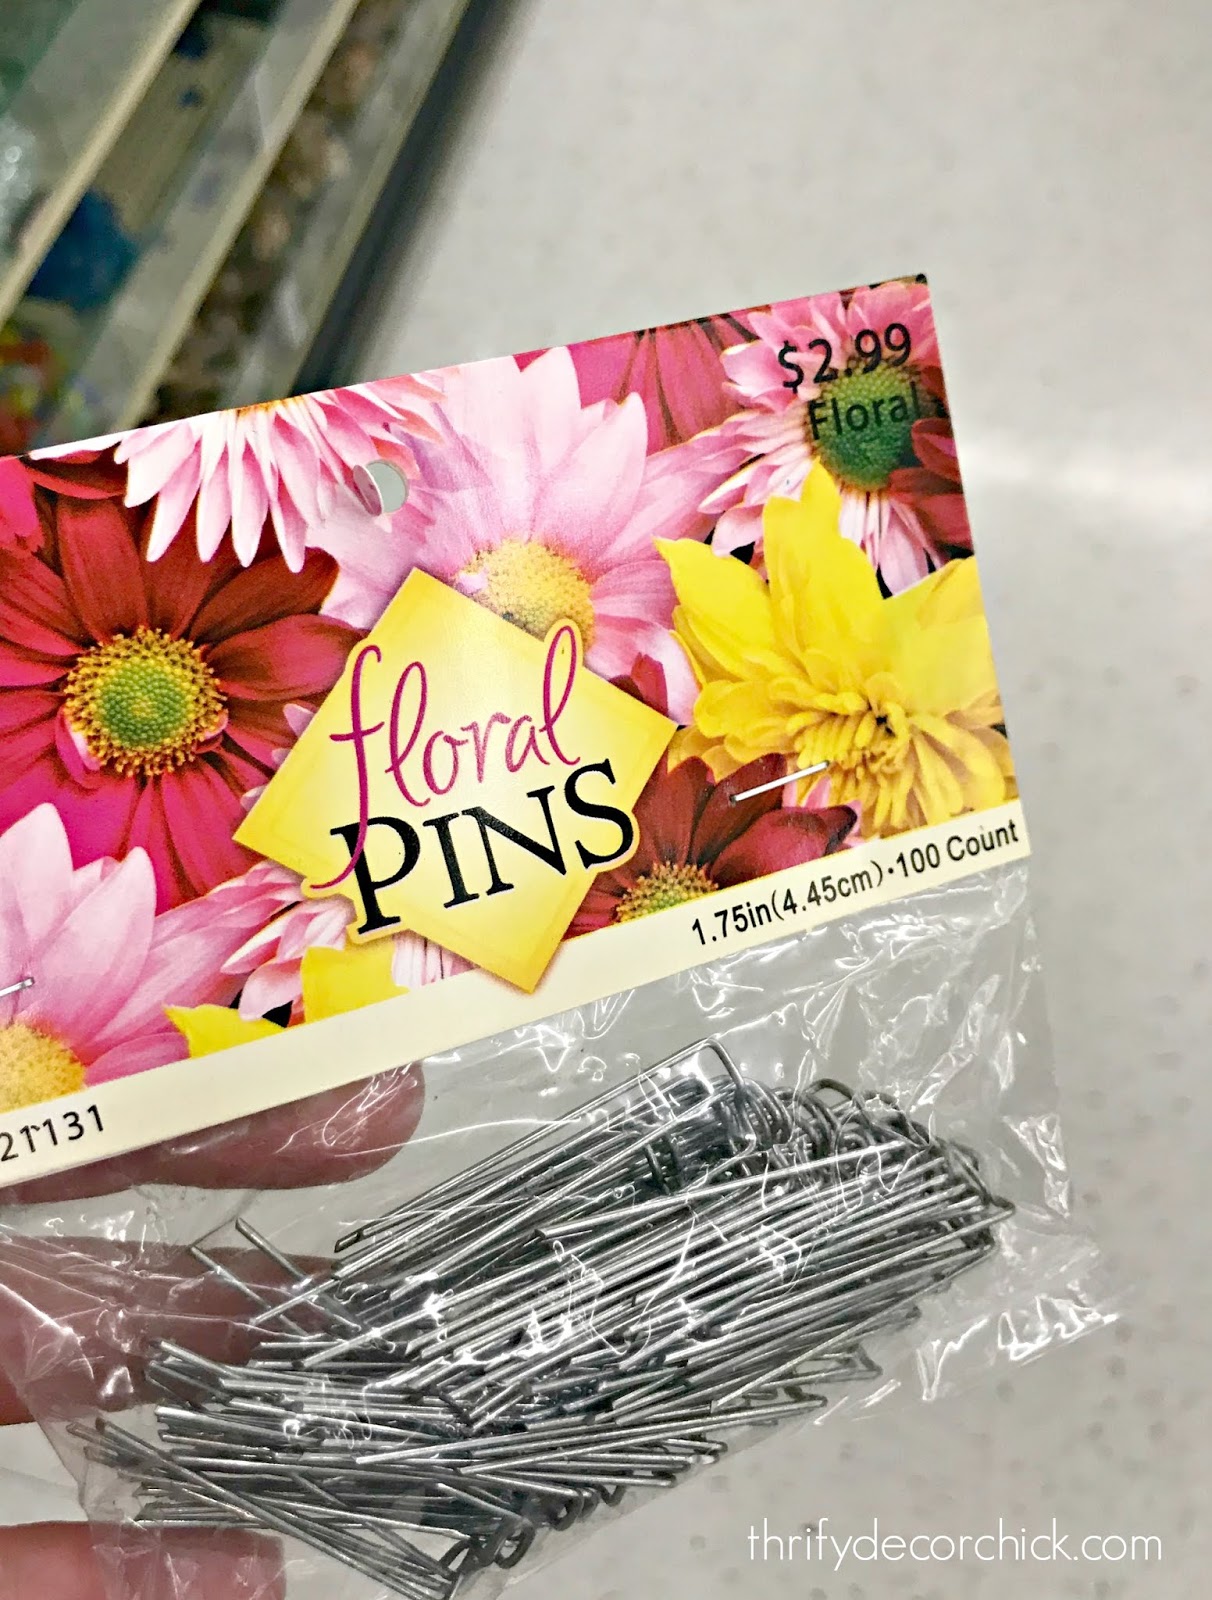
They worked like a charm! You'll probably need to change your spacing as you go, so I highly recommend these instead of glue.
I don't know how many poms I made, but it was two skeins worth. I thought it would take me MUCH longer to make them than it did. I wrapped them as I watched TV and it was easy work.
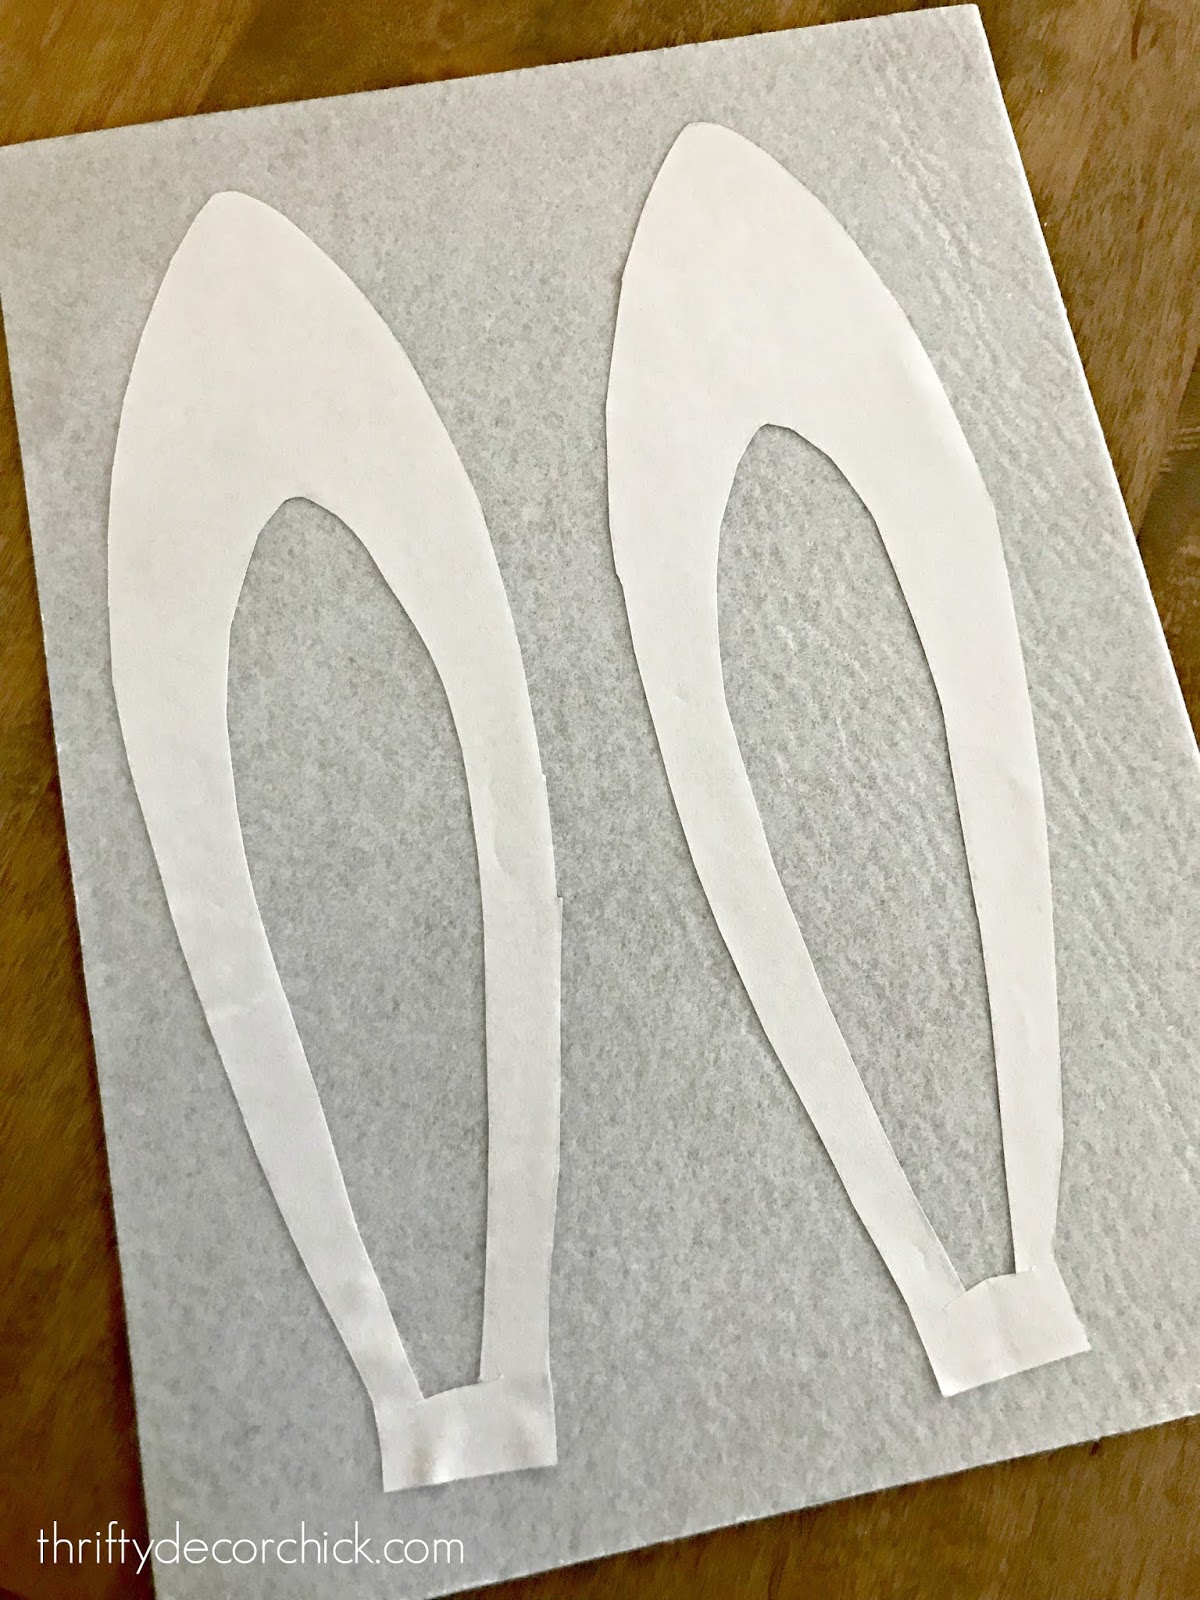
I needed some ears, so I searched for a pattern and found a bunny ear pattern here. I cut it out, and then cut out the middle (pink) part of the ear. I used a stiffer felt for the white, or main part of the ears so they would have some structure:
And then I traced and cut out the pink part of the ears and hot glued those on:
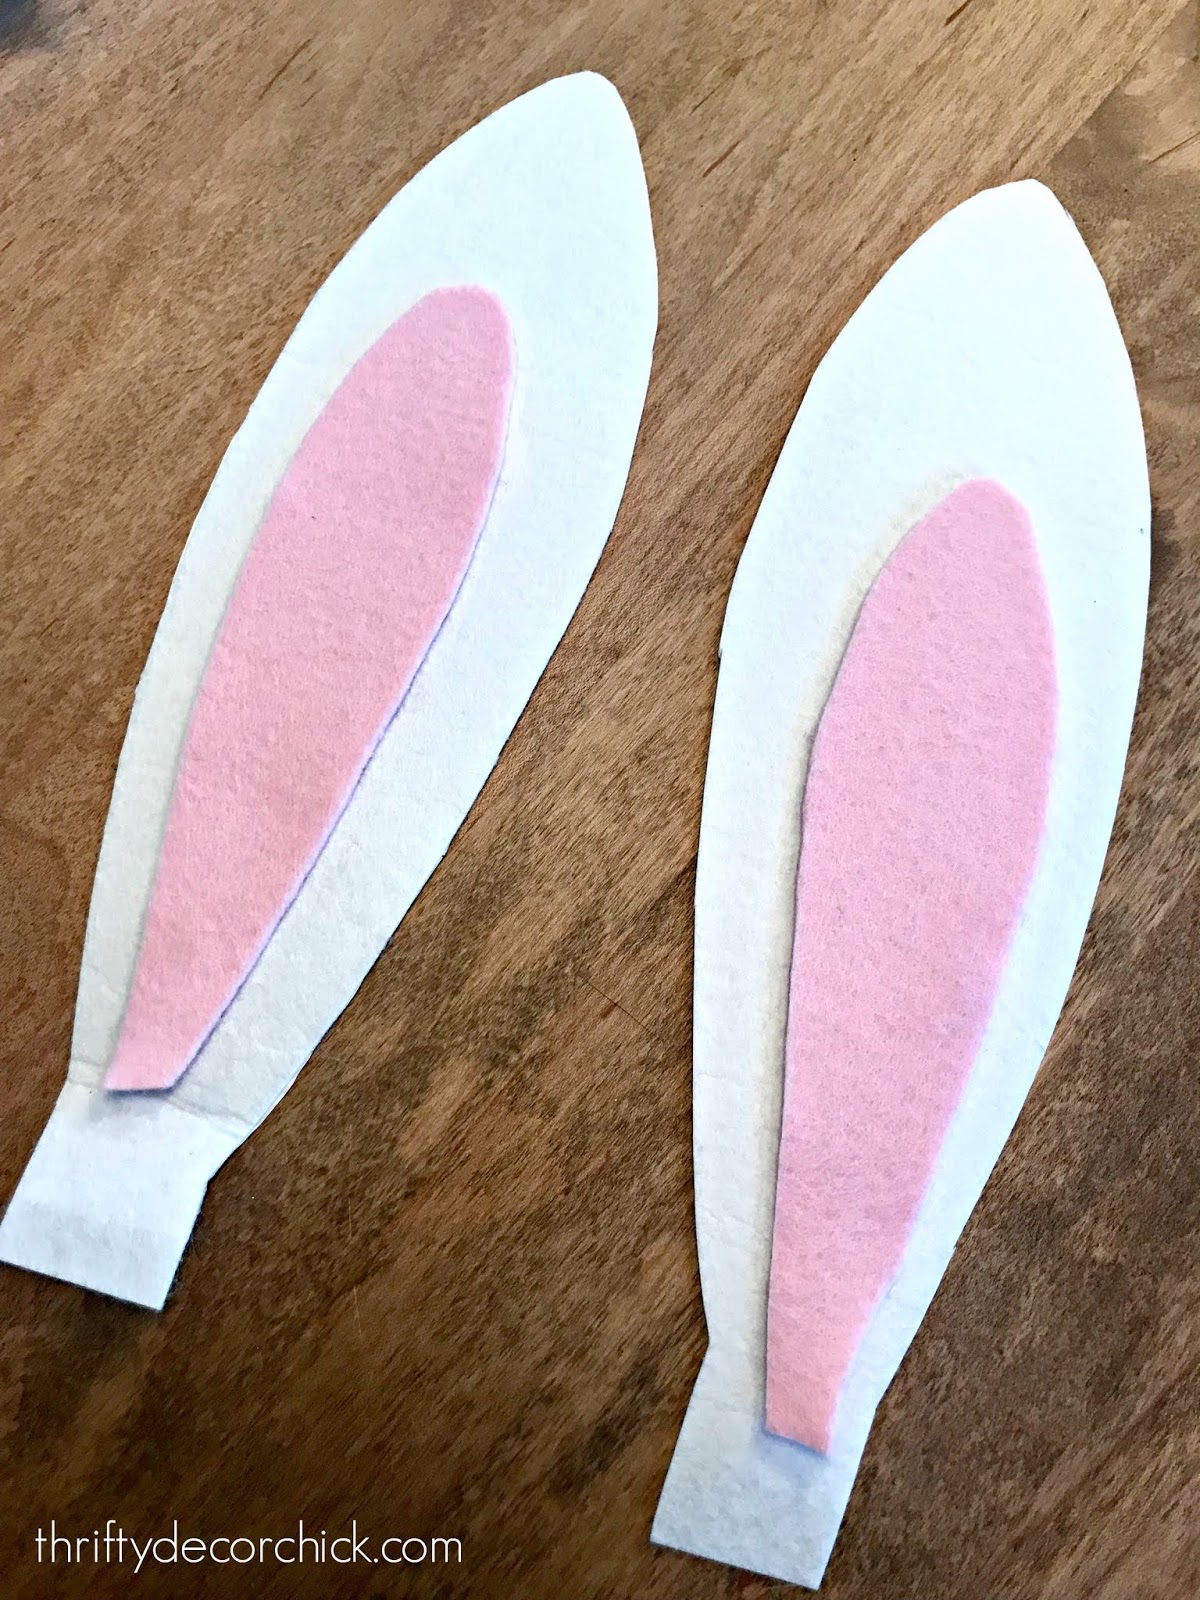
You could free hand them as well, but the pattern is handy!
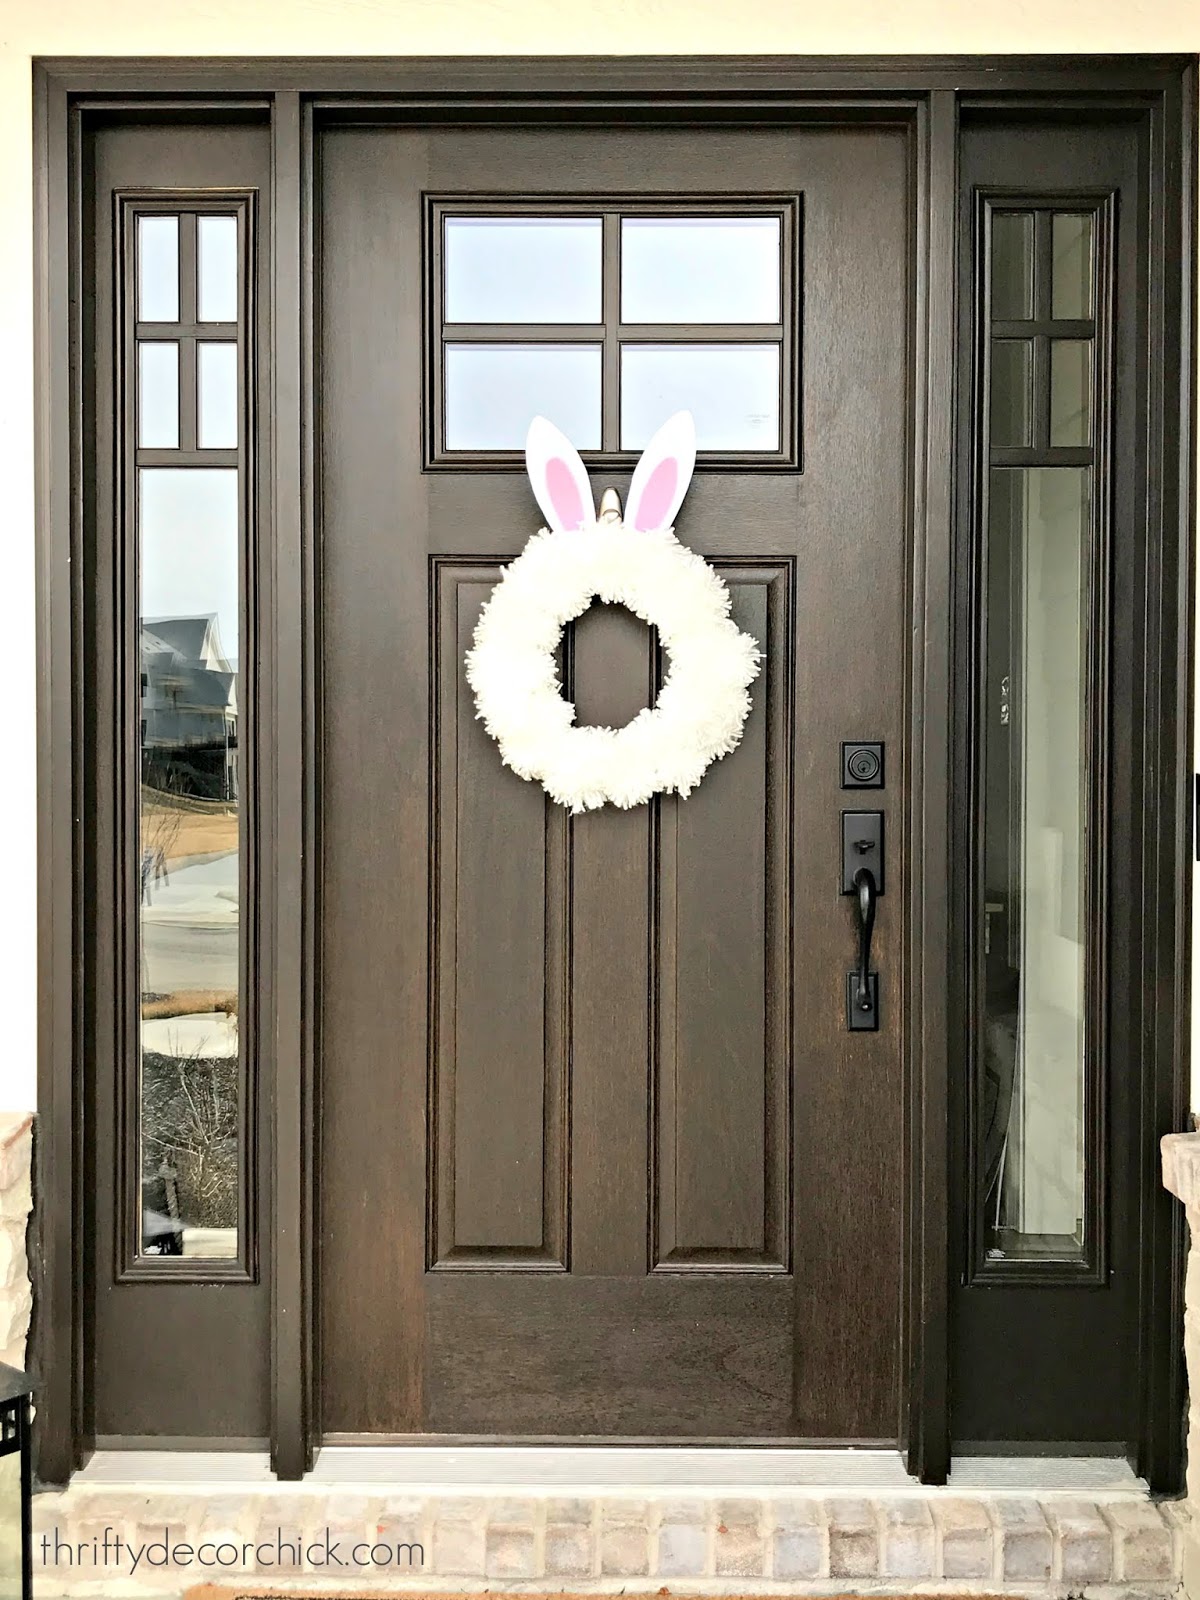
I attached the ears to the back of the wreath form with the floral pins, and then used a tack and some hot glue to create a hook for the door:
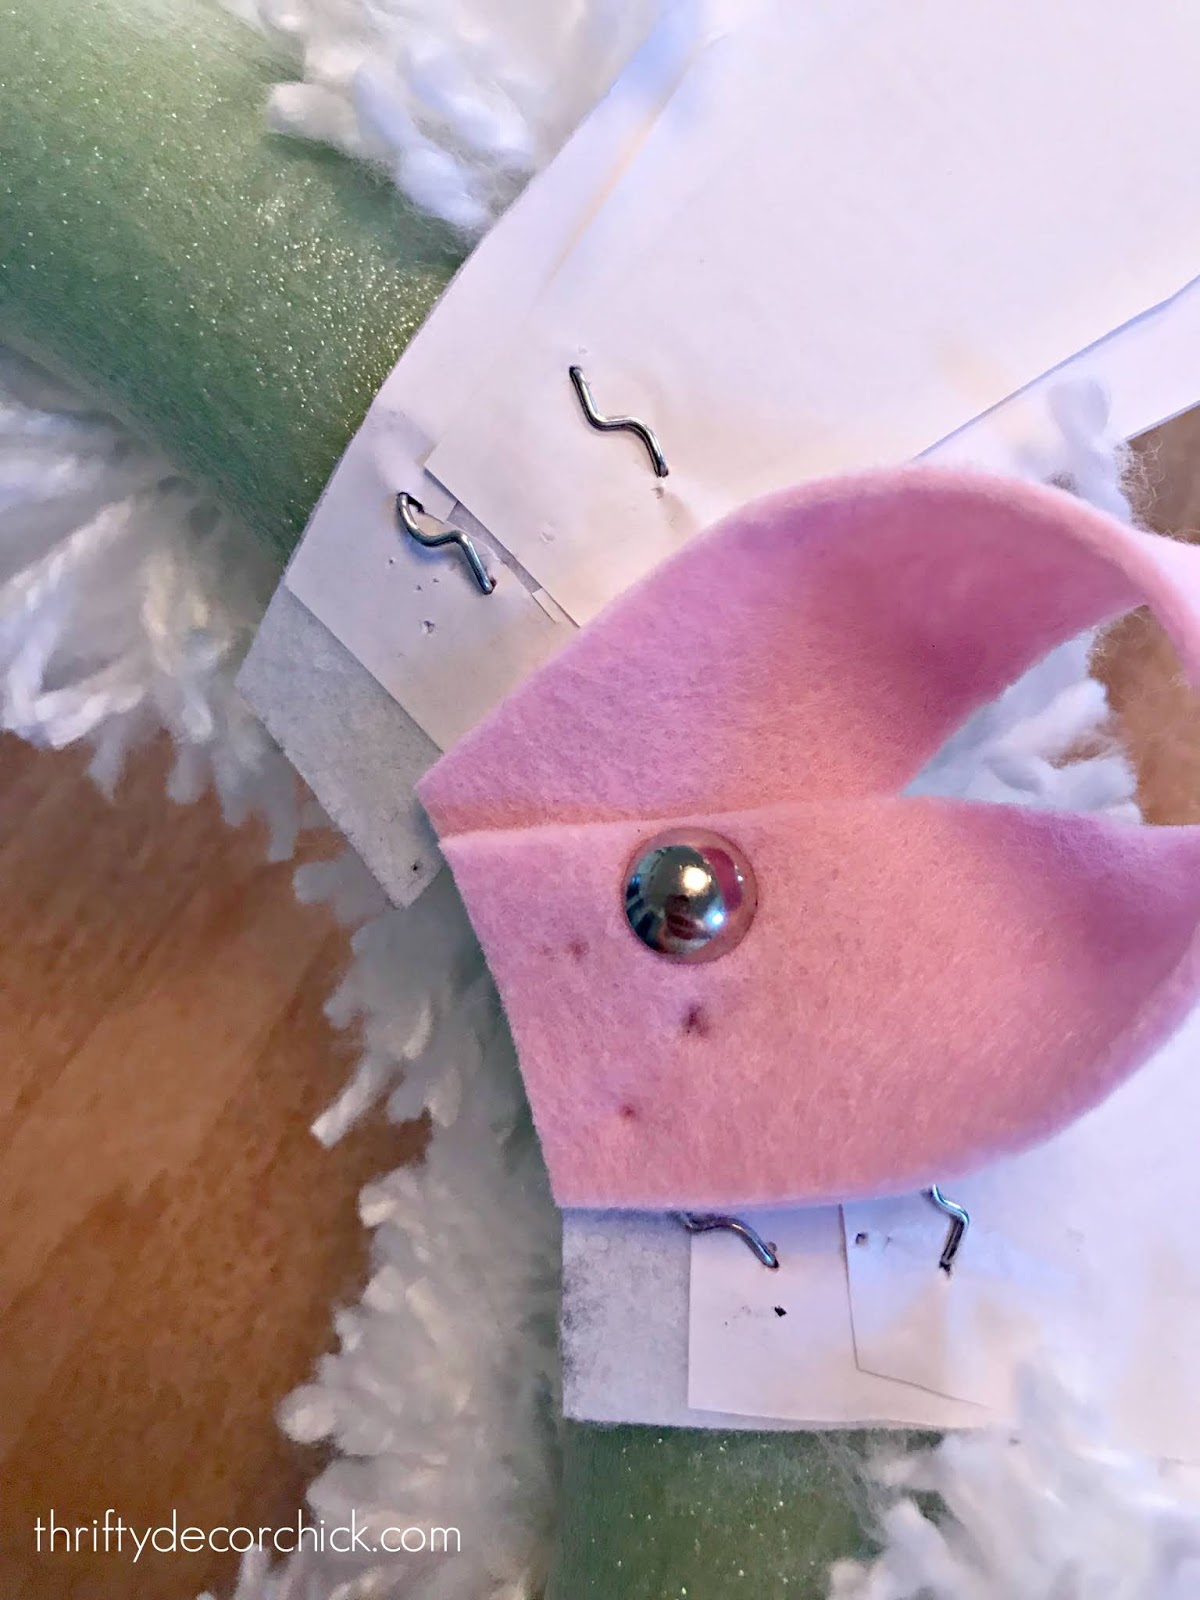
We have a brushed nickel 3-M hook on our door and that felt piece was the perfect way to hang this!
When I was done with the wreath I may have squealed like a little girl:

I mean...come on! It's so FLUFFY!! (Name that movie.):
I ended up trimming some scraggly pieces of yard off before I hung it.
It took me about an hour to finish up the whole wreath and I just LOVE it. I made the family come out and check it out too. I may have also driven by our house a couple times already just to see it on the door:

It would also be cute if you did the ears in just white, and then added a pink or gray pom pom as a a bunny tail on the bottom of the wreath. Mine is the front view, but the back view would be fun too. :)
I spent about $17 but if you could grab your yarn for half off you'd spend more like $13. (I used a coupon for the wreath form.)
It's it the cutest? I love it so. I wouldn't recommend yarn for a door that gets exposed to the elements, but you could always bring it in if needed.
Here's a list of the items I used (affiliate links included):
You can see the how-to for this easy spring tulip wreath here:

See more of our home here.To shop items in our home, click here!Never miss a post by signing up to get posts via email. Via https://www.thriftydecorchick.com/2019/03/how-to-make-its-so-fluffy-bunny-easter.html
Hello there! I'm excited to show you the project I've been working hard on over the past couple of weeks. This was a fun one and I'm thrilled with out how it came together!
I'm telling you what -- when I get going on a project like this where I can do a little DIY and be creative with decor, I'm in my element! I still pinch myself (nearly 11 years later) that I get to share this fun stuff with you all. :)
I shared a bit of this wall a couple months back -- you can see how I used these IKEA cubby units for games here:
They're all supposed to be square cubby units but I made them work for long games as well. They are awesome storage that looks good!
I had big plans for this wall and finally got started last week. I always wanted more wall space in our old house -- we had such an open floor plan, there were a lot of very tall walls, but not many hallway-type spaces. I got my wish in this house and love it!!
I've been trying to keep things balanced so our spaces don't get too busy. It's harder than it seems! I shared a bunch of fun ways to fill large walls last week -- be sure to check that out if you missed it! One of the ideas I showed you was a hint at what I've been working at here:

First up, I needed to paint. It's a long wall that goes into the family room down here so I had a lot to cover. I loved the gray I used on our master ceiling so much, I used that:

The wall got two coats and then I started adding the fun stuff! See those sconces above our bed in that photo above? I bought those at IKEA and ended up replacing them with the ones I showed you here. I loved them though and saved them for this wall project. I had a plan for a quick DIY to hold some tchotchkes -- I repeated the DIY picture ledge shelves from the family room and master bath: 
This time I went super long -- eight feet each!
I kept the decor simple. It's a mix of things we all love -- some of our boy's collectible items (he LOVES these little figurines, I'm spacing on the name of them):

And then photos and art from places we love -- NYC and Disney specifically:


I stained the shelves the color of our old floors -- Jacobean by Minwax. LOVE this color. It's the perfect warm brown stain.
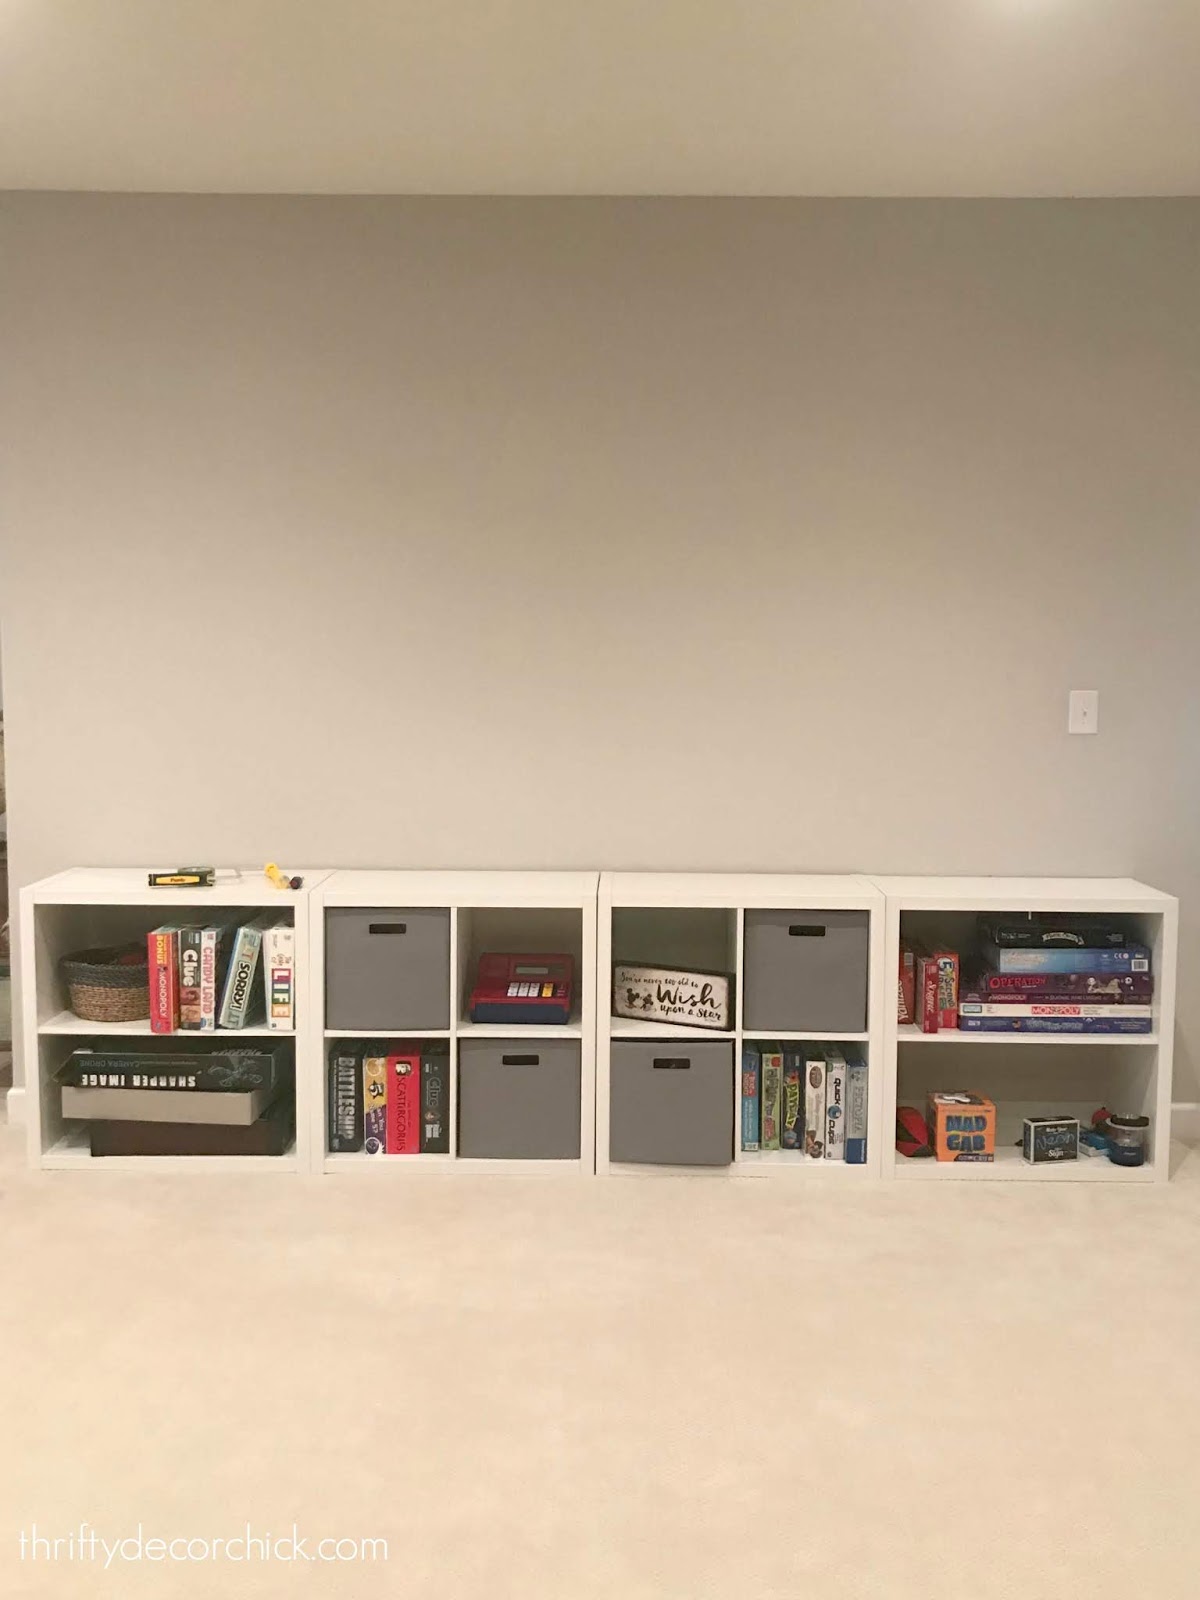
I'll share all of the sources at the bottom of the post! These shelves are plenty big to hold all of our games. The bins hold card and smaller games. I've got a few games in large Ziploc bags and those are in the bins too:

I'm loving the games stacked on their sides by the way! We used to have them all stacked on top of each other and EVERY time the game we wanted was at the bottom. :)
This is so much easier to keep organized:

Our kiddo isn't a little Bub anymore -- but he's not grown yet either. This space doesn't scream KIDS...but it's still fun and includes things he loves:

I got the rug during a huge sale for a different space, but didn't like it there. It looks great here! I LOVE the rug. It's a great design with blues and grays.
Eventually I hope to add a really long table in this space. We'll use it for games and entertaining, but that won't happen until we finish the kitchenette. For now we threw a bean bag chair here and we have the hideaway Lego tray nearby so we can plop down and play a game right on the floor:


I can't even tell you how much of a difference this has made in this space! It's SO warm and cozy and now I want to paint all the walls this warm gray. I know gray isn't for everyone, but I love it, especially with warm wood.
Let's look at the transformation again, shall we? My favorite part! Here's how the wall looked before I started (I wish I had a before before, but this will do!):

And here it is now!:

I absolutely LOVE when form and function coexist beautifully! It's always important to me that a space work well for our family:

I hope this gives some of you ideas for long walls and for cute storage! Let me know if you have questions about anything.
Here are the sources and tutorials for the items pictured:
I'm off to pick out a game to play with the kiddo! :) See more of our home here. To shop items in our home, click here! Never miss a post by signing up to get posts via email. Via https://www.thriftydecorchick.com/2019/03/huge-empty-wall-transformed-into-pretty.html It's baaaaack! I know I said I was going to bring back the before and after link up...and then I didn't. The holidays hit and last month was a doozy so it's happening now. And I'm excited to see what you've been up to! If you're new to this shindig, it's is a great way for bloggers to share their latest projects, big and small. I only ask that a before photo is included, because duh...that's the fun part. If you're not a blogger it's just a great way to find tons of inspiration. You can check out all of the links at the bottom of the last link up here. This will most likely be every other month but we'll see how it goes, you know? As always, I like to share some of my favorite projects that were linked up on the previous linky, so I'll show you those first! First up...Cristina hit it out of the park again! This bathroom makeover at Remodela Casa is beautiful!: 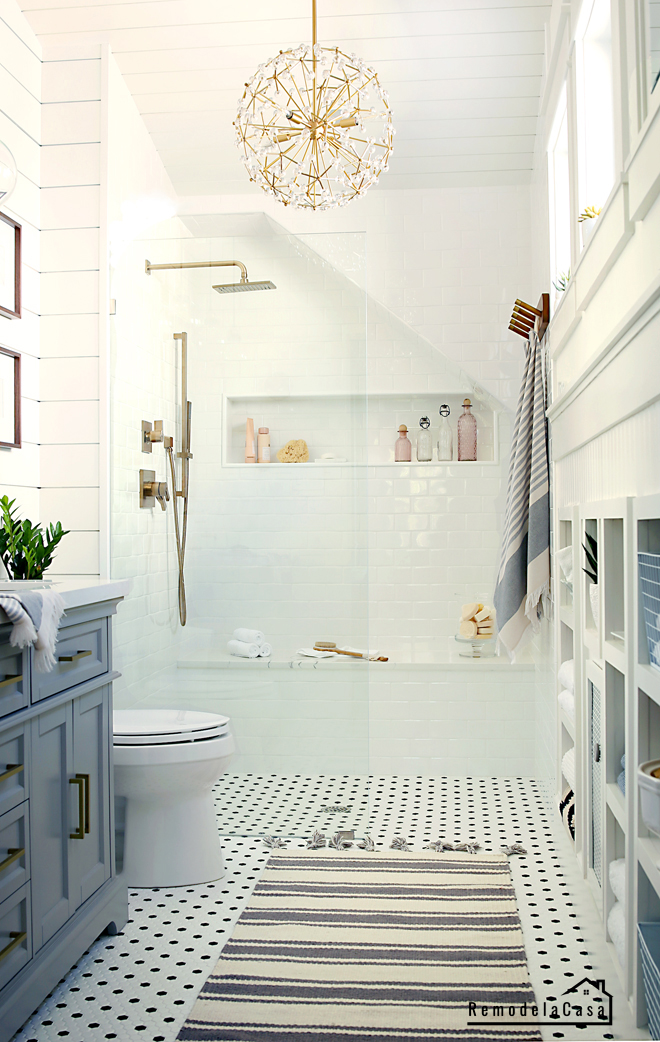
Check out the storage cubbies she created by building into the wall on the right! This china cabinet transformation is one of the best furniture makeovers with paint I've ever seen: 
LOVE that smooth finish and the unique fabric on the back!
This fresh farmhouse laundry makeover is giving me ideas for our laundry: 
The table legs and butcher block are such pretty details!
If you have a countertop that is in good shape, you can update your counters without spending a ton using this tutorial: 
What a brilliant way to get the marble look!
I LOVED this simple update that could be used anywhere in the house. Katie gave her walls the look of wallpaper without hanging the real thing: 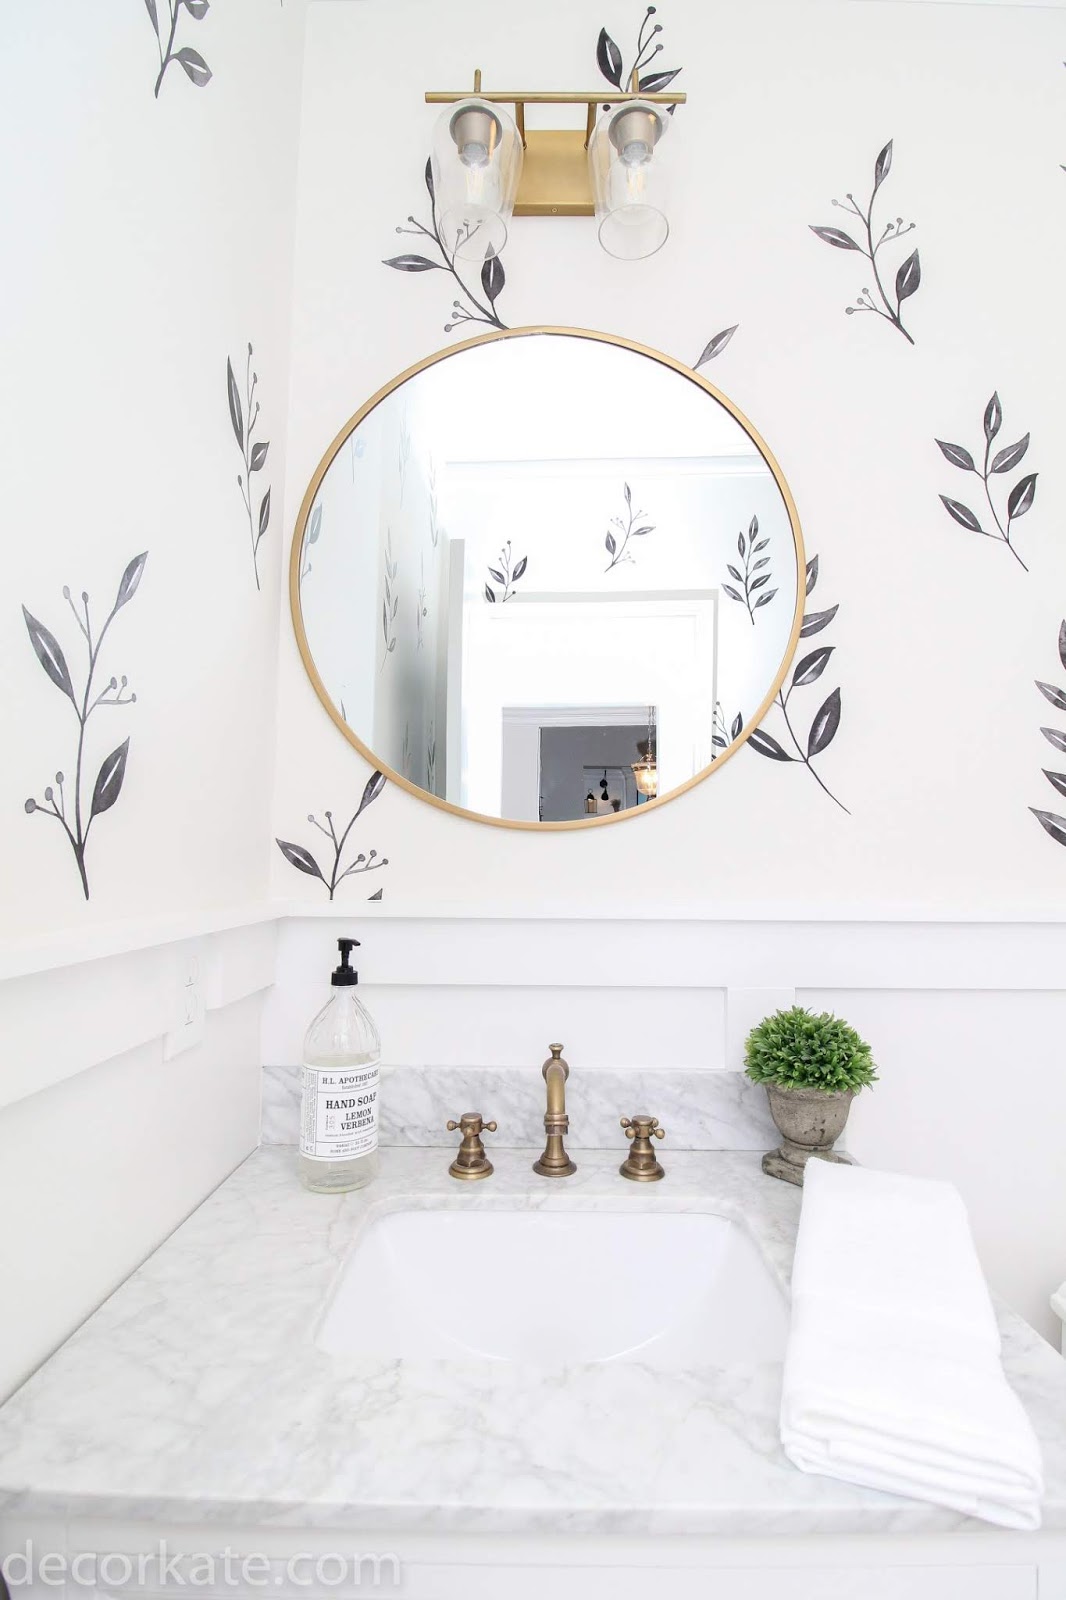
Isn't that so pretty? I'm trying to think of where I could add it.
This farmhouse bathroom makeover is a beautiful example that it doesn't take a fortune to transform a room into a beautiful space: 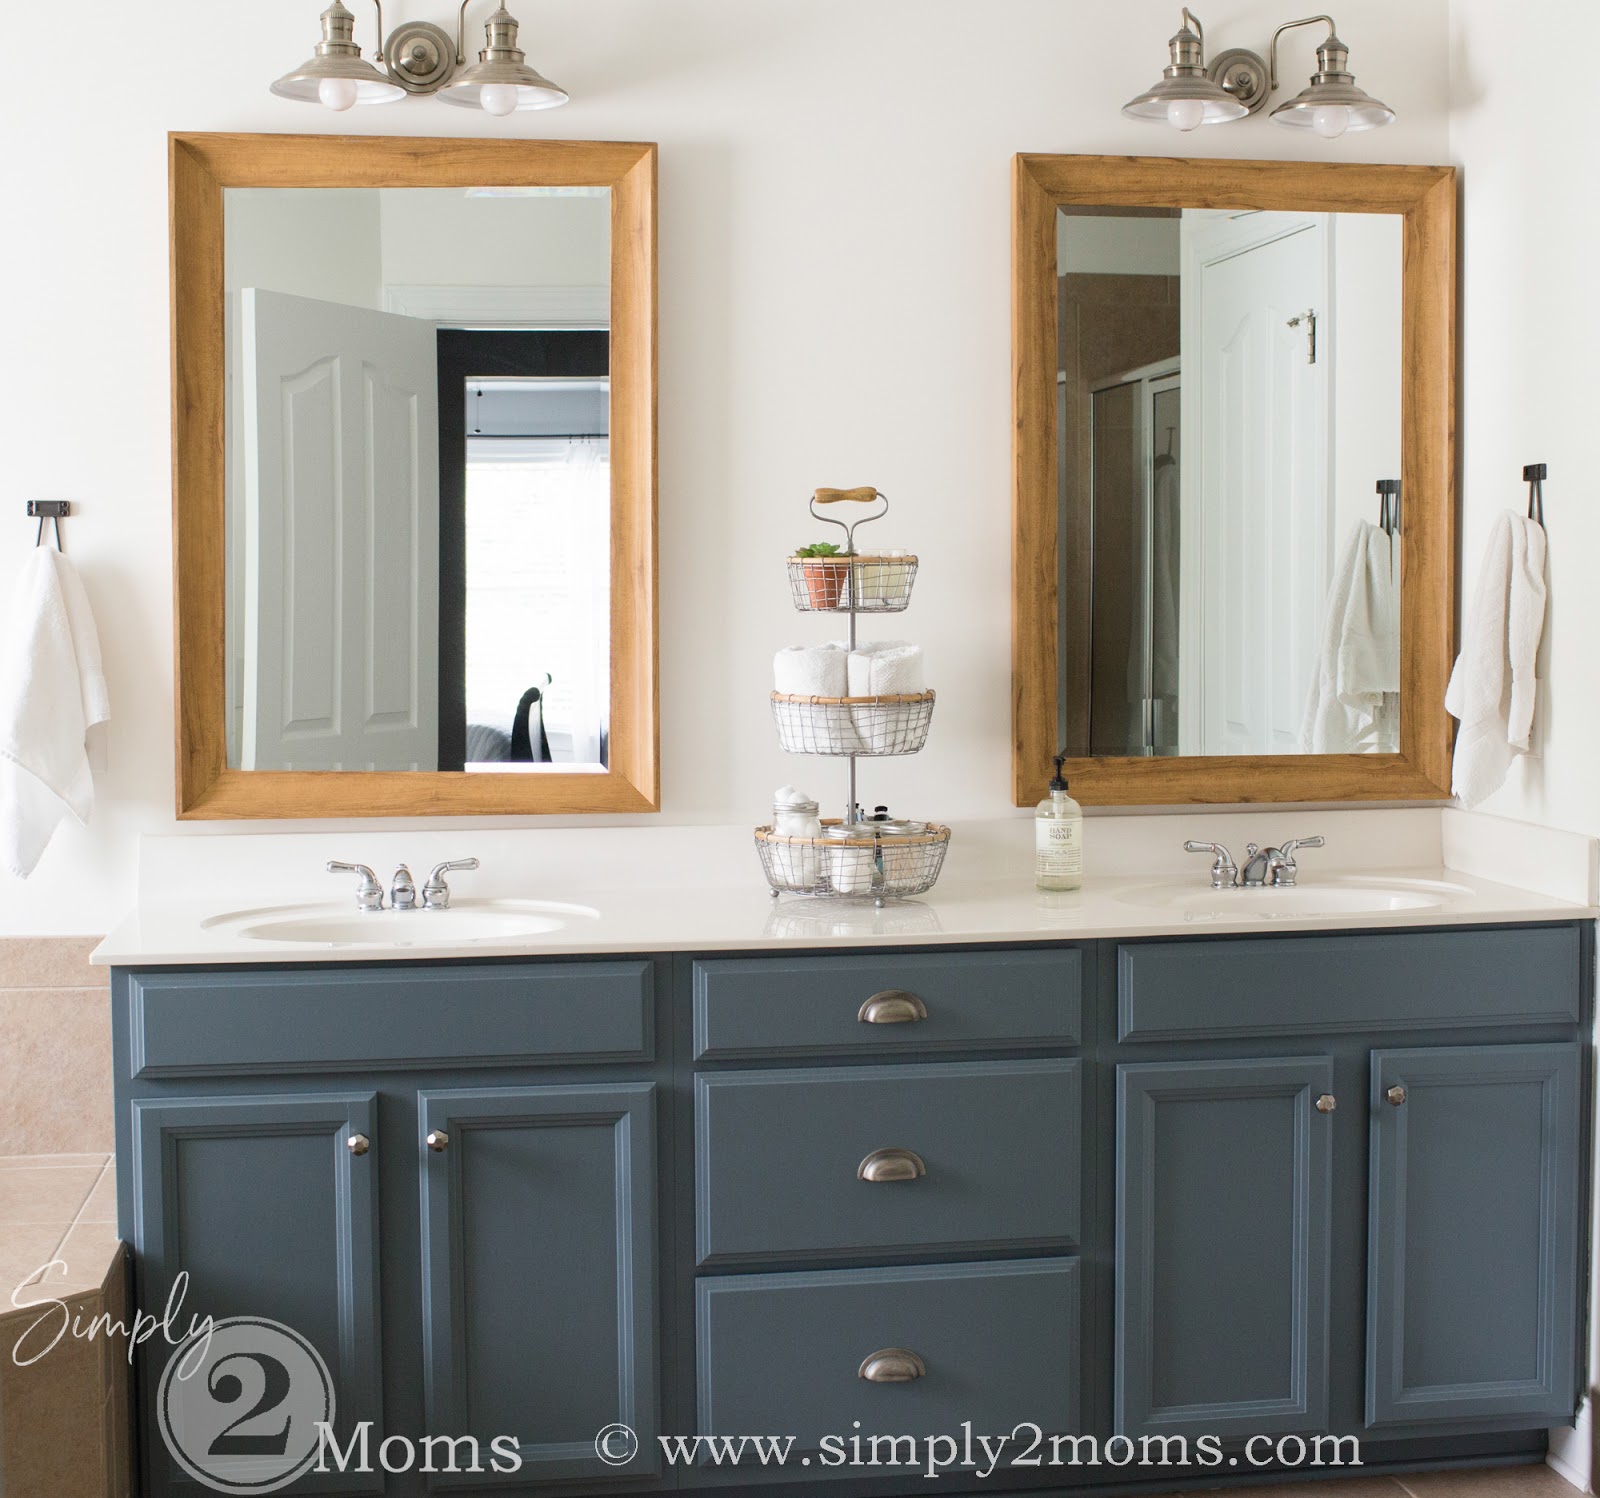
I loved this laundry room makeover as well -- can you believe that's not tile? Nope, it's peel and stick flooring!: 
That blue door is so sweet! You know how I love painted doors. I thought this was brilliant -- have you considered transforming a long closet into a powder room? Kristi did just that!: 
And it is the prettiest tiny bathroom I've ever seen! You must check this one out. And finally, last but not least -- my friend Jenny transformed another kitchen into a beauty with the power of paint: 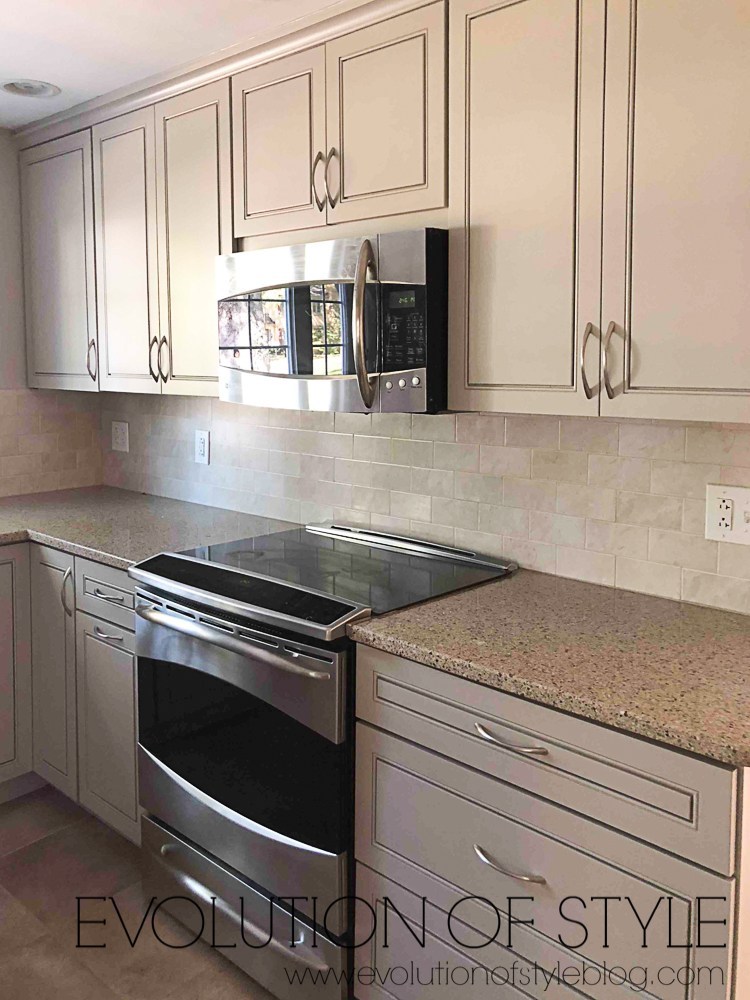
And if you're looking for something other than black or white, this pretty taupey/grey color is lovely! Now let's see what you've been up to lately! Spring projects are welcome -- because I need to have hope that it will arrive! :) If you'd like to be considered for the next round up, please include a link to this post in yours! See more of our home here. To shop items in our home, click here! Never miss a post by signing up to get posts via email. Via https://www.thriftydecorchick.com/2019/03/stunning-diys-and-room-makeovers-link.html
Wow, have I got some inspiration for you today! I for one find big walls difficult to decorate -- and so many of our homes have them now! With the open floor plans and two-story rooms houses have now, they are everywhere.
How do you treat big walls? This post is chock full of ideas, so stay tuned! Now, I will say -- sometimes I find it best to ignore a big wall, at least one that is big as far as height. The super high walls in our old house bugged me for years, and at first I went high with the art. I quickly learned it doesn't need to be accentuated...it's obvious it's a big wall. ;) So I started bringing things back to people level and it felt SO much better. BUT, there are many spaces with expansive walls that you just know need something. It's difficult to tread that line of getting too busy or not doing enough. I'm sharing a few of my favorite ways to fill those biggies first, then keep reading for examples from a bunch of talented bloggers. First up -- in our foyer I added some very simple trim to give the wall a board and batten look (and only spent $15!): 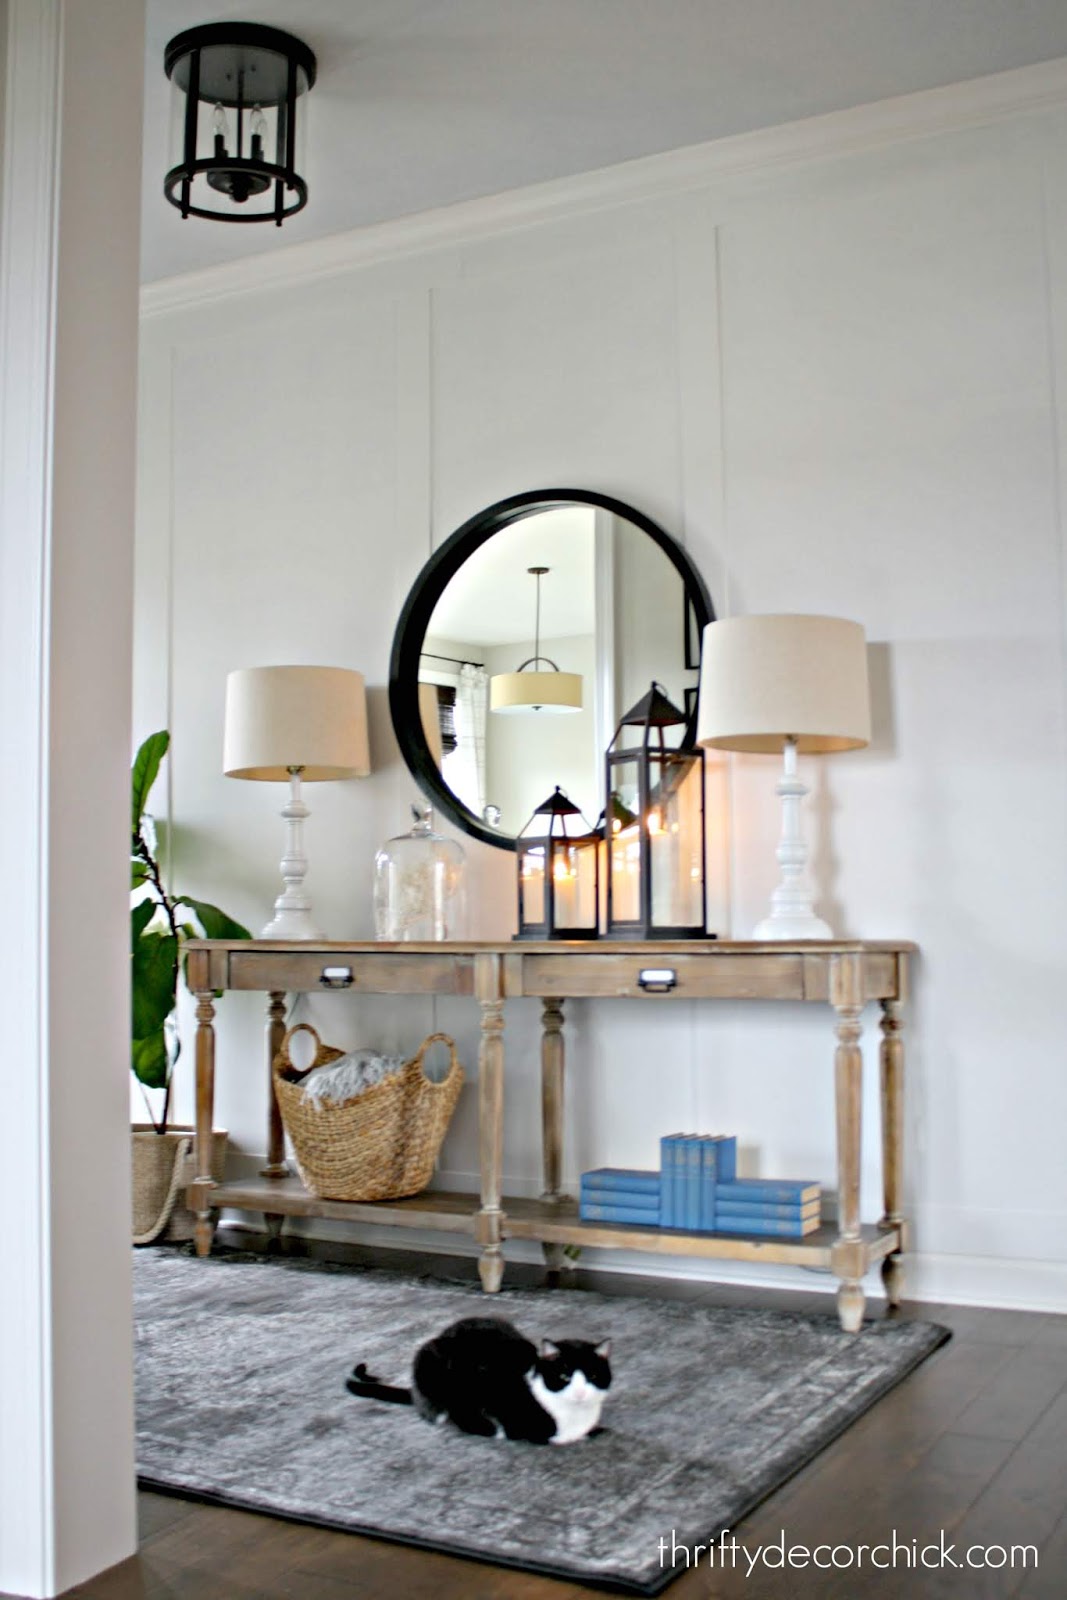
You'll be surprised at what that little bit of dimension does for a space. Even without any art hanging, trim on the walls makes a big difference.
You can create a different kind of gallery wall by building these easy DIY picture ledges in long lengths:

This is SUCH an easy project and these simple ledges and photos fill up a space beautifully.
Another favorite to fill a large wall is shiplap -- or for those of us who have been doing this treatment forever, planked walls:

The subtle lines of planked walls give just enough interest, but they aren't overly busy.
I love a stained planked wall too -- you can see how I did my stained shiplap wall on our stairs:

The wood and stain gives a space so much warmth and texture!
Of course there's always the old go-to -- a gallery wall. Tread lightly with this one because it can get busy quick! But if done well I think they can really fill a wall up nicely.
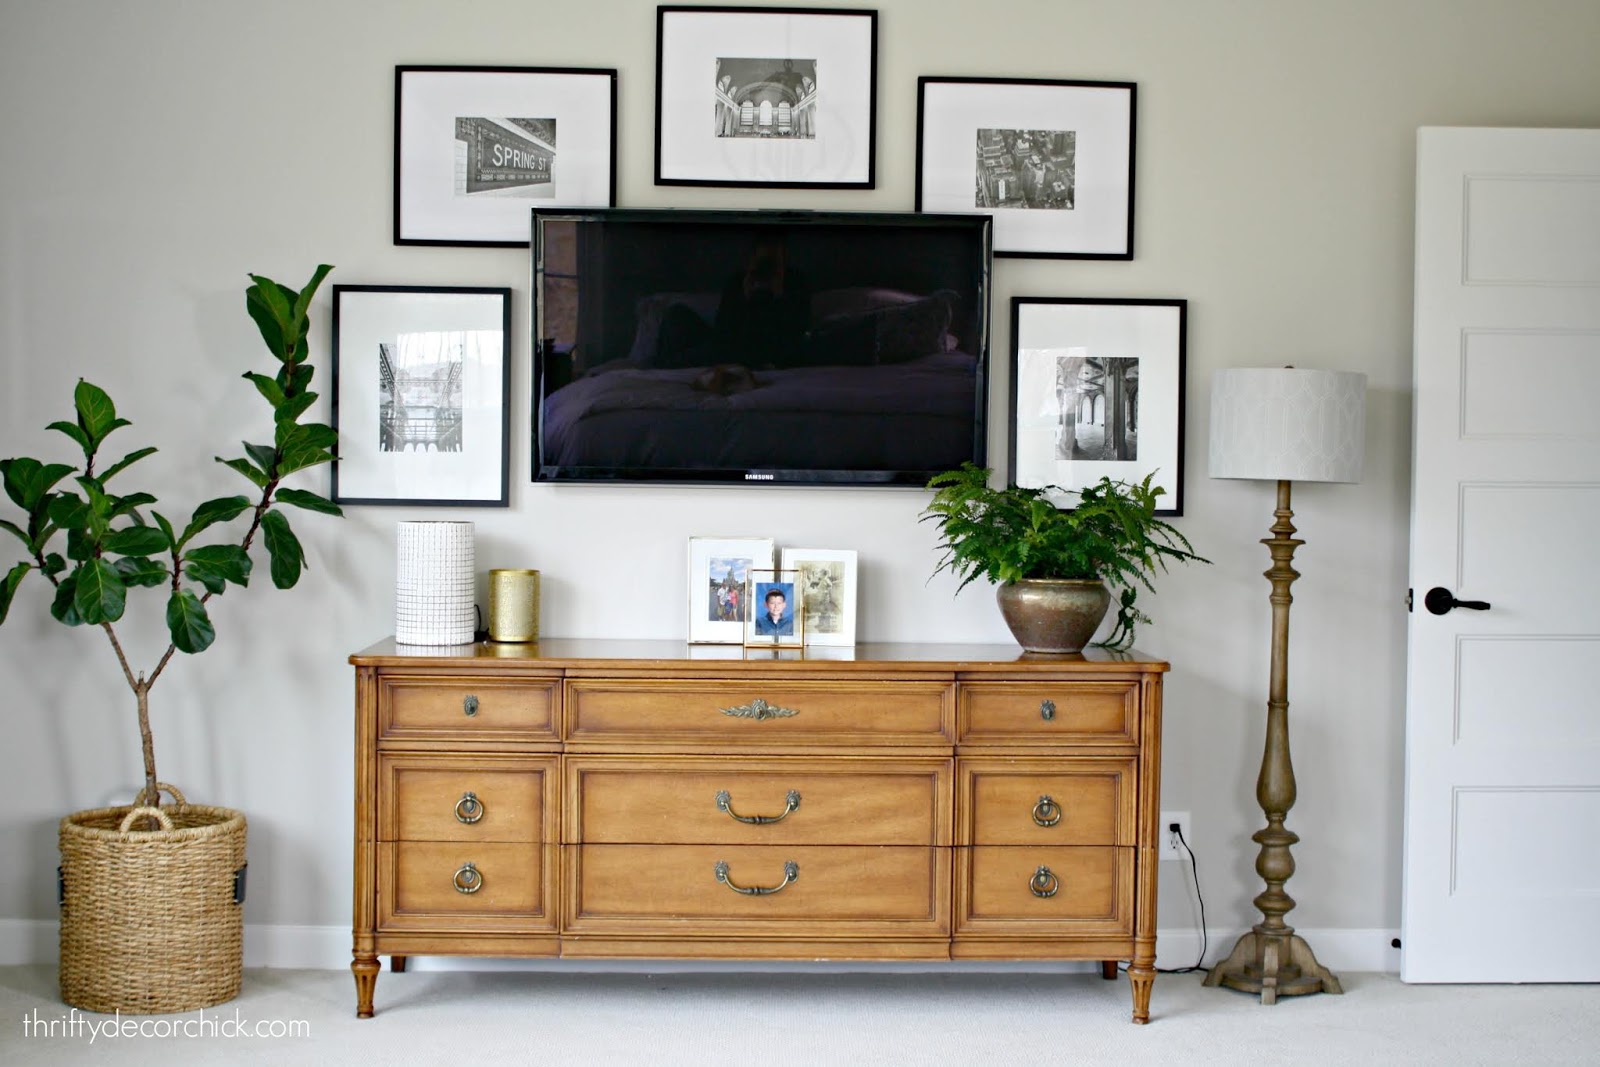
I did a simple design around our TV in the master:
And I did a symmetrical, stacked frame wall down our basement stairs:

If you can invest in some frames (I find them half off at Michael's all the time and IKEA has very inexpensive options), you can print out free art at home, like I did for the gallery wall in our old living room:
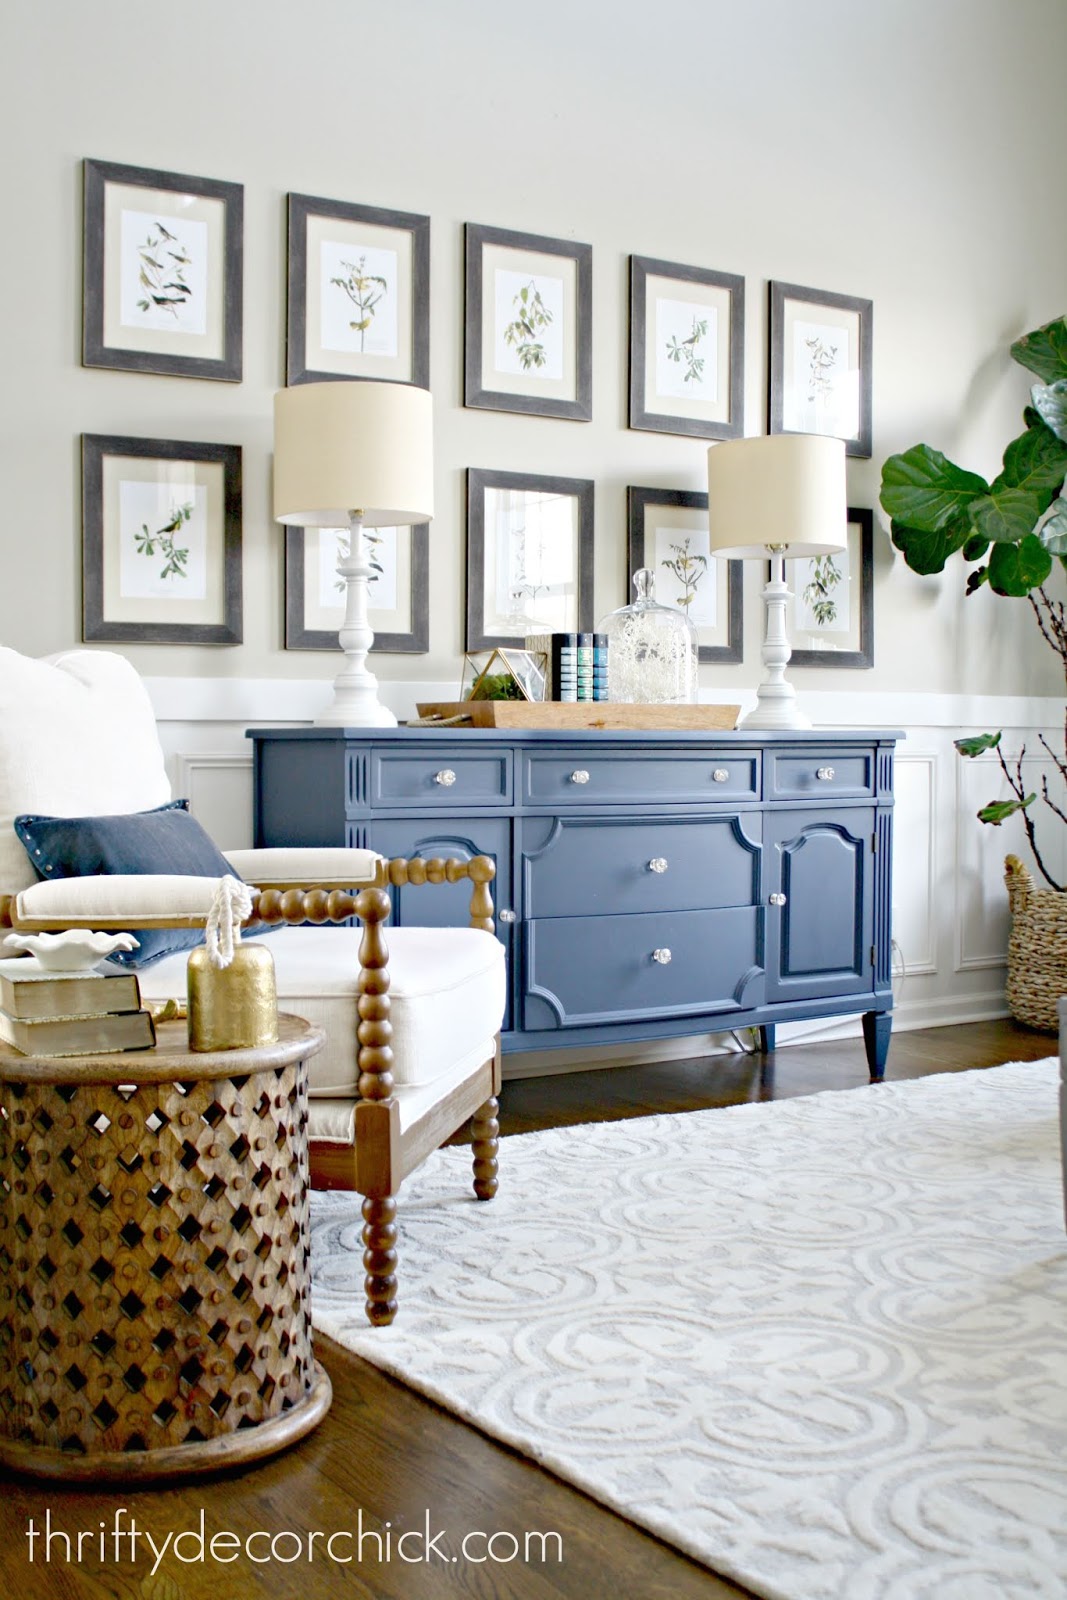
If you're new here, I'm sure you can tell by now that I love me some symmetry. :)
Now let's see some of the beautiful spaces I've gathered for you! I love all of these ideas -- you'll find projects that fit in easily with both modern and traditional design aesthetics.
You know how much I'm loving wallpaper lately! I used peel and stick in our powder room and the real stuff in a hallway. I love this simple but modern removable option:

You don't have to go crazy with it! One wall is plenty.
This cool idea gives the look of wallpaper, but it's just vinyl cut outs:

Vinyl shapes on the wall make a big impact but they are very inexpensive and are easy to remove later. This TV wall was inspired by our old fireplace and the planked wall I did above: 
These plant-based tiles are really lightweight and make a BIG impact!: 
How cool is that? I love that it leans more modern than the traditional wood projects. I may have spoke too soon, because look what else you can do with wood, time and some patience!: 
I love it! Such a unique take on an accent wall. It makes that wall the star but doesn't overwhelm the room.
If you love a shiplap wall but don't have the tools or know-how to hang it, you can try this faux shiplap look!:

I LOVED this dog art but figured there was no way I could do something like this on my own...until I read her tutorial. What a cool project!: 
Now where am I going to hang giant art of our animals? :) This is an idea I read about years back, and it has really taken off! Have you ever considered using a shower curtain as art?: 
SO fun, right?? I love this. This one is brilliant -- did you know you can have any photo made into a shower curtain? And then make it into art?: 
This is another pretty option -- you can get VERY large art out of something like this (and make your own simple canvas frame to hang it:

And then there's the tried and true gallery wall...I loved all of these simple and classic looks. This one made with vintage paper and handwritten letters is lovely:

This idea is a more organic design and you'll save on the frames! I love that it looks like wallpaper:

I love the look of the simple, square IKEA frames around the TV:

Sticking with black and white architectural photos (that you could take yourself) adds a more modern look in a space:

And I loved this coastal look with a few themed items added in. Her repurposed "shadow boxes" for shells are brilliant!:

The addition of the board and batten underneath also helps to break up the big wall as well.
So many great ideas, right? Whether it be a long hallway, a big wall in the living room or a tall staircase, these are wonderful examples of how to fill those big spaces. I'm working on a big wall treatment this week that I hope to share with you next week sometime! Stay tuned!
See more of our home here. To shop items in our home, click here! Never miss a post by signing up to get posts via email. Via https://www.thriftydecorchick.com/2019/03/affordable-diy-ideas-for-filling-big.html |
