Christmas decor storage ideas and hacks that will make next year's decorating easier!
I've figured out some great holiday storage solutions over the years that have helped to keep our decor better organized.
They have made pulling out decor for the next Christmas much easier. These little tips save my sanity each November when the holiday decor comes back out!
In general I find packing holiday decor away is much faster and easier than setting it up. This year I bought new storage bins, so I reorganized and the whole process took longer than usual.
I will tell you off the bat that this won't be one of my thriftiest organization posts.
I spend a little extra to make things easier and more efficient when I pull things out for the next year. (But they will last from year to year!)
Here are my Christmas decor organization methods and a few tips I've figured out along the way!
1. Label your decor for next year
My first tip is to label as much as you can -- especially the stuff you put up in the same spot every year.
I've found over the years that labeling light strands I use for specific areas helps a TON!:

This post may contain affiliate links for your convenience.
See my policies and disclosure page for more information.
You can find my awesome label maker here! This smaller version works great too -- it's just a little more basic. Both are super easy to use.
I label any spot that uses more than one strand of lights -- both inside and outside. So when I get them out I know exactly how many bushes or trees are covered by that group of lights.
I also label them inside, like the strands on our stair garland. That way I'm not trying to figure out how many I used the year before.
I use a LOT of these remote plugs and switches for our indoor lights -- I store them away with the lights that need a remote, like on our stairs. I just keep them plugged into the light strand.
I also keep any needed extension cords attached and stored away with the lights.
If you have more than one set of these remotes, you know the joy of trying to figure out which one goes with which remote. ;)
I label the matching sets so we know what goes with what:

2. Store your trees upright!
Next up is the Christmas tree storage! We have...uhhh, quite a few artificial trees. ;)
My dream my whole adult life has been to store our Christmas trees upright -- and not take ONE thing off of them each year.
Well in this house, my dreams were realized, at least for a couple of our trees! We have a storage room in the basement with enough space to store a couple trees upright.
I found this stand up Christmas tree storage bag years ago and it works GREAT!
You just place it over the tree and tuck the branches in here and there -- it zips up and then cinches as well:
Read the full post
Via https://www.thriftydecorchick.com/2021/01/great-tips-for-holiday-storage-that.html
0 Comments
Easy and quick four ingredient fudge recipe.
If you thought fudge was difficult to make, this simple recipe will prove you wrong!
It only take four basic ingredients and then you can customize the flavors however you want. A friend shared this fudge recipe with me recently and I couldn't believe how easy it was!
This is such a delicious and quick treat to make at the holidays, it will be a staple in our house from now on. It's perfect for neighbors or co-worker gifts.
I'm sharing four versions of this effortless fudge recipe with both milk chocolate and dark chocolate.

This post may contain affiliate links for your convenience.
See my policies and disclosure page for more information.
Each batch only takes a few minutes to make!
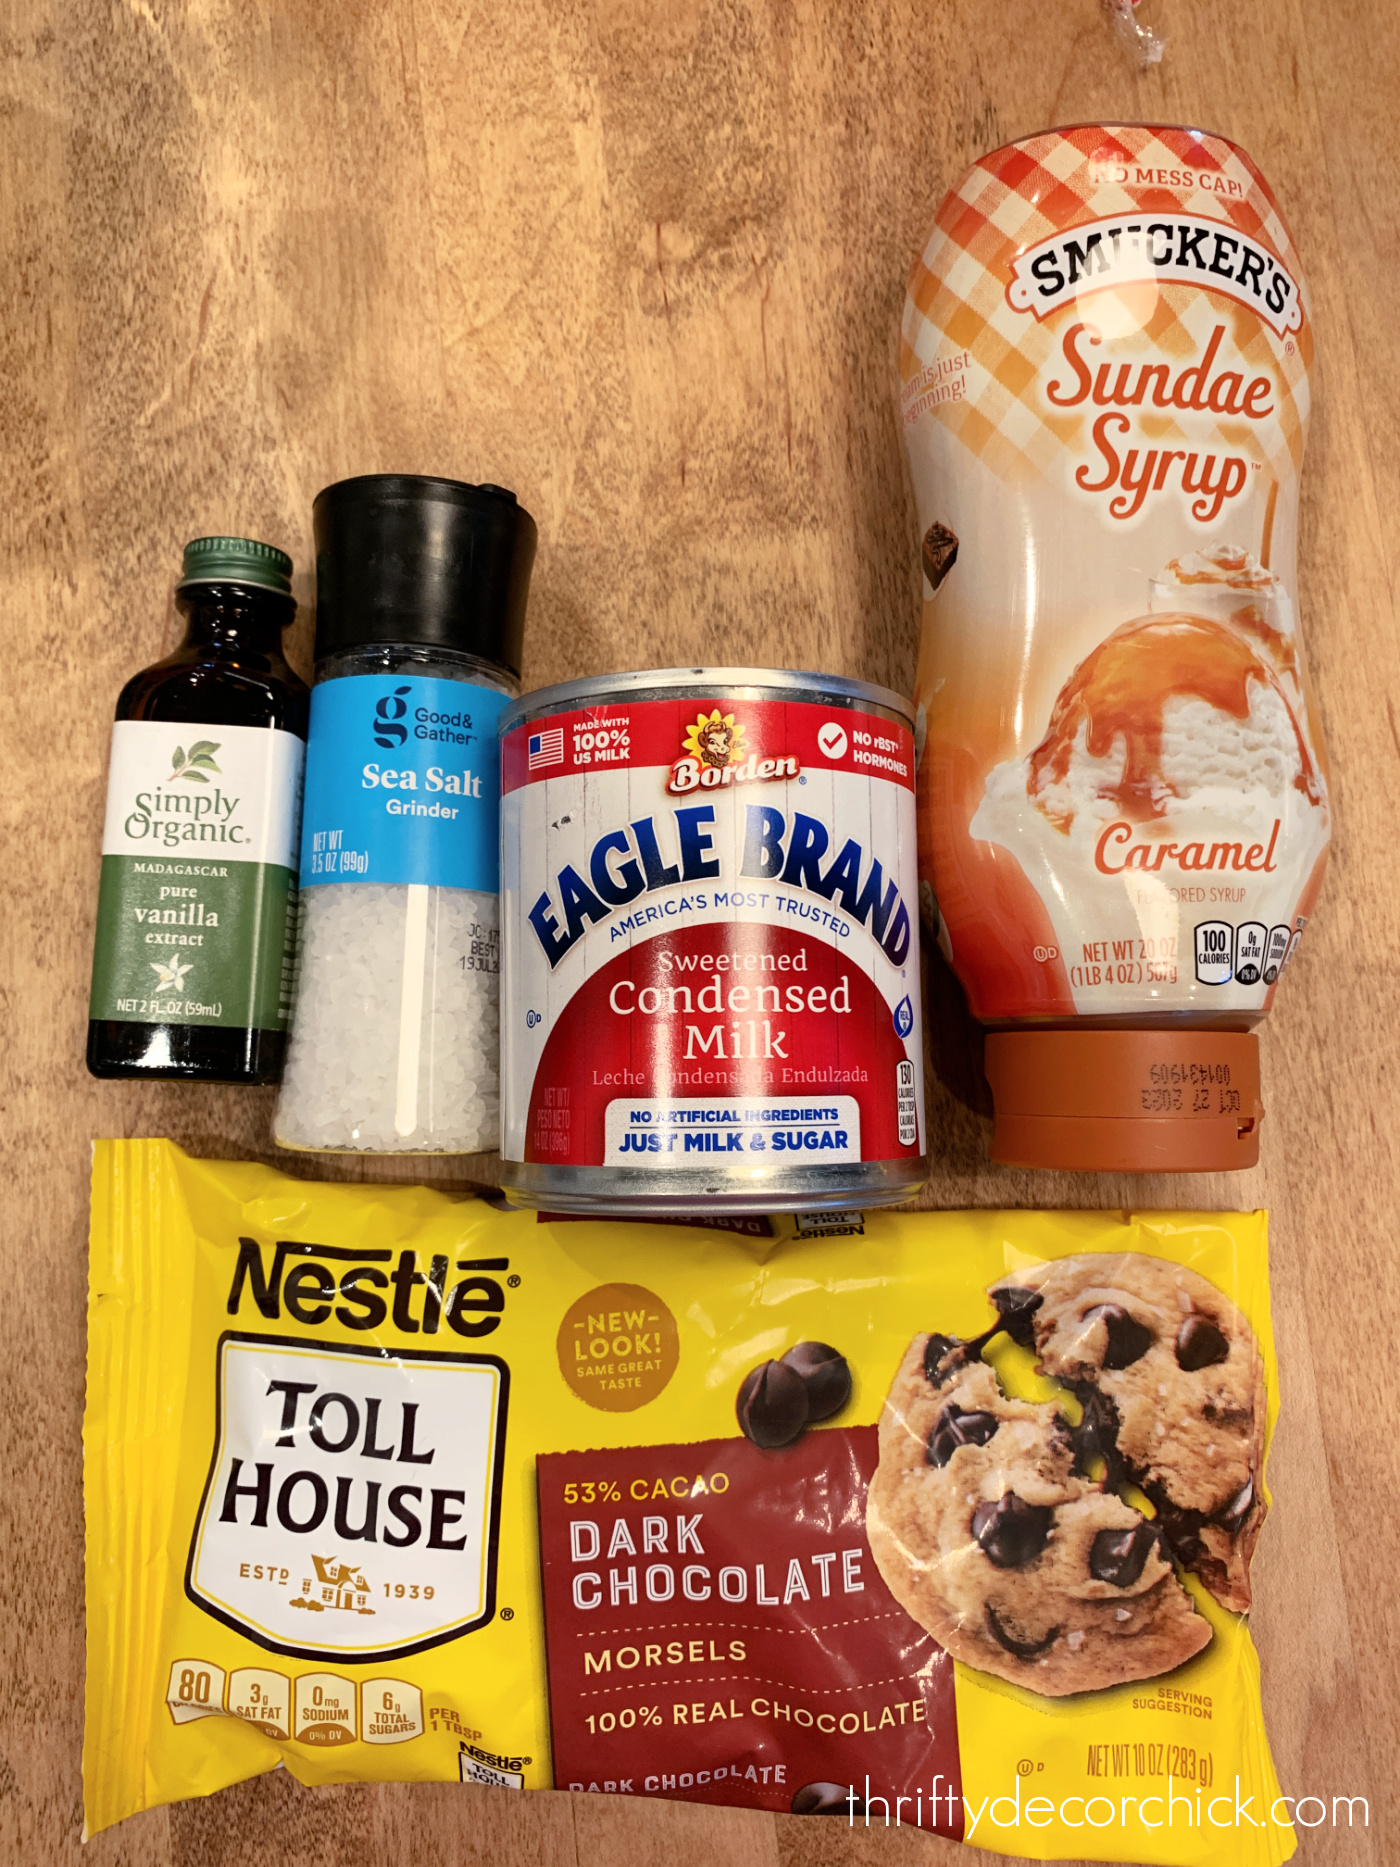
Easy four ingredient fudge recipe:
One bag of milk or dark chocolate chips
One 14 ounce can sweetened evaporated milk
One tsp vanilla extract
Pinch or so of sea salt
Optional additions or toppings:
Nuts, caramel, peppermint, marshmallows, etc.
Start with a microwave safe bowl and add the bag of chocolate chips.
Microwave them at 30 second increments, stirring after each one:

At this consistency, it's almost ready! I microwaved three times at 30 seconds and then about 20 seconds for the last time.
It will be easy to stir and completely melted...just don't warm it too many times!
Add your salt and vanilla extract:


I added the evaporated milk last, because it starts to thicken up quickly once it's mixed:
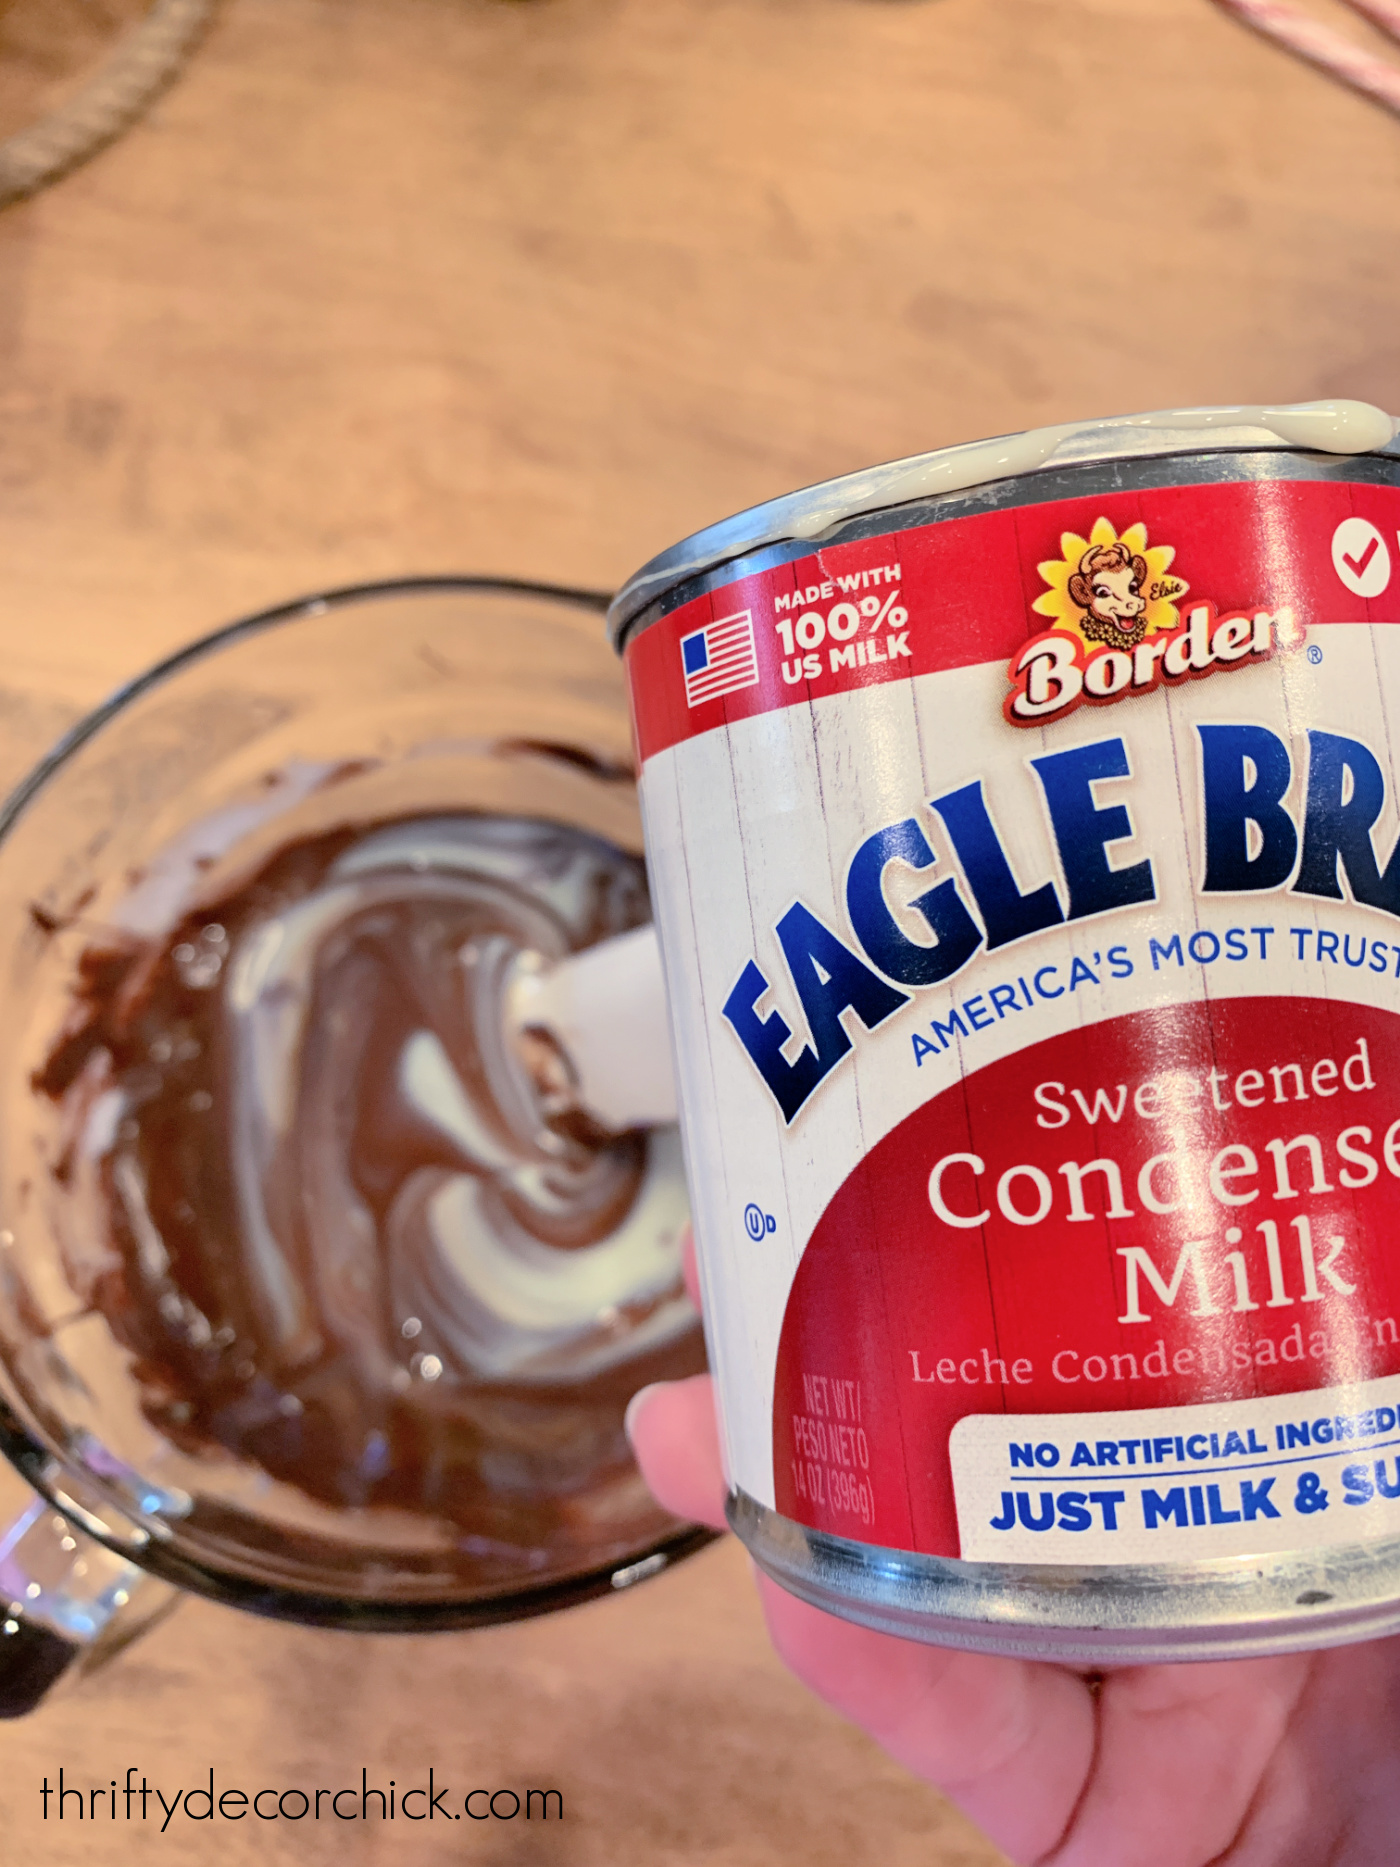
The original recipe called for 14 ounces of chocolate chips and the 14 ounce milk can. Because I could only find 11 ounce of chips, I didn't add ALL of the evaporated milk.
I'm sure the fudge would be fine with all of it, but I wanted to keep those two ingredients equal.
If you want traditional fudge, you're done with the ingredients at this point!
I added a small amount of the toppings to the mix on some of the batches.
I mixed in some chopped nuts in this simple nut version. You can see how much the mixture thickens up at the end:
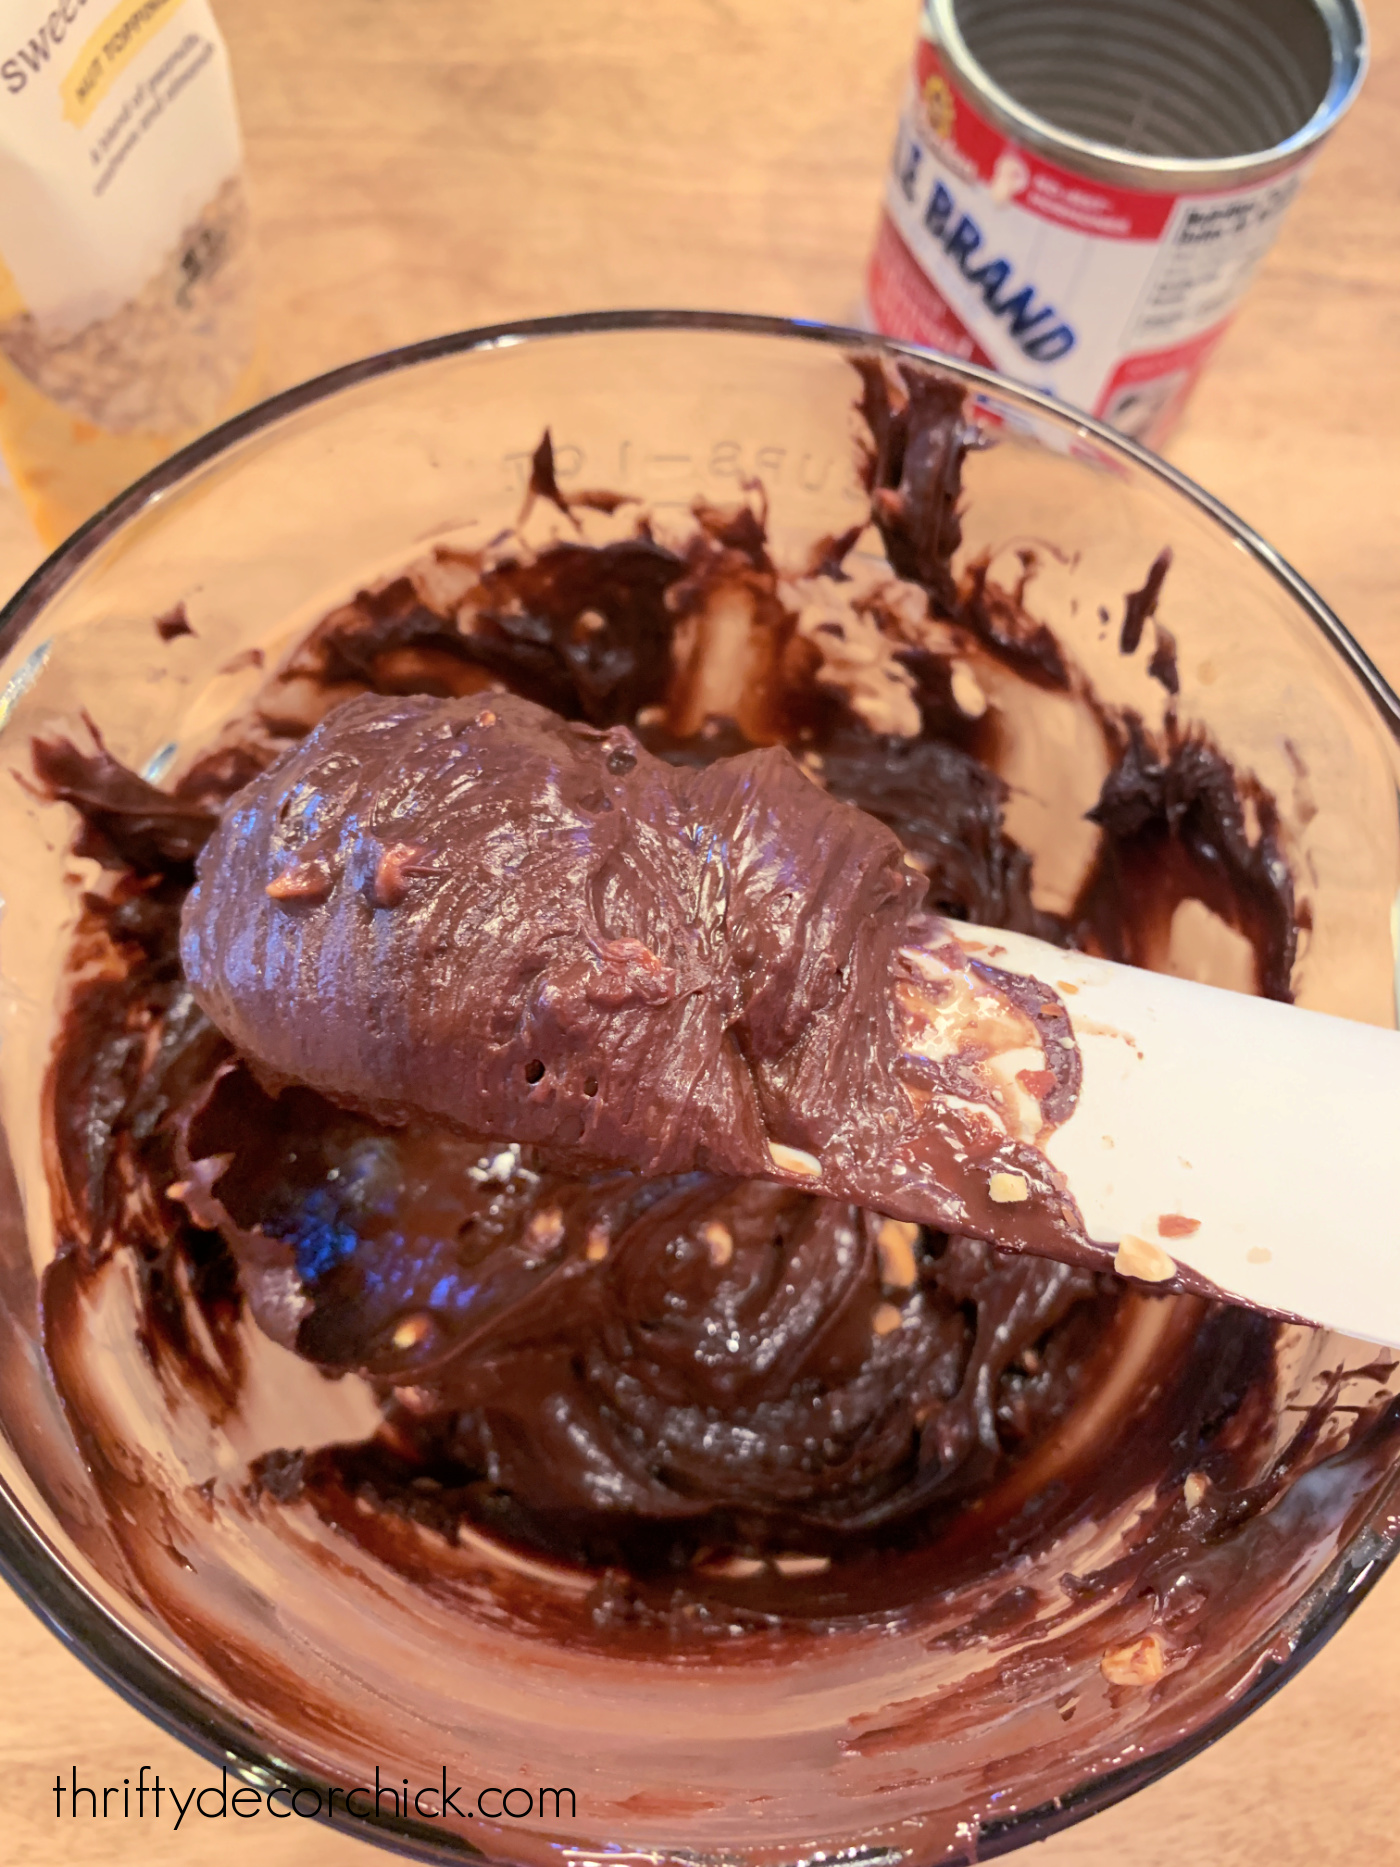
And then your fudge is ready!
I spread the fudge mixture into the containers as well as I could -- mine were not perfect. :)
Then I sprinkled the toppings on while it was still wet:

I crushed some candy canes in a plastic bag to break them up for another topping:
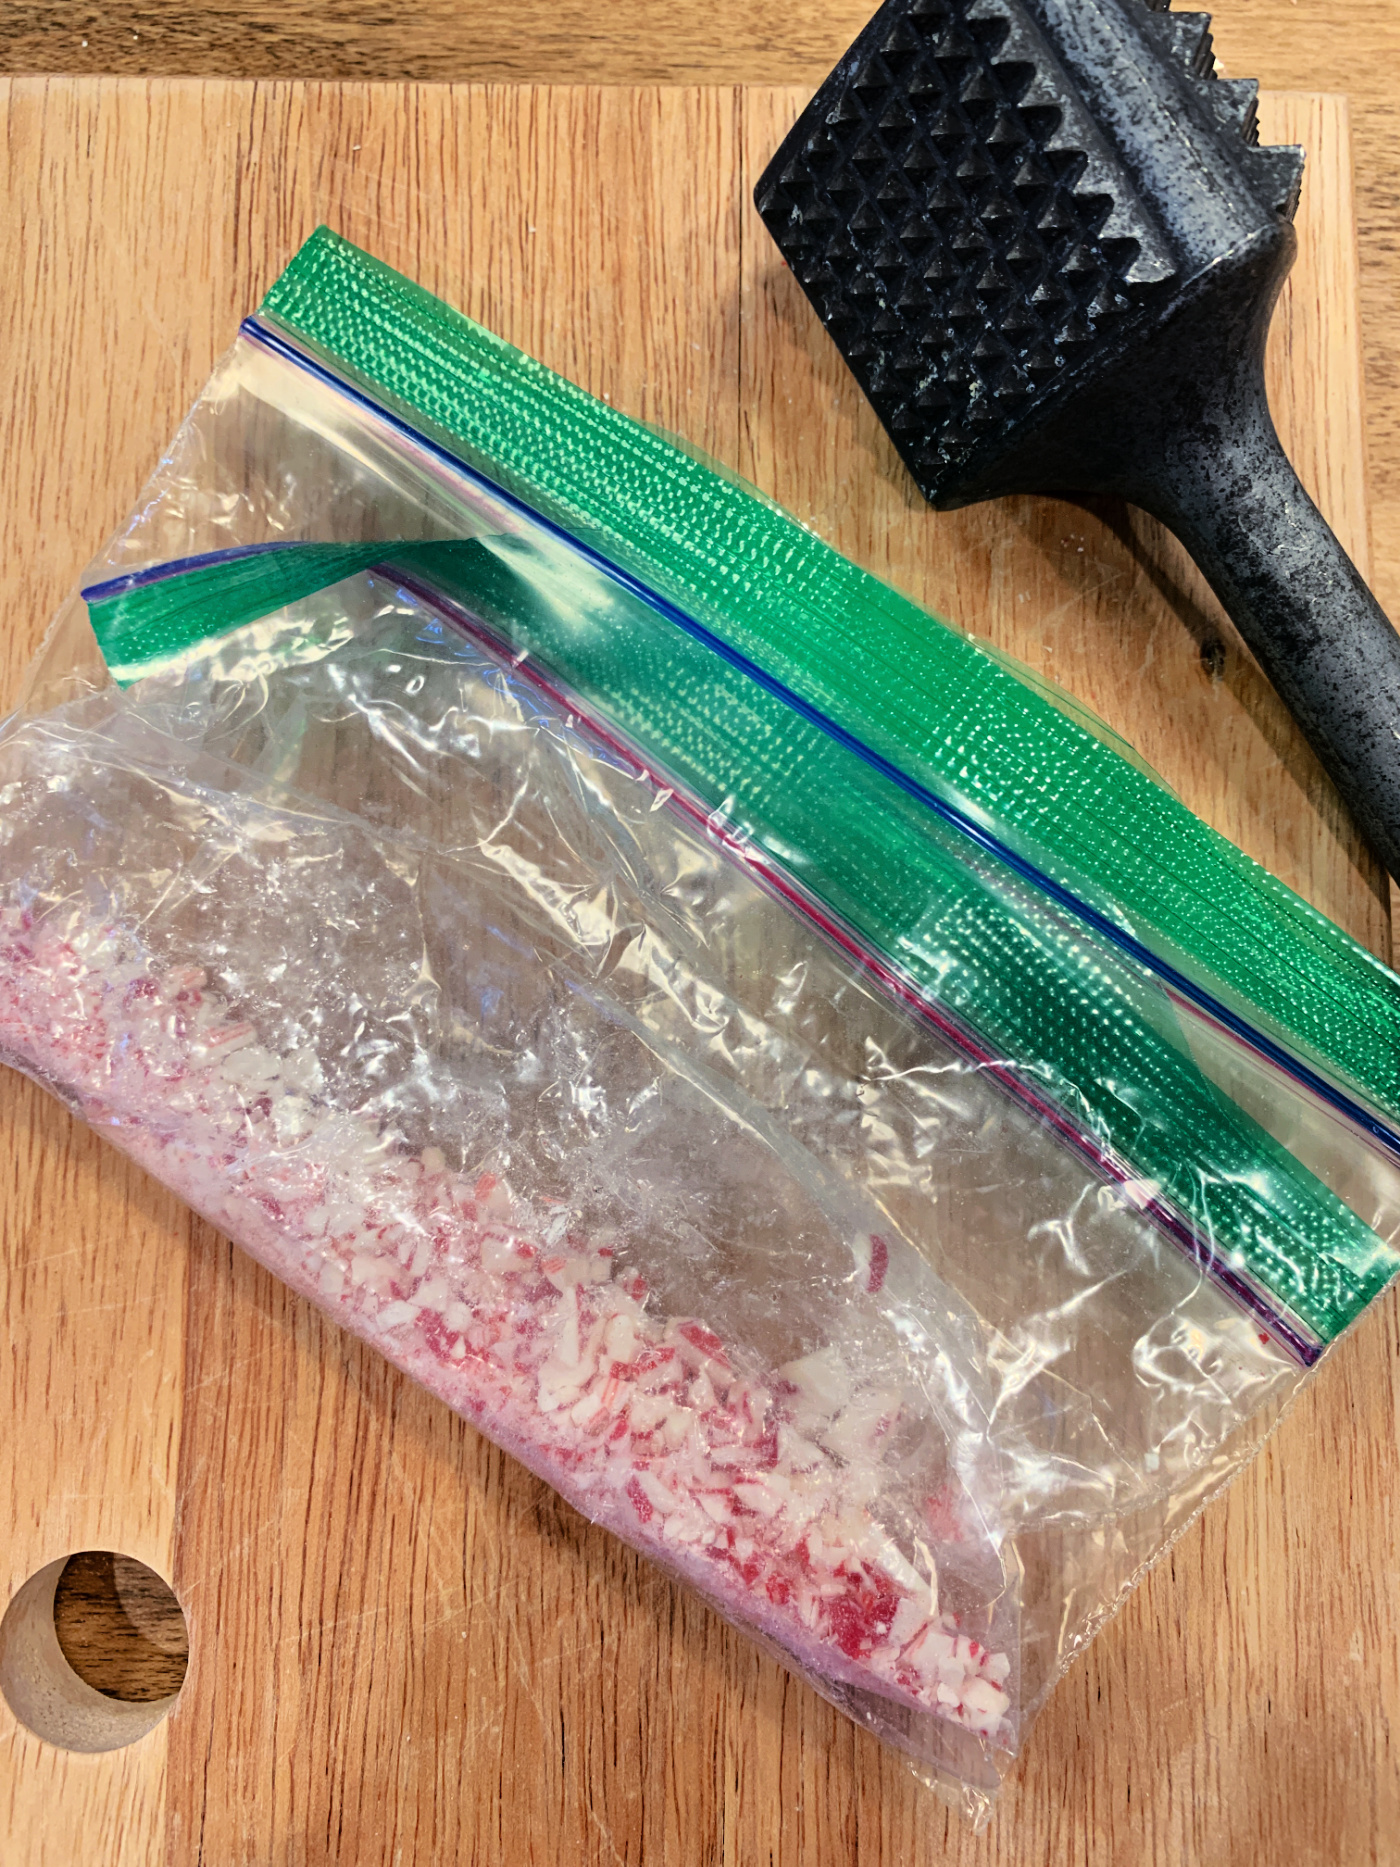
Press your toppings into the top of the fudge just a bit to ensure they stay put!
Your pan can be just about anything -- these are just going in the fridge so they don't have to be oven safe.
I used small shallow metal pans for some and glass containers for others. You can use a loaf pan as well.
Lining your pan with parchment paper will make the removal at the end much easier!
When your fudge is in the pan, chill it in the fridge for at least two hours before serving.
I did two dark chocolate versions of this fudge -- one with nuts and one with caramel and extra sea salt:

And two with milk chocolate chips -- one with peppermint and one with peanut butter (and nuts on top!):


I've never made fudge in my life so I wasn't sure how these would turn out.
They were ALL absolutely delicious! I was kind of impressed...with myself. ?
Our favorites were the peppermint fudge and the peanut butter:
But all were SO GOOD!
I added a bit too much caramel to that version, so they didn't set up quite as well. They were very sticky and not as firm.
But still delicious!
If you want firmer fudge, don't add too much additional liquid to the mixture.
I wrapped up a few from each batch in small plastic treat bags and then placed them the cute gift tins I showed you last week:

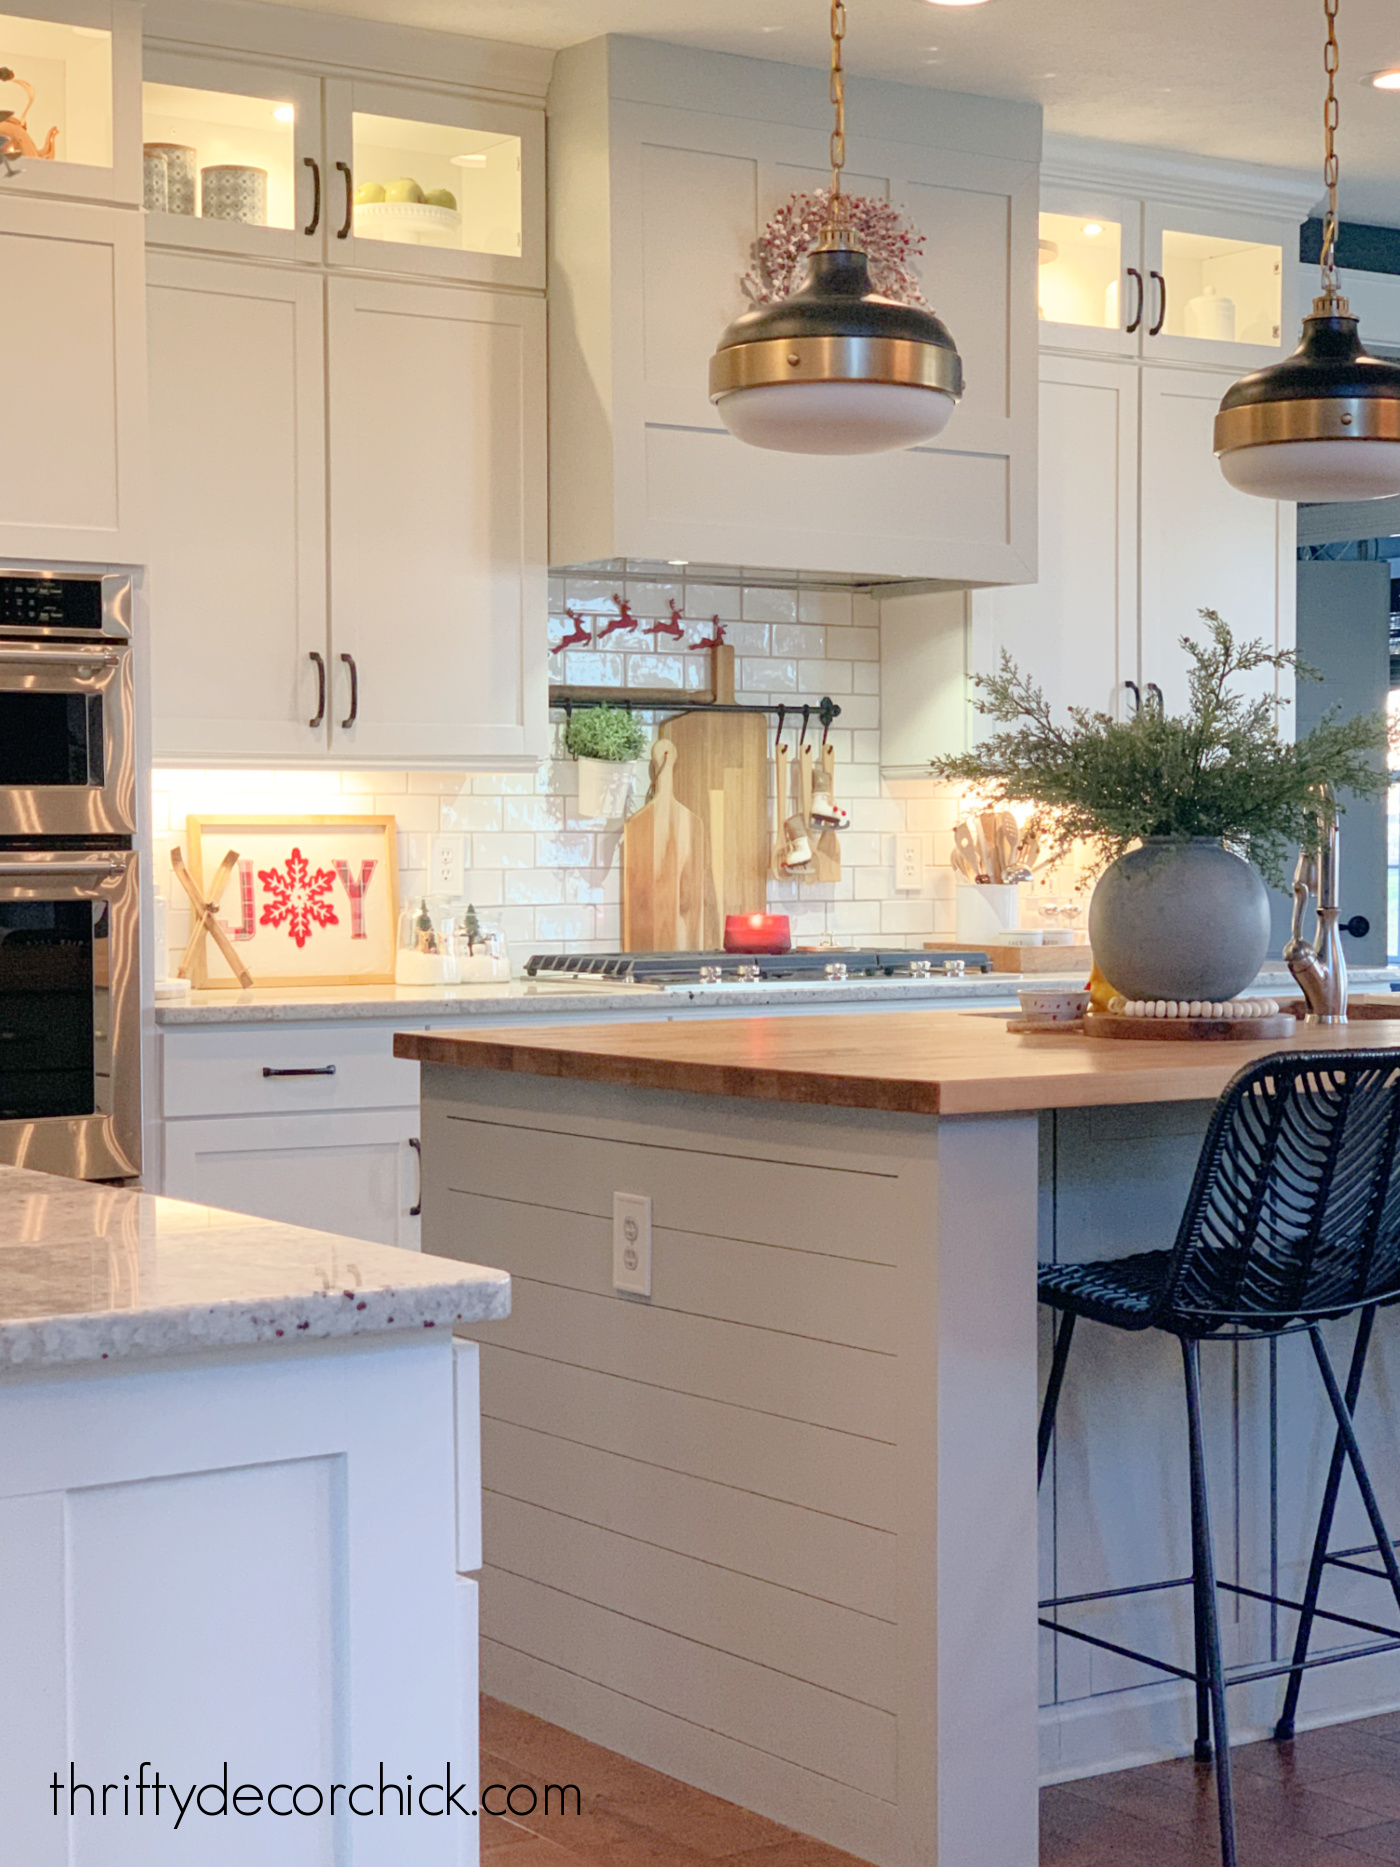
After I finished up these delicious treats, I cleaned up so I could share our Christmas kitchen with you!
The addition of our new floating shelves and tile wall has made such a difference in here! This is my favorite holiday decor in our kitchen yet. :)
I'm just adding the photos here for you to enjoy -- if you have questions about anything please feel free to ask in the comments below!:
Have you tried this super easy fudge recipe? What's your favorite addition? This recipe would be fun to experiment with!
I hope you have a wonderful and safe holiday week -- all the best to you!!
Never miss a post by signing up to get posts via email.
Via https://www.thriftydecorchick.com/2021/12/easy-four-ingredient-fudge-recipe.html Fun last minute (and easy!) gift ideas for the person that has everything!
Looking for last minute gift ideas that take little or no effort to pull together? I've gathered a ton to share with you, as well as some SUPER cute Christmas wrapping items to make your gifts look great!
These finds are perfect for a fun gift exchange or that hard-to-buy-for person.
There are also quite a few really inexpensive items that would work well when you need multiples for neighbors, teachers or co-workers.
I've been working with Big Lots this year, sharing some of my favorites from their stores and online.
I've shopped Big Lots for years and have always loved their Christmas decor, but this year I also noticed how many awesome gift sets they have.
They have a gifts for everyone -- so many fun sets that I just had to share with you. I bought quite a few of them, but can't tell you who they're for, since those people read the blog often. ;)
I'm sharing a few of my favorites here, but they literally had hundreds to pick from!
I loved that so many sets and ready to go as they were, or could be completed with just one or two items for a really sweet gift.
This Oreo dunking set was too cute:

It even comes with tongs so you can get a full dunk into the milk!
The set includes six Oreos, but I would add a whole package to the gift...because six would be gone within minutes in our house. ?
If you have a Coca-Cola lover in your family, this set with the classic Coke glasses is a fun idea:
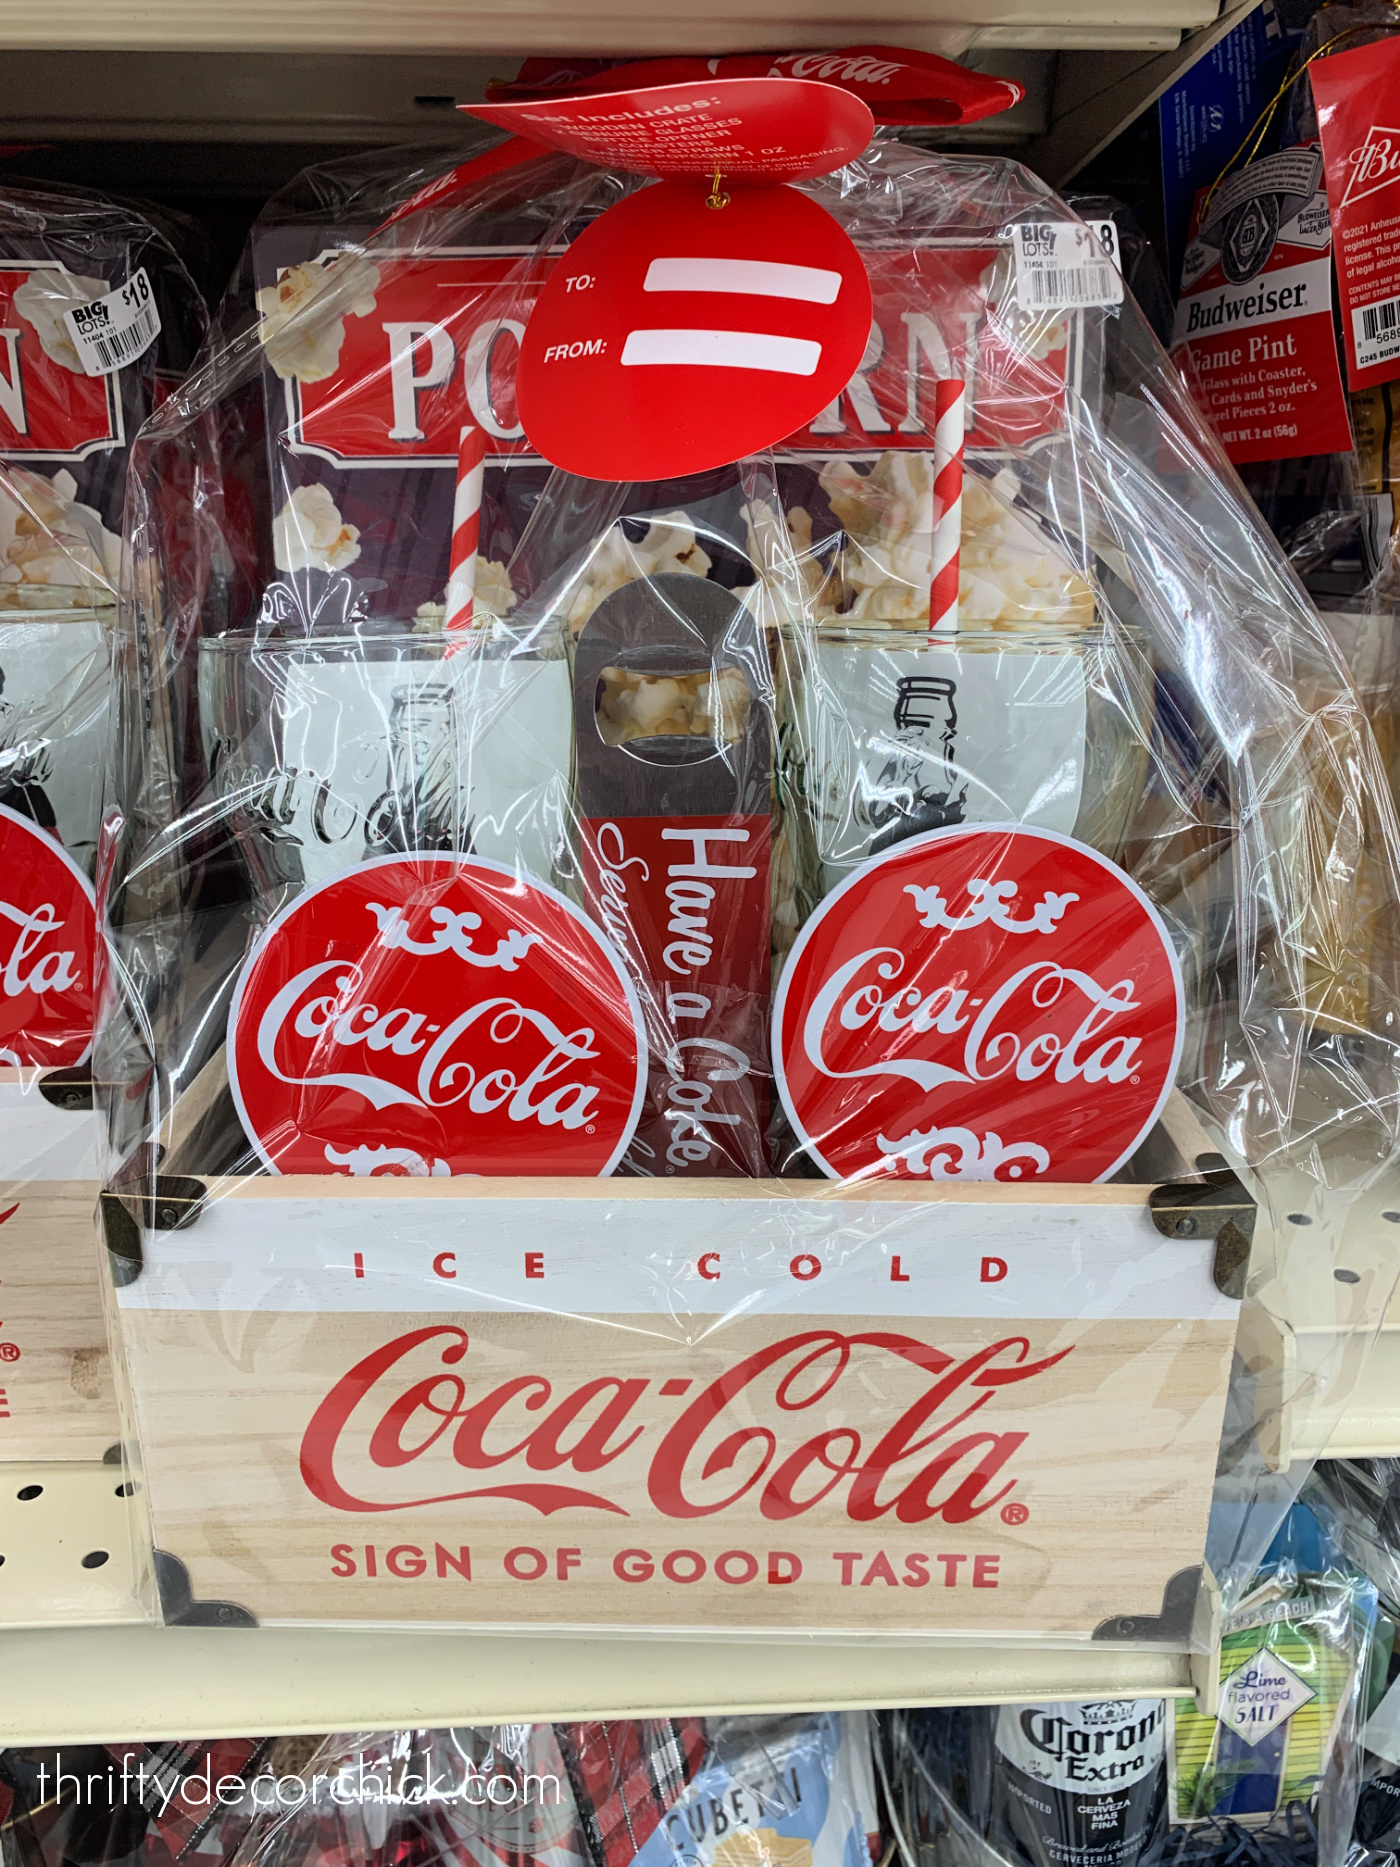
Even the crate it comes in is cute!
Hot cocoa bombs were HUGE last year, but I couldn't find the molds to make them anywhere! This hot chocolate bomb kit has everything you need to make your own:
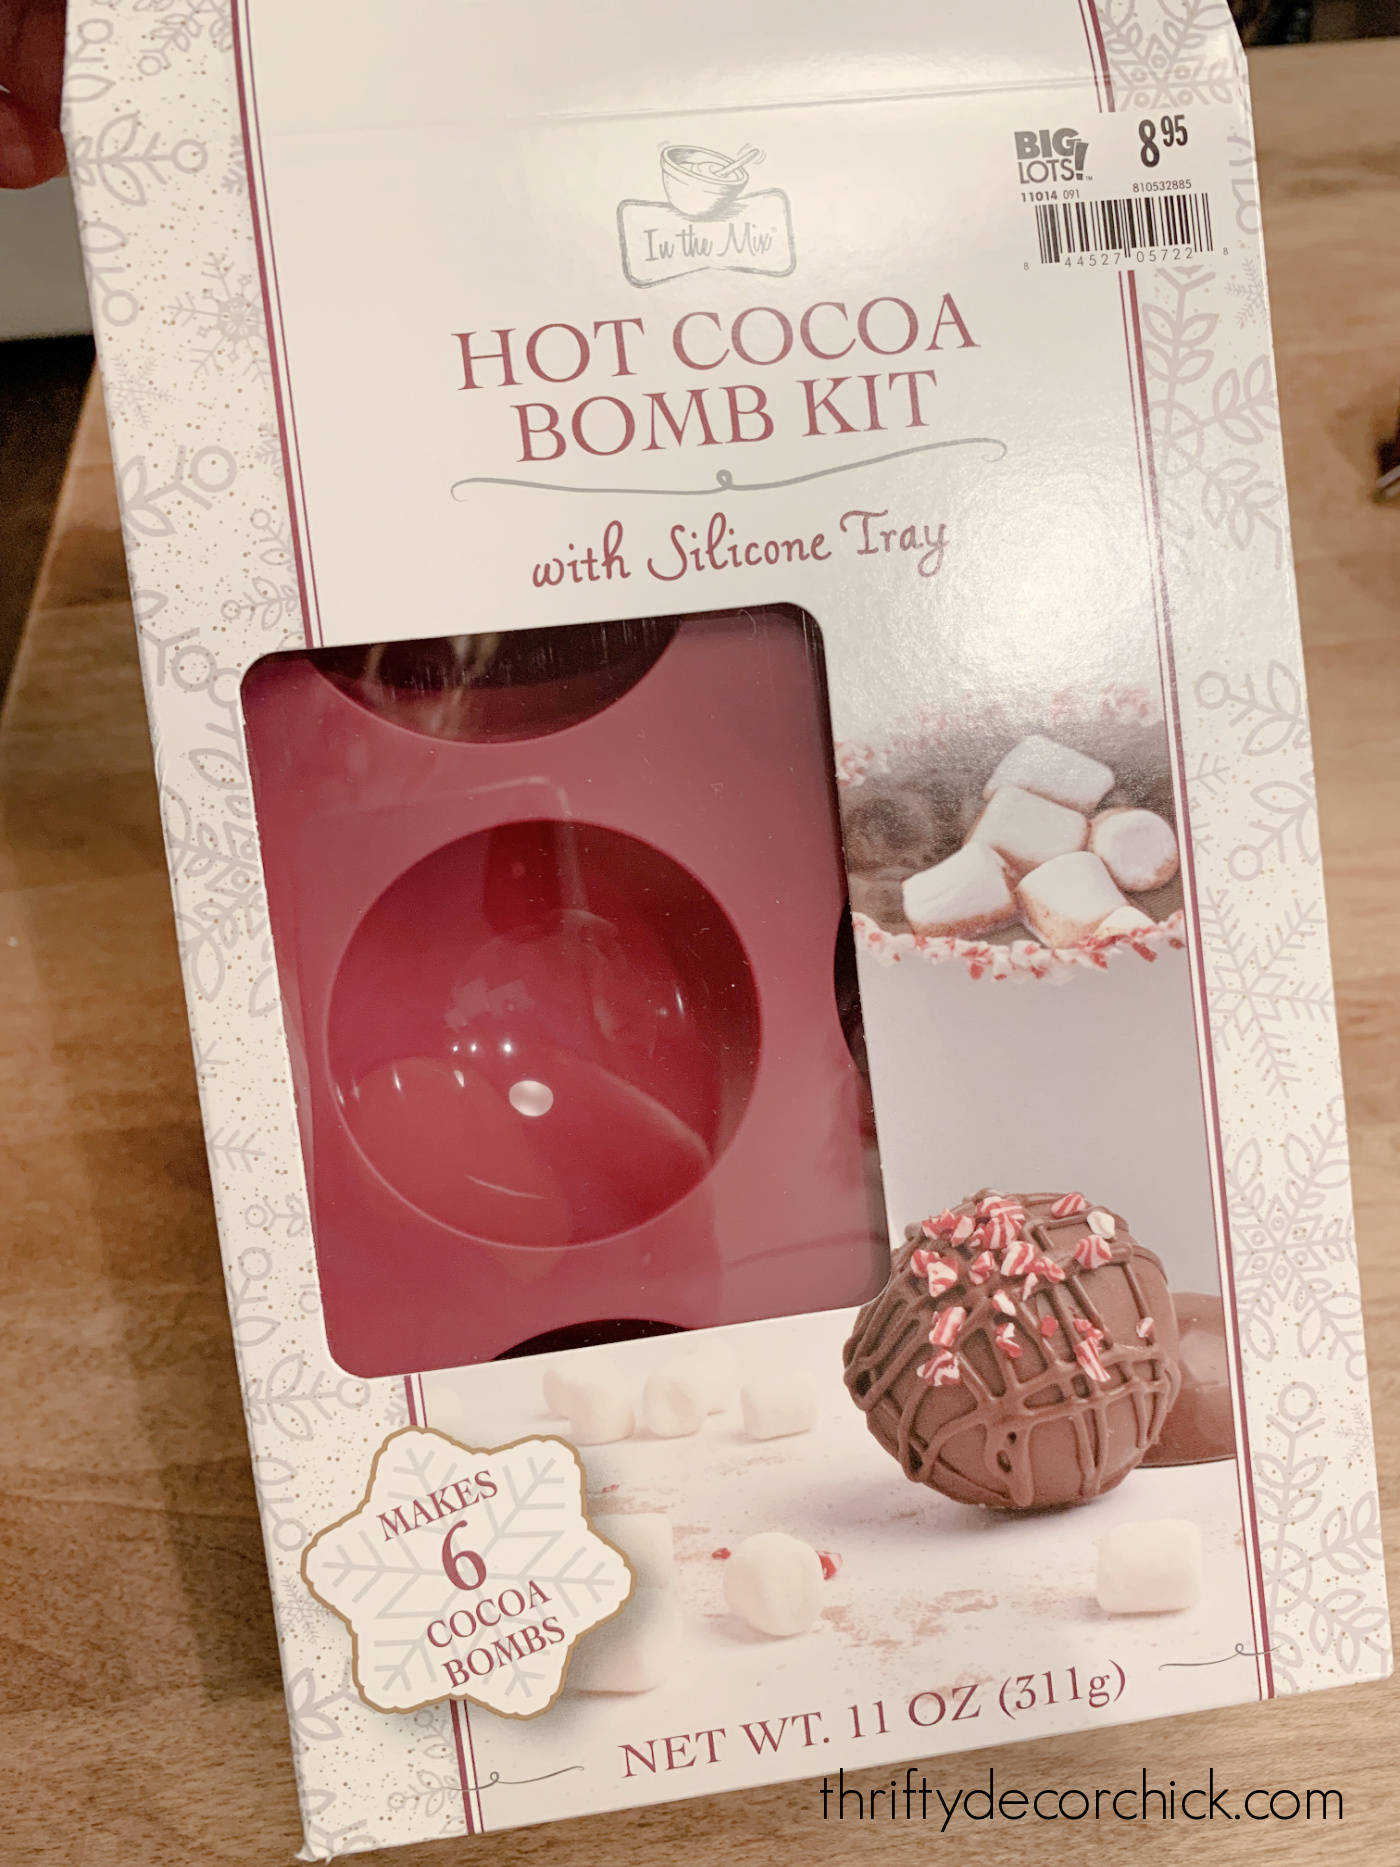
I may keep this one for myself. ;)
Tis the season to make cookies, right? I thought this spatula set and red baking mat would be so cute wrapped up with a cookie mix:

You could throw them all in a mixing bowl with tissue paper -- no wrapping needed.
Big Lots had a TON of these adorable oven mitt and cookie mix sets! I lost count of how many different options they had -- at least ten:
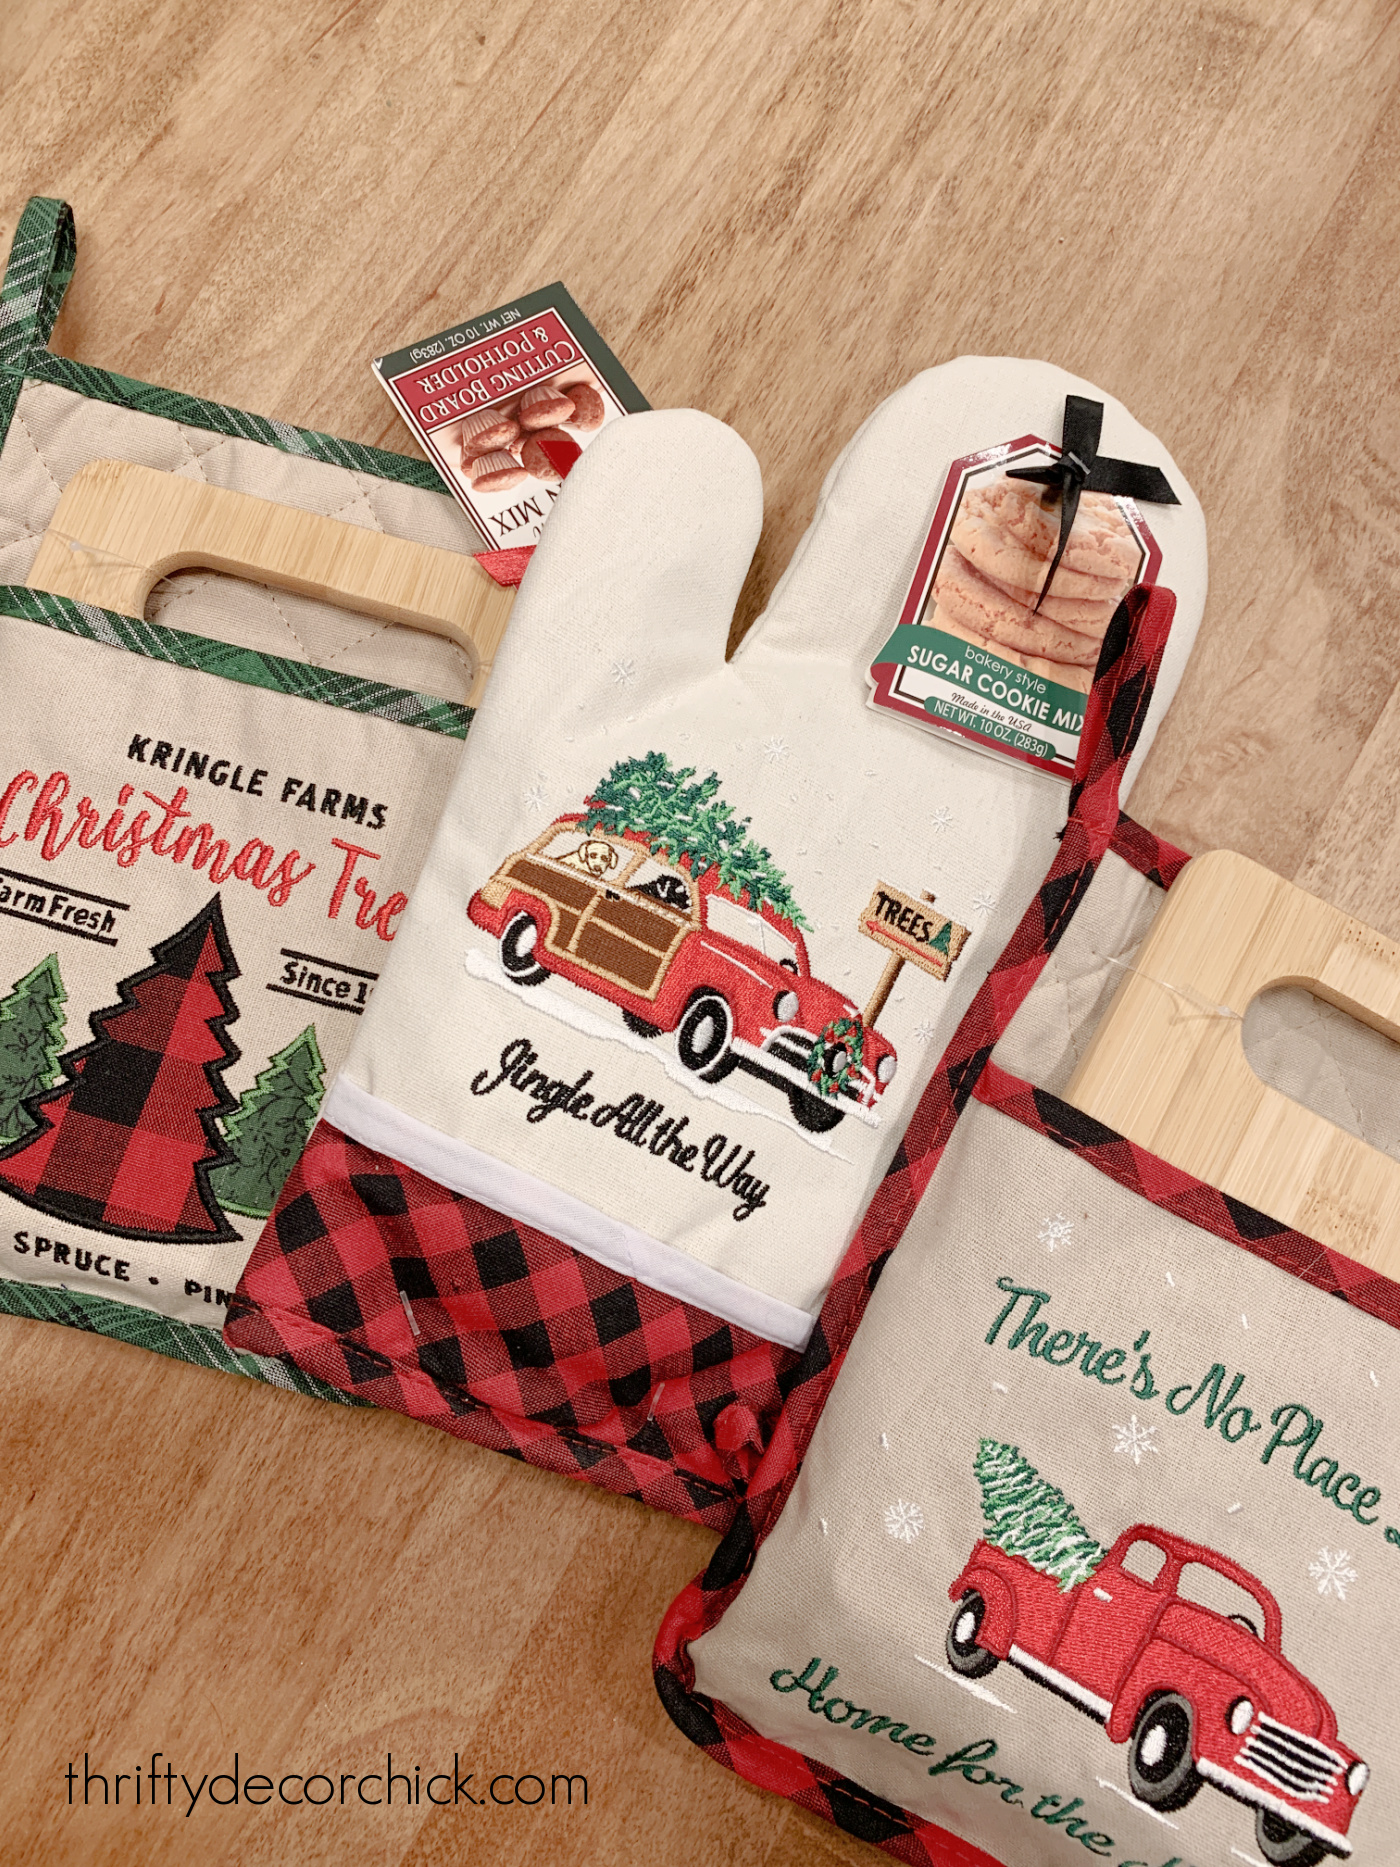
There were so many designs, and at least three baking mixes. Some were muffins, some cookies.
They would be perfect on their own or added to the holiday baking items above. And these are only $6 each!
As you can see, some of the sets come with a small cutting board as well. Too cute!
What a cute gift idea for teachers with a gift card tucked inside! Such an easy and inexpensive gift for neighbors and co-workers as well.
I thought this "giving plate" set would be sweet for anyone who loves to bake for loved ones:
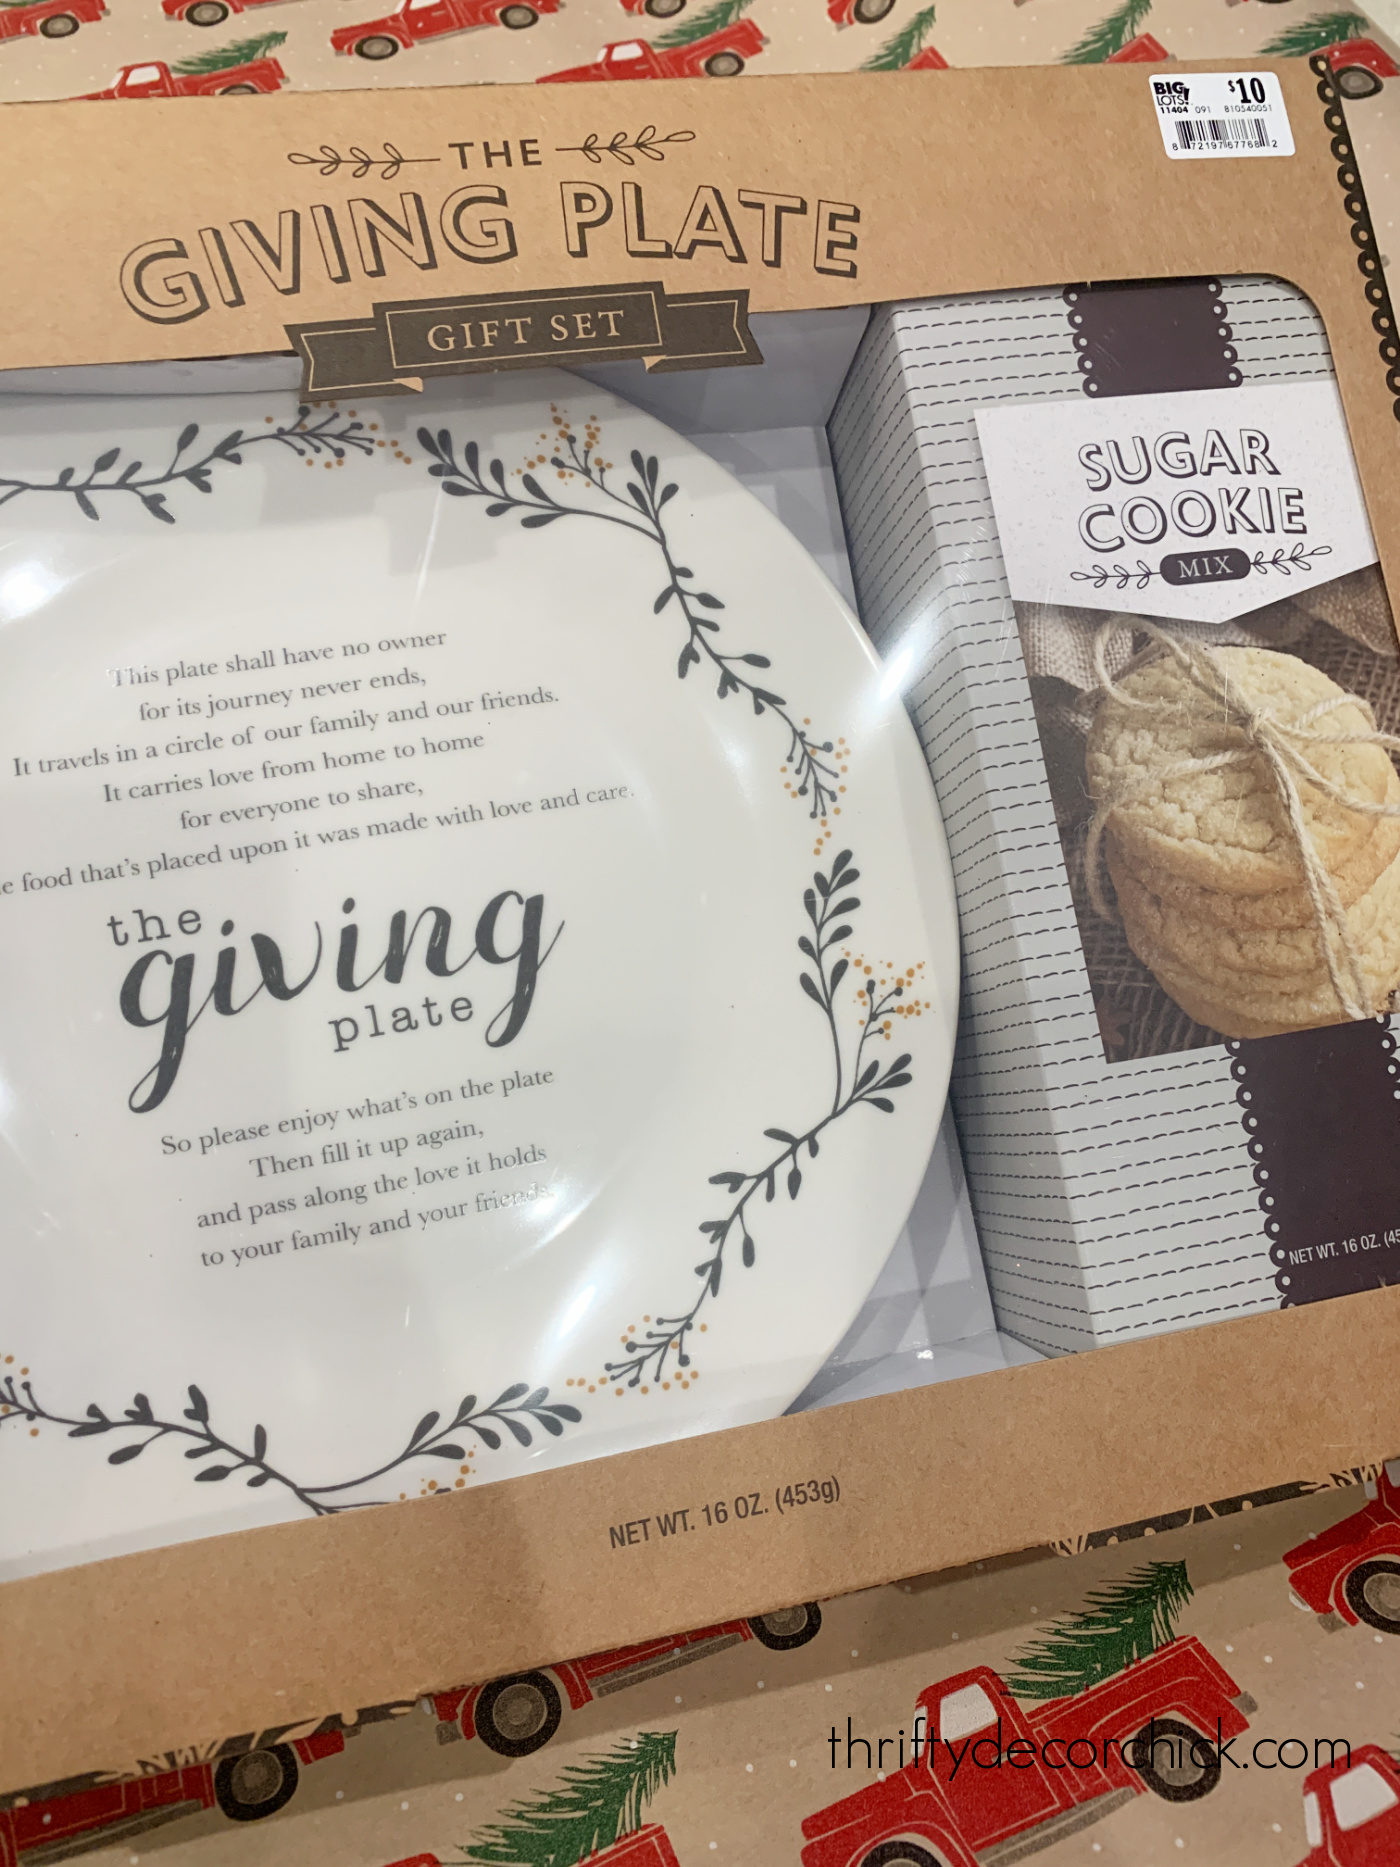
I loved the idea of passing the plate around, but it's so pretty I'd have to return it. ;)
You can't go wrong with coffee and hot chocolate gifts -- you know they'll be used and enjoyed!
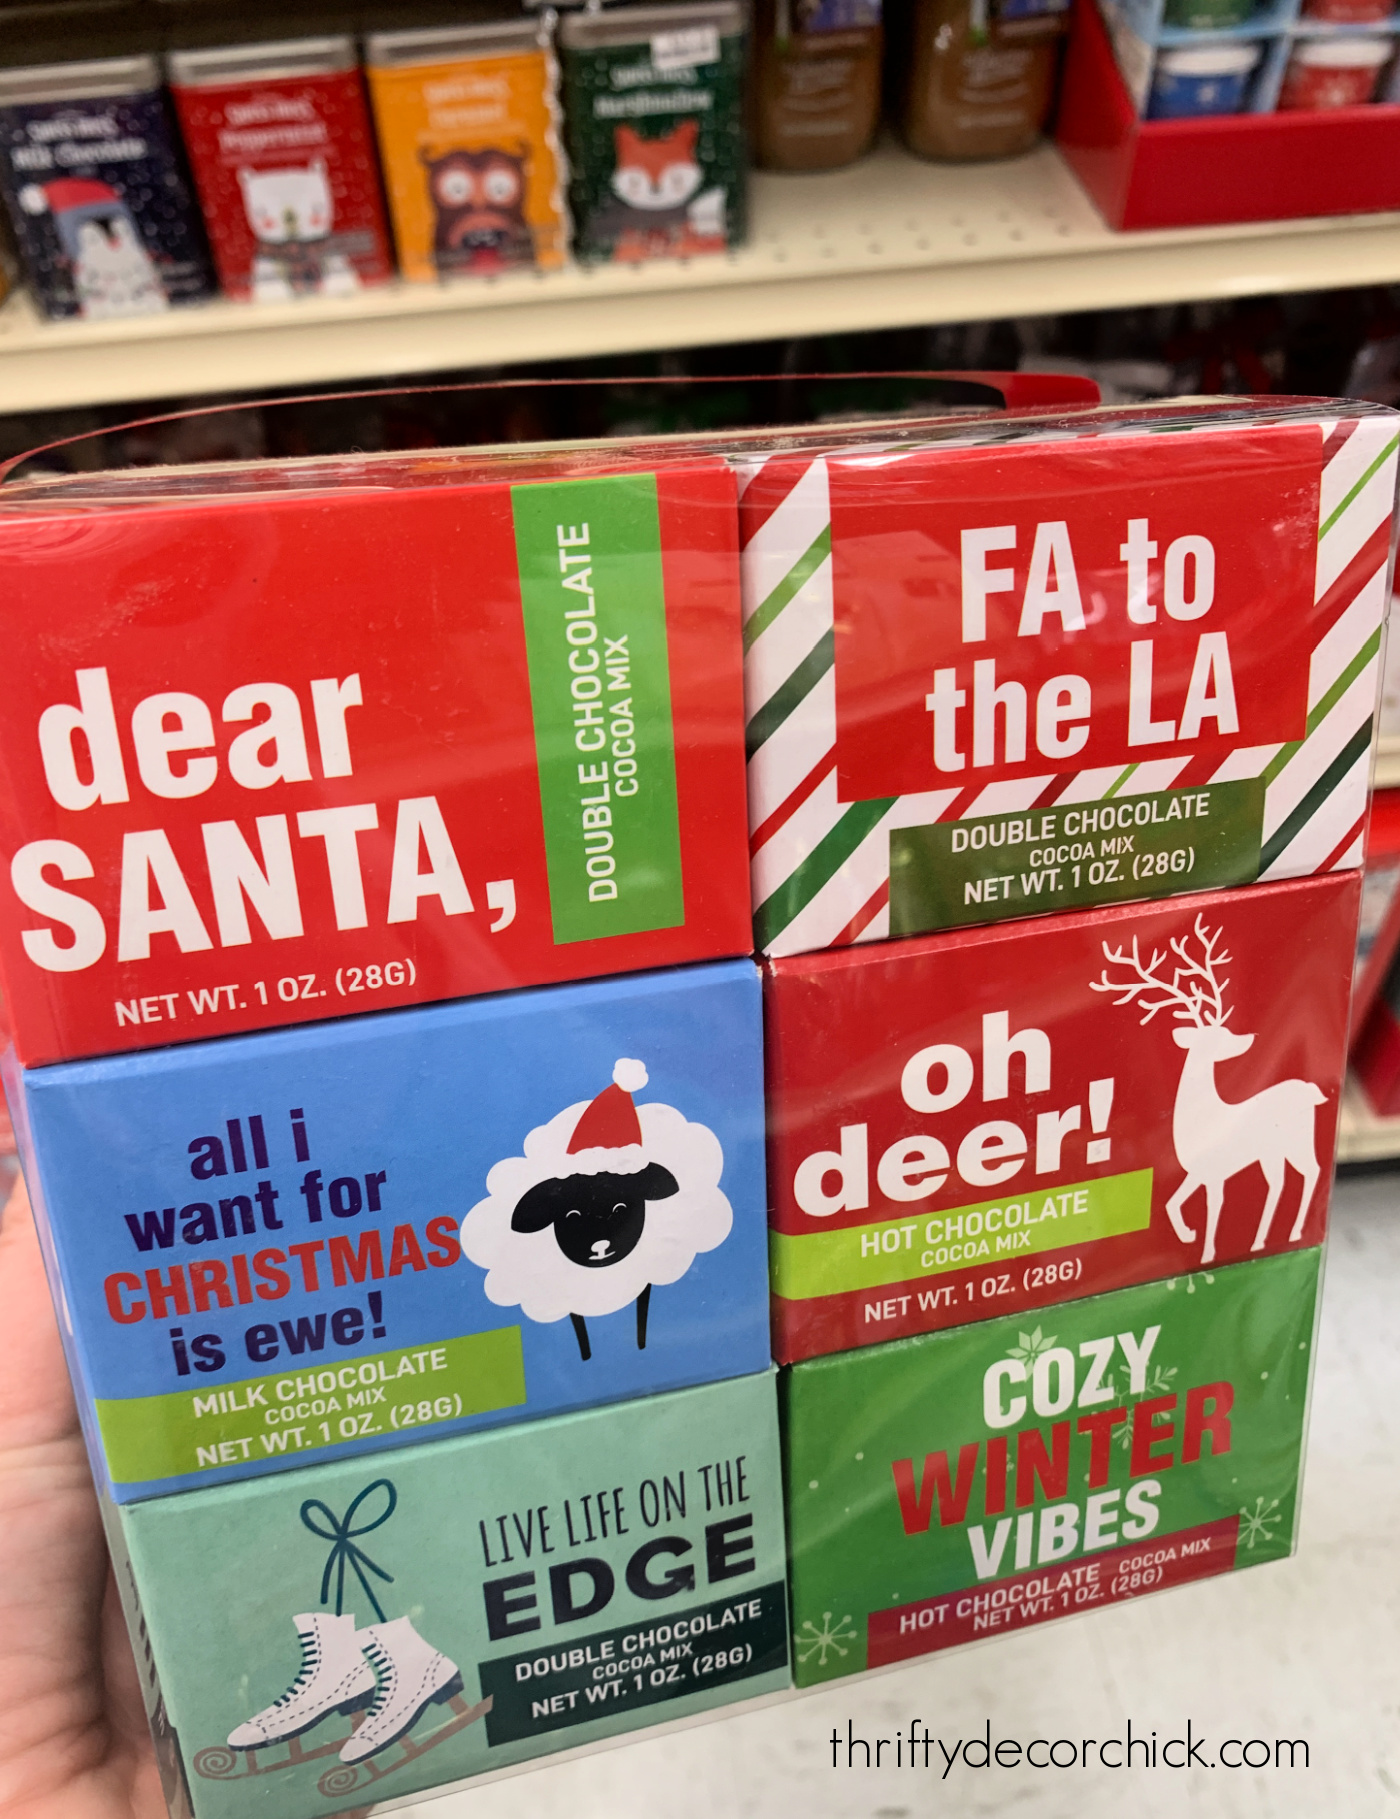
This hot cocoa set comes with a bunch of different flavors you could break up and gift individually:
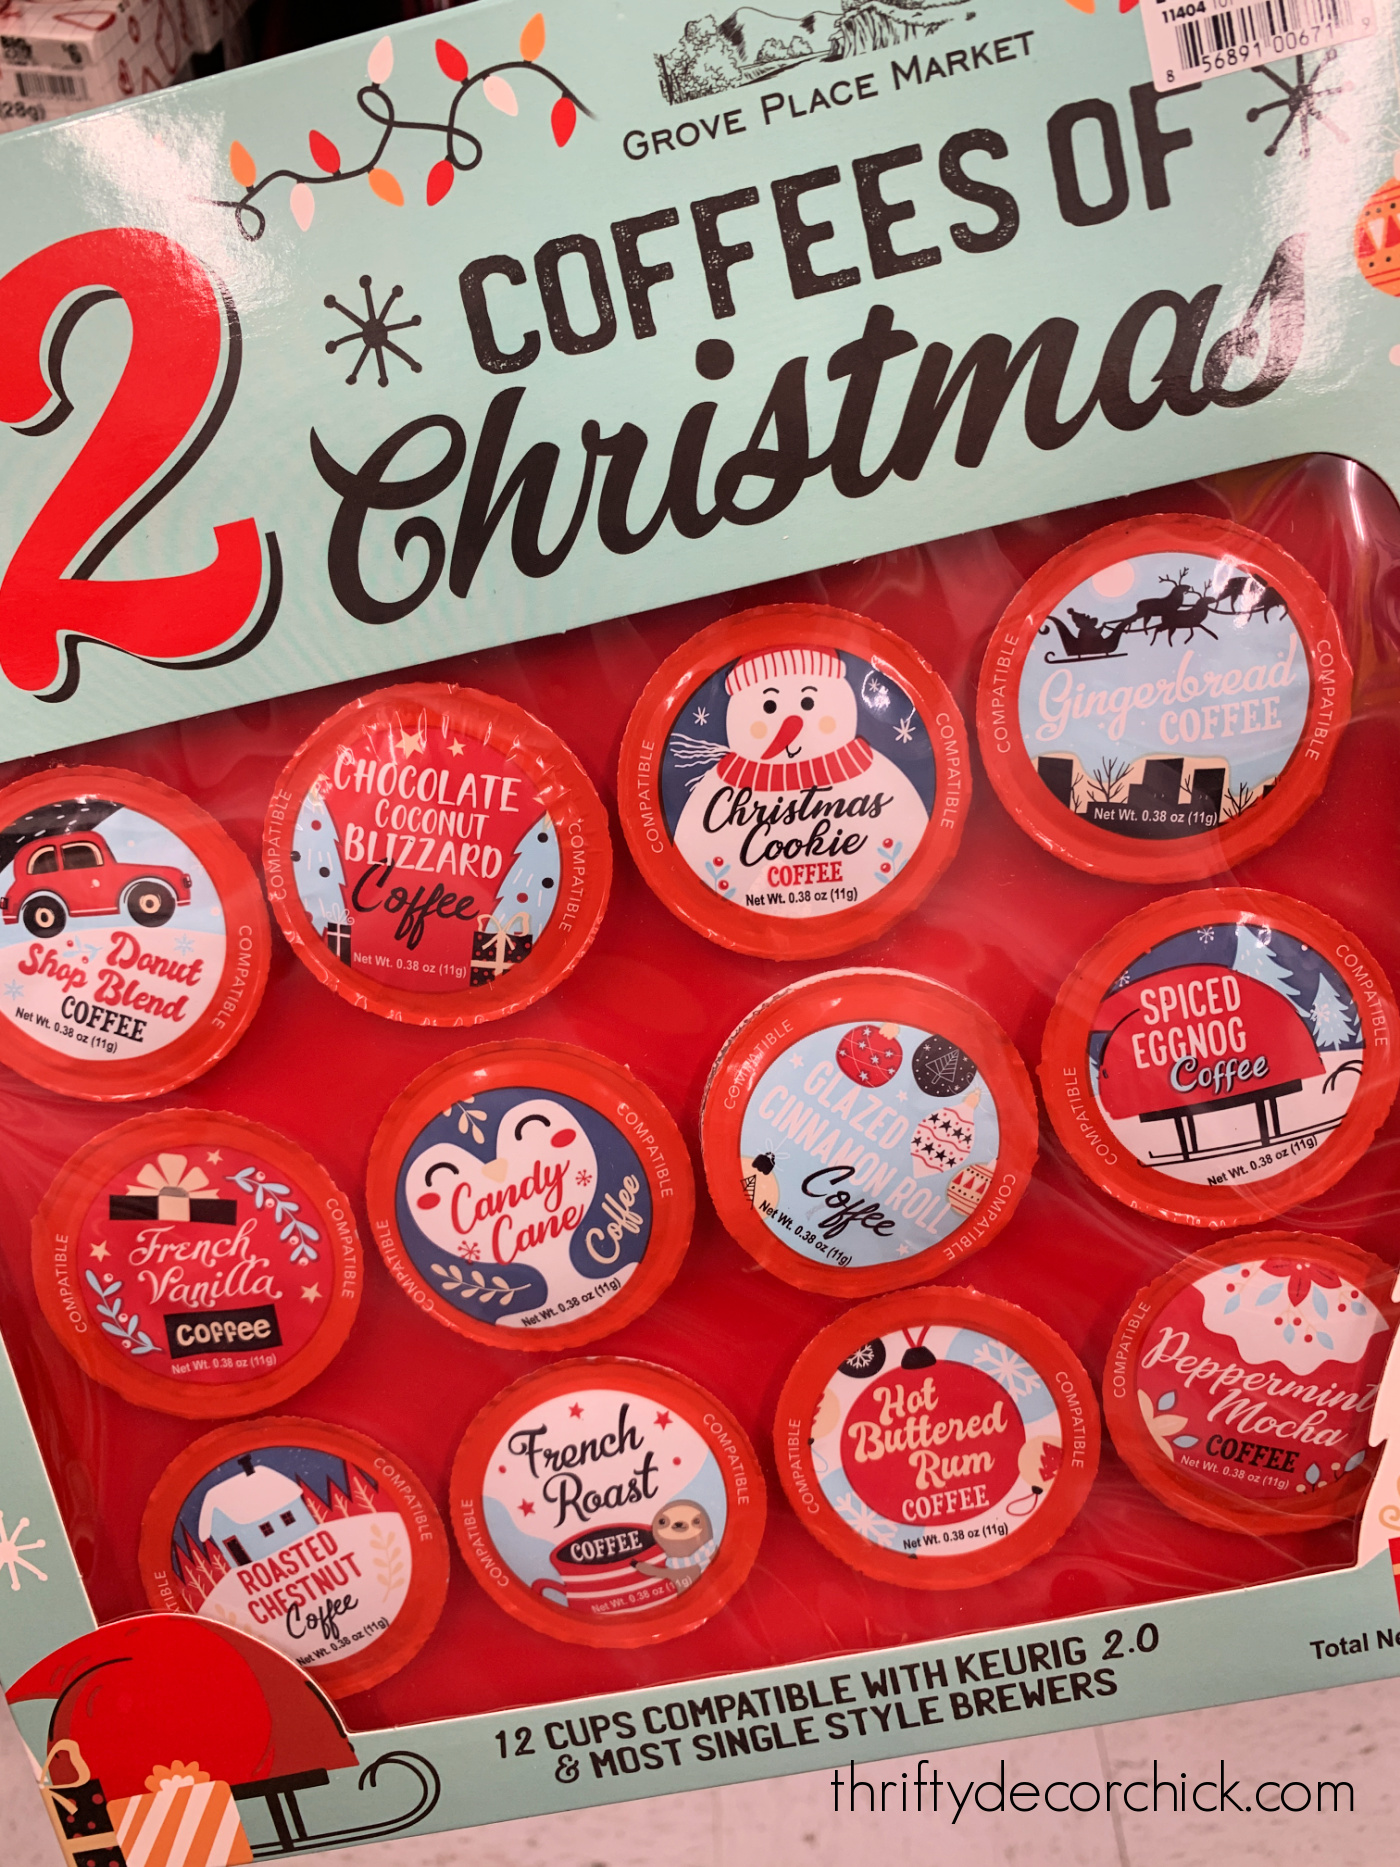
This 12 K-cup coffee set has flavors from buttered rum to Christmas cookie and could be given out separately as well:
Add one of the super cute Christmas mugs from Big Lots and you'll have yet another easy present for just about anybody:

After you've found the perfect gift, take a look at their huge wrapping selection!
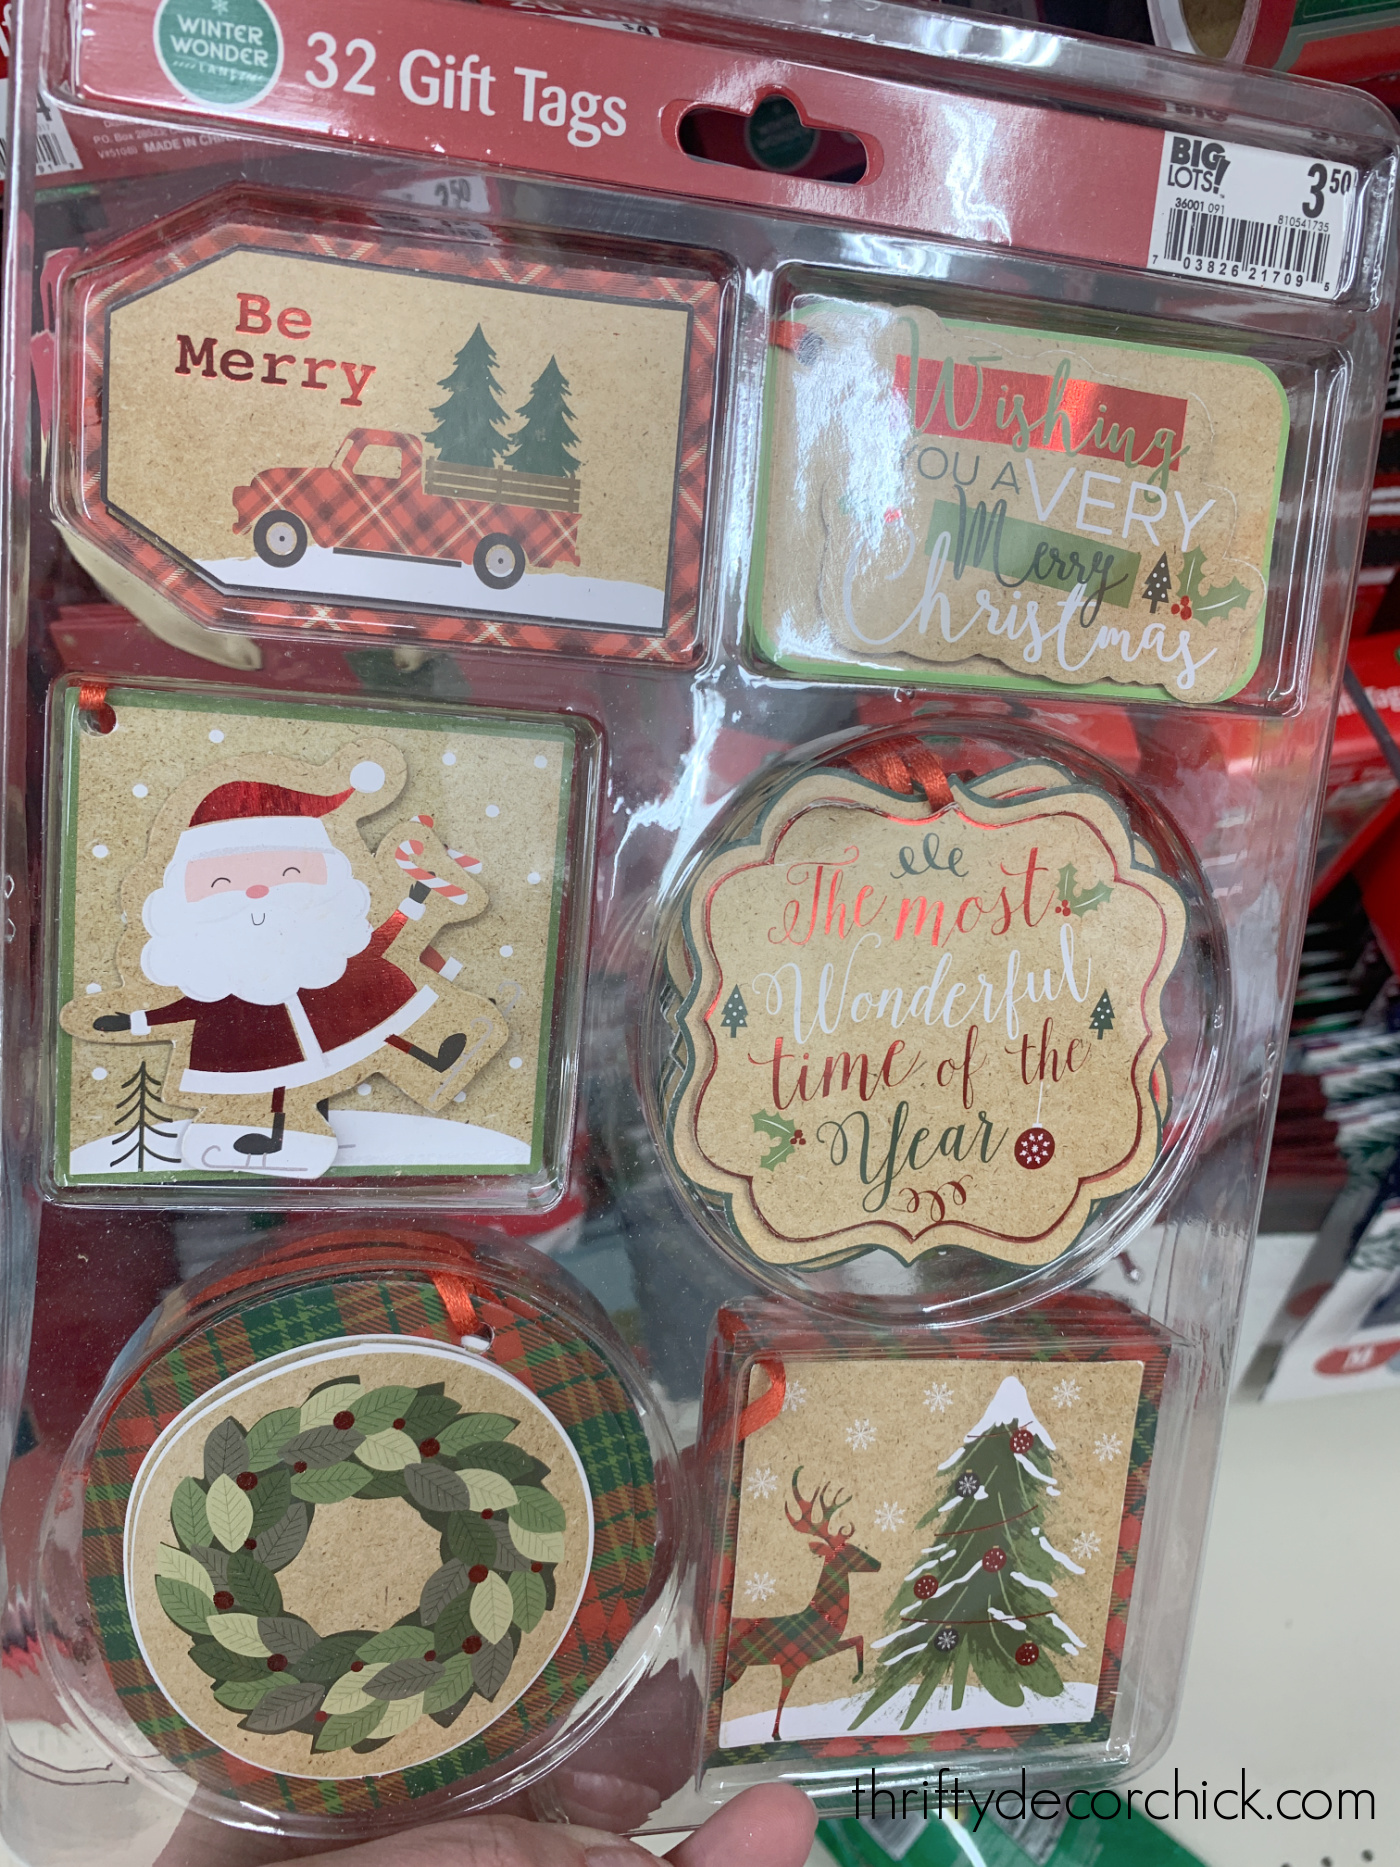
Our Big Lots had a whole aisle dedicated to holiday wrapping, and they had the CUTEST stuff. So many affordable gift tags like these:
They also had rolls of sticky tags with different designs for just a few dollars.
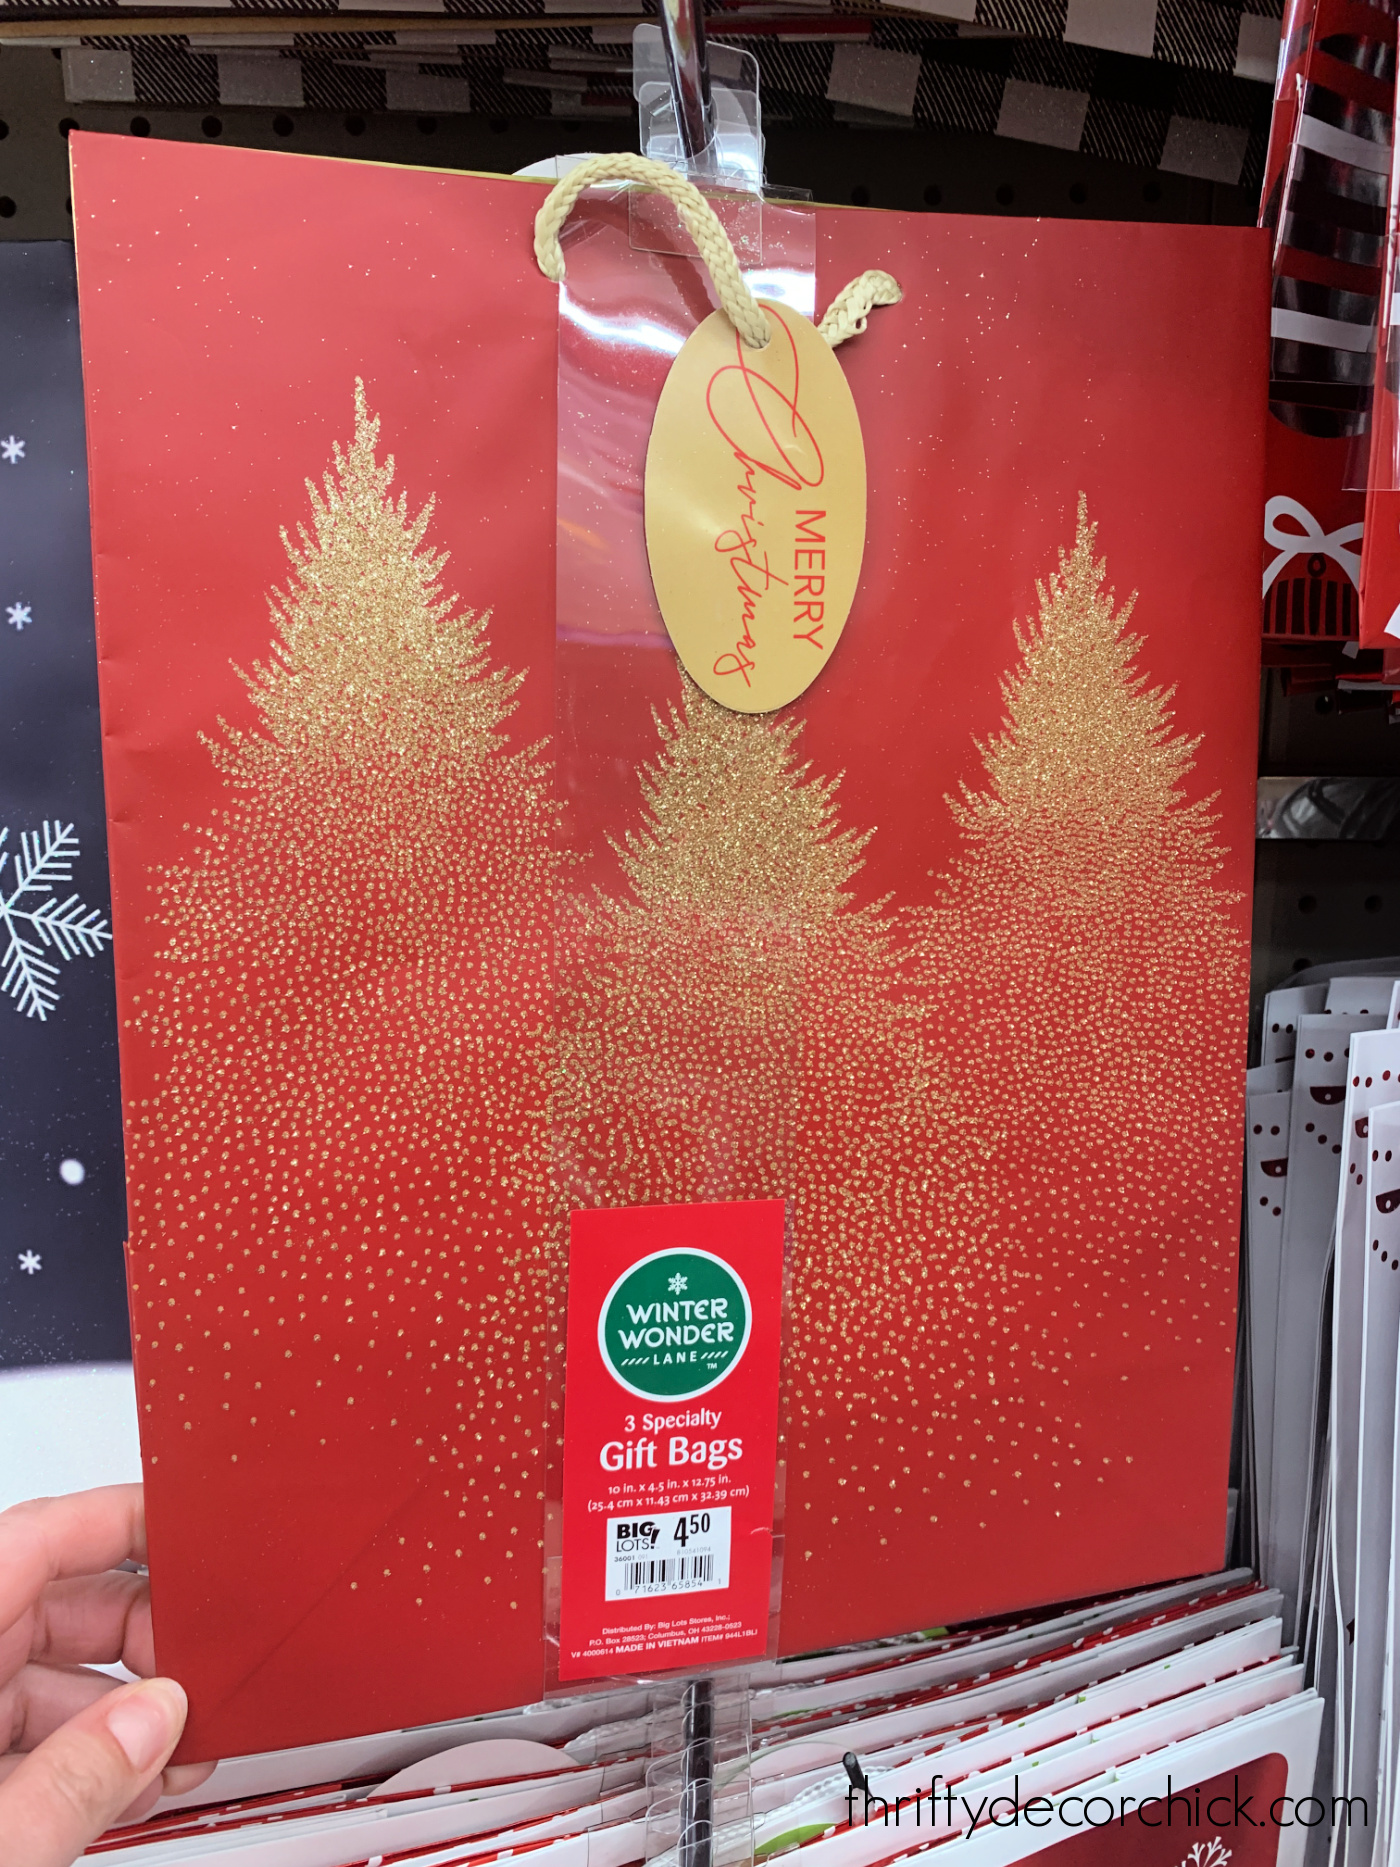
Plus TONS of gift bags...all of which would also look great framed and made into holiday art!:
And they had a huge selection of tins and containers to gift homemade treats. I grabbed these for our neighbor gifts:

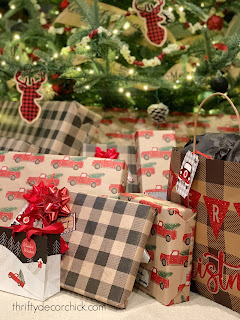
Isn't that so pretty? I've really been drawn to black accents with red and green this Christmas. So much so, I continued the theme of our basement tree decor in those colors into the wrapping.
I picked up this buffalo check paper and red truck wrapping paper at Big Lots, as well as all of these bows, gift tags and bags:
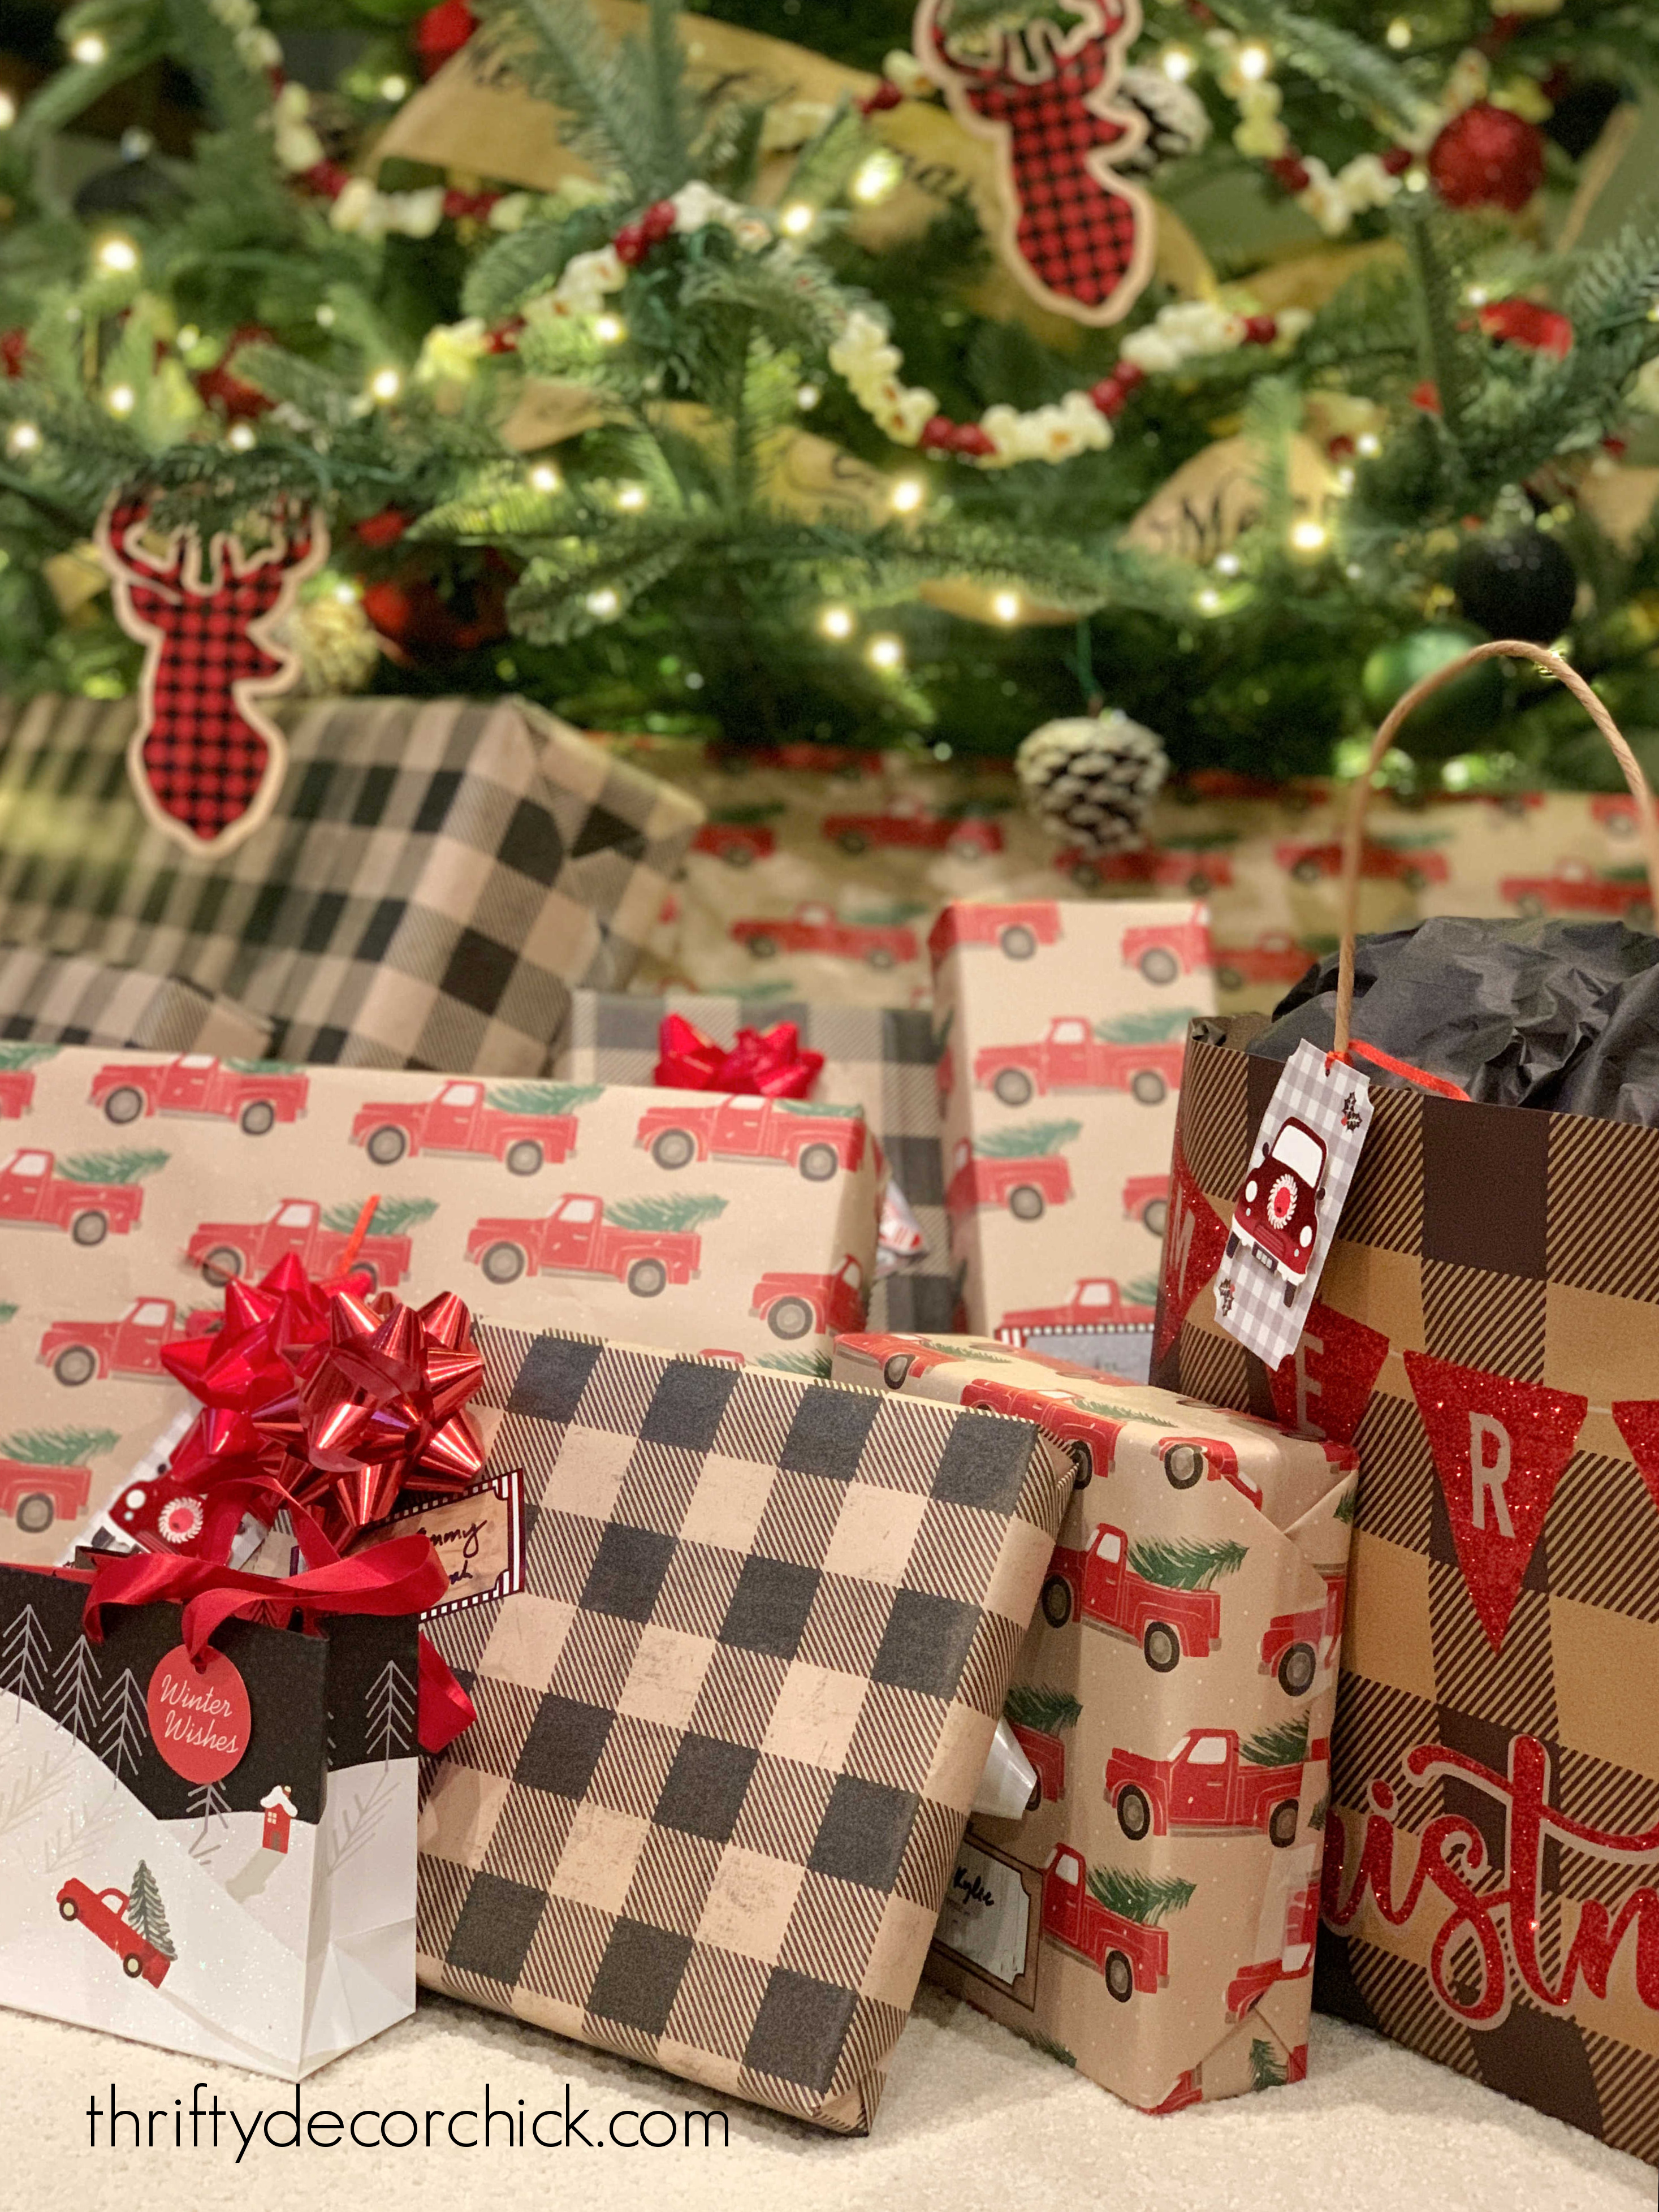
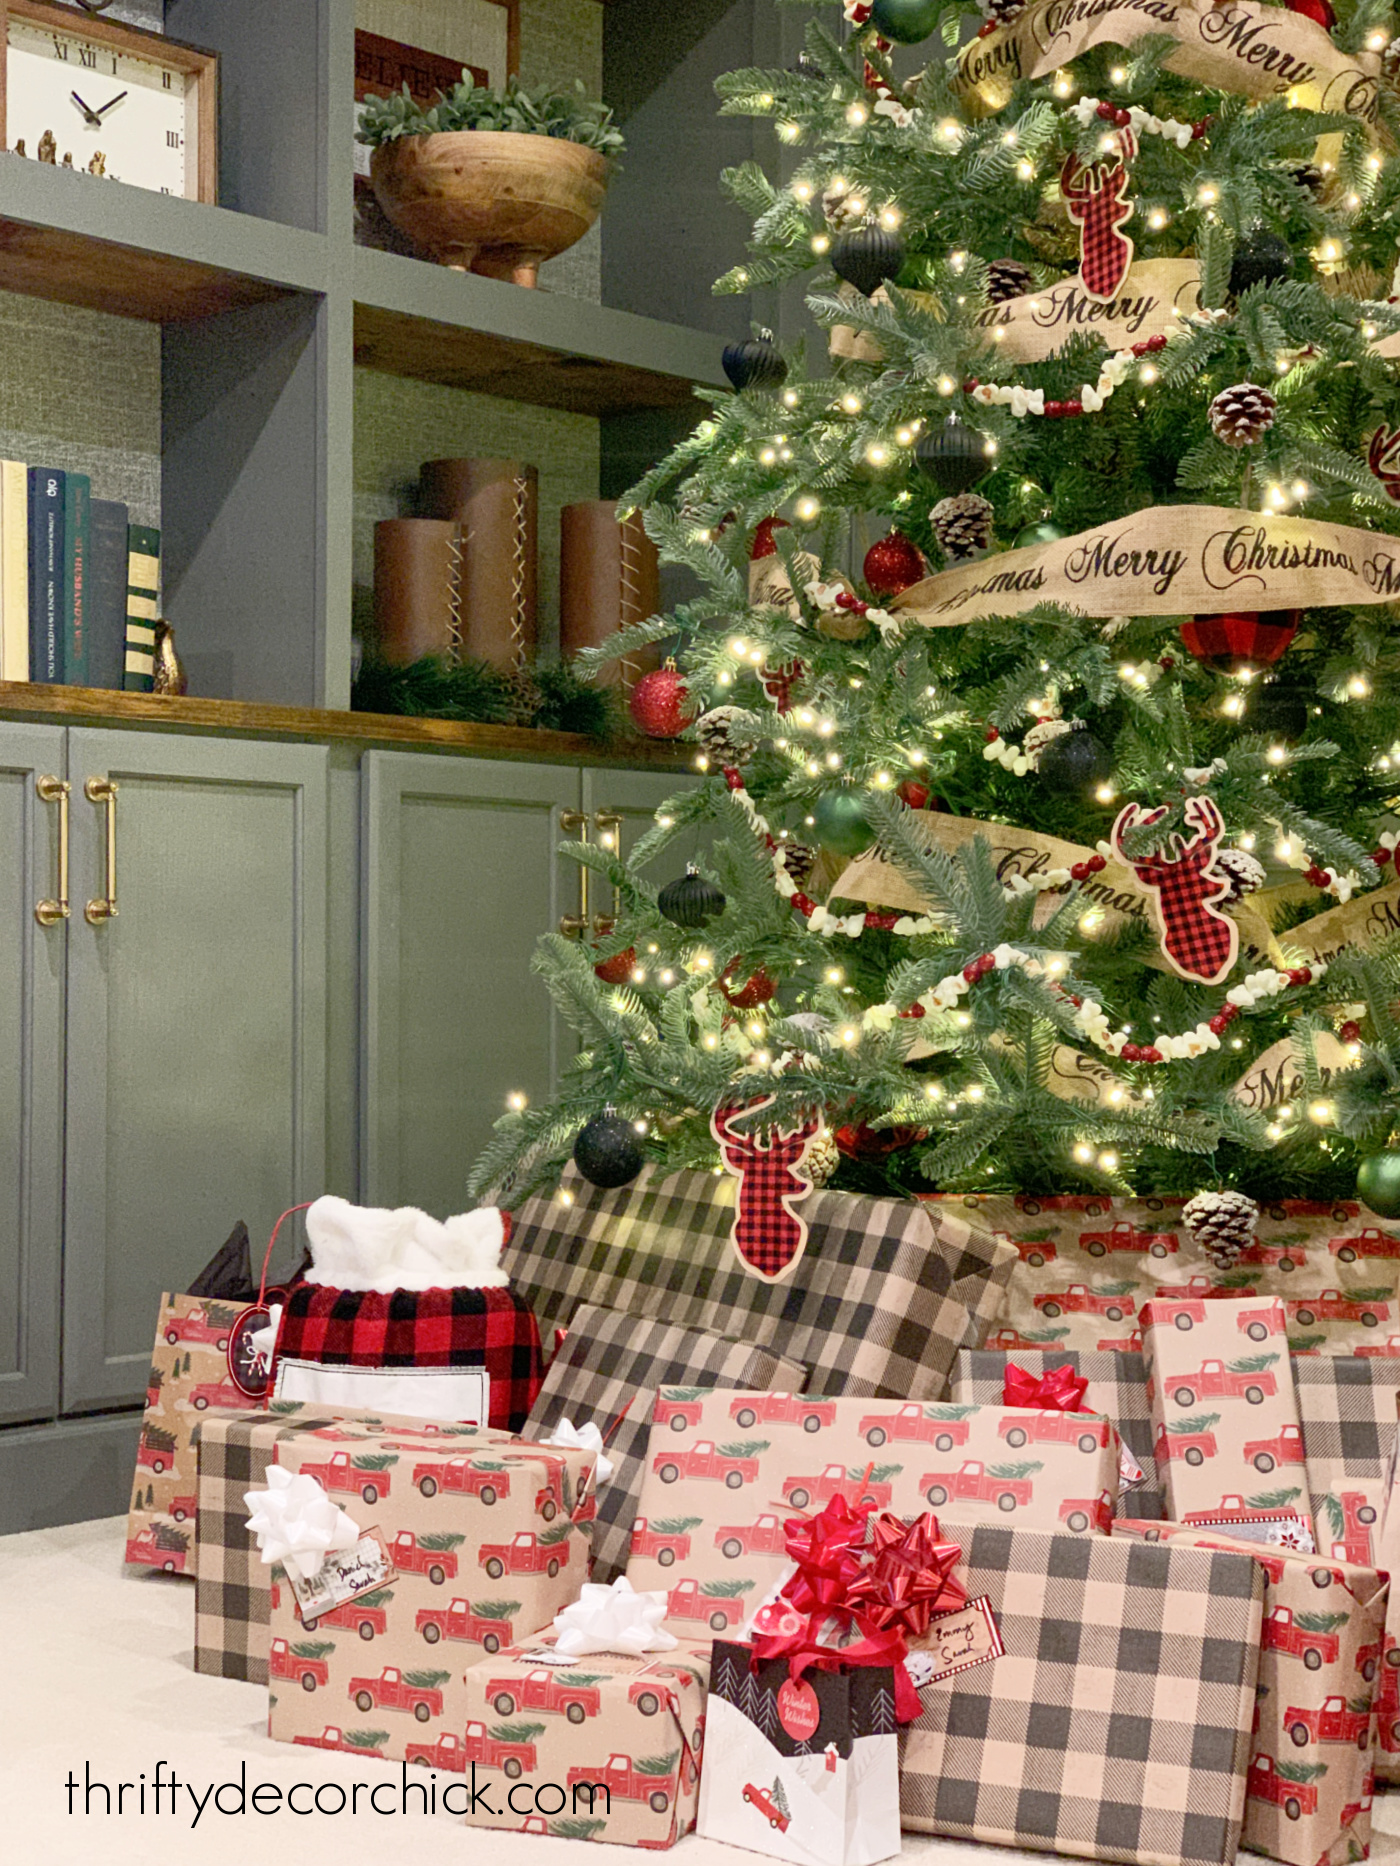
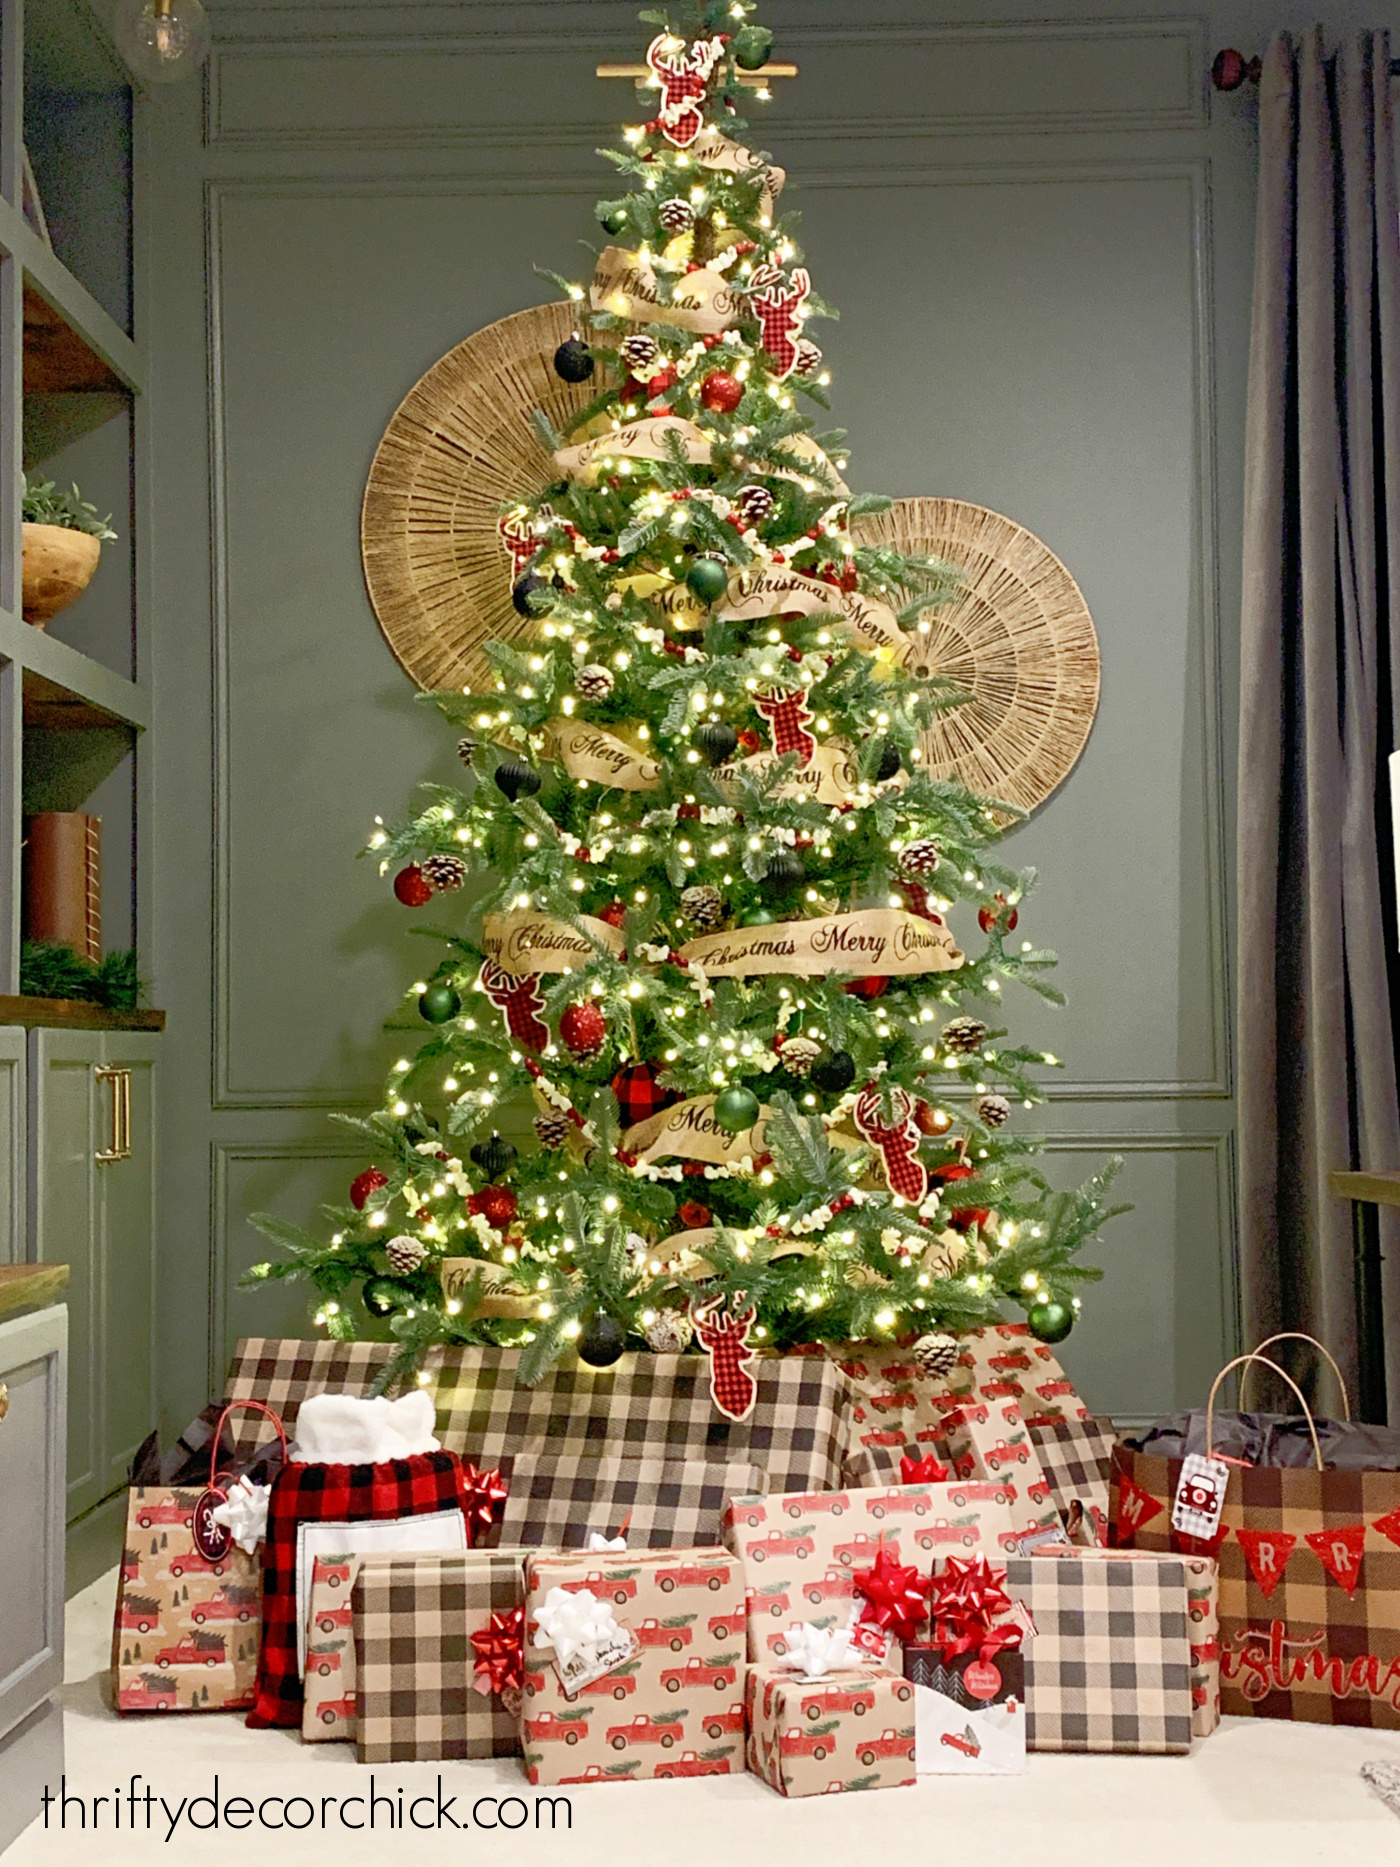
Our basement is so cozy this Christmas after all of the updates I've made this year. I've been wrapping all of the gifts down here because I love this space so much!
I used red, green and black ornaments on the tree, and I love that the wrapping matches! SO pretty!:
If you're looking for some last minute gifts that won't break the bank, run to your nearest Big Lots and check out their incredible selection!
This post sponsored by Big Lots but all opinions are my own.
I only work with companies I know, love and genuinely recommend to you.
Never miss a post by signing up to get posts via email.
Via https://www.thriftydecorchick.com/2021/12/last-minute-Christmas-gift-ideas.html How to make your own DIY Christmas wood sign using craft letters.
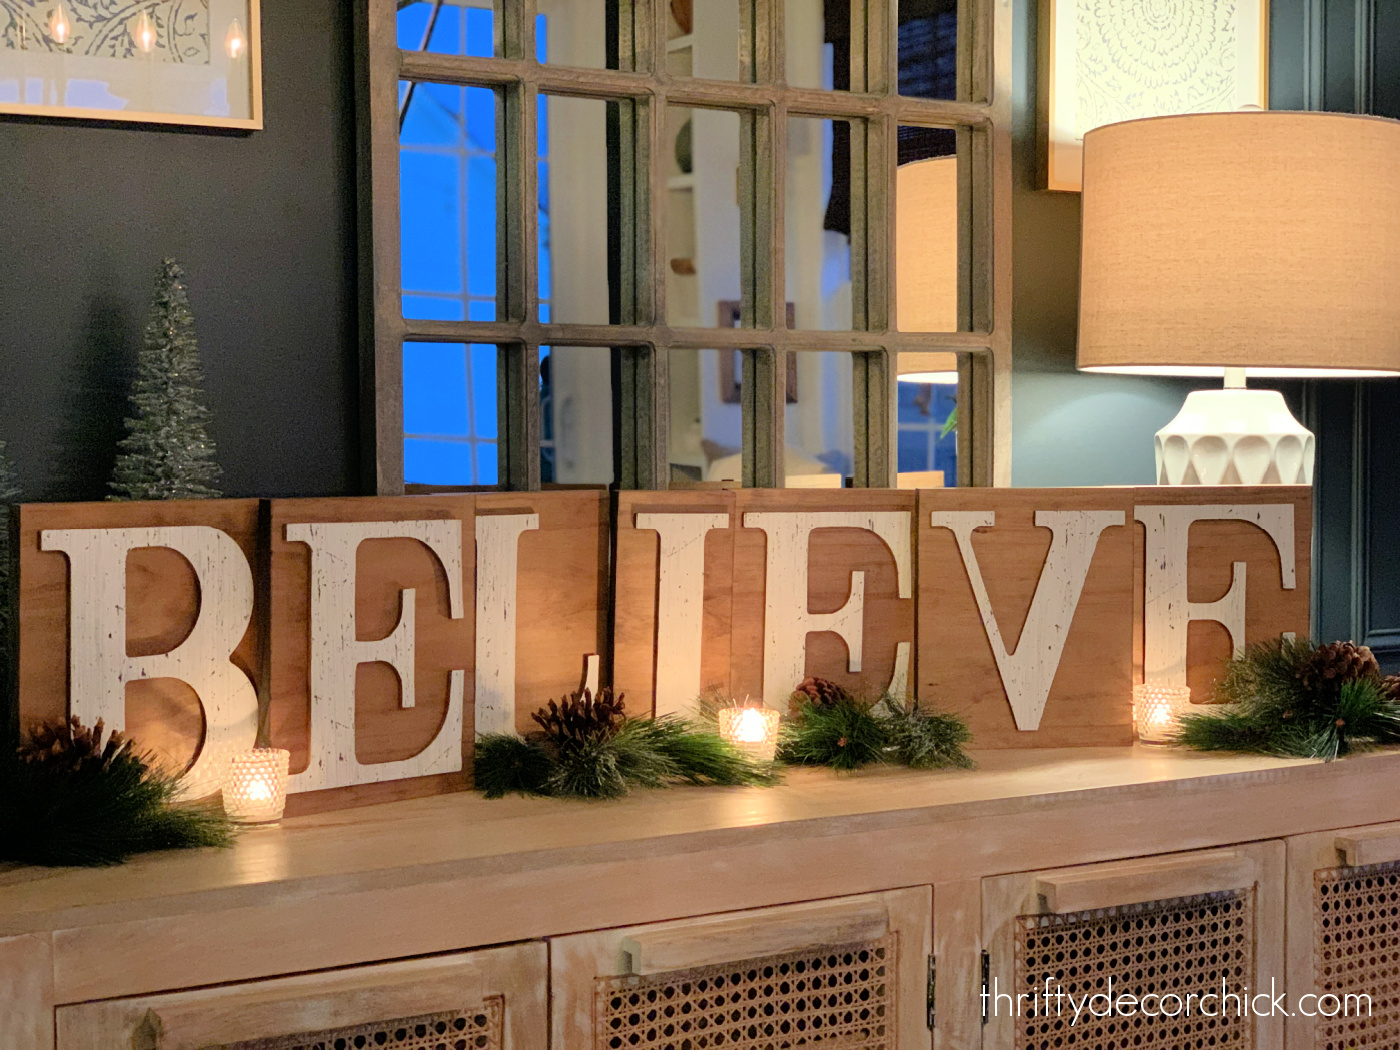
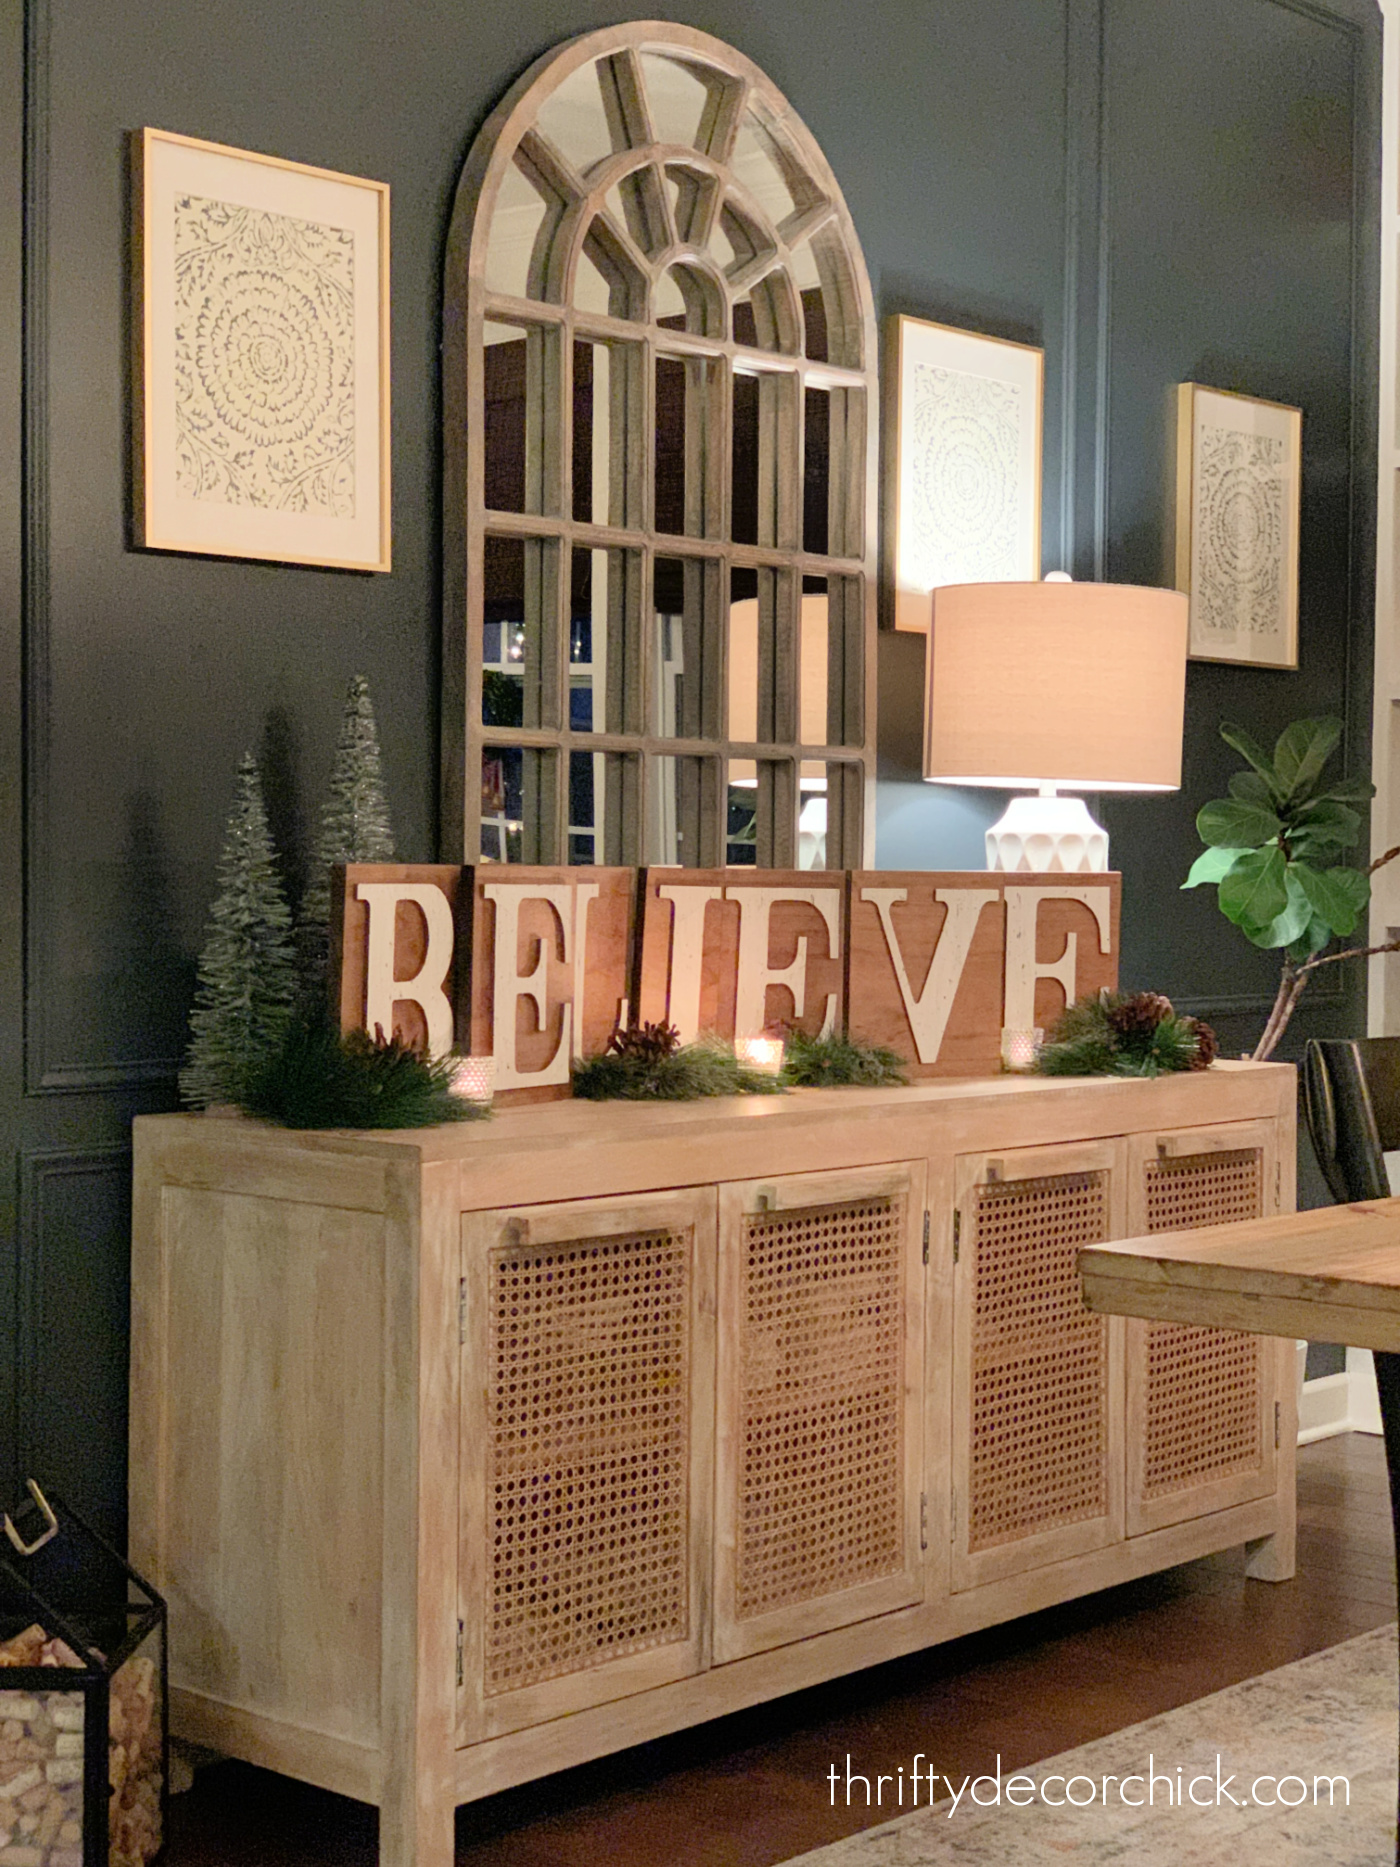
I used inexpensive craft store letters to make this pretty "BELIEVE" wood art. This project is so easy to customize for your own holiday decor!
These cute DIY Christmas letters have been a long time coming! I've had these chip board letters that spell out "believe" for years...I think it's been almost ten years now.
I've held on to them figuring I would come up with a cute idea for them...one day:
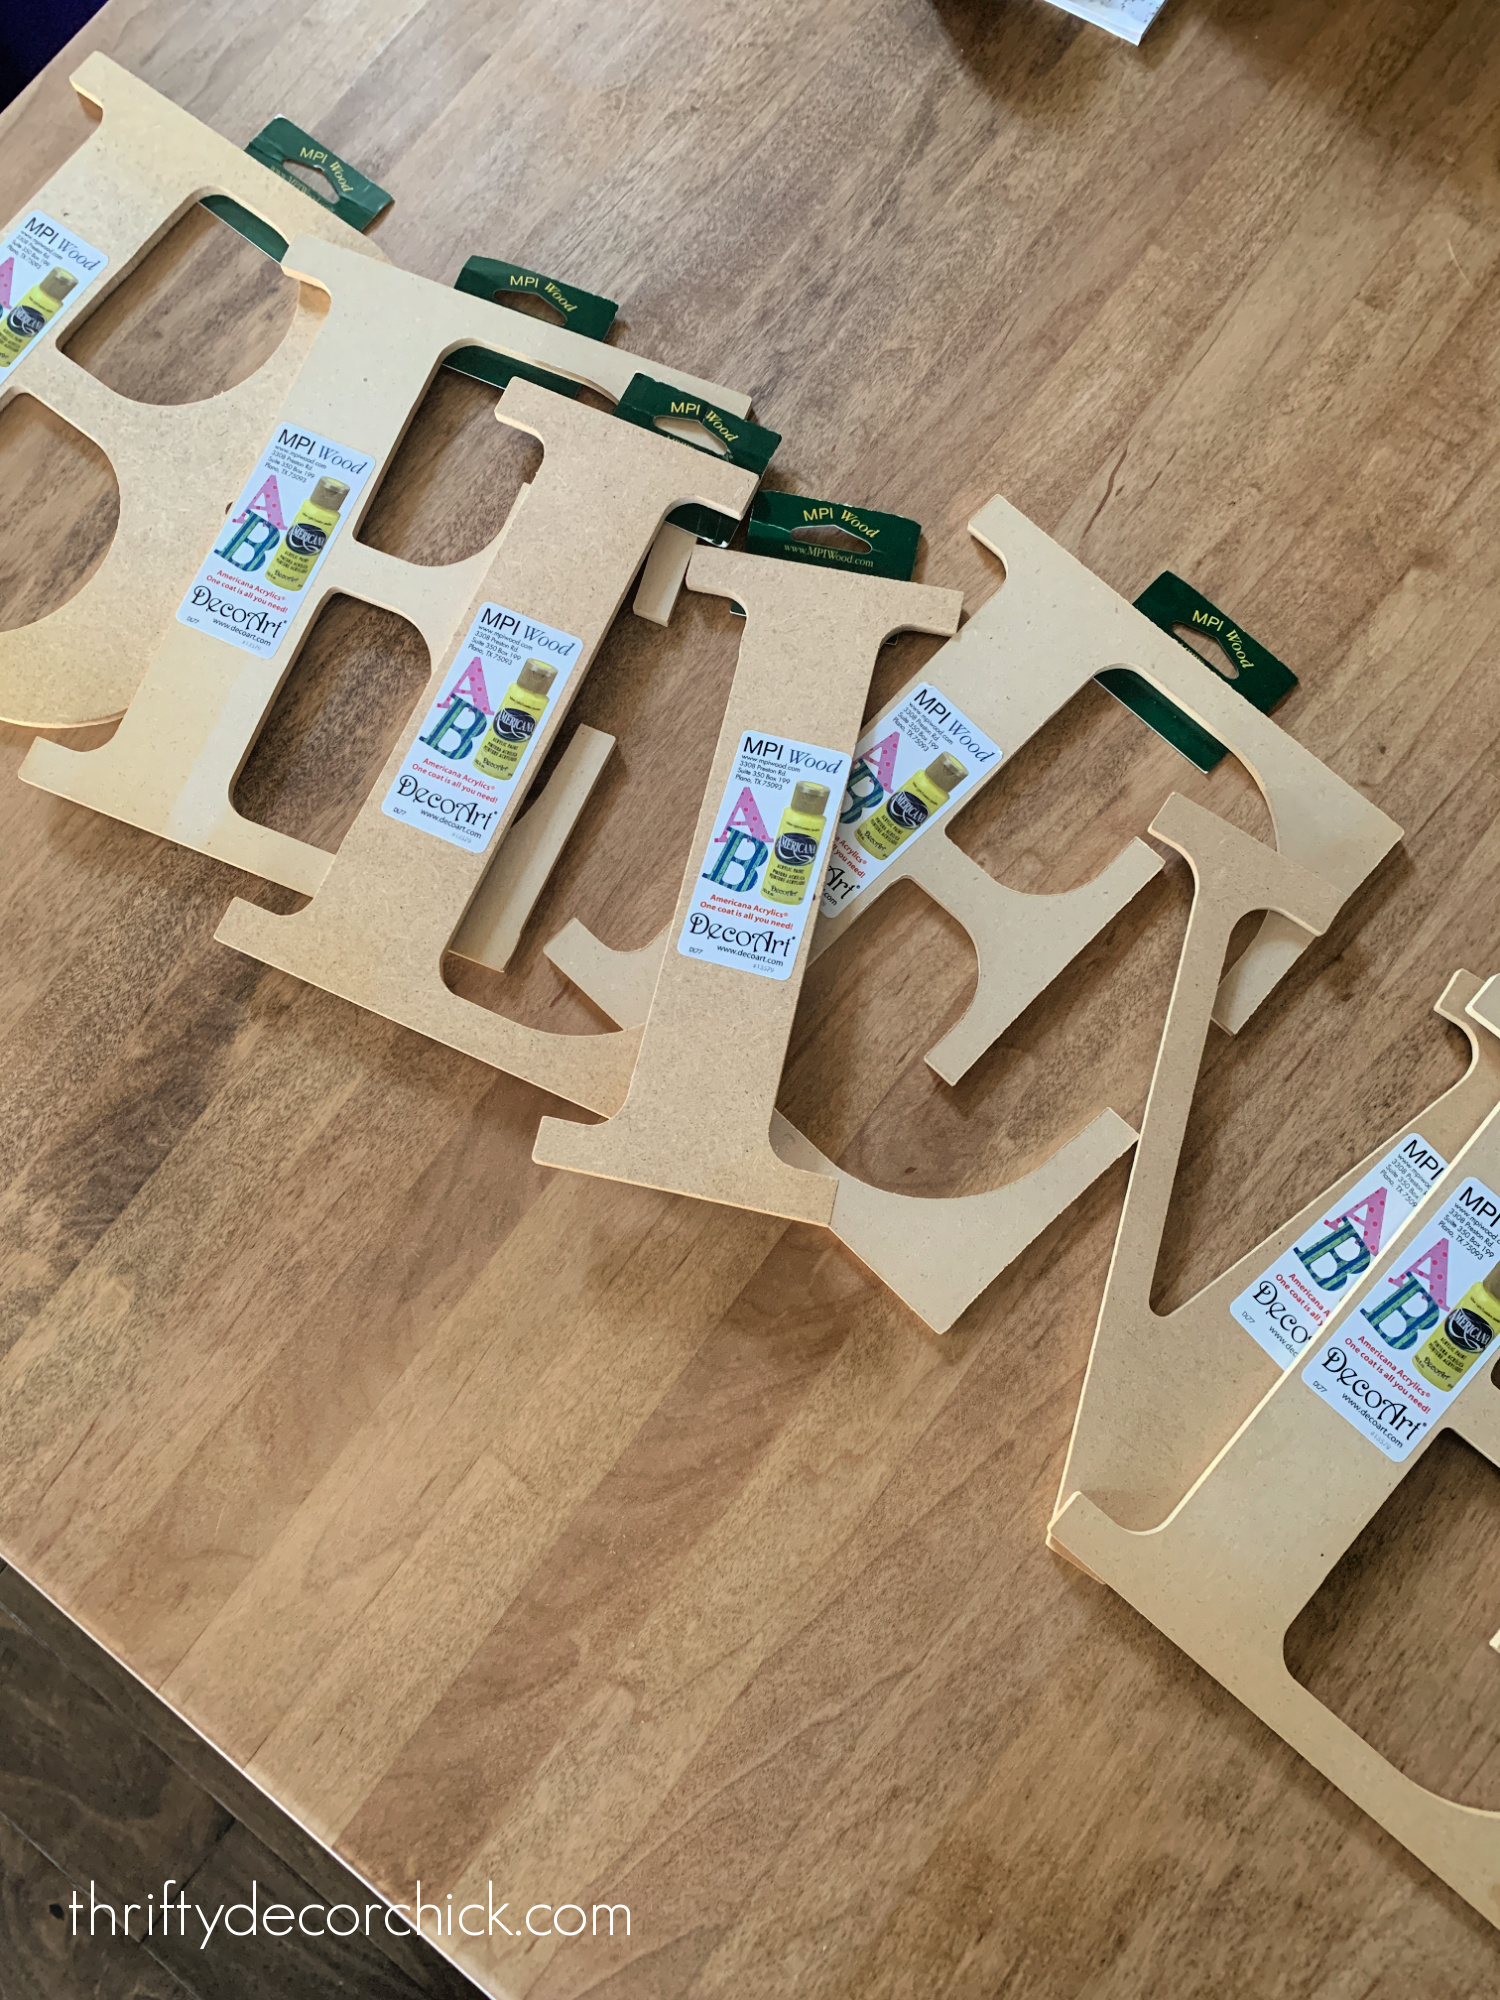
You can find these wood letters at most craft stores -- they usually come in a few different sizes and fonts.
I got these for a couple bucks each (a decade ago ?), but I'm guessing I got them half off!
Because it had been so long, the labels wouldn't budge. If you ever have a problem removing a sticky label, a hot shot with a hair dryer will loosen it for you:

This post may contain affiliate links for your convenience.
See my policies and disclosure page for more information.
My goal was to NOT visit the hardware store for this whole project, so I had to get creative with my supplies.
I found these wood shelves from our kitchen in my scrap pile:
I recently replaced those with these thicker floating shelves and tile:

I love the color of them! The wood stain is called Provincial.
I wanted the look of this project to be fairly neutral -- I found a red spray paint in my stash but it wasn't look I wanted.
I tried a glossy white paint, but it was too shiny and bright.
Then I found one of my old favorite spray paint colors, Heirloom from Rustoleum. I decided to go with that one...then the nozzle died.
Went back to the white...that nozzle died.
Tried the red one more time...that one did as well.
Cool, cool.
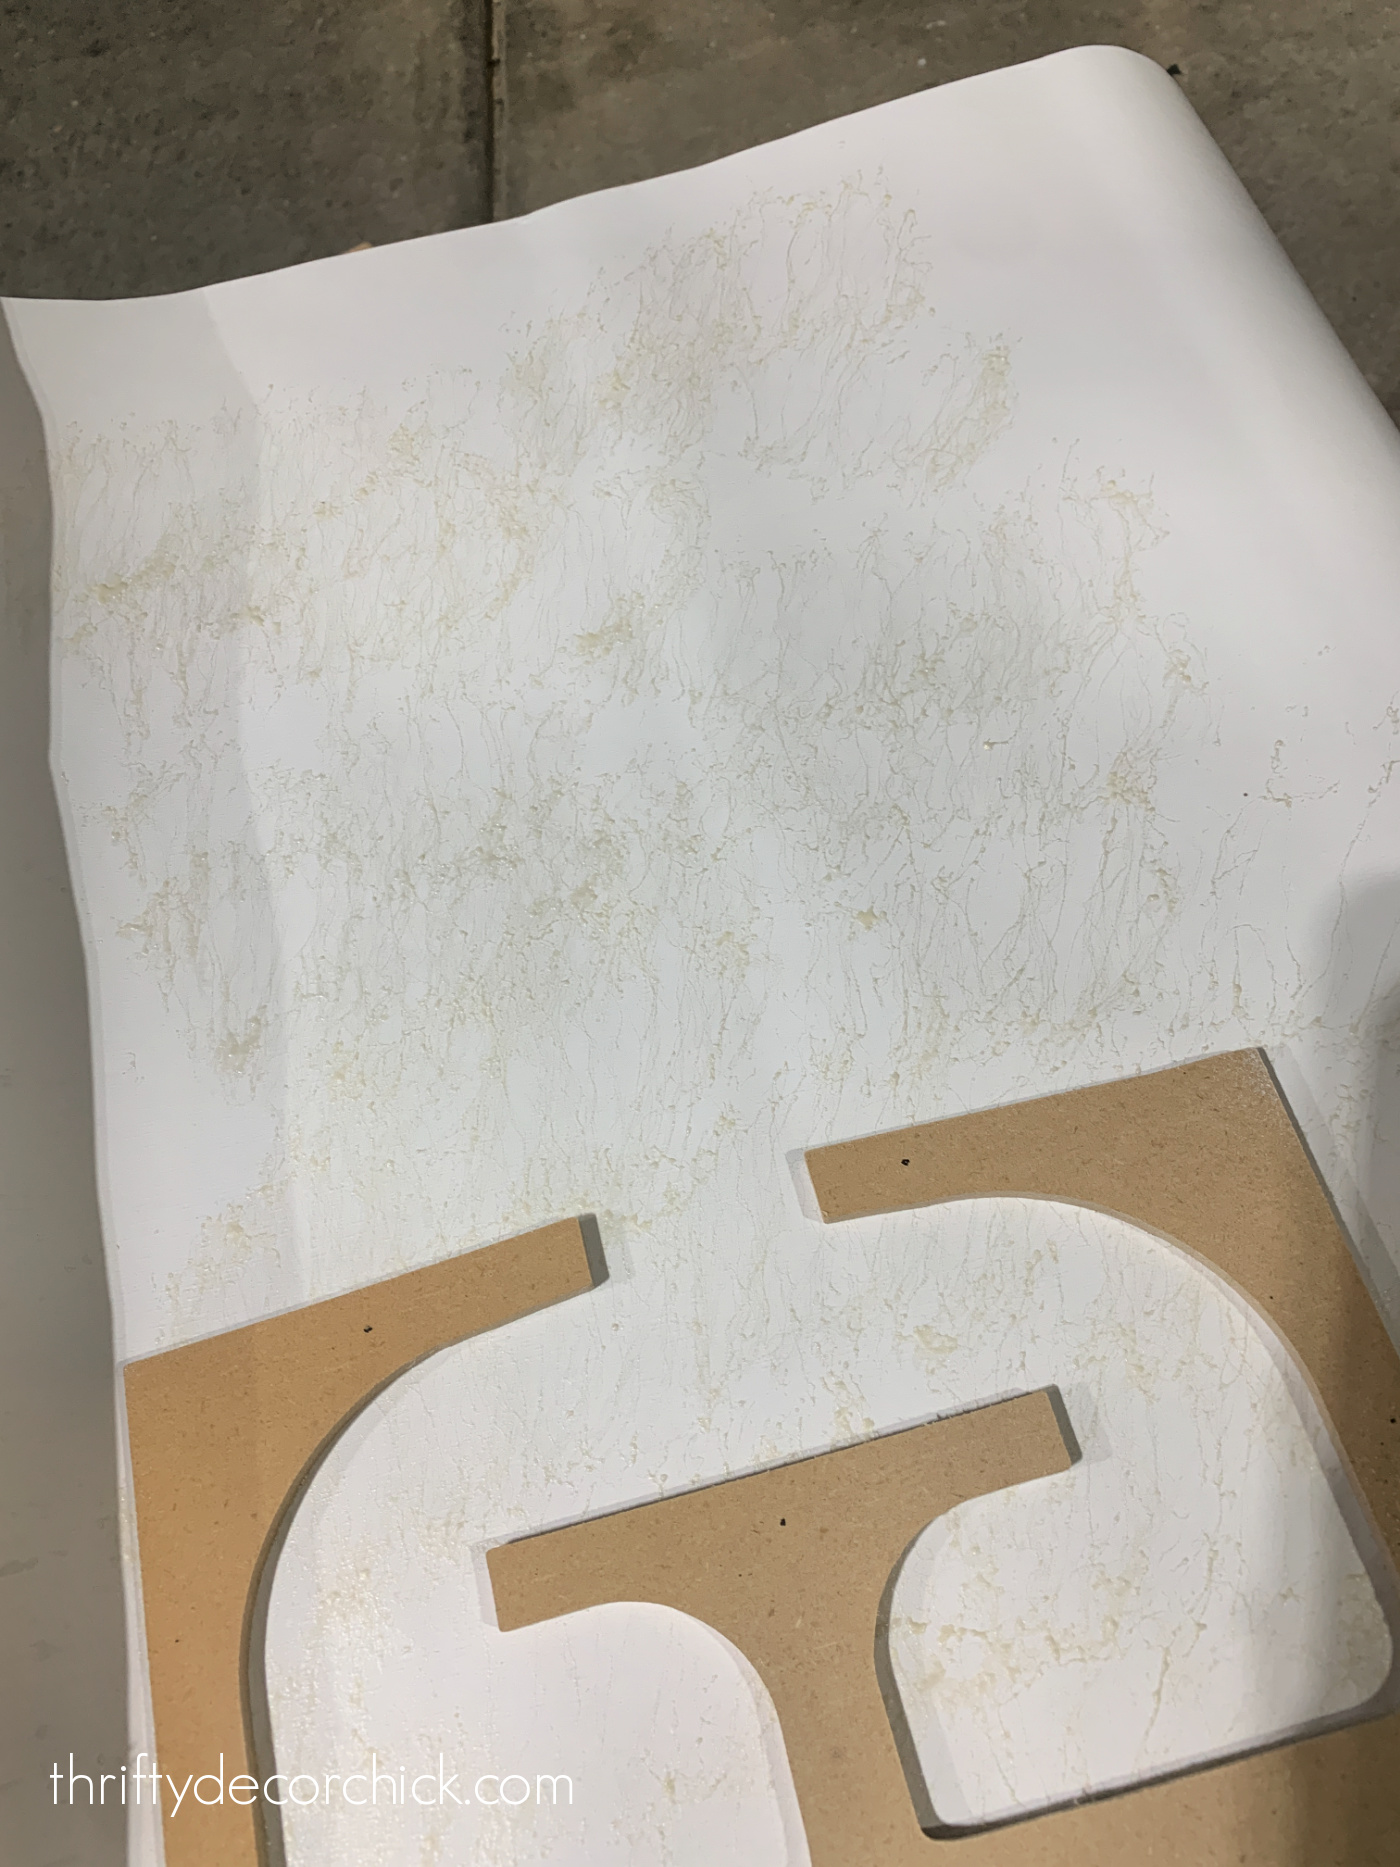
I decided to dump the spray paint idea and found something even better -- the birch wrapping paper I recently showed you when I shared my DIY glass candleholder projects.
I grabbed my favorite spray adhesive:

And sprayed the front of the letters with it:

You can see how thick this adhesive is -- but it doesn't leave any bumpy texture under the paper.
To get the best adhesion, spray the back of the paper you're using as well:
I did my best to make sure the letters were straight to match the lines on the paper.
Press the wood letter face down onto the sticky paper and then push to make sure they connect well. You can put something heavy on top for a few minutes to ensure they stick.
It doesn't take long! This adhesive is STRONG!
If you don't have a spray adhesive, I would suggest Mod Podge over a regular glue.
Afterwards, you'll need to use a sharp razor blade to cut the paper around each letter:

I recommend these smaller X-acto knives -- they are the perfect size for getting the detailed spots!
I later touched up the sides of the letters with some brown paint -- I forgot, otherwise I'd usually do that first.
Then it was time to cut the wood kitchen shelves down to fit each letter.
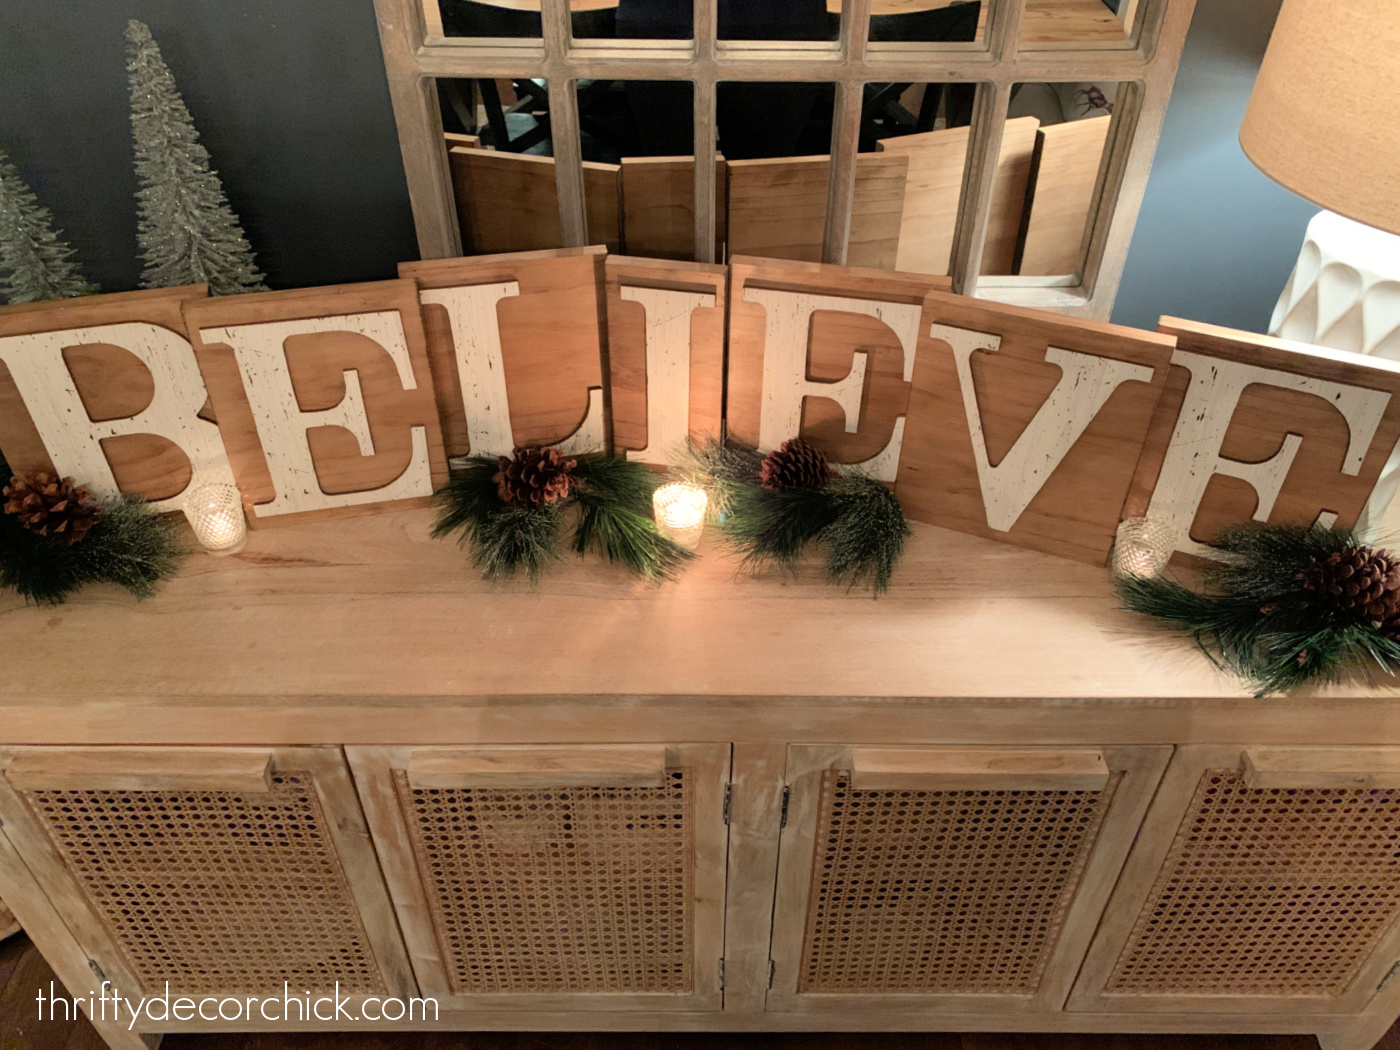
I wanted to be able to stagger the letters for some interest, so the wood slices were a different width for each one:

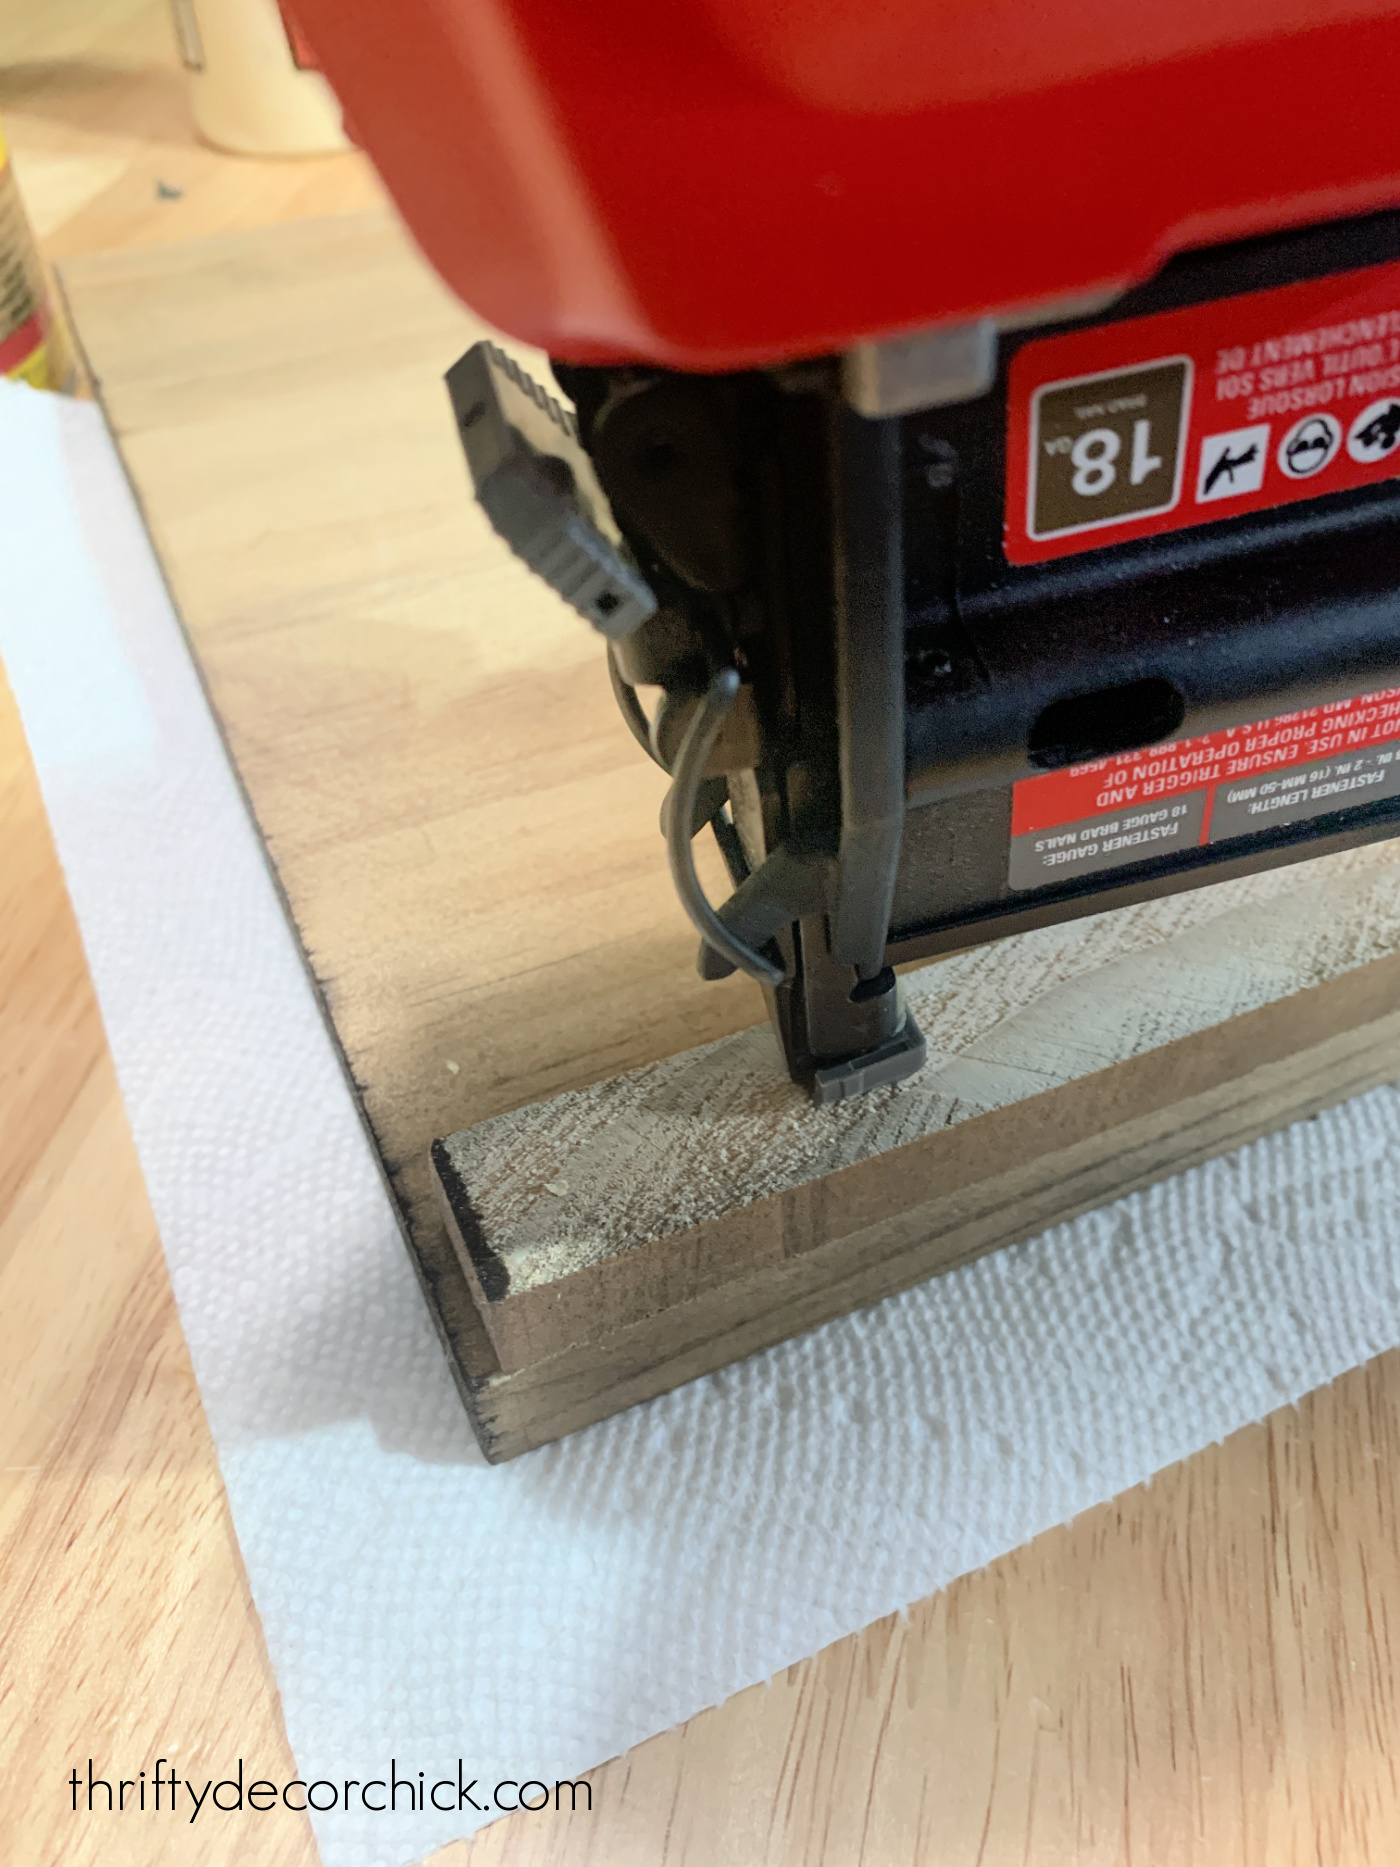
I added some wood glue on the back, but also put a couple short nails into them as well:

The glue gets slippery so the nails will hold the letter in place until it dries.
Hot glue would also work for this step!
The glue will dry clear, but I did wipe away big globs with a wet rag.
I knew these wouldn't stand up on their own, so I cut thin strips from the same wood and attached them to the back on the bottom:
This gives the boards some stability so you can stand them up!
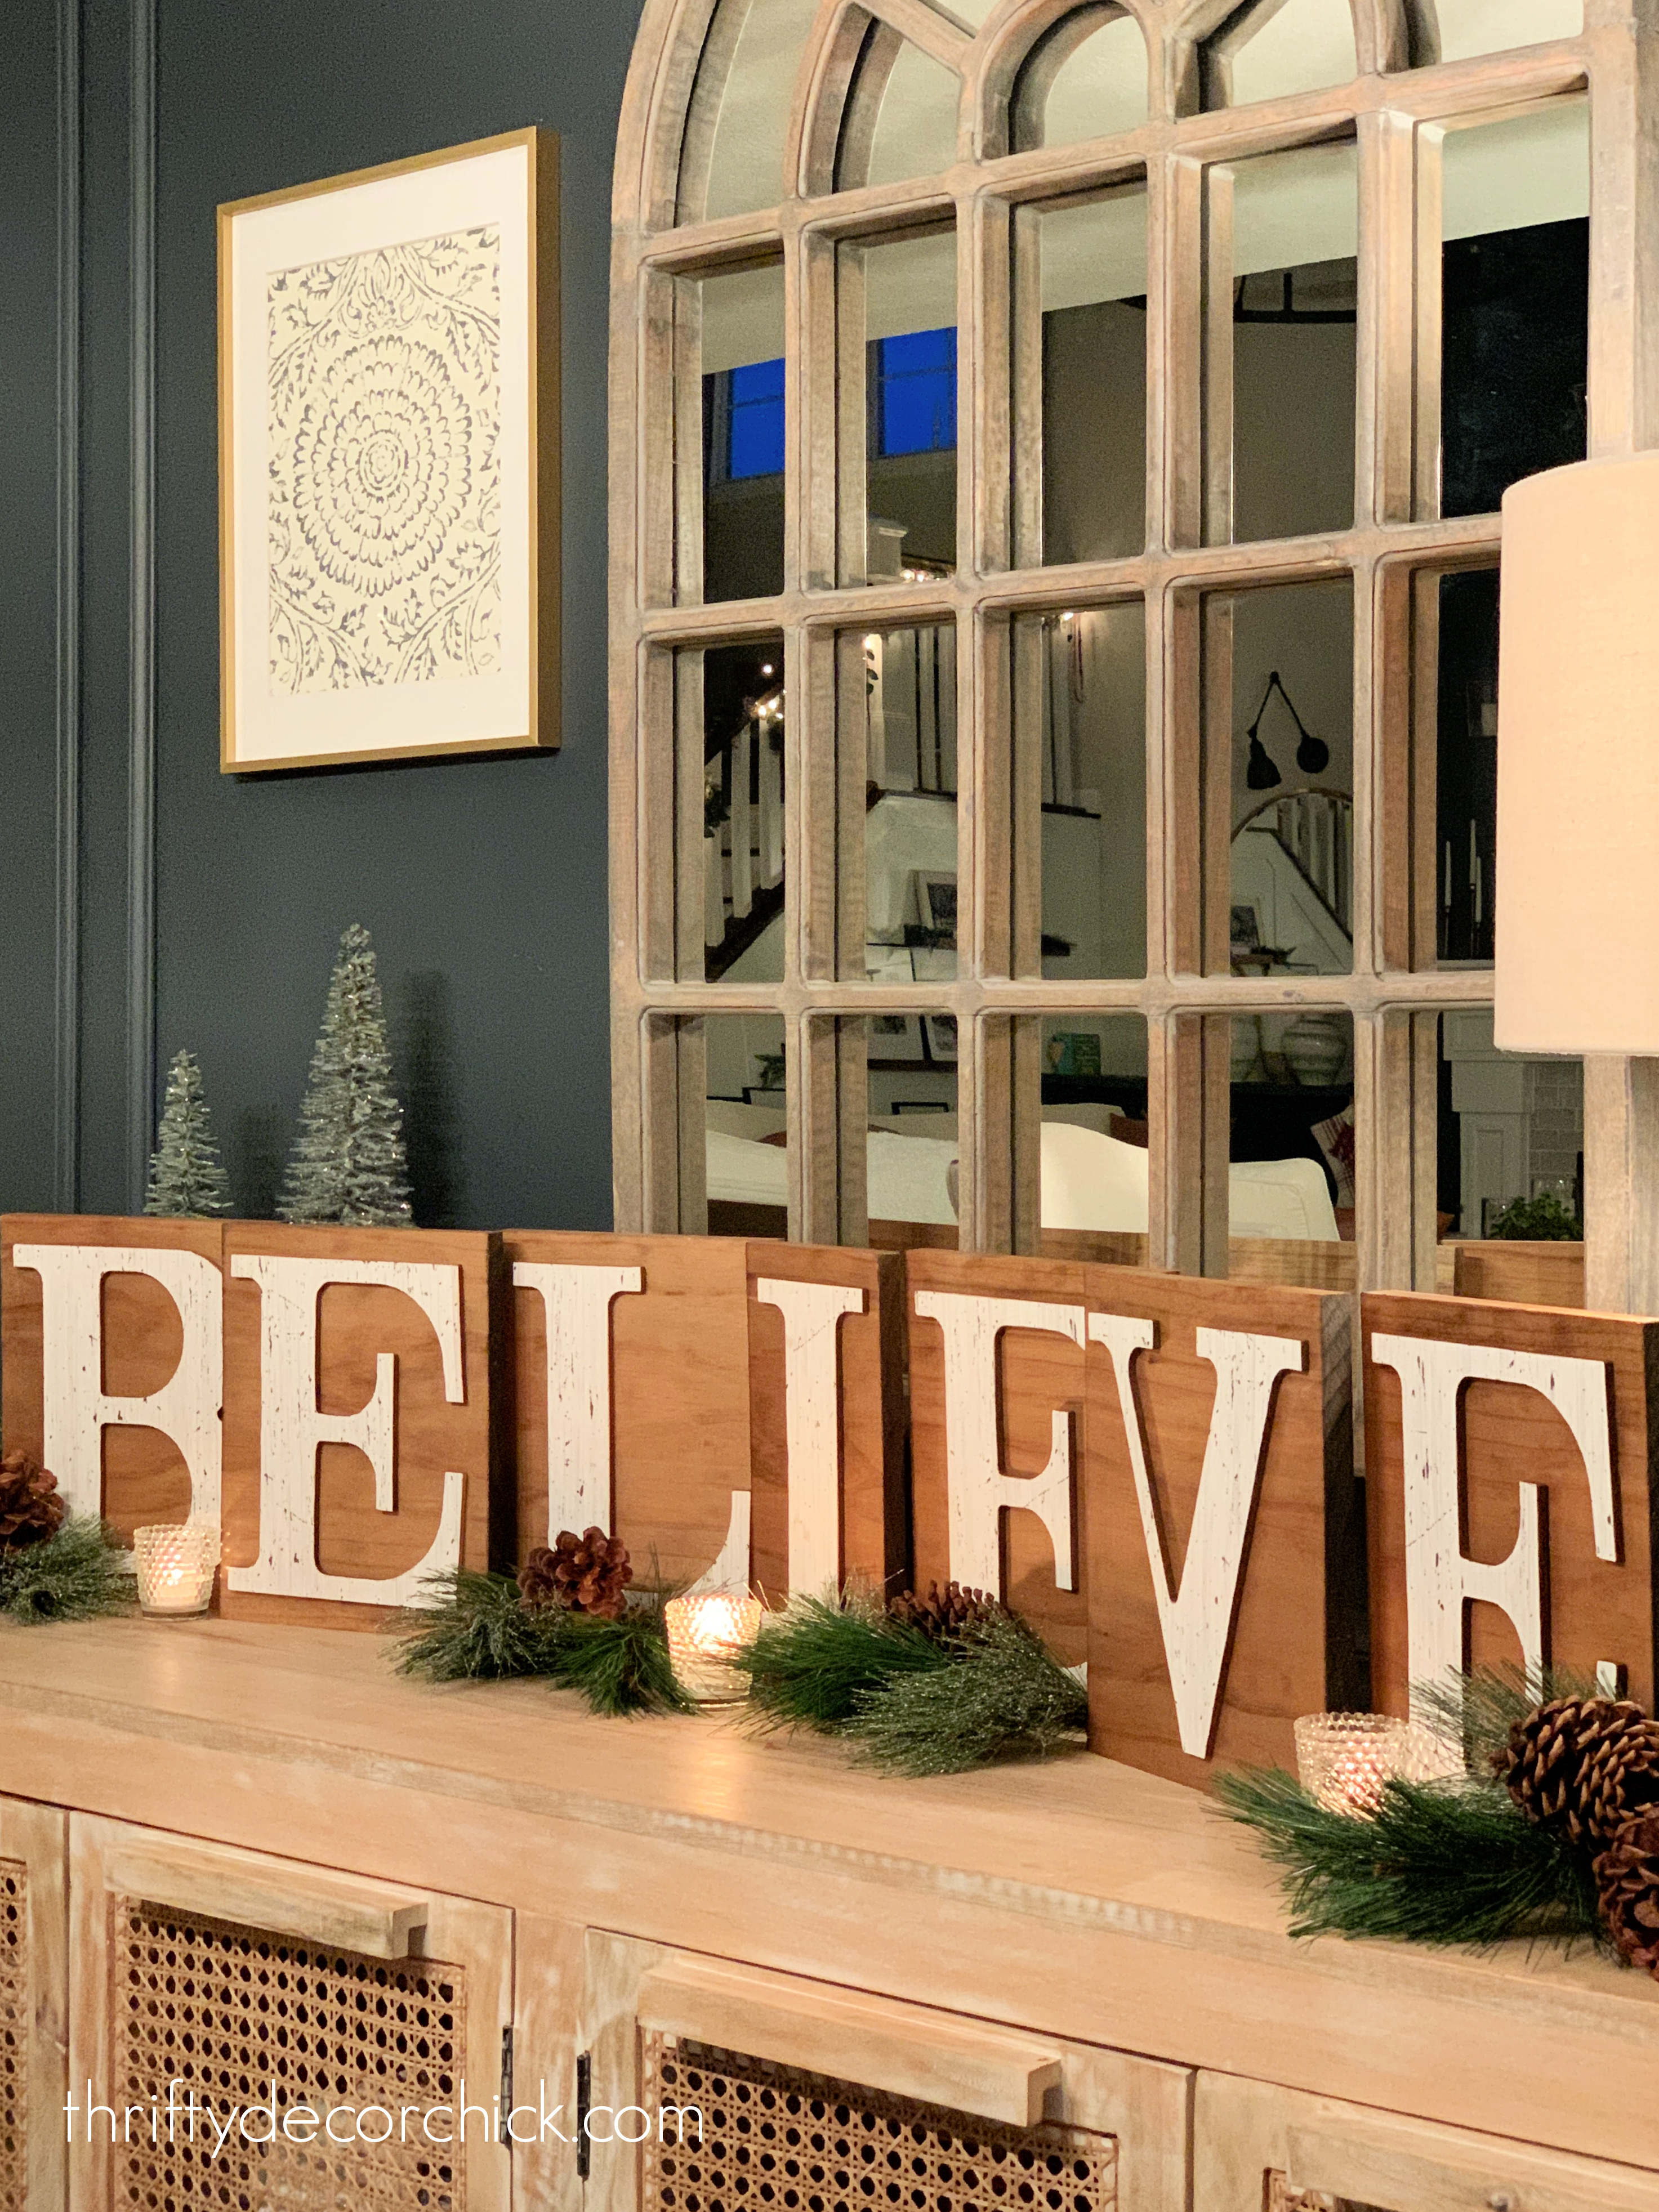
They turned out even better than I thought they would! The wood tone and birch paper give them just the neutral vibe I was going for:

I layered them on our dining room console table:
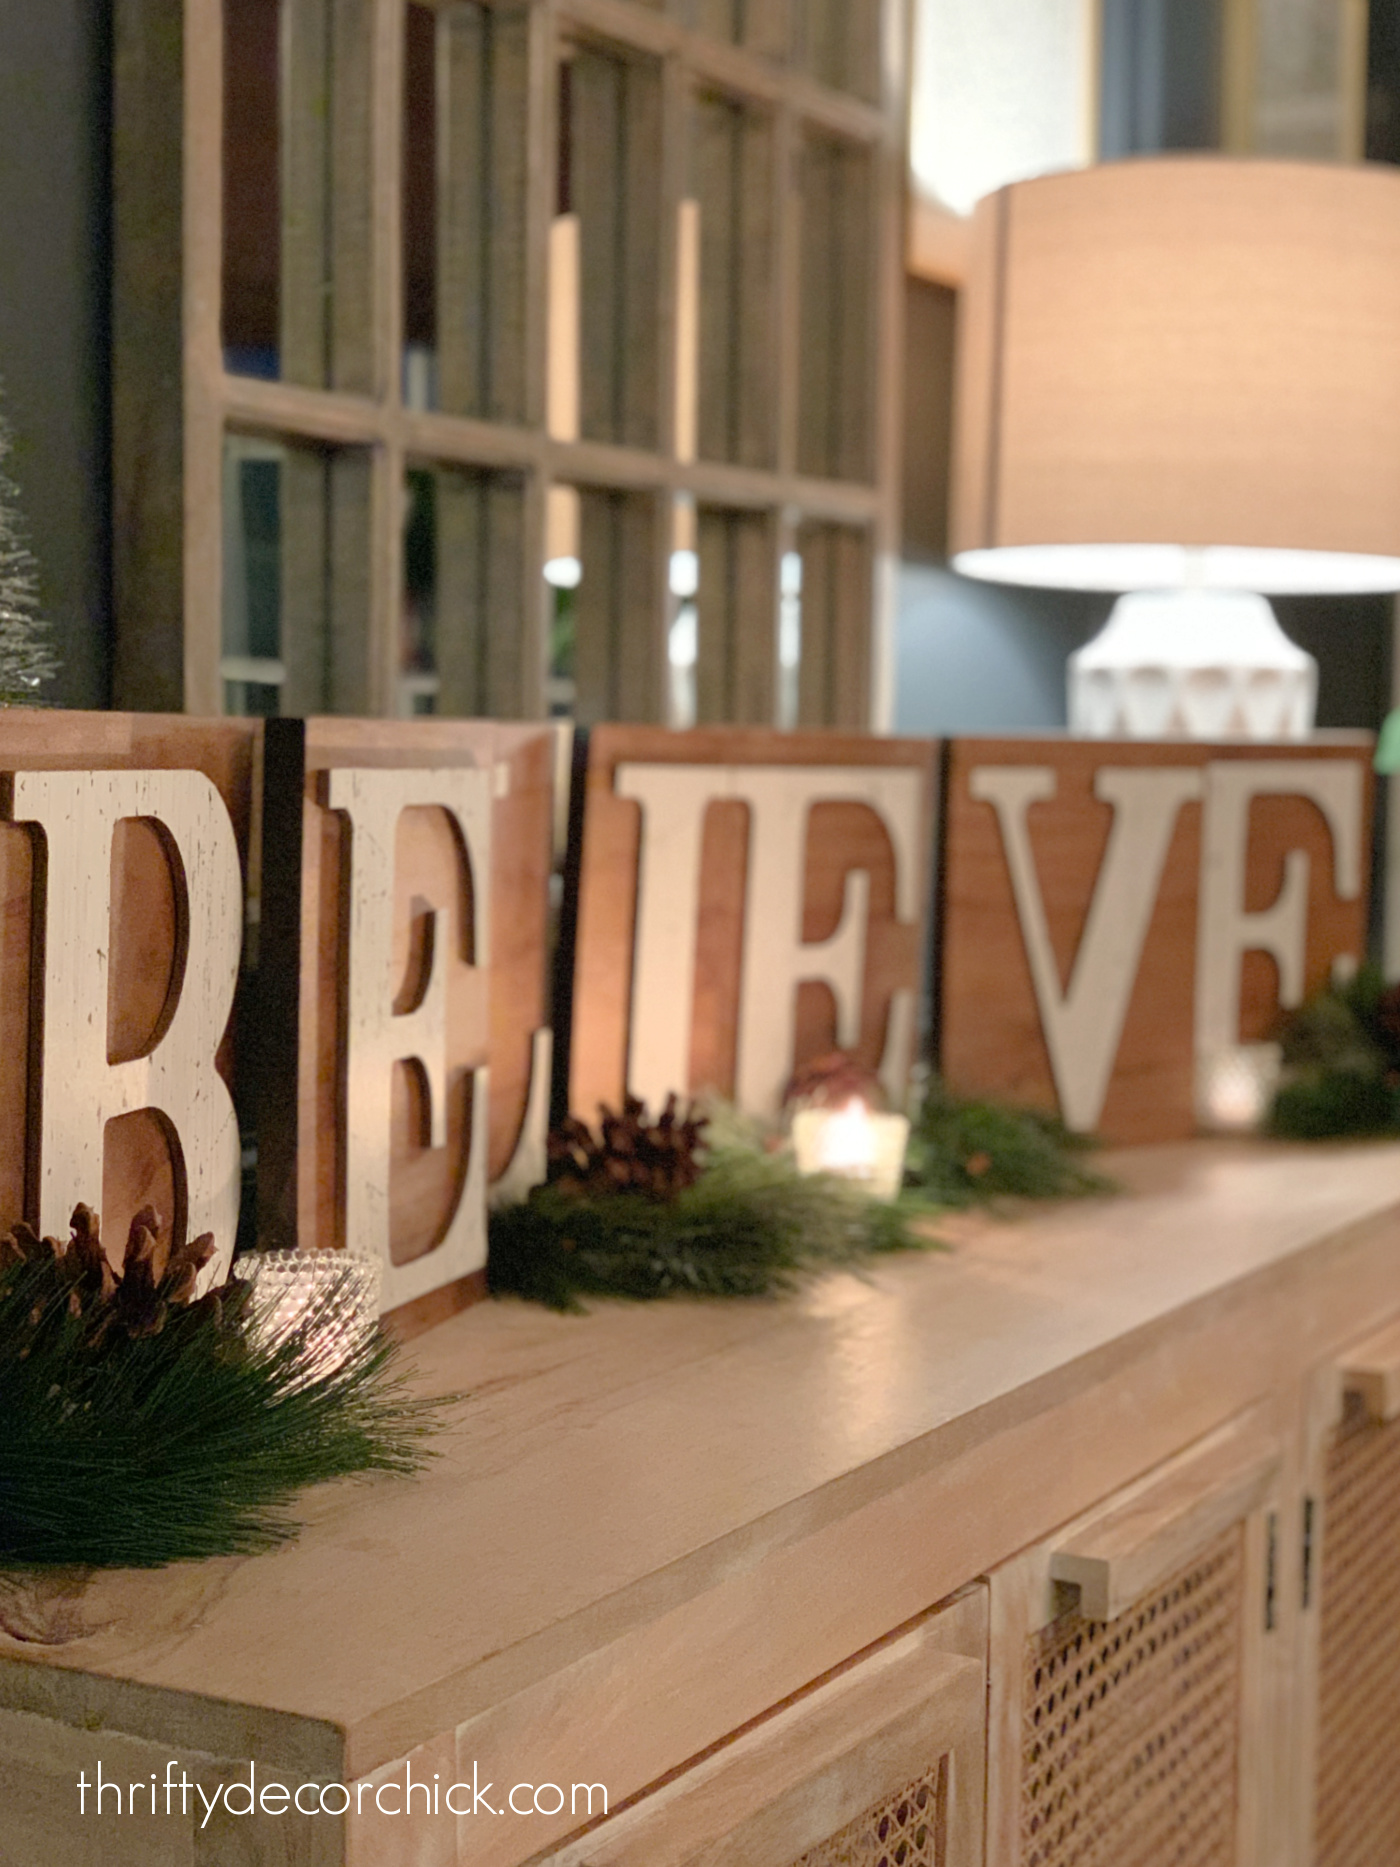
The votive candles and greenery are the perfect additions with the new sign!:
I was going to put these on our mantel this year, but didn't make them in time. :)
I think they would look SO cute up there though! They would also look great on a kitchen counter or hall table as well.
I love that their subdued look will work anywhere in the house:
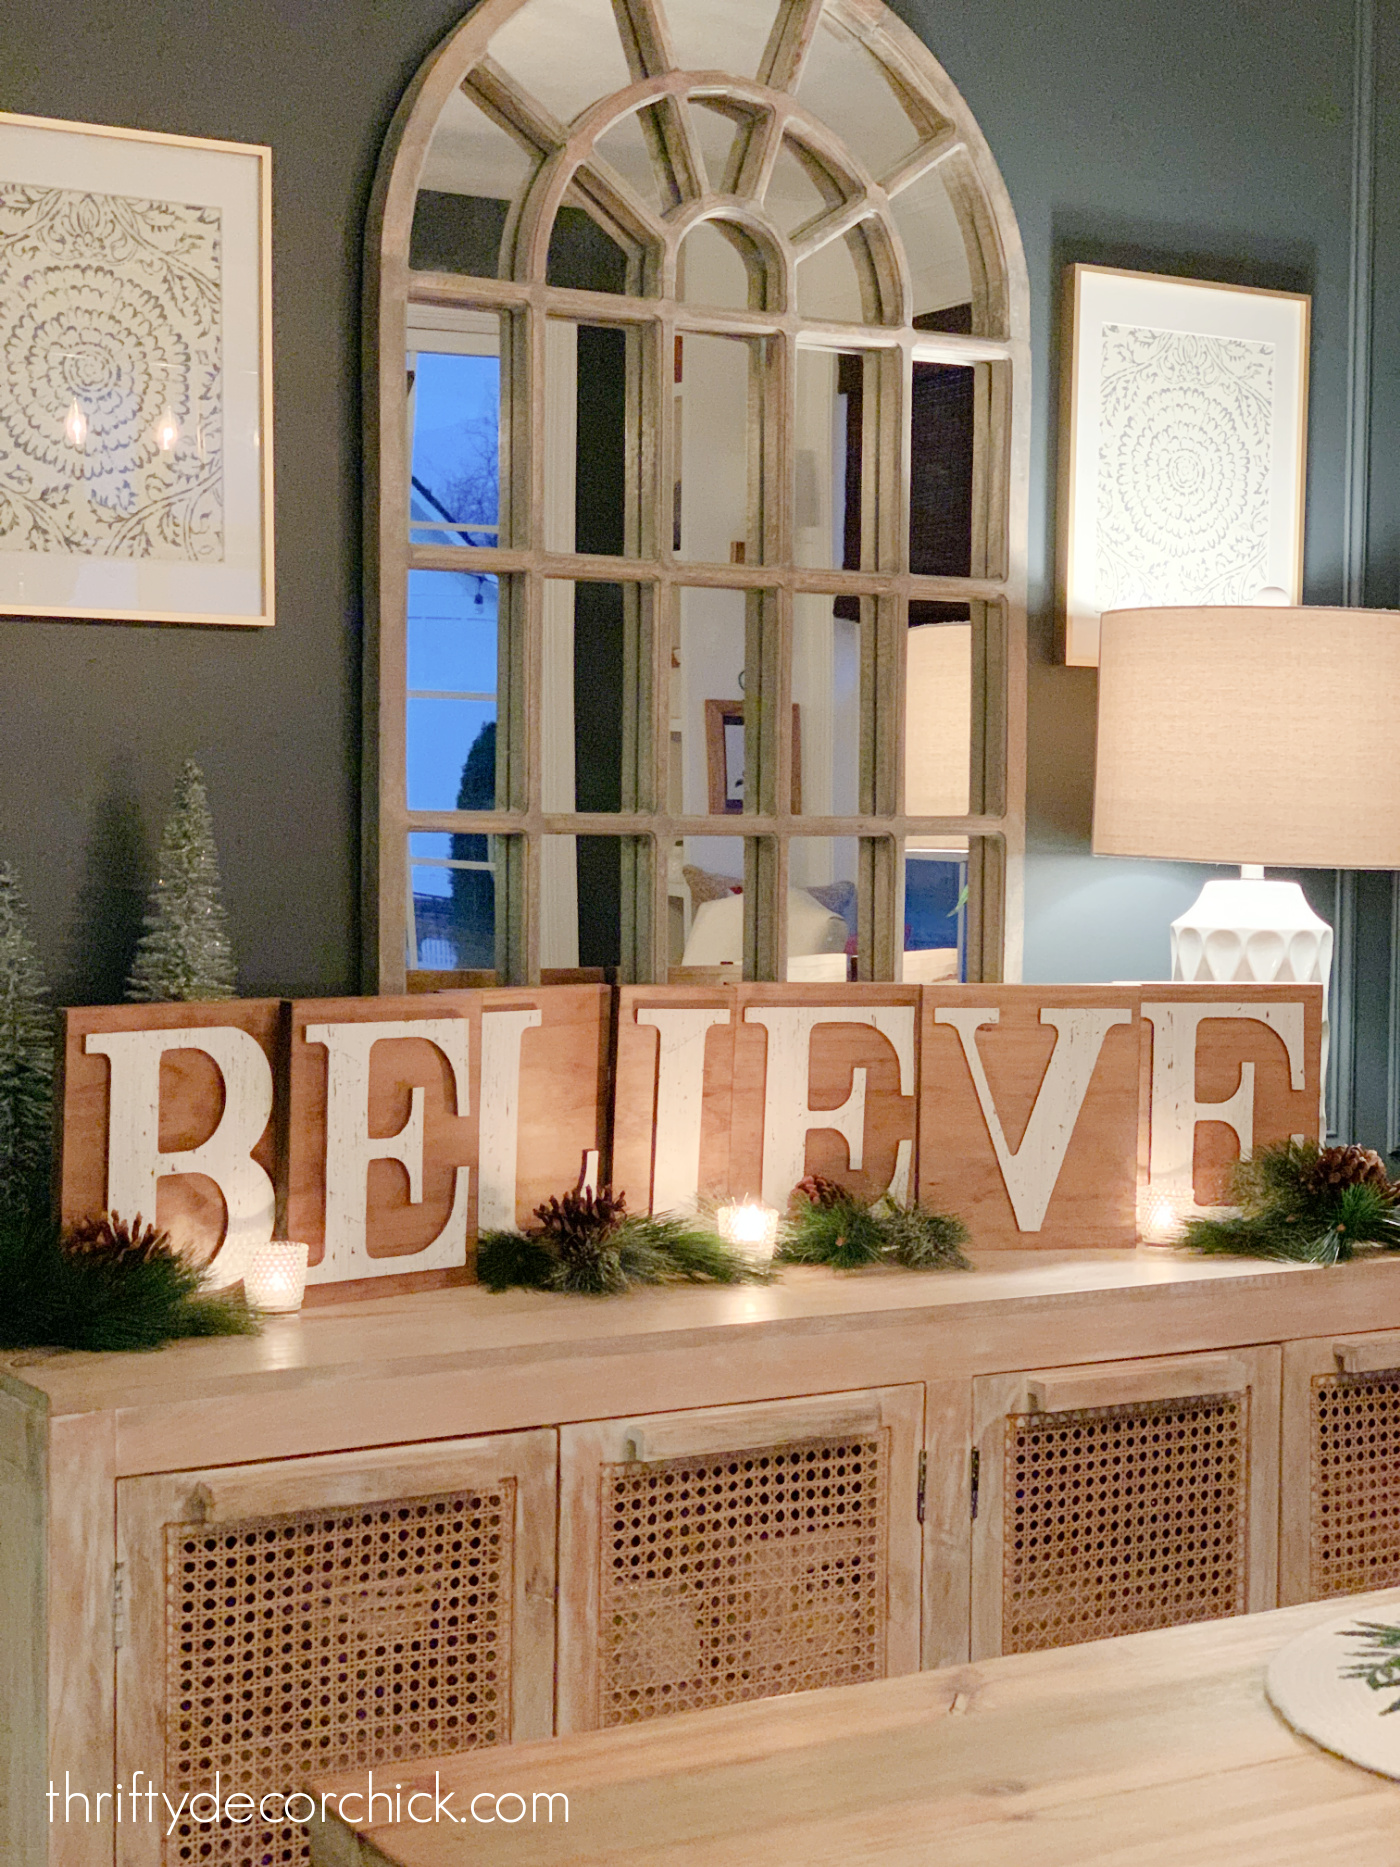
I went super simple in our dining room this year -- just some wreaths in the windows and cute Christmas pillows on the window seat:

Of course these DIY Christmas letters could be changed up SO many ways.
You could paint your wood pieces any color and add pattern or sparkle with the paper.
A red background with white sparkling scrapbook paper would be so fun!
You could use patterned holiday craft paper or wrapping paper, or just use spray paint like I was planning to do.
But I do love the simplicity of the light stain and paper I used:
Have you tried a craft using these inexpensive chipboard letters? They are such a cute addition to your Christmas decor. I've used them many times over the years!
If this was a permanent addition to your decor, you could also skip adding the wood on the back and just hang these on the wall. They'd be extra cute hung with some ribbon or twine.
Check out my knock off Noel art tutorial using wood craft letters here!:

Never miss a post by signing up to get posts via email.
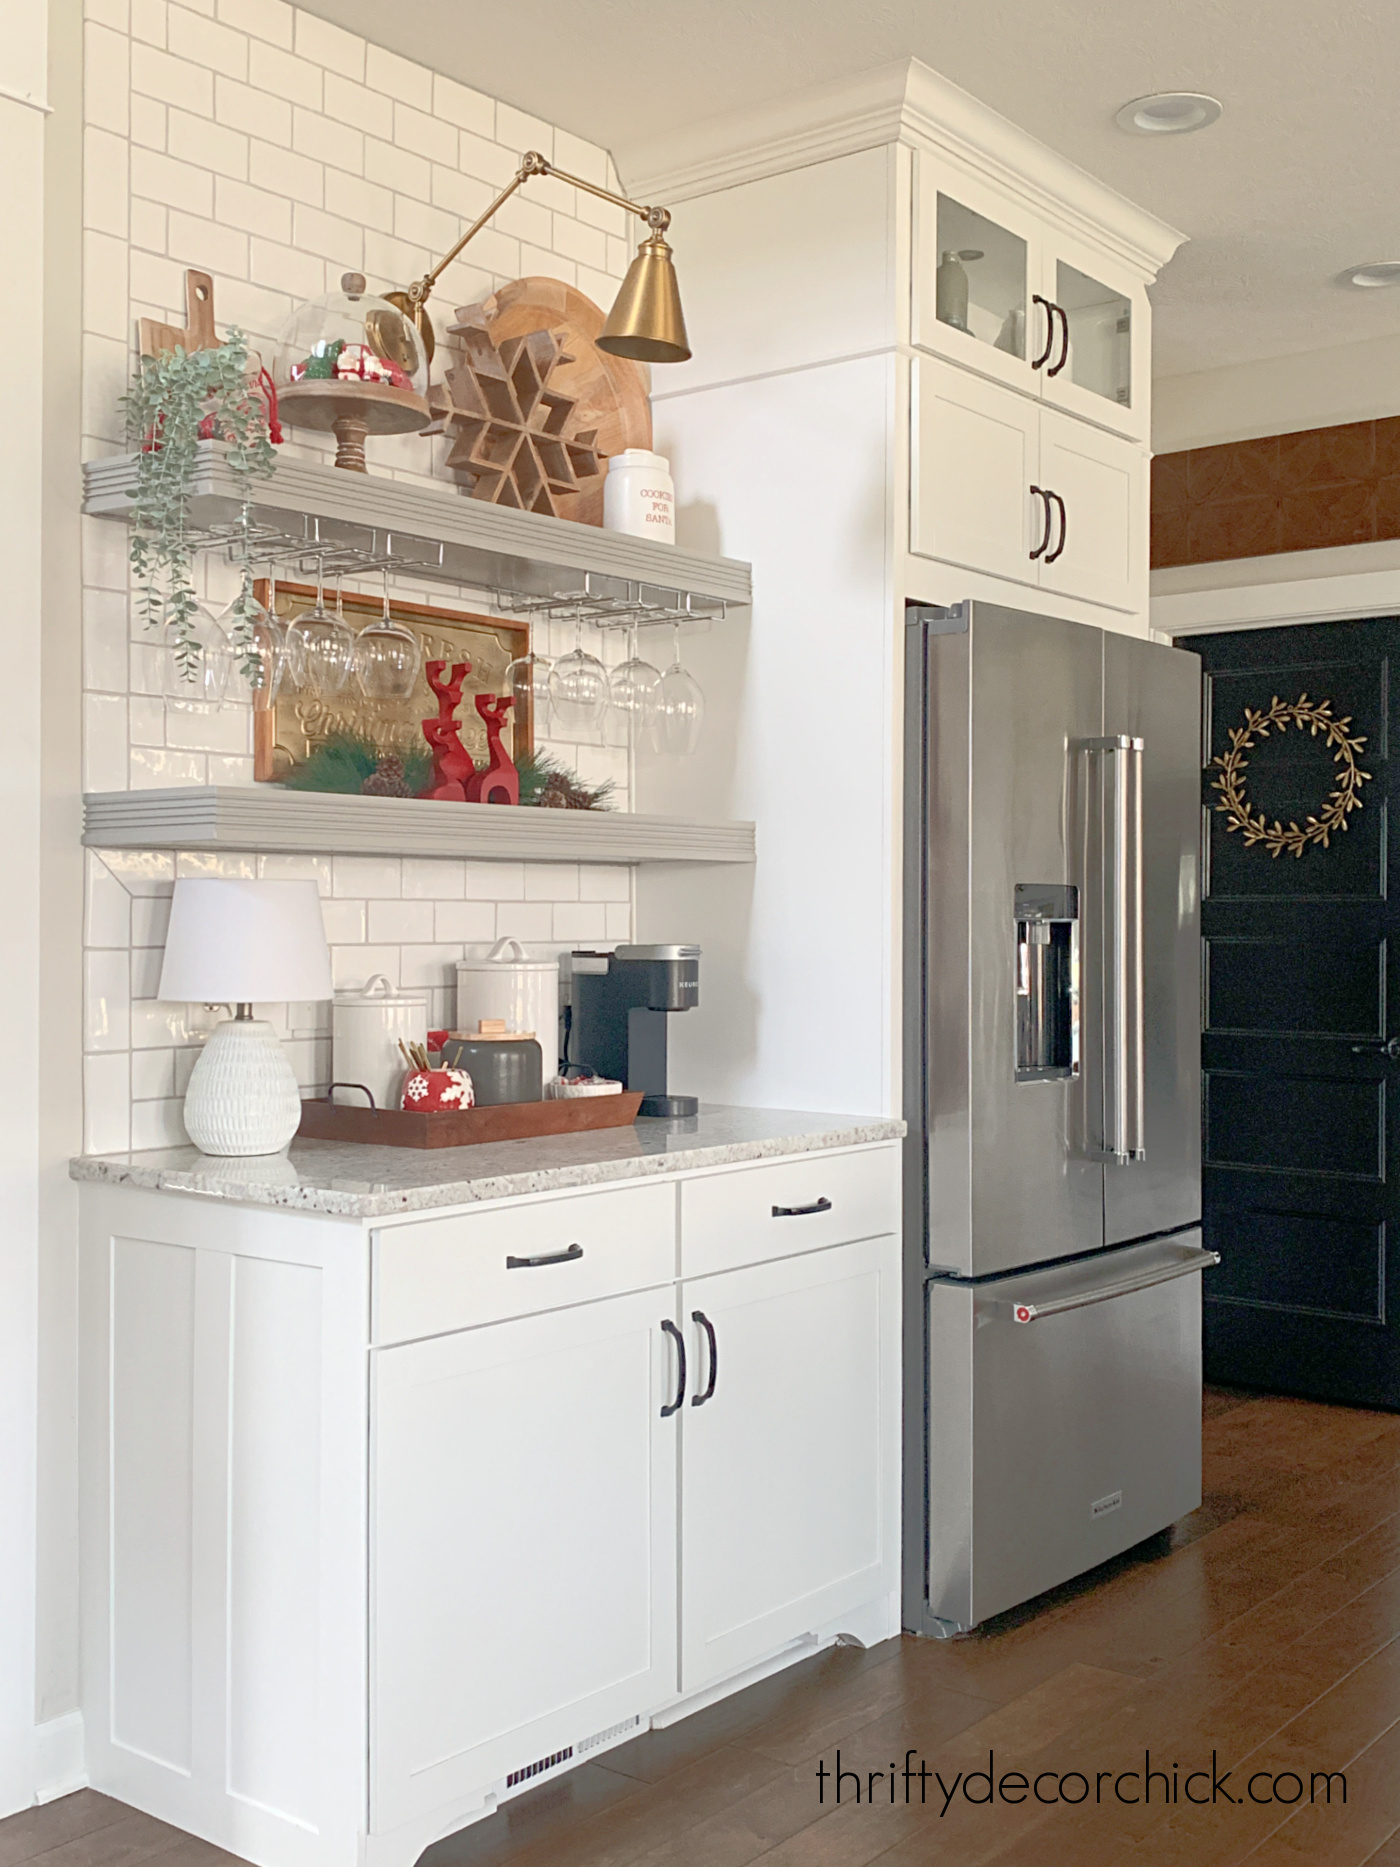
Via https://www.thriftydecorchick.com/2021/12/DIY-believe-wood-Christmas-sign.html Reveal of our beverage bar with thick floating shelves and hanging wine storage in the kitchen.
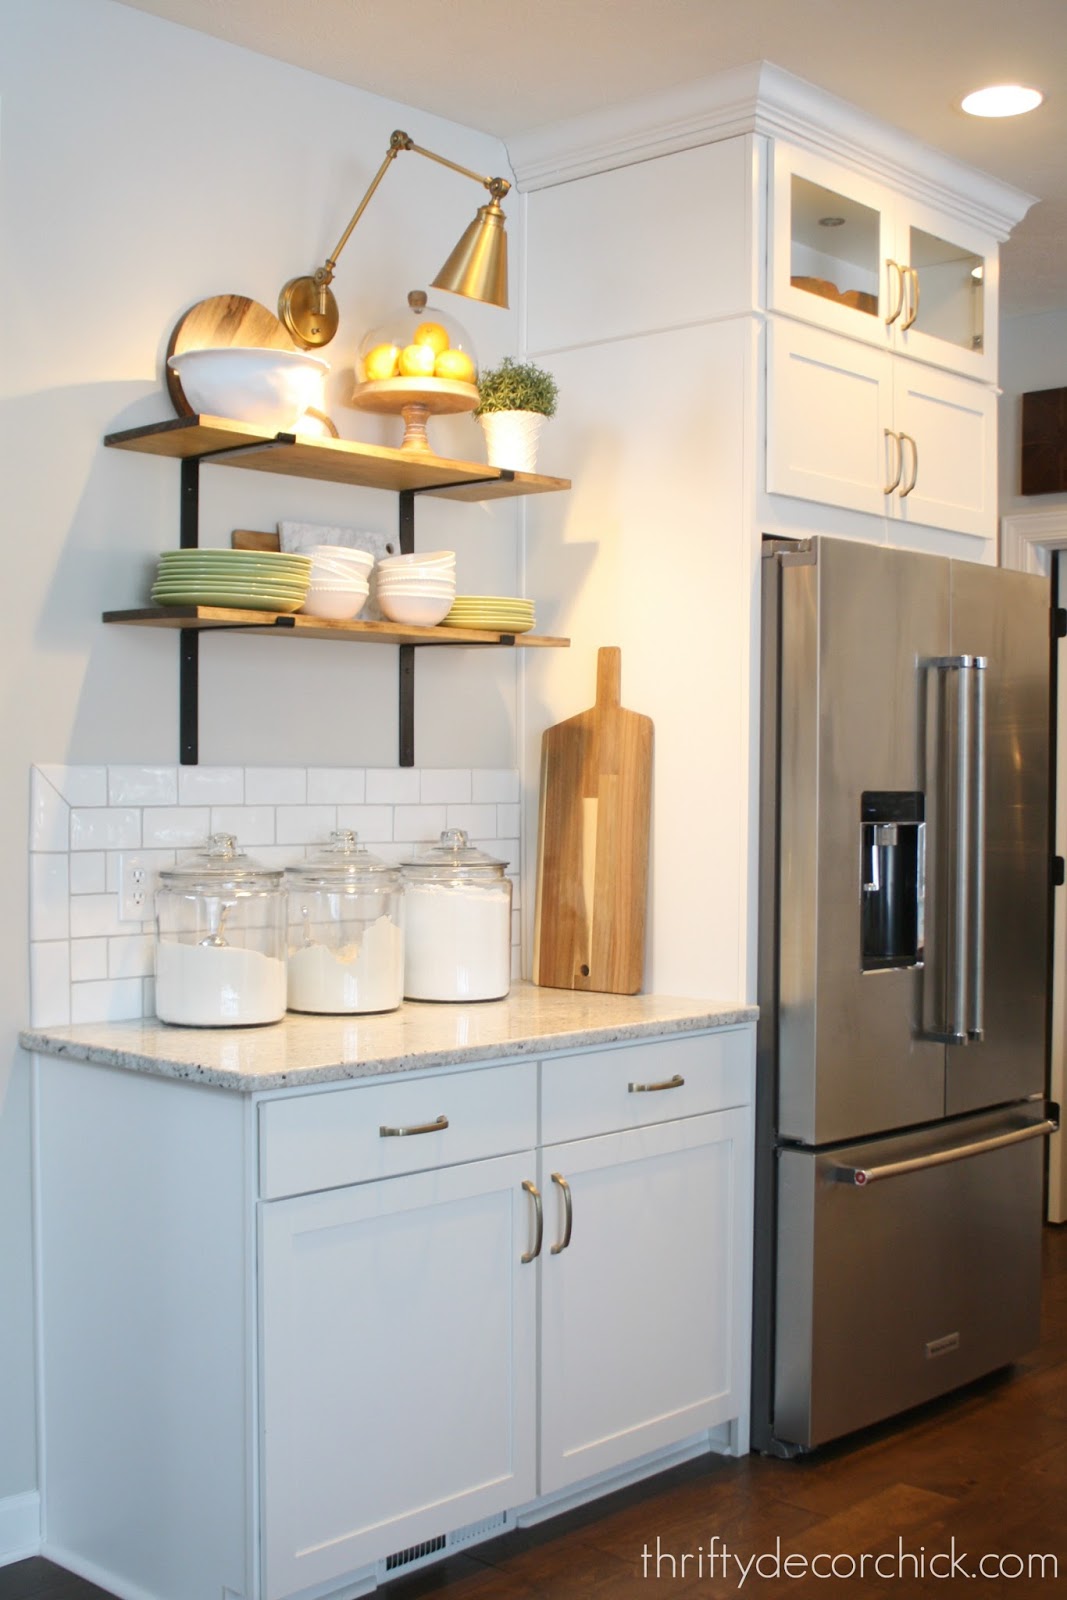
How I tiled a wall in our kitchen the easy way and the reveal of our coffee/beverage bar! This spot has become a hub in our kitchen and is a MUCH better use of this space.
Remember that little wall next to our fridge that I've wanted to address for years? I left it open on purpose when we built (instead of having an upper cabinet hung).
I hung some wood shelves with metal brackets soon after we moved in:
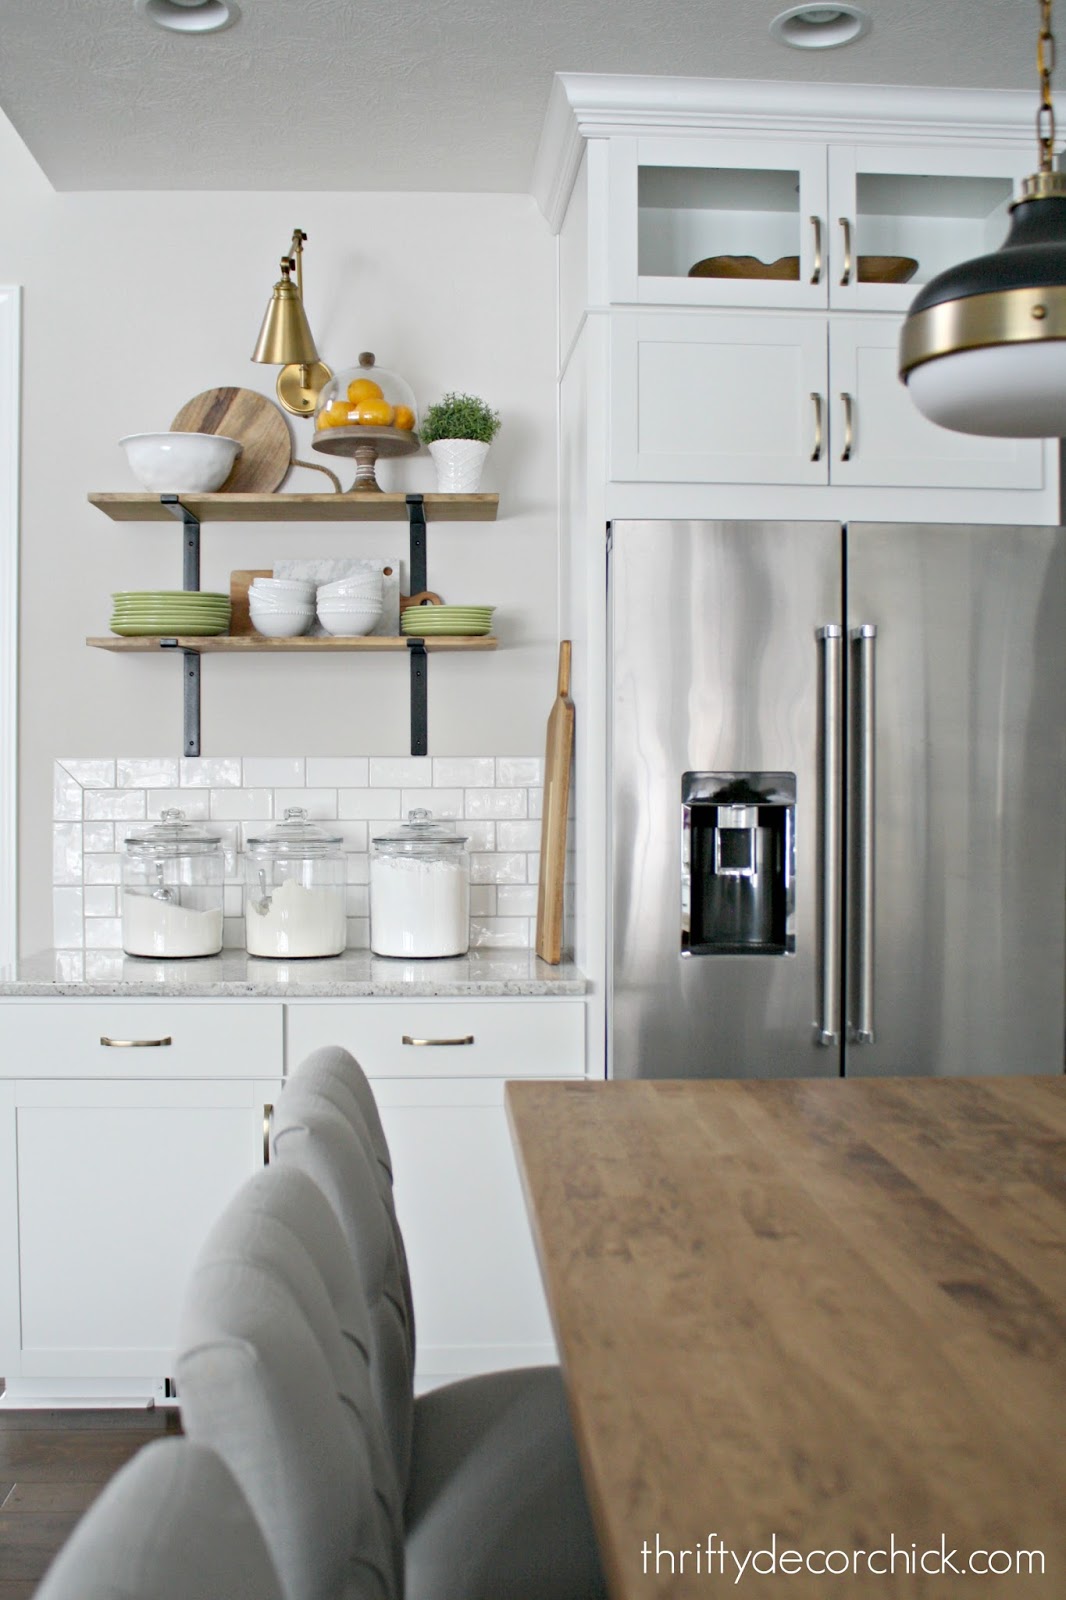
We would have had to add the regular cabinets, but also the upper cabinets with glass, plus trim. And then we would have to have electric run for both the upper and lower cabinet lighting.
It was more than we wanted to spend for just a little bit of storage. All we really wanted was a spot to hold some our nicer wine glasses.
Plus I have a big project in mind for our kitchen, and the cabinets would have been in the way of that. I'm hoping to make that happen next year. :)
So I came up with an idea to beef up the shelving in that spot and add some wine glass storage. Here's another view of what I started with:

This post may contain affiliate links for your convenience.
See my policies and disclosure page for more information.
I figured I'd eventually do something a little more permanent later, and that's just what I did last month:
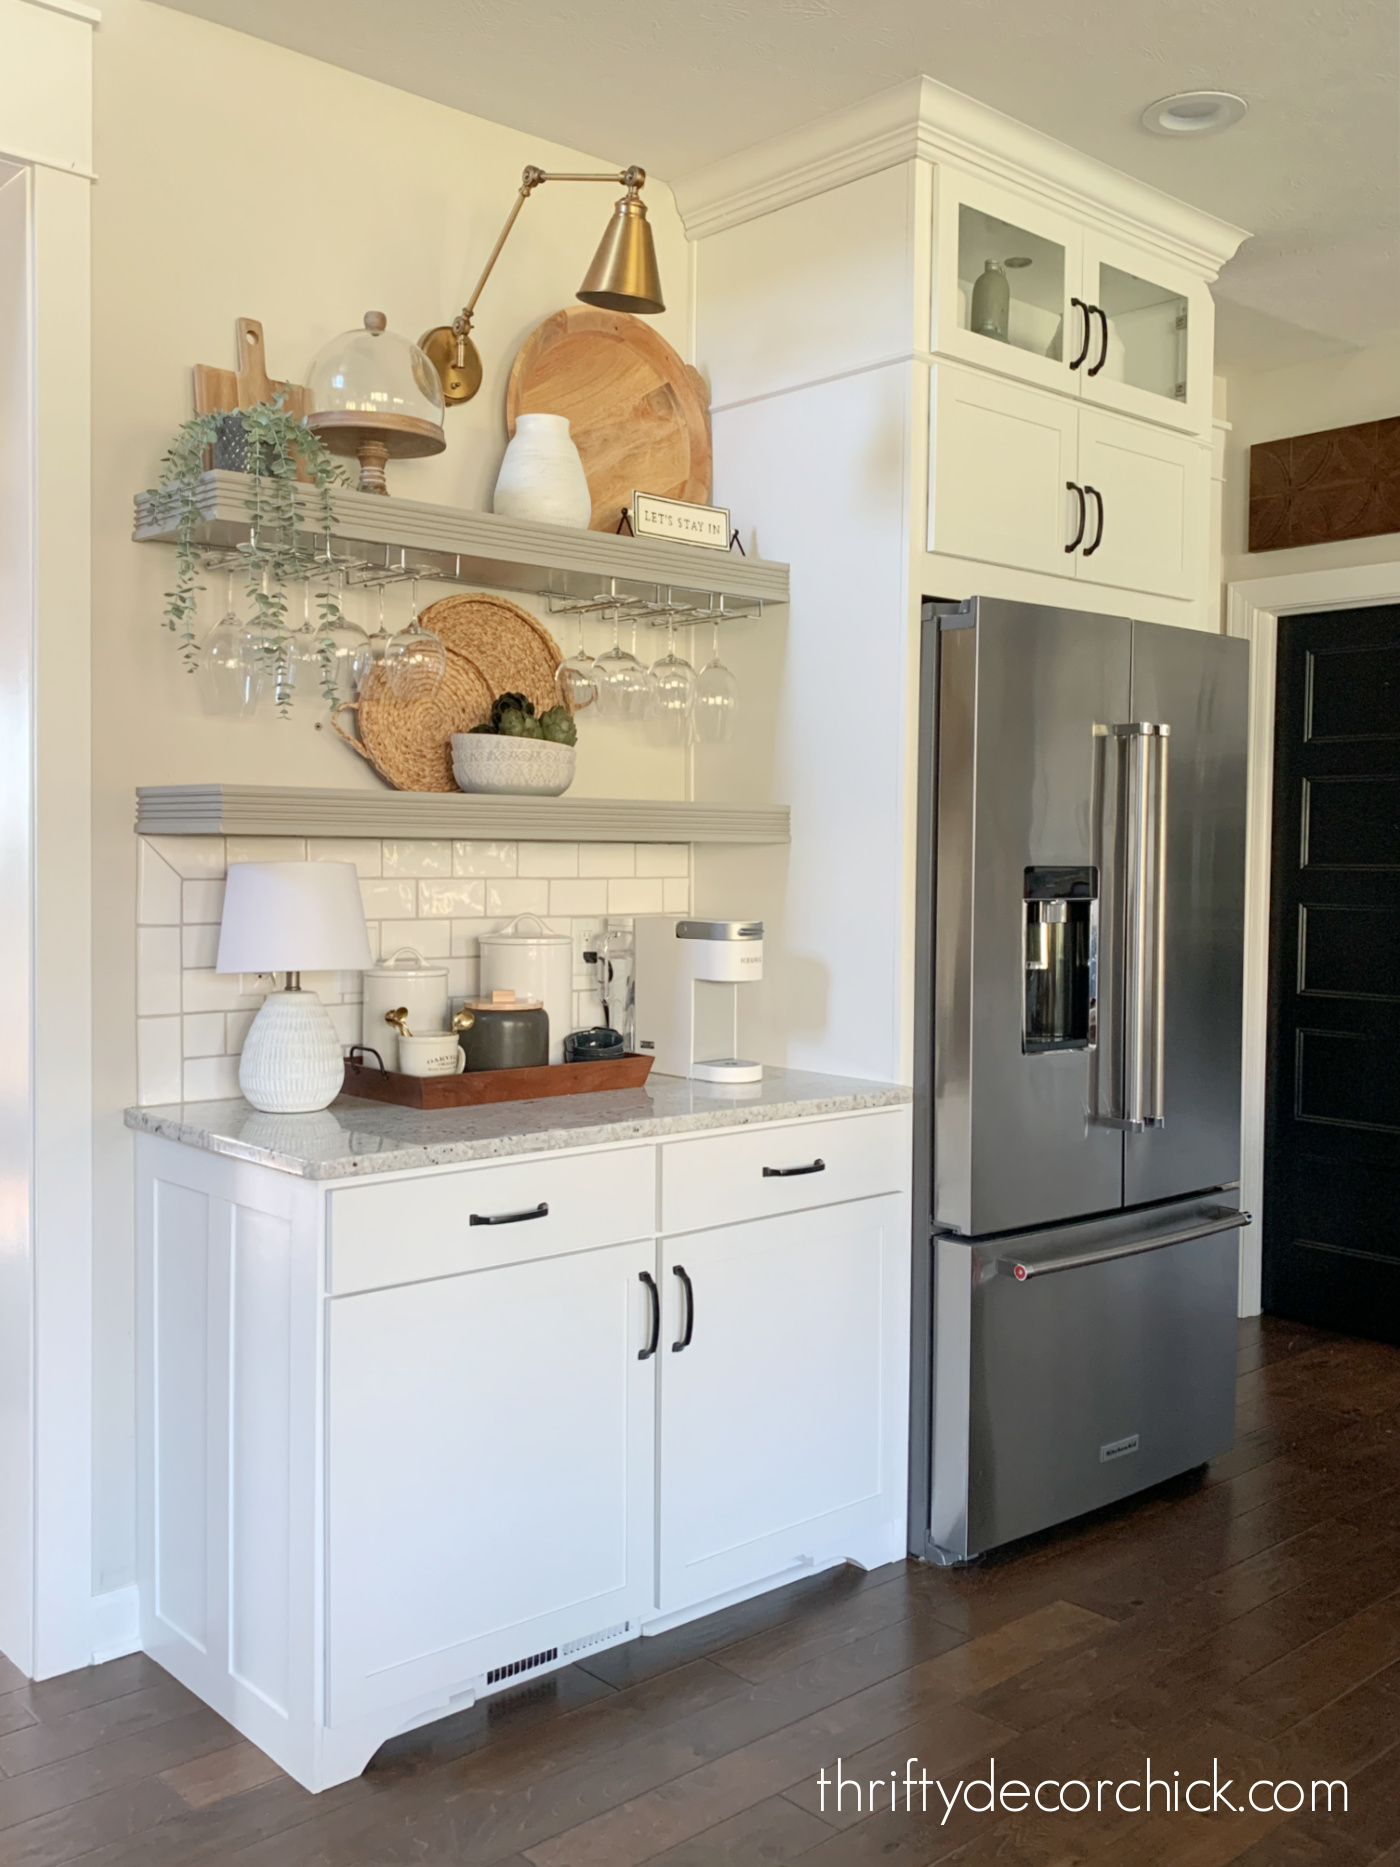
So much better!!
I built super strong and substantial floating shelves on that wall instead, and it immediately looked SO much better.
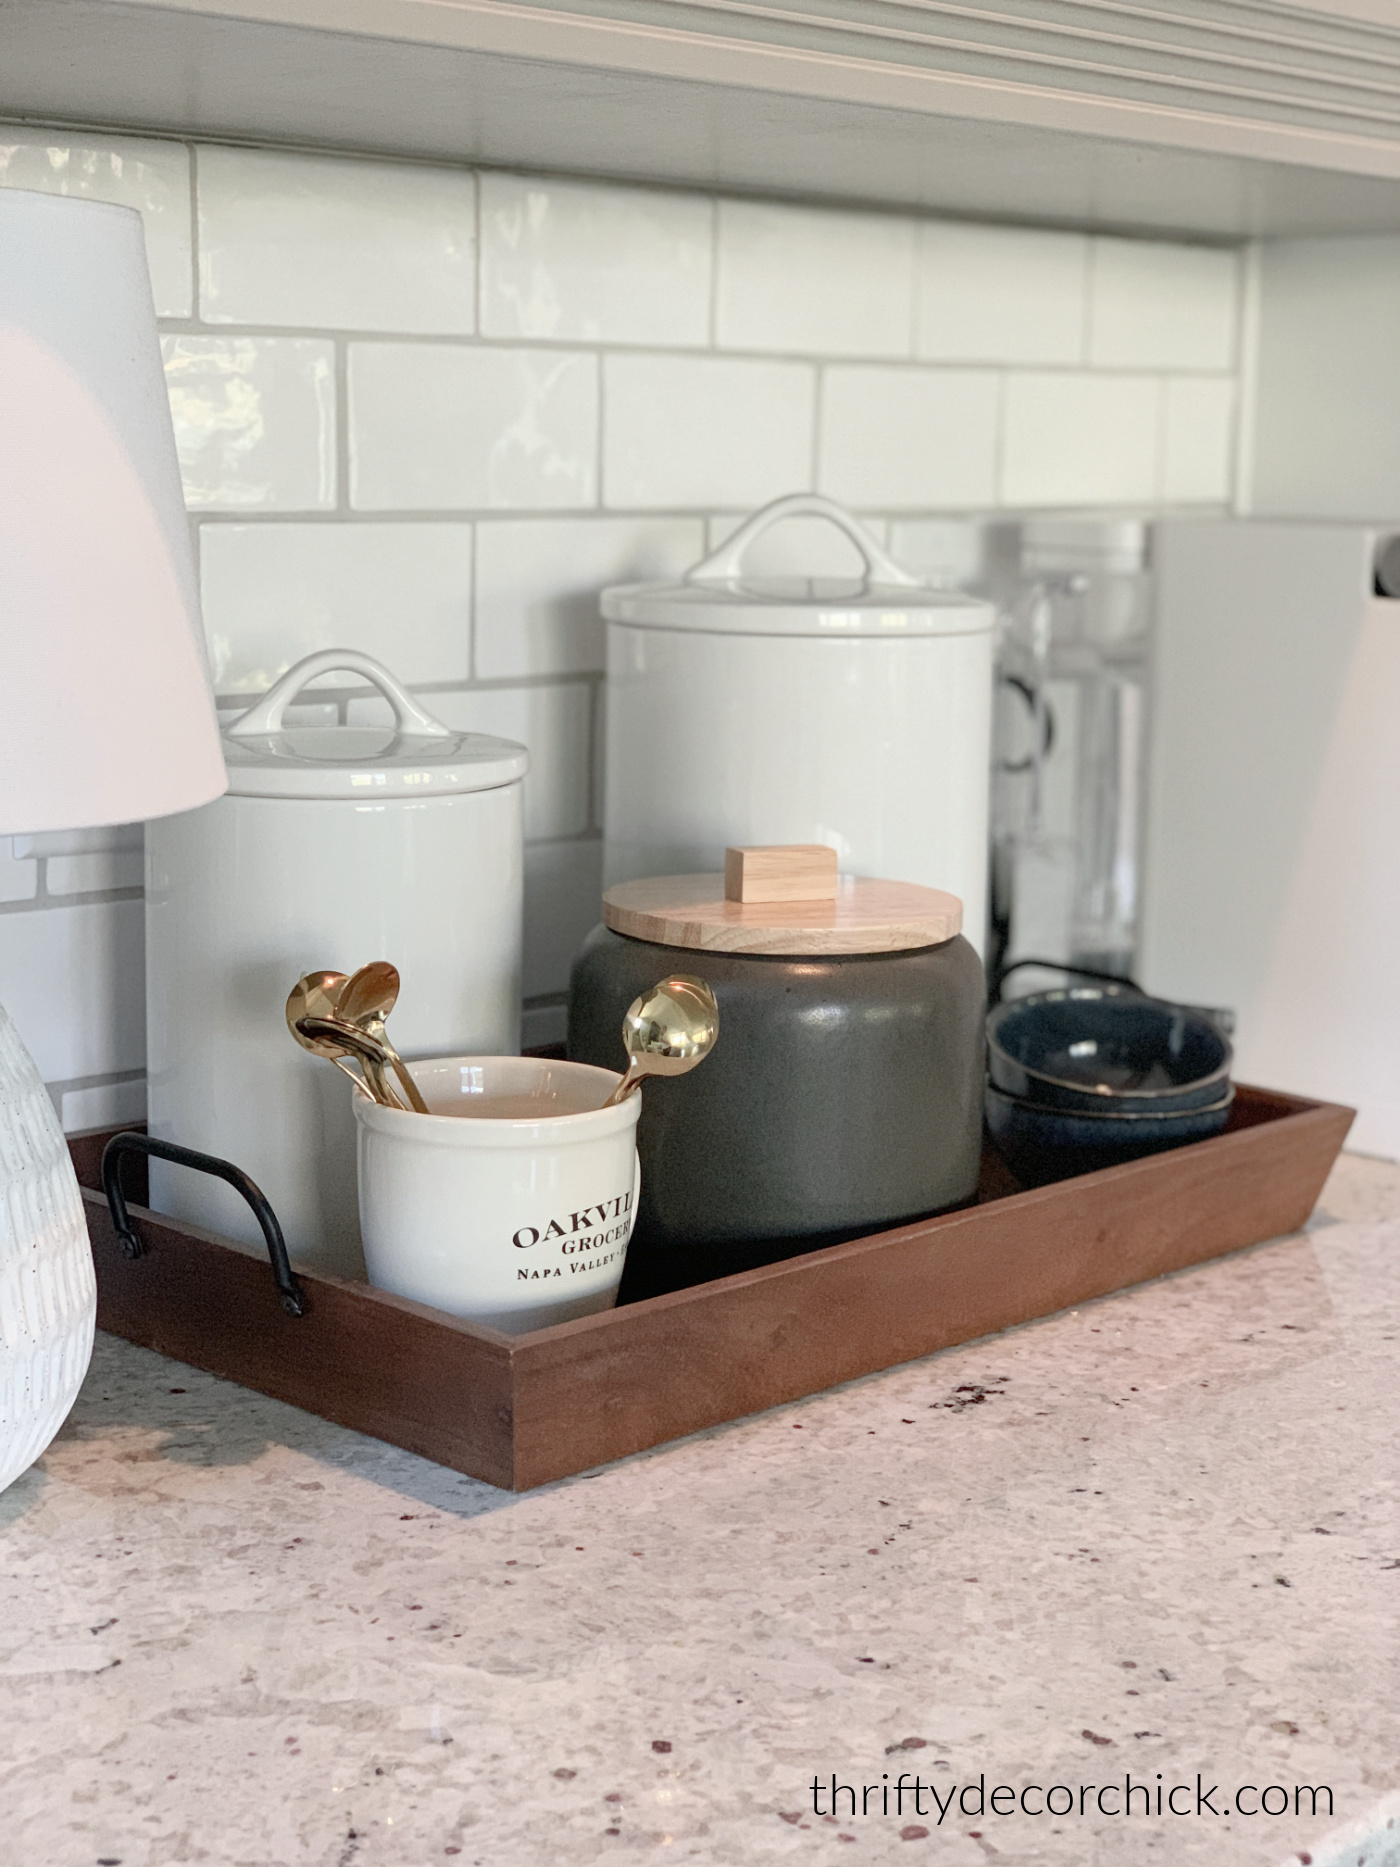
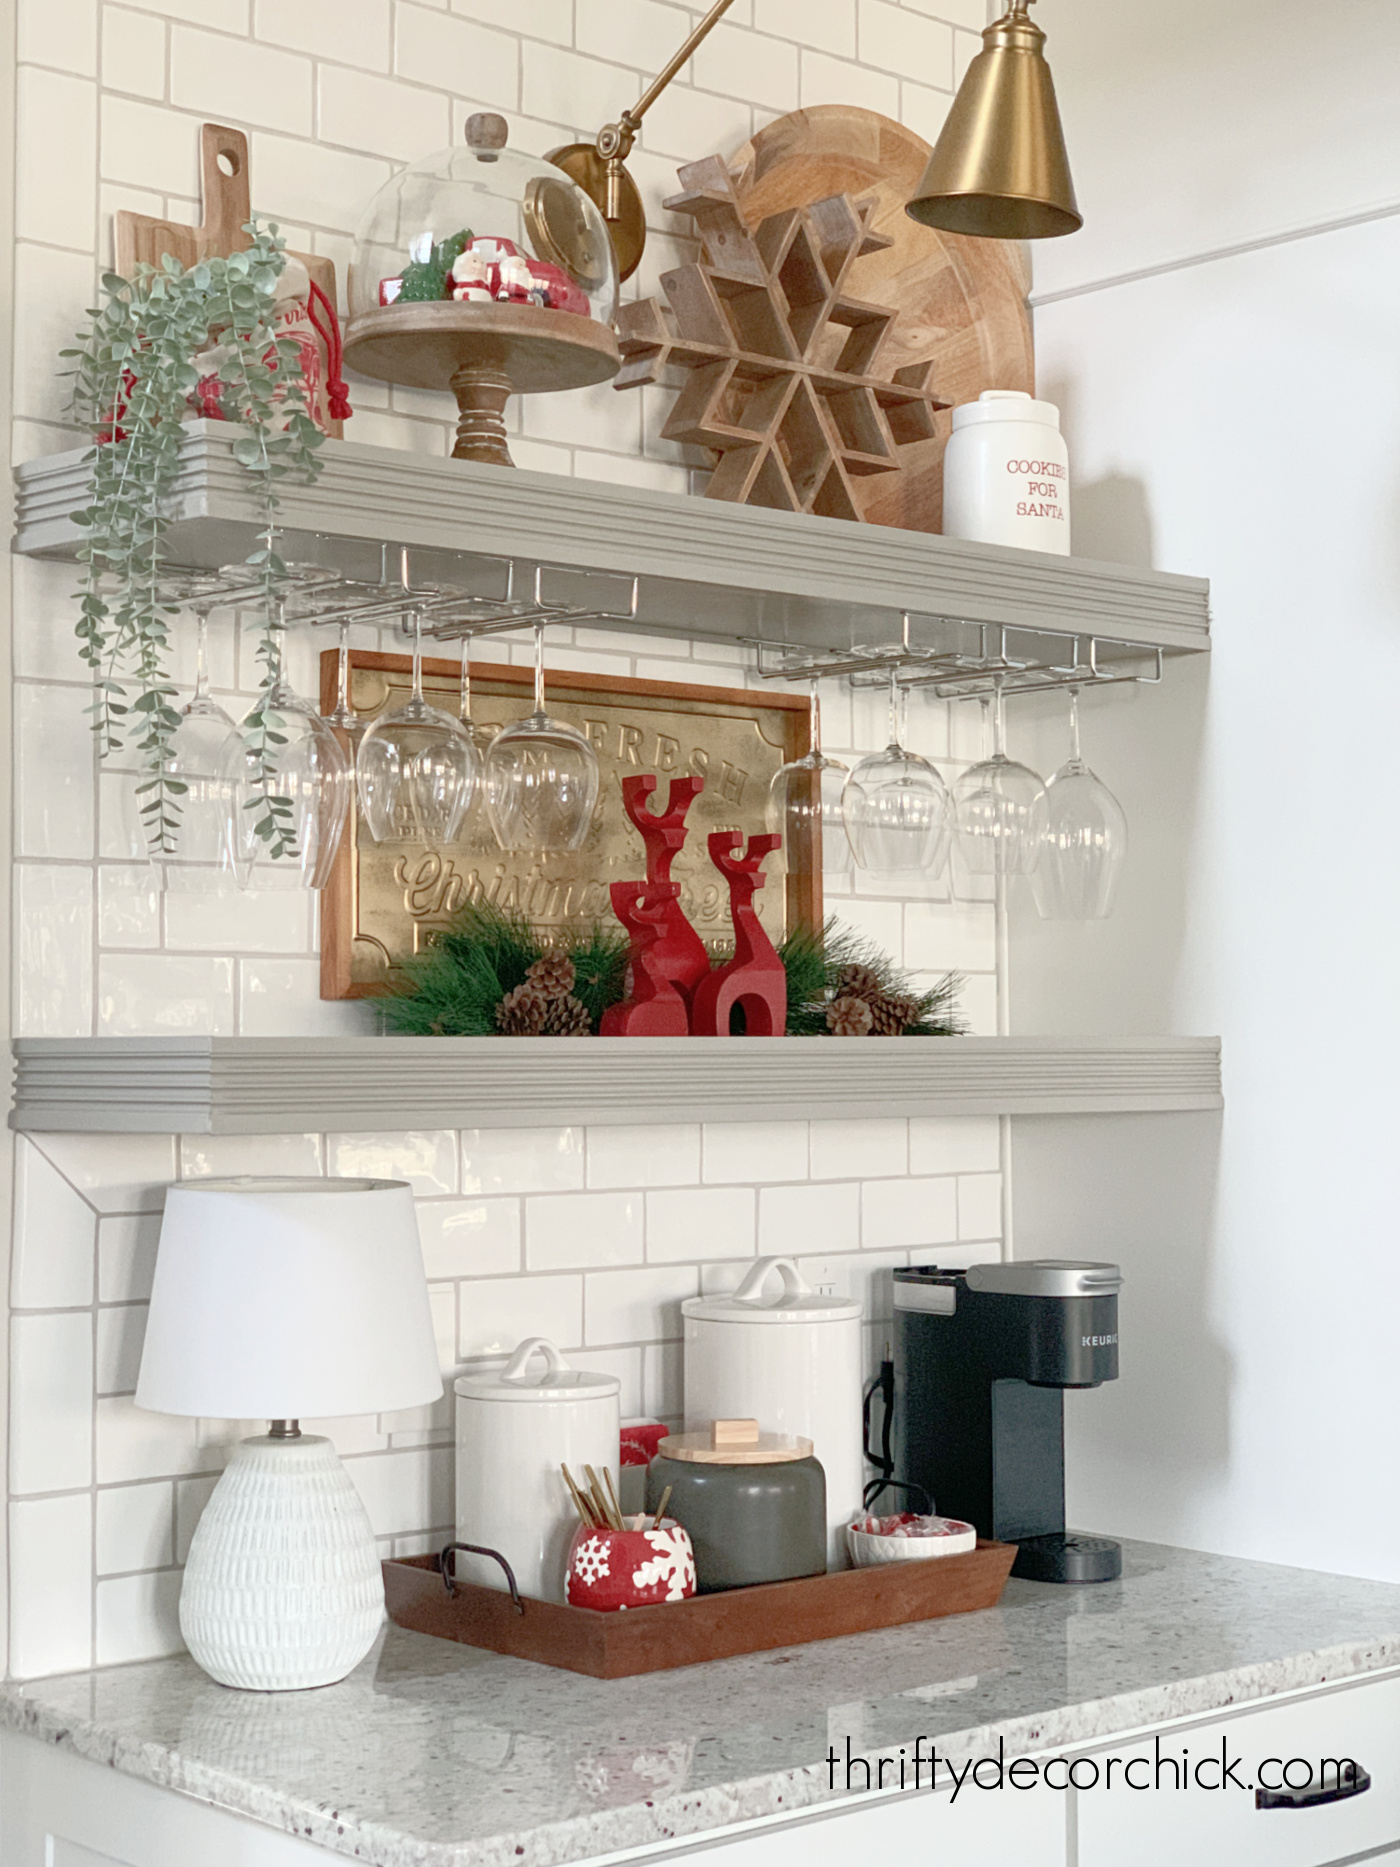
My husband just started to get into drinking coffee this year, so I created a little coffee bar with all of the items he needs every morning:
But I wasn't quite done yet!
I really wanted to make this feel like it was all there from the start, and I knew tiling the whole wall would do just that.
It would have been fine to stick with just the lower part tiled, but I always prefer to have the backsplash go up higher to the ceiling where possible. It feels more finished to me.
We had a good amount of tile left from our build, but I had to purchase a bit more of our ceramic subway tile. It has a handmade look that is a beautiful alternative to basic subway tile.
Last time I tiled was in our mud/laundry room and I used a new method that worked SO well:

You can see how I tiled the easy way without mortar here.
Last time I used a tile mat that I had held onto for years. It worked perfectly and I loved how easy it was to install the tile.
This time I used a brand called Musselbound, and it's very similar but has some differences:

It's basically a roll of super sticky foam. It's really thin and adheres to the wall very fast.
It is much harder to adjust than the brand I used in the laundry room!
It also doesn't "give" as much as the other version when it comes to adjusting the tile. With the last one, I had a few seconds to wiggle the tile exactly where I wanted it.
This time, not as much.
It was fine, but you really need to get the tile placement right the first time! :)
Overall it worked well, and it is MUCH easier than spreading mortar on the wall. I liked that it came with a few tile spacers in three different sizes:
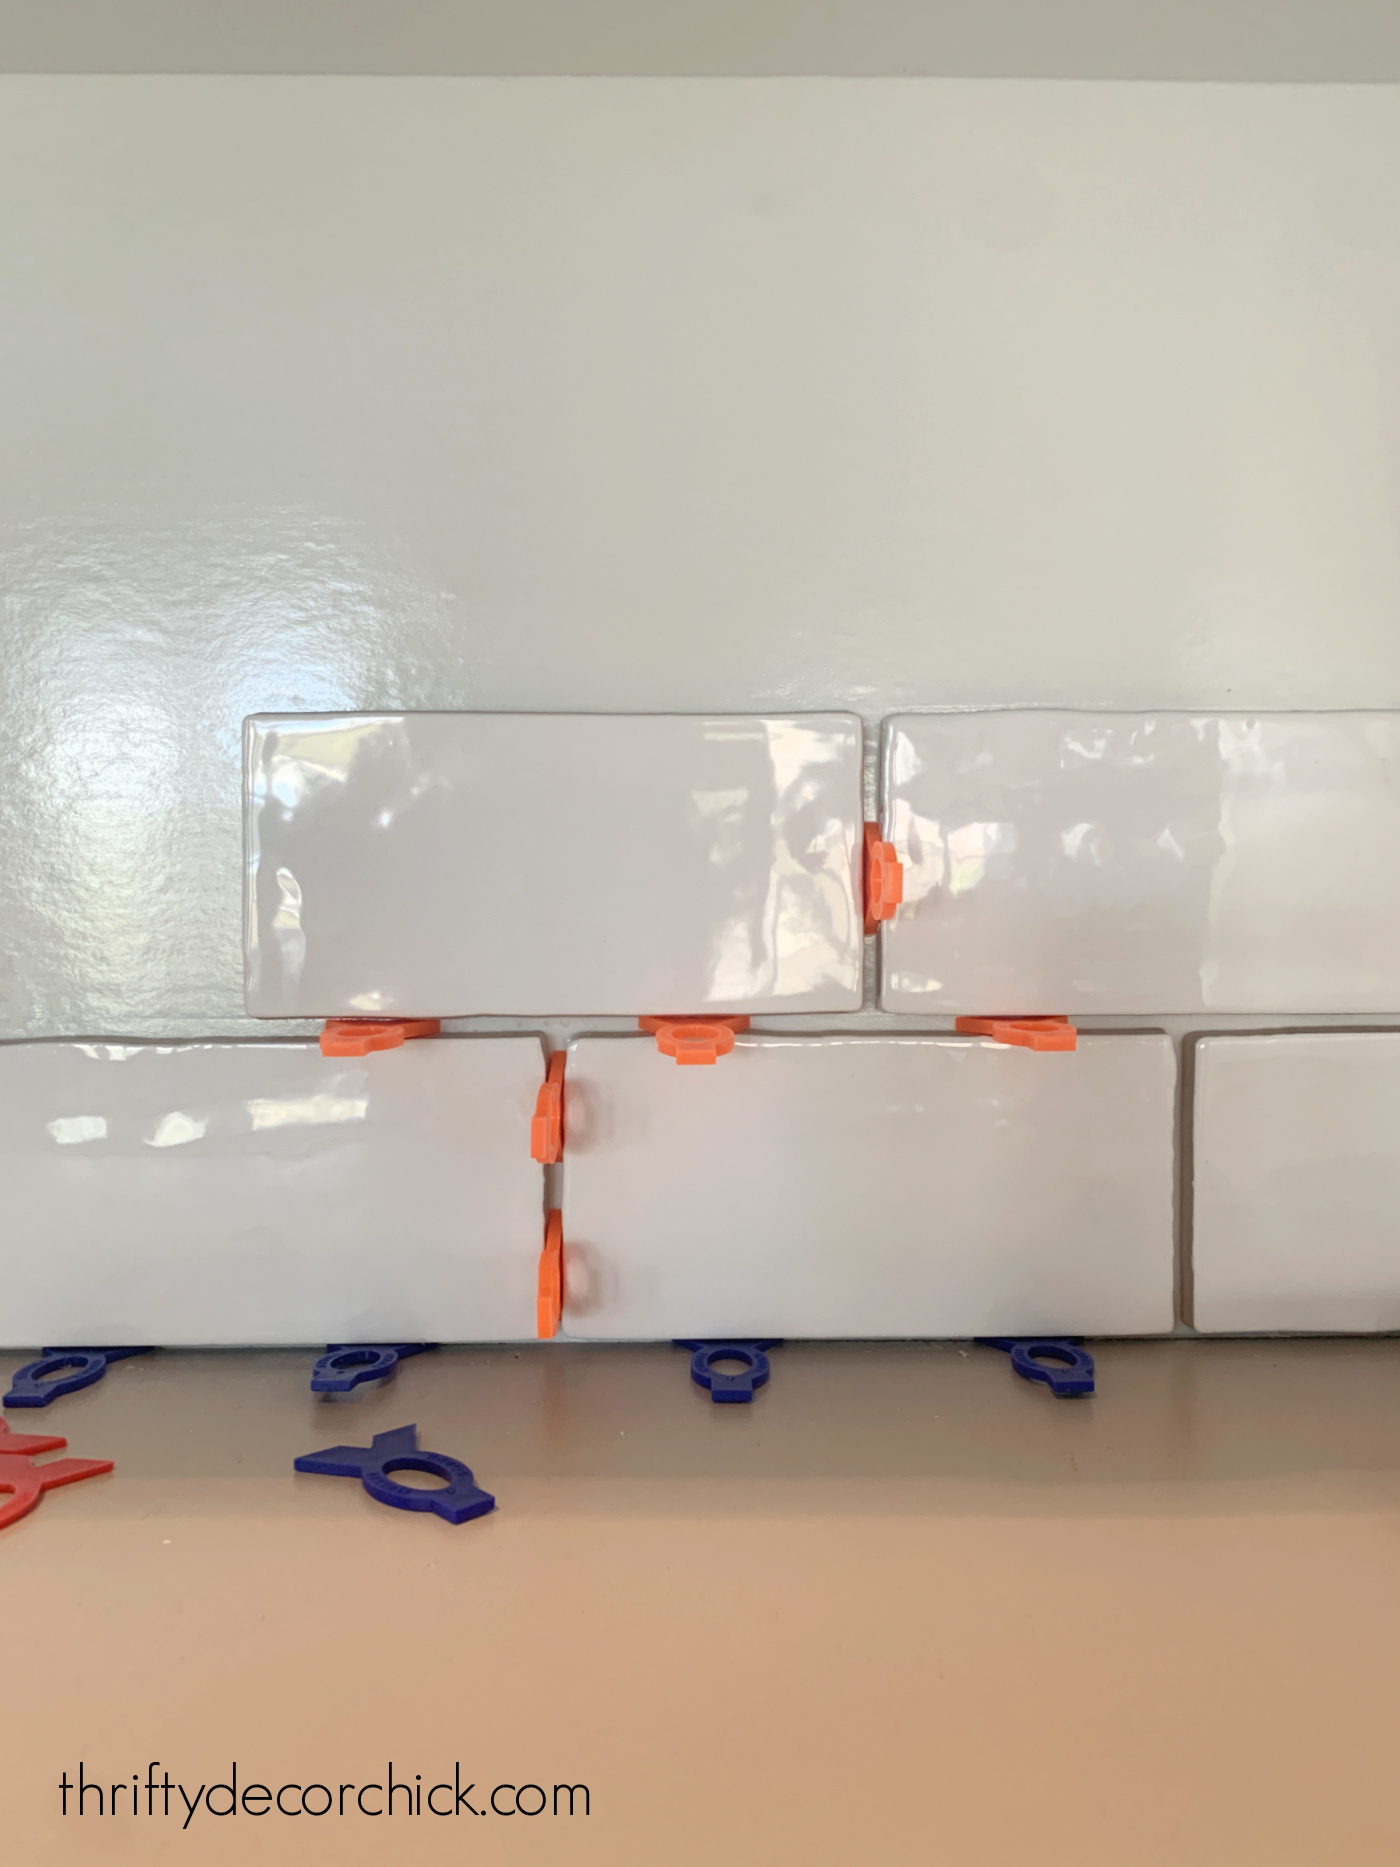
Unlike mortar, where the tile can slip as it dries, you don't have to have a spacer between each and every tile when using this mat.
They provided just enough so I could place each tile and then reuse the spacers as I went. I used the smallest spacers for under the tile and on the sides, and an 1/8th inch spacer between each one.
I used the same easy tile cutter as last time and it is so much quicker and cleaner than the wet saw.
I may not have to use a tile saw again!
After I was done with the grout, some final caulking and then major clean up, it was time to decorate!
Perfect timing to add some Christmas decor in the kitchen:

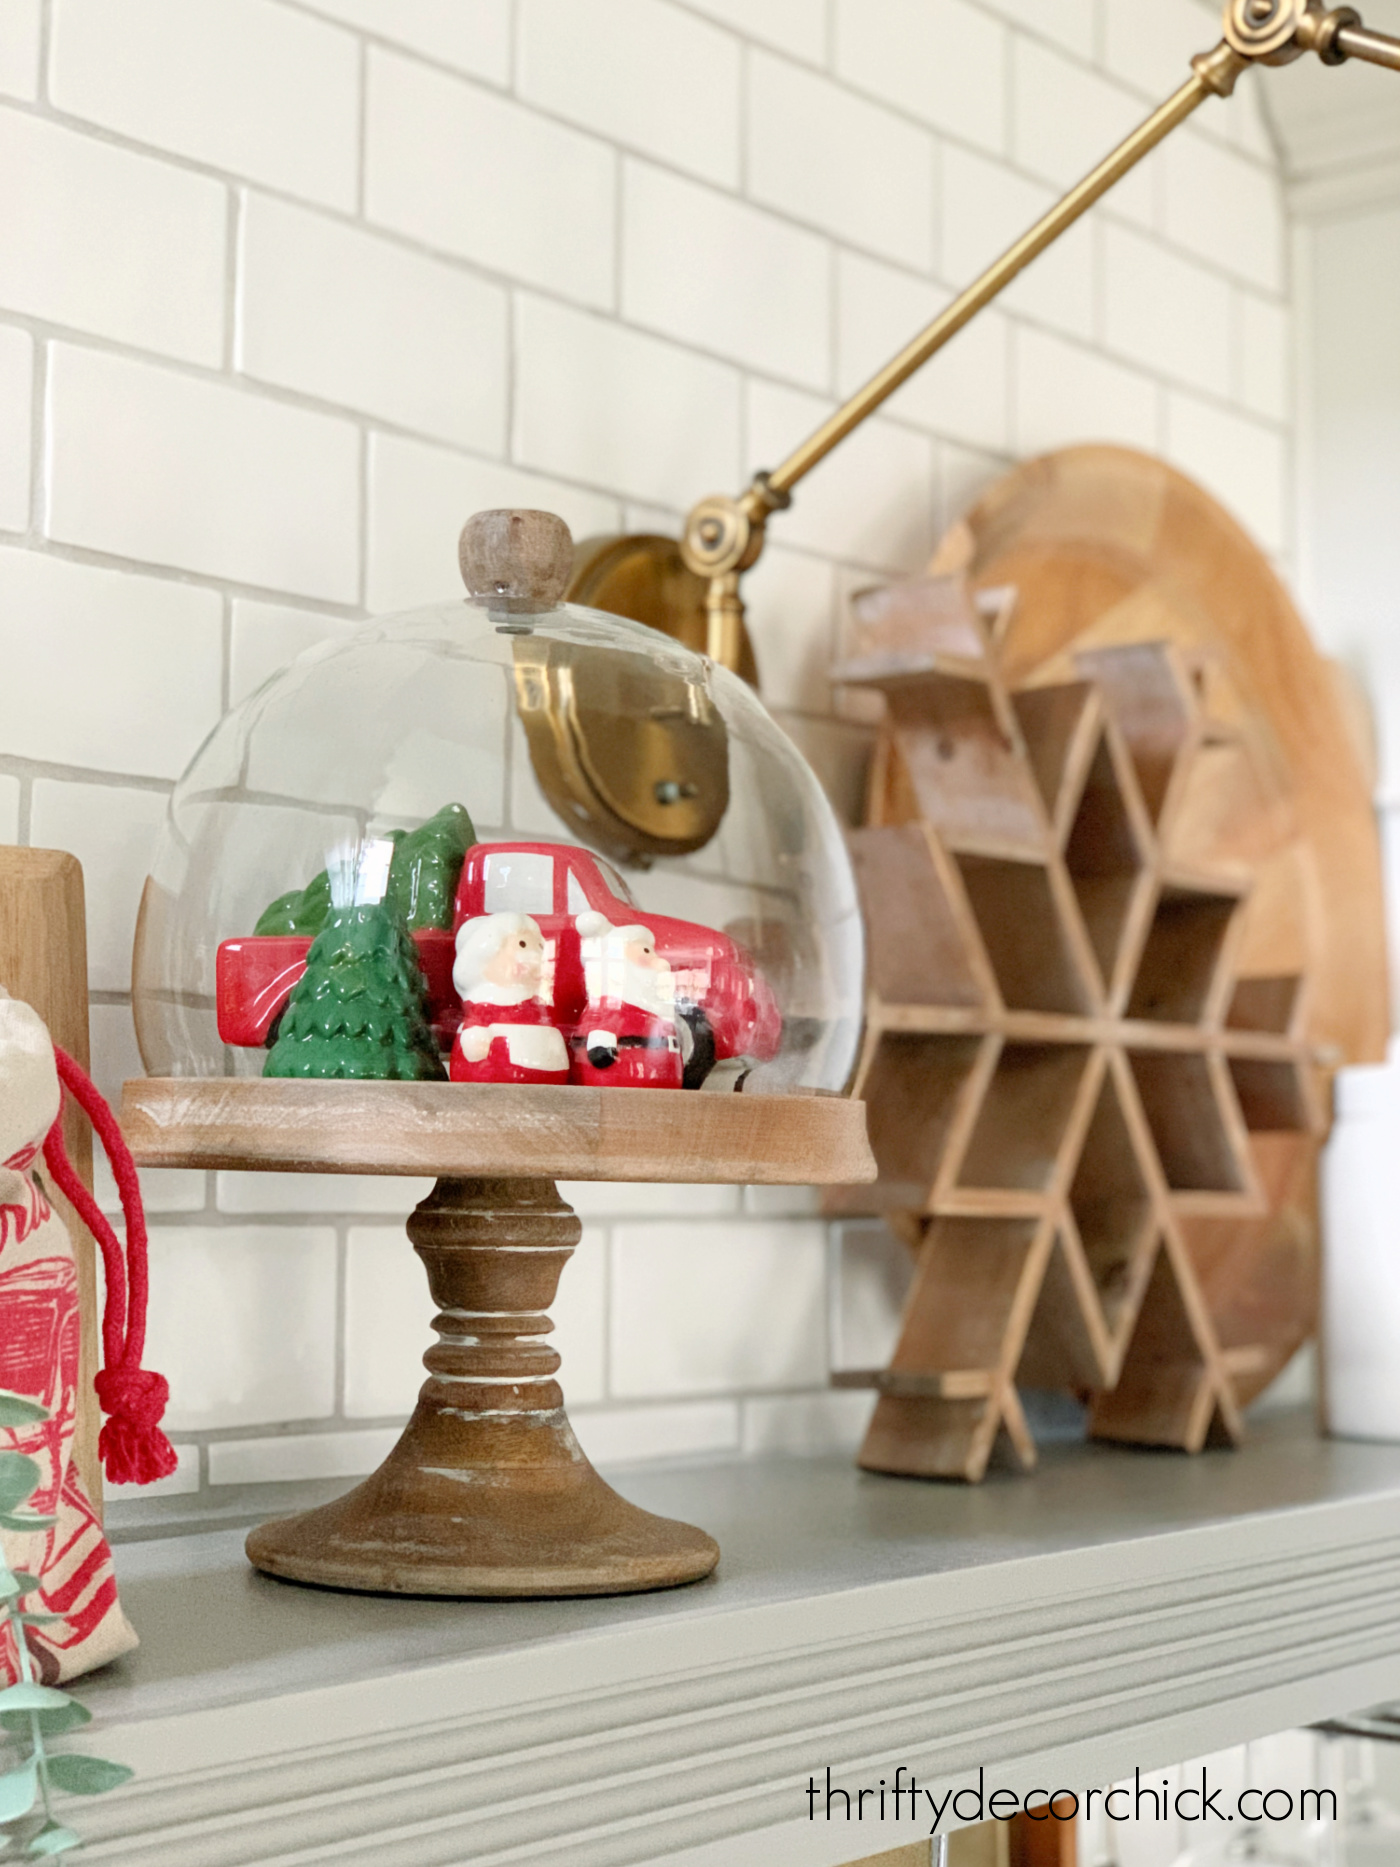
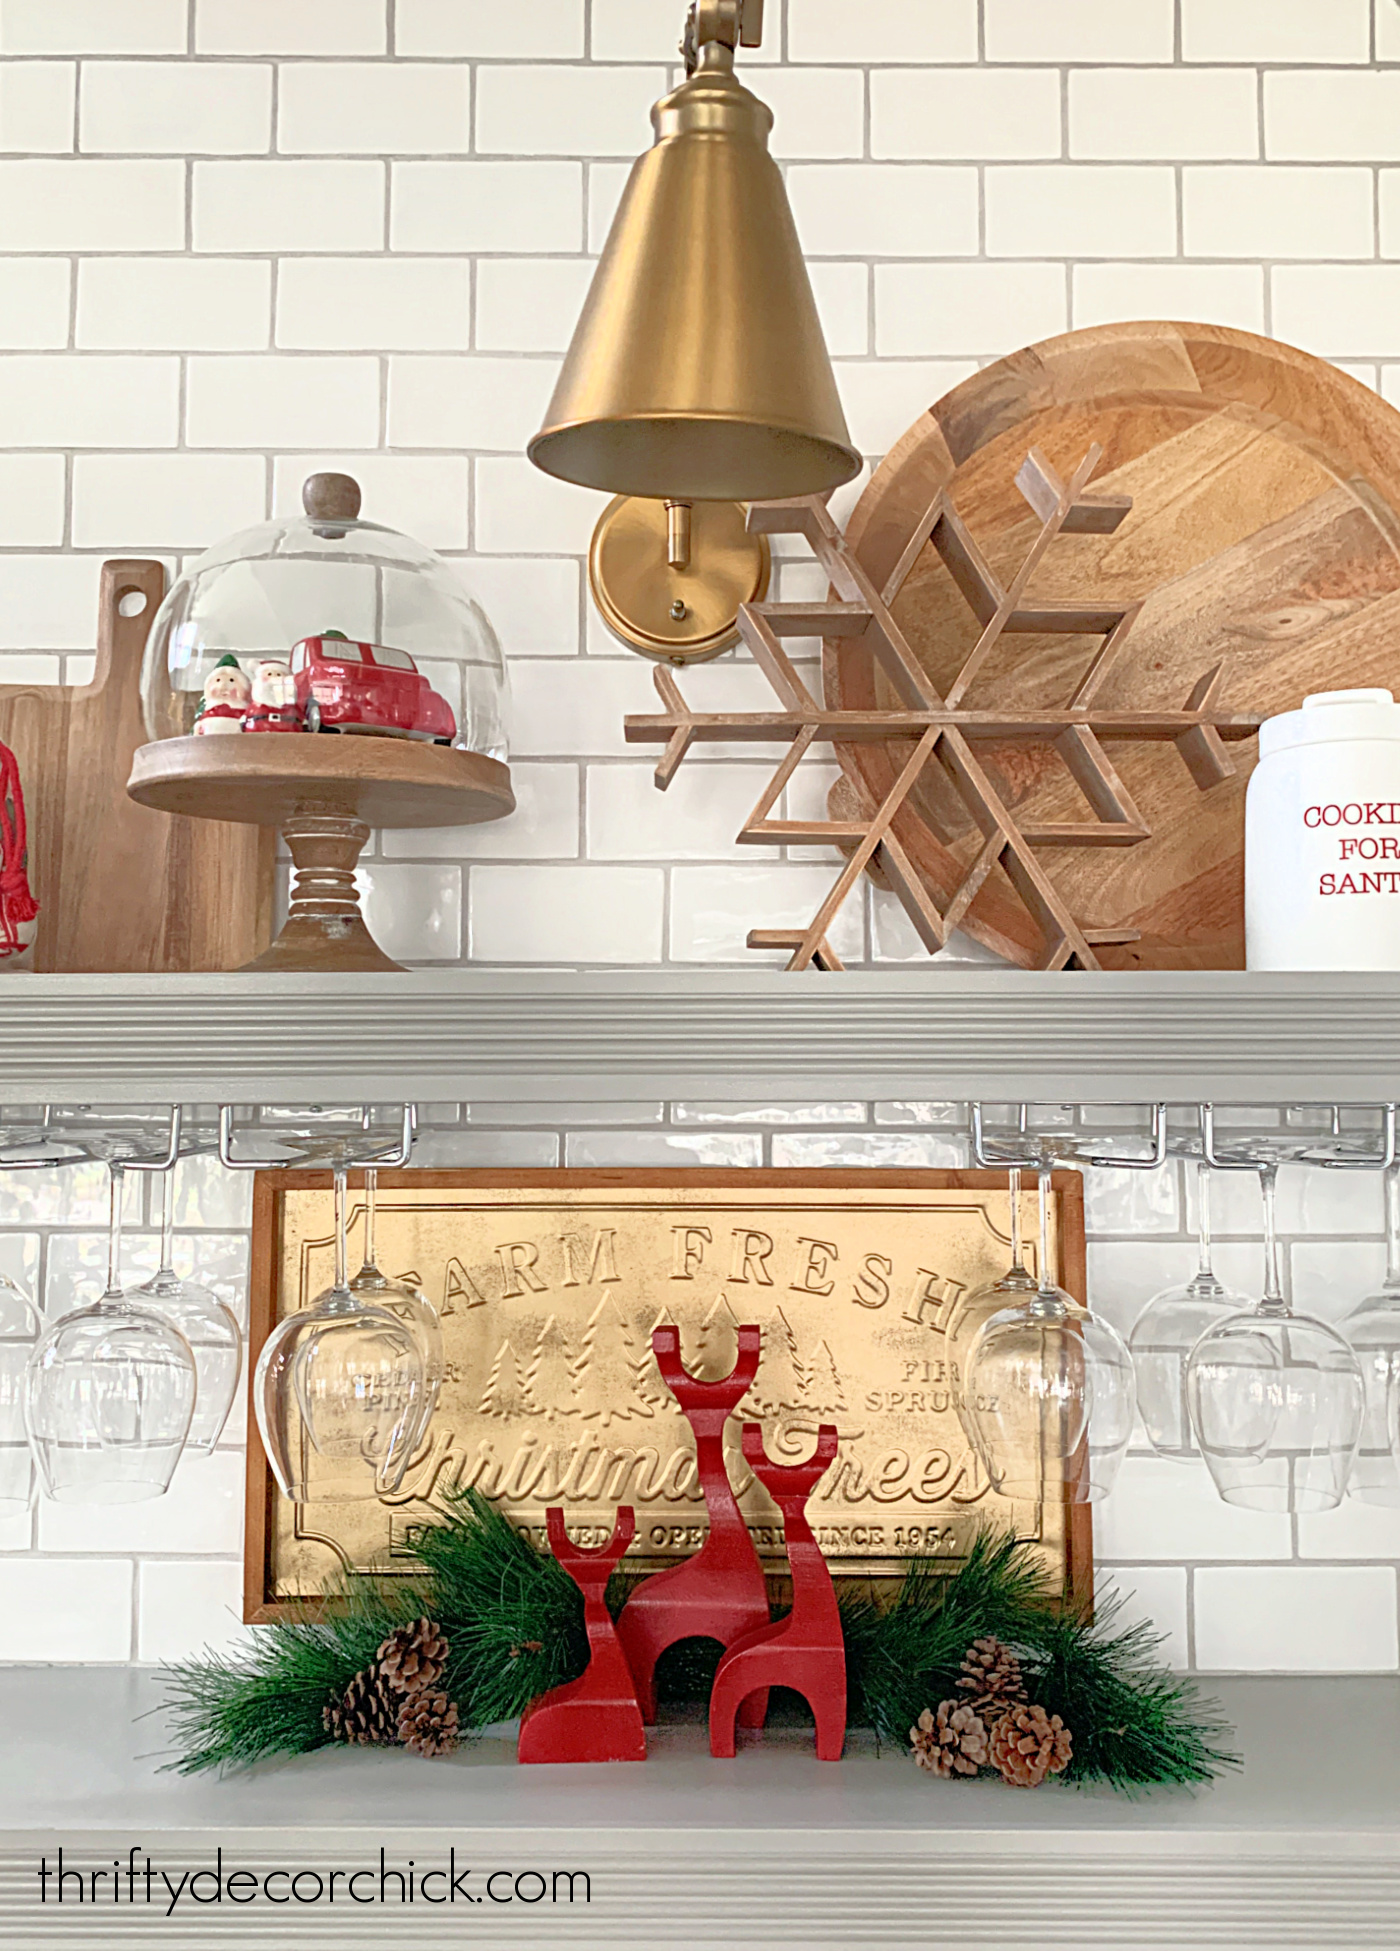
Those wine glass holders have already been SO efficient and are easy to use.
We love having them out for easy access, and they just look pretty!:
This is our wavy subway tile and the grout is the color Silverado by TEC.
As you could see in the before pics, I used to keep large glass jars full of dry ingredients like sugar and flour on this small counter.
This new set up is so much more functional, but I think looks a ton better too:


It looks like it should have always been this way, which is a sign of a great project in my eyes!
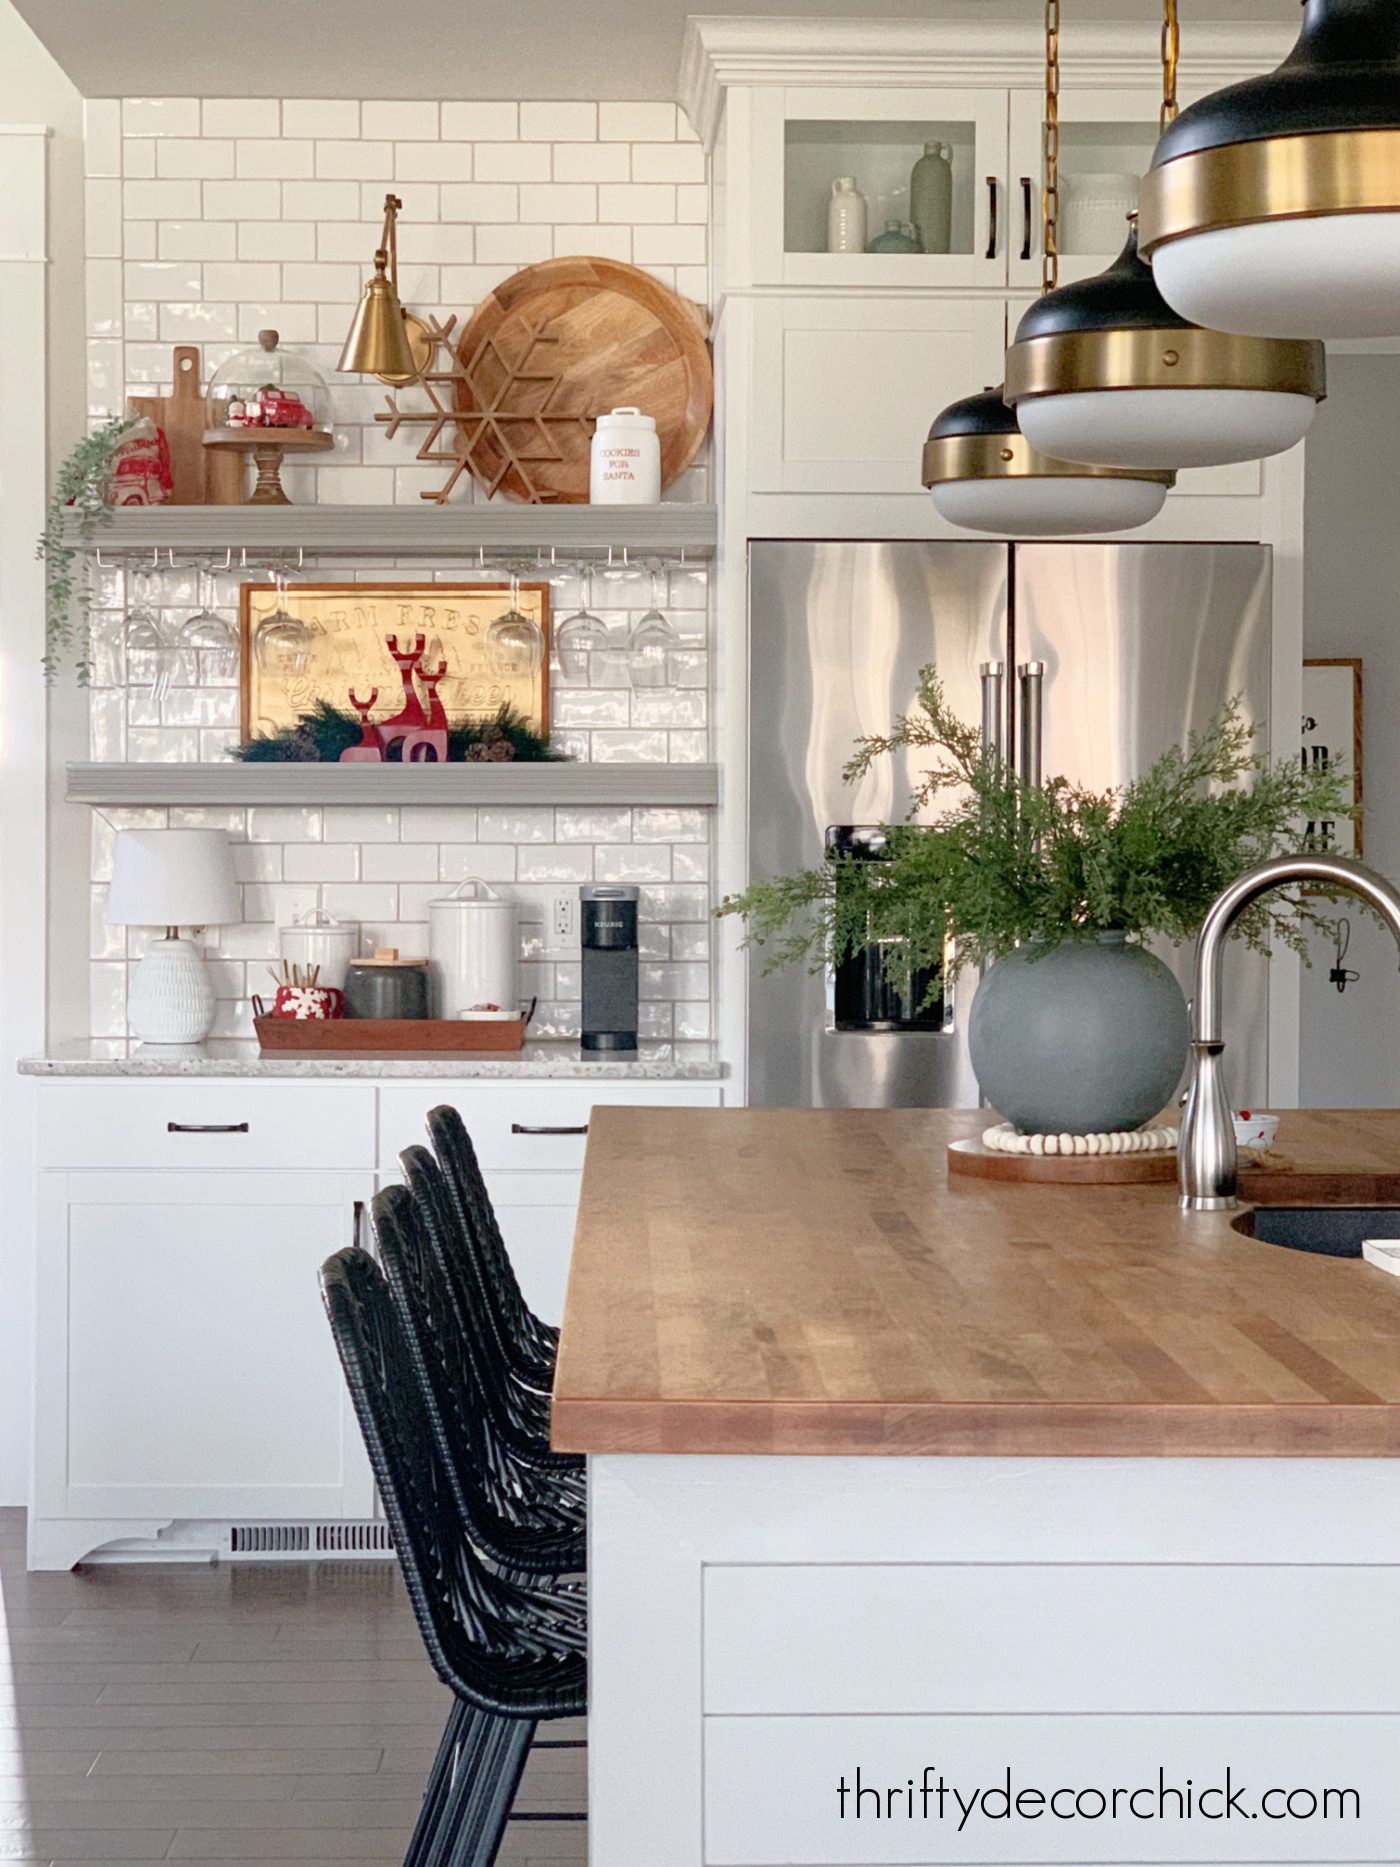
I LOVE this area now...it's so much more custom looking.
It's made a big difference in here:


We keep all of our wine tools and openers in one drawer, and the coffee pods in another.
This new beverage bar is one of our favorite spots in the house right now!
These projects were time consuming, but not difficult. It always surprises me how much simple updates make in a space. :)
Here's a before pic of this spot in our kitchen:
And here it is after I added the custom trim to the side of the base cabinet, installed cabinet feet, spray painted the cabinet hardware and built those heavy duty floating shelves:
Love it!!
Have you attempted a tile project? That tile mat makes for a much quicker and cleaner installation, that's for sure!
Now if they could come up with non-messy way to grout! :)
You can find sources for the items pictured here:
Never miss a post by signing up to get posts via email.
Via https://www.thriftydecorchick.com/2021/12/kitchen-beverage-bar-with-new-tile-and.html Seven beautiful ways to decorate glass candle holder hurricanes.
If you're looking for one really inexpensive way to decorate all year round, but especially at the holidays, these simple glass cylinders are your answer!
I started collecting these round hurricane candle holders from the thrift store years ago. There always seems to be one or two on the shelves and they are soooo inexpensive.
You can also find smaller versions at Dollar Tree and larger sizes on sale at craft stores as well. I think the most I've spent on one was $10, and that was a giant one!
I try to grab these in different sizes and heights for my displays.
I was going through my holiday posts the other day and noticed how many ways I've changed these basic glass vases over the years.
They are so easy to change up!! Here are some of the ways (with instructions at the links) I've decorated these DIY candle holders...
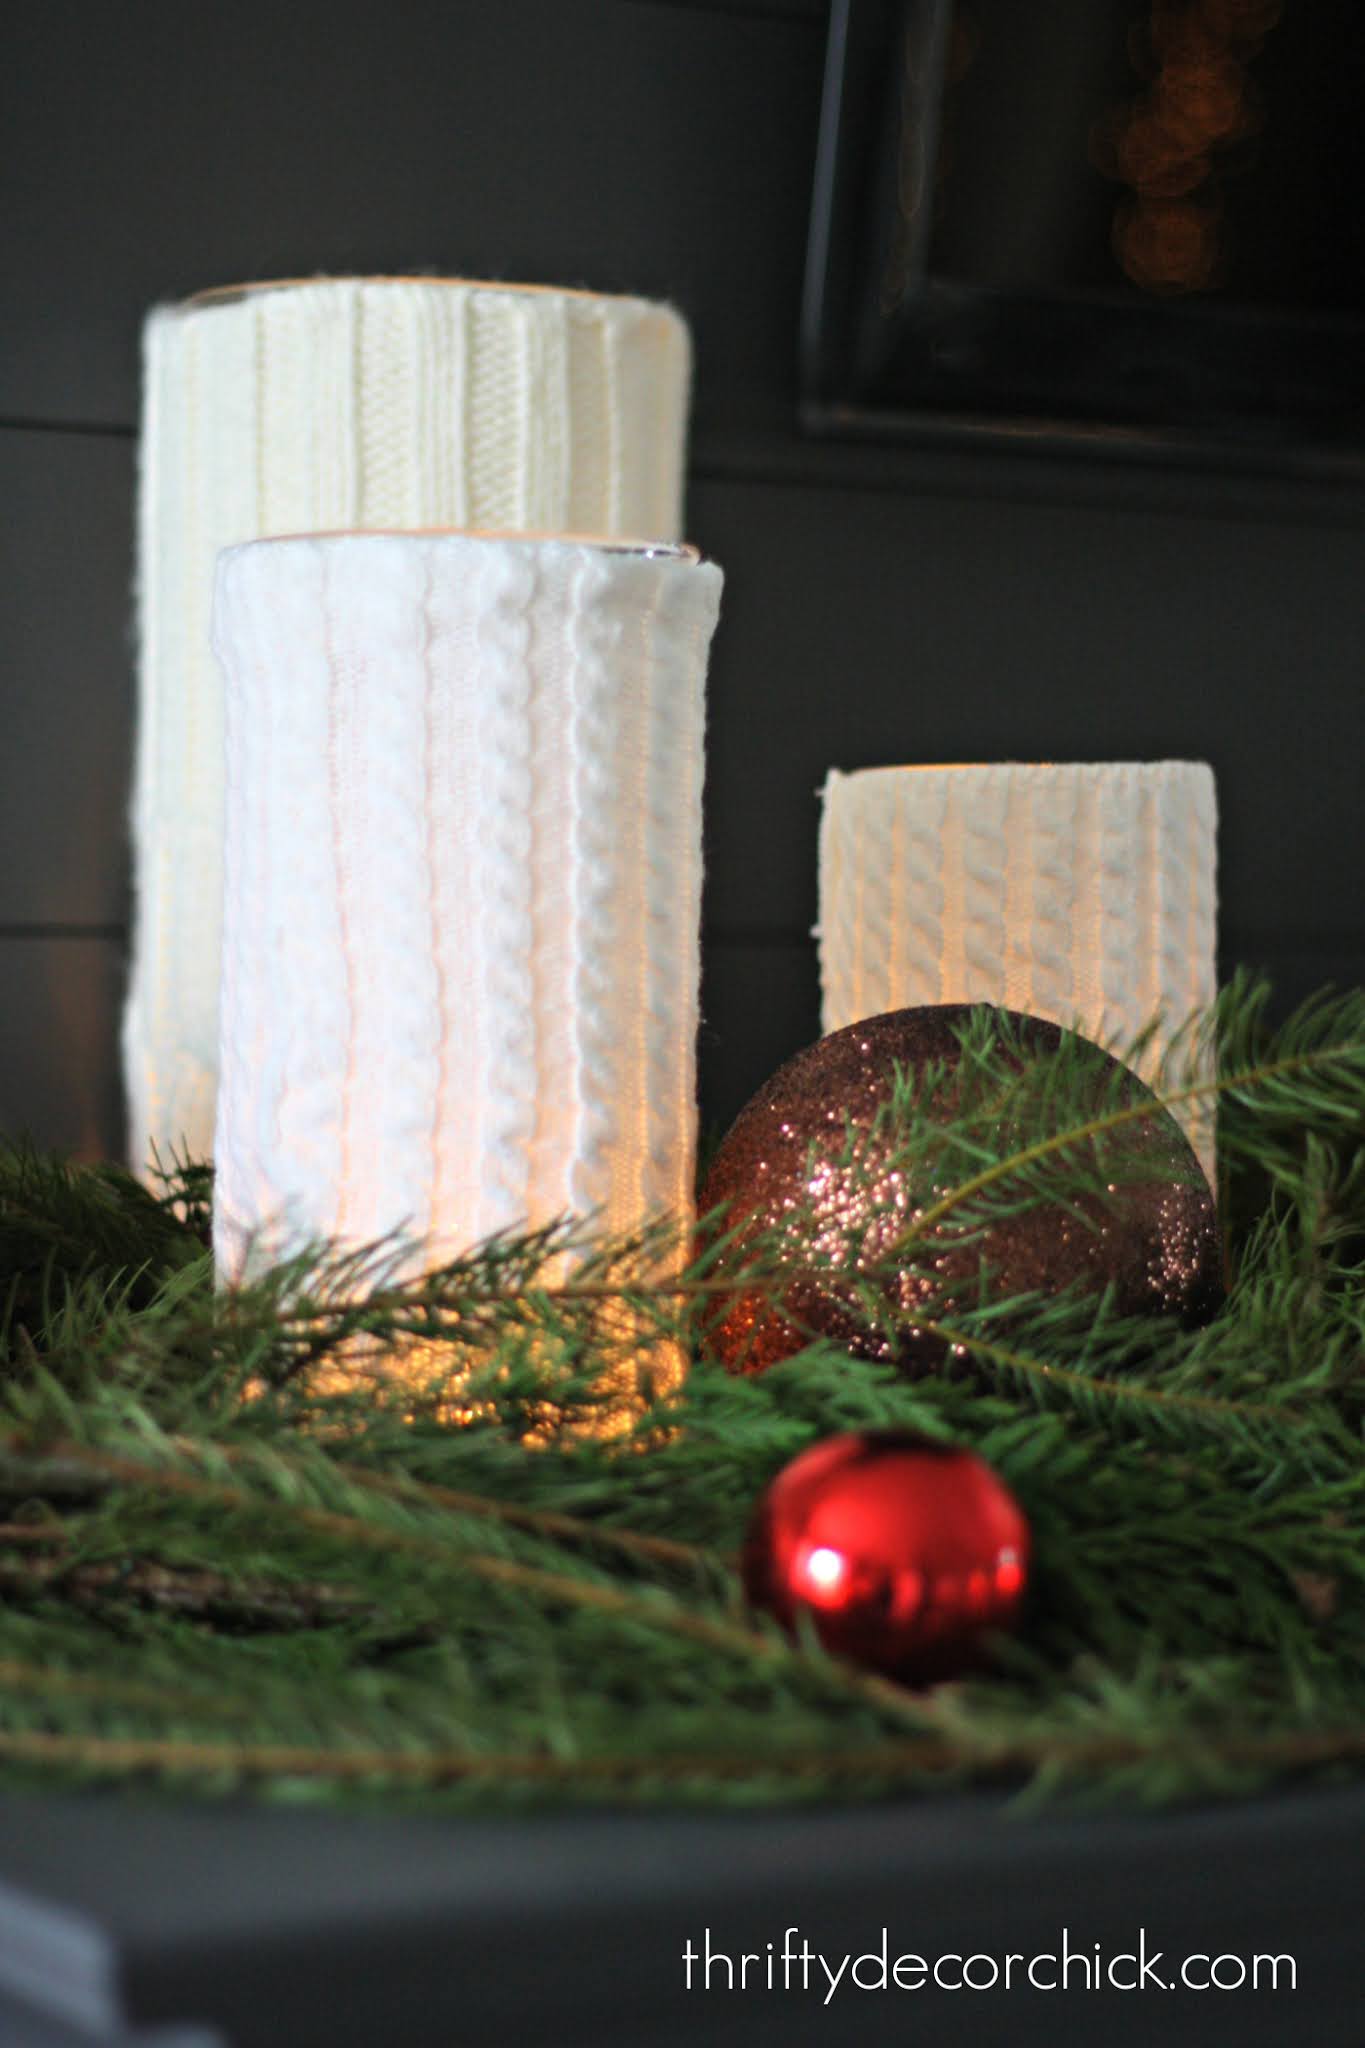
Fabric wrapped candles
These sweater wrapped candles are one of my favorites. I used second hand sweaters and wrapped them around the glass:
This post may contain affiliate links for your convenience.
See my policies and disclosure page for more information.
These are even easier if you use the arms of a sweater!
You could use red, white and green fabric for a cute holiday display as well. :)
I used fabric one other time to wrap the glass containers for the long mirrored tray centerpiece I made for our old dining room table.
I LOVED this centerpiece and think I need to bring it back!:
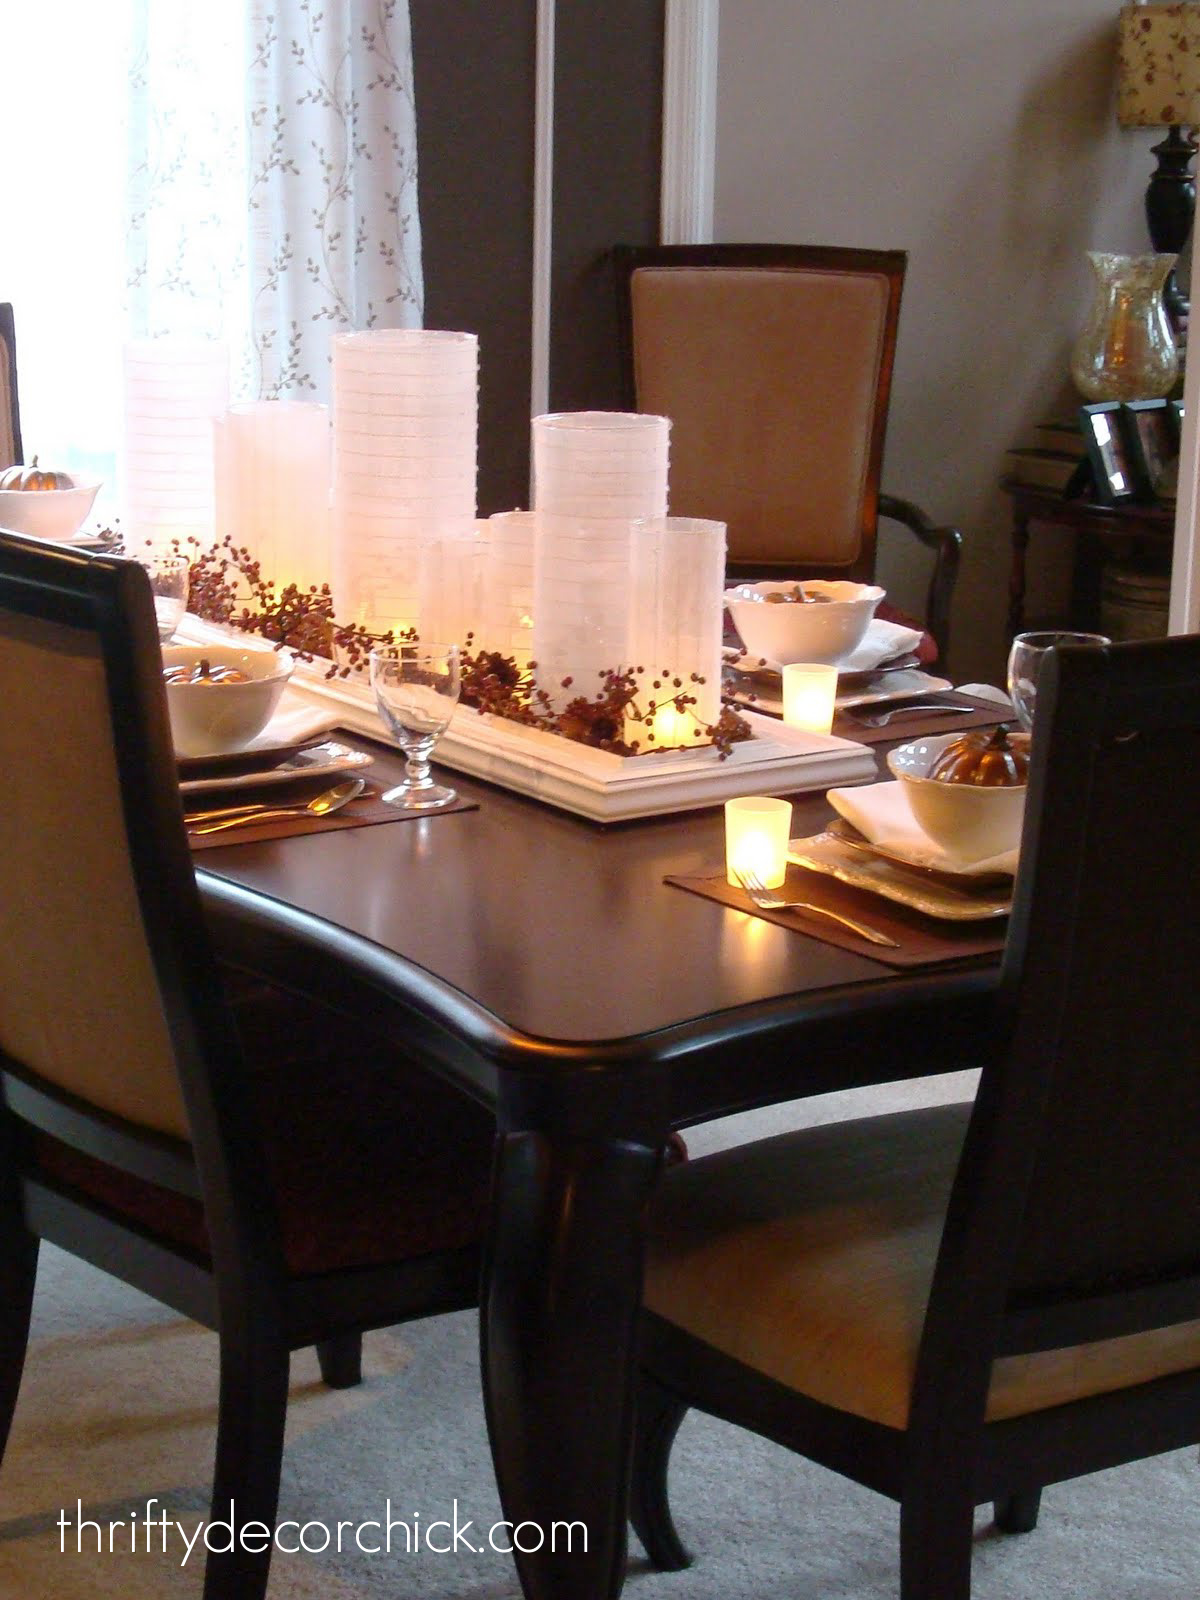
You can use real candles, but I prefer the LED versions with a "flickering flame" when I add anything to the outside.
If you don't have a long tray like this, try a wide or long wood bowl instead! Paper wrapped candles
This next one was another favorite! I loved this gold and silver combo so much!
I used gorgeous metallic wrapping paper and cut the pieces to size to wrap around the glass: 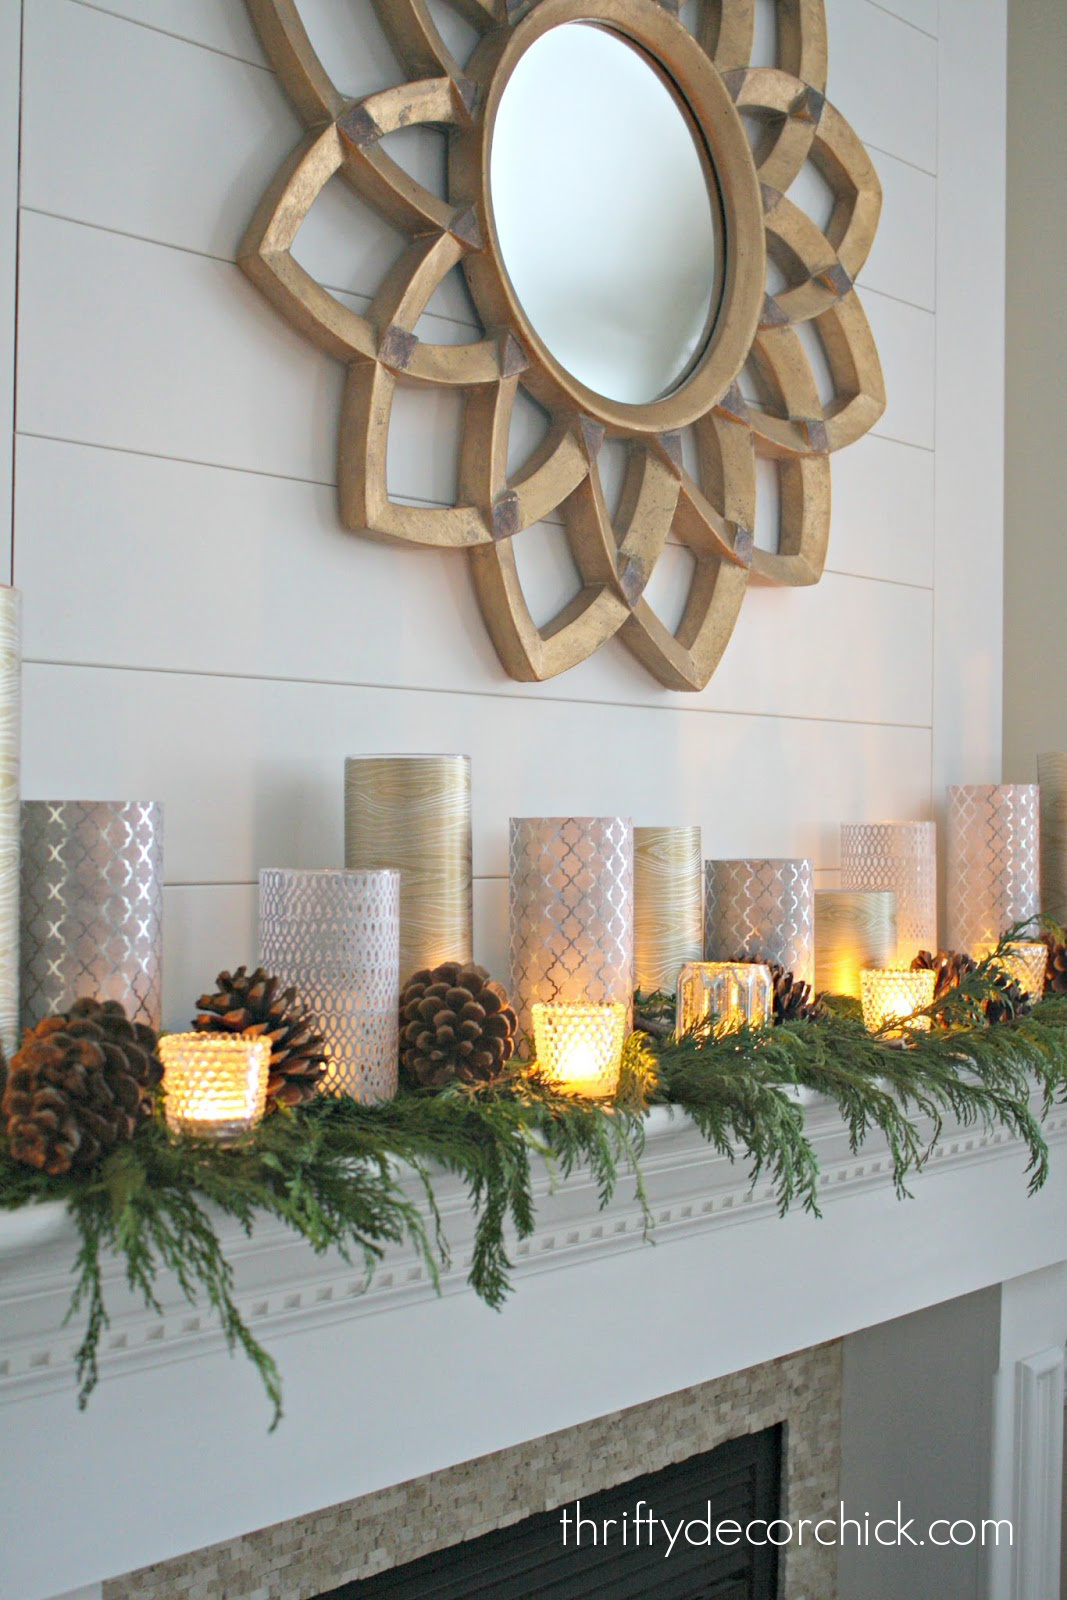
All you need is a pair of scissors and some tape to secure the wrapping paper on the back.
This set of gold wrapping paper or this trio would look so good!
Those metallic holders displayed with the greenery were just so lovely on the mantel.
I used this same idea in our living room a few years ago, but this time used birch bark wrapping paper around the candles:
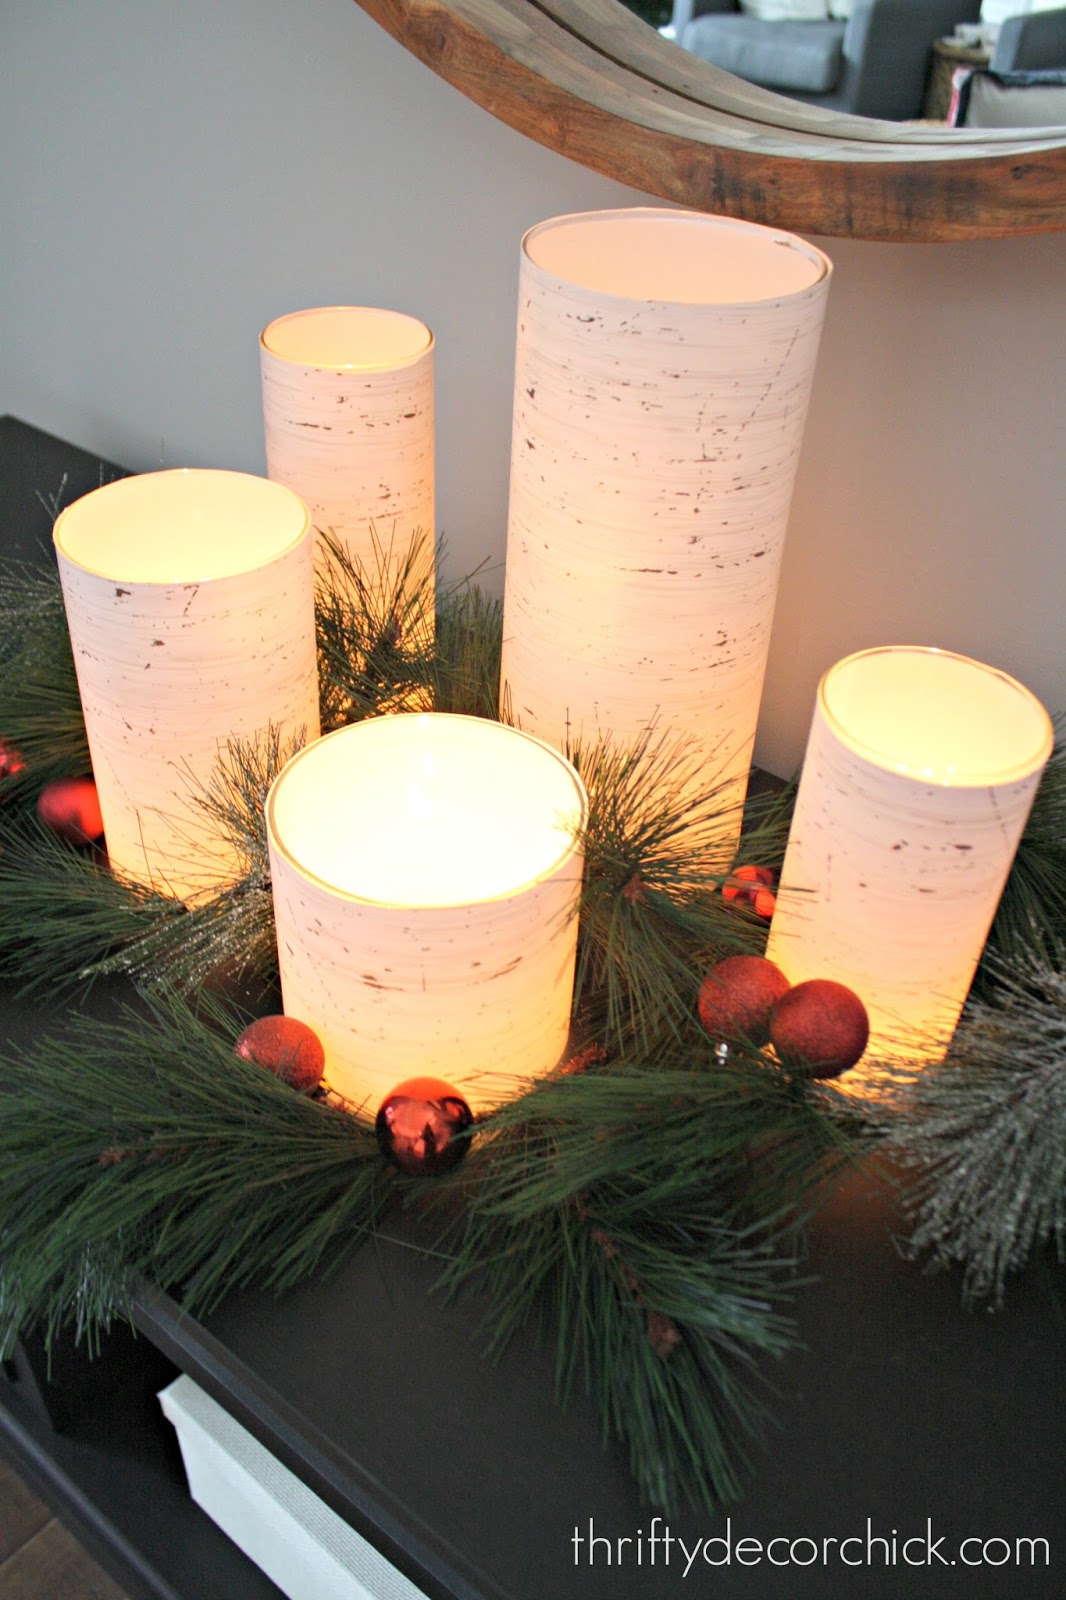
I found this paper at HomeGoods years back, but found a similar birch option here.
I kept these wrapping paper covers so I could do this one again...I love that they looked great even without the candles lit.
Those birch candles and the sweater versions would be beautiful to keep out all winter long!
If you have holiday themed craft paper punches, you can add some cute detail like I did with these snowflake covered cylinders:

It was so easy -- I used sparkly scrapbook paper and snowflake punches. SO cute!
I sprayed the cut outs lightly with spray adhesive and stuck them on. They stayed put but the residue easily washed off later on.
You can also use a paint brush to cover the back of each shape with mod podge to stick it on the glass.
This set of snowflake craft punches is similar to what I used and comes with three sizes.
Using other materials to wrap your candles
This next one is super easy to keep and reuse from year to year.
I used decorative metal radiator sheeting to wrap the glass hurricanes:
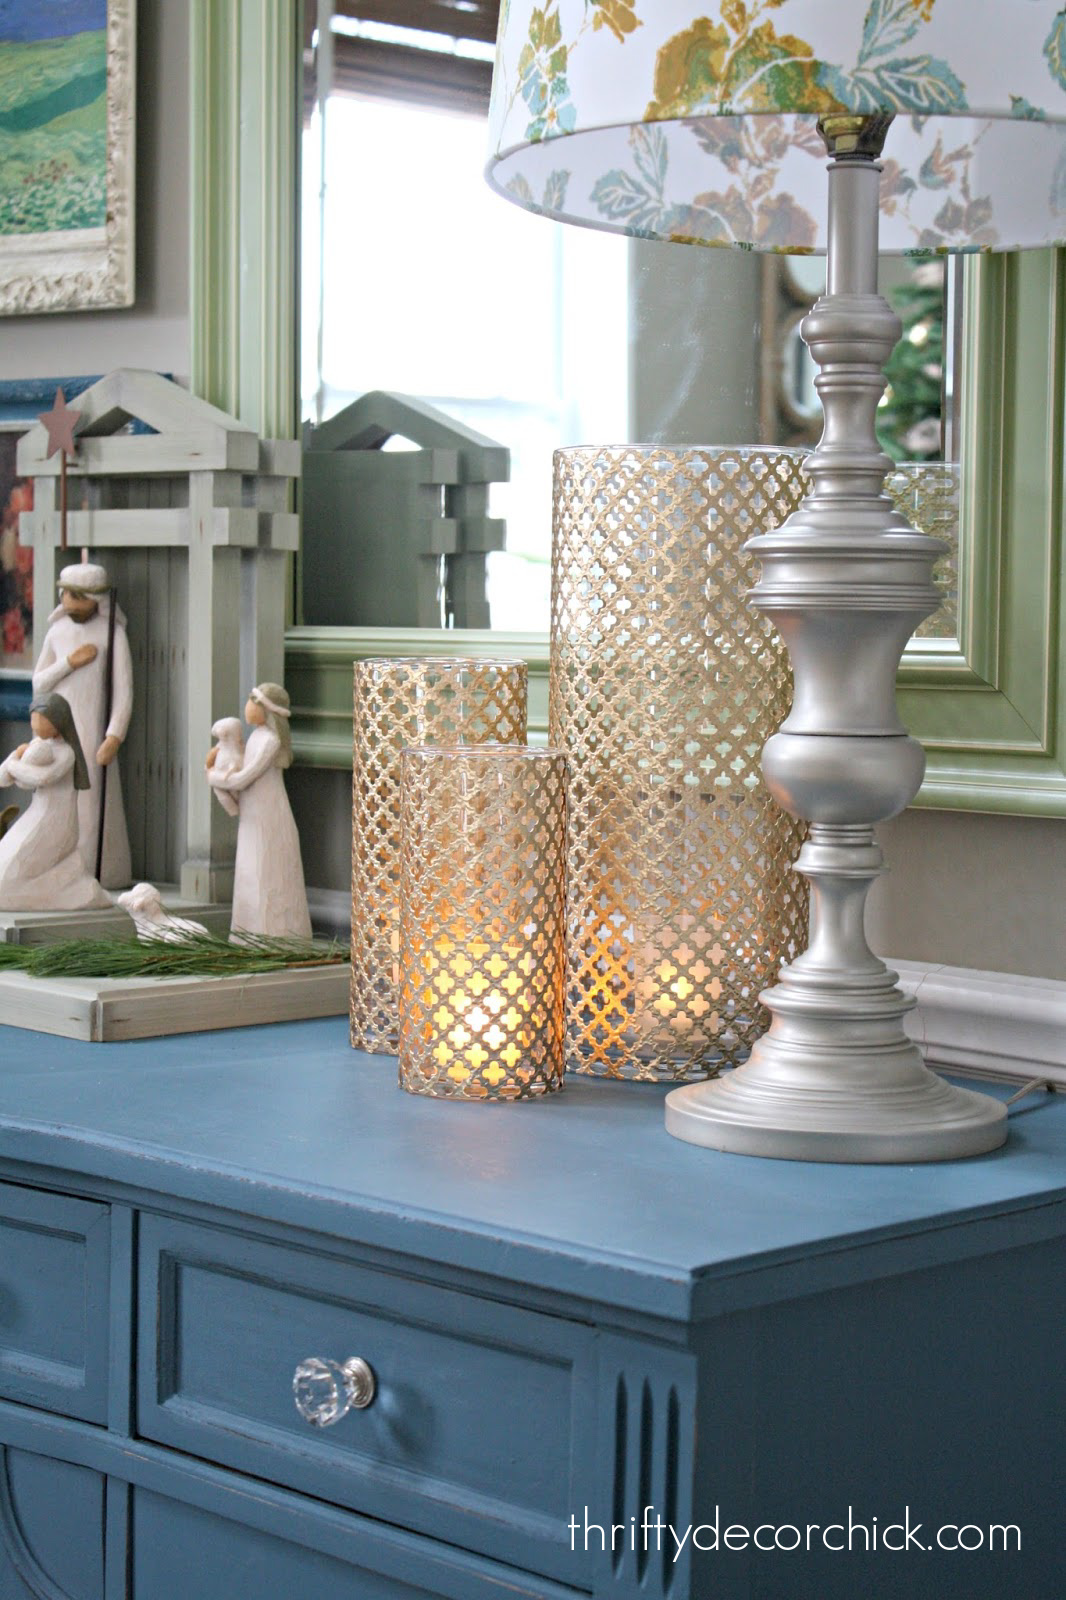
The sheeting comes in a bunch of different designs and metal tones, so this one is easy to change up.
Just pull the metal off to keep them for the next year!
And finally, my latest makeover with these cylinders.
I wrapped the glass with faux leather for a more contemporary design:
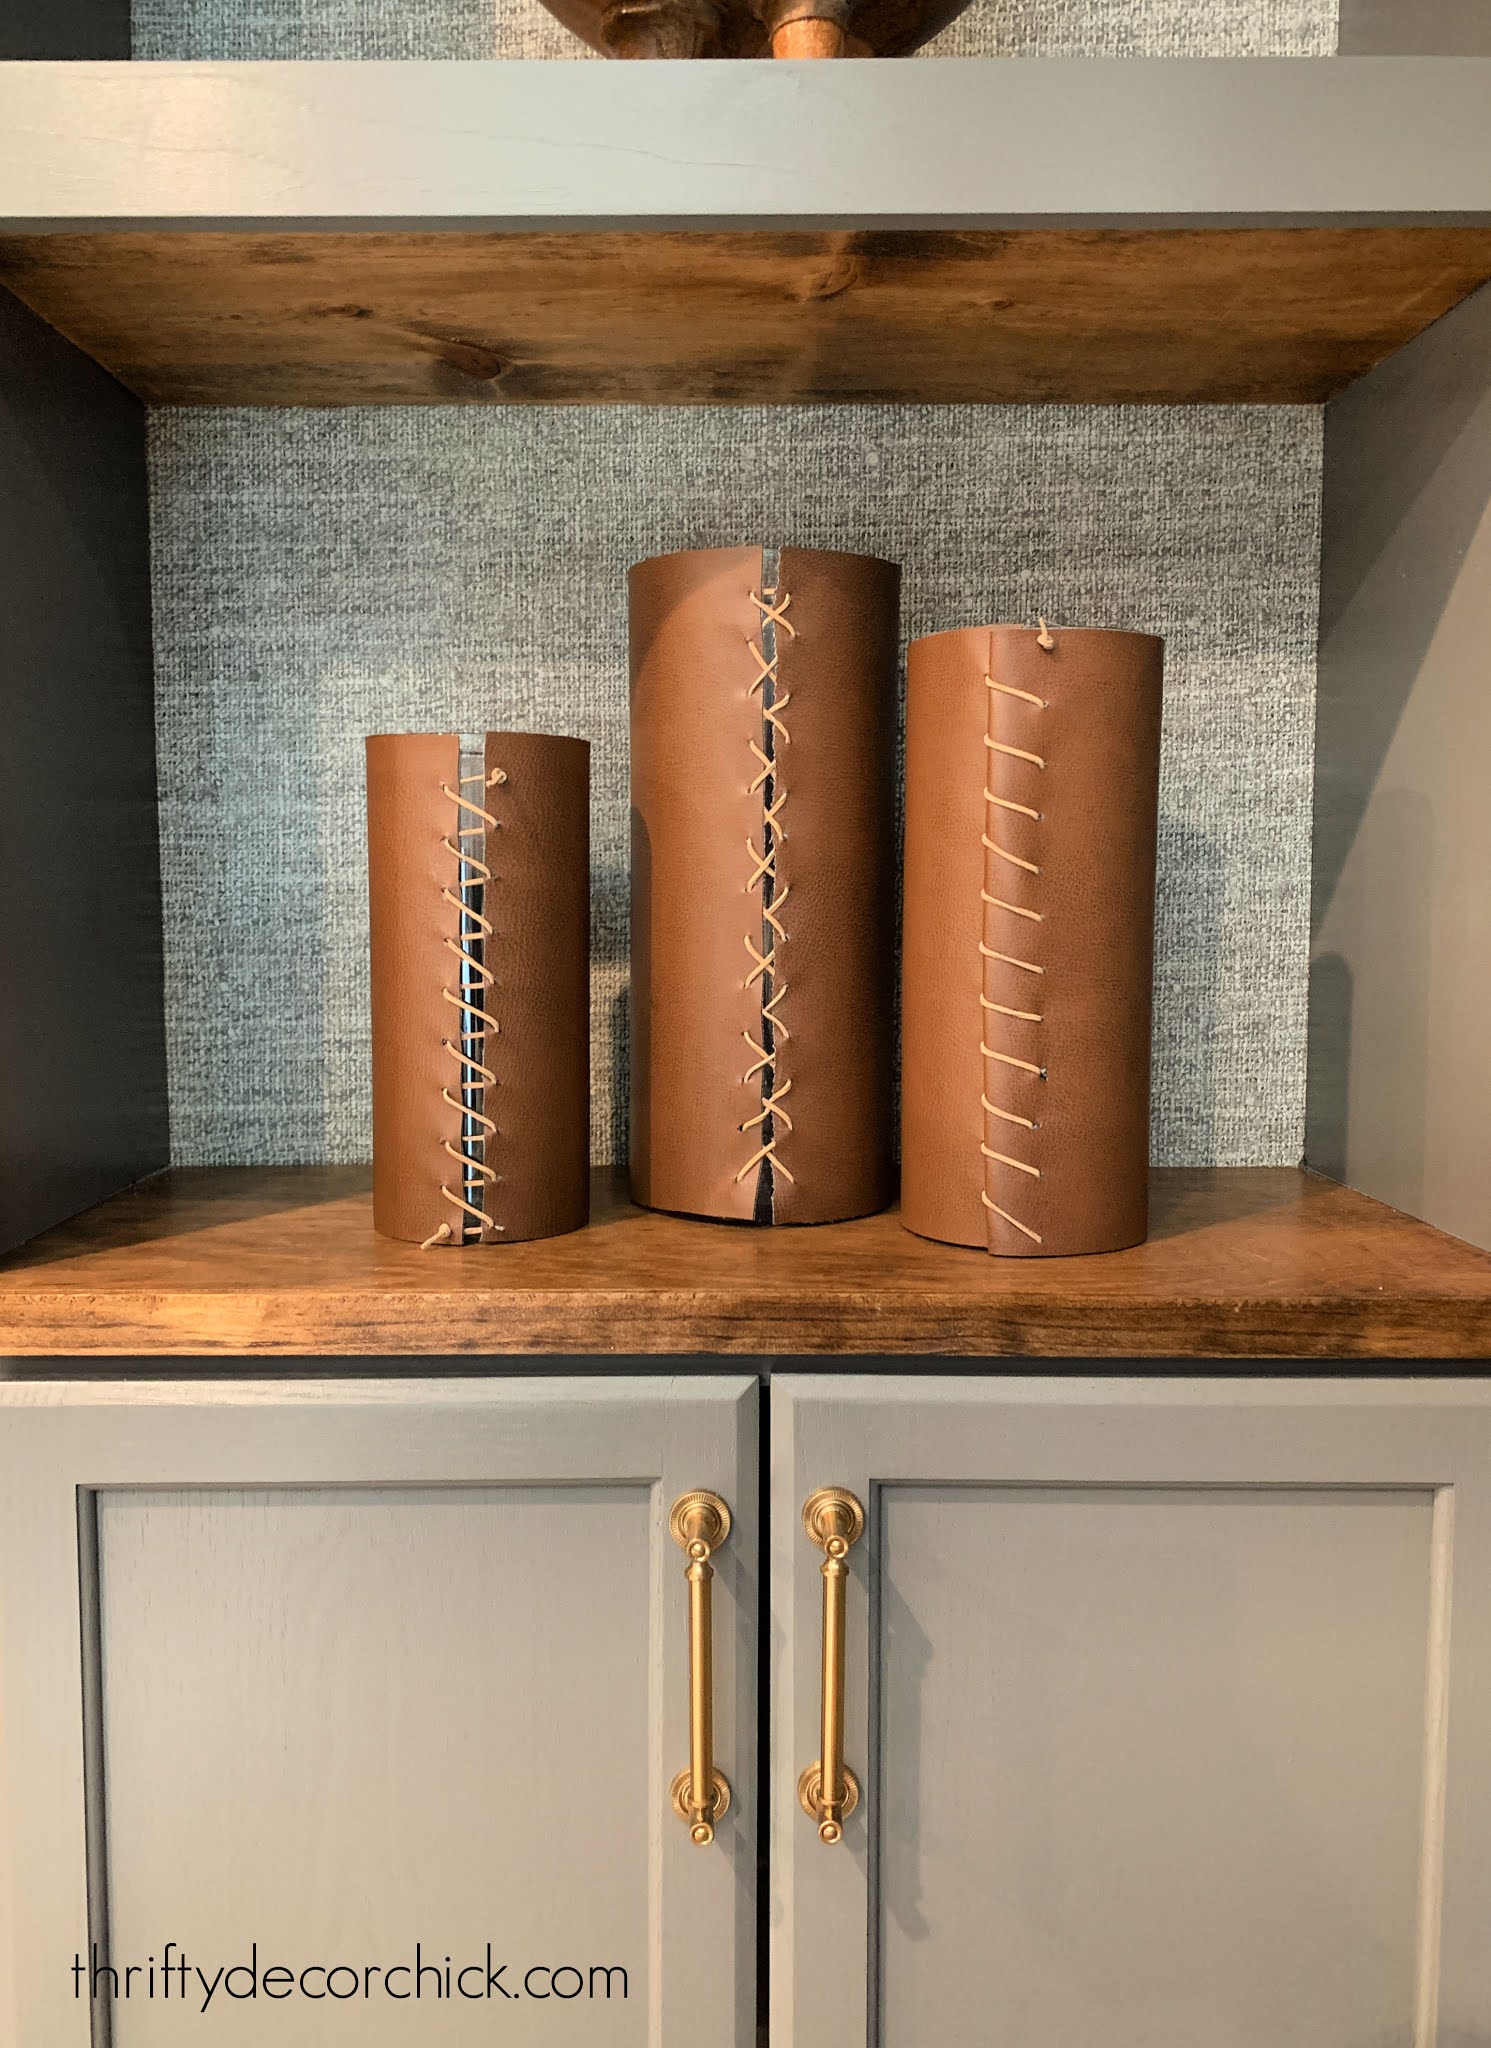
The ready-made options I found online were crazy expensive -- I made these for a fraction of the cost!
And a bonus Christmas candle project -- see the six ways I decorated my $2 Goodwill candleholders with different vase fillers here:
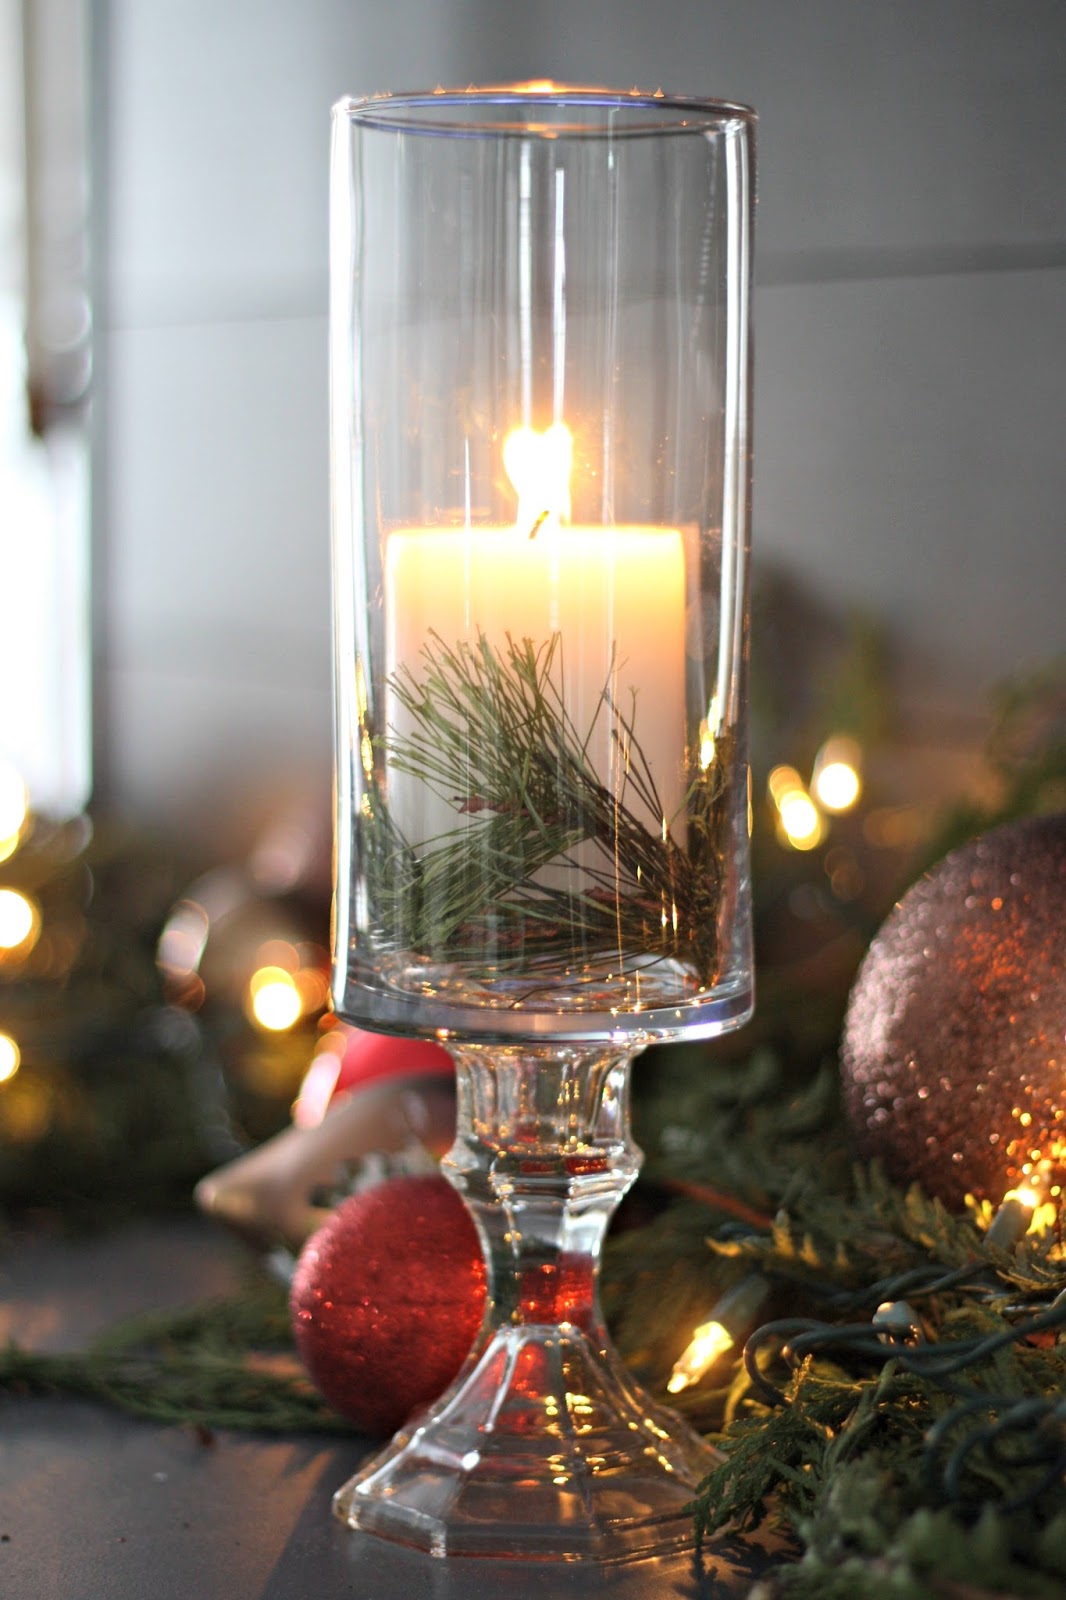
Have you used these inexpensive glass hurricane vases around your house?
Of course they look beautiful with just a pillar candle inside! But they're so easy to change up inexpensively, you could create a new look every year! :)
Never miss a post by signing up to get posts via email.
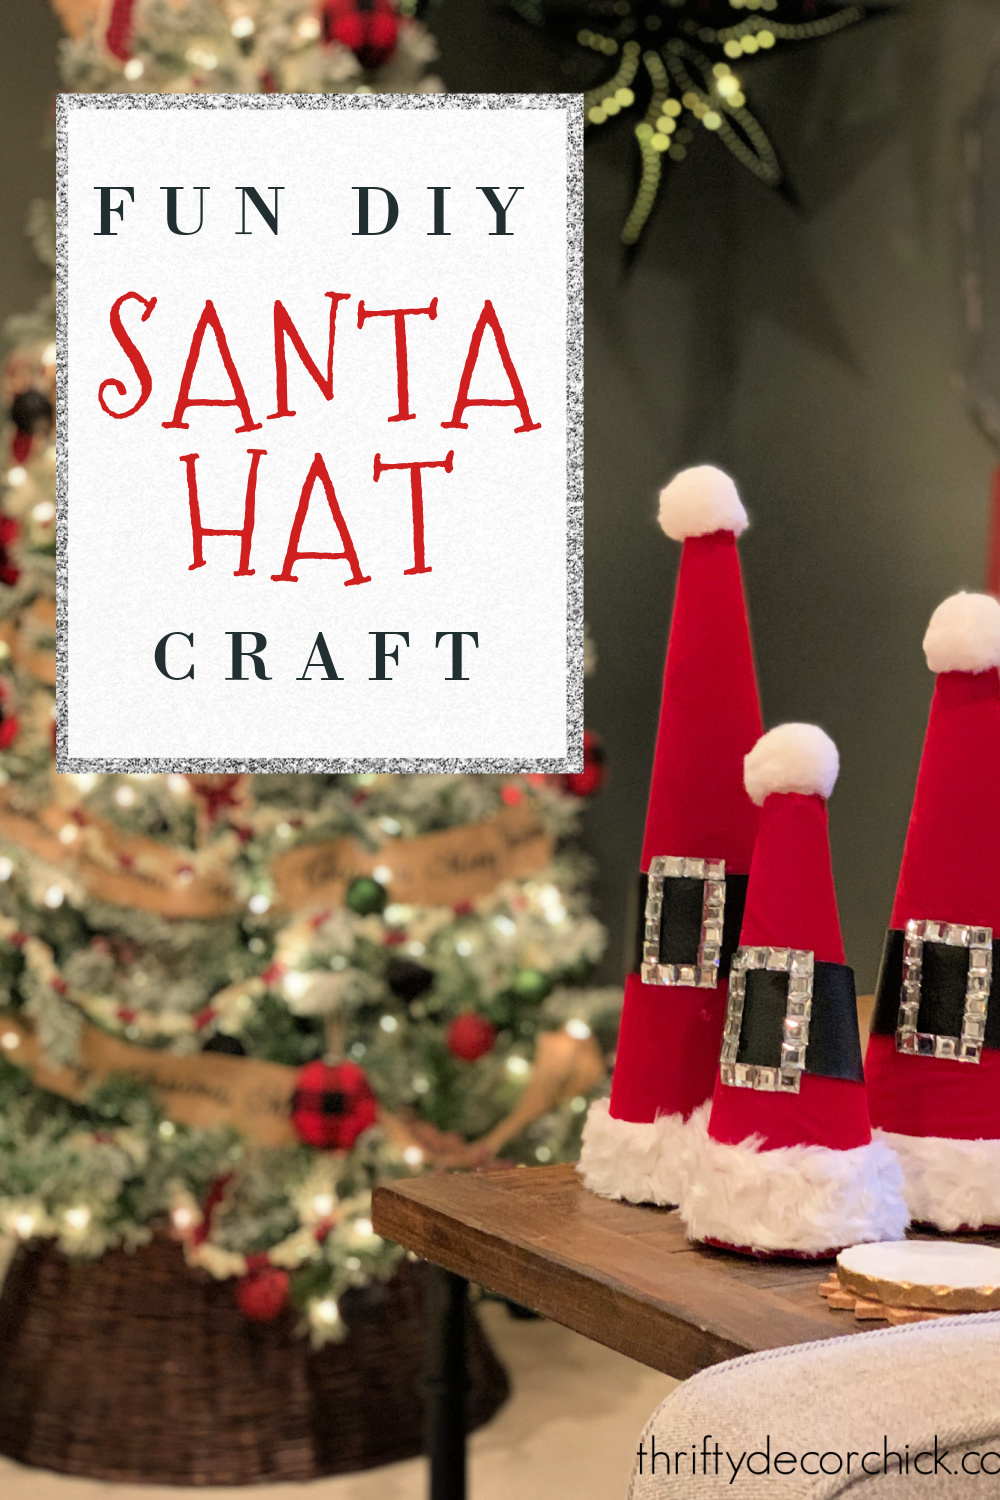
Via https://www.thriftydecorchick.com/2021/12/seven-ways-to-decorate-glass-candle.html Ho Ho Ho! These cute DIY Santa hat decorations are made with foam cones and red velvet.
You can make your own blinged out Santa Claus hat Christmas decor with a few craft supplies. This is a great project for adults and kids during the holiday season!
This project is one of my all time favorite holiday crafts -- it is SO fun and doesn't cost a ton of money to make.

This post may contain affiliate links for your convenience.
See my policies and disclosure page for more information.
I created this Santa hat craft project after I saw more expensive options in the store. They turned out even better than my inspiration and ended up costing way less. I saw some cute Santa hat/suit decor things in Stein Mart and knew I could totally make them for cheaper.
Well, I decided to go for it. I started with three foam cones, in different sizes:
 I got them all for about $10. I think I used a coupon on the largest. If you can catch them on sale, you could spend even less! I found red velvet at the craft store for less than $5 – I only got 22 inches (the width is 54”) and didn’t even use all of that.
I figured out the size by rolling the cones and then cutting the fabric in a semi circle shape:


Cut your excess fabric with scissors and you can tuck it under and glue for a finished look.
I almost used sparkly red felt, but went with the velvet to the get look I really wanted. If you're making mini Santa hats, you could use red construction paper or cardstock!
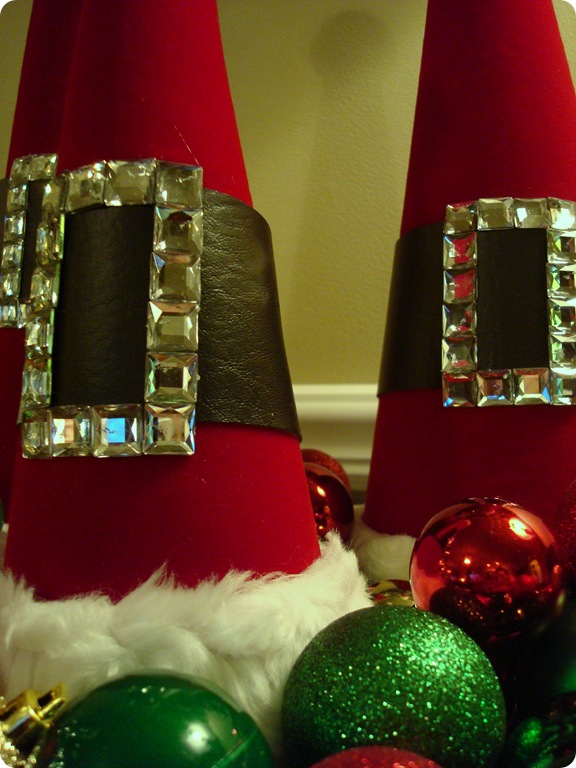
Either would be adorable and would be even cheaper than the velvet. Then I got four inches of black vinyl (that looks like leather) to make the “belt.”
This was less than $2 and I didn’t even need four inches…I only ended up making it 2.5 inches wide:
 Again, just with some hot glue, I wrapped it around and secured it.
Then, the fun part -- the fur. ?
I got some fluffy faux fur trim in the ribbon section at Joann’s to use for this:


For the buckle, I found a package of little square crystals. This package had 52 and I used most of them. I figured out the size and shape I wanted before I hot glued them on: 
I've discovered these are harder to find in craft stores now. I did find these exact crystals here though.
I added a fluffy white pom pom on top, and it was done.
I squealed when I stepped back to look at them!:
 I don’t think I could love these more than I do:  I wasn’t happy with the old Christmas candles I had in this tray (which was a $1.99 tray I got at Goodwill and spray painted white).
I hadn’t even spray painted the bottom of it well enough yet, so I just filled it in with some Dollar Store ornaments:
 I got all of those to make another Christmas ornament wreath, but I like them here much better anyway! My favorite part is the blingy buckle!: 
They aren’t perfect, but you don’t even notice. :)
These cuties have held up for 12 years! They are now the perfect, festive, fun touch to our basement family room!:

What do you think? The Stein Mart version is first, then mine:


Stein Mart had three sizes – I think about $9, $15 and $20 each.
My three cost about $25 total. (And I had so much fun making them!) Adorable.
You can pin this image to save this project for later:
Never miss a post by signing up to get posts via email.
Via https://www.thriftydecorchick.com/2009/12/ho-ho-ho-santa-craft.html |


